Category Archives: Reach for the Stars sampler quilt

Reach for the Stars, Revisited

Thanks to modern technology, I made virtual friends last year with several quiltmakers who, like me, were enchanted with Terri Krysan’s star sampler quilt, Reach for the Stars, and decided to make their own versions. Directions for the quilt were released in serial form by Quilter’s Newsletter beginning with the Oct./Nov. 2013 issue. As each issue was released, our little band of quiltmakers would share our progress and cheer each other on.

Last fall I began corresponding with Fawn S. of New York, who was working on two versions of Reach for the Stars — one as a birthday gift for her mother and one for herself. Several of the quilters in Fawn’s group, the Honey Bees, were also making RFTS. Now Fawn has sent me photos of quilts and quilt tops made by her and her quilting colleagues Rose, Linda, Nancy, and Janet. I am so happy to share those photos with you.

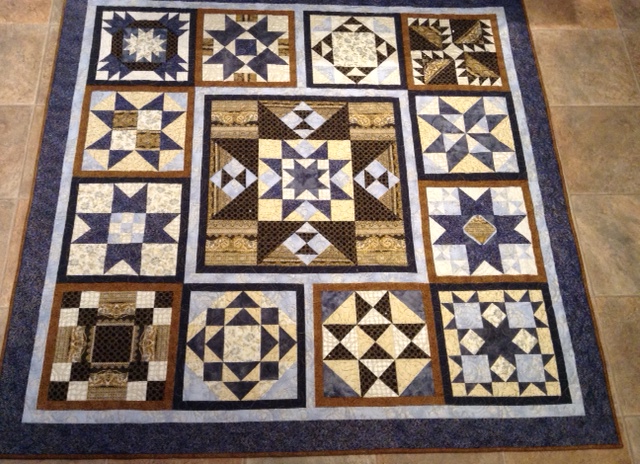
First up, the quilt Fawn made for her mother:

RFTS by Fawn 2 June 2015
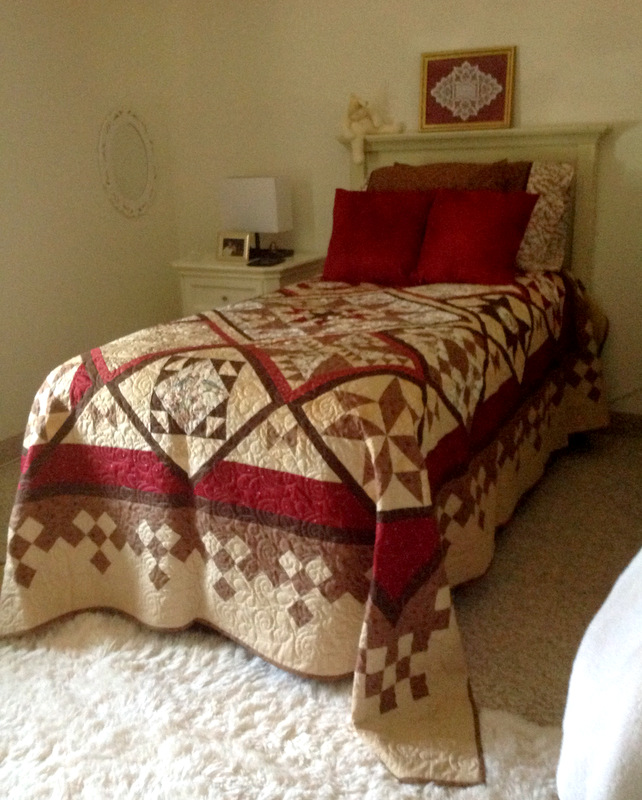
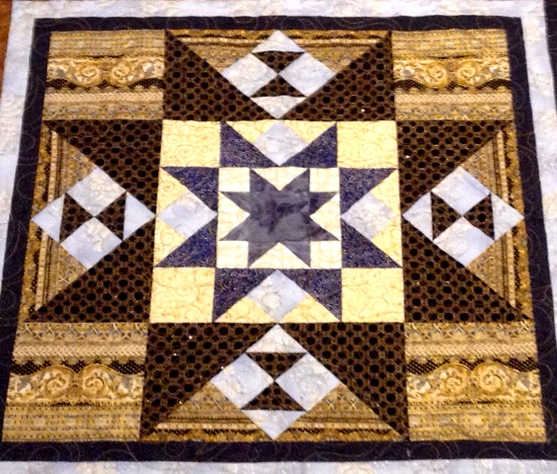
This quilt, featuring fussy-cut cardinals, was made with deep reds, tans, and browns. Here’s the center medallion . . .

RFTS by Fawn center medallion detail

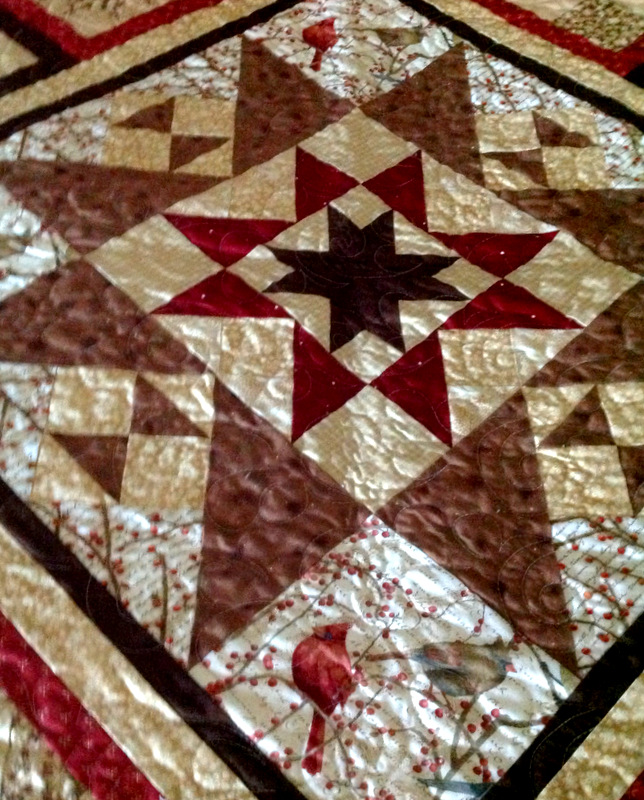
. . . and here’s a close-up of one of those fussy-cut cardinals:

RFTS made by Fawn block detail
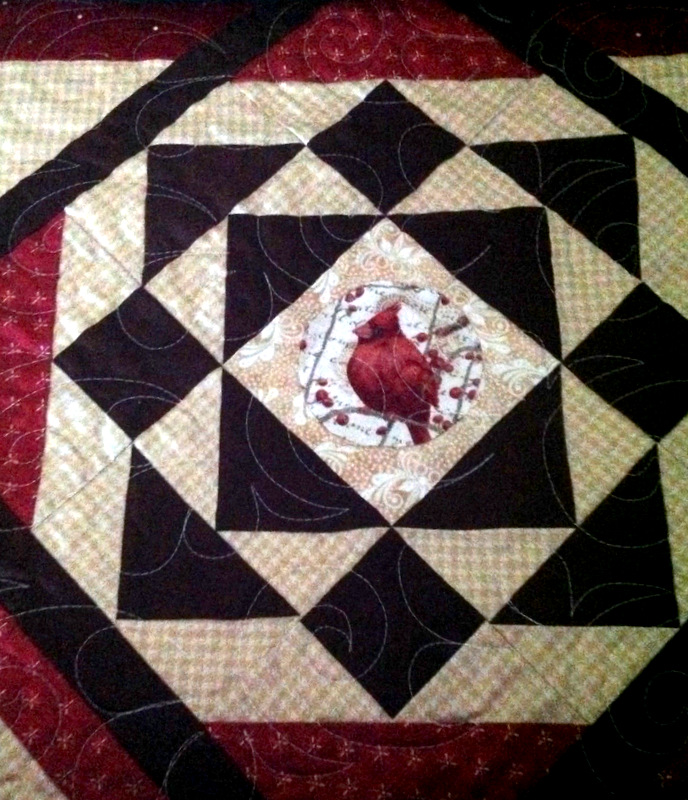
Fawn quilted this herself on her mid-arm. Beautiful!

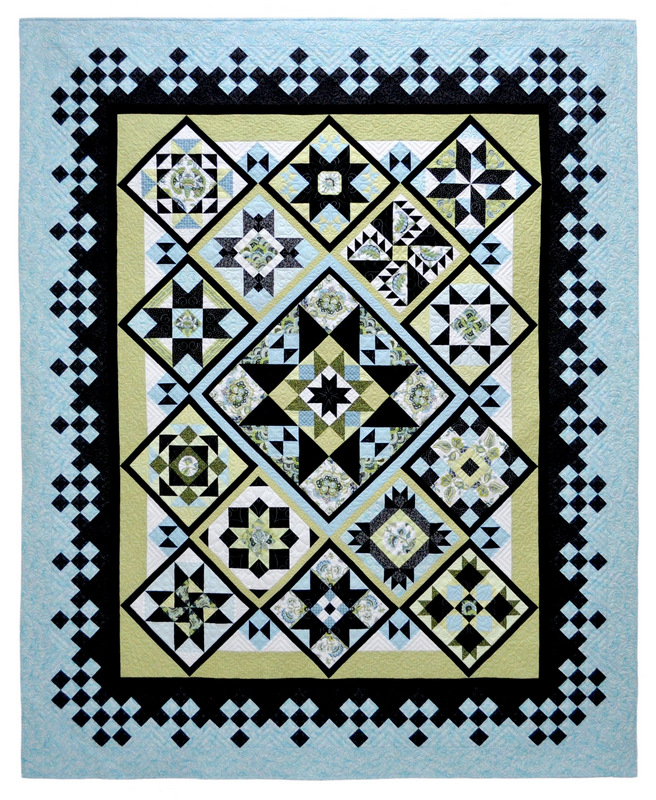
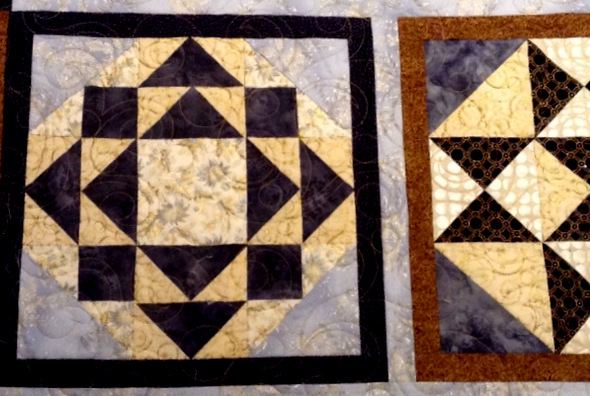
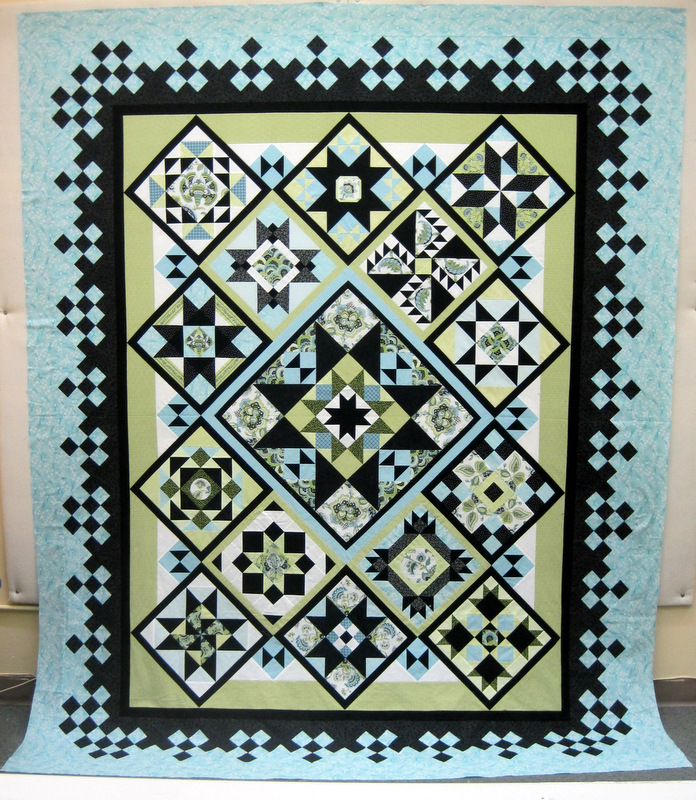
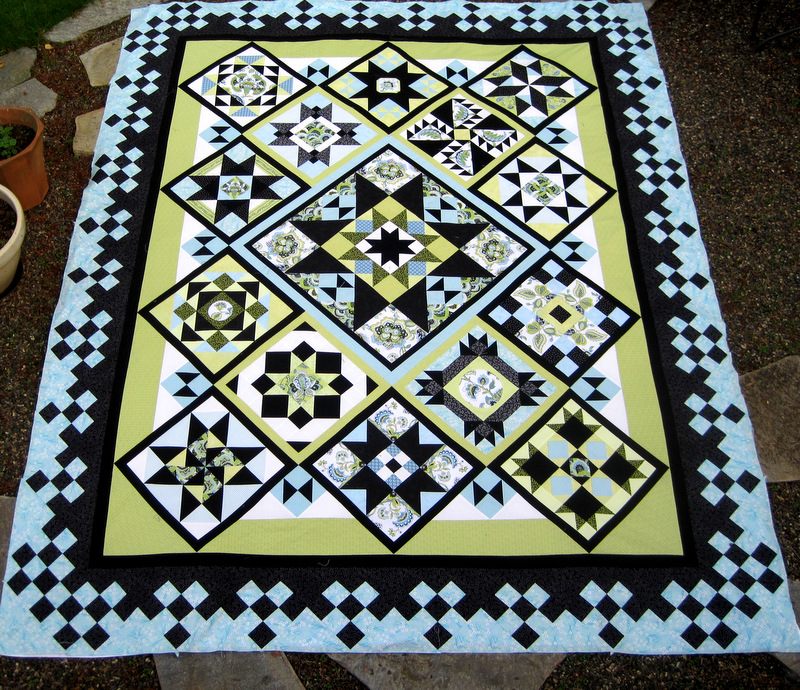
Rose’s finished quilt is a handsome combination of blues, greens, and tans, very dramatic against a white background:

RFTS by Rose June 2015
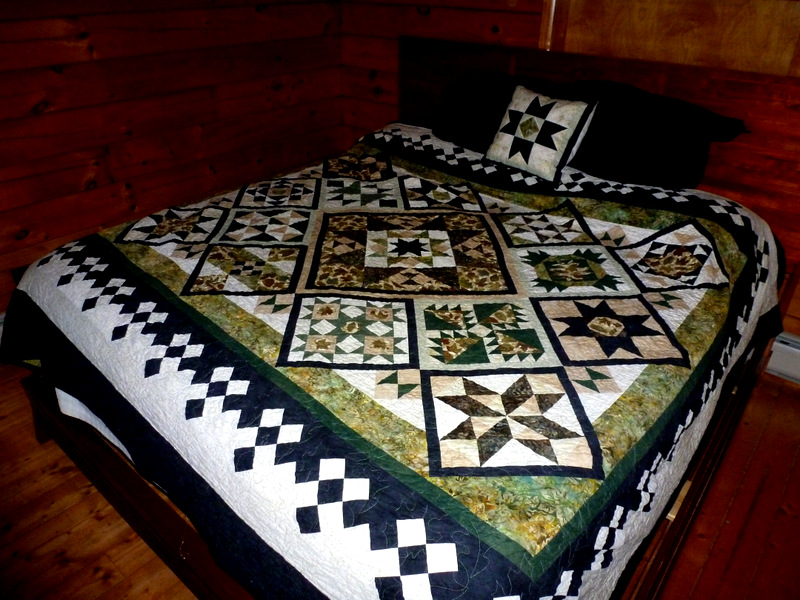
Love the batiks. And did you notice the accent pillow?

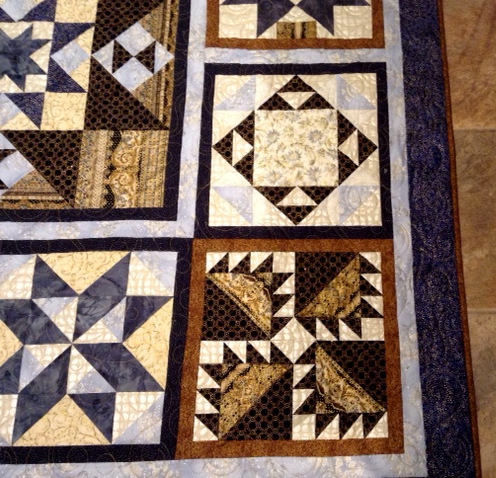
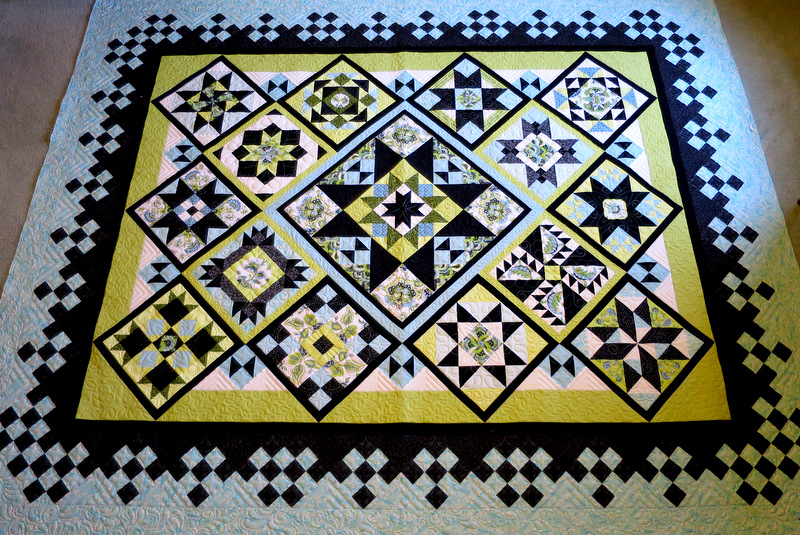
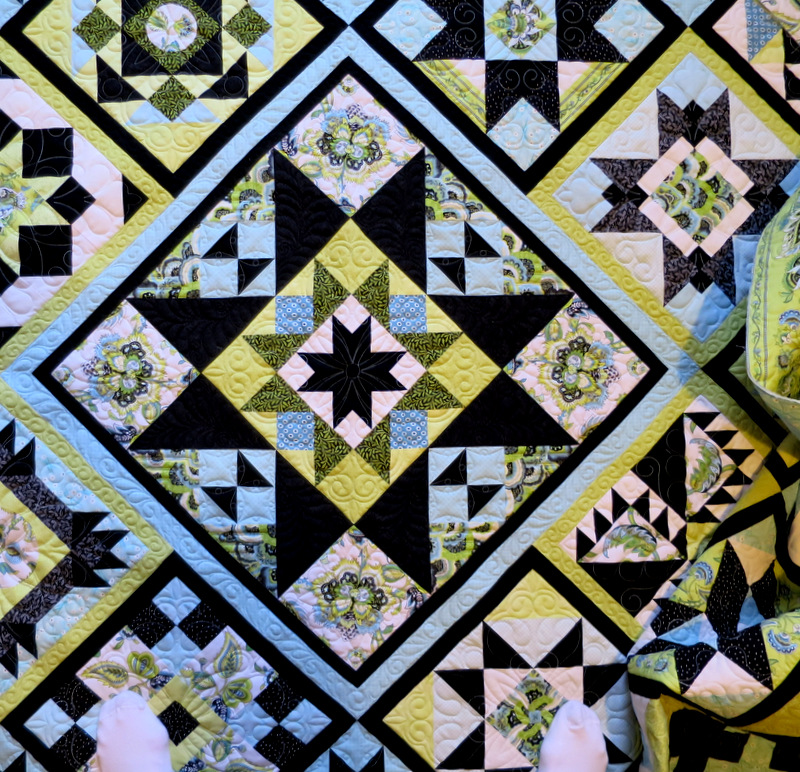
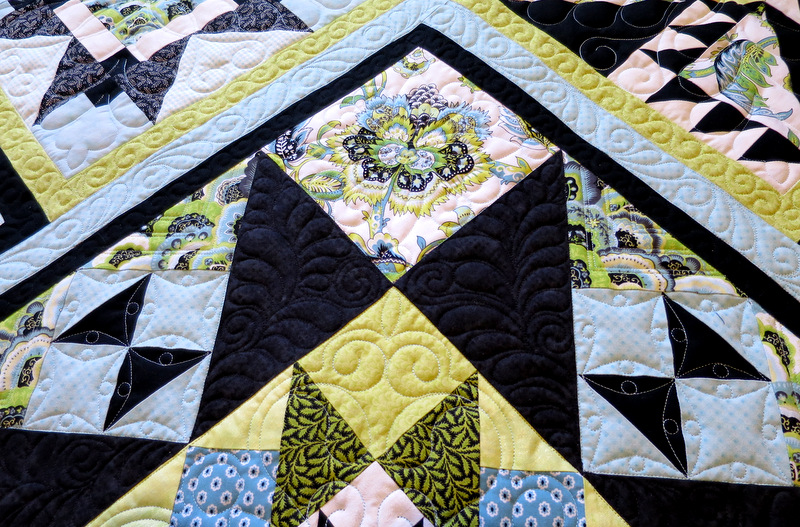
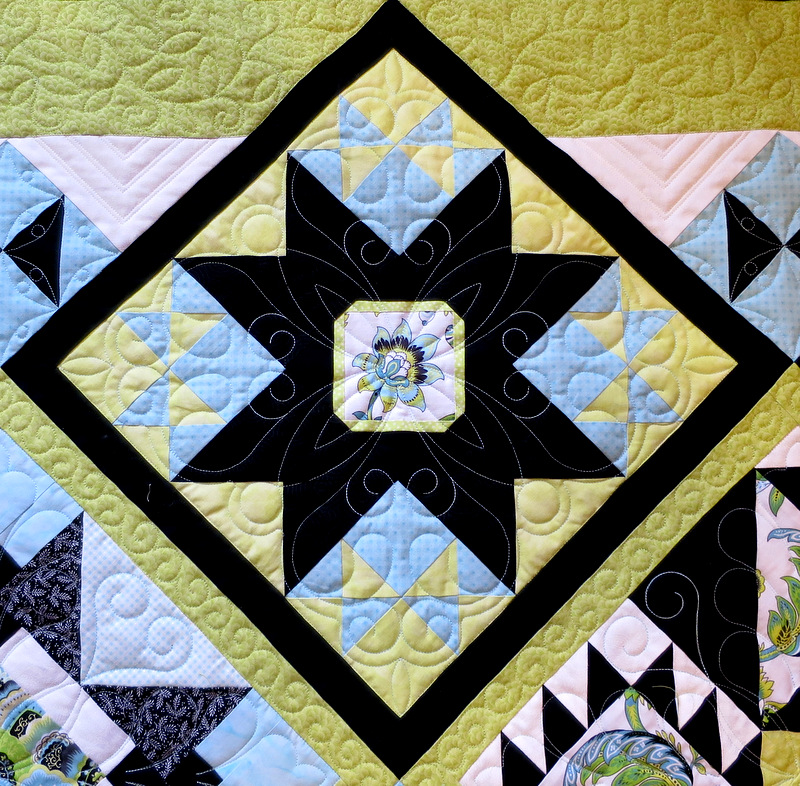
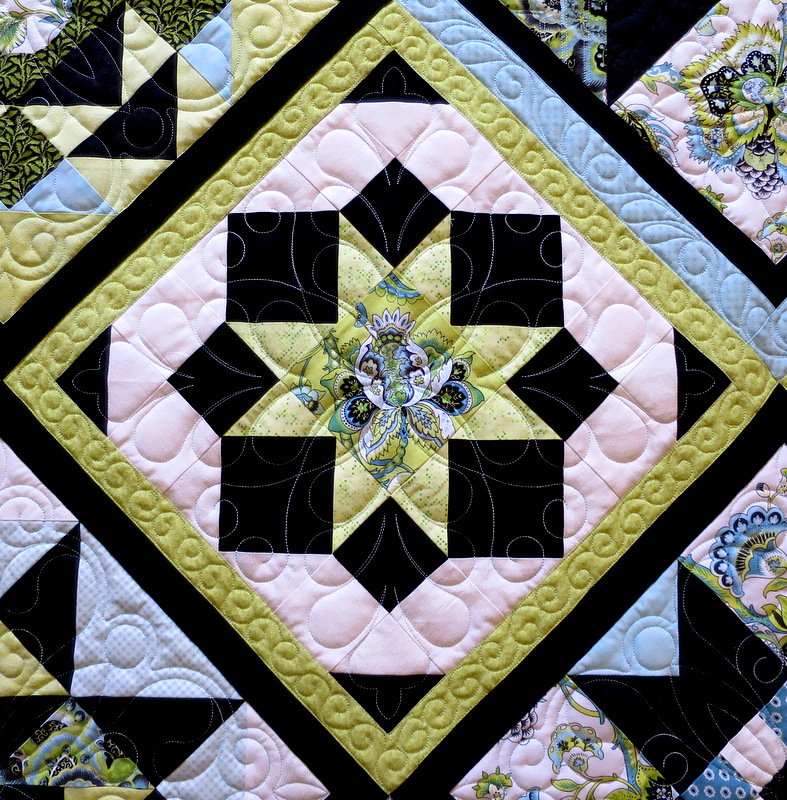
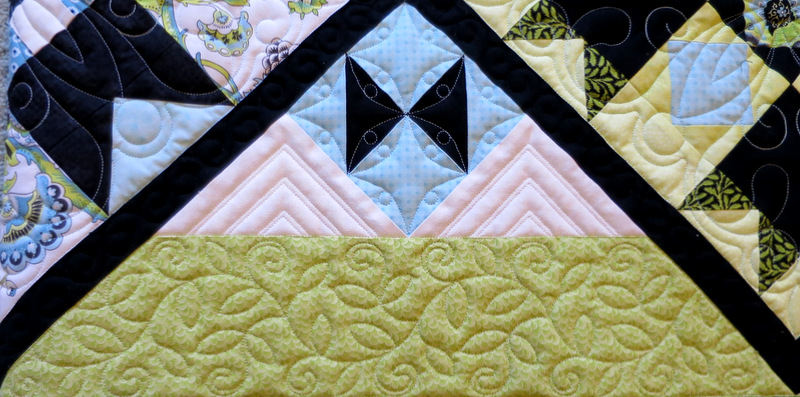
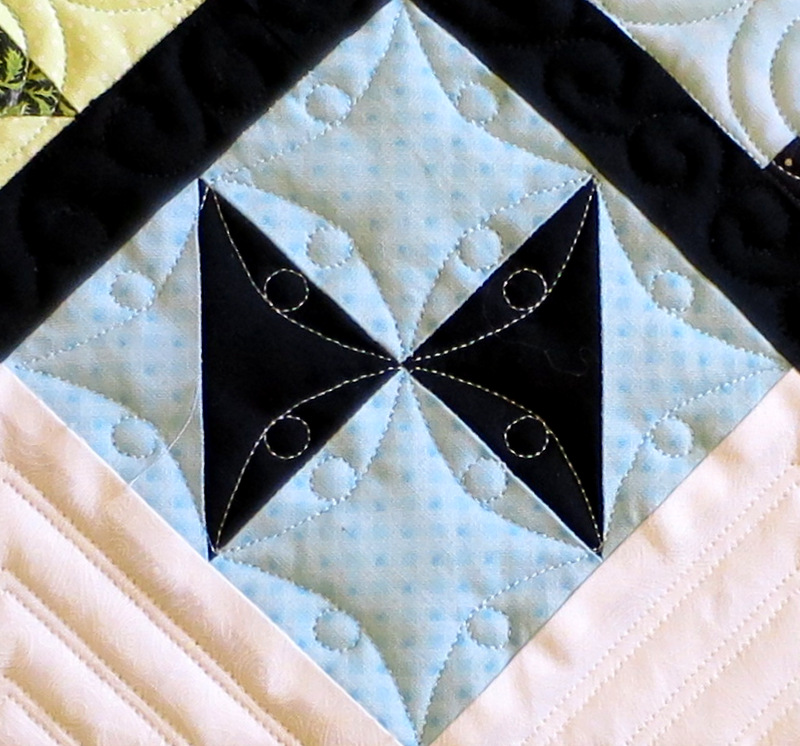
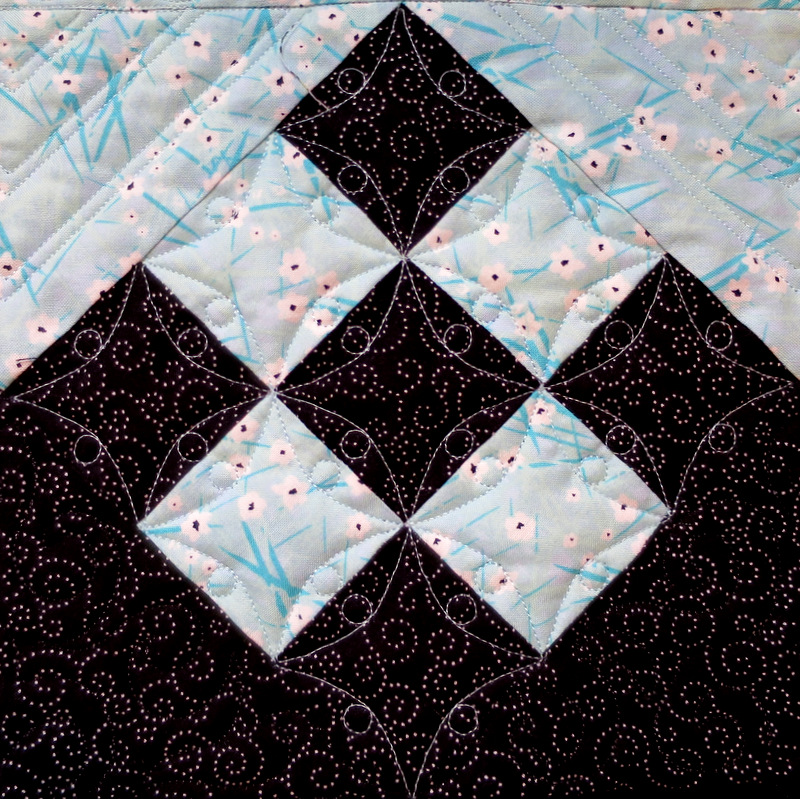
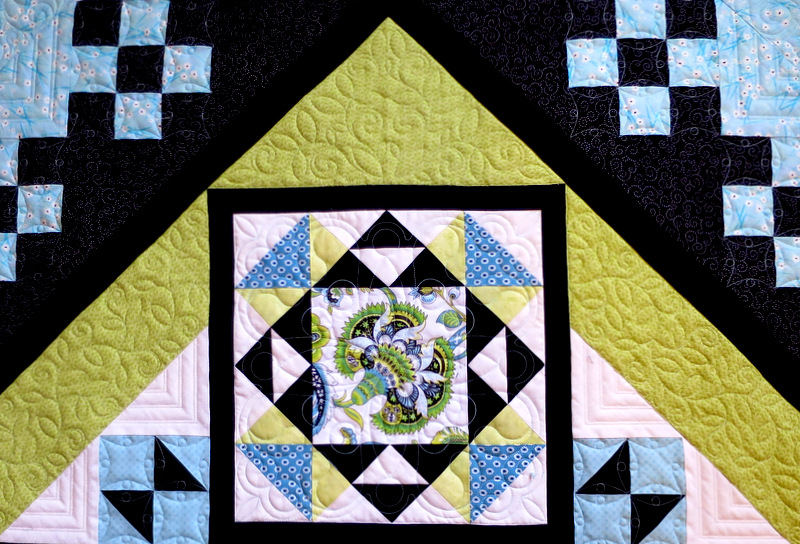
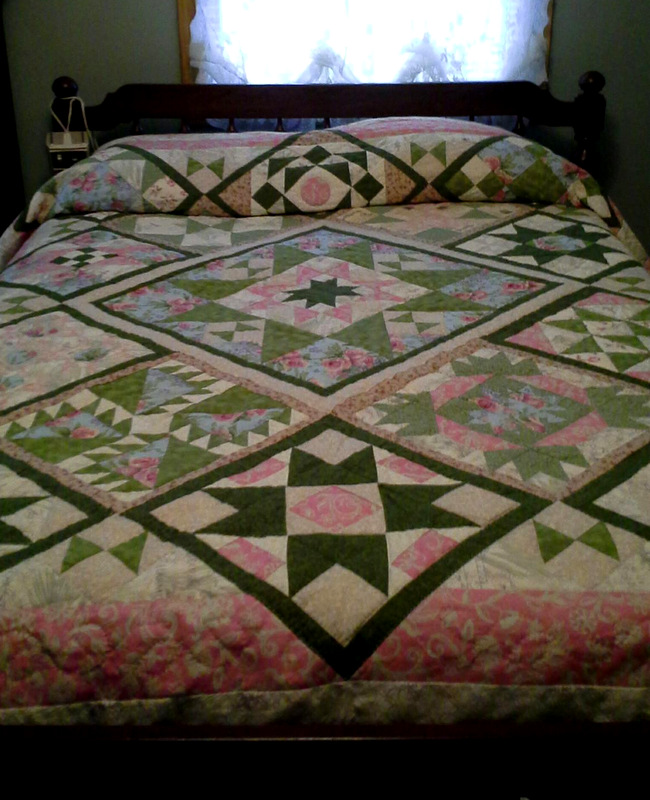
Linda’s focus fabric is a lovely floral on a soft blue background. Her palette of greens, pinks, and creams, combined with that floral focus fabric, yielded this romantic result:

made by Linda

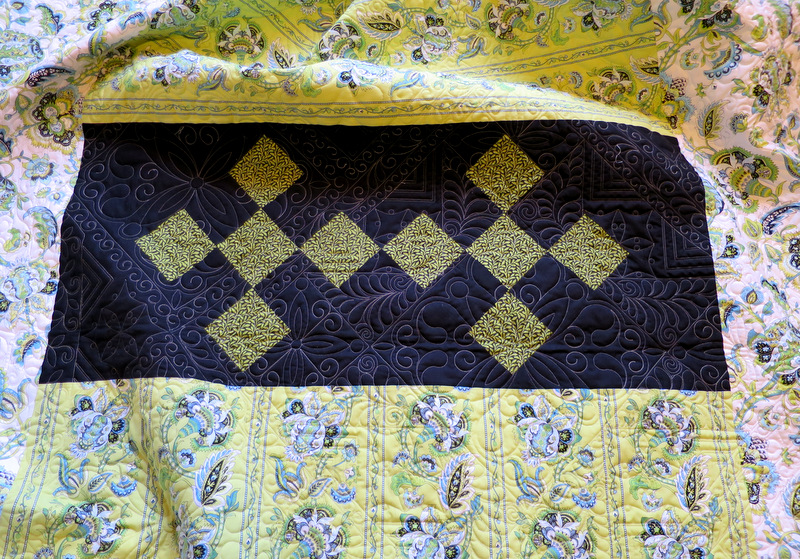
The version of RFTS that Fawn is making for herself is made with teals, tans, and browns:

RFTS by Fawn

It features a different bird print than the one she used on her mother’s quilt.

Nancy’s version also features birds. Her color palette includes deep reds, tans, and blues:

RFTS by Nancy June 2015
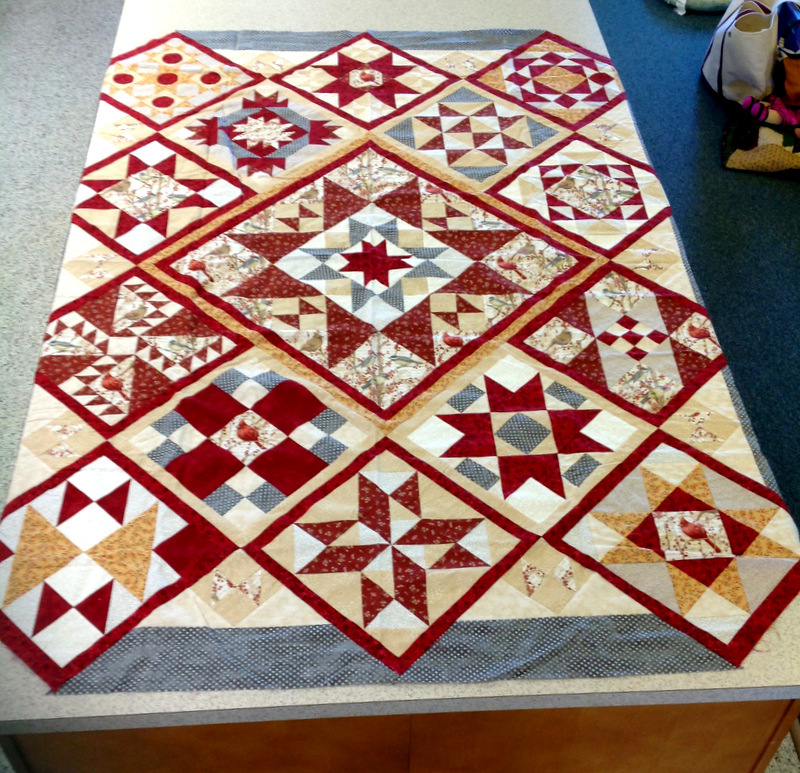
Can’t wait to see both of those quilts with the borders added.

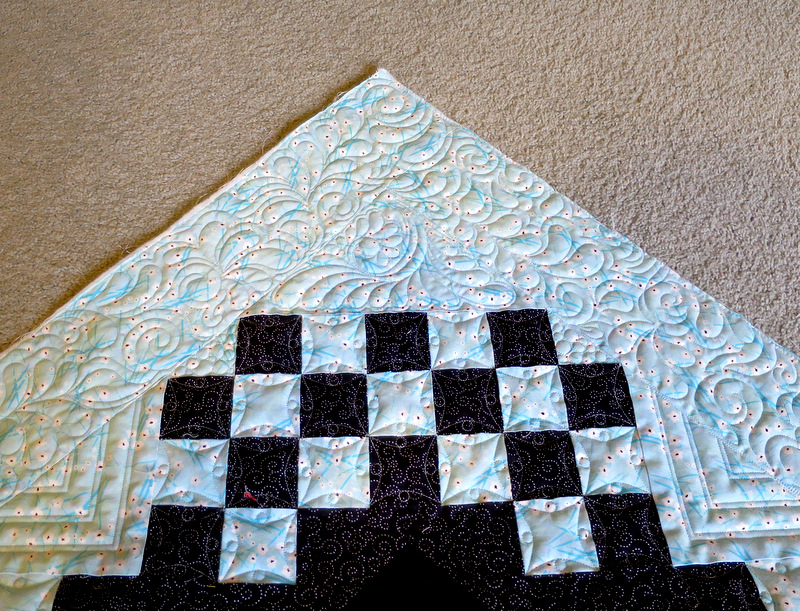
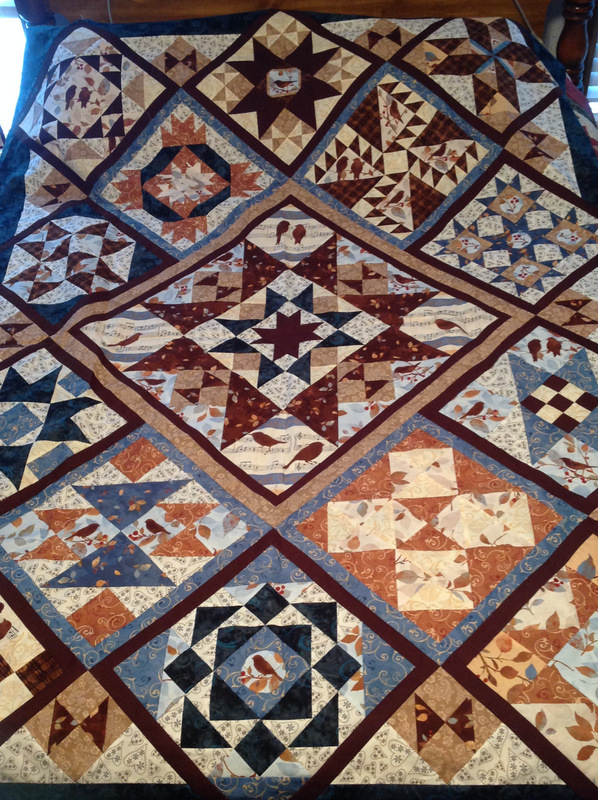
Although this next photo is not in sharp focus, you can still appreciate the gorgeous combination of fabrics in Janet’s quilt top:

RFTS made by Janet June 2015
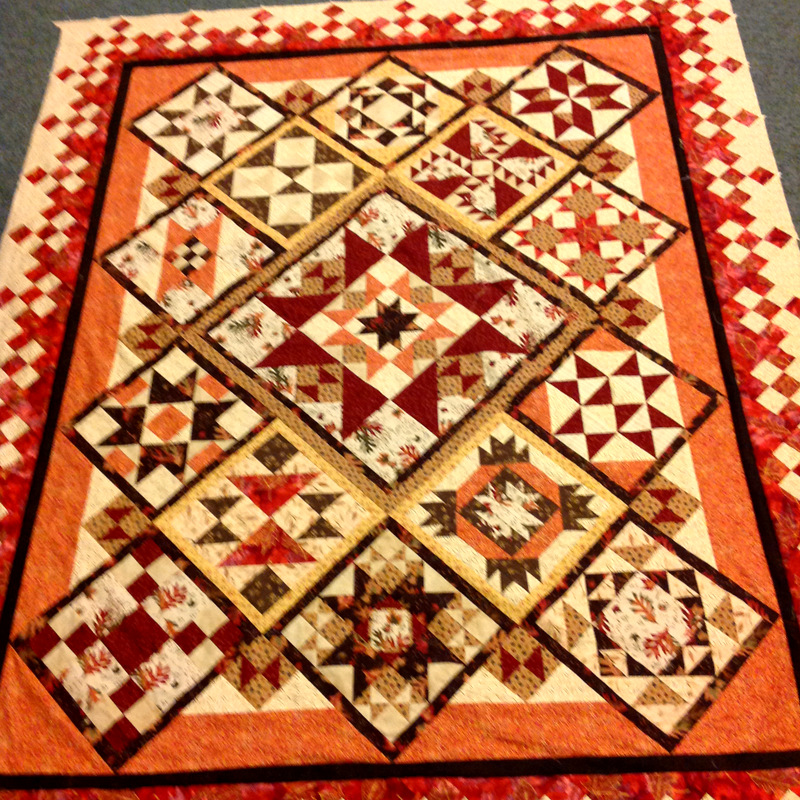
Rusts, corals, tans, and greens on a cream background — so striking. And the batik print in her checkerboard border sets off the inner fabrics beautifully.

Thank you, Honey Bees of  Honeyville, NY, for sharing your beautiful quilts with me! I hope seeing them inspires others who are also reaching for the stars to keep working on their own versions.


Posted in Reach for the Stars sampler quilt, update | 4 Comments

Blogger’s Quilt Festival: Large Quilt Category

Here it is, my entry in the Spring 2015 Blogger’s Quilt Festival hosted by Amy Ellis of Amy’s Creative Side:

Catch a Falling Star (2015)
Catch a Falling Star, 84″ x 105″ (2015)


My regular readers know all about this quilt. A year in the making, Catch a Falling Star is based on a design by Terri Krysan called Reach for the Stars that was offered in Quilter’s Newsletter over the course of seven issues, beginning with Oct./Nov. 2013 and ending with Oct./Nov. 2014.

Using my own color scheme, which is quite different from the original, I replaced three blocks and made a few changes to some of the other blocks. I also challenged myself to incorporate a fussy cut image into every block and redesigned the border to make it symmetrical.

The Jacobean floral fabric and a few others in the quilt are from the Ainsley line by Northcott Fabrics. The remaining fabrics came from my stash.

Many of my blog posts in 2014 are about the creation of this quilt. If you are interested in seeing how it came together, block by block, simply click on the “reach for the stars sampler quilt” link at the bottom of this post. All of the posts will come up in reverse  chronological order. In particular I hope you will look at some of the close-ups of longarm quilter Loretta Orsborn‘s beautiful free-motion and digitized quilting designs.

My quilt is entered in the large quilt category. To see some of the other large quilts entered in the festival, check out this link: http://amyscreativeside.com/bloggers-quilt-festival-large-quilts/.

But wait, there’s more! There are 10 other categories of quilts in the festival: mini, small, appliqué, art, hand quilted, home machine quilted, original design, ROYGBIV, scrappy, and viewer’s choice. Be sure to check them out. And prepare to be inspired!


Posted in Bloggers Quilt Festival, Reach for the Stars sampler quilt, update | 10 Comments

Reach for the Stars: Side by Side

My quilt Catch a Falling Star, based on Minnesota quiltmaker Terri Krysan’s Reach for the Stars quilt, is currently hanging in the Pine Needle Quilt Shop where it is receiving very nice comments from customers.

Several people have asked how my quilt differs from Terri Krysan’s (other than the obvious difference of fabric choices) so I thought I would give you a look at both quilts side by side:

Reach for the Stars3
Left, Terri Krysan’s original quilt “Reach for the Stars” (86¾” x 106½”), 2012. Right, Dawn’s version, “Catch a Falling Star” (84″ x 105″), 2015.

(Photo on left copyright Quilter’s Newsletter. Used with permission. Photo by Melissa Karlin Mahoney. Photo on right by Bill Volckening.)

The center medallion and three of the blocks were made following Terri’s design. From there I departed in ways both large and small. I’ll use the quilt outline below to explain those differences:medallion quilt layout

Blocks 1 and 2: no changes.

Block 3: incorporated fussy-cut images in outer part of block.

Block 4: changed center of block to a fussy-cut image enclosed in an inset circle. Moved to Block 11 position.

Block 5: no change.

Block 6: replaced pinwheel in center of block with a 4-Patch Wonder block. Moved to Block 7 position.

Block 7: eliminated appliquéd circles, incorporated fussy-cut image in center of block. Moved to Block 14 position.

Block 8: incorporated fussy-cut image in center of block and changed design of outer part to incorporate fussy-cut border stripe. Moved to Block 6 position.

Block 9: added four triangles to create a star. Moved to Block 13 position.

Block 10: replaced block completely with design spotted on a coffee mug.

Block 11: replaced block completely with a block I dreamed up (although it may well exist elsewhere). Moved to Block 4 position.

Block 12: made the center a square within a square and changed the color value in the corner four-patches to avoid having dark fabric in the points where they would bleed into the black sashing. Moved to Block 9 position.

Block 13: incorporated fussy-cut image into circle in center. My circle is inset rather than appliquéd. Moved to Block 8 position.

Block 14: replaced center of block with a double pinwheel block incorporating fussy-cut images. Moved to Block 12 position.

That’s it for the blocks, though I should note that Terri used fussy-cut images in seven of her 14 blocks. I challenged myself to incorporate fussy-cut images in all 14.

The setting triangles were made following Terri’s design but I altered the design of the checked border to make all four corners symmetrical. I’m very proud of that achievement.

Now you probably think all 14 blocks are different, don’t you? Not so! Two of the blocks are exactly the same design. They just look different because of the fabrics used. Can you spot which two are the same? Here’s a bigger photo of my quilt to help you look:

CAFS front BV photo 800Happy hunting!


Posted in 4-Patch Wonder, Reach for the Stars sampler quilt, update | 18 Comments

Reach for the Stars: Jenn Varney’s Quilt

Ladies and gentlemen, we have another Reach for the Stars quilt finish! Jennifer Varney of Hudson, New Hampshire is one of several quilters across the country I met virtually last year as we each worked on our own version of a star sampler quilt designed by Terri Krysan and featured as a series project in Quilter’s Newsletter. Over the course of 2014 our little band of stargazers shared pictures, compared notes, and cheered each other on.

We all made changes — some great, some small — to the design. Jenn chose to make a smaller quilt with fewer blocks and to use a straight set rather than putting her blocks on point. Here is her finished quilt:

JV's RFTS quilt-001
The muted browns and blues are offset by shots of metallic gold, giving the quilt such a rich look. The center medallion shows this off especially well:

JV's center medallion
Lorri Wurtzler of Seventh Heaven Quilting in Nashua, New Hampshire did the longarm quilting. I hope you can see Lorri’s lovely quilting in this close-up . . .

JV's RFTS block detail
. . . and this one:

JV's RFTS quilt detail
By changing the setting, Jennifer reduced the number of blocks (not counting the center medallion) from 16 to 12. If my math is correct, her quilt measures about 60″ square, perfect for a lap quilt or throw. And wouldn’t it look terrific on a wall?


Posted in Reach for the Stars sampler quilt, update | 8 Comments

Reach for the Stars: Front and Back

I’m excited to show you a full frontal shot of Catch a Falling Star (CAFS), my sampler quilt based on Terri Krysan’s Reach for the Stars quilt. CAFS was photographed last week by Bill Volckening, quiltmaker, collector, author, historian, and blogger, to name a few of his pursuits. I have no wall or floor space in my home large enough to capture the entire quilt, which measures 84″ x 105″ after quilting, in a photo. Fortunately, there was plenty of room in Bill’s studio.

Here is Catch a Falling Star from the front: CAFS front BV photo 800and from the back:

CAFS back BV photo 800In a future post I’ll take you on a little tour of Catch a Falling Star, block by block. I’ll show you some close-ups of Loretta Orsborn’s lovely quilting and share a couple of fun facts about the making of the quilt.


Posted in Reach for the Stars sampler quilt, update | 11 Comments

Two Steps Forward . . .

. . . and one step back. That’s how the last few days have played out in my sewing room.

Two steps forward: the binding and label on Catch a Falling Star (my Reach for the Stars sampler quilt):

2015-01-14 22.54.34

Still to come: attaching a sleeve on the back (one step back). I’ve decided to enter Catch a Falling Star in a couple of local quilt shows this year, hence the need for a sleeve. Before the sleeve gets attached, though, this quilt is going to be photographed in a studio. That’s something I can’t do at home because I don’t have a suitable space for a full flat shot. Several readers have asked for a look at the entire quilt as well as more photos of Loretta Orsborn’s lovely quilting, and I promise they are forthcoming.

A couple days ago I decided to finish my Sun Flowers wall hanging. I pieced a backing and pin-basted the layers. Two steps forward. Without a quilting plan in mind I started stitching in the ditch on the horizontal seams. Then I stitched the vertical seams and sashing strips on one of the kaleidoscope blocks. At that point I decided what I really wanted to do with this little quilt was stitch diagonally across the surface. Those horizontal and vertical stitching lines had to go.

I picked out all of the quilting. BIG step back:

2015-01-14 01.33.45

It was actually a good thing I picked out the quilting because I had pin-basted the layers rather hastily and the back was not entirely smooth. With the quilting stitches removed, I was able to adjust the layers, and this time I thread-basted them. I put the quilt on my design wall and started thinking about my quilting plan.

Now I’m second-guessing my decision on the diagonal quilting. It seems to me it might distract from the kaleidoscope blocks, which are the star of the show. One thing’s for sure: this quilt is not going under the needle on my sewing machine until I have a plan firmly in place.

In the meantime, I’m going to start piecing the backing for another quilt. One step forward.


Posted in kaleidoscope quilts, Reach for the Stars sampler quilt, update | 4 Comments

Reach for the Stars: Quilting Details

Would you like to see more pictures of Catch a Falling Star, my series sampler quilt based on Terri Krysan’s Reach for the Stars? Ah, I thought so.

Let’s start with a shot of the entire quilt (you’ll see close-ups of longarm quilter Loretta Orsborn’s beautiful work in subsequent photos):

whole quiltYou’re looking at it from the side because I couldn’t squeeze myself into the room in order to take a proper shot looking at the quilt from top to bottom.

Here’s the center medallion . . .

center medallion

. . . with a close-up of the free-motion feathers quilted in the black star points:

free motion feathers in center medallion
The 10 blocks sashed in black and the center of the medallion have one digitized motif and the four blocks sashed in green have a different one. Here is Block 2, sashed in black. . .

block 2, sashed in black
. . . and Block 10 sashed in green:

block 10, sashed in green
All of the quilting in the sashing strips is free-motion.

This is one of the side setting triangles:

setting triangle
Notice the design quilted in the hourglass blocks (there are four in the center medallion and one in each of the side setting triangles):

hourglass block

Loretta used the same motif in the border squares:

9-patch in border
She free-motion quilted feathers all around the outer border:

FM feathers in corner
The straight lines in part of the border give the eye some visual relief from all the quilted curves. Those straight lines are used in the interior of the quilt as well, tying the quilting elements together. You’ll see what I mean when you take another look at a side setting triangle:

setting triangle
And isn’t that vine motif graceful? Here it is in one inner corner:

green vine
Finally, here is a portion of the back of the quilt, where the black fabric allows you to see lots of quilting detail. You can also see the two focus fabrics I used for the fussy-cut images in each of the blocks on the front:

portion of back

Once Catch a Falling Star is bound, I’ll take proper full-length photos of both sides. The binding is attached, by the way, and I’m now gearing up to stitch it down by hand . . . all 378″ of it.


Posted in Reach for the Stars sampler quilt, update | 13 Comments

Reach for the Stars: Quilted!

The New Year has gotten off to a grand start. Yesterday I picked up Catch a Falling Starmy version of Terri Krysan’s Reach for the Stars sampler quiltfrom longarm quilter Loretta Orsborn of Orsborn Specialty Quilting, and I have been swooning with delight ever since. I’ve long admired Loretta’s quilting skills, having seen several examples of her work in quilt shows over the last few years, and was overjoyed when she agreed to work her magic on my quilt. She is equally skilled at digitized and free-motion quilting, and I was eager to have both on display.

On the day I took my quilt top and backing to Loretta’s studio, we spent at least two hours looking at quilting motifs, discussing options, and choosing threads. We made a lot of decisions but I gave Loretta carte blanche to make changes and asked her to incorporate as much free motion quilting as she desired.

Take a look at her lovely work:

photo 2

photo 1

More pictures to come, I promise. These are the photos Loretta sent me when she finished the quilting. The battery on my brand new digital camera is charging as I write this. As soon as the camera is ready to use, I’ll take lots of photos and get them posted. In the meantime, I’m going to start working on the binding.


Posted in Reach for the Stars sampler quilt, update | 10 Comments

Reach for the Stars: I’m There!

Yes, indeed! My Reach for the Stars quilt top is completely pieced, all 88″ x 108″ inches of it. I finished it at Quilt Camp last week. It’s a bit wrinkled from being all folded up during transport, but here it is:

RFTS PN 11-14
Dawn’s Version

I like the look of the black squares floating in the outer border, so rather than binding the quilt in solid black to frame it, as originally planned, I’m going to use more of the background fabric.

But I’m getting ahead of myself. The quilt has to be quilted first! I am going to (gulp) invest in custom longarm quilting on this one. The quilter I have chosen is equally at home with free motion and digitized quilting, and I expect my quilt will have some of both. I’ll have a better idea after we meet next week.

While I was at Quilt Camp I also pieced the back. It measures about 96″ x 116″ and incorporates the two Jacobean floral focus fabrics I used for the fussy-cut images in the center medallion and individual blocks. This is a partial view of the back:

RFTS back, partial
Jacobean Florals on the Back

One of the prints was a border print, so I pieced it in both directions for a bit more visual interest.

I’m still grappling with the realization that this quilt may not fit my queen-size bed. The 88″ width is fine, even if the quilting draws it up a few inches. It’s the length that’s the problem. According to several websites I’ve looked at, the recommended length for a standard queen or king-size quilt is 94″. Even if the quilting shrinks 4″ from the length, it’s still going to be 10″ longer than the recommended length. If this had dawned on me sooner (like when I started making this quilt in January), I might well have resized the blocks. Too late now. But I’m not going to fret about it. Surely I’ll find a good spot to display this quilt.

On a brighter note, I’ve selected a name for my quilt:  Catch a Falling Star. If you were around in 1957 (as I was), you’ll recognize it as the name of a song by Italian-American crooner Perry Como.


Posted in Reach for the Stars sampler quilt, update | 10 Comments

Reach for the Stars: Almost There!

The final two corners are on my Reach for the Stars quilt top, and already it is huge. It measures 80″ x 100″ — oh my! It will measure 88″ x 108″ once the final borders are on. The custom quilting will shrink it a few inches, of course, but still — I think it’s going to be too big for my queen size bed. I was lamenting this to my twin sister, Diane, who quickly pointed out that she has two king size beds in her home and oh, by the way, wouldn’t this quilt look terrific in the upstairs guest room?

There’s no room in my house big enough to photograph the entire quilt top so I placed an old sheet on the patio out back, centered the quilt on top of it, and took a picture in the waning light:

2014-11 all but last border
Final Border to Come

Those of you who have been following my efforts to achieve a symmetrical checked border now have a good look at how it all fits together. Your next view of this will be a finished quilt top!


Posted in Reach for the Stars sampler quilt, update | 20 Comments