Monthly Archives: December 2012

Ready for 2013!

I just dropped off class supply lists for three new classes I’m teaching in early 2013 at the Pine Needle in Lake Oswego, Oregon. If you’d like to find out more about the classes, clicking on this link will take you directly to my Upcoming Classes page.

Class Supply Lists
Class Supply Lists

Information about the classes will also be in the Pine Needle’s new catalog, scheduled to hit mailboxes next week.

Happy New Year!


Posted in update | Comments Off on Ready for 2013!

My Lucky Day

My lucky day occurred two weeks ago, and I am still marveling at my good fortune.

I was at the December meeting of the Portland Modern Quilt Guild, which I joined last spring. The guild was having a membership renewal drive, and those who renewed at the meeting were eligible for prizes. Of course I renewed on the spot. I’ve only made it to a few meetings this year but I have been so impressed with the creativity and talent of the women (and a few men) who belong to the guild. And every one is so friendly. I usually sit down next to someone I don’t know and introduce myself. By the end of the evening I have a new friend. This time it was a lovely woman named Vickie.

There must have been 15 or 20 prizes awarded to renewing members, fun things like new books and bundles of fabric. Alas, I didn’t win a thing. Then one more prize was announced: a quilting session with Nancy Stovall of Just Quilting. Can you imagine how thrilled I was when I heard my name called? Nancy is an award-winning longarm quilter. “What does ‘quilting session’ mean?” I whispered to Vickie. “It means she will quilt a quilt for you!” answered Vickie.

I was so excited that the very next day I took a newly-finished quilt top to Nancy’s studio, and we talked about motifs and auditioned threads. Today I dropped off the backing, and now I just have to sit back and wait till Nancy works her magic. This is the quilt top:

Cosmic Kaleidoscopes

I’ve named it Cosmic Kaleidoscopes. Right now it measures 62″ x 82″, although the quilting process will draw it up somewhat. My goal is to get it bound and labeled in time for “show and tell” at the Jan. 17 meeting of the Portland Modern Quilt Guild and for the Pine Needle’s Open House Jan. 18 and 19.


Posted in kaleidoscope quilts, Portland Modern Quilt Guild, update | 4 Comments

A Table Topper for My Twin

I drew my sister Diane’s name in the siblings and spouses Christmas gift exchange. And — she drew mine! That doesn’t happen very often. This is what I am giving her:

2012-12, table topper
It’s a table topper. You may remember seeing the unfinished top in an earlier post. Diane saw that post and fell in love with the fabric (from the Ainsley line for Northcott Fabrics) and the kaleidoscope block. When I drew her name, I decided to finish the table topper for her.

I didn’t want the topper to be poufy so I used flannel for the batting. It’s quilted very simply. First I stitched in all the ditches and then quilted on both sides of the straight lines in the center and outer edges. Then I quilted a triangle in each of the eight wedges of the kaleidoscope. The simplicity of the quilting keeps your eye focused on the flowers and leaves and vines in that gorgeous Jacobean print:

table topper detail
Here’s the back of the topper:

2012-12, table topper from back
I had never before applied binding to a quilt with obtuse angles (greater than 90 degrees but less than 180). Thanks to Heather Mulder Peterson of Anka’s Treasures, who posted a terrific tutorial on her blog, Trends and Traditions, it was a breeze.

Diane’s table topper — #5 in my series of kaleidoscope quilts — measures 22″ across and 22″ top to bottom.

I hope she likes it — and I hope she doesn’t see this post until after she opens her gift!


Posted in family, kaleidoscope quilts, table topper, update | 6 Comments

Pocket Watch

Do you have any idea how hard it is to find men’s shirts with two simple patch pockets? It’s the only kind the Dear Husband likes to wear. Most shirts nowadays are made with one pocket — or none at all. On the rare occasions when I spot dress or casual shirts with two pockets, I buy several. It’s been a few years since I’ve found some, and many of the DH’s shirts are wearing out. (If you see any two-pocket shirts during your holiday shopping expeditions, please email me!)

Macy’s was having a big sale on men’s shirts last week so I picked up a few. Alas, none of them came with two pockets. I’ll show you what I did to remedy that (something I’ve been doing for 30-odd years).

This particular shirt had no pockets:

shirt 1, before

First, I cut off the sleeves at elbow length and narrow hemmed them. I cut the lower part of one sleeve apart and pressed it flat:

shirt 2, sleeves off-001

These sleeves were extra long so I was able to fashion two pockets out of one sleeve remnant. Here’s one of the pockets as seen from the front . . .

pocket front 500

. . . and from the back:

pocket back 500
Here are both pockets made and sewn onto the shirt:

shirt 3, after
It’s a little hard to see these pockets because the stripes are matched. Here’s a close-up:

shirt 4, pocket detail-001
Oh, and here’s the best part: the price tag:

shirt 5, price tag-001


Posted in family, update | 1 Comment

Batik Bowties

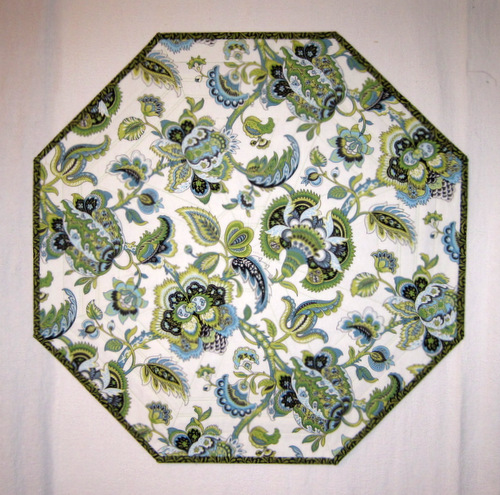
Here is a little top I just finished that features raw-edge machine appliqué in the bowtie blocks and a gradated fabric in the alternating blocks and setting triangles:

gradated-bowtie
Raw-edge machine appliqué is a technique I avoided for years because of concerns about fabric fraying around the edges. Then in October, Nicole of Sister’s Choice Quilts wrote about machine appliqué using Steam-a-Seam-2, a double-sided fusible web. I’ve used Steam-a-Seam-2 on other projects but not in combination with machine appliqué. Nicole reports that she has never had a problem with frayed edges and proved it by showing pictures of one of her quilts that’s been washed multiple times. Based on Nicole’s photos, comments, and excellent instructions (see them here), I decided to give machine appliqué a try.

I chose the bowtie block, one of my all-time favorites, which I’ve always made the traditional way using Y-seams. Y-seams are a little time-consuming but the results are wonderful. (A note to those of you who avoid Y-seams like the plague: I have my own little trick in sewing them, which I will share in a future tutorial).

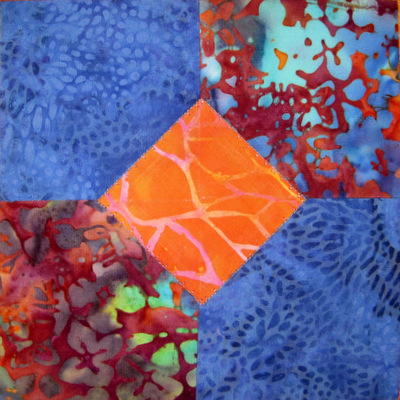
The bowtie blocks shown above came together much more quickly: each block is a simple four-patch with a contrasting square for the knot, fused in place and finished with a blanket stitch. The fastest bowtie block ever!

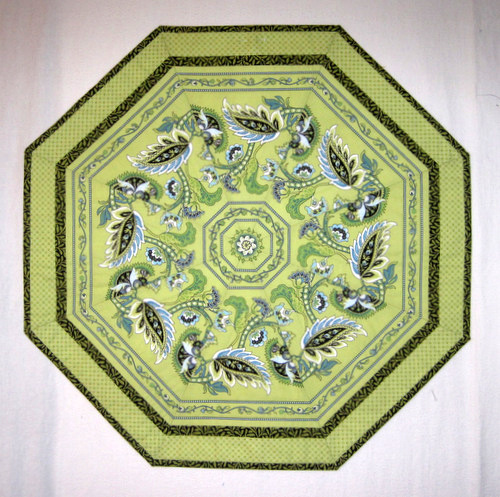
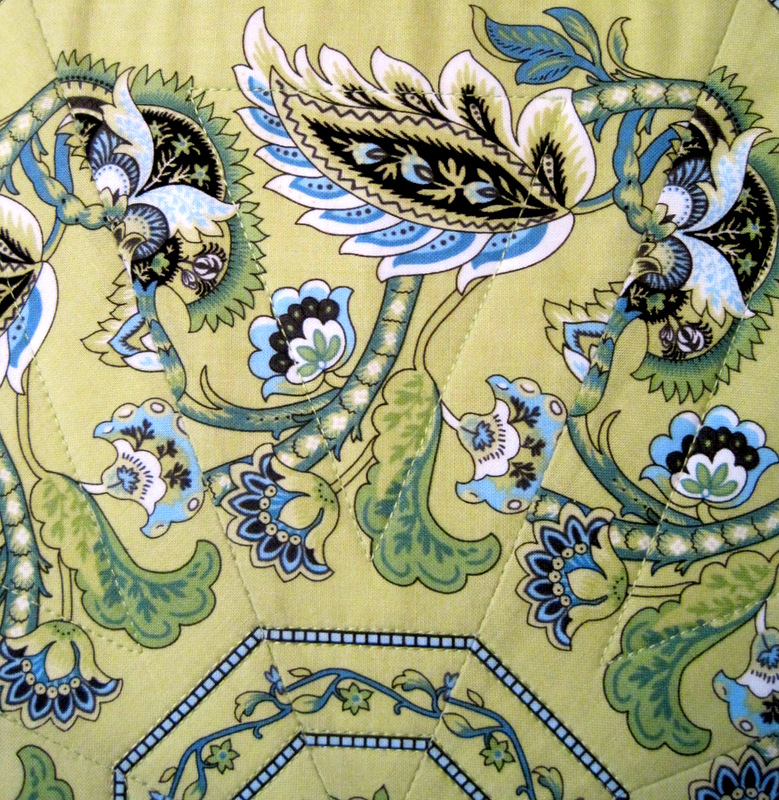
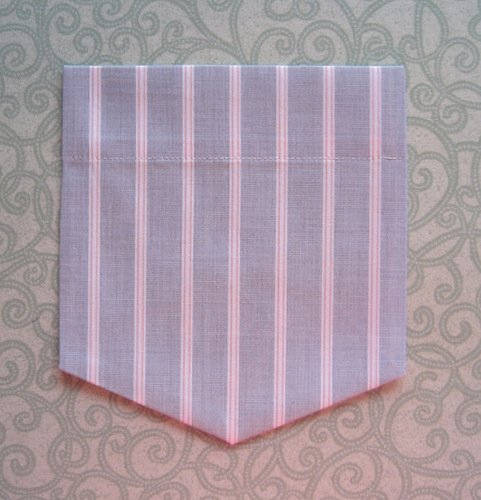
Here’s a close-up of a block with the fused knot . . .

bowtie block before 400-001

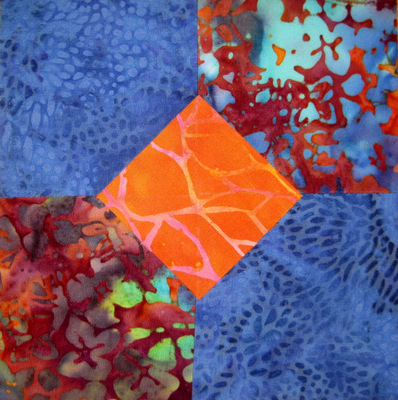
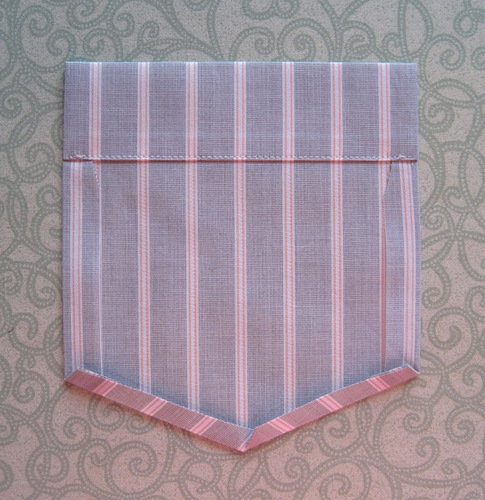
. . . and the same block with the blanket stitch added:

bowtie block after 400
Here’s the same block from the back:

bowtie block from the back 400
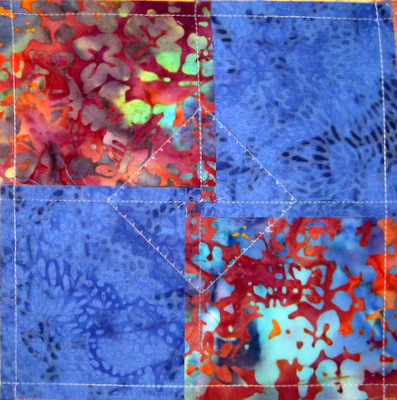
When I made the four-patch blocks, I rotated or “popped” the seam allowances open, allowing the four connecting seams to be pressed in the same clockwise direction. This gives each block a nice flat center — an important consideration when you are fusing another layer of fabric to it.

For the alternating blocks I chose an ombre fabric from the Daiwabo Collection by E. E. Schenck that gradates from a pale lemony yellow to a burnt sienna. Because the alternating blocks are set on point, I had to cut them on the bias to achieve the gradated effect.

The result is Bow-tique Sunrise, a colorful, quirky little quilt. It measures 35″ x 43″, and the blocks are 6″ square. Instead of adding borders, I’m going to finish it as is, binding it in the multicolored batik featured in the bowtie blocks. Don’t you think it will make a cute baby quilt?


Posted in bowties, gradated fabric, machine applique, update | 1 Comment

Sewing Machine Dust Cover: Still Experimenting

A couple of months ago I made a very simple dust cover for my sewing machine and wrote a post about it. Here’s one of the photos from that post:

Sewing Machine Dust Cover


As I was working on it, I was thinking about modifications I would make on the next one: rounded corners, for one thing, and incorporating some kind of trim. Last week I had a chance to experiment, and here is the second version:

The Experiment Continues
A Slightly Different View


The patterned fabrics are from the Enchantment line by Kathy Davis for Free Spirit Fabrics. I used a soft mottled green (Krysta by Michael Miller) for the flange trim and binding.

I like this version a lot but have a couple more tweaks in mind. Stay tuned . . . there will be Version 3. At this rate, my sewing machine will have a full wardrobe of dust covers.


Posted in sewing machine cover, update | Comments Off on Sewing Machine Dust Cover: Still Experimenting

RIP Elfie

I had no idea, when I took this photo in September, that we would be saying goodbye to Elfie so soon. She was 18, and we had her for 16 years, the longest we’ve had any cat. We had her put to sleep last night after a very short illness. At least she didn’t suffer long.

We got Elfie at the Oregon Humane Society when she was about two. She came with the name Monkey, which we promptly changed. All our cats are named after royalty — this is what happens when your husband is a retired history professor — so she was renamed Queen Elfgifu, Elfie for short. (In case you’re not up on your 10th century English history, Queen Elfgifu was married to King Eadwig — and yes, we once had a cat named Eadwig.)

Elfie wasn’t allowed on my quilts because she was a kneader. I was refolding quilts one day in September and when I turned around, there she was stretched out on the quilt pictured above, looking very content. I grabbed my camera and took a couple of photos before ushering her off the quilt.

She was the sweetest cat ever. The Portland White House won’t be the same without her.


Posted in family, update | 4 Comments

Embellishment

Last spring when I was visiting my sister Diane in Atlanta, I renovated a guest room shower curtain and posted the photo in the Home Dec section of my Gallery. Here’s a shot of the renovated shower curtain:

Diane and I were both pleased with the result. Then, during my recent visit over Thanksgiving, we were at Frugal Fabrics in Norcross, Georgia when Diane spotted some wonderful ball fringe trim. I’m telling you, it was made for that shower curtain.

It took just a few minutes to stitch it on, and look what a difference it made:


Here’s a close-up of the trim:

We liked the shower curtain before. Now we love it!


Posted in shower curtain, update | 2 Comments