
First the back story, then the tutorial.
Last spring the talented sisters at Sew Kind of Wonderful released a free pattern called Mini Mod Tiles:
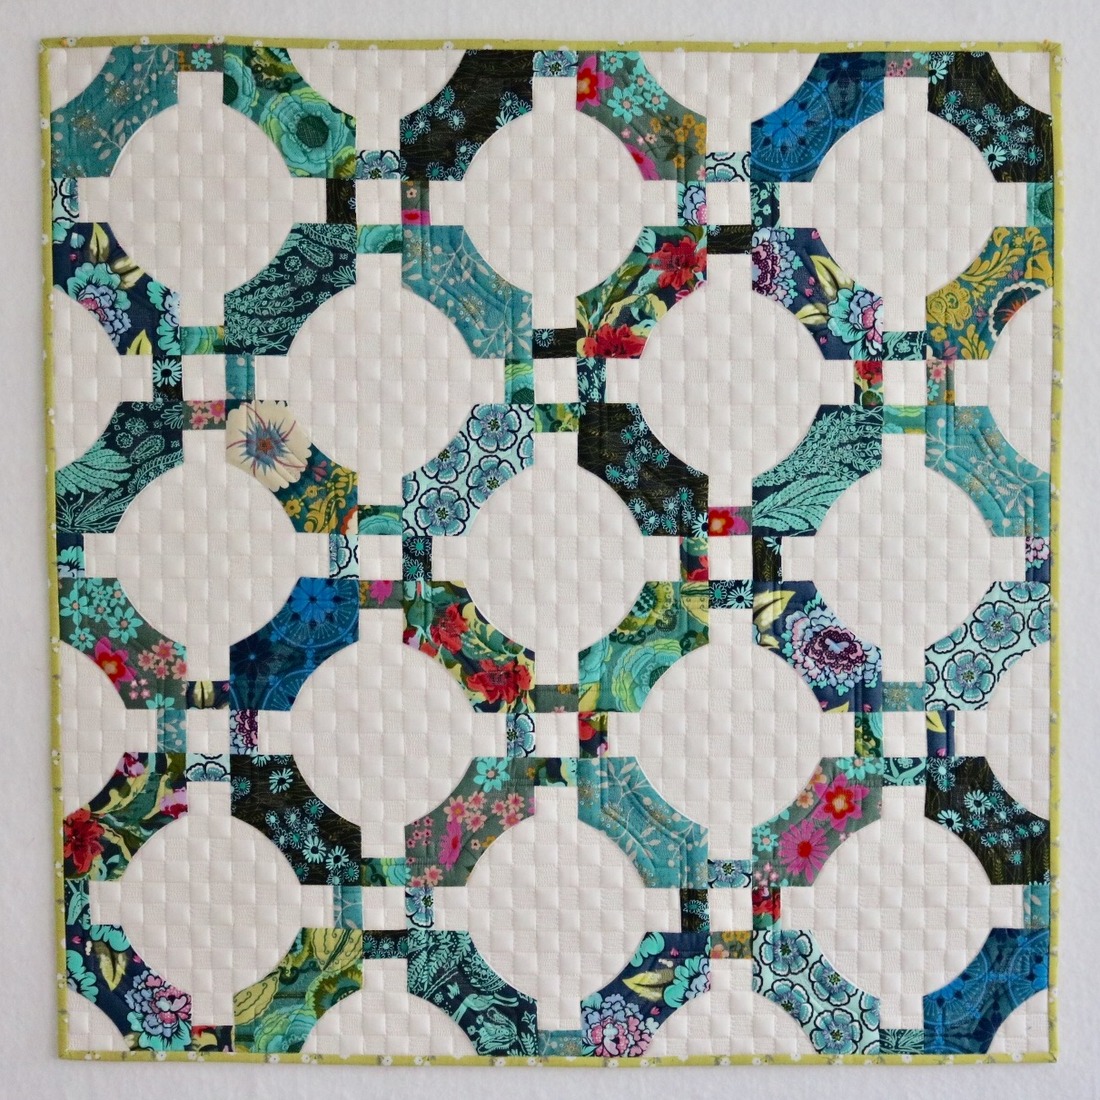
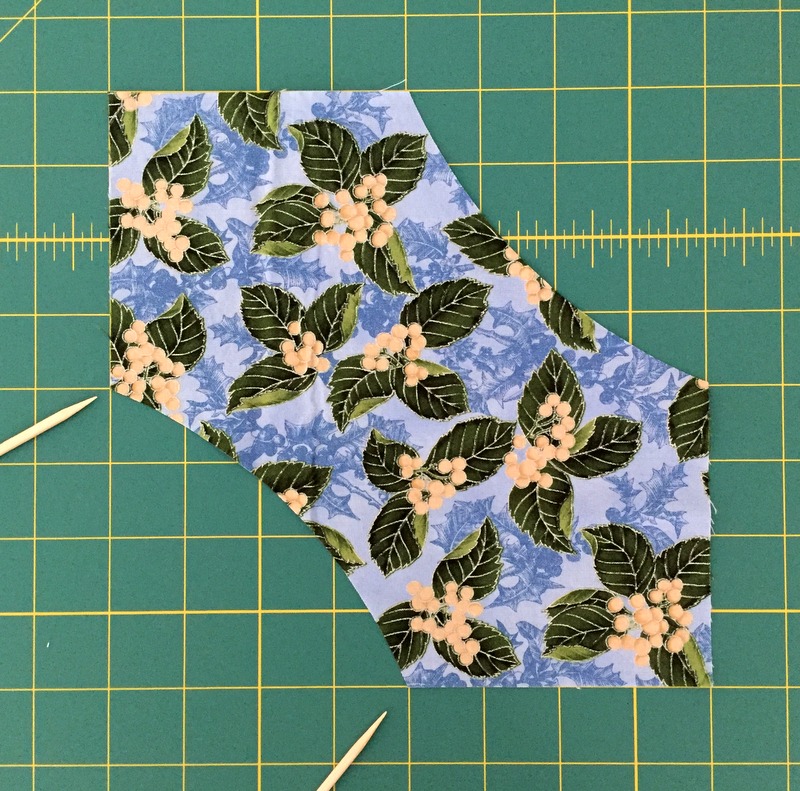
I was instantly enchanted. I downloaded the directions from Sew Kind of Wonderful’s website and made my own version using just three fabrics:

I knew this was the design I wanted to teach at a quilt retreat in June. But I wanted to give my students the option of making a larger quilt. Sure, they could have added more blocks to increase the size of their quilt — but I was thinking of a bigger block. Thus was the “supersized” version of Mini Mod Tiles born:
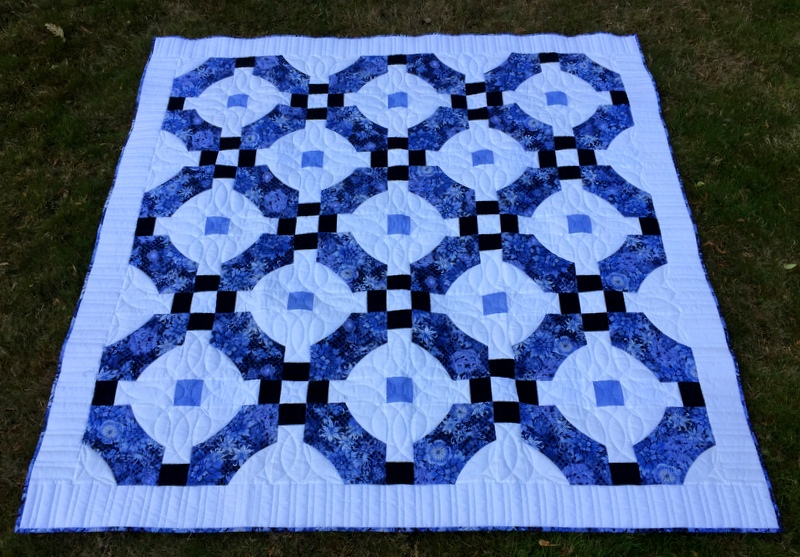
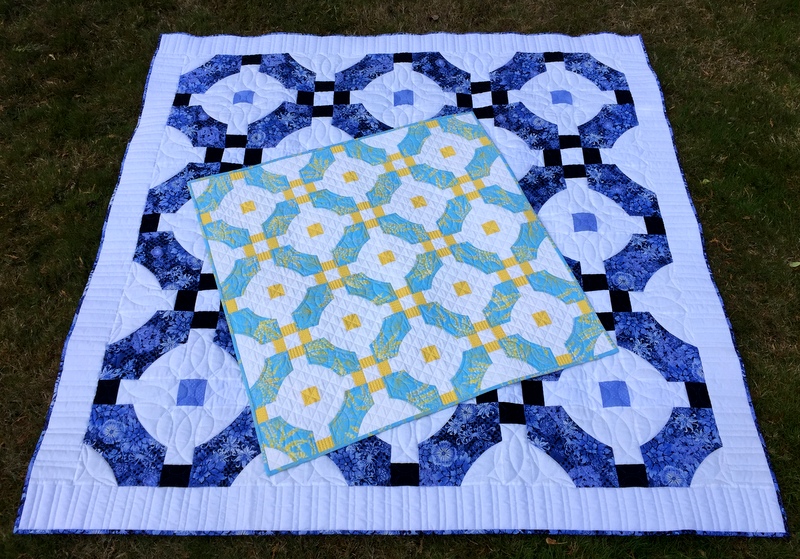
The supersized version was made with the original Quick Curve Ruler whereas the original Mini Mod Tiles was made with the QCR Mini. Here are both quilts to give you an idea of the relative sizes:
The SKW sisters graciously gave me permission to show how I supersized their pattern, hence this tutorial. My directions will be easier to follow if you have already made a quilt using the original Mini Mod Tiles pattern.
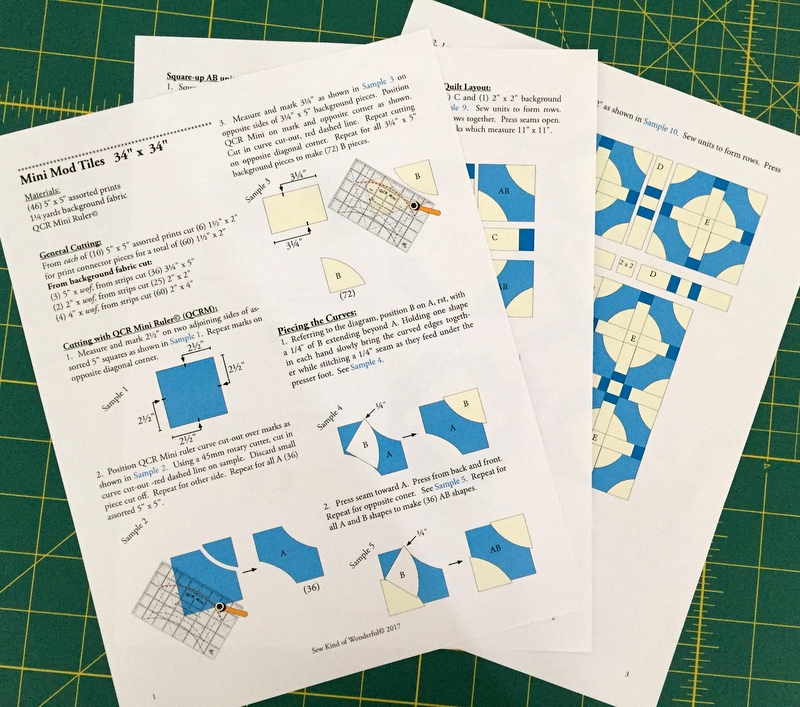
This tutorial has two parts. Part 1 is a two-page handout showing fabric requirements and advance cutting for both a scrappy version using multiple prints like the original SKW version and the more controlled version I made with just four fabrics. Download Part 1: Fabric Requirements and Advance Cutting.
Part 2: Sewing Directions for Mini Mod Tiles “Supersized”
Required: Quick Curve Ruler by Sew Kind of Wonderful (available at many local quilt stores and at Sew Kind of Wonderful’s website).
Required: free pattern Mini Mod Tiles, downloaded from the SKW website.
Download the three-page pattern by going to the Free Patterns link on SKW’s website and double clicking on the photo of Mini Mod Tiles — the same photo you see at the top of this tutorial. Click on the print icon on the upper right side. Print in color:
Study the directions carefully. The cutting, sewing, and squaring up instructions are almost the same as for the mini. The main differences are the cut sizes of fabric and the fact that you are using the original Quick Curve Ruler.
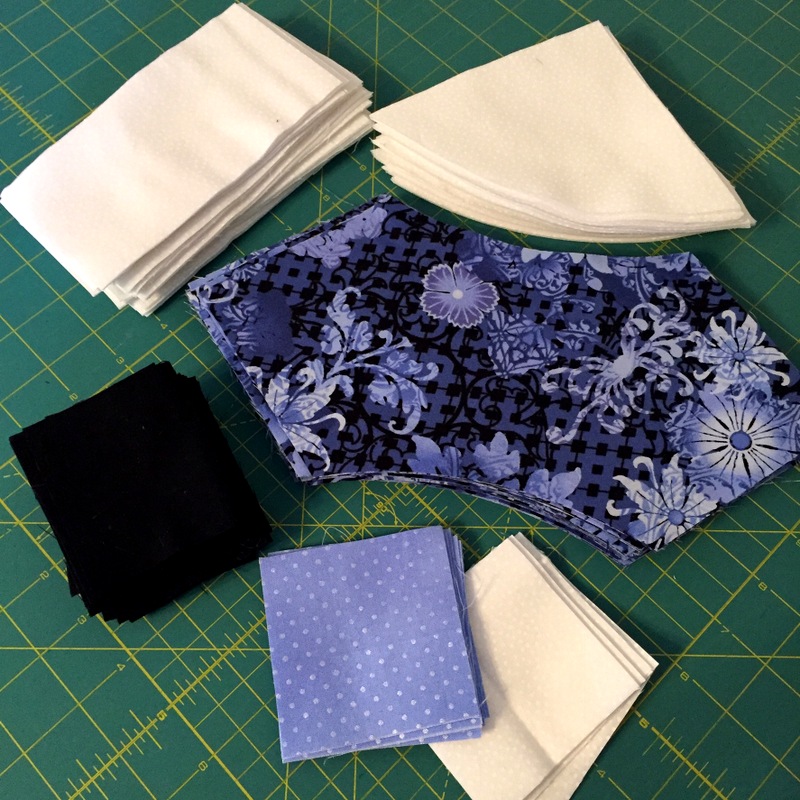
Here are my cut pieces, neatly stacked and ready for sewing:
Cutting with the Quick Curve Ruler (QCR) (Page 1)
Refer to the illustrations on the pattern marked Sample 1, Sample 2, etc.
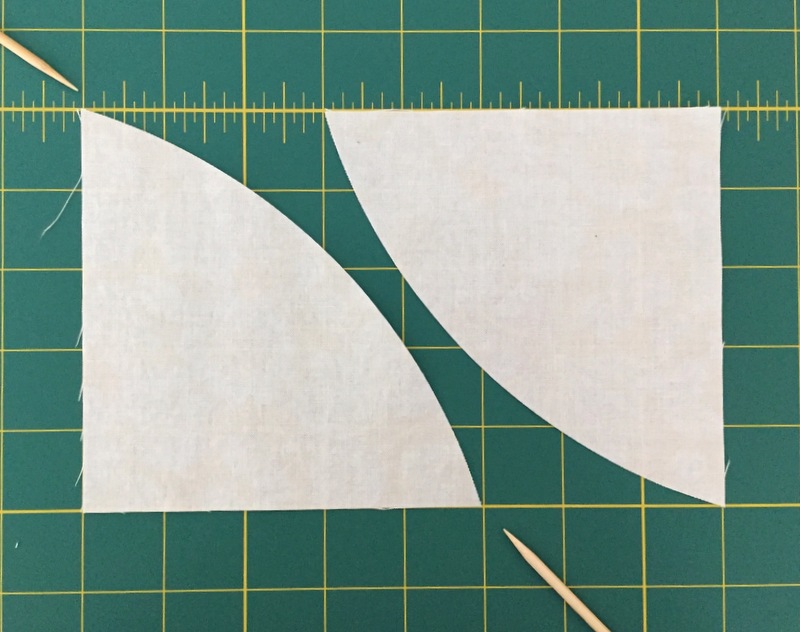
“A” shapes, cut from 8″ focus fabric squares: Referring to Sample 1, measure and make registration marks at the midpoints of the outside edges (4″ from the corners) of all four sides of a square (Sample 1).
Refer to Sample 2 illustration showing the position of the QCR on the fabric square. The red dashed line indicates the curve cut-out you follow with your rotary cutter. You can see that the cut-out curve is right over the registration marks on the left and bottom sides of the square.
First Light Designs tip: Note that the curve cut-out in the QCR is about ⅛” wide. Rather than centering that ⅛”-wide channel over your registration marks, position the ruler so that the inside edge of the channel is right over your registration marks. When you make your cut, follow the inside edge of the channel with your rotary cutter just as you would when making a cut with a straight-edged ruler. Your cut curves will be more uniform in size.
After making the first cut, rotate square 180º and repeat on other side. Repeat with remaining squares. Total: 36 A shapes.
First Light Designs tip: Instead of marking every square four times, arrange the square on a rotary cutting mat with all four sides aligned with the inch lines printed on the mat. (It doesn’t matter where on the mat as long as it’s several inches from outer edges.) Count over 4″ from the corners of the square and position the inside channel of the cutout curve over those points at the edge of the fabric:
By the way, don’t discard the leftover curved pieces! They are a great size for appliqué or paper piecing projects or can be cut into 2¼” or smaller squares for another quilt.
“B” shapes, cut from 5″ x 8″ rectangles: Measure and make registration marks 3″ in from the top left edge and 3″ in from the bottom right edge. Refer to Sample 3 illustration. Note that the ruler is positioned so that the dotted red line showing the cutting channel goes from the upper left corner of the fabric to the registration mark on the bottom right side. After making the cut, rotate the block 180° and repeat. Discard the slivers of leftover fabric.
First Light Designs tip: Instead of marking the fabric rectangle, arrange it on a rotary cutting mat with all four sides aligned with the inch lines printed on the mat. Position the QCR so that inside channel of the cutout curve is over the upper left corner of the rectangle and the 3″ mark from the bottom right edge:
Did you know? You can stack your squares and rectangles and cut multiple units at one time if your rotary blade is very sharp. Try cutting two layers first. If that works, try up to four.
Piecing the Curves (Page 1)
Referring to Sample 4 and Sample 5 illustrations on page 1 of the pattern: See the arrow pointing toward the 1/4″ that Piece B extends beyond Shape A? Change that measurement to 3/8″. When you position Shape B on top of Shape A, right sides together, be sure the tip of B extends 3/8″ beyond the tip of A. Press seam toward A. Note in Sample 4 how the edges of Shape B extend beyond Shape A at the curved seam. This is what you want, as the excess fabric is trimmed when the block is squared up.
Squaring up AB Units (Page 2)
With two B shapes sewn to a shape A, the unit is now called AB.
Referring to Sample 6 on page 2 of the pattern: Square up AB unit to 8″ square. Using an 8½” or larger square ruler, position the ruler so that the straight edges of AB (upper left and lower right corners of the block) measure 8″ square. Trim right side and top. Rotate block 180º, reposition ruler so that bottom and left side of block are on the 8″ lines of the ruler, and trim right side and top. Repeat with remaining squares.
First Light Designs tip: On your squaring up ruler, use an Ultra Fine-Point Sharpie marker to make two small dots — the first one 4¼” to the left of the upper right corner and the second one 4¼” down from the upper right corner, right at the edge of the ruler. When you square up your block, the curved seam that joins Shapes A and B should be right under those dots:
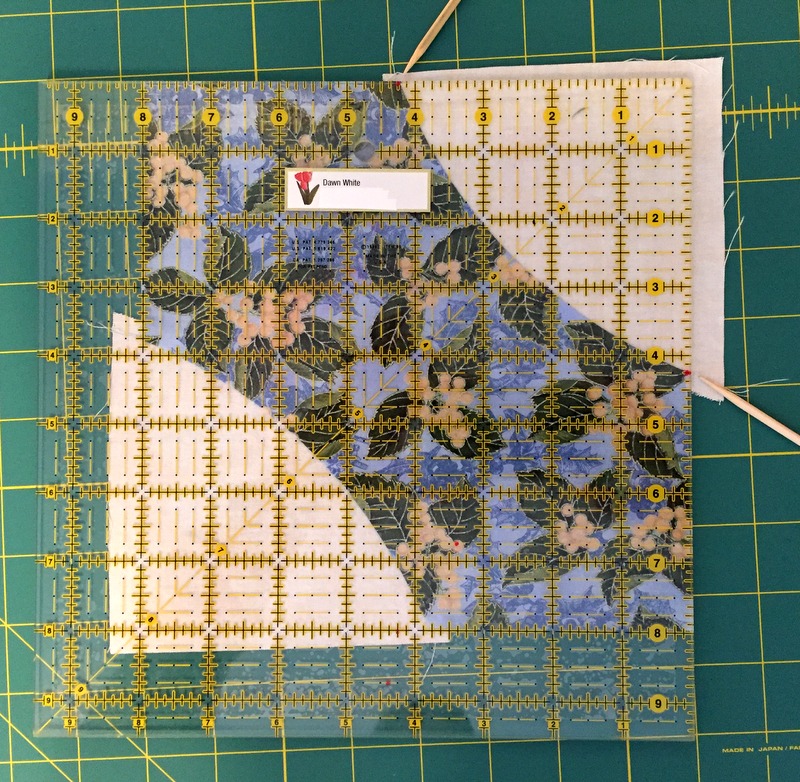
If you find your curved seam falls a bit on either side of the 4¼” measurement, that’s okay. The important thing is that your blocks are hitting the same mark consistently. (The Sharpie marks come off the ruler easily with a drop of nail polish remover, by the way.)
Sashing Assembly (Page 2)
Follow the directions, keeping in mind that your (60) C units are made with connector pieces measuring 2½” x 3″ and sashing strips measuring 3″ x 6″. Likewise the D units are made with two C units and a 3″ square of background fabric in the middle. Note: it would be more efficient to make these C and D units in strip sets but I decided to match my tutorial as much as possible to the original directions.
Block Assembly and Quilt Layout (Pages 2 and 3)
Follow pattern directions, keeping in mind that the center of the block is a 3″ square of accent fabric, not a 2″ x 2″ background piece. Make (9) blocks which measure 18″ square.
Pressing
I did deviate from the pressing directions. Instead of pressing seams open where directed, I always pressed toward the focus fabric, even when sewing rows together. Why? I was planning ahead, in case I wanted to stitch in the ditch around my focus fabric. It’s very difficult to do that when a seam has been pressed open. As it happened, I decided to have both quilts custom quilted; the longarmer stitched in the ditch on both quilts at my request and I really like how much extra definition the stitching gave to the focus fabric shapes.
If you have any questions, please feel free to ask. And if you make a supersized version of Mini Mod Tiles, I would love to see a photo. I know the Sew Kind of Wonderful sisters would, too!
Your tutorial left me convinced beyond any doubt that I have no gift for quilting! But, I am impressed with how skillfully you pen your instructions. I also understand that the precision of your quilts is mostly about measuring and cutting carefully! The quilting work on your super-sized Terrazzo Tiles is marvelous!
Remember that most quilts don’t require cutting and sewing curves.
I bet you could learn if you really wanted to. But as it is, you get gifts made by the best!
Beautiful, Dawn! Even though I don’t quilt, I appreciate your work!