
 Welcome to Part 2 of my Oven Mitt Tutorial, which covers the sewing of the mitt and contrasting band around the cuff edge as well as the final step of tacking the band down before turning the mitt right side out.
Part 1 of my tutorial covers fabric requirements, instructions for downloading and printing the pattern, assembling the layers, and quilting the resulting “quilt sandwich.” Click here to see Part 1.
Click here to download the free pattern:
Oven Mitt Pattern, page 1 of 2
Oven Mitt Pattern, page 2 of 2
Click here to see the Prequel to the Tutorial, in which I explain why I decided to write a tutorial and offer some tips on making sure my pattern fits your hand.
In Part 1 you create a 19″ x 14″quilt sandwich” composed of four layers: outer fabric, cotton batting, insulated cotton batting (Insul-bright), and lining fabric:
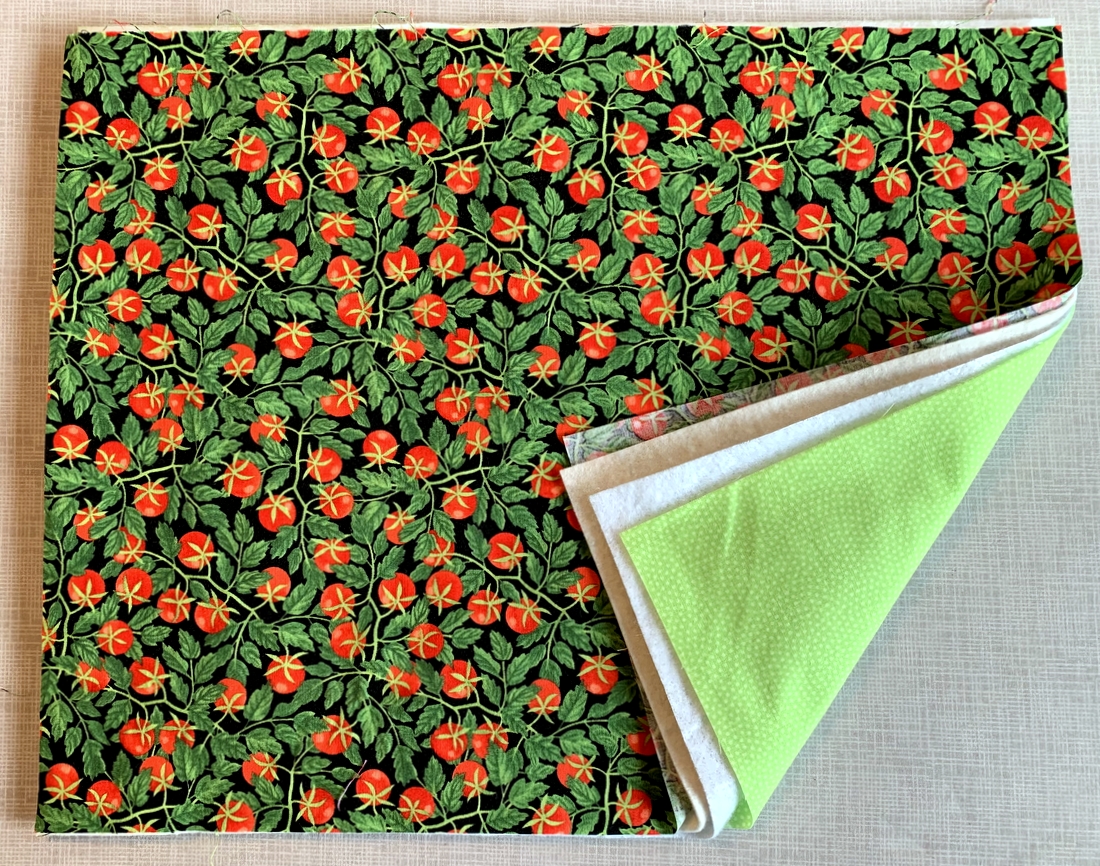
After quilting the four layers you trim them to 18″ x 13″:

Part 2 starts right now!
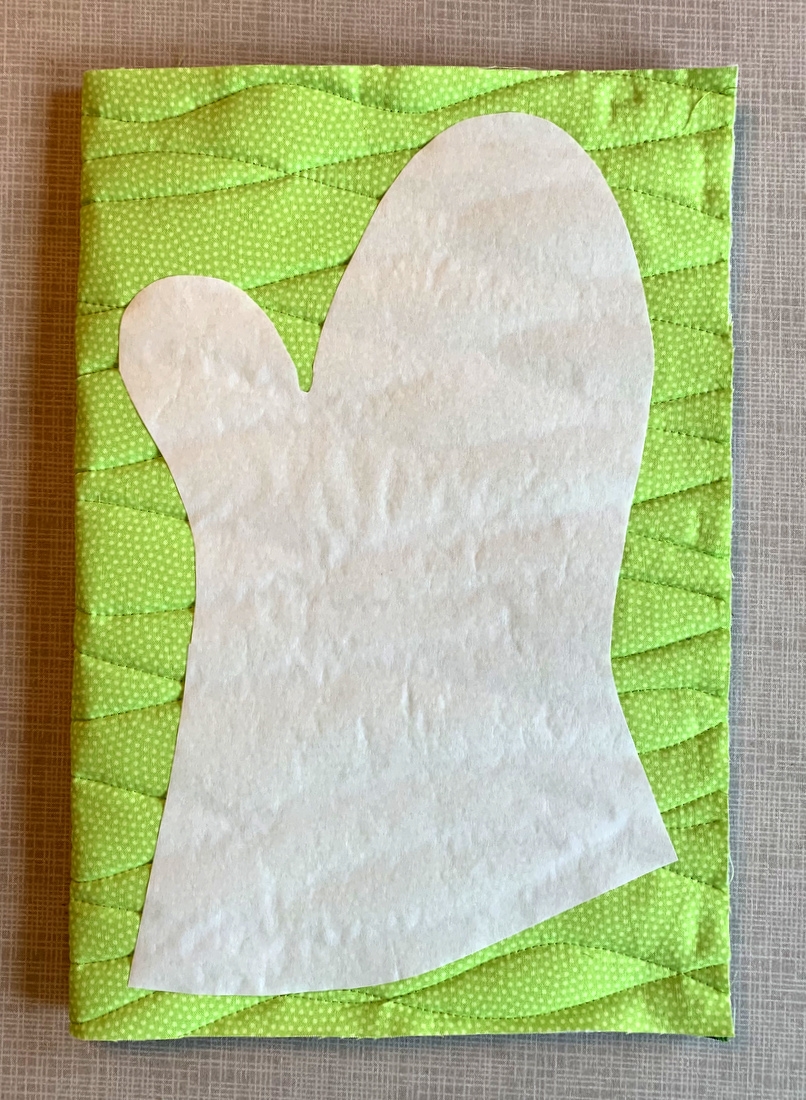
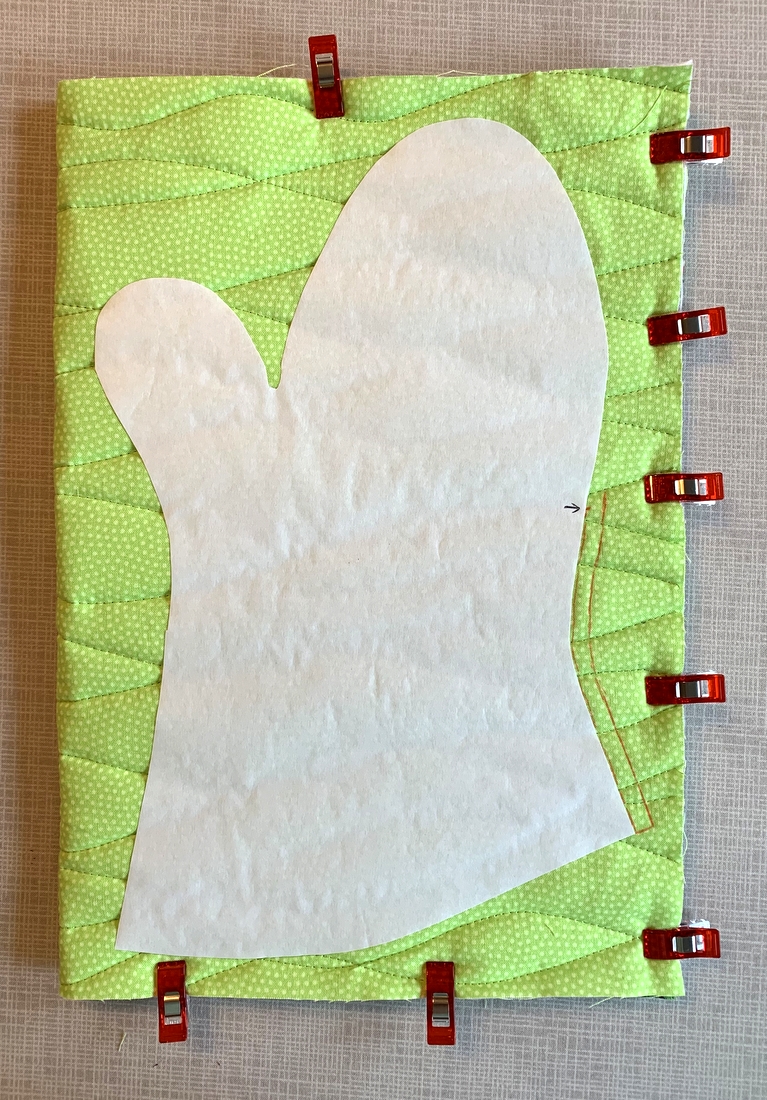
Fold the quilt sandwich in half, right sides together, with the fold on the left. Lay the freezer paper pattern on the fabric, shiny side down, making sure you have at least a half-inch clearance all around. Use a hot dry iron to press the pattern in place:
Using a marking pen or pencil, make a small dot on the fabric next to the pattern about halfway down the finger side of the pattern (see arrow in photo below). Draw a line along the edge of the pattern from the dot to the bottom edge. Draw a second line ¼” to the right starting ¼” above the arrow:
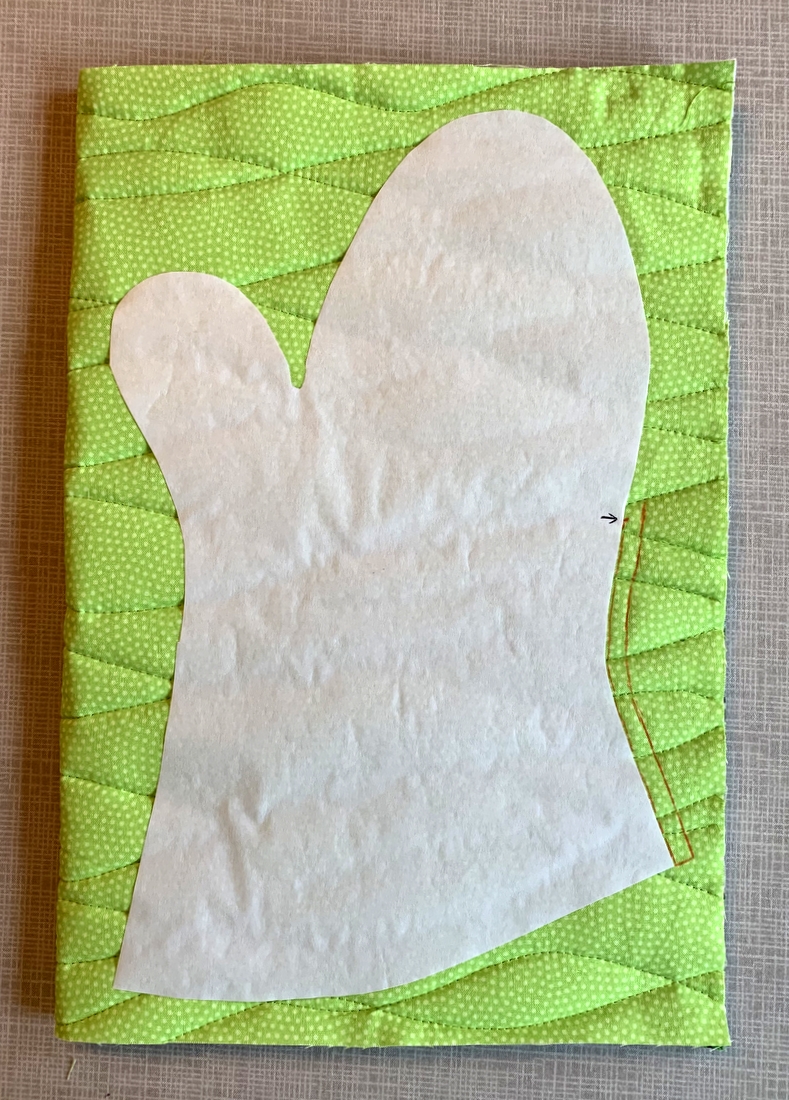 That second line is the cutting line.
Use Wonder Clips around the raw edges of the quilt sandwich. You don’t need a lot of clips – just enough to hold the layers together:
Now you’re ready to sew.
Before you start stitching: make sure the thread in your machine matches the dominant background color of the outer fabric. Once you turn the mitt right side out, you’ll be able to see thread stitches along the seamline. (This is also true of store-bought mitts, by the way.) It’s because you are stitching through eight layers; that’s a big load for two interlocking threads to carry, especially when four of the eight layers have some bulk to them. (There may be times when your bobbin thread is a different color than the top thread. It’s the bobbin thread you are likely to see once the mitt is turned.)
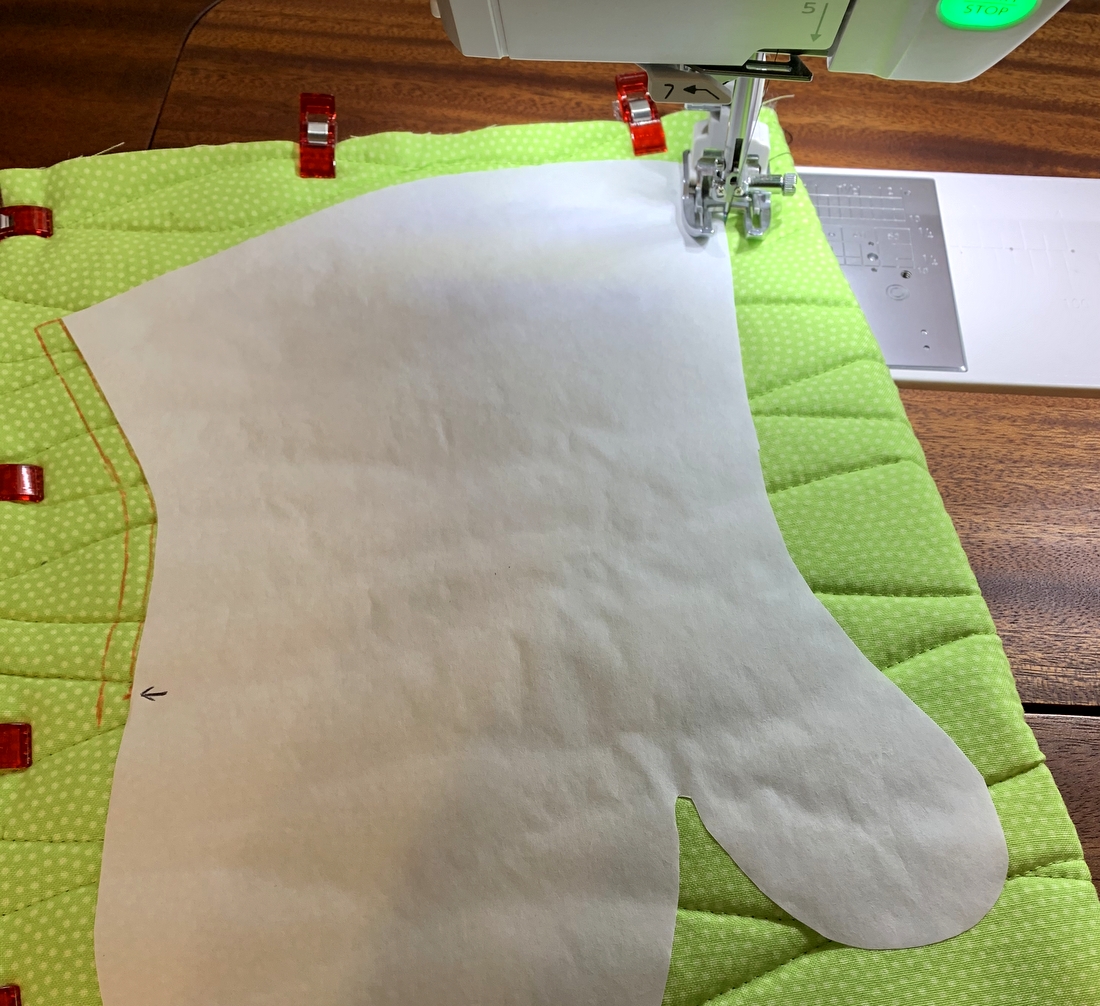
Using an open-toed walking foot, which feeds the eight layers together evenly, sew from the bottom edge of the thumb side of the mitt (see photo below) with the needle right next to the freezer paper, stopping when you get to the dot on the opposite side. Backstitch at the beginning and end of the stitching line.
 The secret to not getting any sharp points as you stitch around the curves of the thumb and finger portions is to go slowly, stopping when necessary to lift the presser foot and rotate the mitt ever so slightly to keep the line of the curve going smoothly. Any points that get stitched in will be visible when the mitt is turned right side out.
Here’s a close-up of the stitching in process:
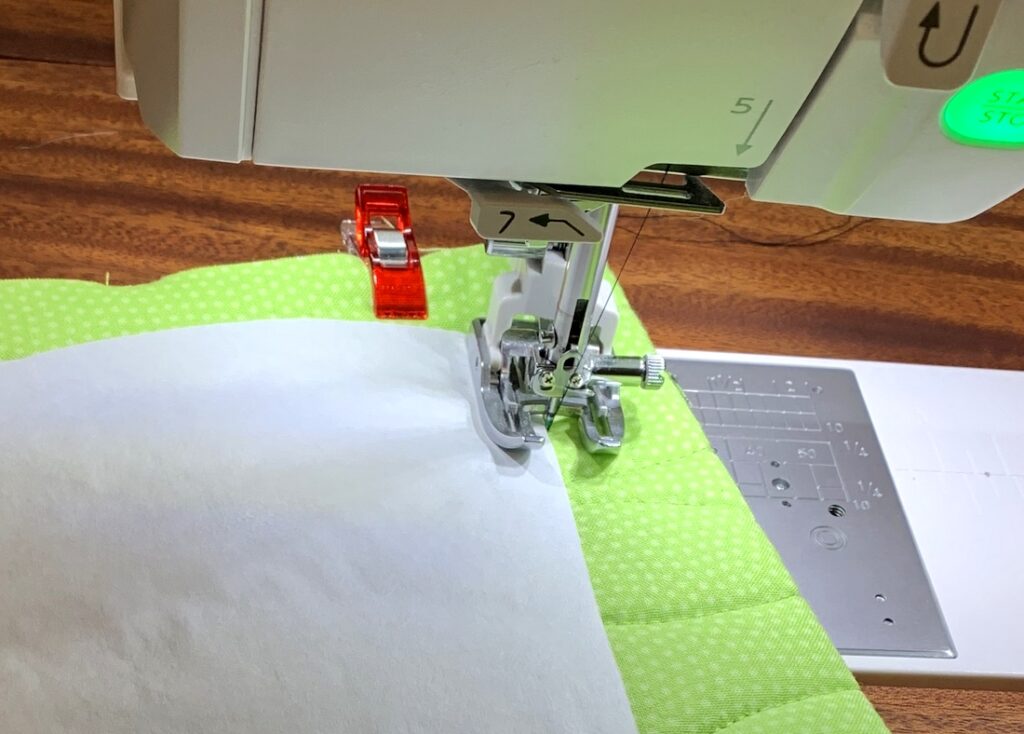 You can see why an open-toed foot is important: you need to see the needle going in and out of the fabric right next to the freezer paper.
Using very sharp sewing scissors, cut along the bottom edge (only) as shown:

Gently peel off the freezer paper pattern:
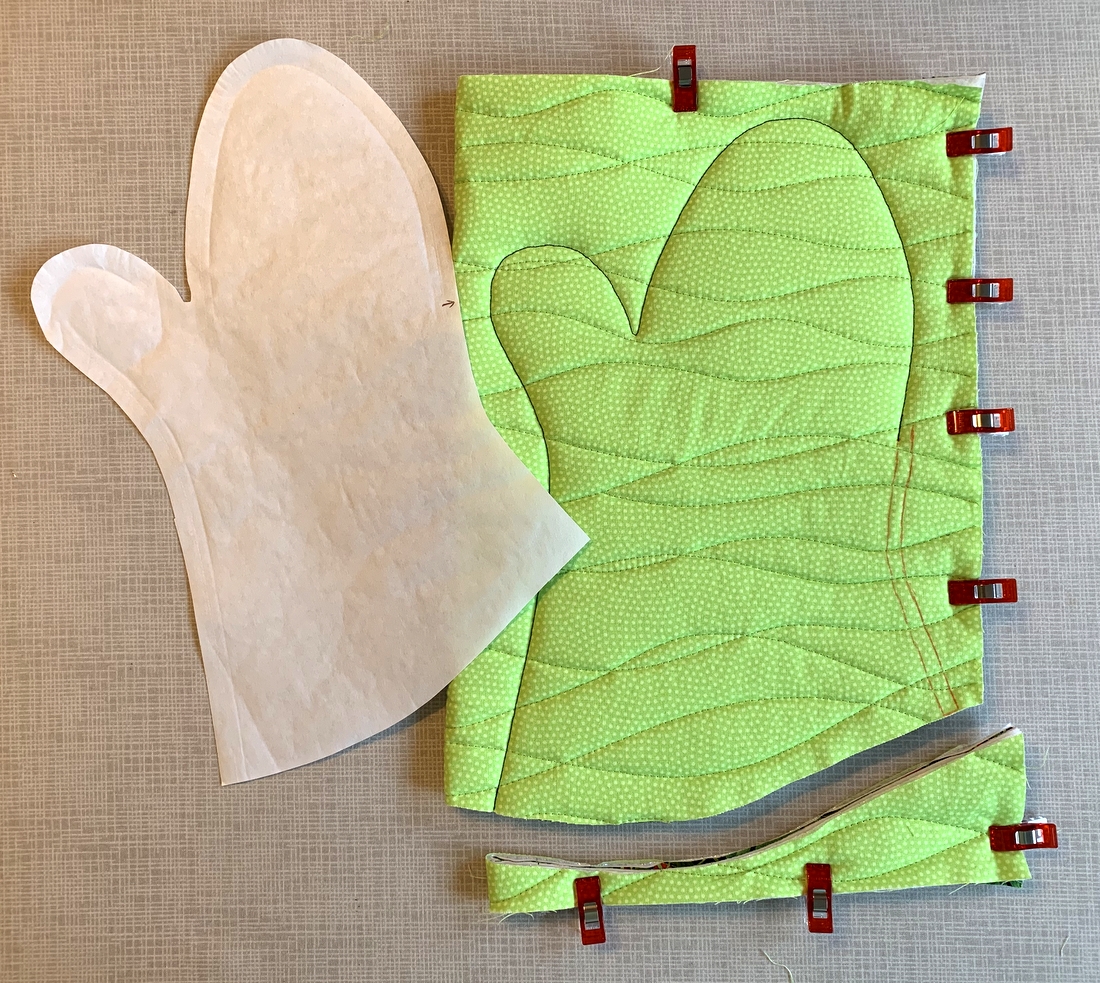 (You can use the pattern over and over again.)
Return to the sewing machine and stitch around the mitt again on the same stitching line, backstitching at the beginning and end:
 This step is important to strengthen the seam and relieve some of the stress on the stitching line when the mitt is turned. The stress is greatest on the notch between the thumb and finger sections.
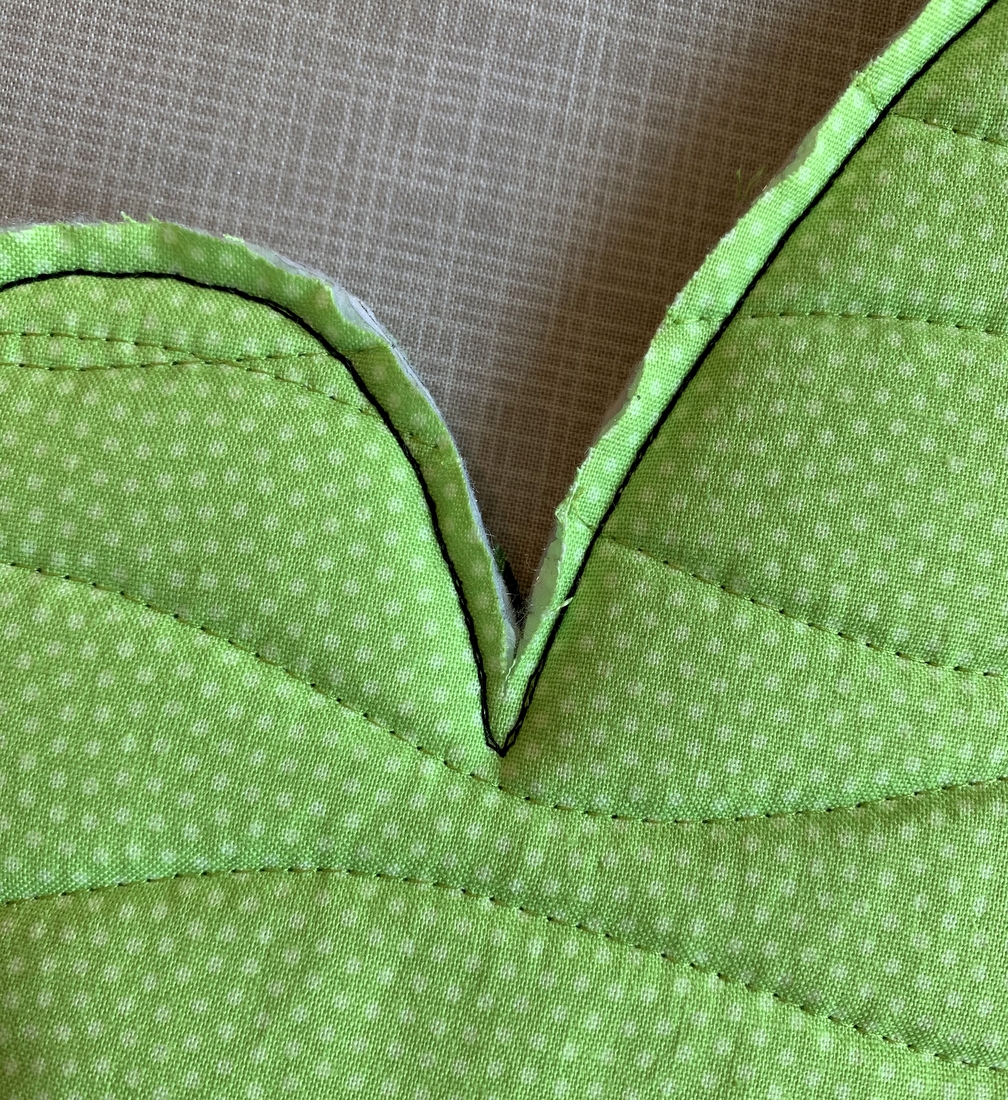
Be as exact as you can stitching on top of the first stitching line. In this close-up of the notch you can see that I took two stitches in a slightly V shape:
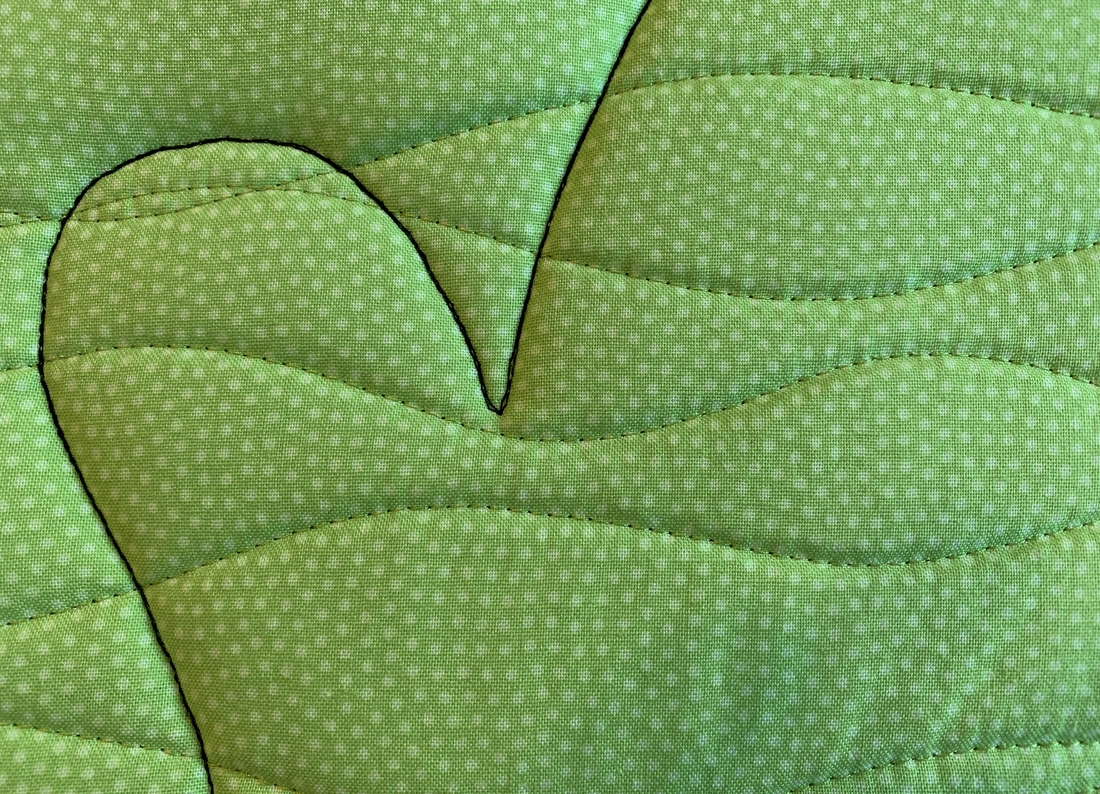 You can also pivot at the end of the thumb curve, take two very small stitches straight across, pivot again and start up the finger curve. I’ve tried both ways and it doesn’t seem to make a difference when the mitt is turned.
You can see I used black thread here. That’s because the background color on the right side of this mitt is black. When the mitt is done, you will not be able to see black thread on the inside of the mitt at all.
Now it’s time to trim the seam allowance.
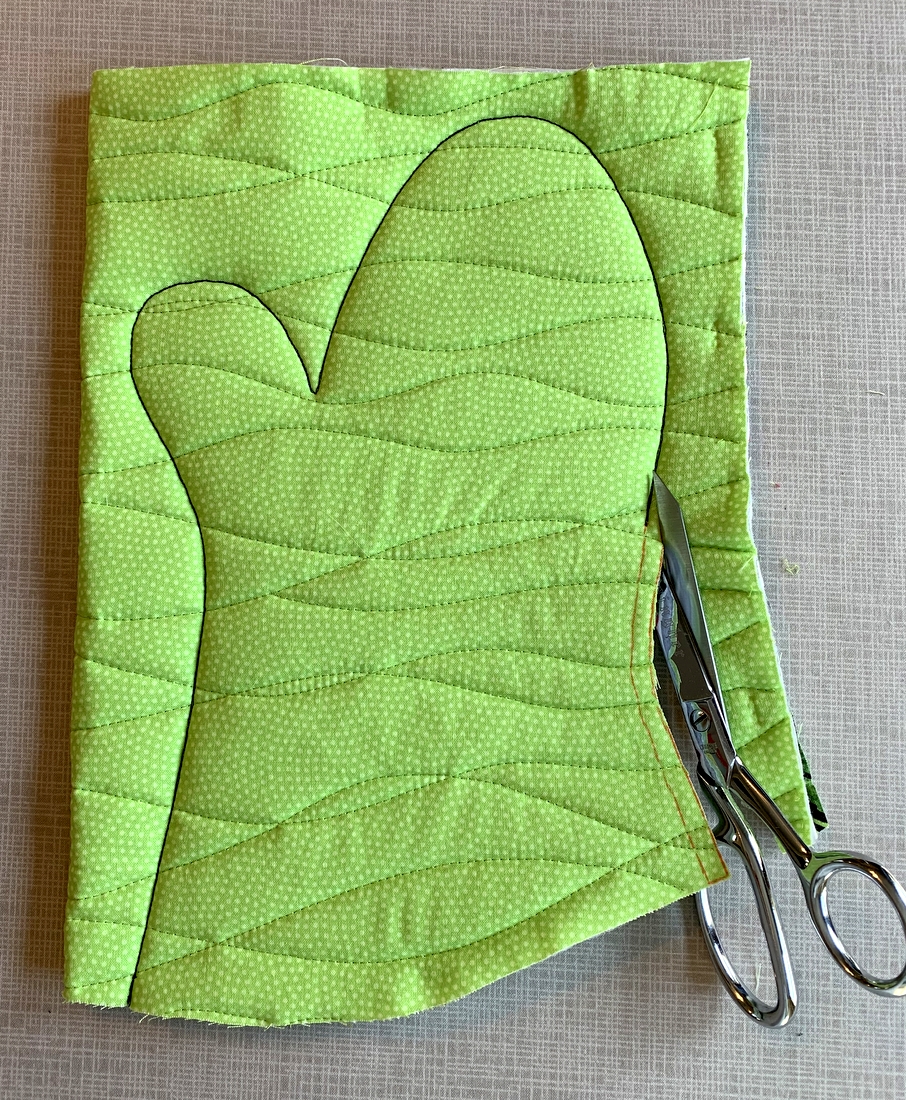
Starting on the side with the partial seam where you marked the outside line (¼” away from the stitching line), cut along that outside line until you are a quarter inch beyond the dot you marked:
Taper to a full 1/8” seam allowance and continue cutting around the finger portion, stopping when you get close to the notch between the thumb and finger portion:
 If a 1/8” seam allowance makes you nervous, shoot for 3/16”. It is not necessary to cut a ¼” seam allowance; in fact, it will make it harder to turn the mitt inside out and won’t give your mitt as smooth a look around the curves.
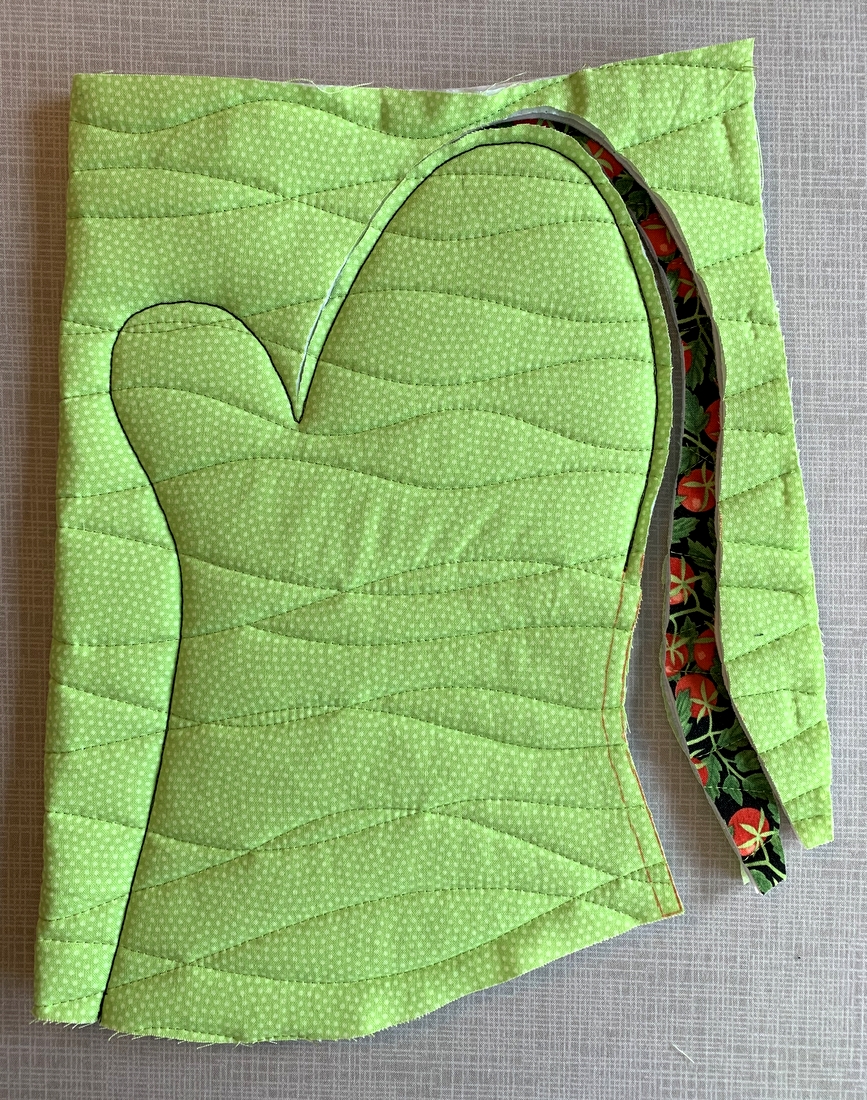
Flip the mitt over and start cutting from the other lower side, working your way around the thumb curve:
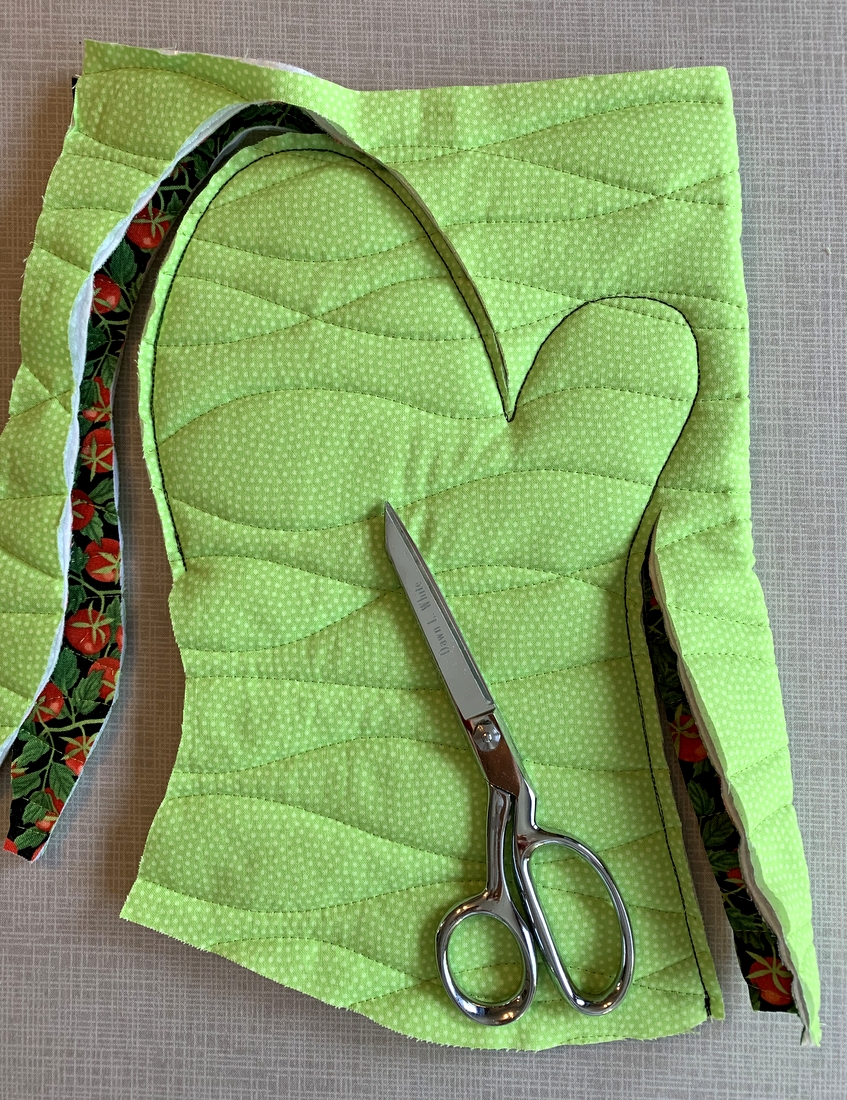
When you get to the notch, carefully trim to within 1/8” of the stitching line:
Because you left a partial seam, it’s going to be quite easy to apply the binding:
Check first to see if you need to baste the layers together at the bottom edge. I find that when I quilt my sandwich with overlapping wavy lines, I often need to take this extra step. Here you can see I basted a quarter-inch from the edge:
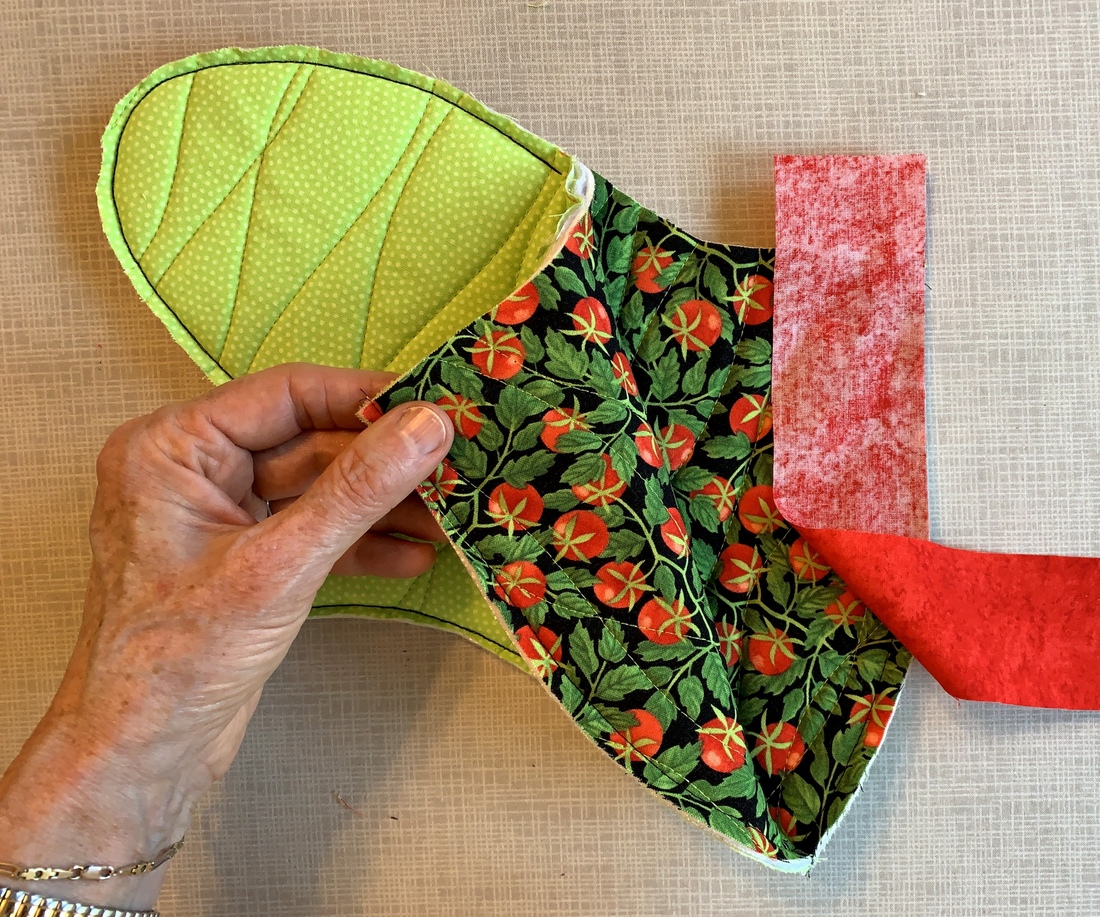
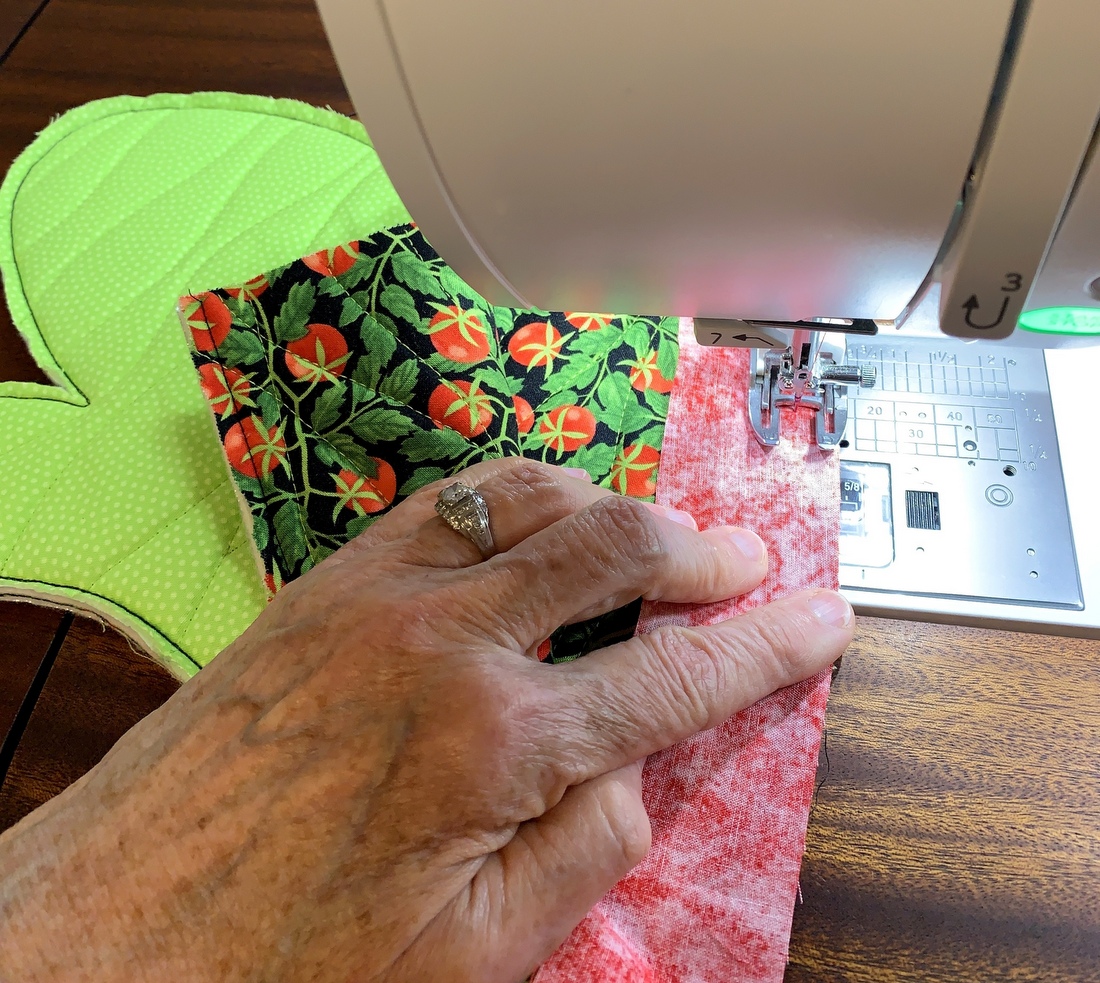
From the 2″ x WOF binding strip, cut an 18″ strip. (Save the remainder of the strip for a second mitt.) With the mitt opened up, align the strip along the lower edge, right sides together. Extend the top of the strip one inch beyond the side edge of the mitt:
Starting at the top of the binding strip, sew around the bottom edge with a 3/8” seam. It is not necessary to pin the strip to the mitt first. Stop stitching when necessary to make sure the edges are aligned and remember that both sides of the mitt are gently curved along the cuff edge. You’ll need to stop every few stitches to adjust the fabrics as you approach the side seam but you should find it fairly easy to manipulate the fabric under the needle while keeping the edges aligned properly.
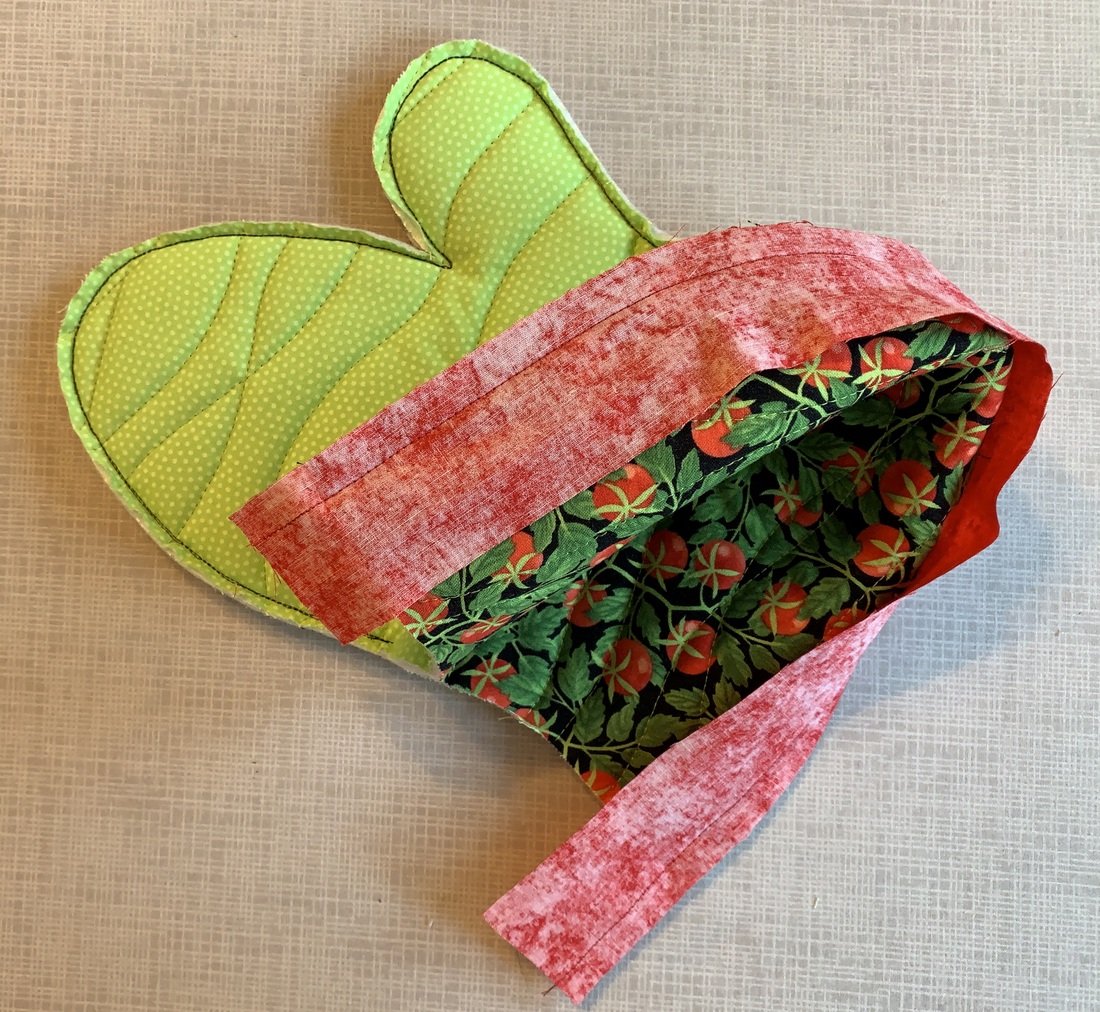
When you get to the end of the strip sew right off the edge of the fabric. Here’s what the mitt looks like now:
To finish sewing the seam, clip the edges together, making sure the edges of the binding strip are aligned at the top and bottom edges:
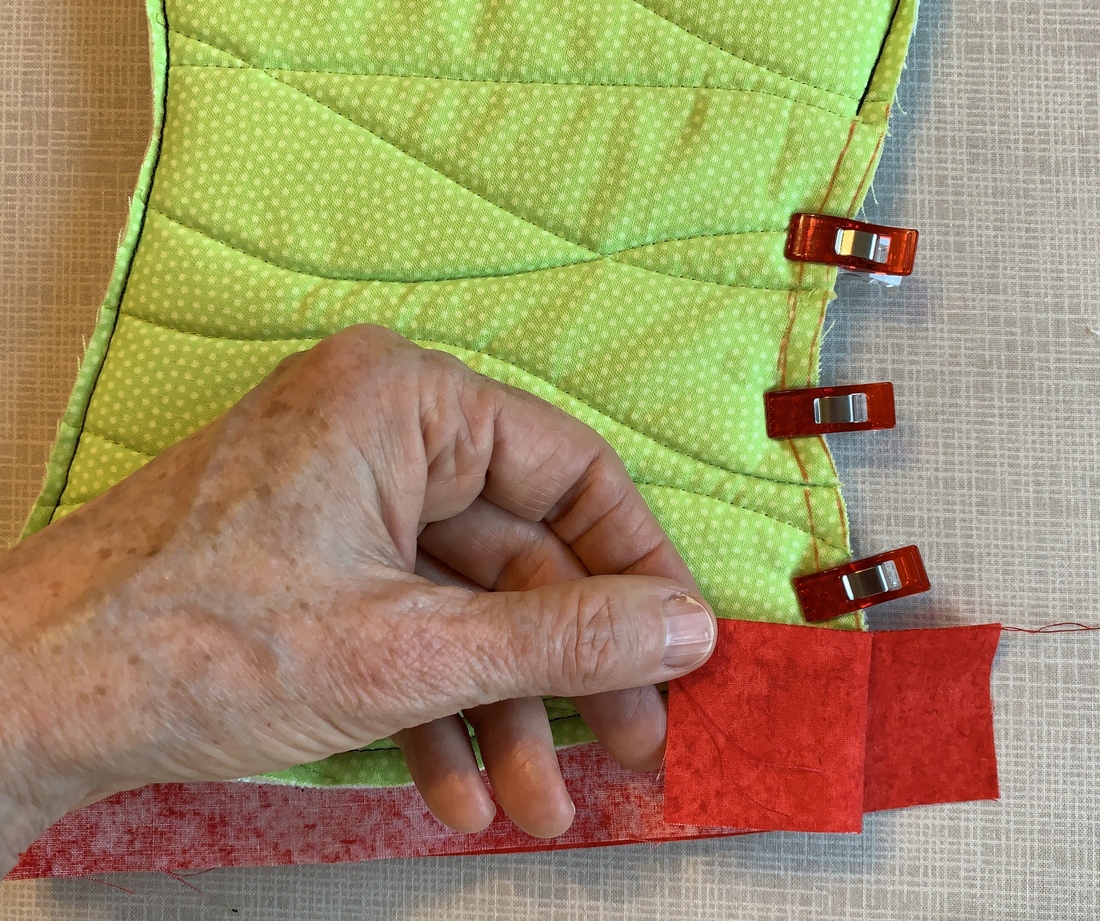
Note that the seam allowances at the top of the binding strip are folded down (see next photo too).
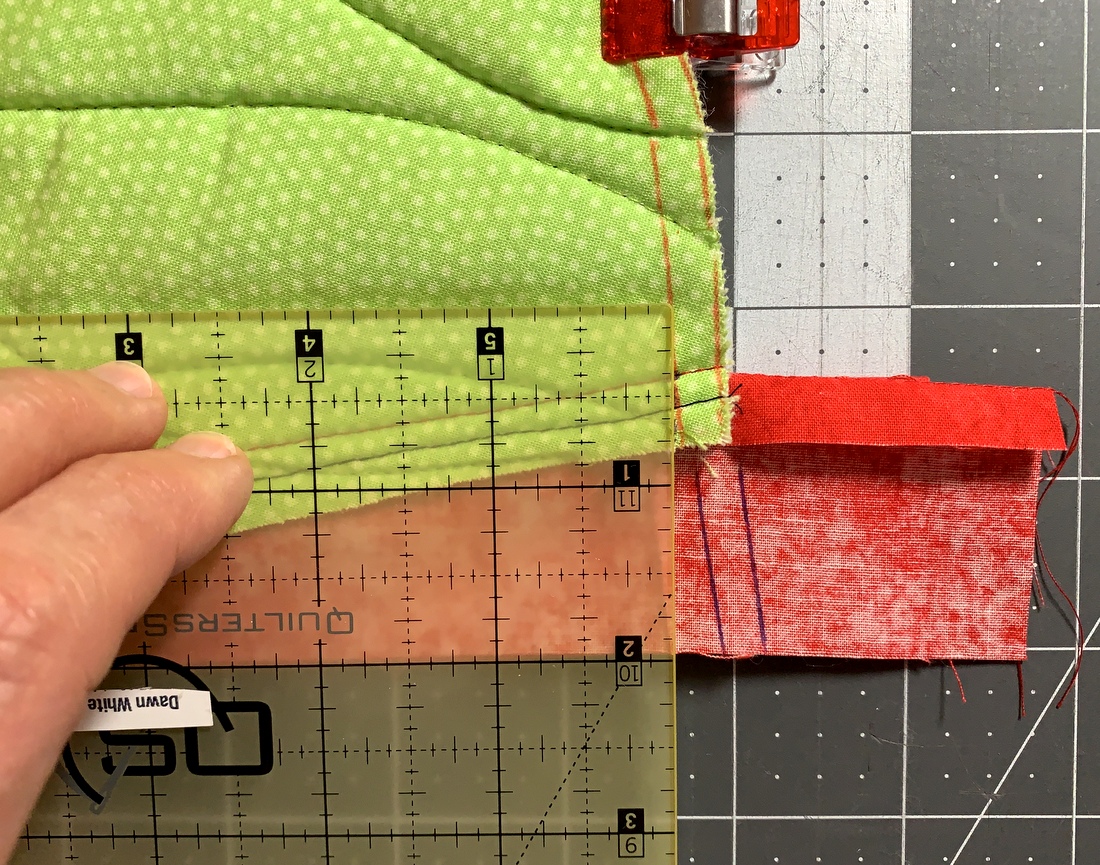
Look very carefully at the next photo. You will see that I have drawn two solid lines visually extending the cutting and stitching lines drawn earlier on the mitt. But I don’t want to sew on that stitching line in the binding strip portion because the binding strip will be too loose; in other words, it won’t fit snugly around the open edge of the mitt when the strip is folded in place. The dotted line to the left of the solid lines is the actual stitching line:
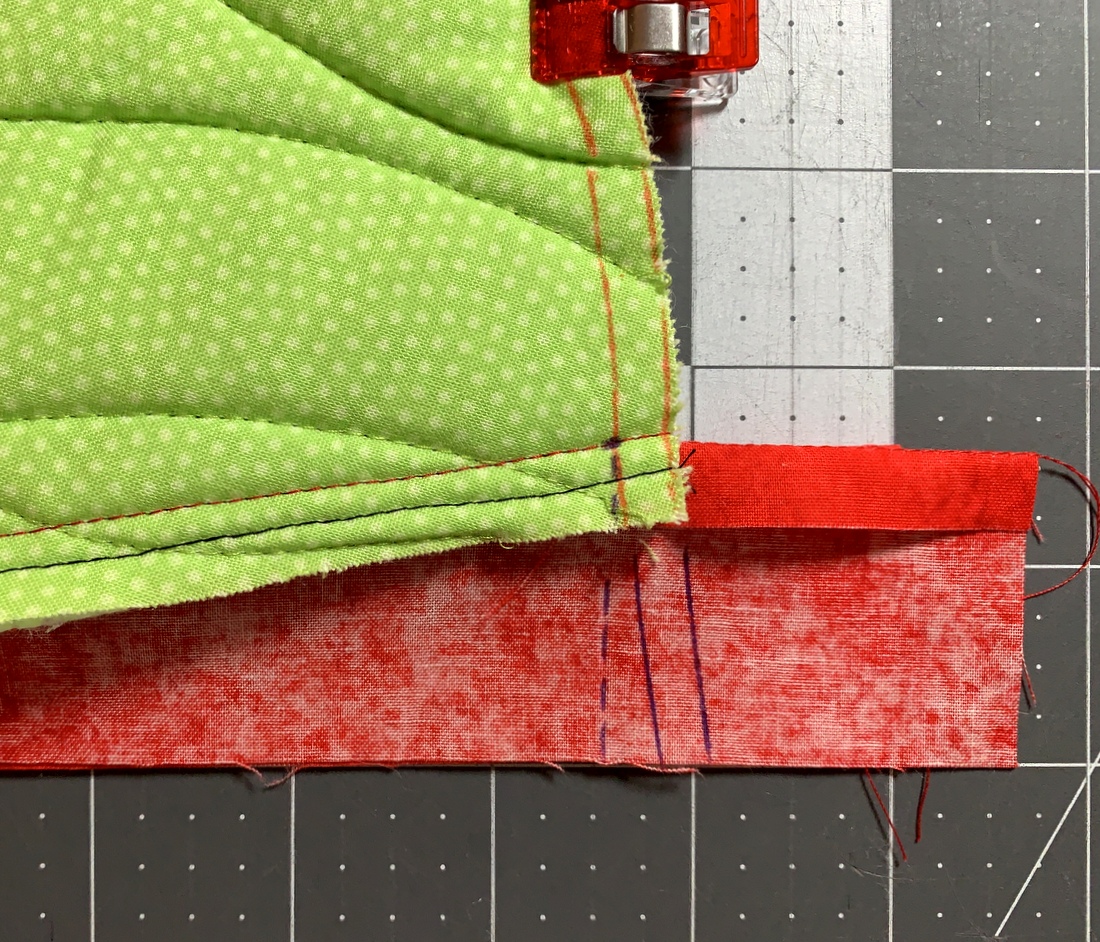
To mark the stitching line place a ruler with a horizontal marking (in this example the 2″ line) aligned with the bottom edges of the binding strip. Draw a dotted line from the dot on the seamline (where the mitt and binding strip were joined) to the bottom of the binding strip. Note that the dotted line is at a 90˚ angle to the horizontal line on your ruler:
Now you can finish stitching the seam, backstitching at the beginning and end. Trim the seam allowance to a generous 1/8″ just as you did around the rest of the mitt:

At this point I know you are eager to turn the mitt inside out but you will find it so much easier to tack down the binding if you do it before turning. So . . .
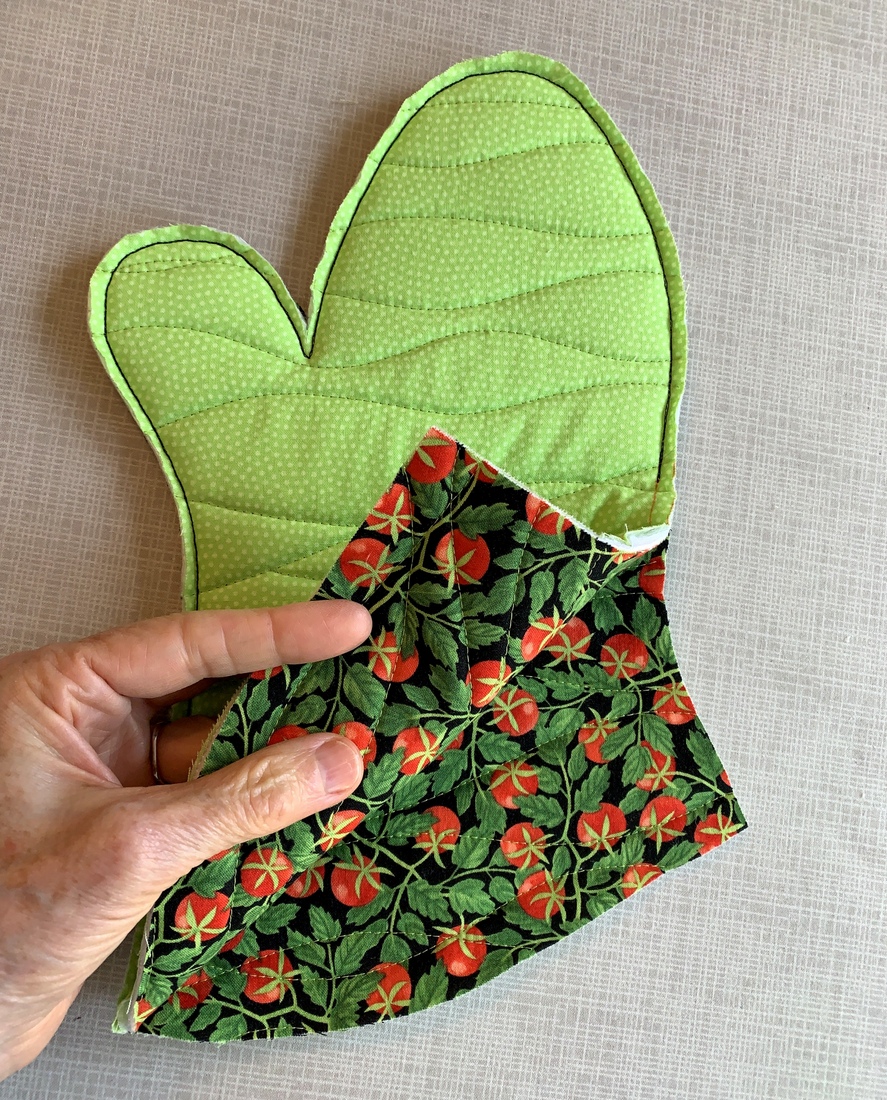
Start at the seam. Finger press the seam to one side and turn the top edge of the binding strip down about a half-inch:

Turn it own one more time, pulling it snugly over the seamline and making sure the folded edge covers the line of stitching. Hold in place with a clip:

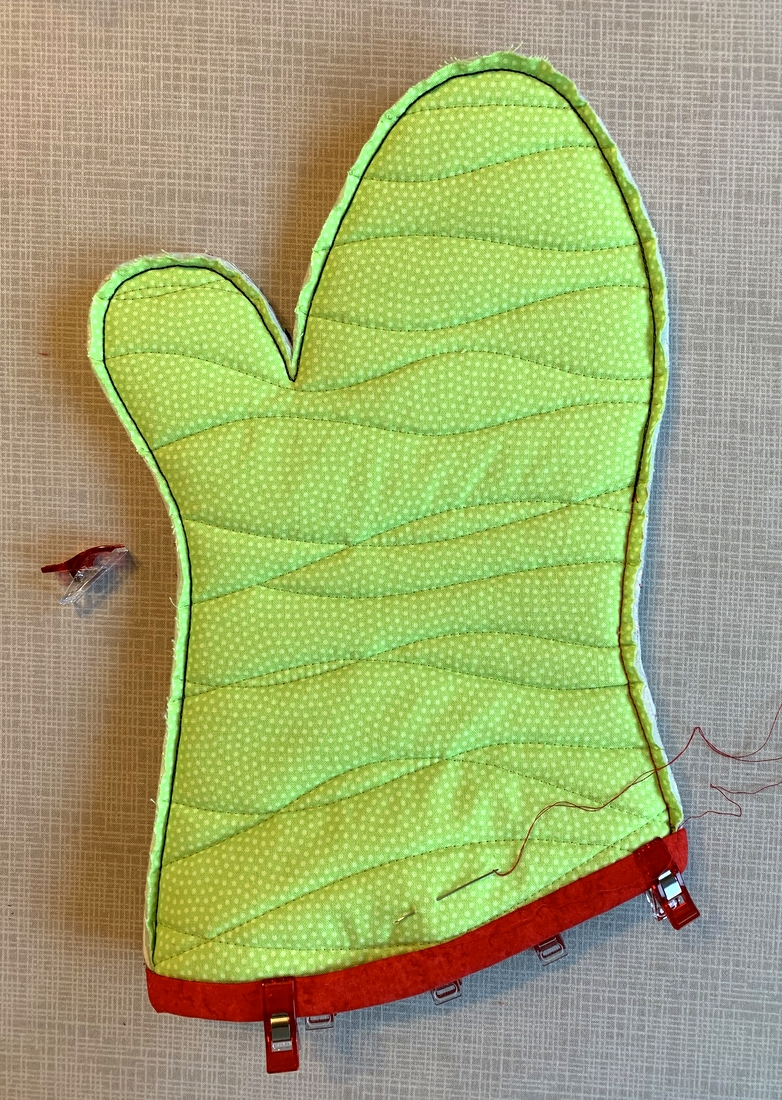
Place a clip on the other side of the seam (where my thumb is) and work your way around the cuff edge, placing a clip every couple of inches:

Using thread to match the binding fabric, tack the folded edge of the binding in place:
Now you are ready to turn the mitt!
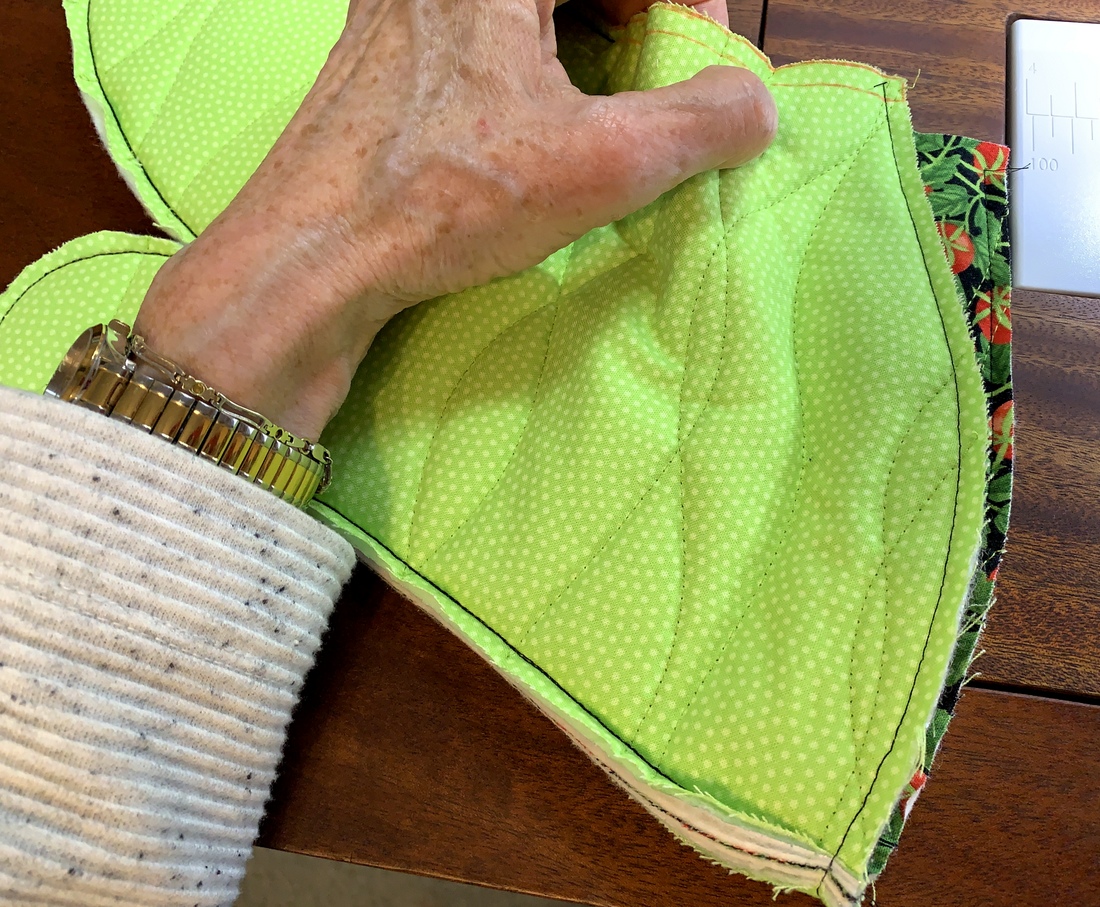
You’ll find that the finger portion turns quite easily but it may take some time to work the thumb through. Be patient with this step and do not give in to the temptation to use some object to push the thumb out from the inside. Use your fingers and thumb only until the mitt is fully turned.
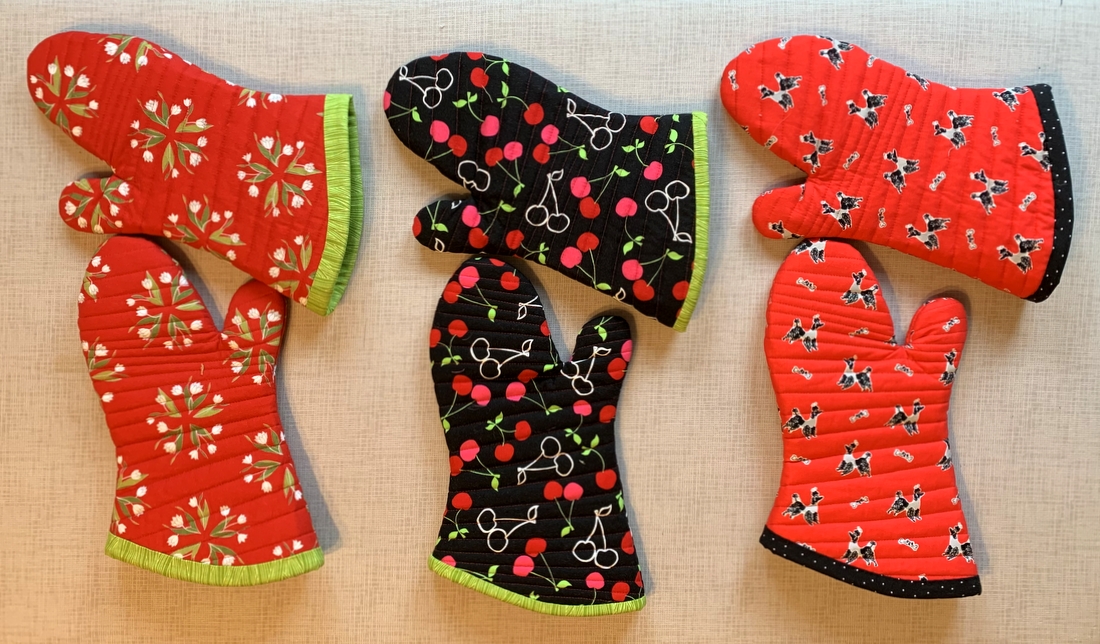
Voila! You have a beautiful functional oven mitt. . .

. . . with a pretty interior . . .
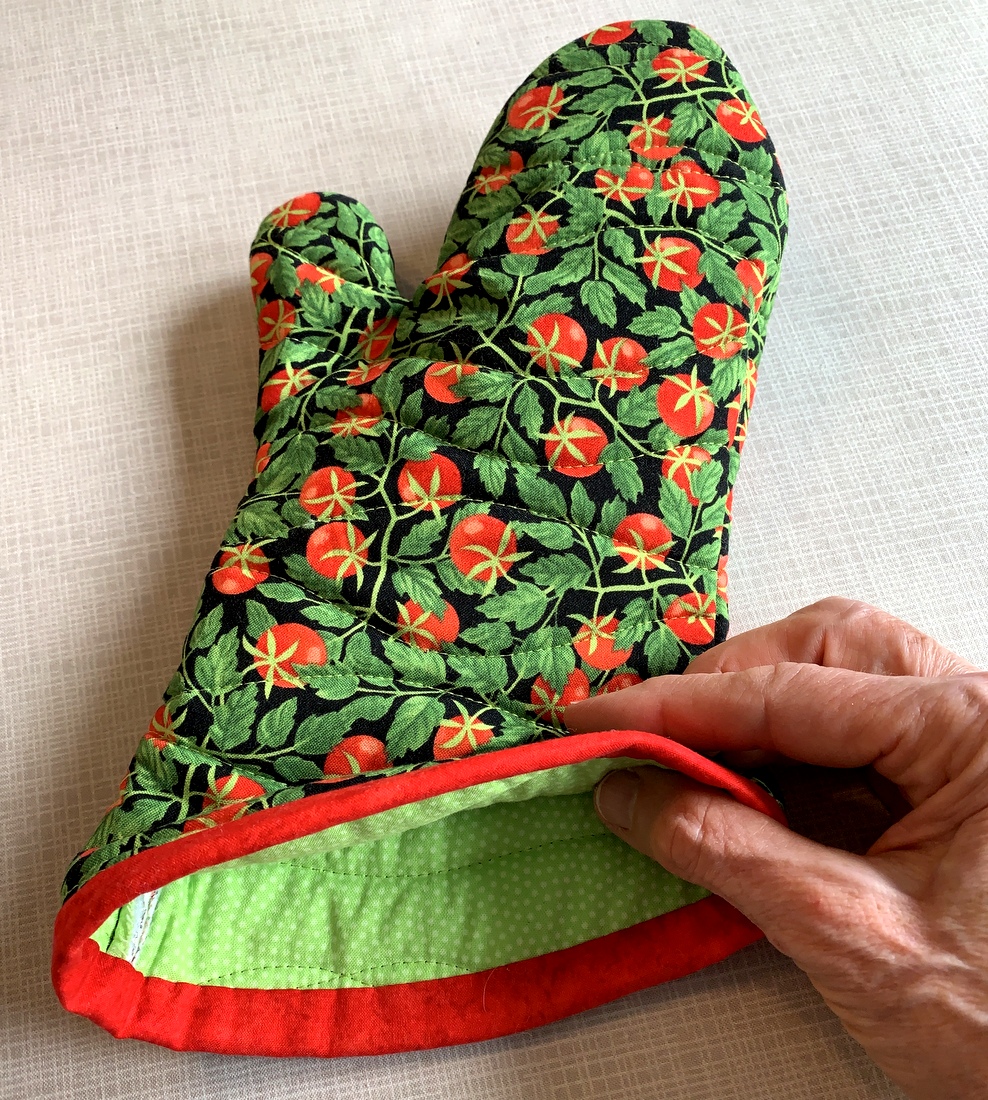
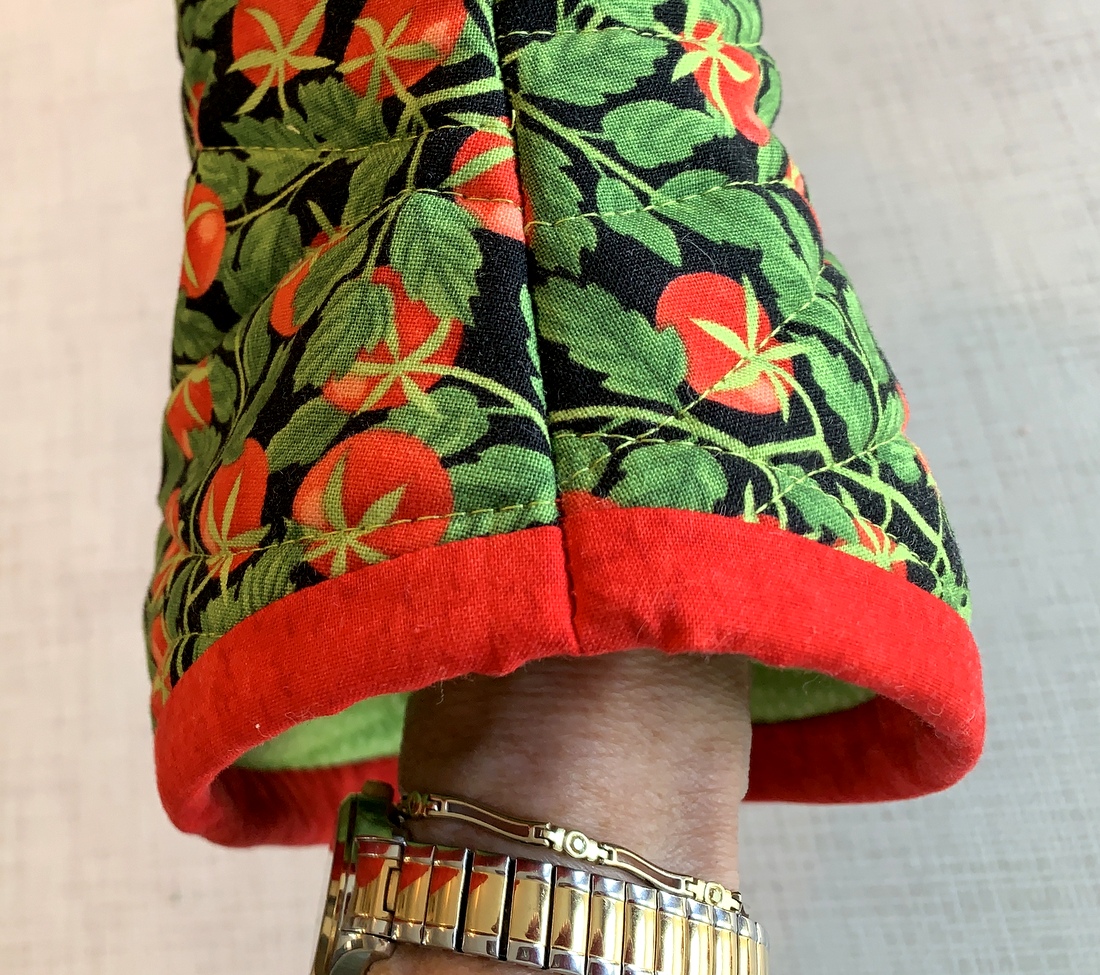
. . . and a beautifully finished accent strip around the opening:
 Now all it needs is a mate!
This mitt is heat-resistant (mainly because of the Insul-bright batting) but not heat-proof, so use care when wearing it just as you would with a commercial oven mitt made of cotton fabric.
Oven mitts made with this tutorial and using the fabrics specified can be thrown in the washer and dryer. Wash them in warm or cold water and dry them on medium heat.
Please let me know if you have any questions or concerns after reading this tutorial. I’ll be happy to respond!
An excellent tutorial! This oven mitt design is so functional, seemingly easy to make (with patience) and a relatively low cost gift absolutely guaranteed to delight – especially since this size mitt is nowhere to be found in the marketplace now. You really are the best!
Aww, thank you for your kind words, Nubs — but I fear you are not an impartial observer! 😉 The jury is out until I hear from some crafters and quilters who have undertaken to make a mitt or two.
Wonderful tutorial – I use the same technique except for the partial which is brilliant! Thanks for sharing!