Category Archives: face masks

Tie One On!

The face masks I’ve been making over the last several days are finished with fabric ties. For the most part I’ve been following the tutorial of ER nurse Jessica Nandino but I departed from her instructions by pressing my strips of straight-grain fabric in the manner of double-fold bias tape before sewing them onto the mask rather than after. This allows me to insert the raw edges of the mask into the center of the binding strips and stitch once through all the layers. The finished product is very neat looking (as in neat and tidy) but the ties aren’t as flat as I would wish. In addition, the process of pressing three separate folds into those fabric strips is time-consuming and tedious. Oy, is it ever!

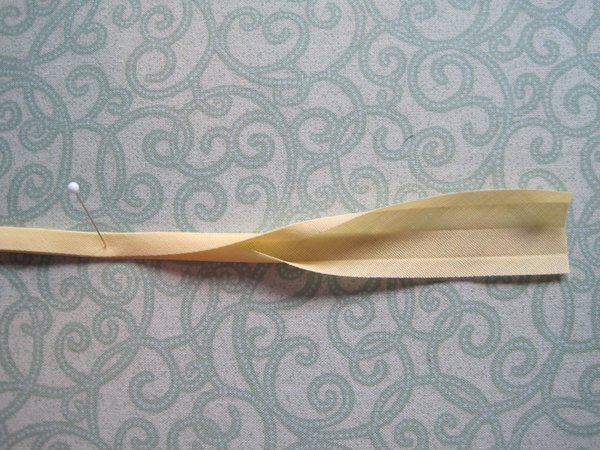
I have a bias tape maker on order that converts strips of bias fabric into ⅜”-wide double-fold bias tape but it will be several days before it arrives. In the meantime, I decided to try something different:  I cut ⅞”-wide strips of fabric on the bias, pressed them only once in the middle, then encased the raw edges of the mask in the folded strip, leaving the raw edges of the bias strips in plain view. I chose batik fabric for the bias strips because it’s very tightly woven. My assumption was that when a mask made this way goes through the washer and dryer, the raw edges of the straps won’t fray and the finished product will still look neat and tidy.

Friends, it worked! Granted, the finish isn’t as fine but I think it looks pretty darn good. Here’s my first attempt:

This mask has been through the washer and dryer.

Here’s a close-up, looking at the inside of the mask:

If you look carefully you can see that the raw edges of the binding are just the teensiest bit fuzzy but there is no raveling. That stitching you see on the inside mask fabric is the nose dart. The nose and chin darts in Jessica’s design give the mask its close fit. It’s a feature of her tutorial that I really like. No need to make a casing to insert a pipe cleaner or floral wire to shape the top of the mask, as I’ve seen in some face mask tutorials.

For my second attempt at a raw edge binding finish I used a zigzag stitch:

I think it gives a neater finish and may prove to be more durable than a single line of stitching.

Here’s a photo of the mask after having been laundered:

Again, no raveling of the raw edges, just the slightest bit of fuzziness.

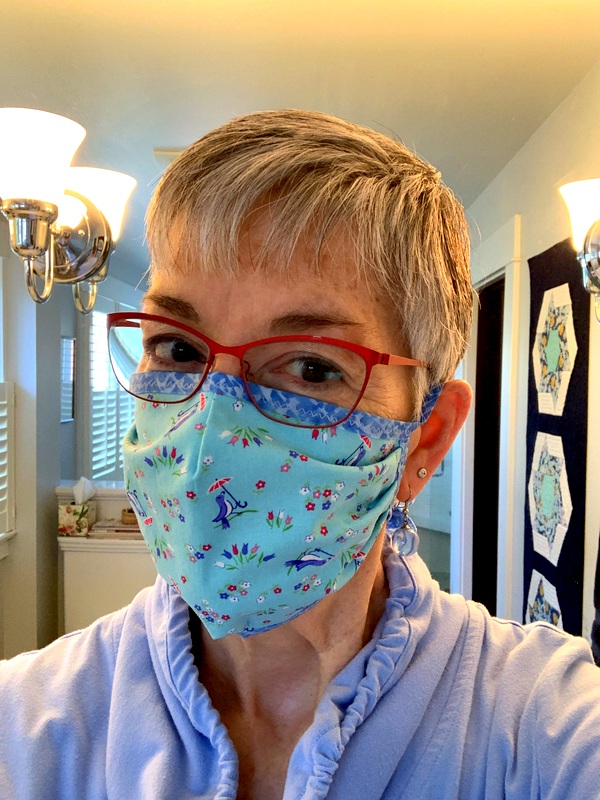
Here is the same mask being modeled by moi:

These masks are not medical grade but they’re certainly better than no protection at all. And you can add an additional layer of protection by inserting a coffee filter in the mask:

I did have to trim the top and bottom of this 12-cup coffee filter to make it fit.

Thus far I’ve been making one mask at a time because of my tinkering with the construction method. Now I’m at the point where I can move to assembly-line production. A very low-key assembly line, to be sure. I’m not a speedy seamstress but my output should increase significantly.

I did figure out a faster way to cut fabric. Jessica’s pattern represents half of the mask. It was designed to be pinned in place with the center of the mask on a folded piece of fabric and cut out one at a time. To speed up the cutting process I made a full-size freezer paper pattern and pressed it to the top layer of fabric. With a sharp blade in my rotary cutter I can easily cut several layers of fabric at a time.

Then I simply peel off the freezer paper pattern and it’s ready to be used over and over again.

When my next batch of masks is done (I’m still sewing for friends and family) I’m going to reward myself by taking a break from maskmaking and sewing something new.


Posted in face masks, family, update | 10 Comments

Strapped

In my last post I showed you some face masks I made following ER nurse Jessica Nandino’s tutorial posted on a craft website called instructables.com. Jessica’s pattern calls for cutting strips from cotton fabric but I made my first few masks using packaged double-fold bias tape in ¼” and ½” finished widths. I wanted to give ⅜”-wide tape a try, thinking it might be more suitable — less bulky than half-inch wide tape but more substantial than quarter-inch — knowing I would have to make my own. I don’t think ⅜”-wide tape is made commercially. Even if it were, I wouldn’t be going to the store for some. This is all about making do with what’s on hand.

Some of my readers were interested in my experiment so I’m showing you the result.

This is what Jessica’s mask looks like when the two layers are stitched together:

Next step is pinning and stitching three pleats on each side of the mask. Normally when you sew, the fabric you are handling is to the left of the needle. In the photo below, the fabric is to the right of my needle. This enables me to sew with the pleats rather than against them:

(When I sew the other side, the mask will be to the left of my needle, the normal way, and I will also be sewing with the pleats rather than against them. And just so you know, I remove each pin before stitching the folds in place.)

To make my binding strips I cut several strips of fabric 1½” wide, cutting on the crosswise grain (from the fold to the selvages). I could have cut bias strips but I wanted to try it first with straight grain fabric, which would give me at least 40″ lengths (no need to piece the strips). Another plus: no struggling to iron folds in stretchy bias strips.

Double-fold tape is pressed in such a way that one side of the tape is slightly narrower than the other (from the fold to the outside edge). The narrow side always goes on the right side of the fabric. When fabric is inserted into the fold of the tape, the wider side of the tape, underneath, is caught in the line of stitching from the top.

Here’s a piece of double-fold bias tape opened up:

You can see three press lines: there’s a fold in the middle, then each end is pressed toward the middle. That’s exactly how I folded my strips, with one long edge pressed a full quarter-inch and the other side a scant quarter-inch, giving me the result you see below:

My finished binding actually measures a little over ⅜” wide. Next time I’ll cut my strips 1⅜” wide.

Now I’m ready to encase the left and right sides in my binding. The raw edges of the mask are snuggled up to the center fold of the binding:


The binding is folded over the seam allowance and pinned in place:


This is how it looks from the back:

The binding is stitched from the front through all layers. You can see how the stitching caught both layers:

The ends have been trimmed . . .


. . . and now it’s time to add the top and bottom strips, which measure about 40-42″, depending on the width of fabric after selvages are removed.

I mark the middle of one strip and match it with the dart in the center of the mask (remember, there’s a nose dart and a chin dart in Jessica’s pattern). I put in three pins only: one at the dart, one where the side of the mask meets the top strip, and one between those two. The pins go through all the layers:


Now I’m ready to start stitching at the far end of the strip, holding the binding in place as I stitch very close to where the two folded edges meet. When I get to the center dart, I insert the next section of mask fabric into the center of the binding fabric and continue stitching, stopping as often as I need to adjust the layers of fabric. My stitch length is short — 2.2 on a computerized machine or about 12 stitches to the inch — because the binding strips are going to get some stress when they are tied behind the head.

I don’t bother finishing the ends of the strips because I’m going to trim them at a 45 degree angle when I’m done . . .

. . . and it’s quite likely that someone winding up with one of my masks will find the strips too long and want to trim them anyway. As long as the ends are trimmed on the diagonal, they shouldn’t ravel, even after being washed multiple times.

My experiment turned out pretty well although the straps still feel just a tad bit bulky. For the next mask I might try making bias binding to see if it makes a noticeable difference. By the way, I like the fabric on this mask so much — it’s from an older line called “Birdie” by Pam Kitty Morning for Lakehouse Dry Goods — that I’m keeping it for myself. The mask I was wearing in my last post was laundered and mailed to my twin sister in Georgia.

I hope you are all staying as safe and protected as you possibly can and maintaining social distance. It’s the least we can do . . . and it’s so terribly important. As I continue to shelter at home, I have some great advice to follow: Keep Calm and Sew On.


Posted in face masks, family, update | 6 Comments

Making Masks, Making Do

And hoping to make a difference.


Like so many other quilters, crafters, and those who sew, I am making face masks, initially for close friends and family, then to meet the growing need for first responders who may not have access much longer to official PPE (personal protective equipment).

After looking over several tutorials this week and trying a couple, I settled on the pattern you see above. It was designed by Jessica Nandino, an emergency room nurse, who posted her tutorial here.

She points out that research on the efficacy of fabric masks is conflicting and stresses that nothing homemade will ever compare to medical grade PPE. These masks are not sterile and they’re not medical grade. But they’re better than nothing. The fact that our first responders will most likely be wearing homemade masks because of a shortage of PPE is downright scary in the midst of the COVID-19 pandemic.

Notice that the mask above has nose and chin darts, and it covers the entire face. The top straps go over the ears and tie in back. The lower ties go under the ears and are tied at the back of the neck. It’s designed to fit in two ways: first, directly over the face, and second, over an N95 respirator as a way to provide a protective barrier in hopes of extending the lifetime of the respirator.

Here’s my first batch:

Although mask-making is a sobering enterprise, I can find some enjoyment in choosing complementary fabrics from my stash for the inside and outside of each mask:

Jessica’s pattern calls for the straps to be made from strips of fabric. I thought I might be able to make masks faster by using commercially made double-fold bias tape I already had on hand. I tried both 1/2″-wide tape (on the pink mask in the middle) and 1/4″-wide tape (the remaining masks). Both sizes work but the half-inch wide tape seems bulky to me and the quarter-inch wide tape was difficult to work with in terms of fully encasing the raw edges of the mask in the fold.

I’m feeling a little bit like Goldilocks. Will 3/8″-inch wide (homemade) be just the right size? I’ll give it a try today and let you know.


Posted in face masks, family, update | 5 Comments