Category Archives: garment sewing

12 Out of 20

No, that’s not a test score. If it were, I would have failed the exam. The title of the post refers to the fact I have completed 12 of the 20 blocks needed for my current WIP (work-in-progress) based on the pattern Dandelions at Dusk by Blue Bear Quilts.

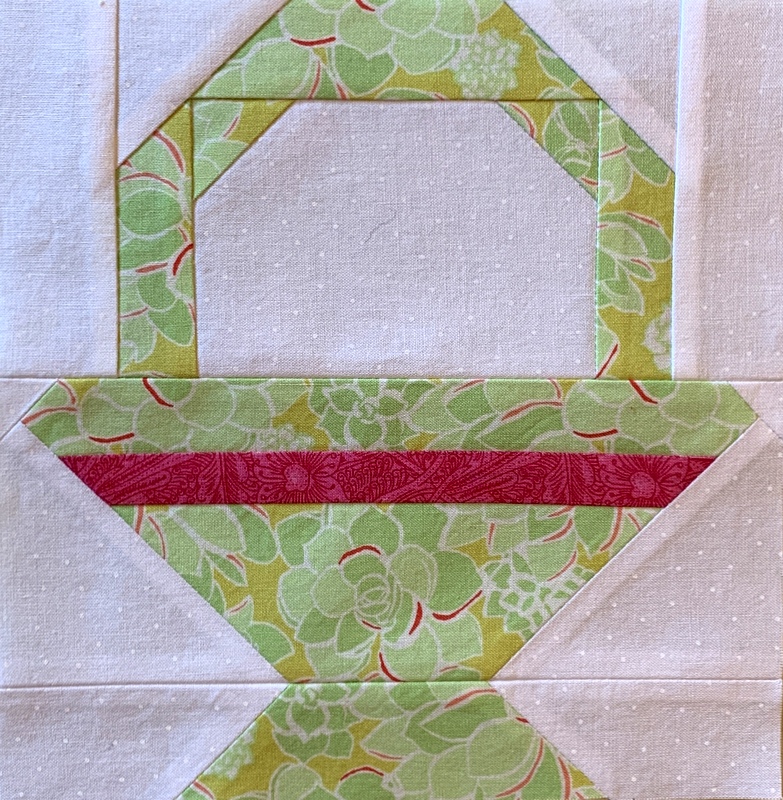
I’m having fun with this one! Take a look at my first 12 blocks:

Aren’t they pretty?

There are several elements that add to the interest of the blocks. First and foremost are the four-patch kaleido units themselves since each one is unique. The pattern is designed in such a way that these units appear in different corners of the blocks, essentially rotating around each other. In my view it allows each floral unit to stand out and really shine.

The two sashing fabrics are also an important part of the design. (Sorry to say this photo, taken in late afternoon in a room with north-facing windows, doesn’t show the medium and medium-dark cornflower blue prints in a consistent light.)

I’d be making faster progress if I were more organized in my approach to cutting and sewing. Some quilters cut all of their fabrics first so that every block is ready to be sewn together from the get-go. Alas, I am not one of those quilters. I usually cut just enough of the fabrics to make a few blocks at a time. It’s all about instant gratification. A bit silly, really, but I’ve always been that way. Even back in the days (make that decades) when I made most of my own clothing, it would take me longer to make something because I would literally be trying the garment on every step of the way.

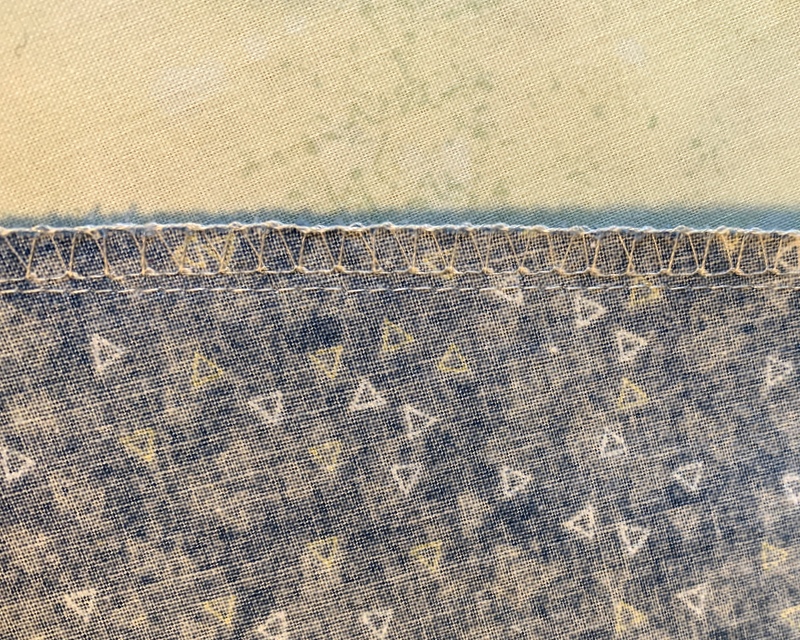
There’s something else going on with this quilt. The background fabric is directional:

Can you see the very subtle herringbone design? It has to be cut and sewn in two different ways for the design to be in the correct position in each block. One really has to pay attention! I confess there has been some “unsewing” and “corrective sewing” going on.

My twin Diane arrived last week for a four-week visit. I had texted her a couple of weeks ago to see if she could come out in March for a week. She replied, “I can come next week and stay for a month.” Oh joy! Today she vacuumed the main floor of the house and mopped the kitchen floor so I could hie to my sewing room and finish the 12th block. I may not let her go home.


Posted in 4-Patch Wonder, family, faux-kaleido quilts, garment sewing, kaleidoscope quilts, update | 5 Comments

Baby Needs a New Pair of Shoes

Oh wait, that’s not right. This is more like it:  Hubby Needs a New Bathrobe.

And now he has one:

Yes, the Dear Husband has a new bathrobe to replace the last one I made him, which was completely worn out. I confess: it was more than worn out. The cuffs on the sleeves were so frayed that I resorted to turning the ends inside and stitching new hems as a temporary measure while I made him a new robe.

I found the perfect fabric at Montavilla Sewing Center in Lake Oswego where I teach: a honeycomb design on a midnight blue background, part of the “Patchwork Blue” line from Maywood Studio. It paired beautifully with the midnight blue blender (“Shadow Play,” also from Maywood) that I used for the front band, tie belt, and pocket trim:

My view of the DH reading the newspaper every morning at the dining room table just got better!


Posted in bathrobe, family, garment sewing, update | 4 Comments

Apron Love

That smile on my face reflects my delight in this darling apron my friend and fellow quiltmaker Nancy S. surprised me with recently. It’s called a crossback reversible apron. You’ll understand why when you see the back:

Did you notice I said it’s reversible? Look at the fabric Nancy chose for the reverse side:

As someone who likes to cook and sew, these fabrics are right up my alley. The two prints are a supple blend of cotton and flax designed by Sevenberry for Robert Kaufman Fabrics.

A quick search of the internet shows numerous patterns available for crossback reversible aprons. Nancy used this pattern by Indygo Junction:

The apron is beautifully made. Thank you, Nancy, for this lovely gift! You can be sure it will be treasured and used.

As usual, Coco the Photobomb gets the last word:


Posted in aprons, cats, garment sewing, update | 4 Comments

Serging (Not Surging) Forward

The shirt I started back in June is finally finished. I got off to a great start using a vintage “Fast & Easy” Butterick pattern and a summery cotton print from my stash:

What should have been an afternoon project came to a screeching halt when I decided to serge the side seams. The last time I used my serger was in 2020, when I made myself this bathrobe.

For the uninitiated, a serger is a specialty type of machine that sews seams, trims off seam allowances, and finishes raw fabric edges — all at the same time. The serger requires four spools of thread, each of which has an intricate threading process. The four threads work together to give a lovely finished edge to a seam.

Almost immediately one of the four threads broke. Now most people would simply rethread the one that broke and carry on. Not me! Here comes a confession:  I never learned how to thread my serger. I found the diagrams that came with my manual impossible to follow so every time a thread broke I would pack my serger in its original box, return to the Montavilla Sewing store where I purchased it back in 2004, and ask the nice people there to “show me one more time how to thread it.”

This time I took my serger in to Montavilla to be serviced because it was way overdue. When I got it back a couple weeks later other things in my life took precedence and it wasn’t until yesterday that I got back to finish the job.

I’m pretty pleased with the result. My summer top is casual like a camp shirt but a wee bit dressier. If you look at the pattern cover you will see that the shirt was designed to be tucked in at the waist. I wanted mine to be an overblouse so I added a second button at the waist. I also lengthened the bodice by one inch and took in the side seams an inch. The fit is a bit boxy but I like it.


Even though my heart remains in quilting, I’d like to make myself a few more short-sleeved shirts. I even have another vintage pattern in mind:

Can you guess how old this pattern is? Hint: big hair and broad shoulders! This pattern dates back to 1985.

As for my serger, it was a lower end model when I bought it almost 20 years ago. Most of the sergers sold today are called “self-threading” or “air-threading” sergers, taking all of the hard work and frustration out of trying to thread them yourself. I think it’s time I upgraded my serger, don’t you?

Posted in garment sewing, update | 7 Comments

A New Project . . .

. . . and it’s not a quilt!

I can’t remember the last time I made myelf something to wear (not counting bathrobes and aprons). My inspiration for making a summery short sleeve shirt can be attributed to the glorious weather we’ve been enjoying in Portland the last few weeks. That and the fact that the Dear Husband and I are taking a little road trip soon and it would be fun to have something new to wear.

Over the years I’ve given most of my patterns away but have hung on to some thinking I might use them someday. For this project I’m using a Butterick pattern that probably dates back to the 1980s. (I couldn’t find a date on the envelope or instruction sheet.) When I pulled the pattern pieces out of the envelope I discovered they had already been cut out. By me. I’ve made this pattern before — but I have absolutely no recollection of what fabric I used and when I made it. (And why don’t I still have the shirt?)

The fabric is from the “Canyon” line designed a few years ago by Kate Spain for Moda. I’ve used it to make a pair of pillowcases for the Portland White House . . .

. . . and this sweet little basket block that may wind up in a quilt someday:


Posted in family, garment sewing, home dec, pillowcases, roll-it-up pillowcases, update | 9 Comments

Enrobed

Last December I made the Dear Husband a new bathrobe because his old one was practically falling apart. I remember thinking, “My robe is pretty worn out, too. I should make myself a new one.”

Fast forward eight months. Eight months! That’s how long it took me to get the job done. But the wait was worth it. Here’s my brand new kimono-style robe:

The fabric is a lovely Asian-inspired toile from Michael Miller Fabrics that’s been in my stash for a number of years. I probably bought it thinking to use it in a quilt. Fortunately I had purchased a fairly large piece, enough to eke out a bathrobe. Also in my stash was a piece of blue polka-dotted fabric that was a good choice for the contrasting band, belt, and pocket trim.

Here’s what the robe looks like from the back:


Rather than make belt loops and a loose belt as the pattern called for, I stitched the belt directly to the robe on the back:

Perhaps you can see the stitching a bit better in this next photo:

The Simplicity pattern I used (5314) didn’t include pockets — what bathrobe doesn’t have pockets, for heaven’s sake? — so of course I made my own. And because the toile fabric depicts large-scale scenes of people and objects like pagodas and bridges and musical instruments, I decided to match the design on the pockets to the fabric underneath.

To do that I made patterns for the pockets out of freezer paper. After positioning them and ironing them in place, I made registration lines on the pattern that lined up with the design underneath:

Then I lifted the freezer paper pattern from the robe and matched it with the same design elements on the fabric scraps I had left over after cutting out the robe. Voilà — fussy-cut pockets.

Here’s the right-side pocket pinned in place:

(You’ll notice I added an inch-wide strip of my contrasting polka-dotted fabric to the pockets for some extra design appeal.)

Here’s the pocket stitched in place:

I did the same thing with the pocket on the left side:

I’m very pleased with the way my new robe turned out. Can you picture me sitting out on the back deck tomorrow morning enjoying my morning coffee? Here’s my dress rehearsal:


Posted in bathrobe, family, garment sewing, update | 18 Comments

A Bathrobe for the DH

My sweet husband has a new bathrobe:

Just in time for Christmas, though it’s not a Christmas present. The one I made him several years ago was completely worn out. I’m chagrined he had to wait so long for a new one.

Somehow I wound up with three bathrobe patterns. The one I ended up using was the Palmer/Pletsch one (lower right), with a few modifications:

And I didn’t pull my serger out of the closet after all. I decided to try finishing the seams with the overlock foot on my Janome, a foot I had actually never used before. The results were just fine:

It did take longer to finish the seams this way. And this frequent visitor to my sewing room caused additional delays in the construction process:


Posted in bathrobe, cats, family, garment sewing, update | 6 Comments

More Simple Sewing

It’s been almost two weeks since the Dear Husband and I returned from our annual Thanksgiving trip to Georgia. I’m afraid I don’t have much to show for it in terms of sewing. Quite ironic, as the few things I have worked on fall squarely in the “simple sewing” camp.

I converted a one-pocket long-sleeved shirt for the DH into a two-pocket short-sleeved shirt. The pockets were made from the bottom part of the sleeves:

I hope you can see the pocket! I matched the plaid pretty carefully.

New napkins for the Portland White House (we don’t use paper napkins):

Pillowcases for the Portland White House featuring the same toile fabric I used in the pillowcases made when I was in Georgia (which I wrote about here):

These are ready to go in my linen closet. Judging by the look on Coco’s face, I may not get them away from her:

That simple paisley table topper I made for sister Diane over Thanksgiving is getting a re-do. It was just two pieces of fabric sewn right sides together, turned, and topstitched around the edges. Trouble was, the two layers of fabric didn’t lie completely flat. I convinced Diane I had to take the table topper home and remake it, this time stitching the layers together and adding a simple binding.

Here’s the paisley fabric with two choices for binding pulled from my stash:

We’re going with the one on the bottom left. Diane and I both like the way the linear squares play off the paisley, and it’s a better color match. I think the binding will look even better cut on the bias.

Once I’m done with that, I absolutely must make the DH a new bathrobe. The one I made him several years ago is practically in tatters. I picked up a cotton print a few months ago with his bathrobe in mind. I’ll trim it with a navy blue blender from Maywood:

It’s been a while since I made a garment. I’ll be pulling my serger out of the sewing room closet and refreshing my memory on how it works. Wish me luck!


Posted in bathrobe, family, garment sewing, home dec, mitered corners, roll-it-up pillowcases, table napkins, table topper, update | 4 Comments