
I don’t even want to think about the number of hours I spent attaching the binding to my Scattered Stars quilt. What should have taken a couple hours at most stretched into (shall we just say) several hours over the space of several days.
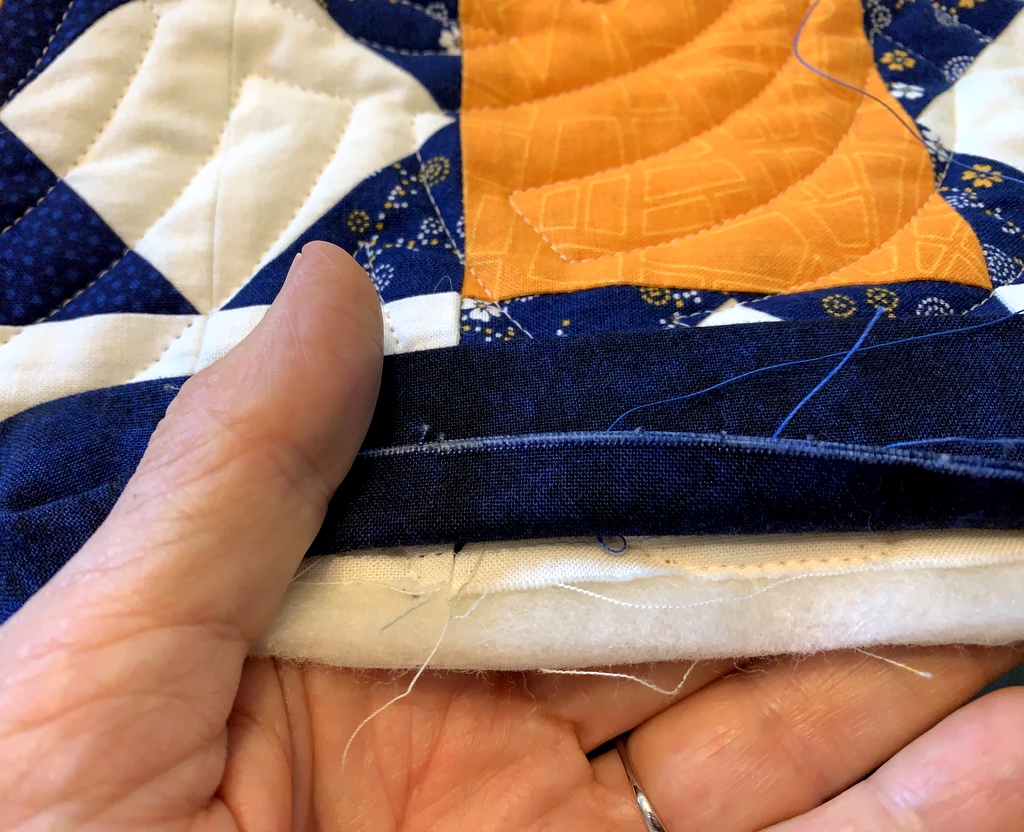
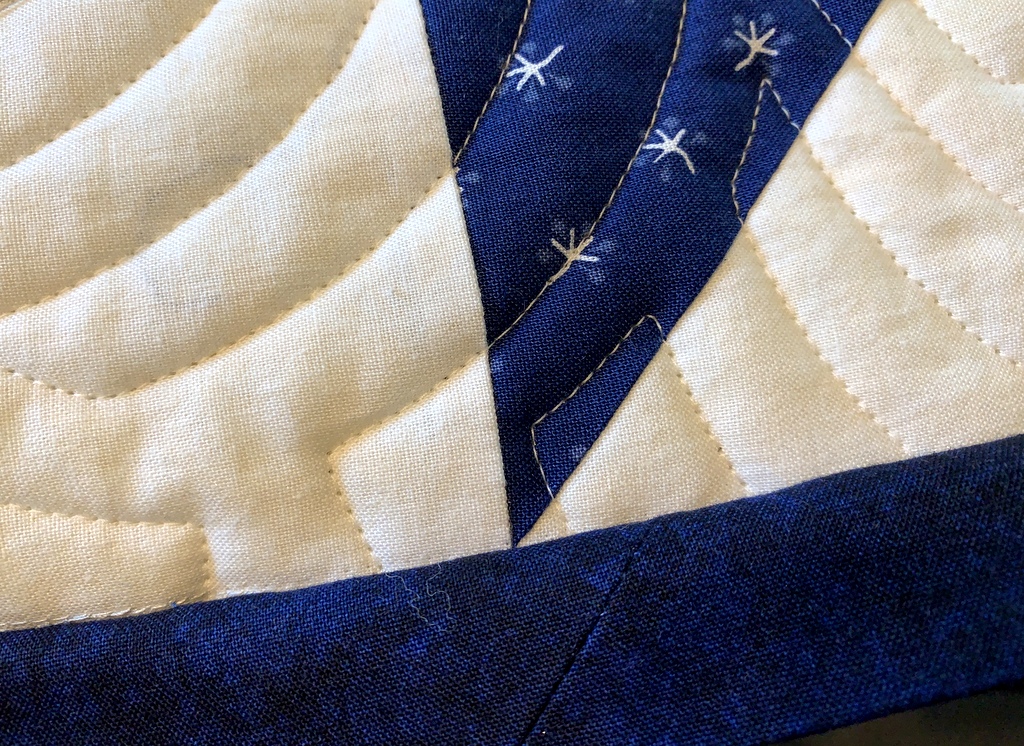
I trace my problems to three decisions — none of which I regret. I can say that now that the binding is on to stay! I’ve already started tacking it down on the back side. Here you can see I’ve turned the first corner and the binding looks fine:
 But getting to that point. Oy!
My first decision was not to add a border to Scattered Stars. That meant the points of my outer stars, being exactly ¼” from the edge of the quilt, would butt right up against the binding, leaving no room for error in attaching it. The danger would lie in cutting off the points by taking a seam allowance that was too deep. Fortunately, I had staystitched ¼” away all around the outer edges of the quilt top so I knew my star points were right where they needed to be.
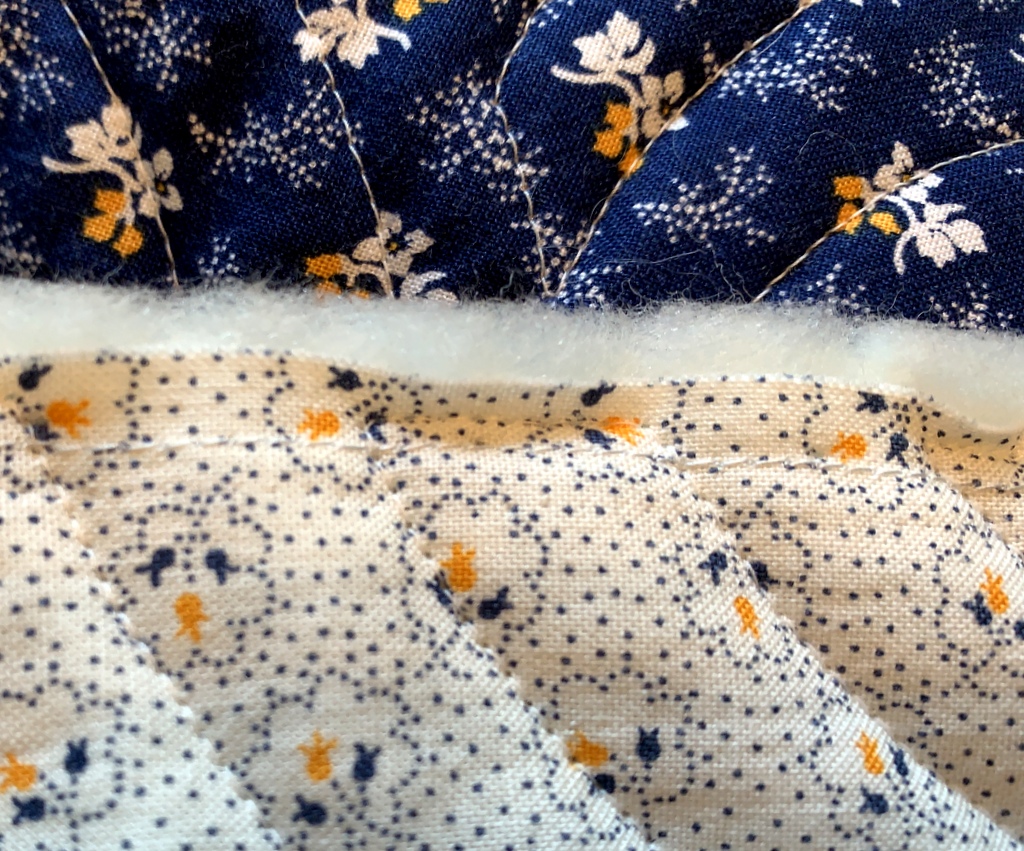
My second decision was to have my binding finish at ½” wide. That required trimming the quilt a quarter-inch beyond the raw edges of the top so there would be a full half-inch from the stitching line to the outer edge. In the foreground of this picture you can see my line of staystitching, the quarter-inch seam allowance, and the additional quarter inch of batting (the quilt is folded so that the back of the quilt is in the background):
Now take a look at that batting. It’s wool. That was my third decision. Wool batting is lighter weight than most other batts made from cotton or cotton/poly blends. Scattered Stars is only twin-size but all those seams in all those star blocks added quite a bit of extra weight. I knew wool batting would lighten the load, so to speak.
But here’s the thing about wool batting: it’s really quite poufy. Look at this side view:
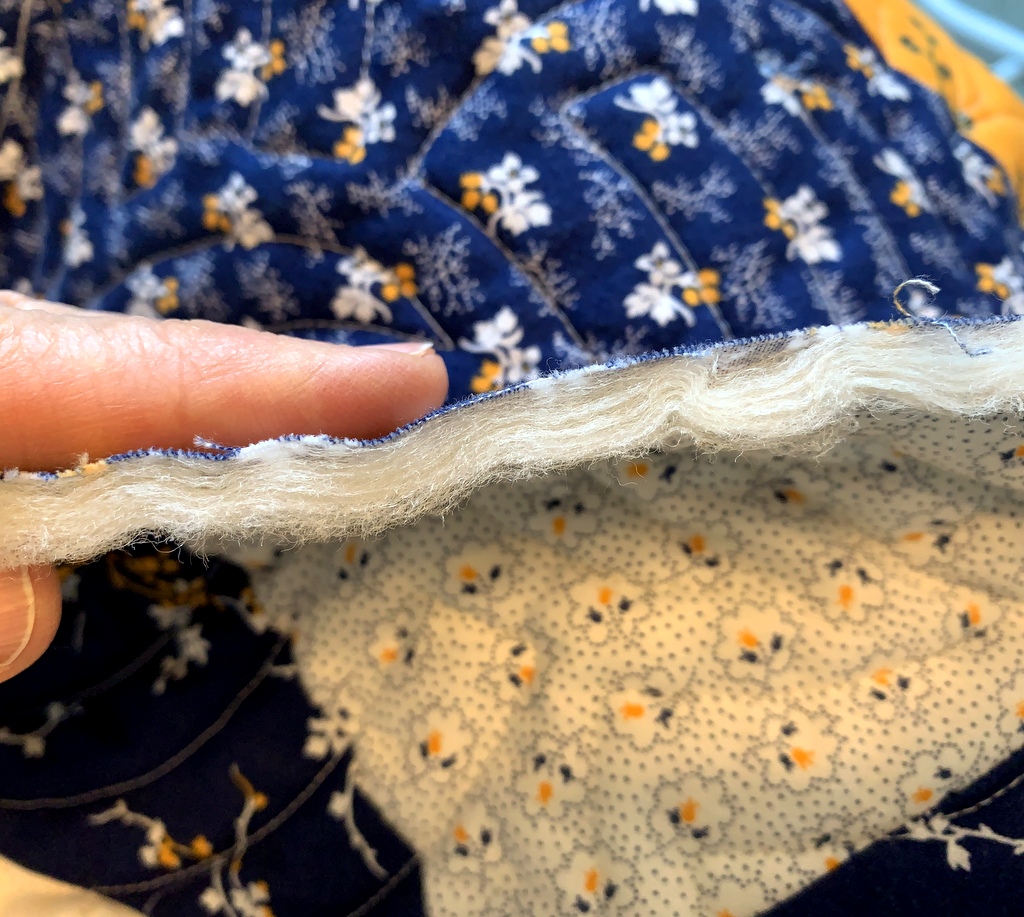
It appears to be made of many ultra thin layers.
I can’t say for sure but that puffiness may have been a factor when stitching the binding on. I had pinned sections of binding at a time, removing the pins as I went, so I was quite sure all of my edges were properly aligned. But somehow the seam allowance on my quilt top shifted slightly to the left as I was sewing. In some places, not all — but I didn’t notice it was happening because my binding fabric was on top.
I actually sewed all four sides of the quilt before I discovered there were several places where I had caught much less than a quarter-inch of the quilt in my seam. If it had happened in just a couple of places I could have taken the stitching out and readjusted the fabric but it happened all around the quilt. Nothing to be done but rip out the entire binding and start over.
The second time I pinned even more carefully and sewed a section only about 20″ long to test my stitching. I checked my seam . . . and the same thing happened. I was using my walking foot so the layers were feeding evenly through my sewing machine but that one layer of fabric was still pulling to the left. Out came the stitching again.
Want to guess what I wound up doing? The only other thing I could think of: basting the binding to the quilt. By hand:
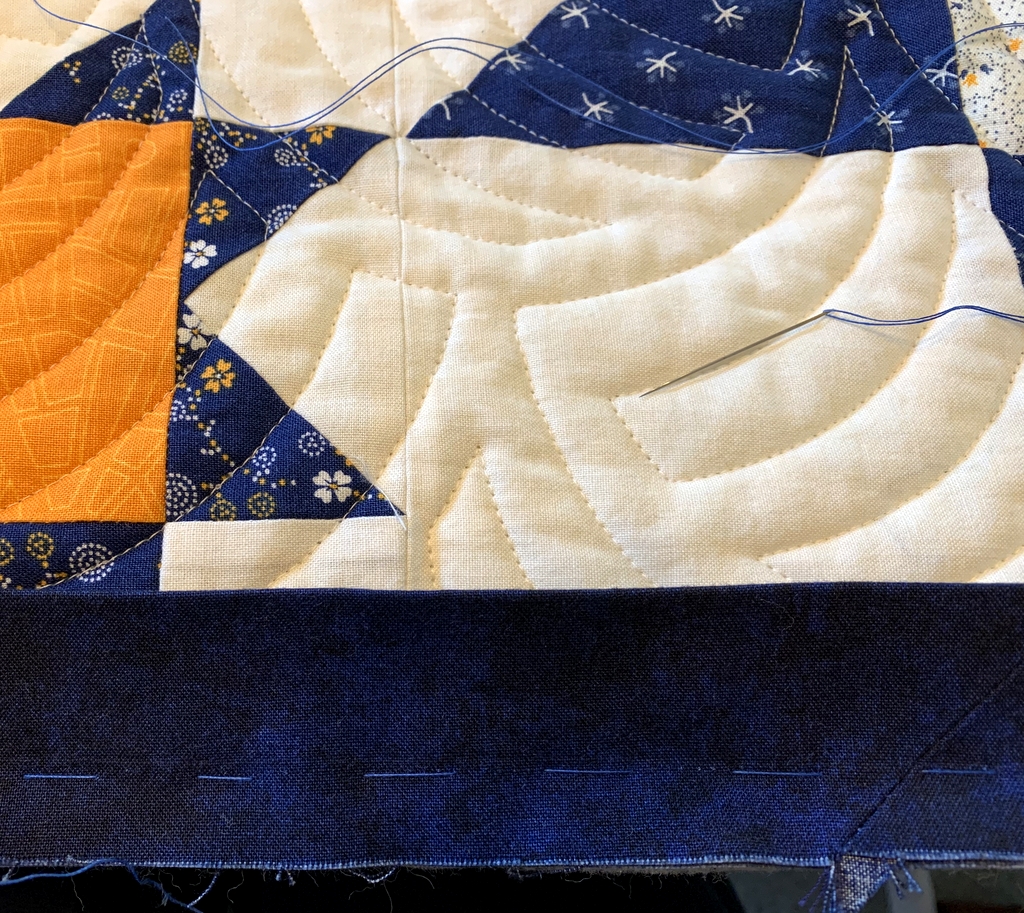
I aligned my basting stitches on the staystitching line underneath, thus guaranteeing I had the necessary quarter-inch of fabric underneath . . .
 . . . and also guaranteeing I hadn’t chopped off any star points:
Then it was just a matter of machine stitching right over my basting stitches. No shifting of fabric this time. What a relief!
I’ve chosen wool batting for many of my quilts and have also used it when applying binding that finished at ½” so I really can’t figure out why I had such a problem this time. I’m just glad the binding is finally on to my satisfaction and I can move toward a finish.
Oh, there’s one more thing I did before starting to tack the binding to the back of the quilt. I pinked the outer edges of the seam allowance to remove a bit of the bulk:
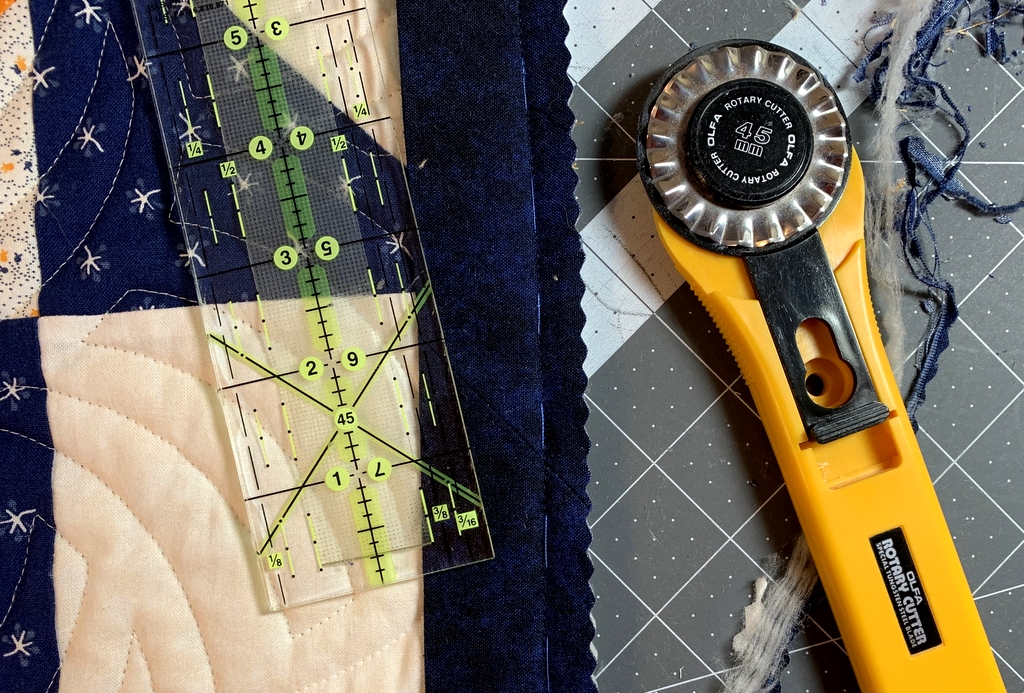 Pinking the edges also eliminated the raveling that often accompanies cut edges of fabric. I have a pair of trusty pinking shears but for long straight stretches I like to use my rotary cutter with a pinking blade. I think this pinking blade is actually meant for paper — I found it in the scrapbooking section at a craft store — but it works very well on fabric.
Since I’m one of those quilters who actually enjoys tacking down binding, this next step will be a pleasure. Then it’s on to the last step, the label.
What a beauty!!
Dawn, I love your quilt! It is really a ‘tour de force’! So sorry the binding was squirrelly… and I think you are right that it is was caused by the thickness of the wool batt. I had used packaged Hobbs Heirloom wool batt for years, and it was always nice and thin… then one day I bought wool off the roll at a local quilt shop, and had the passing thought that it was thicker… but when I started to machine quilt it, I got shifting, big-time. I ripped a lot of machine-quilting, and ended up hand-quilting most of the quilt. Whew. I decided the rest of the wool batting I had bought off that roll could work for my grandson’s mattress topper, and gave it to my daughter. OUT of my house!
Hi Suzette. I am reassured to know I’m not the only one who had issues. By the way, I loved your solution to getting the wool batting out of your house!
Oh my goodness. How frustrating to have to work so hard to get the binding on this beautiful quilt. As always I learn so much from you and I appreciate your ability to figure things out. Glad you pondered and succeeded with the various hurdles.
You can’t fool me, Nubs, you just love overcoming a challenge or two or three or more on the road to . . . perfection! 😉
Oh my goodness, what a lot of effort just to attach the binding. When this is all said and done, I hope you only remember the fun parts of the quilt construction. I appreciate the tip about pinking the edges before sewing on the binding – I’ve never thought of doing that, but it sure makes sense.
Hi Margaret. Actually I pinked the edges after I sewed on the binding. The pinking went through all the layers — top, batting, and backing. That enabled me to wrap the binding really snugly to the back of the quilt to make sure it covered my line of stitching. The only places I couldn’t pink were in the mitered corners. . .
Well it’s nice to know I’m not completely unskilled in binding attachment. I had the same problem! In following a color curriculum this summer, I decided to make seven 15″ quilts so I could see my fabric pulls in action. The pattern I chose is a star block with a border of on-point squares. So LOTS of points. I saw my project as a way to not only learn about color theory, but also practice my points. And even though my points got better, I had the exact same problem that you did each time I attached the binding. I really like wool batting and have lots of wool batt scraps. This was a good way to use them up even though binding time was always frustrating.
Thanks so much for sharing your solution to saving your points! It makes perfect sense.
You can’t lose by basting. It always gives a measure of control and makes you look closely at your project before making decisive steps.
After staystitching, I might have sent the edges through my overlock machine to compress them and grab the backing layer.
I only dream of such precision! 🙂