
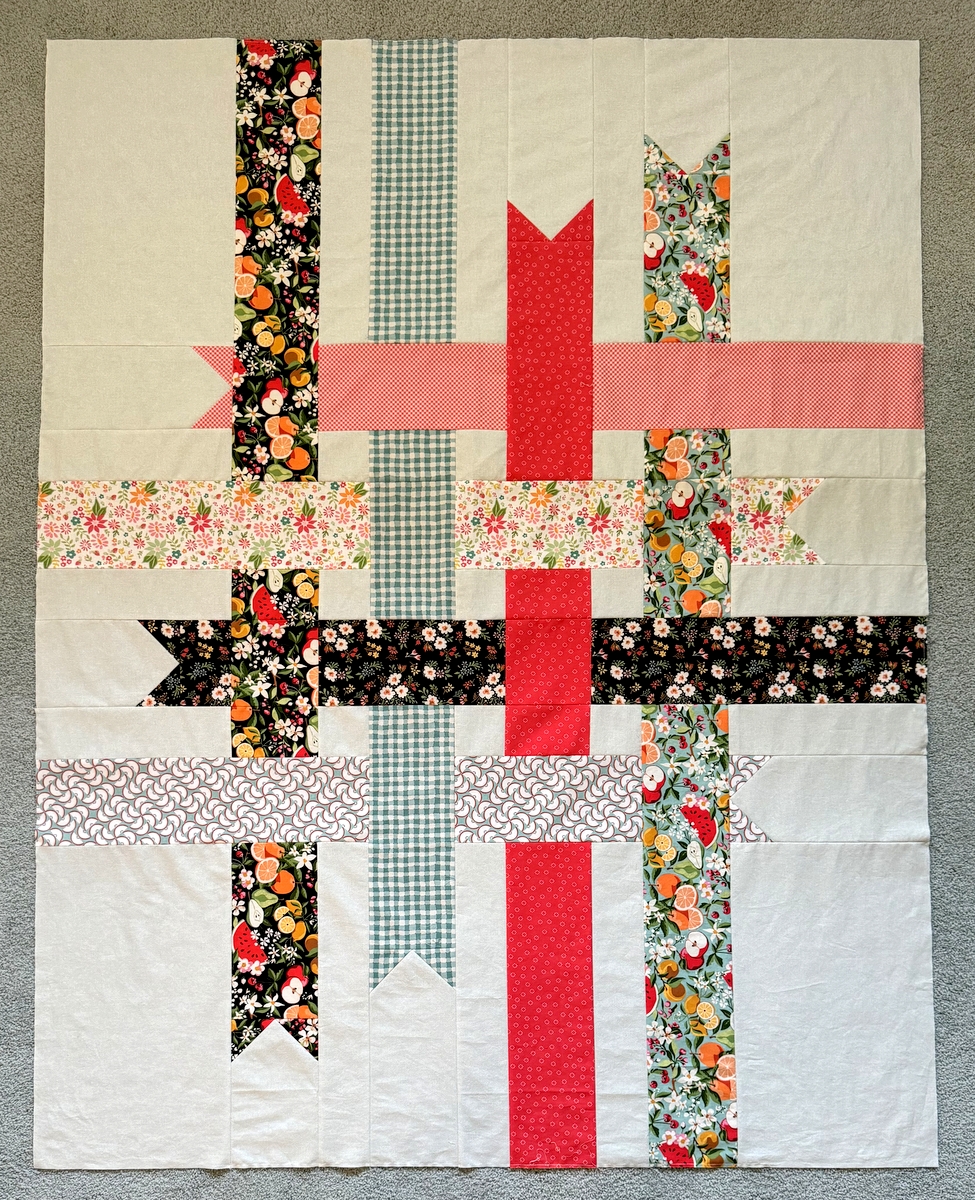
The top I made using the free pattern Ribbon Box from Cloud 9 Fabrics is finished! Before I show it to you, take a look at the top before I corrected a mistake:
 (Pay no attention to the feline photobomber in the lower right corner.)
What’s the mistake, you ask? This: I sewed one of the pieces upside down. Compare the two versions and see if you can spot my booboo:
 (Hint: look in the lower left section.)
It may not be obvious at first glance but I saw it immediately after taking the top photo. The mistake occurs at the bottom of the first vertical ribbon, the black print with all of the fruits on it. If you look at the watermelon wedges, which to me are the ones that immediately draw the eye, you’ll see that the wedge in the bottom section is upside down compared to the wedges in the rest of the ribbon. It’s a directional print so it’s important that the print be oriented the same way so the ribbon appears to be woven from a single piece. (In the fourth vertical ribbon featuring the same print on an aqua background, I deliberately oriented the print in the opposite way; you can tell by looking at those watermelon wedges.)
It was a simple matter to unsew four seams in order to turn the rectangle of fabric around and resew the seams. It’s possible very few people would have noticed it but it would have driven me crazy if I hadn’t fixed it.
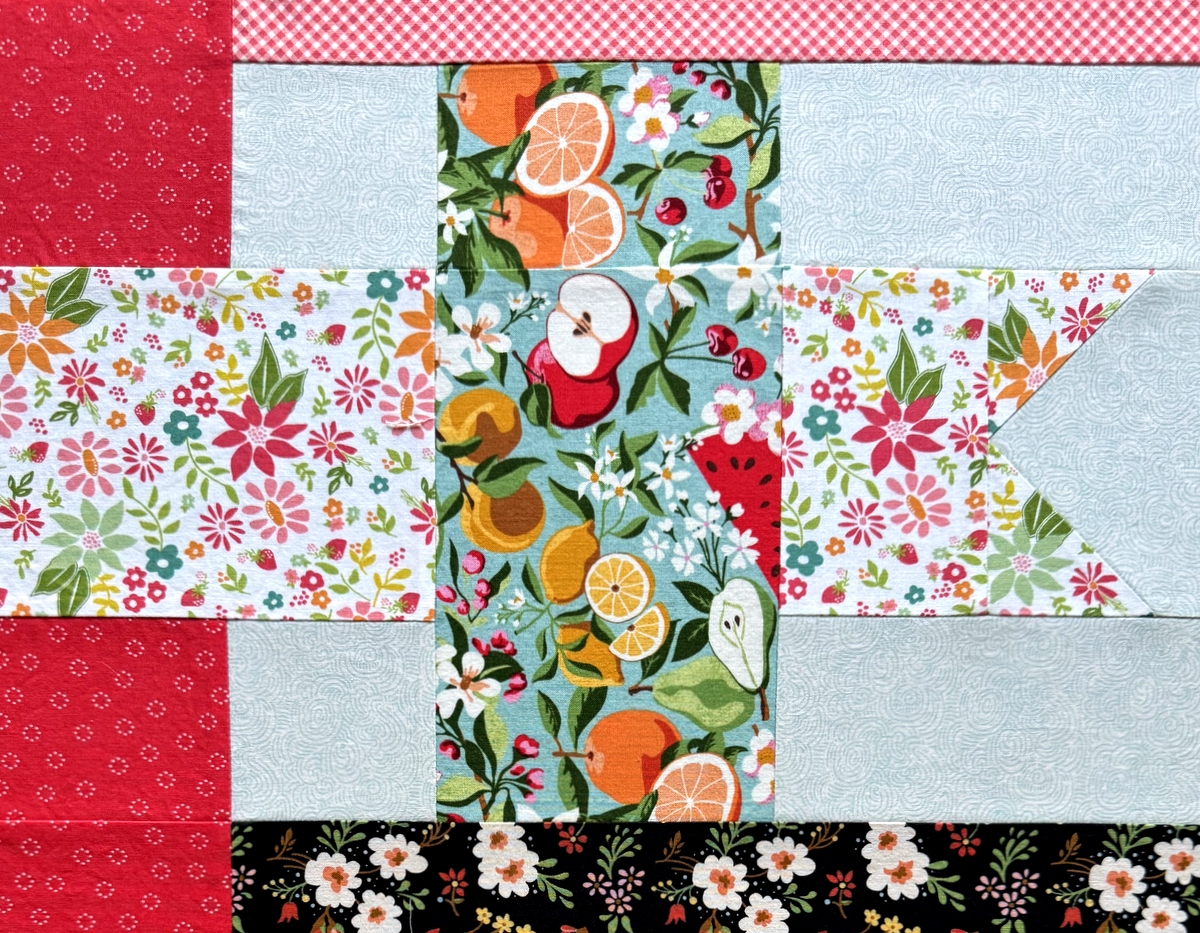
Another thing I did (which almost did drive me crazy) was match the seams in a couple of sections of ribbon so as not to interrupt the design. Here’s the fourth vertical ribbon with one matched seam . . .
. . . and the first vertical seam with two matched seams:
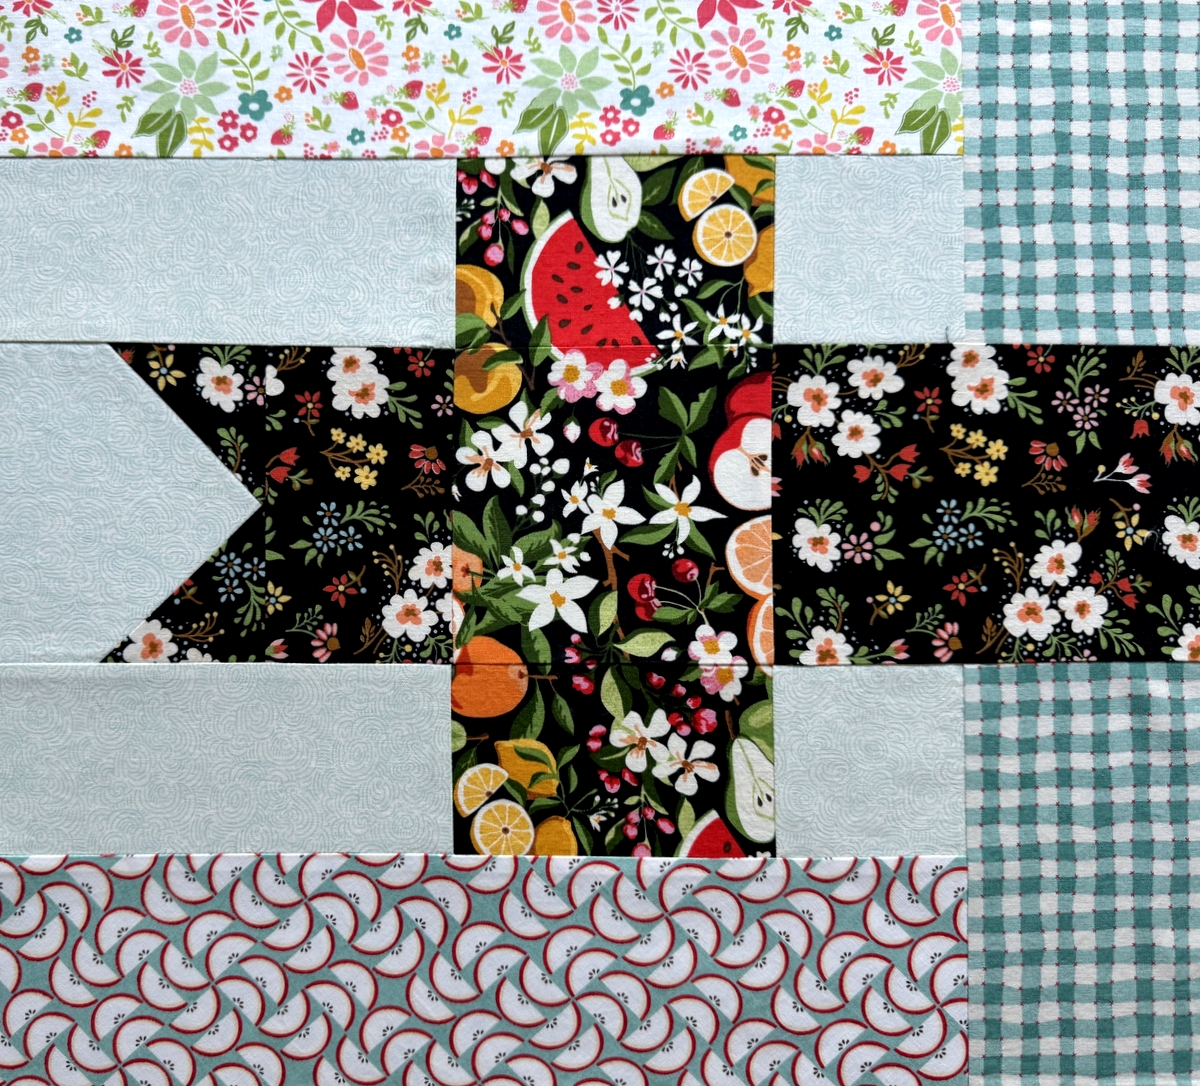
Can you spot the seams? They should be almost invisible.
In my previous post I mentioned making changes to the way the quilt is constructed. It has to do with sewing the quilt together in sections rather than in strictly horizontal rows. It enabled me to eliminate 12 seams! I’ll tell you all about it in my next post along with some important considerations regarding fabric choices, cutting instructions, and arranging the ribbons. If I ever make the pattern again — and I just might! — I will surely be keeping these considerations in mind.
Well, insofar as you painstakingly described your “mistake” so publicly, you of course had to fix it. But, honestly, the time I spent sussing out the infintesimal mistake took me away from time enjoying the quilt top picture (feline included)! It really is very cute!
I love your careful attention to details. I probably would catch the upside down watermelons, but matching the ribbon prints would sail right by me. You are an inspiration! I’m looking forward to your revised sewing plan.
Wonderful job matching those seams! If you hadn’t specified the “mistake” I never would have noticed. This Ribbon Box pattern has been on my To-Do list for a long time. I look forward to seeing how you managed to eliminate some of the seams.
Yay to eliminating unnecessary seams! Designers using two HST in place of one flying goose just make me grit my teeth. My quilt buddies know I won’t make a single cut until a pattern has passed my eliminate seams check. I love throwing in Y-seams to streamline construction!
Wow! Awesome job matching up those seams – something I could never do that perfectly. Love how this top is coming along.