
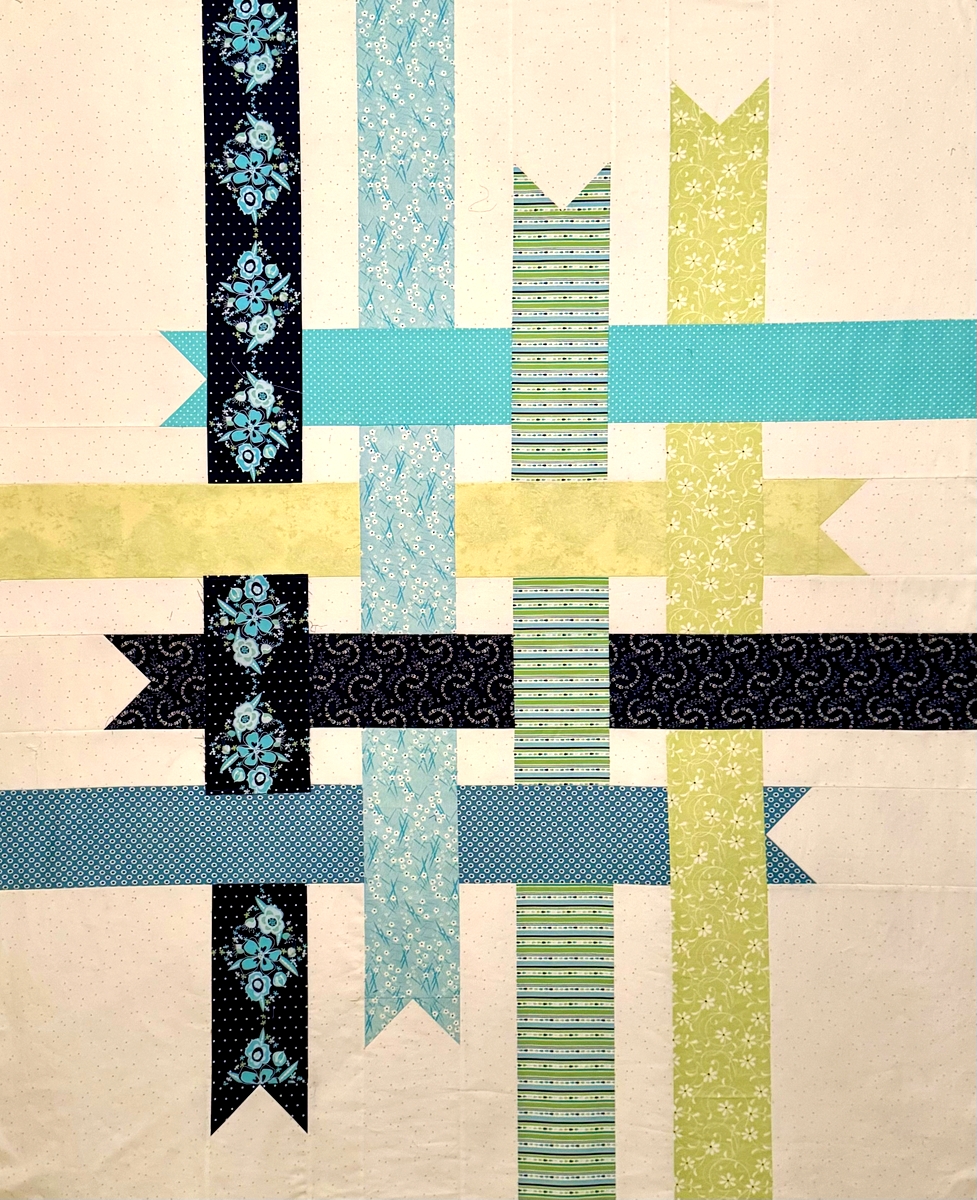
That’s my second version of the Ribbon Box quilt — and it’s at the quilter’s as I write this! Having made two versions (so far), I have some very specific recommendations for those of you who are thinking of making your own version. Let me say this up front: I think you should go for it! It’s a striking contemporary design featuring interwoven ribbons.
What sets Ribbon Box apart from other quilt patterns featuring ribbons is the trimmed ends, adding a touch of elegance. The simplicity of the design allows the eight fabrics used for the ribbons to stand out against the background fabric. Once you have the fabric strips cut and the ribbons arranged to your liking, sewing the pieces together goes pretty quickly. But as much as I like this design, I have some major issues with the fabric requirements as well as the way the fabrics are cut and sewn.
Before I lay out those issues, here’s some background information: Ribbon Box is a free pattern from Cloud 9 Fabrics. It’s part of Cloud 9’s Super 8 Quilt Series: quilt projects that use eight prints from a single line. This link takes you to the Cloud 9 website where you can see four versions of Ribbon Box featuring different lines of fabric by designers for Cloud 9. For each version you can enlarge the cover photo, view a pdf, and print the five-page pattern. The quilts finish at 45″ x 59″. (Note: I added 3″ all around on my two versions for a finished size of 51″ x 65″.)
So . . . here comes my first recommendation: Don’t cut your fabrics yet! In fact, don’t even buy your fabrics until you’ve read this post.
Here’s why: the pattern calls for each ribbon to be cut from a third of a yard of fabric. That’s a strip of fabric cut 12”by WOF (width of fabric, measured from selvage to selvage, giving you roughly 40″ of usable fabric after the selvages are removed). From each 12″-wide strip you cut at least one and in some cases two 5½”-wide strips which are then subcut into rectangles and squares.
I have three major problems with using ⅓-yard cuts. The first is that multiple strips cut from a single 12″-wide piece of fabric will not contain the same part of the design printed on the fabric. That won’t make much difference in a small random print but it will certainly make a difference in a large scale print. The three longest ribbons require a second 5½” strip cut.
The second problem is that cutting 5½” strips without considering the design on the fabric may leave you with a strip of fabric that doesn’t show the print to best advantage. Take another look at my quilt top at the top of this post. The first vertical ribbon was obviously fussycut from my main focus fabric. Ditto with the third horizontal print, in which the white floral garlands on a navy background are evenly balanced in the strip. That’s because I learned from making my first version that attention needs to be paid to what elements of the fabric design wind up in each 5½” strip (more on that below).
The third problem is that some prints look better cut on the lengthwise grain (parallel to the selvages) than on the crosswise grain (selvage to selvage). Obviously you need more than 12″ of fabric if you want to cut on the lengthwise grain. You also need more than 12″ if you want to match a particular element on a crosswise grain so that each segment of ribbon looks like it was cut from one continuous strip.
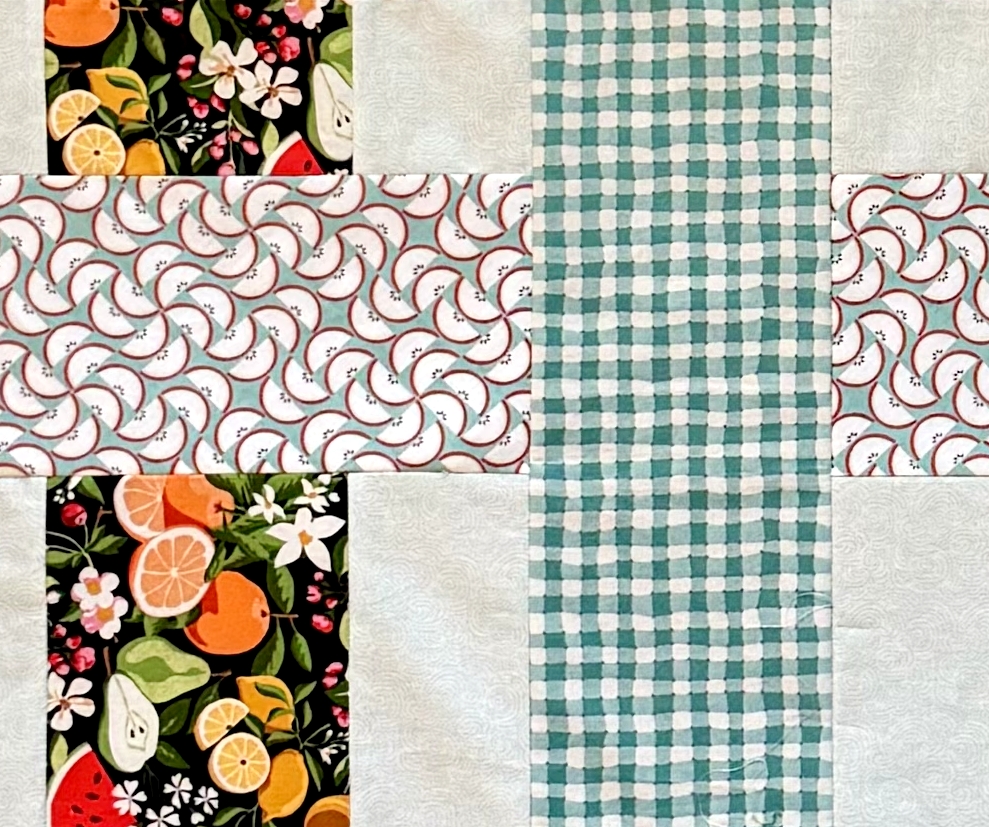
Let me show you some examples. In my first version, the Picnic Quilt, shown here . . .
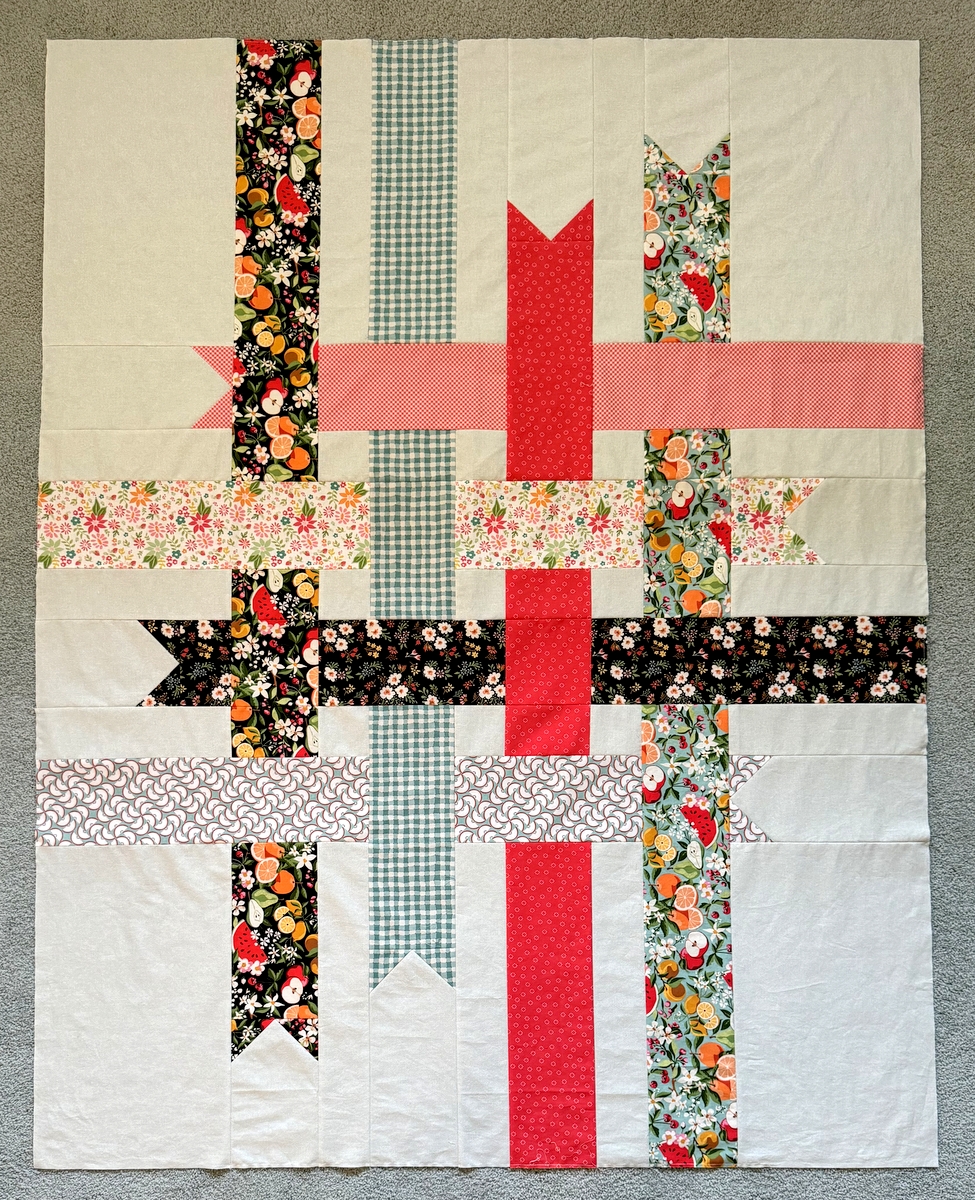
. . . look at the first and fourth vertical ribbons. Notice how the watermelons and apples are positioned in the center of the ribbons? I did that deliberately because they are the boldest element in the fabric design and I wanted them to stand out. I needed multiple cuts from each of the fabrics to get the repeat design I wanted, especially because the prints are directional.
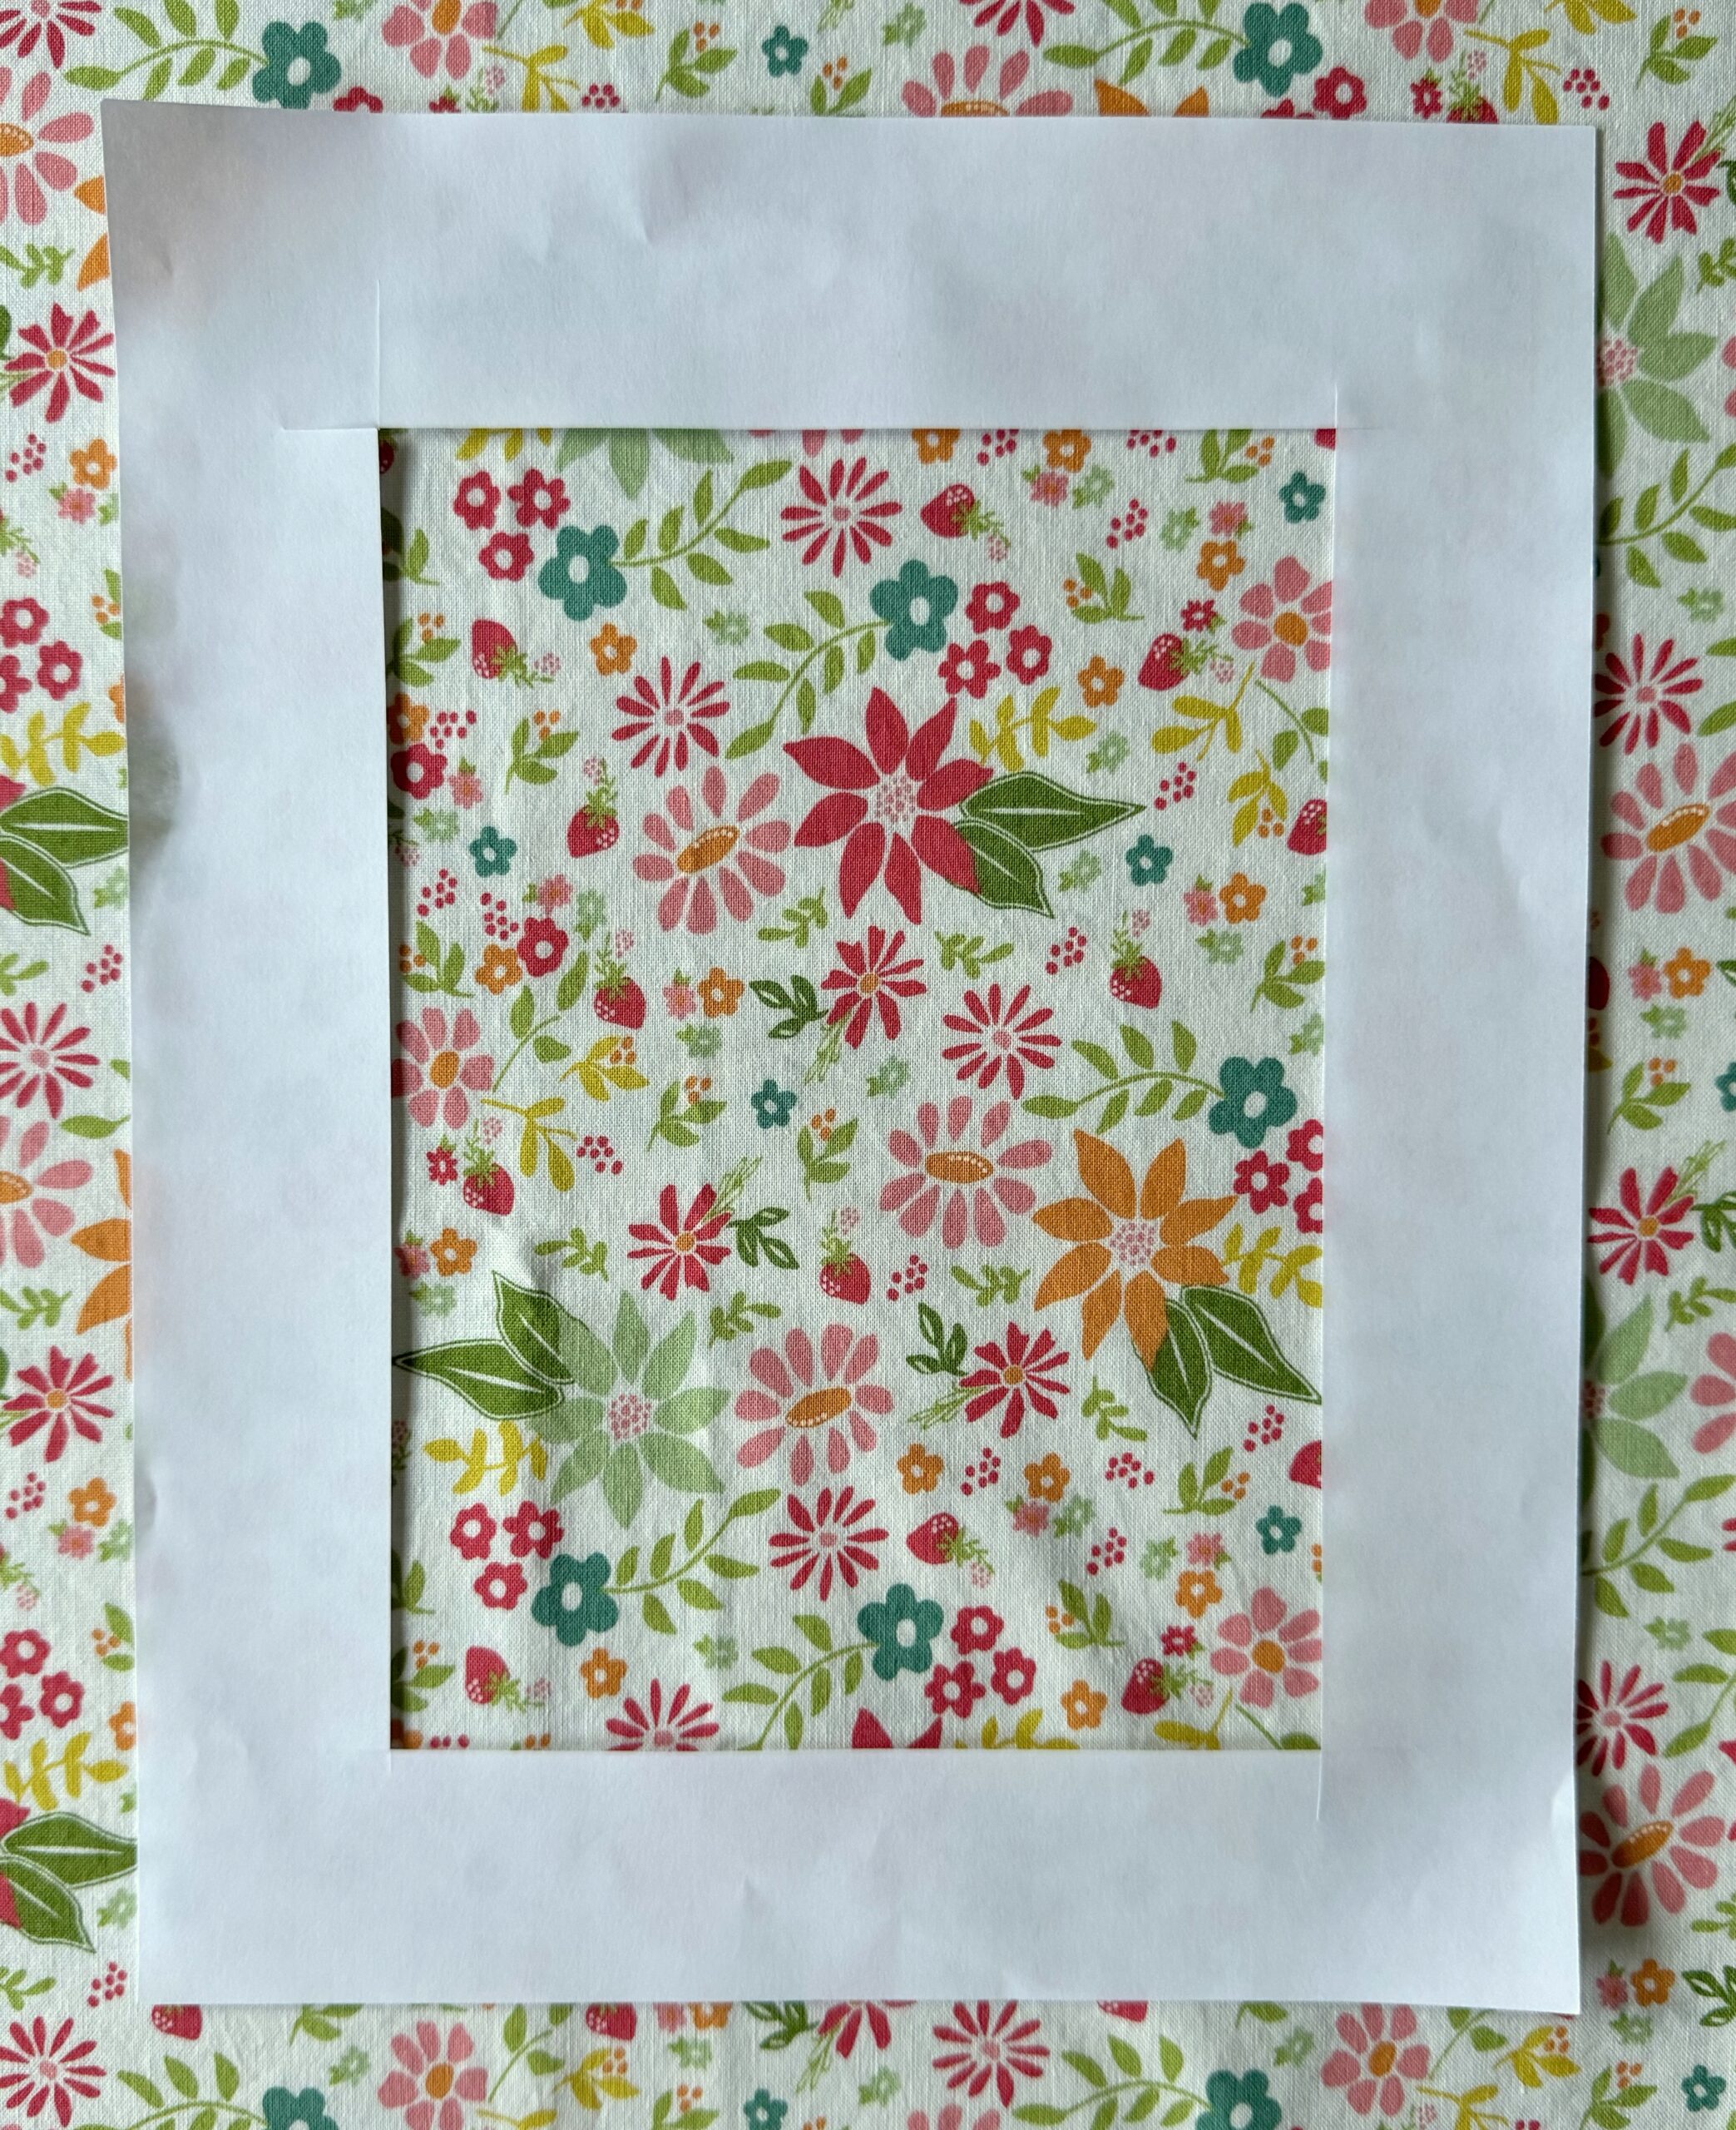
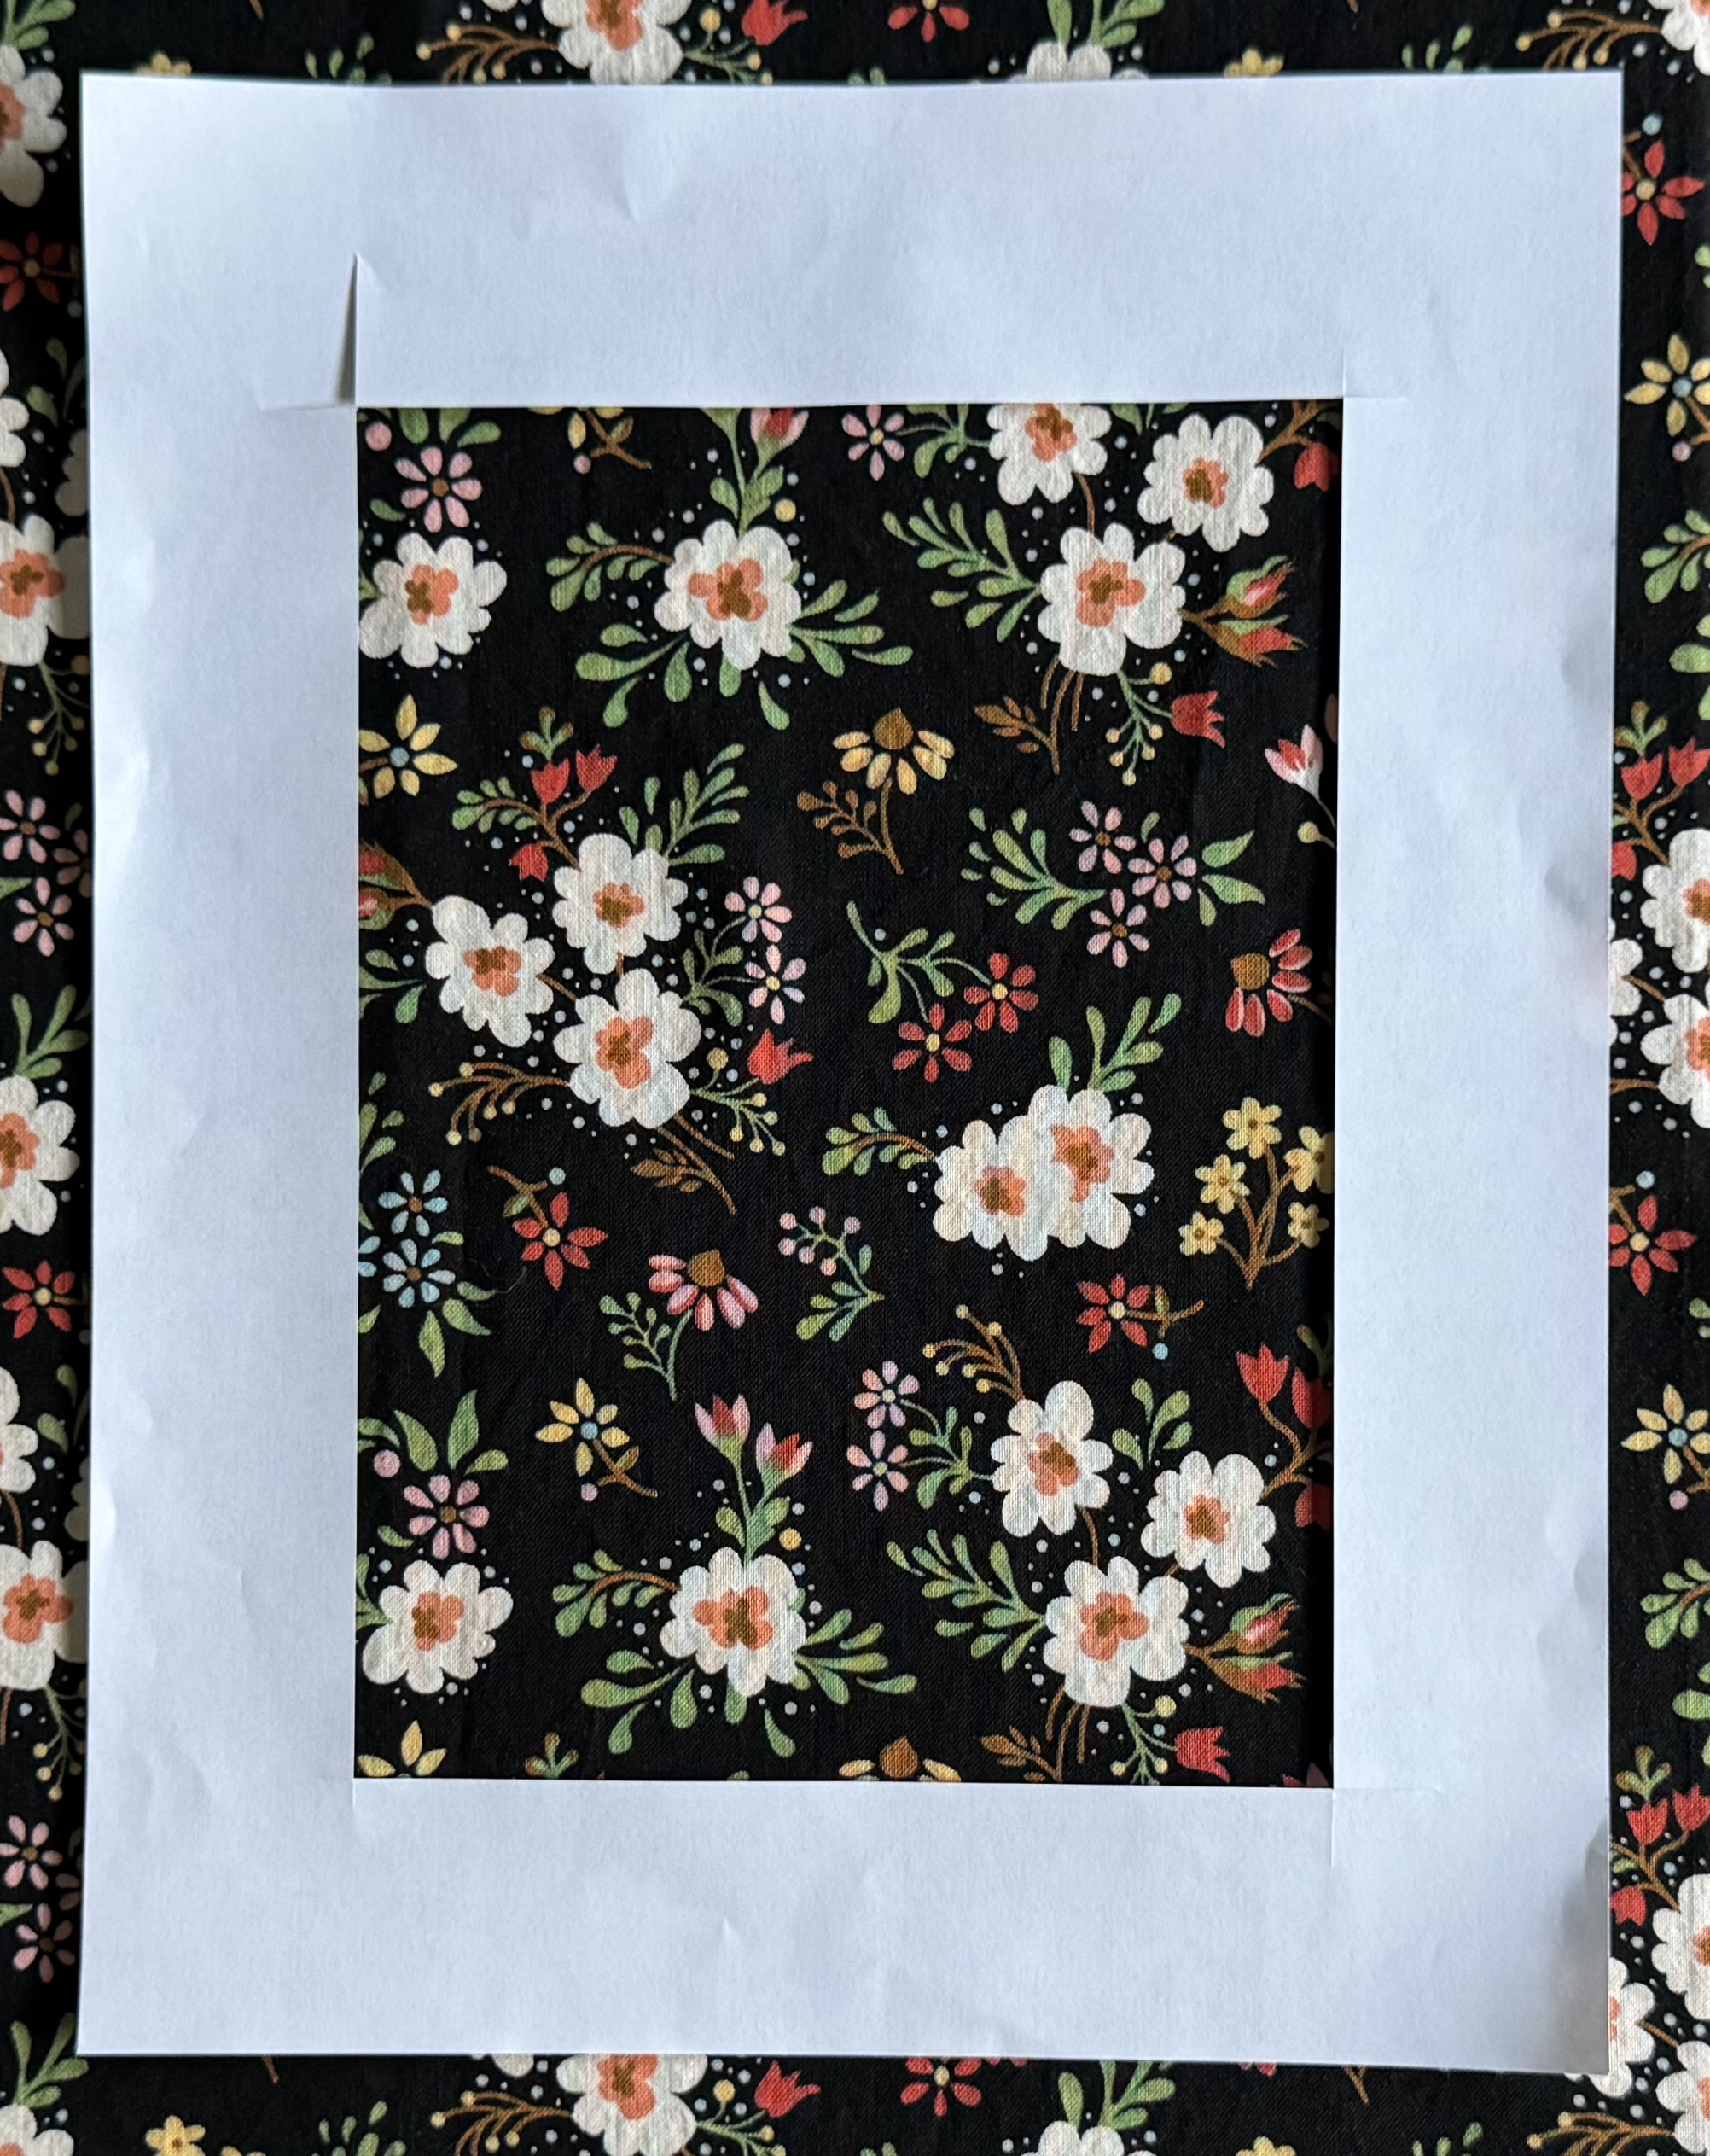
Now look at the second horizontal ribbon, a smaller floral print. You’ll see that three flowers in the print — orange, red, and green — are larger than the others. After cutting a strip at random and then seeing how off-balanced it looked on my design wall, I cut another one in which the red flower (the boldest) runs across the center of the ribbon. I also recut the smaller black print (third horizontal ribbon) so that the clusters of three flowers are balanced on both sides of the ribbon. Both of these fabrics were cut on the lengthwise grain because the images fit better inside a strip that would finish at 5 inches. How did I know that? I cut a 5½”-wide window in a piece of 8½” x 11″ paper so I could audition the fabrics:
 These changes were much more pleasing to my eye.
Next look at the second vertical ribbon, made from a slightly uneven check. You really have to be careful with checks, plaids, and small geometric prints! I cut the fabrics for this ribbon on the lengthwise grain because it was easier to keep the plaid lines even. Finally, look at the fourth horizontal ribbon with the sliced apple print. I cut the fabric on the bias for this one because I didn’t like the effect of the print cut on the straight of grain. The bias cut gives added movement to the quilt and I found the effect fun and playful. (I starched the fabric before cutting strips to help stabilize the bias edges.)
Here’s a close-up of those two ribbons:
 The reason I was able to make these changes in my fabric strips is that I started out with a yard of each ribbon fabric. I rarely buy less than a yard of any fabric, figuring that anything left over can go into another quilt or on a quilt back. That flexibility allowed me to choose the design elements in each print that I wanted to highlight.
Some of you may be thinking right about now that I have been vastly overthinking my approach to making these quilts. And you may be right. I can be quite obsessive-compulsive at times. On the other hand . . . When I am asked why I quilt, I invariably answer, “It’s all about the fabric.” I love beautiful fabrics and I love putting them into quilts that showcase their beauty. So while it is certainly much more economical to buy 12″ cuts of fabric for the ribbons in Ribbon Box, it may not give the best result.
In Part 2 I’ll share my piecing techniques, which resulted in eliminating 12 seams.
By the way, I finished binding the Picnic Quilt a couple of days ago. All that’s left is the label. Photos coming soon of the finished quilt!
Thank you, Dawn. I agree that it’s that attention to detail that really makes a difference in the finished quilt (I may also be just a little obsessive as well). Looking forward to learning your piecing tricks!
Thanks for all the additional information. When I go to all the effort to make a quilt I enjoy it more when it is pleasing to the eye.
Wow, all the thinking that went into the Picnic Quilt makes my head hurt! But, the outcome is really exquisite and I bet few people would realize the complexity that went into it. I would never think to cut a strip on the diagonal – sheer genius. You do beat all, Nubs!
How did you quilt this pattern? I’ve pieced two for my son’s teachers, ready to baste & quilt but I just don’t know what pattern to quilt it with.
Hi Fran! I’ve written blog posts about the quilting on each of the three quilts I have made using the Ribbon Box pattern. The easiest way to see the posts is to click on the Gallery page at the top of my website, firstlightdesigns.com, and then click on the link to quilts. Scroll down and you will see each finished quilt with a very brief description that includes links to the posts that highlight the quilting. You will see why I chose the motifs I did and see close-ups of the quilting my longarm quilter did — so much better than anything I could have done on my domestic machine! This link will take you right to the Gallery/Quilts page: https://firstlightdesigns.com/gallery/quilts/
— Dawn