I’m working on a quilt (another Work-in-Progress, begun over a year ago) that contains several snowball blocks — you know, the ones that have a triangle sewn to each corner, like this:
I’ve seen these edges referred to as foldover corners and stitch-and-flip corners. Whatever they’re called, the usual method of making them is to place a small square in each corner of the larger square, sew diagonal lines from corner to corner, trim the seams, and press the resulting triangles to complete the square.
Pretty basic, pretty fast. Except that it’s usually necessary to draw a stitching line on the small squares and sometimes to pin them to the larger square. It can get pretty tedious drawing all those lines on fabric, and it’s surprisingly difficult to stitch a perfectly straight diagonal line, especially when you are starting out at a corner.
Well! I recently learned a new way to sew these squares that doesn’t involve either pins or drawing lines. It’s faster than the old method and has resulted in improved accuracy in my stitching. I experimented a bit with the method and the materials, and this is what I came up with that works best for me:
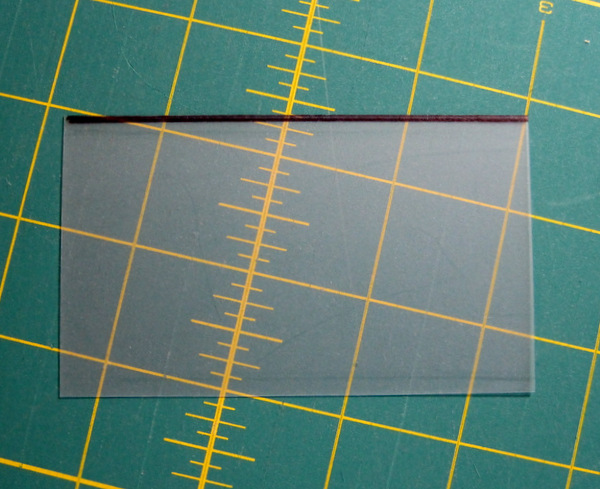
It’s a piece of template plastic, about 4½” wide and 2½” long, the perfect size for a block that finishes at 6″. I placed the plastic on a piece of scratch paper and, using an acrylic ruler and black Fine Point Sharpie pen, drew a thin line along one long edge. You’ll see what the dark edge is for in a moment.
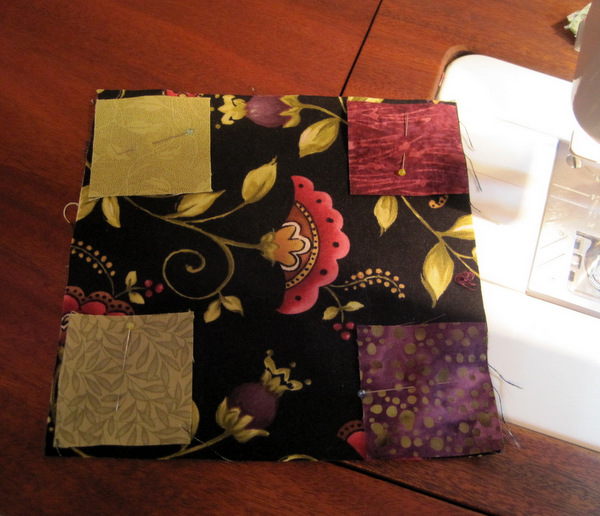
Here is my large square and the four smaller squares I need to make the corner triangles:
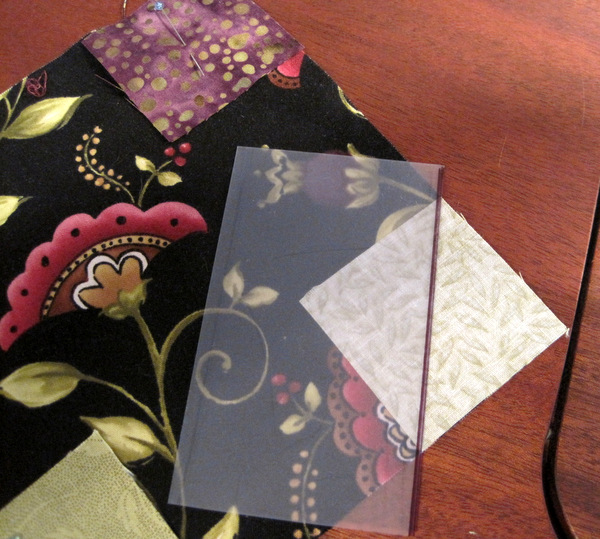
(The only reason I have pins in the smaller squares is to make sure they are in the correct position for the quilt I am making. If I were using the same fabric in all four corners, I wouldn’t need pins at all.)I start by positioning one of the smaller squares right side down in one corner of the larger square. Then I lay the template plastic right along the stitching line, from corner to corner, with the edges of the template plastic extending beyond the beginning and ending points of the stitching line. The inked side of the template plastic helps me see the edge of the plastic better on light fabric:
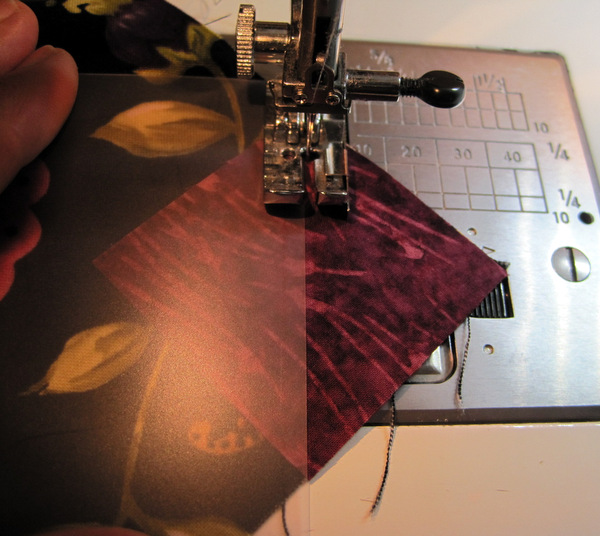
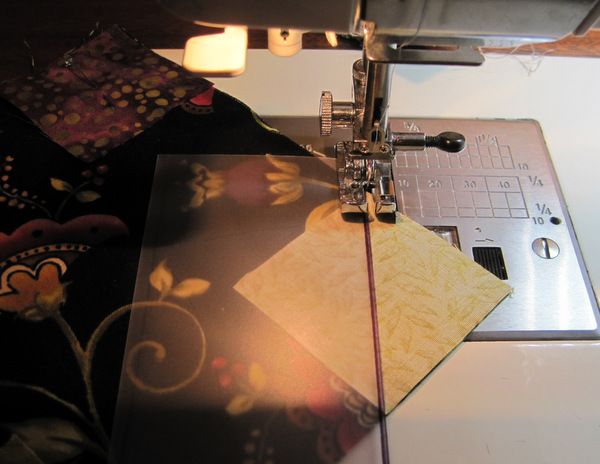
Next I position the fabric with my needle (in the down position) right next to the template at the exact corner of the small square. Holding my left hand (not shown in the photo below) firmly on the template plastic, I start stitching right at the corner:
You can see the needle is right next to the edge of the template plastic, eliminating the possibility of straying off the stitching line:
It feels a little bit like stitching in the ditch, with the edge of the template plastic serving as the ditch. Being able to see the fabric through the plastic helps me make sure the fabric isn’t shifting.
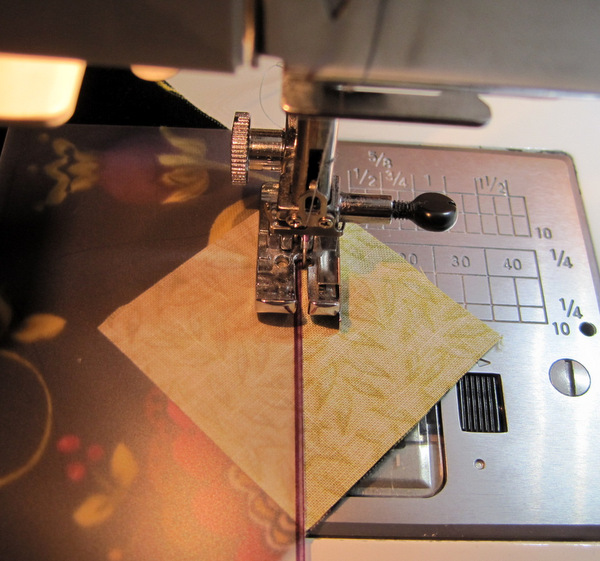
I use the uninked long edge of the template on dark fabrics, as it is easier to see the needle as it goes in and out right next to the edge of the template plastic:
I sew all four corners in this manner, rotating the large square as I go and not cutting the thread between corners:
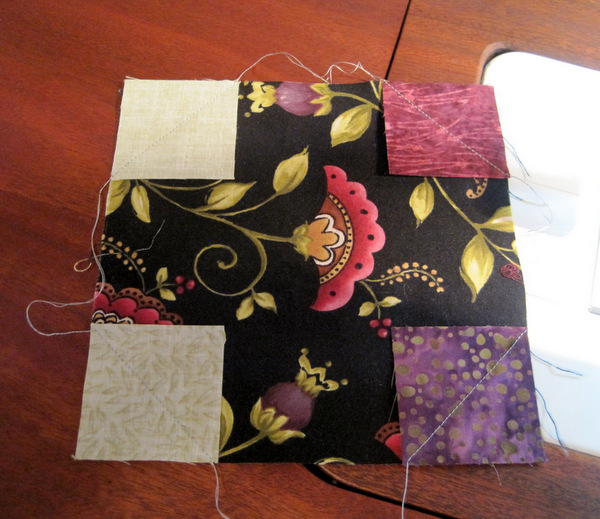
Now all I have to do is cut the threads, trim the seams, and press. Voila! My snowball block is done:

This method works for flying geese blocks, sawtooth edges, just about any block that calls for a triangle to be made from a square or rectangle. The templates can be made with cardboard or other stiff materials, but I’m sticking with template plastic because I like being able to see through it as I sew along next to it. I’ll make larger templates for larger blocks.
My thanks to Kelly at BlueBird Sews for introducing me to this new method. I love learning from fellow quilters!

That’s similar to a technique I used recently. I was sewing binding strips together where you stitch them together on a 45 degree angle. I didn’t want to get up from my sewing machine to get a marker and ruler, so I took a fabric rectangle and placed it as you did your plastic and used the fabric edge as my guide. I was surprised at how well it worked. But, the plastic I think would be much better because the fabric edge would fray pretty quickly. I’m definitely going to try your method. Thanks for showing it to us.
I never even thought about this method for binding strips! Thanks, Pauline!
Love this! Wish I’d seen it before I’d started my latest work in progress – 100 snowball blocks. Thanks, I am definitely going to try this.
Marie, just think how fast the next 100 will go! — Dawn
Can’t wait to give it a try. I’m like you…I love all the little tricks I’ve learned from other quilters that make the blocks go faster and easier!
I’m about to embark on a 9 patch snowball pattern and I was searching the web for any tips to make it easier. This post of yours popped up and I thought, “Hey, I know that blogger!”
Anyhow, just wondering if you find that the template plastic slips a bit while you are sewing, or does it stay pretty much where you want it. It’s been a few years since you posted this technique. Would you still recommend it?
I still love this technique, Auntie Em! If you are concerned about the template slipping, you could put a strip of Nexcare 1″ wide clear surgical tape in the back. (I have a tutorial about using that on the back of acrylic rulers to prevent slippage on fabric.) Have fun with your snowball blocks!
Thanks, Dawn. I’ll give it a try! Goodbye to tedious drawing of diagonal lines!