Making Music, Making Quilt Labels . . .

Compact discs are permanent fixtures in my sewing room. I listen to music all the time when I’m sewing. Sometimes the radio is on, set to an FM station that plays oldies, but most of the time I listen to songs I’ve compiled myself on CDs, eclectic mixes of everything from folk music to jazz to country to the Great American Songbook.

What do my musical tastes have to do with quilt labels? Simply this: CDs do more than just produce beautiful music. These slender silvery discs, measuring 4⅝” in diameter, make great circle patterns for quilts and home sewing projects. They’re lightweight, portable, and very easy to trace around. And they’re the perfect size for quilt labels.

I use fusible interfacing as the backing fabric, so the labels actually get fused to the backs of my quilts. Labels can be made just as easily with a non-fusible interfacing or other lightweight fabric and then appliquéd to the back of the quilt by hand or machine. Either way, they are easy to make and give the back of the quilt a nicely finished look as well as added visual interest.

Here’s a tutorial on how I make quilt labels using a compact disc. For this demonstration I’m making a label for a little quilt called Wonderful Town that I made a couple of years ago. (It’s in my Quilt Gallery, about halfway down, if you’d like to take a look. You’ll notice it doesn’t have a label yet.)

Supplies
Scratch paper
Pencil with a fine point
See-through ruler
Compact disc
Scrap of freezer paper about 6½” square
Piece of cotton about 6½” square for the label
Piece of light to medium-weight fusible interfacing about 6½” square
Temporary marking pen or pencil (I recommend the Frixion erasable gel pen)
Fine point permanent marker
Painter’s tape
Pinking shears

1. Start with a piece of scratch paper and a pencil with a fine point. Trace around a compact disc and put a dot in the center. Draw a line across the dot to establish the baseline rule.
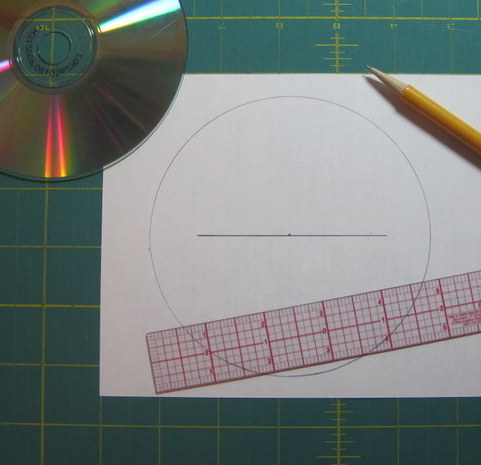
circle and baseline drawn


2. Decide what your label will say and how many lines it will take. Write the label information on scratch paper first to make sure it’s what you want. Center each line, just as it will appear on your label. This is good practice before you record the same information on fabric with permanent ink. Using a see-through ruler, draw lines ⅜” apart in the circle.
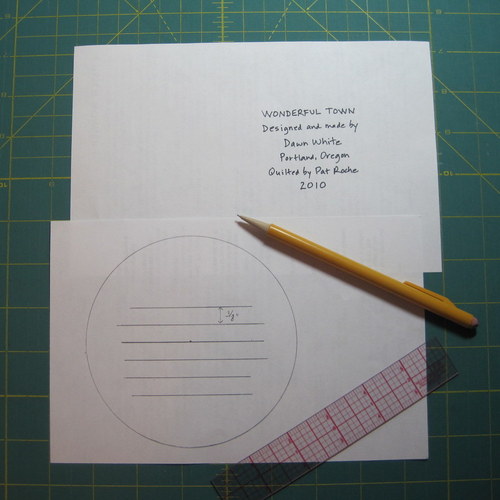
label drafted and guidelines drawn

In my example, I drew two lines above my baseline rule and three below it, for a total of six lines. If I were making a label with five lines, I would have drawn two above the baseline and two below.

3. Using a hot dry iron, press the shiny side of the freezer paper to the wrong side of the label fabric. This keeps the fabric taut, making it easier to write on with a pen. Press from the front to make sure the fabric is flat with no bubbles. The freezer paper will be removed later.

Note: many quilters use cotton muslin for their labels. I usually choose a cotton fabric that was used in my quilt top or one that goes well with it. Here I am using a scrap of light gold fabric that picks up the same shade in the quilt.

4. Center the compact disc on the right side of the label fabric. Trace around it with a temporary marking pen or pencil and put a tiny dot in the center. Draw a baseline across the dot. As with the scratch paper version, draw lines ⅜” apart above and below the baseline.
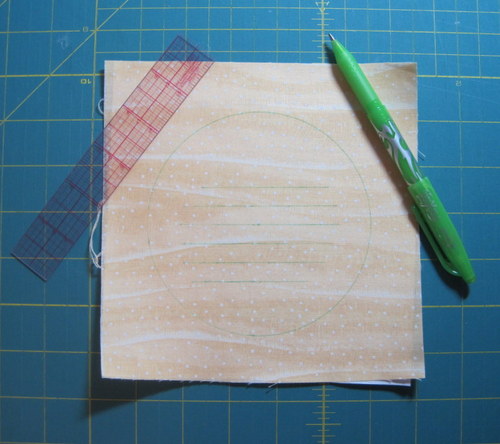
circle and lines drawn with disappearing ink

I absolutely love the Frixion erasable gel pens by Pilot. The ink vanishes at the touch of an iron. Frixion pens come in a rainbow of colors. Here I used green ink, pressing lightly to get just enough of a line to see where I needed to write.

Option: Instead of drawing the rules on the front of the label fabric with a temporary marker, you could draw them on the back of the freezer paper with very dark ink so that they show through from the right side.

5. Tape the label to your work surface with painter’s tape. Test the permanent marker on a corner of your label fabric to make sure the ink doesn’t bleed. Carefully write the information on your label. Don’t worry if your lettering isn’t perfect; mine certainly isn’t. The label just needs to be neatly written and easily read.
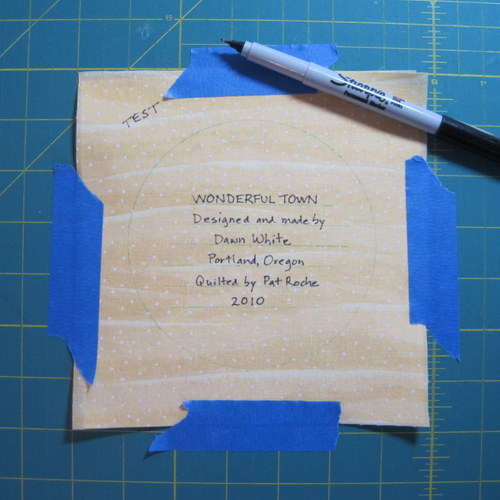
label written with permanent marker

I used a Sharpie Ultra Fine Point here but you may prefer an archival quality pen such as the Pigma Micron, which uses an acid-free pigment-based ink.

6. Remove the tape and peel the freezer paper off the back of the label. On the right side insert a pin at the spot where you marked the center of the label. Is the writing centered in the circle? If not, adjust the pin.

7. Turn the fabric over. Center the compact disc over the pin and trace around the disc with the pencil (not the permanent marker). The line you traced is your stitching line.
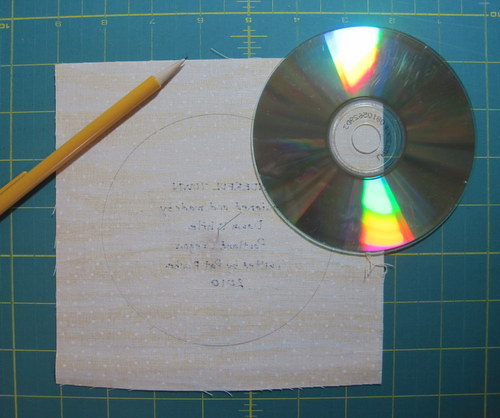
stitching line drawn on back of label


8. From the right side press the label with a hot iron. This sets the ink of the permanent marker and removes the Frixion ink, if you used it. If you used some other type of temporary marking pen or pencil, you may need to remove it before applying heat to the label.

lines drawn with Frixion pen have disappeared!


9. Place the interfacing on a flat surface with the fusible side up. Lay the label fabric right side down on top of it. Imagining the circle as a clock, insert four pins at the 12, 3, 6, and 9 o’clock positions. Place the pins across the seam line, with the tips pointing toward the outside edges; this helps keep the two layers flat. Insert four more pins evenly around the circle.
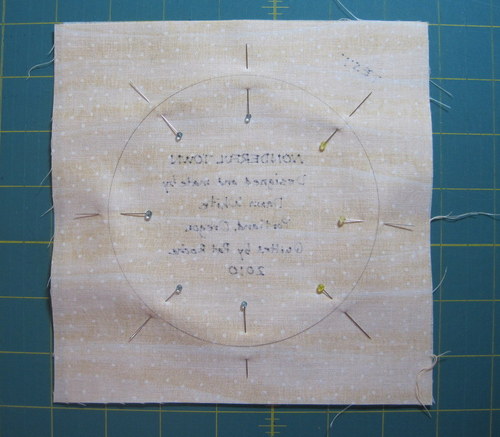
pins inserted evenly around circle


10. Using a small stitch (about 12 stitches to the inch), sew completely around the circle, gently turning the fabric as you sew to keep the curve line smooth and removing the pins as you come to them. Stitch beyond your beginning point by five or six stitches (no need to knot). Clip threads.
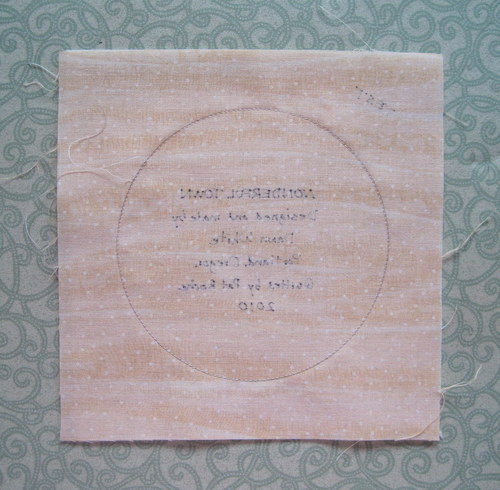
stitching around circle completed


11. Using pinking shears, trim closely next to the line of stitching.

seam pinked close to stitching line


12. Gently pull the interfacing away from the label fabric and make a small slit in the center of the interfacing. With scissors extend the slit to about ¾” from the stitching line on either side.
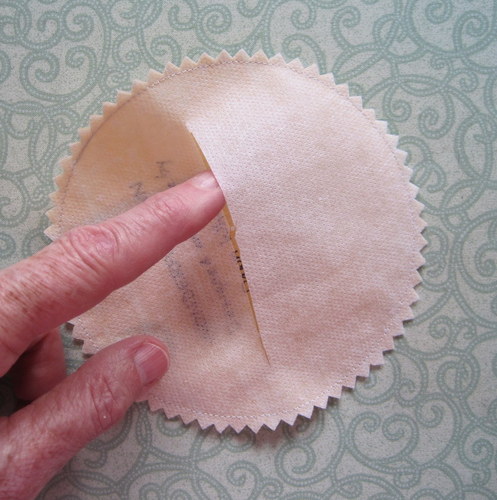
interfacing clipped in the middle and slit extended


13. Carefully turn the label inside out through the slit. Insert your fingers through the slit and gently run a fingernail around the edges to smooth out the circle shape. Fusible interfacing tears fairly easily, so be gentle.
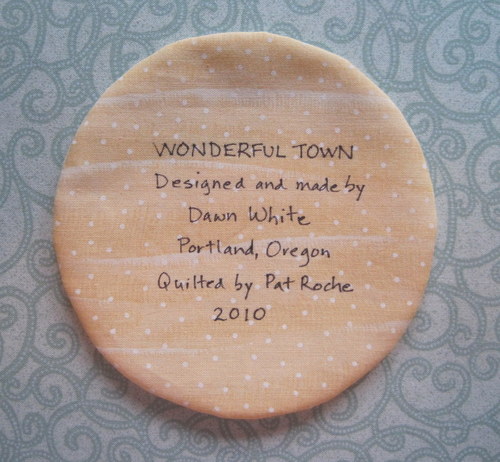
label ready to be fused to back of quilt


14. The label is now ready to be pressed to the back of the quilt. Remember that the fusible side of the interfacing is on the outside. Be sure to position the label exactly where you want it before following the manufacturer’s directions for fusing. After the label is attached, you can stitch around it if you wish to give it that appliquéd look.

finished!


Posted in quilt labels, tutorial, update | 6 Comments

Quilt-Along Update . . .

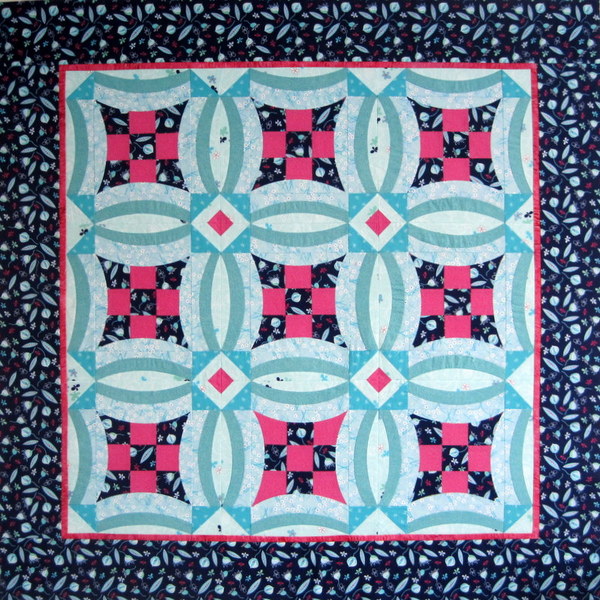
I wrote in an earlier post about my very first Quilt-Along, hosted by Jenny of sewkindofwonderful.com. A few weeks have passed since the Quilt-Along officially ended and I’ve finally finished the top of one of the projects I started:

baby marta’s quilt


It measures 48″ square, a good size for a baby quilt. I’m toying with the idea of using curves in the border but will wait till I’ve quilted it before making a final decision.

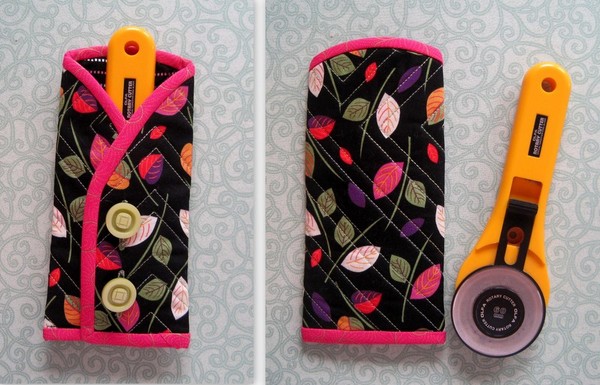
And here’s a little something I made recently for my friend Vivienne’s birthday:

Viv’s rotary cutter case


Posted in Quilt-Along, rotary cutter case, update | 2 Comments

Testing 1, 2, 3 . . .

Every now and then I test one of my own patterns by making a new version. When I haven’t looked at pattern instructions for a few months, I find myself reading them with fresh eyes. I go over the math and measurements as well as the clarity of the written directions. My inner editor usually kicks in, and I wind up making revisions.

Recently I tested Full Moon Rising II, making a few adjustments in the process. Mogambo Moons is the result:

Mogambo Moons, 16½” x 62”
Mogambo Moons 16½” x 62”


Although the pattern calls for different fabrics in the background blocks, I used the same Marcia Derse print for all of the blocks in this version. The moons are made of a gradated cotton sateen that travels from a pale yellow to a deep orange. The uneven striped fabric between the blocks is a batik that includes the entire range of yellows and oranges found in the moons.

I departed from the norm in one other respect. Instead of inserting set-in circles for my moons as my pattern directs, I appliqued them to the top after the blocks were joined together. They are finished-edge applique circles, backed with fusible interfacing.

This is the same method that I use for many of my quilt labels. In an upcoming post I’ll show you how I make them. The process starts with one of the most versatile objects in my sewing room: a compact disc.


Posted in gradated fabric, update | 2 Comments

Hooked on Hexagons

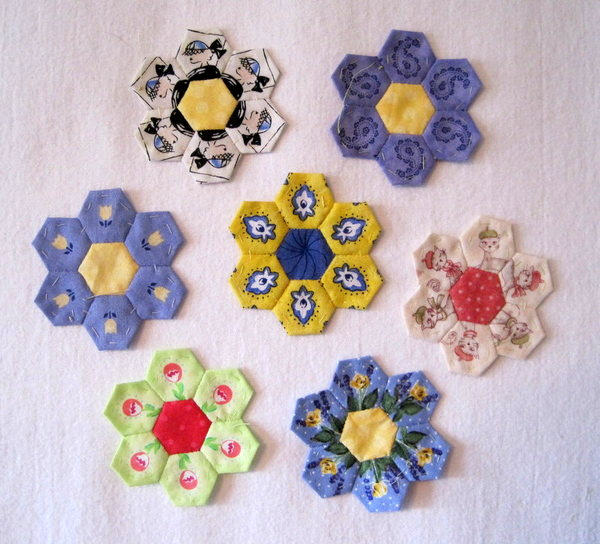
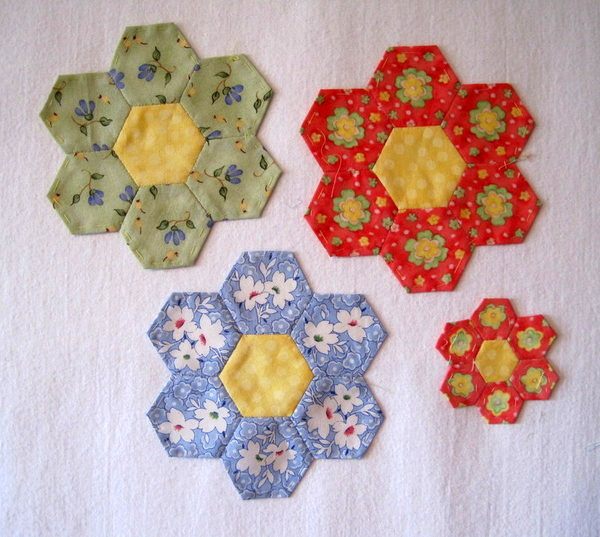
Yes, it’s true. These little six-sided beauties have me enthralled. Why is that? First of all, they are simply charming, especially the smaller ones like these, which measure a mere half-inch on each side:

hexagons galore
Hexagons Galore


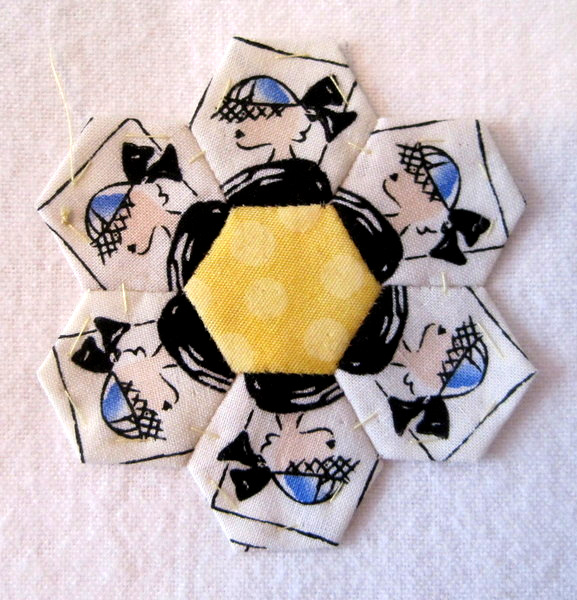
Fussy-cutting small prints can yield wonderfully whimsical results:

hexies 006
Fussy-Cut Hexies


ready for my close-up mr demille
“I’m Ready for my Close-Up, Mr. De Mille”


There’s more to their appeal than that, though: hexagons are made completely by hand. I fantasize about being a good hand quilter but find myself — at least for now — unwilling to invest in the amount of time it would take to become one. That would mean time away from my sewing machine, time away from designing quilts and home sewing projects, time away from reading quilt magazines and blogs, time away from the non-quilting aspects of my life.

But in little more than an hour, I can whipstitch together seven little hexagons and produce a thing of beauty. So satisfying! Trouble is, I don’t have a project in mind. When the mood strikes, I simply take fabrics I love and turn them into hexagons. I have a little plastic baggie of hexagons-in-the-making, all packed and ready for the road (or just an evening at home). They’re oh-so-portable, making them great take-along projects.

A traditional Grandmother’s Flower Garden quilt is most definitely in my future. In fact, it’s already started. I have a few larger hexagons (1” per side) made, although they need another row:

hexies big and small
Hexies Big and Small

(I stuck that baby hexie in there just to show you the difference in sizes.)

The idea of doing something a bit more modern with hexagons is also appealing. Fortunately, inspiration is close at hand:

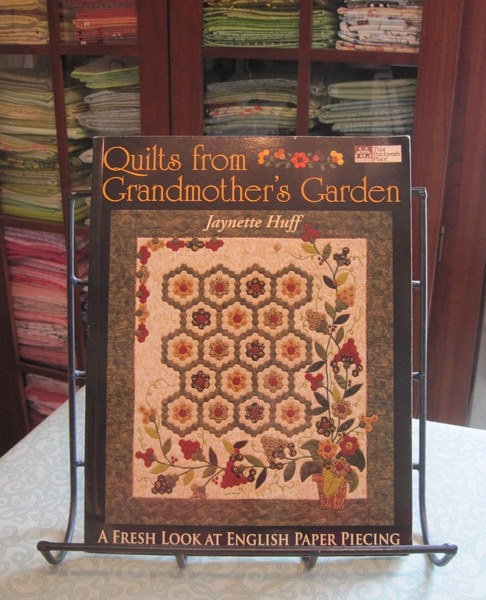
Jaynette Huff’s book


Jaynette Huff’s book, Quilts from Grandmother’s Garden: A Fresh Look at Paper Piecing (That Patchwork Place, 2005) is chock full of ideas for “fabric floral arrangements” made with hexies, and one fine day I may actually get started on an arrangement of my own.

Are you hooked on hexagons, too?


Posted in hexagons, update | 3 Comments

The Sewing Gene . . .

Do you have it?

My sisters claim that I inherited the sewing gene and they didn’t. Maybe this is why I find myself engaged in home sewing projects whenever I visit them. They joke about shackling me to the sewing machine when they know I’m coming. If you take a look at the Home Dec section of my Gallery, you will see that the usual beneficiaries are the Usual Suspects (my sisters).

Our mother was an excellent seamstress, fast and accurate. She sewed all our school clothes and even made pajamas for us when we were little kids. This was back in the days when it was much cheaper to sew garments than to buy them. Every fall before school started, we would go shopping for fabric (we called it material back then) and patterns. Mother had veto power, though she rarely used it. We always had several new outfits to begin the school year, and we would pick our favorite to wear the first day. Mother worked full-time so how she found time to make all of our clothes and hers as well is a mystery to me.

My mother taught me to sew the summer before I started high school. I learned on an old White treadle sewing machine. I don’t remember where we got that sewing machine or what happened to it, but I sure wish I still had it. It sewed like a dream, once you got the rhythm of working the treadle. On my first day of high school, I proudly wore a dress I had made – a sleeveless shift with bias piping around the neck and armholes. It was a green and blue print, and I wore it with a blue velvet beret, which I thought was terribly chic but probably looked silly.

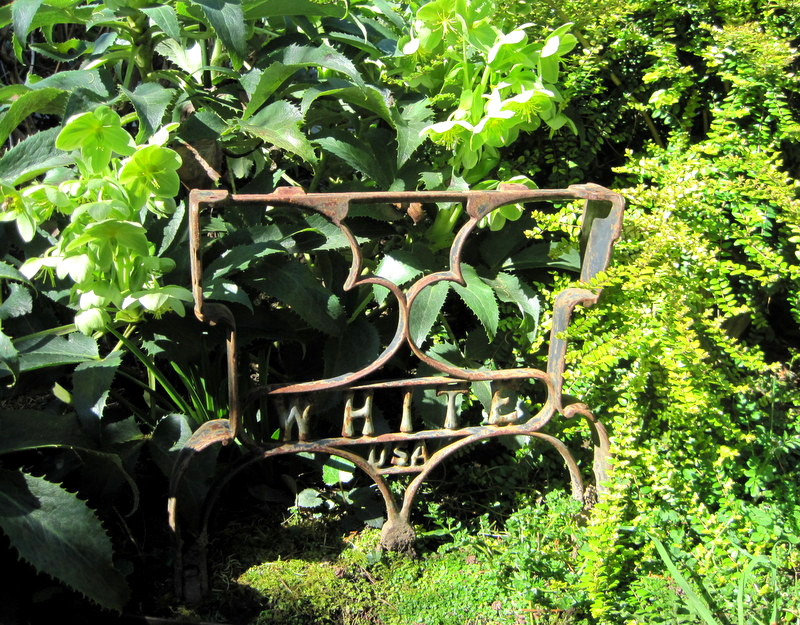
Last year, while antiquing at the beach with my quilt group, the Quisters, I found a wrought iron side support from an old White treadle sewing machine. It came home with me and now lives in the garden in the back yard. It’s a lovely reminder of my mother and the year my sewing gene kicked in.

2012-3, wrought iron garden art
Wrought Iron Garden Art


Posted in family, update | 1 Comment

My Very First Quilt-Along . . .

. . . or QAL, as it’s known for short. Essentially it’s a virtual community of quilters working independently on a project over a set course of time, reporting progress and pictures via the initiator’s blog and a shared photo site such as Flickr. Quilt-Alongs have been around for years but I’m just now discovering them. (Part of my Late Bloomer syndrome.)

So how did my first Quilt-Along come about? One day in late January I was innocently cruising some quilt blogs and spotted this picture:

Jenny's Urban 9-Patch block-002
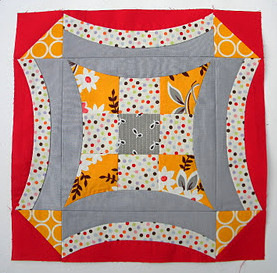
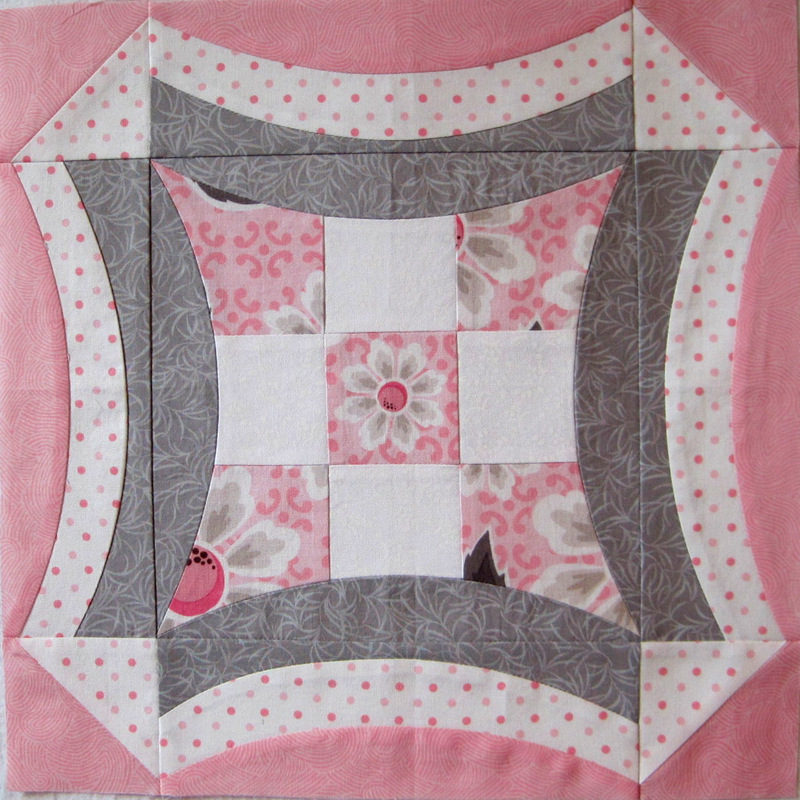
Jenny Pedigo’s Urban 9-Patch Block


The block was designed and made by Jenny Pedigo of Sew Kind of Wonderful, using her own Quick Curve Ruler and a method for sewing curves without pins. Hmmm. Sewing concave and convex seams together without using a single pin? I was skeptical . . . but also intrigued. So I watched the tutorial video on Jenny’s blog, ordered the ruler, and gave it a try. I became an instant convert. And a big fan of Jenny’s, I might add.

Jenny was just getting a Quilt-Along started, the plan being to make a quilt top over 12 weeks — one block a week — using her Urban 9-Patch design and her ruler. A block a week? I can do that, I thought. So — totally on impulse — I joined the Quilt-Along. As if I didn’t have enough other projects in the works.

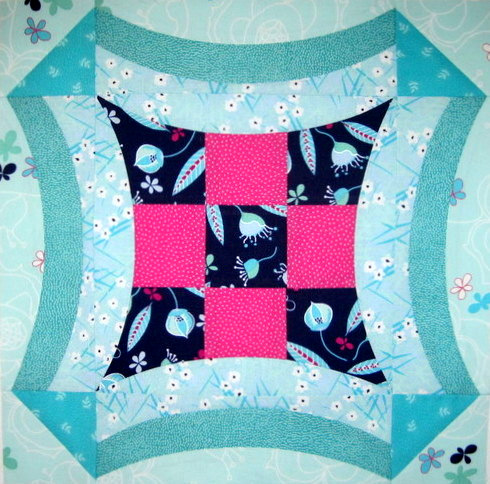
Here’s the first block I made, using a Riley Blake floral:

first urban 9-patch block-001
Dawn’s First Urban 9-Patch Block


I liked the block but I had been saving some other fabrics for just the right project, and I realized this was it. So next came this block, using three fabrics from Mo Bedell’s Party Dress line for Blue Hill Fabrics:

2011-2, Urban 9-Patch block-001
Dawn’s Second Urban 9-Patch Block


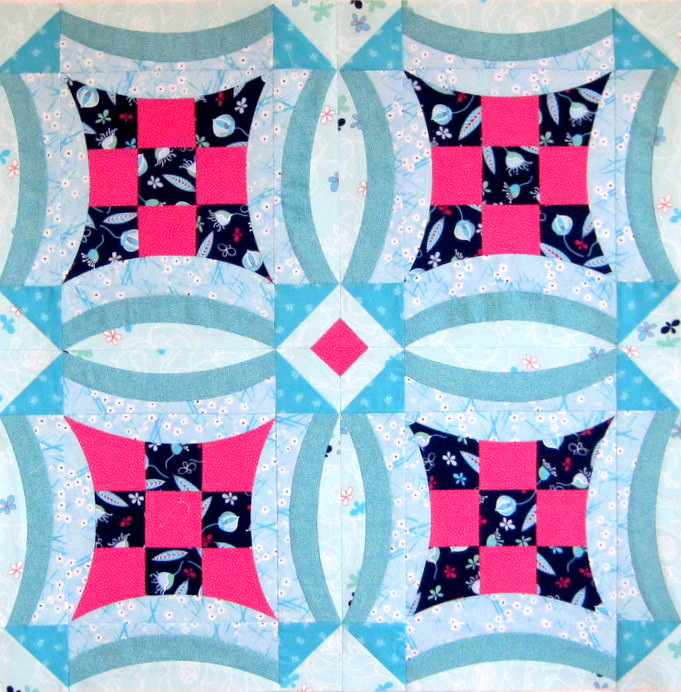
And here are the first four blocks joined together:

urban 9-patch embellished-001
Urban 9-Patch, First Four Blocks

(The fuchsia diamond in the center was my addition to Jenny’s design.)

I was humming along, happily making my Urban 9-Patch blocks, when Jenny introduced her Urban Deco block:

Jenny's Urban Deco block
Jenny Pedigo’s Urban Deco Block


I was captivated by this new design – it’s the Urban 9-Patch block with another row around the outside. Now picture that block without the last strip of fabric that makes the block a square. Can you see the remaining curve as the outside of a quilt? I could! I decided to make a small project testing that idea, so as not to totally abandon my other QAL project.

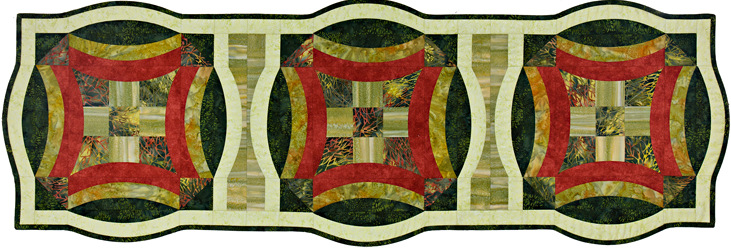
Here is my three-block quilt, made mostly of batiks, with a pale lime Fairy Frost border and dark green batik binding:

9patch-runner-W-002
Into the Woods, Dawn’s Urban Deco Table Runner

I am so pleased with it! And Jenny has kindly given me permission to teach her design. My class, “Jenny’s Urban 9-Patch,” is scheduled for June 9 at the Pine Needle Quilt Shop in Lake Oswego.

Jenny’s Quilt-Along is over now and I’m still several  blocks behind. Time to get back to work.


Posted in Quilt-Along, update | 5 Comments

“Nattering ladies with needle and thread . . .”

I am lucky to own quilts made by two of my great-grandmothers.

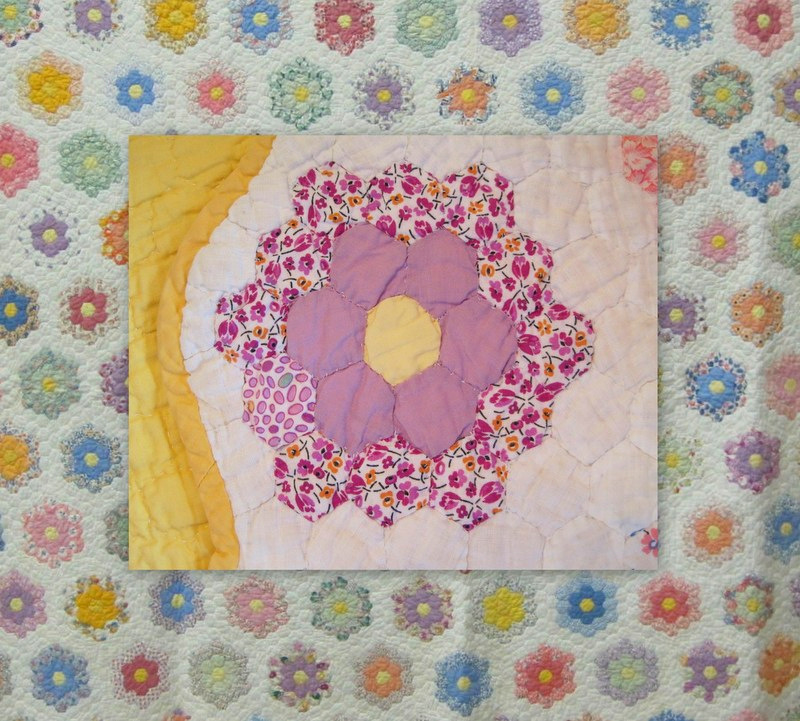
I treasure the Grandmother’s Flower Garden quilt made sometime in the 1930s by my maternal great-grandmother, Grace Violet (nee Watson) White (1873-1964). She was quite imaginative in the way she combined fabrics and replaced fabric she had run out of with something similar. She even fussy-cut some of the hexagons (decades before fussy-cutting came to be called that).

wauka's quilt, with detail
Grace’s Quilt, with Detail


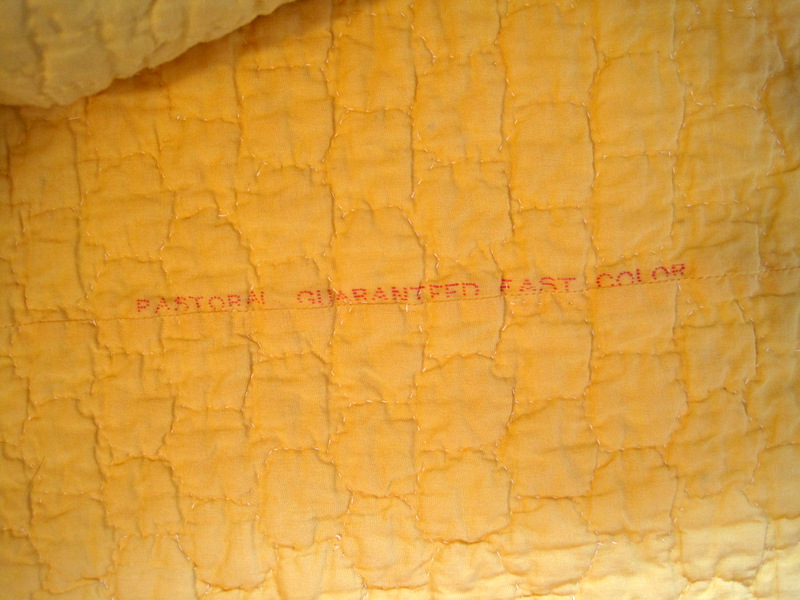
Apparently she didn’t waste a scrap of fabric. Printing from the selvage is visible along seams on the back: PASTORAL GUARANTEED FAST COLOR.

Wauka's quilt, detail of back
Detail, Back of Grace’s Quilt


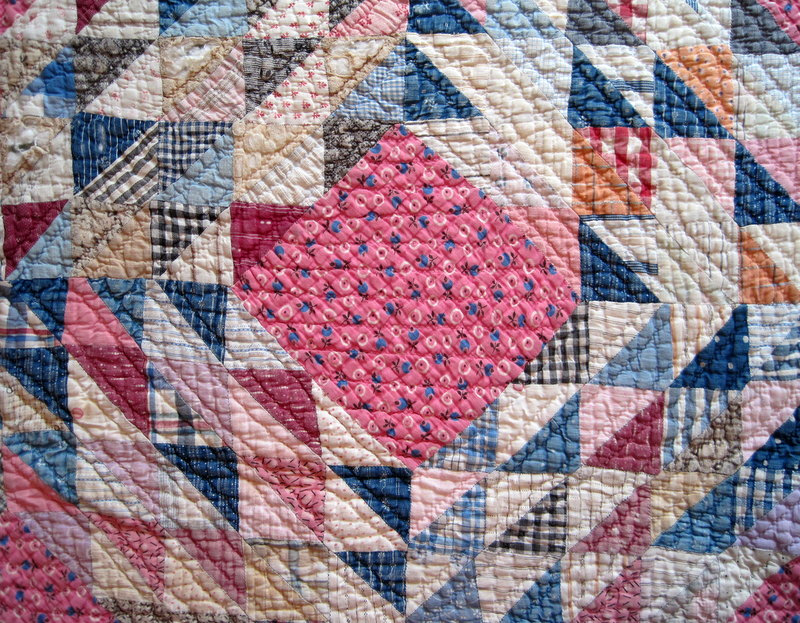
Equally precious to me is the Ocean Waves quilt made sometime in the late 1920s by my paternal great-grandmother, Magdalena (nee Naegeli) Weissenfluh (1862-1929). It’s not in very good condition but it is greatly loved.

Ocean Waves Grandmother Lena
Detail of Lena’s Ocean Waves Quilt


My father, who at 88 is sharp as a tack, gave me the back story on this quilt and the frame it was quilted on, which hung from the ceiling of Grandmother Lena’s home in eastern Oregon:

“Grandmother died in February 1929, some six months before my sixth birthday. My memories of her life are very fragmentary. I do remember, though, that when they [Grandmother Lena and her fellow quilters] were sewing the quilt top together they had me iron the scraps, which came out of the ragbags all wrinkled. Some of those patterns appealed to me and some didn’t. I could still point to some of those on the quilt. The quilt top was sewn on a treadle sewing machine.

 “Now to the quilting frame: It was four pieces of wood, perhaps one inch thick, two or three inches wide. Two of them were a foot and a half or two feet longer than the quilt was wide. The other two were shorter, maybe four feet long. Each piece of wood had a row of holes about two inches apart running the full length of the piece. Lay the two long pieces parallel to each other and perhaps three feet apart. Lay the two shorter pieces across the others, near the ends, making a rectangle of the whole thing. Think of using four good sized nails dropped through the holes (the holes being large enough that the nail would be a loose fit within it), anchoring the four pieces together.

 “Then think of the quilt rolled up on one of the two longer pieces, with enough of the quilt pulled off to reach to the other longer piece. Sort of like film in a camera, being spooled off one spool onto another. Now think of four eye bolts anchored into the ceiling with a cord dangling down from each. Each cord has a loop on the bottom end big enough to slip over the end of the long pieces. Think of the cord being of a length that would put the quilting frame at something like bosom height of a woman seated in a kitchen chair.

 “Two chairs on each side of the frame, four nattering ladies with needles and thread, pushing the needle first from top to bottom, then reaching under the quilt and pushing it back from bottom to top. The quilters were my grandmother, my mother, and my aunt Mandy, plus any other woman who happened to show up. As one panel was completed, the nails would be temporarily removed, and the completed portion of the quilt would be spooled onto the receiving spool and then the nails dropped back in place and the work continued until all the entire quilt has been spooled from one side of the frame to the other.”

Isn’t that a marvelous description?

Sometime in my quilting life, I plan to make a Grandmother’s Flower Garden quilt and an Ocean Waves quilt, in homage to my great-grandmothers Grace and Lena.


Posted in family, hexagons, update | 4 Comments

New Kid in Town

Johnny-come-lately, new kid in town . . . yep, that’s me. Definitely a late bloomer. It’s taken a while but I have finally launched this website and blog.

Until a short time ago, I didn’t pay much attention to blogs. All I knew about “blog” was that it was a shortened version of “web log.” Oh. My. Word. What rock have I been under? I had no idea there were so many blogs out there – millions of them – on every subject under the sun.

Does the world really need one more sewing/quilting blog? I certainly hope so. My goal is to have a site so interesting, helpful, inspiring, and fun to read that it will prompt frequent return visits. So here we go!

Elvis has left the building . . .

The King

. . . and Dawn has entered the blogosphere.


Posted in update | 6 Comments