Category Archives: snowball blocks

Template Tool for Triangles: A Tutorial

Last August I posted a tutorial about using template plastic as a sewing guide when making snowball blocks (you can see the post here). I noted that the template could be used with just about any block that calls for a triangle to be made from a square or rectangle.

Using a template eliminates the need to draw lines marking the diagonal — for snowball or square-in-a-square blocks, for example — or ¼” inch on either side of the diagonal, as you might for Half-Square Triangles made from two squares of fabric. Drawing lines on fabric may not seem like a big deal but it takes a surprising amount of time, especially if you are working on a big project.

The template I made back in August measured 2½” x 4½”, the perfect size for the 6″ snowball blocks I was working on at the time. When I started working earlier this year on my version of Reach for the Stars, a medallion sampler quilt with triangles of all sizes in every single block, I made a larger plastic template with a couple of modifications.

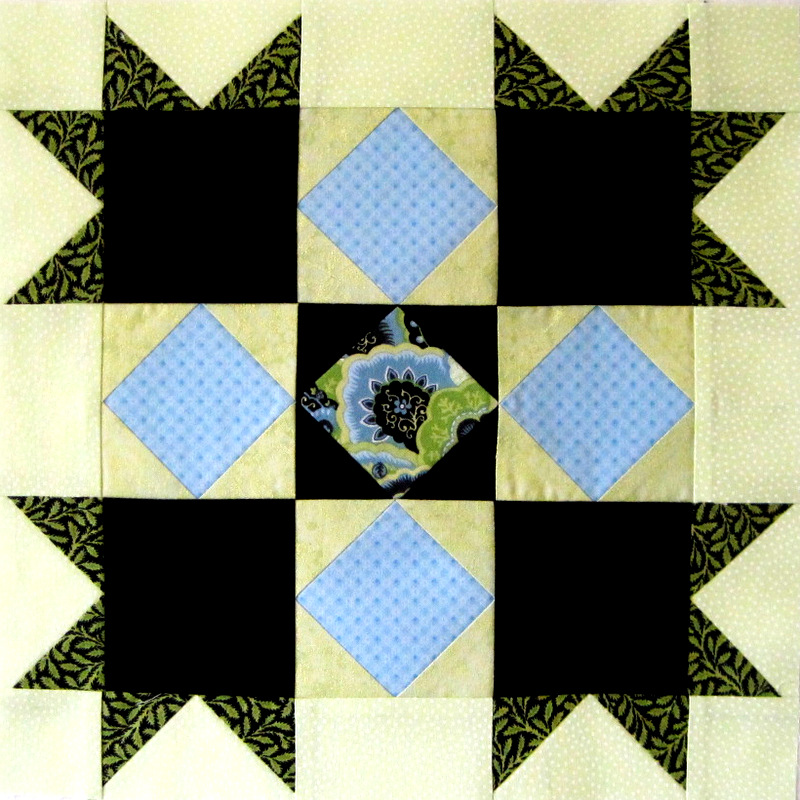
I’ll show you how I used it in Block 7 of my Reach for the Stars project:

2014-4 RFTS Block 7

See the five square-in-a-square components in the center of the block? They’re the blue and green ones and the one in the very middle of the block.

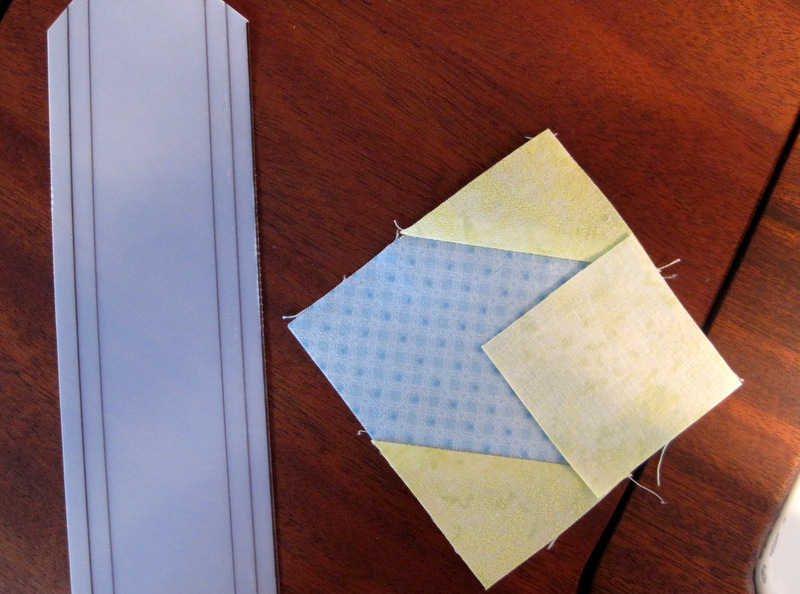
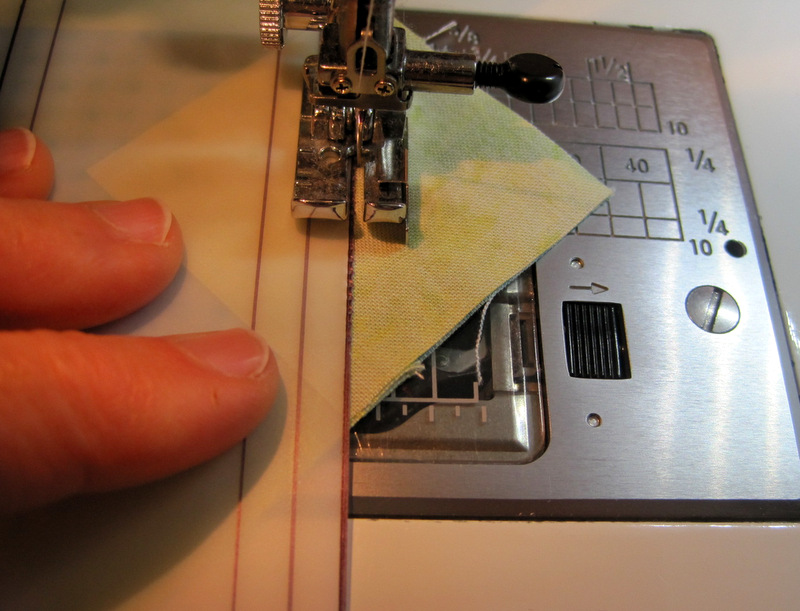
For each square-in-a-square, I first sewed two squares on opposite corners, trimmed the seam, and pressed the seam toward the corners. Now I’m getting ready to sew the third square on:

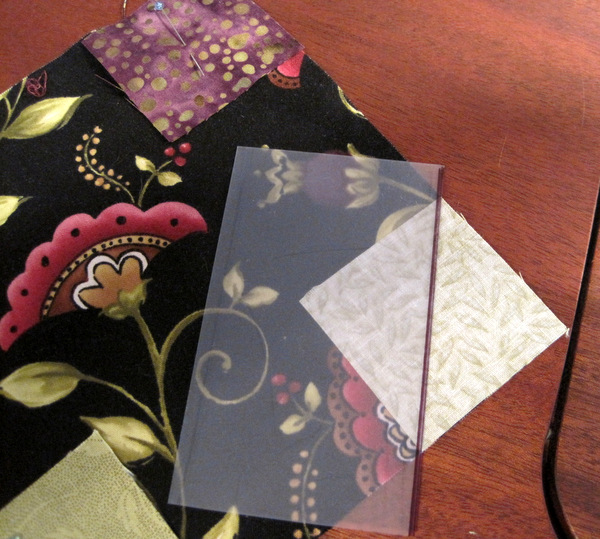
template tool 1

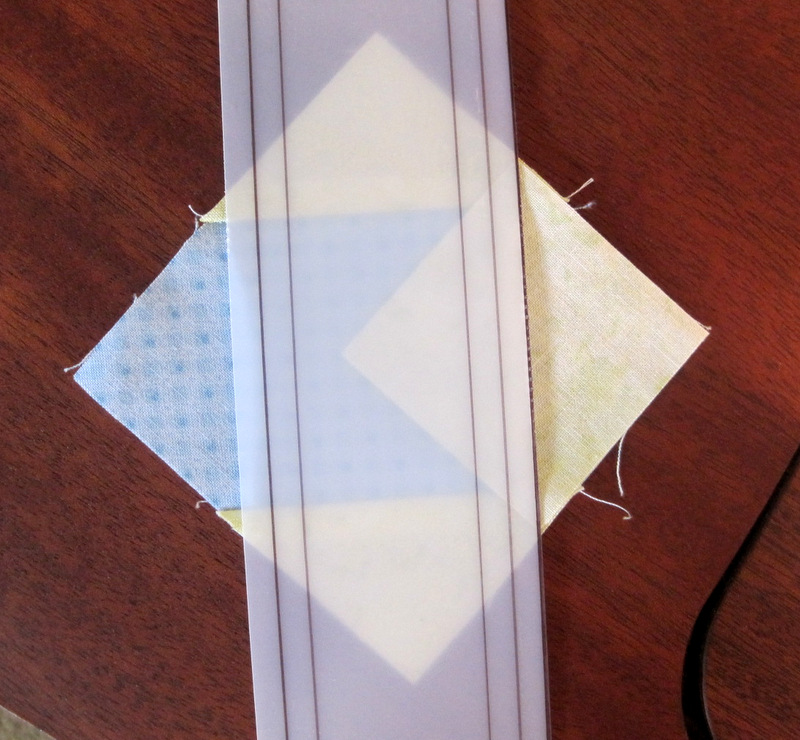
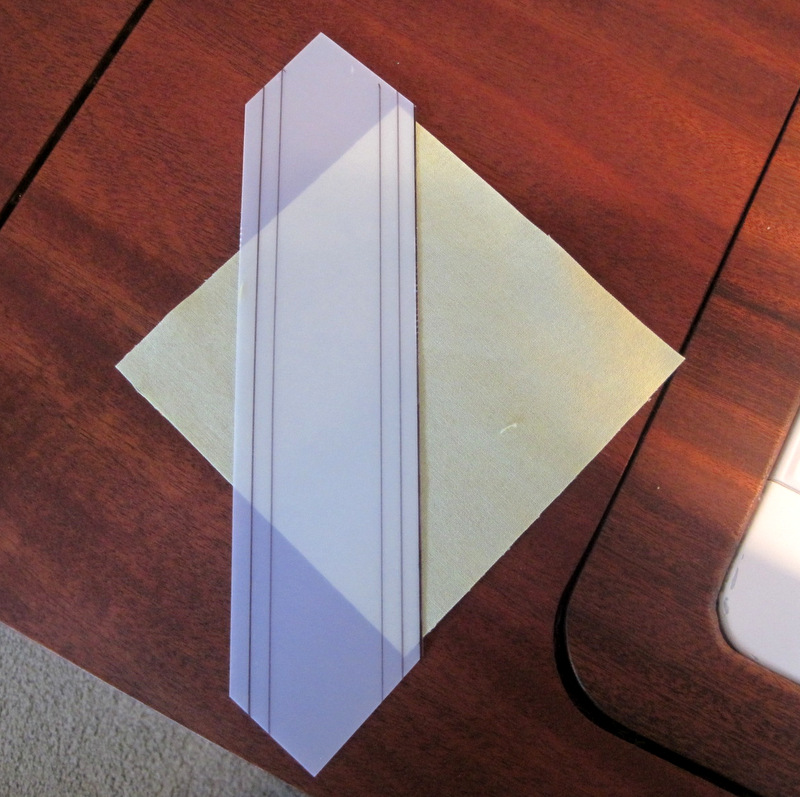
I lay the template on top of the fabric with the right edge of the template lined up with the diagonal of the square:

template tool 2

Because I can see through the plastic, I can easily see that my template is positioned correctly. Did you notice that the right edge of the template is marked with black ink? That helps me see the edge of the tool on light fabric. When I’m sewing on dark fabric, I used the other edge.

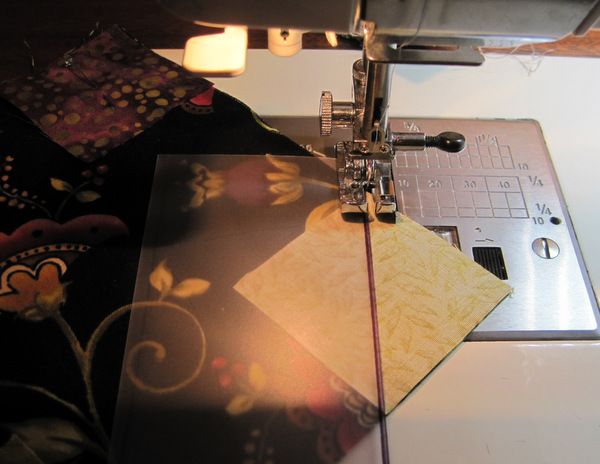
Now I’m ready to sew. With the needle down I position the fabric right next to the edge of the template . . .

template tool 3

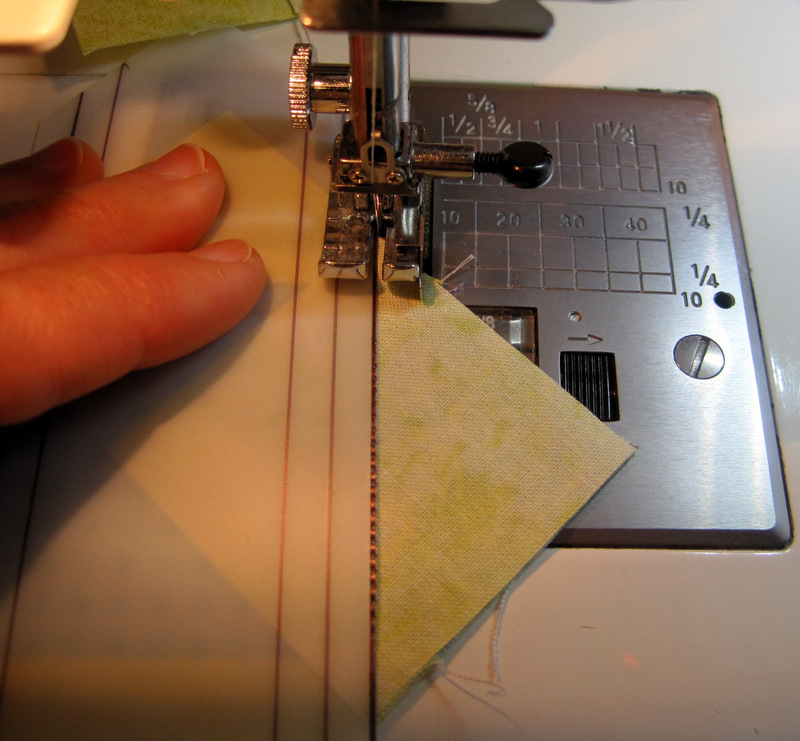
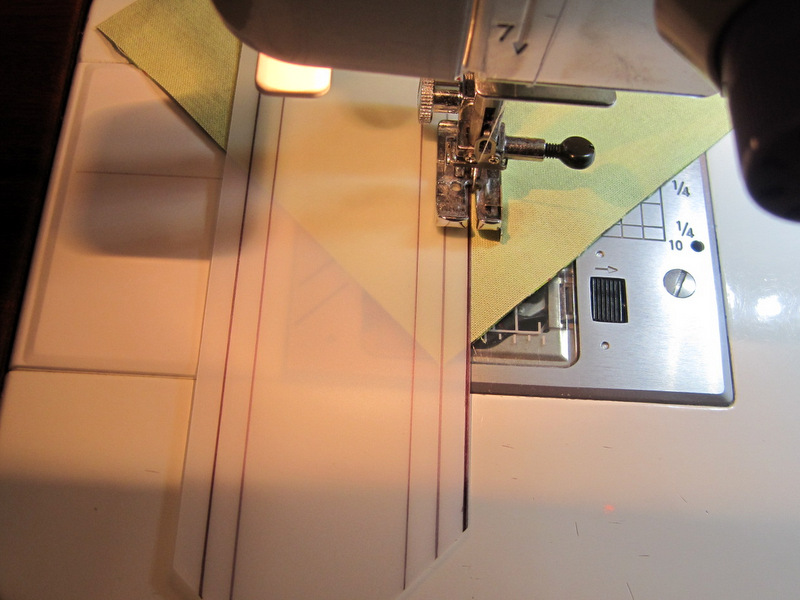
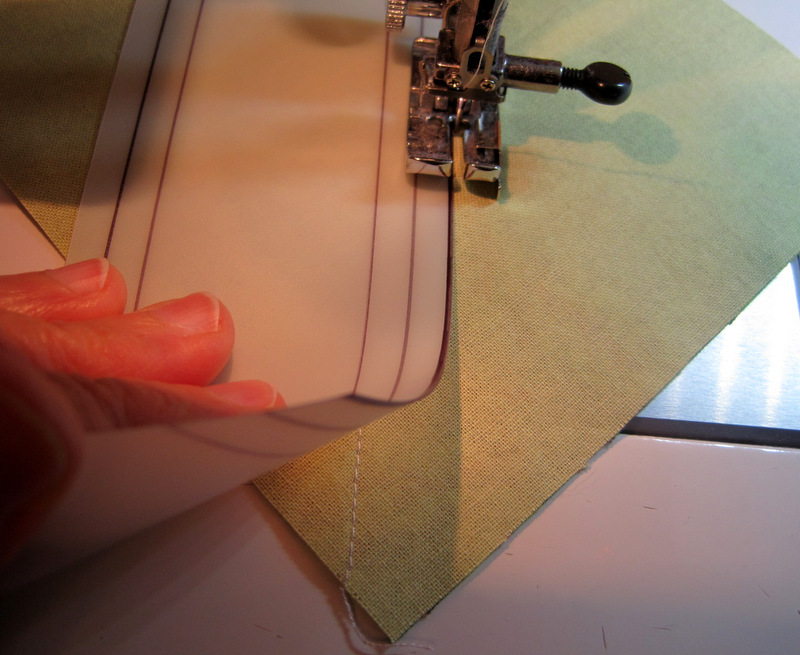
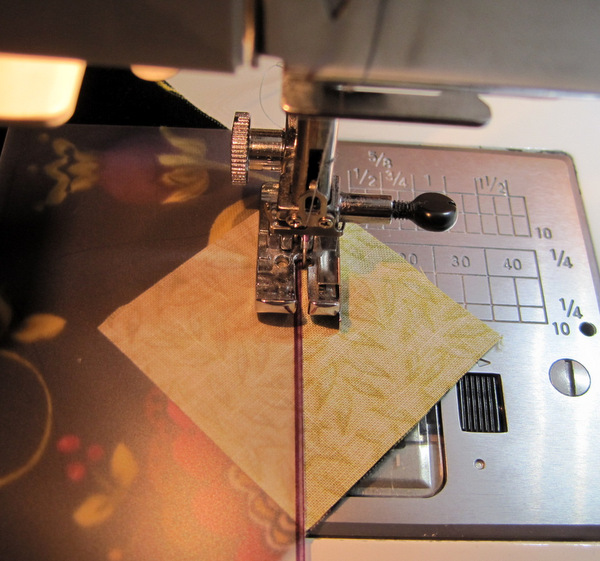
. . . and start sewing. As I stitch I can see that the edge of my template is in position along the diagonal of the square. My left hand on the template keeps it firmly in place:

template tool 4

On bigger pieces I use both hands to keep the fabric and template in place.

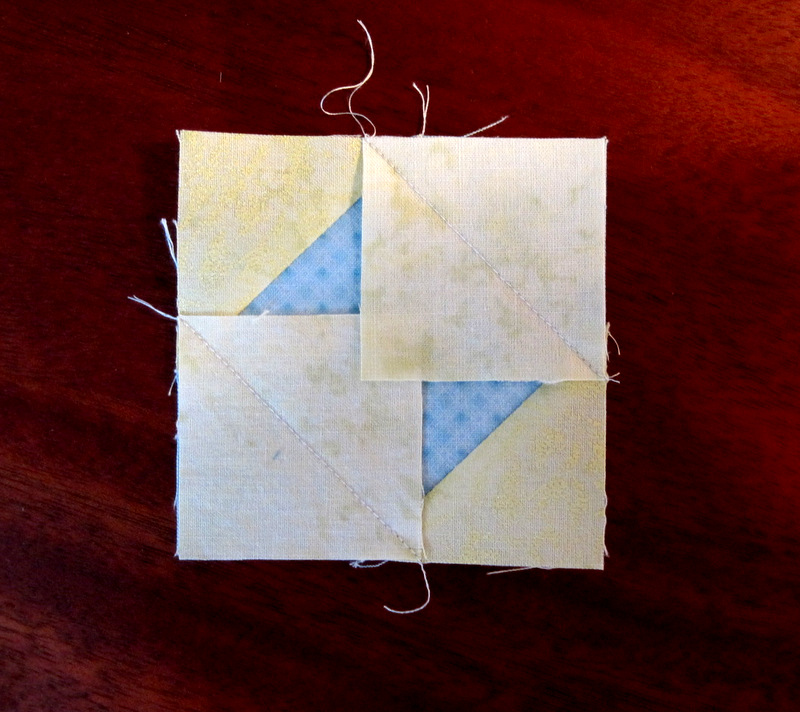
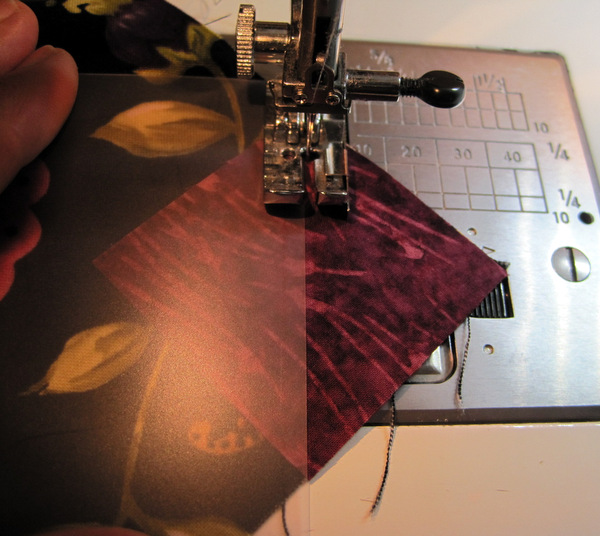
Here is my square-in-a-square, with the two edges ready to be trimmed and pressed:

template tool 5

(Every now and then as I am sewing next to the template I let the needle get too close to the template and it takes tiny bites out of it. That’s why you see what looks like perforation marks on the edge. I can still use the template for quite a while but eventually I will need to make a new one. And change my needle.)

Now what about those lines on the inside of the template, you ask? They are exactly ¼” and ½” in from the edge on both sides. When I am sewing Half-Square Triangles (HSTs) made from two squares, the ¼” line is on the diagonal and the edge of the template is right where it needs to be. To illustrate, I have two 5″ squares, right sides together, ready for the first line of stitching:

template a

See how the ¼” line is on the diagonal of the squares?

Stitching the first line:

template b

When I flip the block around to sew the second line, that ½” line on the template is directly on top of my first stitching line. I am lifting up a corner to show you what I mean:

template c

Strictly speaking, that ½” marking isn’t necessary but I like it because it gives me one more way to test the accuracy of my stitching.

Would you like to make your own template? Here’s what you  need:

— a strip of template plastic (frosted or clear) about 2¼” x 10″
— a piece of scratch paper (8 1/2″ x 11″ is perfect)
— a clear acrylic ruler (my favorite size for this purpose is 4″ x 14″)
— an Ultra Fine-Point Sharpie (or other fine point permanent marking pen) in black

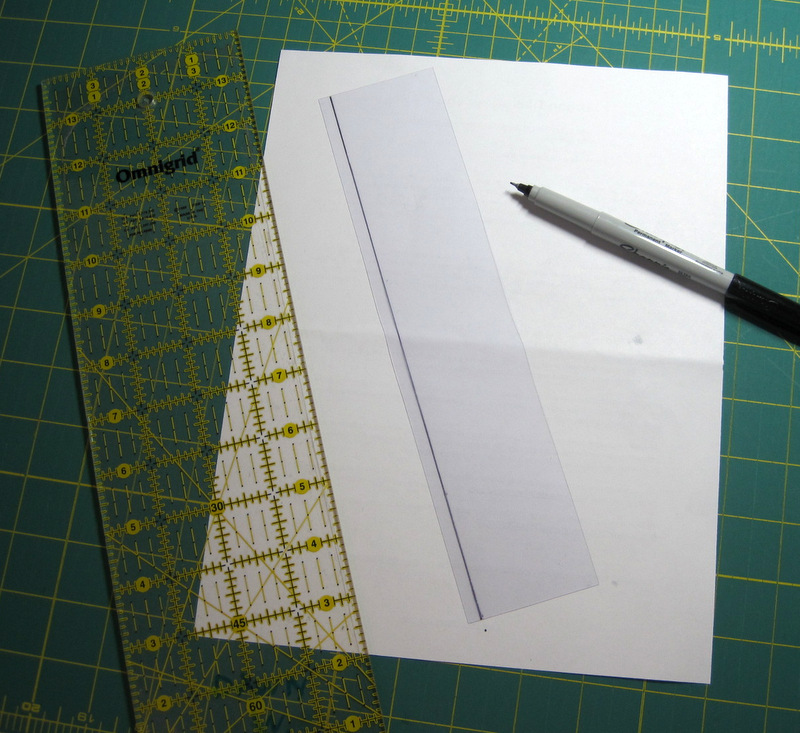
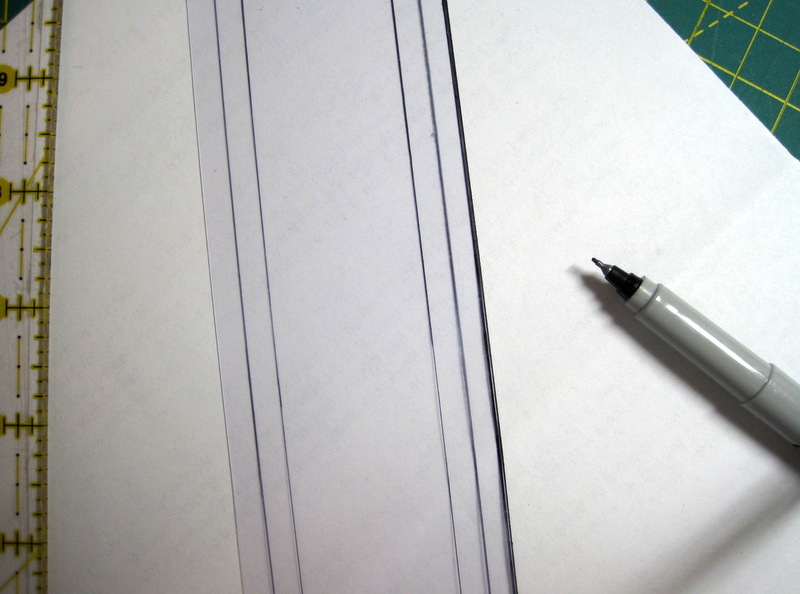
1. Lay the strip of plastic on the scratch paper and, using a ruler and Ultra Fine-Point Sharpie, draw a scant ¼” line from one long edge:

template 1

The measurement needs to be scant  because 1) the line you draw with the pen will add to the measurement and 2) when using the template you will be stitching right next to the edge of it.

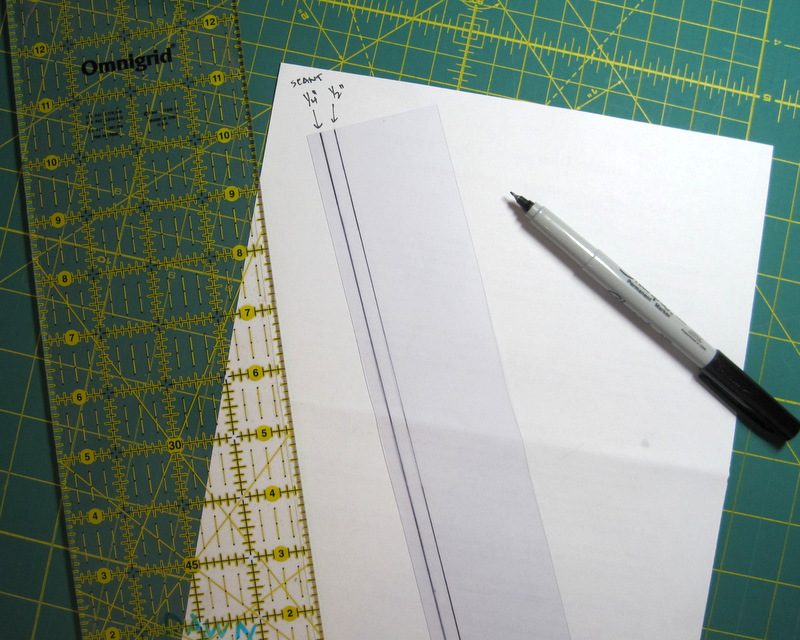
2. Draw a line exactly 1/4″ away from the first one:

template 2

3. Repeat for the other side:

template 3

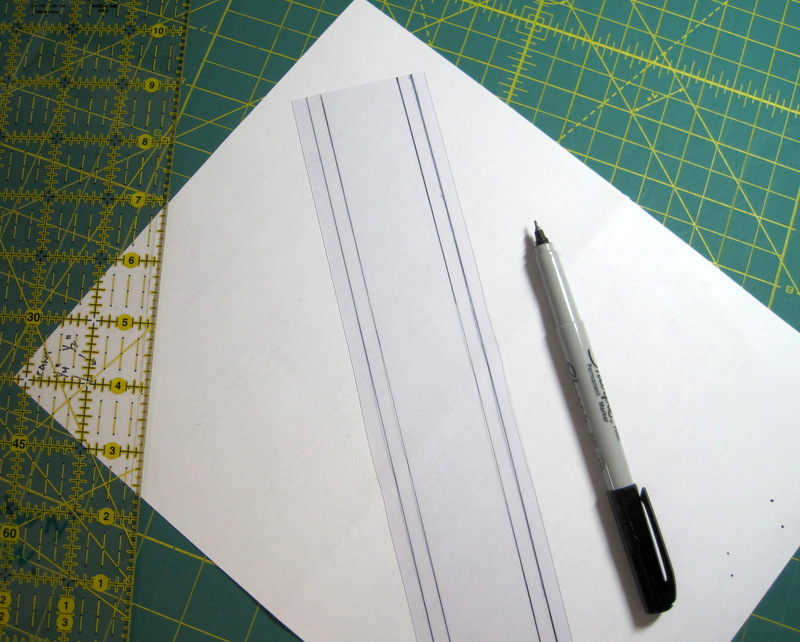
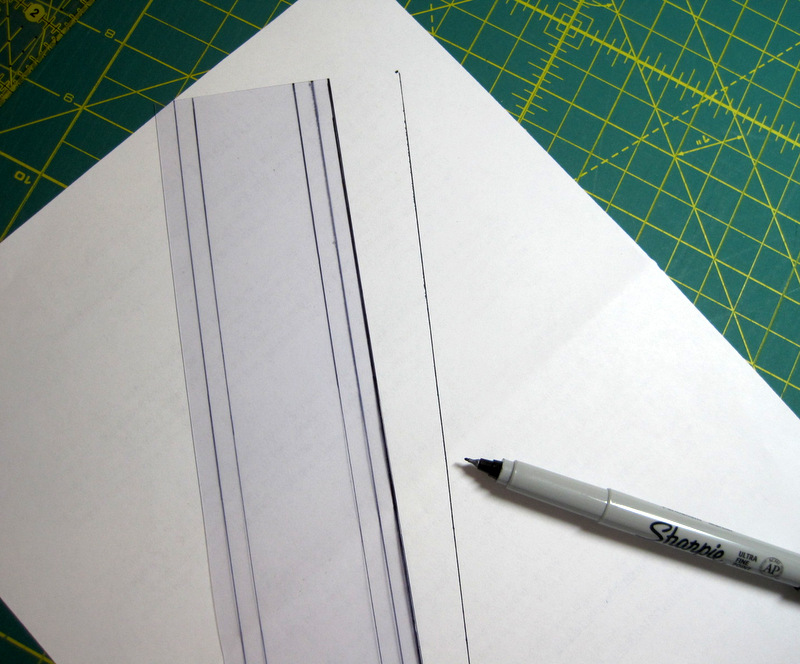
4. Lay the ruler very close to one edge and draw a solid line. You shouldn’t be able to see the edge of the plastic at all:

template 4

The reason for working on top of scratch paper:

template 5

Wasn’t that easy?

If you decide to make this template tool, please leave a comment to let me know how it’s working for you. Happy sewing!


Posted in Reach for the Stars sampler quilt, snowball blocks, stitch-and-flip corners, update | 31 Comments

Playing Around with the Twist Block

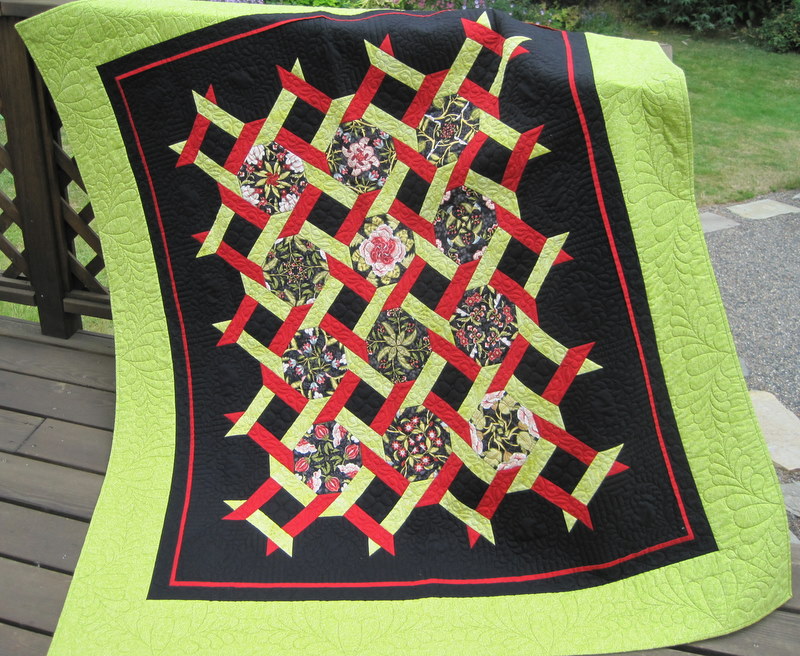
Time to show you more of the project I’ve been working on since my last post. I actually started this project over a year ago, when I got a bug to make a new quilt based on my 4-Patch Wonder with a Twist pattern. This is the first quilt, which is on the cover of the pattern:

2011-9, It's All in the Twist, 57x65

The 12 snowball blocks are very different from each other but they are all from the same piece of focus fabric, made into 4-Patch Wonder blocks (my name for blocks made of four identical layers of fabric that are stacked, cut in squares, and then rotated to make a pleasing symmetrical design). An alternating block — red and green in this case, on a black background — helps create the illusion of interlocking strips. The quilt looks contemporary but the twist block actually dates back to 1870.

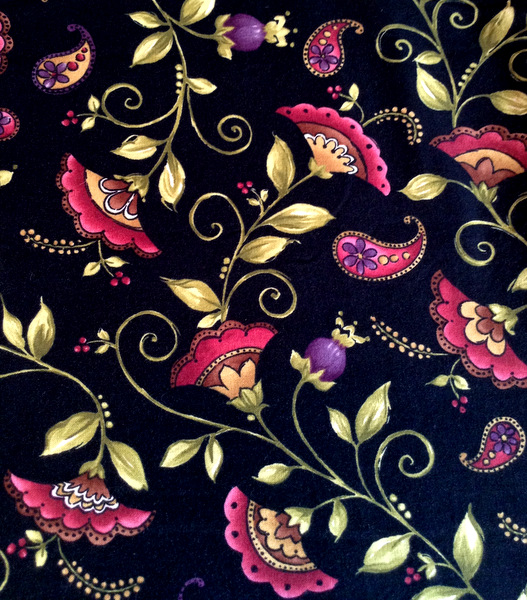
The fabric I had in mind for a second version was this lovely print, Ella, by Kathy Brown for Red Rooster Fabrics:

Ella fabric

I was attracted to the folk-art feel of her design and the rose and purple tones set off by green vines on a black background. My thought was to make the lattice strips out of three colors — rose, purple, and green — instead of two colors as I did in my first quilt. And I thought the Ella print would make great 4-Patch Wonder blocks

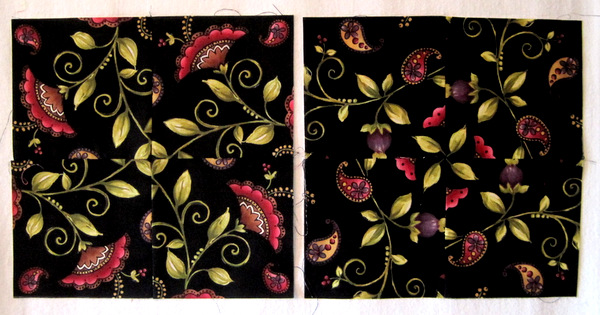
Trouble was, the first couple 4-Patch Wonder blocks I made were — well, they were pretty but not nearly as pretty or as interesting as the original fabric:

Ella 4-pw blocks

I abandoned the plan for 4-Patch Wonder blocks and simply cut squares. Then I dug into my stash for the rose, purple, and green fabrics needed for the twist strips. I pulled out quite a few pieces, all reading as textured solids. Pretty soon I had several options for each color. (What does this tell you about the size of my stash?)

Somewhere along the line I got the idea of using four different fabrics for each of the three colors. That’s right — 12 different fabrics for the twist strips. I just about drove myself crazy deciding which strips would go where, and then devising a way to keep track of them once their positions were assigned. Maybe that’s why I made just a few blocks and put the project away for over a year. Another Work-in-Progress, languishing . . .

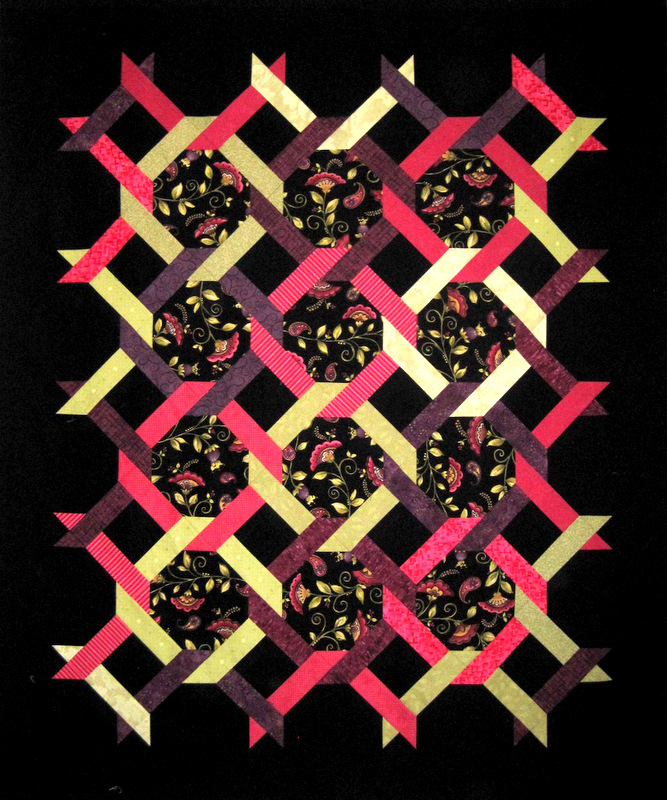
Out it came last week, ready for some close personal attention, and here is the result so far:

Ella 800p

I’m very pleased with it! Still to come: borders. With quite a few 2½” strips left over from the lattice, I’m thinking about making an inner border of 2″ squares using all 12 lattice fabrics. I hope you’ll check back in a few days to see what I’ve done.


Posted in 4-Patch Wonder, faux-kaleido quilts, snowball blocks, update | 5 Comments

The Fastest Snowball Block Ever!

I’m working on a quilt (another Work-in-Progress, begun over a year ago) that contains several snowball blocks — you know, the ones that have a triangle sewn to each corner, like this:

corner triangles #8

I’ve seen these edges referred to as foldover corners and stitch-and-flip corners. Whatever they’re called, the usual method of making them is to place a small square in each corner of the larger square, sew diagonal lines from corner to corner, trim the seams, and press the resulting triangles to complete the square.

Pretty basic, pretty fast. Except that it’s usually necessary to draw a stitching line on the small squares and sometimes to pin them to the larger square. It can get pretty tedious drawing all those lines on fabric, and it’s surprisingly difficult to stitch a perfectly straight diagonal line, especially when you are starting out at a corner.

Well! I recently learned a new way to sew these squares that doesn’t involve either pins or drawing lines. It’s faster than the old method and has resulted in improved accuracy in my stitching. I experimented a bit with the method and the materials, and this is what I came up with that works best for me:

corner triangles #1

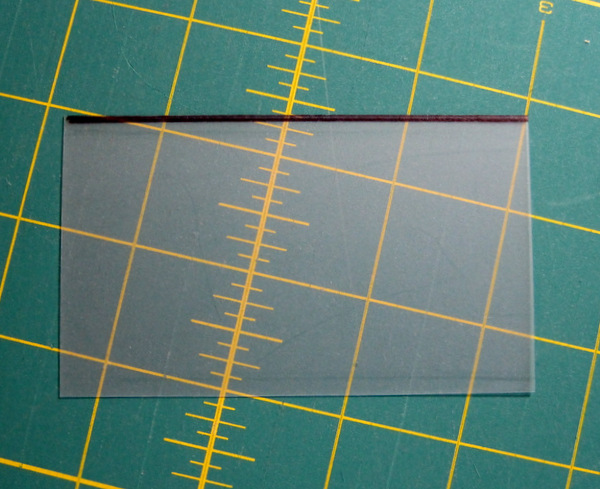
It’s a piece of template plastic, about 4½” wide and 2½” long, the perfect size for a block that finishes at 6″. I placed the plastic on a piece of scratch paper and, using an acrylic ruler and black Fine Point Sharpie pen, drew a thin line along one long edge. You’ll see what the dark edge is for in a moment.

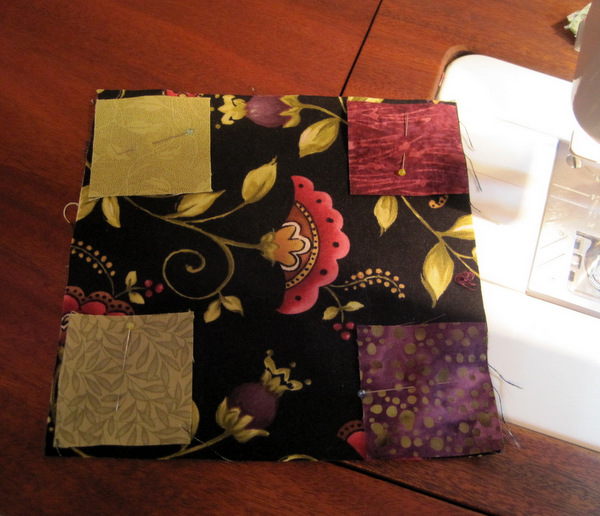
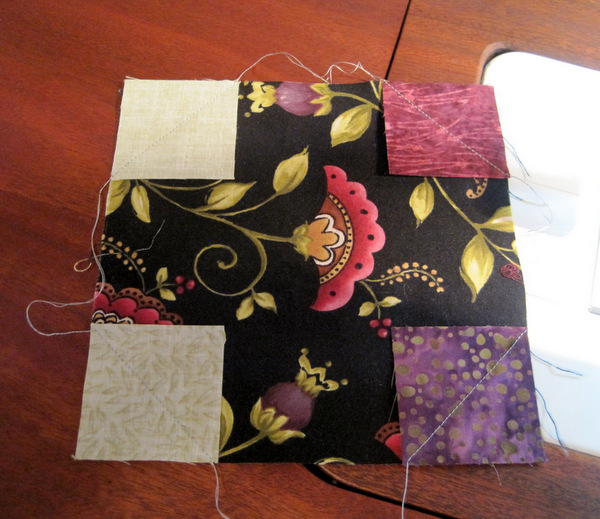
Here is my large square and the four smaller squares I need to make the corner triangles:

corner triangles #2

(The only reason I have pins in the smaller squares is to make sure they are in the correct position for the quilt I am making. If I were using the same fabric in all four corners, I wouldn’t need pins at all.)

I start by positioning one of the smaller squares right side down in one corner of the larger square. Then I lay the template plastic right along the stitching line, from corner to corner, with the edges of the template plastic extending beyond the beginning and ending points of the stitching line. The inked side of the template plastic helps me see the edge of the plastic better on light fabric:

corner triangles #3

Next I position the fabric with my needle (in the down position) right next to the template at the exact corner of the small square. Holding my left hand (not shown in the photo below) firmly on the template plastic, I start stitching right at the corner:

corner triangles #4

You can see the needle is right next to the edge of the template plastic, eliminating the possibility of straying off the stitching line:

corner triangles #5

It feels a little bit like stitching in the ditch, with the edge of the template plastic serving as the ditch. Being able to see the fabric through the plastic helps me make sure the fabric isn’t shifting.

I use the uninked long edge of the template on dark fabrics, as it is easier to see the needle as it goes in and out right next to the edge of the template plastic:

corner triangles #6
I sew all four corners in this manner, rotating the large square as I go and not cutting the thread between corners:

corner triangles #7
Now all I have to do is cut the threads, trim the seams, and press. Voila! My snowball block is done:

corner triangles #8
This method works for flying geese blocks, sawtooth edges, just about any block that calls for a triangle to be made from a square or rectangle. The templates can be made with cardboard or other stiff materials, but I’m sticking with template plastic because I like being able to see through it as I sew along next to it. I’ll make larger templates for larger blocks.

My thanks to Kelly at BlueBird Sews for introducing me to this new method. I love learning from fellow quilters!


Posted in snowball blocks, stitch-and-flip corners, tutorial, update | 8 Comments