Category Archives: face masks

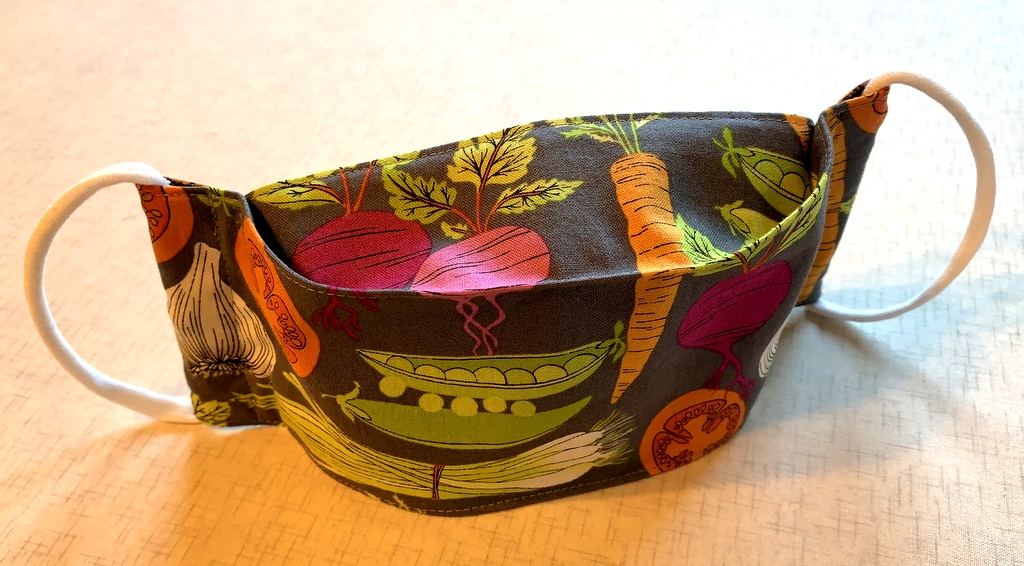
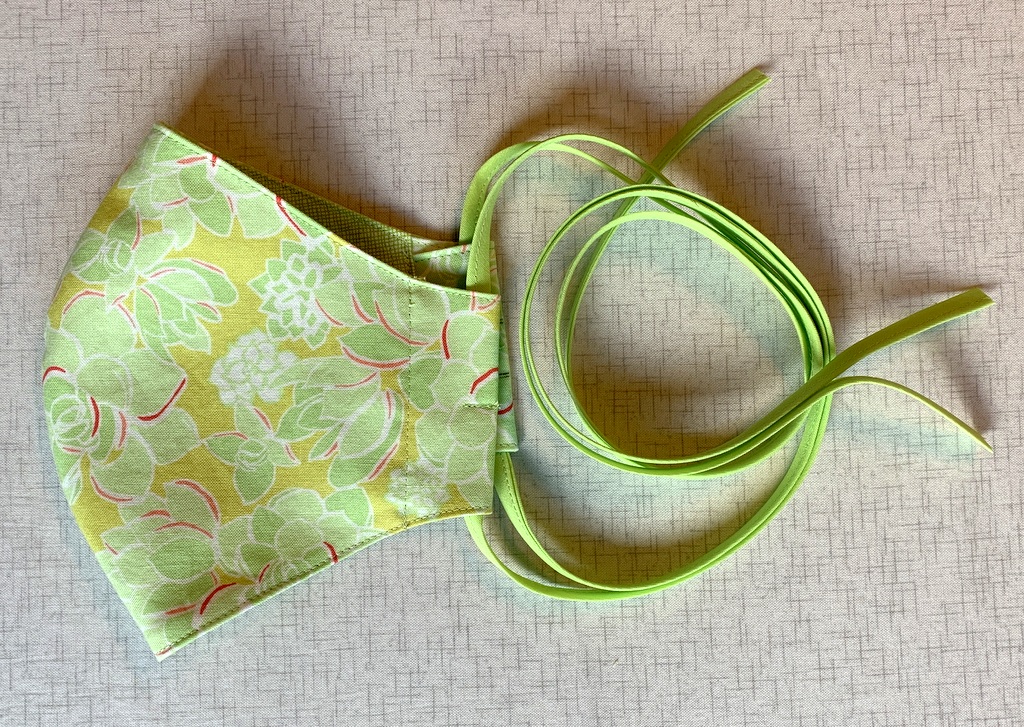
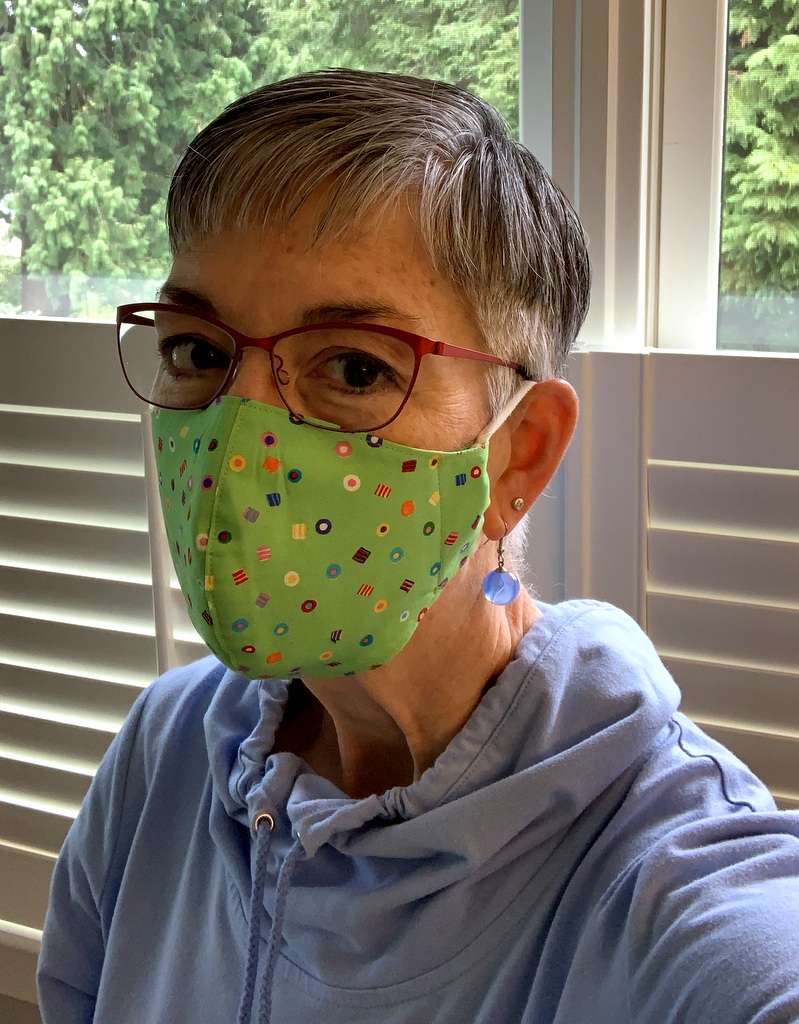
My Feedbag Face Mask, Modified

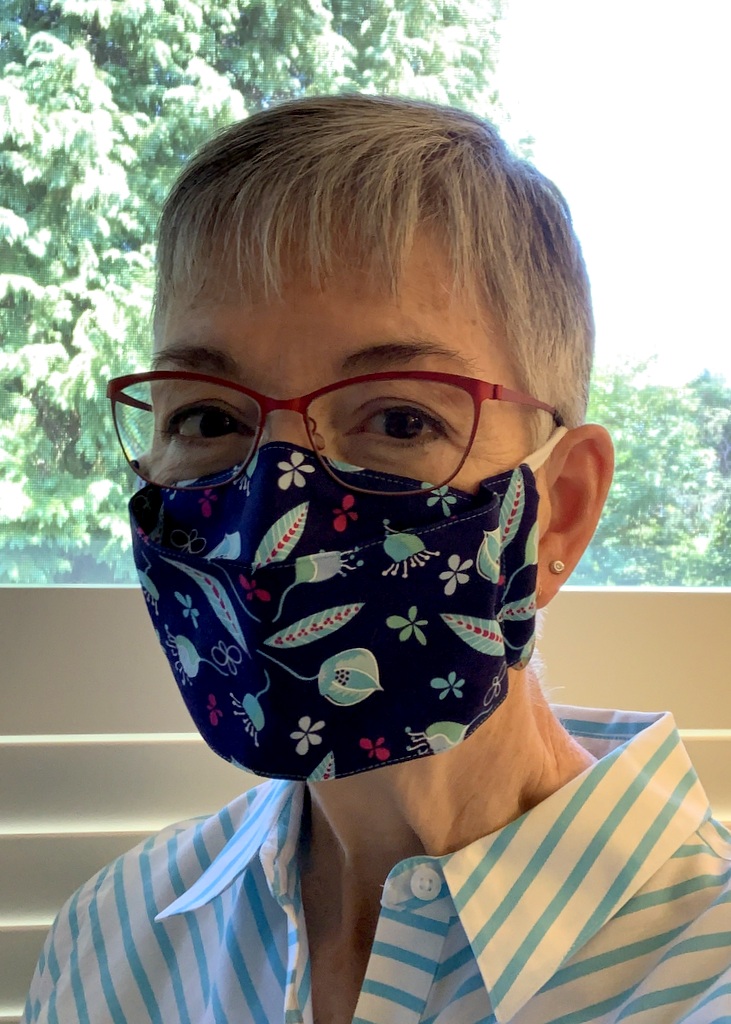
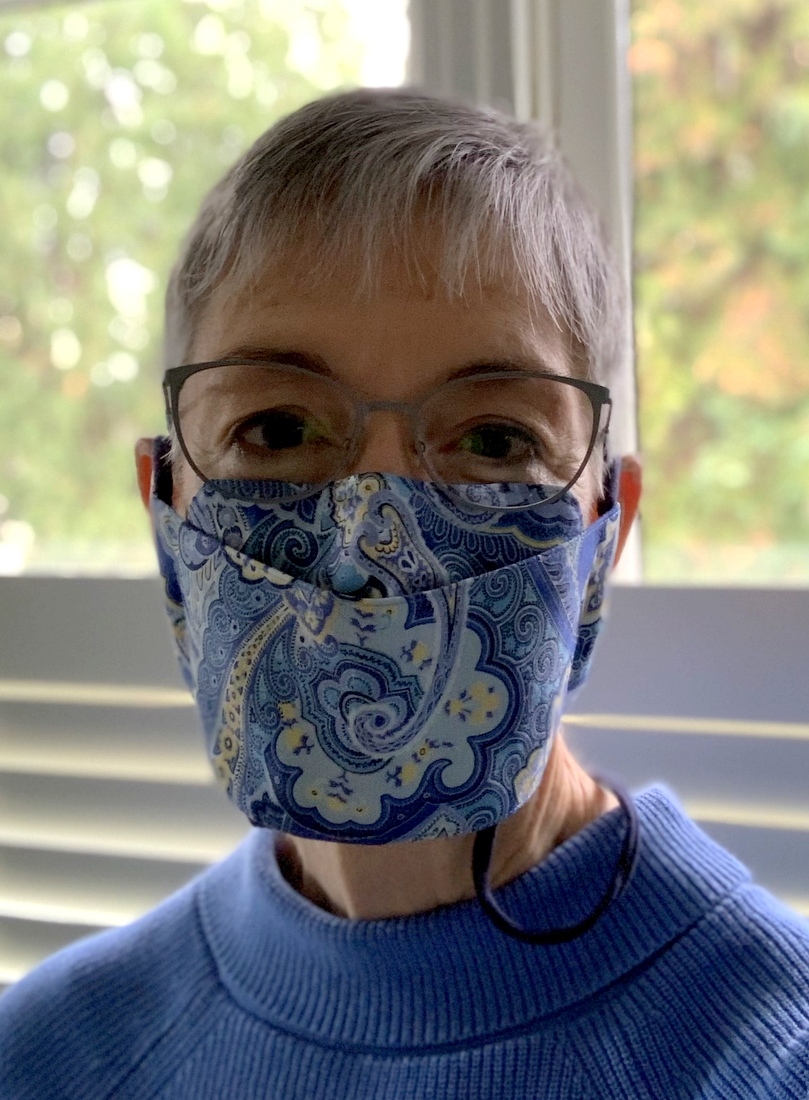
I made myself a new face mask yesterday using the excellent free mask pattern from SeeKateSew. In the process I made a second modification that not only makes the mask fit my face better, it also eliminates one of the final sewing steps. Gotta love that! Here’s a look at my new mask:

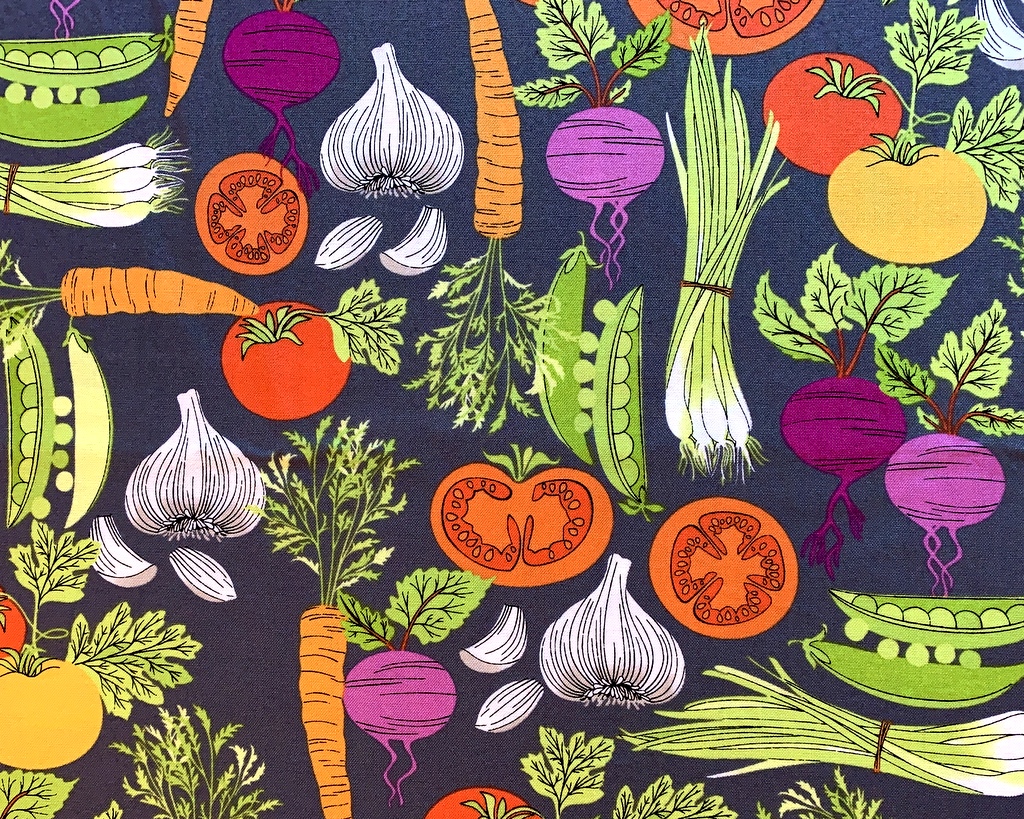
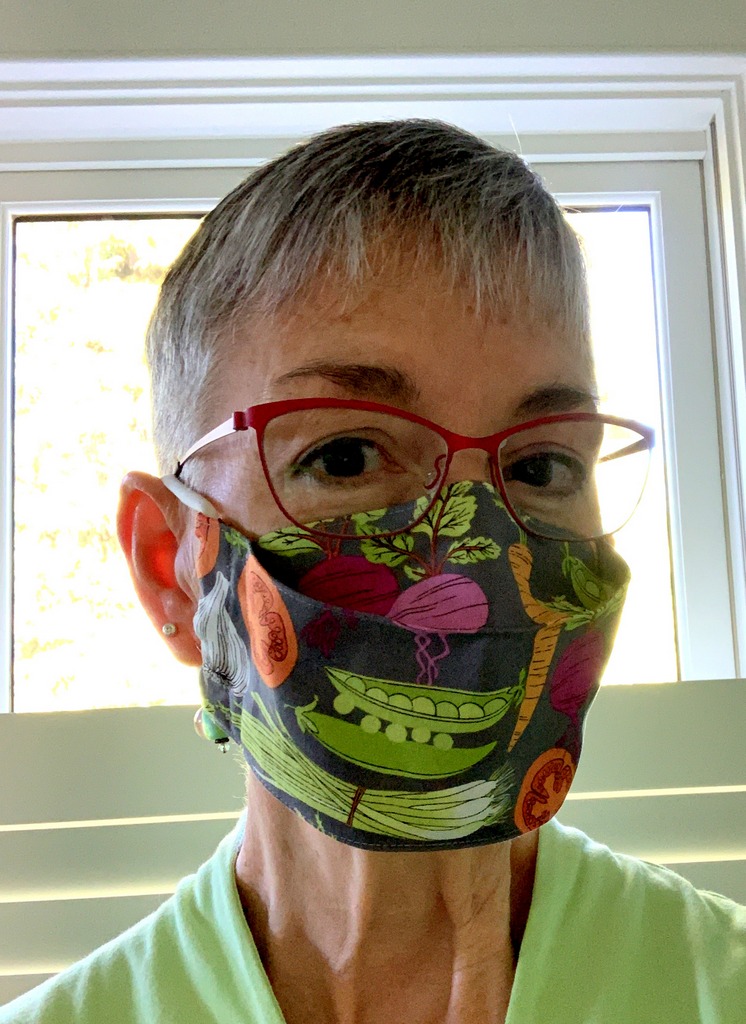
Kate calls her design the 3D Mask but in my family it’s known as the Feedbag Face Mask, thanks to an observation my twin sister Diane made last year about my first effort involving a rather unfortunate choice of mask fabric on my part:

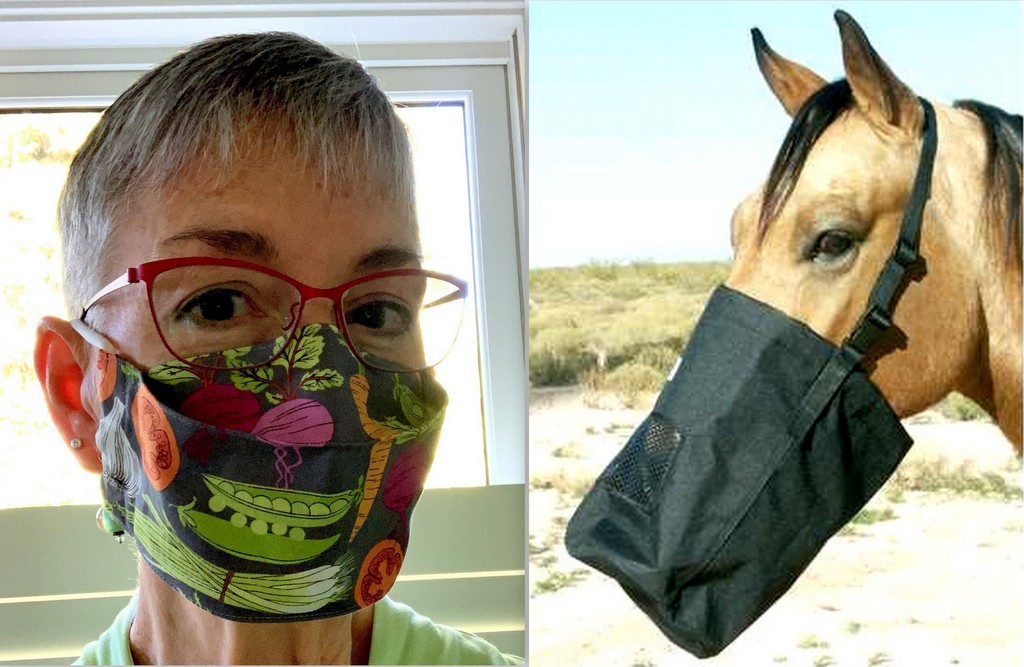
(You can read about it here. It still makes me laugh when I see that photo with the peapod lips and teeth.)

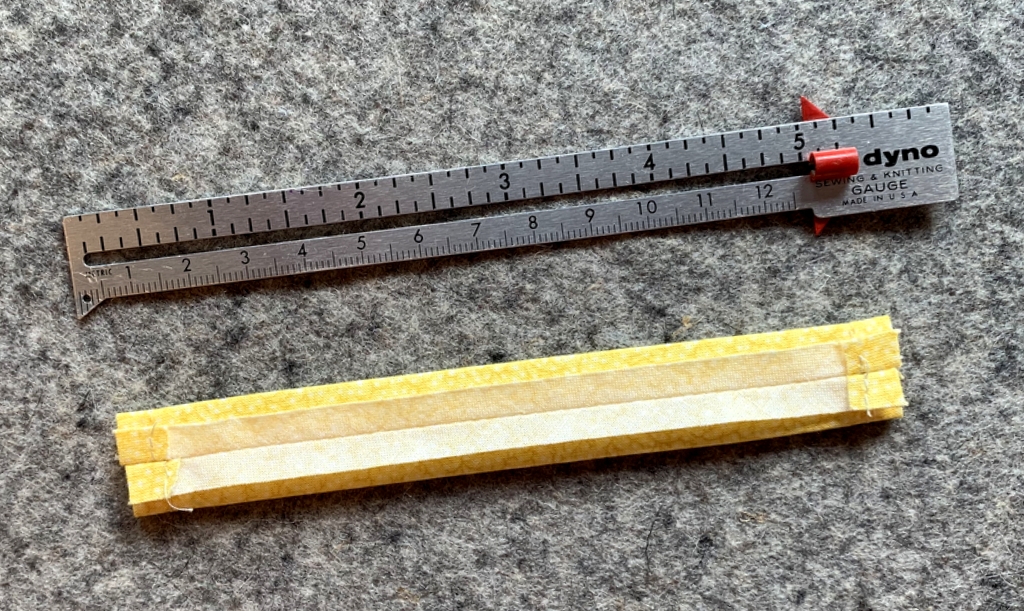
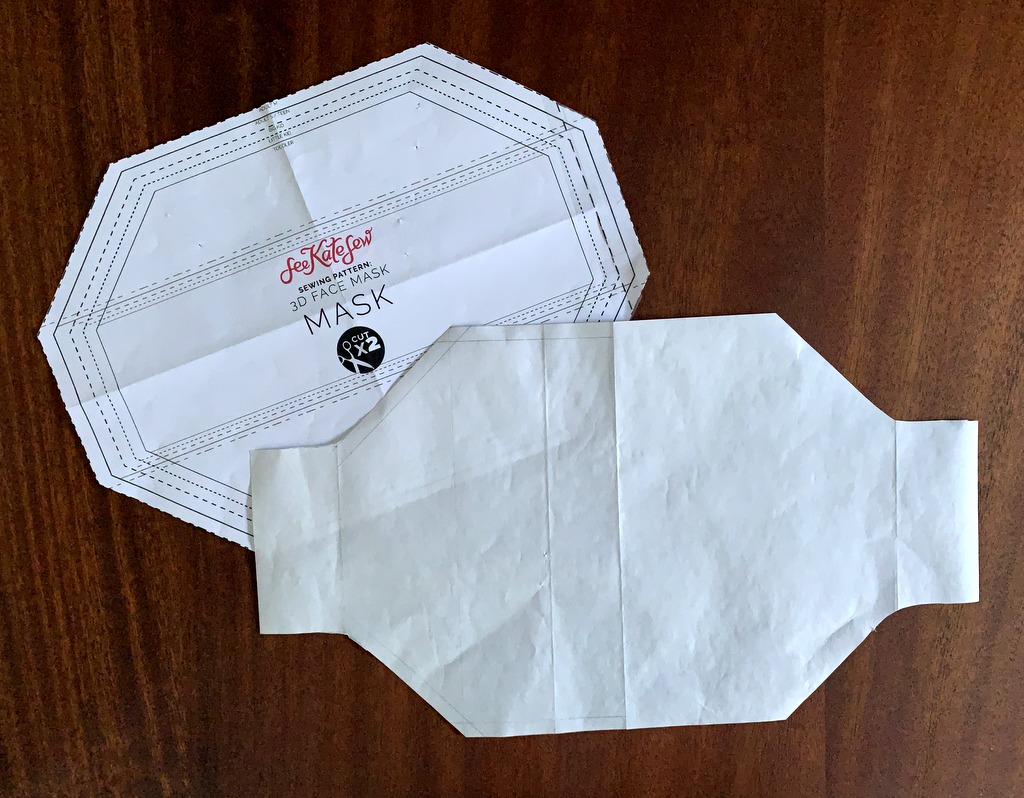
Kate’s pattern is essentially an elongated octagon. I extended the ends to allow for a wider casing for the earloops. That was my first modification, made last year. What you see below is her pattern along with the freezer paper pattern I made from it:

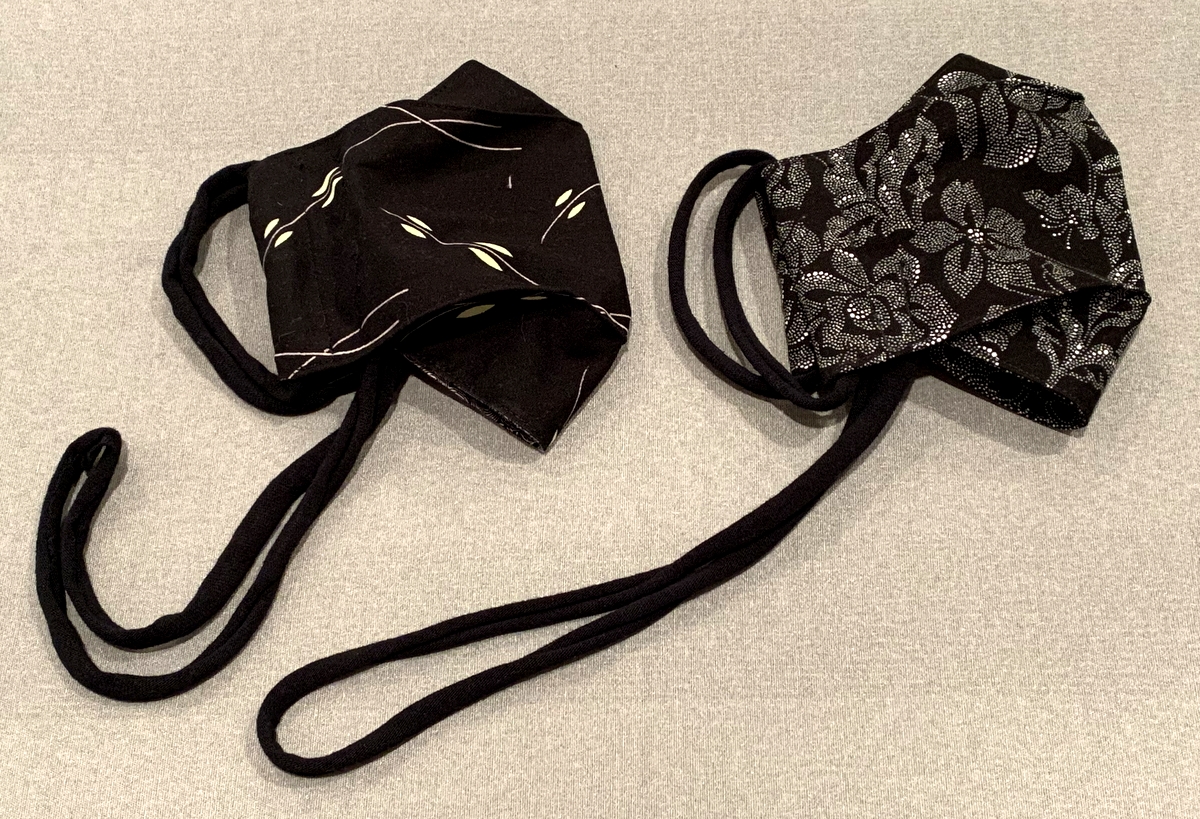
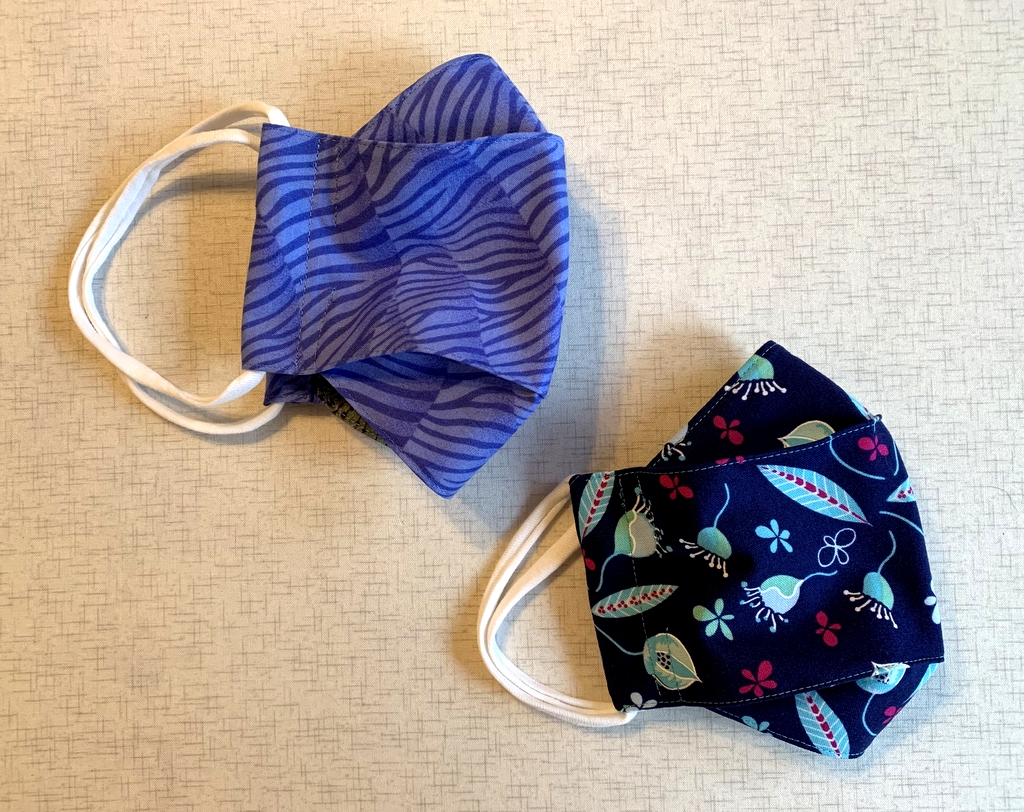
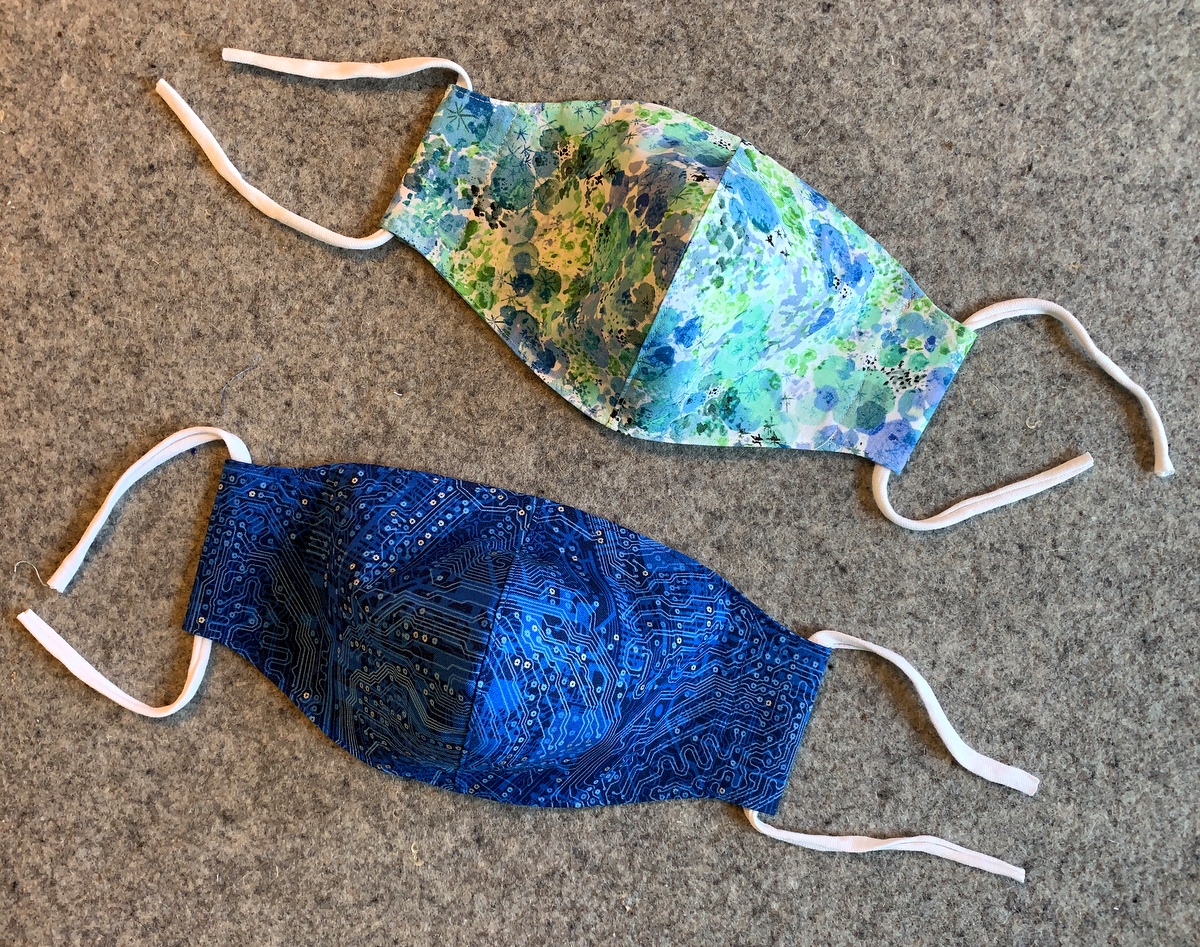
Through folding and stitching, the flat pattern is transformed into three sections (still in one piece). The top section goes across the nose, the middle section over the mouth, and the bottom section under the chin. The mask becomes three-dimensional when pleats are made along the ends of the top and bottom sections next to the casing. This photo of two masks I made last year shows what I mean:

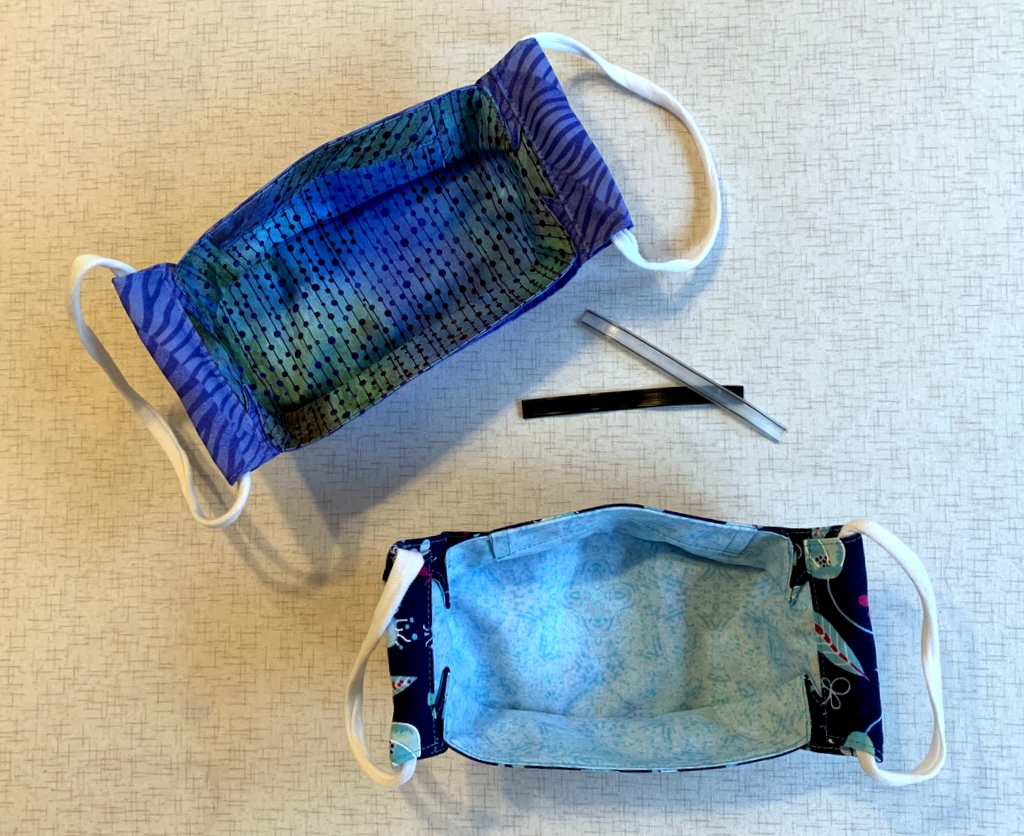
You can also see the channel at the top of each mask where a nosewire can be inserted.

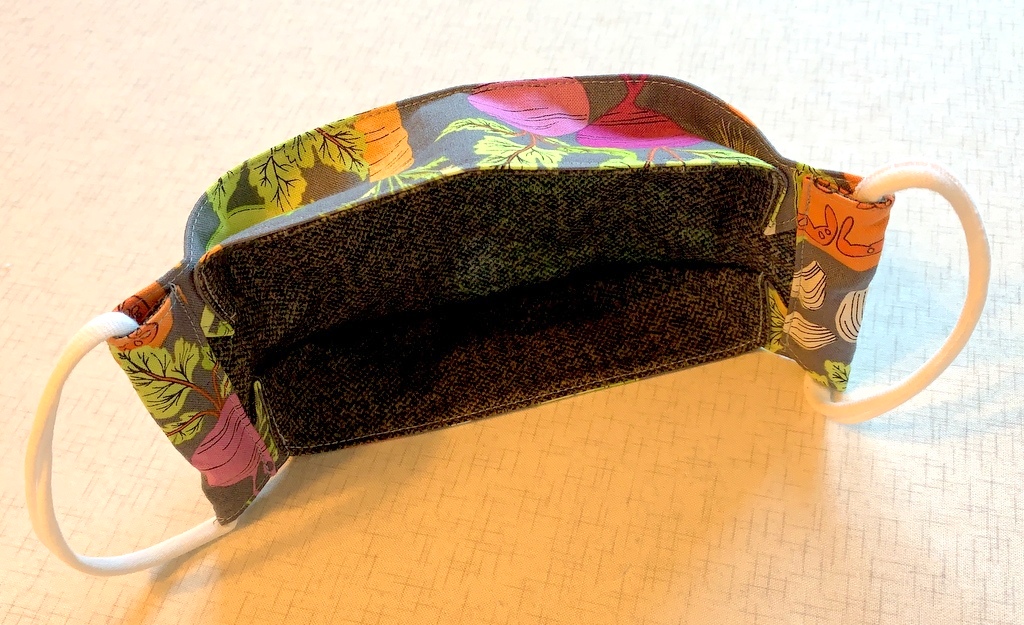
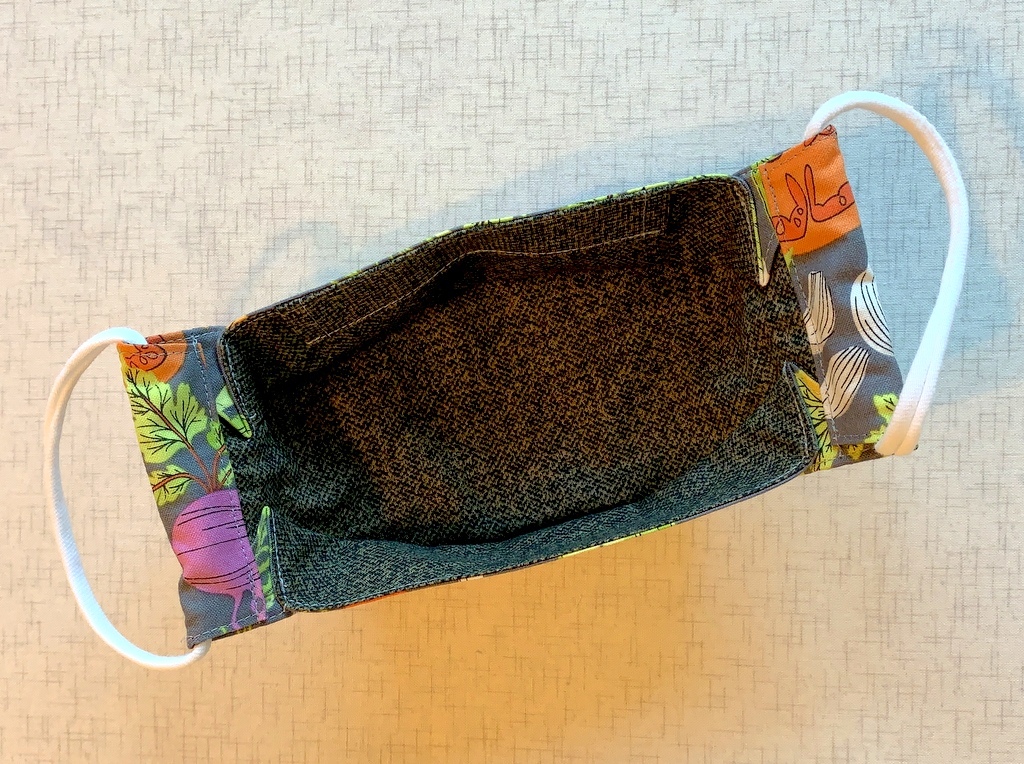
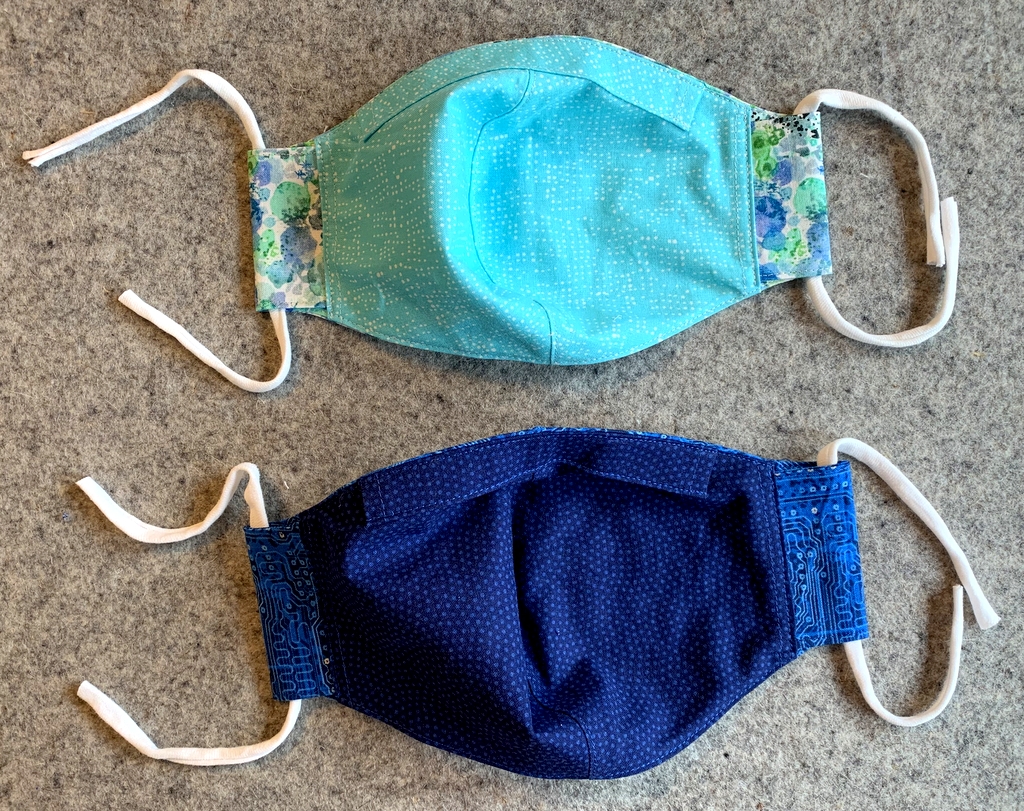
On my latest mask I omitted the pleats at the top section. One result is that the top of the mask comes up a bit higher on my face but another — and better — result is greater comfort. That’s because the nosewire, which gets pressed across the bridge of my nose, fits along the top of my cheeks better. My older masks tend to leave indentations in my skin from the nosewires because the pleating at the top pulls the masks tighter across my face. My modified mask is still slightly boxy (and still snug) at the top while the greater boxiness at the bottom makes the mask fit nicely under my chin.

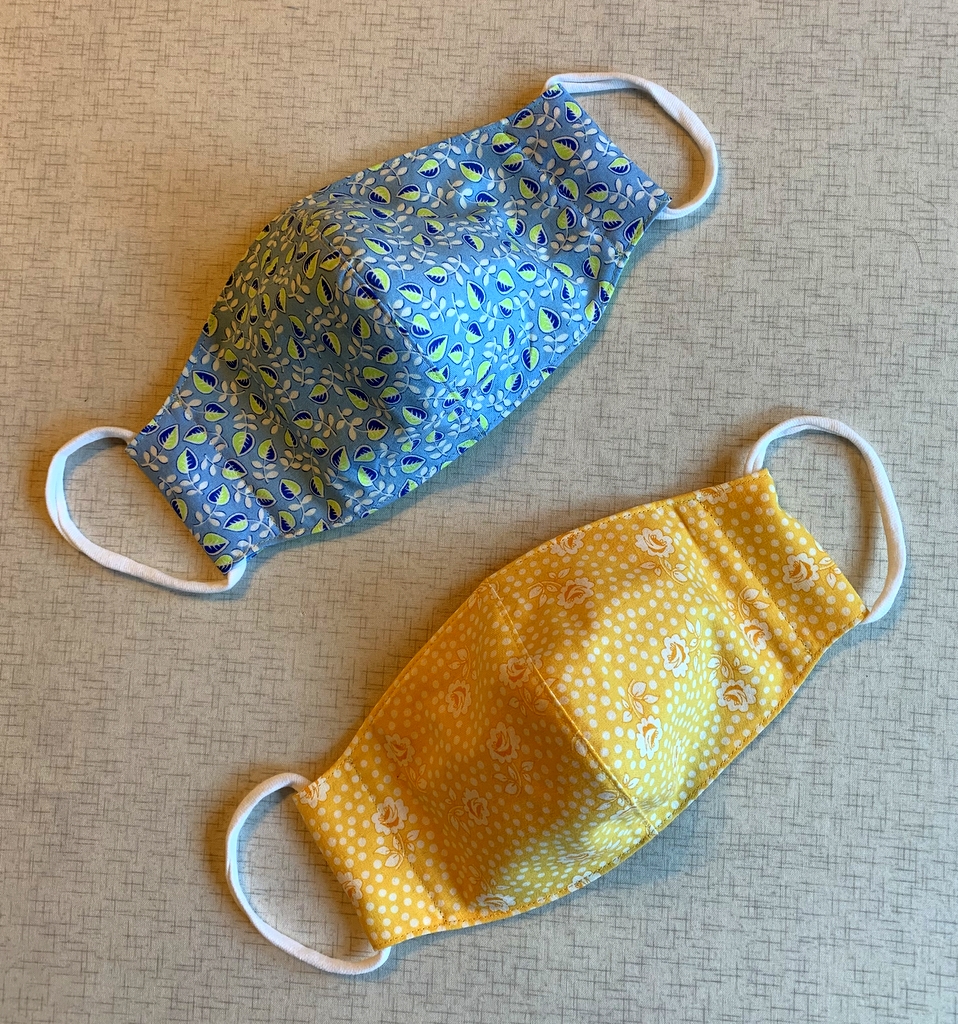
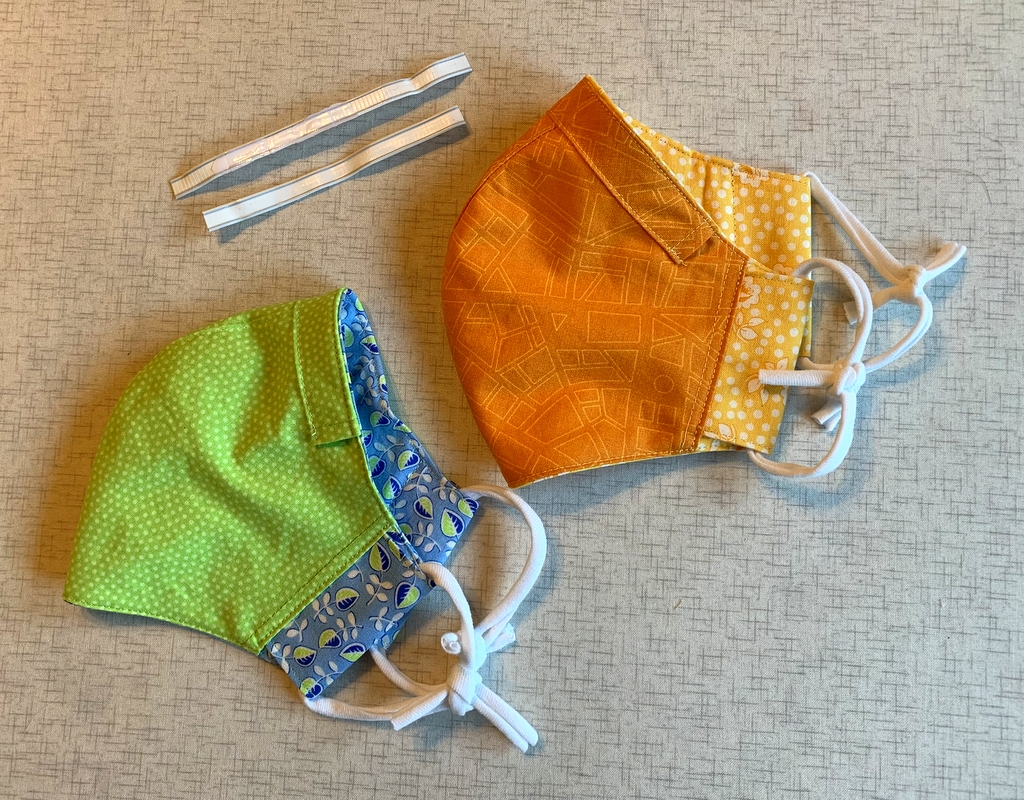
As long as the need to wear masks continues, we might as well go in style, right? For me that means fun fabrics and comfort.


Posted in face masks, family, update | 3 Comments

Half a Lifetime

Hello from Atlanta, where my husband Charlie and I are visiting my twin sister Diane and her husband Ed. It’s our annual Thanksgiving trip. We arrived earlier than usual this year for a special reason: Diane and I turned 70 on November 16th and we wanted to celebrate the big 7-0 together. We weren’t going to let Covid keep us apart.

Charlie and I took extreme precautions on the trip here from Oregon, including wearing safety goggles in transit that made us look like very large insects. Two days after we left Portland the governor of Oregon announced new statewide restrictions because of the alarming increase of Covid cases. We will self-quarantine for two weeks on our return.

In the interim, we are having an absolutely wonderful time doing not very much at all. Lots of Scrabble games, brisk walks outdoors in the fresh air, reading, watching movies, making favorite recipes and trying out new ones. On our actual birthday we got all dressed up — Diane and I in our Little Black Dresses — and went to an early and very properly socially distanced dinner at a lovely French restaurant.

As fraternal twins Diane and I were never dressed alike by our mother but half a lifetime ago, when we turned 35, we bought matching sweaters and posed for this photo:

Fast forward another 35 years. We decided to recreate the photo with new matching sweaters:

Who says you can’t be silly at 70? Of course we can never go out in public wearing these outfits at the same time!

Here’s Diane in her Little Black Dress (which is actually midnight blue) . . .

. . . and here I am in mine:

I whipped up masks for us to wear with our LBDs:

I’ve taken to adding neck straps to my masks after hearing from a fellow quilter, Linda B. No more needing to stuff a mask into a pocket or leave it dangling on one ear. (Thanks so much for the idea, Linda!)

That’s the extent of my sewing on this trip to date but I hauled a bunch of fabric all the way from Portland to start on a new quilt. Here’s hoping I have a couple of test blocks — Quatrefoil blocks, in fact! — to show you real soon.


Posted in face masks, family, Quatrefoil, Scrabble, update | 12 Comments

A Bee in My Bucket Hat

Hmm. Doesn’t have quite the same ring as “a bee in my bonnet,” does it? But I already have a blog post titled “A Bee in My Bonnet” so the one above will have to do.

Why a bucket hat? Well, after happening upon images on Instagram of the Sorrento Bucket Hat by Elbe Textiles I was inspired to give it a try. The pattern is available as a digital download for a mere two dollars. Lauren, the owner of Elbe Textiles, donates all proceeds from the sale of the pattern to a different cause every month. What a lovely thing to do.

Here’s a picture of my newly completed hat:

The multiple stitching lines around the brim are optional. I really like the effect of the contrasting thread. I chose a swirly dotted print in spring green for the lining:

Oh, did I mention the hat is reversible? Two for the price of one!

It’s easy to see why it’s called a bucket hat:

I interfaced the brim (an optional step) to give it more shape. It’s fun to play around with the brim, flipping it up in the front or the back for a different look. Here it is with the front of the brim flipped up . . .

. . . and here is the reverse side with the back brim flipped up:


Now all I need is a matching face mask. (Kidding!)


Posted in bucket hat, face masks, family, update | 8 Comments

Feedbag Face Masks

I have my twin sister Diane to thank for the name.

In my last post I wrote about a new-to-me face mask pattern I tried out using a vegetable print that made me look like I had green peapod lips and teeth. In addition to commenting on the unfortunate location of the veggies on the face mask, Diane said I looked like I was wearing a feedbag. I have to admit she had a point:

It’s a wonderful pattern, though! The proper name of the pattern is the 3D Face Mask from SeeKateSew, and it’s such a great design that I’ve made a couple more masks:

These are for the Dear Husband and me. I’ll bet you can tell from the size of the ear loops which one is his and which one is mine:

Here’s a look at the inside of the masks (note the plastic strips from coffee packages that work very well as nosewires when inserted in the fabric casings):

It’s pretty clear that face masks are going to be part of our wardrobes for the foreseeable future. Who knows how long it will be before the coronavirus pandemic comes under control? Though the reason we need to wear these masks is truly awful, there is a bit of enjoyment to be had in coming up with fun fabric combinations to make them. I’ve certainly enjoyed the photos posted on Instagram of masks created by other makers, and I’ve enjoyed dipping into my own stash to cut some small pieces of treasured fabrics.

Even though I really like SeeKateSew’s pattern, I’m still a big fan of the mask pattern designed by PJ Wong. I recently made masks for my friends Sue and Anne using PJ’s pattern:

Look how bright and cheerful the masks are on the inside:

Okay, friends, time to wrap up this post and head to the grocery store. You know what that means:  time to strap on the old feedbag!


Posted in face masks, update | 7 Comments

Face Mask Fail

Well, maybe “fail” is too strong a word. Maybe I should just say the final result wasn’t what I expected. . .

To be clear, the problem had nothing to do with the pattern. It’s a very good one.

I’ve been intrigued by the three-dimensional face masks I’ve seen some folks wearing. The boxy shape seems to fit the face well and allows for plenty of breathing room. I  decided to make a new mask for the Dear Husband using the 3D Face Mask from SeeKateSew, billed as “the most comfortable face mask.” I picked this print from Andover Fabrics that I bought last year to make the DH a new apron (which hasn’t happened yet):

He’s the gardener of the family and I thought this fabric would make a fun mask for him to wear when he’s outside working in our yard or tending our community garden plot.

I did make one adjustment to the pattern:

That’s my freezer paper pattern in the foreground, with extensions on the side to allow for a generous ¾” casing for the ear loops rather than the narrow ⅜” casing the pattern provides. The freezer paper pattern can be used over and over again — no pinning because the freezer paper is pressed directly onto the fabric, where it is easily peeled off after the fabric has been cut.

The printed directions by SeeKateSew are very clear, as is her website tutorial. The mask came together very easily. Here’s what it looks like from the front:

Here’s a look at the inside . . .

. . . and here you can see I added a sleeve at the top for a removable nose wire:

When the mask was done I could tell it would be too small for my husband. “No problem,” I thought. “I’ll adjust the pattern to make a bigger mask for him. I’ll keep this one for myself.”

Then I tried it on:

Do you see what I see?

Those peas! They look like teeth . . . and the peapods? They look like lips. Green lips.

And see the roots on that bunch of green onions?

Chin whiskers!!!


Posted in aprons, face masks, family, update | 21 Comments

The World’s Smallest Quilt Sleeve

Haha! Just kidding. That’s actually a sleeve for a face mask nose wire. It’s for the mask I made for myself yesterday and goofed on.

The mask looks just fine from the front:

It’s the same lemon fabric I used to make a mask for my twin a couple weeks ago. (We have a thing about lemons.)

Here’s the inside of the mask:

See that line of stitching about 3/4″ down from the top of the mask? That’s where the bottom of the nose wire sleeve is supposed to be . . . on top of the lining fabric, not sandwiched between the lining and the mask where it will never see the light of day. Oops.

My solution was to make a new sleeve and attach it by hand. The sleeve is made just as if it were for the back of a quilt . . .

. . . except it’s miniature. It’s not necessary to turn the sleeve inside out because the seam is going to be on the underneath part of the sleeve when it’s stitched on, forever out of sight.

Oh, there is one other difference from a regular quilt sleeve: this sleeve is cut on the bias rather than the straight of grain so that it molds nicely around the curve of the mask:


I’m using my wonderful little red sticky thimble (official name: Poke-A-Dot by Jillily Studio) to push my needle through the layers of fabric:

It took just a few minutes to stitch the sleeve in place. (I could have stitched it by machine but then the stitching would show on the front of the mask.)

Here’s what the mask looks like from the inside now:

I didn’t want to attach the new sleeve on top of the old one — too much bulk — so I stitched it to the opposite side. The bottom of the mask is now the top.

And looky here: I found the perfect place to store my Poke-A-Dot until I need to use it again:

All’s well that ends well!


Posted in face masks, update | 10 Comments

The Perfect Hostess Gift?

Tomorrow the Dear Husband and I will go on our first social outing since we began sheltering in place in March. The big event is a Happy Hour with good friends at their home. We’ll rendezvous on their spacious deck where we can chat (and eat and drink!) while maintaining proper social distance.

Here’s what I’m bringing as a hostess gift:


I never thought I would be bringing face masks as a hostess gift. On the other hand, I never expected to be living through a pandemic.

Here’s a look at the inside of the masks:

You can see each one has a channel at the top to hold a nose wire.

I made a new mask for myself and added a channel for a nose wire. Unfortunately, I wasn’t paying attention and attached it to the wrong side of the mask lining. When I sewed the lining and the main mask piece right sides together and turned them, the channel was nowhere to be seen. Silly me!

I’m not going to take it apart. There’s an easier solution, which I will share in my next post.

Have a wonderful weekend!


Posted in face masks, family, update | 4 Comments

More About Masks

I’m shifting gears in my mask-making endeavors. Since mid-March, when the Dear Husband and I started sheltering in place at our Portland White House, I’ve made several dozen face masks using one of the first tutorials I came across, that of ER nurse Jessica Nandino. Between then and now, I’ve tried a few other patterns and haven’t found any I liked better.

Until now:

This is PJ Wong’s design. (I haven’t met PJ yet, although we both teach for Montavilla Sewing Centers. She’s an expert on designs and projects for machine embroidery and leads several clubs at Montavilla devoted to sewing, serging, and machine embroidery.) On the Montavilla website I came across this link taking me to instructions for two masks PJ has designed: one with a vertical center seam and one with three pleats. Both designs include instructions for an optional filter pocket, and the pleated mask also includes a casing for a nose wire. The site includes pdf patterns, written directions, and video tutorials.

I tried PJ’s design for the mask with the center seam (often called a duckbill mask) and proclaimed it a winner. What I like most about her design is the inclusion of a facing, separate from the mask and lining pieces, that gives the mask a beautifully finished look — inside and out. What’s more, the facing creates a casing at the sides that allows the mask to be secured with ties or elastic or — a new discovery for me — “t-shirt yarn.” (More on that below.)

As you see in the photo above, I used quarter-inch double fold bias tape on my first mask. All I had to do was stitch the tape closed and thread it through the casing. I cut my lengths of bias tape 36″ long, leaving a length of 18″ on each side at the top and 15″ at the bottom. That leaves plenty of tape to tie at the back of the head and the base of the neck. If you look carefully at the casing, you can tell that I stitched a little bar tack in the middle of the casing to maintain those lengths.

Here’s my first effort:

PJ’s duckbill pattern comes in four sizes, small through extra large. The one I made first is a medium and felt a bit large on me so I decided to try making a mask in the small size. And while I was at it, I wanted to try a different method of securing the mask in place. To be honest, cutting bias strips and sewing fabric ties was the one thing I found rather tedious about the other mask design I’ve been using, although it certainly has other features I really like.

I had seen several references on Instagram to using t-shirt fabric to make ear loops for masks. It is said to be softer than elastic hence more comfortable around the ears. All roads pointed toward a tutorial by craftpassion.com on making t-shirt “yarn.” It was a breeze to make and now I have a small ball of yarn made from one of the DH’s t-shirts, enough for a few dozen masks. (I haven’t told him yet about his sacrifice.)

Here’s my second effort, with t-shirt yarn for the ear loops:

The ear loops are very comfortable. And look how cute the mask is on the inside:

See what I mean about the nice finish? PJ’s directions call for the facing (green fabric) to be stitched down right next to the lining (yellow dotted fabric), which is left open so that a filter can be slipped into the center of the mask. Since I’m not using a filter, I stitched the ends of the lining closed.

The next version I made was for my twin sister, Diane, who needs a mask to go with the dress she is planning to wear to a wedding later this month. The dress is a navy knit wrap with a gray leaf design on it. She wanted a mask that would complement her dress, and she asked for a mask that would hold a nose wire. I made this one for her:

Take a look at the inside:

How cute is that lining fabric? Even with the addition of the gray leaf strip at the top, which holds a nose wire, the mask is nice enough to wear inside out:


Kidding, of course. But now I may have to make a mask for myself with the lemon fabric on the outside because it goes so well with my top!


Posted in bias tape, face masks, family, tutorial, update | 8 Comments

Here, There, and Everywhere

Do you ever buy a piece of fabric that you have no idea what to do with but you just know you have to have it? A couple years ago I was in a quilt shop in Bend, Oregon and spotted a succulent print in greens from the “Canyon” line designed by Kate Spain for Moda. I had to have some!

It sat on a shelf in my sewing room cabinet until a few weeks ago when I pulled it out to make this test block from a new pattern by Margot Languedoc called Pretty Little Baskets:

The pattern is definitely on my “to do” list but I only made one block with that fabric.

Then very recently Sew Kind of Wonderful released a new pattern called Curvy Bow Tie using the new Wonder Curve Ruler and I used a bit more of the fabric to make this test block:

Such a cute block but I wondered if the fabric would look better as the background of the block rather than the focal point. I made another block to see:

Oh yes, I like that better. But I’m not ready to make an entire quilt out of it just yet. (I love the Curvy Bow Tie pattern, though, and do plan to make a quilt when I’ve decided on a color scheme.)

What I really wanted to do with that fabric was make a pair of pillowcases for the Portland White House (using my own tutorial). So I did:

And I used some scraps to try out a new mask tutorial:

Now I can’t stop thinking of ways to use this fabric. Wouldn’t it make a great camp shirt?


Posted in bias tape, bowties, face masks, home dec, roll-it-up pillowcases, tutorial, update, Wonder Curve Ruler | 12 Comments

A Tisket A Tasket

One pretty little basket:


Isn’t it darling? The block is a new pattern called Pretty Little Baskets from Margot Languedoc of — how appropriate — the Pattern Basket:

I’m a big fan of Margot Languedoc’s designs and downloaded the pdf version of the pattern last week as soon as it became available on her website. The block measures 8″ square so it will finish at 7½” square. The green floral fabric is from the “Canyon” line by Kate Spain for Moda.

I don’t know if this block will wind up in a quilt someday. I just know that I needed to make it today.

Back to making face masks tomorrow!


Posted in face masks, update | 5 Comments