
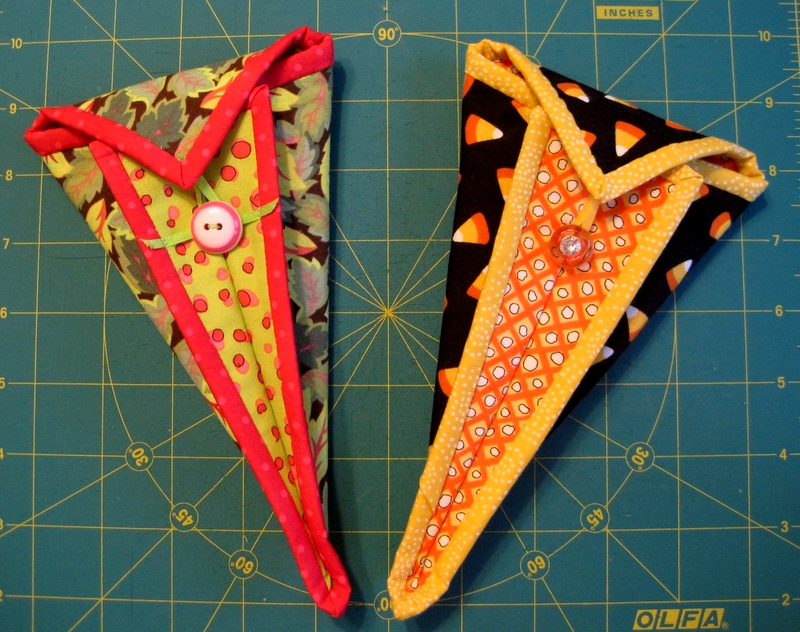
 These safe and stylish scissors cases look complicated but they are surprisingly easy to make. Each case is made from a little quilt sandwich that’s bound, folded in half on the diagonal, and stitched with one seam. If you’ve ever bound a quilt using double-fold binding (also known as French binding), you’ll have no trouble making one of these cases. They make wonderful gifts as well as delightful additions to your own sewing basket.
All you need are two squares of contrasting fabric, one square of batting, and a length of 2″-wide binding (straight grain or bias, your choice) in a third fabric:
Bits of ribbon, small pony tail elastic bands, and vintage buttons combine to make charming fasteners. These are completely optional, however. Even though I usually put a loop and button on my scissors cases, I tend to leave the top flap open so I can easily see if the scissors are there when I look into my quilter’s tote.
If you start with 7″ squares, you’ll wind up with a scissors case that measures about 5″ x 10″. This case was made with 6″ squares and measures about 4″ x 8″ opened . . .

. . . and about 4″ x 6¼” closed:
 I like this size best for my 5″ Ginghers.
(If you’re not sure what size square you need for the scissors you have in mind, experiment with squares cut from sheets of paper. Fold the paper using the instructions below as a guide. Insert your scissors into your paper “case” and test the fit.)
This tutorial is for the slightly larger case using 7″ squares but can easily be modified for the 6″ size.
Scissors Case from First Light Designs
Finished size: about 5” x 10” (from top point of flap)
Materials
(2) 7” squares of cotton
(1) 7” square of light to medium weight batting
36” of binding fabric cut 2” wide and pressed in half lengthwise
Optional: small ponytail elastic band or 4” length of ⅛” – ¼” wide satin or grosgrain ribbon
Optional: button
Optional: ¼”wide Steam-a-Seam fusible web
Recommendation: use a walking foot for construction
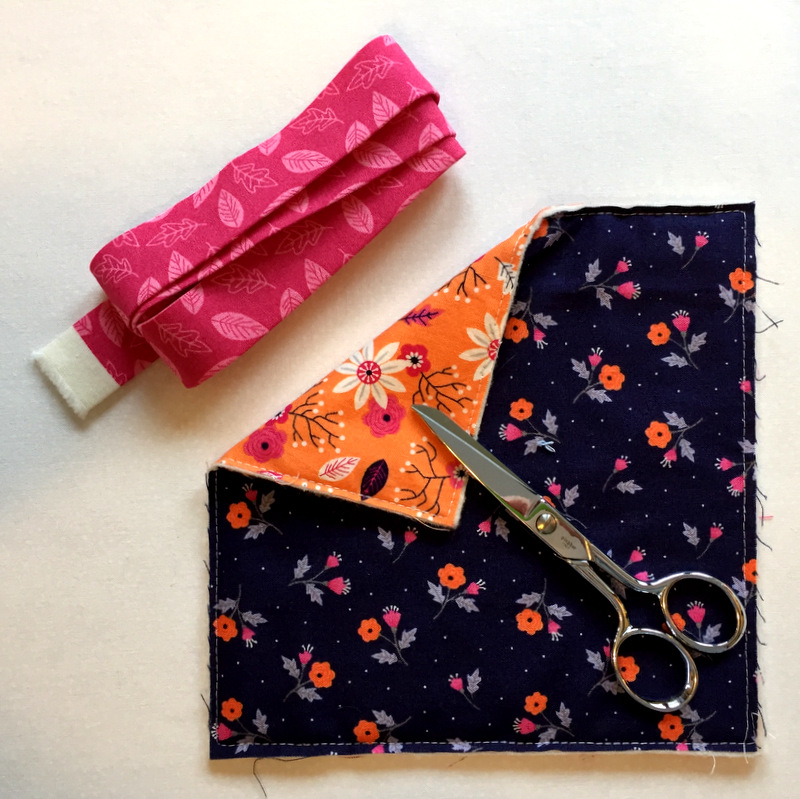
Step 1. Layer the cotton squares and batting as for a quilt and stitch ⅛” from the outside edges to hold the layers together:
In the photo above, the darker print is the outside of the case and the two-toned gold fabric is the lining.
If using a loop and button closure, stitch a loop in one corner on the lining side, keeping stitching inside the seam allowance:
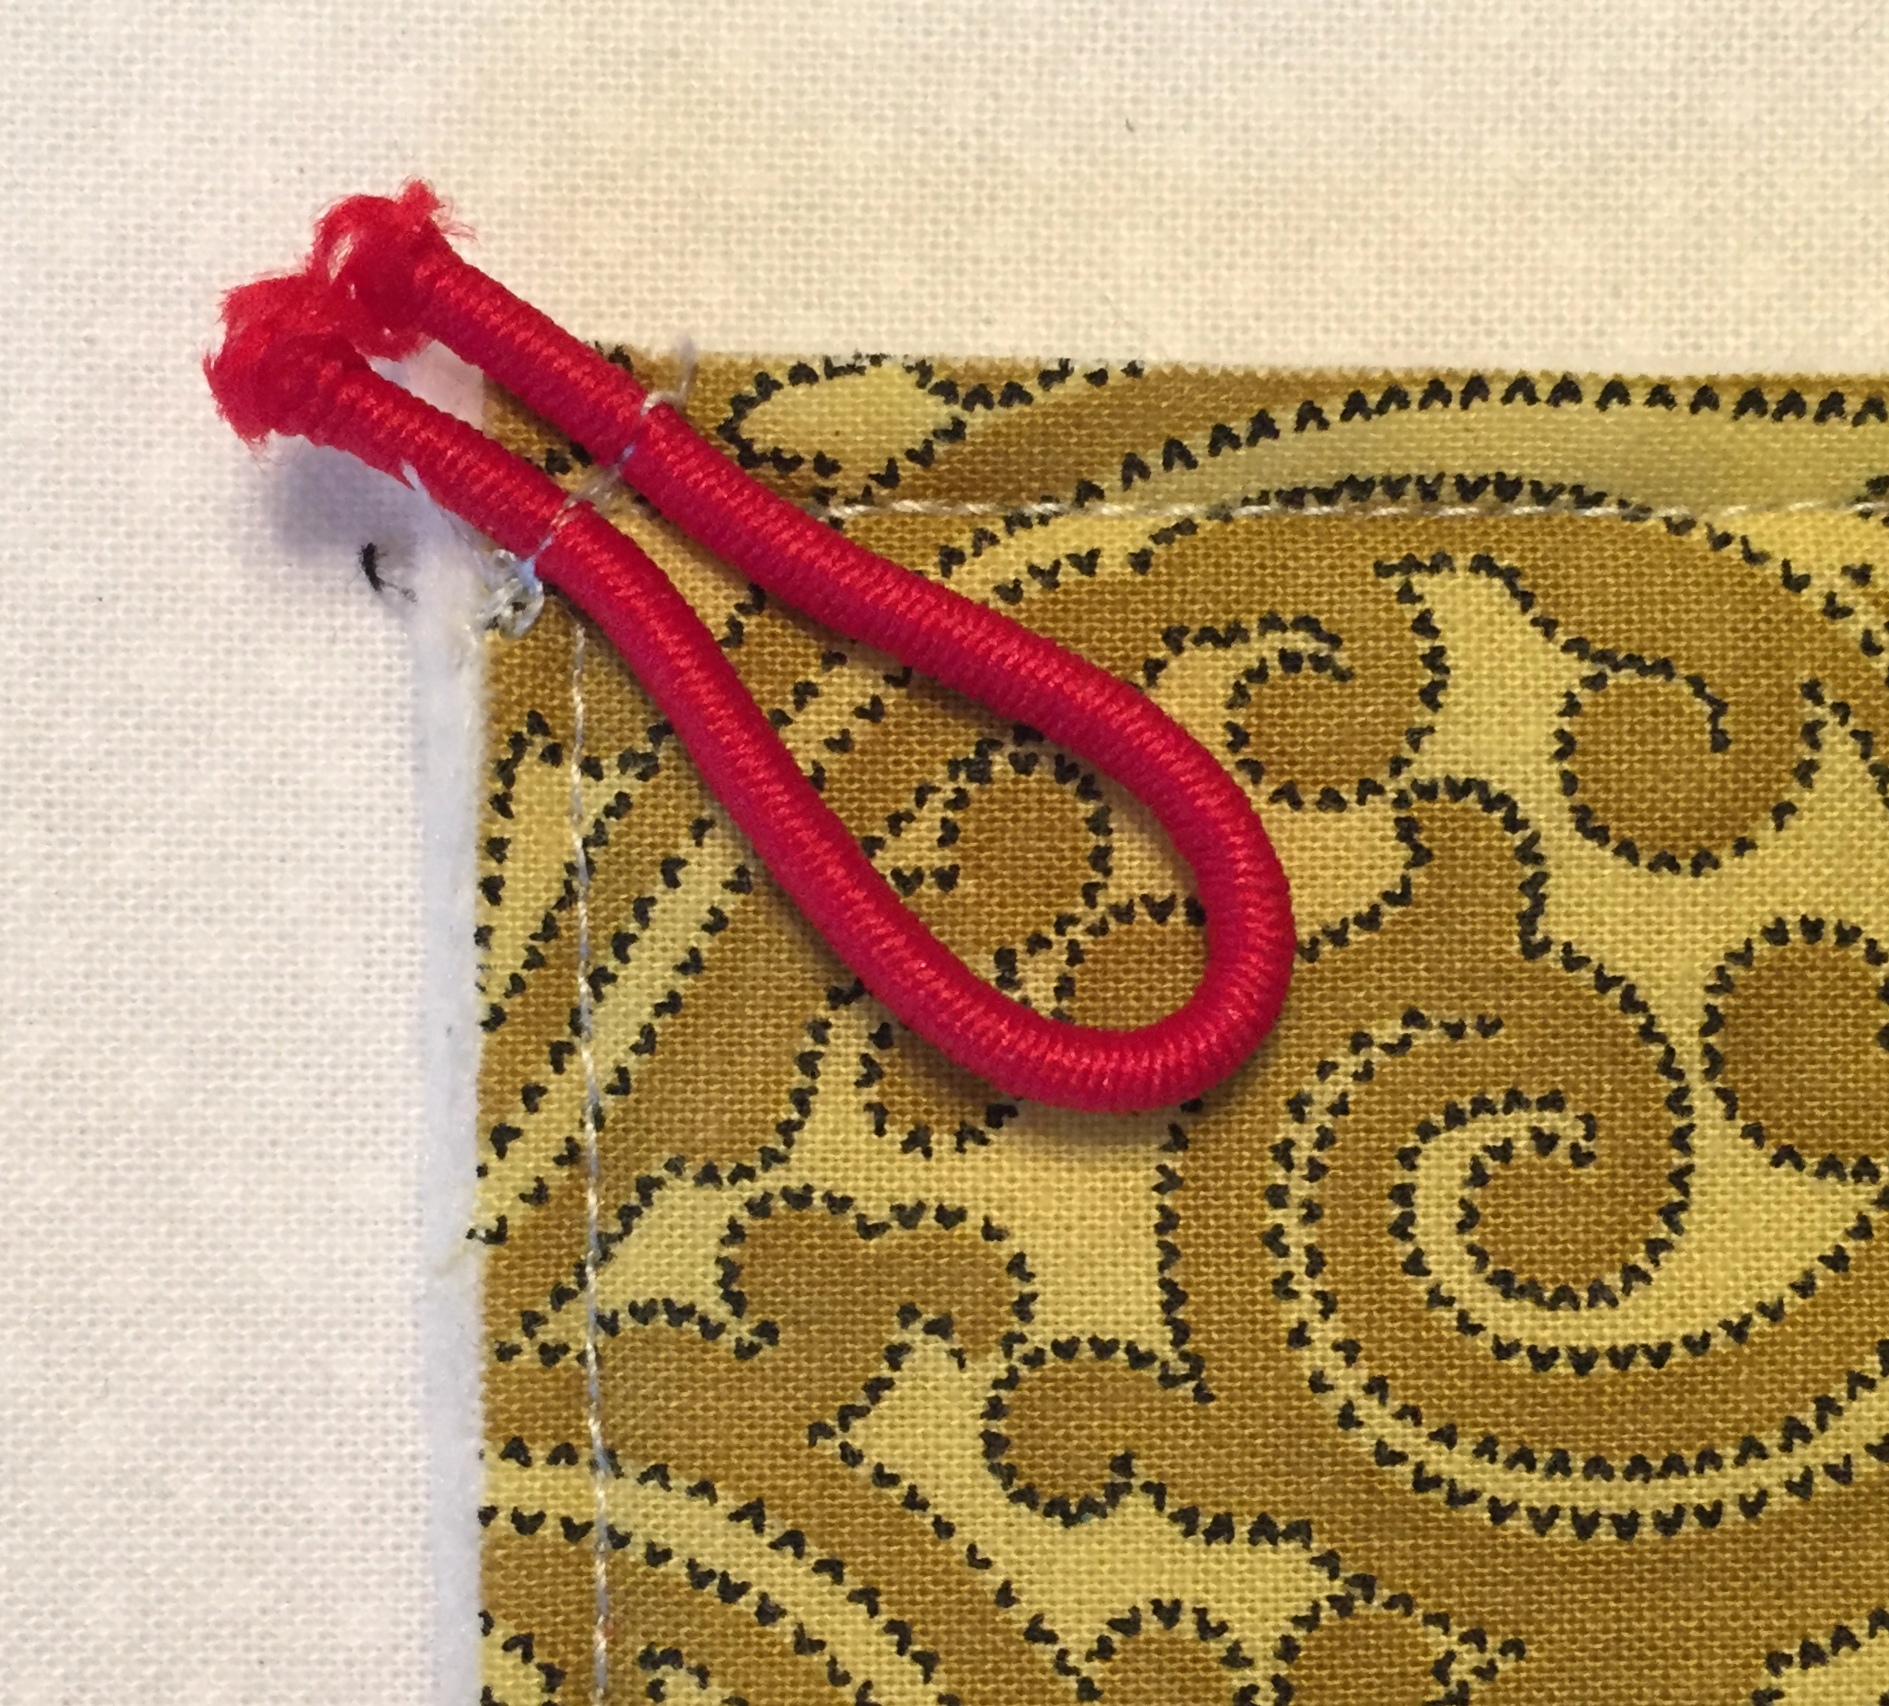
I used a small ponytail elastic on this case but you could also use narrow ribbon as I did in the two cases at the top of this post.
Step 2. Still working on the lining side, position the binding strip halfway down the side from the loop:

Note how the edge of the binding has been folded at a right angle and how I added a few stitches inside the seam allowance to secure the binding to the edge of the quilt sandwich.
Step 3. Leaving enough room to tuck the other binding tail into the fold, begin stitching the binding with a scant ¼” seam, stopping ¼” from the end in order to miter the corner:
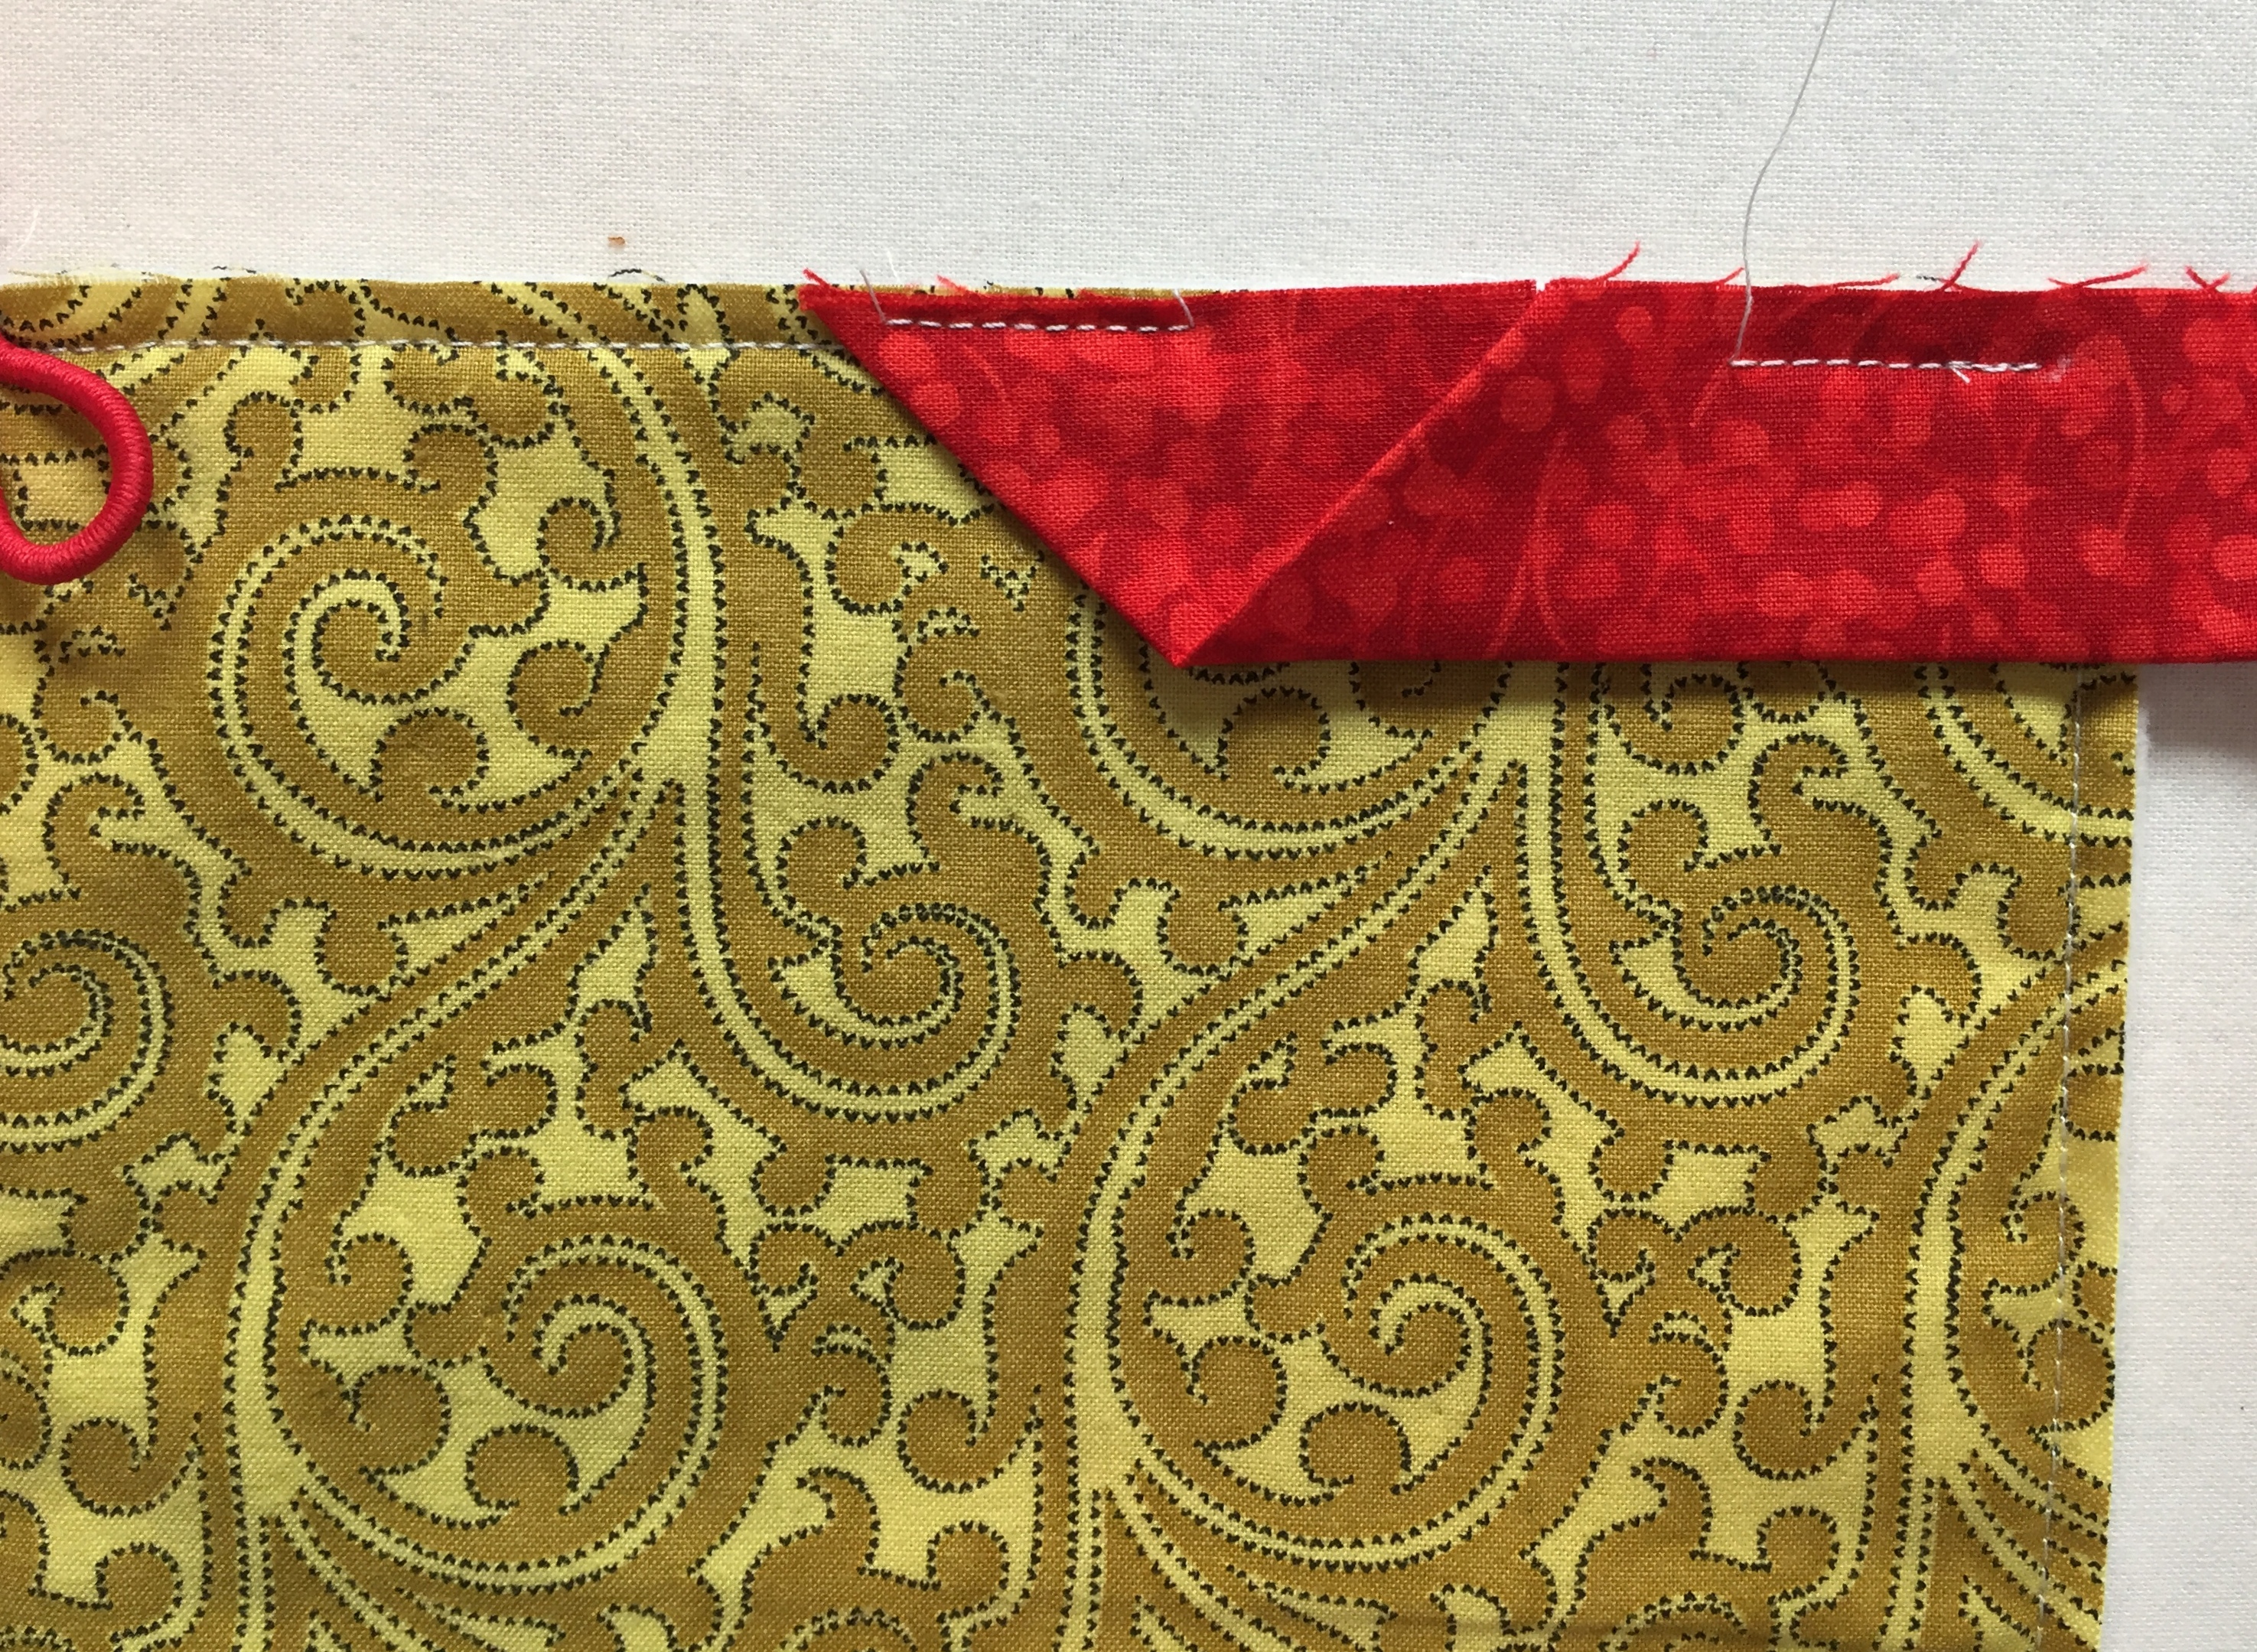
When you come to the fourth corner, be careful not to catch the loop in the binding seams when you miter that corner:
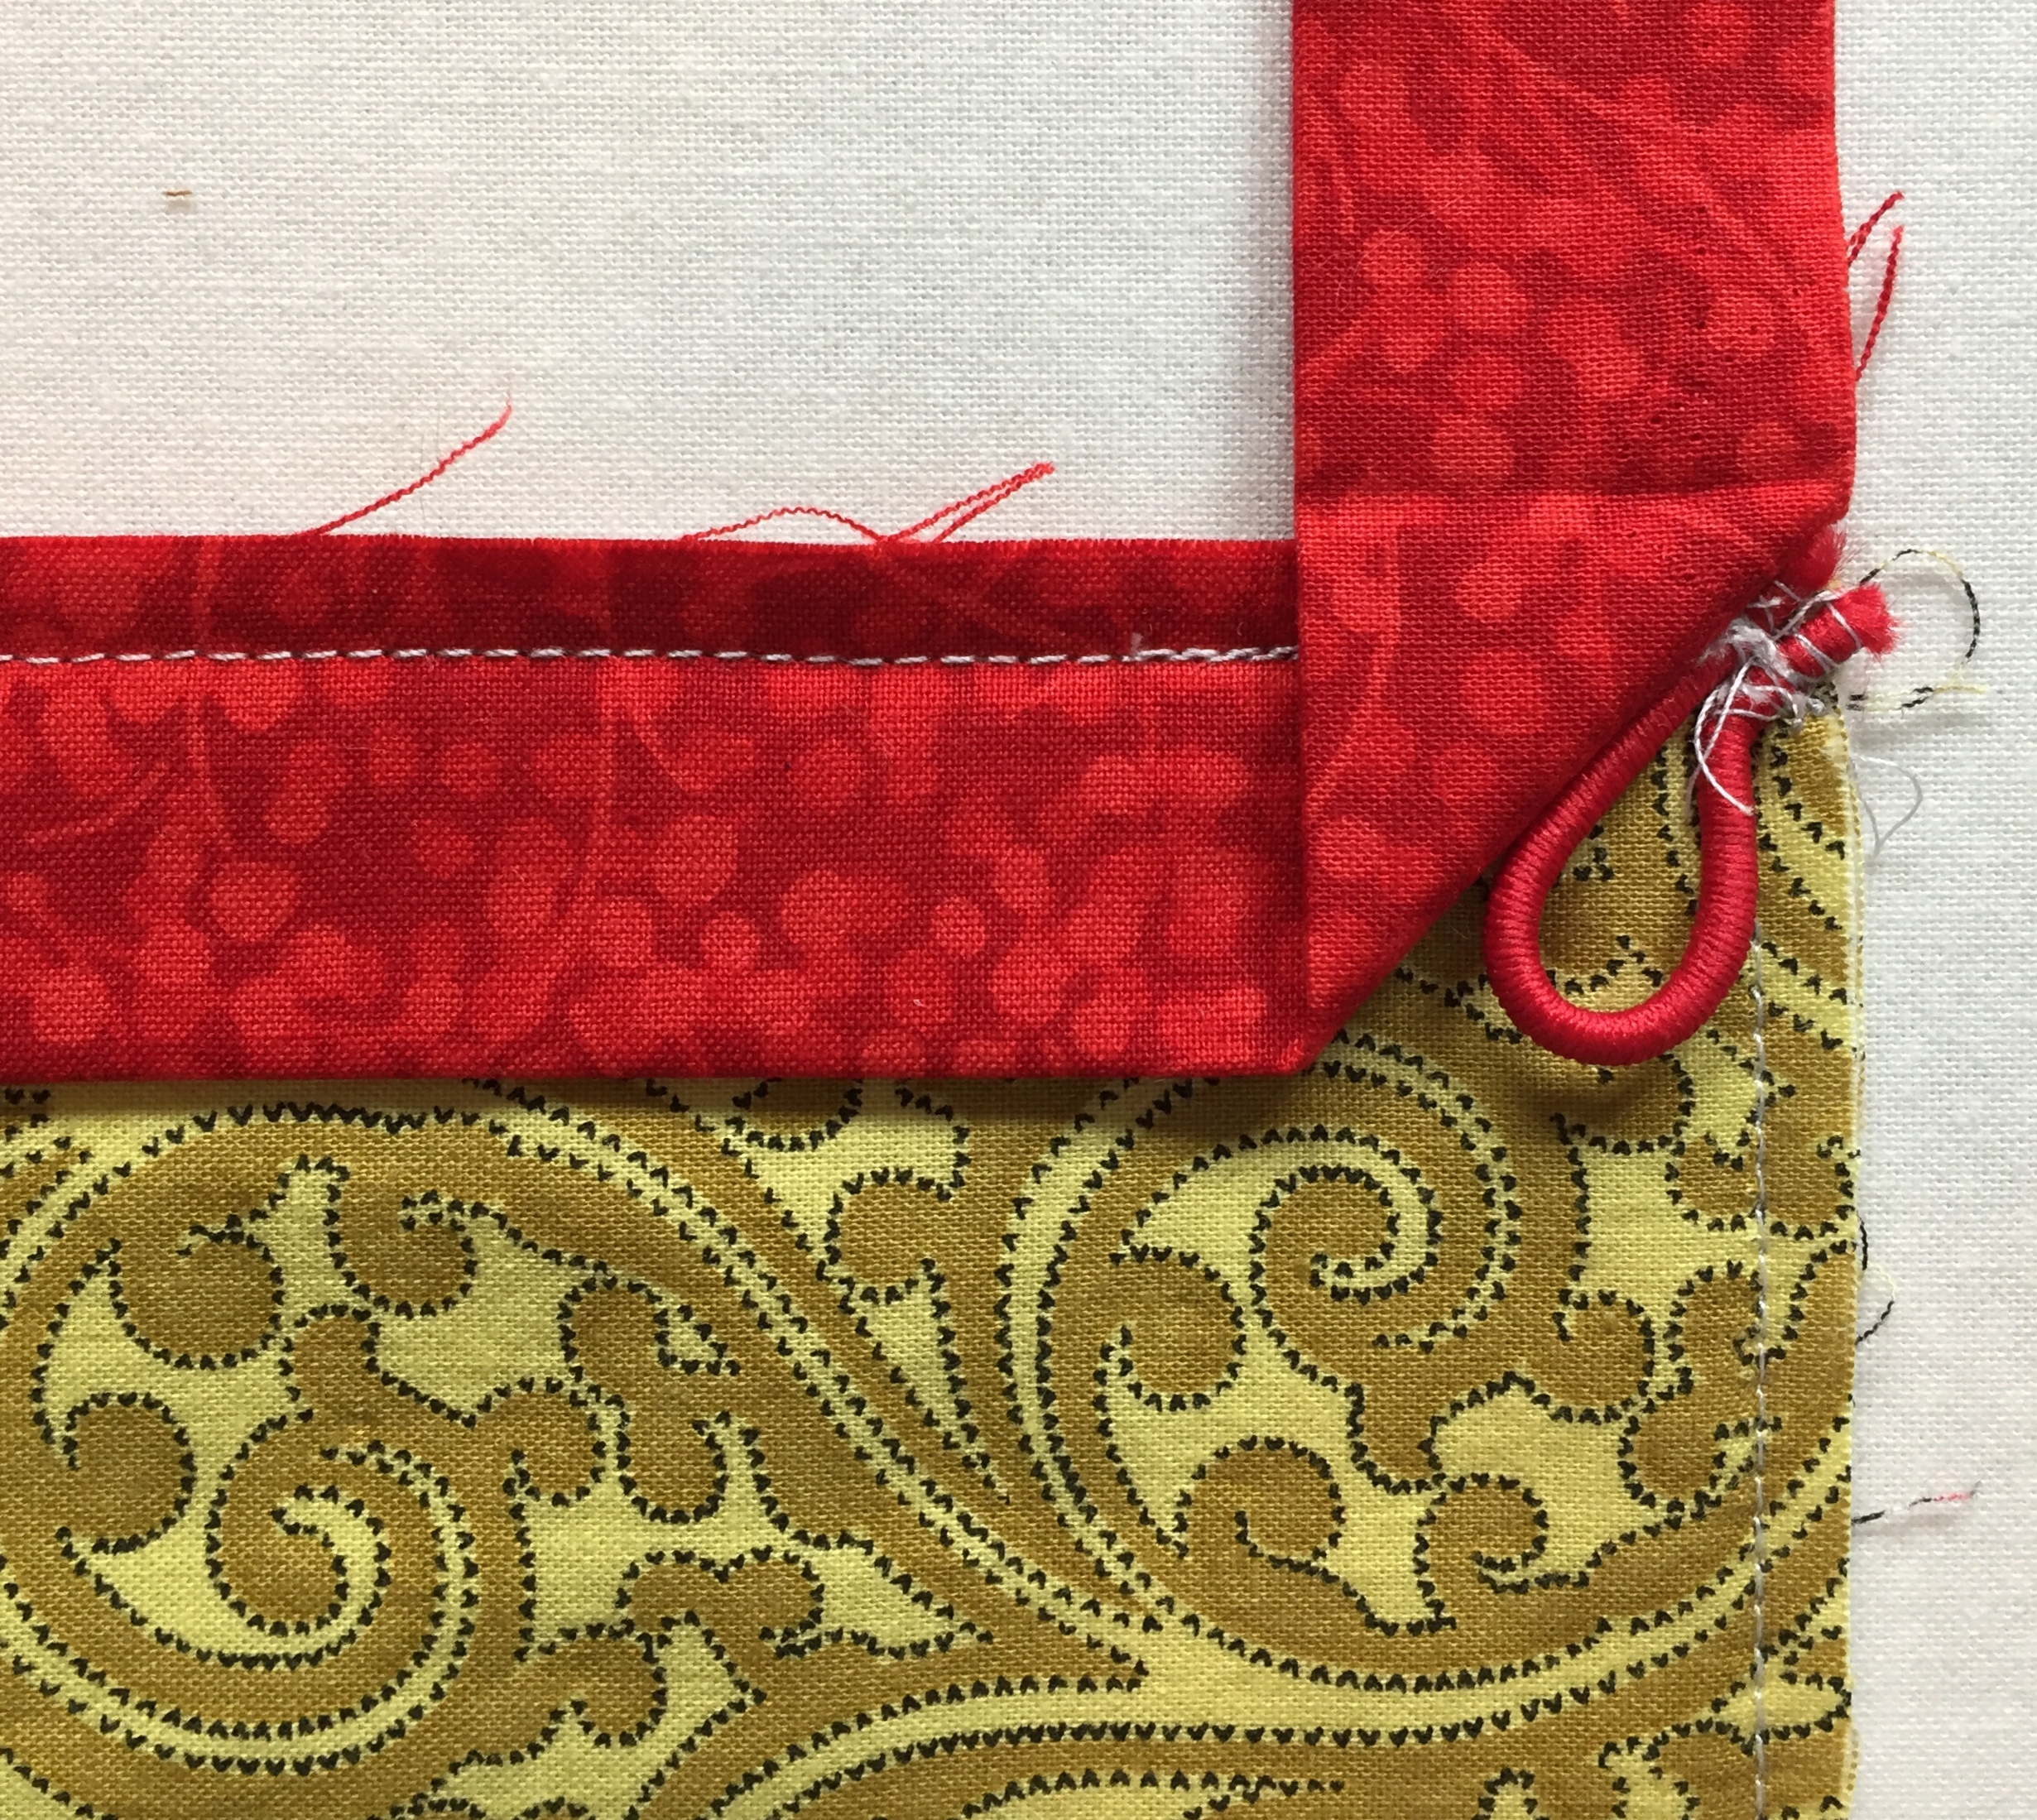
Step 4. Tuck the left tail into the fold of the right tail . . .
 . . . and finish stitching the seam, starting and ending a few stitches beyond the original stitching.
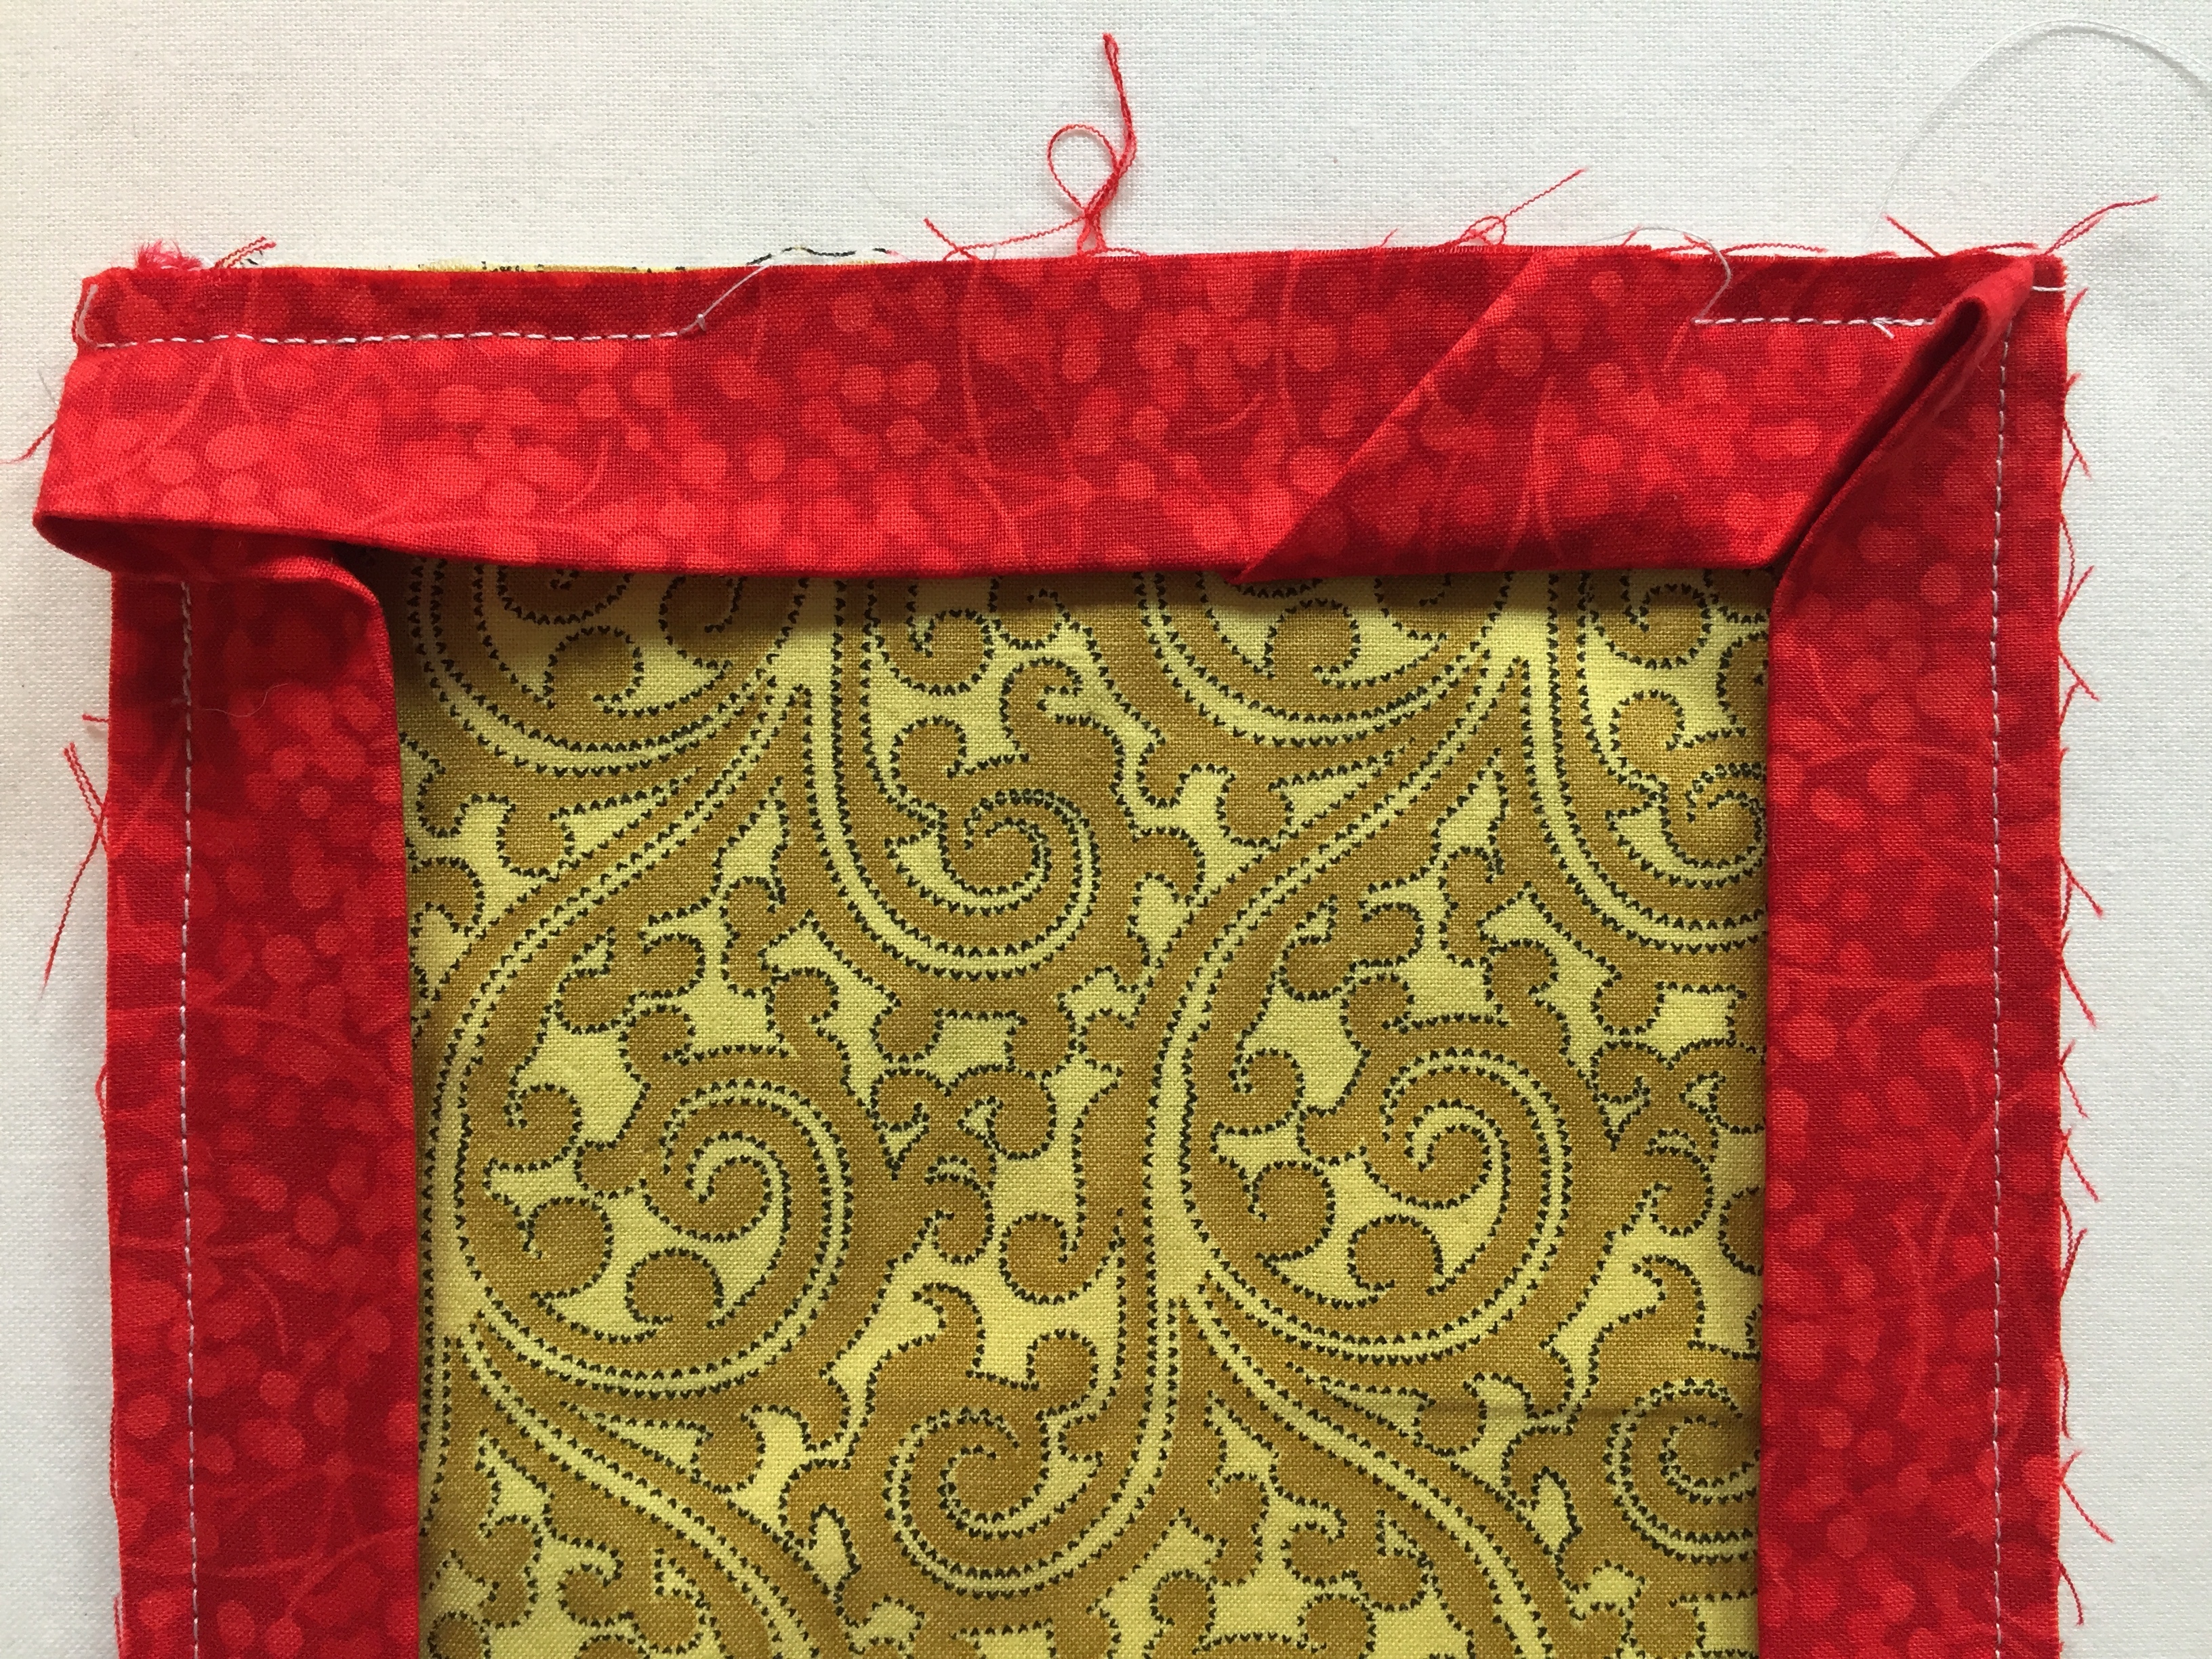
Step 5. Turn the binding to the right side and stitch by hand or fuse in place using ¼”-wide Steam-a-Seam 2 (not Steam-a-Seam 2 Lite). If using fusible web, take care not to melt ponytail elastic with hot iron!
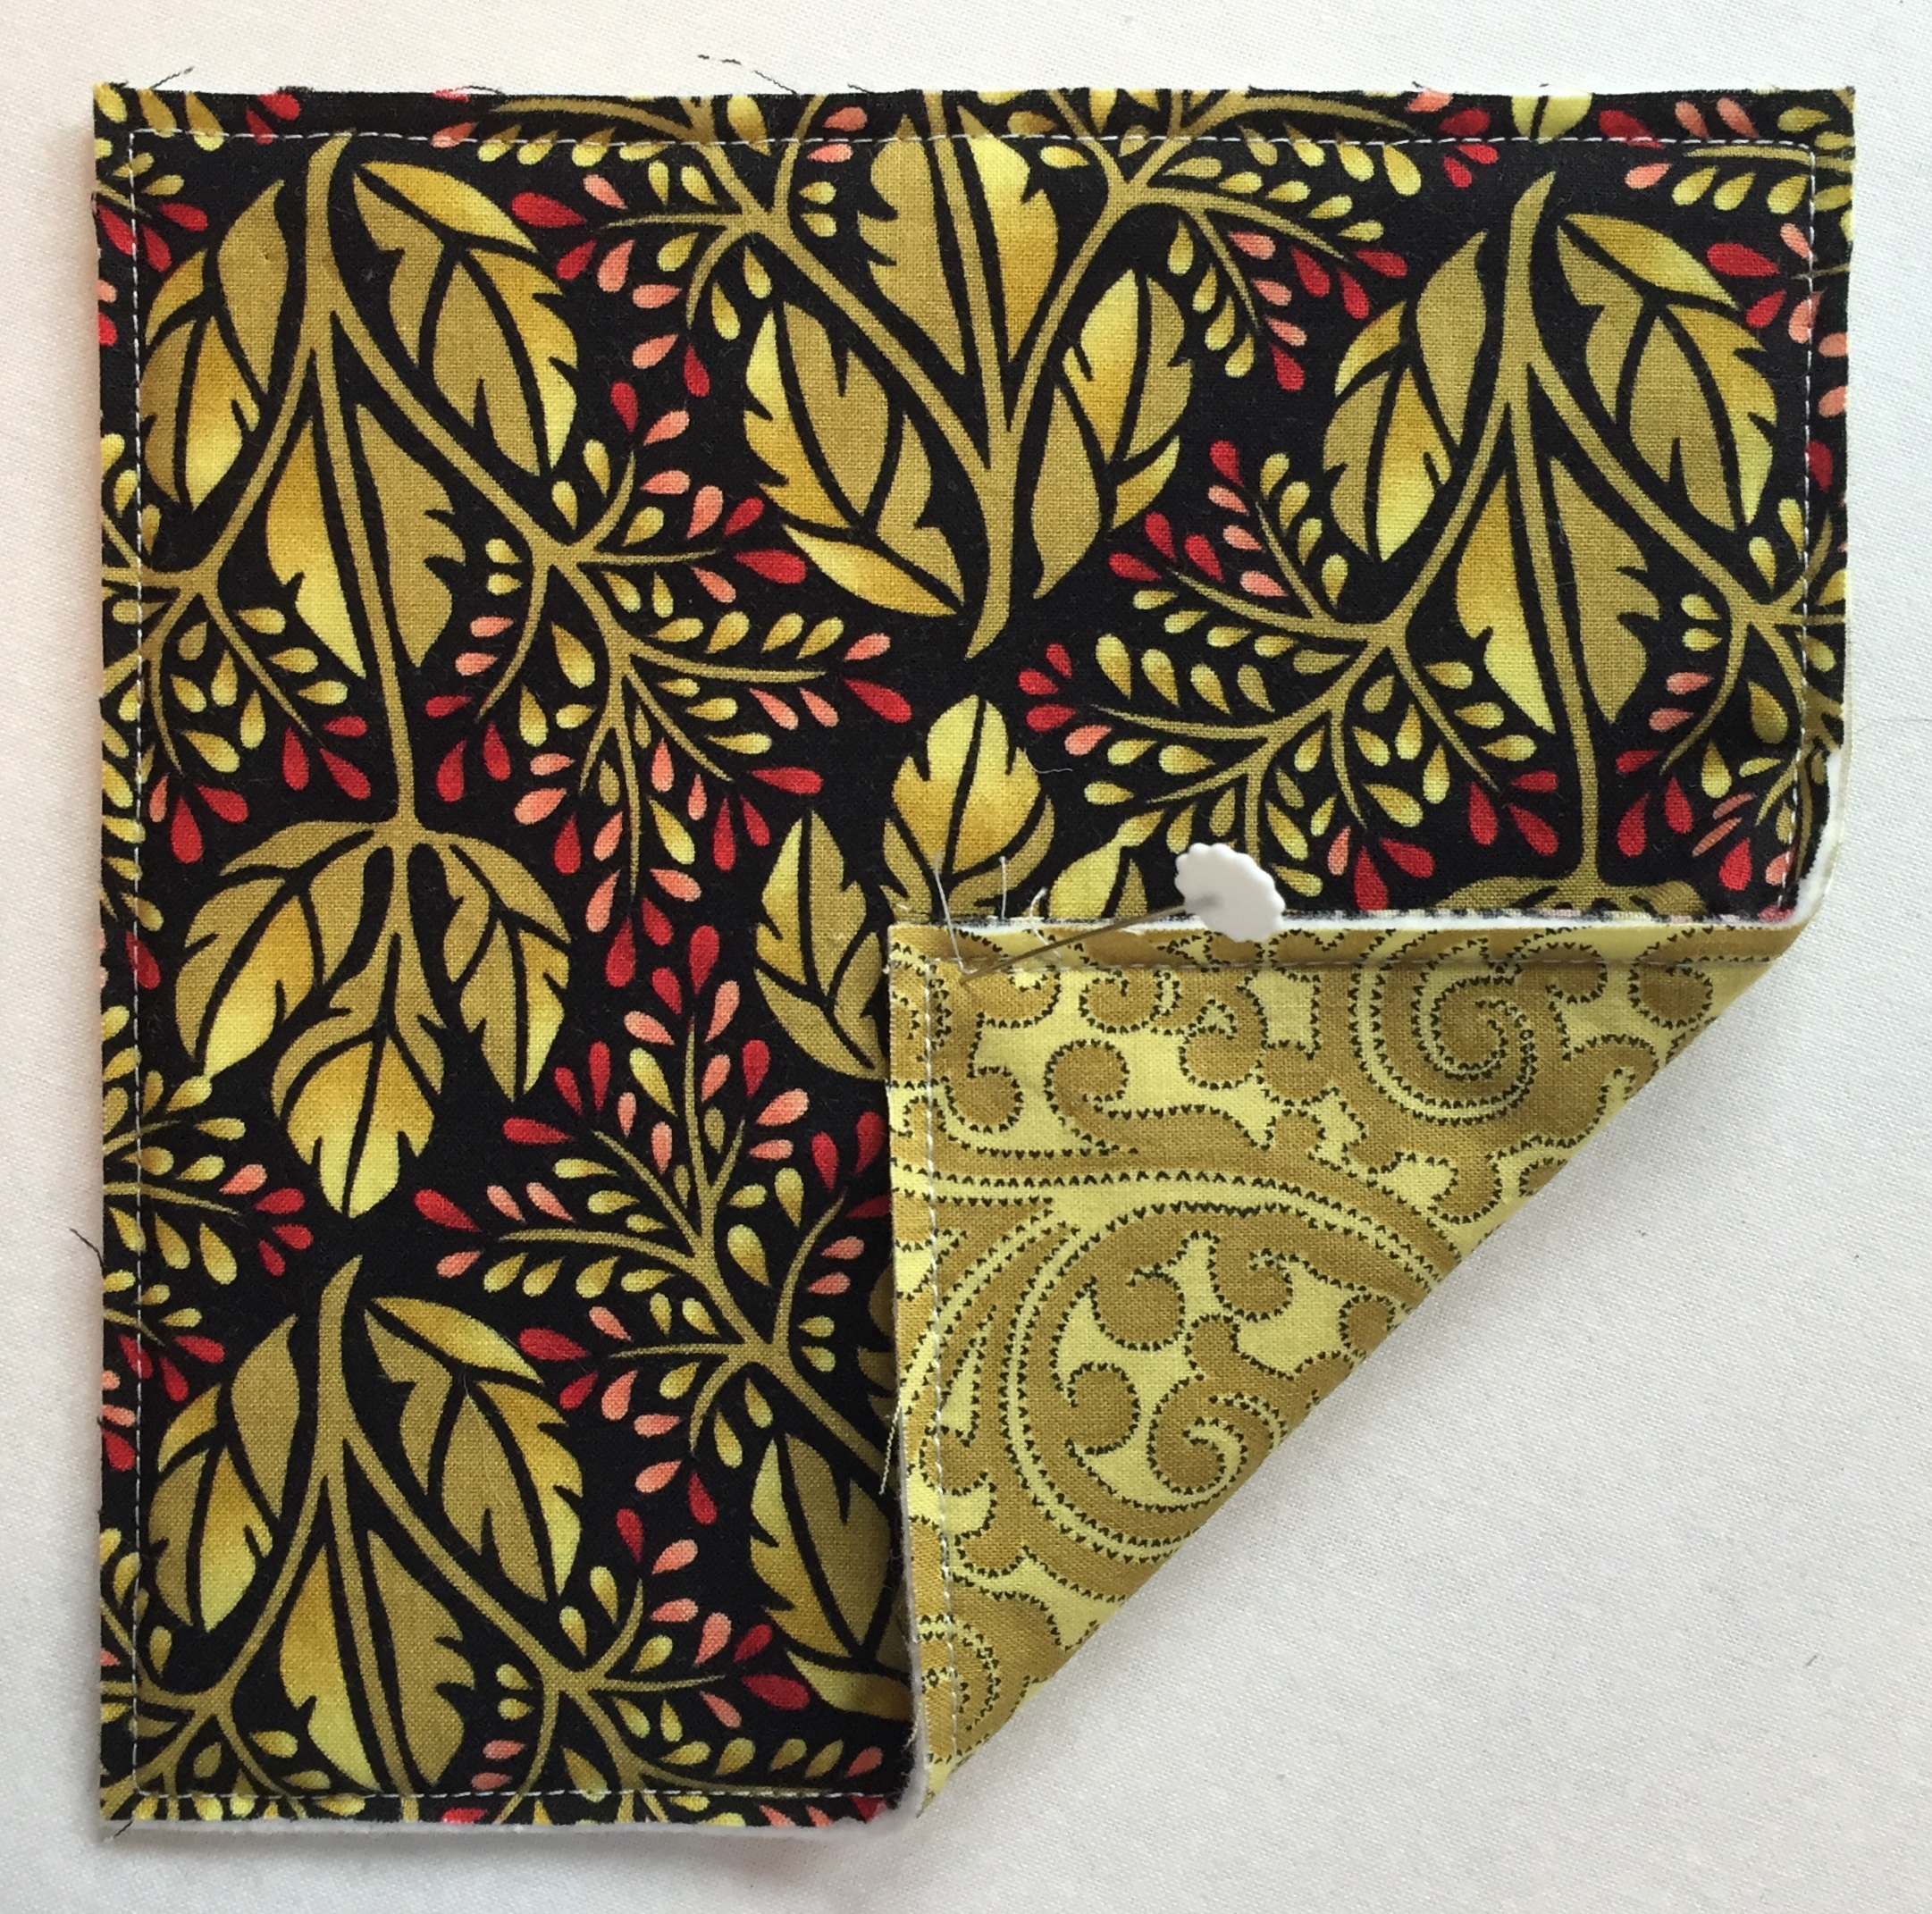
Step 6. Fold the case in half diagonally and mark a stitching line 1¼” in from the upper right corner, tapering to the bottom as close to the binding at the bottom as you can get. (Note: loop is in the upper left corner). The pins in the photo below show the stitching line:
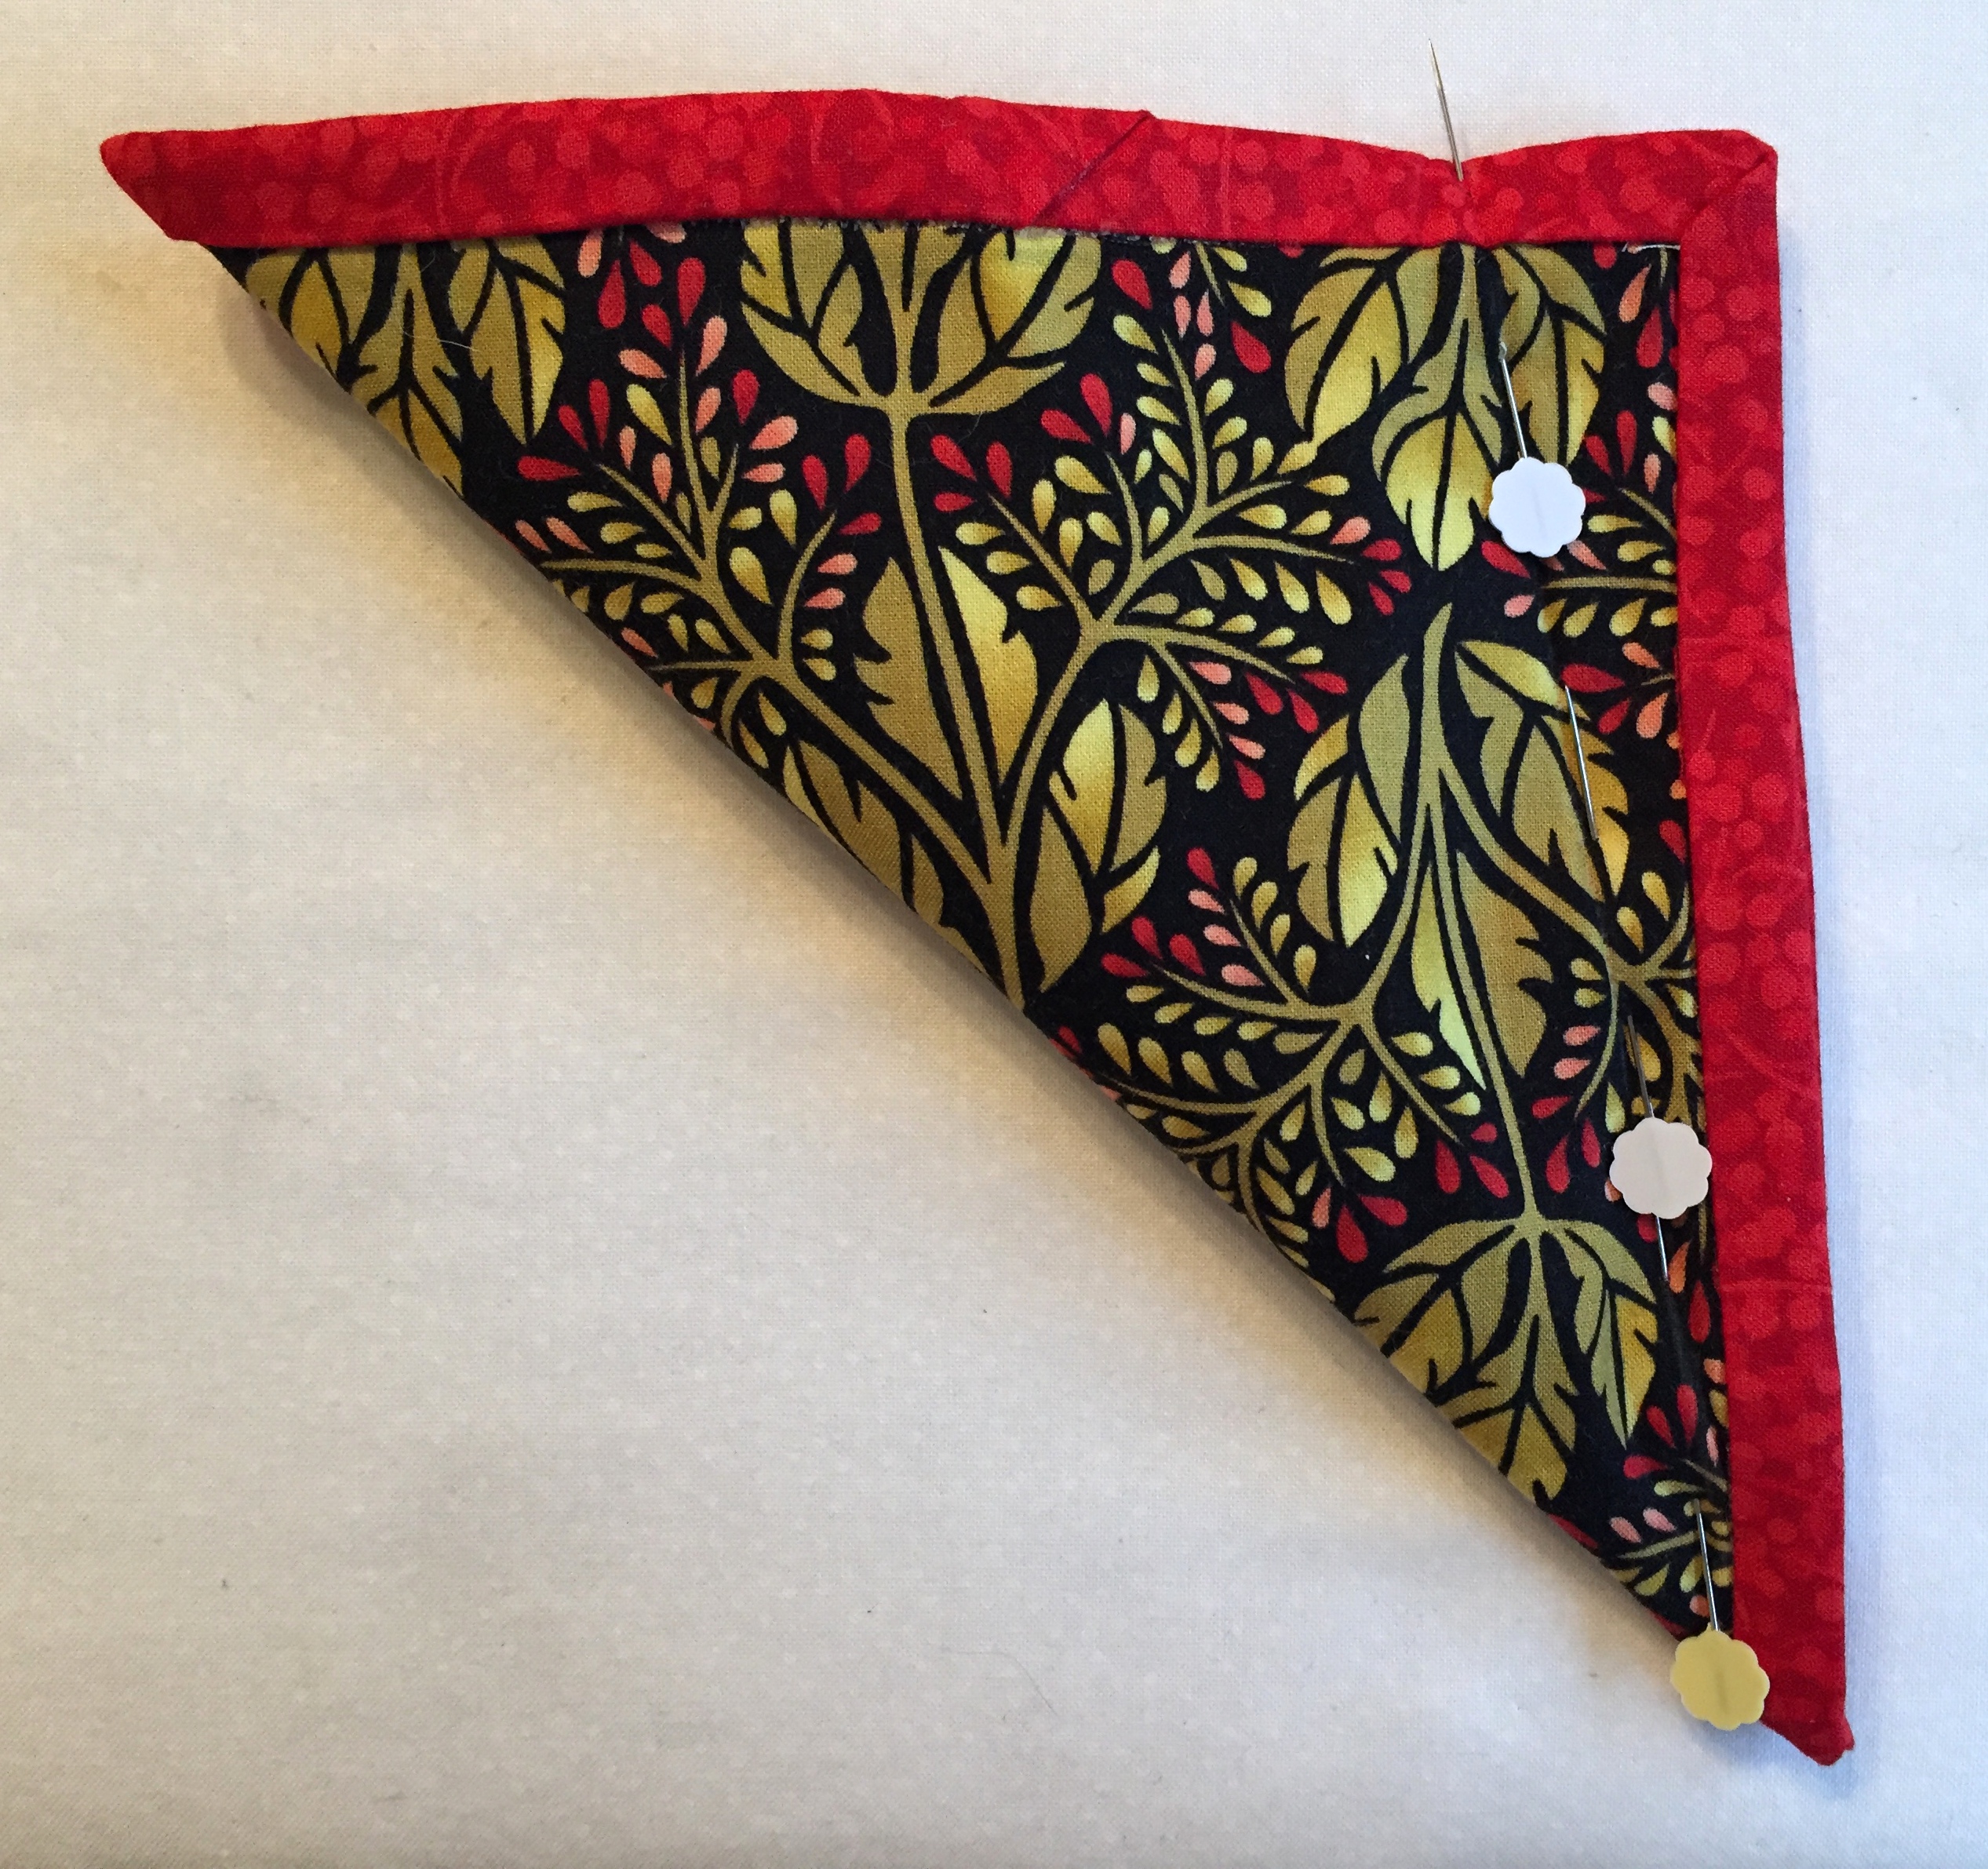
Stitch, backstitching at both ends:
 Note that you stitch through the binding at the top of the seam and taper down toward the corner with the stitching ending right next to the binding. Try using a zipper foot for this line of stitching if the walking foot skips stitches. The stitching will not show when the flaps are folded back. (If using 6″ squares, mark your stitching line 1″ in from the right edge rather than 1¼”.)
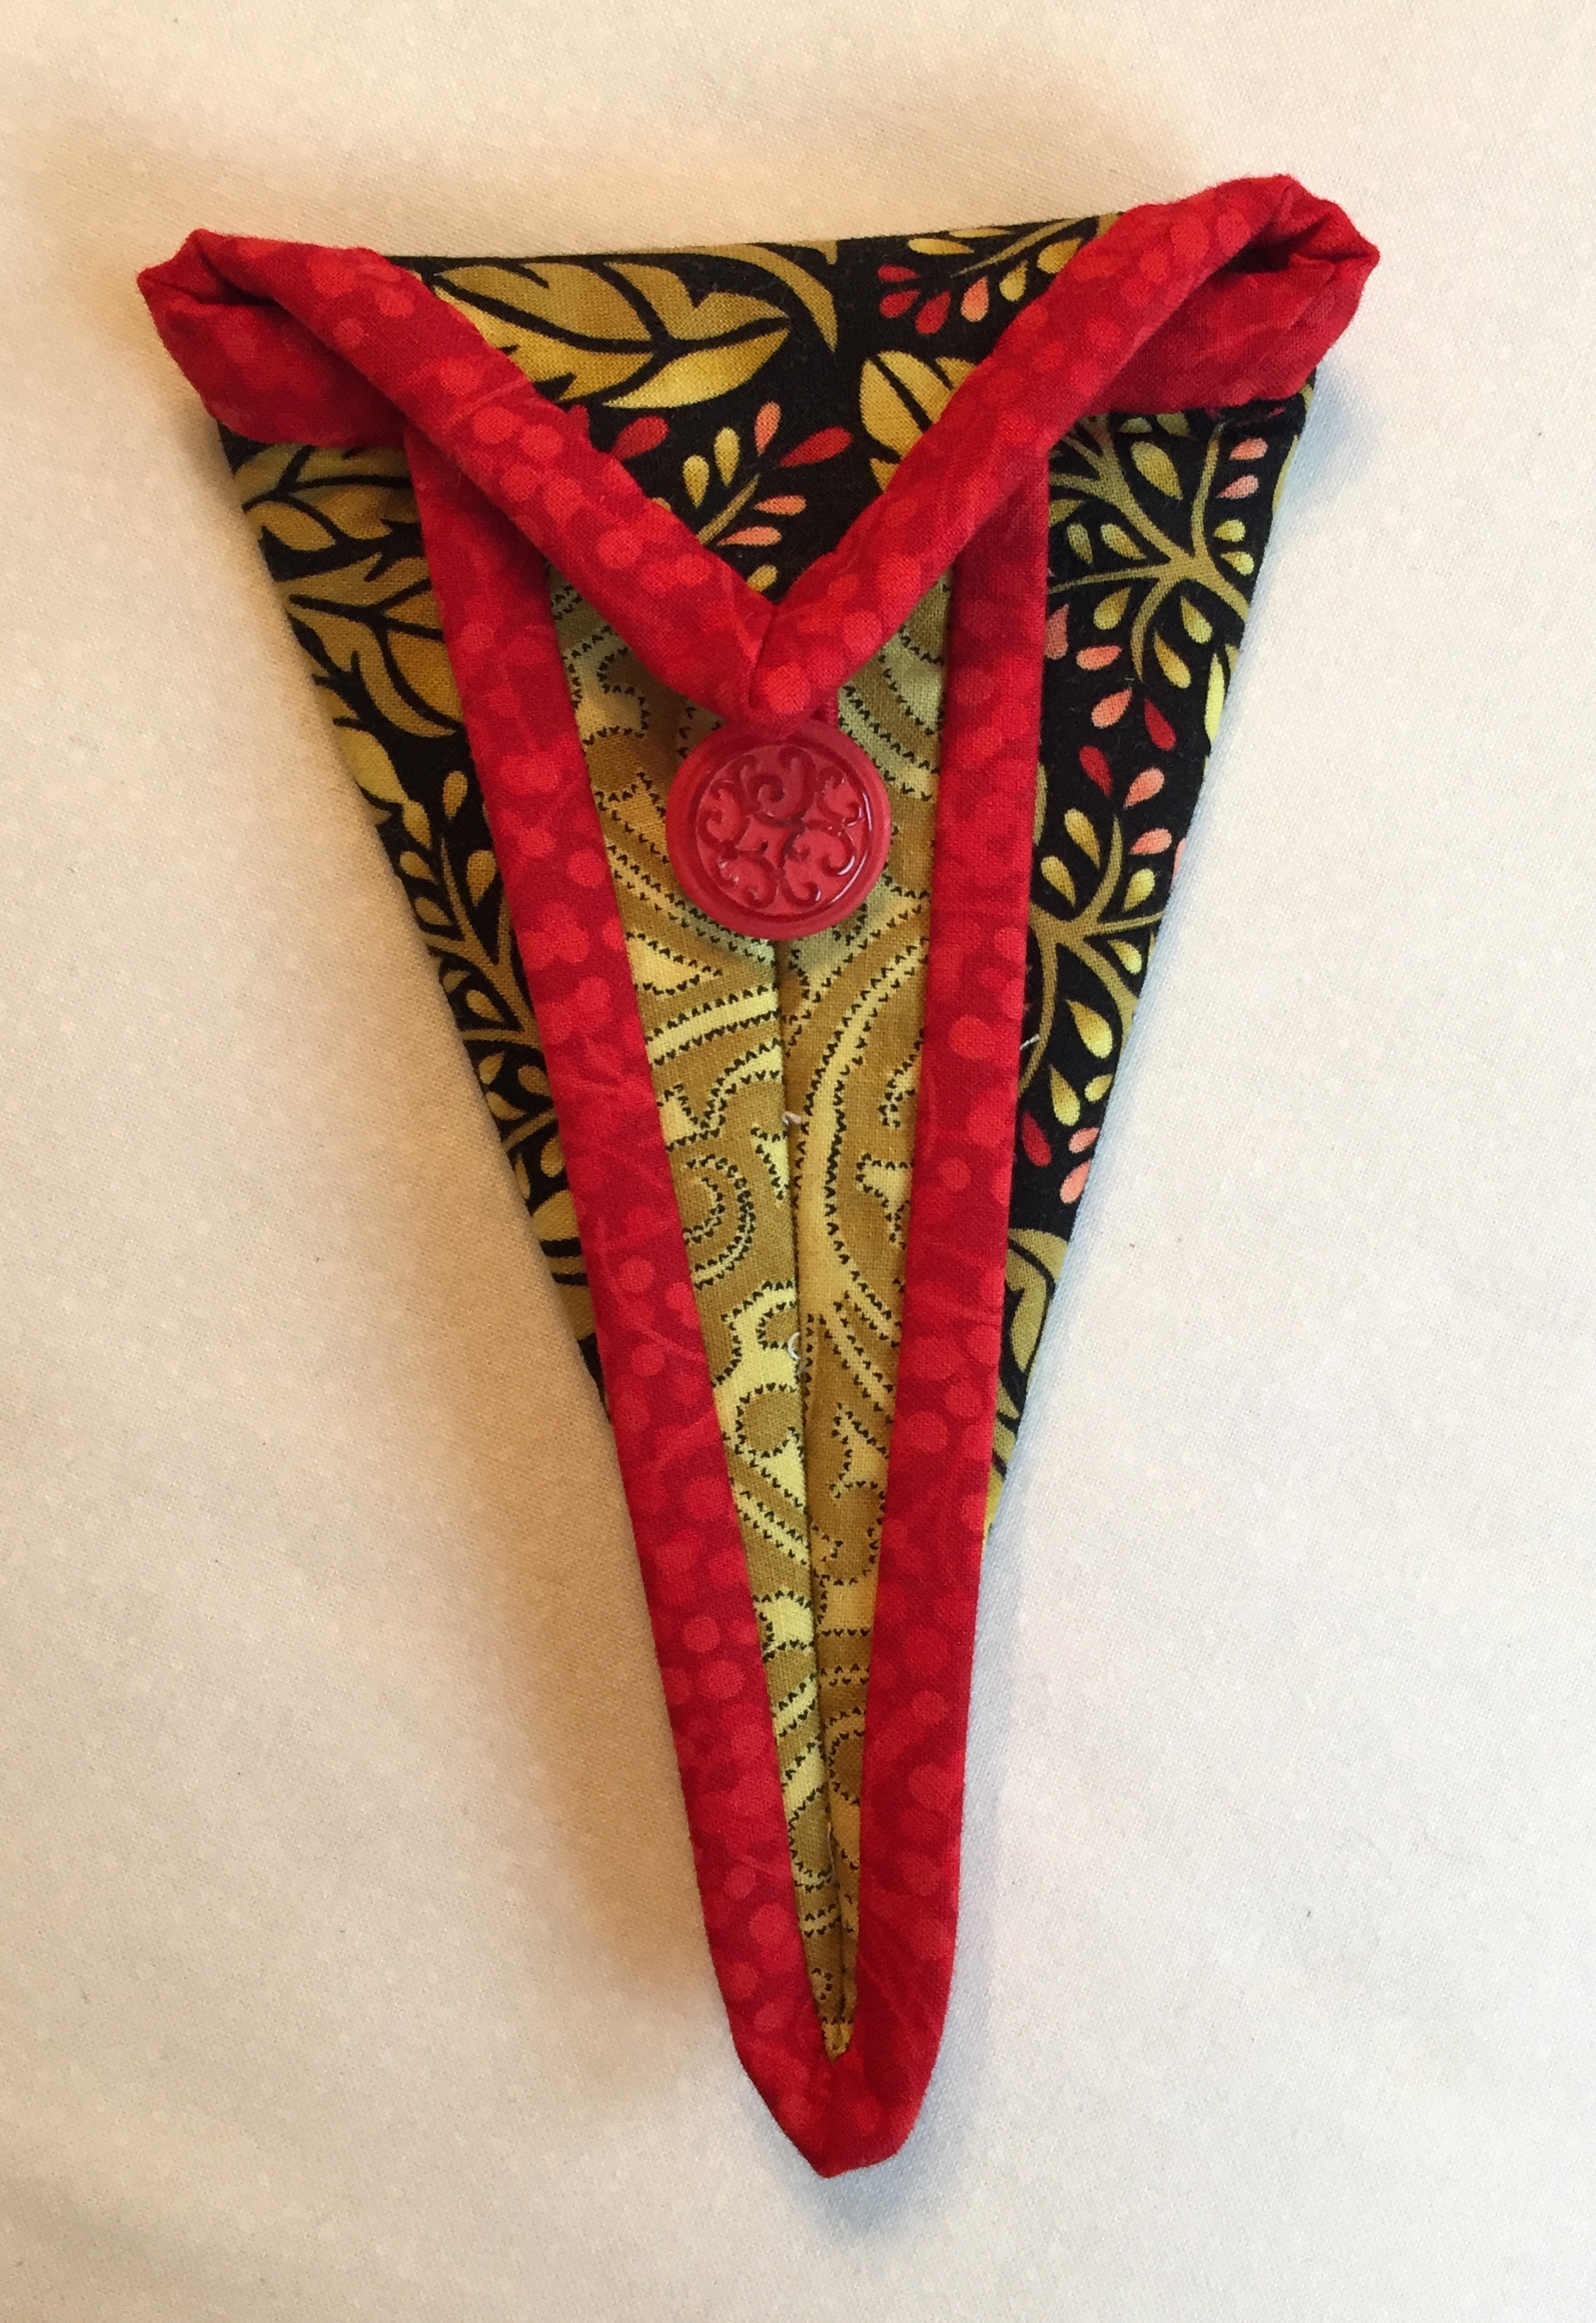
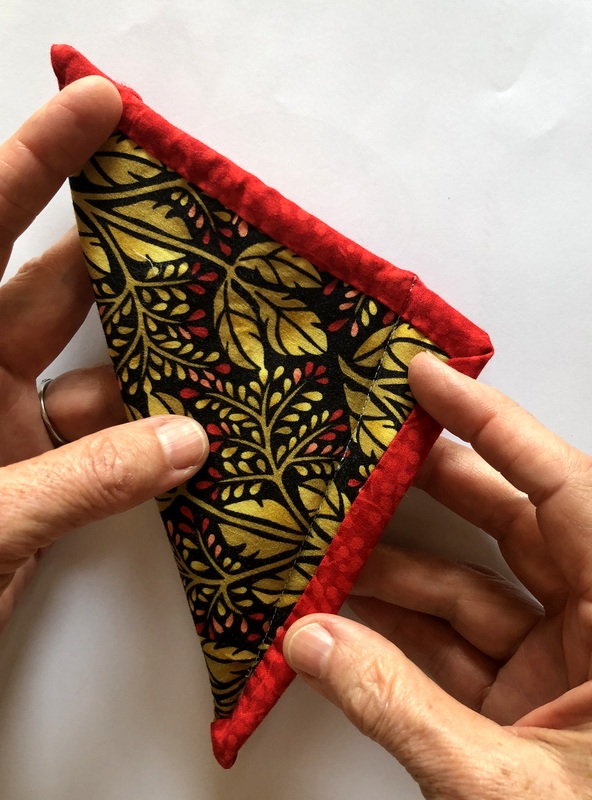
Open up the seam and press flat as shown below. Sew button on seam line (test placement by holding top flap down to see where loop is in relation to button).
Voilà! Ready to use:
Easy peasy! Thank you for such a detailed, yet concise, tutorial. Such a good teacher :)!
This will make such an adorable gift for sewing friends, and would also be a great use for some leftover fabrics that I love but do not have large pieces left over after a quilt project! I’m looking forward to making some of these! Thank you for providing such detailed sewing instructions and beautiful step-by-step photos!
You really are an ace!!
What an awesome creation and tutorial! I can think of a few friends who will likely get one of these as a gift this Christmas. Thank you for linking up with the Tips and Tutorials Festival.
How cute! I will be making some of these cases. Thank you for the tutorial.
Did you mean to edge stitch instead of stay stitch when joining the batting and cotton squares?
Hi, Meagan. Thank you for bringing this to my attention! I originally used “staystitch” which is not accurate because that refers to stitching close to the edge of one layer of fabric to prevent distortion or stretching. “Edge stitch” isn’t quite right, either, as that refers to topstitching. I edited my post to use just the word “stitch.” Thanks again — Dawn