(Part 1 of this tutorial, joining two lengths of bias tape, is available here.)
Part 2, Overlapping ends of bias tape on an apron
Several of the vintage apron patterns in my small collection feature aprons edged in double-fold bias tape. As I was working on my Monterey Bay Apron pattern, I consulted my vintage patterns to compare notes on how the edges were finished. To my surprise, none of them – not a single one – explained in detail how to finish the edges. “Turn under one end” was the most common instruction. I tried that, every way I could think of. The result was always a lumpy bump (a bumpy lump?) where the edges overlapped. After much experimentation I was finally satisfied with two methods. The first method is described below, and the second method is described in Part 3 of this tutorial (coming soon).
I really like the method I am showing you here because it’s fast and easy. It leaves one cut edge of bias tape exposed but the cut is made perpendicular to the folded edges of the tape, i.e. on the bias, so it won’t ravel. It leaves a crisp clean finish, but you can cover the cut edge with a tiny satin stitch if you wish. Here’s what the joined ends looks like:
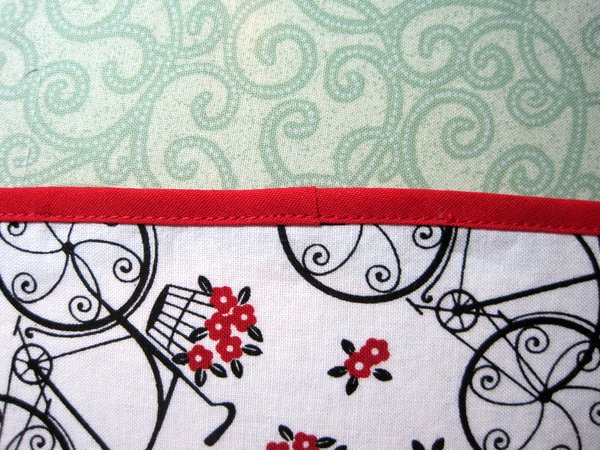
Before you begin, determine where on the apron you want the bias edges to be joined. Look for straight stretches of fabric at least 4” long. My Monterey Bay Apron pattern calls for the bias tape ends to be joined in the places least likely to be noticed: on the back left inside neckline just below the shoulder seam, on the front right side close to the curve along the bottom edge, and in the middle of both apron belt pieces. Look for straight lines on other apron patterns using bias tape to see where the most unobtrusive joining spots are.
Remember that ¼”-wide double-fold bias tape is pressed in such a way that one side of the tape is slightly narrower than the other (from the fold to the outside edge). The narrow side always goes on the right side of the fabric. When the fabric of the apron is inserted into the fold of the bias tape, the wider side of the tape, underneath, is always caught in the line of stitching from the top.
1. On a straight stretch of fabric, insert fabric into the fold of the bias tape. Leaving a 2” tail of bias tape, insert the needle right next to the folded edge of the tape. Take two or three individual stitches to start. Continue stitching right next to the fold, stopping every inch or so to insert more fabric into the fold of bias tape and to adjust for any curves.
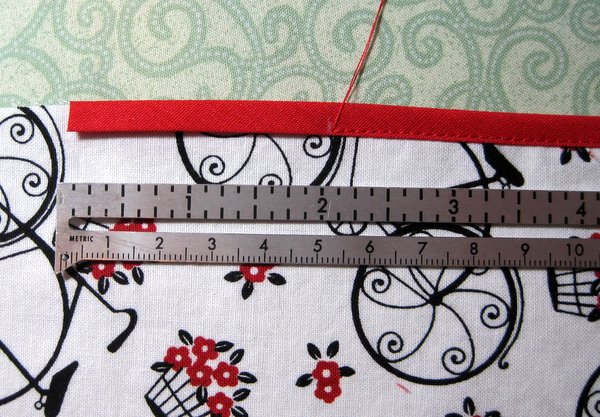
2. Stop stitching 3” from the starting point. Change stitch length to almost zero and take two or three tiny stitches. Clip threads. Cut off the excess bias tape, leaving a 3” tail from the end of stitching.
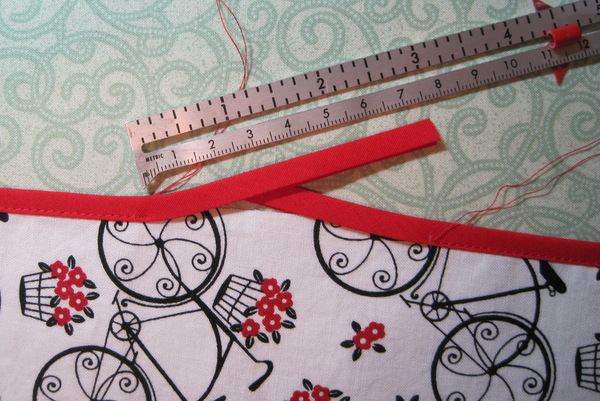
3. Trim the right-hand tail to 1½”:
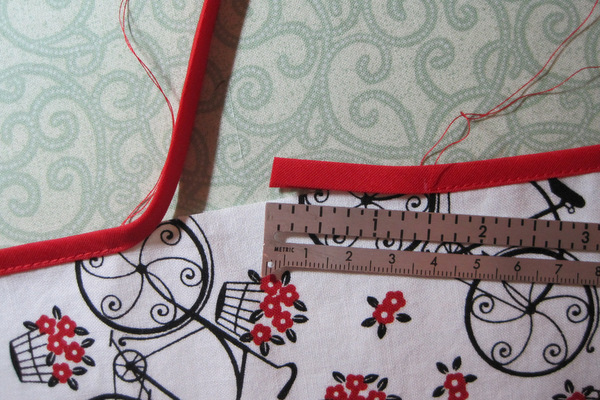
4. Trim the left-hand tail so that it overlaps the right tail by ½”. The cut should be perpendicular to the folded edges of the bias tape.
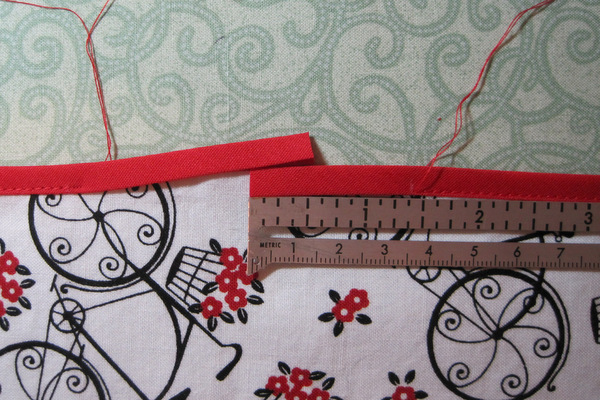
5. Cover the tape on the right side with the tape from the left side. Using the point of a small sharp-pointed instrument such as a stiletto (I use a bamboo skewer), coax open about an inch of the first fold of the bias tape on top and tuck it under the bias tape beneath it:
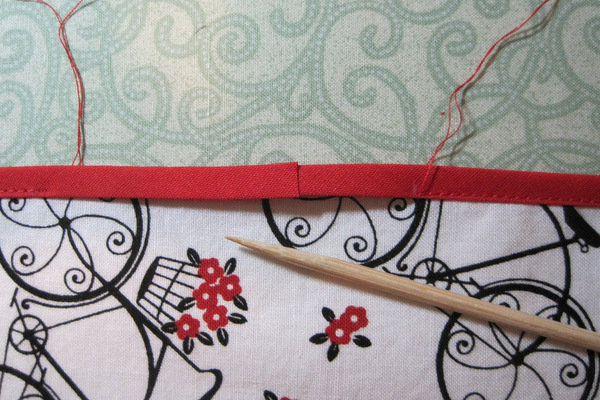
6. Do the same thing on the back side:

7. Finish sewing the bias tape to the apron, beginning and ending with tiny stitches as shown:
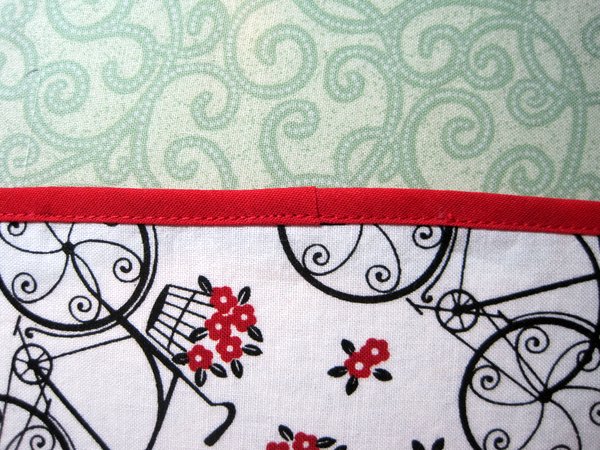
And there you have it! In Part 3, I’ll show you how to join ends of bias tape on an apron using a diagonal seam, similar to finishing the binding on a quilt but with the added challenge of using inch-wide bias tape with multiple folds. This method is quite labor-intensive but it is definitely do-able and the result is a seam that is almost invisible.

[…] Part 1 of this tutorial, joining two lengths of bias tape, is available here. Part 2 of this tutorial, overlapping ends of bias tape on an apron, is available here. […]
I love the idea of using small stitches instead of back sewing. I think I will use that technique from now on! Great idea!