Part 1 of this tutorial, joining two lengths of bias tape, is available here.
Part 2 of this tutorial, overlapping ends of bias tape on an apron, is available here.
Part 3, Joining ends of bias tape on an apron
If you have ever finished attaching binding on a quilt by joining the two loose ends with a diagonal seam and then sewing the newly-joined strip to the quilt edge, this method will look familiar. On a quilt edge, you are normally working with binding that’s at least 2″ wide, 1″ when folded. On an apron edge, you are working with bias tape that’s 1″ wide and a mere quarter-inch when folded. That makes finishing the seam both challenging and time-consuming but the result is a seam that is almost invisible. Take a look at the bias trim on this apron belt piece:
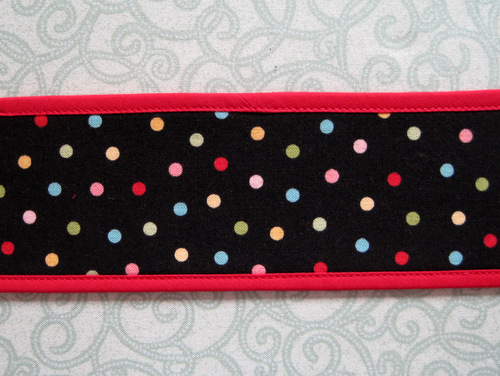
On my Monterey Bay Apron, I use the overlapping method (described in Part 2 of this tutorial) on the inside edge around the neckline. There’s just no straight stretch long enough to accommodate the method described below. But you can use this method on the outer edge of the apron (along the bottom front, for example) and on both belt pieces. Look for straight lines on other apron patterns using bias tape to see where the most unobtrusive joining spots are.
Remember that ¼”-wide double-fold bias tape is pressed in such a way that one side of the tape is slightly narrower than the other (from the fold to the outside edge). The narrow side always goes on the right side of the fabric. When the fabric of the apron is inserted into the fold of the bias tape, the wider side of the tape, underneath, is always caught in the line of stitching from the top.
1. Leave 6″ between the beginning and ending points of stitching and leave 6″ tails on each side. Make a mark at the midpoint on the apron and 3″ from the starting point of stitching on the right-hand tail. The marks should be at the same point, as shown below:
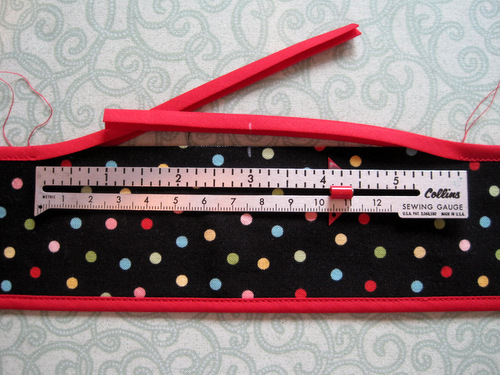
2. Press the right-hand tail open about an inch and a half from the end. Don’t try to press the fold lines completely out. With the right side up, make a diagonal cut as shown about 1/4″ to the left of the mark on the bias tape:
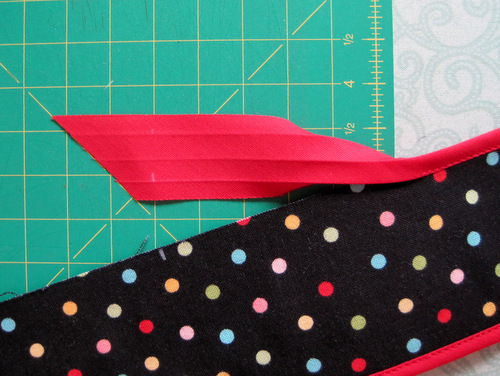
3. Lay the left-hand tail over the edge of the fabric. Lay the right-hand tail on top. With a removable marking pen or pencil, make a diagonal mark next to the cut edge of the right-hand tail.
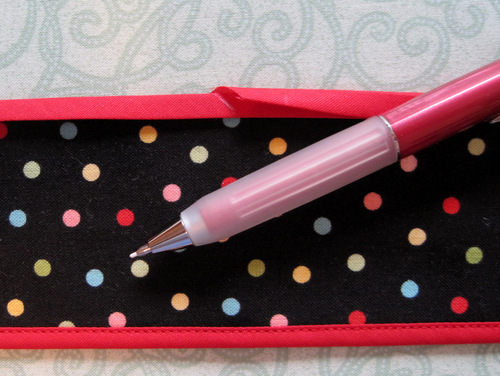
4. Open out the left-hand tail and press open about an inch and a half from the end. With right side up, draw a diagonal line exactly 1/2″ to the right of the mark made in Step 3. Cut along that line.
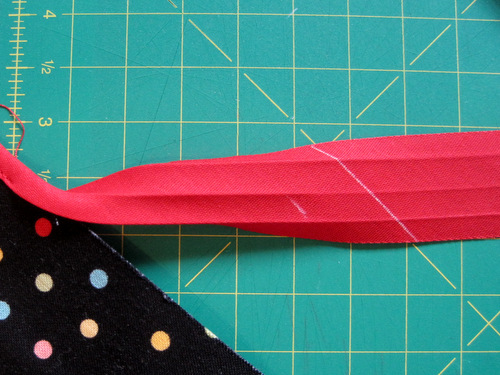
This is what the two cut ends should look like:

5. With right sides together, pin the two ends as shown, overlapping 1/4″ at each end.
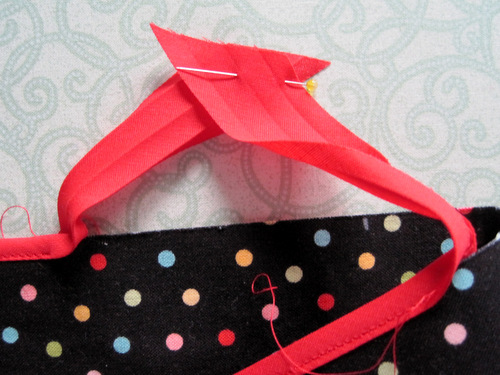
6. Draw two lines 1/4″ apart on a small scrap of paper. Lay the pinned edges of bias tape on top, aligning the two cut edges with the line on the right. Leaving tails at both ends, sew a 1/4″ seam, using the drawn lines as guides. Use 15 stitches to the inch or 2.0 on a computerized machine.
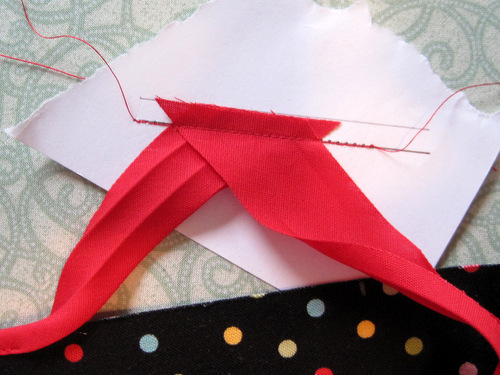
7. Gently tear the paper away. Trim seam to a scant 1/4″ and press open. Trim dog ears from seam but leave thread tails in place. Carefully press folds back into place, using just the tip of the iron. Be very careful not to stretch or distort the length of tape.

8. Now open the bias tape and trim the thread tails. On the right side, encase raw edge of fabric between the folded edges of the bias tape and finish stitching the seam, beginning and ending with tiny stitches.
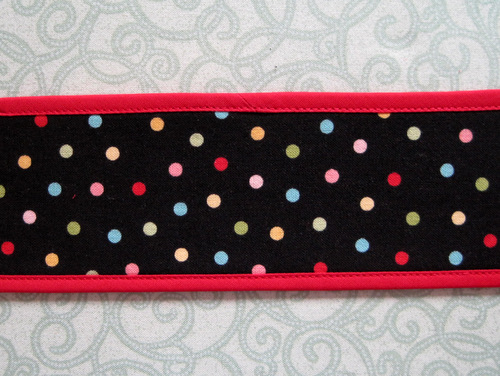

Amazing!
Thank you for this whole series of posts. This one is especially helpful!
thanks so much for your comment, Katie! It’s good to know the tutorial is being used.
A quilting friend started making 1/4″ bindings on charity baby quilts. She liked it so much that she started doing it on bigger quilts. I like how very clean and tidy her 1/4″ bindings looked on the bigger quilts. You could even make it a little stuffed (another friend does that to her bindings- takes in a little bit more of the quilt than the width of her binding), which also gives a little dimension. I’ve never tried doing a 1/4″ binding. After seeing your really well-done tutorial, I’m enthused to try it. Thank you for taking all the time to lay out the pix and instructions. Your tutorial is really thorough and very well done.
Super helpful photos, thanks for this, it is just what I needed!