Last August I posted a tutorial about using template plastic as a sewing guide when making snowball blocks (you can see the post here). I noted that the template could be used with just about any block that calls for a triangle to be made from a square or rectangle.
Using a template eliminates the need to draw lines marking the diagonal — for snowball or square-in-a-square blocks, for example — or ¼” inch on either side of the diagonal, as you might for Half-Square Triangles made from two squares of fabric. Drawing lines on fabric may not seem like a big deal but it takes a surprising amount of time, especially if you are working on a big project.
The template I made back in August measured 2½” x 4½”, the perfect size for the 6″ snowball blocks I was working on at the time. When I started working earlier this year on my version of Reach for the Stars, a medallion sampler quilt with triangles of all sizes in every single block, I made a larger plastic template with a couple of modifications.
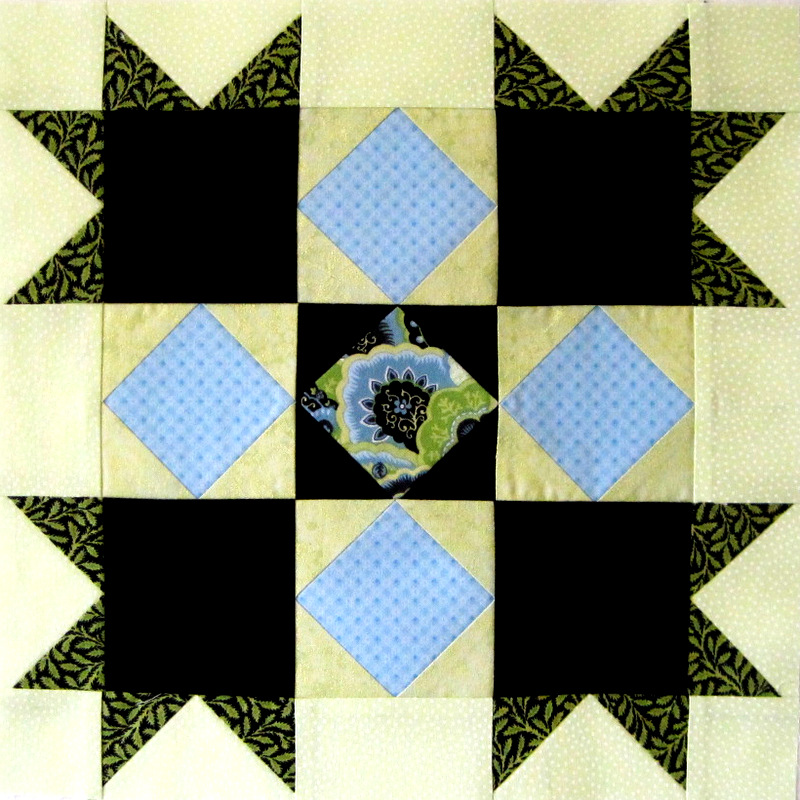
I’ll show you how I used it in Block 7 of my Reach for the Stars project:
See the five square-in-a-square components in the center of the block? They’re the blue and green ones and the one in the very middle of the block.
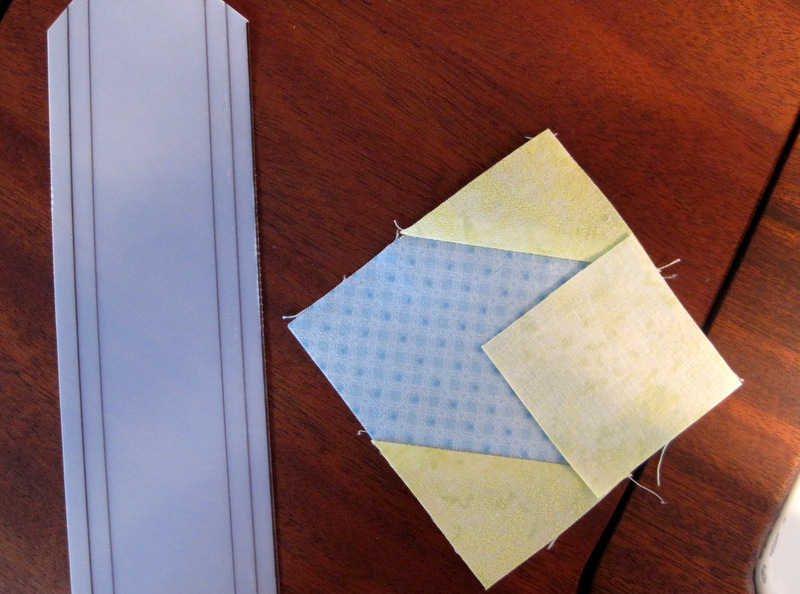
For each square-in-a-square, I first sewed two squares on opposite corners, trimmed the seam, and pressed the seam toward the corners. Now I’m getting ready to sew the third square on:
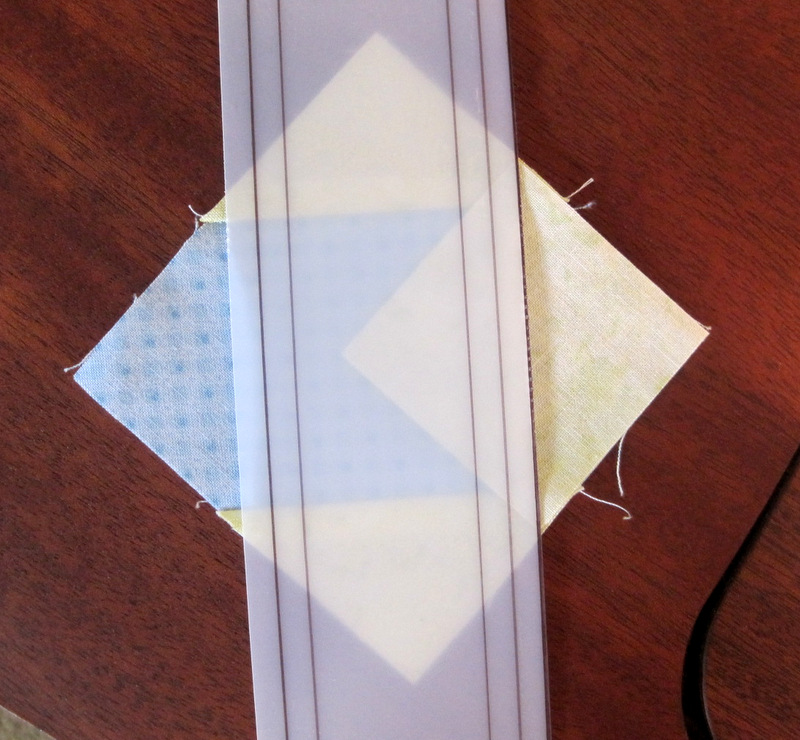
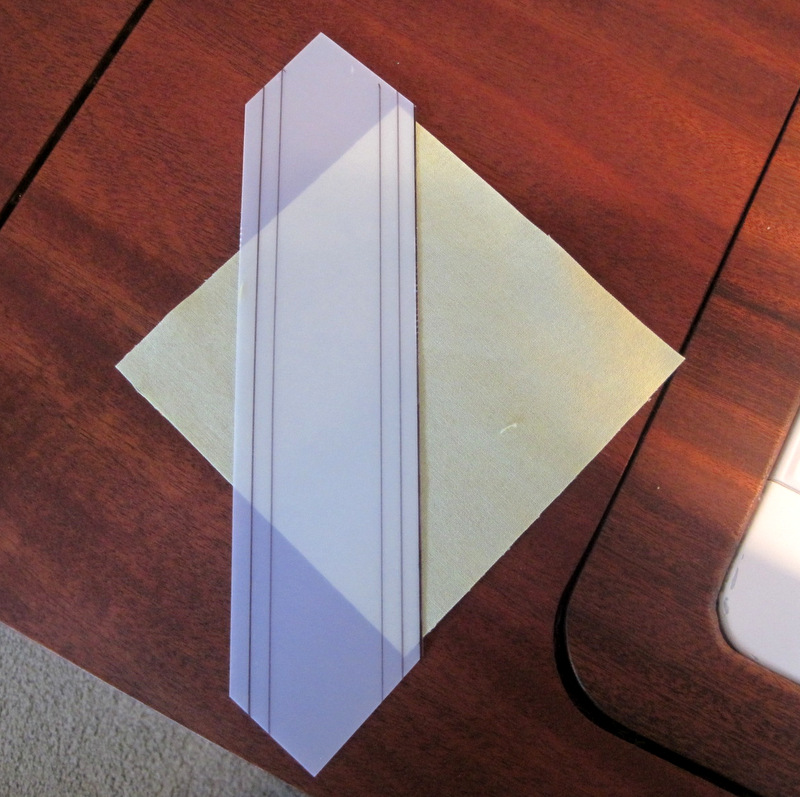
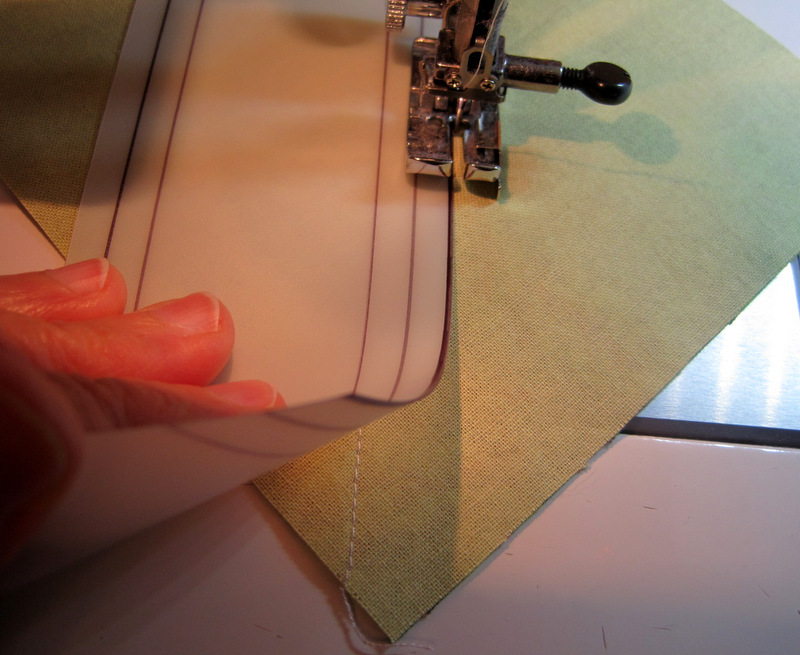
I lay the template on top of the fabric with the right edge of the template lined up with the diagonal of the square:
Because I can see through the plastic, I can easily see that my template is positioned correctly. Did you notice that the right edge of the template is marked with black ink? That helps me see the edge of the tool on light fabric. When I’m sewing on dark fabric, I used the other edge.
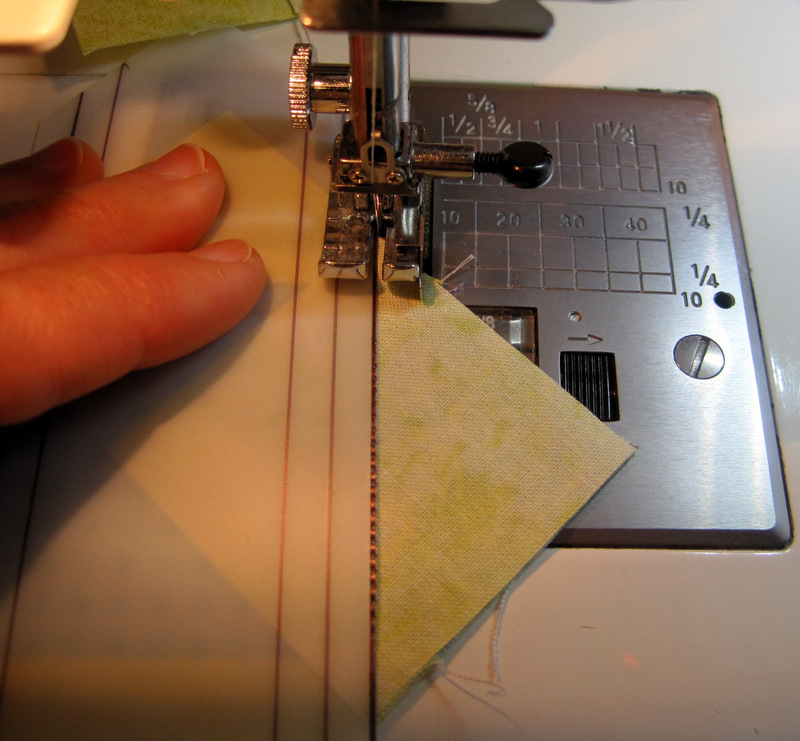
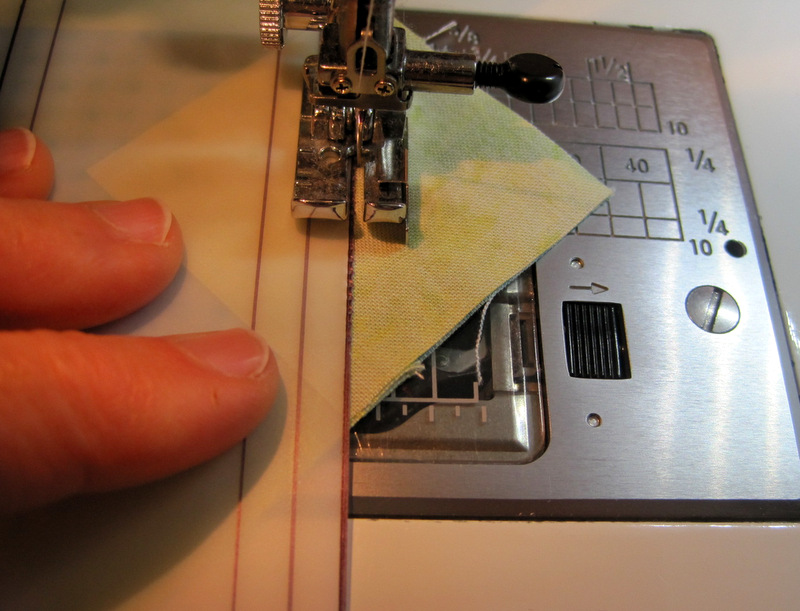
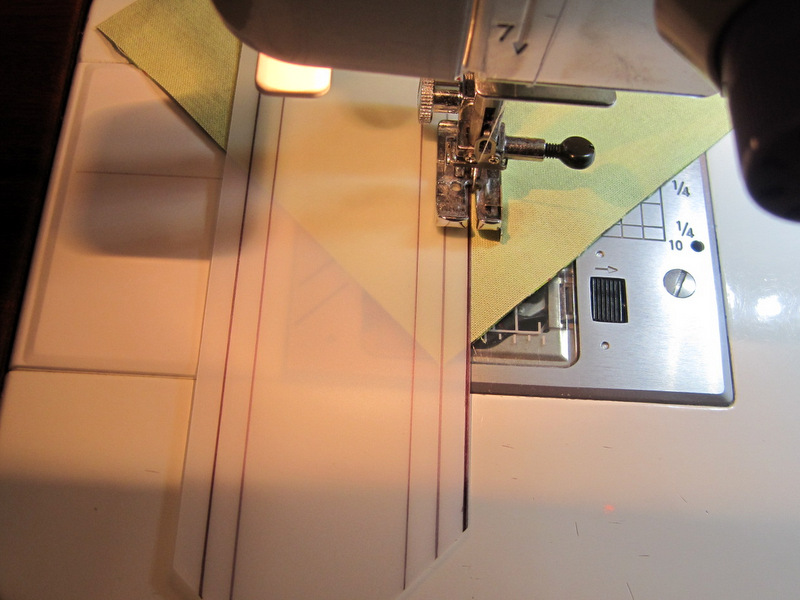
Now I’m ready to sew. With the needle down I position the fabric right next to the edge of the template . . .
. . . and start sewing. As I stitch I can see that the edge of my template is in position along the diagonal of the square. My left hand on the template keeps it firmly in place:
On bigger pieces I use both hands to keep the fabric and template in place.
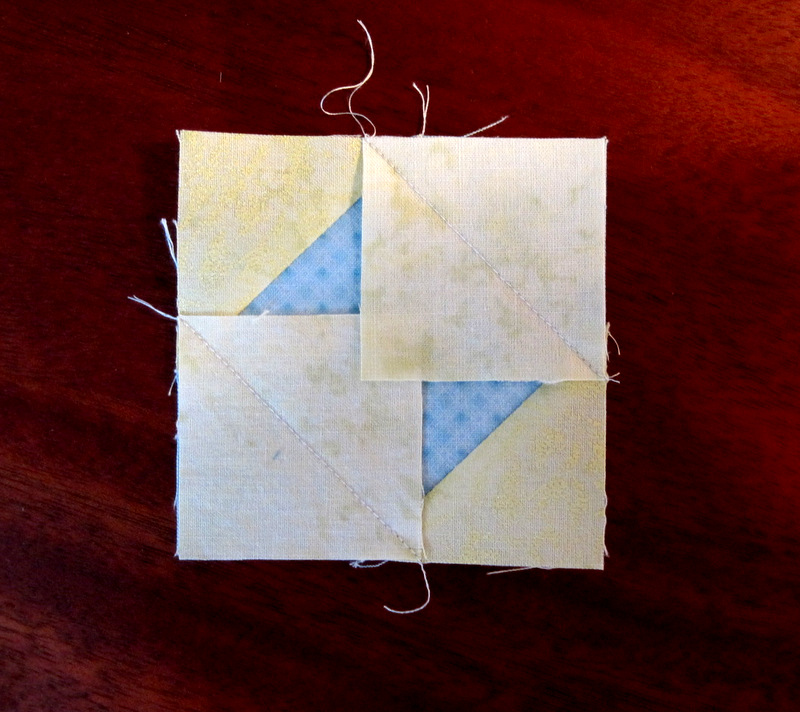
Here is my square-in-a-square, with the two edges ready to be trimmed and pressed:
(Every now and then as I am sewing next to the template I let the needle get too close to the template and it takes tiny bites out of it. That’s why you see what looks like perforation marks on the edge. I can still use the template for quite a while but eventually I will need to make a new one. And change my needle.)
Now what about those lines on the inside of the template, you ask? They are exactly ¼” and ½” in from the edge on both sides. When I am sewing Half-Square Triangles (HSTs) made from two squares, the ¼” line is on the diagonal and the edge of the template is right where it needs to be. To illustrate, I have two 5″ squares, right sides together, ready for the first line of stitching:
See how the ¼” line is on the diagonal of the squares?
Stitching the first line:
When I flip the block around to sew the second line, that ½” line on the template is directly on top of my first stitching line. I am lifting up a corner to show you what I mean:
Strictly speaking, that ½” marking isn’t necessary but I like it because it gives me one more way to test the accuracy of my stitching.
Would you like to make your own template? Here’s what you need:
— a strip of template plastic (frosted or clear) about 2¼” x 10″
— a piece of scratch paper (8 1/2″ x 11″ is perfect)
— a clear acrylic ruler (my favorite size for this purpose is 4″ x 14″)
— an Ultra Fine-Point Sharpie (or other fine point permanent marking pen) in black
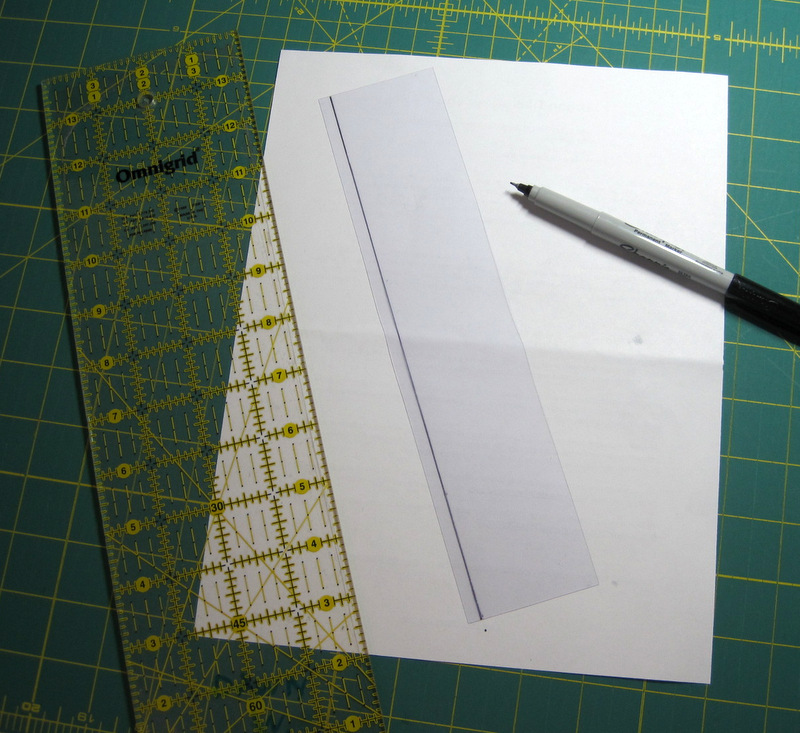
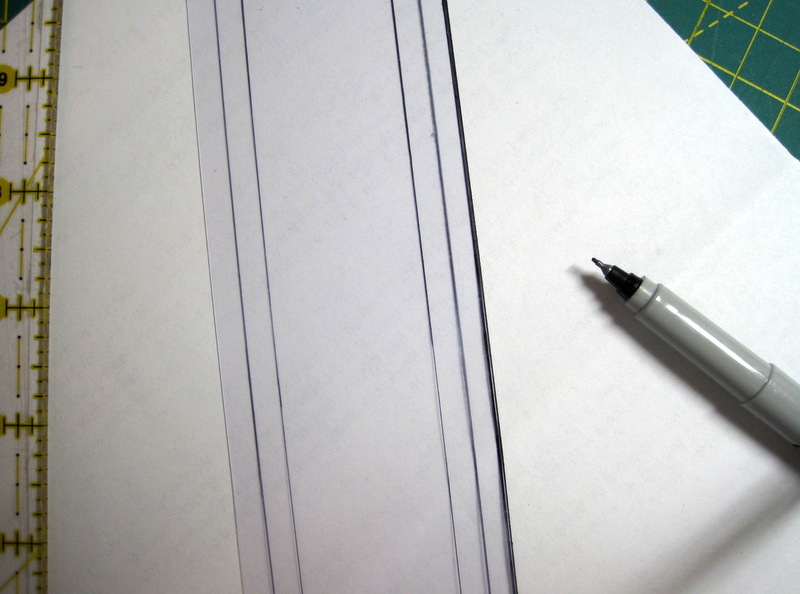
1. Lay the strip of plastic on the scratch paper and, using a ruler and Ultra Fine-Point Sharpie, draw a scant ¼” line from one long edge:
The measurement needs to be scant because 1) the line you draw with the pen will add to the measurement and 2) when using the template you will be stitching right next to the edge of it.
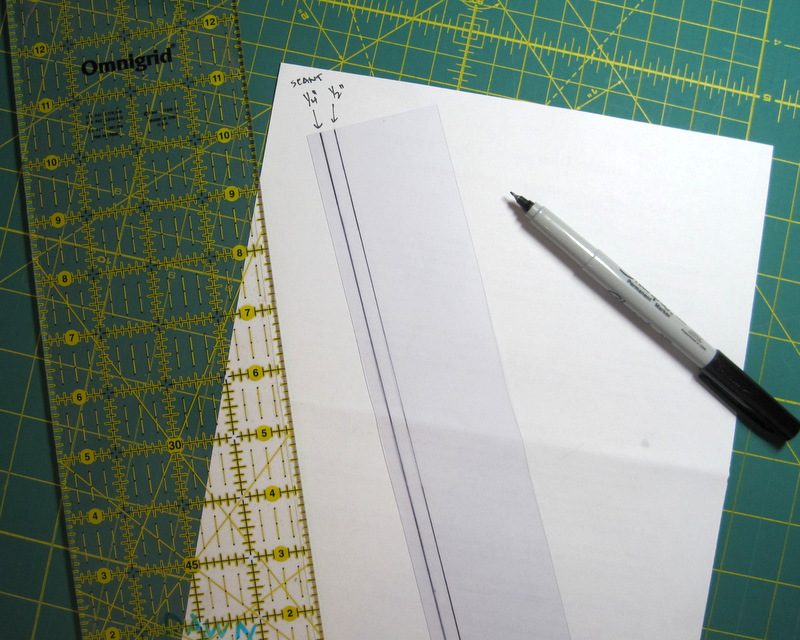
2. Draw a line exactly 1/4″ away from the first one:
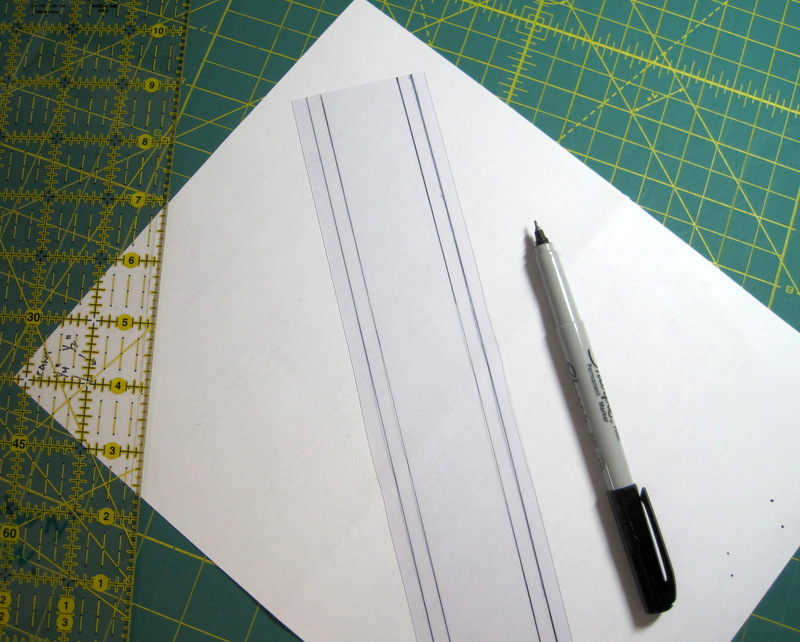
3. Repeat for the other side:
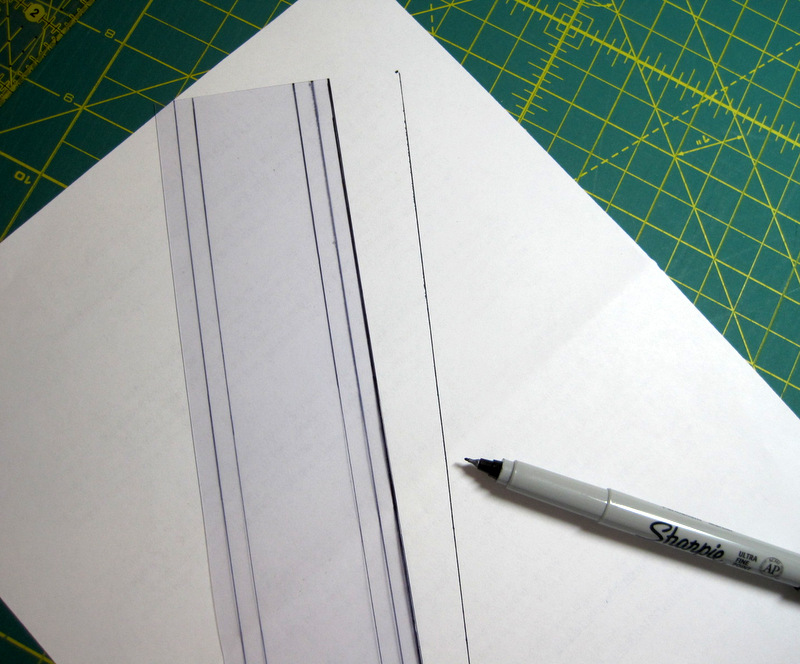
4. Lay the ruler very close to one edge and draw a solid line. You shouldn’t be able to see the edge of the plastic at all:
The reason for working on top of scratch paper:
Wasn’t that easy?
If you decide to make this template tool, please leave a comment to let me know how it’s working for you. Happy sewing!

Great post, Dawn! I had missed the original post about the template, but this one comes at a timely manner. Something like this has honestly never occurred to me, but definitely seems worth trying out!
I have used this since the first time you posted it. Great Tool. Just made 120 “fold over corners ” yesterday, and couldn’t do it that fast without this Tool. Thank you for sharing.
Merethe
Brilliant – I hate drawing all those lines too but love square in a square but not when they turn out wonky. Thanks for the great tip. I know I will be using it!!
This is definitely going to be one of my favorite tips. I will use a a Stitch in the Ditch foot along with this to keep from hitting the template while sewing. The bar in the middle of the foot will lay next to plastic and keep you straight. The foot may look like the blind hem foot, but is definitely different. Thanks so much for the tip.
Just started using this technique but using index card. I will definitely be making this template as it will be much easier being able to see through my template plus the advantage of being able to sew on each side of diagnal
Love this, definitely going to make two one for home and one for travel!
Great idea! I haven’t made this yet but I will. It would be fantastic for traveling.
Thanks for sharing.
Absolutely brilliant. Many thanks
I have been using a Post-It Note to put along the diagonal and the glue is just enough to hold the top fabric in place while sewing. I got the idea from Nancy Brenan Daniel almost 20 years ago, who got the idea from Sonnie Meek. I am going to try your template idea, and put a few sandpaper dots on the plastic to keep it from moving. If you have two templates, you can chain piece without lifting the presser foot and just keep feeding the fabric through.
Excellent tip about the sandpaper! There are rubbery dots that could work well.
oooo! This simple tool plus the ditch foot, and a person on Pinterest (where I found this tip) noted she was going to put those little sand paper dots on it to make it grip the fabric – – – ingenious, you guys! I’ll make one next time I’m doing diagonals.
Great idea! I’ll have to give it a try.
I intend to make one of these. Should be a great time saver.
Could you please tell me what is Scratch paper.
It’s scrap paper, Helen, usually recycled from something I printed from the computer.
What a wonderful idea. Making one for me too. crystalbluern at onlineok dot com
Could you use a zipper foot next to the template to keep from perforating the template?
It would be fiddled though possible. You should make one or more samples as the needle has to be in just the right spot at the edge of the foot. Worth trying!
Most zipper foot attachments have a very thin, edge, closer than 1/4 inch. I wouldn’t use mine for that reason.
Thank you so much. This is a great idea. I love it. Thanks for sharing.
How do you measure the scant quarter inch?
In the case of the plastic template, I place the right edge of my acrylic ruler on top of the paper, aligning the 1/4″ line on the ruler with the left edge of the paper. Then I move the ruler a tiny bit to the left — the equivalent of two or three threads — just enough to make that 1/4″ measurement “scant.” Hope that helps, Kathy!
Thank you for a great time-saver! I used a red pen for the 1/2″ line so I wouldn’t get lost while sewing.
What a great idea thank you for sharing, will definitely be making a couple of these. 🙂
Peg
i knew there had to be a better way than putting tape on my new $2000 machine! thank you!
this will be a fantastic time saver!!!! thanks so much
Un outil surement très pratique, je vais essayer bien vite…
Saw this on pinterest. This is brilliant! I will go make one today and use it to piece quilt binding. I usually just shoot for the corner and eyeball it, but being able to see through the plastic will help with bigger squares. And the extra seam allowance will make it work to not waste the extra fabric. Woo hooo! Thanks.
I’ve used plastic templates for different projects but this will definitely be on my to do list! I will also plan to attach a few nonskid discs to help hold the template in place.
Thank you soooo much for sharing this cool and clever tip and tool! I have finished a HST Postcard from Sweden miniquilt for a swap and I had to draw a diagonal line on 600 2″ squares and it was so boring! Now I will make another mini for me using your tool! Thank you sooo much, and many hugs from Brazil! :))
What a fantastic idea! I’m going to try it as soon as I can.