
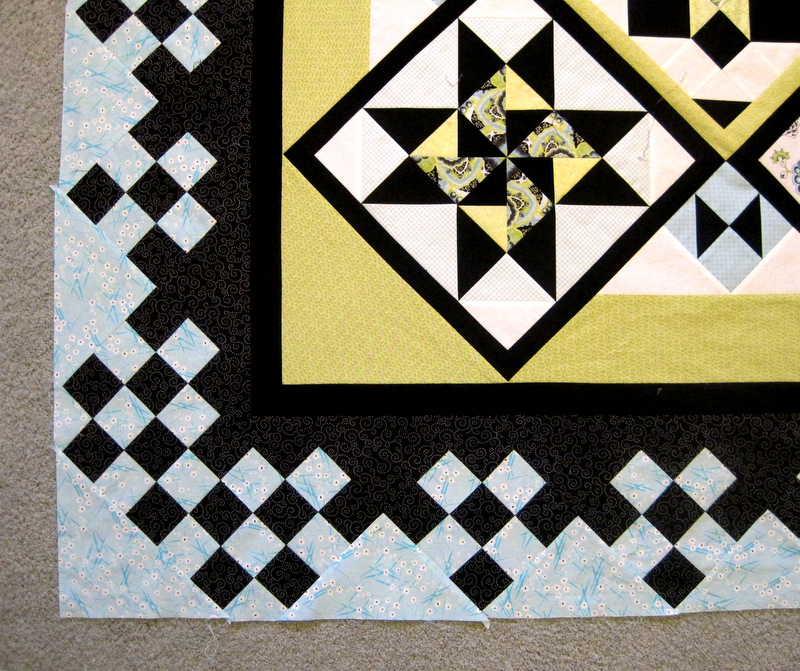
Border Breakthrough? More of a Corner Crisis. Okay, that’s a bit dramatic. It wasn’t really a crisis, but what I had envisioned as an easy way to extend the points of a narrow inner border into the wide outer border on the corners of my Reach for the Stars quilt turned out to be anything but.
(As regular readers know, my quilt is based on designer Terri Krysan’s quilt of the same name that was recently serialized in Quilter’s Newsletter magazine. I’ve been working on this quilt for the better part of a year, posting progress reports as often as I had something to show. The previous post recounts my efforts to achieve a symmetrical border and to carry the symmetry into the corners. If you haven’t read that post yet, you might want to, as it helps put today’s post in context.)
I could have taken the easy way out and simply attached the corner units without fussing with inner border points at all. The quilt has strong diagonal lines, and it probably would have looked just fine:

Butting the components up against each other gives you a better idea of what a corner would look like sewn together:
But I wanted the point of the solid black border to extend into the print border. Although I have departed in several ways from Terri Krysan’s design, this was one element I wanted to preserve. All I needed to do — I thought — was replace a 2″ black print square with a block that included a solid black piece, like this one:
Easy enough to make. I toyed with the idea of paper piecing the unit but it was just as fast to sew two half-square triangles to a larger triangle. I made a 2½” block and then trimmed it to the finished size of 2″ square to test its position as a replacement block. Much to my dismay, it was too small. The bottom edges of the triangle didn’t match the seamlines in the solid black border.
The cause of the discrepancy, I finally figured out, was the finished width of the narrow black border: 1⅜”. I had cut the border strips 2½” inches wide, not knowing how wide they would turn out to be, knowing only that the finished width would be determined by where the setting triangles came together at the corners. This is because of the highly unscientific but vaguely mathematical way I figured and constructed the borders. If the narrow black border had finished at 1¼” wide, I think it might have fit.
But it didn’t. What to do?
The solution came to me only when I started thinking outside the box. Literally. Instead of working with a 2½” square (the box), I played with a 2½” x 6½” rectangle of black print — the equivalent of three squares — and larger triangles of the solid black. That gave way to two 2½” x 3½” rectangles when I realized they would give me the shape I desired in the size needed to match the other seams. Let me show you what I mean:
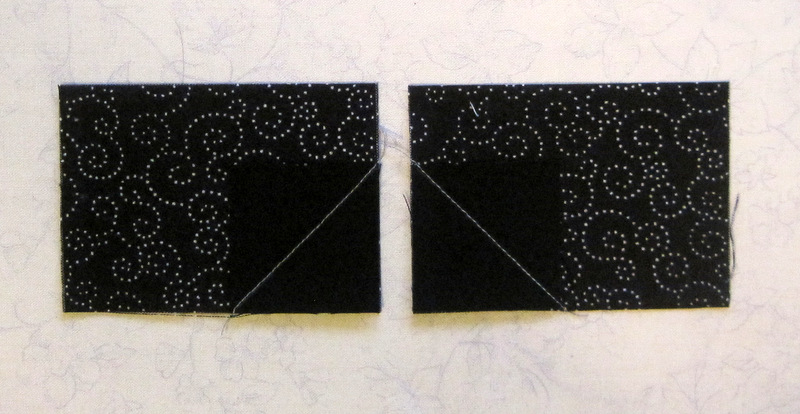 The larger pieces are the 2½” x 3½” rectangles. The solid black pieces are 1⅝” squares, about to become foldover corners:

When I joined the two pieces in the middle and tested the edges of the resized triangle against the seamlines in the black border, they were right where they needed to be. Hurrah!
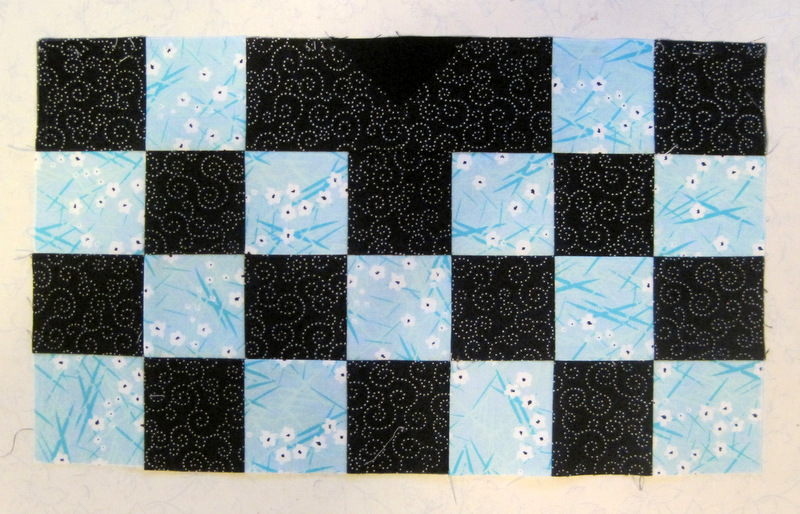
Here is the new rectangular unit inserted into part of a corner unit . . .
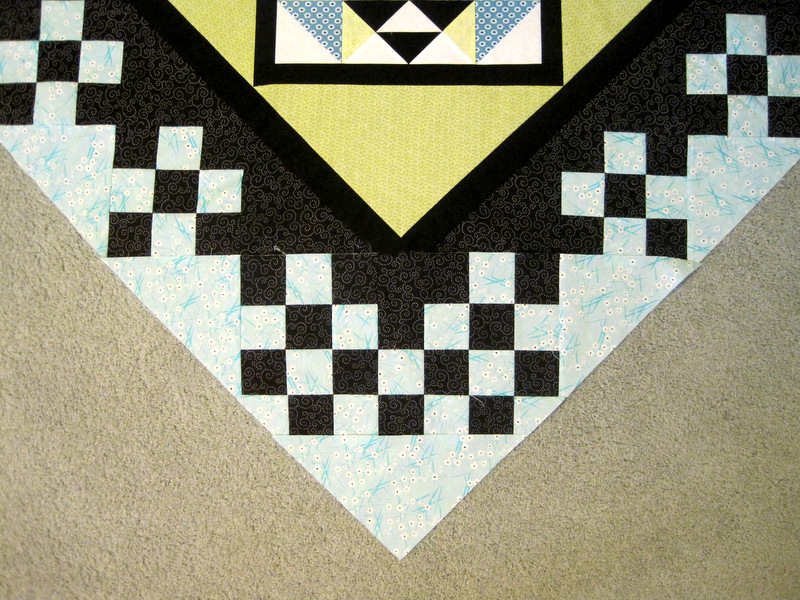
. . . and here is that corner unit joined to the quilt:
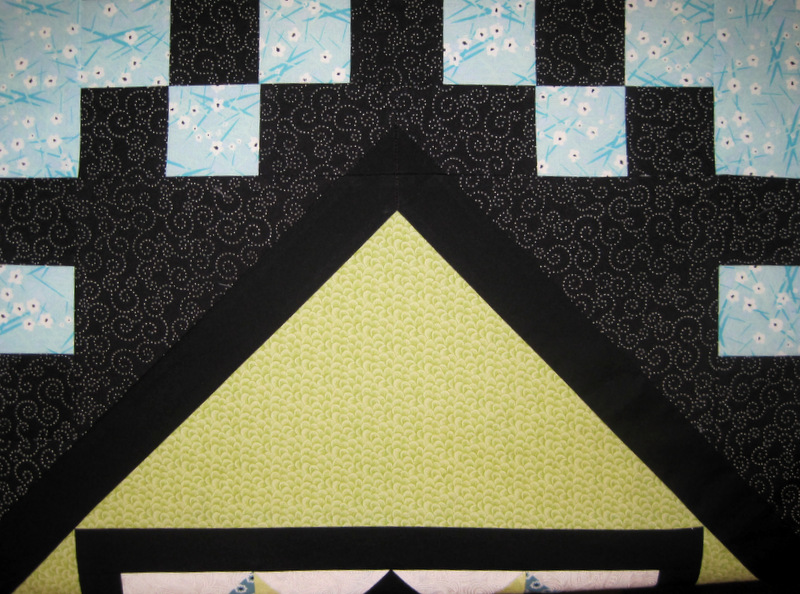
This close-up shows how the seam joining the two solid black triangles becomes, in effect, an extension of the mitered seam in the narrow black border:.
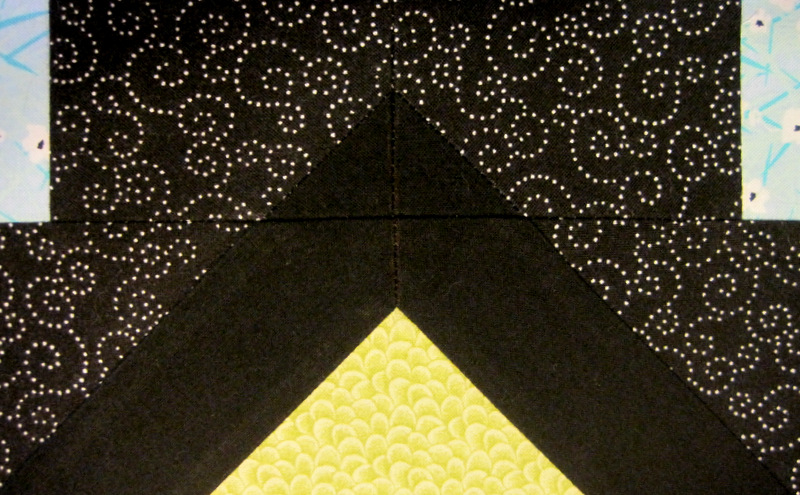
This view of the second corner shows you how it all fits together:
Two more corners to go. Then all that’s left is to add the final border of background fabric, which helps float the nine-patch units. Can you believe it? I am almost done!
Love this border! You made something that looks difficult work so easily!
I love it! Looks so beautiful.
Oh SNAP! I read your posts and it just makes me feel so amateur. Or too tired to have thought through all of that. I’m so glad you have done the hard work because I’m pretty sure I want to follow your modifications. I can not WAIT to see the final result and it seems to be just around the corner now!
Wow I love the border, I cannot wait for my hand to heal and get started. Although I should finish my daughters quilt first.lol
I’ve been watching this project from the first and I have really enjoyed it. I think you have done an absolutely GREAT job.