My quilt Catch a Falling Star, based on Minnesota quiltmaker Terri Krysan’s Reach for the Stars quilt, is currently hanging in the Pine Needle Quilt Shop where it is receiving very nice comments from customers.
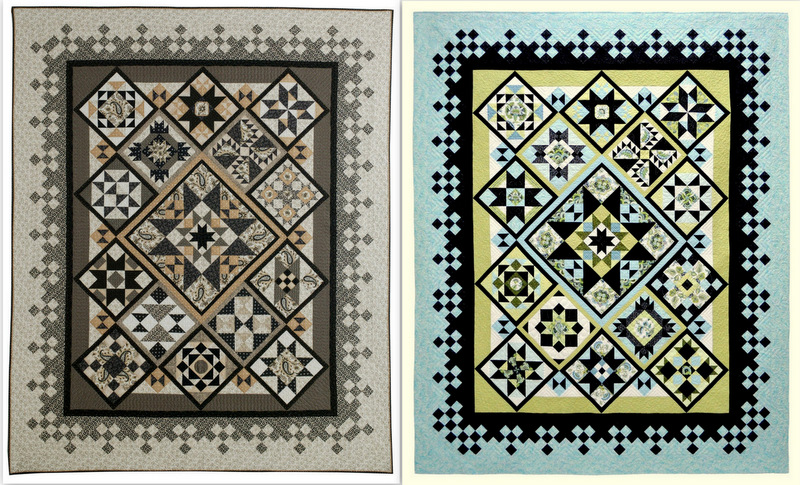
Several people have asked how my quilt differs from Terri Krysan’s (other than the obvious difference of fabric choices) so I thought I would give you a look at both quilts side by side:

(Photo on left copyright Quilter’s Newsletter. Used with permission. Photo by Melissa Karlin Mahoney. Photo on right by Bill Volckening.)
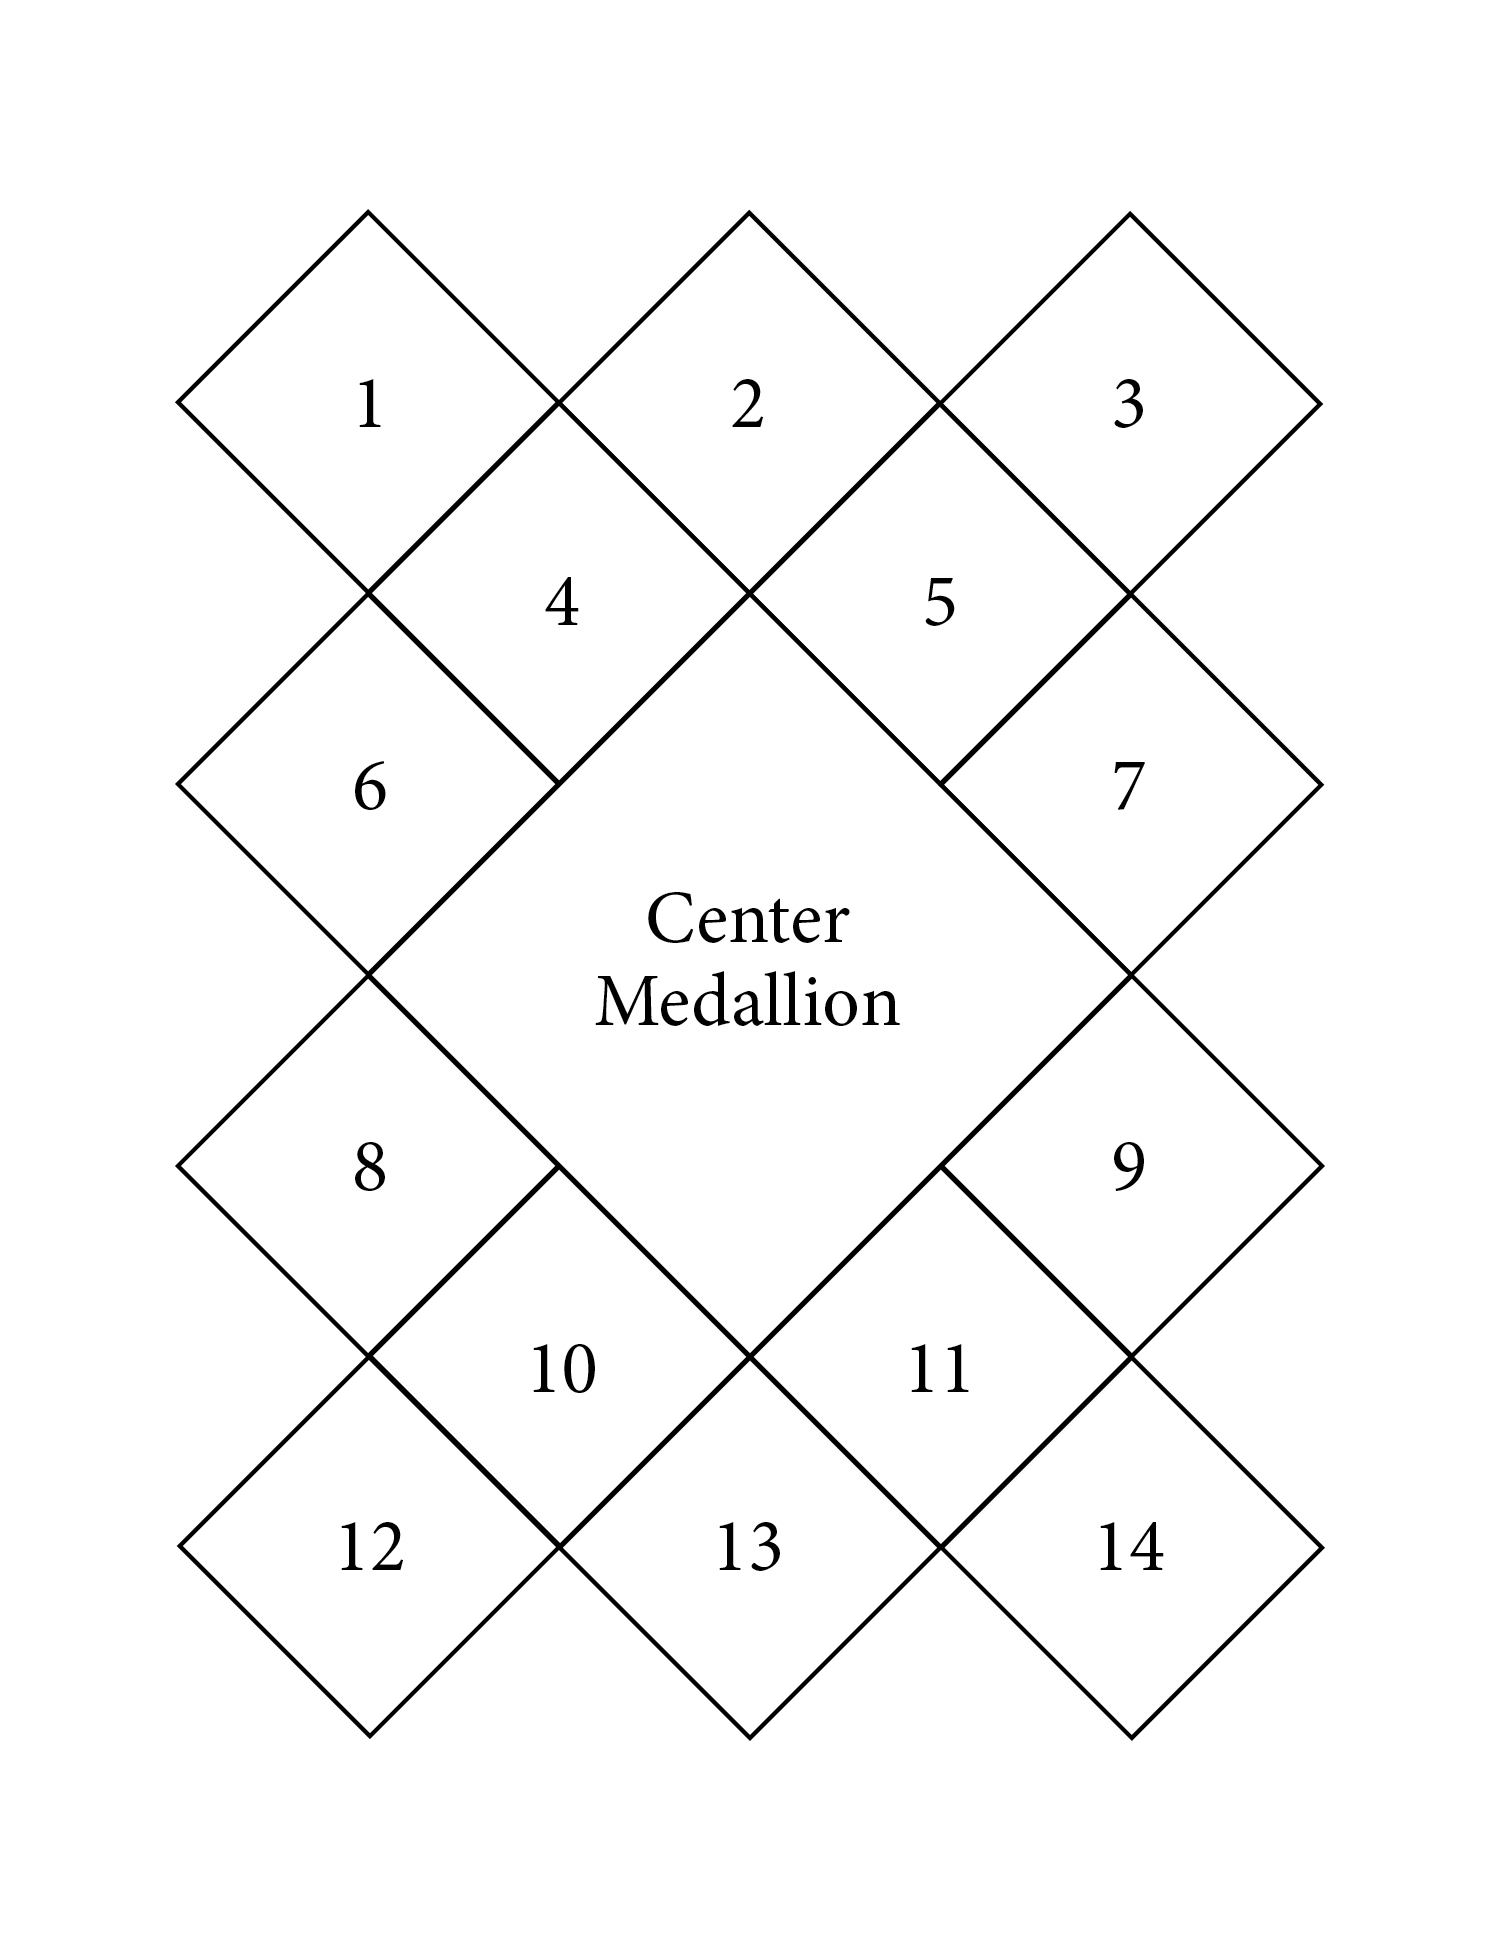
The center medallion and three of the blocks were made following Terri’s design. From there I departed in ways both large and small. I’ll use the quilt outline below to explain those differences:
Blocks 1 and 2: no changes.
Block 3: incorporated fussy-cut images in outer part of block.
Block 4: changed center of block to a fussy-cut image enclosed in an inset circle. Moved to Block 11 position.
Block 5: no change.
Block 6: replaced pinwheel in center of block with a 4-Patch Wonder block. Moved to Block 7 position.
Block 7: eliminated appliquéd circles, incorporated fussy-cut image in center of block. Moved to Block 14 position.
Block 8: incorporated fussy-cut image in center of block and changed design of outer part to incorporate fussy-cut border stripe. Moved to Block 6 position.
Block 9: added four triangles to create a star. Moved to Block 13 position.
Block 10: replaced block completely with design spotted on a coffee mug.
Block 11: replaced block completely with a block I dreamed up (although it may well exist elsewhere). Moved to Block 4 position.
Block 12: made the center a square within a square and changed the color value in the corner four-patches to avoid having dark fabric in the points where they would bleed into the black sashing. Moved to Block 9 position.
Block 13: incorporated fussy-cut image into circle in center. My circle is inset rather than appliquéd. Moved to Block 8 position.
Block 14: replaced center of block with a double pinwheel block incorporating fussy-cut images. Moved to Block 12 position.
That’s it for the blocks, though I should note that Terri used fussy-cut images in seven of her 14 blocks. I challenged myself to incorporate fussy-cut images in all 14.
The setting triangles were made following Terri’s design but I altered the design of the checked border to make all four corners symmetrical. I’m very proud of that achievement.
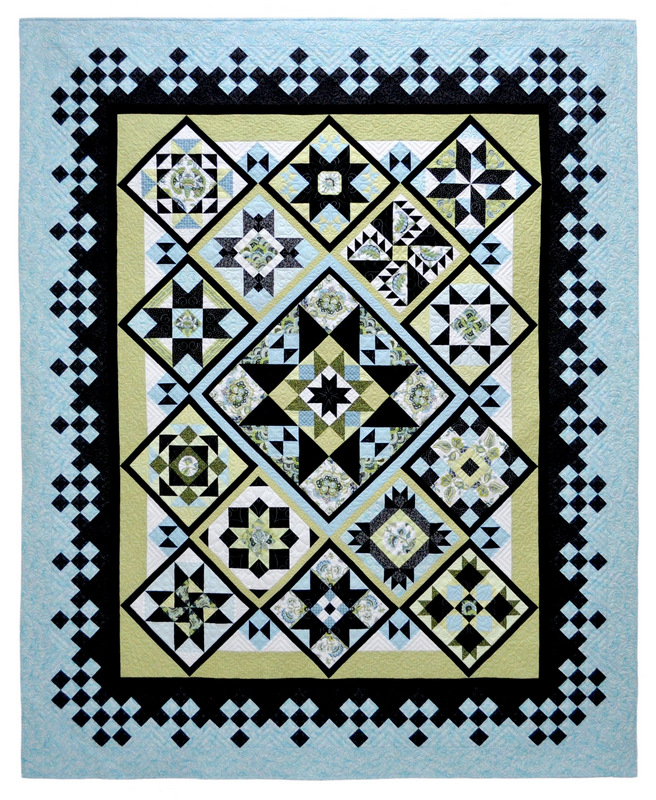
Now you probably think all 14 blocks are different, don’t you? Not so! Two of the blocks are exactly the same design. They just look different because of the fabrics used. Can you spot which two are the same? Here’s a bigger photo of my quilt to help you look:


Congratulations on a startingly beautiful quilt. The squares around the edge set it off so well. It’s a real winner.
Absolutely stunning. I am going to guess 3 and 12. But it took a lot of hunting and I may still be incorrect! This and Olivia Twist are two of my favorites. The fussy cutting is spectacular especially Block 5. As Charlie said above, you truly do have a real winner.
You are right, Rebecca! Blocks 3 and 12 are identical. Thank you so much for your kind words!
Wow! I love the colors you chose – it’s neat to see side by side with the original pattern. What an intricate quilt –
Thanks for the detailed explanation and chance to compare.
Beautiful! Good choices.
Hello! Love this quilt, and was wondering if there is anywhere to get the pattern since the old issues it was in are no longer available in print.
Wendy, the issues are still available on Quilter’s Newsletter Magazine’s website, quiltersnewsletter.com. Most of the issues are available in print; a few are digital only. A friend of mine found the issues she needed at her local library: seven issues in all, beginning with Oct./Nov. 2013 and ending with Oct./Nov. 2014.
Hi Dawn! I know this is a few-years- old post, but I just completed a sampler BOM from my local quilt shop, and I’ve decided to use the Reach for the Stars pattern. I have the pattern from my magazines that I’ve saved, but would really like to know how you got the checker board border corners to match. It does look tricky! Thanks!
Hi Melissa! I wrote about the corner borders on my version of Reach for the Stars in two posts back in November 2014. If you enter “border breakthrough” in the search box on the right side of my home page, you will be taken to those two posts. And when you get to that point on your quilt, get in touch with me and I will walk you through my process.
Melissa, can you share with me the pattern. Or tell me where I can buy it. Tiamiadart@gmail.com
There is no stand-alone pattern for Reach for the Stars. Instructions for Terri Krysan’s quilt appeared in seven consecutive issues of Quilters Newsletter Magazine (QNM), beginning with Oct/Nov 2013 and ending with Oct/Nov 2014 (issues 436-442). QNM ceased publication a few years ago.
A website called Quilting Daily (quiltingdaily.com) sells digital copies of individual issues of Quilter’s Newsletter Magazine. Here are the links that will take you to each issue you wish to purchase:
https://www.quiltingdaily.com/product/quilters-newsletter-october-november-13-digital-edition/
https://www.quiltingdaily.com/product/quilters-newsletter-december-january-2014-digital-edition/
https://www.quiltingdaily.com/product/quilters-newsletter-february-march-2014-digital-edition/
https://www.quiltingdaily.com/product/quilters-newsletter-april-may-2014-digital-edition/
https://www.quiltingdaily.com/product/quilters-newsletter-june-july-2014-digital-edition/
https://www.quiltingdaily.com/product/quilters-newsletter-august-september-2014-digital-edition/
https://www.quiltingdaily.com/product/quilters-newsletter-october-november-2014-digital-edition/
I believe each digital issue is $5.99. — Dawn
Thanks, Dawn! I will do as you suggest and read the posts. Not quite to that point on my quilt, but very soon……
I love the way you made your border symmetrical. It’s one of the things that bothered my OCD in the original quilt!
Such a beautiful quilt, can I buy the pattern anywhere?
Hi Leslee. I just responded to your email message! — Dawn
Is there anywhere you can buy the pattern?
There is no stand-alone pattern for Reach for the Stars. Instructions for Terri Krysan’s quilt appeared in seven consecutive issues of Quilters Newsletter Magazine (QNM), beginning with Oct/Nov 2013 and ending with Oct/Nov 2014 (issues 436-442). QNM ceased publication a few years ago. Occasionally you can find single issues for sale on eBay or Etsy. You might also check with a local quilt guild to see if a member has copies of the magazine to sell or loan. Recently I learned that a website called Quilting Daily (quiltingdaily.com) sells digital copies of individual issues of Quilter’s Newsletter Magazine. If you go to quiltingdaily.com, click on the search icon (a magnifying glass) and search for those issues. Good luck!
Thank you so very much, Dawn, for your help and information. We have been able to trace enough of the magazines to have the basic outlay and most of the blocks so we will individualise by adding a few of our favourites. Thank you for the inspiration to make this beautiful lockdown quilt.