Yes, I know. I should be working on those UFOs and WIPs instead of creating new ones. But I just couldn’t resist trying out an idea for a new quilt. I’ve made just one 15″ block so far:
It’s a riff on the traditional “Burgoyne Surrounded” block. What do you think?
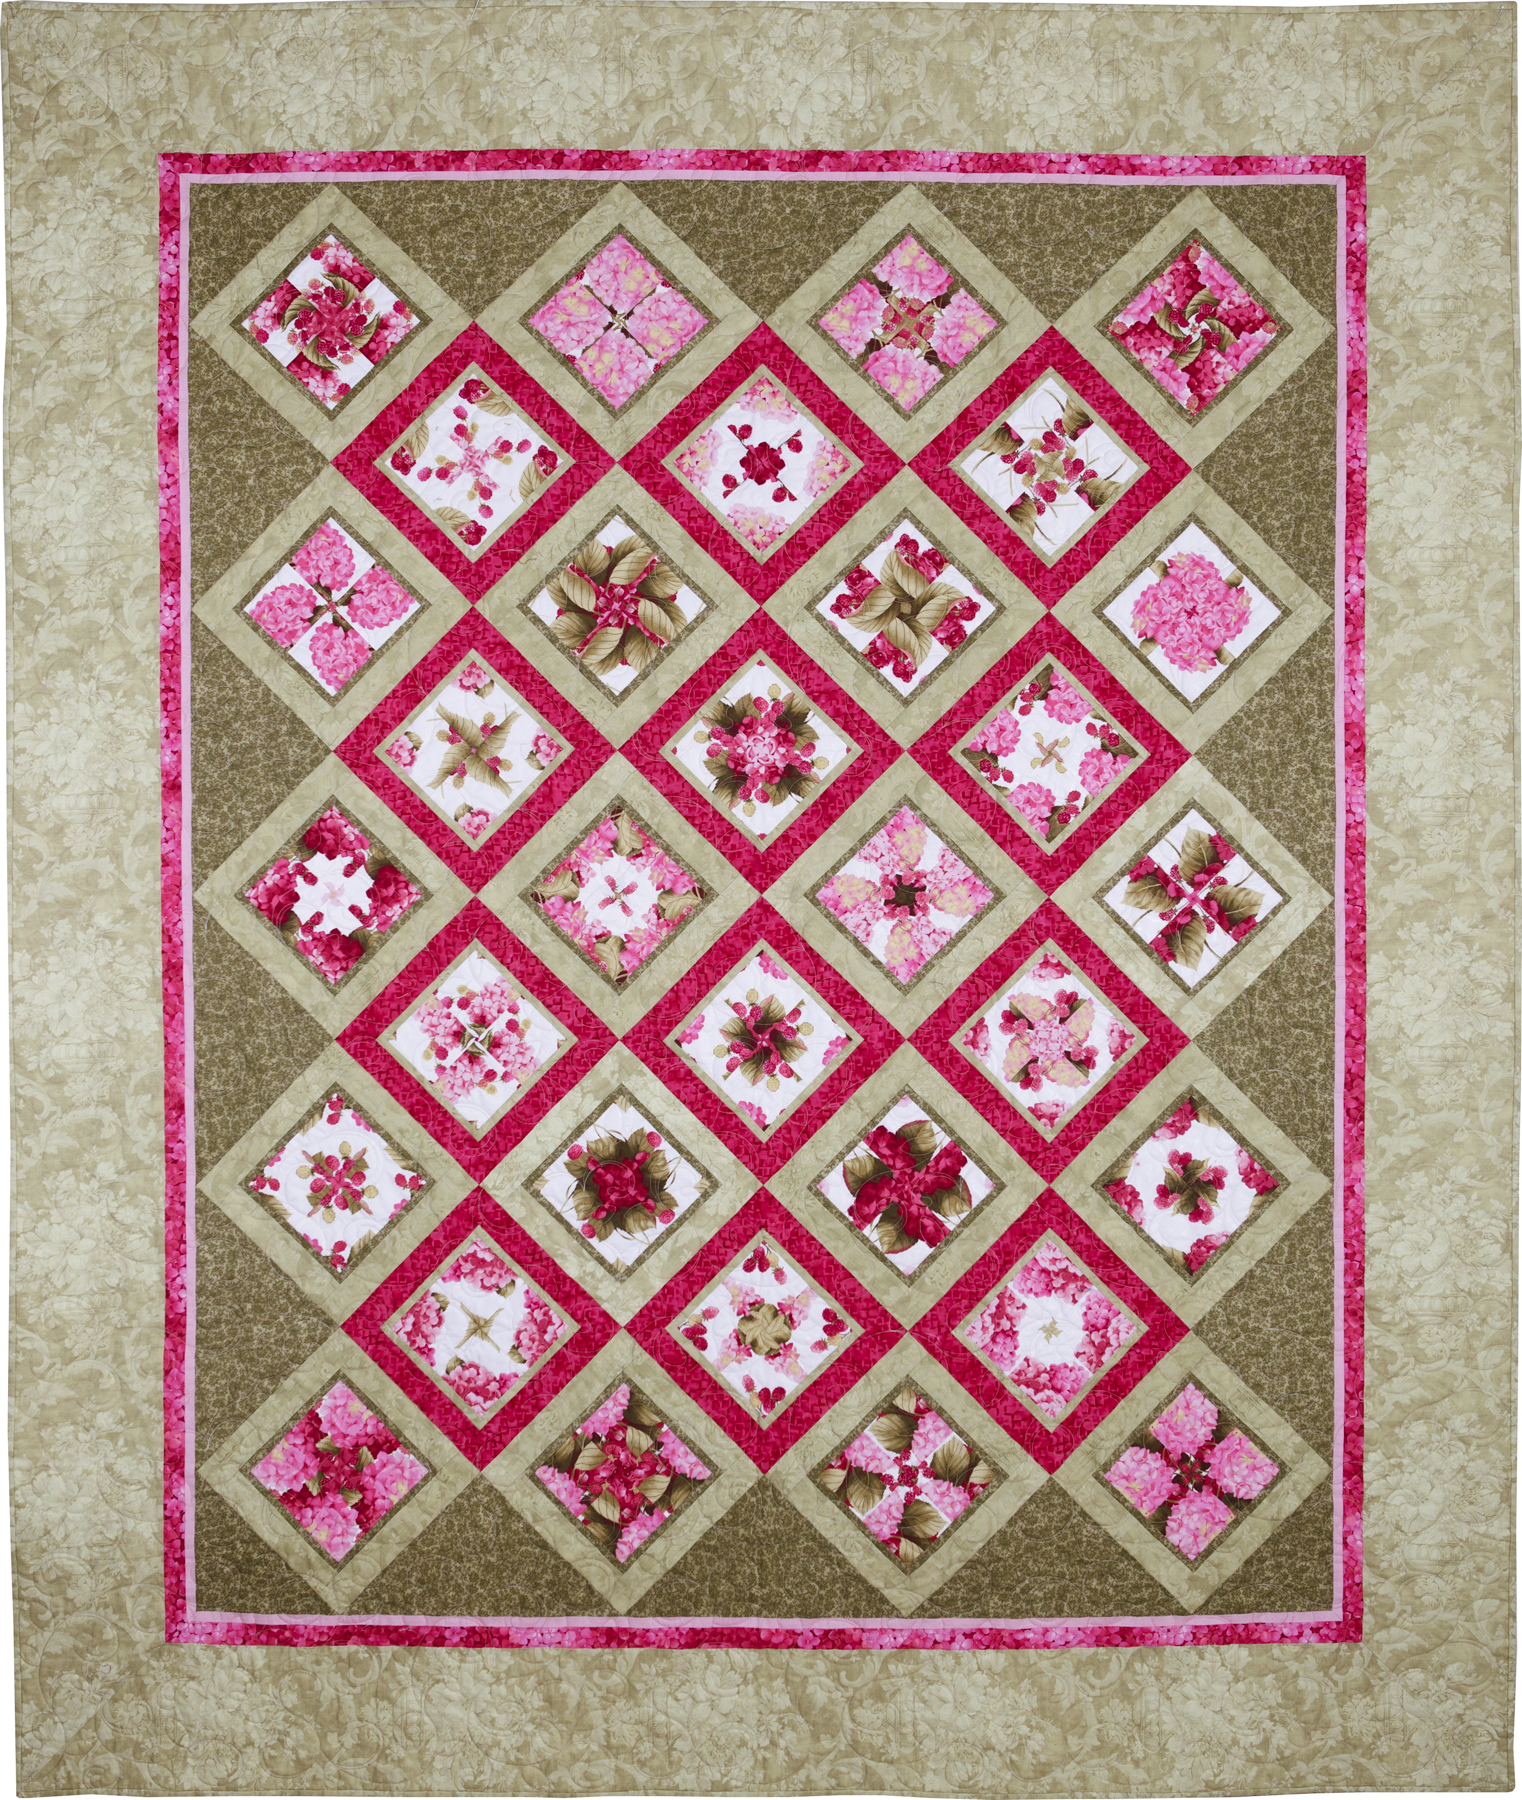
I’ve finally added Framboise to my Quilt Gallery. I’ve learned that one way to keep your patterns current is to make new versions in updated fabrics. I didn’t do that here, though. I used fabric that’s been in my stash for some time (Hydrangeas and Raspberries by Holly Holderman for Lake House Dry Goods) because I knew it would make a striking 4-Patch Wonder quilt. I actually put these blocks together early last year. It’s taken me this long to finish the top and get it backed, quilted, bound, labeled and photographed.
Framboise, 69″ x 84″ (2012)
I wish I had documented the process of arranging the blocks on my design wall. I usually start by putting my favorite block in the upper left hand corner but sometimes I have to move it for the sake of balance. Here’s a close-up of my favorite block, which wound up in the upper middle center of the quilt:
Dawn’s Favorite Block
Framboise was quilted by Melissa Hoffman. I asked Melissa to choose an edge-to-edge design with vines, leaves and scrolls and to use a light pink and green variegated thread. The effect is soft and subtle, just what I wanted. Here’s a better look at the motif:
Quilting Detail
I usually play around with leftover blocks on the back but I was in “get ‘er done” mode at the time so all I did was add a strip of the original focus fabric:
Back of Framboise
You can’t see it in the photos but the white background on the Lakehouse fabric has a secondary design that is very lightly frosted. It adds a glow to the quilt that I love. The rest of the backing fabric is a pastel batik that I’ve had for quite a while. Here’s a closer look at the quilting on the back:
Detail of Quilting on Back
Naming this quilt did not come easily. A host of alliterative titles came to mind – Blossoms and Berries, Berries and Blooms, even a pun on the Bloomsbury Group. In the end I decided on Framboise (raspberry in French) on the basis that it refers not only to the berry but to the color of the hydrangeas.
I’m scheduled to teach a class on Fractured Images in a couple of weeks so this seems like a good time to update my class notes and look over my class samples.
Fractured images are created when four identical layers of fabric are cut into squares and sewn together. Three of the four repeats are trimmed different ways before being cut into squares. When the four sets of squares are arranged in a grid and sewn together, a striking ripples-in-a-pond effect emerges. Squares can be cut in many different sizes but 2” and 3” squares are the most common. Bold floral designs with secondary motifs in the background and lots of contrast fracture especially well.
When I taught this class last spring at the Pine Needle, the shop had just received some fabrics in the Hickory House line by Faye Burgos for Marcus Brothers Fabrics. I was curious to see how one of the florals in that line would fracture and whether it would be more striking made from 2” or 3” squares. Here is the image before fracturing . . .
Hickory House floral, unfractured
. . . and here are the two fractured images side by side:
Fractured Images made from 2″ and 3″ Squares
The image on the left, which measures 13″ square, contains 81 squares, each square finishing at 1½”. The image on the right, which measures 14″ square, contains 25 squares, each square finishing at 2½”. Which one do you like better?
One way of cutting the fabric for a fracture is to pin the layers together, matching design elements, and then cut only the image intended for the fracture. What to do with the remaining fabric that’s already layered and pinned? Why, cut it into 4-Patch Wonder blocks, of course. (“4-Patch Wonder” is my name for a block made of four identical layers of fabric that are cut in squares and then rotated to make a pleasing symmetrical design. If you’ve looked at the quilts in my Gallery, you know that I’m a big fan of this faux-kaleido block, as well as its more sophisticated cousin, the kaleidoscope block.)
Look how dramatic these 4-Patch Wonder blocks are that were made with leftover Hickory House fabric:
These 4-Patch Wonder blocks are 5″ squareThese blocks are 6½” square
Let me show you another fractured image made from a beautiful tropical floral fabric a friend brought me from Hawaii. Here is the image before fracturing. . .
Tropical Flowers, Unfractured
. . . and after:
Tropical Flowers, Fractured
This one was made a little differently. Instead of sewing the squares together, I arranged them on a piece of featherweight fusible interfacing and fused them in place. Then I covered the raw edges with grosgrain ribbon held in place with ¼”-wide Steam-a-Seam-2. I added a pink polkadot flange and a wide black border. The squares were cut 3″, by the way, and the piece is 21″ square including the border.
I haven’t decided what to do with this fractured image. I think it could hold its own as a finished piece, but it looks so good set on point that I can also see it as a center medallion in a larger quilt . . .
On Point
. . . perhaps accompanied by some of these 4-Patch Wonder blocks made from the leftover fabric:
4-Patch Wonder Blocks (6½” Square)
If you’ve never fractured an image before, I recommend that you try it. It’s a lot of fun, and I predict that it will forever change the way you look at fabric!
Just back from a mini-retreat with three of my Quisters, one of whom owns a vacation home just steps from the McKenzie River in the lush Willamette Valley in Oregon. How sweet it is to fall asleep to the sound of the river rushing by! We sewed for two full days out of three; the third day was reserved for an excursion to Sisters, Oregon for lunch, a bit of shopping, and an absolutely essential stop at the Stitchin’ Post.
Each evening we walked to the river, glasses of wine in hand, to spend a few peaceful moments enjoying the beautiful setting and reviewing our accomplishments of the day. Peggy had to leave early so she missed our “show and tell” photo shoot this morning before we left. Here is Deborah with the two sets of pillow shams she made to go with her recently completed king-size bed quilt. She also worked on blocks for a red and green quilt that is going to be simply sensational:
Deborah with pillow shams and quilt blocks
Vickie was on a roll! She made umpteen hot pads and coasters as well as these classic terry-cloth towel bibs for her darling 6-month-old twin grandsons:
Vickie with hot pads, coasters, and bibs
And here I am with my latest fractured image — subject of a class I will teach at the Pine Needle this fall — and a set of pillowcases for the Portland White House:
Dawn with fractured image and pillowcases
I also made the label (not shown) for my 4-Patch Wonder quilt, Framboise, which we had fun staging against the backdrop of the McKenzie River:
Framboise (69″ x 84″), August 2012
A great getaway in a gorgeous location with dear friends. . . what could be better than that?!
After returning last month from a week in Sisters, Oregon, home of the largest outdoor quilt show in the world, I posted about the quilt show and the terrific class I took. Before I had a chance to write a third post about what I accomplished that week, my husband and I left on a road trip to California to visit our two youngest granddaughters (9 and 12). We brought them back to Portland to spend a few days with us. My sewing and quilting projects languished but I didn’t mind because I was having such fun with the girls.
They are home in San Francisco now. The house is quiet. Elfie the cat has come out of hiding. And I’m back in my sewing room taking stock of the projects I worked on in Sisters. Remember the sewing machine cover designed by Monique Dillard of Open Gate Quilts that I posted about here? This is my version so far:
sewing machine cover, in progress
When it’s finished, it will look something like this:
Monique Dillard’s design
I finished binding my pink and green quilt, Framboise, made from my 4-Patch Wonder pattern:
Framboise, bound but not labeled
When the label is on, I’ll declare the quilt finished and post a proper picture in my Gallery. That’s Elfie, by the way, who doesn’t seem the least bit interested in my quilt.
I’m very excited about my newest design, the Monterey Bay Apron. After making eight versions and tweaking each one, I’m finally satisfied with the cut and the fit. Here is a look at Number Nine:
Monterey Bay Apron
back of Monterey Bay Apron
The belt is secured to the back with buttons. In the photo above, the ends of the belt were temporarily pinned to the back, adjusted for my model, Geri. The ends can be positioned anywhere along the back, making the apron one-size-fits-most. Here is a close-up of the front:
detail, Monterey Bay Apron
The pattern should be available in just a few weeks!