Category Archives: family

Rounding the Bases


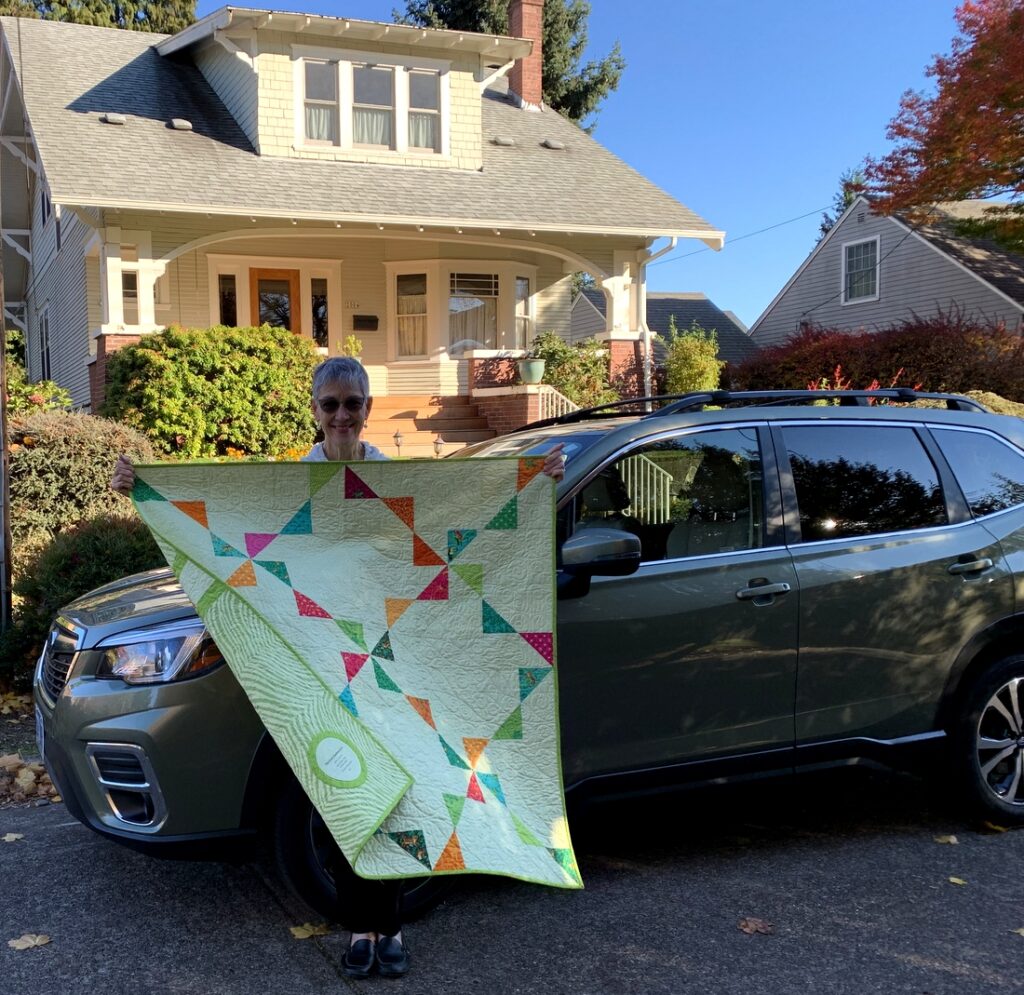
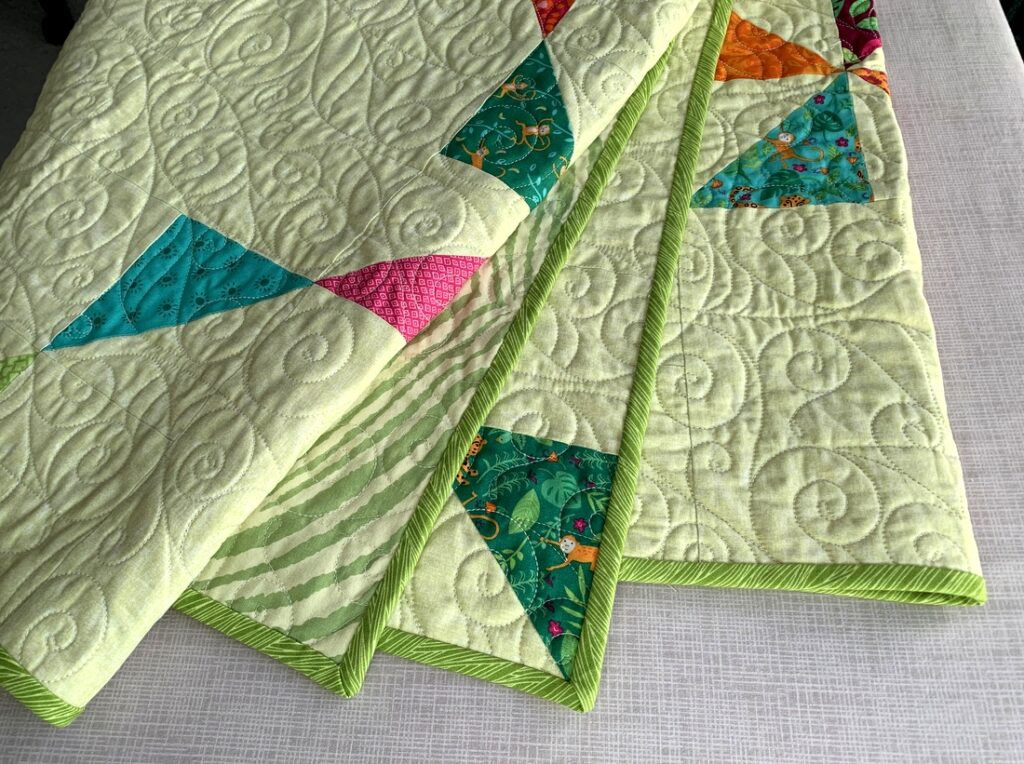
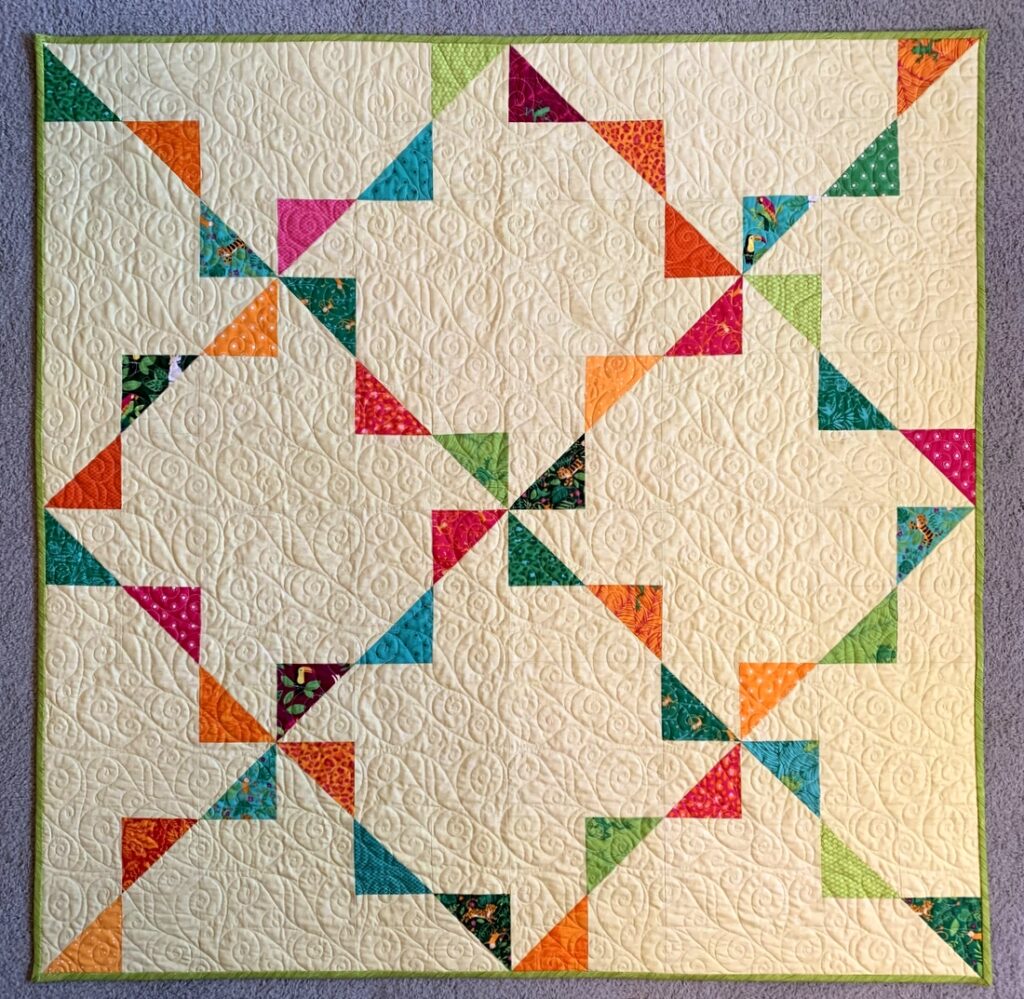
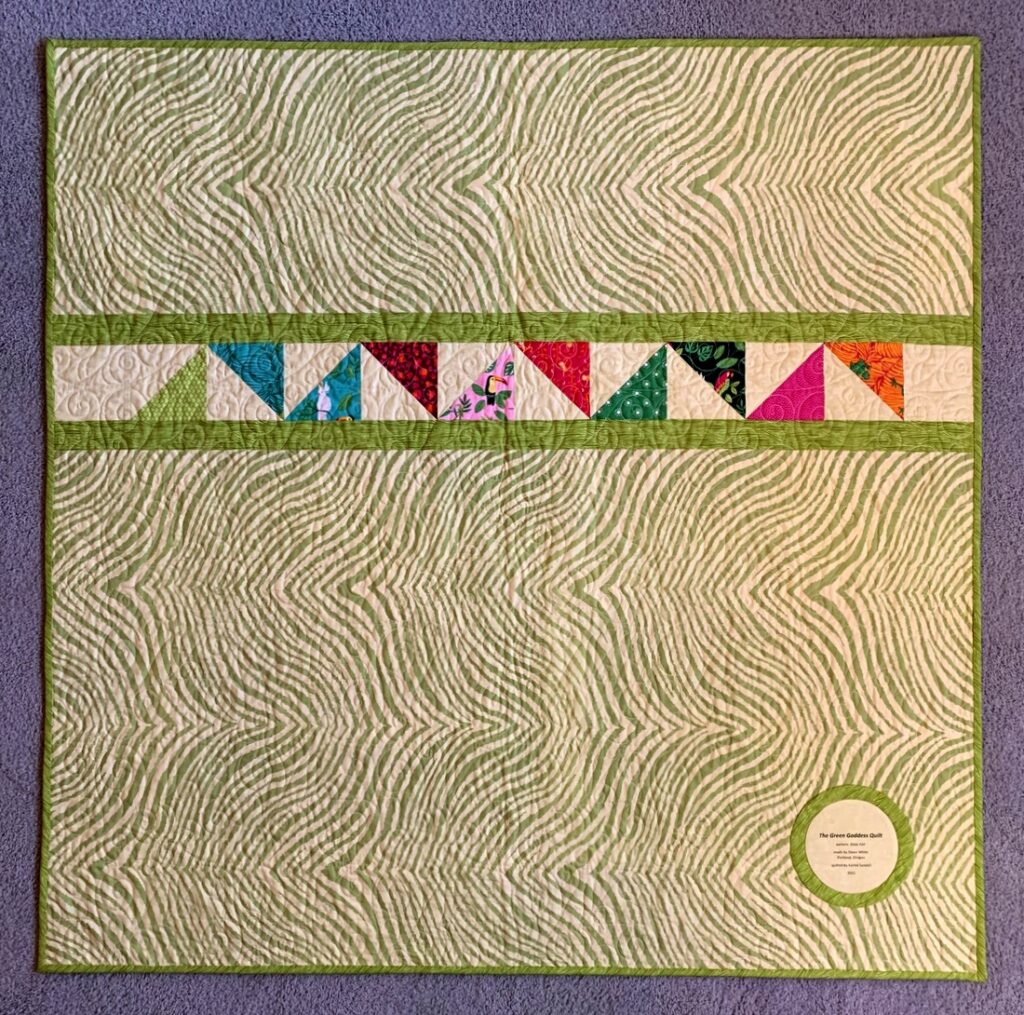
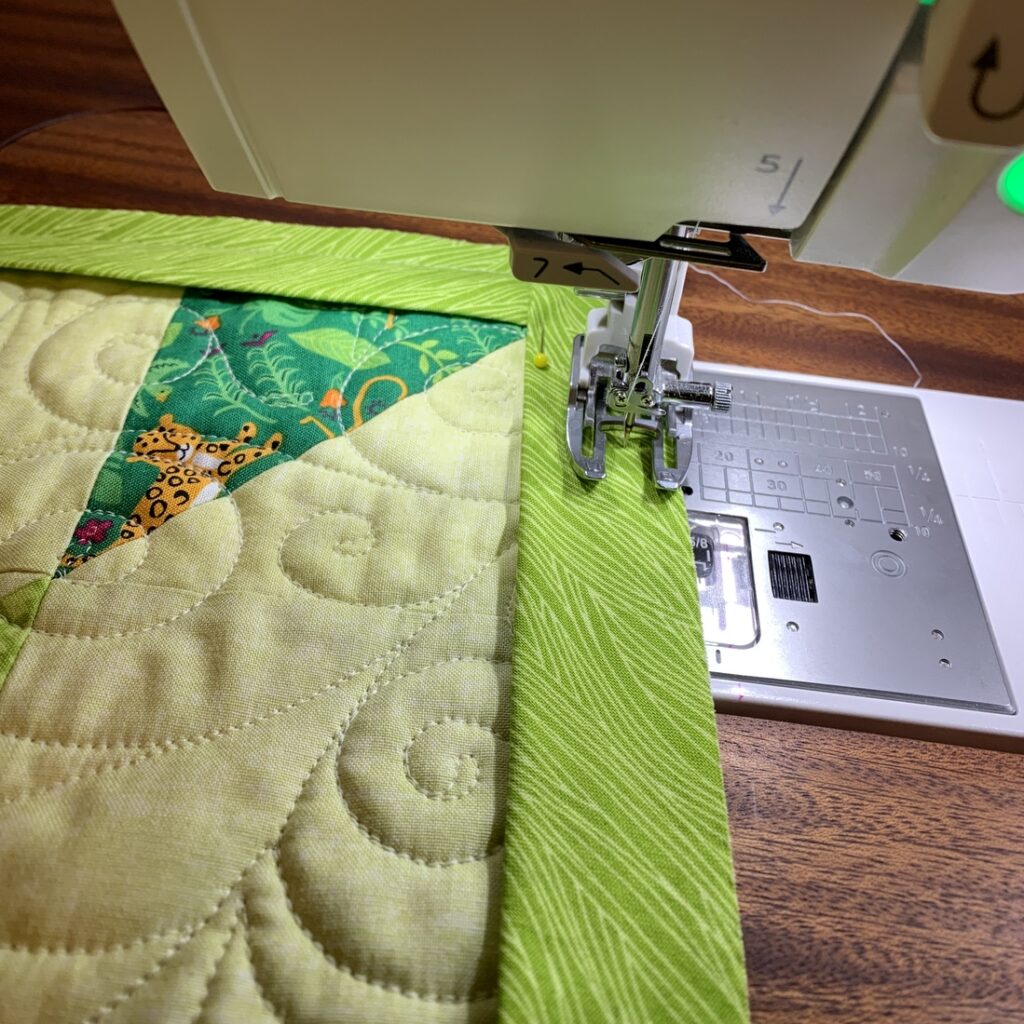
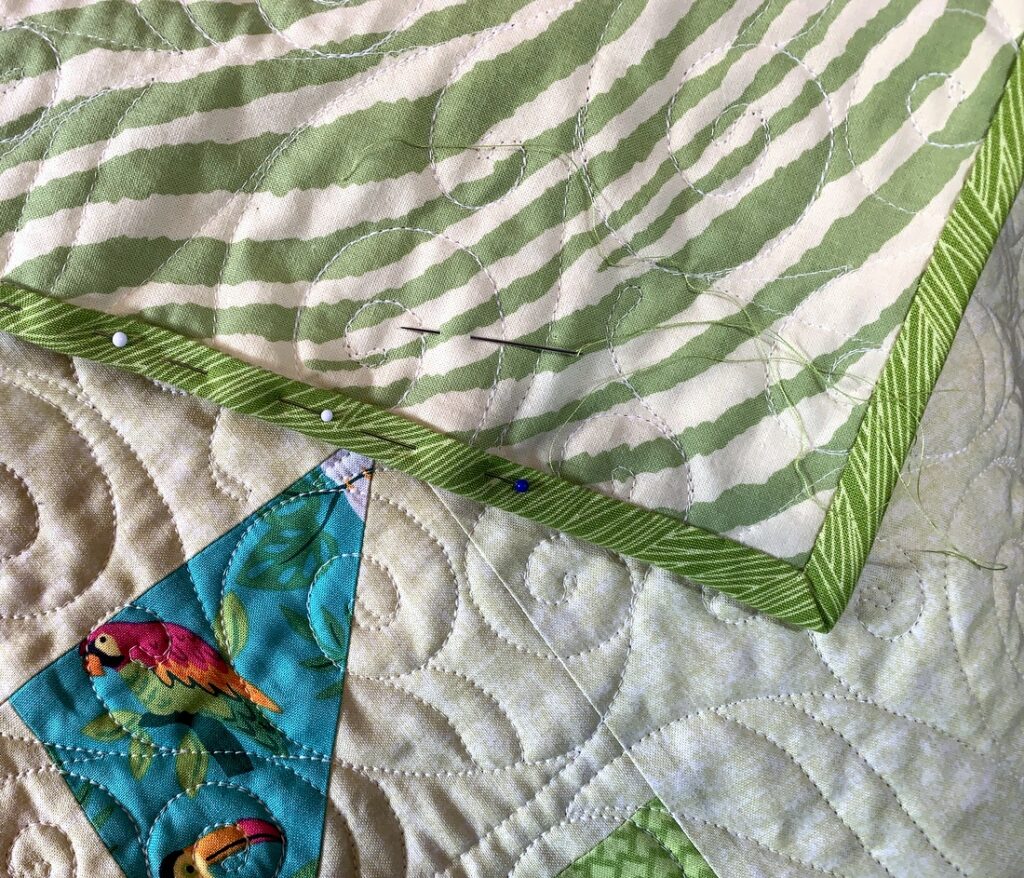
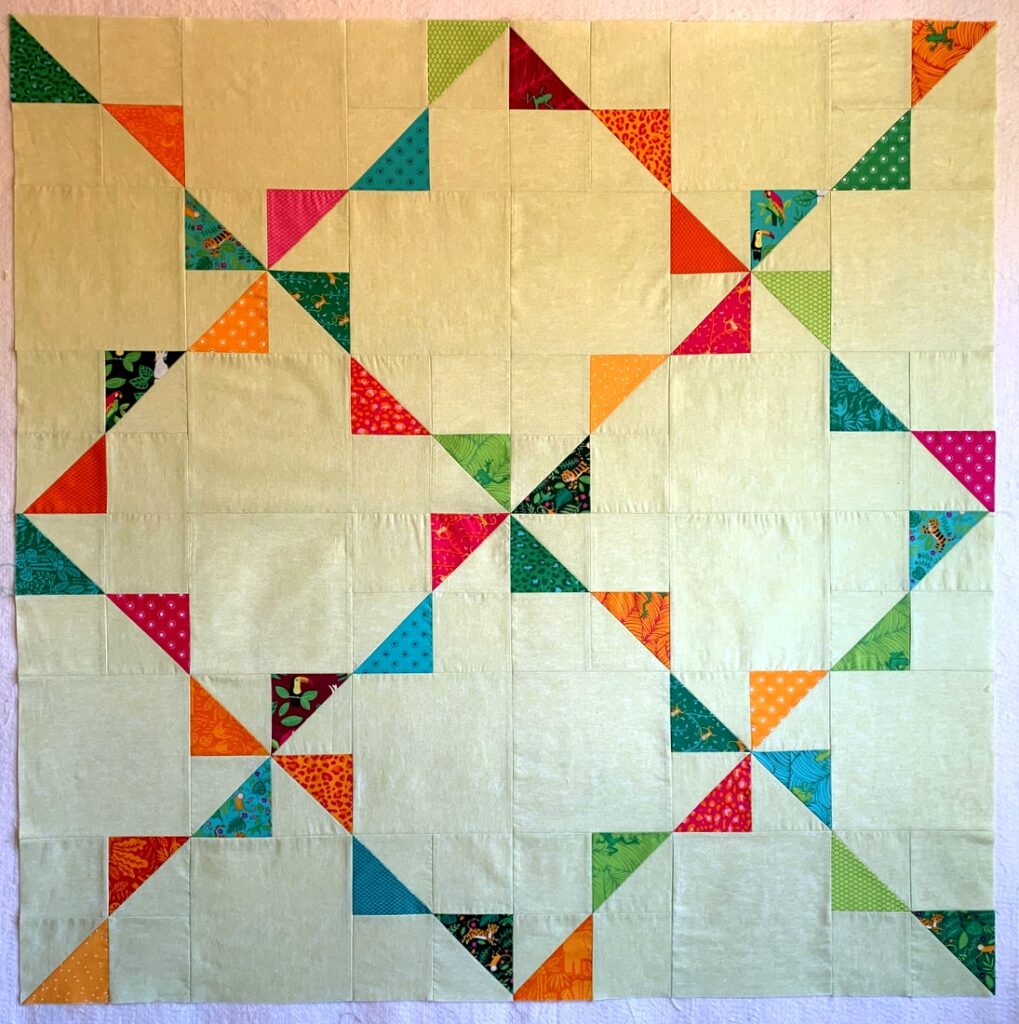
Yesterday afternoon I finally got the bias binding attached to my Green Goddess car quilt (made from the free State Fair pattern by Melissa Corry). It’s a little hard to tell from this photo but I’m attaching the binding with a 3/8″ seam, the same measurement the finished binding will be:

A pattern of green and yellow colors with white background

The binding got attached shortly before the beginning of yesterday’s Game 6 of the National League Championship Series, with the Atlanta Braves holding a 3-2 edge over the Los Angeles Dodgers (last year’s winners of the World Series). If the Braves won, they would advance to the World Series; if the Dodgers won, the two teams would be tied at 3-3 and force a Game 7.

The Dear Husband and I settled down to watch the game and I began hand stitching the binding to the back of the quilt. Many quilters dread this step in quiltmaking but it has always been a process I’ve enjoyed. And it was oh, so appropriate to be working on this while a baseball game was underway.

You see, whenever I bind a quilt I have a visual in my head of each corner being the base of a ballfield. I start out a few inches from one corner, and as I get to each corner I tick off the base mentally in my head. It’s always satisfying to round third base and head for home plate.

I didn’t get all that far yesterday because the game was so exciting I kept pausing with my needle in midair. By now (if you’re a baseball fan) you know the Atlanta Braves won the game and will be going to the World Series for the first time since 1999. Twenty-two years! The team will face the Houston Astros, winner of the American League Championship Series.

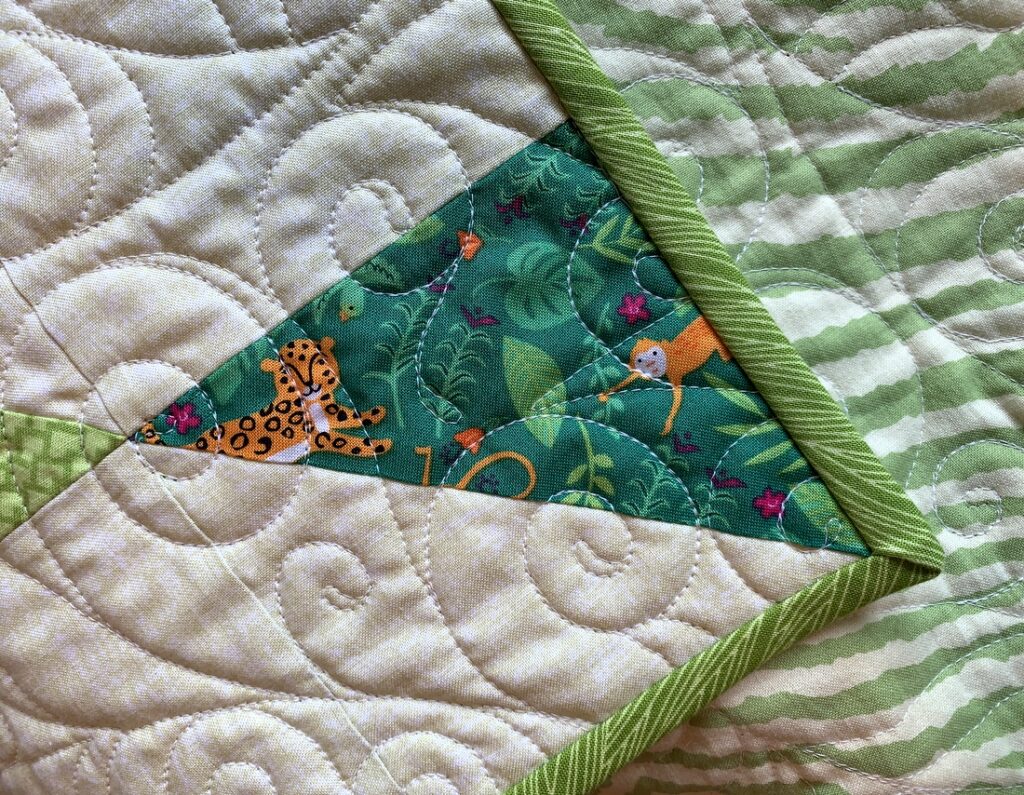
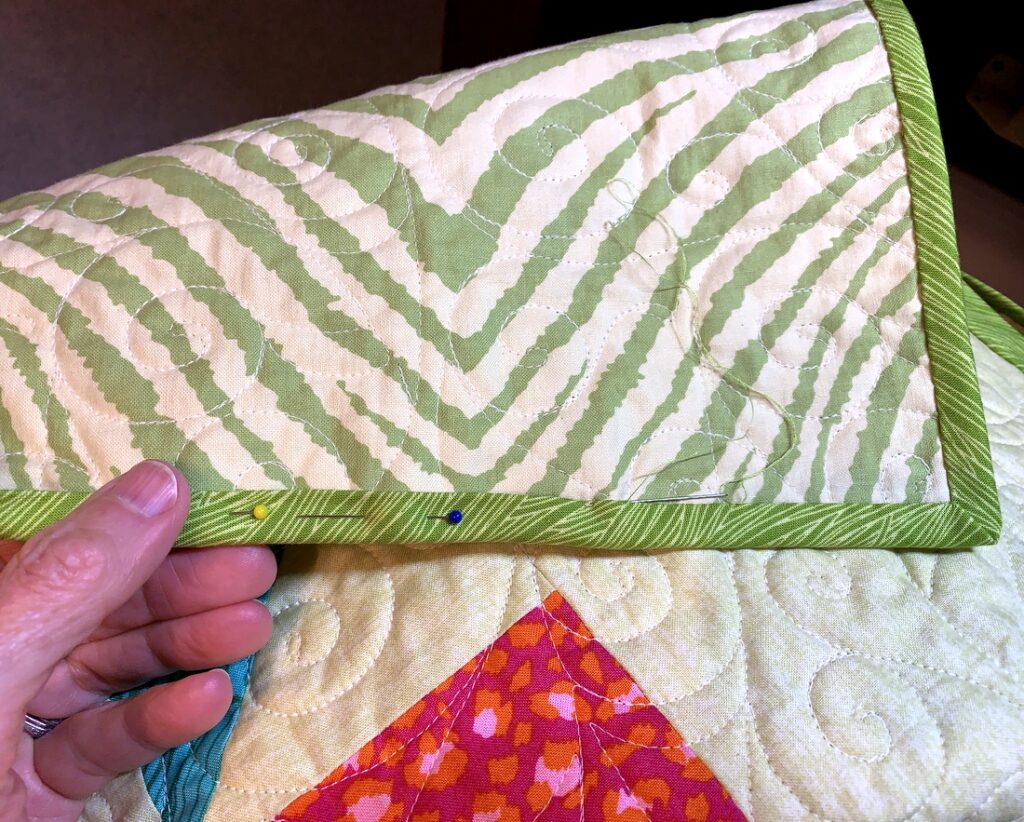
I hope to have my quilt completely bound before the first game of the World Series on Tuesday. In the meantime, here are a few process shots of my binding, starting with first base — er, the first corner:

A pattern of green and yellow colors with white background

. . . which looks like this from the front:

A pattern of green and yellow colors with white background

. . . and the second corner:

A pattern of green and yellow colors with white background

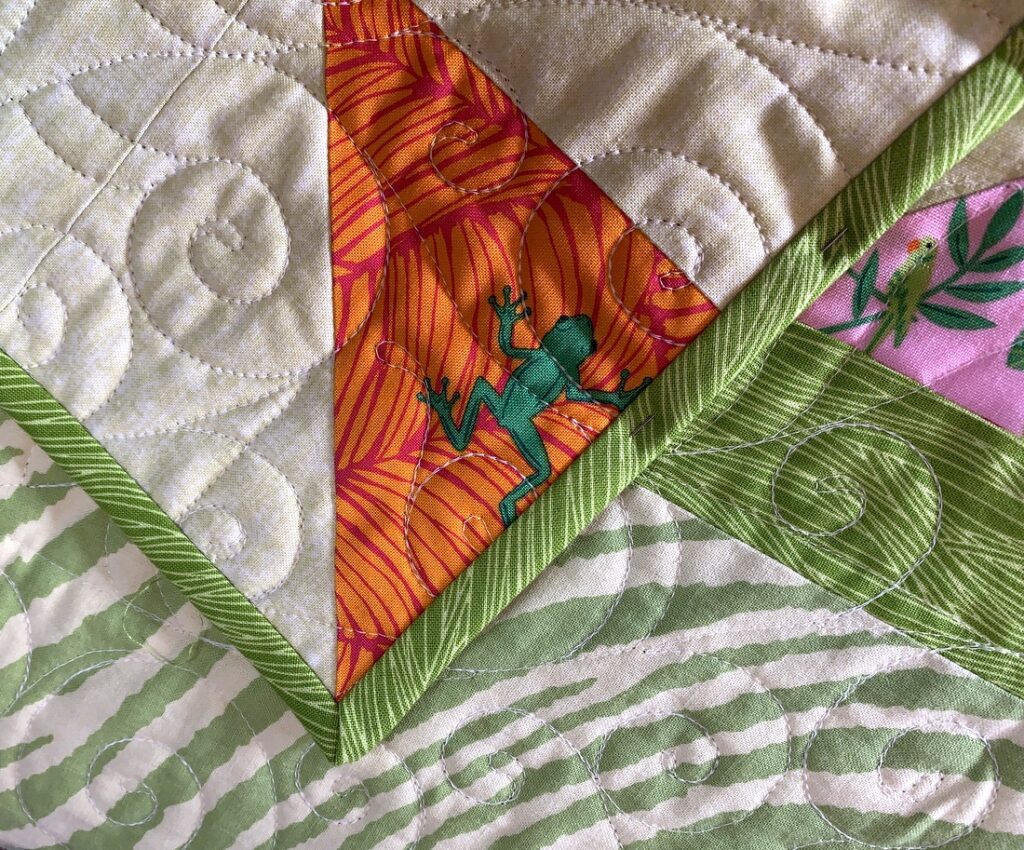
. . . which looks like this from the front:

A pattern of green and yellow colors with white background

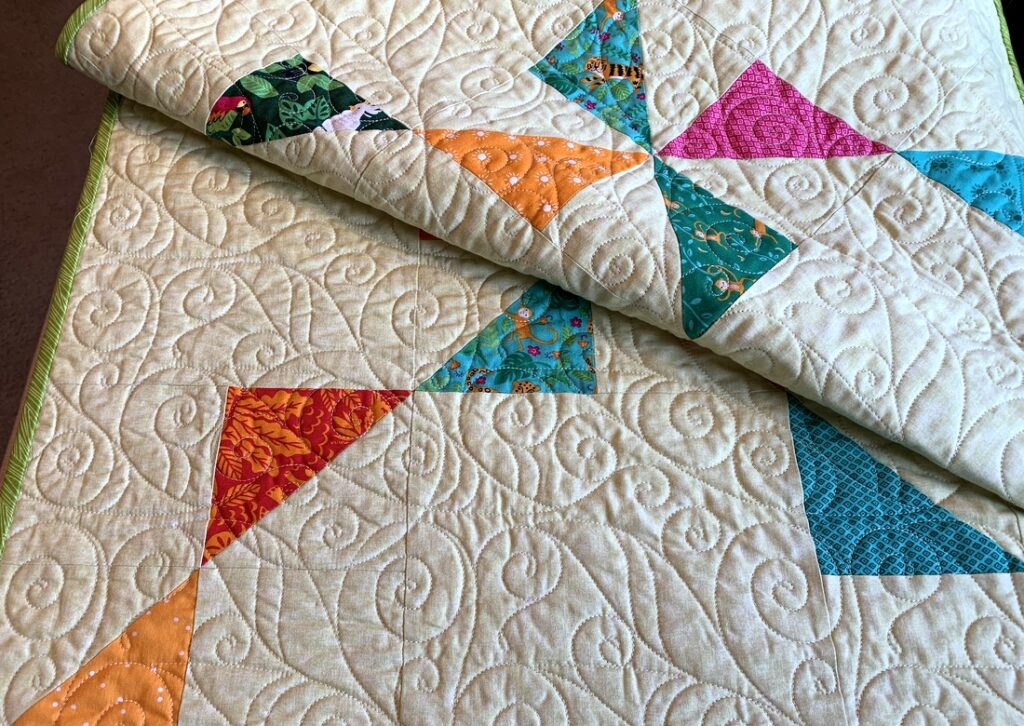
Depending on the time of day and the amount of natural or artificial light, the colors of the quilt — especially the greens — can look so different. Nevertheless, I think you can see how cute the fabrics are that feature the animals in Stacy Iest Hsu’s “Jungle Paradise” fabric line.

Can I say it? I think this quilt is a home run!


Posted in family, State Fair quilt pattern, update | 5 Comments

Changing Horses Midstream


There must be a quilting equivalent to that expression but I’m leary of mixing my metaphors. And, metaphorically speaking, I didn’t really change horses midstream. Instead I said “Whoa!” and pulled them to a halt.

You already know that I spent hours and hours in front of my design wall arranging the blocks on my current project, nine large blocks making up a fun pattern called State Fair. Each block contains 36 pieces so you know there was a lot of moving pieces around to get the balance I was seeking. I didn’t sew a single component together until I had all nine blocks laid out.

But here’s what happened: after sewing just four of the nine blocks together, I was so pleased with what I saw that I didn’t want to go any further. Behold:

A pattern of green and yellow colors with white backgroundWhat you see is a quilt top that will measure 48″ square when bound. That’s a bit on the small side for a lap quilt — but not for what I have in mind. You see, I have long wanted to make a quilt for my car (aka the Green Goddess). I think this will be the perfect size. It’s large enough for the Dear Husband to throw across his lap on a road trip but small enough to fold up easily and toss in the back seat. And in a pinch it could double as a seat cushion at a baseball game.

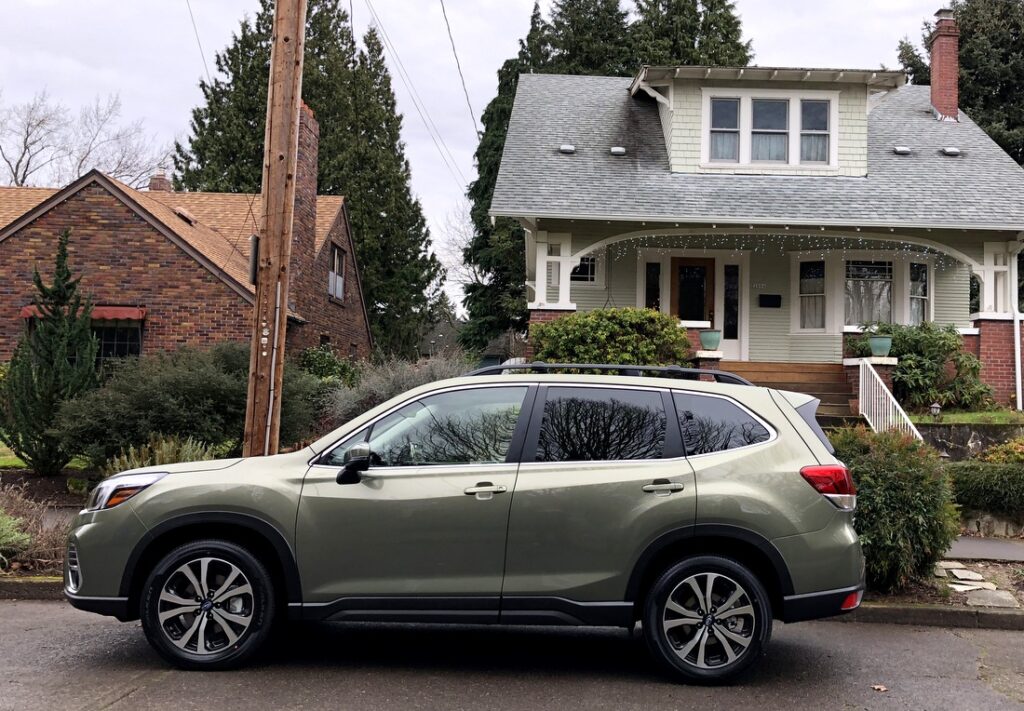
Here’s another bit of good news: in my fabric stash I found the perfect fabric for the back. I’ll be back soon to show you. In the meantime, here’s a shot of the Green Goddess when she was brand new (January 2019):

A pattern of green and yellow colors with white background

You’ve probably already noticed: green house, green car. And soon: a green quilt for the green car.


Posted in family, State Fair quilt pattern, update | 4 Comments

Oven Mitts that Fit: the Prequel


A pattern of green and yellow colors with white background

The prequel to the tutorial, that is.

My oven mitt tutorial is almost ready to go. Before I hit “publish” on the post, I want to give you a bit of background (by way of explaining my obsession with making a beautifully finished oven mitt) and a couple of hints on making a pattern for a mitt that fits your own hand.

For the last three or four years I was on the lookout for new oven mitts but was never able to find suitable replacements. The ones in stores were either too big or poorly made, sometimes both. My twin sister Diane was in the same boat. We actually bought our mitts at the same time years ago and they had definitely seen better days. We were bemoaning the lack of good store-bought oven mitts around Thanksgiving last year. At that point I decided to make my own — and make a pair for Diane to boot.

In preparation I went online and checked out several printed tutorials. Boy, was I surprised! Some of the tutorials were way too much work. Some had you cutting out left and right hand patterns. Why on earth . . . ? The mitts are the same shape on both sides, for heaven’s sake.

Others had you make two mitts – one from the main fabric and one from the lining fabric; you inserted the lining mitt into the main mitt and sewed the two together, meaning you were doing twice as much cutting and sewing – and not even getting a mitt that was quilted all the way through. Not one tutorial gave what I considered good instructions for a nicely finished cuff edge made with a contrasting fabric.

There had to be a great method out there somewhere, I thought, and if I couldn’t find one – well, I would just have to figure one out for myself. But I needed a pattern to get started. I downloaded a couple of free templates. When they were printed I could tell they were too big. What to do? Why, make my own pattern.

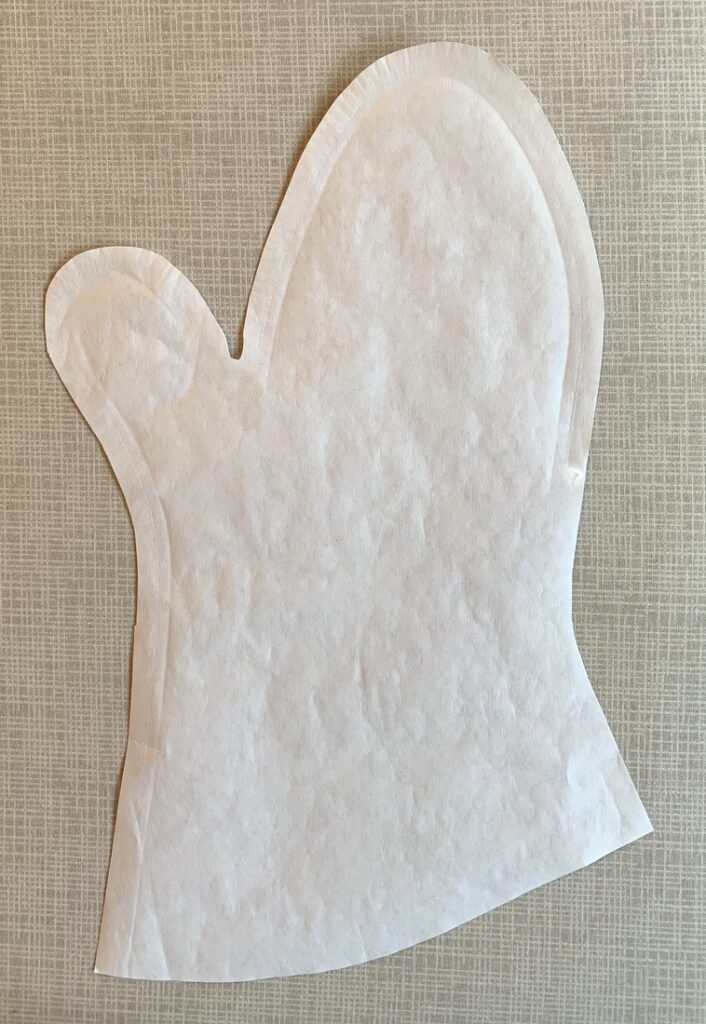
I simply traced around my favorite old mitt on a piece of freezer paper:
A pattern of green and yellow colors with white background

Did you notice that the pattern is flared at the bottom? That makes the mitt easier to slip on if you are wearing a garment with long sleeves.

For those of you unfamiliar with freezer paper, it has a shiny coating on one side that allows it to be ironed temporarily onto fabric. No need to use pins. The freezer paper can be peeled off easily, leaving no residue — and it can be used over and over again. The best place to get your freezer paper? The grocery store! The only brand I’ve ever seen is by Reynolds Kitchens. Crafters and quilters love it.

Combining what seemed to be the best elements of some online tutorials, I made a test mitt. That was the easy part. The hard part was applying the binding strip around the cuff edge. The opening of the mitt is relatively small, presenting a challenge first in moving it under the needle of the sewing machine and then in joining the raw edges neatly. Most tutorials are maddeningly vague about this step or produce results that leave something to be desired.

I experimented with different widths of binding strips and various techniques for joining the ends, making several sets of mitts in the process, including this early pair for Diane:
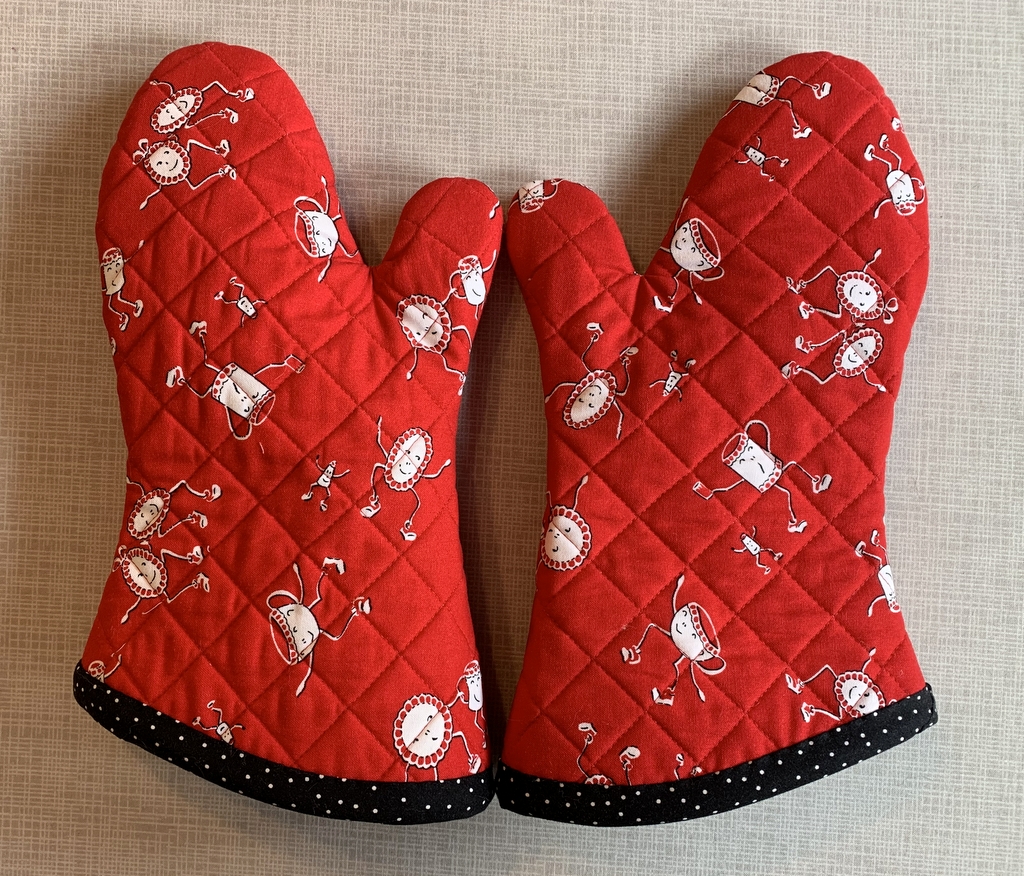
A pattern of green and yellow colors with white backgroundThe results were satisfactory . . . but I was looking for something more. The best solution came to me last month in a “what if?” moment. It seems so obvious now.

Want to know my secret? A partial seam!
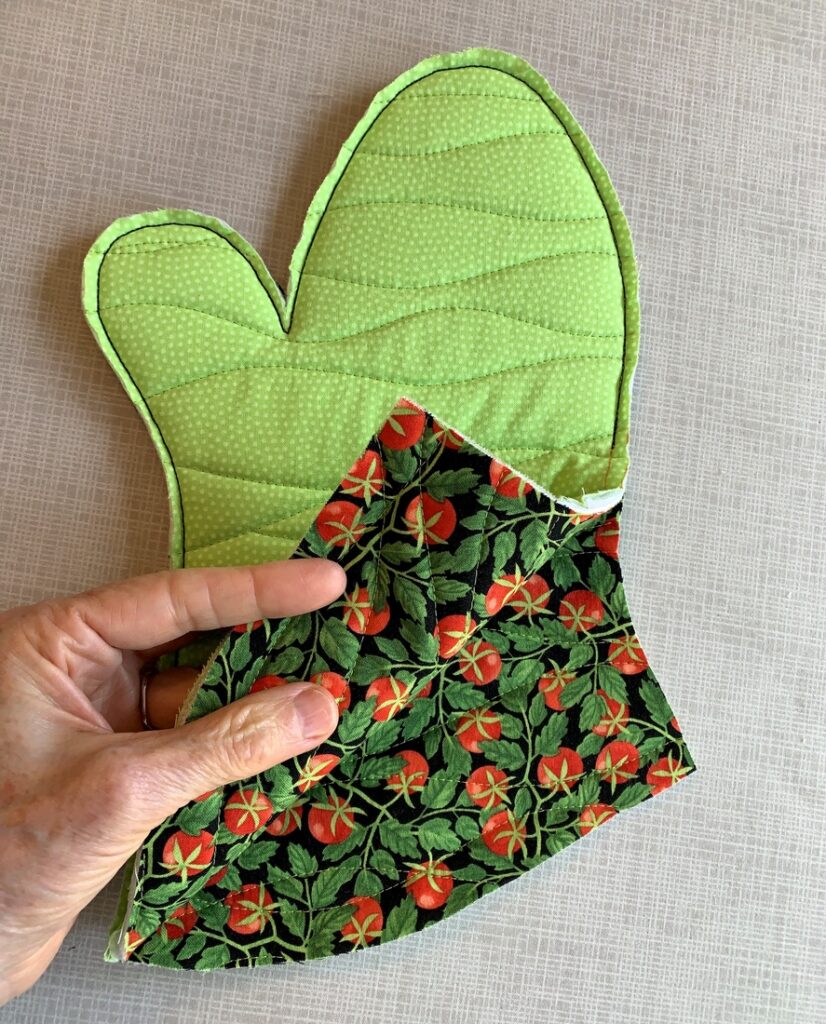
A pattern of green and yellow colors with white background

That’s right. By leaving one side seam only partially sewn, there was more room around the cuff edge to manipulate the fabric while applying the binding strip. And then I could finish sewing the side seam, which now includes the binding strip, giving me a beautifully finished mitt when the strip was turned down and tacked to the inside:
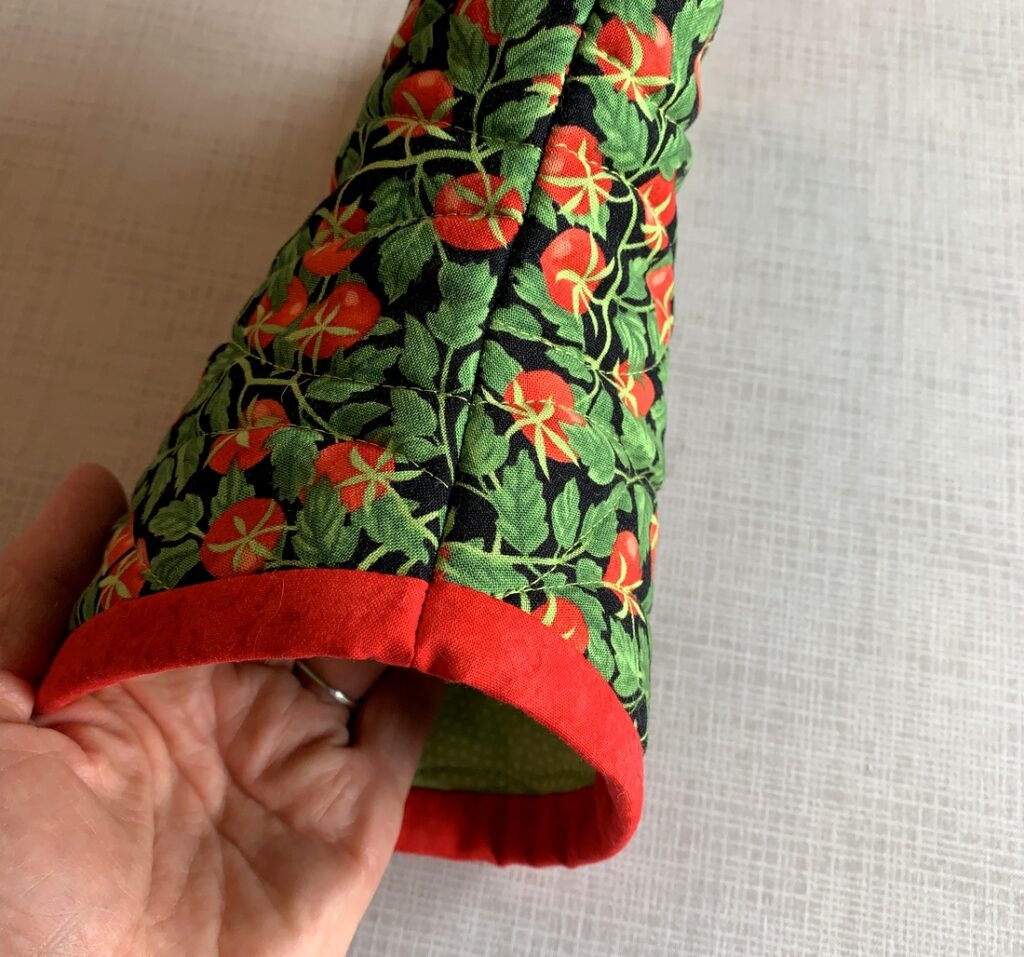
A pattern of green and yellow colors with white background

Are you intrigued? Want to make your own? I hope so!

My tutorial will come with a link to a printable template so you can make your own freezer paper pattern. Or you can do what I did and draw around a mitt you already have.If you use my pattern you can modify it to fit your own hand. If you make your own pattern by tracing around an existing mitt, you can place your hand on it to test the fit as I do in the photo below.

The edges of the pattern should be at least ¾” wider than your hand around the thumb and finger portions. There should also be at least 1″ from the notch between your thumb and fingers to the notch of the pattern and from the tip of your thumb to the end of the thumb on the pattern. Note the arrows:
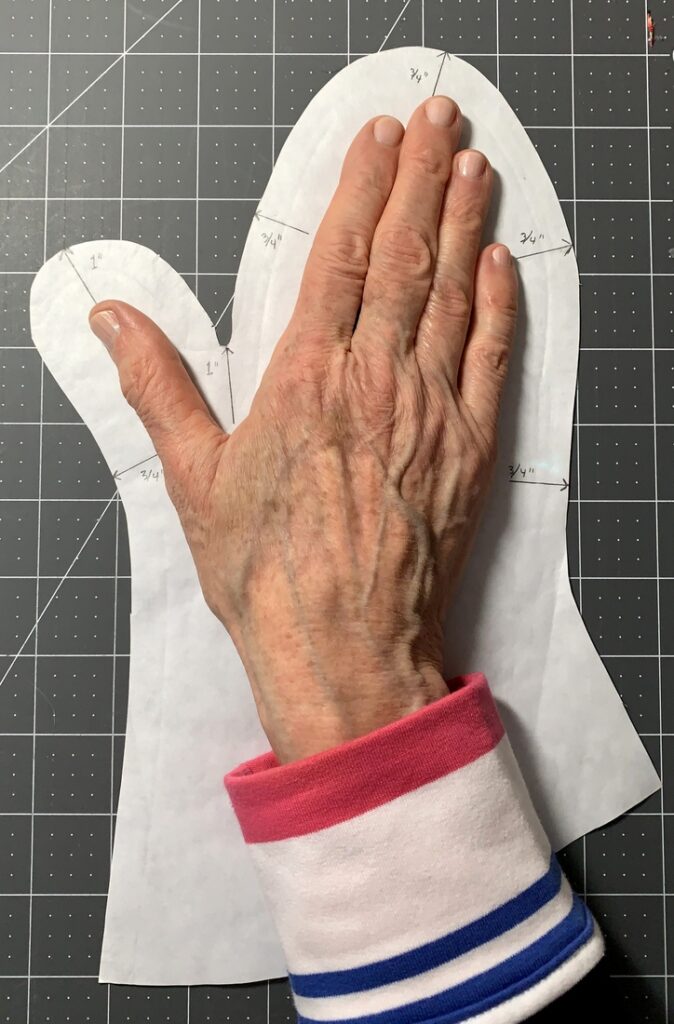
A pattern of green and yellow colors with white background

It may look like my hand would be swimming in a mitt that size but you need room to turn the mitt inside out and still have room for the seam allowance.

My tutorial is so detailed and picture-laden that it is coming to you in two parts. Part 1 covers fabric requirements, instructions for downloading and printing the pattern, assembling the layers, and quilting the resulting “quilt sandwich.”

Part 2 covers the sewing of the mitt and band around the cuff edge as well as the final step of tacking the band down.


Posted in family, home dec, oven mitts, tutorial, update | 10 Comments

Oven Mitt Breakthrough


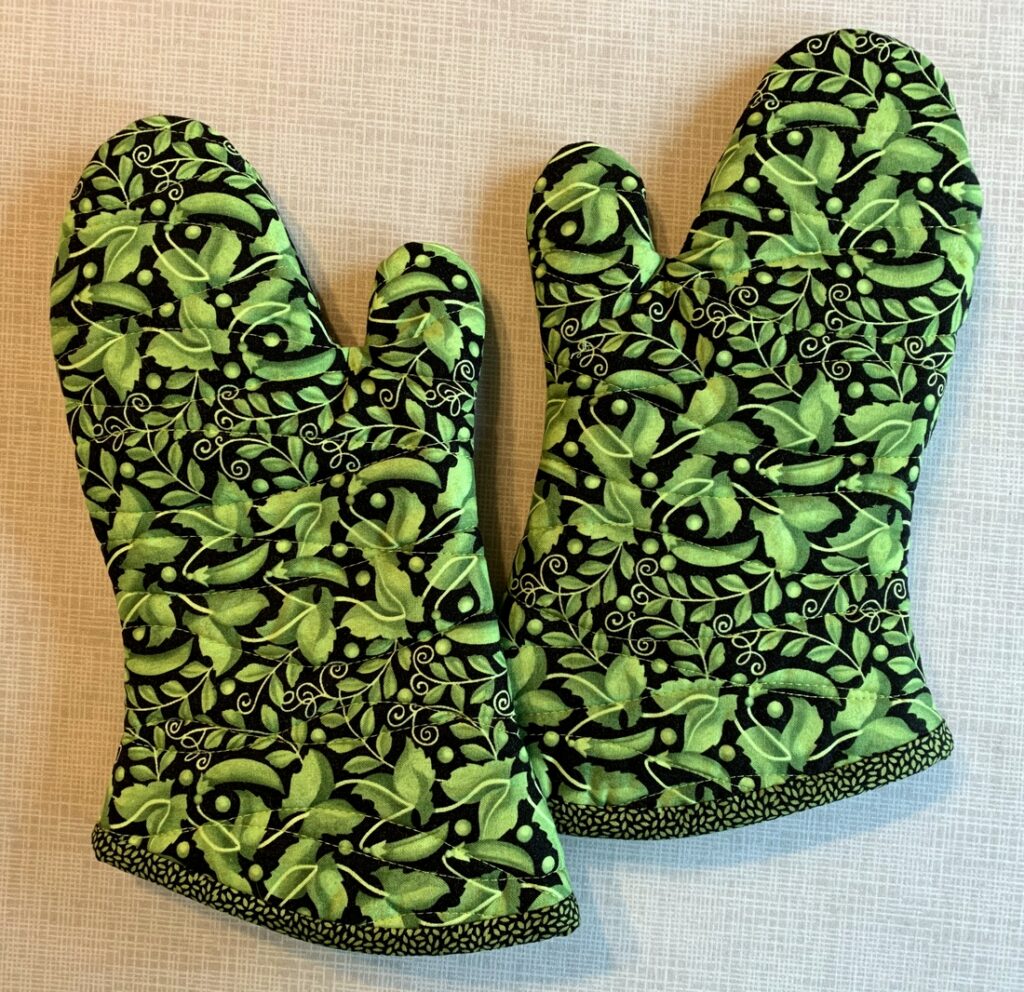
A pattern of green and yellow colors with white backgroundFor those of you wondering whatever happened to that oven mitt tutorial I promised a couple of months ago, I have an update for you. I actually started working on a tutorial back in January but got hung up working on instructions for applying the binding.

Each set of oven mitts I’ve made since making my own pattern in December has been nicely finished but applying the binding has been a process best described as “fiddly.” My goal has been to figure out a way to apply the binding for a neat finish that can be effectively illustrated in a picture-heavy tutorial and be easy enough for a confident beginner to follow.

To that end I’ve been experimenting with different widths and different ways of joining the ends. I’ve tinkered with single-fold and double-fold binding. The results have been acceptable. But ease of construction? Not so much. “There has to be a better way,” I kept thinking.

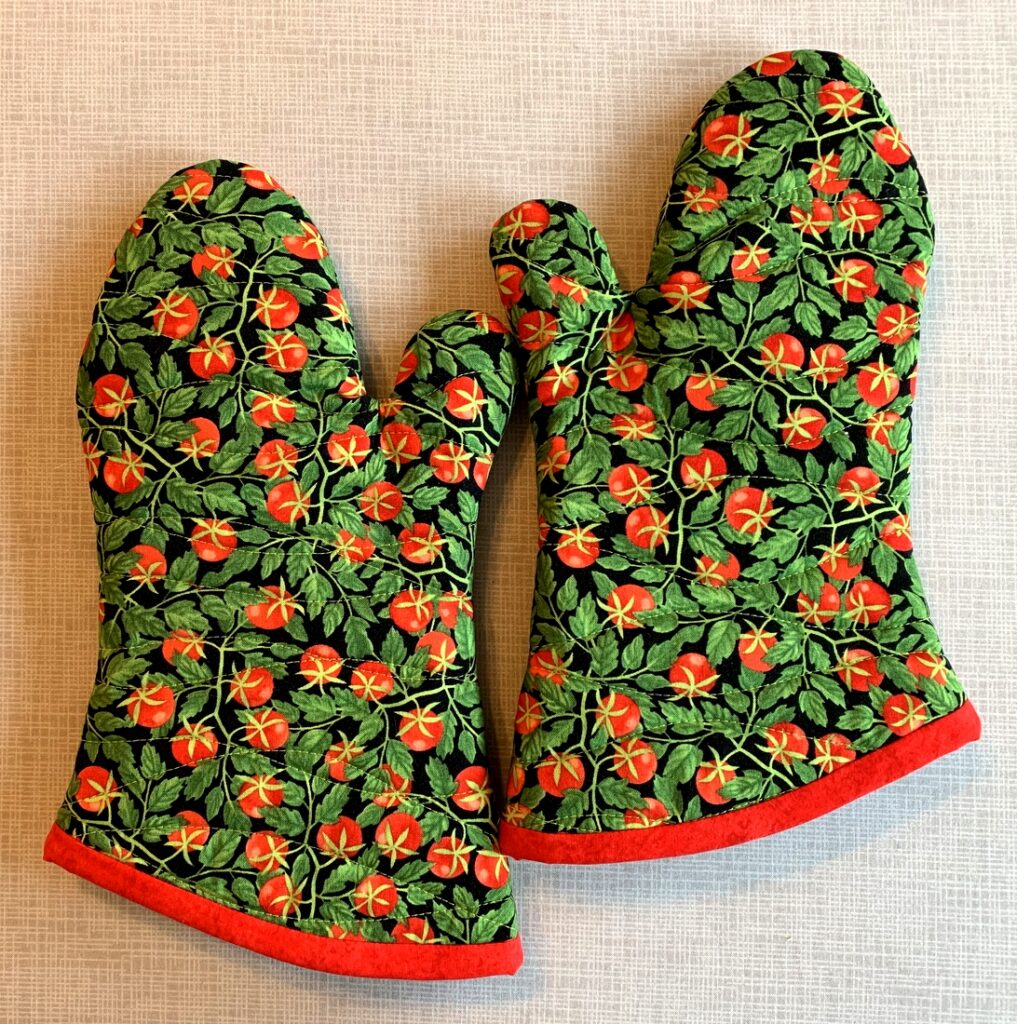
The other day I had a “what if?” moment. Yesterday I tried out my idea. I was on the right track but took one wrong turn. I tried again today — and it worked! The result is the set of oven mitts you see above.
Isn’t that fabric cute? It reminds me of a Valentine card I received as a kid that had peas on the outside. Inside was the message “Peas be my pod-ner.”

I have the perfect person in mind for these oven mitts. She’s Irish and loves the color green as much as I do. She reads my blog so I’m betting she’ll figure out these are for her. I’m planning to visit her next month but don’t want to wait that long to give them to her. If I get them in the mail tomorrow, she might get them by St. Patrick’s Day.


Posted in family, oven mitts, single-fold binding, tutorial, update | 7 Comments

Quick and Easy? Think Again!


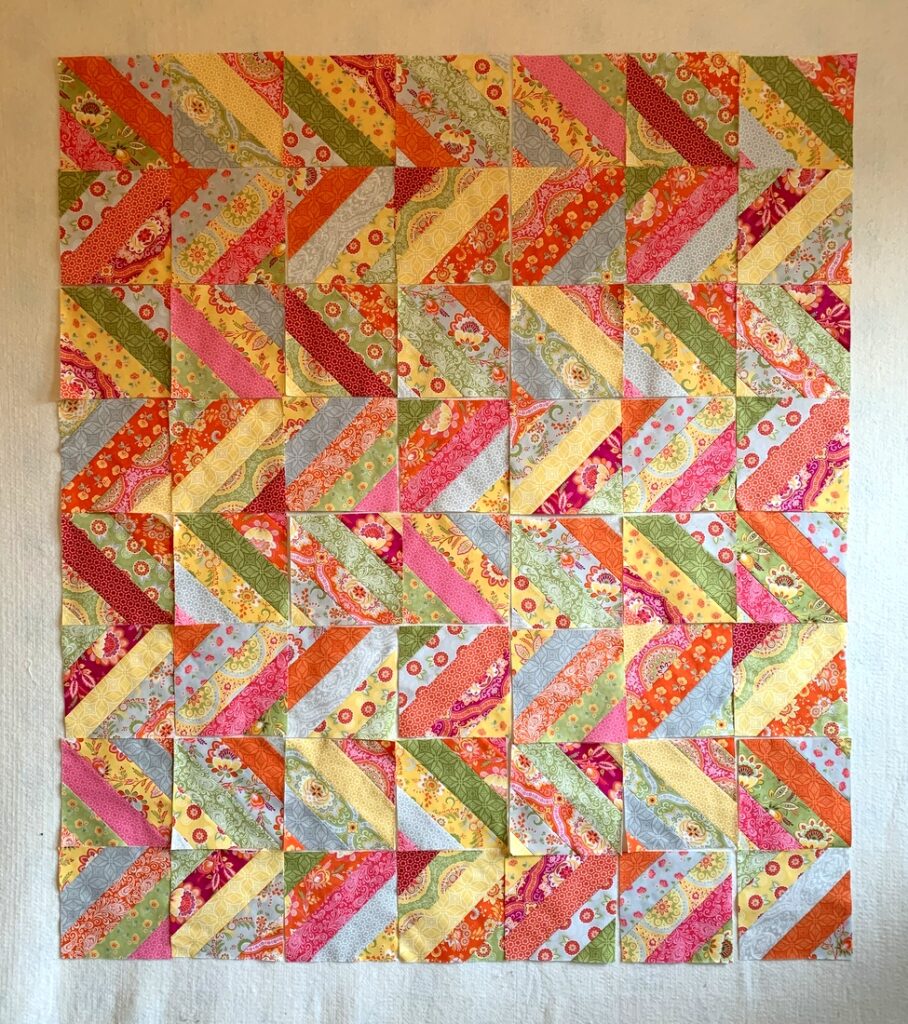
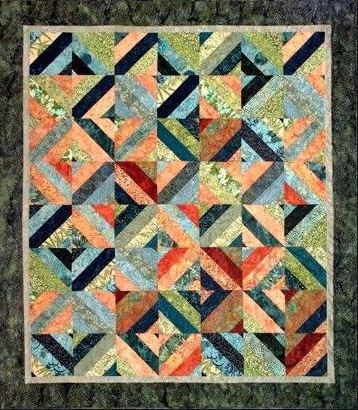
Let me start this post by telling you this is not the final layout of my current work-in-progress:

A pattern of green and yellow colors with white background

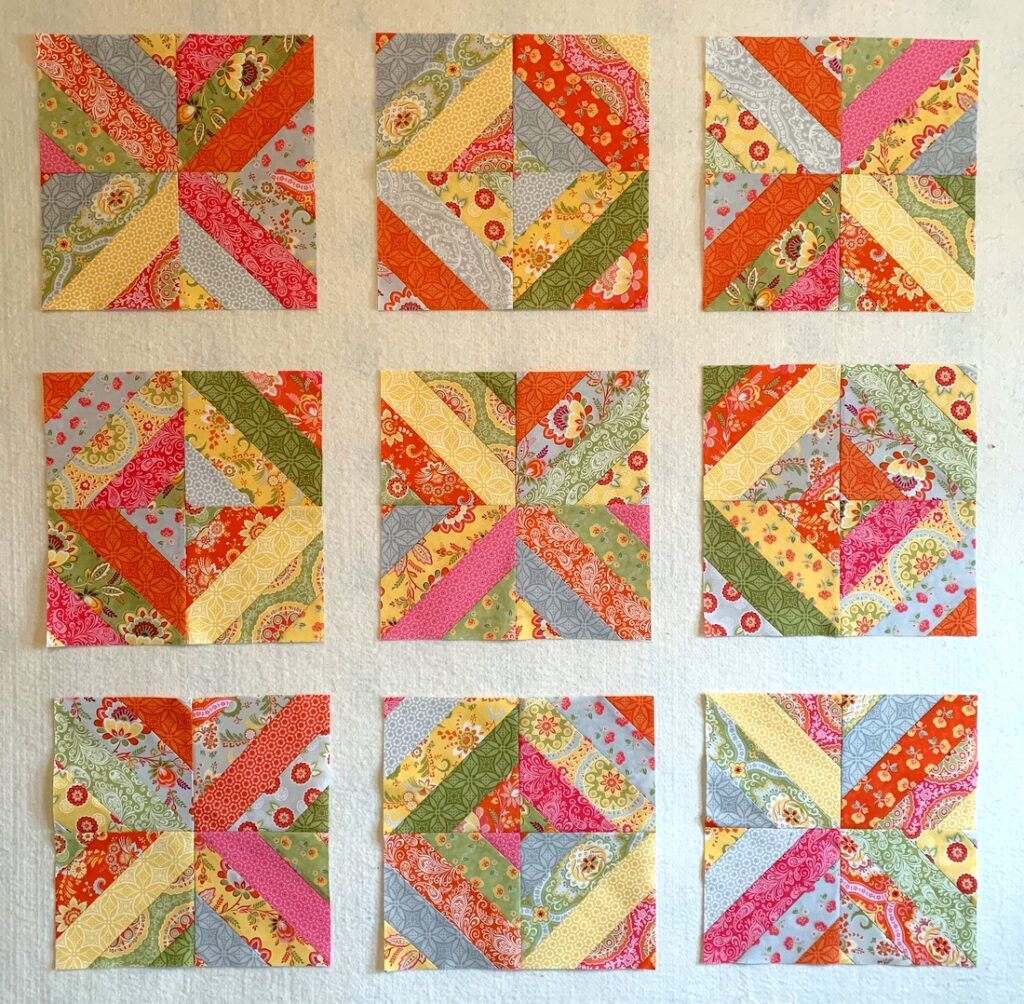
What was supposed to be a quick and easy quilt top has taken me the better part of two weeks — mainly spent in moving blocks around on my design wall. Making the strip sets and cutting them into blocks was indeed quick and easy — and really fun, as this line of fabrics (“High Street” by Lily Ashbury) was quite delightful to work with.

Instead of arranging my blocks like the original design, Larene Smith’s Tea Time in Bali, seen here . . .

A pattern of green and yellow colors with white background

. . . I opted for a “streak of lightning” setting, the one you see at the top of this post. After playing around for quite a while with the arrangement, I called in the Dear Husband for a second opinion.

“Well,” he said after a long pause, “it looks very modern.”

“Hmmm, yes. But it looks so . . . busy,” I said. “I’m just hoping the yellow and light grey strips give the eye a place to rest.”

“They don’t,” he replied. “There’s no place in this quilt for the eye to rest.”

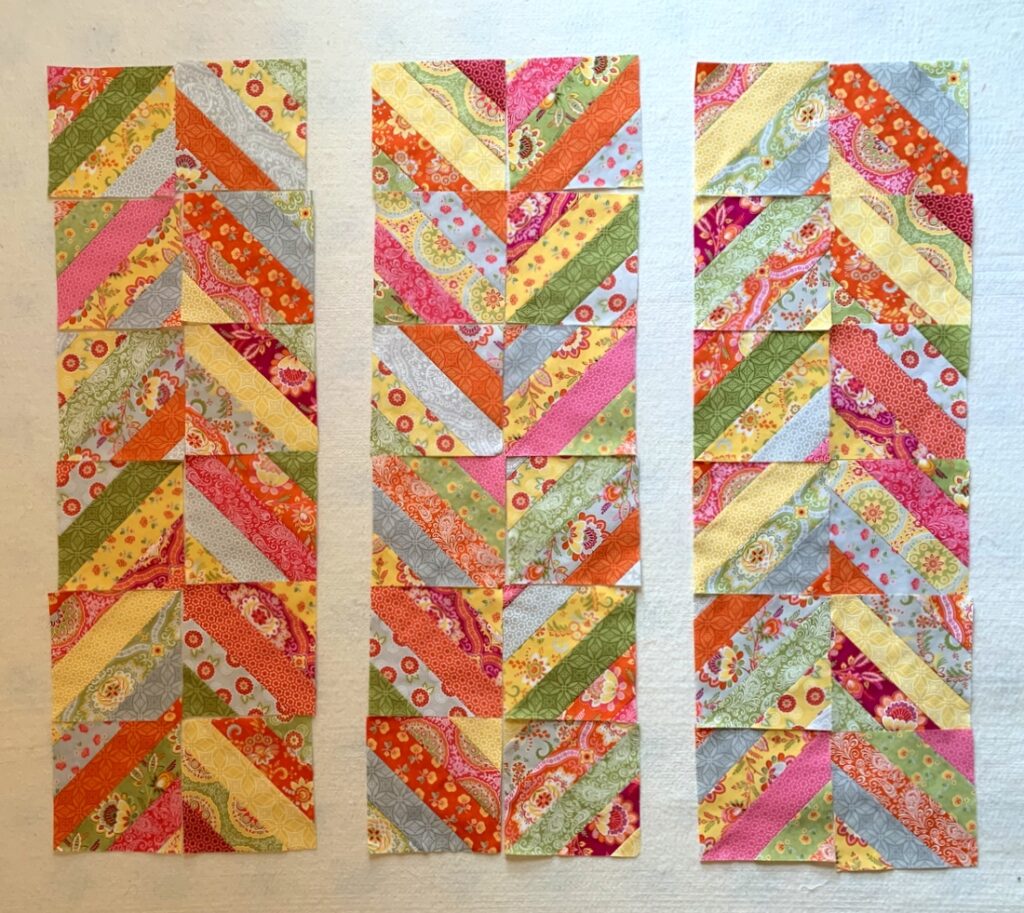
He was right, of course. At that moment I knew I had to come up with another plan, one that would include some negative space. The first thing I tried was breaking the blocks into columns:

A pattern of green and yellow colors with white background

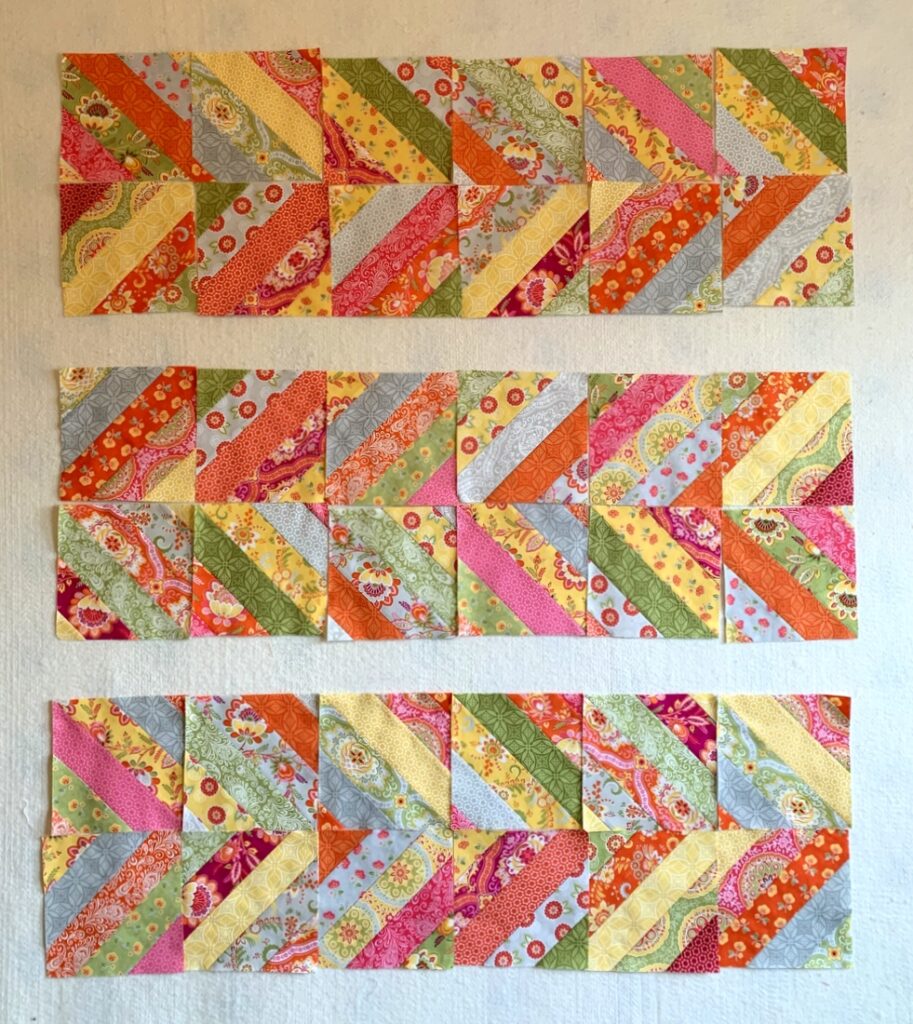
That seemed like a step in the right direction, giving me chevrons rather than streaks of lightning.When I rotated the photo I liked the effect even better:

A pattern of green and yellow colors with white background

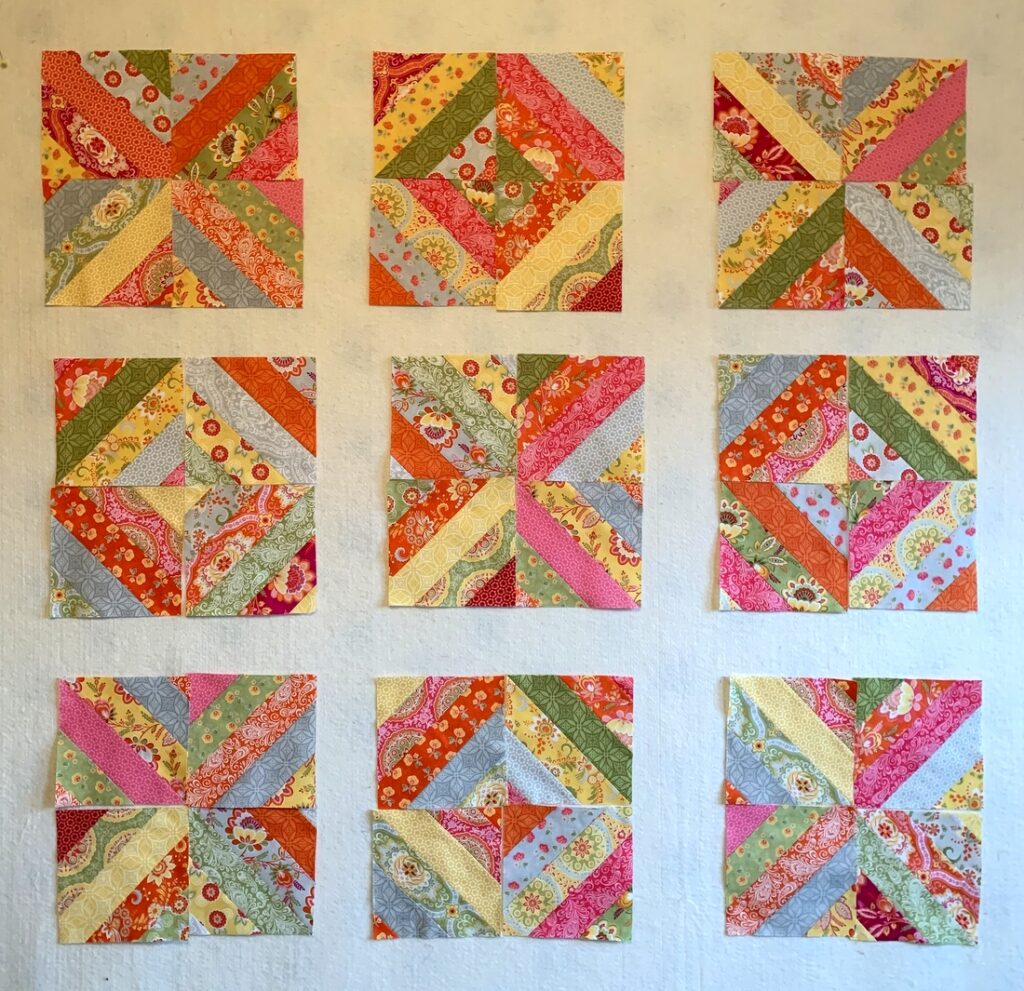
But I wasn’t there quite yet. Chatting on the phone with my sister Diane about my setting troubles, she asked me to text her photos and after seeing the one directly above she suggested breaking the blocks up even more. That got me to this point:

A pattern of green and yellow colors with white background

I liked where this was going. My blocks were now more like the ones in the pattern layout, with each set of four blocks looking like an X or an O. But those dark purple prints were bothering me. I removed them and added strips from some of the blocks I didn’t use:

A pattern of green and yellow colors with white background

Ah, now that’s more like it!

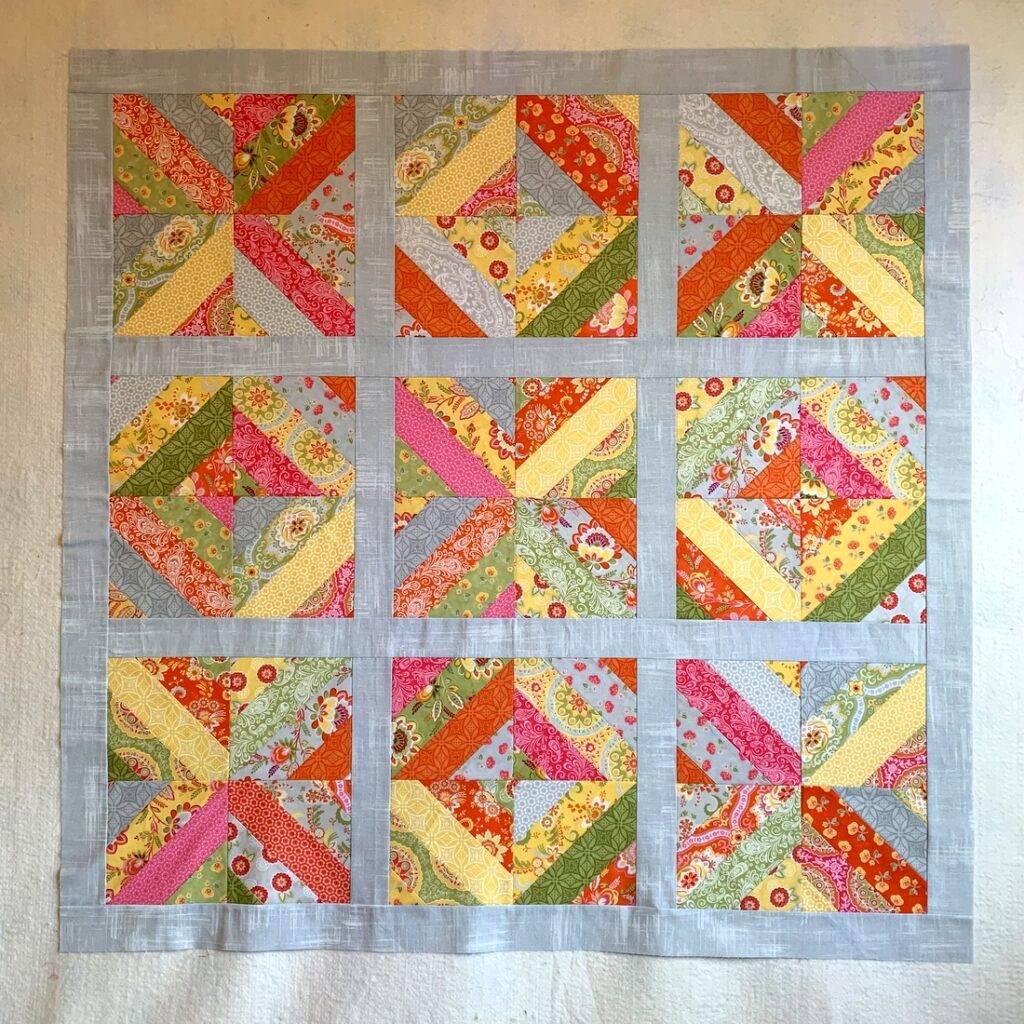
Now on to the sashing. It was easy to envision white sashing just by looking at the blocks up on my design wall but I was leaning toward light grey, thinking it would add to the modern vibe I was going for. Into my stash I dove, coming up with some strips already cut that were originally planned for another project:

A pattern of green and yellow colors with white background

The fabric, “Painter’s Canvas” by Laura Gunn for Michael Miller Fabrics, actually looks rather silvery, with random striations going in both directions.

Right now this quilt measures 45″ square. I could declare it a done deal and get it ready to be quilted but there are a couple more things I want to try. . .

I hope you’ll check back to see the outcome.


Posted in family, update | 5 Comments

A Happy Surprise


A few weeks ago I came across this vintage needle case that had been tucked away for years in a project bag in my sewing room closet:

A pattern of green and yellow colors with white backgroundFinding it was a happy surprise because I had completely forgotten about it. I’m pretty sure it was an estate sale find, maybe dating back to the 1990s.

I don’t know if the needle case is knitted or crocheted (maybe both?) but I can tell it was skillfully crafted. It’s about 4¾” wide and 4¾” long, not counting the loop. You can see how beautifully made it is. Take a peek inside:

A pattern of green and yellow colors with white backgroundThe fabric on the back is a very finely woven cotton, perhaps a sateen, in a geometric print:

A pattern of green and yellow colors with white backgroundBoy, would I love to have a piece of that in my stash.

At first glance my needle case may look like a strawberry but you know what I saw when I came across it? A heart! That’s why I decided to wait till Valentine’s Day to write a post about it.

And now Valentine’s Day is almost upon us. We’re snowed in, as it happens. Not to worry. Knowing that snowfall was expected this week, I made my weekly grocery run earlier than usual and laid in a small supply of champagne and chocolate caramels which I will happily share with the DH:

A pattern of green and yellow colors with white backgroundI’m ready!


Posted in family, update | 7 Comments

Oven Mitt Giveaway!


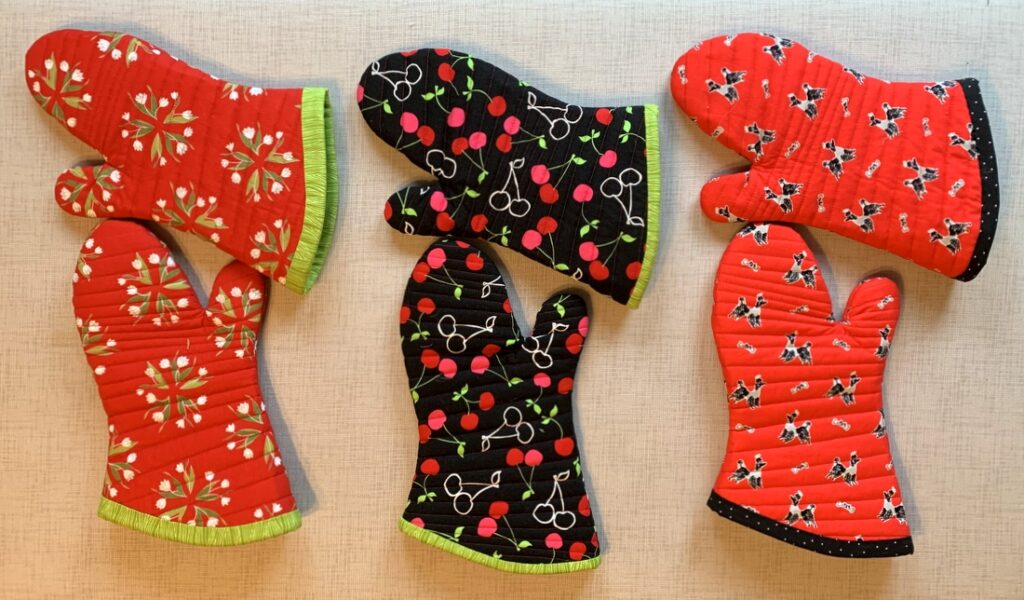
That’s right, friends. I’m giving away a set of oven mitts to three lucky winners. Will you be one of them?

A pattern of green and yellow colors with white background

I made these oven mitts in preparation for writing a tutorial. The shape of the mitts is the same on all of them — it’s the binding I’ve been tinkering with. I’ve been trying different widths and finishing techniques. Now that I’m finally satisfied, I can get to the tutorial — but now I have to make one more set of mitts to photograph for the tutorial!

The mitts you see above were made of four layers:
⦠the outer fabric is 100% cotton
⦠the second layer is 100% cotton batting
⦠the third layer is Insul-bright, an insulated lining material specifically made for hot pads and oven mitts
⦠the fourth layer (the inside of the mitt) is cotton with an aluminized coating, commonly used to cover ironing boards. This fabric is not essential but I had some on hand and decided to use it because one of my old oven mitts happened to be lined with it.

To be entered in the giveaway, all you have to do is write a comment at the bottom of this post responding to the question, “What is your favorite kind of food?” If you wish, name a dish you especially like in your favored cuisine. How simple is that? No need for you to subscribe to my blog or follow me on Instagram (though I would be delighted if you chose to do either).

One entry per person. I will mail anywhere in the world so international readers are welcome to enter.

Family members are invited to leave comments but are not eligible to win. (Don’t feel too sorry for them; all they have to do is let me know they want a set and they’ll get one!)

The giveaway will remain open through Friday, January 29. On Saturday, January 30, I’ll use a random number generator to pick three winners. Winner #1 gets the red mitts on the left with the flowers; winner #2 gets the set in the middle with the cherries; and winner #3 gets the set on the right with the poodles.

But wait — there’s more! It it happens that you are a winner and the mitts are totally the wrong color for your kitchen, you can let me know when I contact you and I’ll make you a custom set in the color of your choice. If that happens, I’ll draw a fourth winner for the set that didn’t work for you.

Good luck, everyone!


Posted in family, Giveaway, home dec, oven mitts, tutorial, update | 46 Comments

The Oven Mitt Quilt


Is this not the oddest looking quilt you’ve ever seen?

A pattern of green and yellow colors with white background

Actually, it’s not a quilt at all.

I’m gearing up to make a few sets of oven mitts as gifts and I didn’t want to take the time myself to quilt the four layers needed for a well insulated mitt. So . . . I made a “quilt top” using three suitable prints from my stash that could all be quilted with the same color thread and asked Karlee of SewInspired2Day to quilt it for me. The result is what you see above.The quilt motif is “Modern Waves,” one that Karlee has used on another of my quilts, Where It’s @.

Here’s a closer look at those three fabrics, pictured with my oven mitt pattern to give you an idea of the scale of the prints:

A pattern of green and yellow colors with white background

I think they’re going to make pretty cute oven mitts!

You may remember the mitts I made last month for my sister Diane. I quilted the fabric for those using a cross-hatch design:

A pattern of green and yellow colors with white background

After I published the post I had a few requests for a tutorial. Good news! A tutorial is coming.

And maybe even a giveaway. Stay tuned!


Posted in family, Giveaway, home dec, tutorial, update | 3 Comments

Something in Red: New Oven Mitts


Are these not the cutest oven mitts you’ve ever seen?

A pattern of green and yellow colors with white background

Last month, while visiting my twin sister Diane, we were commiserating on the sad state of our oven mitts. We have the same ones — we bought them years ago when we were together in a kitchen shop. They’re in pretty bad shape but they’re the best-fitting oven mitts we’ve ever found so we’ve just hung on to them. (The ones in the stores today are too darn big. I suppose they’re meant to be one-size-fits-all but I swear they’re made for ham-fisted cooks and chefs.)

I resolved to make a pair of oven mitts for Diane when I got back home as a thank-you gift for the marvelous hospitality she and her husband Ed bestowed on the Dear Husband and me over the two-plus weeks we spent with them at their home in Georgia over Thanksgiving. I finished the mitts last week and popped them in the mail. Since then I’ve been waiting (im)patiently for Diane to receive the mitts so I could show them to you. They arrived today — finally!

Diane’s kitchen has accents of red so I chose this darling Michael Miller print that’s been in my stash for a few years. I traced around my old oven mitt to make a pattern out of freezer paper:

A pattern of green and yellow colors with white background

I looked at several tutorials online and combined what I thought to be the best features. Interestingly, the patterns that accompanied the tutorials also make oversize mitts. I like the lines and fit of mine so much better!

Diane started her holiday baking today — that’s Ina Garten’s recipe for Salty Oatmeal Chocolate Chunk Cookies on the cookbook holder — so her new oven mitts have already been put to the test:

A pattern of green and yellow colors with white background


Posted in family, home dec, oven mitts, update | 18 Comments

A Quatrefoil Christmas Quilt


A pattern of green and yellow colors with white backgroundOh, I know I am going to enjoy working on this new project! This is Test Block #1 of a quilt I’ve started with a festive line of holiday fabric called “Holliberry” designed by Corey Yoder for Moda Fabrics. The block is called Quatrefoil, which means “four leaves” in French.

When I first learned about “Holliberry” a few months ago, I knew I wanted to make something with it. Not knowing what to make, I decided to buy a Layer Cake (a package of 10″ squares featuring the entire line) and a few pieces of yardage. I already had my background fabric: a polkadot print from another designer, Lori Holt of A Bee in My Bonnet. I love how the green and red dots are scattered randomly over the white fabric.

The fabrics got packed up last month and hauled to Atlanta so I could work on the quilt while visiting my twin sister Diane over Thanksgiving. I keep a sewing machine there, along with a complete set of accessories, because I always do some sewing while I am at her home.

This year my sewing experience was especially enjoyable because Diane had her handyman make a “Big Board” that sits on top of her ironing board to increase the ironing surface.This Big Board is BIG! Check it out:

A pattern of green and yellow colors with white background

My own Big Board is 22″ x 60″, which suits me (and my small-ish sewing room) just fine. Diane’s Big Board measures 26″ x 68″. I had sent her a king-size cotton batt, unbleached muslin, and fabric for the cover beforehand. She and her handyman wrapped three layers of batting and one layer of muslin around the frame and stapled them in place. Then they stretched the top layer of fabric over the surface and held it in place underneath with large 2″ T-pins I had ordered from a wig shop. Because the top layer is pinned rather than stapled in place, it will be easy to take it off for laundering or replace it when the time comes.

My Christmas Quatrefoil quilt will be what I call “controlled scrappy.” I’ll be using different combinations of prints from the “Holliberry” line:

A pattern of green and yellow colors with white background

The stacks of squares on either side of the block can either be the four leaves of the quatrefoil or the centers of four blocks.

Despite the wonderful addition of Diane’s Big Board, the block you see at the top of the post was the only one I made on this visit. Diane and I were too busy celebrating a big birthday — our 70th! — and let’s just say that it’s not a good idea to drink champagne and sew at the same time.

After making Test Block #1, I determined I needed to make one change but I didn’t get to it until after returning home earlier this week. Here is Test Block #2:

A pattern of green and yellow colors with white background

Can you see the difference?

I’ll give you a hint: look at the four small green blocks with the diagonal print.

Here are the blocks side by side (I wish the colors were the same but the photos were taken at different times of day in different light):

A pattern of green and yellow colors with white background

I replaced the four-patch units in each corner so I could change the orientation of the diagonal green lines. The green lines on the right block form a diamond shape that echoes the diamond shape of the red print. The change might not be noticeable to some but I find the revised block much more pleasing to the eye.

Now that I’ve finished the first block, I can hardly wait to make some more!


Posted in family, Quatrefoil, update | 6 Comments