 Here’s an easy and fun tutorial to get your New Year off to a crafty start.
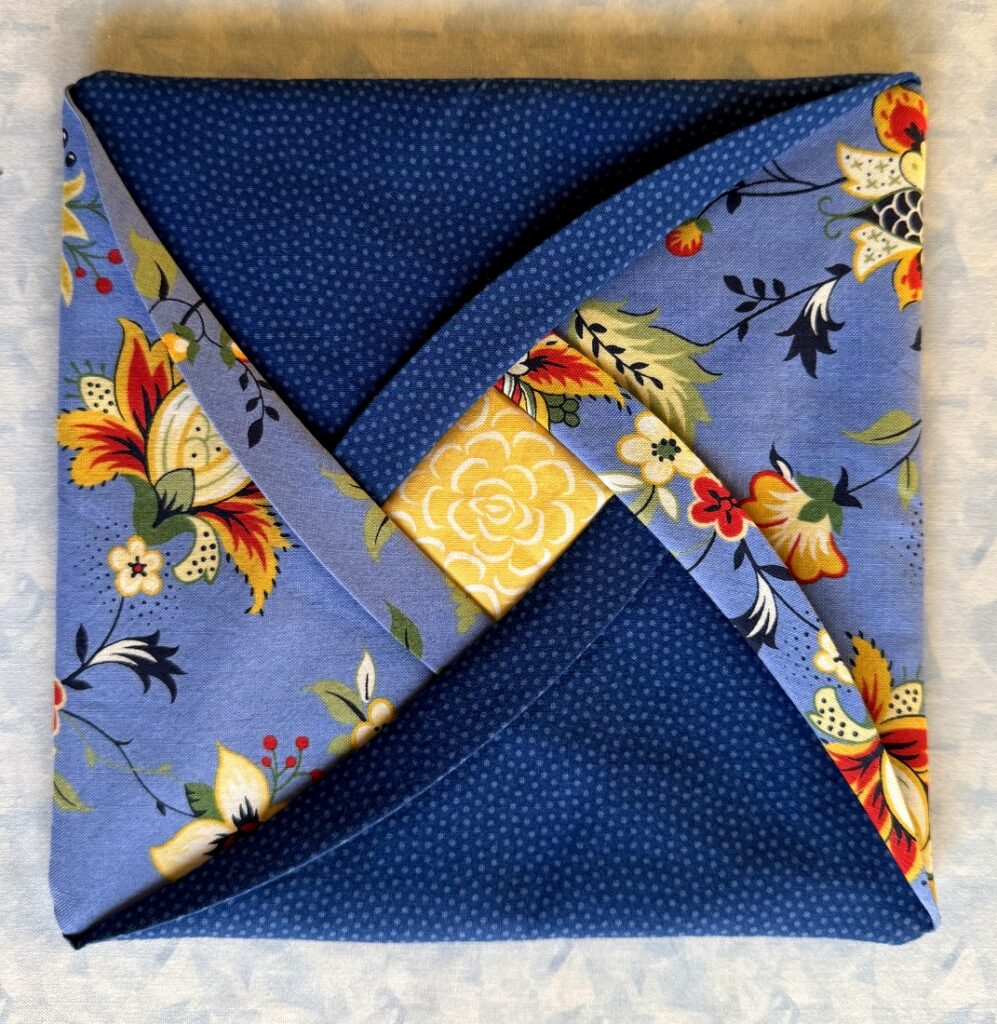
With six squares of fabric plus one square of insulated heat-resistant batting, you can quickly assemble and sew a sturdy and stylish hot pad. You probably wouldn’t guess from looking that the design is created with four folded triangles, each of which creates a flap that is folded back to reveal a contrasting fabric diamond in the center.
My tutorial results in hot pads that finish about 8″ square but you can make them larger or smaller. See my “Notes” at the bottom of the tutorial.
These hot pads make great gifts — but don’t you want to make a couple first for your own kitchen?
Supplies
Sewing machine with walking foot, open-toed if possible
Standard sewing supplies (scissors, thread, seam ripper, etc.)
New needle — 90/14 sharp or jeans needle, as you will be sewing through multiple layers
Rotary cutting equipment – mat, cutter, rulers (4” x 14” comes in handy)
Wonder Clips (small size)
Gently pointed instrument, such as a bone folder, to poke out corners
Fabric
For one hot pad you’ll need six 9″ squares of 100% cotton fabric: one for the “diamond” fabric in the center of the hot pad, four for the triangles (made from folded squares) that go around the center diamond, and one for the back.
You’ll also need one 9-inch square of Insul-bright*, an insulated heat-resistant batting.
(*Insul-bright is made of polyester fibers needled through a reflective metalized polyester film. According to the Warm Company, maker of Insul-bright, the fibers “resist conduction while the reflective metalized polyester film reflects radiant energy, hot and cold, back to its source.” You could use two squares of 100% cotton batting as an alternative to Insul-bright but they wouldn’t have the reflective property.)
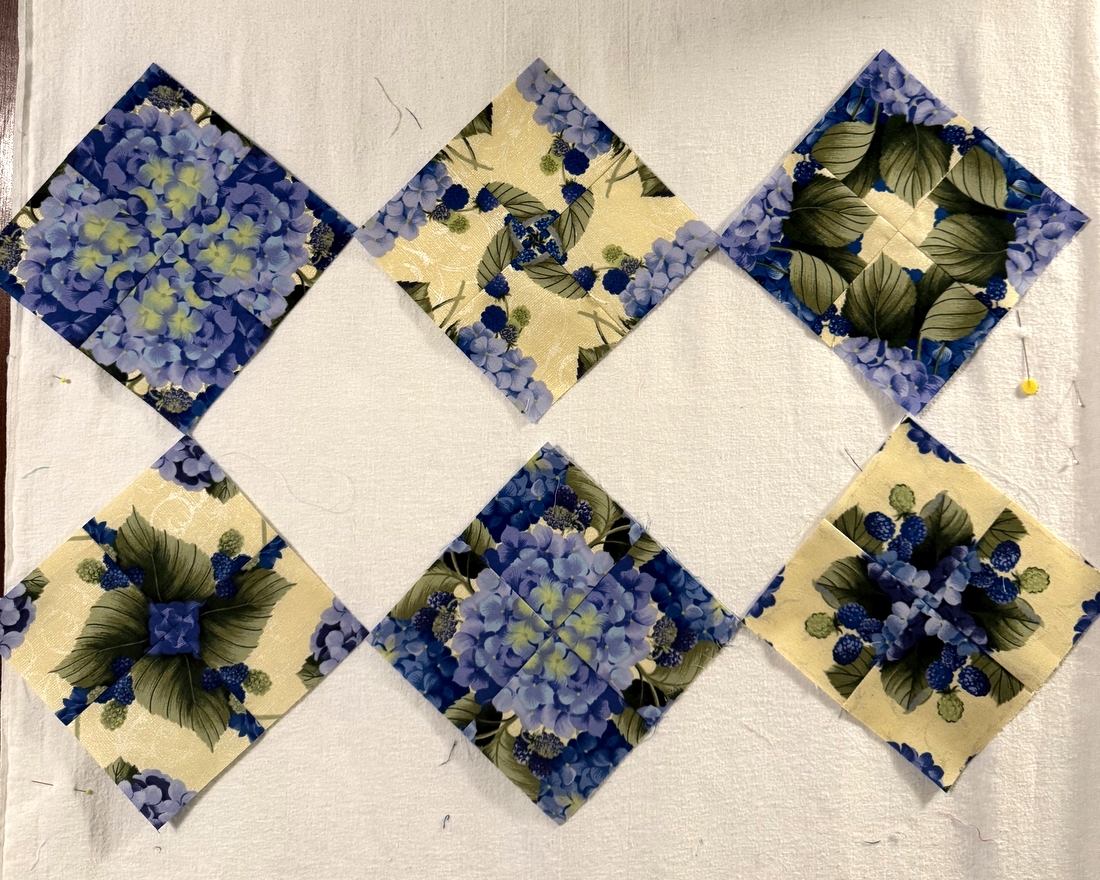
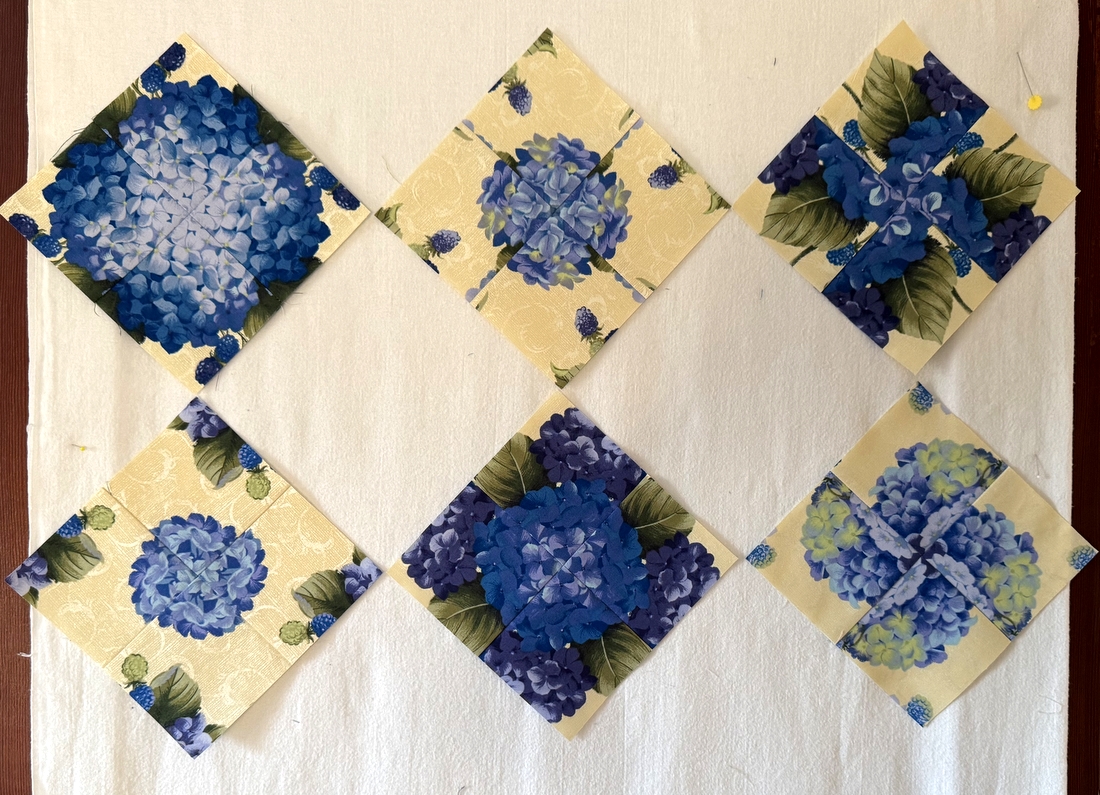
Choose at least three fabrics that go well together and offer good contrast. The fabric for the center diamond should be fairly bold, as you don’t see much of it. The fabric for the back can be any of the three that show on top or a completely different fabric. Because these hot pads are meant to be used, I advise steering clear of light-colored fabrics. Choose fabrics that are medium to medium-dark in value. Just being practical!
This design is fat-quarter friendly. One fat quarter yields four 9” squares. A regular or long quarter (9” x width of fabric, usually about 42”) also yields four 9” squares. A fat quarter of three different fabrics yields enough 9” squares for two Folded Flap Hot Pads.
Cutting and pressing the fabric
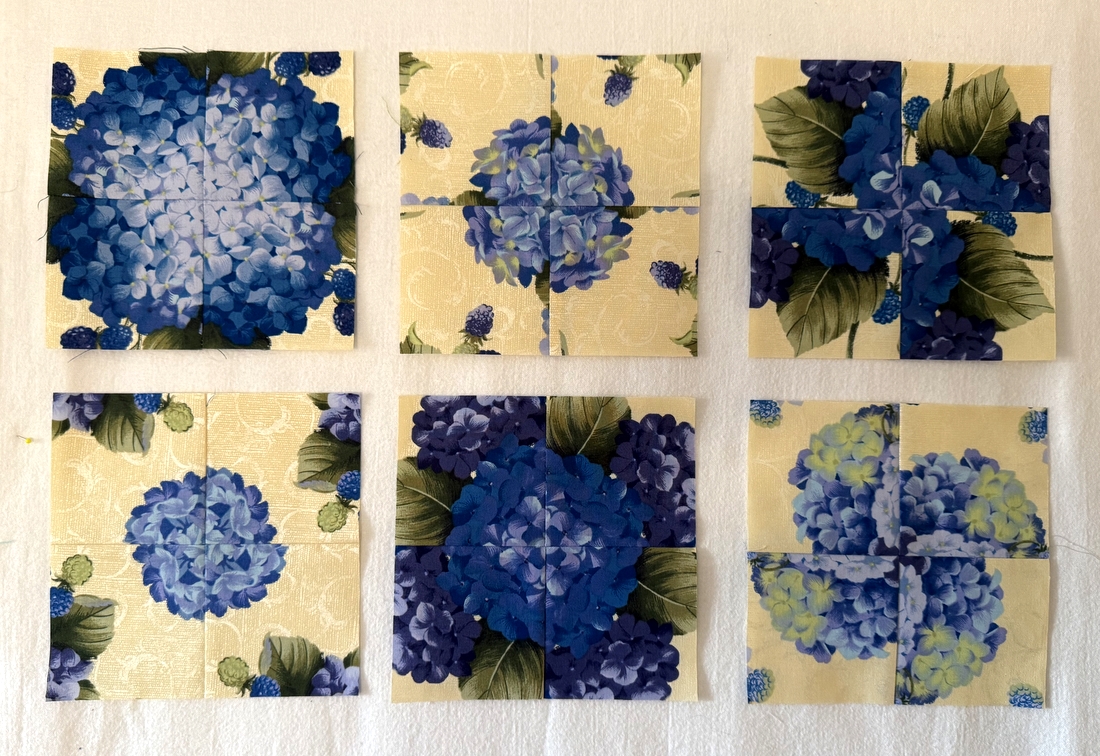
Cut four 9” squares for the top (two each of two different fabrics. We’ll call them Fabric A and Fabric B.)
Cut one 9” square for the center diamond (Fabric C).
Cut one 9” square for the back (Fabric A, B or C — or another of your choosing).
Cut one 9” square of Insul-bright.
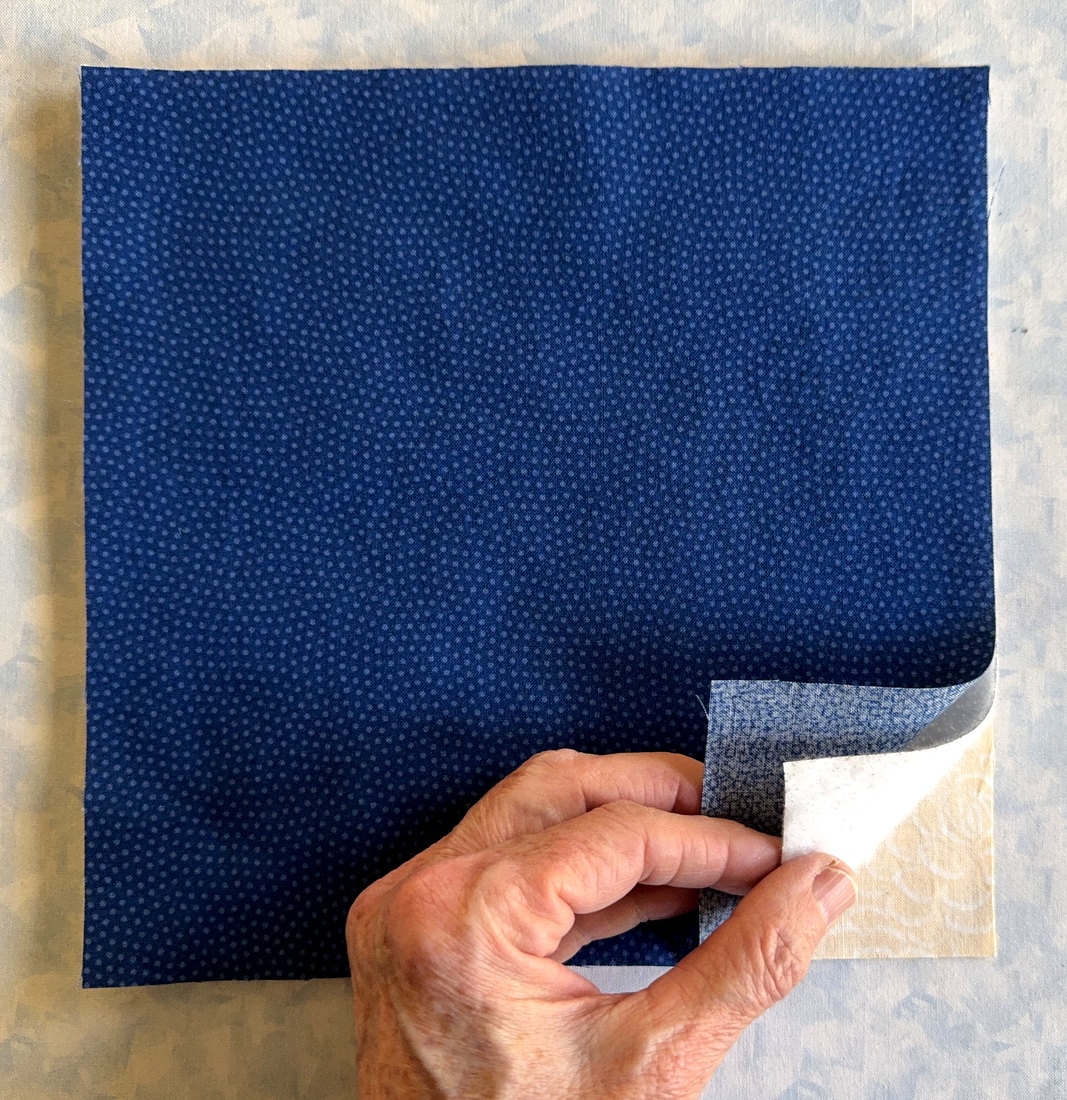
Press the squares of Fabric A and B in half, wrong sides together, to form triangles.
Putting it together
1. On a flat surface start layering the fabrics in this order:
Fabric C (center diamond fabric), right side down
Insul-bright (it does not have a right or wrong side)
Back fabric, right side up:
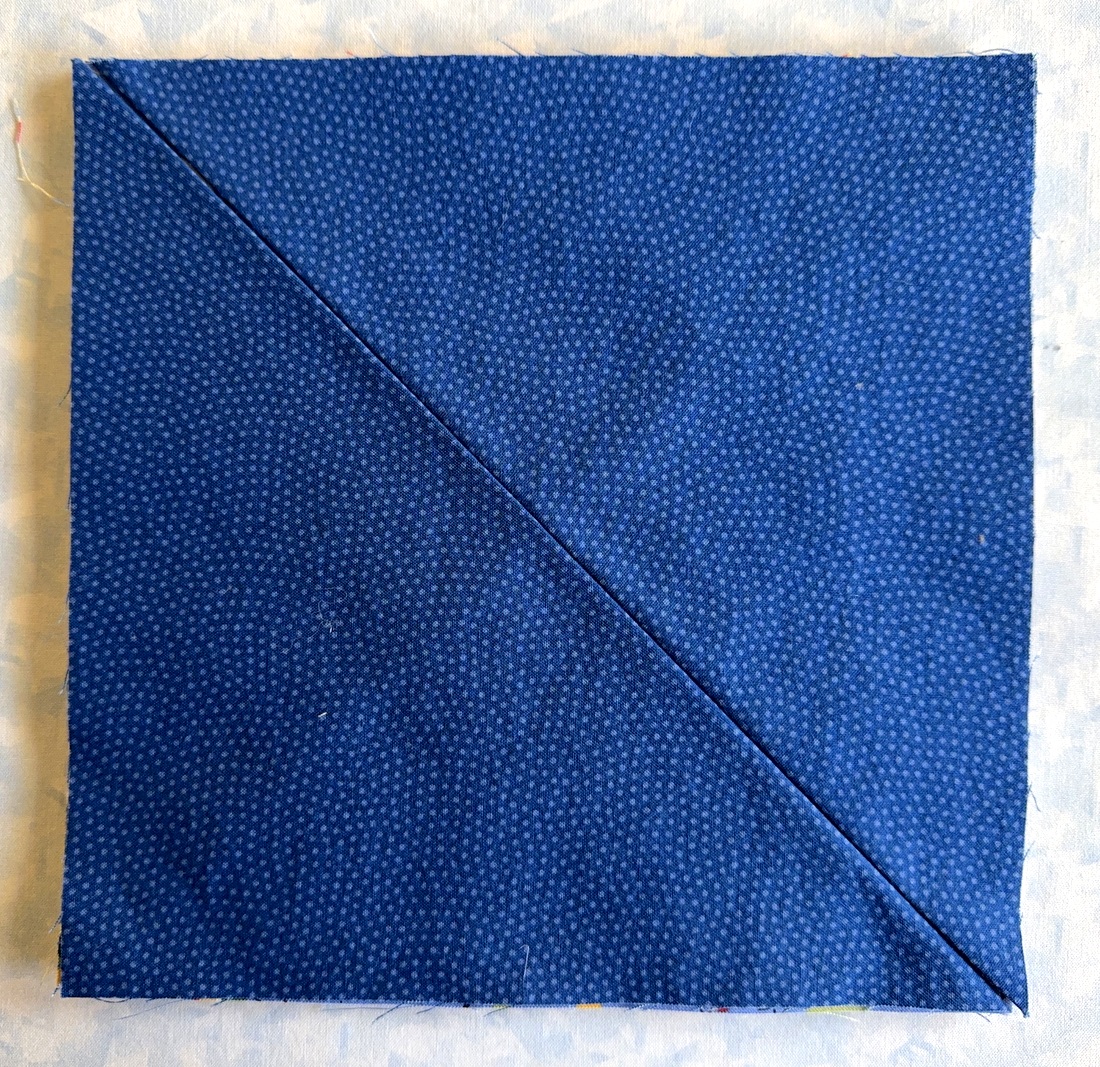
 2. Next come two triangles of Fabric A, with folded edges meeting in the middle, forming a diagonal line across the square from upper right to lower left. These are Triangles 1 and 2, with Triangle 1 being the one in the upper left side:
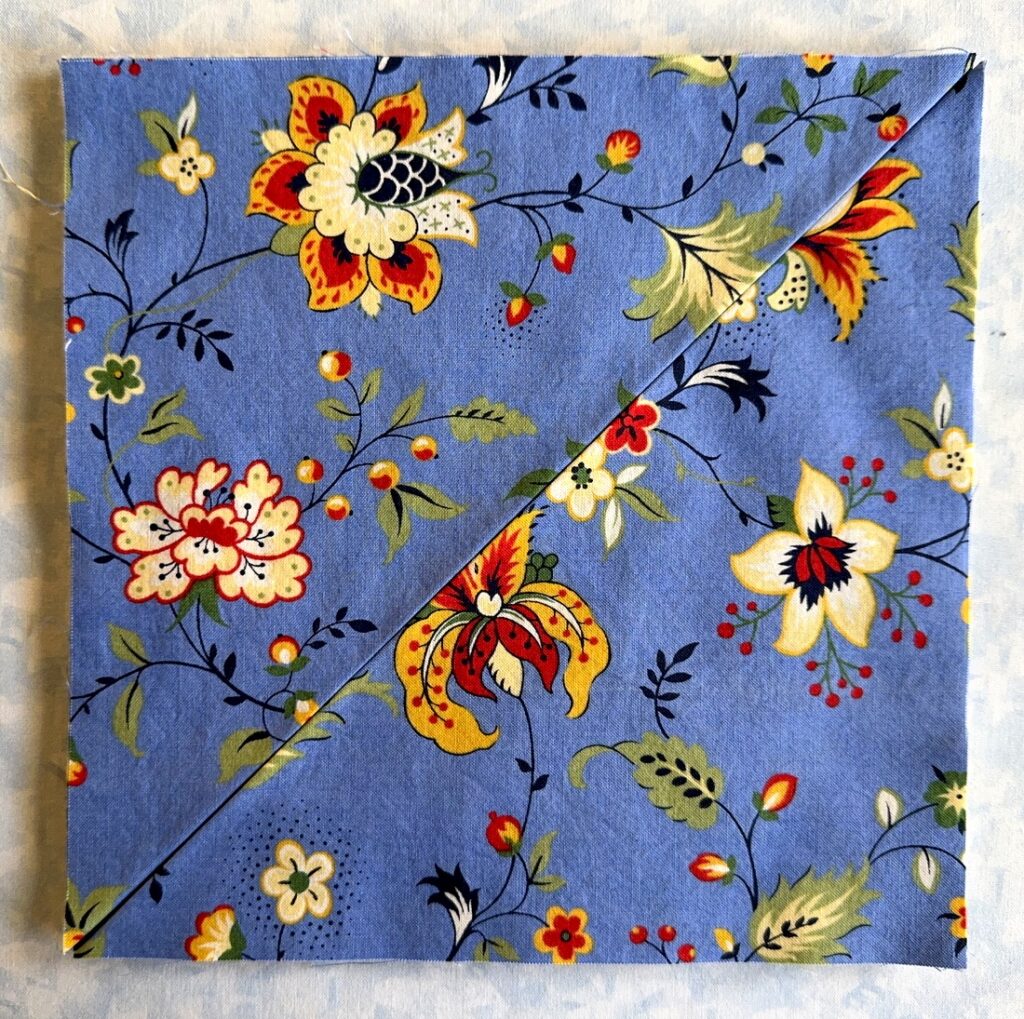 3. Now layer the two triangles of Fabric B, with folded edges meeting in the middle, forming a diagonal line in the opposite direction:
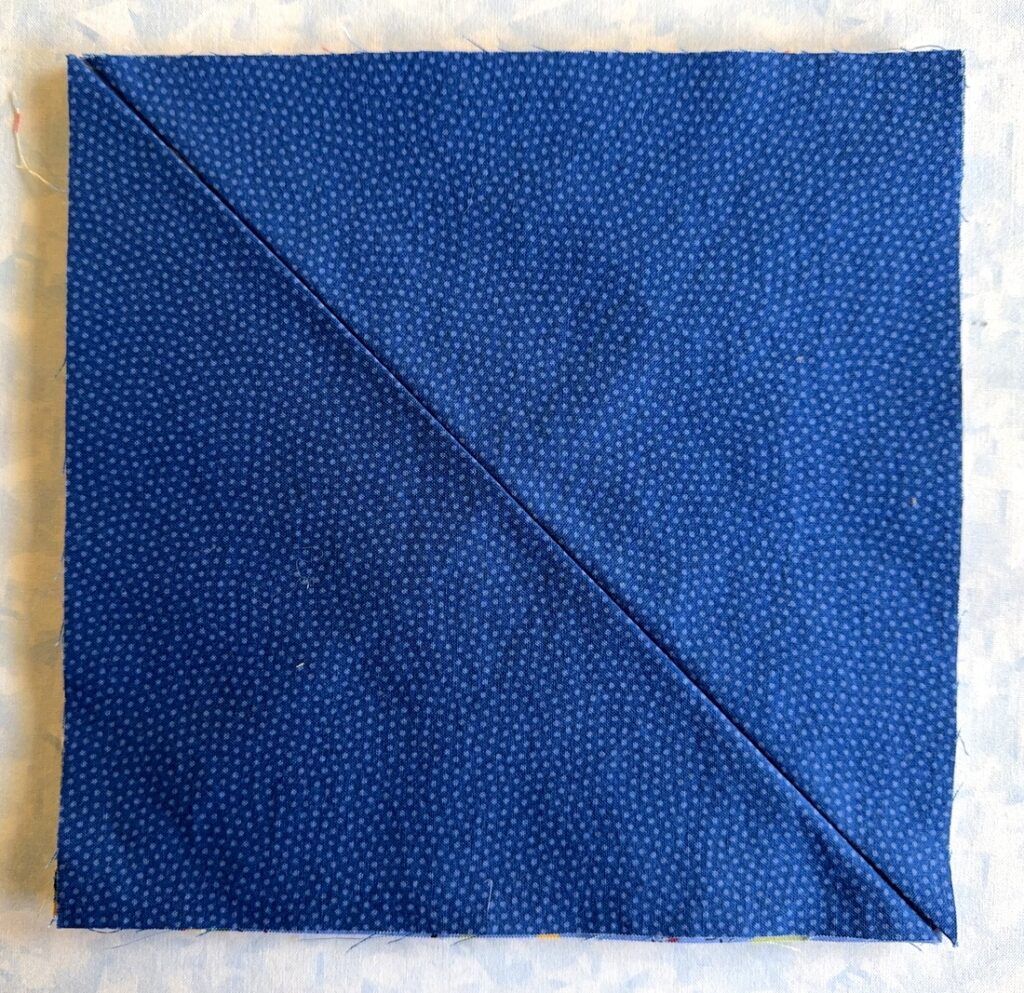 Make sure raw edges are aligned all around. These are Triangles 3 and 4, with Triangle 3 being the one on the upper right side. With all your layers in place, Triangles 3 and 4 are the only ones you see.
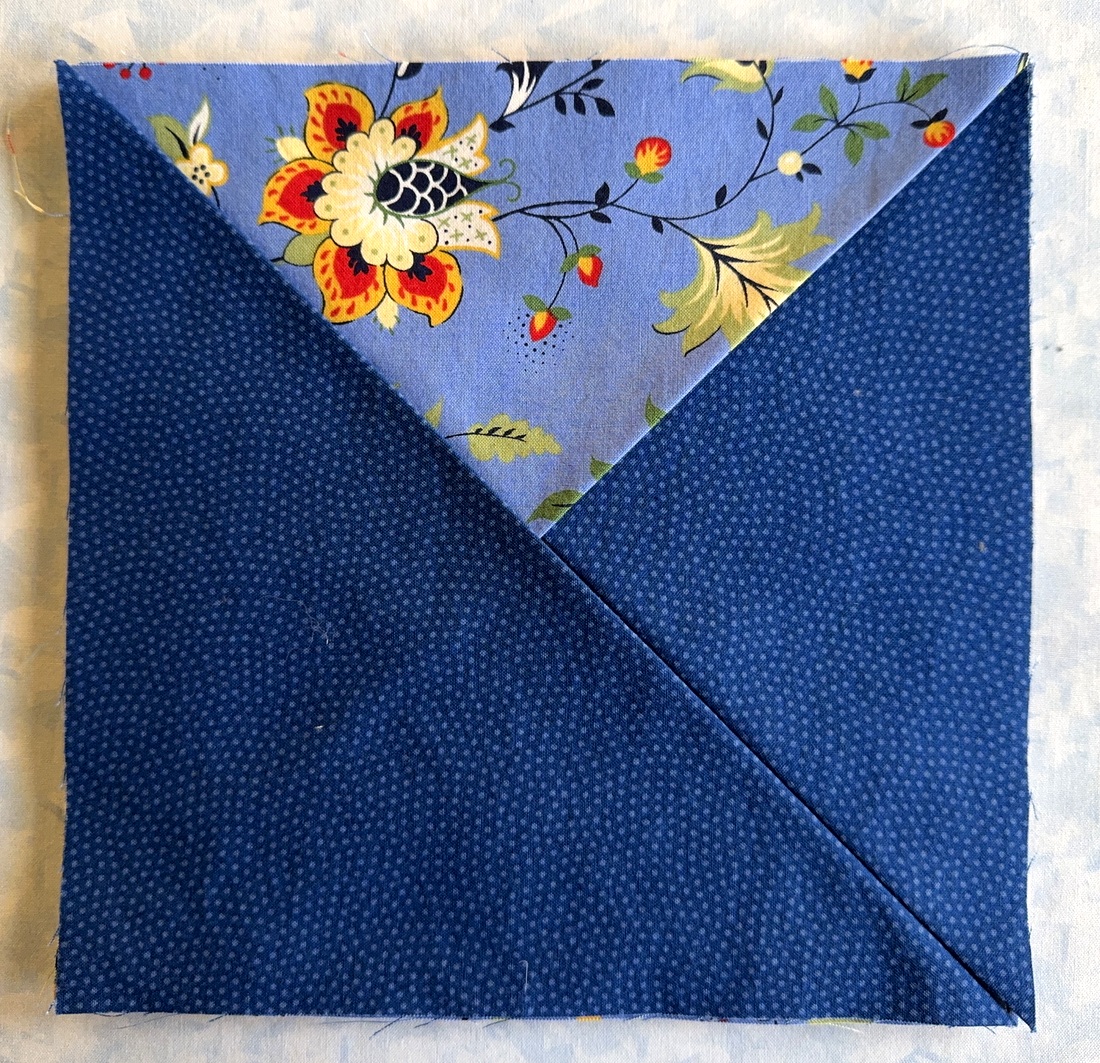
4. Pull back the upper top left corner of Triangle 3 to expose the two pieces of Fabric A underneath:
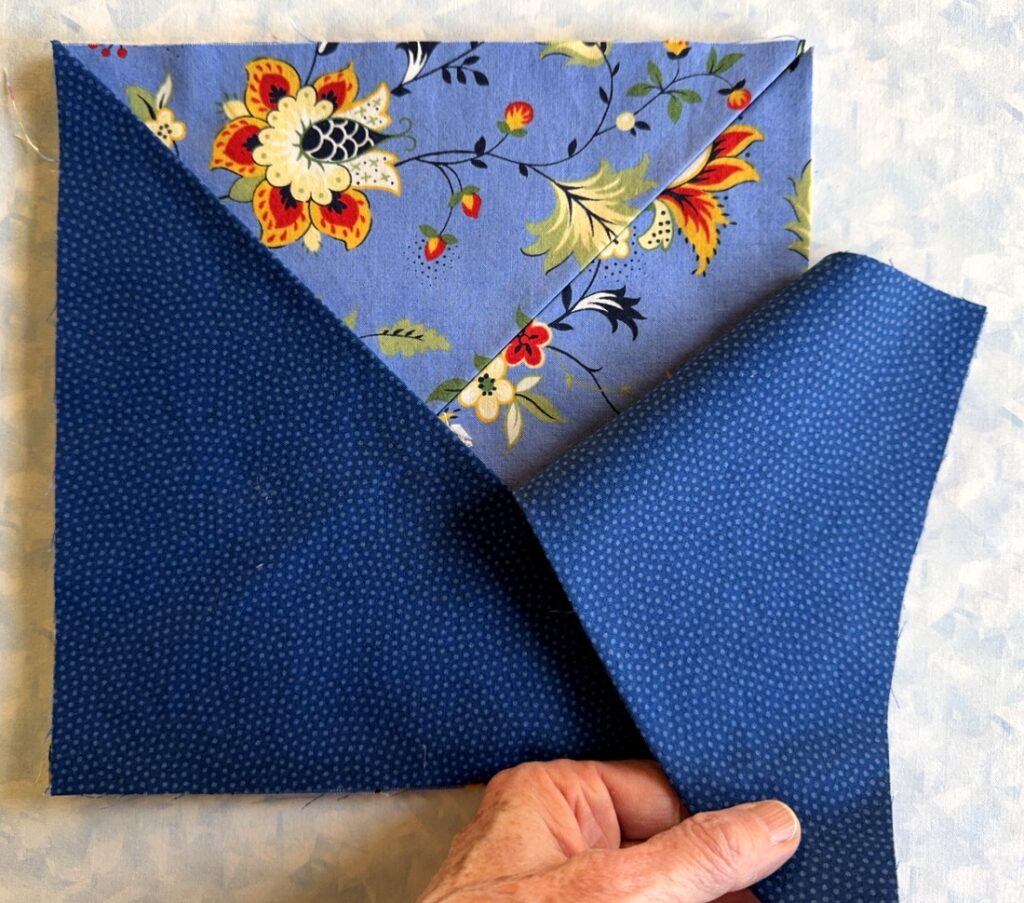 5. Pull back the upper right corner of Triangle 1 (Fabric A) and tuck Triangle 3 underneath it. It should look like this:
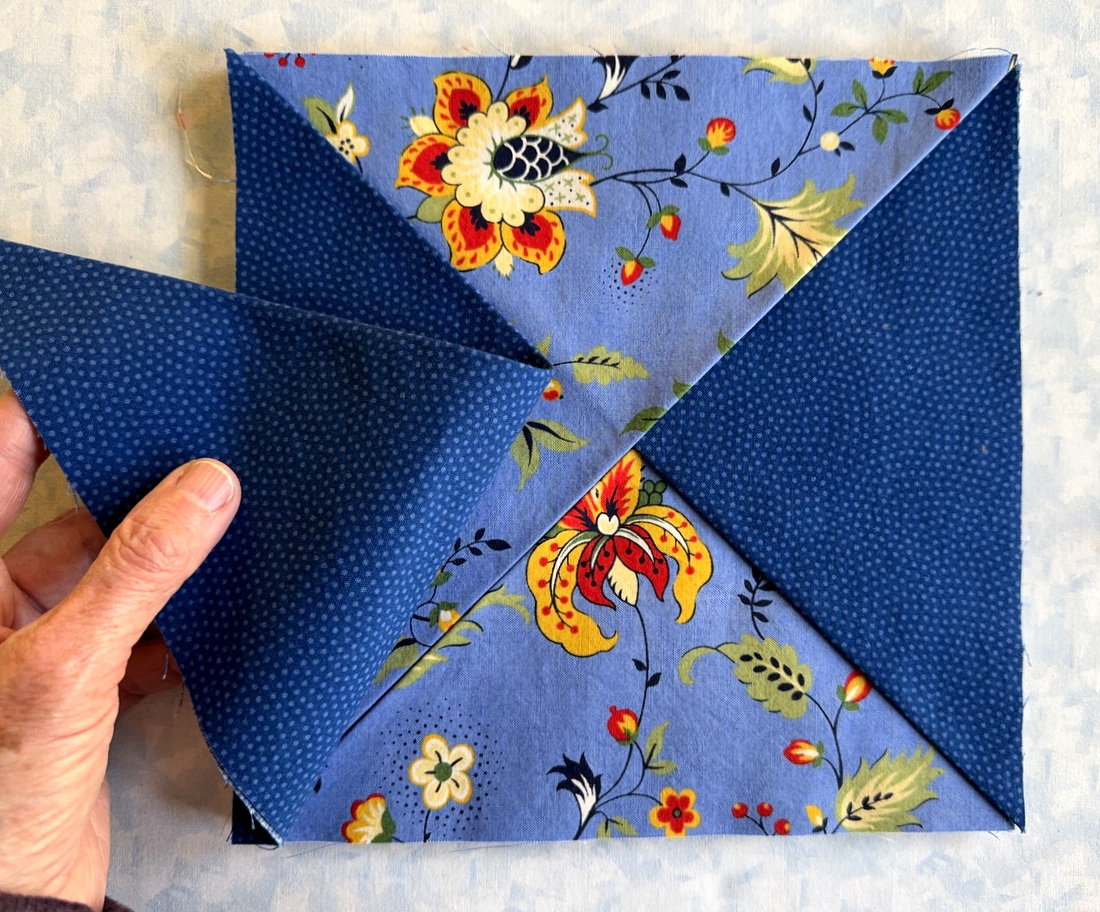
 6. Pull back the lower bottom right corner of Triangle 4 to expose the two pieces of Fabric A underneath:
 7. Pull back the lower left corner of Triangle 2 and tuck Triangle 4 underneath it.
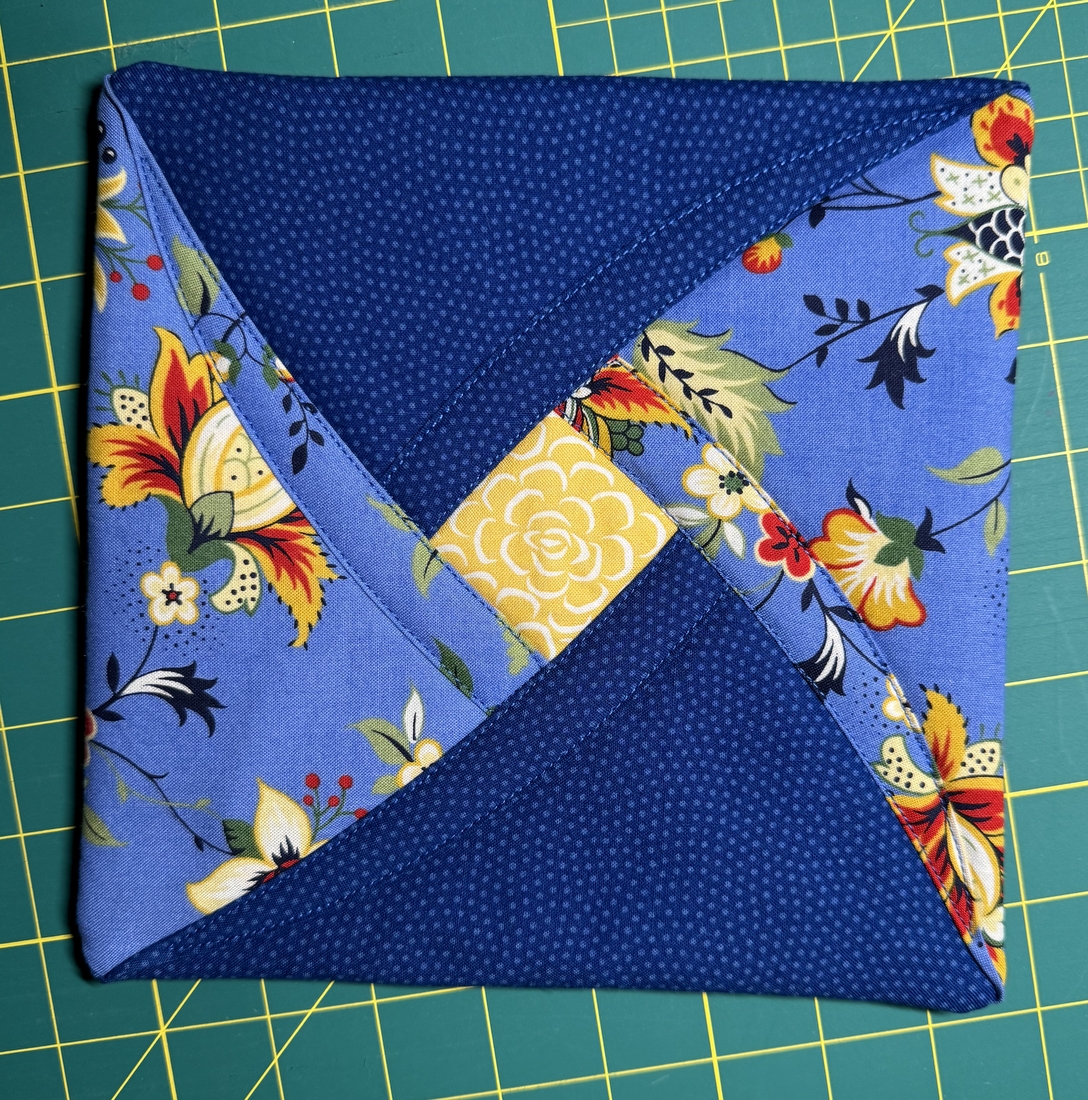
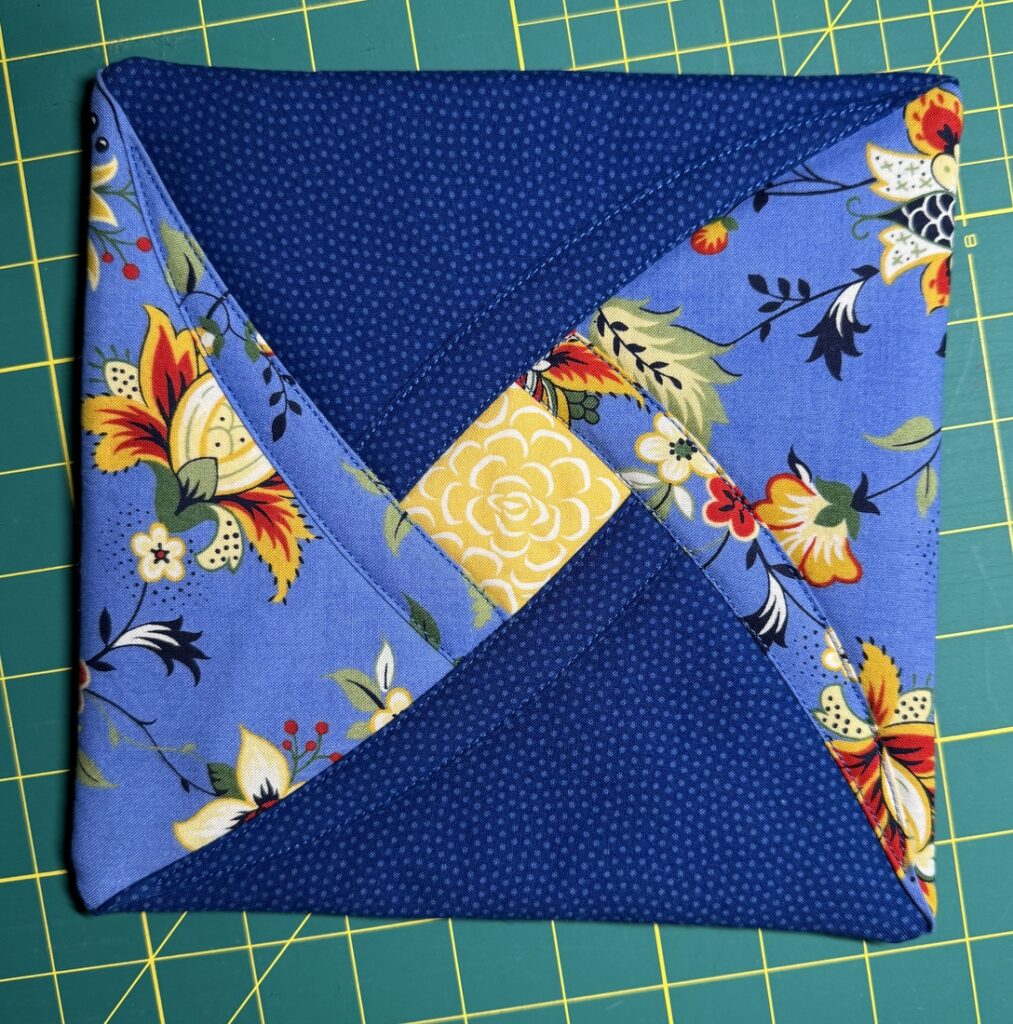
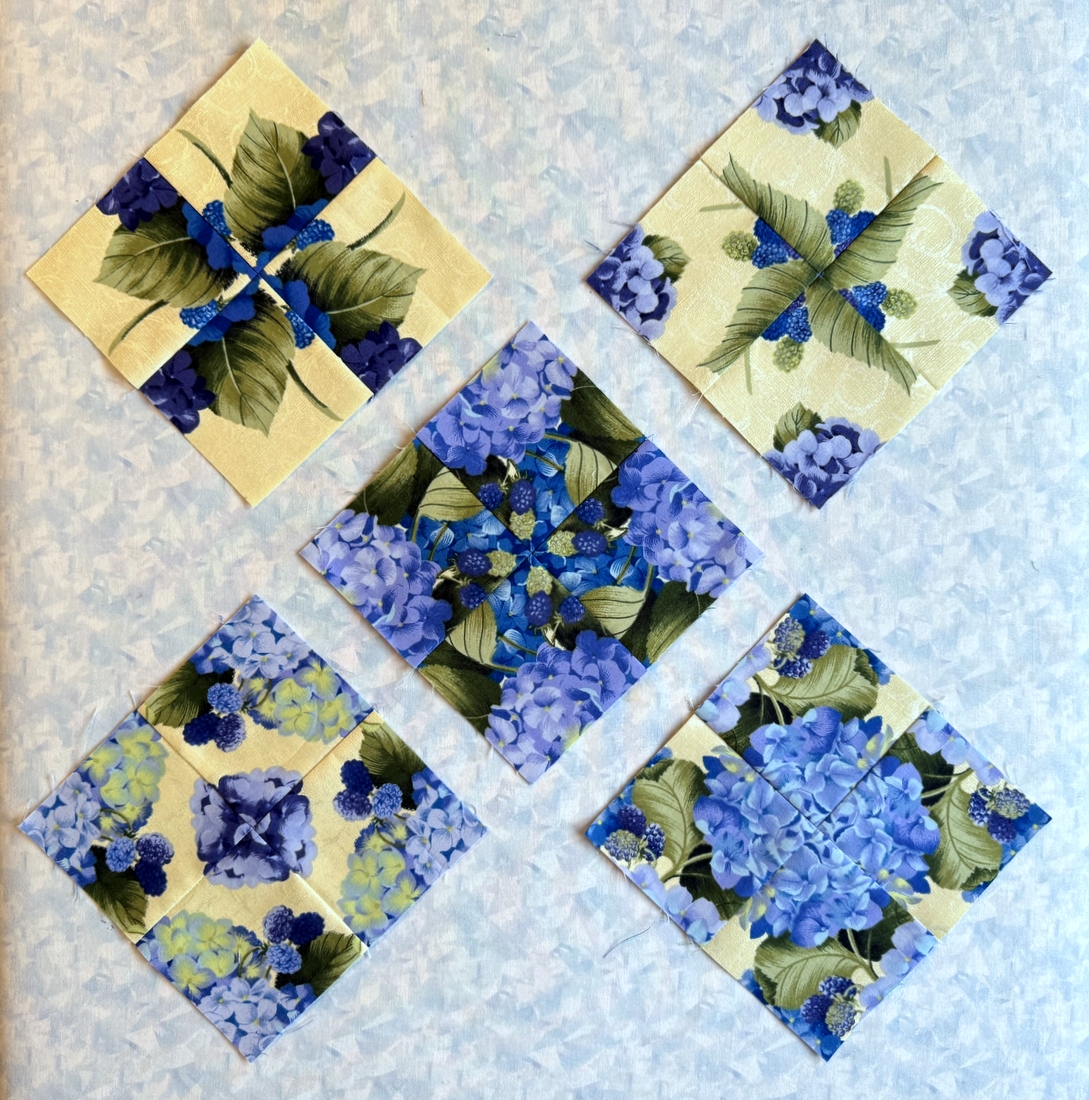
You now have an X design, with two triangles of Fabric A opposite each other and two triangles of Fabric B opposite each other:
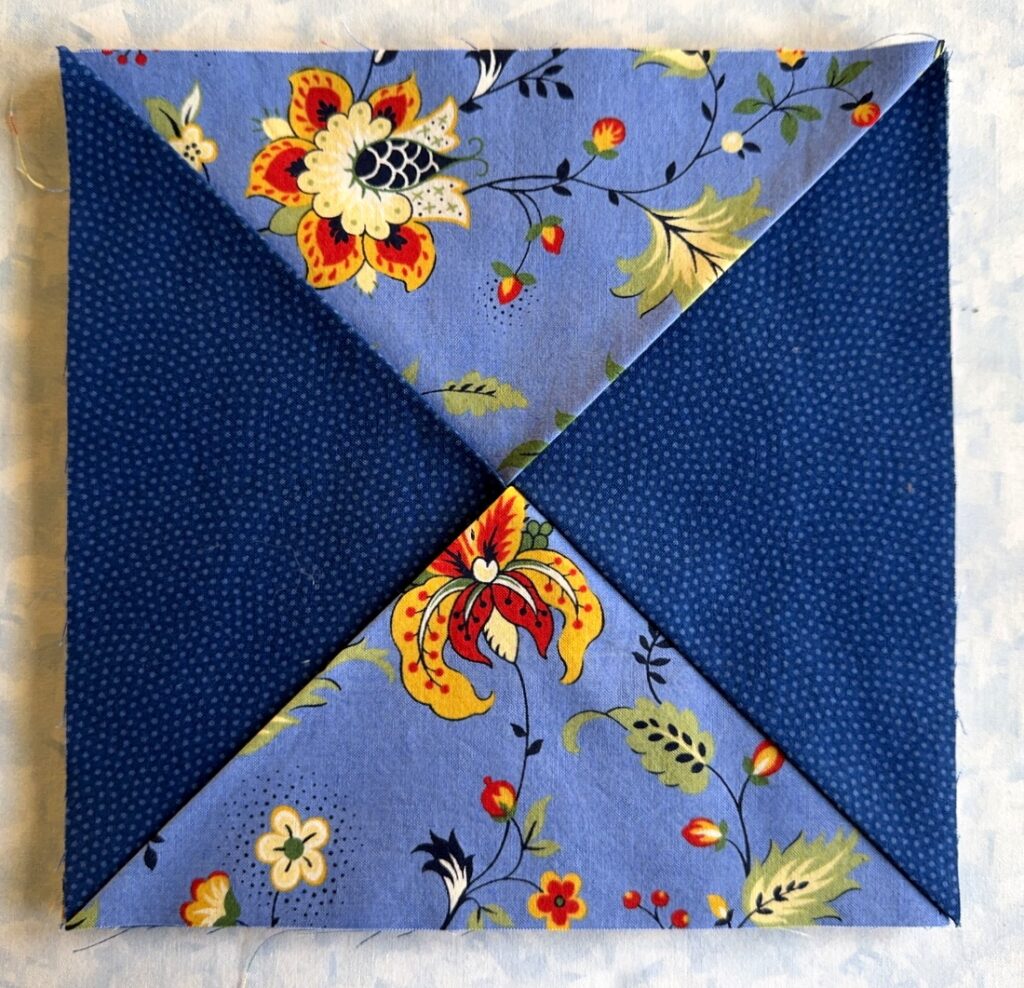 It may seem a little vague as you’re reading it for the first time but when you are actually arranging the triangles, it should become very clear.
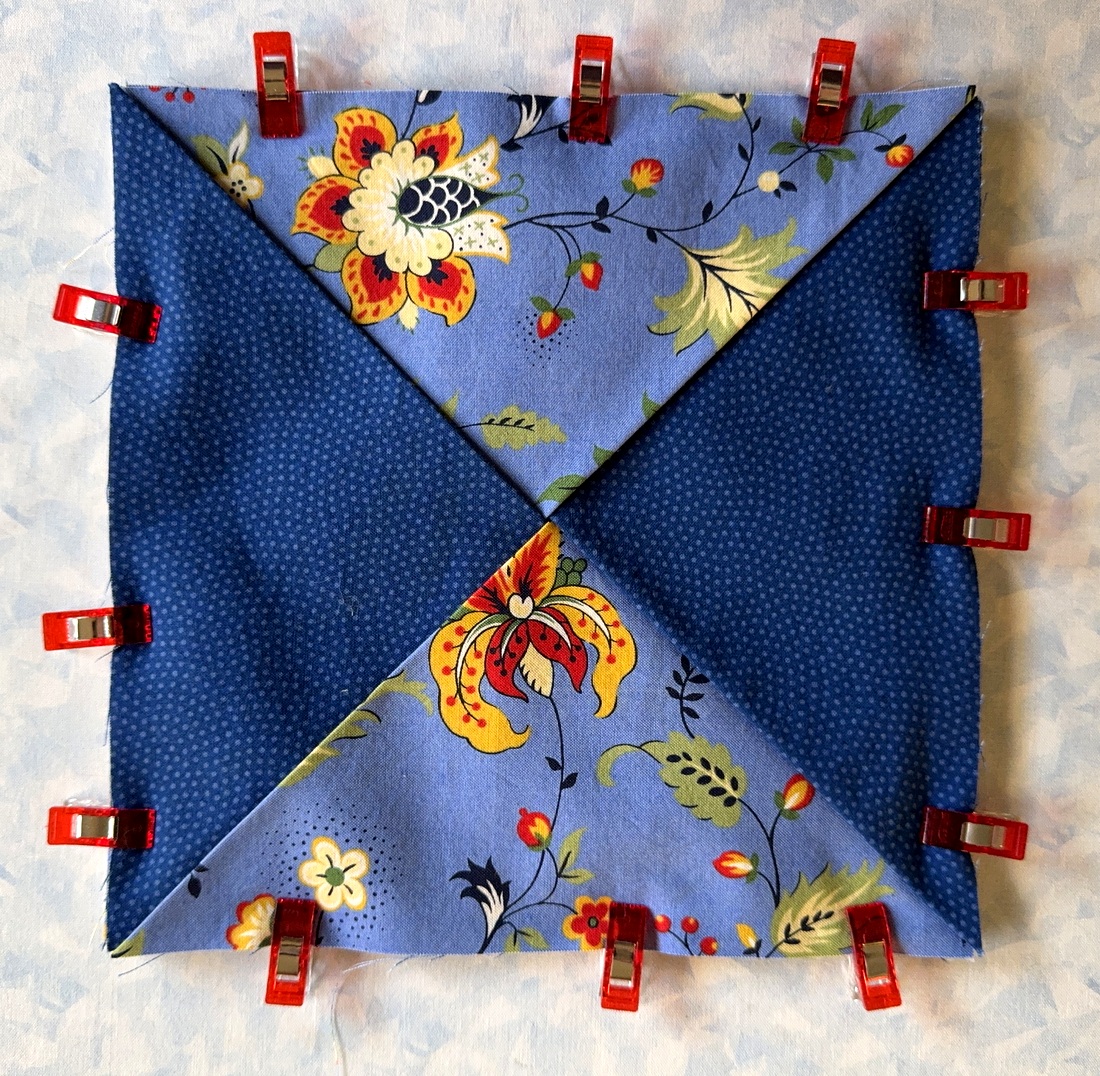
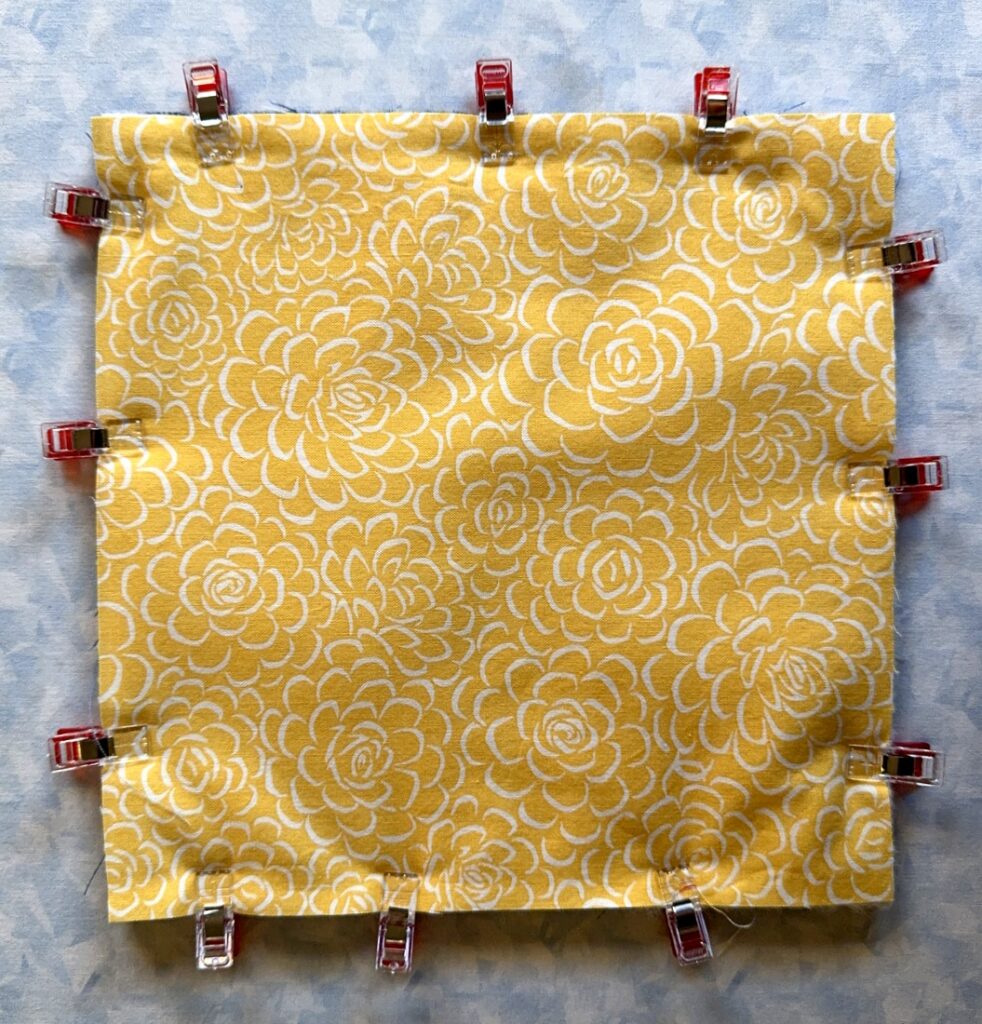
8. Use Wonder Clips around all four sides to hold the layers in place:
 Check the back to make sure the fabric is smooth with no puckers:
 9. Using a walking foot, start in the middle of any side and stitch a 3/8” seam around the entire square. Stop just before the corner where the folded edges meet, pivot, and take two stitches diagonally across the corner, pivoting again to stitch the next straight side. Sew a few stitches beyond the original starting point:
 Clip the threads.
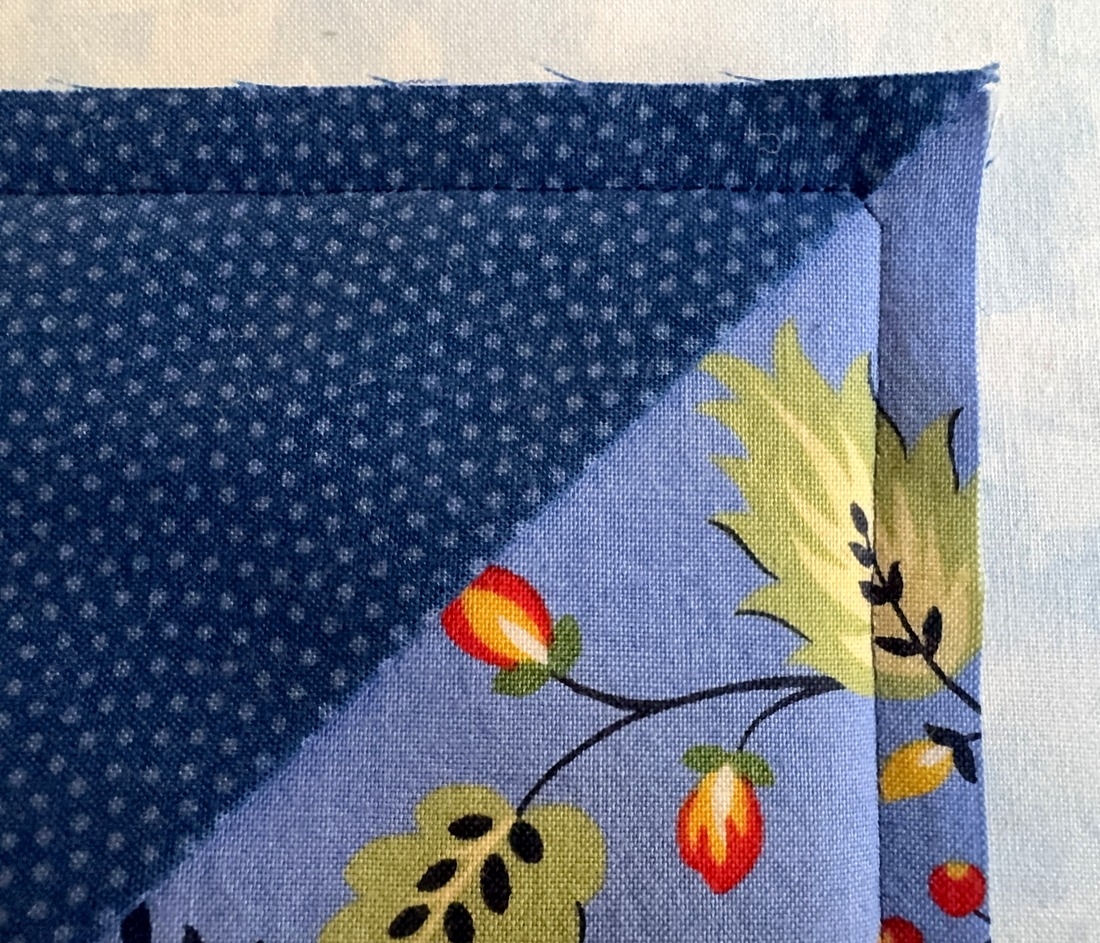
Here’s a close-up of one corner showing the two diagonal stitches:
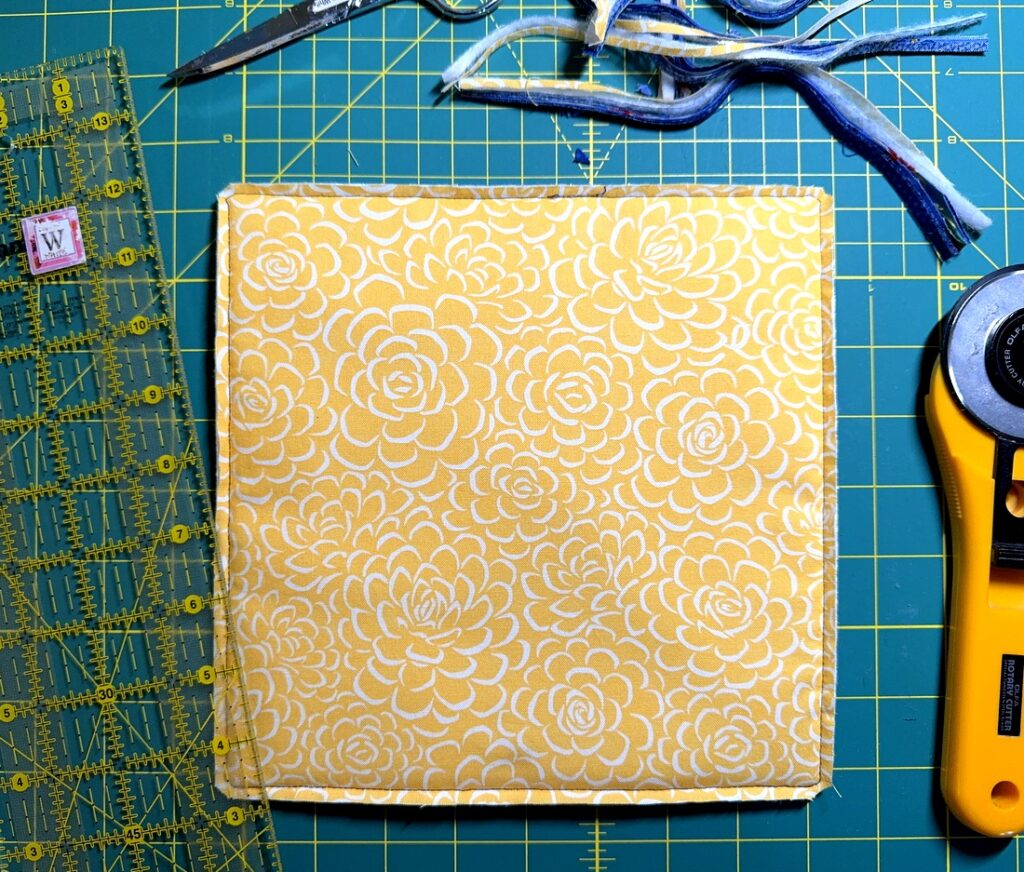
 10. Using a rotary cutter or sharp scissors, trim 1/8” from the stitched edge. Clip across corners. I trimmed from the back for the simple reason that I could see my stitching lines more easily:
11. Insert fingers through folded edges of the center and turn hot pad right side out. Carefully poke the corners with a bone folder or other gently pointed instrument. Because of the bulk, you’ll get softly rounded corners:
 Press the hot pad.
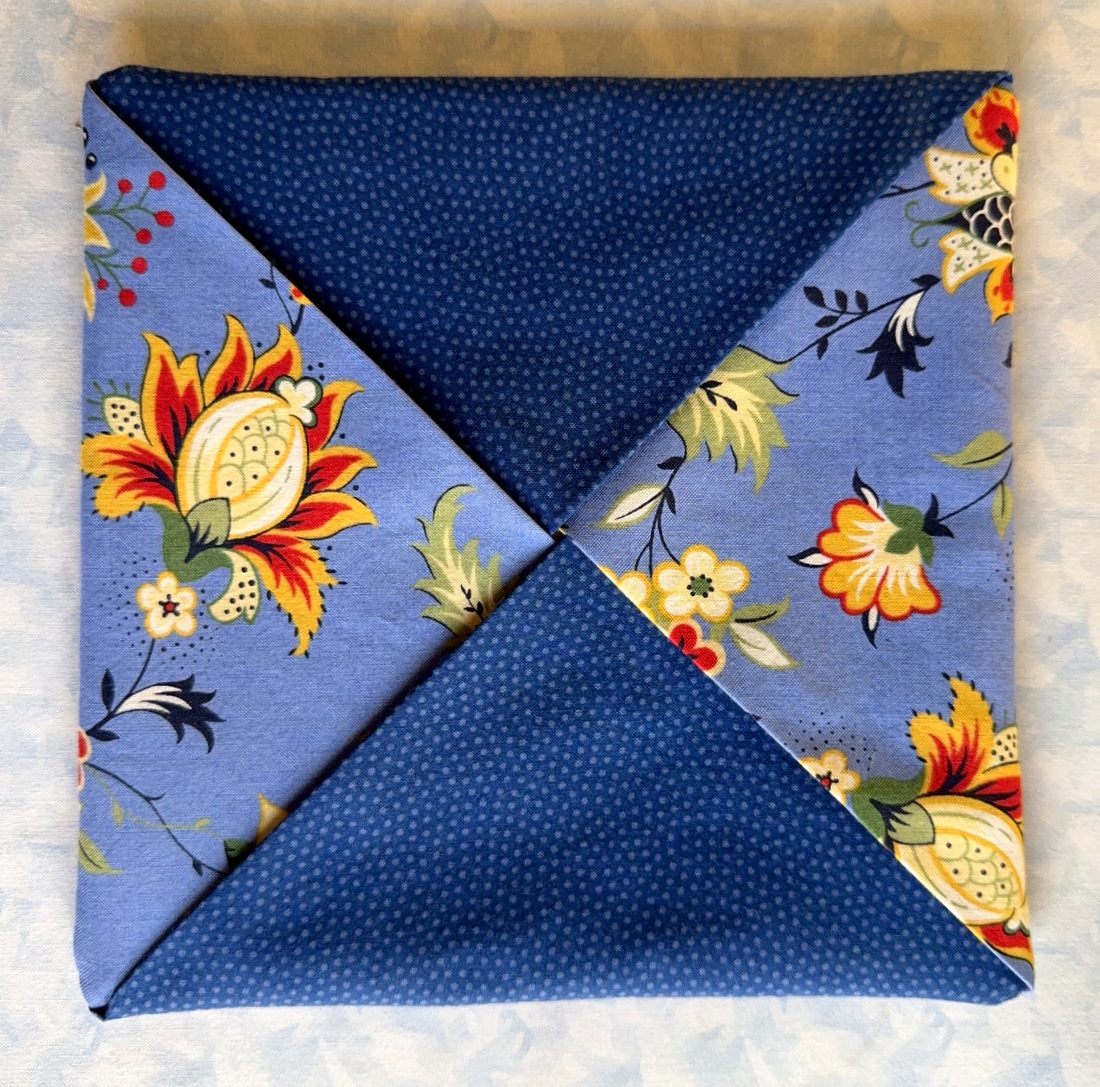
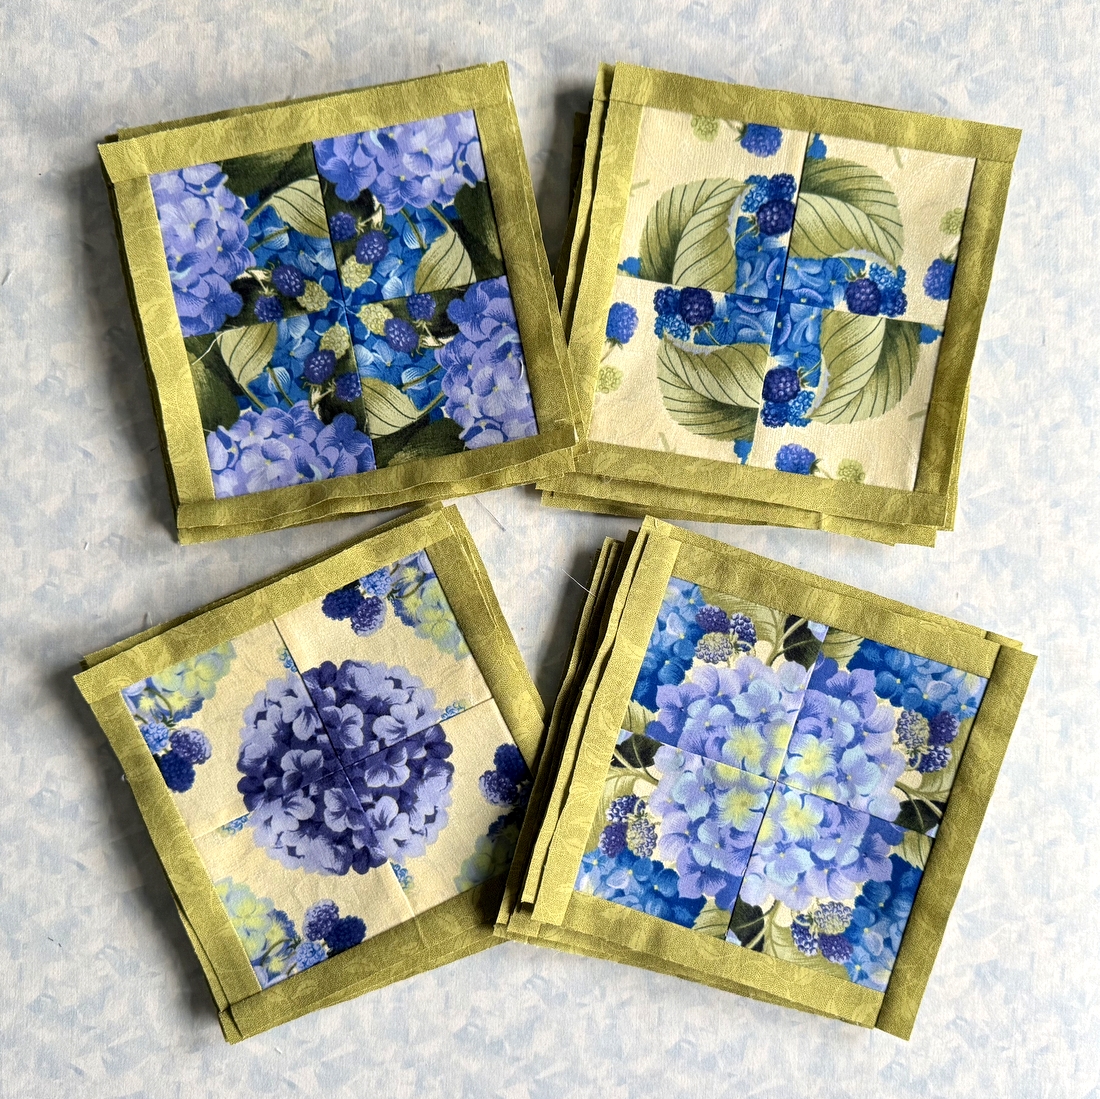
12. Turn back the folded edge of each triangle in the center to form a flap, with the widest part of the flap at the center (about ¾”), tapering to almost nothing at the outer edges. Press all four flaps down, exposing the center diamond shape of Fabric C:
Optional: Stitch around the flaps through all thicknesses, using a straight or decorative machine stitch, to permanently anchor the flaps:
 I strongly recommend this extra step, as it helps keep the shape of the hot pad if it is machine washed and dried.
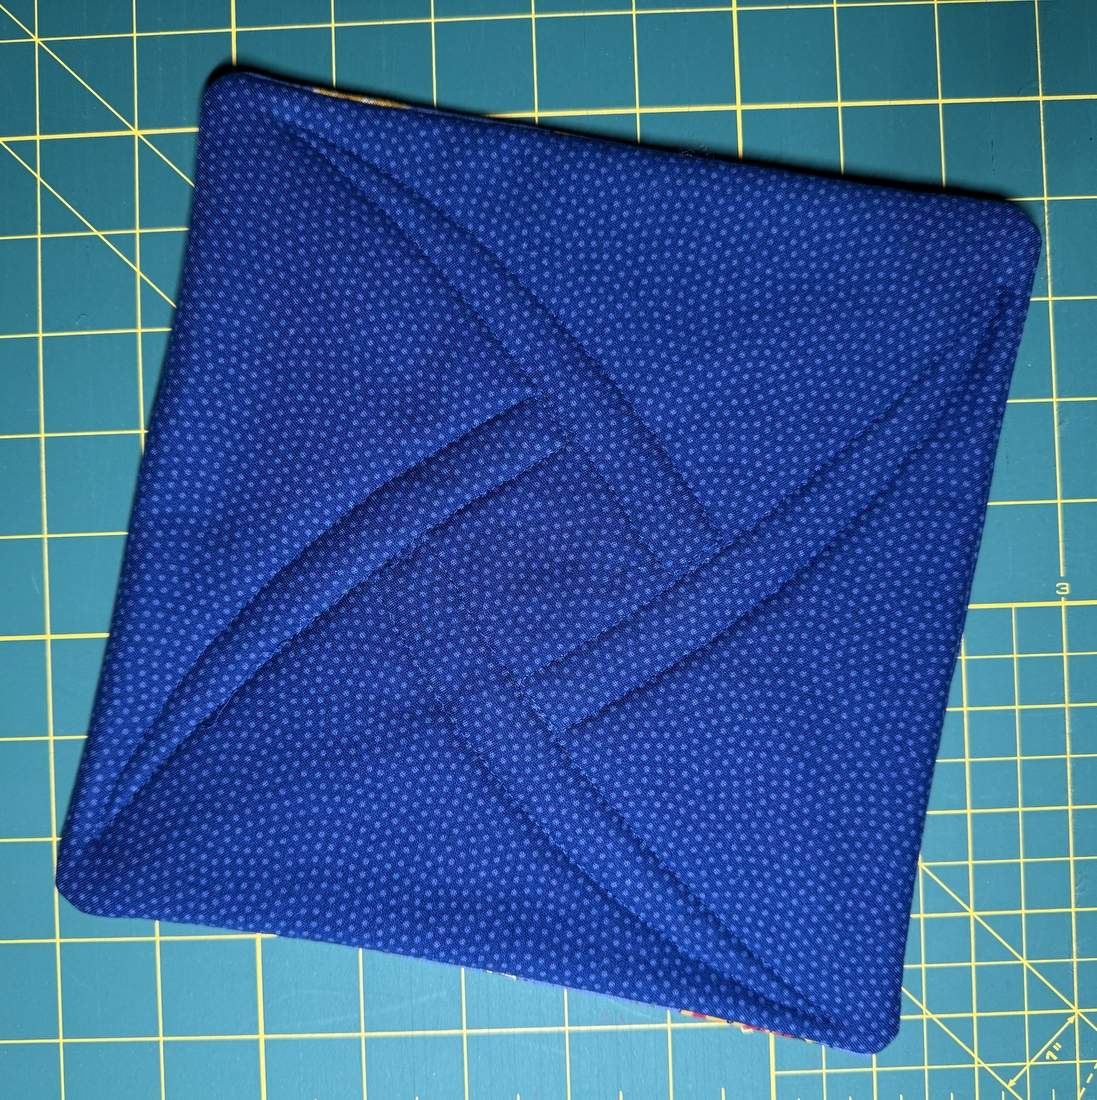
Here’s a look at the back:
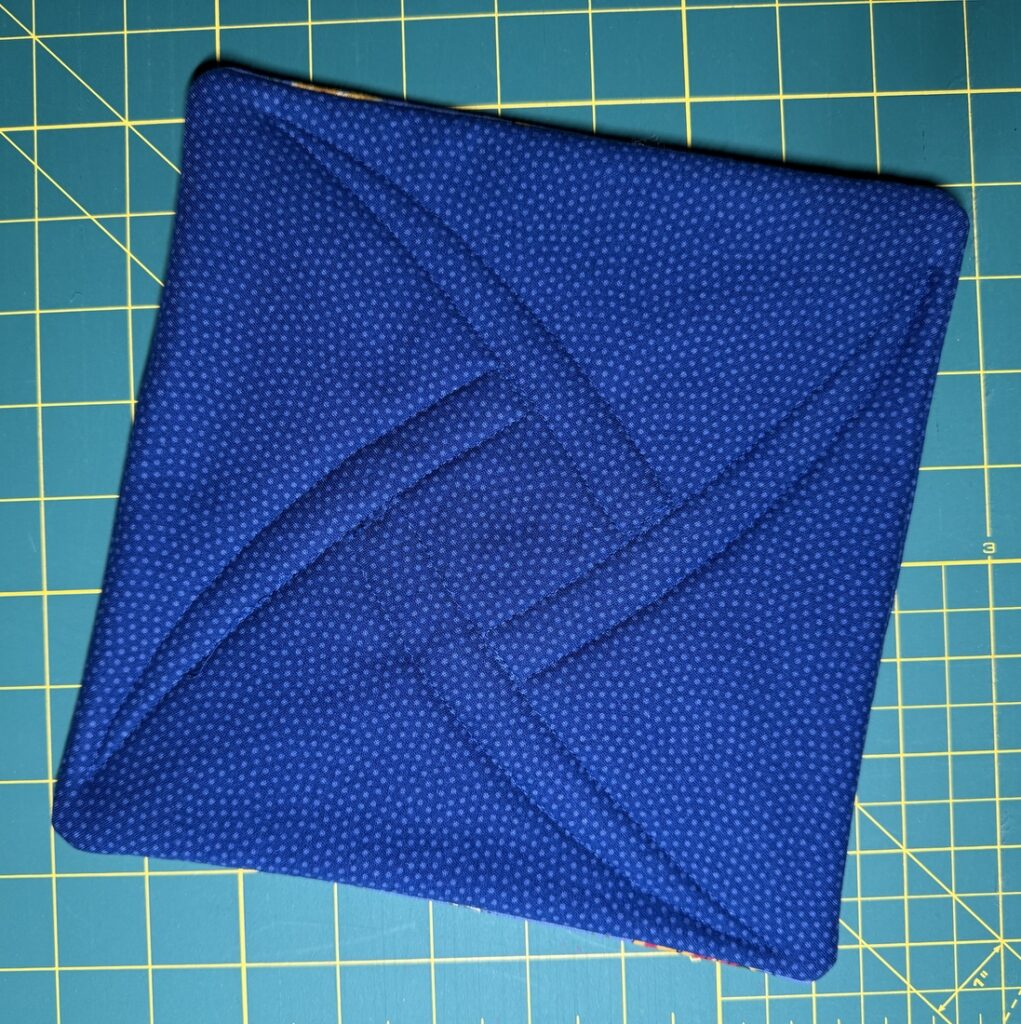 It looks good enough from the back to be reversible!
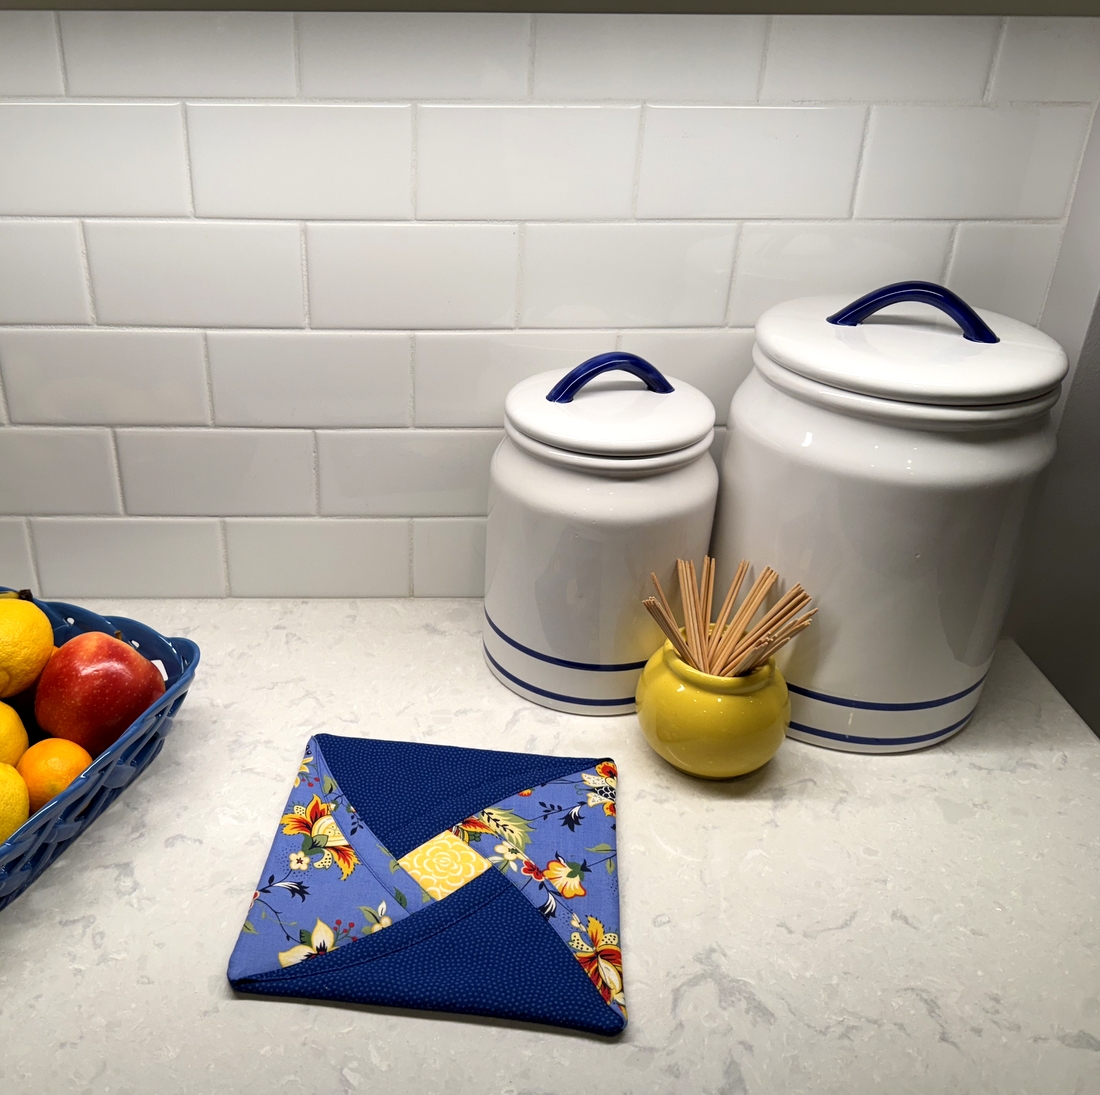
This hot pad looks right at home in my kitchen:
 The only thing it’s missing is a mate.
Notes
1. Use the same fabric for all four sides of the top – or four different ones for a scrappy look. It’s up to you!
2. The hot pads can be made larger or smaller. For example, if you have a stack of pre-cut 10″ squares from a single line of fabric, you can make Folded Flap Hot Pads that finish at 9″ — or cut the squares down to 9″ so they finish like mine at about 8″ square. Just remember that the finished hot pad will be 1″ smaller than the starting size of your cut squares.
3. The center “diamond,” cut from a square, is the focal point of the hot pad. Think about the possibilities for fussy-cut centers! Perhaps you are wondering if the bright yellow blossom in the center of my sample hot pad was fussy-cut. Why yes, as a matter of fact it was.
4. For a look at a pair of Folded Flap Hot Pads I made years ago and finished just last month, see this post.

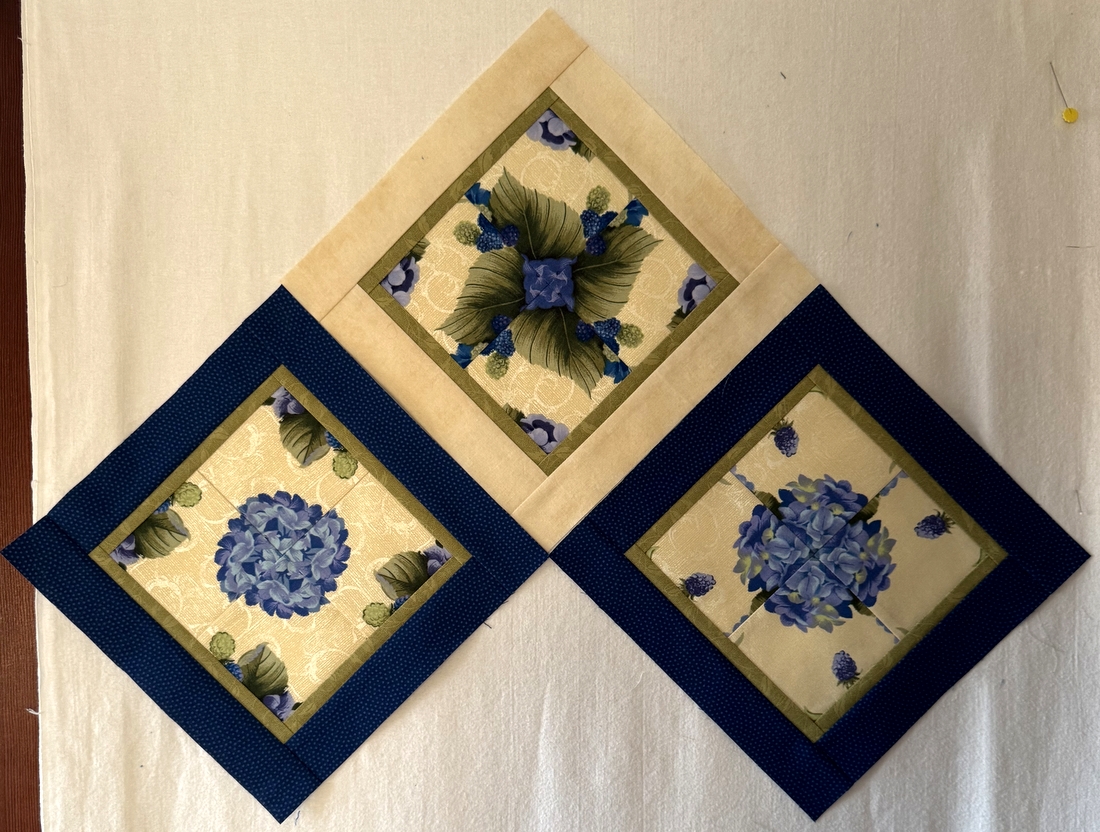
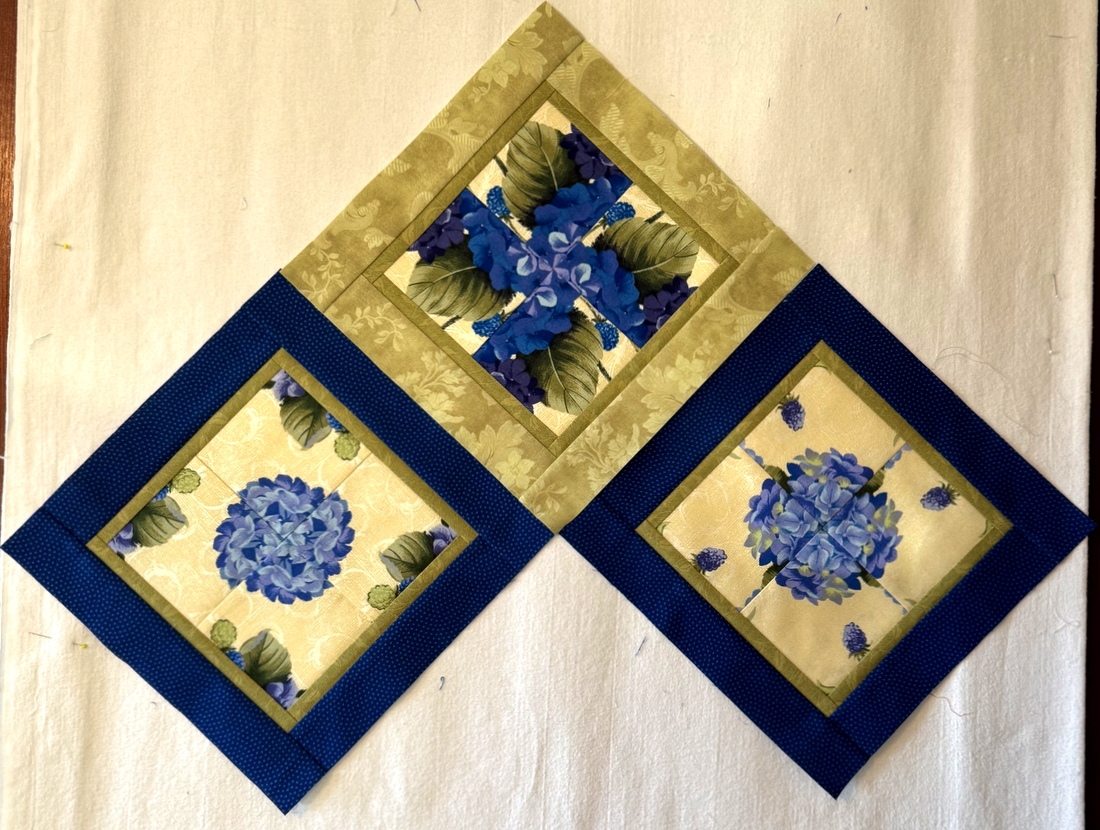
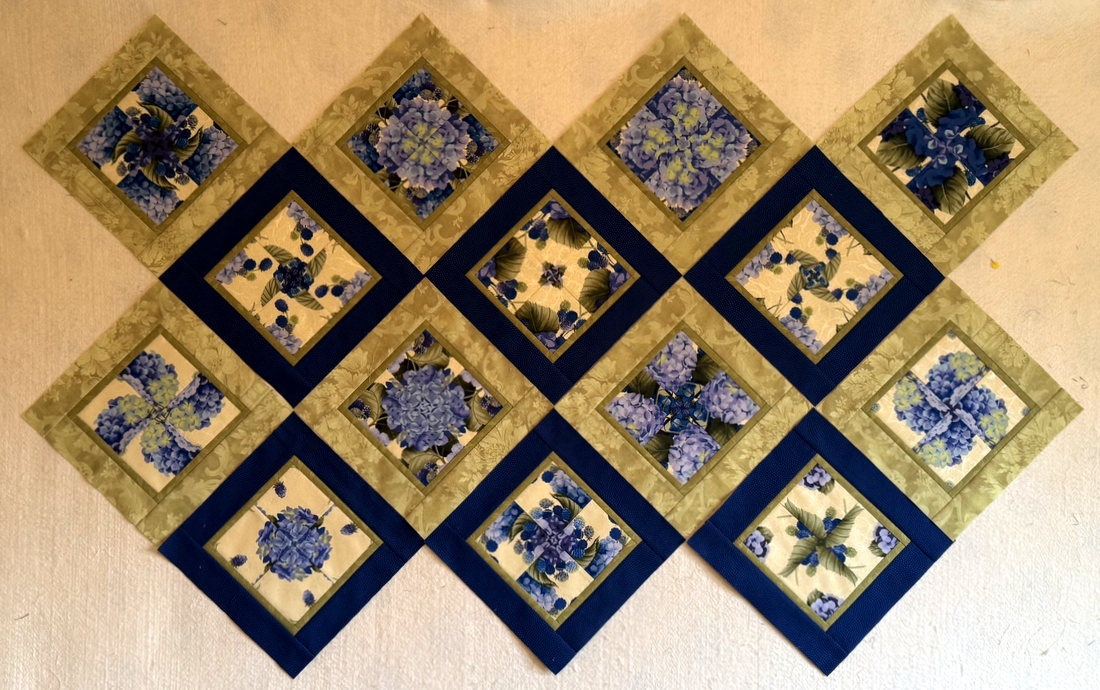
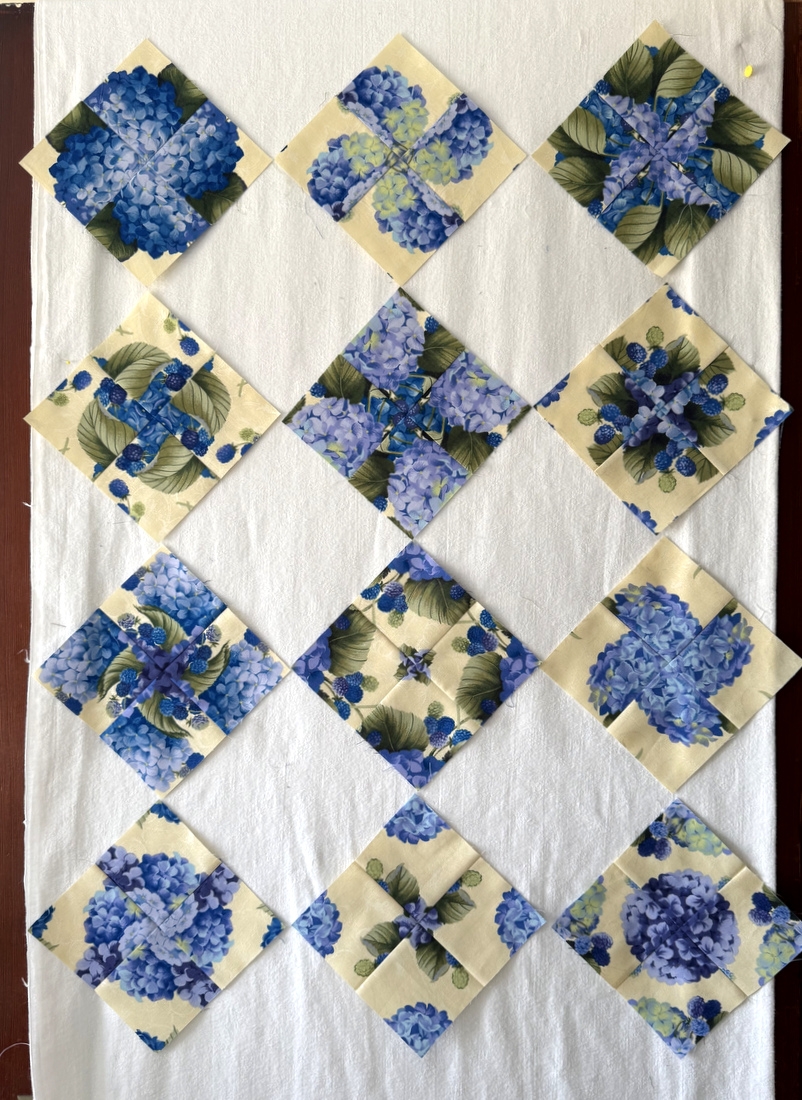
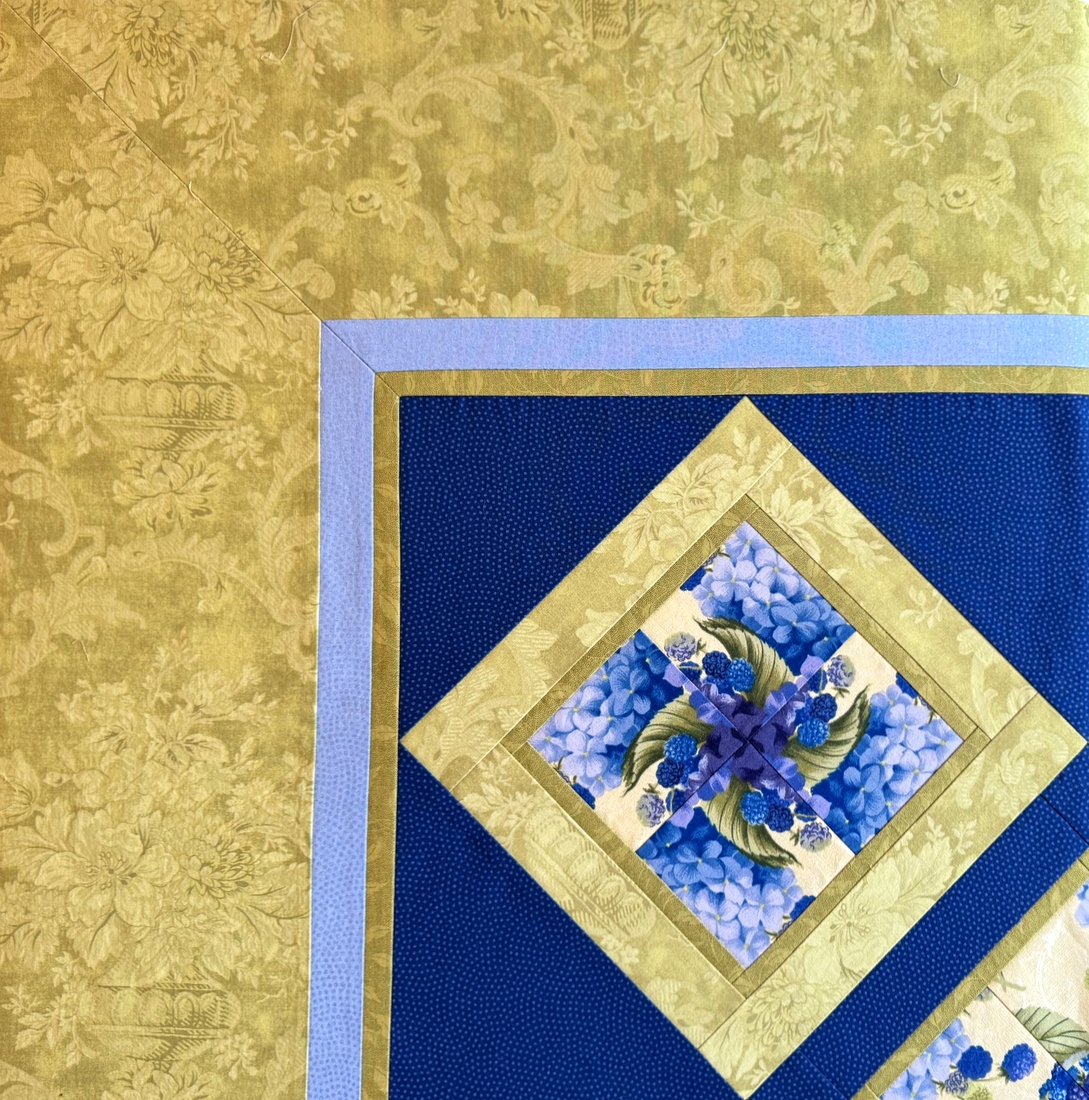 The inner border finishes at 1/2 inch and the second one at one inch. The inch-wide border is one of several pieces I have in my stash of “Spin Dot,” a lovely blender by Timeless Treasures Fabrics. It’s from the same line as the royal blue blender I used in the corner and side triangles (as well as the 12 inner blocks you can see in this post from Feb. 23).
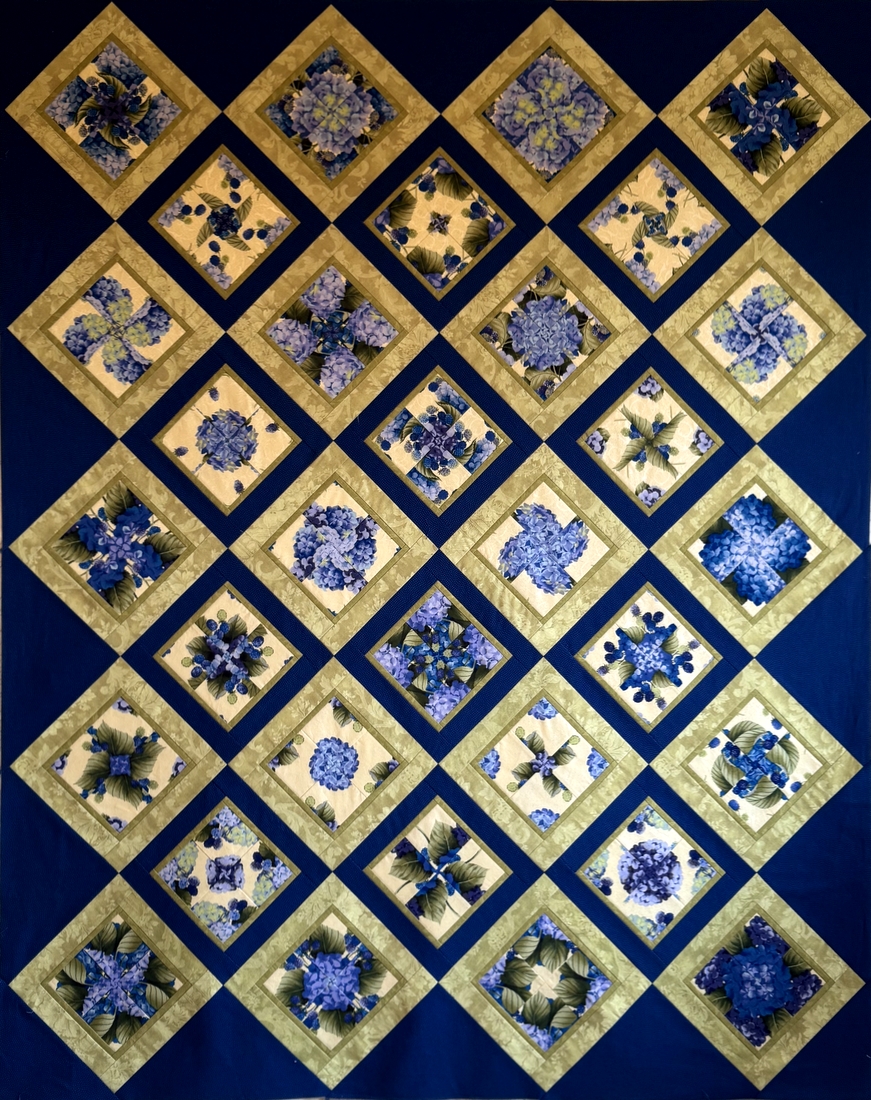
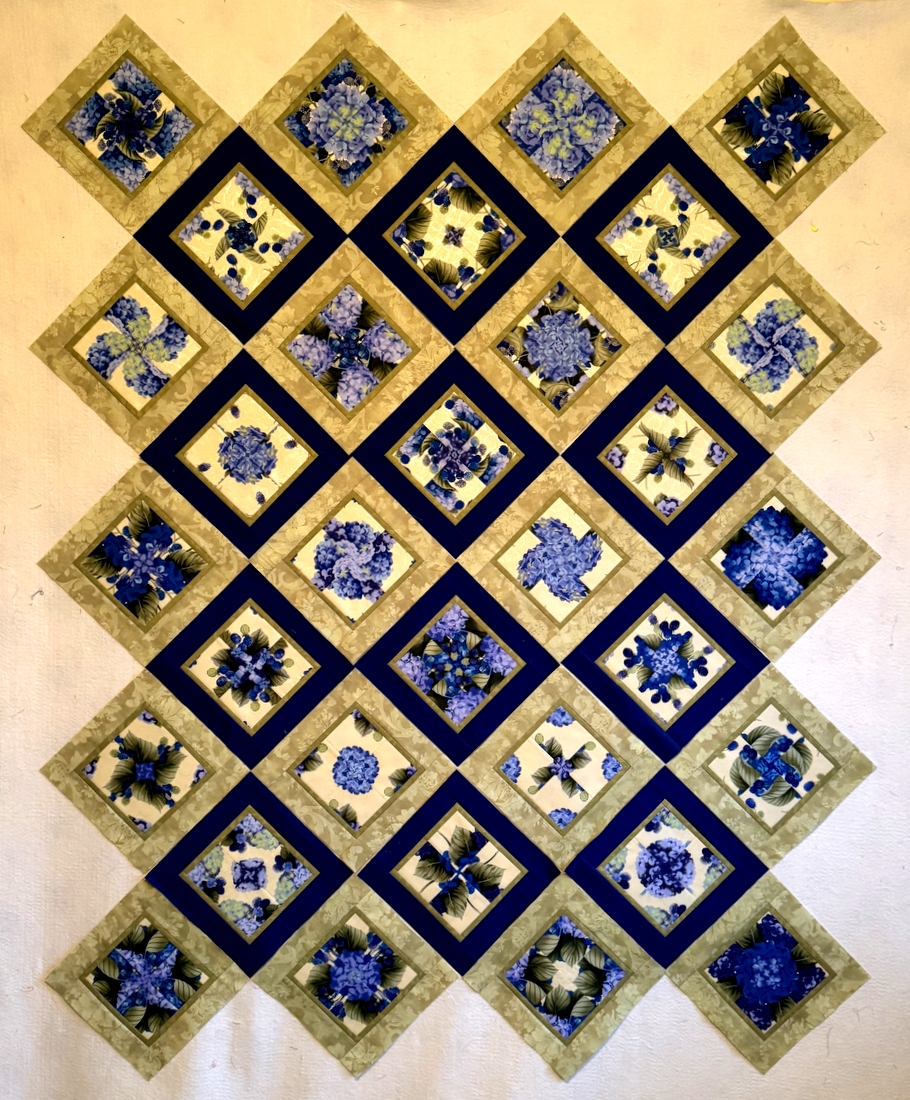

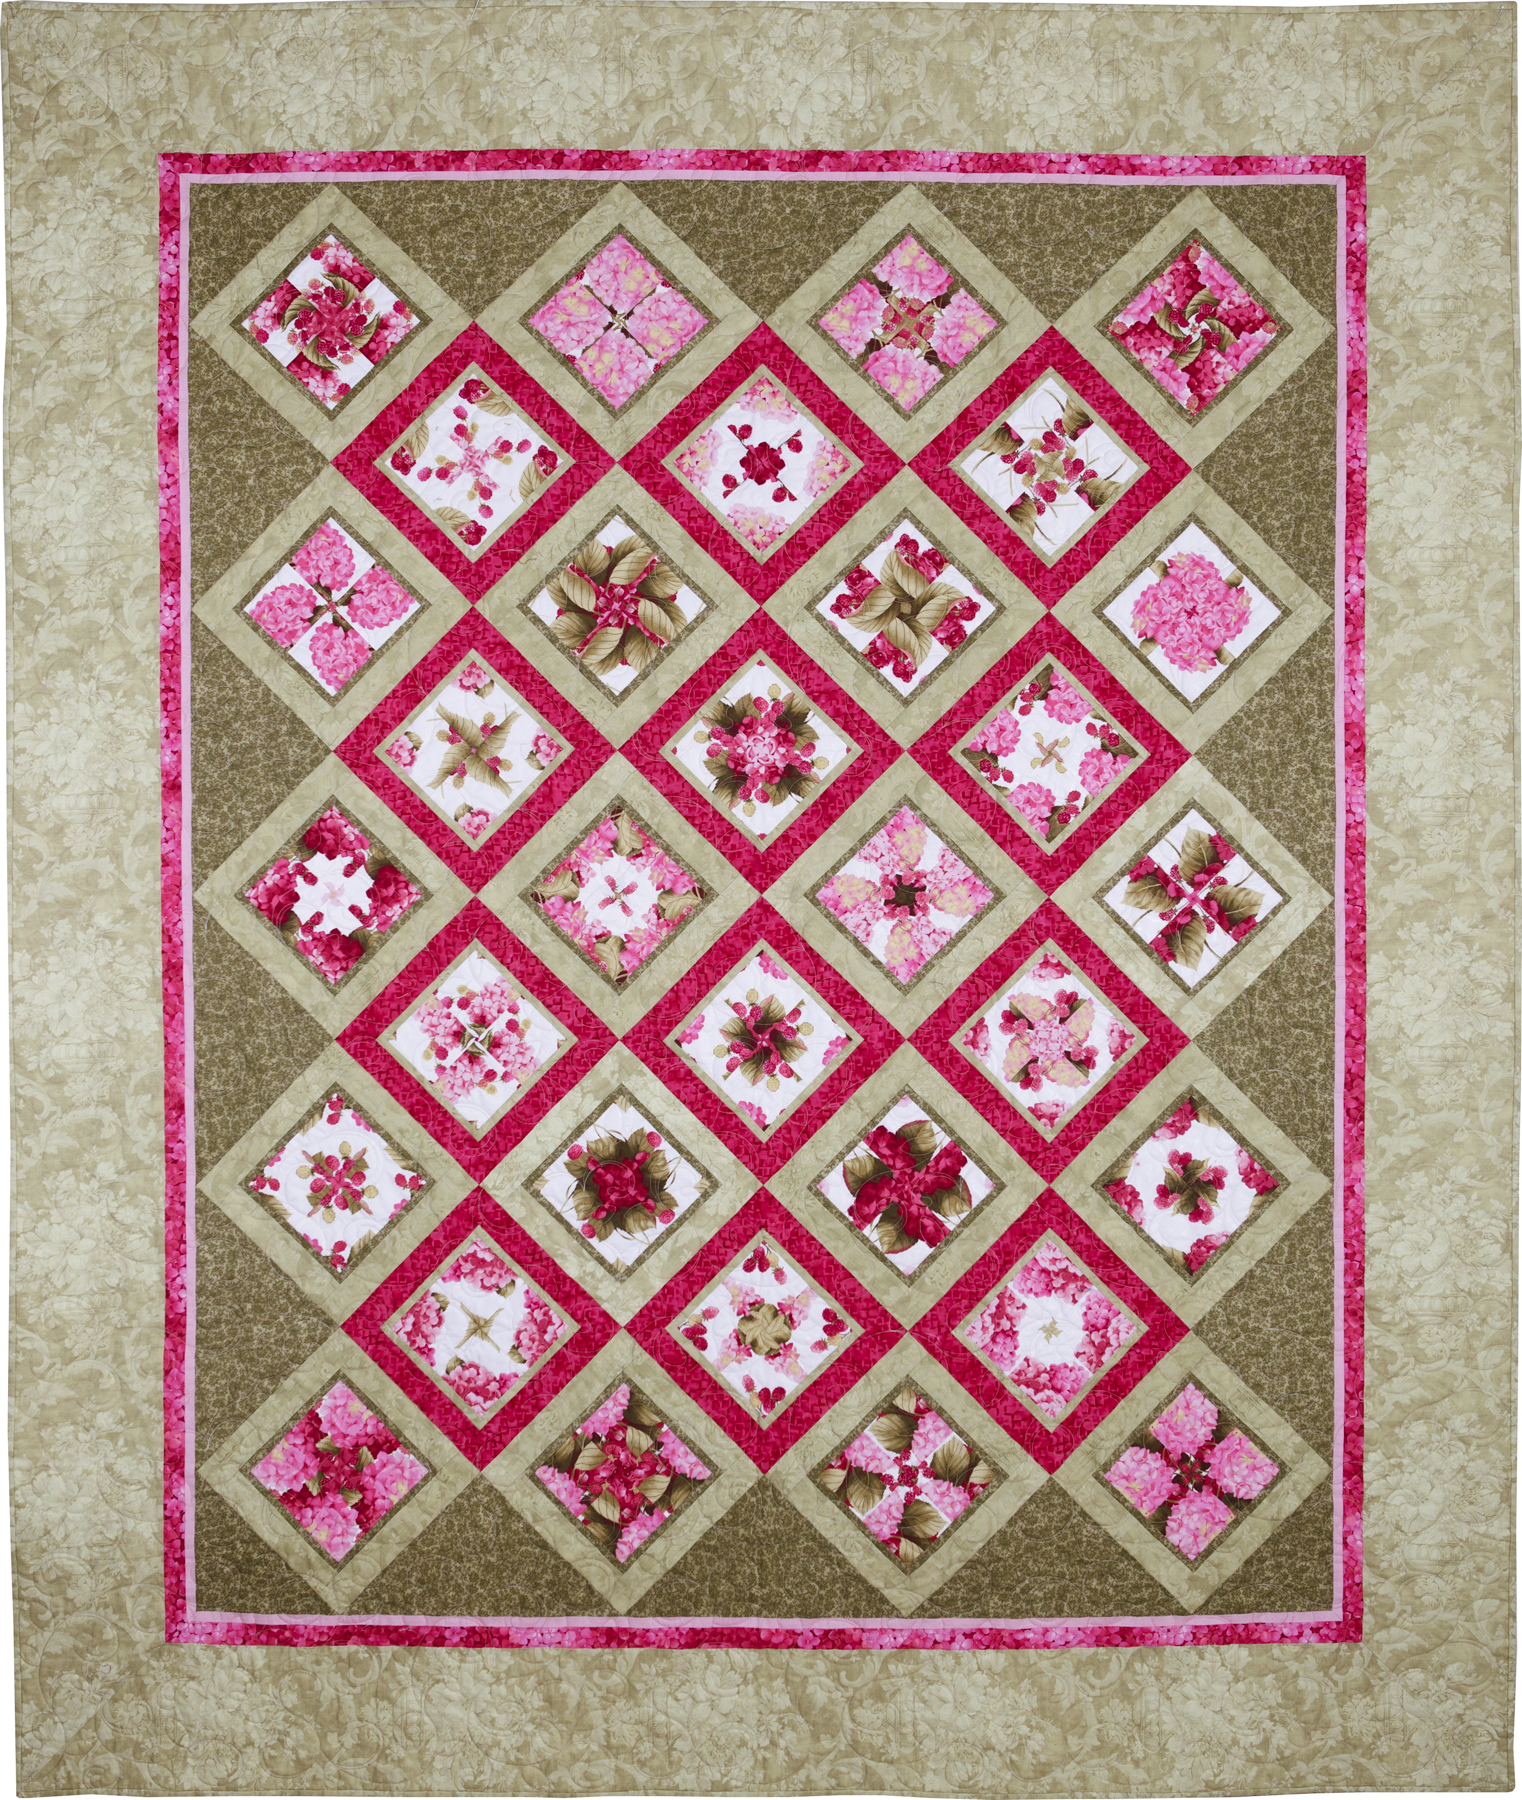
 Can you even tell?