Category Archives: update

Strapped

In my last post I showed you some face masks I made following ER nurse Jessica Nandino’s tutorial posted on a craft website called instructables.com. Jessica’s pattern calls for cutting strips from cotton fabric but I made my first few masks using packaged double-fold bias tape in ¼” and ½” finished widths. I wanted to give ⅜”-wide tape a try, thinking it might be more suitable — less bulky than half-inch wide tape but more substantial than quarter-inch — knowing I would have to make my own. I don’t think ⅜”-wide tape is made commercially. Even if it were, I wouldn’t be going to the store for some. This is all about making do with what’s on hand.

Some of my readers were interested in my experiment so I’m showing you the result.

This is what Jessica’s mask looks like when the two layers are stitched together:

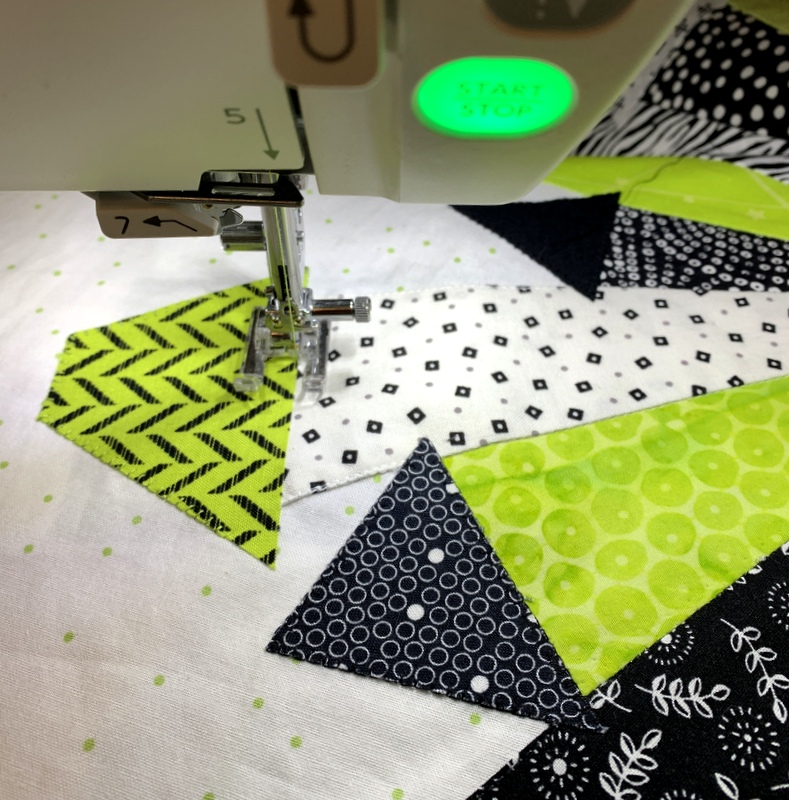
Next step is pinning and stitching three pleats on each side of the mask. Normally when you sew, the fabric you are handling is to the left of the needle. In the photo below, the fabric is to the right of my needle. This enables me to sew with the pleats rather than against them:

(When I sew the other side, the mask will be to the left of my needle, the normal way, and I will also be sewing with the pleats rather than against them. And just so you know, I remove each pin before stitching the folds in place.)

To make my binding strips I cut several strips of fabric 1½” wide, cutting on the crosswise grain (from the fold to the selvages). I could have cut bias strips but I wanted to try it first with straight grain fabric, which would give me at least 40″ lengths (no need to piece the strips). Another plus: no struggling to iron folds in stretchy bias strips.

Double-fold tape is pressed in such a way that one side of the tape is slightly narrower than the other (from the fold to the outside edge). The narrow side always goes on the right side of the fabric. When fabric is inserted into the fold of the tape, the wider side of the tape, underneath, is caught in the line of stitching from the top.

Here’s a piece of double-fold bias tape opened up:

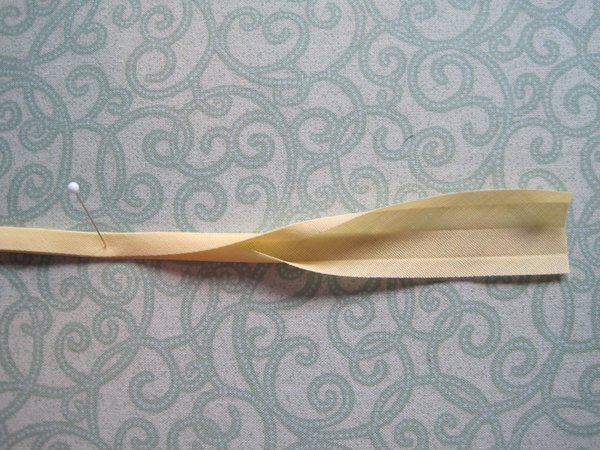
You can see three press lines: there’s a fold in the middle, then each end is pressed toward the middle. That’s exactly how I folded my strips, with one long edge pressed a full quarter-inch and the other side a scant quarter-inch, giving me the result you see below:

My finished binding actually measures a little over ⅜” wide. Next time I’ll cut my strips 1⅜” wide.

Now I’m ready to encase the left and right sides in my binding. The raw edges of the mask are snuggled up to the center fold of the binding:


The binding is folded over the seam allowance and pinned in place:


This is how it looks from the back:

The binding is stitched from the front through all layers. You can see how the stitching caught both layers:

The ends have been trimmed . . .


. . . and now it’s time to add the top and bottom strips, which measure about 40-42″, depending on the width of fabric after selvages are removed.

I mark the middle of one strip and match it with the dart in the center of the mask (remember, there’s a nose dart and a chin dart in Jessica’s pattern). I put in three pins only: one at the dart, one where the side of the mask meets the top strip, and one between those two. The pins go through all the layers:


Now I’m ready to start stitching at the far end of the strip, holding the binding in place as I stitch very close to where the two folded edges meet. When I get to the center dart, I insert the next section of mask fabric into the center of the binding fabric and continue stitching, stopping as often as I need to adjust the layers of fabric. My stitch length is short — 2.2 on a computerized machine or about 12 stitches to the inch — because the binding strips are going to get some stress when they are tied behind the head.

I don’t bother finishing the ends of the strips because I’m going to trim them at a 45 degree angle when I’m done . . .

. . . and it’s quite likely that someone winding up with one of my masks will find the strips too long and want to trim them anyway. As long as the ends are trimmed on the diagonal, they shouldn’t ravel, even after being washed multiple times.

My experiment turned out pretty well although the straps still feel just a tad bit bulky. For the next mask I might try making bias binding to see if it makes a noticeable difference. By the way, I like the fabric on this mask so much — it’s from an older line called “Birdie” by Pam Kitty Morning for Lakehouse Dry Goods — that I’m keeping it for myself. The mask I was wearing in my last post was laundered and mailed to my twin sister in Georgia.

I hope you are all staying as safe and protected as you possibly can and maintaining social distance. It’s the least we can do . . . and it’s so terribly important. As I continue to shelter at home, I have some great advice to follow: Keep Calm and Sew On.


Posted in face masks, family, update | 6 Comments

Making Masks, Making Do

And hoping to make a difference.


Like so many other quilters, crafters, and those who sew, I am making face masks, initially for close friends and family, then to meet the growing need for first responders who may not have access much longer to official PPE (personal protective equipment).

After looking over several tutorials this week and trying a couple, I settled on the pattern you see above. It was designed by Jessica Nandino, an emergency room nurse, who posted her tutorial here.

She points out that research on the efficacy of fabric masks is conflicting and stresses that nothing homemade will ever compare to medical grade PPE. These masks are not sterile and they’re not medical grade. But they’re better than nothing. The fact that our first responders will most likely be wearing homemade masks because of a shortage of PPE is downright scary in the midst of the COVID-19 pandemic.

Notice that the mask above has nose and chin darts, and it covers the entire face. The top straps go over the ears and tie in back. The lower ties go under the ears and are tied at the back of the neck. It’s designed to fit in two ways: first, directly over the face, and second, over an N95 respirator as a way to provide a protective barrier in hopes of extending the lifetime of the respirator.

Here’s my first batch:

Although mask-making is a sobering enterprise, I can find some enjoyment in choosing complementary fabrics from my stash for the inside and outside of each mask:

Jessica’s pattern calls for the straps to be made from strips of fabric. I thought I might be able to make masks faster by using commercially made double-fold bias tape I already had on hand. I tried both 1/2″-wide tape (on the pink mask in the middle) and 1/4″-wide tape (the remaining masks). Both sizes work but the half-inch wide tape seems bulky to me and the quarter-inch wide tape was difficult to work with in terms of fully encasing the raw edges of the mask in the fold.

I’m feeling a little bit like Goldilocks. Will 3/8″-inch wide (homemade) be just the right size? I’ll give it a try today and let you know.


Posted in face masks, family, update | 5 Comments

A Spot of Green . . .

. . . in honor of St Patrick’s Day. It’s rather nice to be thinking about St. Paddy’s Day and not about the self-confinement the Dear Husband I have entered as part of our responsibility to help flatten the curve of the coronavirus pandemic. I’ve read a lot of posts today about how people are coping and I deeply appreciate the perspective that Sharon Santoni of My French Country Home brings to the situation. She lives in France some 5,000 miles way from my home in Portland, Oregon but we are definitely on the same page.

So back to the wearin’ of the green, or rather the sewin’ of the green:

That’s the last of the 20 roofs on my Dresden Neighborhood quilt (based on the pattern of the same name by Persimon Dreams).

I stitched all the roofs using the blanket stitch on my new Janome 9450QCP sewing machine. I confess: it was harder than I expected. Not because my machine is new. No, it’s because I’ve never machine appliquéd with a blanket stitch before! How did I get to this advanced age without learning that skill?

I had to practice — a lot — on scraps before attempting it on my funky little neighborhood. The most difficult part was stitching around the sharp corners. I couldn’t find a decent tutorial on how to do that so I fiddled with the points, trying different approaches until I was satisfied. And I matched my thread with the roof to minimize the imperfections.


See that zebra print roof above at about the 8:00 position? It’s the only roof that’s rounded and it was very easy going around it with the blanket stitch. Had I known that when I was cutting out the roofs, I would have made more of them rounded!

Uh-oh. There’s a dark smudge just to the left of the roof in the 11:00 position, made of the same zebra fabric. Here’s a close-up:


I have no idea how it got there. It definitely wasn’t there when I stitched around the roof. I tried dabbing it with a wet Q-tip but it looks like ink. The next time you see this there will probably be a chimney covering that sooty-looking spot. How appropriate.

What’s left? Doors and windows; a circle appliquéd in the center; and then it’s time to sandwich and quilt my little neighborhood.

As I was sewing the last roof on, the name for my quilt-in-progress popped into my head: Uptown Funk.


Posted in appliqué, family, Janome 9450QCP, machine applique, update, wall hanging, wonky Dresden neighborhood | 5 Comments

All You Need is Love

All you need is love
All you need is love, love
Love is all you need.
— the Beatles (1967)

When I made my Love Rocks quilt top a couple weeks ago using Sew Kind of Wonderful’s design from the new book Text Me, I decided I wanted to put a message on the back. Of course, it took me much longer to piece the back of the quilt than it did the front. The individual letters on the back range from 6″ to 9″ tall and are made from blocks that finish at 1½” square.

I still have to add borders to the back but here’s a collage photo showing you both sides:


You may remember I was using a positive/negative print from Riley Blake Fabrics (“Blossom” by Christopher Thompson) when working on the top:


After finishing the top I needed more of both fabrics so I went back to cool cottons, one of the best quilt shops in Portland, for more. There was plenty of the red print in stock but the background fabric was gone. Look what I found instead:


The very same “Blossom” print in the colors of the rainbow!

You gotta *love* it!


Posted in update, Wonder Curve Ruler | 5 Comments

Throwback Thursday: Give Me the Simple Life (2019)

It’s time for the tenth and final installment in my Throwback Thursday series looking at quilts made in the last decade. Coming up with my choice for 2019 was easy: it was the only quilt I completed last year! Here is Give Me the Simple Life:

Give Me the Simple Life, 95″ square (2019)

The pattern is Hazel’s Diary Quilt by Shelly Pagliai of Prairie Moon Quilts. Regular readers followed the making of this quilt from my very first block (and post) in January 2018 till its completion in September 2019.

I’m very proud of this accomplishment, as I made it my goal to become proficient in needleturn appliqué during the making of the quilt. It certainly provided ample opportunities for practice! Longarm quilter Kazumi Peterson did the amazing quilting.

Approved by Coco the Cat Inspector

Give Me the Simple Life will be on display later this month at Northwest Quilters’ 46th annual show, “A Festival of Quilts,” in its new venue, Camp Withycombe, in Clackamas, Oregon. Dates are Friday and Saturday, March 20 and 21. If you are in the neighborhood, please stop by. There’ll be over 300 quilts on display and lots of vendors selling wonderful things (like fabric).

Thank you so much for joining me in this 10-week lookback at some of my favorite quilts!


Posted in appliqué, cats, free motion quilting, Hazel's Diary Quilt, needleturn appliqué, Throwback Thursday, update | 6 Comments

March Madness

Hooray — March is here! Spring is on its way! In celebration of my favorite season of the year, I’m working on a new project featuring the quintessential color of spring: green, of course. My favorite color.

You’re probably wondering why on earth I’ve started something new when I have so many Works-in-Progress and Unfinished Objects (aka WIPs and UFOs) on hand. All I can say in my defense is that a) I like working on multiple projects at once, and b) there’s a method to my madness.

Before I explain, let me show you the new project:

I’m building a wonky neighborhood using the pattern Dresden Neighborhood by Kim Lapacek of Persimon Dreams. The wedges are made with a Dresden plate ruler, hence the name of the pattern. Isn’t my little neighborhood cute? The houses will have wonky doors and windows, and the raw edges in the center will be covered by an appliquéd circle.

Here’s Kim’s version as shown on her pattern cover:

I came across the pattern last year and bought it right away. After looking at some clever and charming versions recently on Instagram and Pinterest, I decided to jump in and create my own version. I’m also working on a couple of large quilts so the idea of a small (24″ square finished) project has great appeal. That’s one reason.

The houses in this little neighborhood are meant to be embellished with decorative machine stitches, especially around the roofs. Late last year I upgraded my Janome sewing machine to the Horizon Memory Craft 9450 QCP model. I am absolutely loving some of the new features but haven’t yet played around with the decorative stitches. This project is the perfect jumping off point. That’s the second reason.

And the third reason? I’m going to be teaching a “Wonky Dresden Neighborhood” class in June. (I teach at Montavilla Sewing Center’s Lake Oswego store.) This is going to be my store sample so I have some extra motivation to finish it up as soon as possible and get it on display. Hardly a burden. I can’t wait to get back to it!


Posted in appliqué, home dec, machine applique, update | 8 Comments

Short Stack

Am I dreaming of pancakes?

Nope. What I have here is a short stack of curves, ready to sew into letters for a message on the back of my Love Rocks quilt:


The markings on the new Wonder Curve Ruler from Sew Kind of Wonderful make it easy to cut the curves. Once I’ve sewn and pressed the curves, I’ll trim the resulting blocks into 2″ squares and sew those blocks together to form letters that will be 9″ tall when finished.

Tall letters from a short stack. And I’ll have to cut several more stacks of curves to have enough blocks for the simple message I have in mind.

Now I can’t stop thinking about pancakes.

Hmmmmm. Pancakes for dinner? Why not?!


Posted in update, Wonder Curve Ruler | 3 Comments

Throwback Thursday: Hip Hop (2018)

Today is Thursday so it must be time for Week 9 of Throwback Thursday. Ten years — 10 quilts. My choice for 2018 is Hip Hop, a wall hanging/table runner made using my own pattern Full Moon Rising:

Hip Hop, 16″ x 59″ (2018)

A lively aboriginal print featuring kangaroos was the inspiration for this quilt. Each of the five circles contains a different ‘roo. Here are a couple of close-ups:

You can see the kangaroos were fussy cut to fit the circles. By the way, those circles are inset, not appliquéd.

I hope this little quilt brightens your day. It makes me smile every time I see it.


Posted in update | 3 Comments

Throwback Thursday: Dutch Treat (2017)

It’s Week 8 of Throwback Thursday. Over the last seven weeks I’ve shown you seven quilts, one for each year between 2010 and 2016. Today’s quilt is my first red and white quilt (though not my last, as you know from my most recent post). Here, representing Week 8, is Dutch Treat:

Dutch Treat, 48″ x 60″ (2017)

Made from the pattern A Mid-Winter’s Night by Cottage Rose, the quilt features a mix of reds and two light background fabrics, all from my stash. The quilting was done by longarm quilter Debbie Scroggy.

Dutch Treat gets its name from the windmill shaped blocks:

Eight weeks and eight quilts down, two to go! I hope you’ll join me next week for 2018’s pick.


Posted in Throwback Thursday, update, Winding Ways quilt block, windmill block | 6 Comments

Love Is in the Air . . .

. . . and on my design wall. Take a look:

The pattern is Love Rocks, from the brand new book Text Me by those talented sisters at Sew Kind of Wonderful. The curves were made with the Wonder Curve Ruler, also by Sew Kind of Wonderful, which made its debut last fall:

The book was just released at the end of January. Being a huge fan of Sew Kind of Wonderful’s other rulers and designs, I ordered Text Me as soon as it was available. And even though I couldn’t possibly justify starting a brand new project, I absolutely couldn’t wait to try out the new ruler and one of the designs in the book.

I already had the perfect fabric in my stash: a pair of positive/negative prints in red and white from the “Blossom” collection by Christopher Thompson for Riley Blake Fabrics. Here’s a close-up of the print:

To give you some perspective, the block above is 4″ square. The letters L, V, and E in my quilt top measure 17½” tall! The quilt finishes at 35″ x 40″. (Mine will be a little larger because I cut my borders a bit wider.)

Here’s a photo of the Love Rocks quilt on the back cover of Text Me:

As you can see, I reversed the red and white fabrics in my version. Doesn’t have to be red and white, of course. Wouldn’t it be a darling baby quilt in just about any combination of fabric and colors?

The book has instructions for making letters and numbers in three different sizes. Also included are directions for five quilts plus two bonus quilts made with leftover blocks. And there are 16 fun emoji blocks. The sisters even included an alphabet made from half square triangles (HSTs) in case you want to create letters without sewing curves.

Gosh, my post sounds like a commercial endorsement, doesn’t it? I’m not being sponsored by Sew Kind of Wonderful. I just love their designs and enjoy sewing curves using their rulers and no-pin method of sewing them.

And I have an idea in mind for the back of my quilt that may just involve some letters . . . and maybe an emoji . . .


Posted in baby quilt, update, Wonder Curve Ruler | 3 Comments