
A couple of weeks ago I was digging through a dresser drawer in my sewing room looking for a scrap of fusible interfacing to use in making a quilt label. In the process I pulled out a mysterious bundle, which turned out to be a folded piece of gridded flannel onto which I had pinned 143 — count’ em! — 3-inch squares:

Apparently I set this project aside in 2019 — the year I taught a Fractured Image class at Montavilla Sewing — and promptly forgot about it. Don’t you think it’s high time I finished it?
I started sewing rows together from the bottom up (for the simple reason they were easier to get to). Here’s how far I’ve gotten:
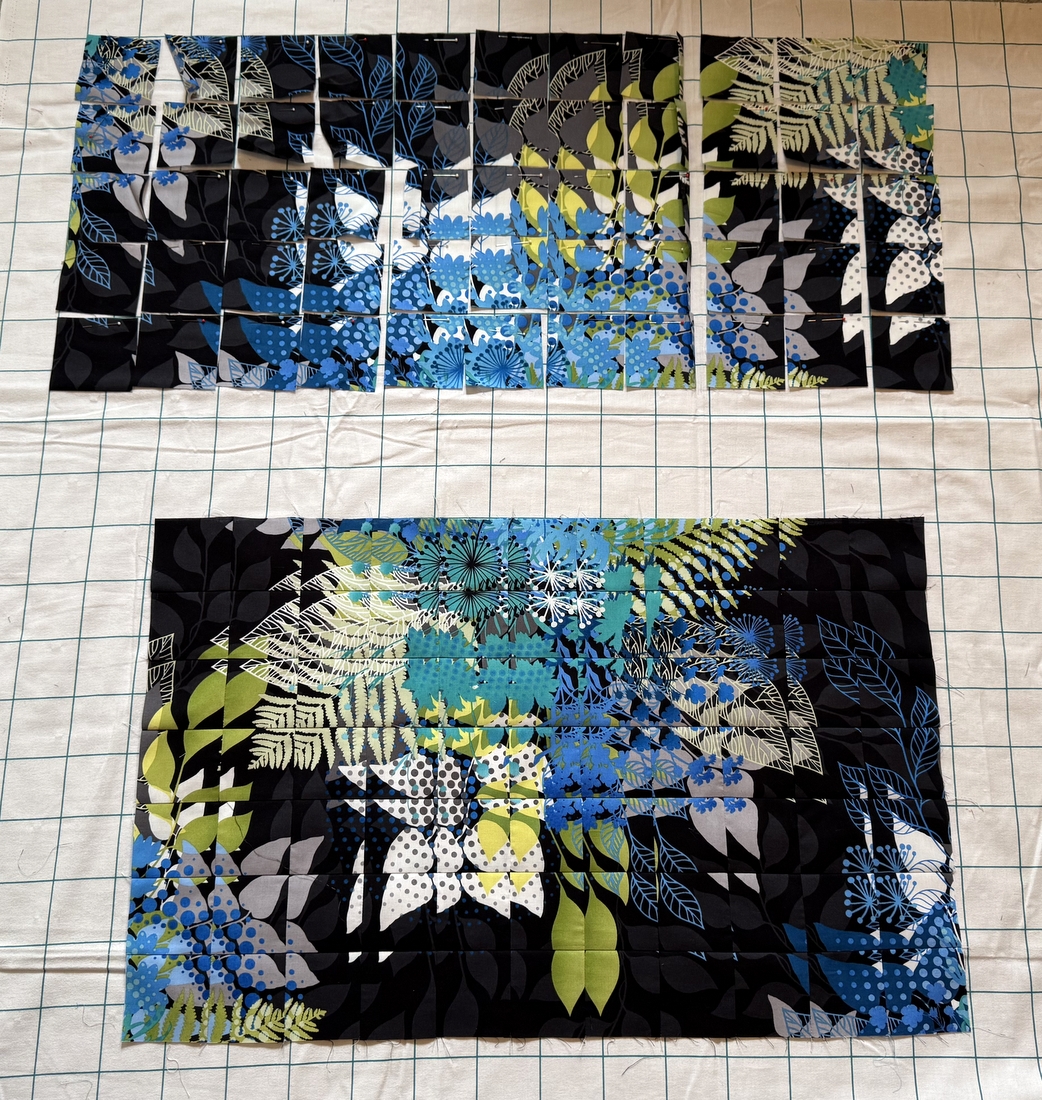
Can you see how the rather abstract medley of blossoms, leaves, and ferns is coming together to form a striking ripples-in-a-pond effect? It starts with an image cut from four repeats of fabric, and the magic is in the cutting and arranging of squares. Unlike a four-patch kaleidoscope block in which four layers are stacked on top of each other and cut into squares, a fractured image is created by trimming the second, third, and fourth repeats a certain way before cutting them into squares. When the squares are sewn back together, the result is a fractured image. It sounds complicated but it’s very easy.
Here’s a better shot of the rows I’ve finished so far:
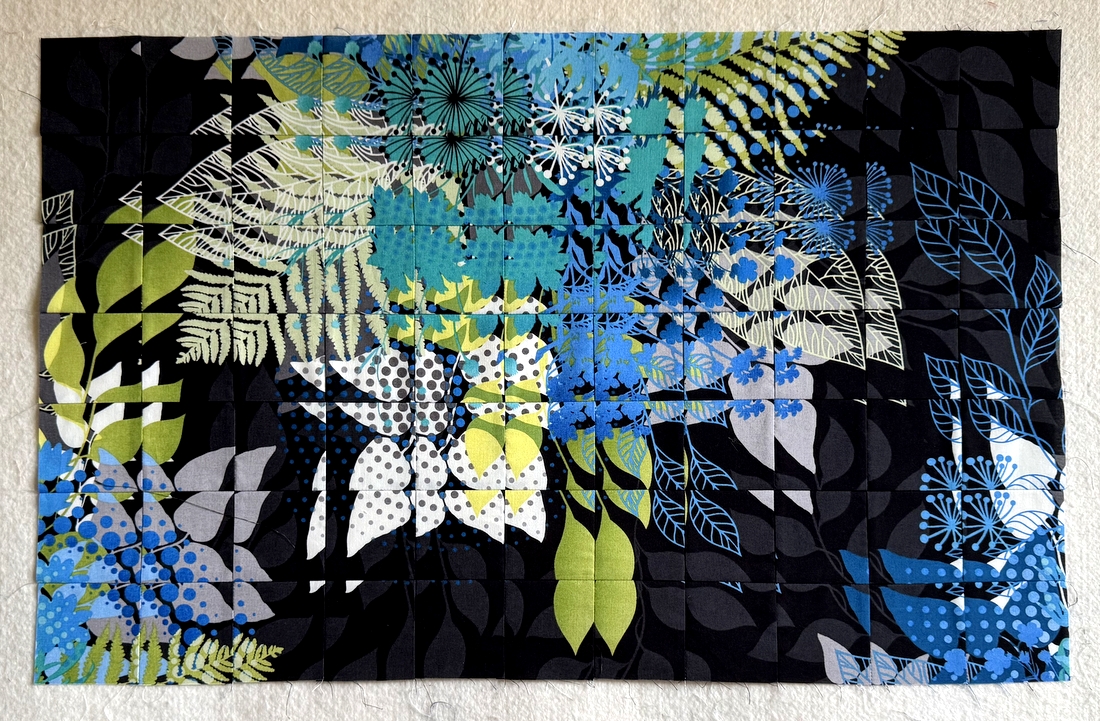
If you look carefully at some of the squares, you should be able to see how any two squares viewed side-by-side or top-to-bottom share design elements.
I first learned about fractured images in a class I took in the summer of 2010 from Johanne Gibson in Sisters, Oregon. After getting back to the project you see above, I rummaged around in my sewing room closet and unearthed several projects I had fractured in the past, including some I had completely forgotten about.
Here is the result of that first class with Johanne:
 No doubt the Kaffe Fassett fans reading this will recognize the fabric immediately. Using 3″ squares, my first fractured image measures 28½” x 34″. This could easily be transformed into a wall hanging by quilting and binding it as is. Or I could add a narrow border and finish it. Or it could be the centerpiece of a larger quilt. So many options!
With Johanne’s permission, I taught her method several times in classes at the Pine Needle Quilt Shop in Lake Oswego (now home to Montavilla Sewing). A blog post from 2012 shows a few more examples of images I fractured. You can see those images and read the post at this link.
Among the images I fractured (and forgot about) was this sweet one. . .
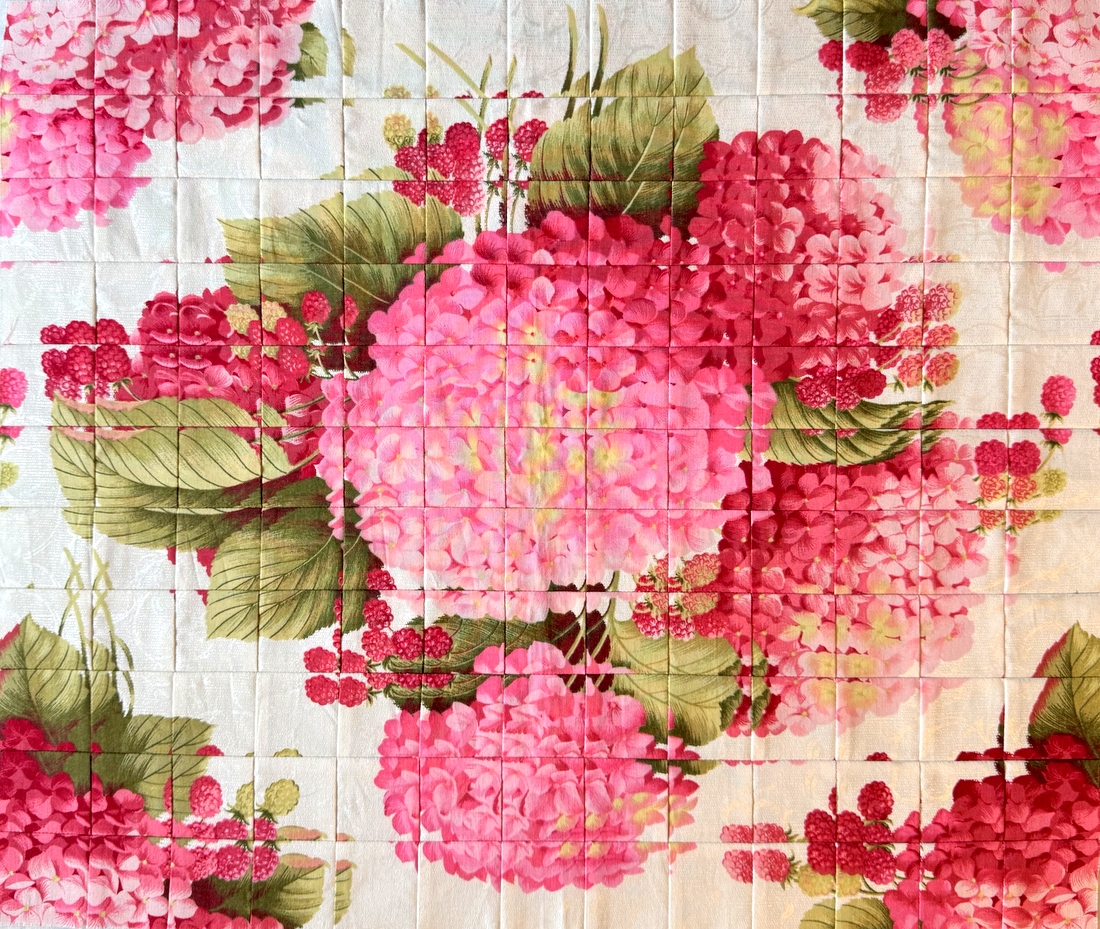 . . . featuring the pink colorway of “Hydrangeas and Raspberries” by Lakehouse Fabrics that was used in my 4-Patch Wonder quilt Framboise. This fracture started with 2″ squares and measures 20″ x 17″. I’m thinking it would make a lovely pillow to complement my Framboise quilt.
I’m also thinking it might be time to teach another Fractured Image class. What do you think?
Oh my goodness, what a marvelous find. This technique looks so unique. Hope you finish your find and teach a class!
Well . . . although not one myself for leaving something untouched for six years without deciding to gift, keep, donate, or ditch . . . I’m kinda glad you found this and are finishing it. The fabrics are spectacular and I am looking forward to the results!
Uncovering past work has consequences.
Wow, these are incredible!! Can you bring them to your classes so we can see them up close?!! Fabulous colors!
Gladly!
Love the new colors! I remember doing this pattern once when you visited with Diane. It’s lovely!
Those quilts are stunning! Absolutely gorgeous! You are amazing!
By the way, I miss getting together with you. We should try and plan that in the near future. I miss you.