Author Archives: Dawn

Reach for the Stars: Block 3

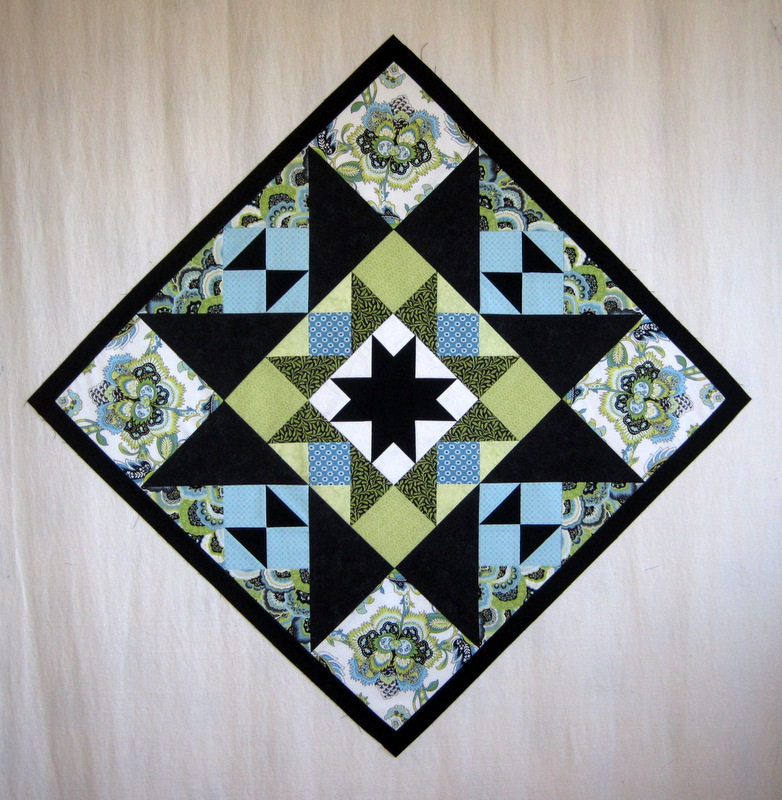
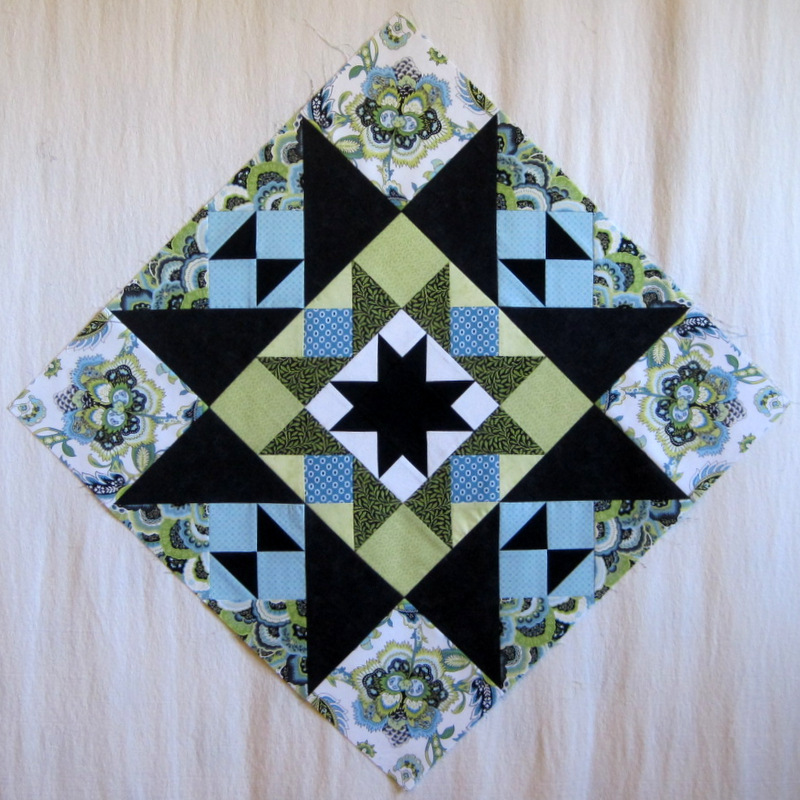
2014-1 RFTS dlw Block 3
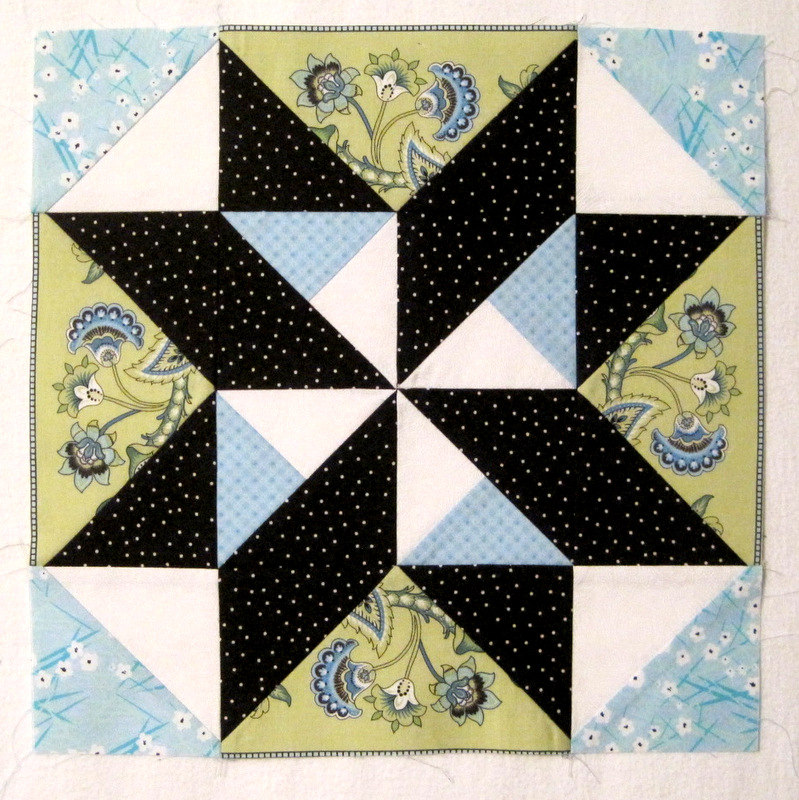
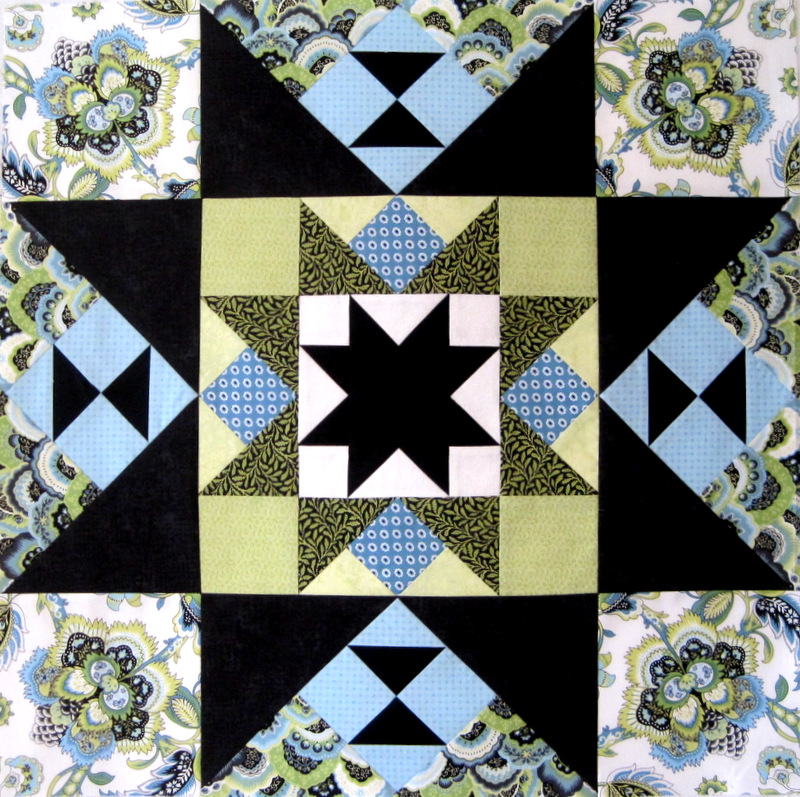
Reach for the Stars Block 3, 12″ square


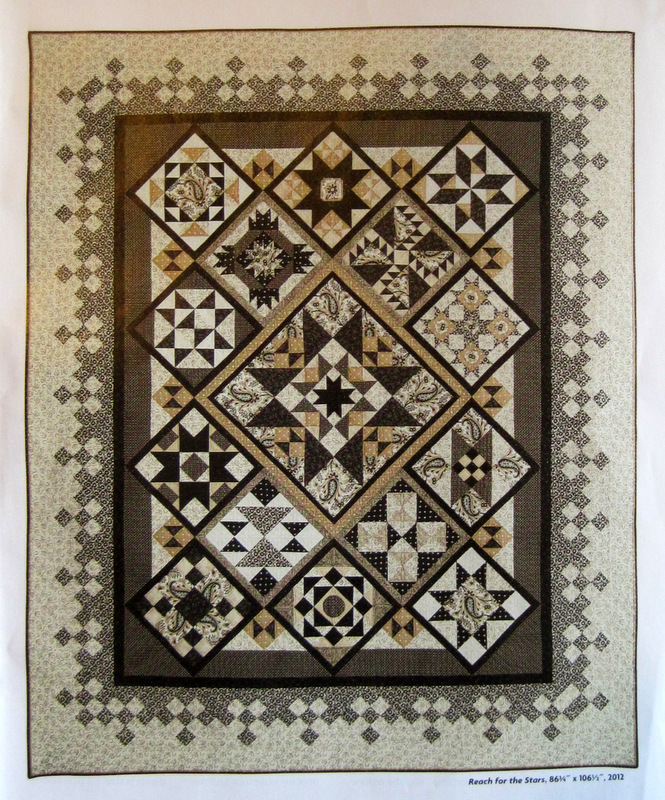
No, you didn’t miss Blocks 1 and 2. I haven’t made them yet. The block you see above is number 3, one of 14 different blocks that surround a center medallion in a gorgeous quilt, Reach for the Stars, designed by Terri Krysan. Her quilt was featured in the Oct./Nov. 2013 issue of Quilter’s Newsletter . . .

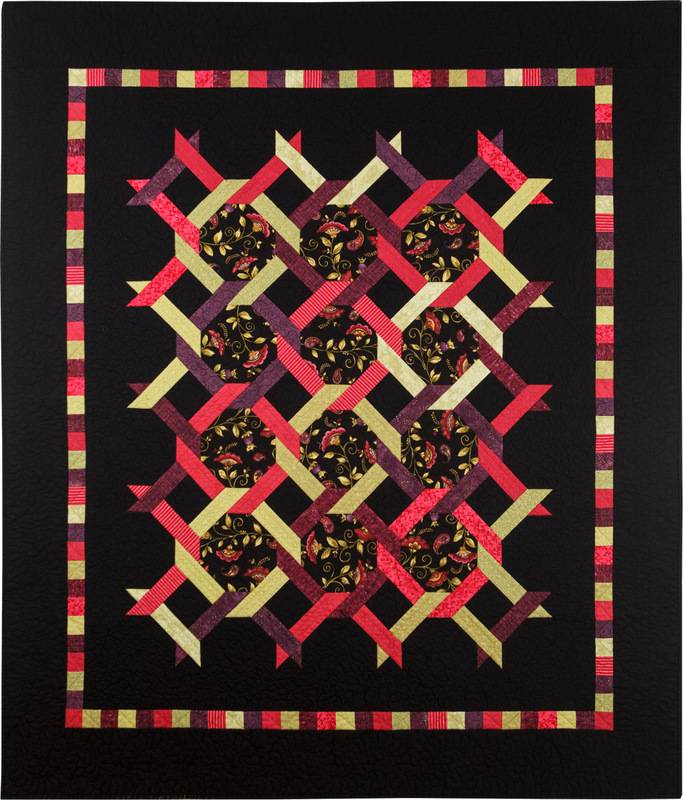
2014-1 RFTS quilt
Terri Krysan’s Quilt, 86½” x 106½”

(Copyright Quilter’s Newsletter. Used with permission. Photo by Melissa Karlin Mahoney.)

. . . and I decided to make it, using fabrics in my stash and a different colorway. The magazine is offering directions in a seven-part series that began with the Oct./Nov. 2013 issue.

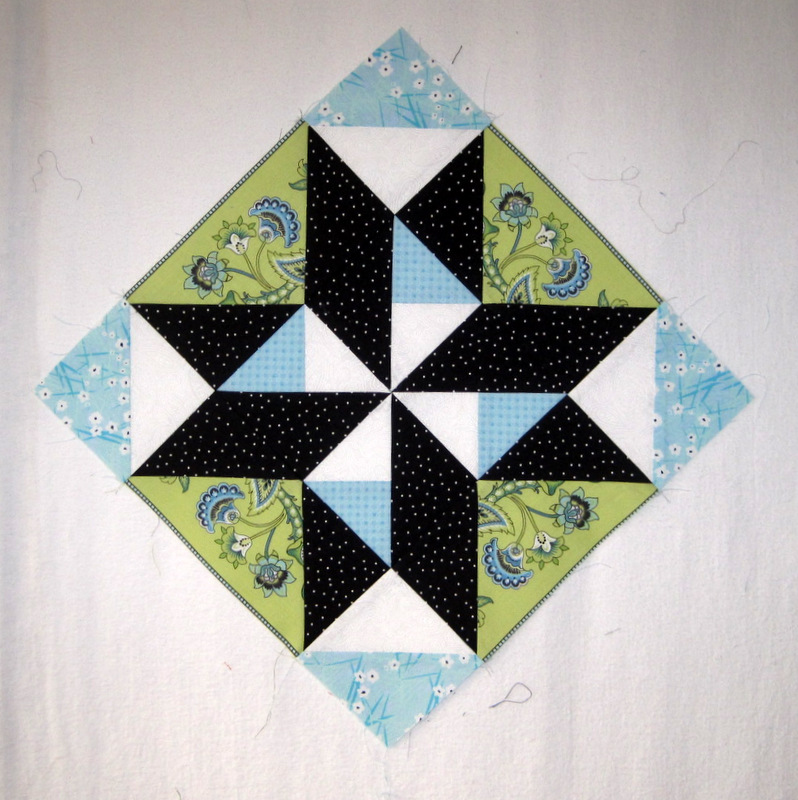
Block 3 is in the upper right hand corner in the original quilt. It is set on point, so this is the proper orientation for my Block 3:

2014-1 RFTS dlw Block 3 on point
Reach for the Stars Block 3, on point


I have two spectacular Jacobean florals in my fabric mix and will be looking for ways to use them. Perhaps I should challenge myself to incorporate a fussy-cut image into every block.

I made the center medallion block a couple of weeks ago. Since then I’ve added a black strip, the first of two sashings:

2014-1 RFTS medallion with sashing
Medallion with one of two sashing strips


The medallion block now measures 26″ square; on point it measures 37″ at the widest point. Once I have a few more blocks made, I’ll decide whether the second set of sashing strips should be aqua or green.


Posted in Reach for the Stars sampler quilt, update | 7 Comments

First Finish of 2014

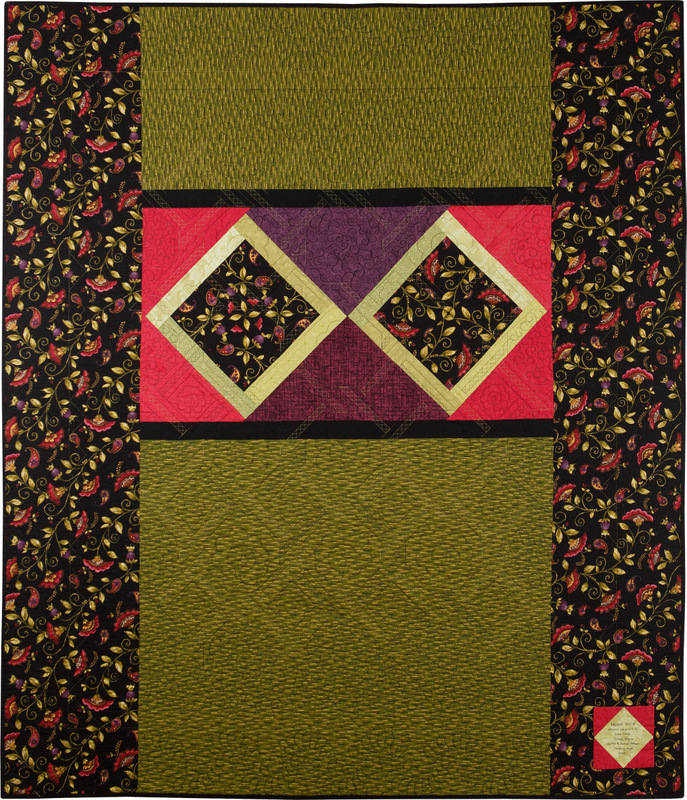
“First finish of 2014.” Ah, it feels good to say that. May I present Square Dance:

May-2014-Shoot-HR-3
Square Dance, 55½” x 64½”

Just 18 months from conception to completion. Not bad for me! To read about the inspiration for this quilt and how it evolved, see my first post about it and a follow-up.

Square Dance was quilted by Melissa Hoffman, one of many talented longarm quilters in the Portland metropolitan area. Here are a couple of close-ups:

2014-1 Square Dance quilting detail
Quilting Detail


2014-1 Square Dance quilting detail 1
Feathers and Filigrees

Don’t you love the way quilting adds texture? The filigree motif in the inner black background was free-motion quilted.

The back of the quilt:

May-2014-Shoot-HR-4
Leftover Blocks on the Back


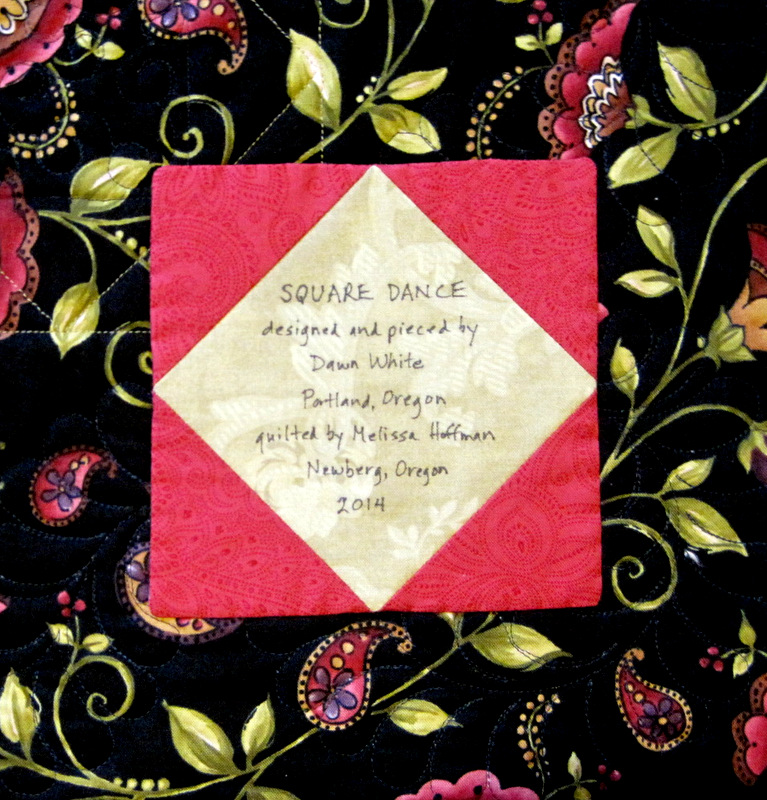
Just for fun, the label is a square in a square:

2014-1 Square Dance label
Final Task: the Label


Square Dance
will hang in the Stitches in Bloom quilt show at the Oregon Garden next week (Jan. 24-26). If you happen to be in the neighborhood of Silverton, Oregon then, I hope you’ll stop by.


Posted in free motion quilting, update | 7 Comments

UFO Busting? Check!

The Spring 2008 issue of Designer Quilts magazine featured a red and white quilt called Checkerboard Square, designed by Alex Anderson using fabrics from her Never Enough Romance line for P&B Textiles. As quilt designs go, it’s pretty basic: 18 squares set on point, surrounded by nine-patches and sashing strips. The fabric line really made her design sing, though. It included a large toile and seven companion fabrics, and it came not just in red but also in black and royal blue colorways.

I decided to make the blue version, and in the fall of 2008 I cut the entire quilt out. And, for some reason I can’t explain, I put the quilt aside. For five years. Last week I decided that this UFO would be the first one to tackle in this fresh New Year.

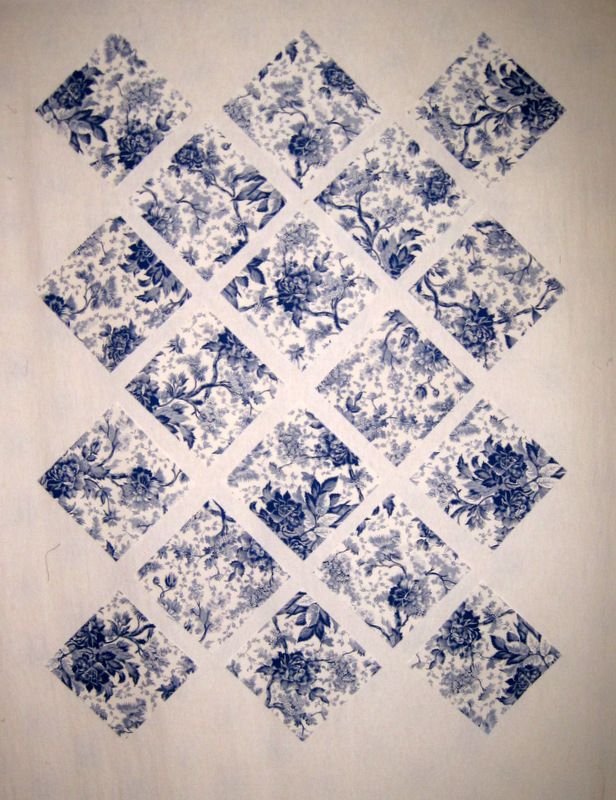
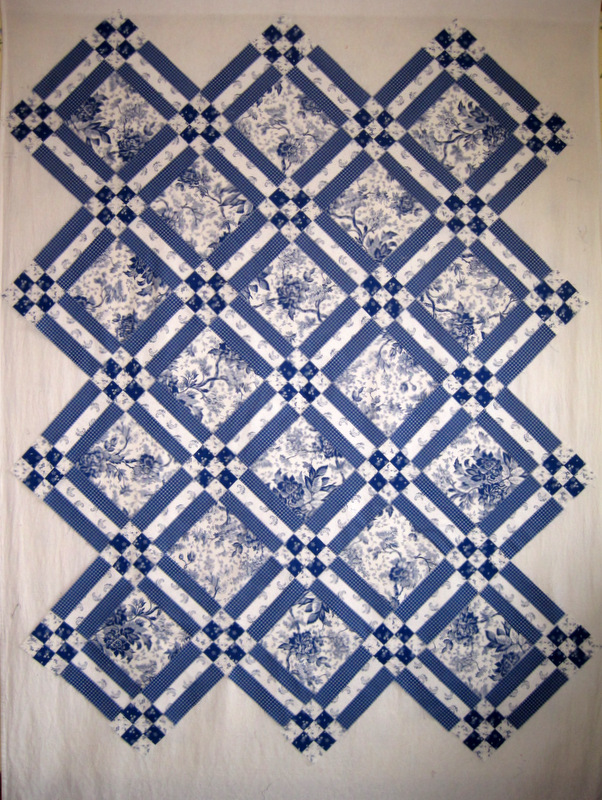
First I made 48 sets of sashing strips. (No, that’s not quite accurate. I cut the first four sets an inch short and had to make new ones.) Then I made 31 nine-patch units. Then, because I am admittedly obsessive about such things, I arranged the 18 squares on point on my design wall and moved them around until I felt the blooms and vines in the toile design were more or less evenly distributed. Here are my toile squares:

2014-1, 1 BlueWhite focus blocks arranged
Here they are with the sashing strips attached:

2014-1, 2 BlueWhite blocks and sashing strips
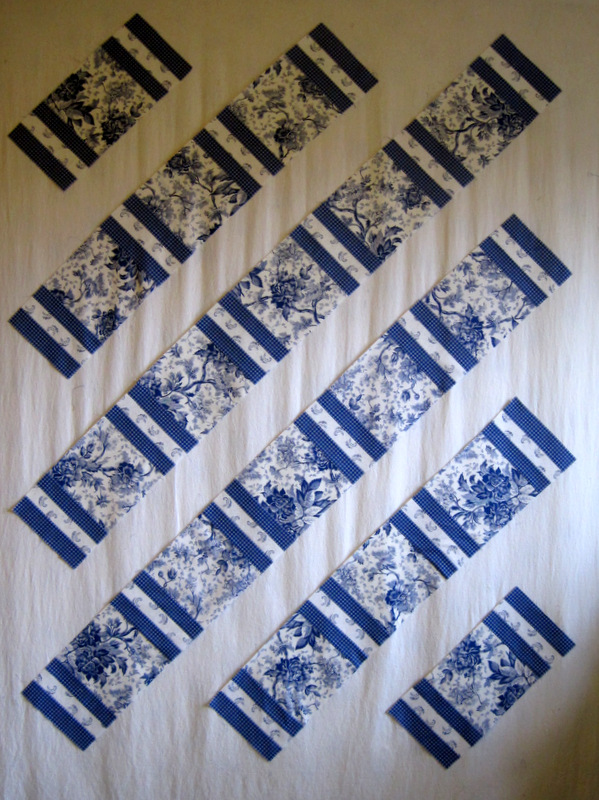
After the nine-patch/sashing strips that make up the connector rows were joined, I arranged them on my design wall, filling in the blank spaces you see in the photo above:

2014-1, 3 BlueWhite  rows ready to sew
The angle is a little wonky but now you can see what this quilt is going to look like.

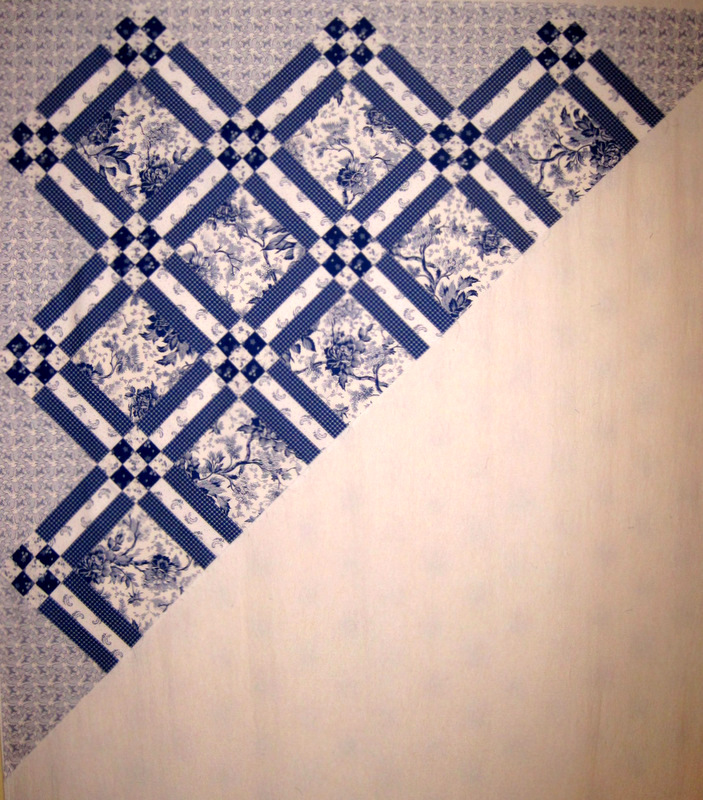
I’m almost half done joining the rows. With the setting triangles attached, it’s starting to look like a real quilt:

2014-1, 5 BlueWhite top in progress
With two borders — a narrow blue one and a larger one made of the toile print — the quilt top will measure about 71″ x 88″.

My New Year is off to a promising start. I hope yours is, too!


Posted in update | 8 Comments

Reaching for the Stars

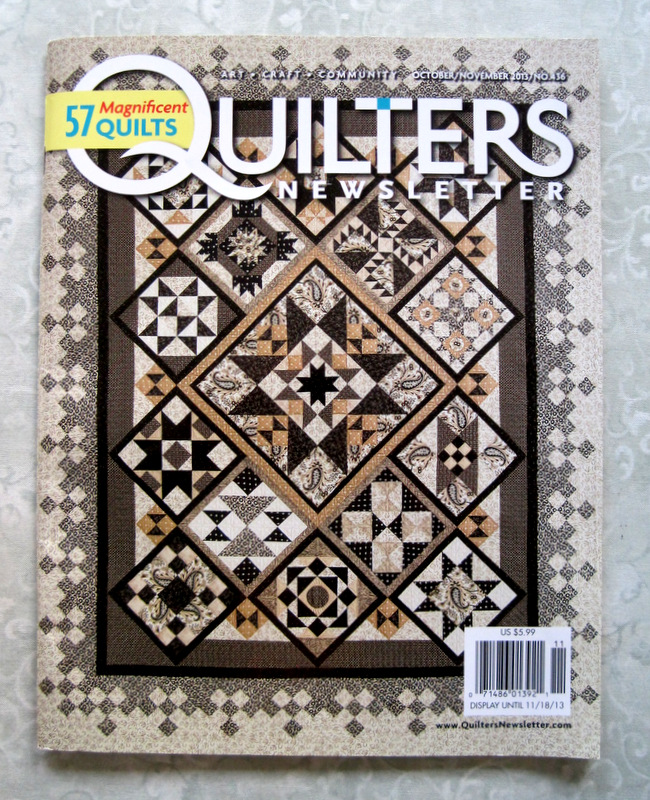
Reach for the Stars is the name of a beautiful sampler quilt designed by Terri Krysan of Lakeville, Minnesota and quilted by Page Johnson of Rosemount, Minnesota. It was pictured on the cover of the Oct./Nov. 2013 issue of Quilter’s Newsletter magazine:

2014-1, QNM cover of sampler quilt
Cover Quilt: Reach for the Stars
(Copyright Quilter’s Newsletter. Used with permission. Photo by Melissa Karlin Mahoney.)

I remember thinking “how pretty!” when my magazine came in the mail in October but I didn’t give it another thought until reading this post by Jennifer of Seams Crazy. Jennifer really fell hard for this quilt, and that prompted me to take another look. I fell too! Quilter’s Newsletter was starting a seven-part series beginning with the Oct./Nov. issue but I wasn’t ready to take on a new project. For starters, I had plenty of quilts on my to-do list, not to mention various Works-in-Progress (WIPs) and Unfinished Objects (UFOs).

But the idea was planted . . . and it took root. This week it dawned on me that I had the perfect collection of fabric already in my stash. Not the tans and creams featured in Terri Krysan’s quilt. As a matter of fact, I have almost no tans in my stash. What I do have is lots of blues and greens, which go perfectly with the Ainsley line of Northcott fabrics that I bought well over a year ago in a moment I can only describe as fabric lust.

Over the last couple of days I auditioned various fabric combinations and started work on Part 1 of the series, the center medallion, basically a star within a star within a star, with hourglass blocks added to the mix. Here is my medallion block:

2014-1, Medallion block
Center Block, 24½” Square

It’s even more dramatic set on point, as in the pattern:

2014-1, Medallion block on point
On Point, 34½” Across

The block has two sets of sashing strips but I am going to wait till I have a few more blocks made before deciding on my sashing fabrics.

I’m already three blocks behind, as the Dec. 2013/Jan. 2014 issue of Quilter’s Newsletter has been out for weeks and I expect the Feb./March 2014 issue, with directions for the next three blocks, to be in my mailbox any day now. I’m going to take my time, though, making each block when time and inspiration arrive at the same time.

What about you? Is anyone else out there Reaching for the Stars? It might be fun to share our progress and cheer each other on!


Posted in Reach for the Stars sampler quilt, update | 25 Comments

It Was a Very Good Year

partridge canstockphoto7458339As 2013 draws to a close, I am reminded how lucky I am to have my health, family and friends I treasure, a home that I love, and time to create lovely things with needle and thread. I am also grateful to you, my loyal readers, who keep me inspired to document my sewing and quilting life. Thank you for adding firstlightdesigns.com to your list of must read blogs!

I’ve been reviewing what I accomplished on the sewing/quilting front this year. Not as many quilts as I had hoped — nine, including baby quilts — but that’s because I was making other things: table runners, sewing machine dust covers, iPad mini cases, iron caddies, valances, pillowcases, little fabric boxes, and a partridge in a pear tree. Okay, just kidding about that last one.

If you’ve been reading my posts over the last year, you’ve probably seen most of the items mentioned above (except for the partridge in a pear tree). I’ve updated the sections of my Gallery to include photos of my 2013 projects.

Happy New Year, everyone! Please stop by in 2014.


Posted in family, update | 3 Comments

Honeymoon in Paris

Finis!

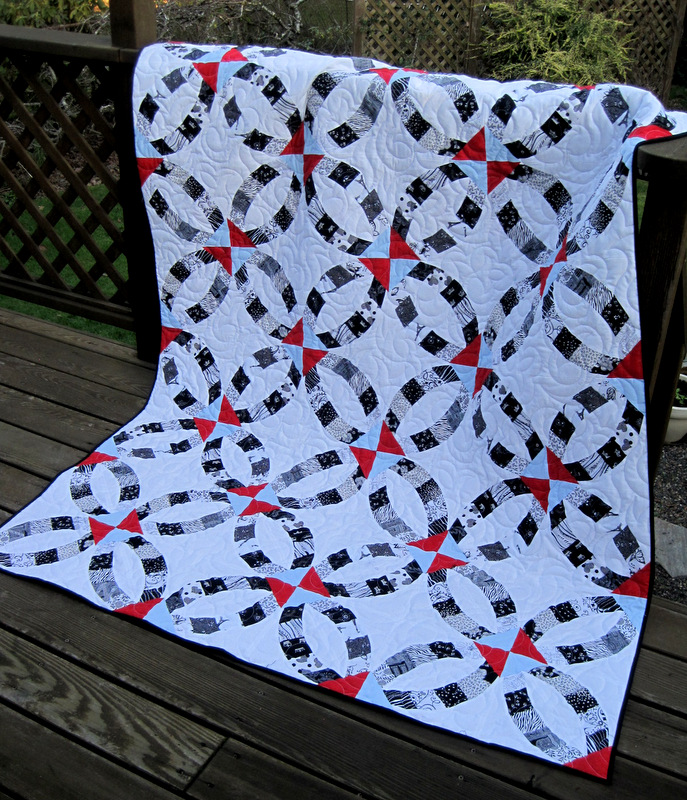
My quilt Honeymoon in Paris is back from the quilter, bound, and labeled. Here’s a look at the front . . .

2013-12, Honeymoon in Paris
Honeymoon in Paris, 56″ x 75″ (2013)

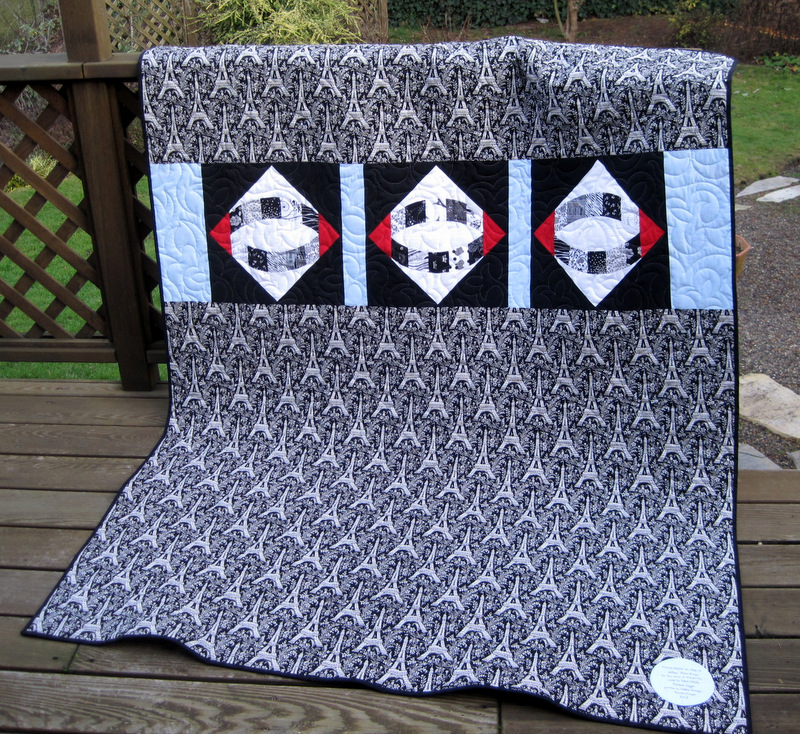
. . . and the back . . .

2013-12, Honeymoon in Paris, back
Leftover Blocks on the Back


Honeymoon in Paris
was quilted by longarmer Debbie Scroggy of All Quilted, LLC. I saw samples of Debbie’s work at a recent Portland Modern Quilt Guild meeting and decided to give her a try. I’m so happy I did! She offers a very fast turnaround time and does beautiful work.

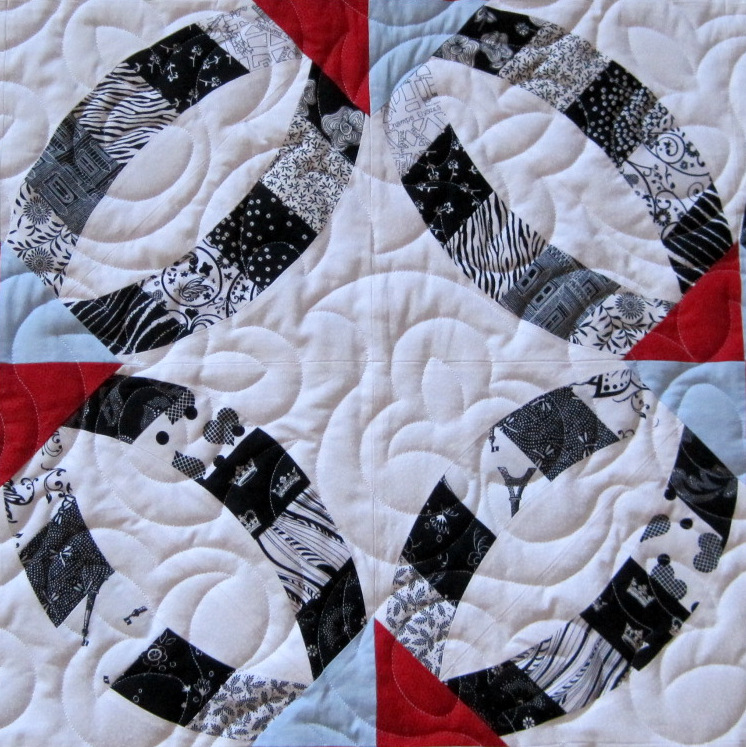
I wanted a spacious airy edge-to-edge design for this quilt. Debbie gave me lots of options. As soon as I spotted the fleur-de-lis element in this quilting design, I knew that was what I wanted. Here’s a close-up of the quilting:

2013-12, Honeymoon in Paris quilting detail
See the Fleur-de-Lis?


Honeymoon in Paris
gets its name from the Paris-themed fabric (two prints on the front and the Eiffel tower on the back) and the double wedding ring block design. The fleur-de-lis motif in the quilting adds a bit more French flavor.

The pattern is Metro Rings by of Sew Kind of Wonderful. I really enjoyed making this quilt, which may be my last finish of 2013. The best thing about finishing a quilt? Starting a new one!


Posted in Portland Modern Quilt Guild, update | 9 Comments

Curves Ahead

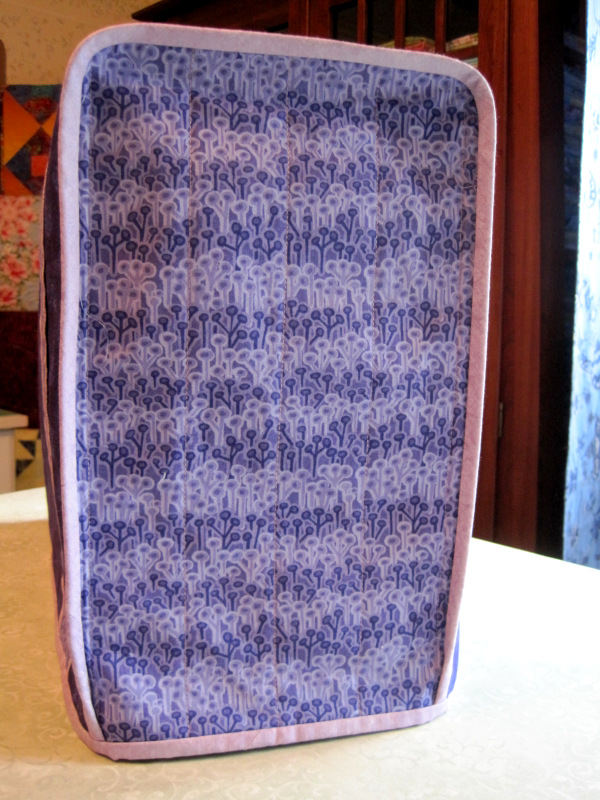
Sewing around curves on three-dimensional objects like bags and sewing machine covers can be tricky. There’s a lot of bulk to be distributed, and if the object is lined and/or interfaced, the reinforced fabric may not be as pliable. I’ve devised a method of pinning and sewing that works for me, so I thought you might like to see how I do it.

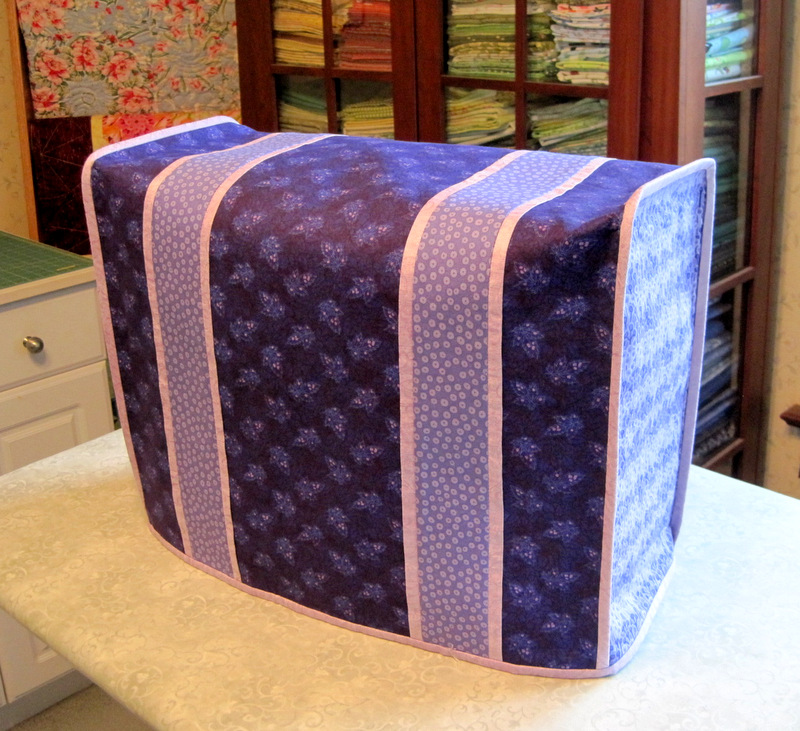
My example is a sewing machine dust cover I just finished for my friend Vickie S.’s birthday. The cover has three main pieces: the main body, which is a rectangular shape that goes from front to back over the sewing machine, and side panels that are curved at the top. The pieces are sewn wrong sides together and then bound with double-fold bias binding.

Here’s what the finished dust cover looks like:
2013-12, Vickie's sewing machine cover

On the right side of the main body piece, I make marks in the seam allowance at the middle and corners. (The corner marks are determined by the finished depth measurement of the sewing machine.) I staystitch a scant 1/4″ where the main body will curve around the rounded top edges of the side panels. My stitching line is about 3″ long, meaning it extends 1½” on each side of the corner mark. (You can see this 3″ line of stitching on the photo below. I also stitched 1/8″ from the edge all around the main body after attaching the lining.) Then I clip to the stitching line, making my cuts 1/8″ to 1/4″ apart.

The staystitching step is important because it 1) reinforces the area where the fabric was clipped, and 2) gives me a line to follow when I am ready to sew around the curve.

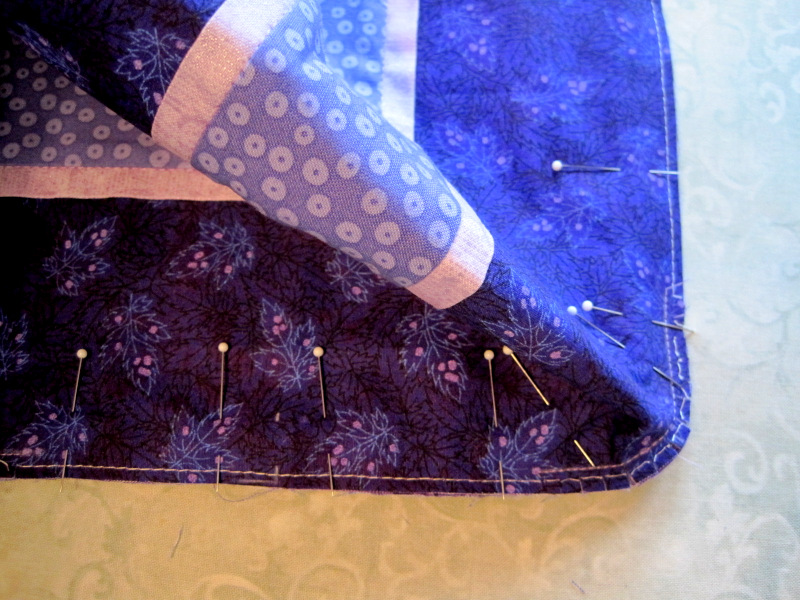
Starting in the center of one long edge, wrong sides together, and working from the right side of the main body, I pin one side panel to the main body piece, turning the clipped edges of the main body to follow the curve of the side panel:
2013-12, dust cover corners 2

The clipped edge of the main body is easily shaped into a curve, matching the curved edge of the side panel underneath. See how the excess fabric of the main body piece forms a funnel? At the corner I angle a pin on either side of the funnel. The rest of the pins are perpendicular to the raw edges.

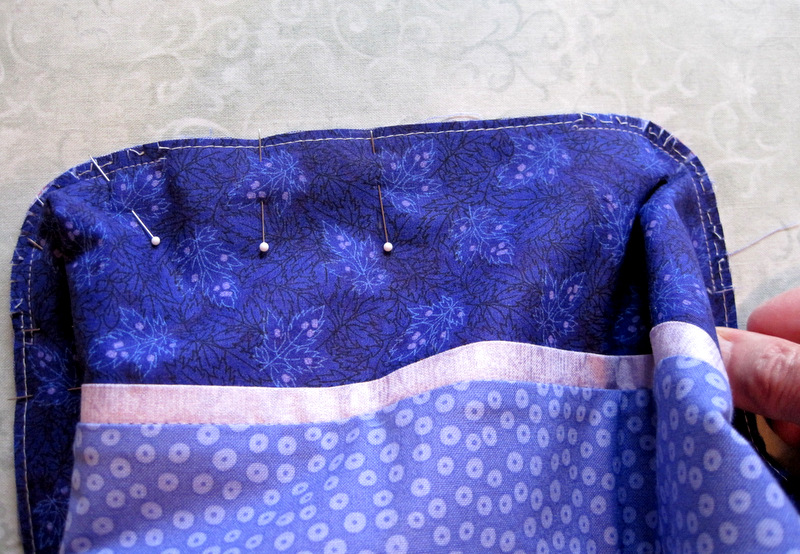
The second curve is ready to be pinned:
2013-12, Vickie's cover 8

At the sewing machine, I maintain the funnel shape as I start sewing the first side. As I near the first rounded corner, I flatten the funnel with my left hand, making sure the folds in the funnel don’t interfere with the stitching line. I stitch directly on top of the staystitching, turning the fabric as I go to maintain the curve :

2013-12, dust cover corners 5

Note that this row of stitching is still a scant 1/4″ from the raw edges. When the bias binding strip is sewn on, it will be a full 1/4″ seam, covering the previous line of stitching.

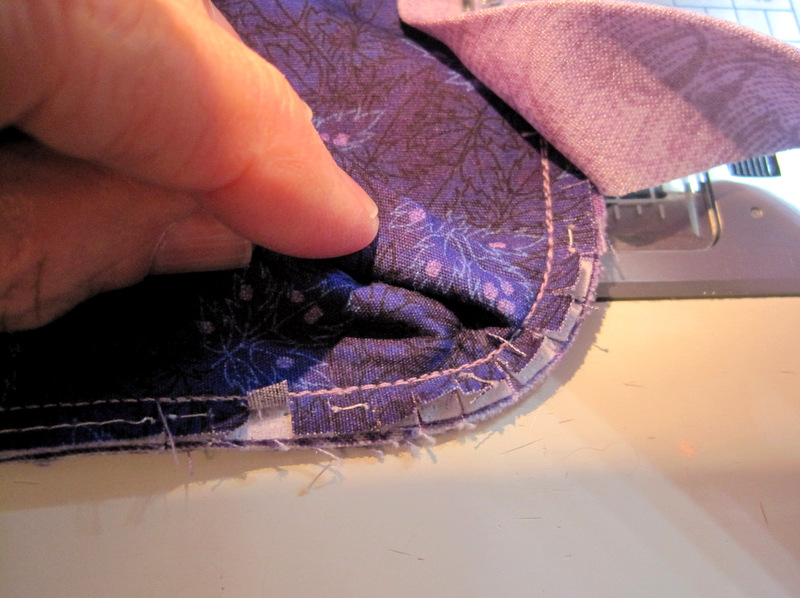
Now I am ready to attach the bias binding. No pinning needed for this part. As I approach the curve I flatten the funnel again:
2013-12, Vickie's dust cover 6

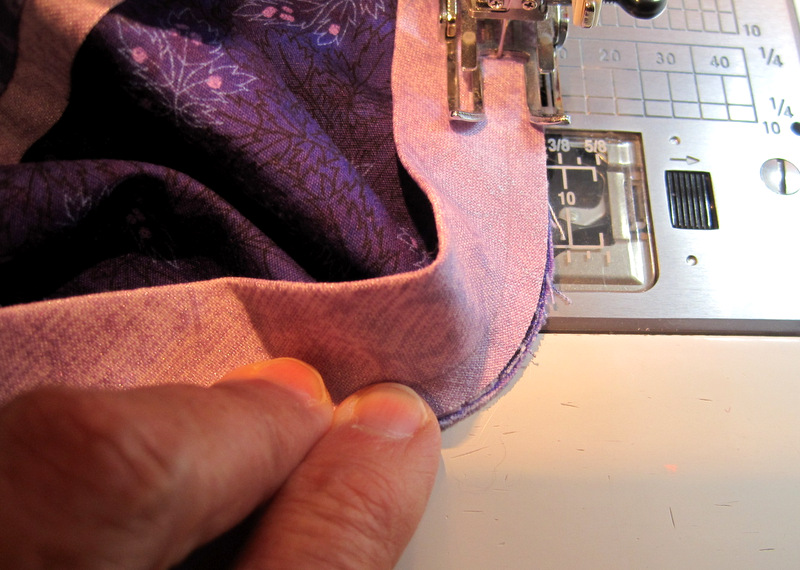
Then I position the binding. Because the binding is bias, it’s easy to shape it around the curve. In the photo below you can see that I have drawn a light pencil line on the 1/4″ seamline. This helps me maintain the right shape of the curve as I am sewing around the corner.
2013-12, Vickie's dust cover 7

I can feel as I go around the curve that the fabric directly under the needle is flat because the fullness from the main body has been pushed to the left, away from the stitching line.

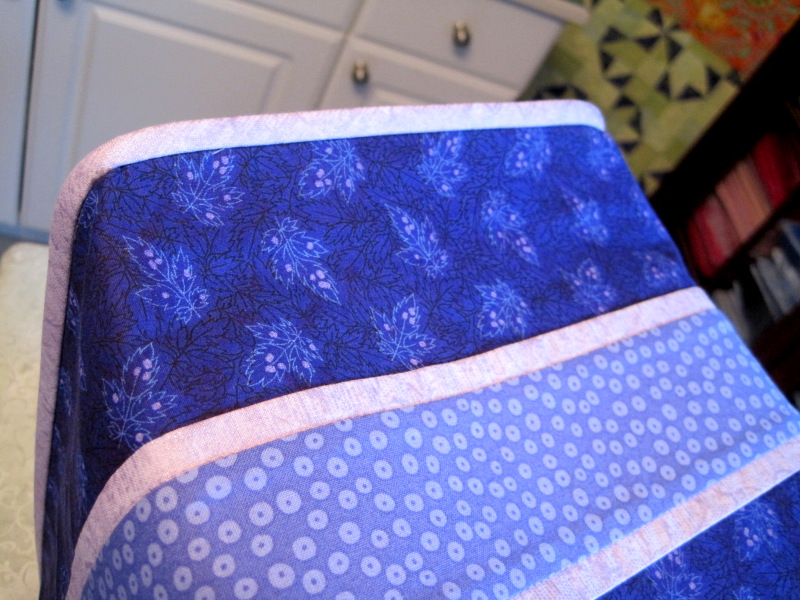
Now all I need to do is fold the binding over the seam and fuse it with 1/4″-wide Steam-a-Seam 2. I could stitch it down by hand but I find that the fusible web does a great job of holding the binding in place, and it’s much faster than sewing it by hand.

Here’s a closer look at the bound edges, first from the top . . .
2013-12, Vickie's sewing cover 8

. . . and now from one side:

2013-12, Vickie's cover, side

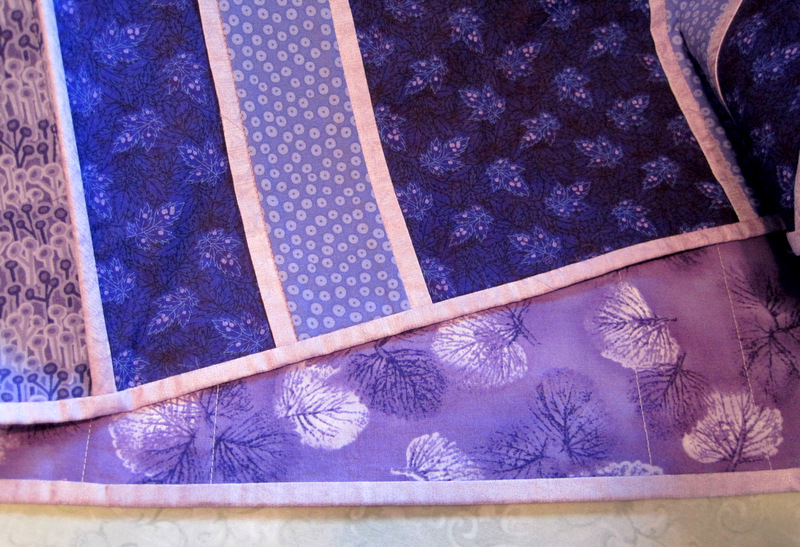
And here’s a peek at the lining fabric inside:
2013-12, Vickie's sewing machine cover, inside
Vickie’s birthday was at the end of November so I’m a wee bit late with her gift. I hope she thinks the wait was worth it!



Posted in update | 1 Comment

A Mighty Distraction

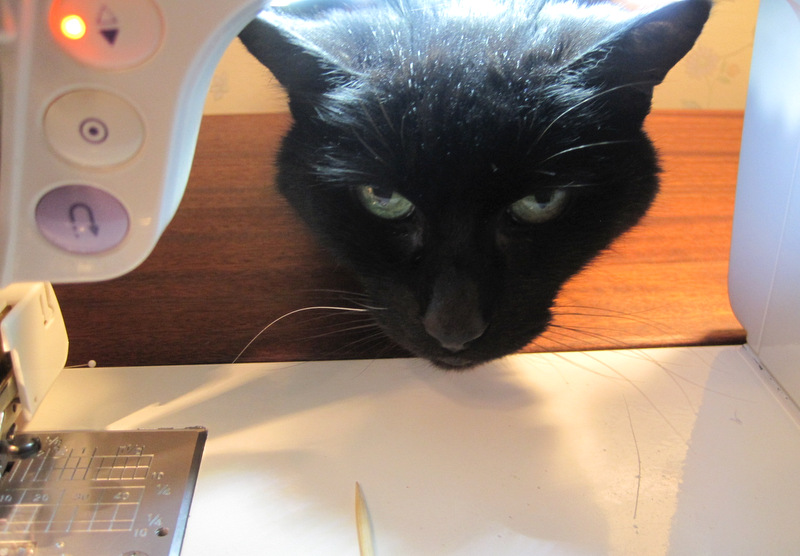
She’s tiny (under 6 pounds) but she’s mighty. I’m talking about my cat Theodora. Night and day, her demands for attention are endless.

Theo is a frequent visitor in my sewing room, where she is either stealing my chair when my back is turned (see post here) or prowling around on my sewing table while I am trying to sew:

2013-12, Theo on my sewing table

The older she gets (she’s 16 now), the more vocal she gets. Impossible to ignore!


Posted in cats, update | 1 Comment

Lyra’s Quilt

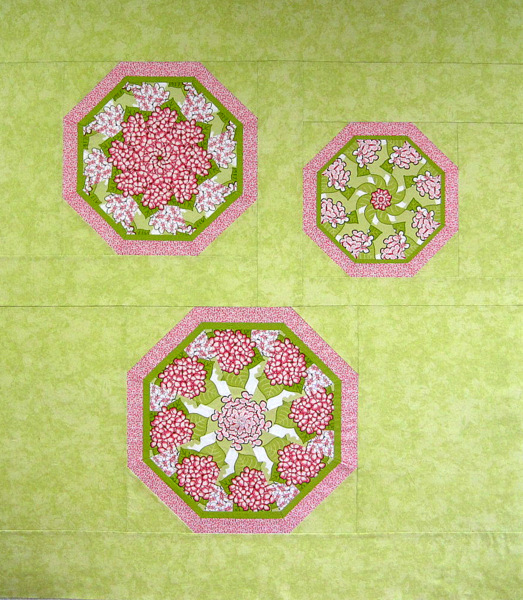
Hydrangea Kaleidoscopes, 47" x 54"
Hydrangea Kaleido quilt top, 47″ x 54″

Remember this quilt? I was working on it back in February (you can read about it here) when I learned that my brother’s son and his wife were expecting their first child, due in August. They didn’t want to know the sex of the baby until it arrived. In the back of my mind I was thinking that if the baby were a girl, this might become her quilt.

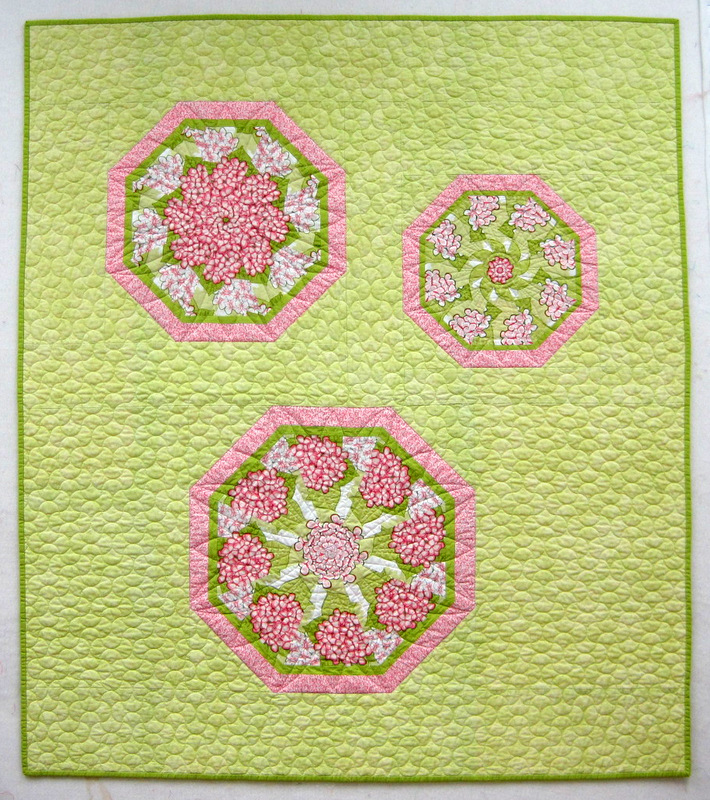
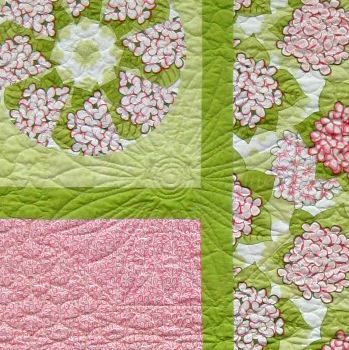
At the end of August, their daughter was born. I was still considering this quilt for her but didn’t decide for sure until it came back from long-arm quilter Nancy Stovall of Just Quilting. Then I knew it would be perfect for a sweet little girl. Nancy quilted a sunburst motif in the center of each kaleidoscope block and a tessellating clamshell design in the background. Take a look:

2013-11, Lyra's quilt
44″ x 51″ After Quilting


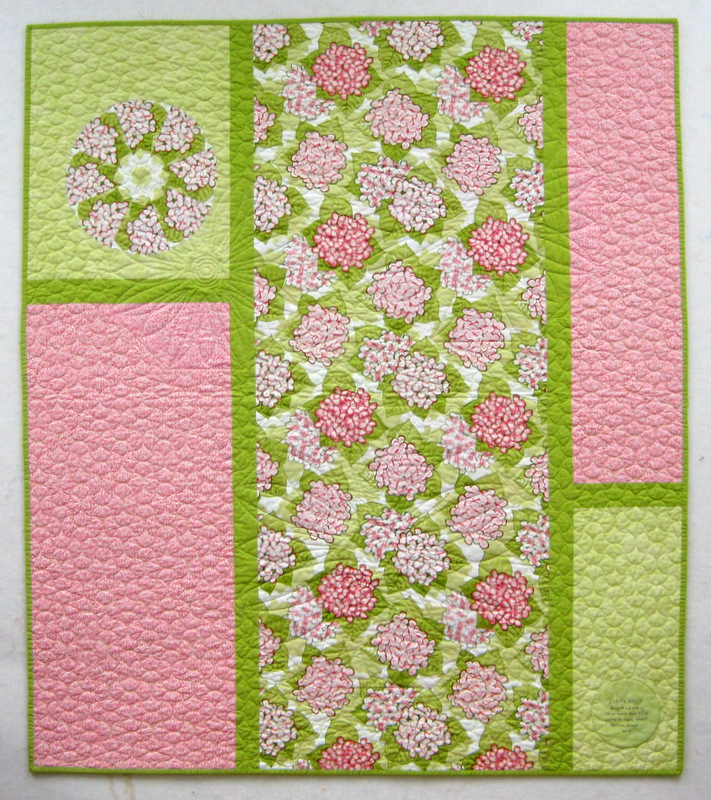
On the back I put a big strip of the hydrangea focus fabric and converted a leftover kaleido block into a circle:

2013-11, Lyra's quilt, back
44″ x 51″ After Quilting


On this detail photo of the back you can get a better look at the quilted sunburst:

2013-11, Lyra's quilt, detail of quilting
Quilting Detail


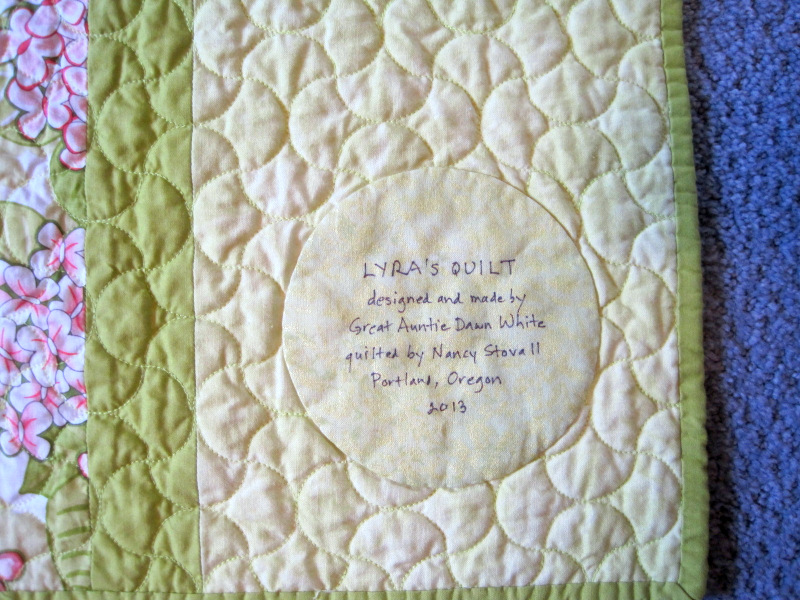
The label was made using a compact disc (described in my tutorial here):

2013-11, Lyra's quilt label 1

The photo above, which gives you a better look at the tessellating clamshell motif, was taken after the quilt was washed, giving it that soft puckery look.

Lyra’s quilt — #7 in my series of kaleidoscope quilts — will soon be on its way to her. I hope she likes it!


Posted in baby quilt, family, kaleidoscope quilts, quilt labels, update | 4 Comments

Un Deux Troix . . .

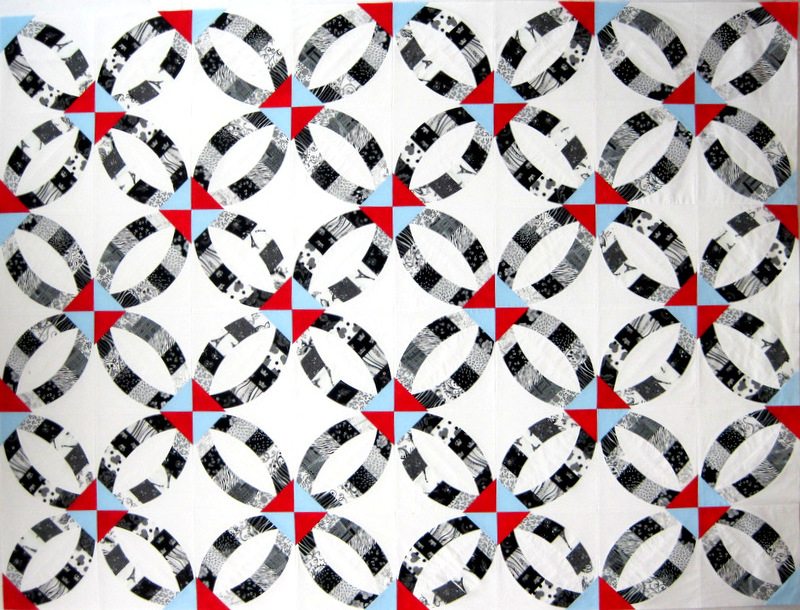
Step One:  make a quilt top. In this case it’s my version of Sew Kind of Wonderful’s Metro Rings pattern:

2013-11, Metro Rings horizontal


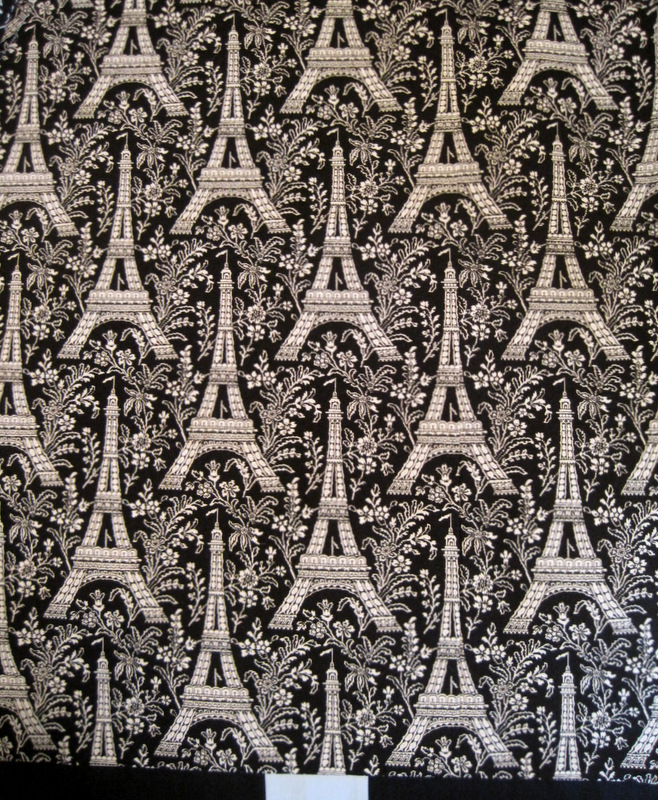
Step Two:  make a back for it. I incorporated some leftover blocks and used Michael Miller’s Eiffel Tower fabric:

2013-12, Honeymoon in Paris, back


I had to piece two widths of Eiffel Tower fabric for the back. To match the design, I used a tip I learned from Elizabeth Hartman in her free class, Creative Quilt Backs, on Craftsy.com. In Lesson 4, Elizabeth demonstrates her technique for matching large-scale prints. Even though the print on my quilt back isn’t large-scale, her technique worked just fine.

See if you can find the seam in this close-up of the back:

2013-12, Metro Rings back, detail 1

Even if you spotted it, I think it will be virtually invisible by the time the quilt is quilted and washed.

Step Three:  send it off to be quilted. It’s at the longarmer now, and I can’t wait to get it back!

By the way, when I chose the fabric for the backing, the name of this quilt suddenly came to me: Honeymoon in Paris. Why? Three reasons. One:  two of the fabrics I used in the rings on the front are Paris-themed. Two:  the pattern is based on the traditional wedding ring block. Three:  there are Eiffel Towers all over the back. Choosing a name was as easy as . . . un deux troix!


Posted in update | 6 Comments