Category Archives: family

More Simple Sewing


It’s been almost two weeks since the Dear Husband and I returned from our annual Thanksgiving trip to Georgia. I’m afraid I don’t have much to show for it in terms of sewing. Quite ironic, as the few things I have worked on fall squarely in the “simple sewing” camp.

I converted a one-pocket long-sleeved shirt for the DH into a two-pocket short-sleeved shirt. The pockets were made from the bottom part of the sleeves:

A pattern of green and yellow colors with white background

I hope you can see the pocket! I matched the plaid pretty carefully.

New napkins for the Portland White House (we don’t use paper napkins):

A pattern of green and yellow colors with white backgroundA pattern of green and yellow colors with white background

Pillowcases for the Portland White House featuring the same toile fabric I used in the pillowcases made when I was in Georgia (which I wrote abouthere):

A pattern of green and yellow colors with white background

These are ready to go in my linen closet. Judging by the look on Coco’s face, I may not get them away from her:

A pattern of green and yellow colors with white background

That simple paisley table topper I made for sister Diane over Thanksgiving is getting a re-do. It was just two pieces of fabric sewn right sides together, turned, and topstitched around the edges. Trouble was, the two layers of fabric didn’t lie completely flat. I convinced Diane I had to take the table topper home and remake it, this time stitching the layers together and adding a simple binding.

Here’s the paisley fabric with two choices for binding pulled from my stash:

A pattern of green and yellow colors with white background

We’re going with the one on the bottom left. Diane and I both like the way the linear squares play off the paisley, and it’s a better color match. I think the binding will look even better cut on the bias.

Once I’m done with that, I absolutely must make the DH a new bathrobe. The one I made him several years ago is practically in tatters. I picked up a cotton print a few months ago with his bathrobe in mind. I’ll trim it with a navy blue blender from Maywood:

A pattern of green and yellow colors with white backgroundIt’s been a while since I made a garment. I’ll be pulling my serger out of the sewing room closet and refreshing my memory on how it works. Wish me luck!


Posted in family, garment sewing, home dec, mitered corners, roll-it-up pillowcases, table napkins, table topper, update | 4 Comments

Simple Sewing


My sister Diane has a new table topper and four generously sized napkins made from the same paisley fabric I used last year to update the window treatment in her dining room:

A pattern of green and yellow colors with white background

(I wrote about the window treatments in this post from a year ago.)

Simple sewing. Even so, I found it necessary to revisit my own tutorial on mitering the corners of the napkins.

A pattern of green and yellow colors with white background

Diane just happened to have some enameled napkin rings shaped like umbrellas that go perfectly with the napkins:

A pattern of green and yellow colors with white background

Aren’t those fun? They add just the right amount of whimsy, don’t you think?


Posted in family, home dec, mitered corners, table napkins, table topper, update | 6 Comments

Giving Thanks


Greetings from Norcross, Georgia, the Atlanta suburb where my twin sister Diane and her husband Ed live. My husband and I are here for our annual Thanksgiving visit spanning two weeks. We’ve already been here a week. The time is going by way too fast!

Before we left Portland, Diane asked if I would bring fabric to make a pair of what she calls “Dawn pillowcases” as a thank you gift for a friend of hers. These are pillowcasesmade in such a way that all seams are enclosed. You may know them as burrito or roll-it-up pillowcases (see my tutorial here.) I love to have a sewing project to work on while I am here so of course I said yes.

Diane figured I would have something appropriate in my stash. (How well she knows me!)I texted her photos of possible fabrics and she quickly zeroed in on this lovely sage and cream toile from Timeless Treasures that I’ve had for a few years:

A pattern of green and yellow colors with white background

I brought several other fabrics as candidates for contrast strips, flanges, and bottom bands. Diane chose a narrow stripe for the flange and a small leaf print for the band, deciding against a third fabric for a contrast strip between the flange and the body of the pillowcase. This is the result:

A pattern of green and yellow colors with white backgroundThe pillowcases are pictured on the bed in the main floor guest room, whose bedspread and quilt (the latter made by moi several years ago) match the cases perfectly.

As it happened, I didn’t have quite enough of the leaf fabric to make two bands without having to piece them. I used strips of the toile to do that. Take a peek inside a pillowcase:

A pattern of green and yellow colors with white background

Here’s a close-up of the inside:

A pattern of green and yellow colors with white backgroundI stitched the seam allowances down so they will stay flat when the pillowcases are washed.

Diane arranged the cases in a lovely gift box:

A pattern of green and yellow colors with white background

They’ll be in the mail tomorrow.

I had five yards of that toile; perhaps I was thinking of it as a potential quilt backing. There’s enough left to make two more sets of pillowcases — one for Diane’s guest room (since we know how well the pillowcases go with the furnishings) and one for the Portland White House. I’m thankful for that!


Posted in family, home dec, roll-it-up pillowcases, tutorial, update | 7 Comments

Egg-ceptionally Creative Crafting


Meet the newest resident of my sewing room:

A pattern of green and yellow colors with white backgroundThis Scotch lassie is only 3½” tall and less than 2″ wide. Isn’t she adorable? She was made from an egg — an egg! — by my husband’s daughter Barbie when she was a young girl.

The Scotch lass joins two other little egg dolls, also made by Barbie, that have been gracing my sewing room for several years:

A pattern of green and yellow colors with white background
When Barbie’s mother died in 2008, these little treasures were found tucked away in a box in her home. Happily for me, Barbie brought them to the Portland White House where they have been lovingly displayed on a shelf in my sewing room. The latest addition turned up recently in a box at the home of my husband’s son Mike, no doubt brought there after his mother’s passing.

(I should note that Mike and Barbie are just a few years younger than I am. I married their father when I was 30 and they were in their 20s. That was almost 40 years ago. . .)

I asked Barbie how she learned to make these dolls and how old she was when she made them. It turns out Barbie and her best friend Bonnie — namesake of Barbie’s older daughter, now 19 — made dozens of these around the time they were in 7th to 9th grades. This was in the mid to late 1960s, which means these dolls are around 50 years old.

“Bonnie and I always enjoyed doing crafty things,” recalled Barbie. ‘We used to make little one-inch dolls out of felt for our bigger dolls. These tiny dolls were stuffed and had embroidered eyes or eyes made from beads. We used ‘weaving loom loops’ made for kids and shaped them for hair.”Barbie noted that the flowers on the hat of the doll above right were made from weaving loom loops.

(Weaving loom loops. That rang a bell. I remember making a potholder for my grandmother with one of those weaving loom kits when I was a kid. It was red and grey, a color combo I love to this day.)

I am amazed at the artistry and creativity behind these egg dolls. How did they do it? “No one helped us,” said Barbie. “All logistical problems we solved ourselves. I think Grace may have shown us how to puncture and blow out the raw eggs. But that was it.”

The detail on these dolls is amazing. Look at their hair, their clothing, their hats. “Bonnie’s mom Grace sewed so there were always plenty of fabric scraps around,” said Barbie. The girls drew the faces on with watercolors although Barbie thinks they may have also used crayons and felt tip markers.

The care with which Bonnie and Barbie created their egg dolls extends 360 degrees. Look at the backs of the dolls:

A pattern of green and yellow colors with white background


A pattern of green and yellow colors with white background

As I examined these egg dolls again today, I realized that the shoulders of the dolls are made from egg cartons.

“That’s right,” said Barbie. “Cut and upside down, with felt cut and glued on the bottom. We may have added something for weight on the inside.”

These three dolls are all that remain of the dozens that Bonnie and Barbie crafted together. It’s pretty miraculous that they have survived half a century. I love having them on display in my sewing room but I know they are not mine to keep. As I reminded Barbie today, “You know these belong to you. I consider myself a lucky temporary custodian!”

A pattern of green and yellow colors with white background


Posted in family, update | 9 Comments

Kitchen Remodel: The Glass-Fronted Cabinet


When I showed you pictures of my newly remodeled kitchen last week, I mentioned there was something I wanted to do to the glass-fronted cabinet. Today I did it:

A pattern of green and yellow colors with white background
Do you see what I did? Here’s the before picture:

A pattern of green and yellow colors with white background
Yes! I covered the back of the cabinet! It needed something. The clear glassware didn’t show up well against the white walls and the spots of color from the dishes on the middle shelf didn’t add enough pizzazz.

I was originally planning to use a scrap of wallpaper left over from another room. It was the right shade of yellow but it was too formal for the kitchen:

A pattern of green and yellow colors with white background
My twin sister Diane suggested I use fabric. Of course! With medium-weight interfacing fused to the back, it would have just the right amount of body to attach to the back wall. I had what I thought was the perfect fabric in my stash but when I went to fetch it all I had were scraps. Fortunately, there was enough yardage of another tone-on-tone print to do the trick.

I cut the fused fabric and interfacing slightly oversize. After fusing them, I trimmed the sides with a rotary cutter to fit the back of the cabinet. Nice raw edges with no raveling, thanks to the interfacing. I applied double-sided tape to the back of the fabric at the top edge and pressed it into place with my fingers.

I figured the glass shelves would hold the sides in place, and they do.Along the bottom edge I glued a piece of braided trim, also from my stash, to provide a nice finished look:

A pattern of green and yellow colors with white background

Am I pleased with the outcome? You bet!


Posted in family, home dec, kitchen remodel, update | 13 Comments

Tammy’s Dahlia


Back in November of last year – my gosh, where does the time go? – I received an email from a woman in Canada named Tammy asking if I could help her track down a dahlia quilt pattern. She included photos of a quilt that her mother-in-law, then 89, had given her in the 1990s. Tammy’s mother-in-law thought she might have received the quilt as a wedding gift when she got married in 1952 and that her husband’s sisters might have made it.

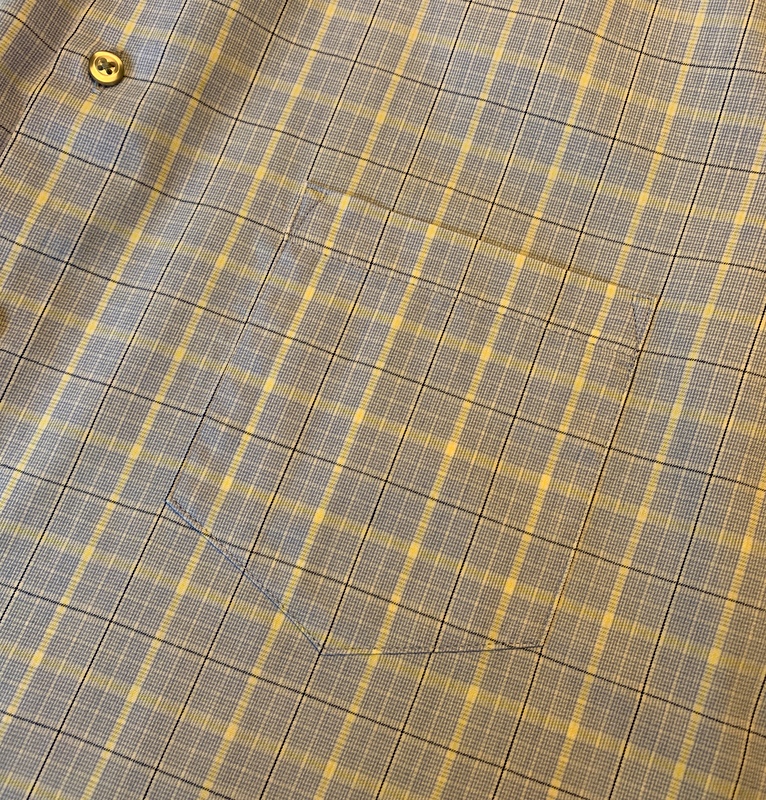
Here’s a photo of a block with sashing strips and cornerstones:

A pattern of green and yellow colors with white background
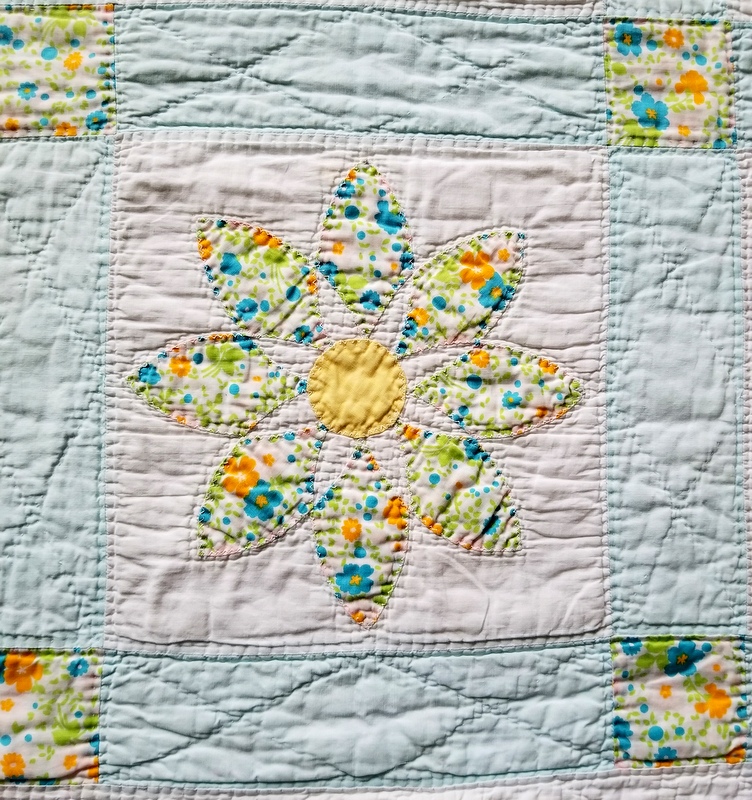
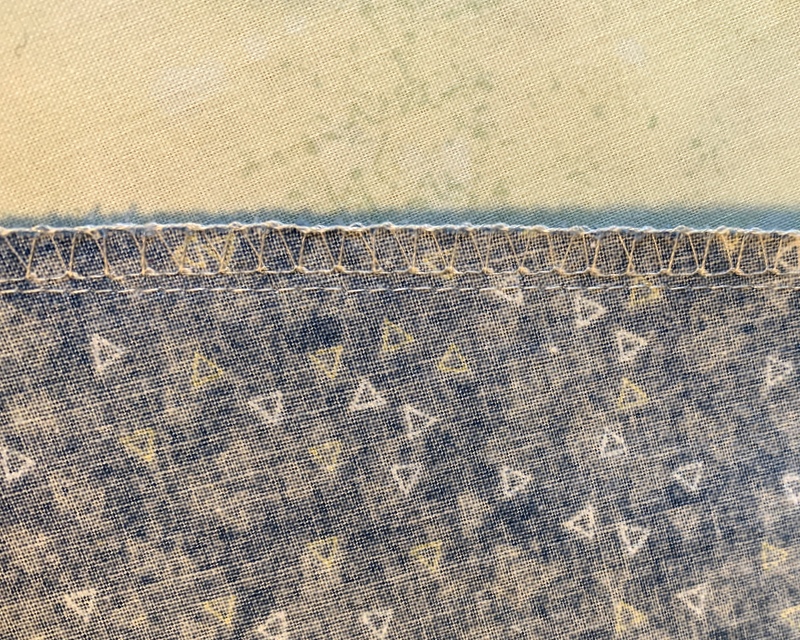
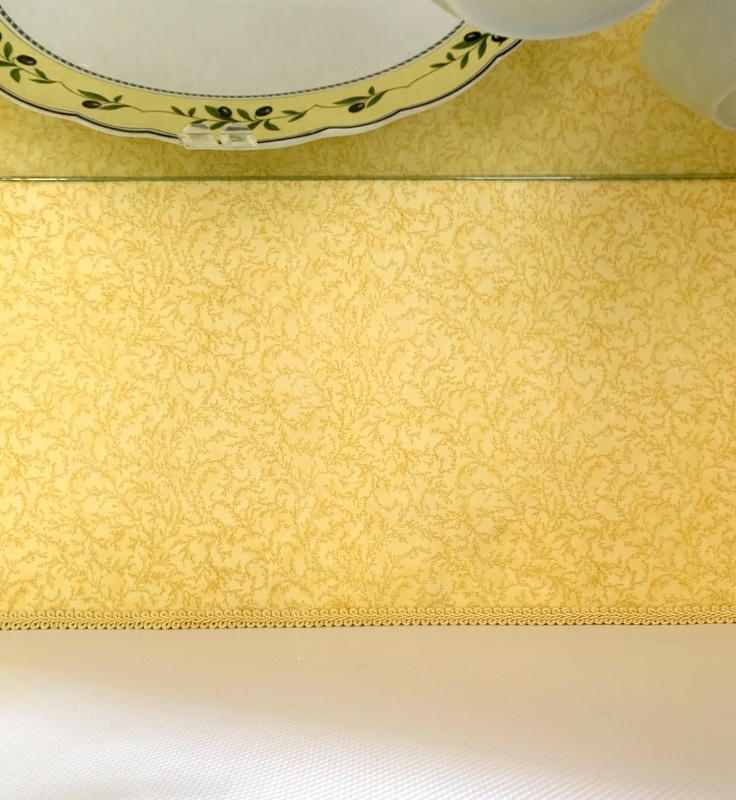
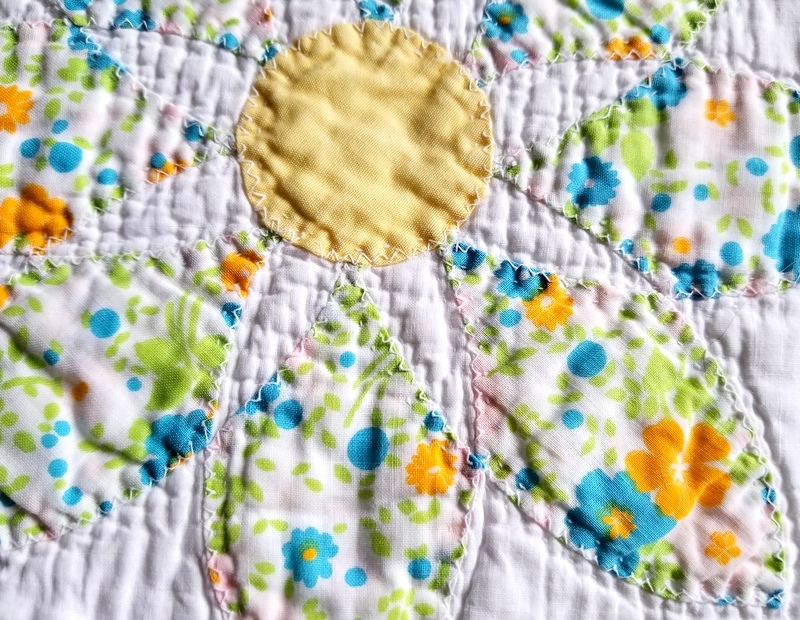
The block measures 10½” square and the dahlia blossom measures 9½” from tip to tip. You can see that the appliqué pieces were turned under and zigzagged in place by machine. Here’s a detail of the appliqué:

A pattern of green and yellow colors with white background
Tammy searched the Internet and Pinterest as well as several quilting websites and blogs but could not find the exact pattern. She did find somewhat similar blocks like the Friendship Dahlia and the Star Dahlia but no block in which the white “star” formed between each of the printed fabric petals is the background of the block rather than actual pieces appliquéd in place.

She reached out to me because she had seen my posts on a mystery quilt my husband’s niece inherited. It turned out to be a Star Dahlia quilt but Tammy thought I might have come across her version during my quest. Tammy is not a quilter herself but her birth mother is and would love to make a quilt using this block. That was a great incentive to help.

If I couldn’t find the exact block, I thought, perhaps I could create it.Having embarked in early 2018 on a huge needleturn appliqué project – Hazel’s Diary Quilt – I thought it would be fun and useful to reproduce Tammy’s mystery block while practicing my needleturn skills. “This is just the kind of challenge I love!” I told her.

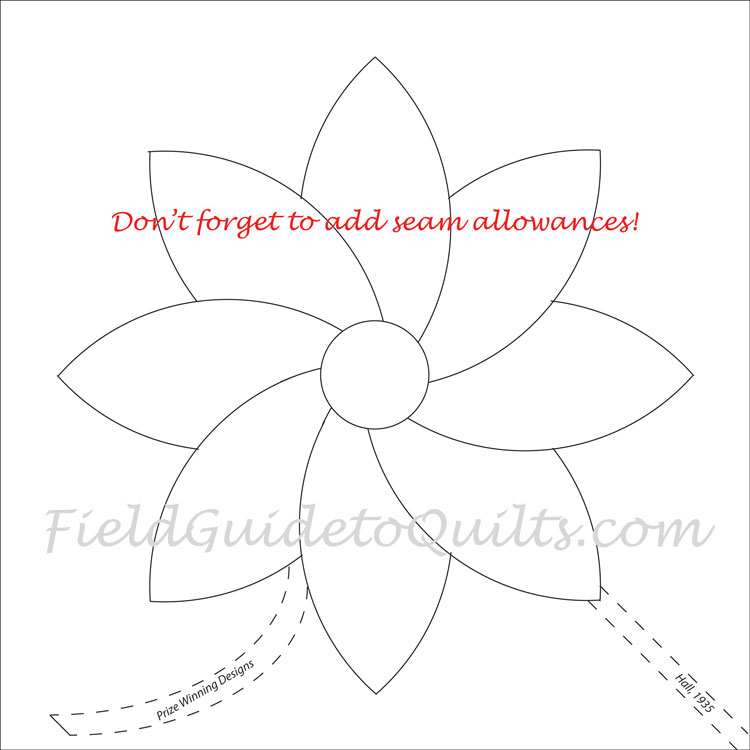
I too searched online but could not find a block exactly like the one in Tammy’s quilt. I did find a couple of dahlia blocks that seemed to match the outline of what I was already thinking of as “Tammy’s Dahlia.” The Friendship Dahlia Diagram on FieldGuidetoQuilts.com was a good start:

A pattern of green and yellow colors with white background

I also found a lovely version on Barb’sBlock and Border blog of a Friendship Dahlia quilt made by her mother in the 1950s using a pattern in Aunt Martha’s Favorite Quilts: 17 Quilt Patterns Pieced and Appliqued, first published in 1935.

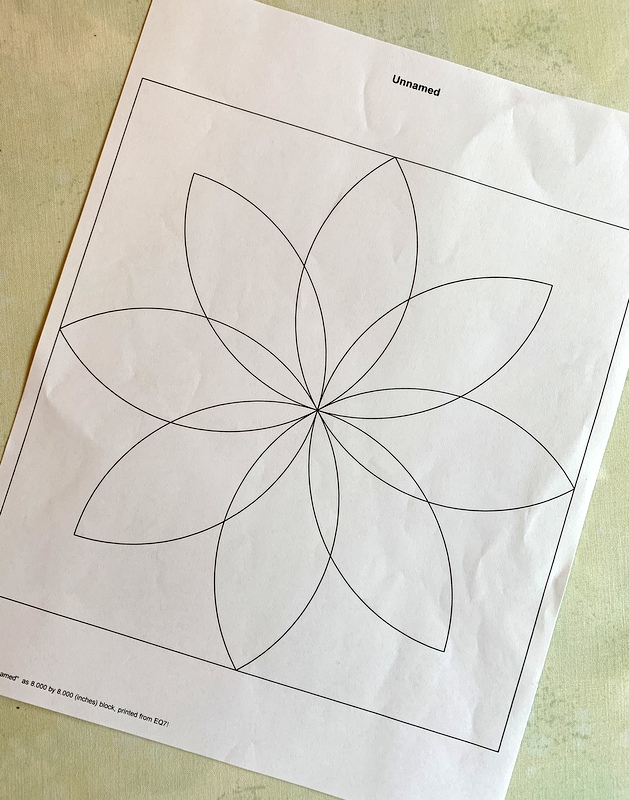
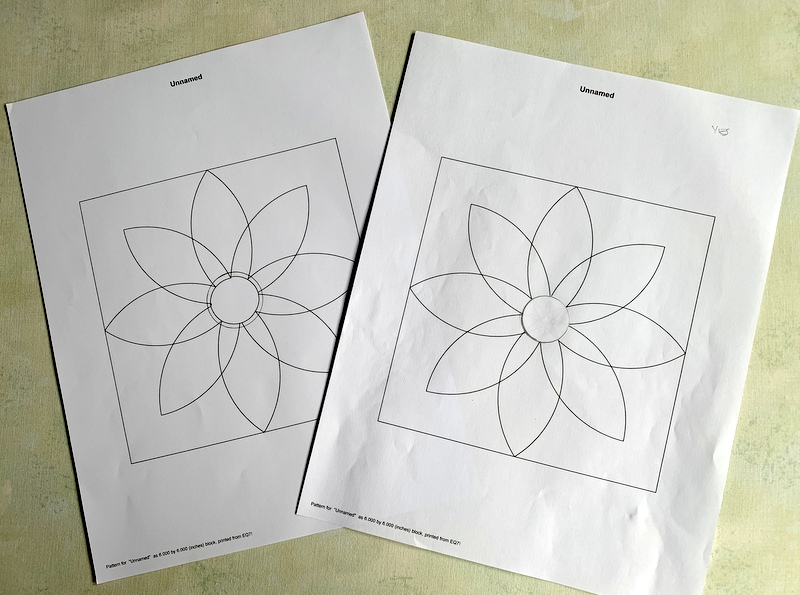
In both versions I could see that if the lines of the petals were continued to the center circle, the block would look very much like Tammy’s Dahlia.Using the software program EQ7 (in which I am not very proficient), I attempted to draw the design . . .

A pattern of green and yellow colors with white background

. . . and then created a mock-up using “fabric” made of paper. What I mean is that I photocopied a piece of fabric (in this case a print from Fig Tree that I’ve been hoarding), cut out the shapes, and glued them onto freezer paper:

A pattern of green and yellow colors with white background

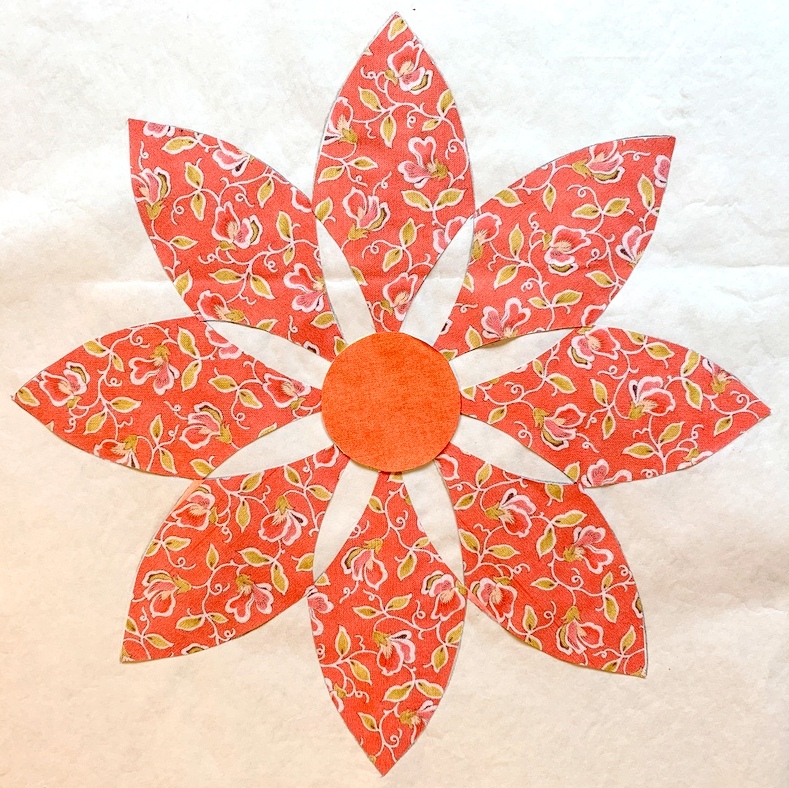
Right away I could see that the white star shapes were too narrow compared to Tammy’s version.Every few weeks I would head back to the computer and play around with the software. Here are just two more of numerous versions I worked on:

A pattern of green and yellow colors with white background

And here is my first test block made using actual fabric:

A pattern of green and yellow colors with white background
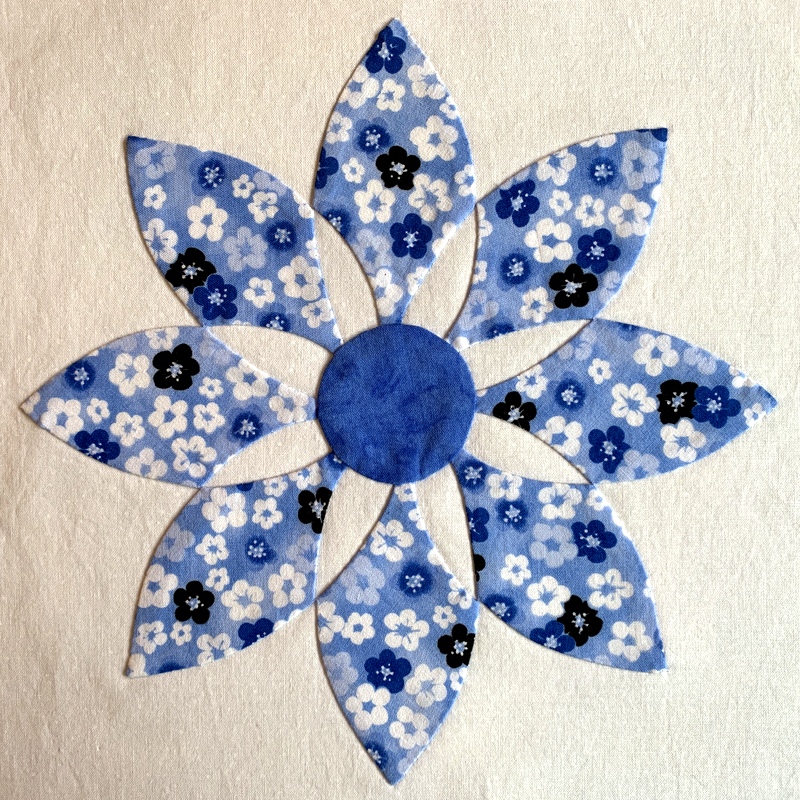
This block measures 9½” from tip to tip so it’s the same size as the one in Tammy’s quilt, sized for a quilt block that finishes at 10½” square.

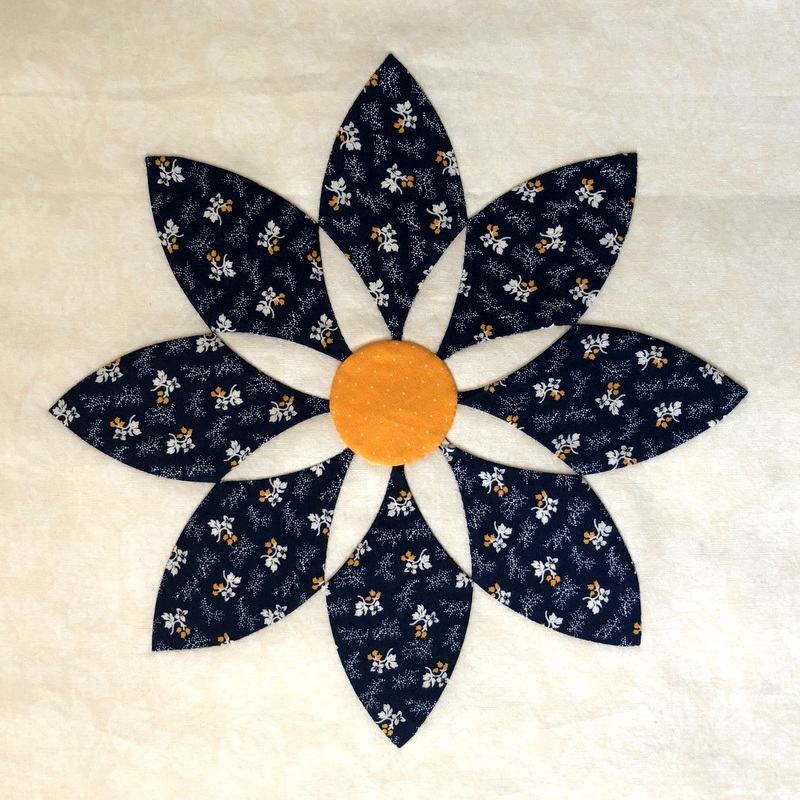
My second test block measures 11″ from tip to tip, sized for a 12″ finished block:

A pattern of green and yellow colors with white background
Both blocks turned out reasonably well but I wasn’t satisfied. I wanted the inside tip of the petal to come to a point like some of the ones in Tammy’s quilt. It’s tricky because the curves of the inner point are convex rather than concave. Just a couple days ago I made a test petal — and nailed it!

A pattern of green and yellow colors with white background
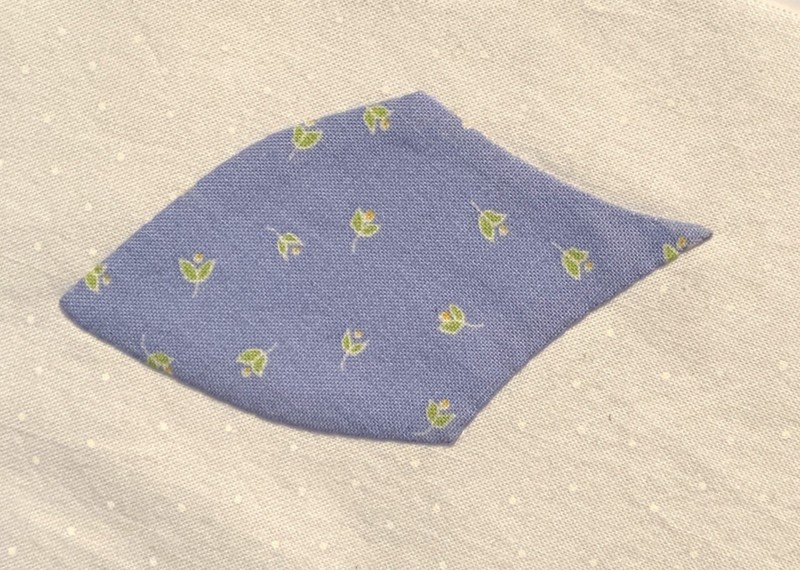
I sure couldn’t have done that a few months ago.

Tammy has been wonderfully patient while I worked on this project in fits and starts. Now that Hazel’s Diary Quilt is off being quilted, I am at last free to turn my attention back to Tammy’s Dahlia and, with the help of a graphic artist, finish this project in the next few weeks. I am so looking forward to the day when I can forward the pattern to Tammy and she in turn can give it to her birth mother.

I’ll be sure to show you the final product. If there is interest, I will post the pattern on my website as a free download.
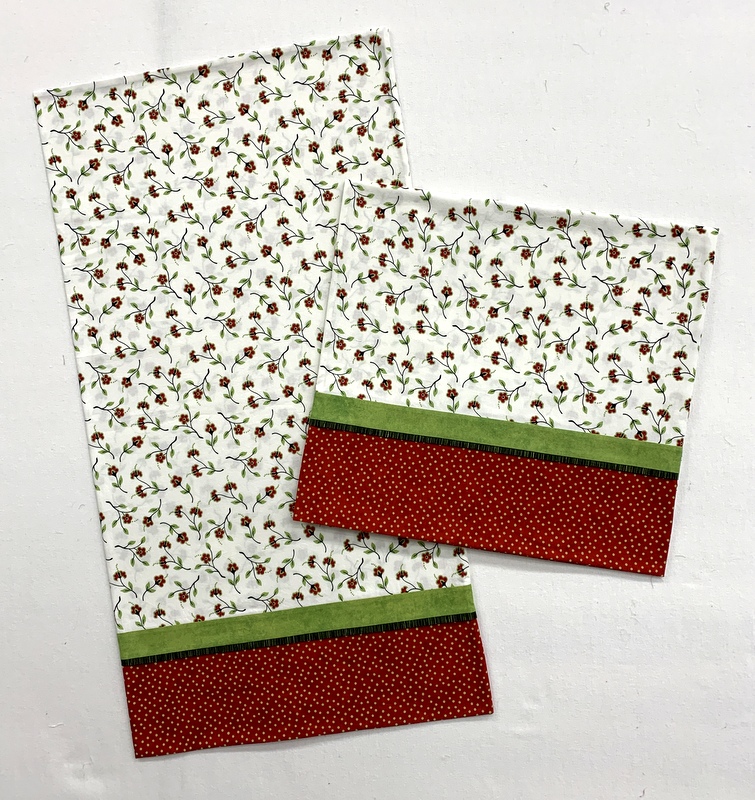
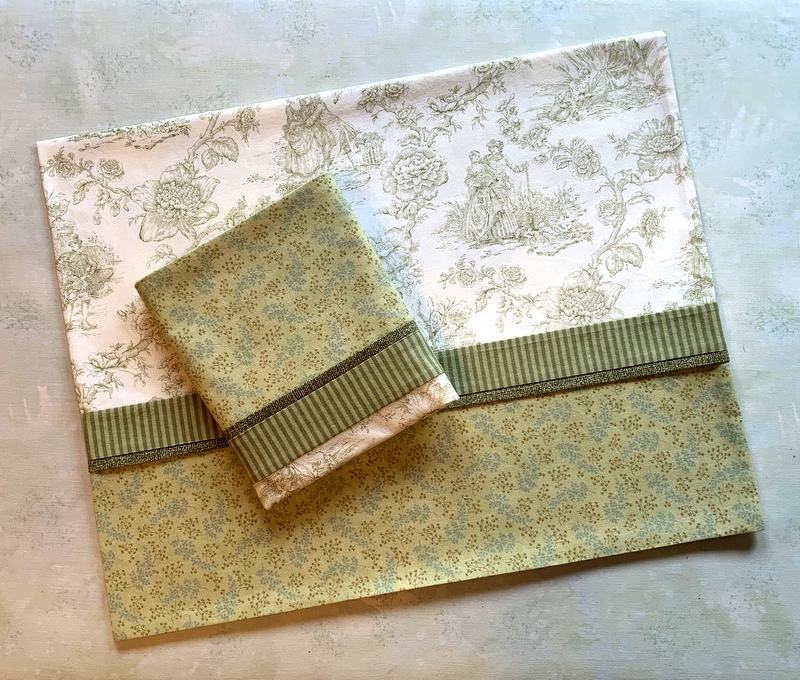
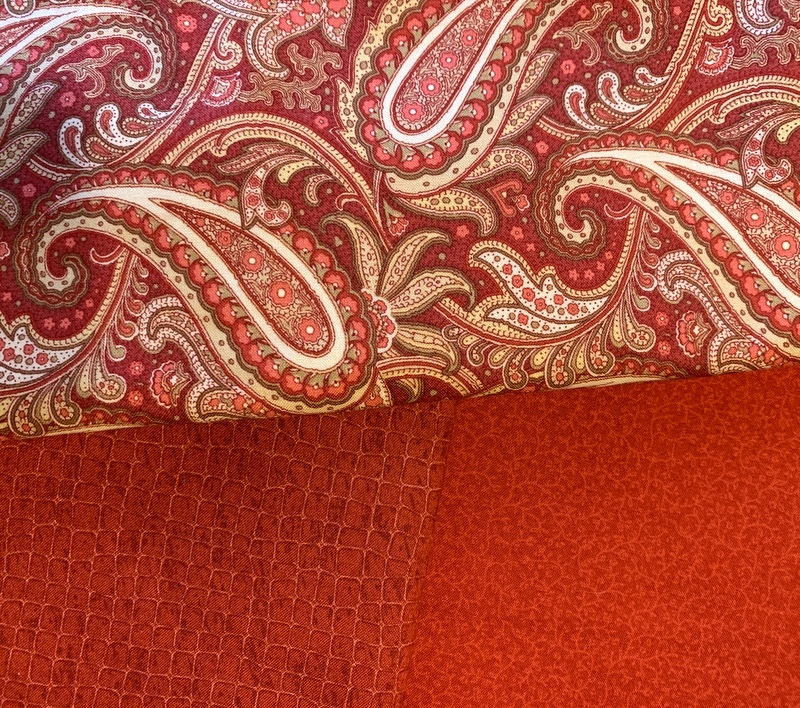
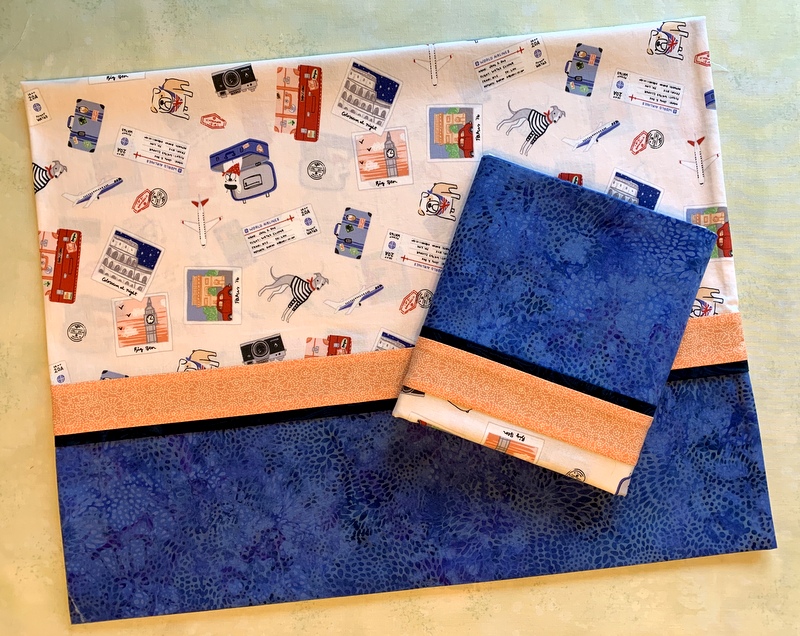


Posted in appliqué, family, Hazel's Diary Quilt, needleturn appliqué, update | 13 Comments

Kitchen Remodel: An Update


It’s been a couple of months since I posted photos of our kitchen remodel. It was almost complete by mid-June and for all practical purposes it’s complete now, although there are a couple of technical issues to resolve regarding a lower cabinet. I’m still planning to do a “before and after” post but for now I’ll show you pictures of the kitchen so you can see some of my decorating choices.

Here’s the view looking toward the southeast corner:

A pattern of green and yellow colors with white background

The kitchen faucet was one of the very first things I bought and I was a little nervous about how big it seemed:

A pattern of green and yellow colors with white backgroundMy husband and I were on the same page about wanting hot and cold faucets rather than one faucet that has to be adjusted to hot and cold. Once installed the fixture seemed to fit just fine. The first soap dispenser I chose was so wobbly I sent it back and the replacement almost looks like it’s part of a kitchen faucet set.

Opting for a single sink was such a good decision. Our old sink was divided. It’s so much easier to wash large pots and pans in this one, and anything not going into the dishwasher gets washed and dried and put away.

Here’s a straight shot of the south wall:

A pattern of green and yellow colors with white backgroundYou can probably tell from this photo that my blue and white color scheme is punctuated by splashes of primary colors.

Looking toward the southwest corner:

A pattern of green and yellow colors with white background

Here’s a peek into the broom closet to the left of the fridge:

A pattern of green and yellow colors with white backgroundNotice the paper towel dispenser mounted on the inside door? One less thing taking up space on the kitchen counter!

The rest of the west wall:

A pattern of green and yellow colors with white backgroundThe blue ceramic canisters were chosen not just for their color. They are shaped along the lines of the white ceramic composter to the left of the sink (see second photo).

Circling around to the north wall:

A pattern of green and yellow colors with white background

There’s my new cookie jar. And how do you like the retro-style kitchen step stool? It arrived in a flat box a few weeks ago but didn’t get assembled until last night, which tells you something about the timing of this post. It’s a happy coincidence that the green of the step stool is repeated in the watercolor above it.

Speaking of which, I must tell you that the three pieces of artwork in my kitchen are by my talented daughter-in-law, Jeanne Ann White. Here’s a close-up of the original watercolor to the left of the glass-fronted upper cabinet . . .

A pattern of green and yellow colors with white background
. . . and the linocut print on the right side of the upper cabinet . . .

A pattern of green and yellow colors with white background
. . . and the original watercolor to the left of the refrigerator:

A pattern of green and yellow colors with white background

I love what Jeanne Ann’s artwork adds to the kitchen!

So what’s left? Well, in addition to the aforementioned cabinet issue — happily not noticeable in any of these photos — I still plan to make a tailored valance for each window. That project was put on hold while I labored on my Hazel’s Diary Quilt top. And I have something in mind for the glass-fronted cabinet I think you’re going to like.

Before I embark on those, I have a certain project to finish up that I’ve been working on periodically for months but haven’t written about yet. Although not connected in any way to Hazel’s Diary Quilt, it does involve needleturnappliqué. I hope you’ll check back in with me to see what it’s all about.

Thanks for stopping by the Portland White House to see my new kitchen!


Posted in appliqué, family, home dec, kitchen remodel, needleturn appliqué, update | 17 Comments

Dogs and Cats and Pillowcases, Oh My!


A pattern of green and yellow colors with white backgroundWhen I spotted this whimsical travel-themed fabric at a quilt shop in central Oregon last year, the first person I thought of was my friend Anna. Anna loves animals (especially dogs), France, and world travel — probably in that order.

Several years ago Anna sold her home in Portland and moved to Paris to live. Imagine that! It was a dream she had had for many years. I knew her through a mutual friend but had not seen her for some time when we ran into each other on the street just weeks before her departure. We stayed in touch after this chance meeting and a few years later, when Anna proposed a short-term house swap, my husband and I jumped at the chance.

In 2015 Charlie and I spent three weeks at Anna’s apartment in Paris taking care of her sweet cat Buddy . . .

A pattern of green and yellow colors with white background
. . . while Anna stayed at our home in Portland taking care of Empress Theodora:

A pattern of green and yellow colors with white background

The arrangement worked out splendidly. And I was lucky enough to go back to Paris in the fall of the same year with my twin sister, petsitting for Anna while she went to the United Kingdom to visit her beau, an American who had spent his professional life working in Europe.

Anna subsequently married her beau and they bought a house in France’s Loire Valley which they share with Buddy and two rescue dogs. So you can see how this fabric seems to have Anna’s name written all over it. (In fact, the travel documents on the fabric are in the name of Jane S. Doe but we can use our imaginations.)

I decided to make a pair of pillowcases with the fabric and send them to Anna in France. Months came and went while the fabric stayed in my stash. Then I learned Anna was coming to Oregon this summer for her 50th high school reunion. In no time at all I had made a pair of pillowcases, which were waiting for Anna when she arrived last week:

A pattern of green and yellow colors with white backgroundI tried to tone down the cuteness factor by choosing a rather masculine batik for the cuffs of the cases. After all, husband Joe has to sleep on them too!

(For those who might be interested, the fabric is from the line “Jetset Europe” by Anne Bollman for Clothworks Fabrics. I used my own tutorial to make the pillowcases.)


Posted in cats, family, Paris, roll-it-up pillowcases, tutorial, update | 7 Comments

Stitching and Crafting Along


I had hoped to complete all theappliquéin the center medallion of Hazel’s Diary Quiltby now. Here’s how far I’ve gotten:

A pattern of green and yellow colors with white background
Yes, I have a ways to go but I’m pretty excited by the way the medallion is coming together. For reference, the center block including the red scallop measures 18″ square and the entire medallion measures 36½” square. It will be on point in the finished quilt. There will be flowers in each corner and leaves along the vines.

What’s happened in the two weeks since my last post? My husband Charlie and I took a road trip to Ashland, home of the Oregon Shakespeare Festival, in the southern part of the state. There we rendezvoused with Charlie’s daughter Barbie and our granddaughters Bonnie (19) and Beatrice (16) for a family vacation. They live in San Francisco and Ashland just happens to be the halfway point between our two homes.Despite being saddled with summer colds, Charlie and I had a great time with the three Bs. We saw a couple of plays, enjoyed strolling around the charming town of Ashland, and did a little shopping.

We brought Beatrice back to Portland with us as she was accepted into Oregon Ballet Theatre’s intensive summer training program for the month of July. She is in class six days a week — that’s pretty intensive! We are so delighted that she can be with us for part of the summer. We always look forward to Bonnie and Beatrice’s summer visits. Bonnie couldn’t come this year because she’s working two jobs at home. She’s so grown up now; she even has her driver’s license!

I took my appliqué project to Ashland to work on and managed to apply a few leaves and petals. Barbie was much more productive. She completed a lunchbag for Beatrice while we there — completely by hand and without a pattern. She’s very creative that way. Take a look:

A pattern of green and yellow colors with white background
The bag is made of oilcloth. Barbie enclosed the raw edges with double-fold bias tape that she stitched on to the oilcloth with lime green embroidery floss. She sized the bag to hold three plastic containers: one for a sandwich, one for fresh vegetables, and one for fresh fruit. Then she added a pocket on the outside to hold granola bars:

A pattern of green and yellow colors with white backgroundA ballerina dancing several hours a day needs a substantial lunch!

Look at the cute detail of French knots where the ends of the bias tape meet:

A pattern of green and yellow colors with white background

Here’s Bea on arrival at OBT for her first day of classes:

A pattern of green and yellow colors with white background

Back to Hazel’s Diary Quilt: I hope to show you my completed medallion very shortly. If I’m to finish my quilt top by the end of July (my stated goal), I need to pick up the pace.


Posted in appliqué, family, Hazel's Diary Quilt, needleturn appliqué, tote bags, update | 7 Comments

Kitchen Remodel: Week 9


Friends, we are this close to being done. Witness the painted trim around the windows:

A pattern of green and yellow colors with white backgroundDid you notice you can now see the kitchen floor? It made me deliriously happy to peel off the brown protective paper and finally mop that floor!

The view above is looking southeast. Moving clockwise around the kitchen, here are some more views starting with the south wall:

A pattern of green and yellow colors with white background

A pattern of green and yellow colors with white background

A pattern of green and yellow colors with white background

A pattern of green and yellow colors with white backgroundWhat’s left to do?, you may ask. Mostly little things: cleaning up a few paint spills and spatters, doing some caulking, putting the doorbell back up, installing the phone jack cover, that kind of thing. Oh, and the liner for the hood range insert is finally on its way. Once that’s in, I do believe we will be ready for inspection.

In the meantime, I’m slowly filling the cupboards and drawers. You can see from the photo above that I haven’t finished filling the glass-fronted upper cabinet yet. And I’m thinking about the valances I plan to make for the windows. I’ve had something in mind for some time but haven’t even gotten to the sketching stage yet. I’m going for a look my sister Diane would describe as “simply elegant and elegantly simple.”


Posted in family, home dec, kitchen remodel, update | 12 Comments