The Bathroom Remodel Begins

When we remodeled the upstairs bathroom in 1985, I neglected to take “before” photos. Not this time around! I want to capture every moment in the bathroom’s transformation.

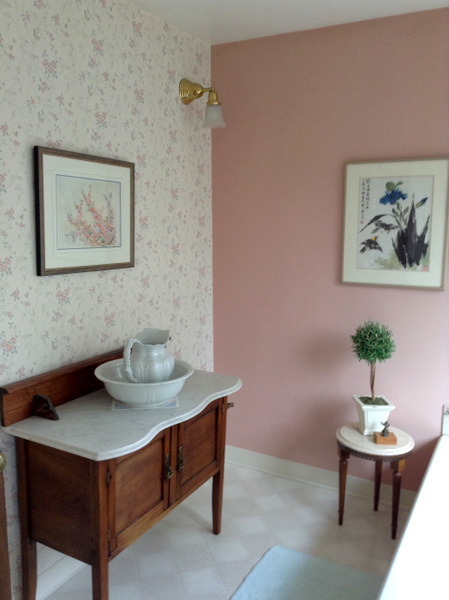
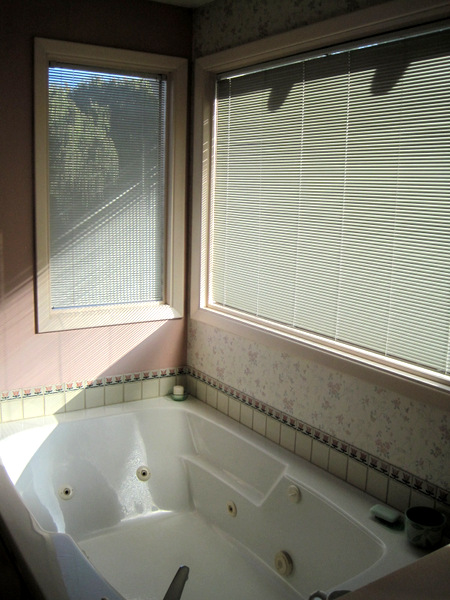
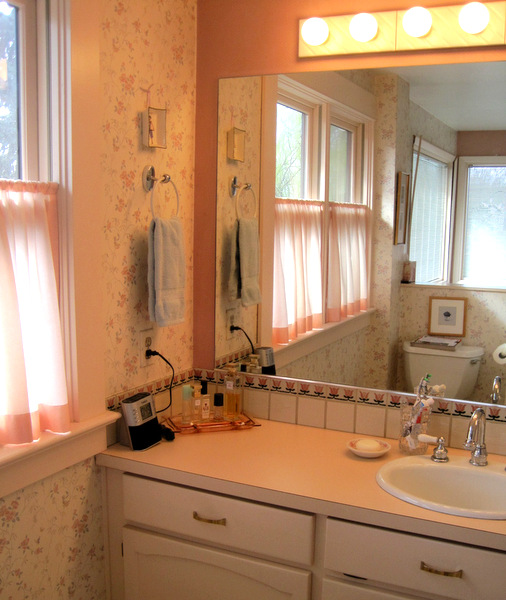
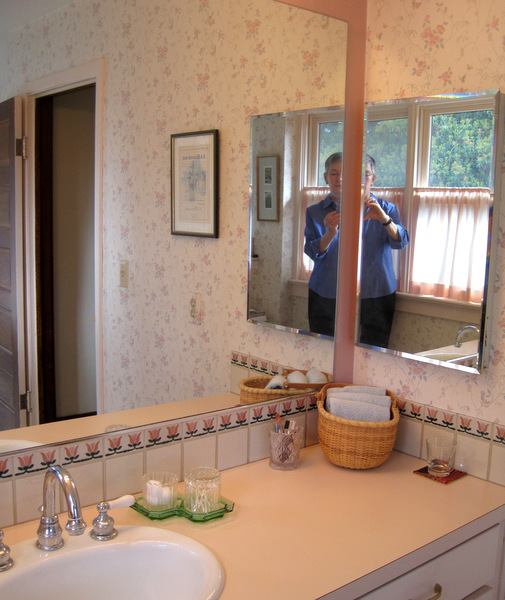
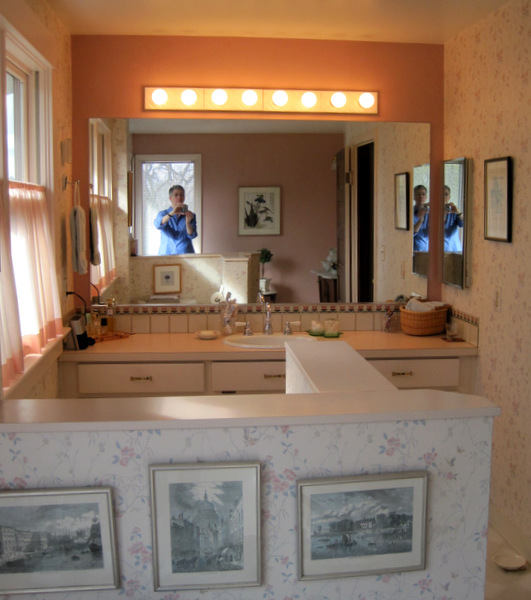
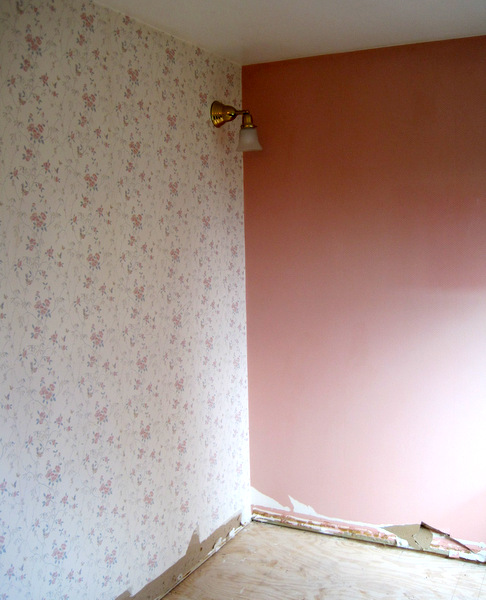
Here are some pictures of the bathroom before the crew arrived last week and emptied it of most of the fixtures.

nw corner
NW Corner


ne corner
NE Corner


se corner 2
SE Corner


sw corner
SW Corner


In the photo below, I am standing in the tub facing south.

looking south
Facing South


Do you want to see what the bathroom looks like now? Take a look! This is the northwest corner, where the shower will go:

nw corner, empty
NW corner, empty


This is the northeast corner, where the clawfoot tub will go:

ne corner, empty
NE Corner, Empty


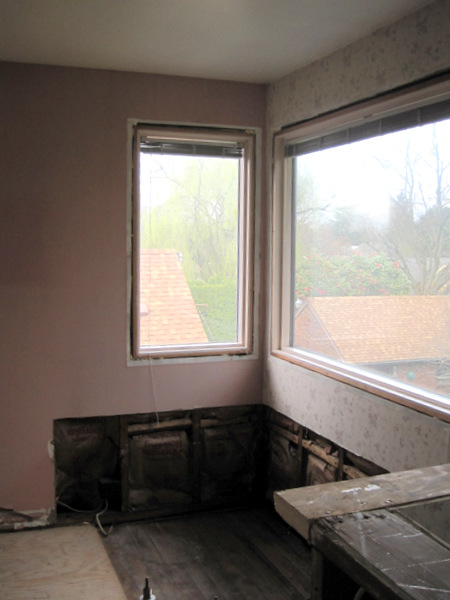
The southeast corner:

se corner, empty
SE Corner, Empty

The windows you see above, installed in 2004, are just about the only things in the bathroom not being replaced.

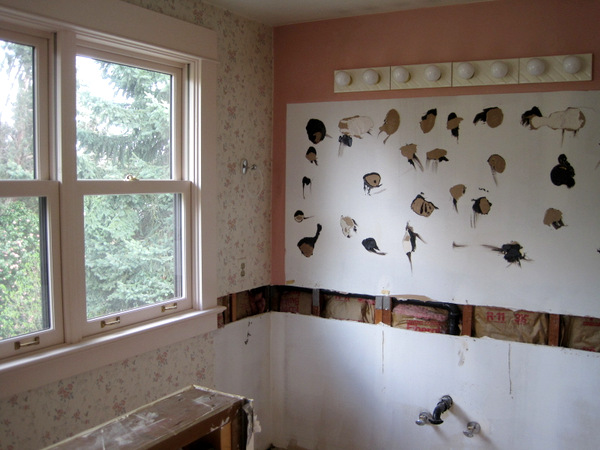
The southwest corner:

sw corner, empty
SW Corner, Empty

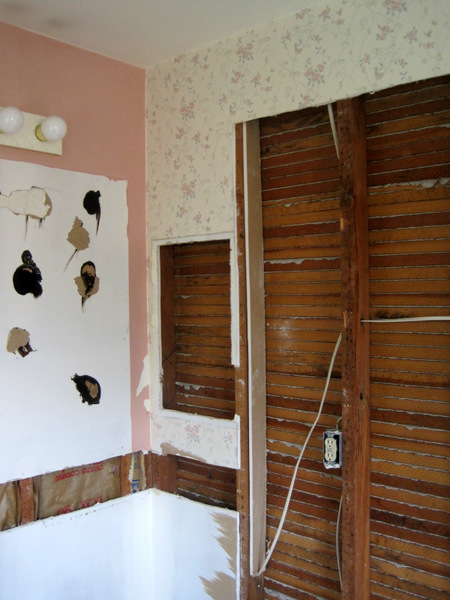
See that lath and plaster? It’s original to the house — the bathroom walls were sheetrocked during the 1985 remodel. On the other side of the lath and plaster is a linen closet that’s going to get a fresh coat of paint.

There’s still a little demo left: the wallpaper has to come off and the remaining light fixtures removed. But things are rolling along. The clawfoot tub was delivered today, and the plumber arrives bright and early tomorrow morning.


Posted in bathroom remodel, update | 6 Comments

Happy Birthday, House!

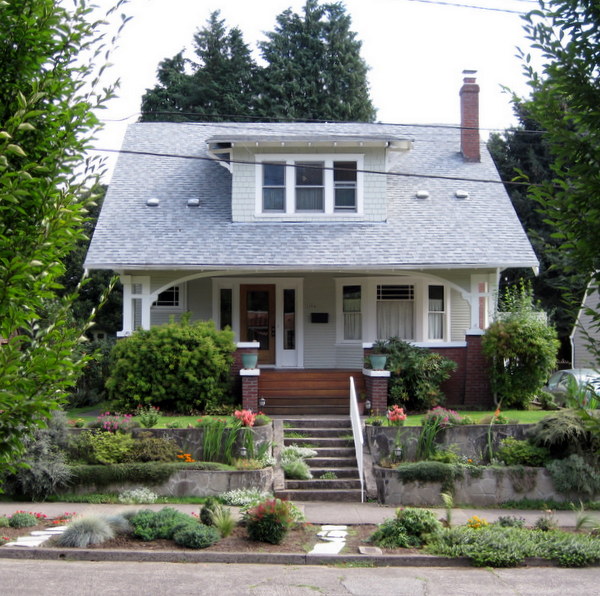
Our house was built in 1913, which means it turns 100 years old this year. Happy Birthday, House!

Portland White House
The Portland (OR) White House


We’ve done a lot to the house over the 32 years we’ve lived here — remodeled the kitchen (twice), remodeled the upstairs bathroom, remodeled the main floor bathroom (twice), finished the basement, rebuilt the garage, and rebuilt the back patio (twice).

Now we are embarking on a second remodel of the upstairs bathroom. When we moved into our house in 1981, the upstairs bathroom had a tub but no shower. We replaced the tub with a larger Jacuzzi-style tub but didn’t add a shower because we had chosen to relocate the tub under a picture window. It’s time to add that shower now.

We’re going to replace the jetted tub with a clawfoot tub, add a custom shower on the opposite wall, and replace all the other fixtures in the bathroom. We’re not doing the work ourselves, I hasten to add. My husband and I are not do-it-yourselfers when it comes to these kinds of home improvement projects.

Although my website/blog was created to chronicle my sewing and quilting life, I’ve decided to include the transformation of our upstairs bathroom. Demolition starts next week!


Posted in bathroom remodel, family, update | 12 Comments

Quisters’ Show and Tell

Today is the last full day of my quilt group’s retreat in Central Oregon. Our fellow Quister Deborah had to leave early but Peggy and Vickie and I are still here enjoying the brilliant sunshine, crisp air, and each other’s company. We are also taking great pleasure in surveying our various and sundry completed projects and works-in-progress.

Vickie is working on two wool appliqué projects. In my last post, you saw one of them in a tableau. Here is a close-up of that project, bursting with vivid color and texture:
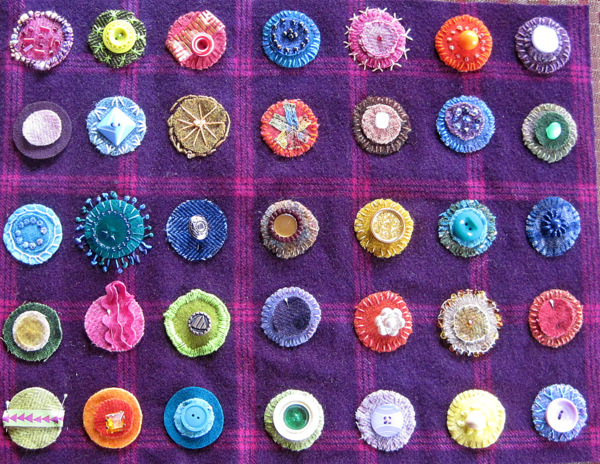
Vickie's circles

The project measures 12″ x 15½” and contains 35 multilayered wool discs, each uniquely embellished.

Vickie is also working on a series of seasonal pillows. Here is her Summer Sampler pillow, designed by Debbie Busby of Wooden Spool Designs. It measures 14″ x 16″:
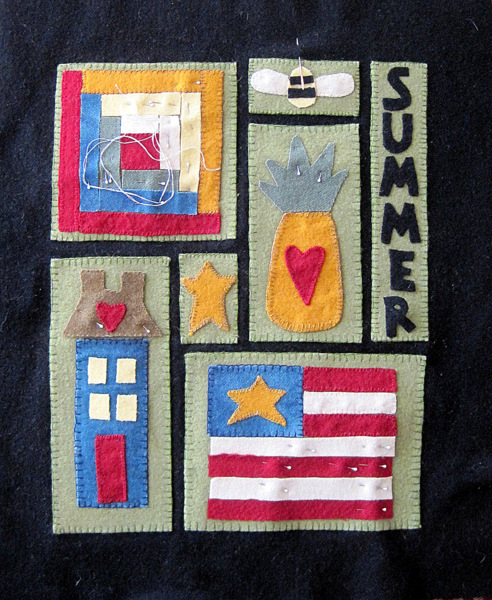
Vickie's wool applique

I finished another sewing machine dust cover, number four. I didn’t need another one but I was teaching a class at the Pine Needle recently and needed to demonstrate a particular construction technique. This one is made with three prints from the Madrona Road line by Violet Craft for Michael Miller:
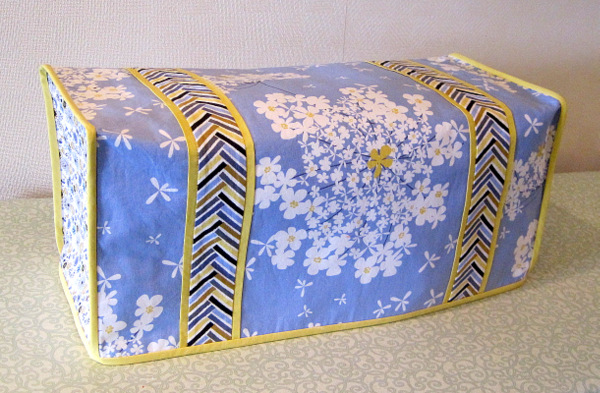
Dawn's sewing machine dust cover

I’m working on some other projects that I can’t show you yet. Birthdays coming up. ‘Nuff said.

Peggy finished the most wonderful quilt while she was here. Last summer she took a class from Janet Fogg called “Illustrating the Past” in which a fabric piece from the past — it could be a quilt, a quilt top, a fragment, a block — is updated with piecing and appliqué techniques to create a new original work. Peggy had been given a vintage quilt containing blocks of appliquéd flowers. She transformed it in the most amazing way:
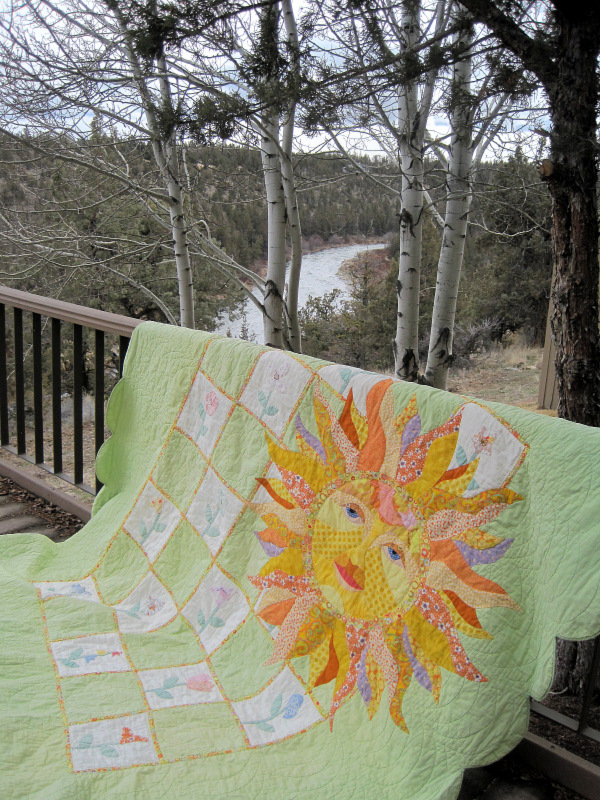
Peg's Sunshine quilt 1-001

Here is a close-up of that sunshine face:
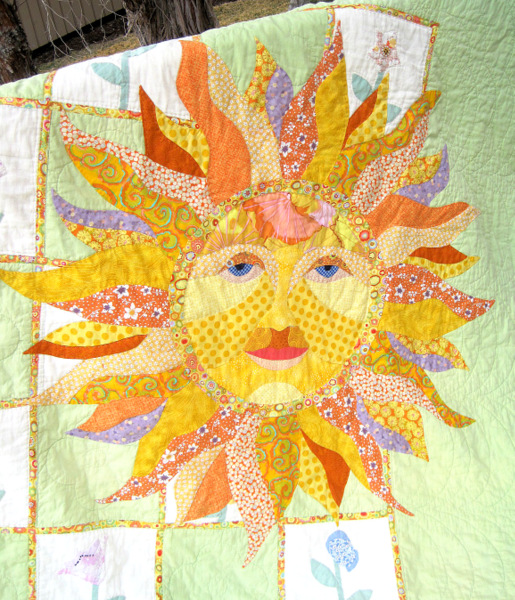
Peg's Sunshine quilt 2

The sun is pieced and then appliqued to the original quilt. Peggy hand-quilted parts of the face and some of the rays.

Here’s another look at the quilt, which measures 74″ x 88″:
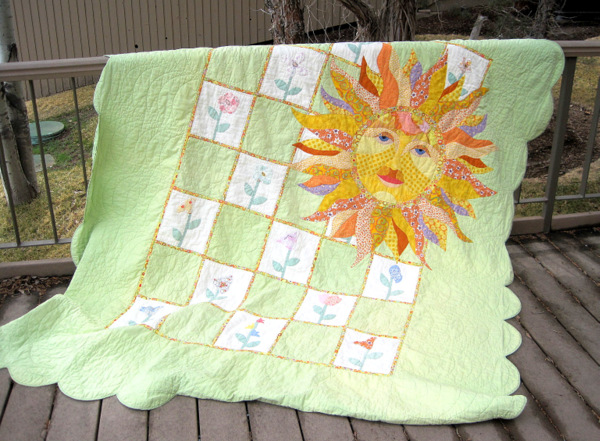
Peg's Sunshine quilt 3

The batting in the appliquéd blocks had migrated so badly that Peggy made a slit in the side of each block, removed the batting, and replaced it with new batting. Then she sewed narrow strips around the blocks to cover the slits. The strips add more color to the quilt and tie the old and new elements together. The result is a highly original quilt that honors the past while celebrating the present.

Peggy is also a talented rug hooker who has designed and hooked several rugs. Here is a look at her current work-in-progress, an image of her beach house on the Oregon coast:
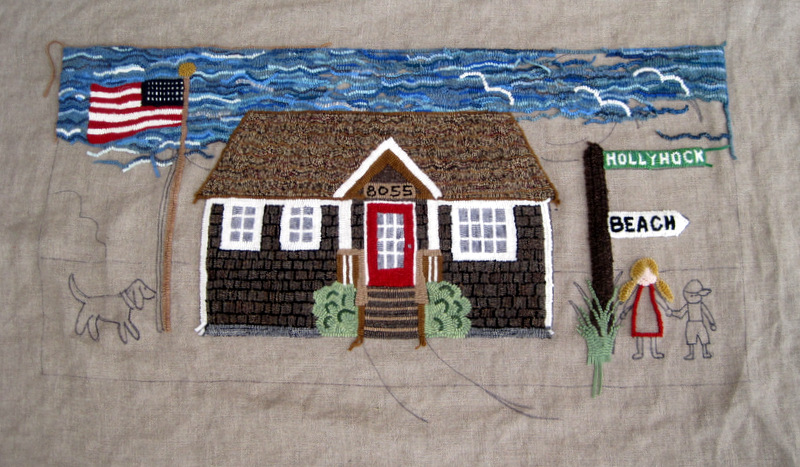
Peggy's hooked wool rug-in-progress

This wool rug will measure about 25″ x 48″ when it’s finished.

As you can see, my creative Quisters and I have had a great week!



Posted in Quisters (Quilt Sisters), sewing machine cover, update, wool applique, wool rug hooking | 1 Comment

Quisters’ Retreat, Updated

There’s a lot of serious crafting going on here at my quilt group’s weeklong retreat in Central Oregon. Sewing, piecing, quilting, rug hooking, wool appliqué — you name it, the Quisters are doing it. Let me show you what I’m talking about, starting with a tableau of one of Vickie’s wool appliqué projects:

Vickie's wool embellishment


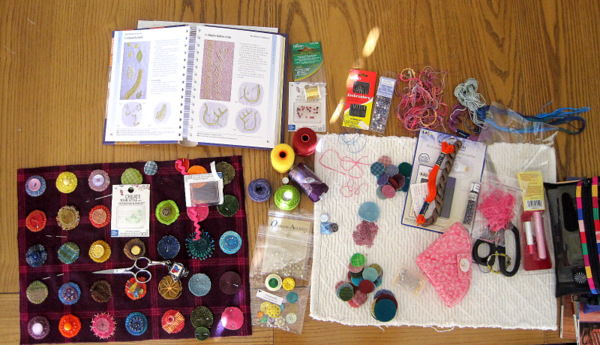
She’s working on a project begun in a class last summer taught by Sue Spargo. Working with a beautiful piece of purple plaid wool, Vickie added wool circles of different sizes and is embellishing the circles with a colorful assortment of beads, vintage buttons, ribbons, and embroidery floss.

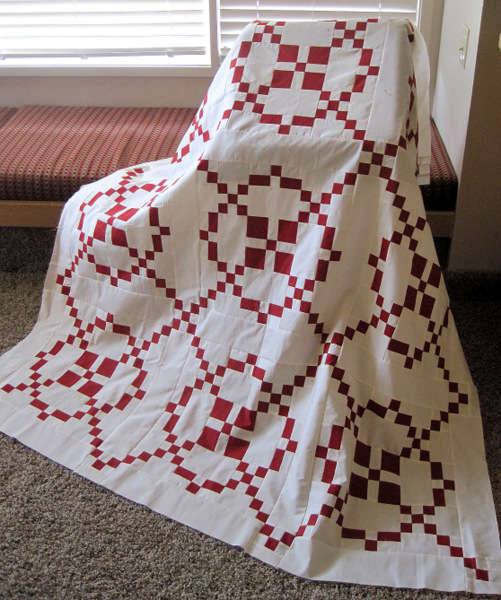
Deborah finished her red and white Burgoyne Surrounded quilt top, which measures 57″ square:

Deborah's Burgoyne surrounded

It’s from the book Burgoyne Surrounded by Elizabeth Hamby Carlson (That Patchwork Place, 2004). The smaller red and white squares finish at one inch!

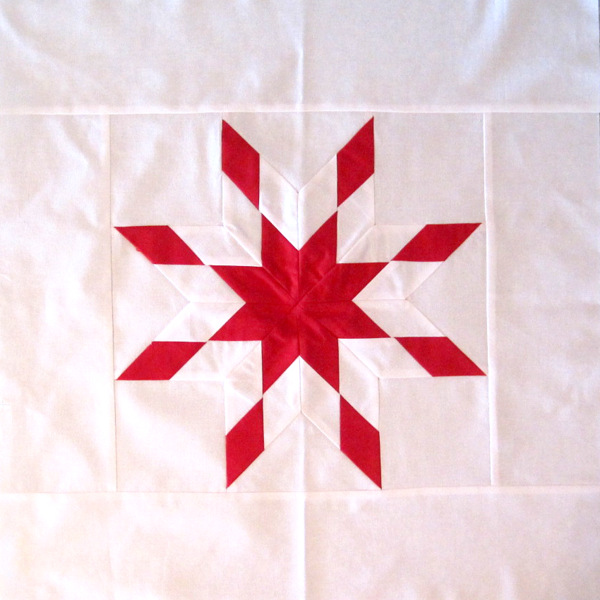
Peggy is working on a red and white quilt, too. She is recreating an antique Lone Star quilt featured in the Feb. 2012 issue of American Patchwork and Quilting. This is one of four Blazing Star blocks that go in the corners:

Peggy's cornerstone for Lone Star quilt


The corner blocks are 20″ square so you can imagine how large the Lone Star is in the center of the quilt. If my math is correct, Peggy’s finished quilt will contain 1,480 diamonds.

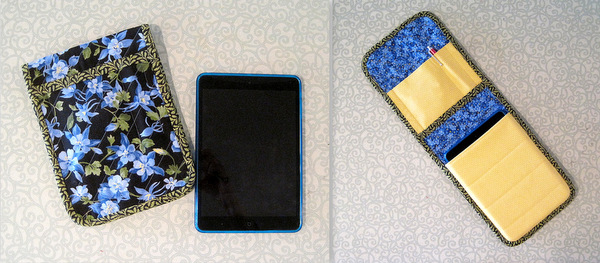
My sister Diane asked for a cover for her new iPad mini so I made one from some of the same fabrics used in the iron caddy shown in the previous post. (Note to sister Reigh: I’ll make you one, too!)

Diane's iPad mini case

We’re here till Friday, so be sure to check back for more Show and Tell.


Posted in iPad cover, Quisters (Quilt Sisters), update | 2 Comments

Quisters’ Retreat

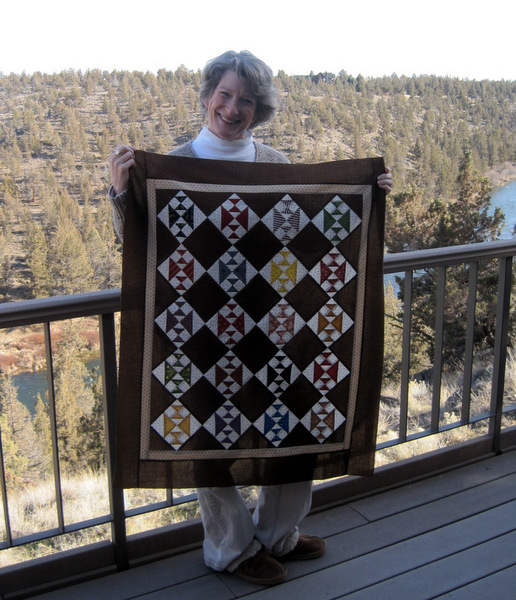
I’m at a quilt retreat in Central Oregon this week with three of my fellow Quisters (Quilt Sisters). Of course we all brought lots of projects to work on. Deborah was the first one to finish a project. She is embarking on a series of small Civil War quilts, and here is the first one:

Deborah with Crosses and Losses 31 x 37-001


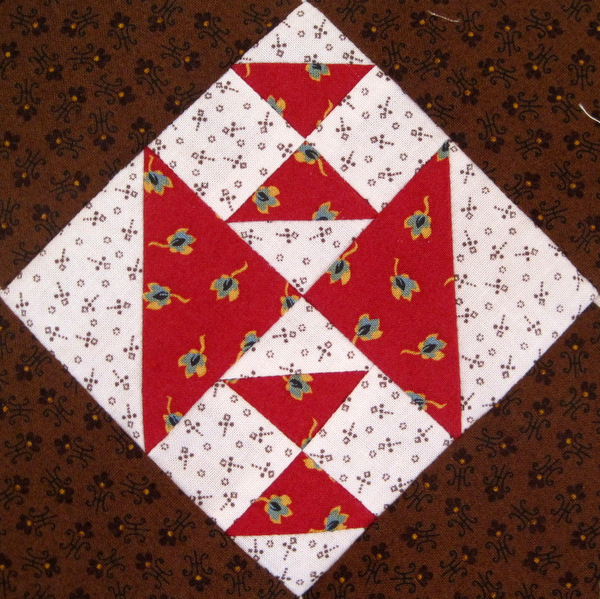
The quilt, made of 4″ blocks set on point, measures 31″ x 37″ with borders. The block is called Crosses and Losses. I especially like this one:

Deborah's block, Crosses and Losses, 4 inches


Deborah found the design in Civil War Legacies: Quilt Patterns for Reproduction Fabrics by Carol Hopkins (That Patchwork Place, 2012). Carol Hopkins named her design “Grandpap’s Cards” because her grandfather kept his playing cards arranged in perfectly straight lines, much like the way the Crosses and Losses blocks are lined up across this quilt top.

The book is full of charming small quilts — the one Deborah chose is the largest one in the book — made with beautiful repro Civil War fabrics and sporting whimsical names such as “Mo’s Suspenders” and “Alexander’s Bean Pot.” I can’t wait to see which one Deborah chooses next!

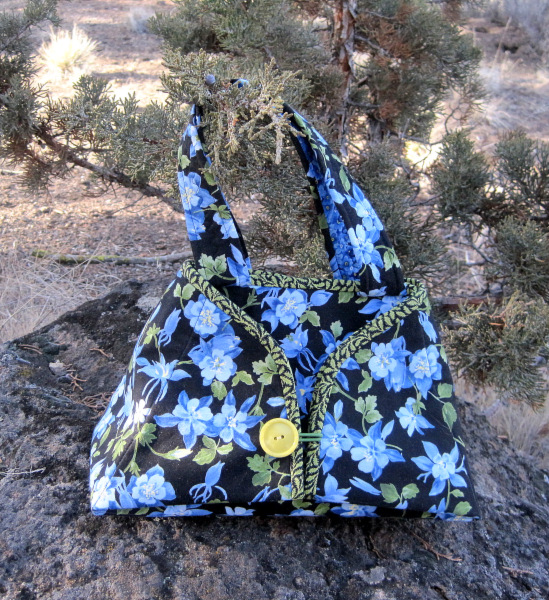
My first finish of the week is this iron caddy, the perfect container to transport a still-hot iron after taking a quilt class:

iron caddy with vintage buttons


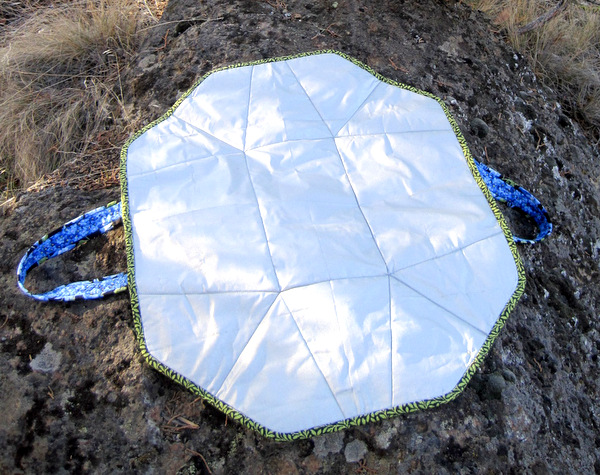
The caddy doubles as an ironing pad because the inside is lined with a silvery heat-resistant fabric like the kind you find on ironing board covers. When the tote is opened up, you have a nice little ironing surface measuring about 19″ x 25″. The pattern, “Caddy Pad,” was designed by Sisters’ Common Thread (http://www.sisterscommonthread.com/caddy/).

I bought the main body fabric a couple of years ago. It’s Wildflowers IV by Sentimental Studios for Moda. If you look carefully you can see a companion fabric from the same line on the inside of the handles. The binding fabric is more recent; it’s from the Ainsley line by Northcott.

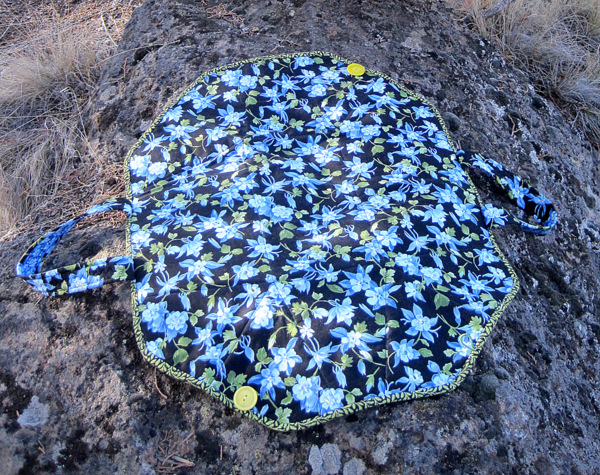
Here’s the outside of the caddy, laid out flat:

iron caddy, outside


Here you can see the ironing surface on the inside:

iron caddy, inside


I departed from the directions by 1) adding a different fabric to the inside of the handles, 2) inserting the handles in the seam allowance before adding the binding, 3) rounding off the angled corners, 4) applying bias binding instead of straight grain binding (because of the rounded corners), and 5) fusing the binding to the inside with Steam-a-Seam-2. I finished the caddy with vintage yellow buttons.

With four of us sewing and crafting, there’s going to be a lot of show and tell this week. I hope you’ll come back for a visit!


Posted in iron caddy, Quisters (Quilt Sisters), update | 12 Comments

My Little Neighbor: Back at Work

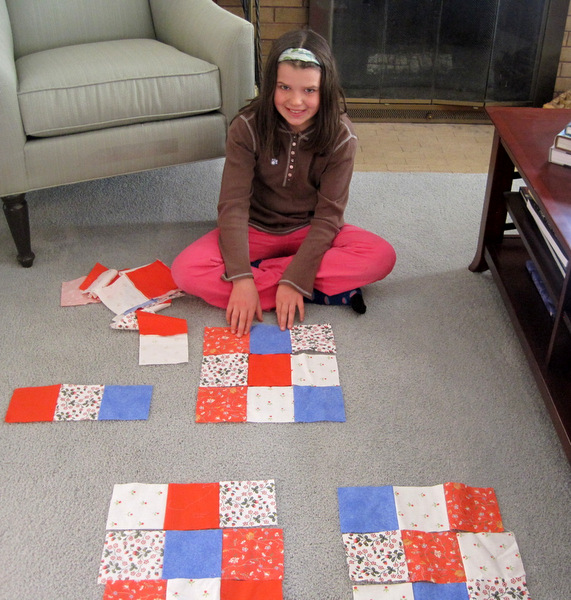
My Little Neighbor, age 10, is back at work on her first quilt, a 9-patch. To see her running and skipping around the neighborhood, you’d never know she was sidelined last summer with a broken foot. That’s why she started the quilt: she needed a project she could work on by hand while sitting on the couch with her leg in a cast.

She started last July with five fabrics culled from my stash and by August had a basketful of strips, made by sewing three patches together. To see her first efforts, go here:

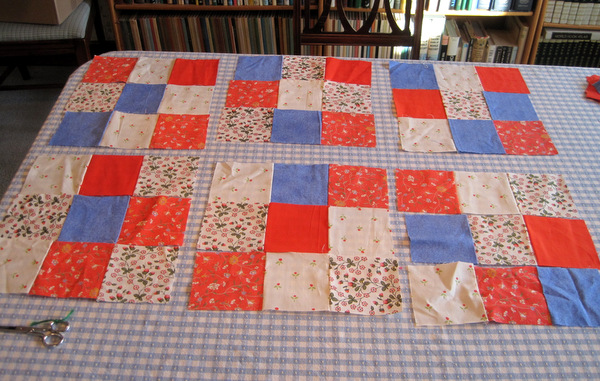
MLN came over a few days ago, ready for the next step: sewing the strips in rows to make blocks. She arranged sets of strips into 9-patches, moving strips around as needed to achieve a nice balance of color and value.  When the dining room table was covered with blocks . . .

MLN's 9-patches

. . . we moved to the living room floor:

MLN with 9 patches


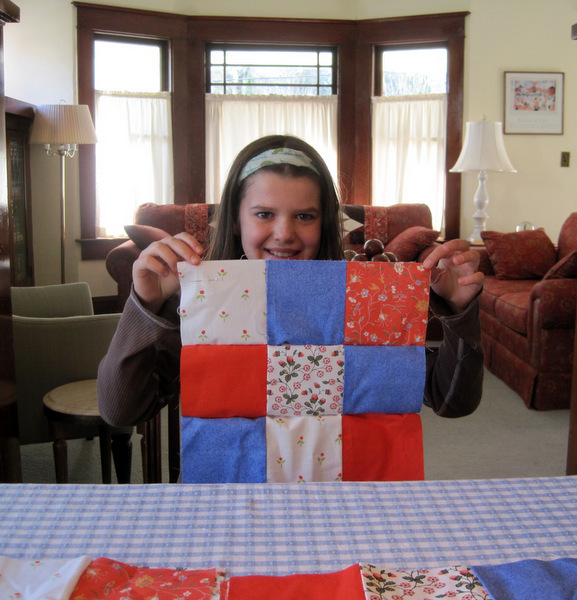
After a short lesson on how to press the seams so that they are opposing when the rows are sewn together, MLN was ready to join the rows. Here is her first block, pinned:

MLN with first block pinned


See how nicely her seams match? Her quarter-inch hand-sewn seams are spot on!


Posted in My Little Neighbor, update | 6 Comments

From Bears to Butterflies

bella butterfly 500

Sometimes the obvious escapes me. I’ve been working with this pretty hydrangea floral fabric for a couple of weeks now but didn’t notice until taking pictures for this post that the hydrangeas are made up of clusters of butterflies. I even missed the clue on the selvage:

bella butterfly selvage 500

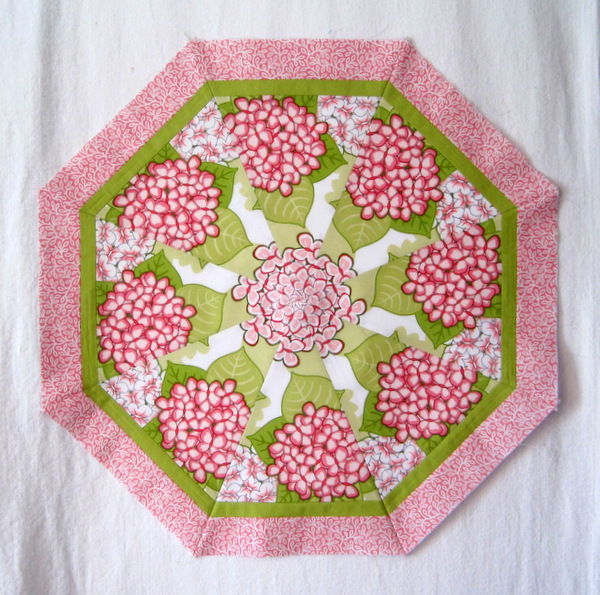
You may recall from a recent post that I was using this fabric to make three sizes of kaleidoscope blocks that I was calling Papa Bear, Mama Bear, and Baby Bear to distinguish their relative sizes. The bear image is now banished from my brain; I see only butterflies.

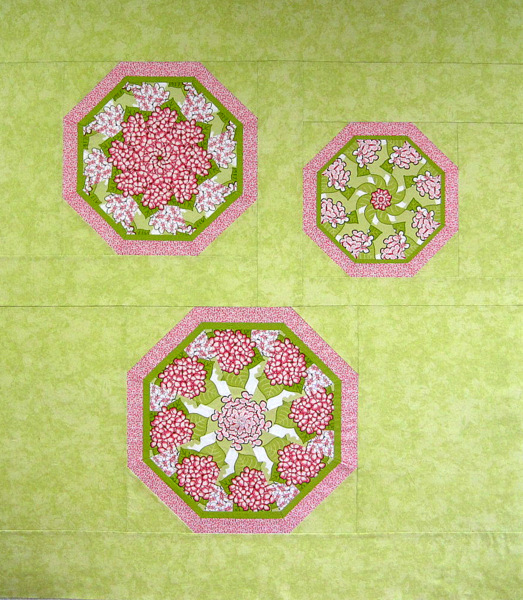
And here are those butterfly blocks are, floating on a field of pale green:

Hydrangea Kaleidoscopes, 47" x 54"
Hydrangea Kaleido Quilt Top, 47″ x 54″


The background fabric is Krystal by Michael Miller, and I’m pretty sure the solid green inner border in the kaleido blocks is Michael Miller, too. The pink and white print in the outer border is Yvette, from the City House Fabrics line by Swirly Girls Design for Michael Miller.

I’m thinking of binding the quilt in the solid green. (I do wish solid fabrics came with information printed on the selvages like print fabrics do. I like to know what fabric I’m working with — and what if I need more and can’t find it locally? That information on the selvage is essential for an Internet search.)

Now to ponder quilting motifs and quilt names. I’m thinking of simple cross-hatching in the background, spaced an inch or two apart, and some kind of floral design in the kaleido blocks. As for a name, I’m waiting for inspiration to strike. Bloomin’ Butterflies? Butterfly Kisses? Suggestions gratefully accepted!


Posted in kaleidoscope quilts, update | 3 Comments

One Thing Leads to Another . . .

You already know that I’m crazy about kaleidoscope quilts. My most recent effort, Cosmic Kaleidoscopes, contained five oversized kaleidoscope blocks floating on an inky background; it measured 62″ x 82″ before quilting. I wanted to try a scaled down version using softer fabrics and a light background. I sketched a design on graph paper and chose a luscious pink and green hydrangea print as my focus fabric.

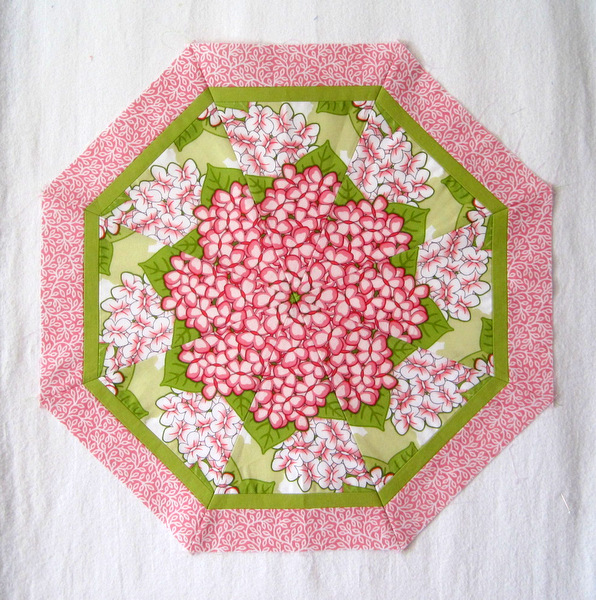
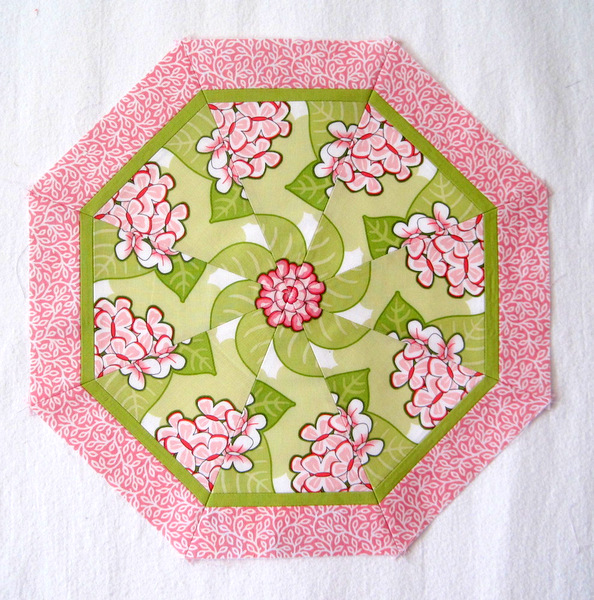
The blocks are three different sizes, the largest being 20″ and the smallest 13½”. I suppose it was inevitable that I would start thinking of them as the Three Bears. Here is Papa Bear:

Papa Bear
Papa Bear, 20″ wide

. . . and Mama Bear:

Mama Bear
Mama Bear, 17″ wide

. . . and Baby Bear:

Baby Bear
Baby Bear, 13½” wide

The next time you see these blocks, they will be in a quilt top, floating on a pale green background.


Posted in kaleidoscope quilts, update | 7 Comments

Fabulous February

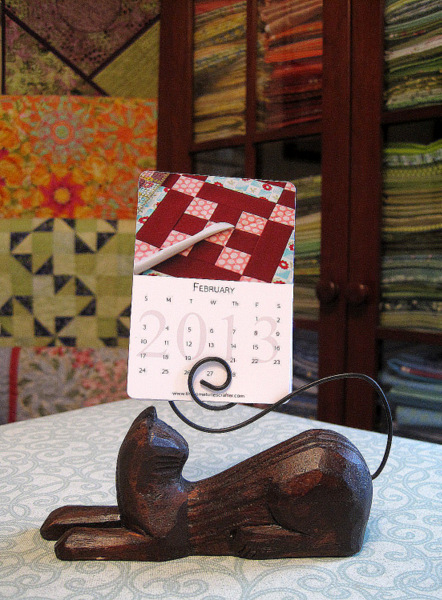
Feb 2013 calendar

Why is February fabulous? Well, Punxsutawney Phil didn’t see his shadow last Saturday, Groundhog Day, thus predicting an early spring. Here in Portland, Oregon — about 3,000 miles from Punxsutawney, Pennsylvania — we are already seeing signs of spring. The tulips are pushing up out front, and my next door neighbor Dolores has roses in bloom. I’m looking forward to the first unexpected whiff of daphne, my own personal harbinger of spring. It usually happens in March but maybe it will happen this year in Fabulous February.

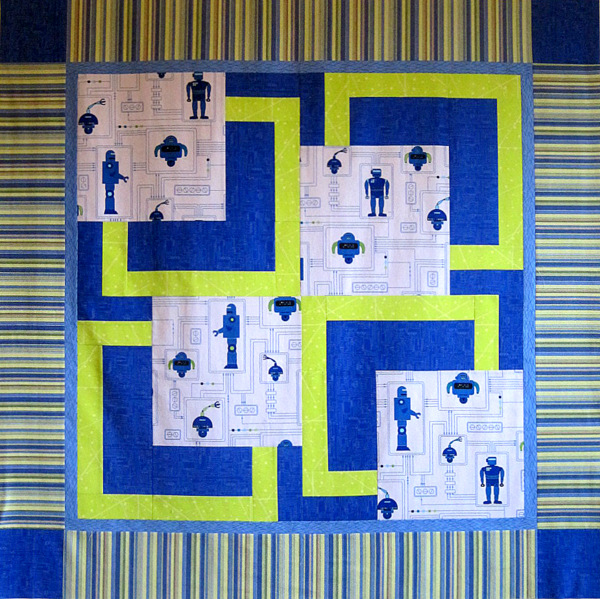
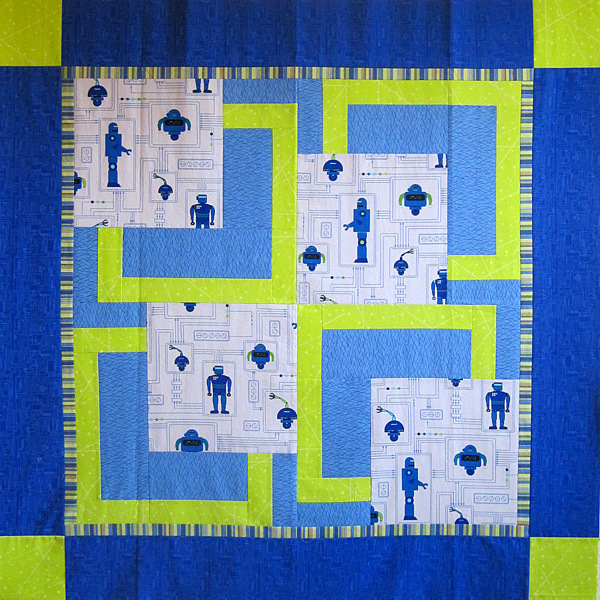
I feel good about what I got accomplished in January, and February is already shaping up to be a good month. I’ve pieced two baby quilts using the same fabrics but in different combinations. The pattern is BQ by Maple Island Quilts. First up is Baby Nemo’s quilt top . . .

Nemo's quilt 600

. . . followed by Baby Gregory’s quilt top:

Gregg's quilt 600


The robot focus fabric and the royal blue circuit board print are from the Mechanical Genius line by Mo Bedell for Timeless Treasures. (Mo, also a Portlander, designs for Andover Fabrics now, and I am eagerly awaiting her new line,  Full Moon Lagoon.)

The blocks in these baby quilts are 16″ square so they went together very quickly. With borders the quilt tops measure 50″ square. I plan to piece the backs tomorrow. Then I’ll take the tops and backs to Nancy Stovall of Just Quilting — not to quilt them for me but to sandwich them. I learned recently that one of the services Nancy provides at Just Quilting is basting quilt layers together using her longarm equipment. She uses a very large stitch in a giant stipple design. I usually baste my quilt sandwiches with safety pins; it will be interesting to see if the quilting process goes more smoothly when I don’t have to stop and remove pins. Of course I’ll  have to remove the basting stitches later but I understand they come out easily.

I’ve also been working on a few other fun projects and will be posting pictures soon. I hope you’ll stop back by for a look!


Posted in update | 2 Comments