Mad about the Mini

It would be fair to say that the Dear Husband and I are slow to embrace new technology. Not that we’re averse to it. It’s just that we get along with what we have and don’t recognize a need for something until it’s been on the market a rather long time. We were probably the last family in the western world to buy a microwave (which we use primarily to reheat coffee) and we still don’t own a flat screen TV.

So it came as a surprise to friends and family when we acquired a new gadget earlier this month: an iPad Mini. The iPads have been around for a few years but Apple released the Mini just a few months ago. I had been thinking about buying an iPad for a couple of years but never quite got around to it. By the time I was ready to take the plunge, the Mini was available. In a way, my procrastination paid off.

We’ve had this tiny little computer for only three weeks and have a lot to learn about its capabilities, but so far I love everything about it. I do feel guilty about something, though. I bought it for the DH and me, but I have monopolized it from the get-go. It has my email, my Scrabble, and my music loaded on it. I listen to Pandora Internet radio on it for hours in my sewing room. I even carry it around in my purse!

Of course, one of the first things I did was make a case for it:
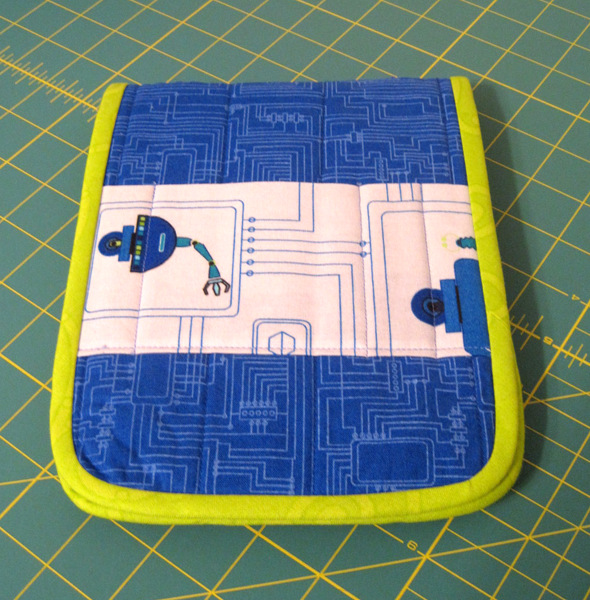
 

The case is basically a padded envelope with a flap that covers the entire front. That’s because I wanted to protect the iPad Mini with extra batting. The back side has a layer of batting and a layer of stiff interfacing.

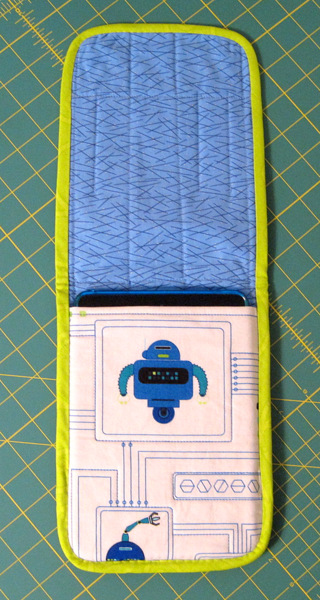
With the flap open, you can see how the iPad Mini is easily tucked into its snug little pocket:
 

Thinking the case might double as a cushion for the iPad Mini while it’s in use, I added four strips of elastic to the back corners:
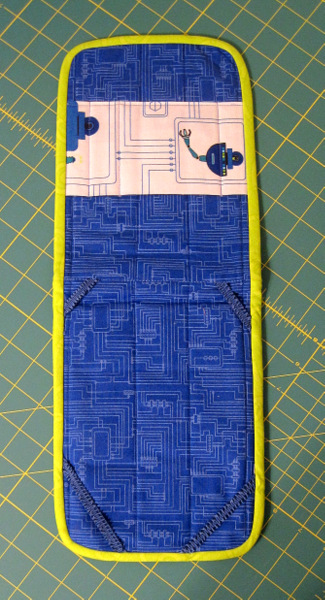
 

I wasn’t sure of the proper position so each strip of elastic is in a slightly different place. This cover is a first attempt so the fact that the strips of elastic are not in perfect alignment doesn’t bother me (well, not too much).

As it turned out, the two top strips of elastic aren’t deep enough to hold the top of the device but the bottom two work just fine. The bottom strips actually do double duty: they come around to the front and hold the top flap in place, keeping my — er, our — iPad Mini very secure when it’s in my purse:
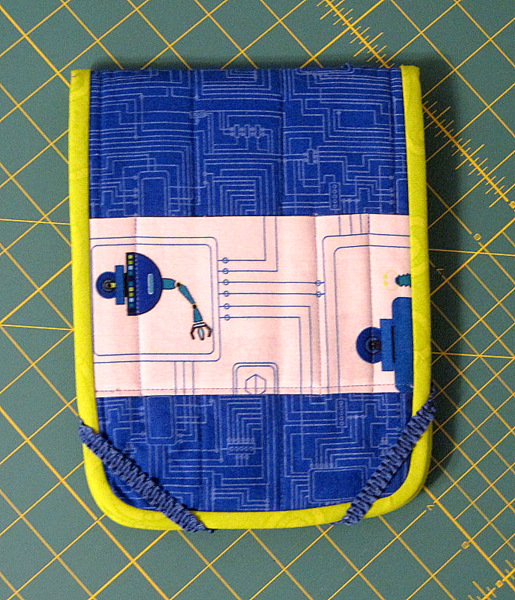
 

The divided pocket on the front is for earbuds and a stylus. I think the next version might have a zippered pocket on the inside for these items, leaving the front cover open to some creative patchwork.

Isn’t this robot fabric perfect for an iPad Mini case? The fabric is from the Mechanical Genius line by Mo Bedell for Timeless Treasures. You’ll be seeing more of the robot fabric before too long because I’m using it in two baby quilts, currently under construction.


Posted in family, iPad cover, update | 3 Comments

Marta’s Quilt

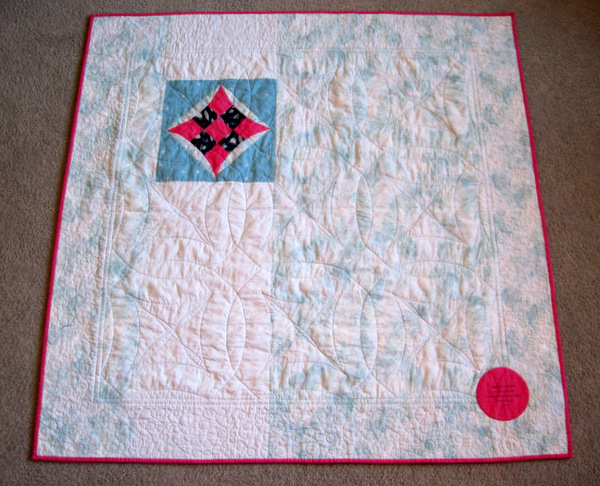
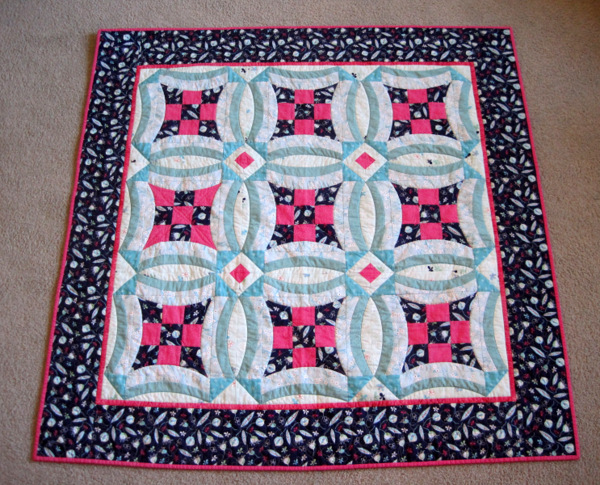
My third finish of the year — Marta’s Quilt:

Marta's Quilt, 47" square
Marta’s Quilt, 47″ square


I started this quilt last spring as part of a Quilt-Along led by Jenny Pedigo of sewkindofwonderful.com and finished the top in June. The pattern is Jenny’s own design, Urban 9-Patch. I added the fuchsia diamonds between the blocks for an extra jolt of color.

Why did it take so long to get it quilted? Well, I had lofty ideas of doing some fancy free motion quilting (FMQ) on it. The longer I put off practicing my free motion quilting skills, the longer the quilt top languished. There’s just no getting around the fact that FMQ demands lots of practice.

Little Miss Marta is now 14 months old. I figured I’d better hurry up and get her quilt done before she graduates from college. I had done some preliminary stitching in the ditch to stabilize the blocks in preparation for FMQ. I stitched in more ditches and then quilted ribbons in the center of each block and a loop-de-loop in the borders to finish it.

A leftover block went on the back:

back of Marta's Quilt
back of Marta’s Quilt


Don’t you love that wrinkly, crinkly look a quilt gets when it’s been washed?


Posted in free motion quilting, Quilt-Along, update | 4 Comments

Cosmic Kaleidoscopes

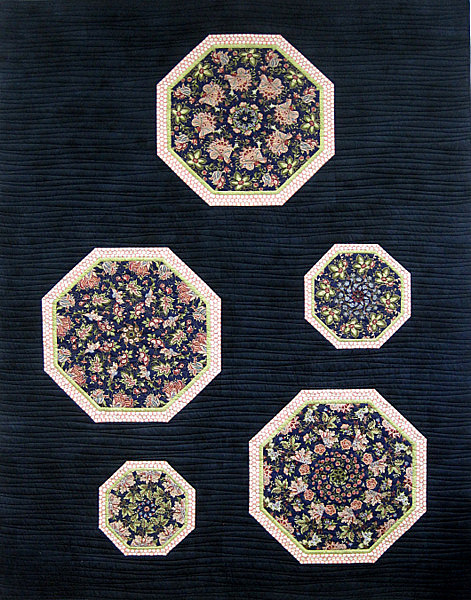
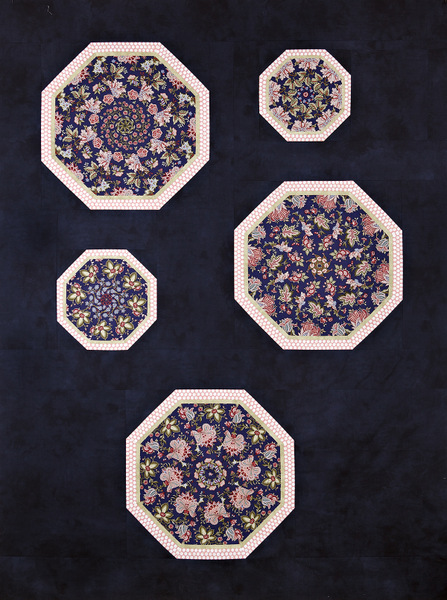
Allow me to introduce Cosmic Kaleidoscopes, my second finish of 2013 and #6 in my series of kaleidoscope quilts. You may remember from a recent post, My Lucky Day, that I won a quilting session with Nancy Stovall of Just Quilting at last month’s Portland Modern Quilt Guild meeting. Nancy was able to finish it in time for this month’s guild meeting (Jan. 17). I wanted to show it there first before posting pictures.

Here is my quilt, enhanced by Nancy’s lovely work:

Cosmic Kaleido 600
Cosmic Kaleidoscopes, 60″ x 76″


Because the kaleidoscope blocks are so busy, I wanted the quilting in the background to be very simple. Nancy and I decided on slightly wavy lines that would simply flow off the edges of the borderless quilt.

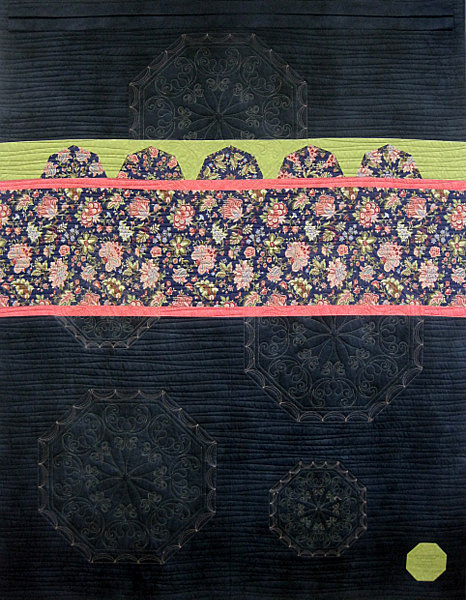
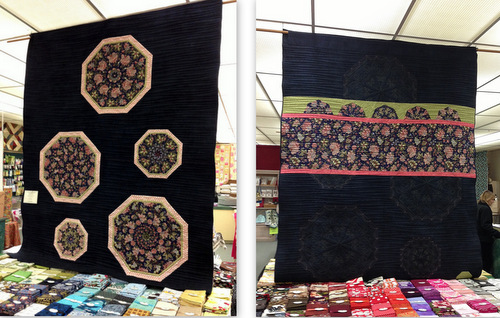
The back is another story. I inserted a strip of the focus fabric and added some half-kaleido blocks made from the leftover focus fabric. Nancy used a lighter thread for the kaleidoscope blocks on the front, creating an almost lacelike effect on the back:

Back of Cosmic Kaleidoscopes


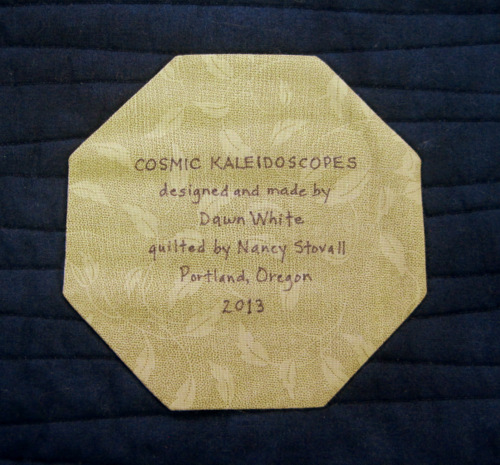
Just for fun, the label is the same octagonal shape as the kaleidoscope blocks:

Cosmic Kaleido label 500
Cosmic Kaleido Quilt Label


My quilt was on display at the Pine Needle last weekend . . .

H9MHTKHI
Hanging at the Pine Needle

. . . and today it went to Silverton, Oregon where it will be shown at the Stitches in Bloom Quilt Show at the Oregon Garden this Friday and Saturday, Jan. 25 and 26.

About the fabrics: the Jacobean floral is from the Ruby line by Timeless Treasures. Before sewing the kaleidoscope wedges together, I sewed on sashing strips of a soft mossy green (Shadow Play) and a pale coral dot (The Emperor’s Garden), both by Maywood Studios. The background fabric — a soft inky blue-black with hints of charcoal — is Modern Textures by Marcia Derse, from the Riverwoods Collection for Troy Corporation.


Posted in kaleidoscope quilts, Portland Modern Quilt Guild, update | 7 Comments

In a Bind

I’m not really in a bind. I’ve just spent part of the last three days binding two quilts. I really enjoy the process of finishing a quilt by hand-stitching the binding. I’m not bothered by the amount of time it takes; I’m content with either sitting in my sewing room listening to music or settling down in the TV room with a movie I’ve watched so many times I hardly need to look at the screen. I did some of each over the weekend.

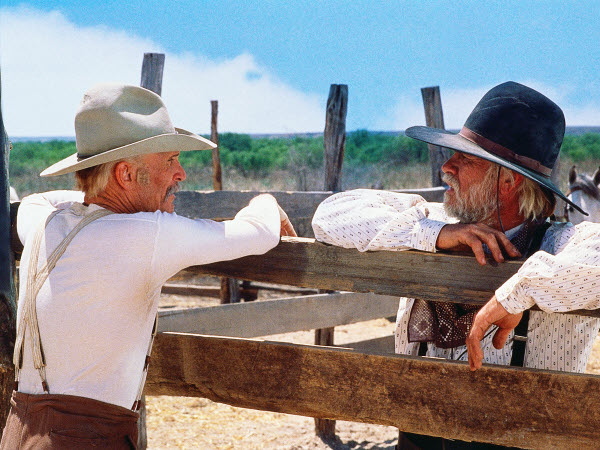
My movie of choice was Lonesome Dove, with Robert Duvall and Tommy Lee Jones. It’s actually a miniseries from 1989 based on (and very faithful to) Larry McMurtry’s Pulitzer-Prize winning novel, which I have read not once but twice. I had this picture on my bulletin board at work for many years:

Robert Duvall and Tommy Lee Jones in Lonesome Dove
Robert Duvall as Gus McRae and Tommy Lee Jones as Woodrow Call in Lonesome Dove


I never noticed before how many quilts were used in Lonesome Dove. Watching this beloved movie again while working on a quilt of my own making was a double pleasure.

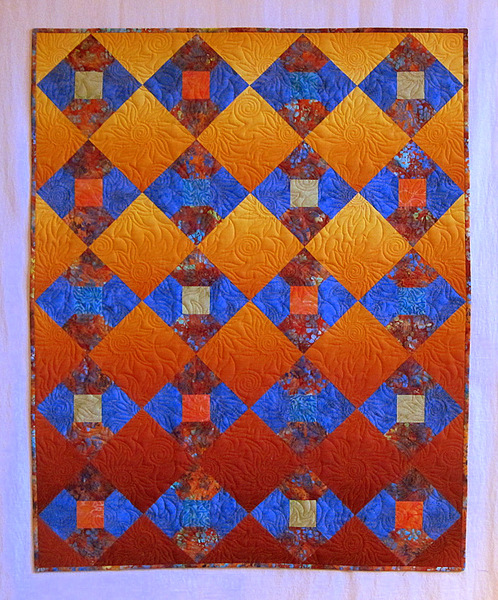
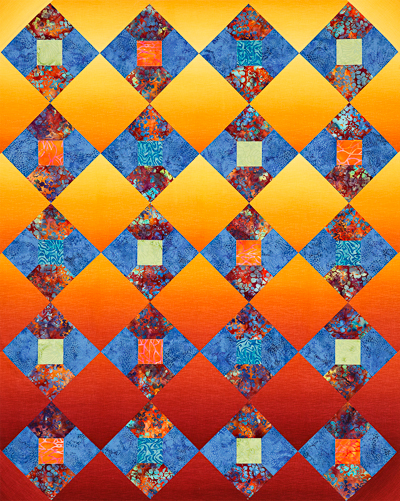
Here’s a look at Sunrise Bow-tique, one of the quilts I bound over the weekend:

Sunrise Bow-tique, 33.5" x 42"
Sunrise Bow-tique, 33.5″ x 42″


I wrote about the quilt top in a post last month called Batik Bowties, which you can read here. The top features bowtie blocks with machine appliquéd knots. In the alternating blocks I used an ombre fabric that gradates from pale yellow to burnt sienna.

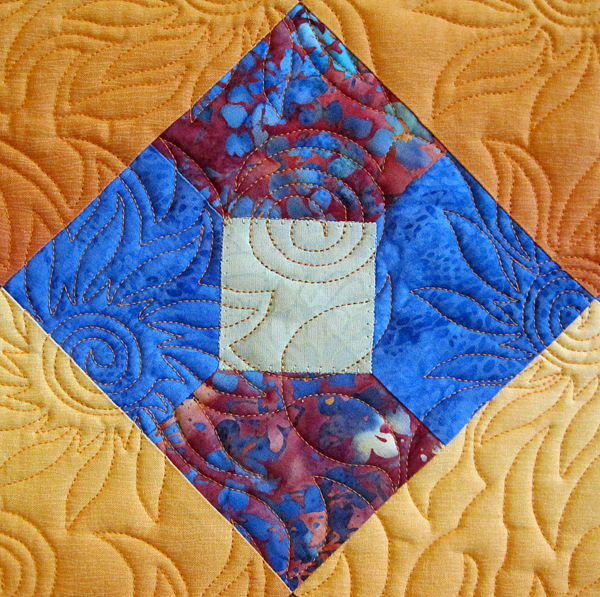
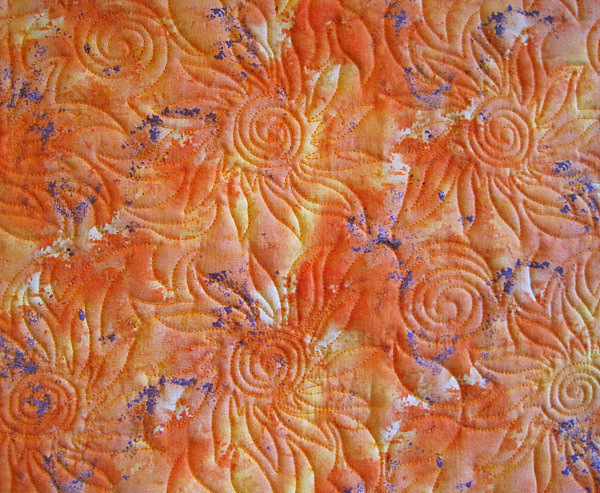
Nancy Stovall of Just Quilting quilted an allover design of spirals, some with sun rays emanating from them, very much in keeping with the colors and name of my quilt. I’m so pleased with her quilting! Here’s a close-up:

Sunrise Bow-tique, detail 600

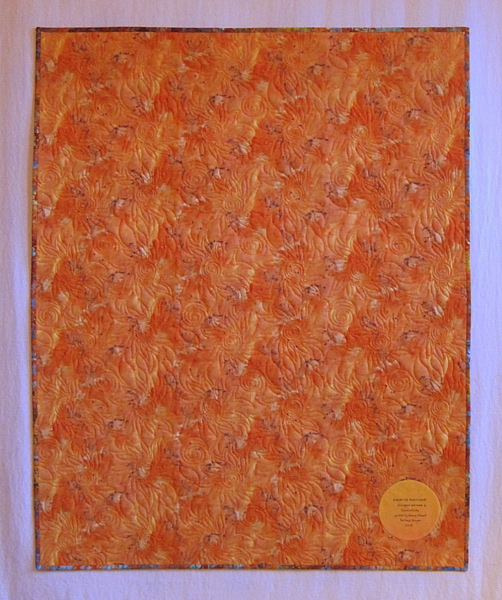
I found this fabric in my stash that seemed perfect for the back:

Back of Sunrise Bow-tique


This close-up shows more of Nancy’s quilting:

Sunrise Bow-tique, detail of back


I still need to take photos of my other newly-finished quilt, Cosmic Kaleidoscopes. I hope you’ll stop by later this week for a look at it.


Posted in bowties, gradated fabric, machine applique, update | 6 Comments

Yet Another Sewing Machine Dust Cover

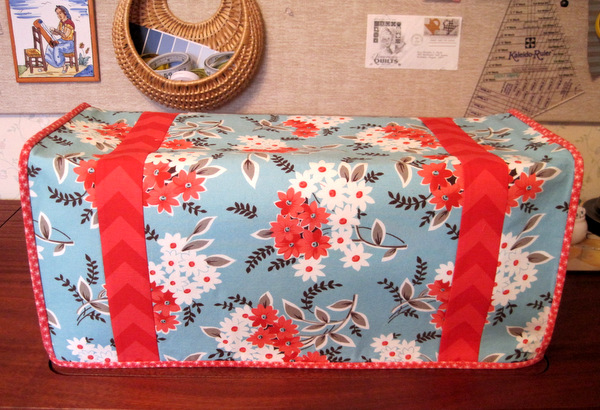
Yes, I’m still at it. Still playing with the design and construction of a sewing machine dust cover designed to fit my Janome 6500.  Here’s my latest version:

Bigger Than a Breadbox


Since I’m going to be teaching a class on this soon, I wanted to test my directions again as well as an idea I had about the binding process. Versions 1 and 2 (which you can see together here) have the bottom edges of the front, back, and sides bound first, before the side panels are joined to the front and back piece. Wouldn’t it be easier, I wondered, if the side panels were bound first? Then one long binding strip could be added around the bottom of the dust cover.  The answer: yes, much easier!

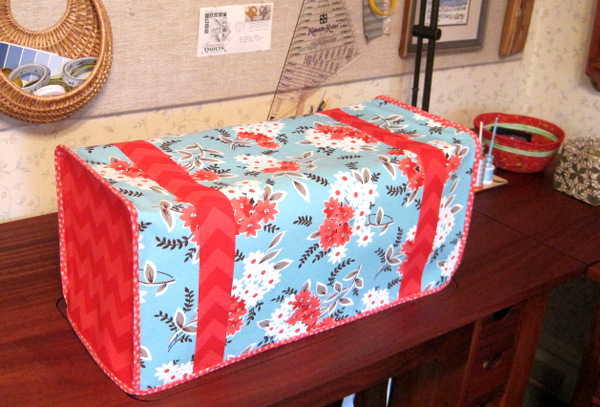
A View from the Side


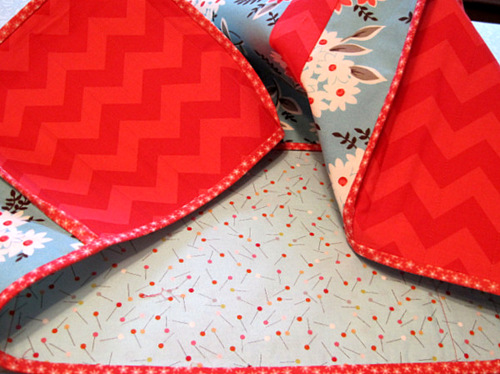
I really had fun with this fabric. The floral print is from Denyse Schmidt’s Flea Market Fancy line for Free Spirit. The chevron stripe is by Riley Blake, and the binding fabric is Teeny Tiny Flowers by Holly Holderman for Lakehouse Dry Goods. The whimsical lining fabric, seen in the photo below, is Sew Stitchy by Aneela Hoey for Moda:

custom sewing machine cover, inside
A Peek at the Lining

Now on to the next good thing: finishing one of many Works-in-Progress!


Posted in Janome 6500 sewing machine, sewing machine cover, update | 3 Comments

Ready for 2013!

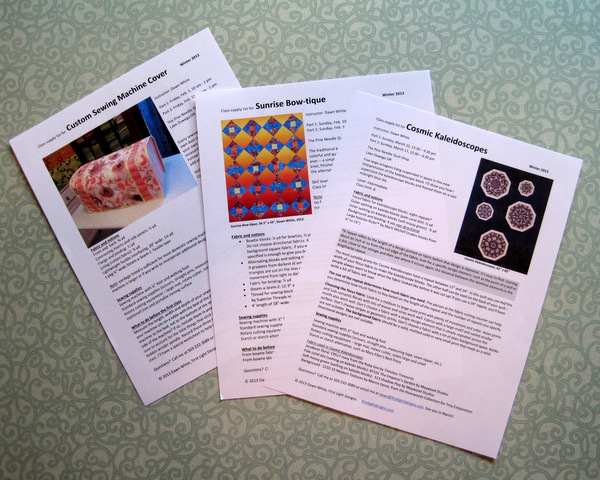
I just dropped off class supply lists for three new classes I’m teaching in early 2013 at the Pine Needle in Lake Oswego, Oregon. If you’d like to find out more about the classes, clicking on this link will take you directly to my Upcoming Classes page.

Class Supply Lists
Class Supply Lists

Information about the classes will also be in the Pine Needle’s new catalog, scheduled to hit mailboxes next week.

Happy New Year!


Posted in update | Leave a comment

My Lucky Day

My lucky day occurred two weeks ago, and I am still marveling at my good fortune.

I was at the December meeting of the Portland Modern Quilt Guild, which I joined last spring. The guild was having a membership renewal drive, and those who renewed at the meeting were eligible for prizes. Of course I renewed on the spot. I’ve only made it to a few meetings this year but I have been so impressed with the creativity and talent of the women (and a few men) who belong to the guild. And every one is so friendly. I usually sit down next to someone I don’t know and introduce myself. By the end of the evening I have a new friend. This time it was a lovely woman named Vickie.

There must have been 15 or 20 prizes awarded to renewing members, fun things like new books and bundles of fabric. Alas, I didn’t win a thing. Then one more prize was announced: a quilting session with Nancy Stovall of Just Quilting. Can you imagine how thrilled I was when I heard my name called? Nancy is an award-winning longarm quilter. “What does ‘quilting session’ mean?” I whispered to Vickie. “It means she will quilt a quilt for you!” answered Vickie.

I was so excited that the very next day I took a newly-finished quilt top to Nancy’s studio, and we talked about motifs and auditioned threads. Today I dropped off the backing, and now I just have to sit back and wait till Nancy works her magic. This is the quilt top:

Cosmic Kaleidoscopes

I’ve named it Cosmic Kaleidoscopes. Right now it measures 62″ x 82″, although the quilting process will draw it up somewhat. My goal is to get it bound and labeled in time for “show and tell” at the Jan. 17 meeting of the Portland Modern Quilt Guild and for the Pine Needle’s Open House Jan. 18 and 19.


Posted in kaleidoscope quilts, Portland Modern Quilt Guild, update | 4 Comments

A Table Topper for My Twin

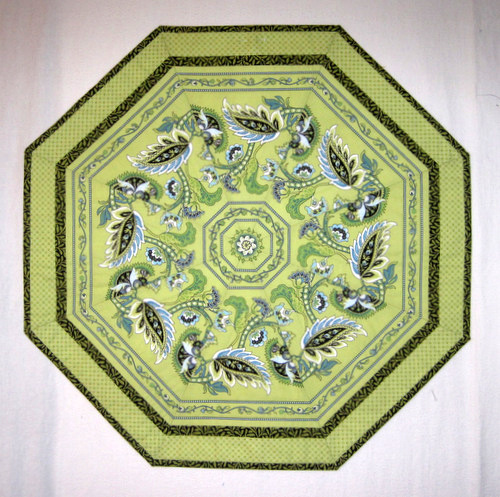
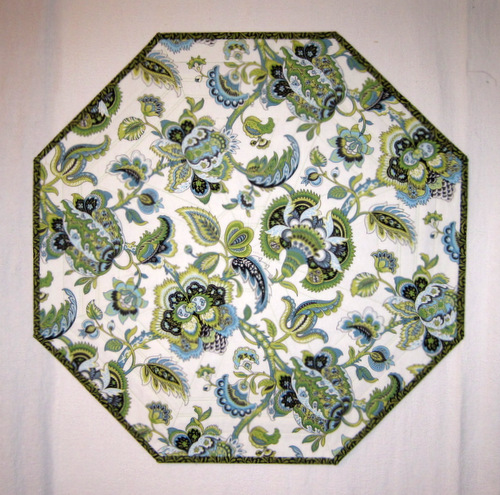
I drew my sister Diane’s name in the siblings and spouses Christmas gift exchange. And — she drew mine! That doesn’t happen very often. This is what I am giving her:

2012-12, table topper
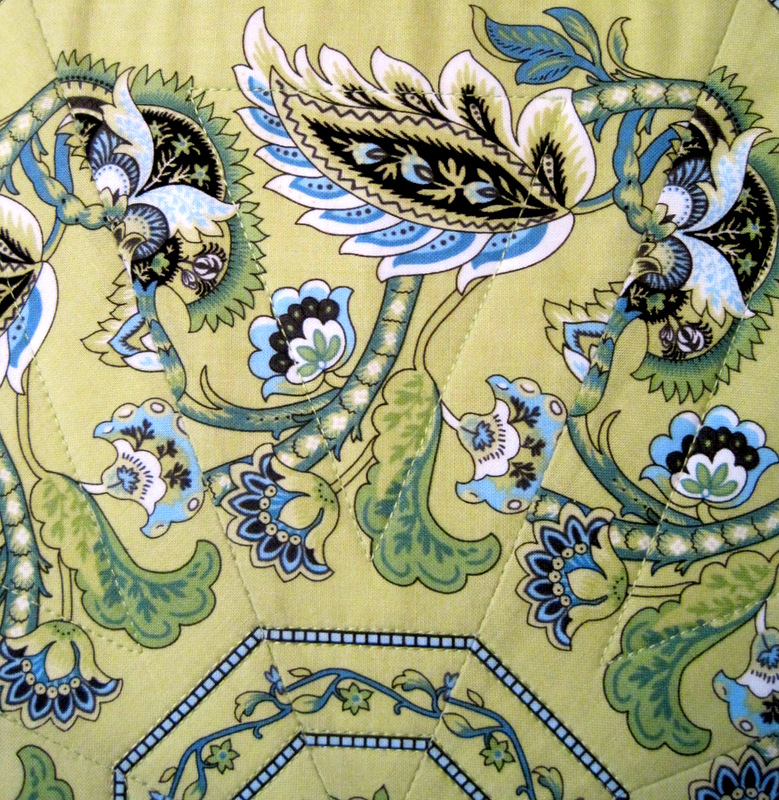
It’s a table topper. You may remember seeing the unfinished top in an earlier post. Diane saw that post and fell in love with the fabric (from the Ainsley line for Northcott Fabrics) and the kaleidoscope block. When I drew her name, I decided to finish the table topper for her.

I didn’t want the topper to be poufy so I used flannel for the batting. It’s quilted very simply. First I stitched in all the ditches and then quilted on both sides of the straight lines in the center and outer edges. Then I quilted a triangle in each of the eight wedges of the kaleidoscope. The simplicity of the quilting keeps your eye focused on the flowers and leaves and vines in that gorgeous Jacobean print:

table topper detail
Here’s the back of the topper:

2012-12, table topper from back
I had never before applied binding to a quilt with obtuse angles (greater than 90 degrees but less than 180). Thanks to Heather Mulder Peterson of Anka’s Treasures, who posted a terrific tutorial on her blog, Trends and Traditions, it was a breeze.

Diane’s table topper — #5 in my series of kaleidoscope quilts — measures 22″ across and 22″ top to bottom.

I hope she likes it — and I hope she doesn’t see this post until after she opens her gift!


Posted in family, kaleidoscope quilts, table topper, update | 6 Comments

Pocket Watch

Do you have any idea how hard it is to find men’s shirts with two simple patch pockets? It’s the only kind the Dear Husband likes to wear. Most shirts nowadays are made with one pocket — or none at all. On the rare occasions when I spot dress or casual shirts with two pockets, I buy several. It’s been a few years since I’ve found some, and many of the DH’s shirts are wearing out. (If you see any two-pocket shirts during your holiday shopping expeditions, please email me!)

Macy’s was having a big sale on men’s shirts last week so I picked up a few. Alas, none of them came with two pockets. I’ll show you what I did to remedy that (something I’ve been doing for 30-odd years).

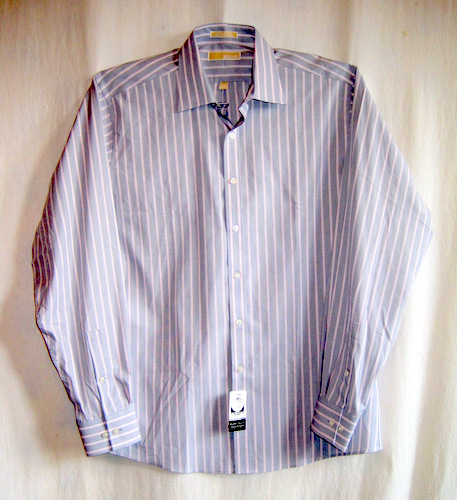
This particular shirt had no pockets:

shirt 1, before

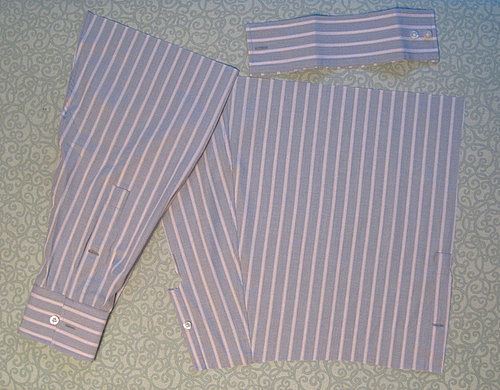
First, I cut off the sleeves at elbow length and narrow hemmed them. I cut the lower part of one sleeve apart and pressed it flat:

shirt 2, sleeves off-001

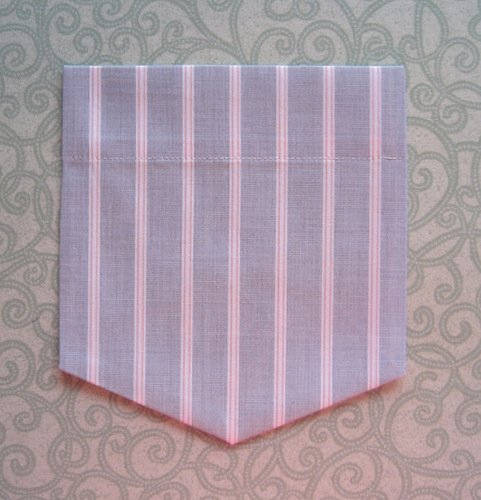
These sleeves were extra long so I was able to fashion two pockets out of one sleeve remnant. Here’s one of the pockets as seen from the front . . .

pocket front 500

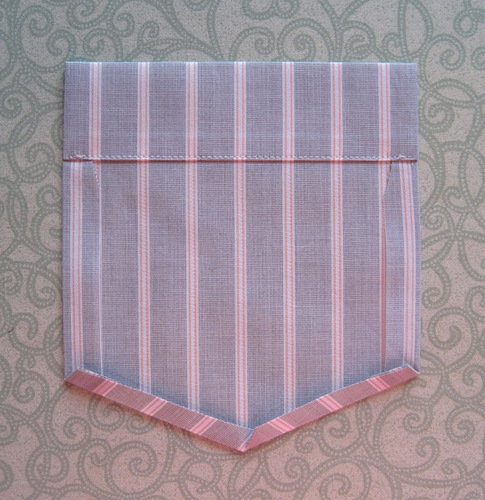
. . . and from the back:

pocket back 500
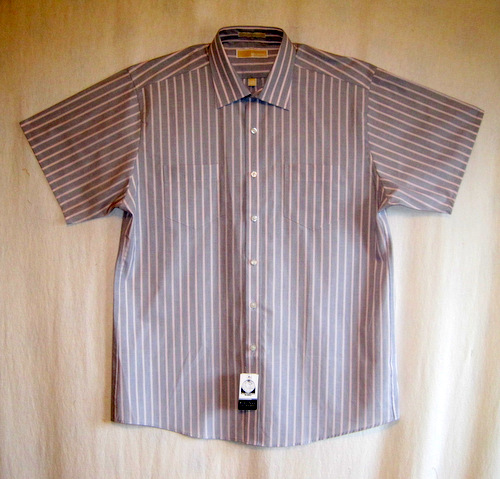
Here are both pockets made and sewn onto the shirt:

shirt 3, after
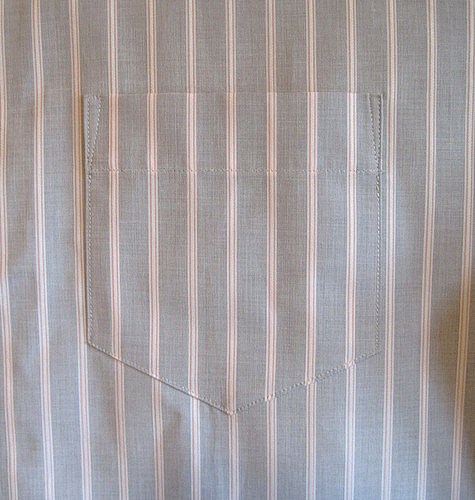
It’s a little hard to see these pockets because the stripes are matched. Here’s a close-up:

shirt 4, pocket detail-001
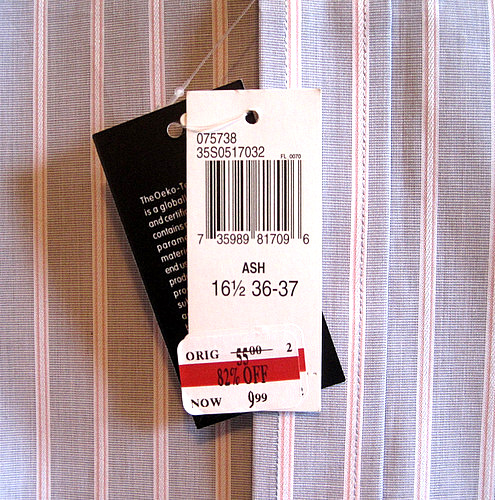
Oh, and here’s the best part: the price tag:

shirt 5, price tag-001


Posted in family, update | 1 Comment

Batik Bowties

Here is a little top I just finished that features raw-edge machine appliqué in the bowtie blocks and a gradated fabric in the alternating blocks and setting triangles:

gradated-bowtie
Raw-edge machine appliqué is a technique I avoided for years because of concerns about fabric fraying around the edges. Then in October, Nicole of Sister’s Choice Quilts wrote about machine appliqué using Steam-a-Seam-2, a double-sided fusible web. I’ve used Steam-a-Seam-2 on other projects but not in combination with machine appliqué. Nicole reports that she has never had a problem with frayed edges and proved it by showing pictures of one of her quilts that’s been washed multiple times. Based on Nicole’s photos, comments, and excellent instructions (see them here), I decided to give machine appliqué a try.

I chose the bowtie block, one of my all-time favorites, which I’ve always made the traditional way using Y-seams. Y-seams are a little time-consuming but the results are wonderful. (A note to those of you who avoid Y-seams like the plague: I have my own little trick in sewing them, which I will share in a future tutorial).

The bowtie blocks shown above came together much more quickly: each block is a simple four-patch with a contrasting square for the knot, fused in place and finished with a blanket stitch. The fastest bowtie block ever!

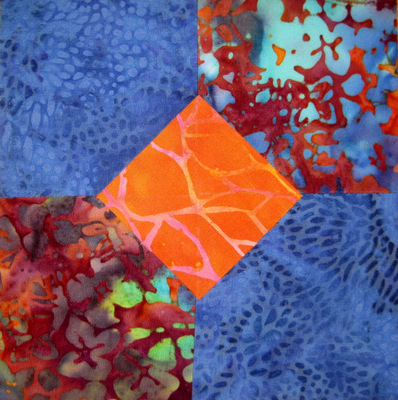
Here’s a close-up of a block with the fused knot . . .

bowtie block before 400-001

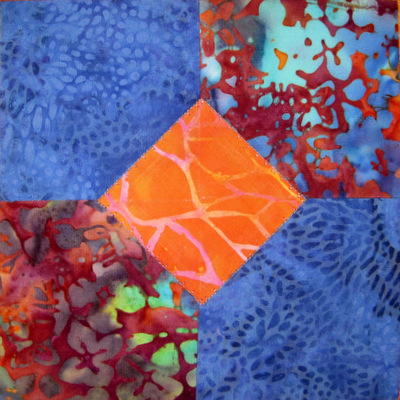
. . . and the same block with the blanket stitch added:

bowtie block after 400
Here’s the same block from the back:

bowtie block from the back 400
When I made the four-patch blocks, I rotated or “popped” the seam allowances open, allowing the four connecting seams to be pressed in the same clockwise direction. This gives each block a nice flat center — an important consideration when you are fusing another layer of fabric to it.

For the alternating blocks I chose an ombre fabric from the Daiwabo Collection by E. E. Schenck that gradates from a pale lemony yellow to a burnt sienna. Because the alternating blocks are set on point, I had to cut them on the bias to achieve the gradated effect.

The result is Bow-tique Sunrise, a colorful, quirky little quilt. It measures 35″ x 43″, and the blocks are 6″ square. Instead of adding borders, I’m going to finish it as is, binding it in the multicolored batik featured in the bowtie blocks. Don’t you think it will make a cute baby quilt?


Posted in bowties, gradated fabric, machine applique, update | 1 Comment