Category Archives: mitered corners

Satisfying Sewing

During my recent two-week stay at sister Diane’s home in Georgia last month, the only sewing I did other than new valances for her garage was this pair of napkins with machine-mitered corners:

The days leading up to our departure were so busy I didn’t take the time to organize a quilt project as I usually do, so I wound up throwing this fabric in my suitcase with the idea of making napkins. We use only cloth napkins at the Portland White House, and some of the older ones are pretty faded. This fleur de lis print will go very well with my blue and white transferware dishes.

I usually make my napkins with a 1/4″-wide hem using a method involving folding the fabric at the corners to form the miters. In fact, one of my very first tutorials — from 10 years ago! — describes this method. Folded miters work very well with narrow hems — say 1/4″ to 3/8″ wide. For anything wider, a miter stitched by machine is a better choice.

Because I had decided to finish these napkins with a 1/2″-wide hem, I looked for tutorials online to refresh my memory on how to machine-stitch mitered corners. I found a few that described the process with photos but every tutorial was lacking what I consider important information.

I want to make a couple more napkins now that I’m back home, and this time I’m going to take process shots so I’ll have them on hand the next time I decide to make some.

Is there interest out there in a tutorial? Let me know!


Posted in family, mitered corners, table napkins, tutorial, update | 17 Comments

First Finish of 2021

First things first: Happy New Year, friends! May 2021 exceed your expectations in every way.

Now on to the next good thing: ‘Tis the Season, my quilt made with the Missouri Star Quilt Company’s Quatrefoil pattern, is a wrap! Take a look:

The quilt was officially completed on New Year’s Day but it was dark by the time I’d stitched the label on so I had to wait till today to take photos. Indoor shots only, I’m afraid; it’s January in Portland (need I say more?).

There was never a doubt in my mind what fabric I would use to bind this quilt: it absolutely had to be the green diagonal stripe in Corey Yoder’s “Holliberry” line. I tried a new-to-me way of applying the binding: it’s single-fold rather than the traditional double-fold. I’ve been wanting to try this method since hearing my friend Pam Raby of Loved to Pieces sing its praises when she was on the Quilt Show with Ricky Tims and Alex Anderson last July.

Oh my. Mitering the corners was a breeze! There’s much less bulk, and the corners lie nice and flat. Feel free to inspect mine:

For the label I made an inset circle and then enclosed it in another circle:

Here’s a look at the back of the quilt:


Since I love the crinkly look and feel of a laundered quilt, ‘Tis the Season went into the washer and dryer after these pictures were taken. Now here it is, still warm from the dryer, on the back of the couch, where it will take up residence for the time being:

‘Tis still the season as far as I’m concerned!


Posted in mitered corners, Quatrefoil, quilt labels, single-fold binding, stitch-and-flip corners, update | 12 Comments

Throwback Thursday: Catch a Falling Star (2015)

Today marks Week Six of Throwback Thursday. Each week since the beginning of the year I’ve highlighted one quilt made in successive years beginning in 2010. This week we’re up to a quilt made in 2015.

Choosing my quilt for 2015 was easy. It had to be Catch a Falling Star, my version of Terri Krysan’s Reach for the Stars:

Catch a Falling Star, 84″ x 105″ (2015)

Often when I finish a quilt, there are one or two things I would have done differently. Not with this one. I love every block, I’m happy with every modification I made to Terri’s original design, and I’m thrilled to pieces with the combination of computerized and free-motion quilting done by Loretta Orsborn.

Instructions for Reach for the Stars appeared in seven consecutive issues of Quilters Newsletter Magazine, beginning with the Oct./Nov. 2013 issue and ending with the Oct./Nov. 2014 issue. Sadly, QNM is no longer in publication.

Almost every month I receive a request from a quilter wanting to know how to get directions for Reach for the Stars. A few years ago I could point to eBay or Etsy for the needed issues but copies are getting harder to find. My advice nowadays is to check with a local quilt guild to see if any member has these seven issues and would be willing to lend or sell them to the person wanting to make the quilt.

Catch a Falling Star was my first ever sampler quilt. I wasn’t sure I would ever make another one. But I did. You’ll see that one when I reach Week 10 of Throwback Thursday.

Thanks for joining me on my weekly trip down Memory Lane!


Posted in 4-Patch Wonder, faux-kaleido quilts, free motion quilting, mitered corners, Reach for the Stars sampler quilt, Sew-Along, Throwback Thursday, update | 4 Comments

More Simple Sewing

It’s been almost two weeks since the Dear Husband and I returned from our annual Thanksgiving trip to Georgia. I’m afraid I don’t have much to show for it in terms of sewing. Quite ironic, as the few things I have worked on fall squarely in the “simple sewing” camp.

I converted a one-pocket long-sleeved shirt for the DH into a two-pocket short-sleeved shirt. The pockets were made from the bottom part of the sleeves:

I hope you can see the pocket! I matched the plaid pretty carefully.

New napkins for the Portland White House (we don’t use paper napkins):

Pillowcases for the Portland White House featuring the same toile fabric I used in the pillowcases made when I was in Georgia (which I wrote about here):

These are ready to go in my linen closet. Judging by the look on Coco’s face, I may not get them away from her:

That simple paisley table topper I made for sister Diane over Thanksgiving is getting a re-do. It was just two pieces of fabric sewn right sides together, turned, and topstitched around the edges. Trouble was, the two layers of fabric didn’t lie completely flat. I convinced Diane I had to take the table topper home and remake it, this time stitching the layers together and adding a simple binding.

Here’s the paisley fabric with two choices for binding pulled from my stash:

We’re going with the one on the bottom left. Diane and I both like the way the linear squares play off the paisley, and it’s a better color match. I think the binding will look even better cut on the bias.

Once I’m done with that, I absolutely must make the DH a new bathrobe. The one I made him several years ago is practically in tatters. I picked up a cotton print a few months ago with his bathrobe in mind. I’ll trim it with a navy blue blender from Maywood:

It’s been a while since I made a garment. I’ll be pulling my serger out of the sewing room closet and refreshing my memory on how it works. Wish me luck!


Posted in family, garment sewing, home dec, mitered corners, roll-it-up pillowcases, table napkins, table topper, update | 4 Comments

Simple Sewing

My sister Diane has a new table topper and four generously sized napkins made from the same paisley fabric I used last year to update the window treatment in her dining room:

(I wrote about the window treatments in this post from a year ago.)

Simple sewing. Even so, I found it necessary to revisit my own tutorial on mitering the corners of the napkins.

Diane just happened to have some enameled napkin rings shaped like umbrellas that go perfectly with the napkins:

Aren’t those fun? They add just the right amount of whimsy, don’t you think?


Posted in family, home dec, mitered corners, table napkins, table topper, update | 6 Comments

Pine Needle Retreat 2017: Group Two

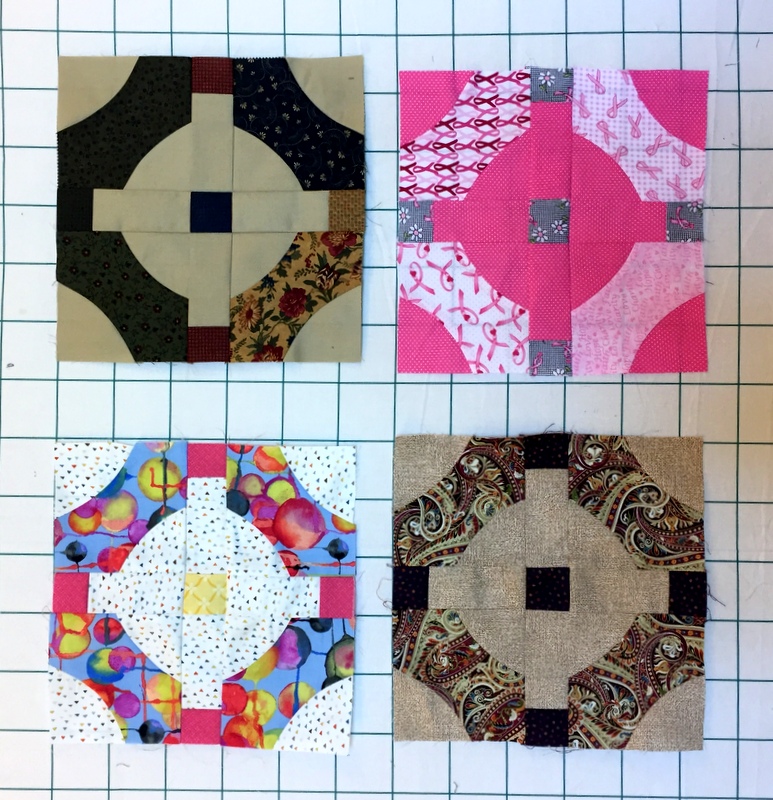
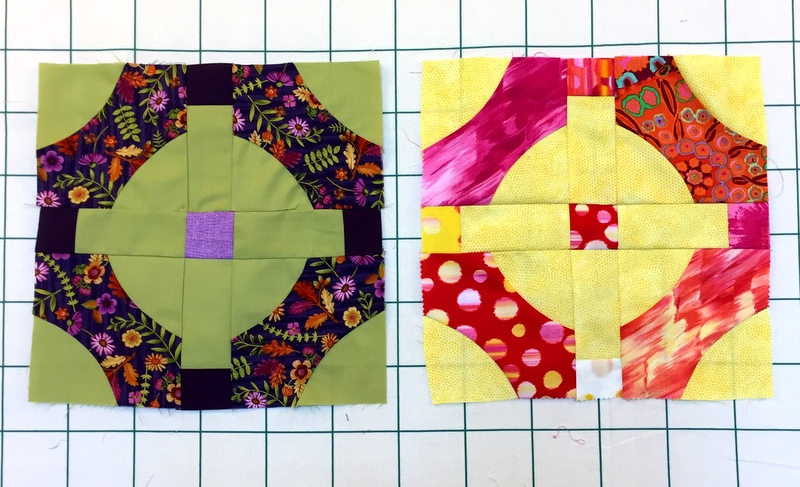
Aren’t these lovely? They are the first group of Mini Mod Tile blocks coming from the second group of quilters attending the Pine Needle Quilt Shop’s retreat in western Washington last month. (You can read all about the first group’s output in my preceding post.) The blocks you see above were made by Sandra and Dena (top row) and Linda and Barbara B. (second row).

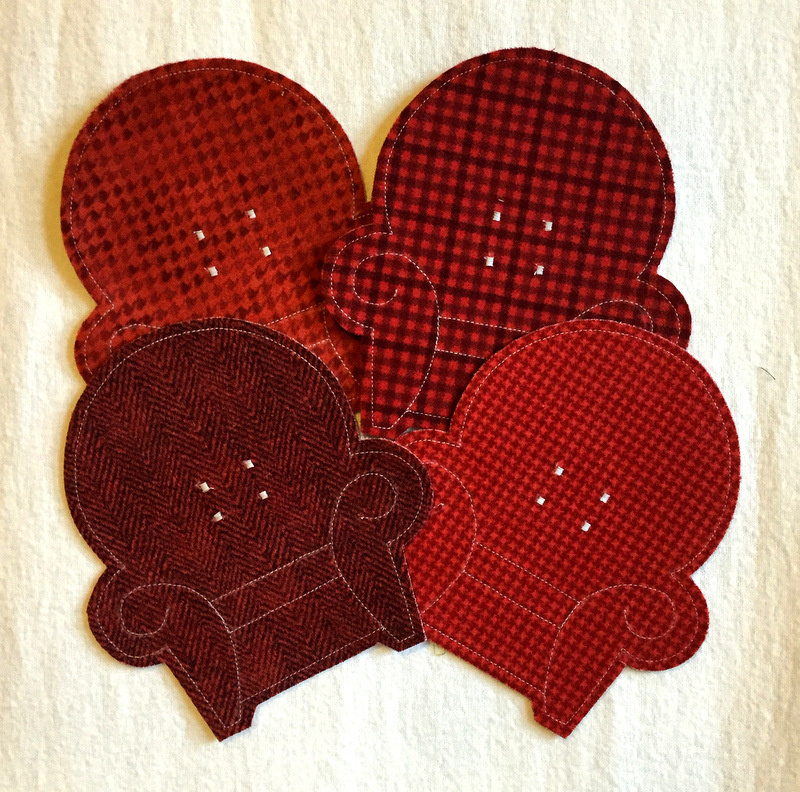
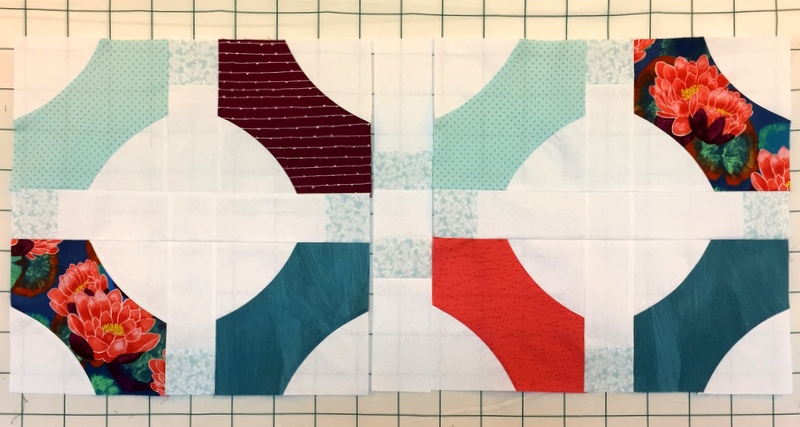
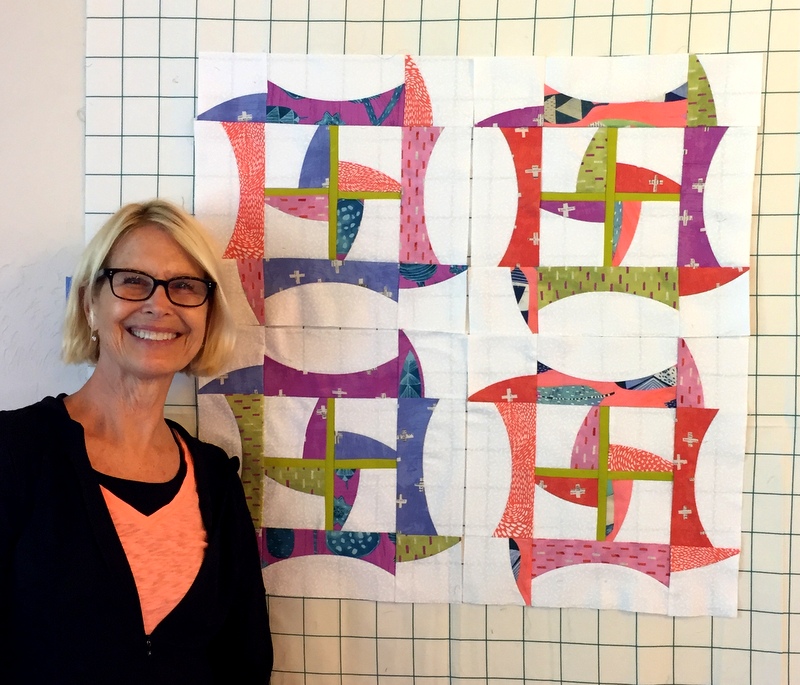
Here are the second group of blocks:

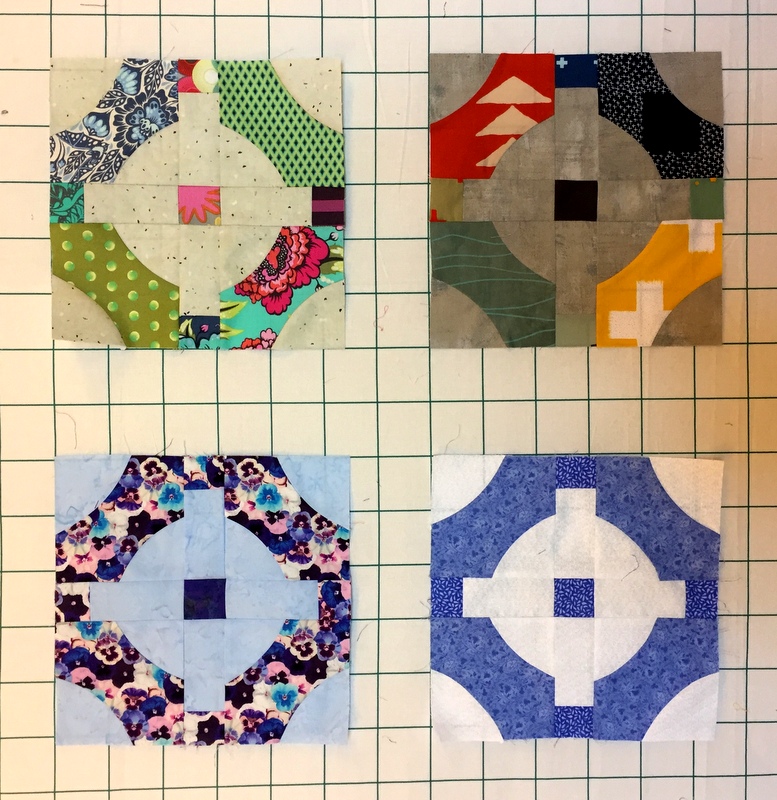
These were made by Lorri and Barbara S. (first row) and Liz and Roxanne (second row).

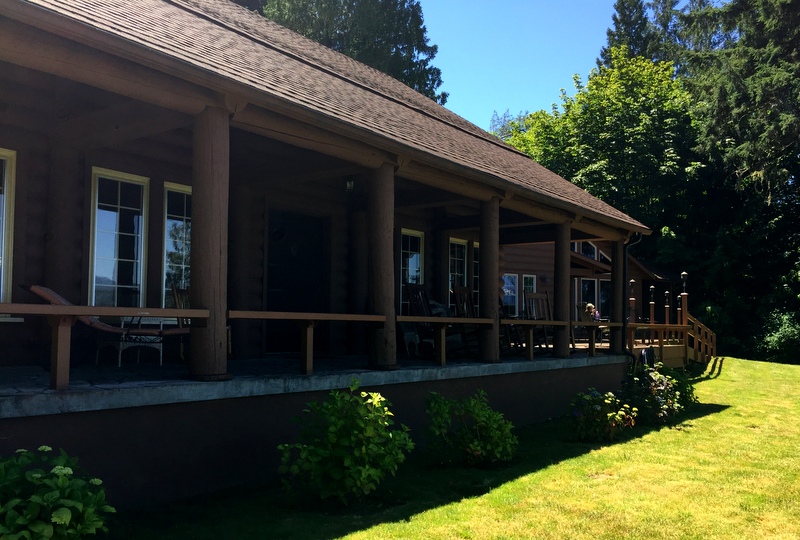
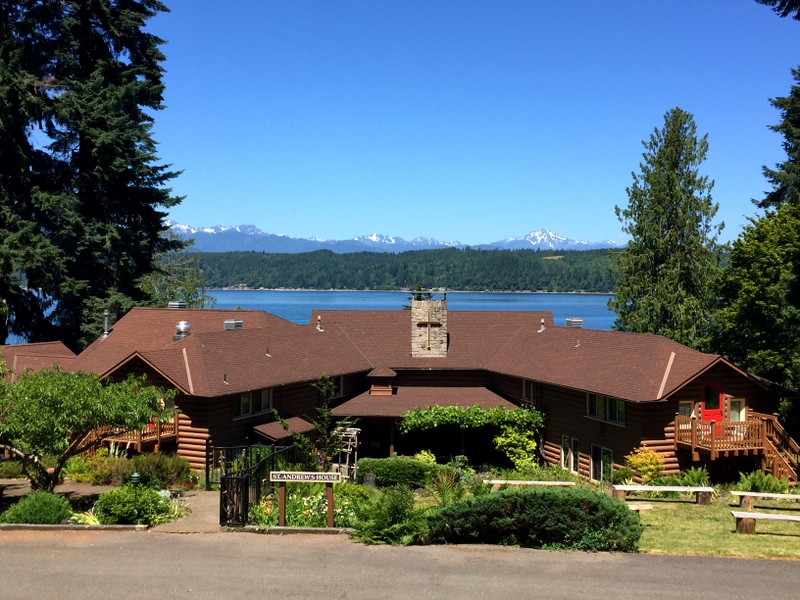
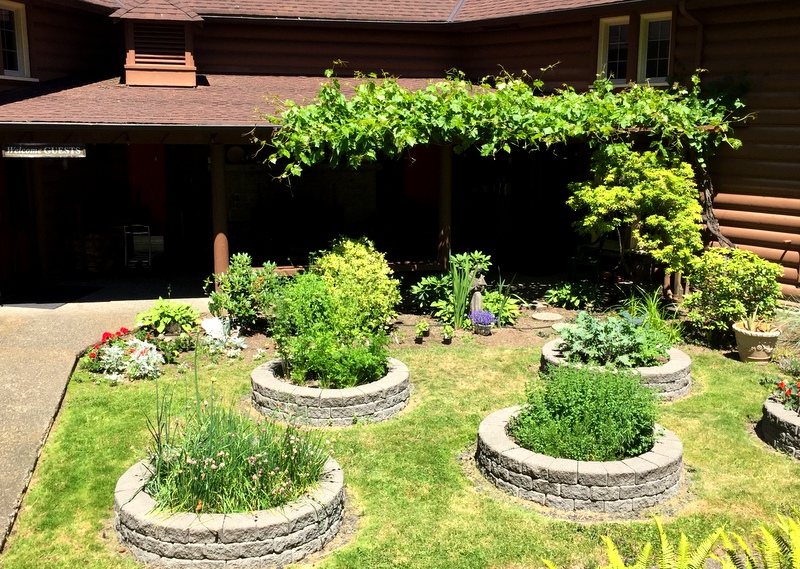
The venue for the retreat was St Andrews House on Hood Canal near Union, Washington. In my previous post I showed you the view of the Olympic Mountains from the long porch at St Andrews House. Here are some photos of the house itself starting with the porch, which runs along the back of the house:


The view from the parking lot:


The herb garden:


A pleasant shaded seating area:


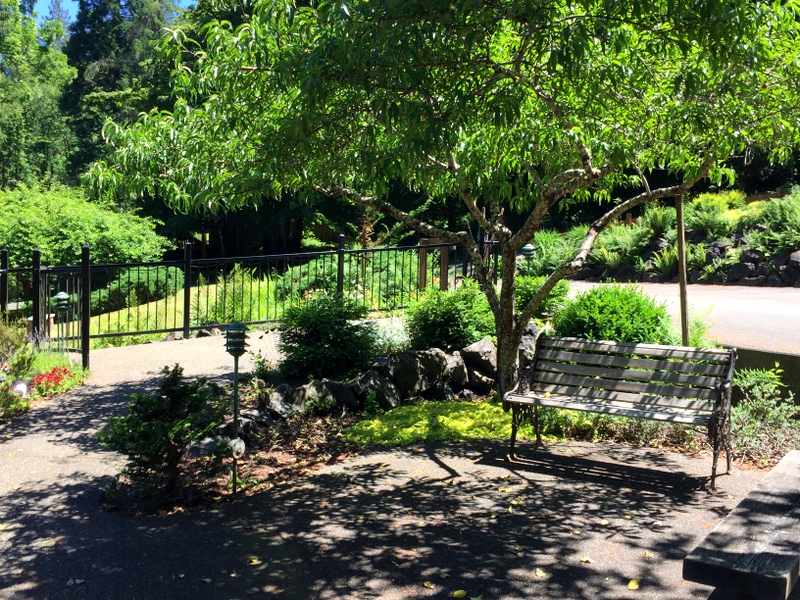
Such a lovely retreat and conference center!

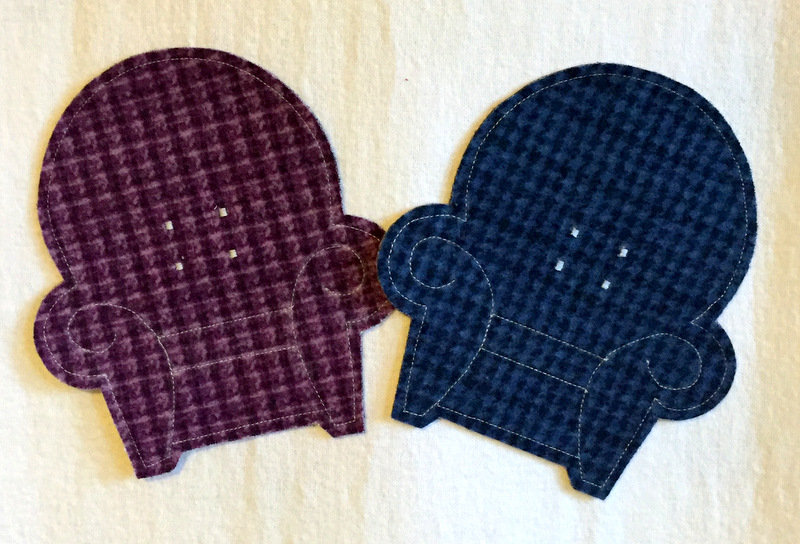
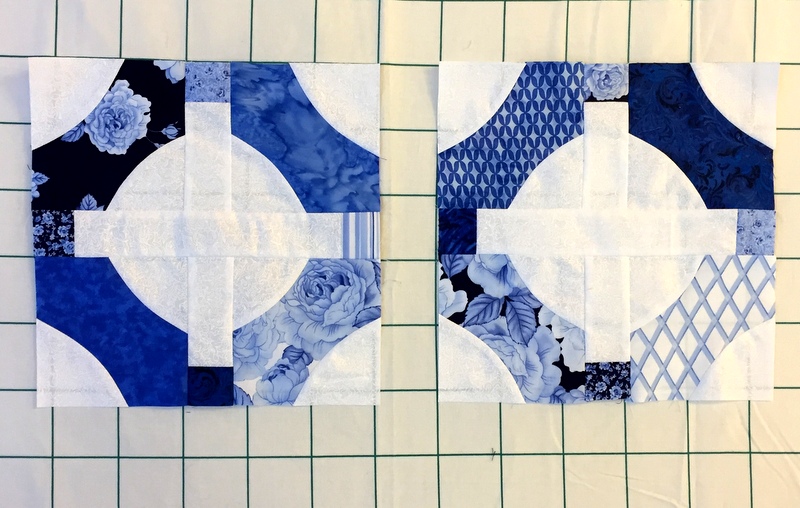
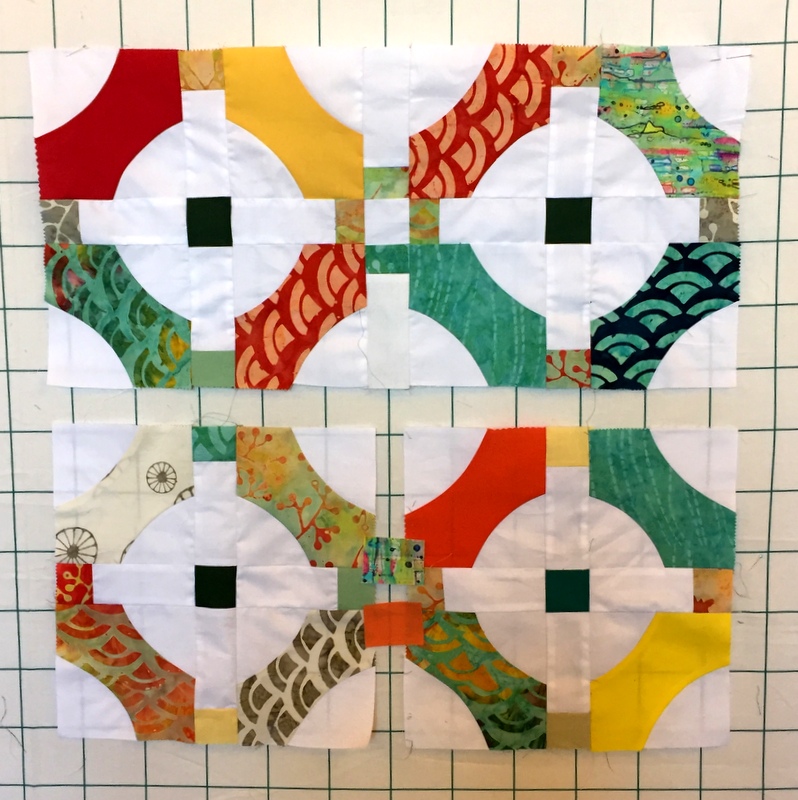
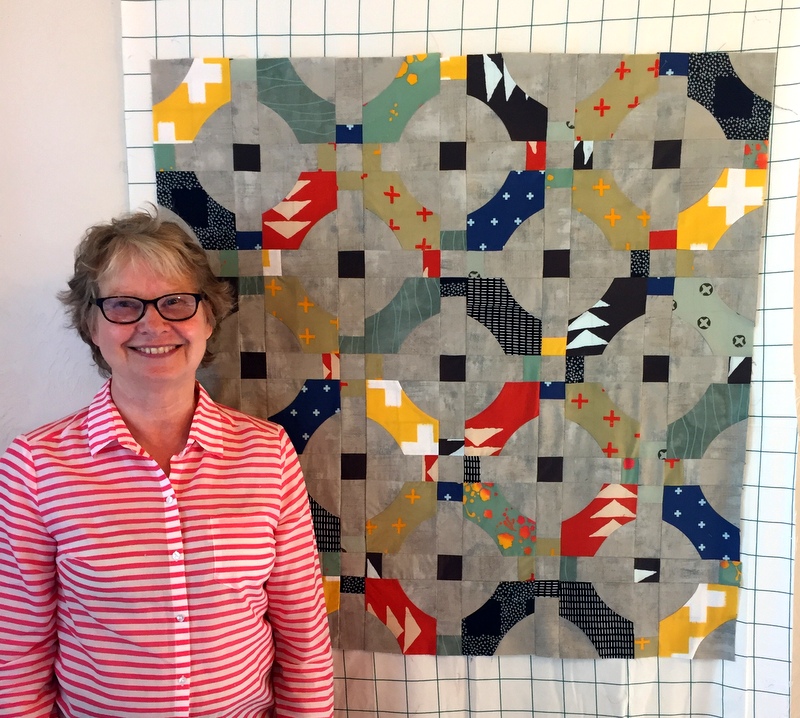
Now for more blocks. These blue and white blocks were made by Joyce . . .

. . . and these were made by Sue and Lisa:


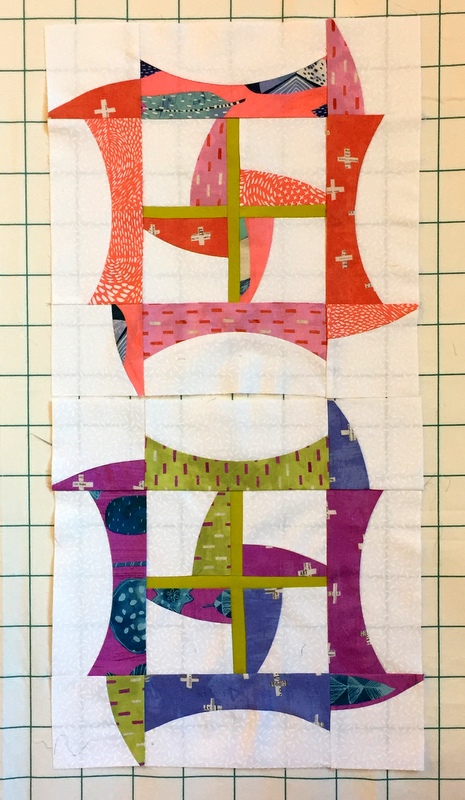
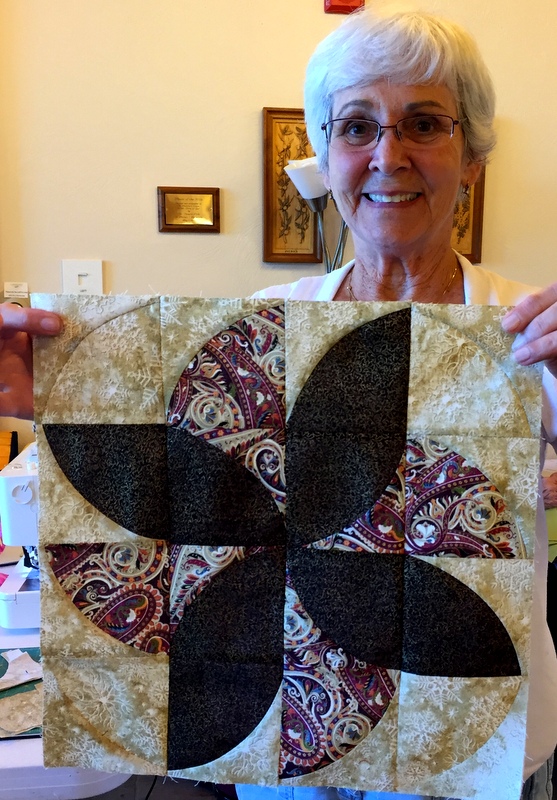
So far all the blocks you’ve seen measure 11″ unfinished and were made with the QCR Mini, the small version of the original Quick Curve Ruler by Sew Kind of Wonderful.  Kay was one of those making my “supersized” version of Mini Mod Tiles in which the blocks measure 18″ unfinished:

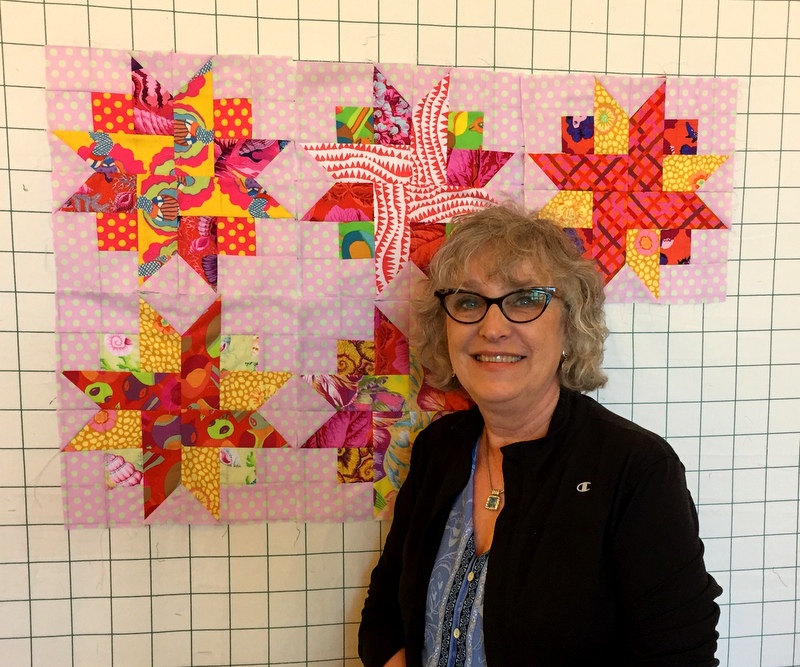
What about those three blocks on top? Kay was also working on a second project, making Ribbon Star blocks from the Missouri Star Quilt C0. It’s pretty clear Kay likes color!

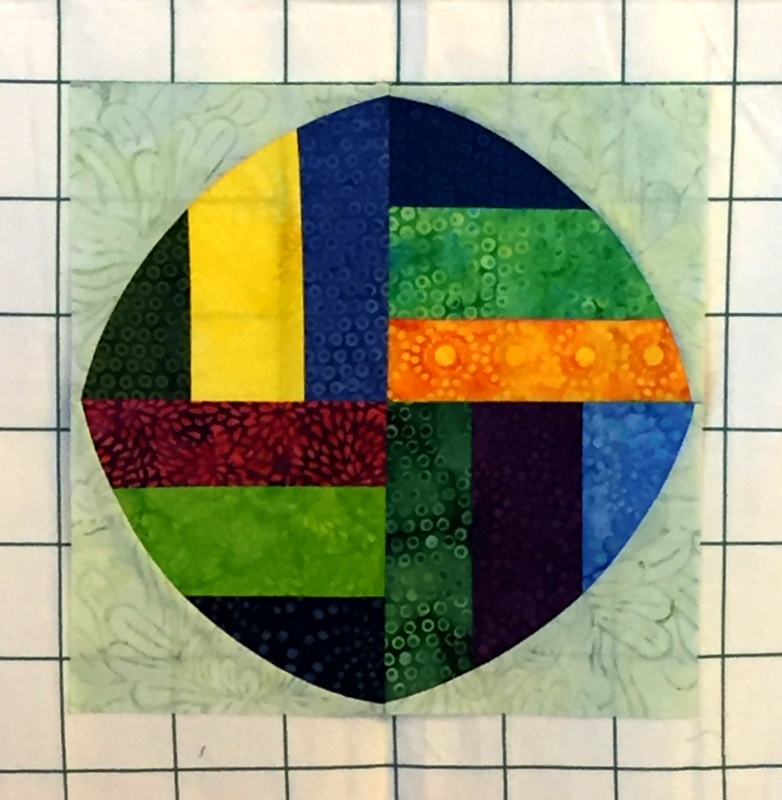
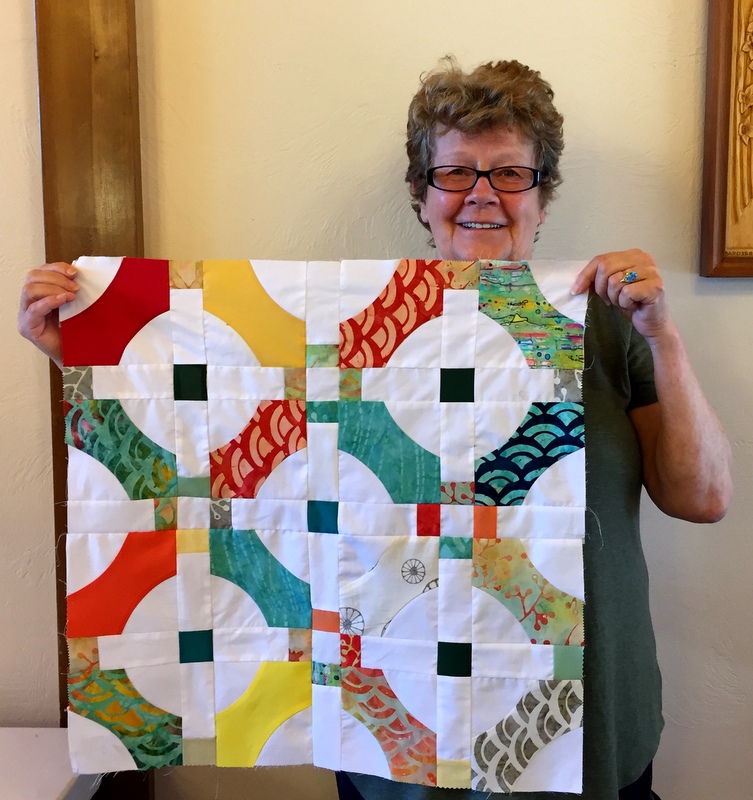
Another quilter making colorful supersized blocks was Kristine:

Missy was making the mini version using a palette quite similar to Kristine’s:

Three of my students were using the original Quick Curve Ruler to make different designs by Sew Kind of Wonderful. Janna started with the free pattern Spring Fling from SKW but departed from the design to do her own thing. Here’s her first block:


Katie fell in love with the pattern Dancing Churndash designed by SKW for Cut Loose Press. Here are her first two blocks:

Delia chose SKW’s Chic Diamonds design:

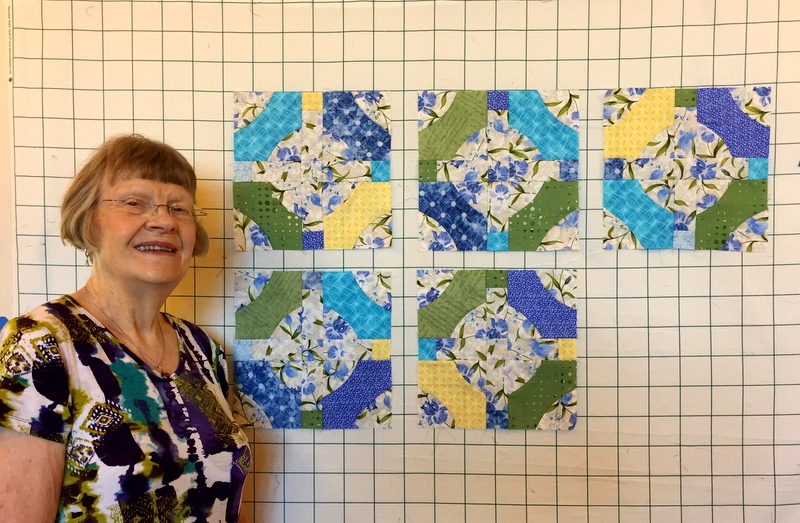
With the second group of students I was much better at getting pictures of them with their projects toward the end of our time together. Here is Rosalie with her five beautiful blocks:

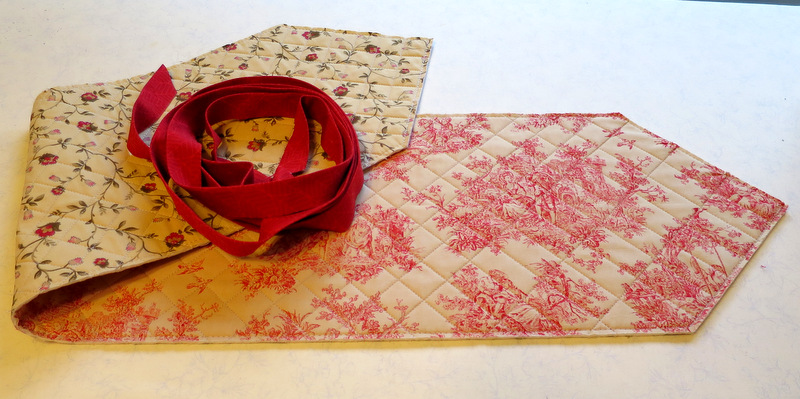
Barbara B. completed a runner . . .


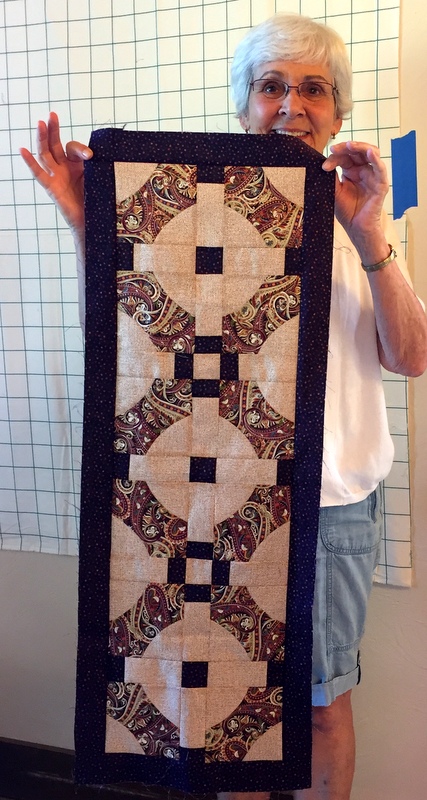
. . . and had enough fabric left to make a mini Fun Poinsettia block:


Here’s Missy with her four blocks sewn together:

Do you see how there’s a fifth block in the center that is made up of partial blocks from the four? This is an example of a secondary block design being the same as the primary.

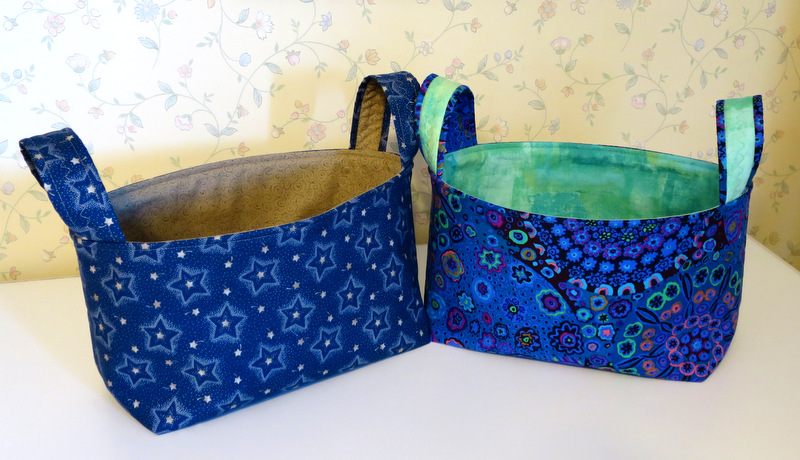
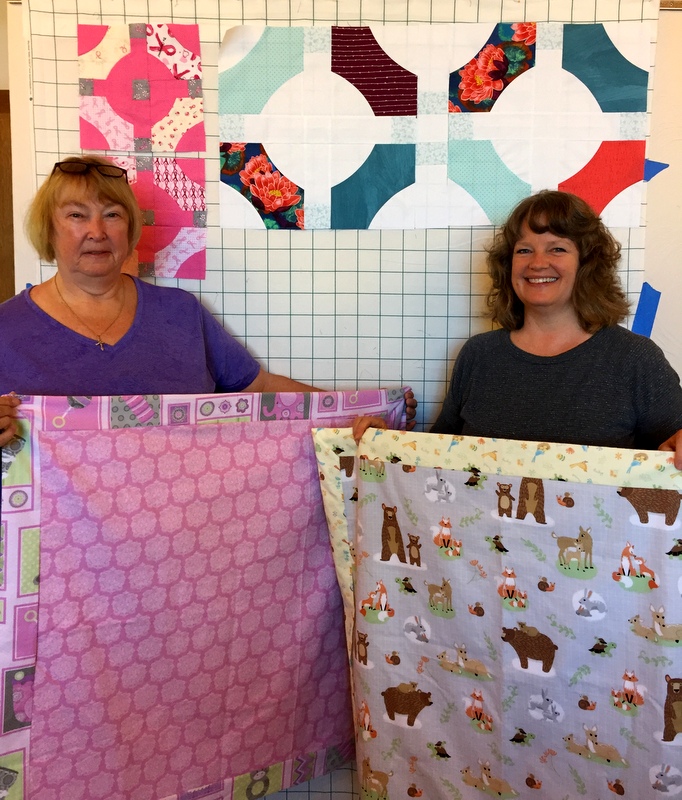
In addition to their blocks (shown behind them), Dena and Kristine made self-binding baby blankets in soft flannels:


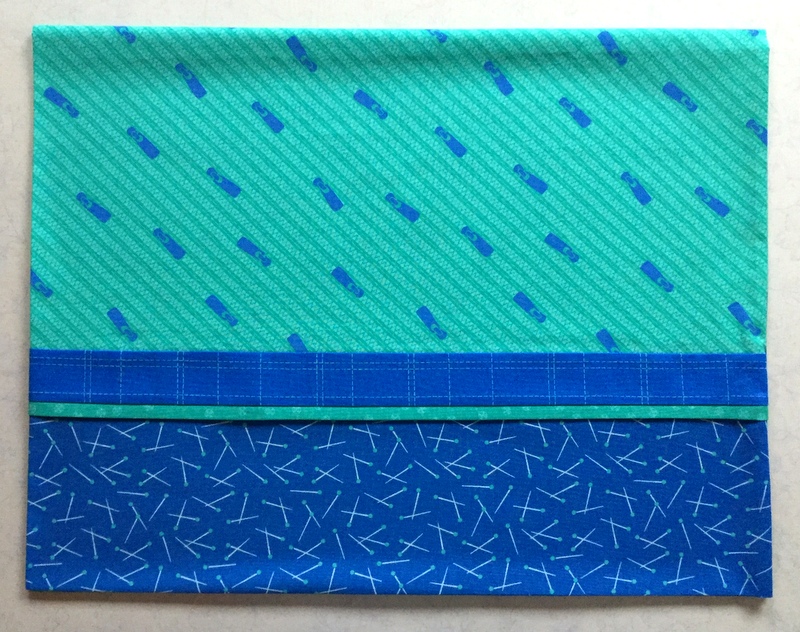
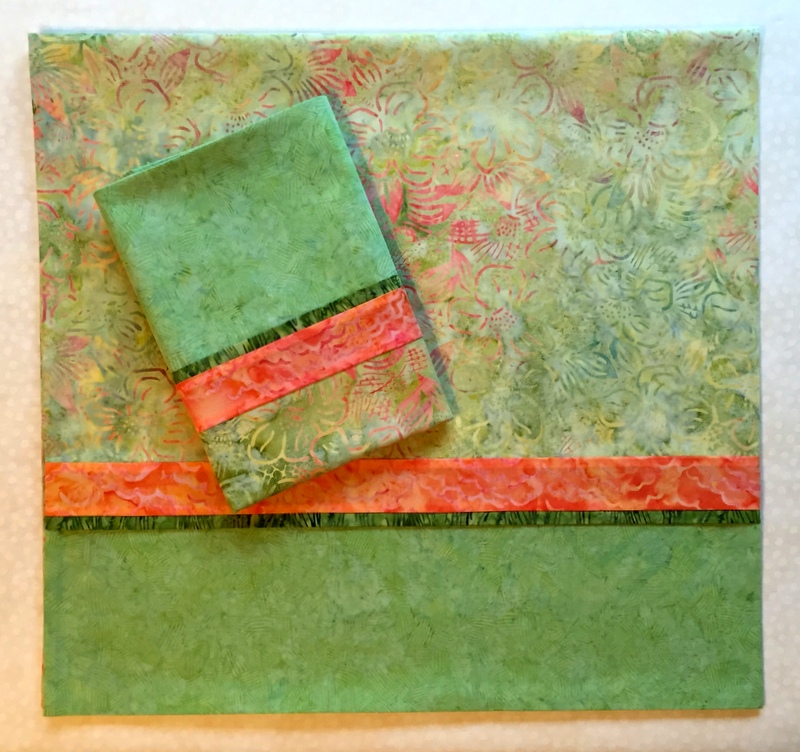
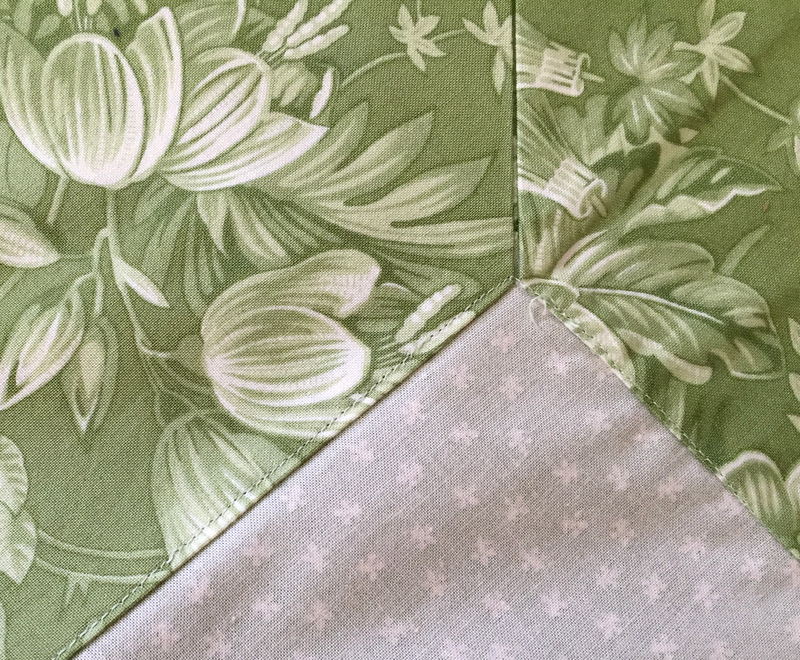
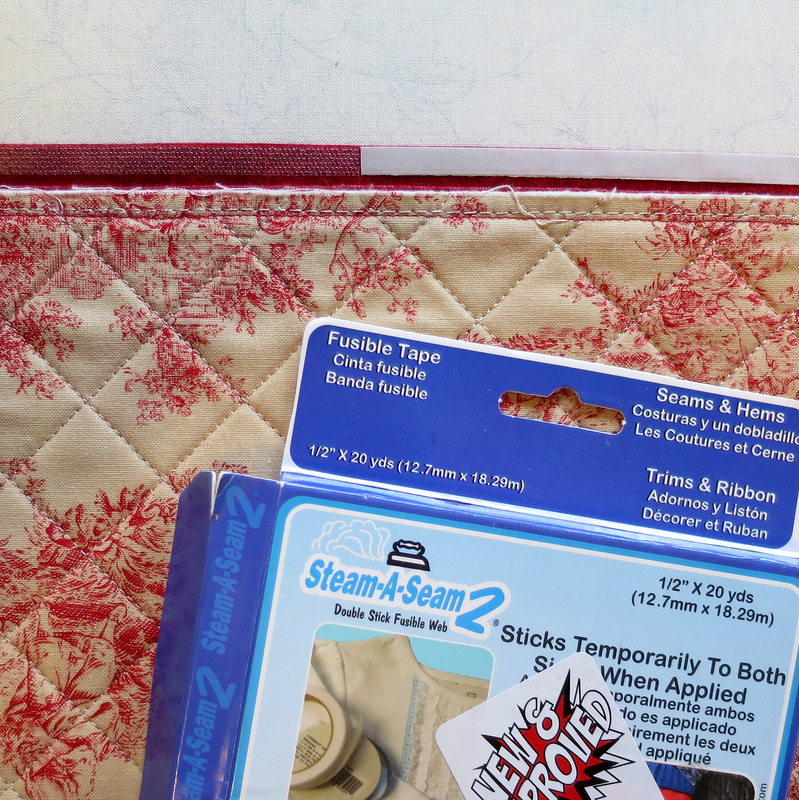
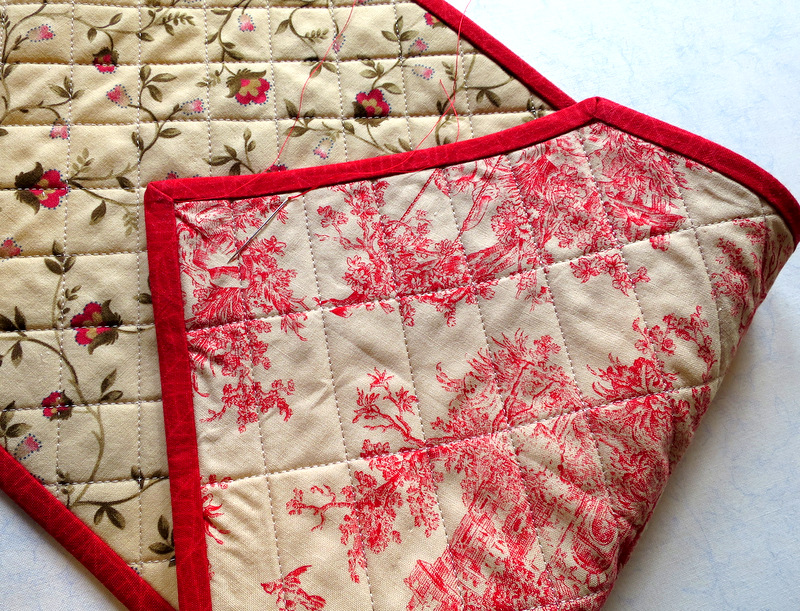
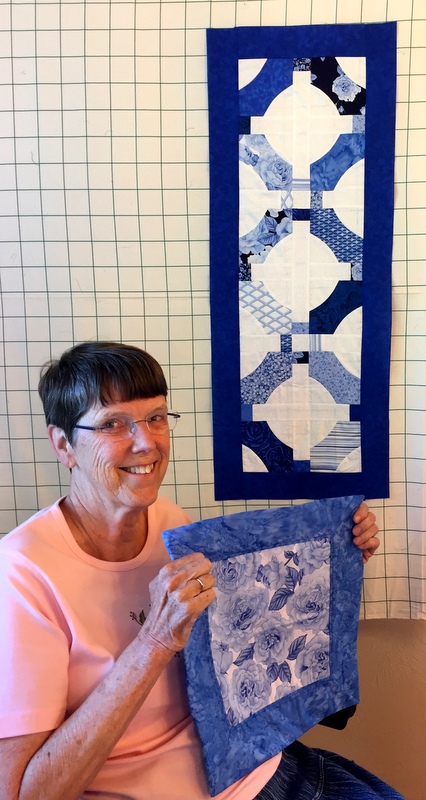
Dena showed several quilters how she mitered the corners on her baby quilt. Joyce practiced the technique, making a square with mitered corners in addition to her lovely runner:

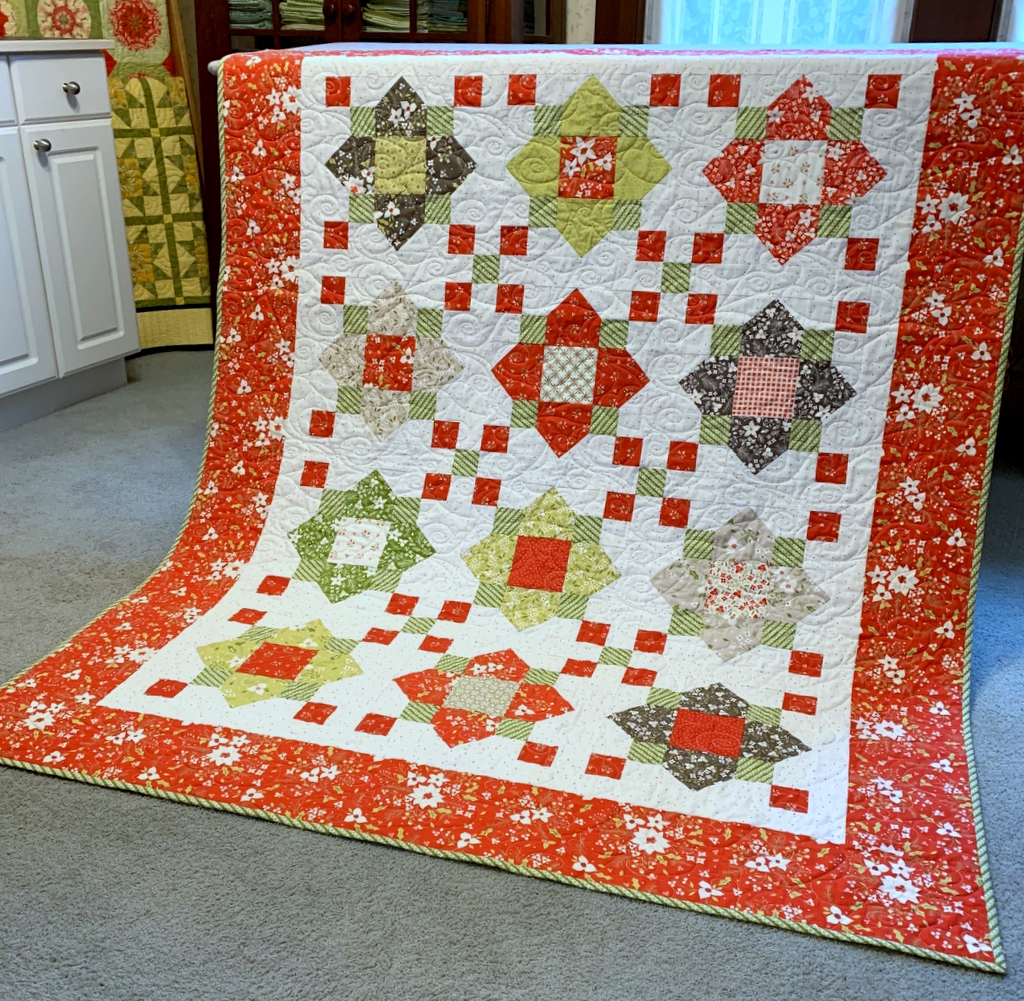
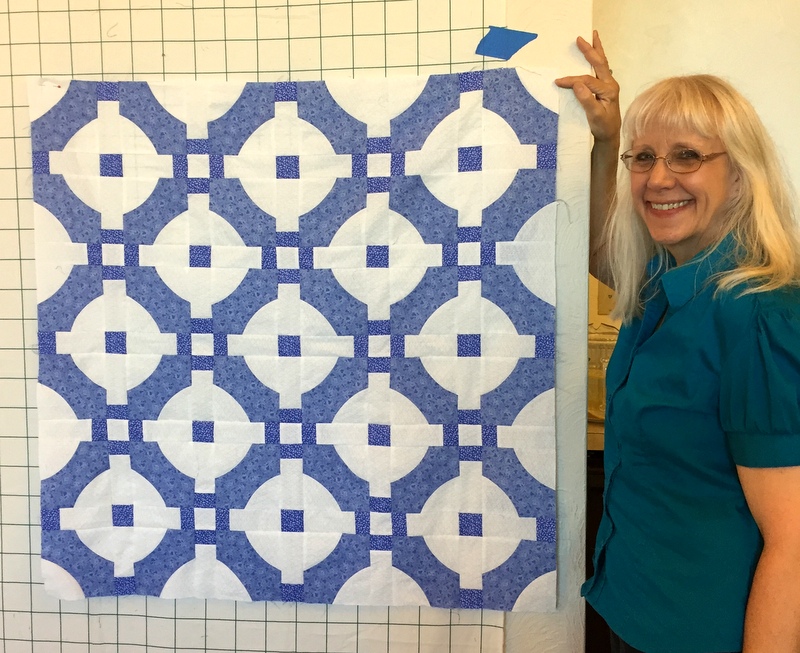
Another vision in blue and white is Roxanne’s quilt top:

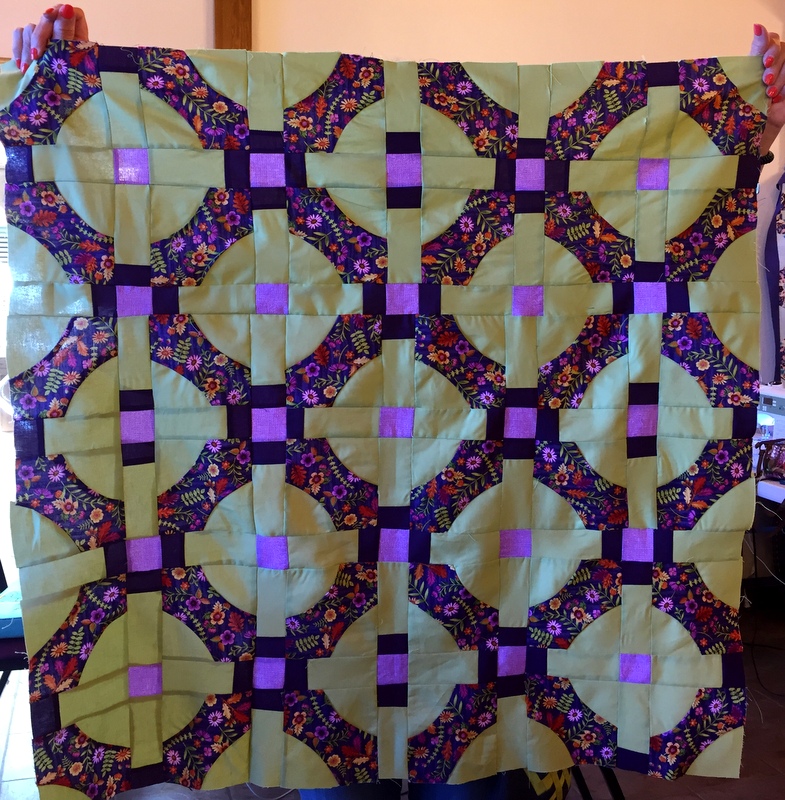
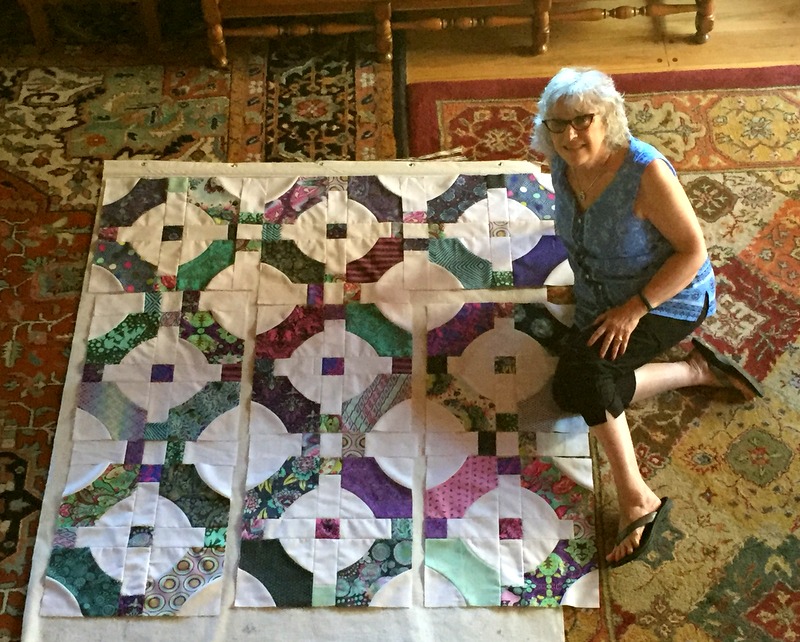
Linda decided to change the 3 x 3 setting to 4 x 5 to make a bigger quilt. Here is half of her Mini Mod Tiles quilt sewn together:


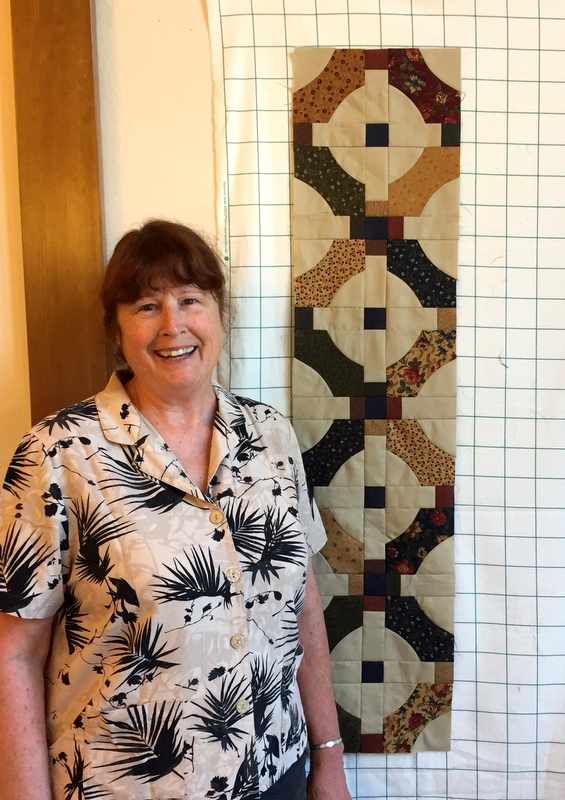
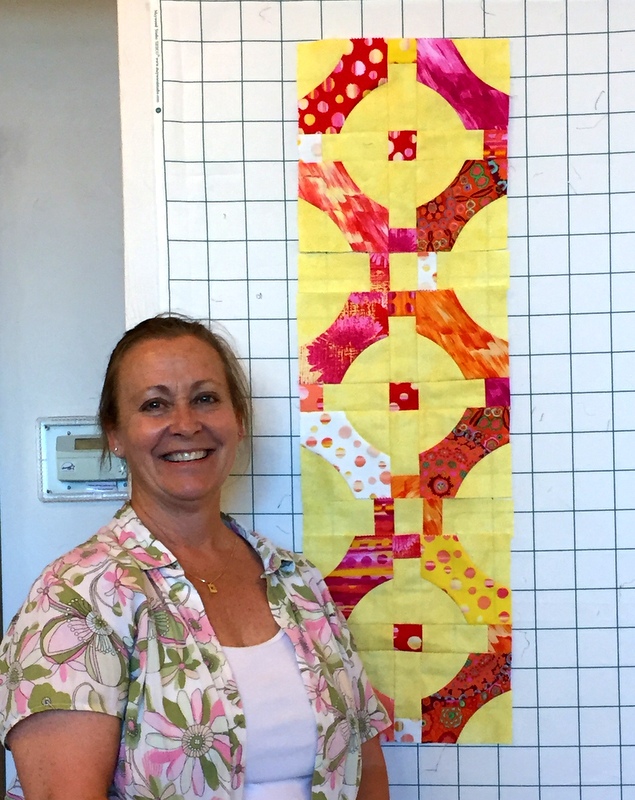
Mini Mod Tiles looks wonderful in both traditional and modern fabrics. Here is Sandra with her four-block runner in soothing muted colors. . .

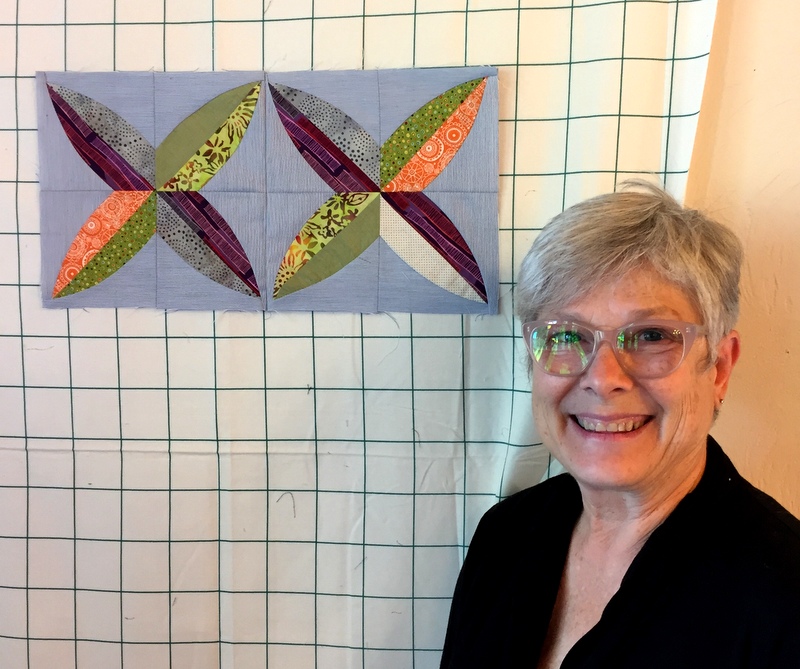
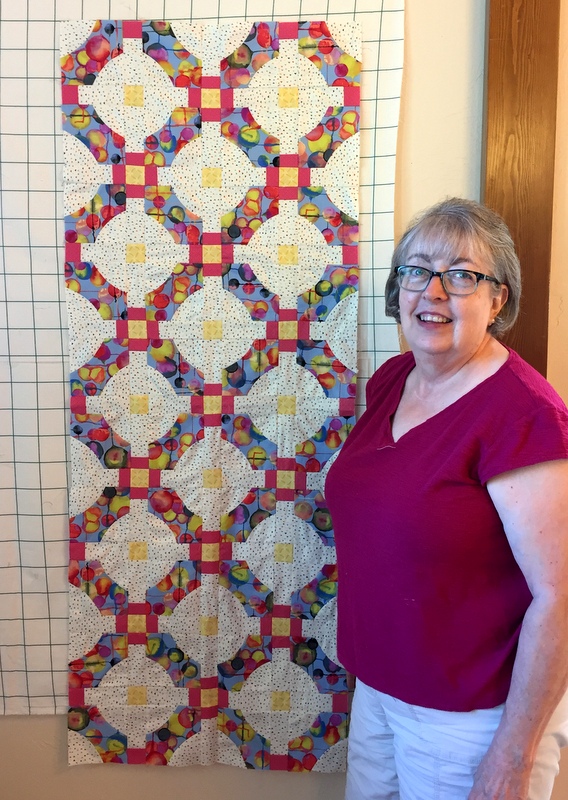
. . . and Lorri with her five-block runner using bright Tula Pink prints:

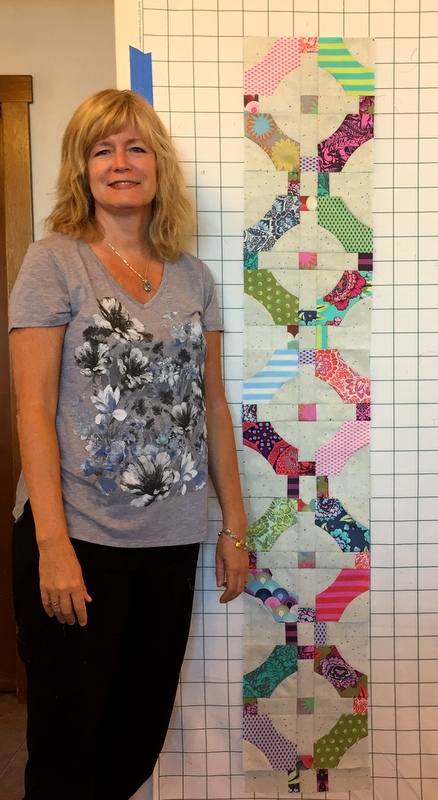
Lisa’s runner makes me think of pink lemonade:

Or maybe raspberry sorbet?

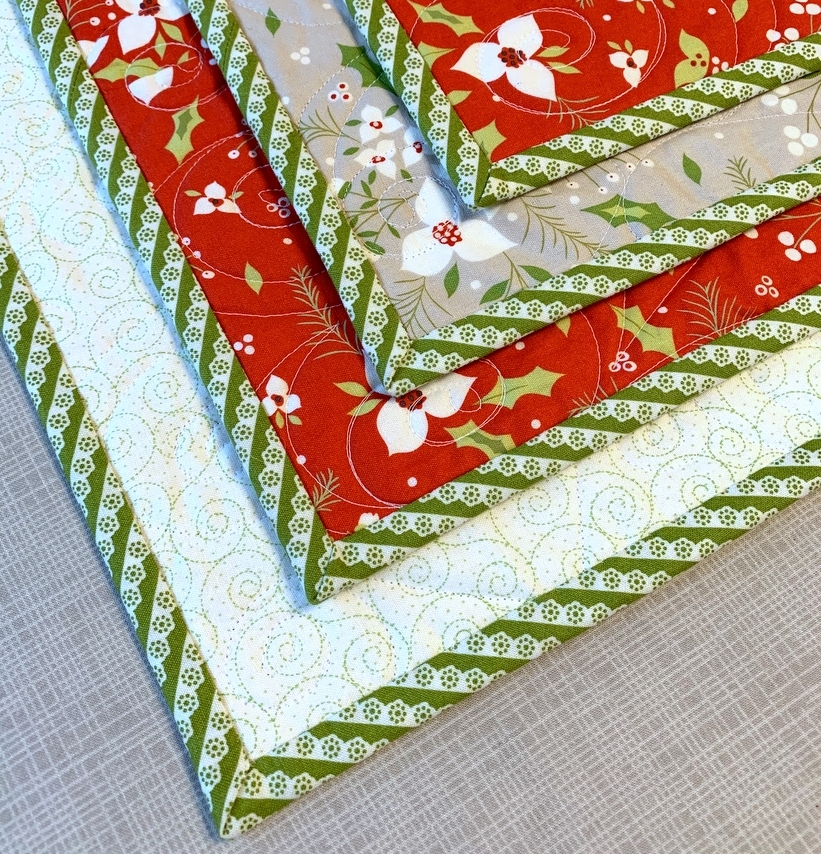
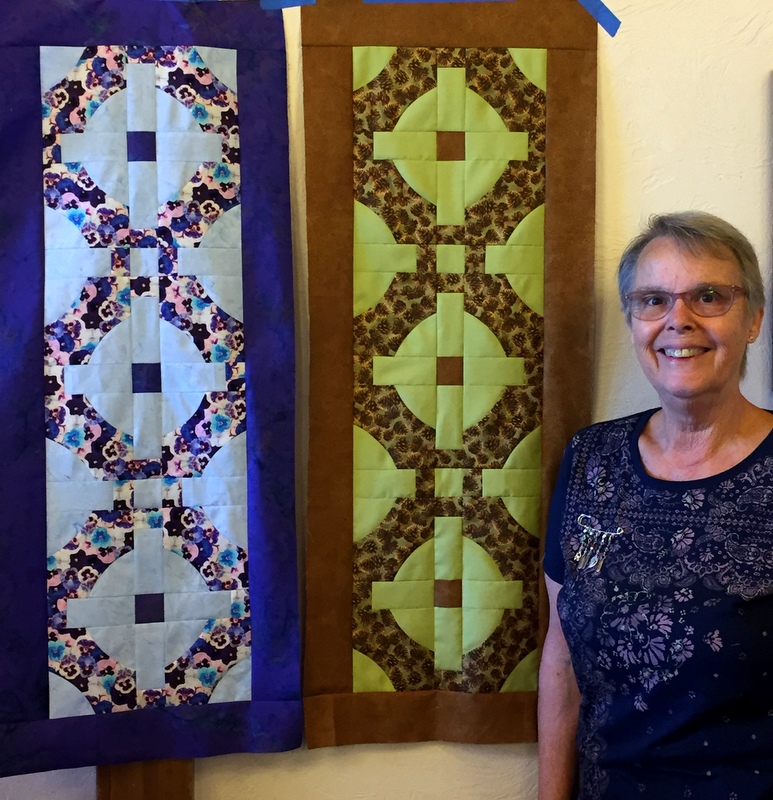
Liz completed her purple pansy runner and made a second one with a charming pinecone print:

Sue departed from the original design by incorporating sashing strips inside some of her blocks:

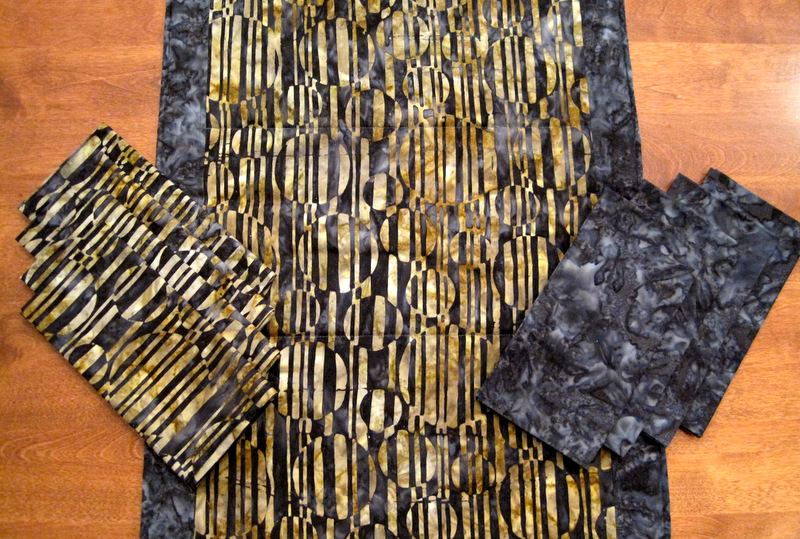
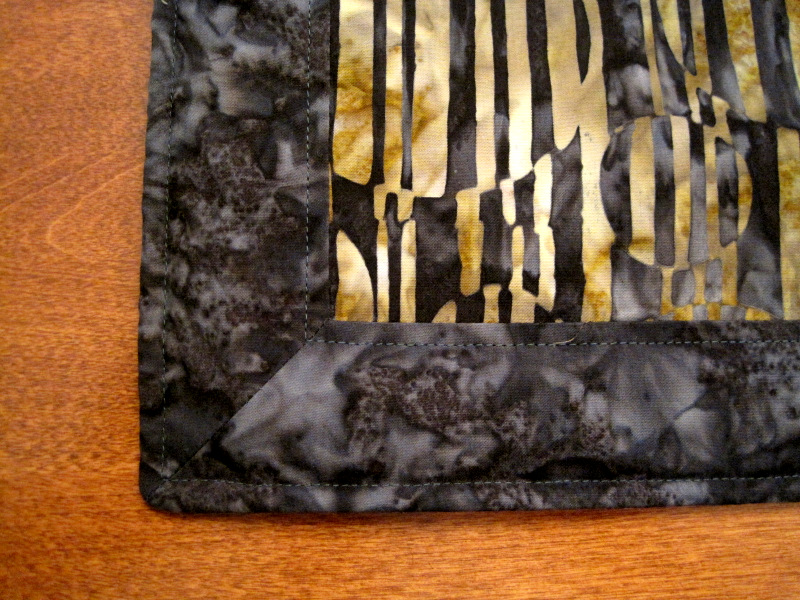
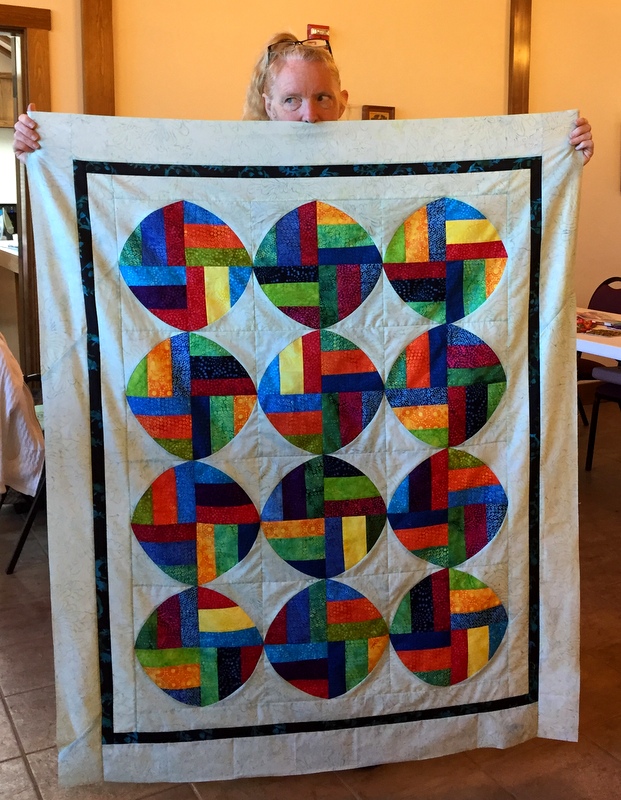
Remember Janna’s bright batik block? Here is her quilt top complete with narrow and wide borders:

Here is Katie with her four Dancing Churndash blocks:

Can you believe Katie is working on her very first quilt? Amazing! She has a bright future as a quiltmaker.

Katie’s sister Barbara S. was originally planning to make a runner but she liked her blocks so well she kept making them and wound up with a quilt top!

In this photo Kay has laid out her supersized blocks and is auditioning the scrappy connector strips between blocks:

Kay also made a few more fabulous Ribbon Star blocks:

During her time at the retreat Delia finished quilting a quilt begun in an improv class with Jean Wells:

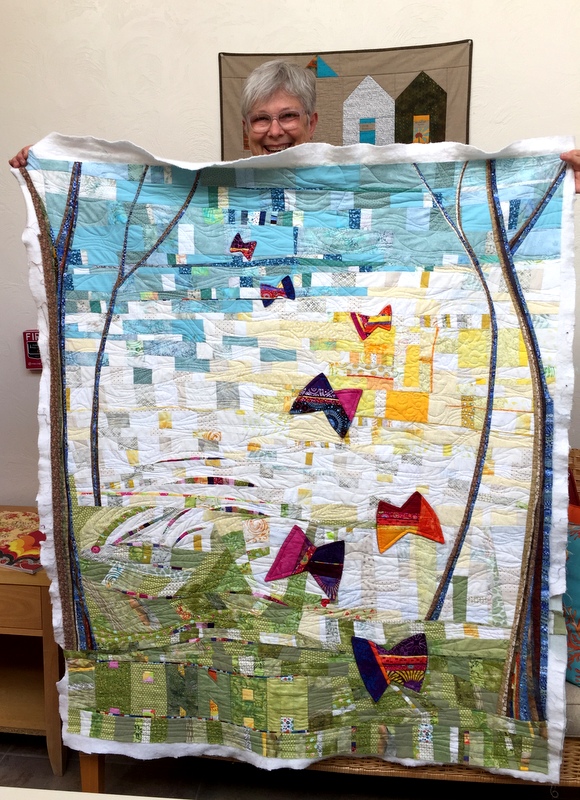
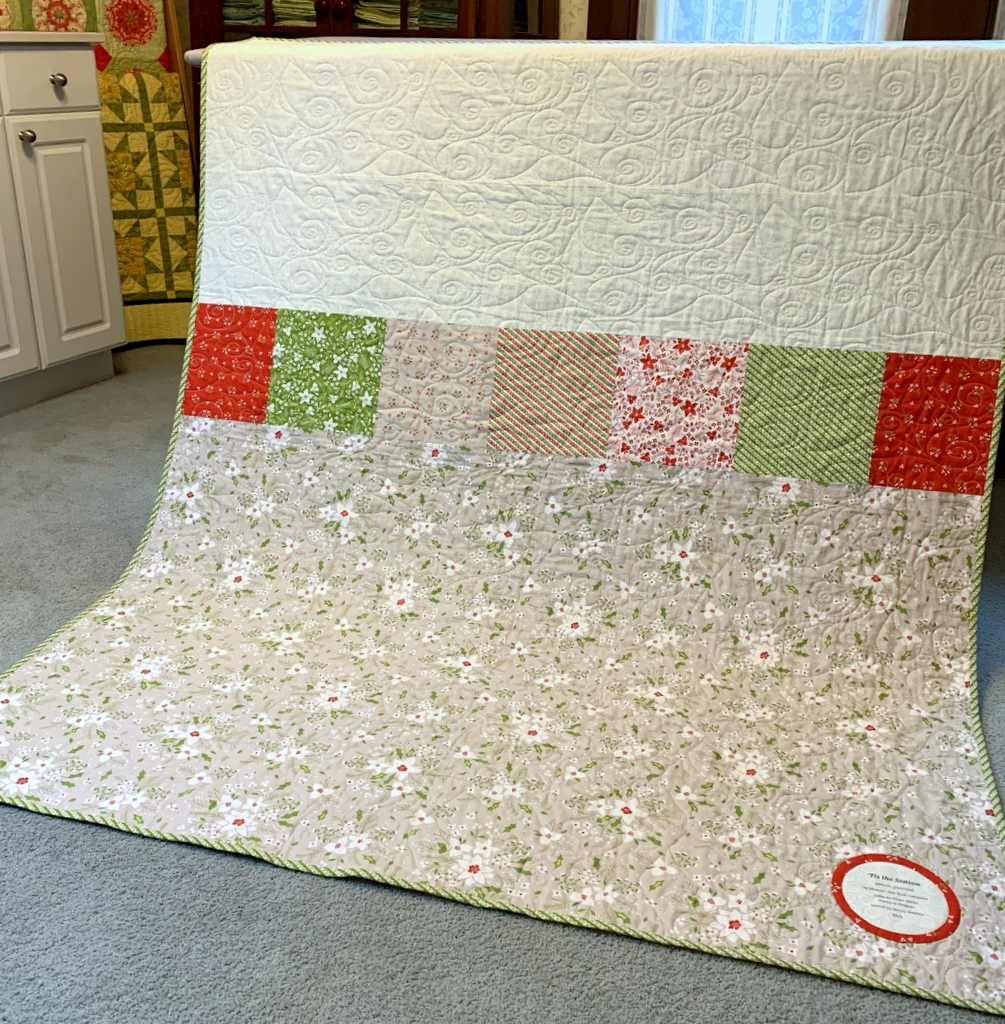
The back is as interesting as the front:

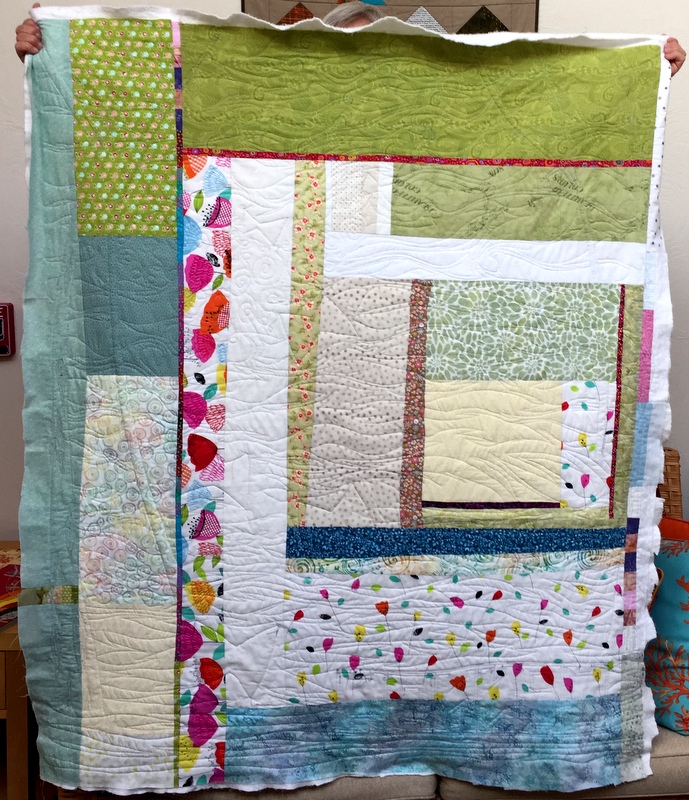
It was all quilted on Delia’s domestic machine. She was on deadline: her quilt needed to be in the mail the following week to Sisters, Oregon where it will hang in the world’s largest outdoor quilt show on Saturday, July 7.

That’s the perfect segue to let you know I am in Sisters right now with my quilt group, the Quisters. We’ve taken classes this week put on by A Quilter’s Affair and we will all be at the quilt show tomorrow where a record 1,497 quilts will be hung for one day. Of course I will be keeping an eye out for Delia’s quilt.

I hope you have enjoyed seeing the beautiful blocks, runners, quilt tops, and other projects created by my students at the two Pine Needle retreats!
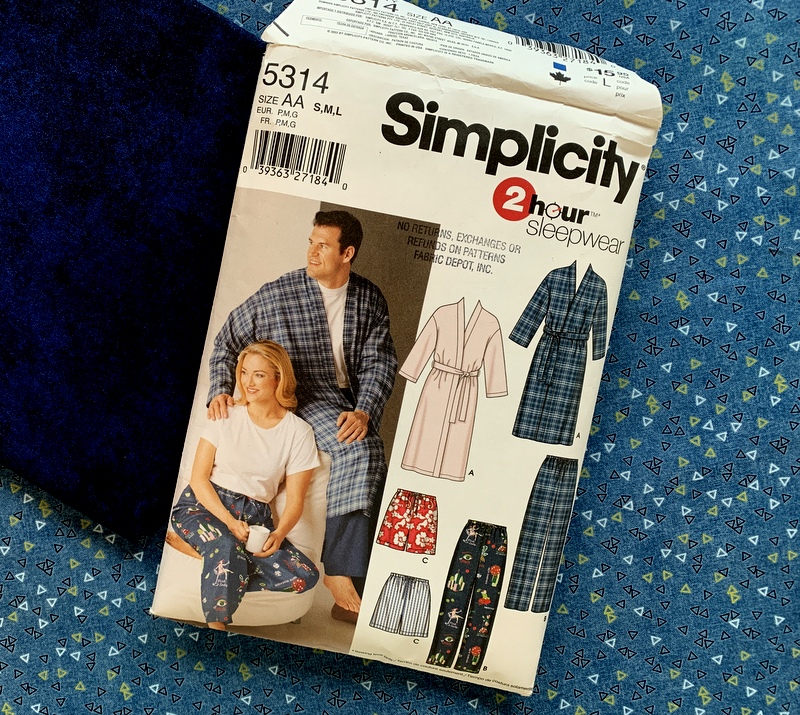
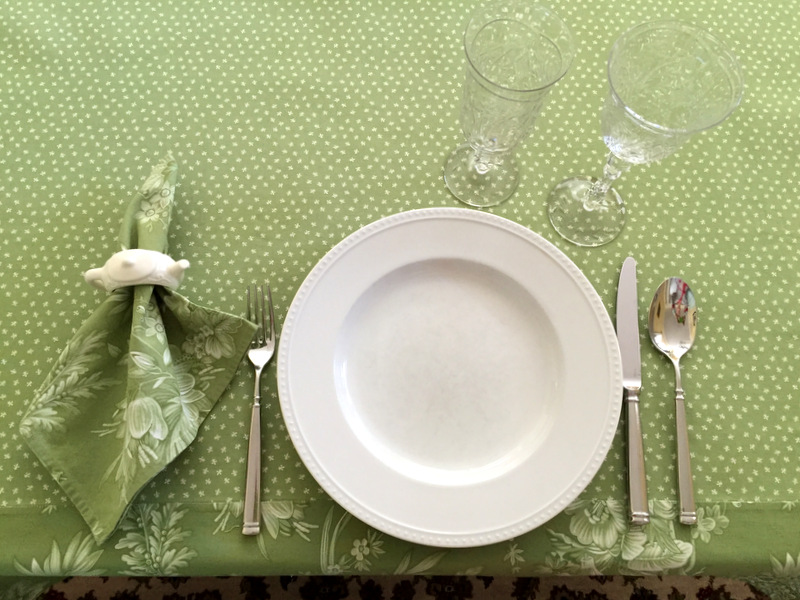
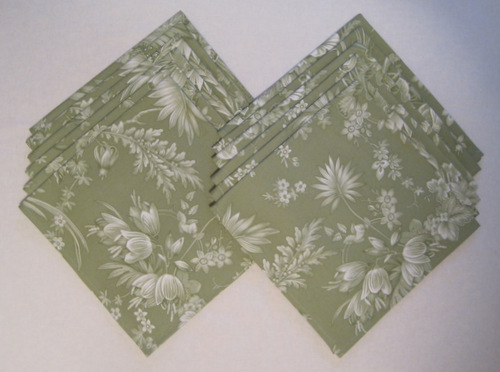
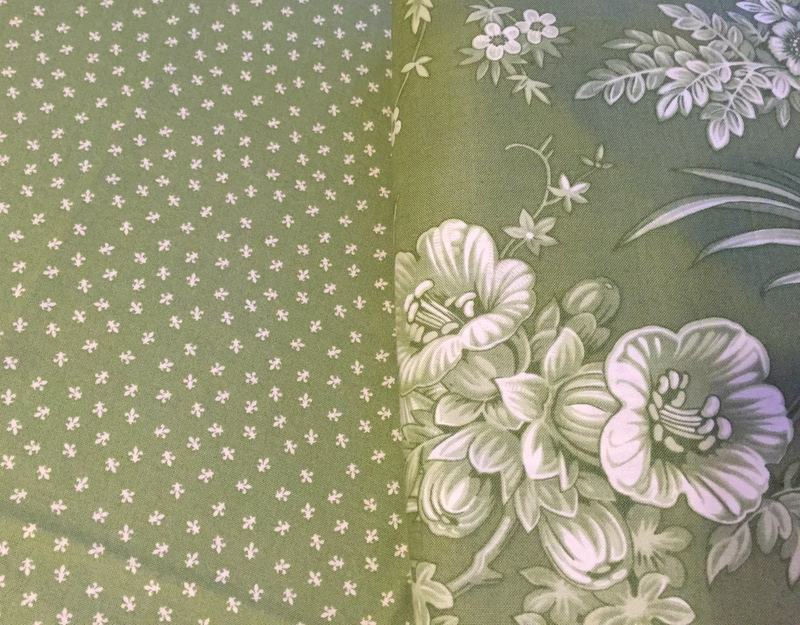
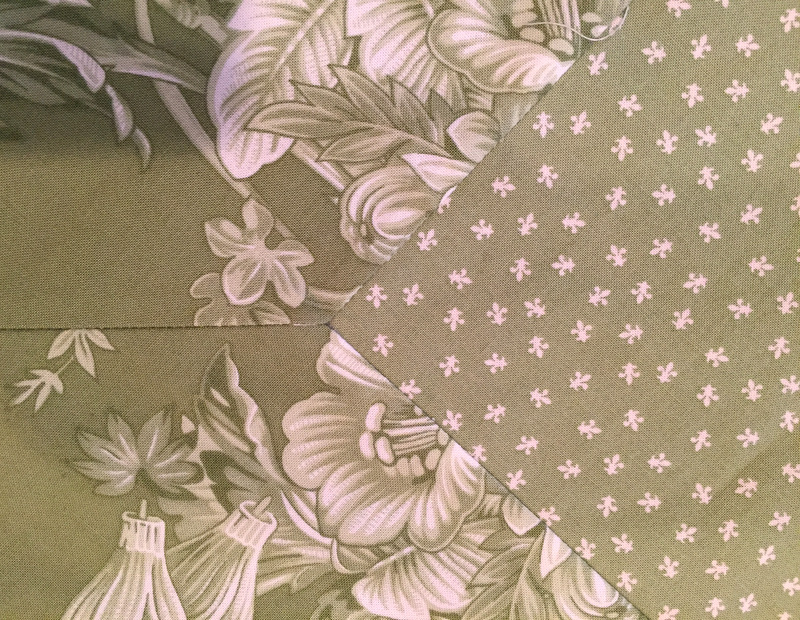
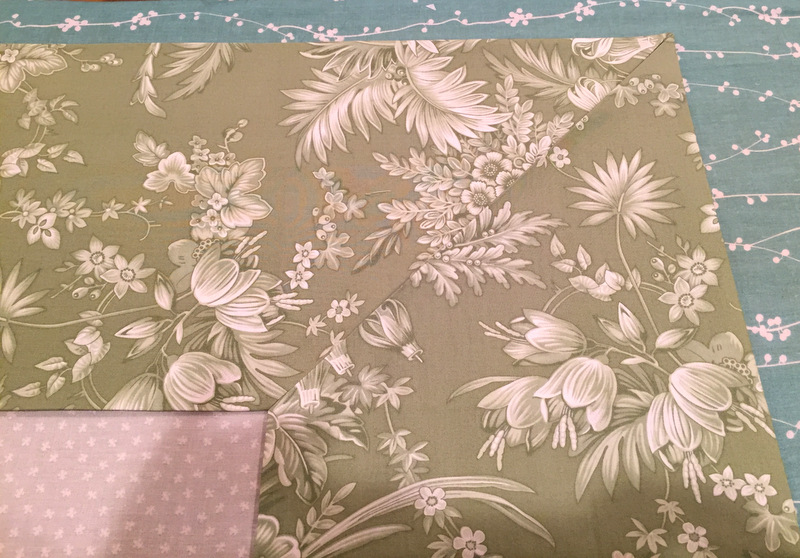
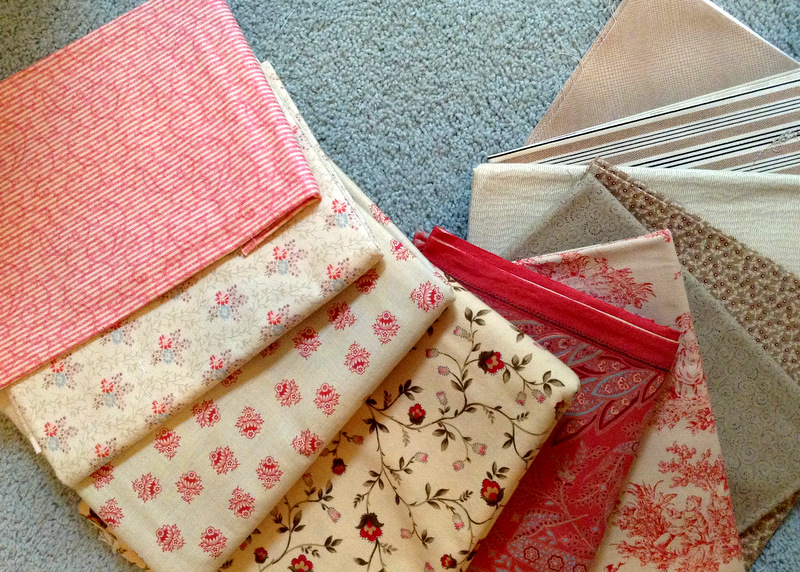
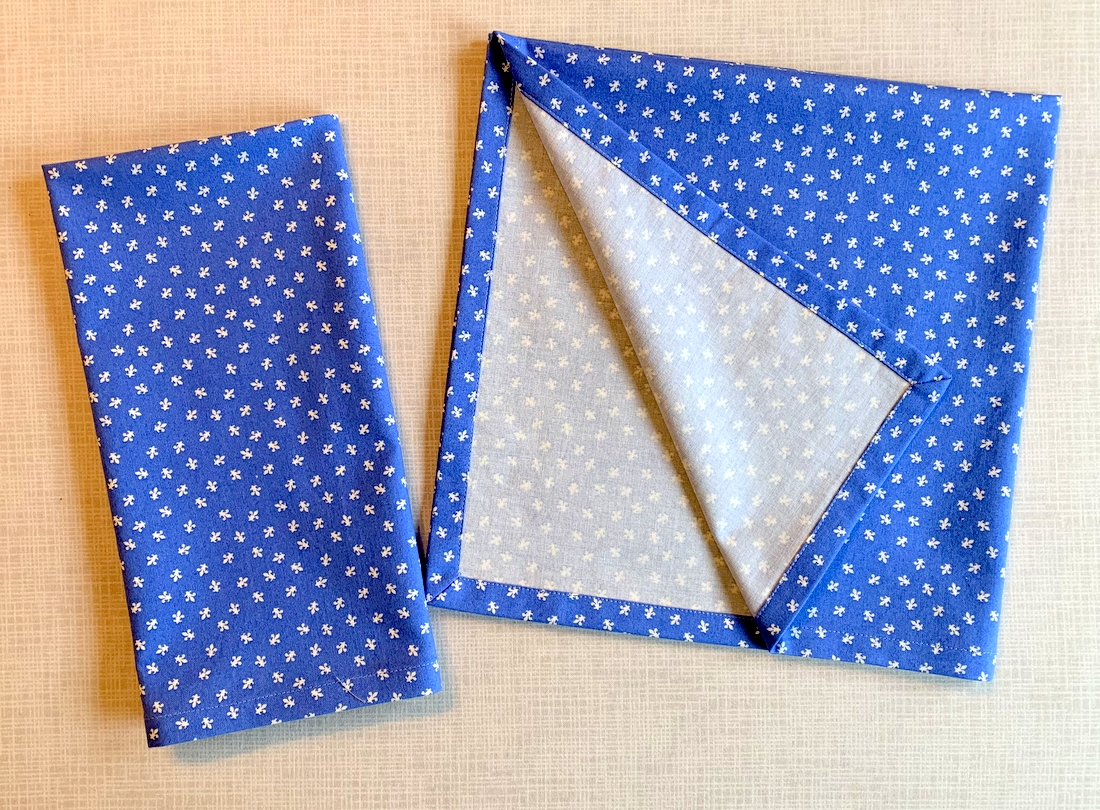


Posted in baby quilt, free motion quilting, mitered corners, QCR Mini, Quick Curve Ruler, Quilter's Affair, Quisters (Quilt Sisters), Sisters OR Outdoor Quilt Show, table runner, update, wall hanging | 3 Comments

Pretty Little Things

This is Part Two of a two-part post on what I accomplished in my sewing room during 2015. Part One featured my finished quilts (unquilted tops don’t count) and can be seen here. Most everything else qualifies as a Pretty Little Thing, so let’s take a look at the Pretty Little Things I made in 2015:

This 9″ x 41″ reversible runner was made for my sister Diane’s living room to cover a “seam” created when two small chests were placed back to back to make a larger unit:

runner completed

Here is the runner in situ in her living room in Atlanta:

Scott find round box for remotes in place
To celebrate the spring birthdays of my friends and fellow Quisters (Quilt Sisters) Deborah and Peggy, I made these fabric baskets based on the 1 Hour Basket Tutorial from Hearts and Bees. The baskets measure about 9½” wide, 6½” tall, and 5½” deep.

a pair of baskets
Pillowcases! I make several every year. Here are cases I made as a hostess gift for my friend Anna in Paris . . .

pcases for Anna and Joe

. . . and a pair made for the Portland White House:

pcases for Portland White House

Of all the pillowcases I have made for my own home, these are the ones my husband likes best.

My sister Diane commissioned me to make a pair of pillowcases to give as a hostess gift to friends in Maine:

pcases for Kathy and Paul's guest house
Her friends have a darling little terrier named Lucy who got her own little pillowcase (and pillow). It measures 6″ x 12″ and goes in her doggie bed:

dog pillow front

This sewing-themed fabric became a singleton pillowcase for me to take to Quilt Camp:

Dawn's quilt camp pcase
I drew my sister Diane’s name in our annual sibling draw for Christmas. When I asked her for ideas on what I could get her, she said, “Dawn pillowcases, of course!” I made her these king size pillowcases from my batik stash:

pcases for Diane and Ed
By the way, all of the pillowcases above were made following my tutorial, Perfect Pillowcases.

For the annual fall Open House at the Pine Needle, the quilt shop where I teach, I made these Cozy Flannel Armchair Coasters, inspired by coasters bought at a craft sale 30 years ago:

flannel coasters print

The coasters are reversible. Below are the backs of the coasters you see above. Just for fun I changed orientation of the herringbone weave:

flannel coasters brown

The coasters were a big hit so I made some more as gifts. My friend Beth got these for her birthday in her favorite colors . . .

coasters teal and purple
. . . and I tucked in this set of four as part of my sister Diane’s Christmas present:

flannel coasters red
My last non-quilt project for the year isn’t small and didn’t get made in my sewing room but I’m including it here anyway. It’s the two-fabric tablecloth I made for my sister Diane’s dining room while visiting her over Thanksgiving:

tablecloth
The tablecloth goes with the 16 mitered-corner napkins I made for her a couple of years ago out of the same large floral print used in the border. Here’s one of those napkins in a place setting:

tablecloth with setting

Oh, there’s a tutorial for those napkins, too: Make Mine Mitered.

How satisfying to have a visual record of what I made last year! Thanks so much for taking this look back with me. And now it’s time to head back to my sewing room and get started on my 2016 projects.

Avanti!


Posted in family, home dec, mitered corners, Quisters (Quilt Sisters), roll-it-up pillowcases, table napkins, table topper, update | 3 Comments

Time for a Tablecloth

For the last decade or so, my husband and I have spent Thanksgiving week in Atlanta with my twin sister Diane and her husband Ed. Three years ago I arrived at her home with a gift of these table napkins, made from a fabric called Heavenly Peace by Verna Mosquera for Free Spirit Fabrics:

A Dozen Table Napkins for Diane

Diane loved the fabric, and I promised to make a matching tablecloth. After three years, isn’t it about time?

Since I like to work on a home dec project when I’m at Diane’s, I brought all the yardage I had left — which was considerable — along with a piece of fabric (from the American Jane line designed by Sandy Klop for Moda Fabrics) that was a perfect color match:

tablecloth fabrics 1-001

Diane and I worked out a simple design that would feature the fleur de lis fabric on the table surface. A few inches of the large floral print would also show on the table and continue down to a generous drop. I wanted to miter the corners and continue the miter around to the back so the stitching lines would be covered. That way no raw edges would be exposed.

I did the math (or so I thought) and created a little paper pattern to guide me in the preparation of the miters:

tablecloth fabric

Well, friends, it would have taken 11 yards of the floral fabric to make the tablecloth the way I originally envisioned it. That’s because I was going to cut a 25″ strip and needed 398″ inches. The modified plan used half that because I cut the fabric along the fold, getting two strips from a width of fabric instead of one. (I wish I could tell you I figured that out before cutting the first 25″ strip.)

The mitered corners came together nicely. Here is a shot from the back . . .

tablecloth mitered corner from back

. . . and from the front:

tablecloth mitered corner from front

On the back, where the folded edges of the miter meet, I used Steam-a-Seam 2, a double-sided fusible web, to fuse the folded edges together:

tcloth with fused miter


From the front, I stitched in the ditch where the two fabrics meet. The stitching line caught the folded edge of the miter on the back:

tablecloth stitched in ditch

Here is Diane’s new tablecloth in place:

tablecloth

And here is the table set with a matching napkin:

tablecloth with setting

Diane and I both declared ourselves very pleased with the result. An added bonus: the fleur de lis motif is a lovely reminder of our recent big birthday trip to Paris.


Posted in home dec, mitered corners, table napkins, update | 9 Comments

Design Dilemma

Earlier this week my twin sister Diane called me with a home dec design dilemma. The small chest that sat between two red leather chairs in her living room was so narrow that people sitting in the chairs couldn’t see each other around the lamp at the back of the chest. Her solution was a clever one: she claimed a matching chest from another room and placed it back to back with the first one. Then she had a piece of glass made to fit the top. The only problem was that you could see under the glass where the two chests met in the middle.

Could she commission me to make a table runner to cover the middle section? Of course she could. She wanted something very simple — no piecing required, just a rectangle about 9″ wide and long enough to extend down both sides of the chest. We talked about colors to match her living room — deep red, tan, forest green. I was ready to charge off to a fabric store to look at home dec fabrics.

Diane was incredulous. “Don’t you have some fabric in your stash that will work?” she asked. Well, of course I did. A little stash diving resulted in this group of fabrics sent from Portland to Atlanta via iPhone for Diane’s inspection:

fabric choices

She liked the print in the center of the photo — the one with the red flowers and vines on a tan background — and the red and tan toile on the right side. No need to choose between them. By making the table runner reversible, we could use both fabrics.

I pulled a red leaf print from my stash for the binding:

the winning combo
The only thing I needed to buy was topstitching thread. It had to be just the right color to look good on both fabrics, as the backgrounds are similar but definitely not the same. In no time at all my quilt sandwich was ready. I decided to quilt a diagonal 1″ grid across the surface of the table runner, using my walking foot and this light taupe rayon thread by Madeira that has a beautiful sheen:

topstitching thread
I cut the binding strips on the bias, by the way, because I knew the leaf print would look better that way. Here is the runner quilted and ready to bind:

ready to bind
Notice that the table runner isn’t just a rectangle? It wouldn’t be much more work, I reasoned, to make the ends pointed, and it would be so much more elegant. It didn’t occur to me until later that I would have six corners to miter and that four of those corners would be angles greater than 90 degrees. No worries, though. Heather Peterson of Anka’s Treasures has an excellent tutorial on her blog, Trends and Traditions, that shows how to bind outside corners greater than 90 degrees.

Once the binding was stitched on, I tacked it down on the other side using Steam-a-Seam 2, a double stick fusible webbing. At the top of the photo you can see how the webbing is positioned right along the folded edge of the binding:

fusing the binding

(Steam-a-Seam 2 comes in ¼”-wide rolls. All I had on hand was ½”-wide. Easy enough to cut it in half to make ¼”-wide strips.) The fusible webbing made short work of finishing the binding. All that was left was tacking down the mitered corners by hand. I was on the last miter when I noticed I had missed three rows of quilting:

tacking down the binding (2)
Now doesn’t this look better?

stitching corrected
Here is Diane’s reversible table runner (measuring 9-3/8″ x 41″), ready to be boxed and mailed:

runner completed

This little project was a pleasant diversion from binding Toile Story. I do enjoy binding quilts by hand but was ready for a little break. Diane said she wasn’t in a hurry to receive this but was hoping to get it before she hosts a cocktail party later this month. She’ll be very surprised to get this in the mail so soon — unless she sees this post first.


Posted in family, home dec, mitered corners, update | 3 Comments

Back Home Again

“Hey, it’s good to be Back Home Again.” Do you remember the song by John Denver? It came out in 1974, so you have to be Of a Certain Age to know it. We are indeed home after a delightful two-week stay in Atlanta with my sister Diane and her husband, made even more delightful by the arrival of our sister Reigh and her husband a couple days before Thanksgiving.

I managed to squeeze in a couple of little sewing projects for my sisters the last week I was there. Reigh said she would love to have a runner for the pub table in the dining area off her kitchen, and Diane said she would love a new set of pillowcases for the guest room on the main floor. My arm didn’t have to be twisted:  it meant a trip to a local quilt shop!

Off we went to InTown Quilters in Decatur, Georgia, where both Diane and Reigh selected batiks for their projects. Reigh has a lot of brown and blue in her kitchen and dining area, with touches of yellow and gold. The colors in this simple table runner should go very well with her décor:

Reigh's table runner and napkins

Reigh bought enough fabric for me to make two sets of napkins, four in each set.

Because the design of the runner is so simple — just a rectangle of fabric with four borders — I mitered the corners to give it a little something extra:

Reigh's table runner, detail

I used low-loft batting and did some very basic topstitching to finish it. Reigh has promised to send me a photo of the table runner when she gets back home so I can show you how it looks in its designated spot.

Here are the pillowcases I made for Diane’s guest room:

Diane's new pillowcases

Here’s another view that includes the pleated bedskirt I made last year during my annual Thanksgiving visit:

Diane's new pillowcases en suite

I love the way the gold fabric in the pillowcase picks up the gold in the bedskirt.

Reigh and Diane joke about shackling me to the sewing machine when we are all together but the truth is I am in my element when creating something with fabric.


Posted in bedskirt, family, home dec, mitered corners, roll-it-up pillowcases, table napkins, update | 6 Comments