Category Archives: table topper

A-doorable!

The doors are on my wonky Dresden Neighborhood mini quilt:

I cut the strips for my doors a little taller than designer Kim Lapacek’s pattern calls for. That’s because my house fabrics are pretty busy and I wanted to tone down the prints with some longer strips of solid fabrics — or at least fabrics that read as solid. In fact, there’s only one solid, the true red.

The next decision? What to use for the circle that goes in the center. First I auditioned a scrap of the solid red:

I liked it but felt it was too strong. Maybe one of the red prints would work better? I cut a circle out of a scrap and stuck it on:

As much as I like this print (one of my favorites from Corey Yoder’s “Holliberry” line), it seemed to add to the busy-ness of the prints rather than calm them down.

Next I tried one of the greens:

Okay, this is more like what I had in mind. (And you shouldn’t be surprised. Green is my favorite color, after all.)

But then I wondered:  how would it look with a smaller solid red circle on top of the green one?

Oh, yeah! I’m liking this a lot. As Henry Higgins would say, “By George, I think she’s got it!”

But guess what else I’m seeing? A big green button on top of the red circle. Maybe even a smaller red button on top of the green one. What do you think? Can you see it too?

One of the pleasures of working on a project like this is letting it evolve. Each quilter who makes this charming pattern (Dresden Neighborhood by Persimon Dreams) winds up with a unique project, totally subject to the whims and preferences of its maker.

Now that I have a plan, I’ll inset a red circle into a larger green scrap and turn that scrap into a circle so that I can applique it (by hand) into place. Then I’ll be ready to add the batting and backing and turn it into a quilt sandwich.

Working on this project is making me smile. Always a good thing on a cold and rainy January day!


Posted in appliqué, table topper, update, wall hanging, wonky Dresden neighborhood | 5 Comments

Happy New Year!

Happy New Year, friends and treasured blog followers! I’m popping in to say hello and point out the stitching around the roofs on my wonky Dresden Neighborhood mini quilt:

It’s still under construction but you can see the rest of the neighborhood here.

I used a simple straight stitch to outline each roof, using my open-toed walking foot so I could easily see every stitch as it was being made:

The threads I used — light green, red, and medium gray — were chosen to blend with the roof fabrics rather than offer contrast. The effect is very subtle but gives the roofs in my wonky little neighborhood a nicely finished look.

Thanks for stopping by on this first day of 2022!


Posted in appliqué, table topper, update, wall hanging, wonky Dresden neighborhood | 5 Comments

Up on the Rooftop

My Dresden Neighborhood homes now have roofs over their heads. I just finished fusing 20 slightly wonky roofs in place. But before I show you, take a look at the “before” photo, with the dresden blades attached to the background fabric:

Who doesn’t love polkadots?! I especially love them when they’re scattered randomly across fabric. They add an extra touch of whimsy, don’t you think?

Now for the roofs:

(That’s a circle of freezer paper in the middle, put there just to cover the raw edges.)

Next up: stitching around each roof. I used a heavy duty fusible on them so I’ll use a straight stitch around the edges of each roof rather than a decorative stitch. Doors and windows get fused on next. Hmmm, wouldn’t it be fun to use buttons for some of the windows? I have some really neat vintage buttons that might find their way onto the finished quilt . . .


Preparing to teach a class on this pattern (Dresden Neighborhood by Persimon Dreams) has given me an excuse to play in my sewing room. (As if I needed an excuse!)

Since this is my second version of Dresden Neighborhood — you can see my first one here — I’m going to try out some new ideas (buttons being one of them). As designed, this mini quilt finishes at 24″ square but I’m toying with the idea of making it round. To that end I cut my background fabric about 31″ square. We’ll see where that takes me after I’ve finished decorating the houses.

For crafters and quilters in the area who might be interested in my class, clicking here will take you to the class information page at Montavilla Sewing Center in Lake Oswego.


Posted in appliqué, table topper, update, wall hanging, wonky Dresden neighborhood | 3 Comments

More Simple Sewing

It’s been almost two weeks since the Dear Husband and I returned from our annual Thanksgiving trip to Georgia. I’m afraid I don’t have much to show for it in terms of sewing. Quite ironic, as the few things I have worked on fall squarely in the “simple sewing” camp.

I converted a one-pocket long-sleeved shirt for the DH into a two-pocket short-sleeved shirt. The pockets were made from the bottom part of the sleeves:

I hope you can see the pocket! I matched the plaid pretty carefully.

New napkins for the Portland White House (we don’t use paper napkins):

Pillowcases for the Portland White House featuring the same toile fabric I used in the pillowcases made when I was in Georgia (which I wrote about here):

These are ready to go in my linen closet. Judging by the look on Coco’s face, I may not get them away from her:

That simple paisley table topper I made for sister Diane over Thanksgiving is getting a re-do. It was just two pieces of fabric sewn right sides together, turned, and topstitched around the edges. Trouble was, the two layers of fabric didn’t lie completely flat. I convinced Diane I had to take the table topper home and remake it, this time stitching the layers together and adding a simple binding.

Here’s the paisley fabric with two choices for binding pulled from my stash:

We’re going with the one on the bottom left. Diane and I both like the way the linear squares play off the paisley, and it’s a better color match. I think the binding will look even better cut on the bias.

Once I’m done with that, I absolutely must make the DH a new bathrobe. The one I made him several years ago is practically in tatters. I picked up a cotton print a few months ago with his bathrobe in mind. I’ll trim it with a navy blue blender from Maywood:

It’s been a while since I made a garment. I’ll be pulling my serger out of the sewing room closet and refreshing my memory on how it works. Wish me luck!


Posted in family, garment sewing, home dec, mitered corners, roll-it-up pillowcases, table napkins, table topper, update | 4 Comments

Simple Sewing

My sister Diane has a new table topper and four generously sized napkins made from the same paisley fabric I used last year to update the window treatment in her dining room:

(I wrote about the window treatments in this post from a year ago.)

Simple sewing. Even so, I found it necessary to revisit my own tutorial on mitering the corners of the napkins.

Diane just happened to have some enameled napkin rings shaped like umbrellas that go perfectly with the napkins:

Aren’t those fun? They add just the right amount of whimsy, don’t you think?


Posted in family, home dec, mitered corners, table napkins, table topper, update | 6 Comments

Old Fabric Crushes

I happened across one of my posts the other day written in October 2012, a little over five years ago when my blog was in its first year. I was writing about three fabric groupings in my stash that I was wild about even though I hadn’t yet decided yet what to make with them. What a pleasant surprise to discover that I have, in fact, used all three groupings!

The first was this one, a mix from several lines anchored by the red and aqua floral print in the center from Denyse Schmidt’s line, “Flea Market Fancy,” reissued earlier in 2012:

Several of the fabrics wound up in this sewing machine dust cover . . .

. . . and this set of king-size pillowcases, both made in 2013:


The second group was this one, primarily from the “Ainsley” line by Northcott Fabrics:

From this group came a small project, a kaleidoscopic table topper made in 2014 . . .


. . . and a large project, my queen-size sampler quilt Catch a Falling Star, completed in 2015:

The third group was from the “Scarlet” line by Pamela Mostek for Clothworks:


These fabrics remained in my stash until 2017, when I used them to make my current Junior Billie Bag . . .


. . . and matching accessories:


Now when I see a new group of fabrics I just can’t live without, I’ll remind myself that the fabric in my stash is indeed getting used. I’ll just need three additional lifetimes to sew my way through all of it. Can you relate?


Posted in Billie Bag, home dec, Junior Billie Bag, kaleidoscope quilts, Reach for the Stars sampler quilt, roll-it-up pillowcases, sewing machine cover, sewing tool caddy, table topper, update, windmill block | 5 Comments

Pine Needle Retreat 2017: Group One

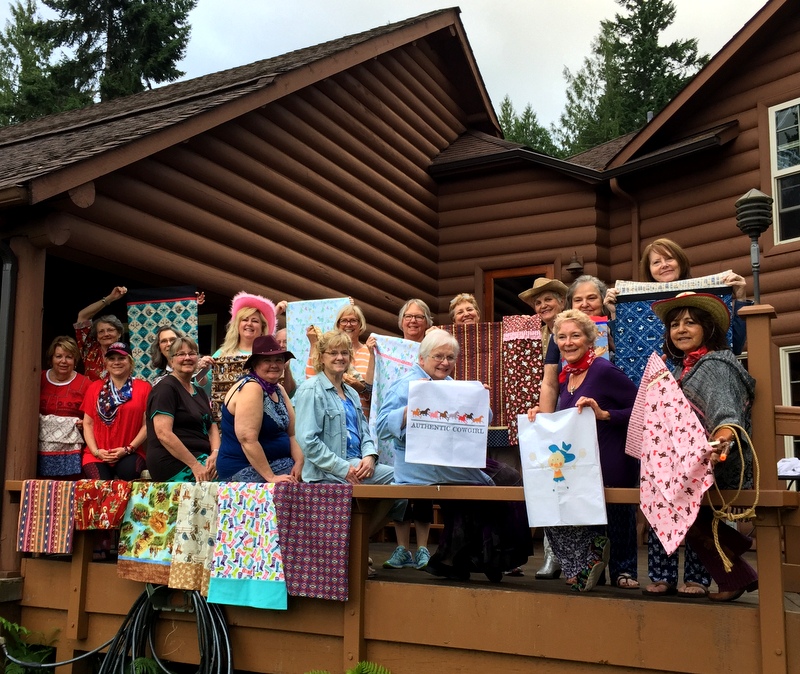
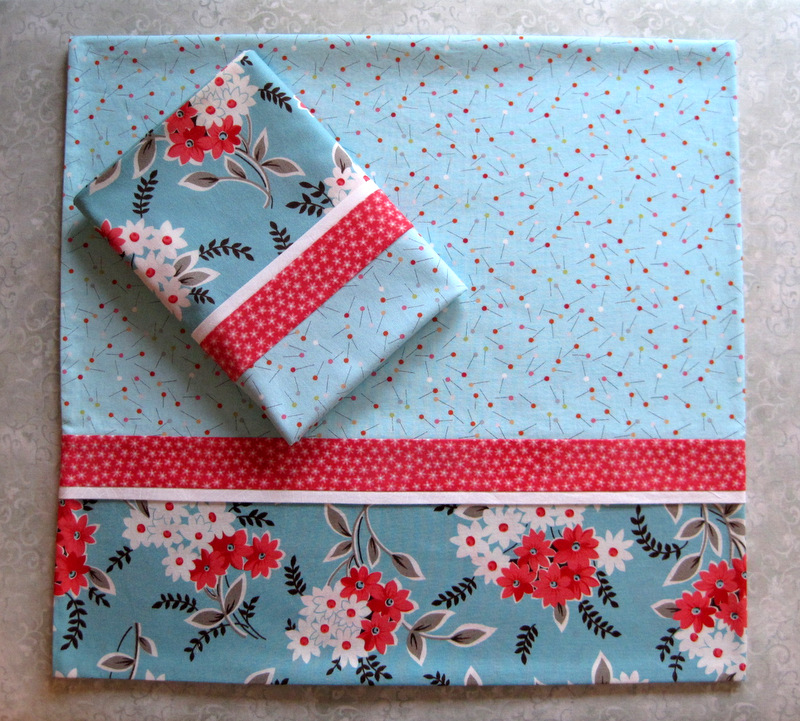
Don’t these quilters look happy? This photo was taken the first evening of the Pine Needle Quilt Shop‘s retreat last month in Union, Washington just after completing a pillowcase exchange. The retreat had a western theme, which is why you see cowboy hats, boots, and bandana prints on both people and pillowcases.

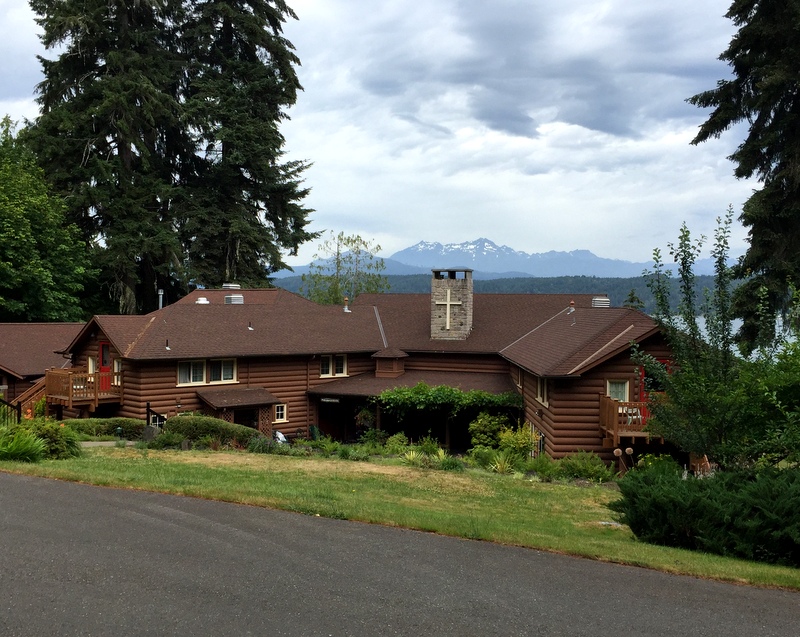
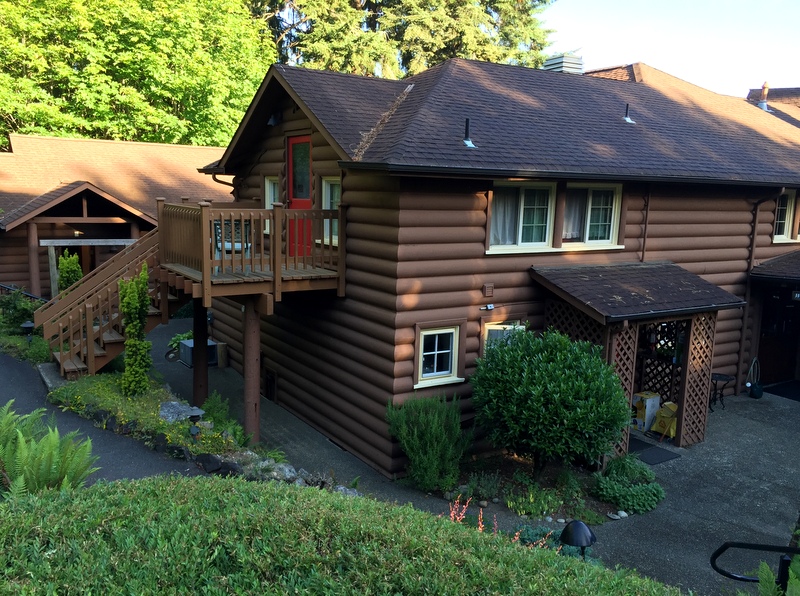
The retreat was held at St Andrews House, a retreat and conference center run by the Episcopal Church of Western Washington. I had the pleasure of teaching for the Pine Needle at St Andrews House last year and returned this year for two back-to-back retreats.

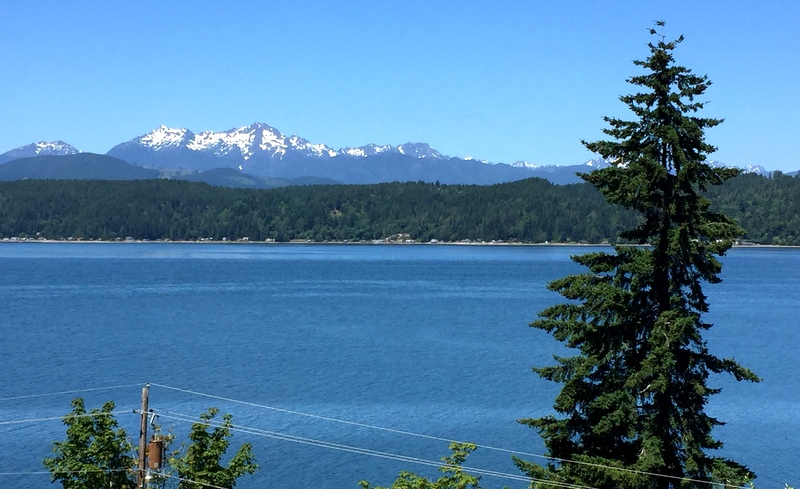
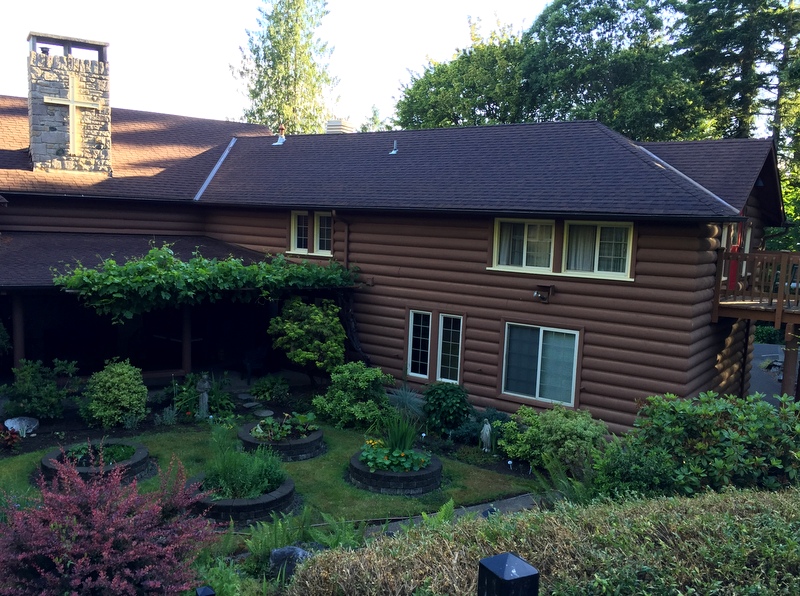
What a lovely spot for a sewing/quilting getaway! The house sits above Hood Canal and offers commanding views of the Olympic Mountains. This is what you see from the long porch that runs along one side of the main building:

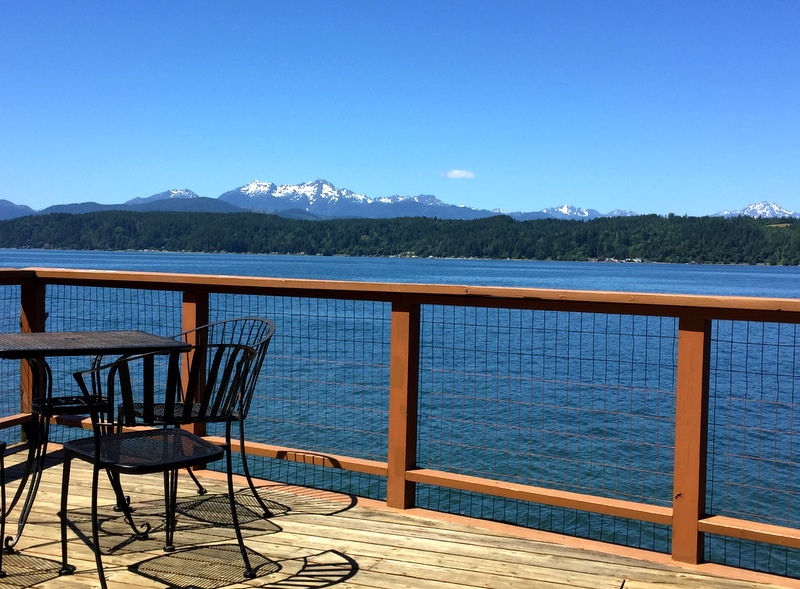
I stayed with Geri, owner of the Pine Needle and organizer of the retreat, in Bayne Cottage, a little house below the retreat center also owned by the church. Every morning before walking up a short (but very steep) hill to the retreat center, I had coffee on the deck that sits right over the water when the tide is in. This was my view:

The design I chose for this year’s retreat was Mini Mod Tiles by Sew Kind of Wonderful:


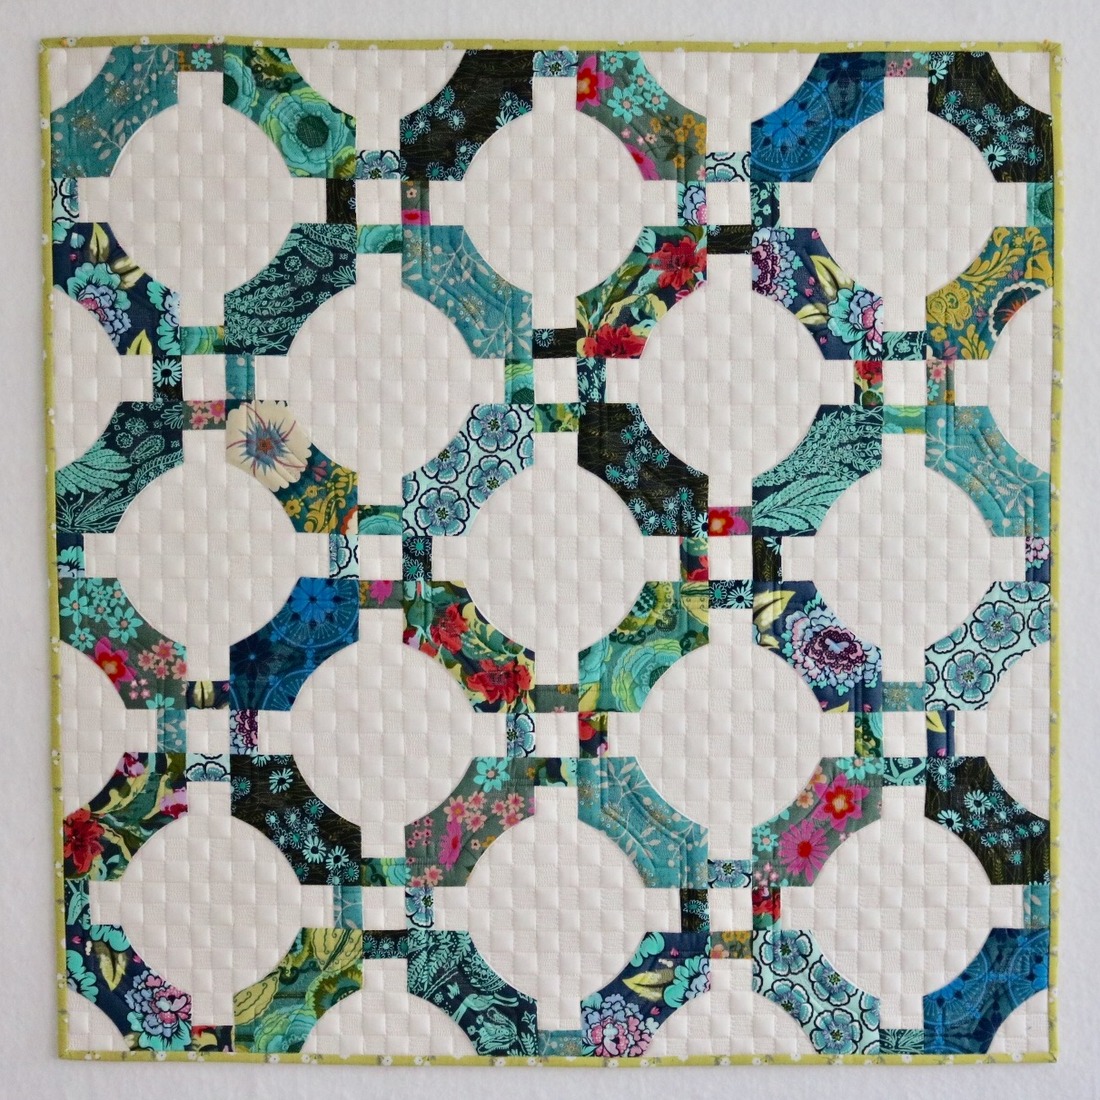
This is the quilt that appears on the SKW website. It was made with the QCR Mini, the smaller of the two specialty curve rulers designed by Sew Kind of Wonderful. The block finishes at 10½” and the entire quilt finishes at 35″. Did you know the pattern is a free download? You can find it here.

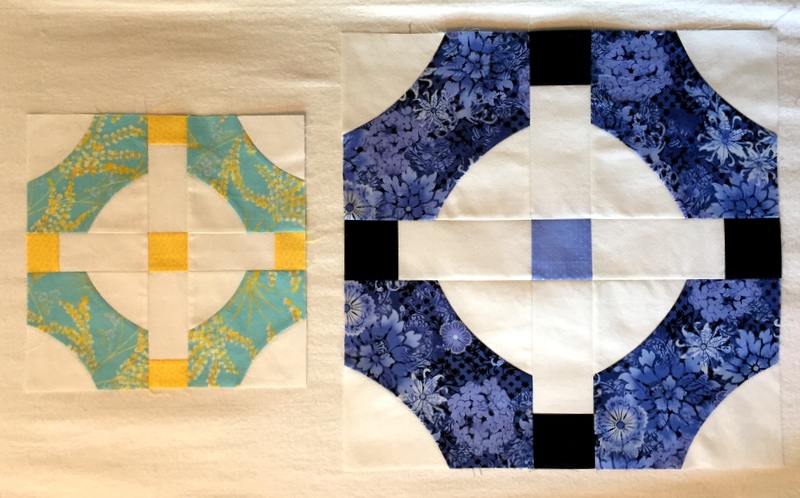
I decided to “supersize” the block so that the quilt could also be made with the original Quick Curve Ruler. That way I could offer my retreat students two options. Here are my two test blocks, one finishing at 10½” and the other finishing at 18″:

In no time at all, my students were sewing curves the Sew Kind of Wonderful way: no pinning! The fabrics are cut slightly oversize and trimmed so that when the block components are sewn together, they fit the way they’re supposed to.

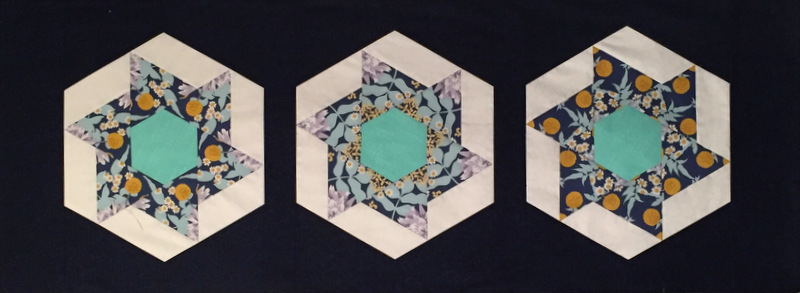
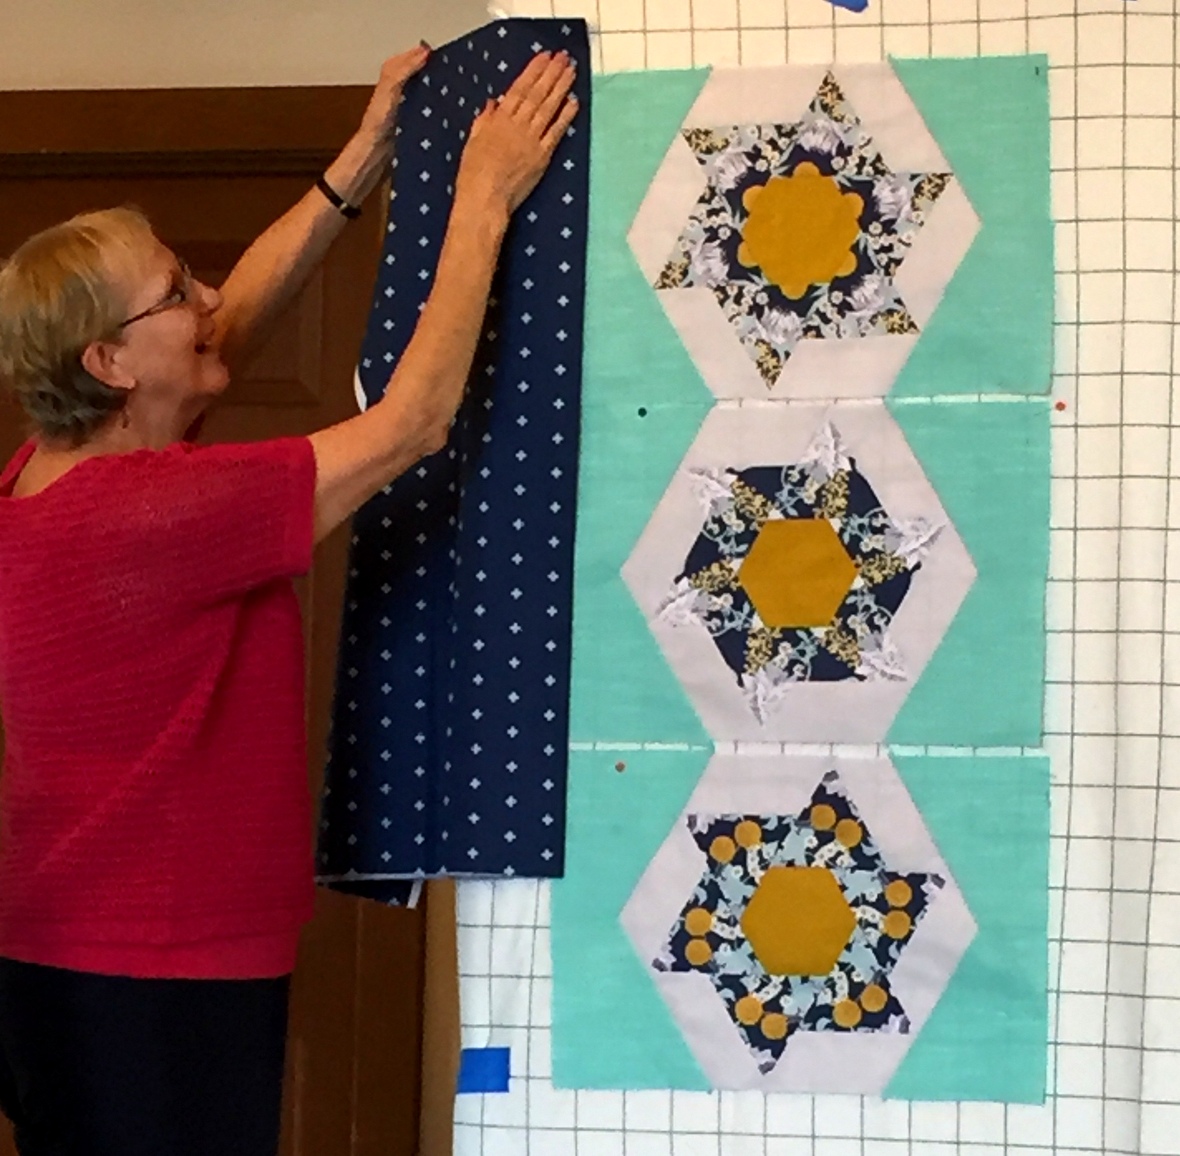
Here are the first three blocks:

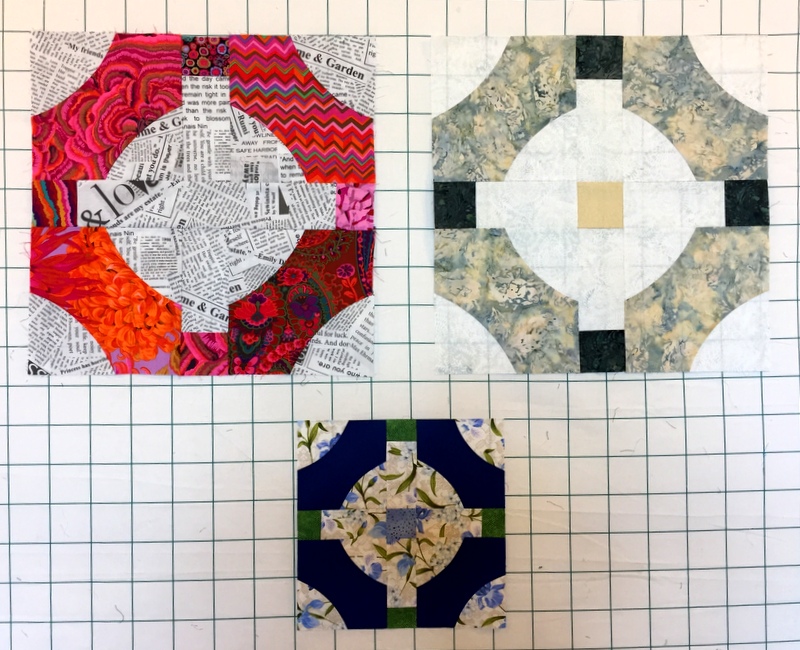
The blocks in the top row were made by Diane and Lynn. We were all dazzled by Diane’s choice of Kaffe Fassett prints combined with a bold text print for the background. Doesn’t Lynn’s block look like real tile? She chose the perfect batik for her focus fabric to get that effect. Lynn’s sister Karen made the block in the second row. She reversed the usual placement, using a lovely floral print for the background and a dark blue solid where a print would normally go.

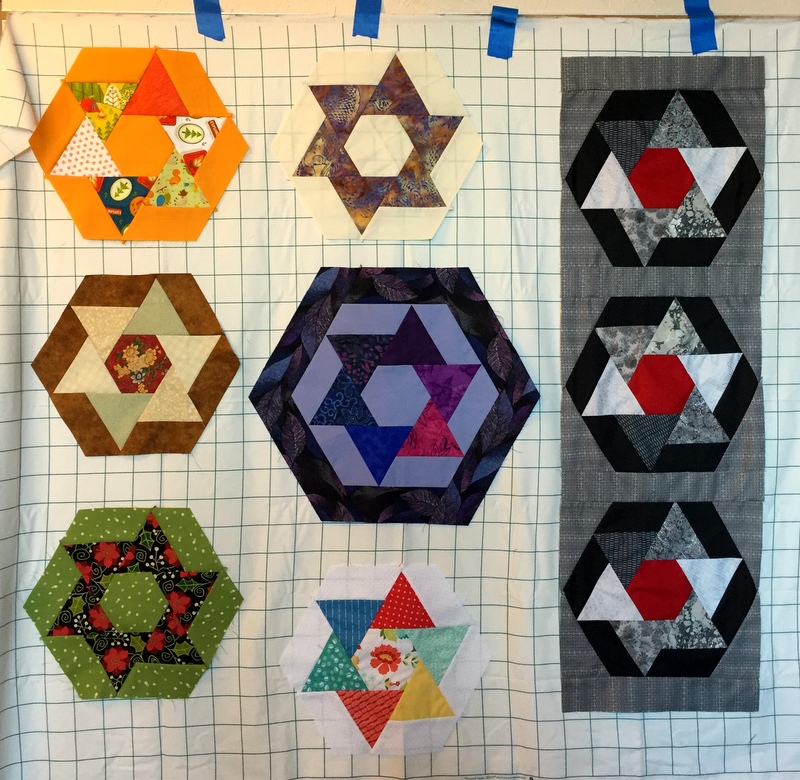
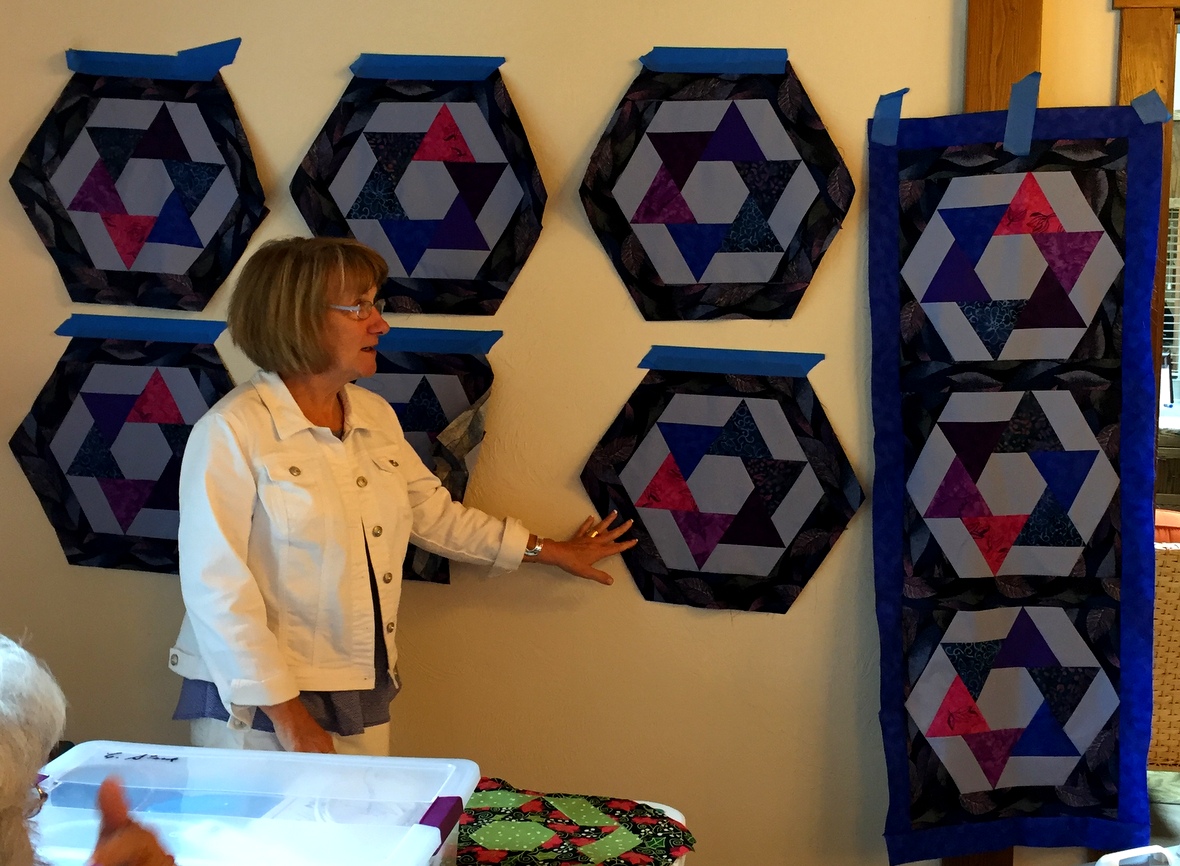
As the first day progressed, the number of blocks on the wall quickly increased:

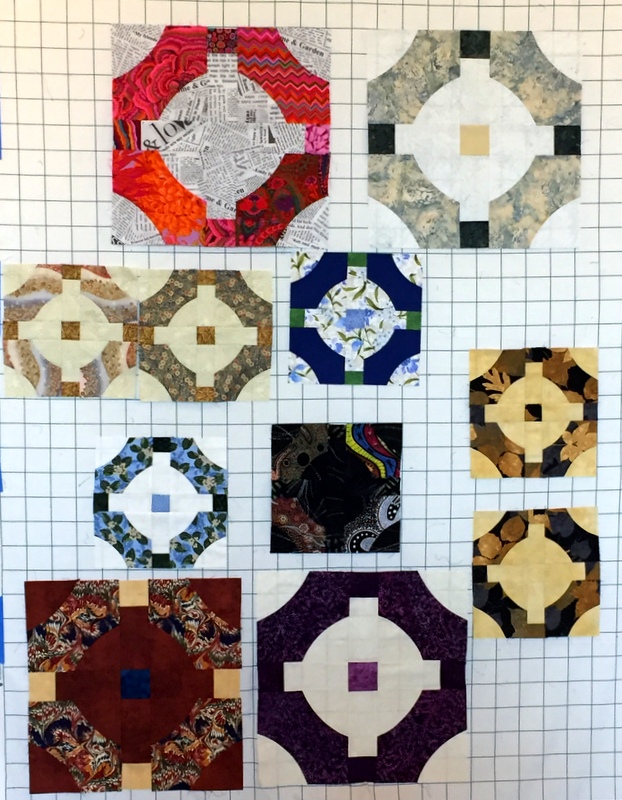
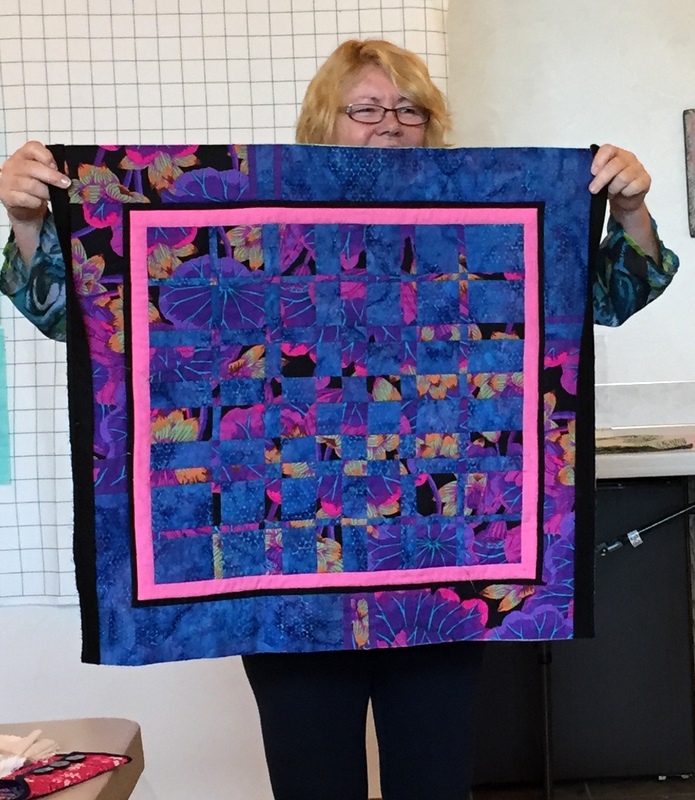
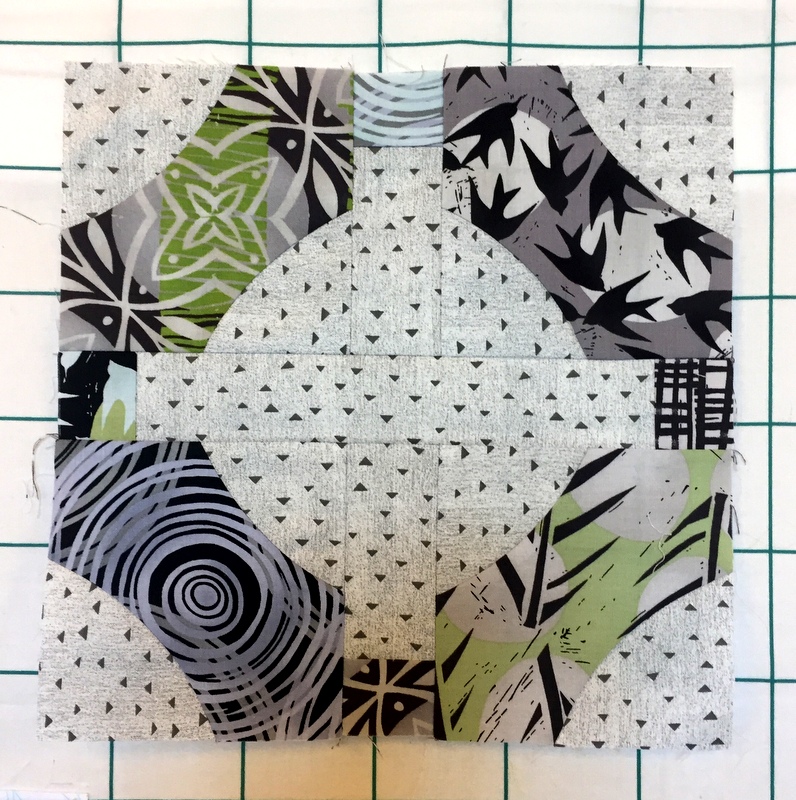
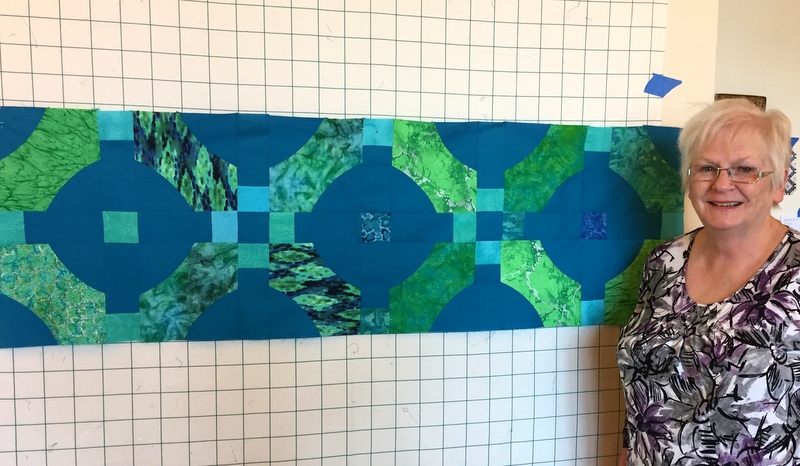
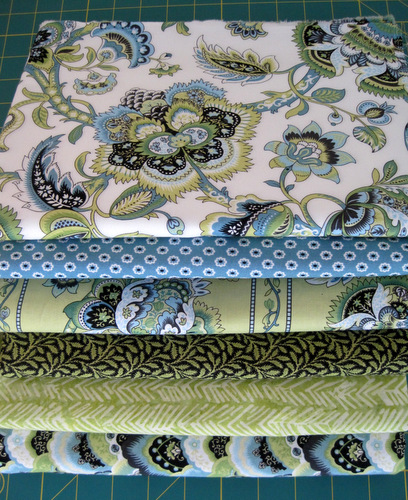
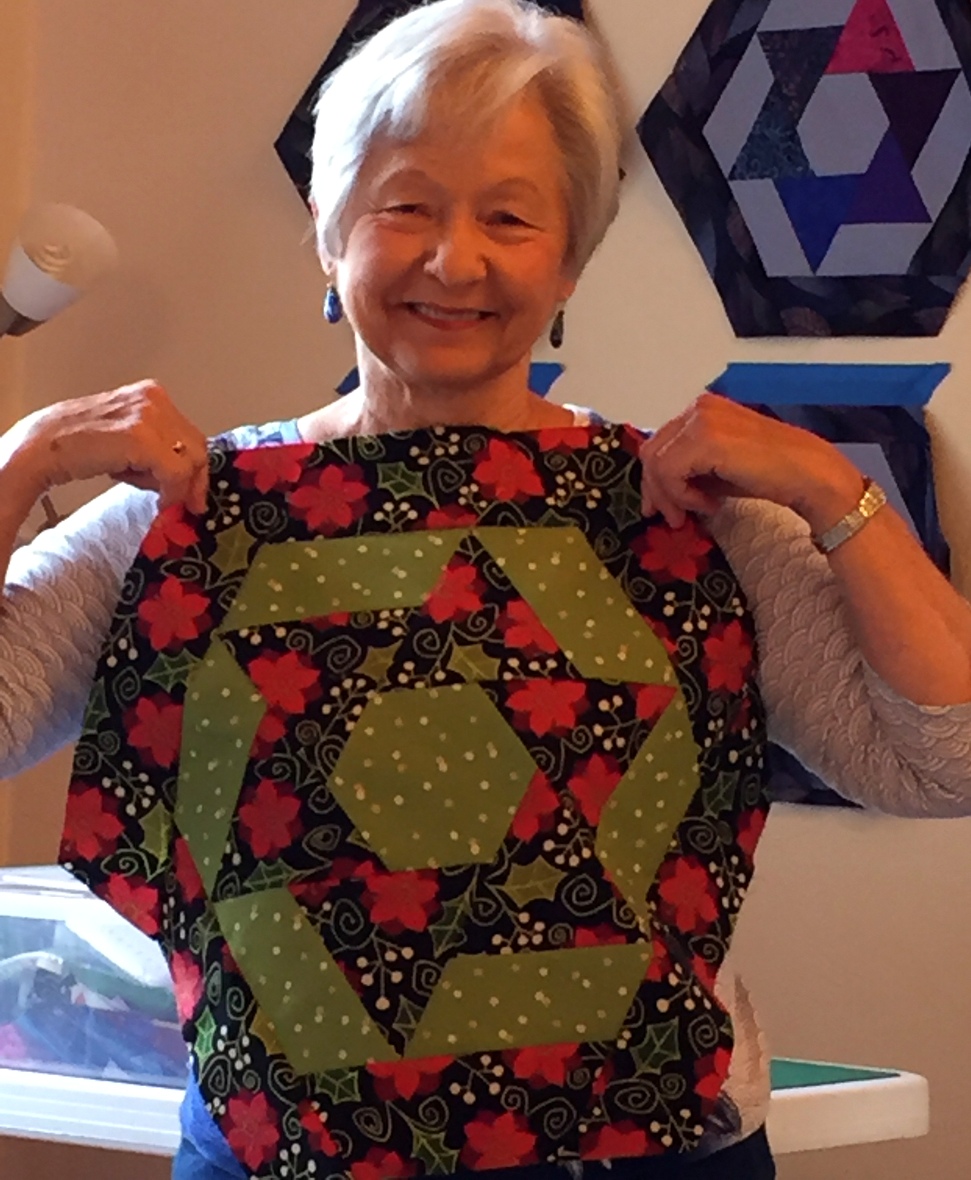
The new blocks were made by Denise (Asian fabrics in second row), Colleen (aboriginal fabrics in third row), Puff (autumn colors on the far right side of photo), Marti (marbled print with rust background in lower left), Tamara (rich purple batiks in bottom row), and me (blue and green holiday print in third row). As you can see with Puff’s two blocks on the right, one block was made with a contrasting center square and one without. Puff decided she liked the top version better.

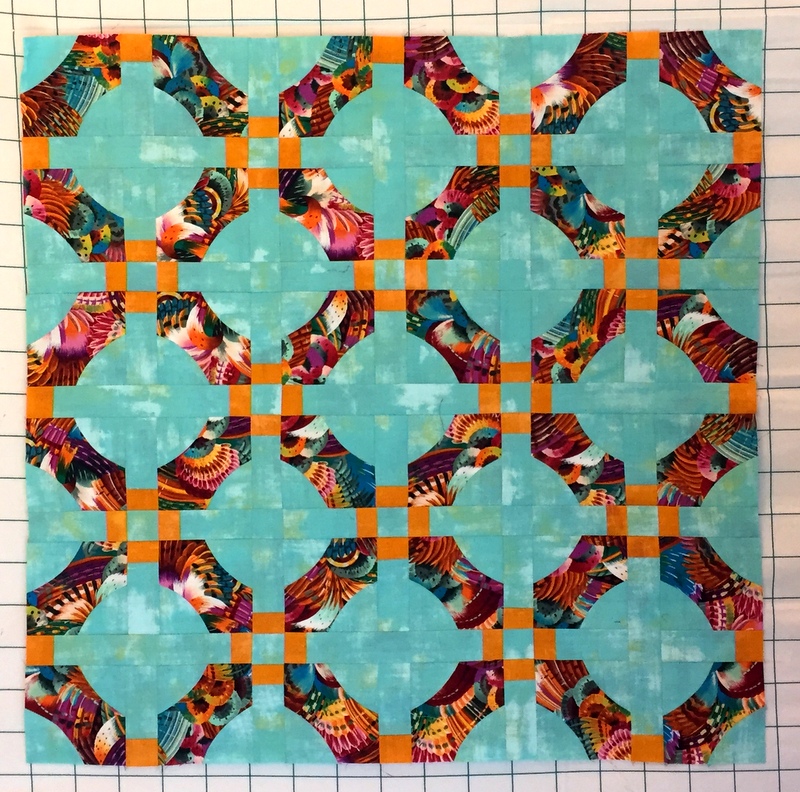
I told the students, “Once you have your curves sewn and trimmed, I think you’ll be pleasantly surprised how quickly the quilt goes together.” When I came to the classroom on the morning of the second day, I was flabbergasted to see a finished quilt top. Kay had finished hers the evening before!


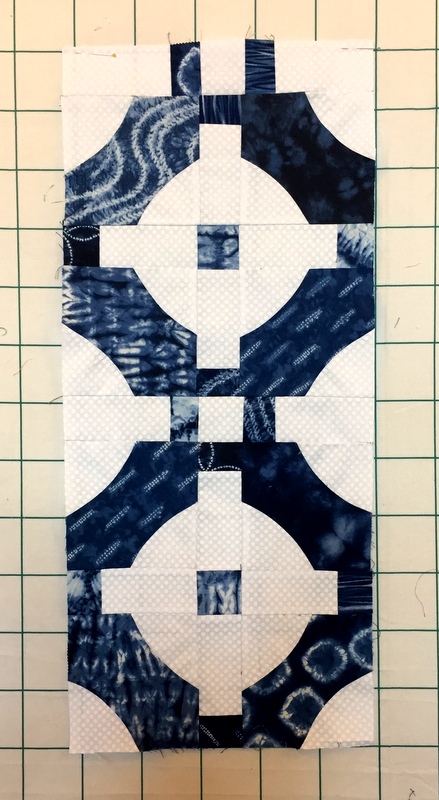
As always, it’s so fun to see the different fabrics that students choose. Candyce’s blue and white fabrics are Shibori prints:


Susie’s focus fabrics are from the Marks line by Valori and Jean Wells. She found the perfect background fabric from another line to go with them:


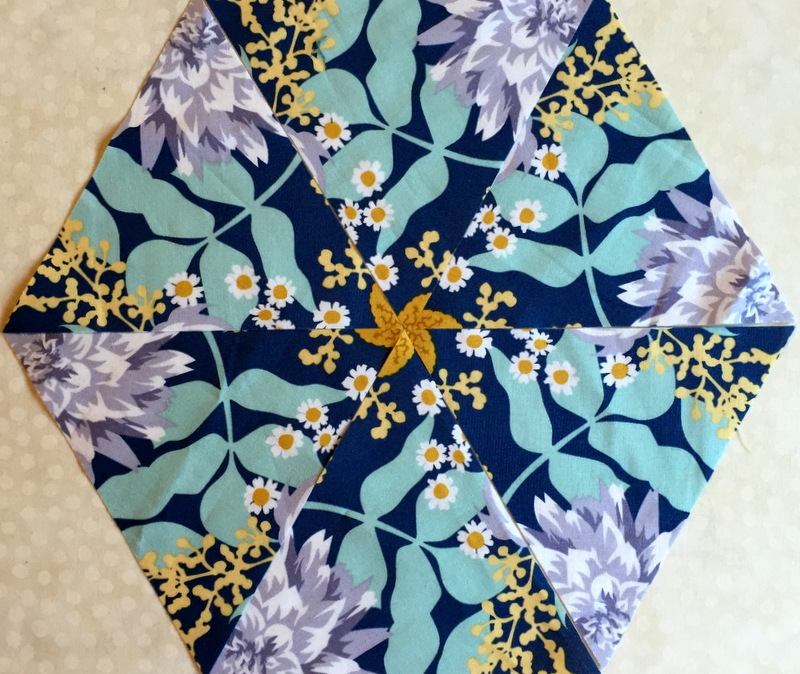
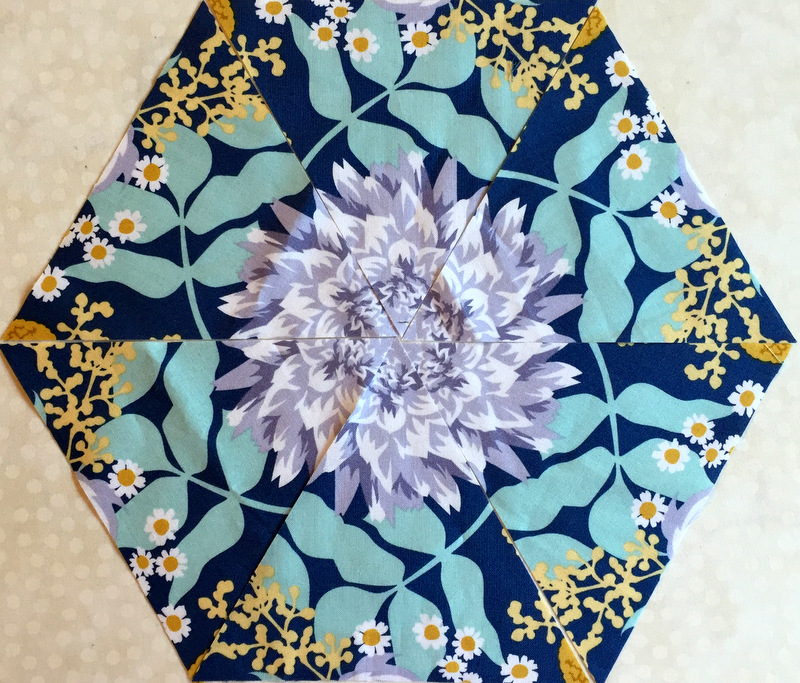
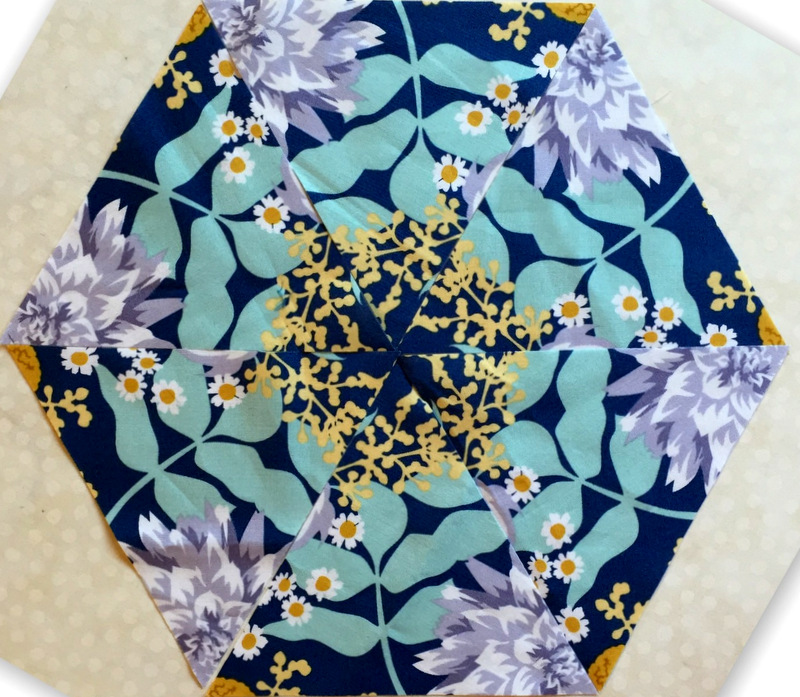
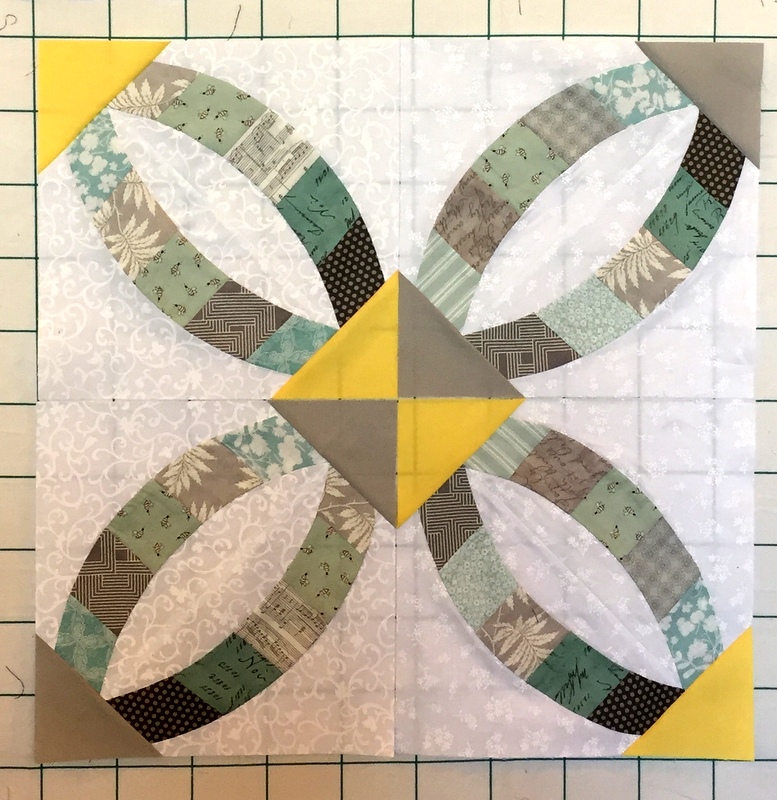
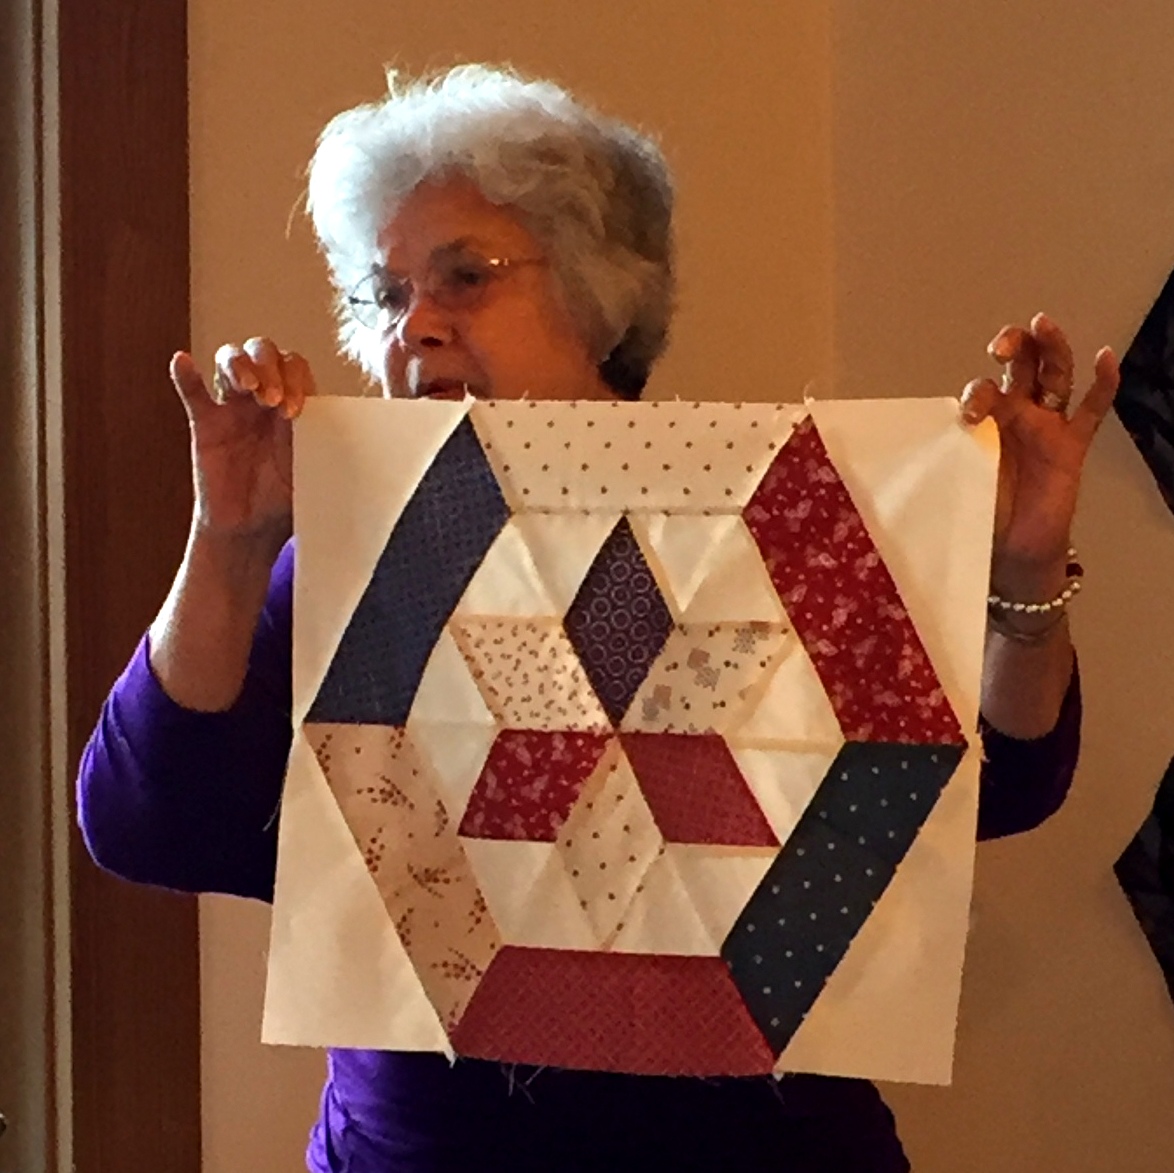
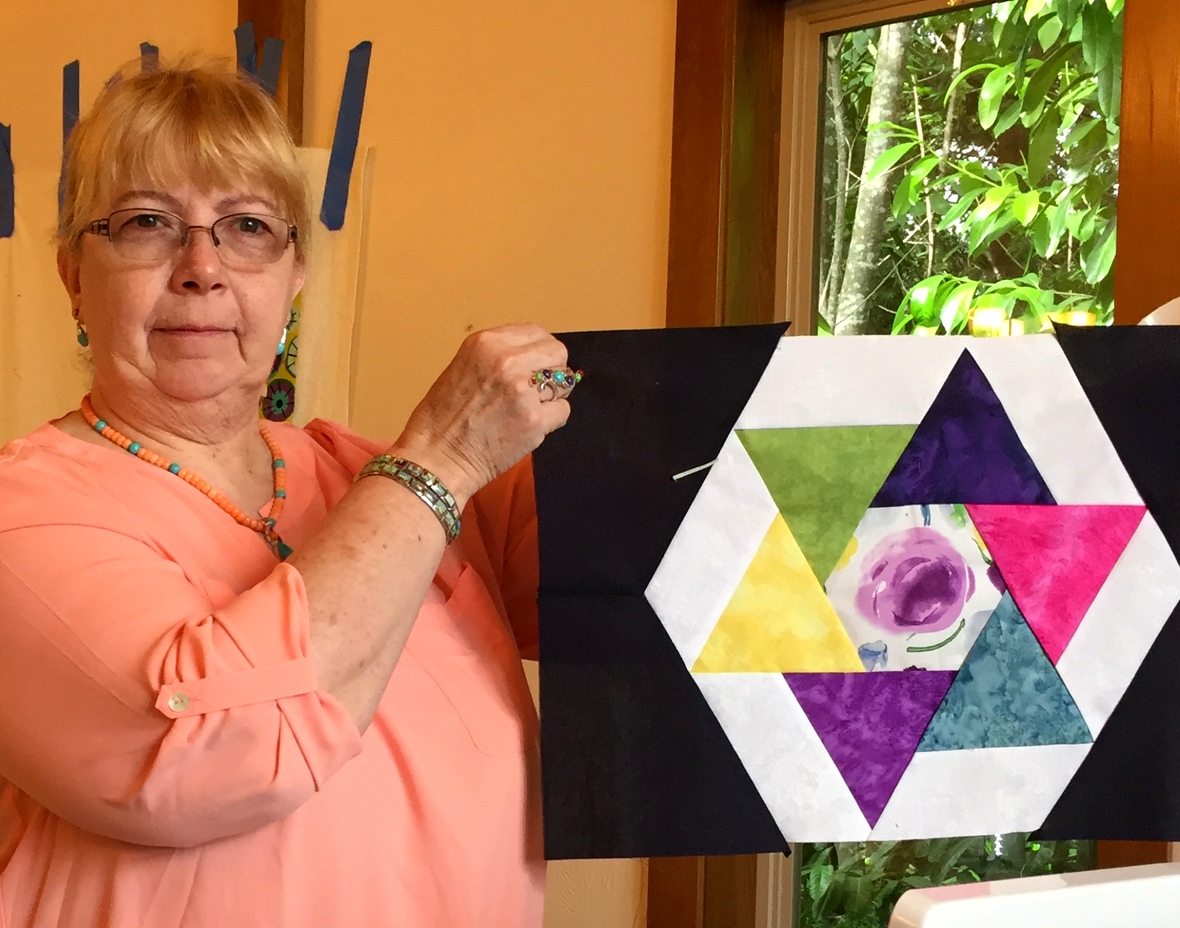
Best friends Martha and Sandy wanted to make a different Sew Kind of Wonderful pattern, Metro Rings. That was fine with me, as I’ve made Metro Rings myself and could offer them some special tips. This block represents a joint effort, as they are using the same fabrics. See how the big block is made of four smaller ones? Two of them were made by Martha and the other two by Sandy. The four blocks haven’t been sewn together but you can see that their points of the triangles in the center are going to come together perfectly:


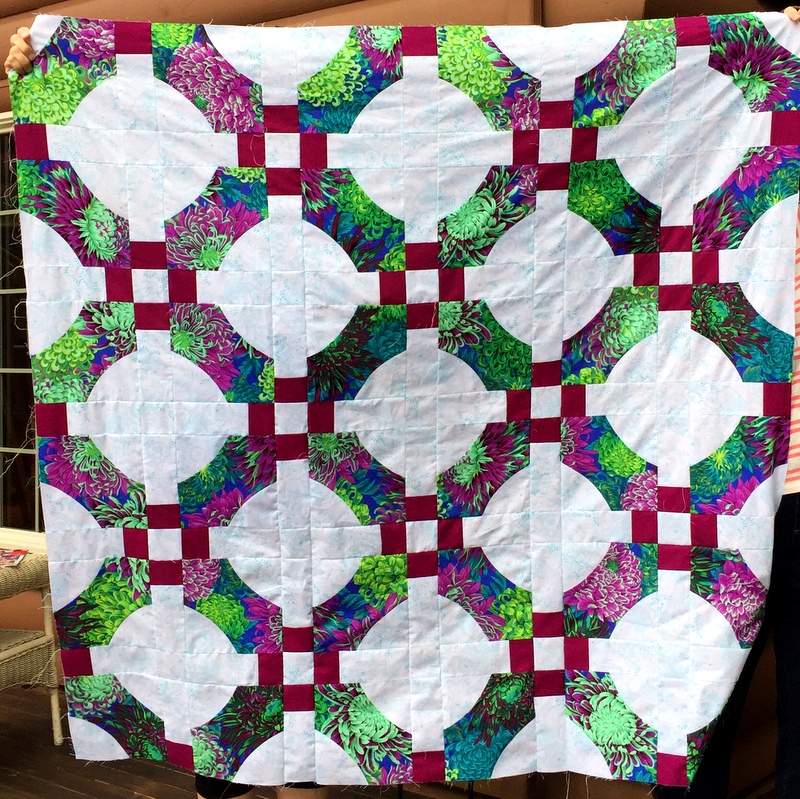
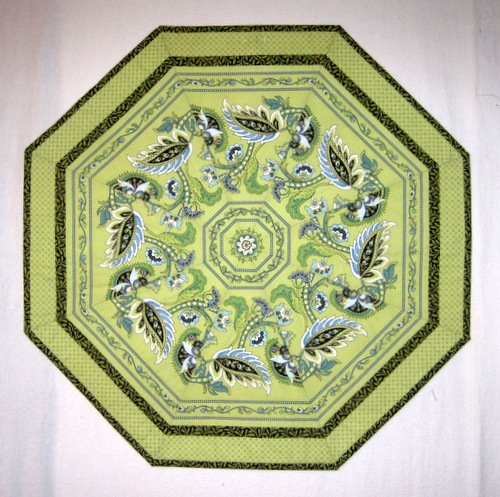
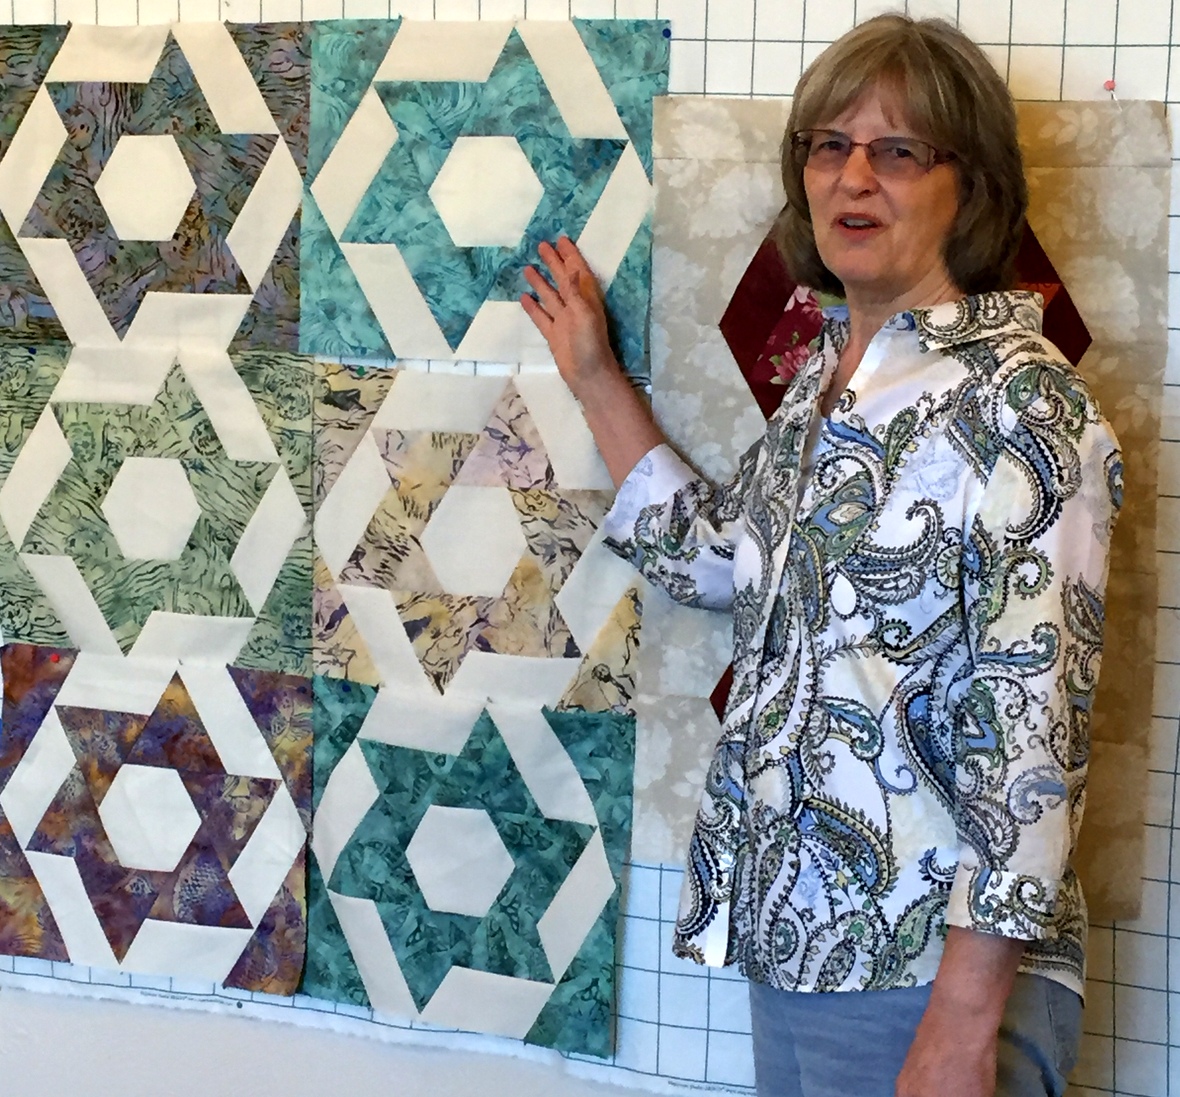
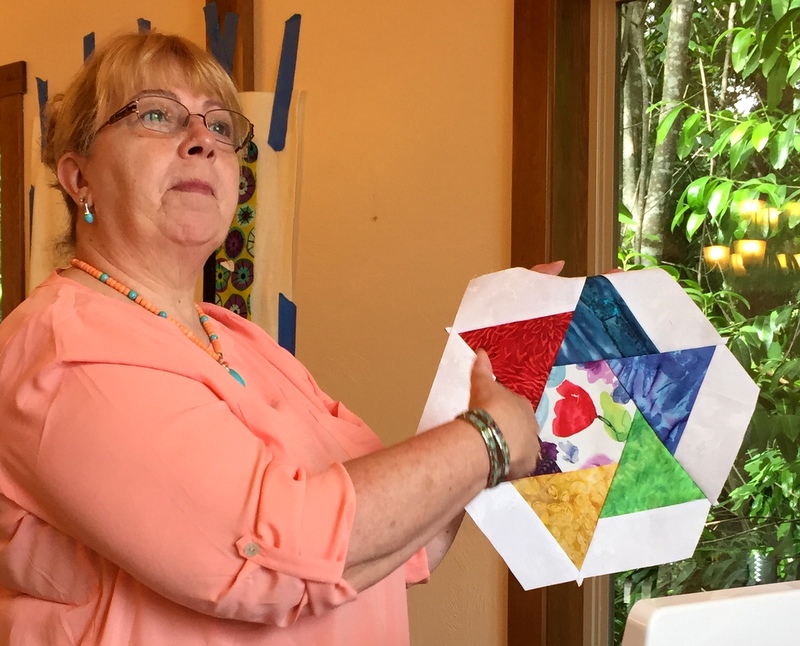
Here is Linda’s supersized version of Mini Mod Tiles, made in one of my favorite color combinations, green and purple:


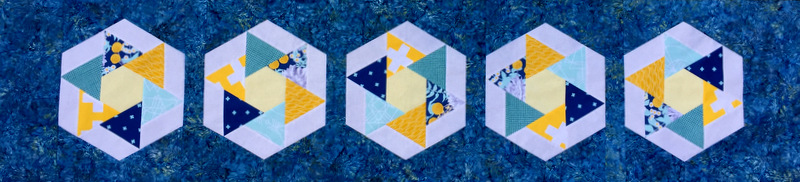
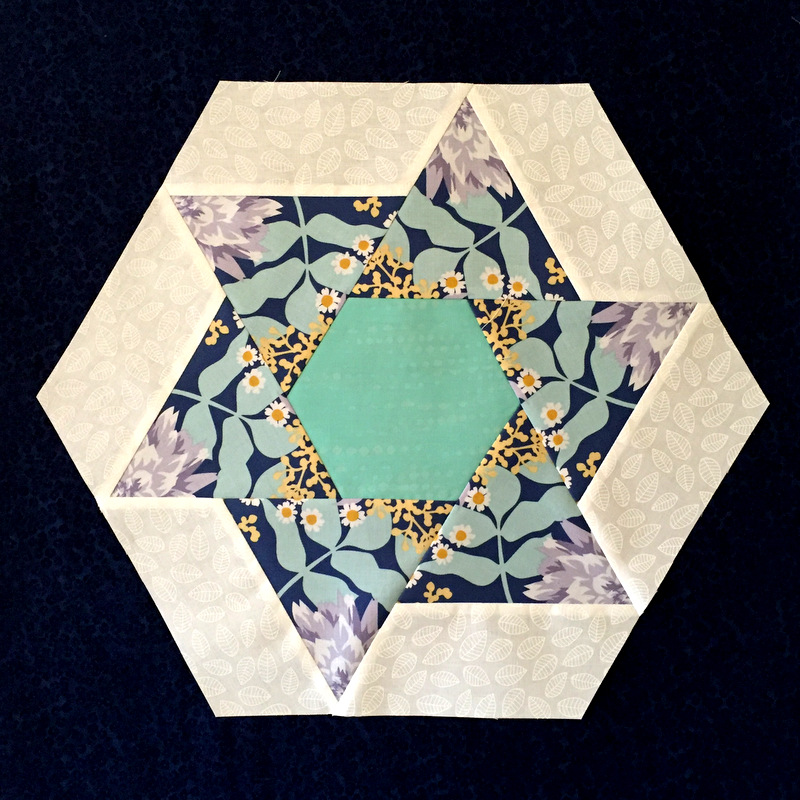
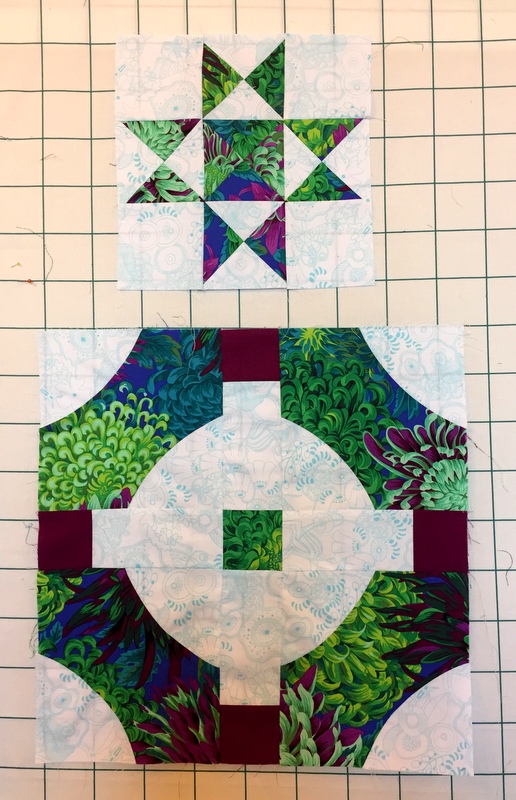
I had suggested that students making the supersized version save their fabric scraps, as they’re large enough to be used in something else. Linda proved my point. She sewed four curvy scraps together and then trimmed them to make an hourglass block. Five hourglass blocks (see the center block?) then became part of a larger nine-patch star block:

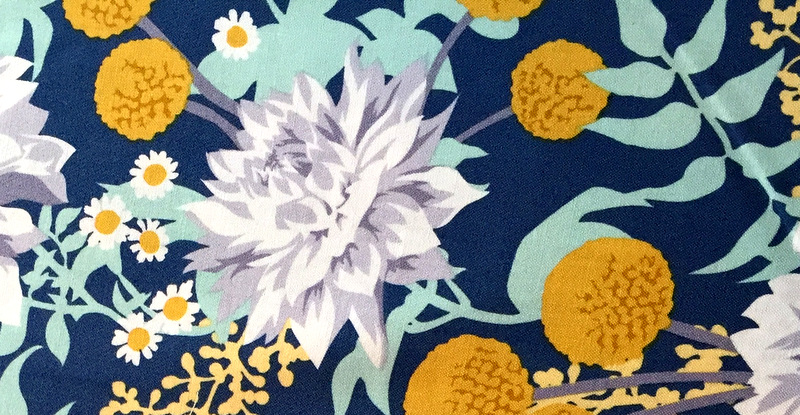
Linda’s background fabric, from the Alison Glass Sun Print 2016 line, goes so well with her wild floral print.

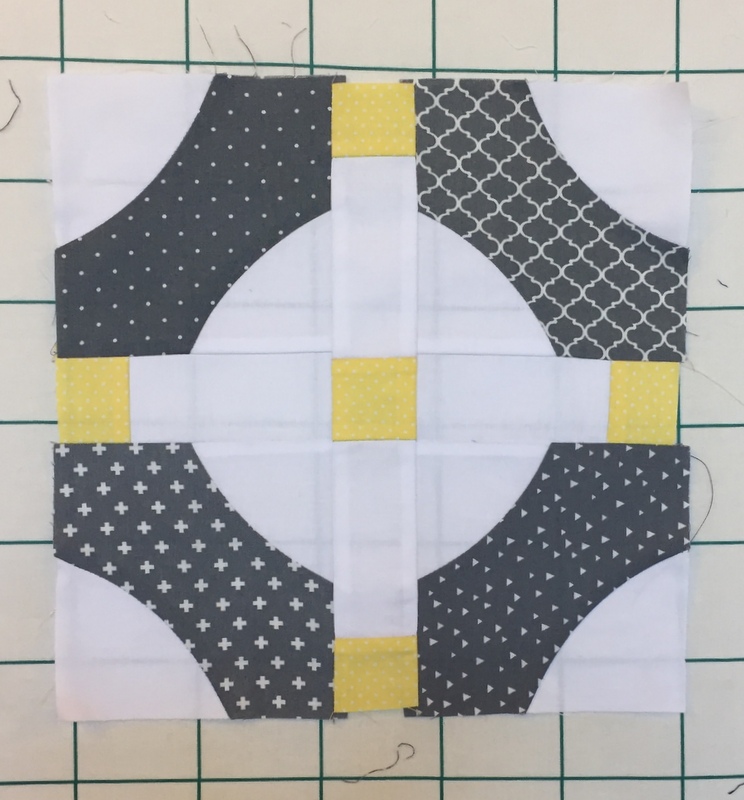
Jan had a charm pack of 5″ squares in grey and white prints, pairing them with white and yellow to great effect:

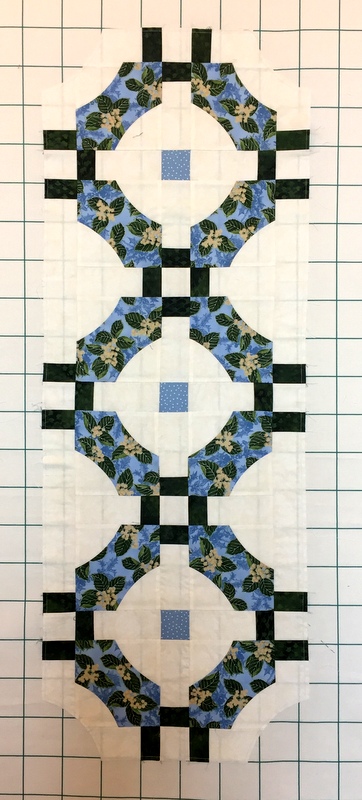
Kitty used that same fresh color combination in her runner:

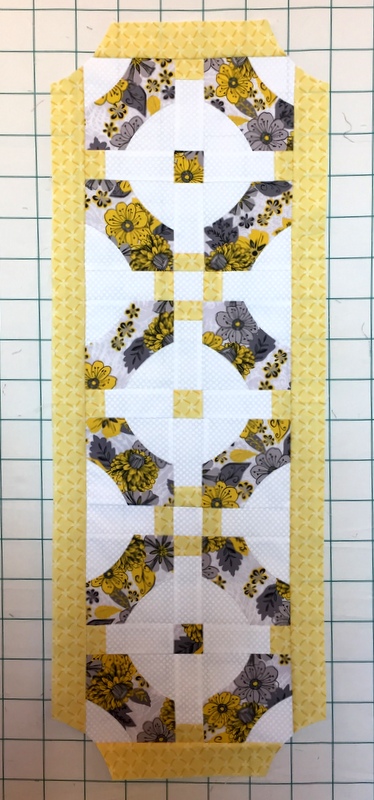
She added a border of her yellow accent fabric. See how the edges of the runner have been cut to match the curve? That was an option I suggested to accentuate the curve within the block. Kitty will bind her runner in the focus print which will give her runner nice definition.

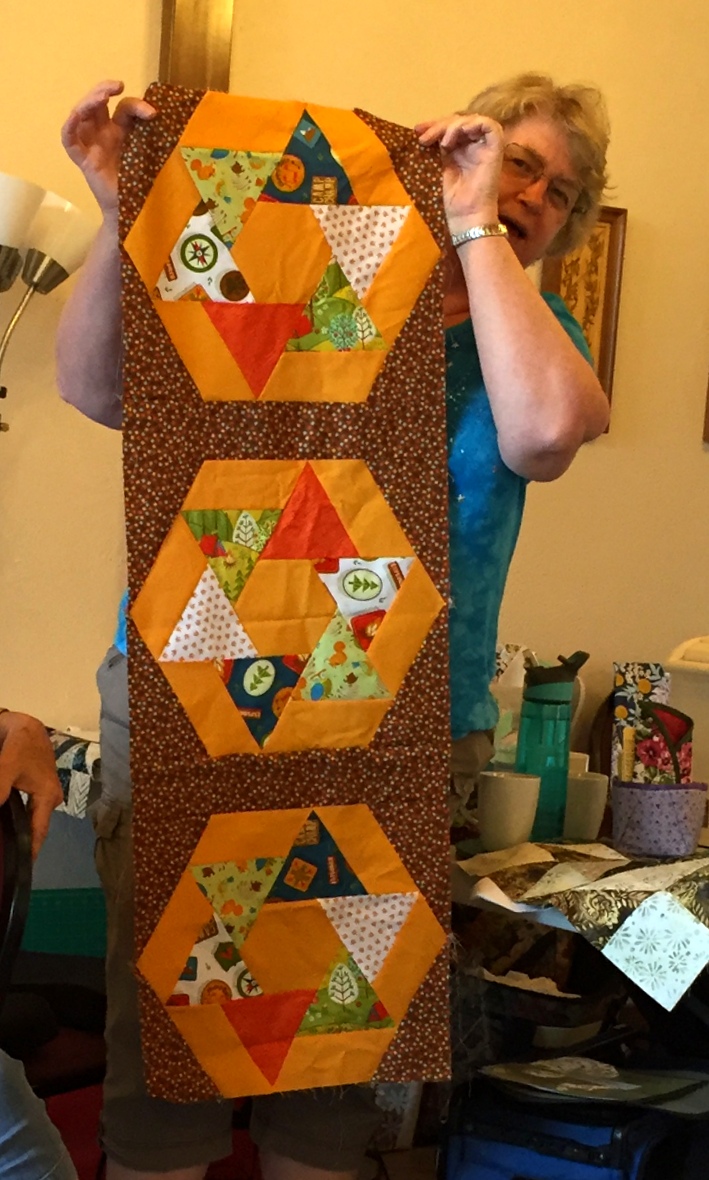
Here is Kitty’s sister Puff with her lovely runner:

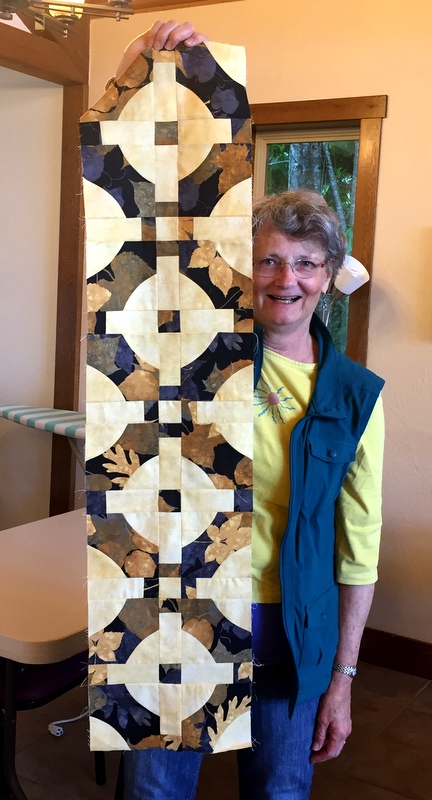
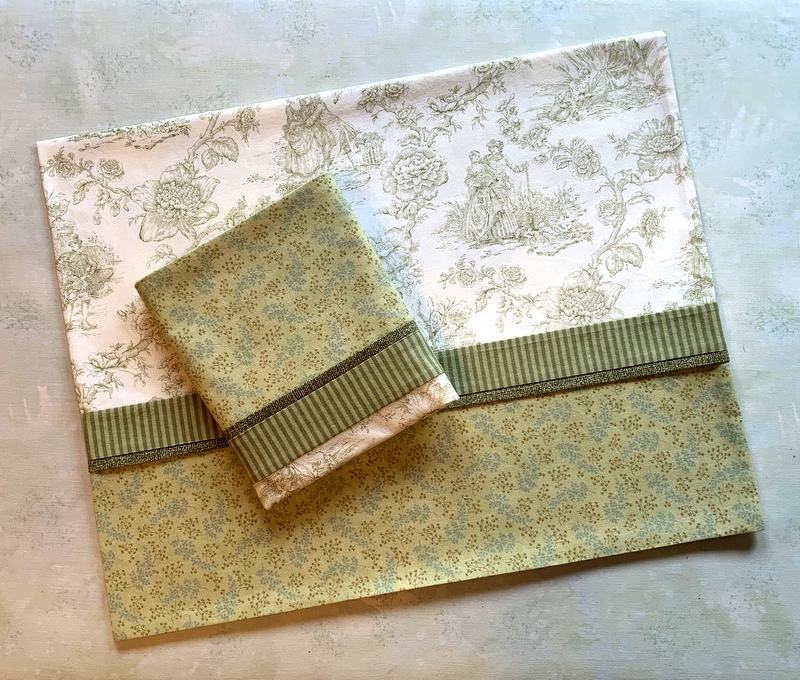
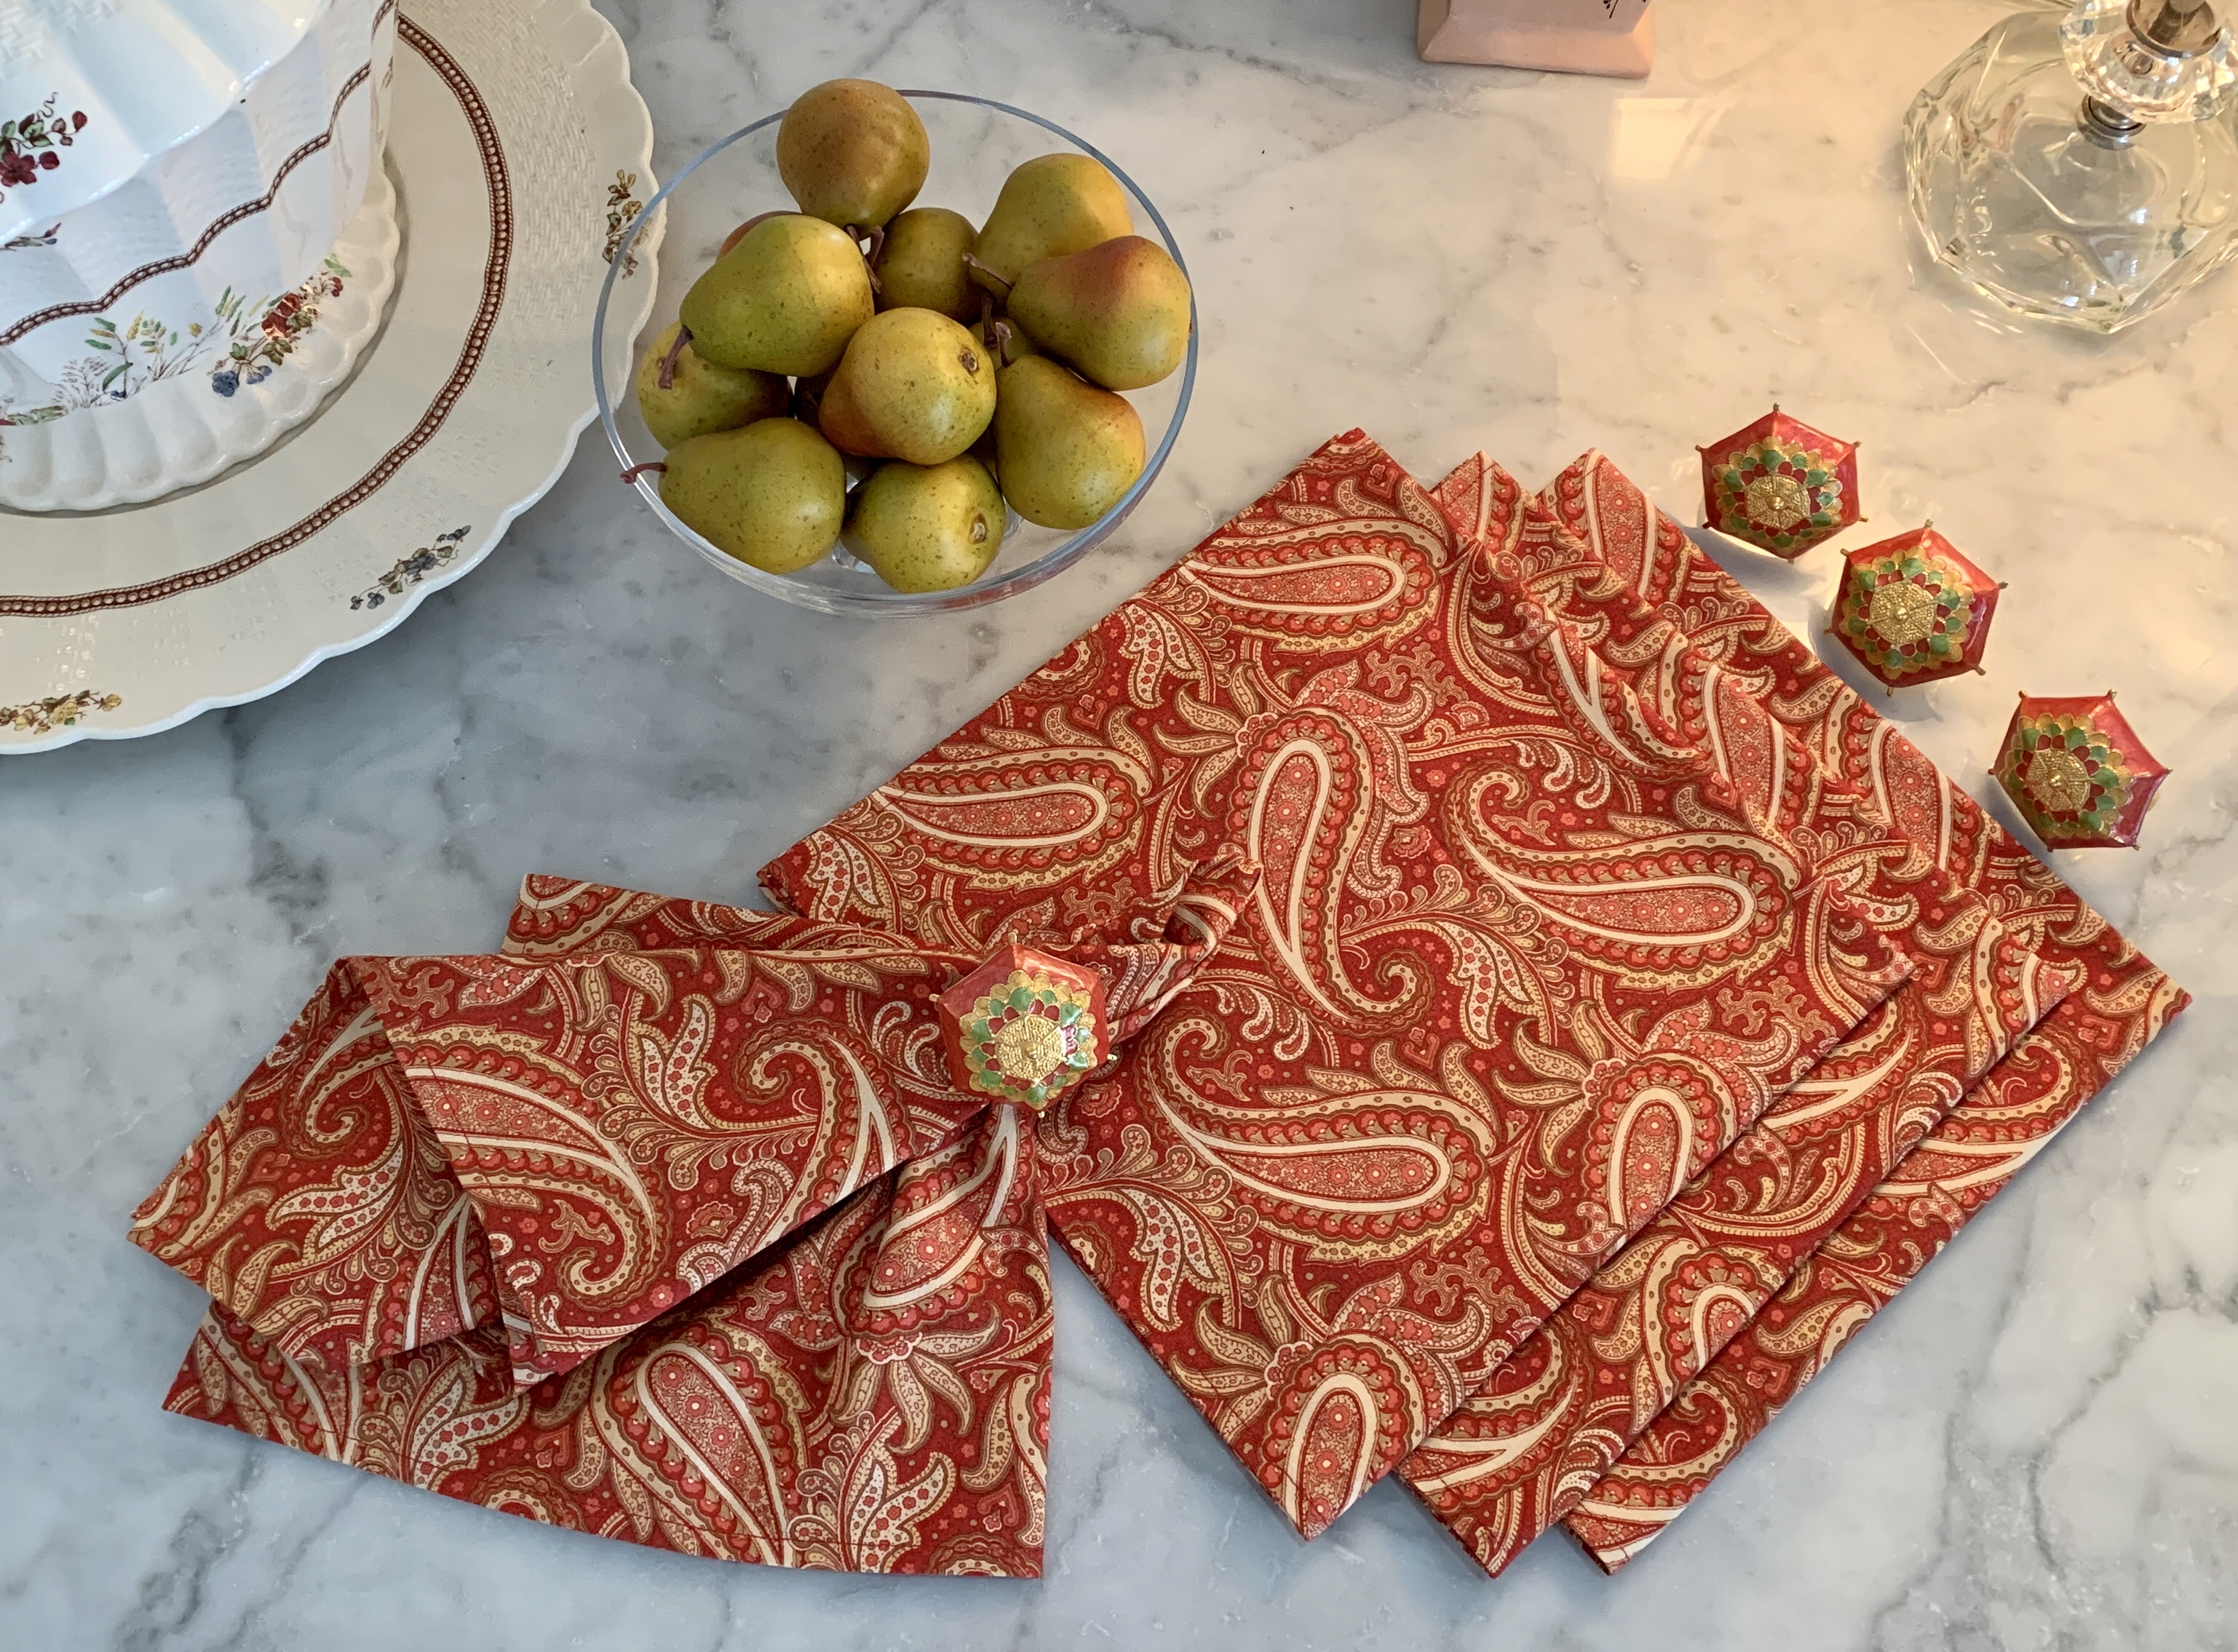
She’s going to make a set of napkins from the print to go along with the table runner.

We had three sets of sisters at this retreat! Marti came all the way from New York to join her sister Vicki. Here are their bold and beautiful supersized blocks:

I also cut curves on the runner I made at the retreat:


When I bind this in the dark green, the curved ends will really stand out.

My plan was to snap pictures on the last day of all the quilters with their projects but alas, that didn’t happen. Still, I think you have an idea of the many wonderful ways in which Mini Mod Tiles can be interpreted. Sometime this fall the Pine Needle will have a reunion for retreat participants. Many of these projects will be completed by then and I promise to get some good pictures.

In my next post you’ll see more versions of Mini Mod Tiles, including some supersized ones, made by the second group of retreat participants. Do come back to see!


Posted in QCR Mini, Quick Curve Ruler, table runner, table topper, update | 2 Comments

Pine Needle Retreat 2016

Talk about a room with a view!

Hood Canal

This photo of Hood Canal in Washington State — those are the Olympic Mountains in the background — was taken from the deck of the house I stayed in last week. I was in Union, Washington to teach at a four-day quilt retreat organized by the Pine Needle. The deck of the house I shared with Geri, the owner of the Pine Needle, was built right over the water. I fell asleep to and woke to the sound of water gently lapping at the rocks on the shore.

The retreat itself was held at St Andrews House, a retreat and conference center run by the Episcopal Church of Western Washington:

St Andrews House, Hood Canal
Isn’t that a serene setting for a retreat? Here are a couple of closer views of the building:

St Andrews House Hood Canal 1

St Andrews House Hood Canal 2

A covered deck runs the entire length of the house on the water side, affording spectacular views of Hood Canal (technically a glacial fjord) and the Olympics.

The pattern I selected for the retreat was Spinners, from the book On the Run Again by Heather Mulder Peterson (Anka’s Treasures, 2014). Spinners is one of 11 designs in the book, so participants got a bonanza of designs when they signed up.

One of the things I love about teaching is seeing what fabric combinations students bring to the sewing table. Here are the first few blocks:

Spinners first blocks
On our last morning, we had an impromptu show and tell of our projects. Unfortunately, our California girls (Candyce, Jan, and Janice) had to leave very early to catch a flight home, and a couple of other participants had already packed their projects away, so I don’t have photos of those. Still, we have plenty of examples to show you.

Diana came to the retreat planning to make one test block. She liked her first block so well she decided to make an entire quilt! Here are her first six blocks:

Spinners Diana

Linda completed her quilt top! She fussy cut the center hexagons. The narrow containment border and wider floral border set off her blocks beautifully:

Spinners Linda Lake

Sophia was very productive! Not only did she complete a Spinners top . . .

Spinners Sofia
. . . she also made another block from Heather’s book, the block called Happy Dance . . .

Sofia with Happy Dance 
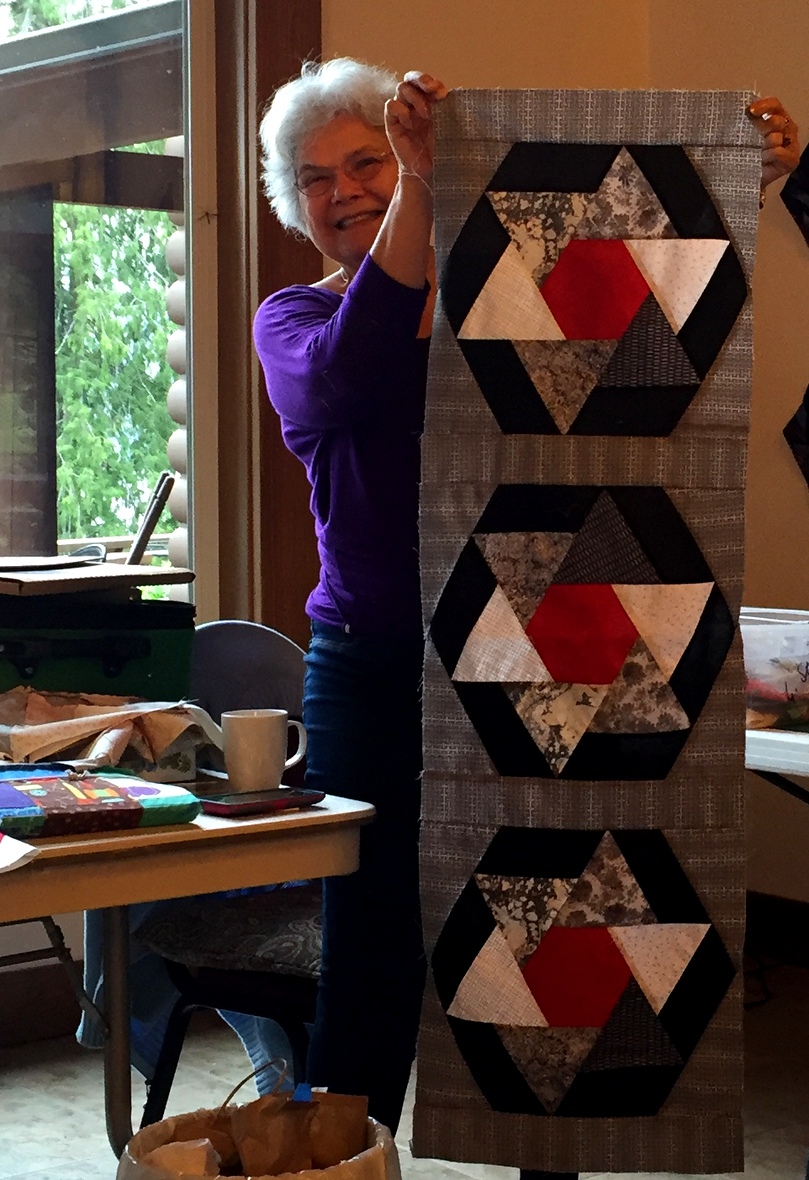
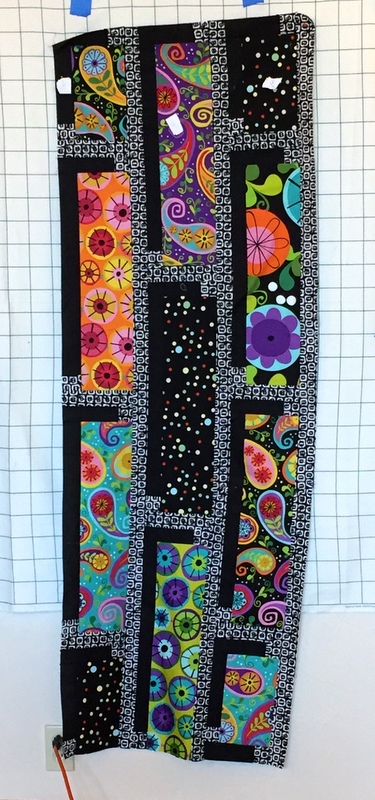
. . . and this one called Chatter Box:

Sofia with block
Donna made a set of placemats using the table topper design from the book — and had enough fabric leftover to make a table runner:

Spinners Donna

Those placemats will add a lively jolt of color to Donna’s table.

Carol S. also chose the table topper design, using a delightful holiday fabric featuring poinsettias and holly:

Spinners Carol Stark
She made several, to be given as gifts. Lucky recipients!

Carol D. made kaleido-spinner blocks (my name for the Spinners block made with identically-cut triangles that surround the center hexagon) using a lovely stylized floral fabric:

Spinners Carol Dyer
Did you notice Carol’s Spinners blocks are on point? She is making a runner for a narrow table; her runner will be 13½” wide. If she had turned her blocks horizontally, the runner would measure 15½” wide.

Pam S.’s runner features playful prints spinning around solid gold:

Spinners Pam Snyder

I can’t help it; those fabrics make me smile.

Evelyn also made kaleido-spinner blocks. She’s making a quilt and is showing us the fabric she chose for the border. It’s going to look terrific next to the subtly textured aqua batik that surrounds the spinning triangles:

Spinners Evelyn Bonney
I can think of only one word to describe Tamara’s Spinners runner: elegant. Take a look:

Spinners Tamara Brockett
The touches of metallic in the triangles and light background fabric, contrasting with that rich burgundy, contribute to the rich effect. Tamara fussy cut her triangles from a fabric I wouldn’t have thought of for a kaleido-spinner quilt:

Spinners Tamara Brockett with focus fabric

Tamara will incorporate that fabric on the back of her runner.

Sharon fussy cut flowers for the center of her blocks from a beautiful fabric that looks like a watercolor painting. Here’s one of those blocks . . .

Spinners Sharon Justus
. . . and another:

Spinners Sharon Justus block 2
She’s using a different colored batik in each of the triangles.

Debbie H. chose fabrics for her runner that match the décor of her dining room:

Spinners Debbie

That creamy jacquard background fabric sets off her Spinners blocks so well. And her Y-seams are perfect!

Debbie S. pieced a king-size bed runner using lively tropical fabrics. She also made kaleido-spinner blocks:

Spinners Debbie Scroggy
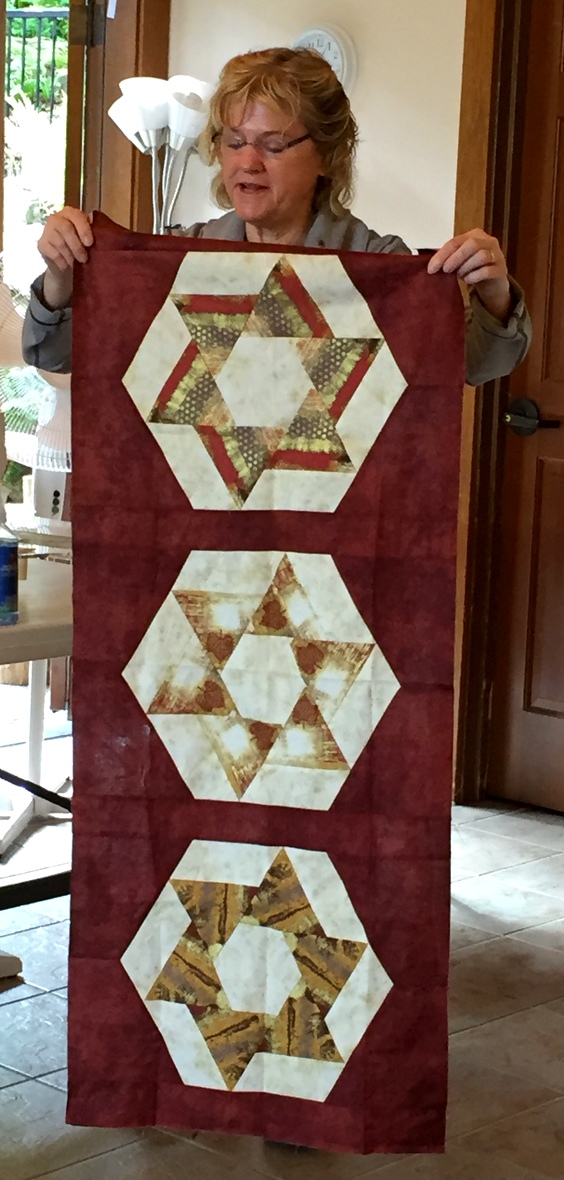
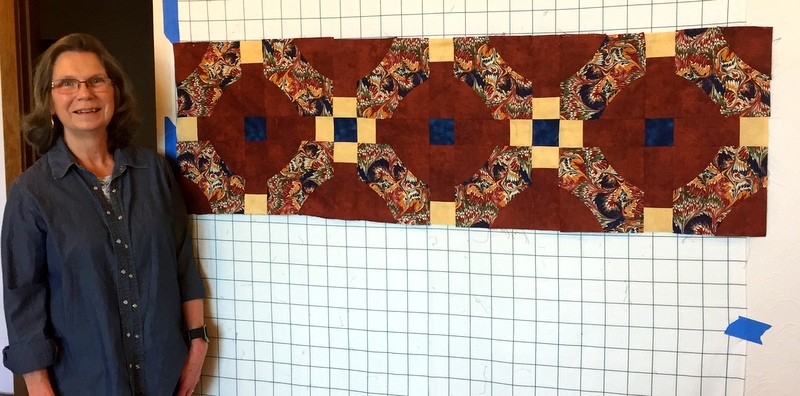
Debbie put her own spin on the design by incorporating two fabrics in the top and bottom blocks (that stripe!), omitting the sashing strips, and adding an accent strip around the blocks. Debbie is a professional longarm quilter (AllQuilted LLC). I will be very interested to see how she quilts this vibrant runner.

While the retreat featured the Spinners pattern, the participants were free to work on whatever they wanted.  Helen was finishing the binding on two spectacular small projects . . .

Helen with Convergence

Helen's project
. . . and she was also working on her version of Shadowbox (pattern by Mountainpeek Creations):

Helen's quilt

Colleen worked on her 6″ Farm Girl Vintage blocks, designed by Lori Holt of Bee in My Bonnet:

Colleen with Farmgirl Vintage
That block on the far right has over 50 pieces in it. I can only imagine how many pieces the finished quilt will contain.

Thank you, Geri, for organizing a fabulous retreat filled with laughter, games, good food, and some very productive and creative sewing. Thank you, participants; you made teaching a pleasure. I hope to see you all again when we convene at the Pine Needle in October to show off our finished creations.


Posted in bed runners, hexagons, kaleido-spinner, table topper, update, wall hanging | 13 Comments

May Day Finish: A Kaleido-Spinner Top

Happy May Day! Can you believe four months have passed since we rang in the New Year? Time sure flies when you’re having fun.

I’ve been playing with Heather Peterson’s Spinners pattern, from her book On the Run Again (Anka’s Treasures, 2014). I’ve chosen this pattern to teach next month at the Pine Needle Quilt Shop‘s retreat on Hood Canal in Washington State. I want to show my students a few different ways Spinners can be interpreted based on fabric and color choices as well as size of finished project.

My latest experiment is a three-block table runner or wall hanging in which I cut the six 60° triangles in each block from six repeats of fabric. In my last post I showed you the first block I made using that technique.

Here is the three-block runner, with the first block I made in the center:

kaleido spinner horizontal
Runner Measures 20″ x 54″

How fun is that? The blocks are all made from the same focus fabric: Moon Garden, from the line Wander by Joel Dewberry for Free Spirit Fabrics.

It’s difficult to envision what a block will look like when you first cut the triangles; that’s part of the appeal for me of making kaleidoscope quilts. This isn’t a true kaleidoscope quilt because the triangles don’t meet in the center to form a  hexagon. They spin around the center hexagon instead (which is why I’m calling this top a kaleido-spinner). Even so, the outcome of each block is a surprise.

Since some of my students may be minimalists or modern quilters, I’m going to make a sample block in solids or mostly solids. I’m already thinking about how a modern quiltmaker might treat the negative space when it comes to quilting.

I’m also still thinking about making placemats using this pattern. We don’t use placemats at the Portland White House because there is always a tablecloth on our dining room table (yes, made by me). But I have the perfect fabric in mind, one of those fabrics I bought a lot of a few years ago because I liked it so well. And the perfect fabric to make coordinating napkins is also in my stash. All in good time . . .

In the meantime, I am going to enjoy this spectacular May Day in Portland, Oregon. I hope you are enjoying sunshine and warm temperatures wherever you are!


Posted in faux-kaleido quilts, kaleido-spinner, kaleidoscope quilts, table topper, update, wall hanging | 3 Comments

A Different Spin

wander horizontal
Moon Garden in the Midnight Palette

Recognize this fabric? It’s called Moon Garden, from Joel Dewberry’s line Wander. I’ve used it in small amounts in the bed runner I showed you yesterday, the one I made using the pattern Spinners by Heather Peterson of Anka’s Treasures:

spinners bed runner 20.5 x 90
Bed Runner Measures 20″ x 90″

“Ho hum,” you must be thinking. “That’s old news.” Yes indeed, but since bringing that beautiful floral fabric home earlier this month I have been fixated on using it in Heather’s pattern in a different way. I hinted as much in an earlier post about this fabric.

You already know that I am, to put it mildly, fond of kaleidoscope quilts. I’ve finished at least 10 quilts containing kaleidoscope blocks. All of them were made of eight 45° triangles forming an octagon. Until today I had never made a kaleidoscope block composed of six 60° triangles forming a hexagon.

In case you hadn’t noticed, the Spinners block contains six 60° triangles. Instead of meeting in the middle to form a kaleidoscopic image, however, the triangles “spin” around a center hexagon. That didn’t stop me from testing my idea that six identical triangles placed in a Spinners block would produce an interesting effect.

Before I show you my Spinners block, take a look at the kaleidoscope blocks I could have made. Because the triangles are equilateral, any of the three points can go in the center, providing three different outcomes.

Here’s the first one:

Kaleido Spinner block a

The second one:

Kaleido Spinner block b

And the third one:

Kaleido Spinner block c

I like them all but am partial to the first one. A quilt made of these blocks and more would be very striking, to be sure. The floral print lends itself beautifully to kaleidoscope blocks. But we’re headed in a different direction this time. Take a look:

Kaleido Spinner block
Block Measures 15½” x 13½” Unfinished

A new spin, both literally and figuratively. I’m calling it a “kaleido-spinner” block.

I placed the block on a piece of dark blue fabric so the block would stand out and I like the effect so well I’m going to use that fabric. I’ll make a couple more blocks before deciding whether to make a wall hanging or keep going to make a quilt.

What do you think? I’m pretty excited about it!


Posted in faux-kaleido quilts, hexagons, kaleidoscope quilts, table topper, update, wall hanging | 6 Comments