Category Archives: windmill block

Another Finish: Another Junior Billie Bag

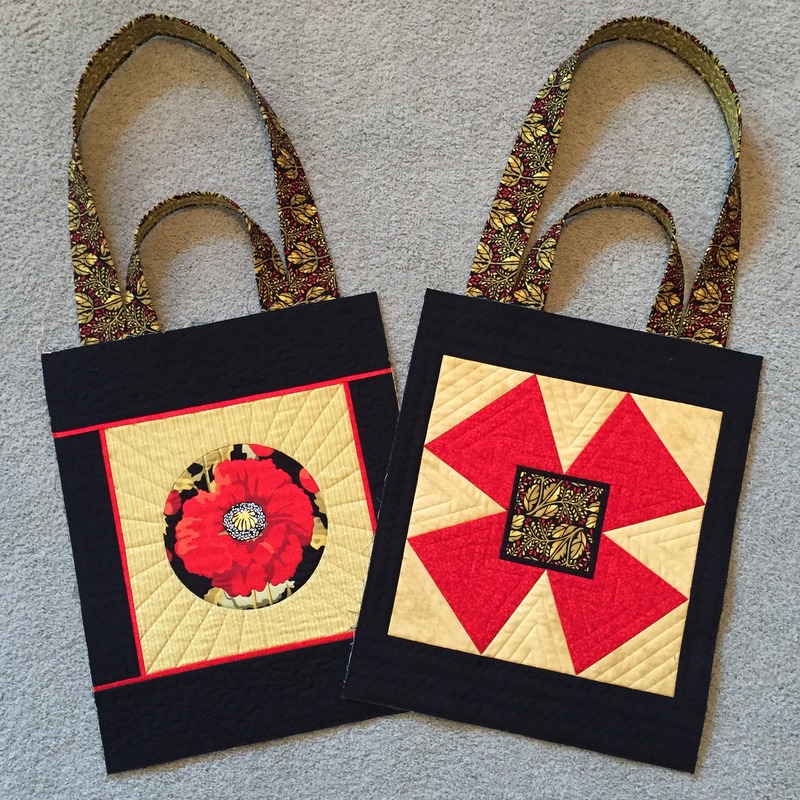
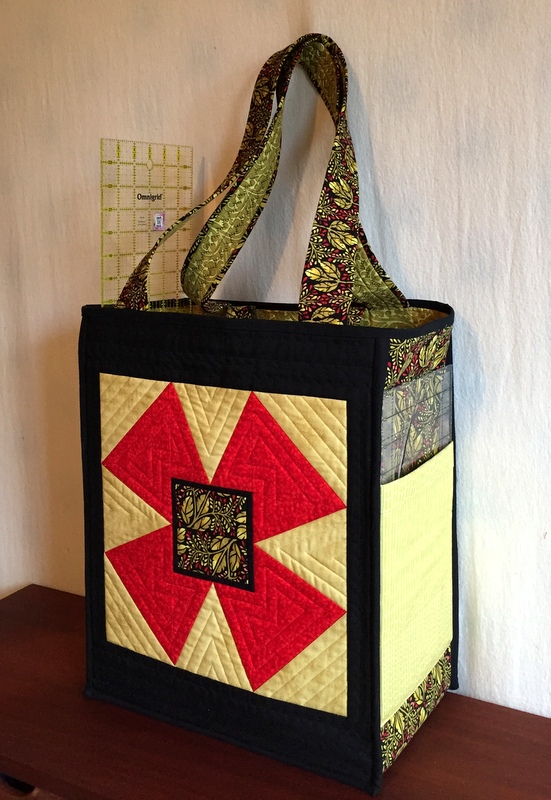
Ladies and gents, I have another finish to report: Here is my latest version of the quintessential quilter’s tote known as the Junior Billie Bag:


I just finished teaching a class at the Pine Needle on making a JBB. I started the class (and this bag) in January; you can read about my fabric choices here.

In the photo above, you see the longer of two sets of handles; these are worn over the shoulder. In the photo below you see the shorter set of handles, allowing the bag to be carried like a satchel:


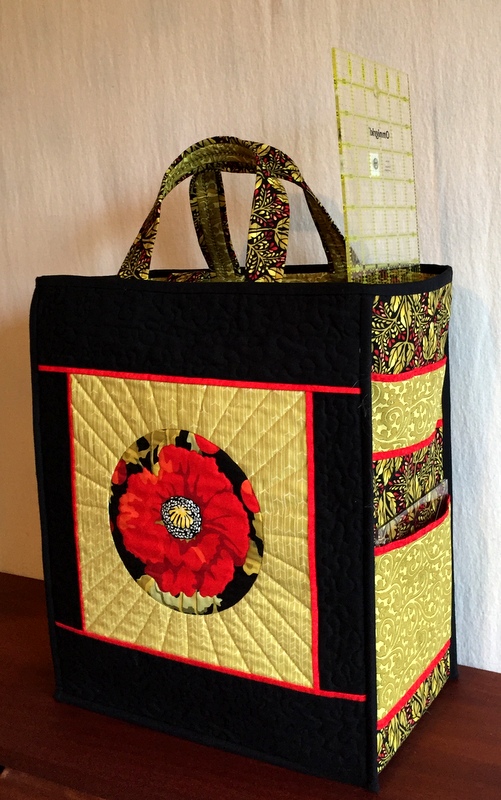
Notice the custom outside pockets in both photos.

Now look inside the Junior Billie Bag, where you’ll find many more pockets, all sized with specific items in mind:


After those pockets are filled, there’s still room to tuck in bundles of fabric or batting — or even a sack lunch. Now you know why I call the Junior Billie Bag “the quintessential quilter’s tote.”

The original Billie Bag was designed by Billie Mahorney and measured 21″ x 21″ x 7½”. This version is smaller, measuring 14″ x 17″ x 7½”. Billie never wanted to write a pattern, preferring to teach her design in a classroom setting. Now that she has retired from teaching, I have the pleasure of teaching the class. How glad I am! It’s been so much fun sharing her design with other quilters, and in the process I have made myself a JBB or two and given others as gifts.

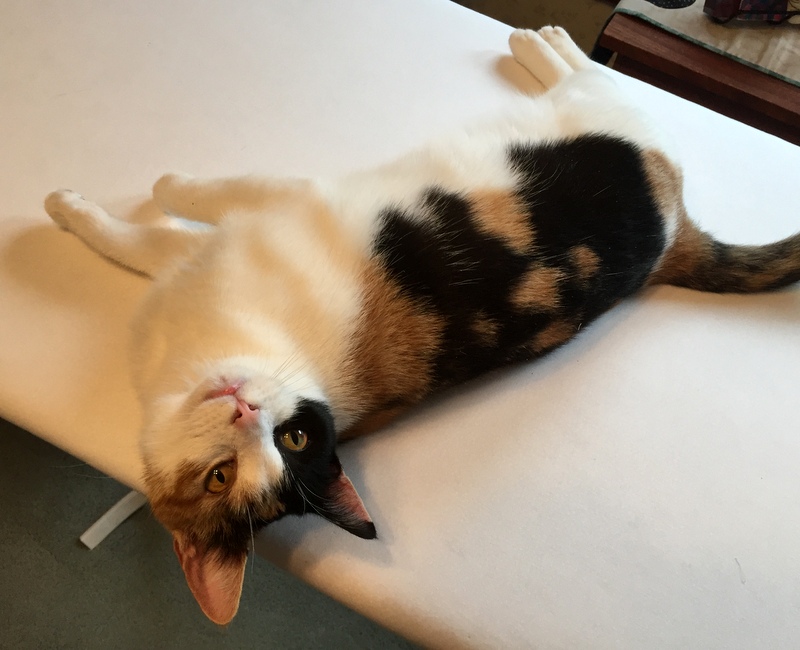
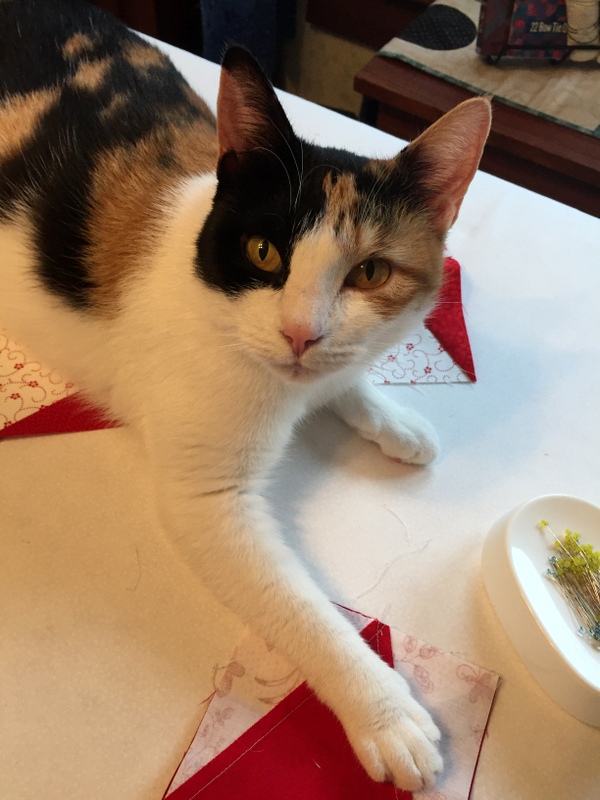
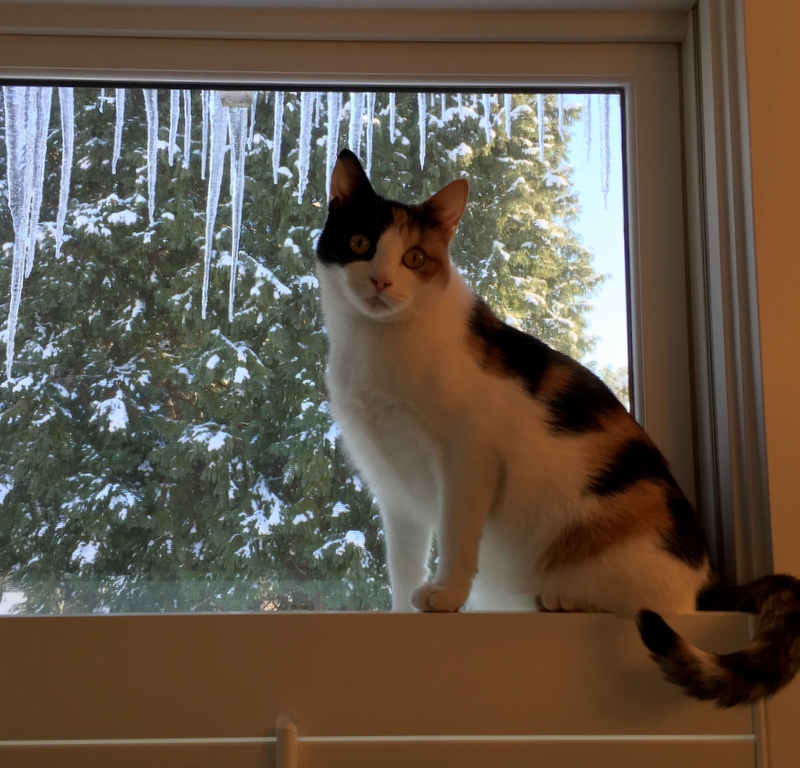
When Coco saw me taking photos of the JBB this morning, she trotted right over to investigate. Before I knew it, she had crawled inside and made herself very much at home:

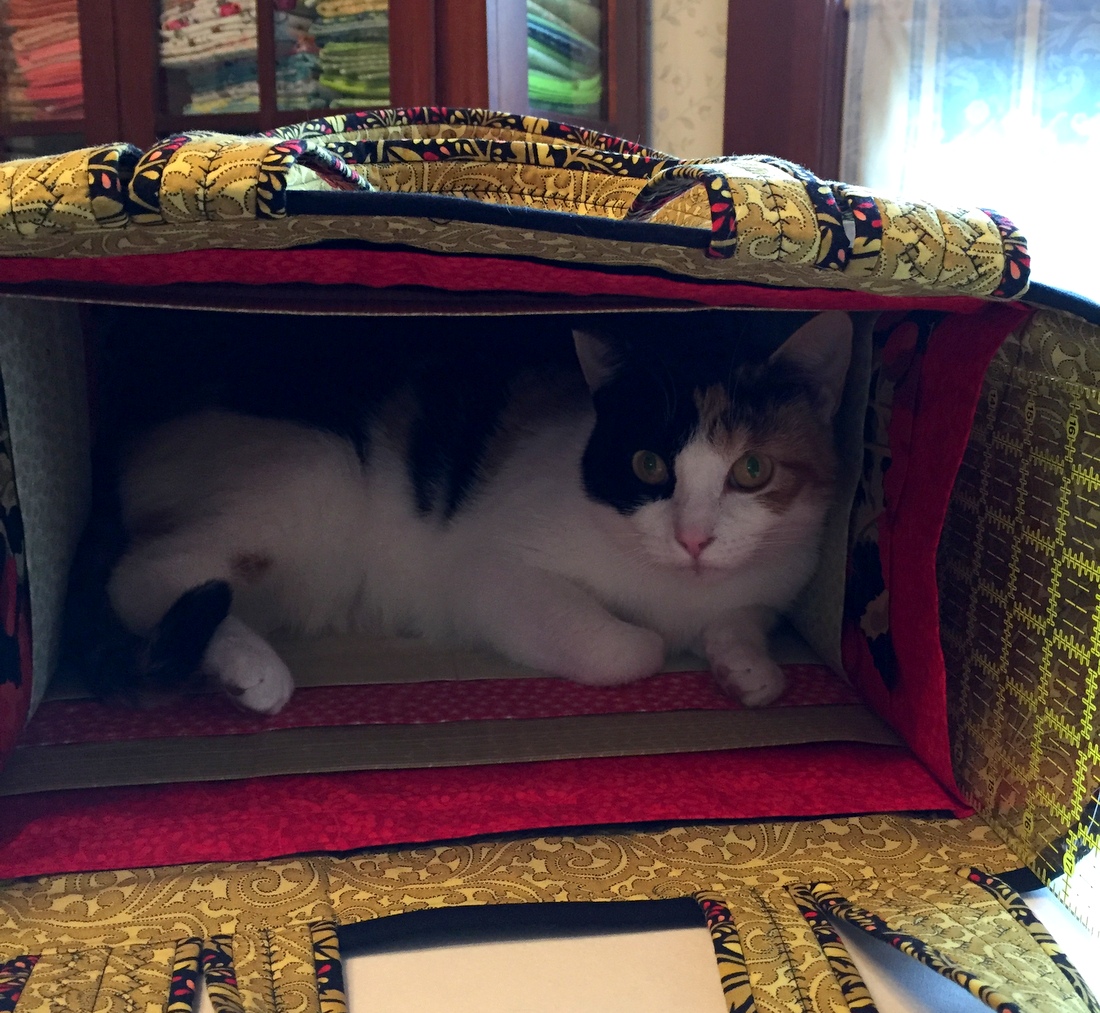
It seems the Junior Billie Bag is perfectly sized for a cat. Who knew?!


Posted in Billie Bag, free motion quilting, Junior Billie Bag, tote bags, update, windmill block | 12 Comments

Getting Right to the Point . . .

. . . is not as easy as it looks.

I’m talking about the places on my red and white windmill quilt where the points of the windmills meet. Matching my points turned out to be much more challenging than I had anticipated.

Here’s why. Take a look at a complete block:

The seams in the Half Square Triangle (HST) corner blocks and in the center pinwheel are sewn at 45° angles . . .


. . . whereas the seams in the V blocks are sewn at sewn at 60° angles:


When a V block is sewn to an HST or pinwheel block, the seams don’t naturally “nest,” even when the seams are pressed in opposite directions. Accuracy in pinning and sewing is essential.

My individual blocks went together nicely. Joining the blocks to form rows and then sewing the rows together was where I ran into problems. I’m a pretty precise piecer but I found that getting my points to line up properly was not just a matter of careful pinning and stitching.

Eight seams come together where the outer points of the windmills meet in adjacent blocks. It’s very difficult to sew them together without some of the seams shifting ever so slightly. With the amount of contrast between light and dark fabrics, points and seams that are even a stitch or two out of alignment are going to stick out like sore thumbs.

The seam between Rows 1 and 2 gave me absolute fits. There was much ripping out and resewing of small sections, accompanied by much gnashing of teeth (and some unpardonable language). I finally resorted to pinning and basting two rows together, then going back to do corrective sewing on the problem points (ripping out, repinning, rebasting . . . multiple times) before sewing the entire seam with a shorter stitch length.

The horizontal seam in the center of the picture below shows two properly joined blocks:

On the back where the eight seams come together, the row seams were popped open to distribute the bulk, forming ½” square pinwheels:

I can now happily report that all of the frustration was worth it. Take a look at my finished quilt top:

Now that all of the blocks are joined, can you see the overlapping circles? You should be able to see both light and dark circles. They are illusions, as there are no curved seams in this quilt top. The quilt block is a variation of the classic Winding Ways block, which employs curved seams to form overlapping circles.

The pattern (A Midwinter’s Night by Cottage Rose) calls for borders with pieced cornerstones but I like the look of this without any borders at all. It measures 48½” x 60½”, a nice sized throw.

And I have a name for it. Because I think of the blocks as windmills, I’m going to call this quilt Dutch Treat. Some of my readers suggested I call it Coco’s Valentine, since my calico kitty seems to like it so much. Truth be told, Coco likes every quilt I make, never missing an opportunity to lounge on a quilt under construction or a finished one.

Linking up with Kelly of My Quilt Infatuation.


Posted in cats, update, Winding Ways quilt block, windmill block | 9 Comments

Filling in the Blanks

This is the final layout of my scrappy red and white windmill quilt:

Windmill Quilt final layout
The pinwheel centers were the last to go in, as they needed to be balanced with each other as well as inside their respective blocks. And it was a balancing act. First the windmills needed to be positioned so that no like red prints (which read as solids) were in adjacent blocks and then the pinwheels needed to be positioned in the same way. My other self-imposed rule was that the red prints in each pinwheel had to be different from the other reds in the same block.

Since I was working with a limited number of reds, this turned out to be quite a challenge. I wound up with two neighboring blocks with the same red in the pinwheels (not sayin’ where) but I’m not worried about it because the quilt top still looks balanced over-all.

Speaking of pinwheels, those little blocks look pretty cute from the back:

back of pinwheel block

To flatten the center where eight seams intersect, I popped two seams open, creating a teeny tiny pinwheel which no one will ever see once the quilt top is sandwiched.

The pattern I am using is A MidWinter’s Night by Deb Eggers of the Cottage Rose. I made one small but significant change to her directions which is best explained by showing you a couple of photos. Here are the first two blocks I made, side by side:

dk and lt windmill block

See how the values are reversed in the two blocks so that the windmill is dark in the left block and light in the right? But notice that the dark and light values in the center pinwheels are in the very same position.

Doesn’t it stand to reason that the values in the pinwheel should be reversed as well? I removed the pinwheel in the left block above and replaced it with a pinwheel with reversed values. Now look at the two blocks:

windmill blocks lt and dark
Doesn’t that look better? I sure think so. I’m glad this occurred to me before I sewed 20 pinwheels together the same way.

I am hoping to get all of the blocks sewn together this weekend. I might even get the top completed. My efforts are somewhat hampered by this constant visitor to my sewing room:

Coco on ironing board
Coco likes to make herself at home on my ironing board. She’s always very interested in what I’m doing:

Coco helping me sew
See how she has placed her paw directly on the pieces I am trying to pin? With “help” like that, no wonder I sometimes feel my progress is too slow.


Posted in cats, update, windmill block | 11 Comments

Color Me Cranky

Me? Cranky? Yes, because until yesterday I hadn’t sat down at my sewing machine for 10 days. Ten days! That must be a record for me. It seems there are just too many other things going on right now. Such is the life of a busy retiree — but this retiree isn’t happy unless she gets to spend some quality time in her sewing room on a regular basis.

What I needed was a little red and white color therapy, and happily I got some:

windmill pinwheels
What you see here is a jumble of pinwheels. These blocks will go into the windmill quilt I started last month.

Here are the pinwheels laid out in the order they will appear in the quilt:

windmill pinwheels 2

That hole in the third row is because the pinwheel already got sewn into this block:

windmill block 1
If all goes according to plan, I’ll post photos tomorrow of the entire quilt layout. Maybe I’ll even have some blocks sewn together. Now that would make me really happy.


Posted in update, windmill block | 5 Comments

I ♥ My Windmill Quilt

I’ve been longing to get back to my windmill quilt and today, after a three-week break, I finally did. With Valentine’s Day coming up next week, it seems appropriate to be working with red and white fabrics.

You may recall I’m making this pattern by Deb Eggers:

a mid-winters night quilt pattern
“Controlled scrappy” is the look I’m going for, with a mix of reds for my darks and two red-on-white prints for my lights. Here’s a light and dark block side by side:

dk and lt windmill block
My plan is to use a few additional red-on-white prints for the pinwheels in the center of each windmill block. After making the two complete blocks you see above, I decided to hold off on final selection of fabrics for the pinwheels until after all of the blocks were laid out on my design wall. I wanted to be sure the red fabrics, some of which are brighter than others, were balanced across the quilt with no like fabrics touching in rows or columns. A bit obsessive-compulsive, perhaps? Oh, maybe just a bit . . .

I decided on a 4 x 5 setting, requiring 20 blocks, and sewed the outer strips of each block, leaving the middle strip unsewn because of the missing pinwheel centers. I was having difficulty laying out the partial blocks on my design wall until I hit upon the idea of using just one V block from each windmill block.

This is what I wound up with:

windmill quilt V blocks

It’s just coincidental that laying the blocks out this way created some elongated hearts. Sweet!

Satisfied with the placement above, I laid all of the blocks out:

windmill quilt layout
I am already in love with this quilt!


Posted in update, windmill block | 6 Comments

Before and After Quilting

Oh, my — quilting sure makes a difference! Here’s a before and after shot of the windmill panel of the Junior Billie Bag I’m working on:

JBB windmill block before and after quilting
After stitching in the ditches, I quilted straight lines inside the red and gold shapes to emphasize the angles. In the black border strips I used a decorative stitch that mimics the little teardrop shapes in the fussy-cut center block:

jbb windmill block quilting detail
That’s a very subtle touch (translation: you can hardly see it) but I like knowing it’s there. I also stitched around the veins of the leaves to hold the layers in the center together.

In the other panel (which I wrote about in an earlier post) I added some additional straight lines radiating from the center circle:

17-2 JBB circle panel quilted
I also outline stitched around the red poppy and the center of the flower to hold those layers together.

Here are the front and back panels with the two sets of handles attached:

17-2, JBB panels quilted

Am I pleased with my quilted panels? I’m crazy about them! Next up: side panels with exterior and interior pockets.


Posted in Billie Bag, Junior Billie Bag, update, windmill block | 5 Comments

Wild about Windmills

I didn’t have to look far to find a block design for the other main panel of my quilter’s tote known as the Junior Billie Bag:

jbb windmill block
It’s essentially the same block that’s in the red and white quilt I started a couple weeks ago. I swapped out the pinwheel center of that block with the fussy-cut square you see above, surrounding it with a narrow black accent strip.

I am loving the bold look of this block, which reminds me of a windmill. (My red and white blocks with the pinwheel centers look even more like windmills; there’s a quilt name in there somewhere.)

Here’s the latest windmill block with black border strips added to size it for my Billie Bag:

JBB windmill panel

I’m mulling over the quilting possibilities. Maybe straight line quilting in the windmill block and free motion meandering in the black background strips?

Just for fun I positioned the block on point on my design wall (and cropped it here so it would be framed in black):

Camera Uploads8
Striking, yes? It reminds me a bit of a Maltese cross. Wouldn’t it make an interesting quilt? Oh for another lifetime to make all of the quilts that are in my head!


Posted in Billie Bag, Junior Billie Bag, update, windmill block | 3 Comments

Too Clever by Half

Which is to say: not very clever at all.

I’ve been humming along on the blocks for my latest project, a variation of Winding Ways using red and white fabrics. As I showed you in my last post, I’m working from a stack of V blocks made up of four reds and a couple of light prints:

V blocks

I figured that pairing all of the reds with both of the lights would give me a lot of variety when it came time to arrange the blocks on my design wall. But a funny thing happened when I started playing with the blocks. I had a stack that didn’t work at all! How did that happen?

Had I really thought about it before running off in high spirits to my sewing machine, I would have figured it out.

Look at a dark block. You see that the toile print is in the star points of the V blocks and the red fabric is on the outside:

windmill block 1

Now look how a light block has the vine print in the V of the V blocks and all around the outside:

windmills block 2
When you put the blocks together in their proper order, with the light and dark blocks alternating, the vine and toile fabrics should alternate, too, like this:

Windmill blocks 3x3

In other words, the V in the light blocks should always be the vine print, never the toile. And the star points in the dark blocks should always be the toile print, never the vine. I made several blocks that were the exact opposite.

(Just to be on the safe side, I’m going to make the center pinwheel blocks last. They’re going to be a bit scrappy and I sure don’t want to wind up with identical pinwheels in adjacent blocks.)

You know that carpenter’s saying “measure twice, cut once”? My dear friend Colleen, also a quiltmaker, modified that saying to “think twice, measure twice, cut once.” I should have followed Colleen’s advice. Instead I have a set of blocks I can’t use in this quilt.

Although I will never get back the time spent cutting, sewing, and trimming those extra blocks, there is a bit of a silver lining: they can always be used in another quilt or perhaps a table runner. Or on the back of this quilt. One thing I can assure you: they will never wind up as orphan blocks. I’ve invested entirely too much time in them.


Posted in update, Winding Ways quilt block, windmill block | 6 Comments

Snowed In!

Local pundits are calling it “Snowpocalypse” — the epic snowfall on Wednesday that pretty much shut Portland down. We can go years in Portland without snow in winter but this season it has already snowed four times. The temperatures aren’t rising enough to melt the snow so we are stuck with it for a while.

What a great excuse to hunker down and get some sewing done! This is what I’ve been working on:

windmill block 1

windmills block 2
Aren’t those pretty blocks? They remind me of windmills. The pattern is A Mid-Winter’s Night by Deb Eggers of the Cottage Rose Quilt Shop:

a-mid-winters-night-quilt-pattern
The pattern is a reworking of the classic Winding Ways block with a pinwheel in the center. If you look carefully at the quilt pictured on the pattern cover you can see overlapping light and dark circles. The circles are illusions, as all of the cutting and stitching lines are straight. I believe the Winding Ways block is traditionally made with curves resulting in a four-patch block. The method I’m using here results in a nine-patch block.

Working strictly from my stash — I couldn’t have driven to a fabric store in this weather even if I’d wanted to! — I pulled out some red tone-on-tone prints that read as solid and a couple of white-on-red prints.

Now I’m making my way through my little piles of V blocks:

V blocks
The pattern calls for the Tri-Recs rulers, which I own, but I am getting great results from the V Block Trim Down Ruler by Deb Tucker. I resized the block from 9″ to 12″ so the units you see above measure 4½” square. With the V Block Ruler you can trim down blocks for 11 different sizes ranging from 1½” to 6½”.

I may add another red for more variety in my darks. With the exception of a few small pieces in my scrap bin, I’m limited to the vine and toile prints for the lights. I’ll save the smallest pieces for the center pinwheels.

While I am happily ensconced in my sewing room, Coco is keeping tabs on the weather from her perch above the plantation shutters in the master bath:

Coco Jan 2017

The icicles start to melt in the morning sun but refreeze when the sun moves out of sight.

This is our back yard as seen from the kitchen door:

Jan 2017 snow backyard

This is the view from the front porch:

Jan 2017 snow out front
You can see why I have no desire to drive anywhere. And freezing temperatures are expected for the next four days!


Posted in cats, update, Winding Ways quilt block, windmill block | 14 Comments