It’s Tutorial Time! Rotary Cutter Coat

1
Rotary Cutter Coats

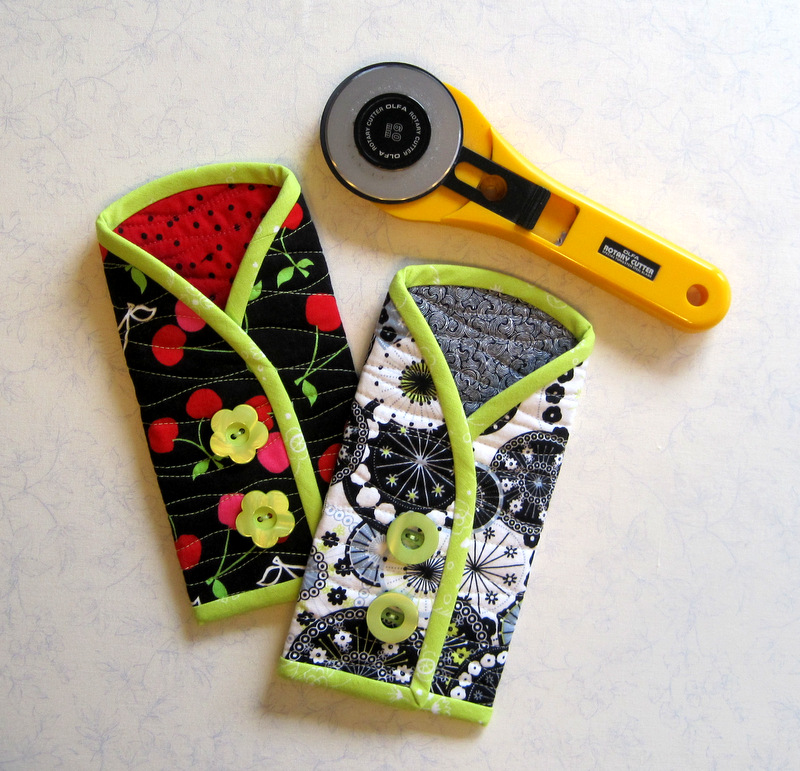
What quilter wouldn’t love one of these quilted cases to hold her rotary cutter? The buttons and contrast trim make the cases look like little coats — so that is what I am calling them. A finished coat measures about 3¾” x 8″.

This tutorial guides you step by step. You can also download a one-page handout.

Fabric and notions
One piece of fabric 9″ x 10½” for outside of coat
One piece of fabric 9″ x 10½” for inside (lining)
One piece of fabric 18″ square for bias binding
One piece of lightweight batting trimmed to 9″ x 10½”
One piece of freezer paper about 10″ x 11″
¼”-wide Steam-a-Seam 2 (double stick fusible web)
Two buttons 7/8″ – 1¼” in diameter

Supplies
Sewing machine with walking foot
Standard sewing supplies (scissors, pins, measuring tape, seam ripper, etc.)
Rotary cutting equipment (mat, rotary cutter, rulers)

The free pattern is available here as a pdf file: Dawn’s rotary cutter case pattern.

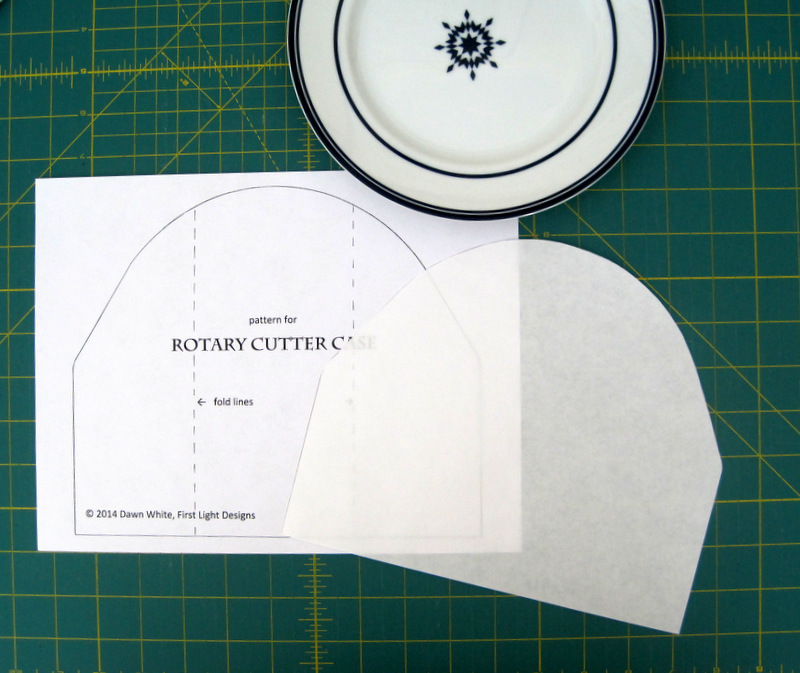
1. Download and print the pattern. The bottom edge of the pattern should measure 9½”. If the measurement is less than that, enlarge the pattern slightly. (If the bottom edge measures 9¼”, the pattern will still work just fine. All you need to do is alter the flap measurement in Step 10 to 2-5/8″.)

2. Trace the pattern onto the flat (not shiny) side of the freezer paper. Cut around the outside edges of the pattern. Set pattern aside.
2
Paper Pattern at Left, Freezer Paper Pattern at Right

Are you wondering what that blue and white plate is doing in the picture above? I thought it would amuse you to know that’s what gave me the shape for the rounded part of the pattern.

3. Lay the lining fabric wrong side up on a flat surface. Lay the batting fabric on top. Lay the outside fabric right side up on top of the batting. You now have a quilt sandwich. Baste and quilt as desired.

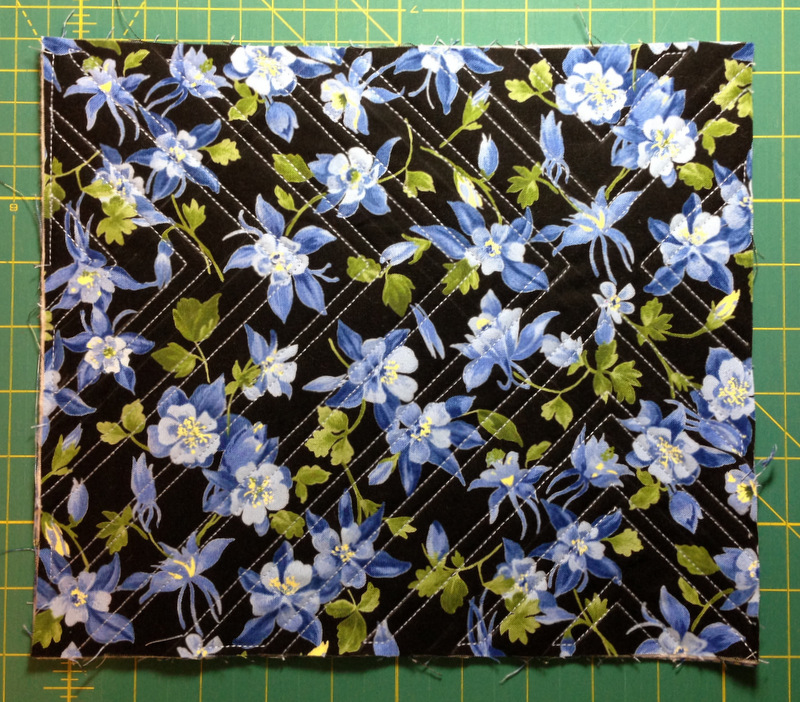
You can quilt any motif you desire. Free-motion quilting is an option but I usually take the easy route and quilt straight lines or random curved lines using my walking foot. With straight lines I often stitch on the diagonal about 1″ apart. In the example below I used straight lines at right angles to form a chevron design:
2014-08-25 16.53.57
Straight Line Quilting (on the Diagonal)

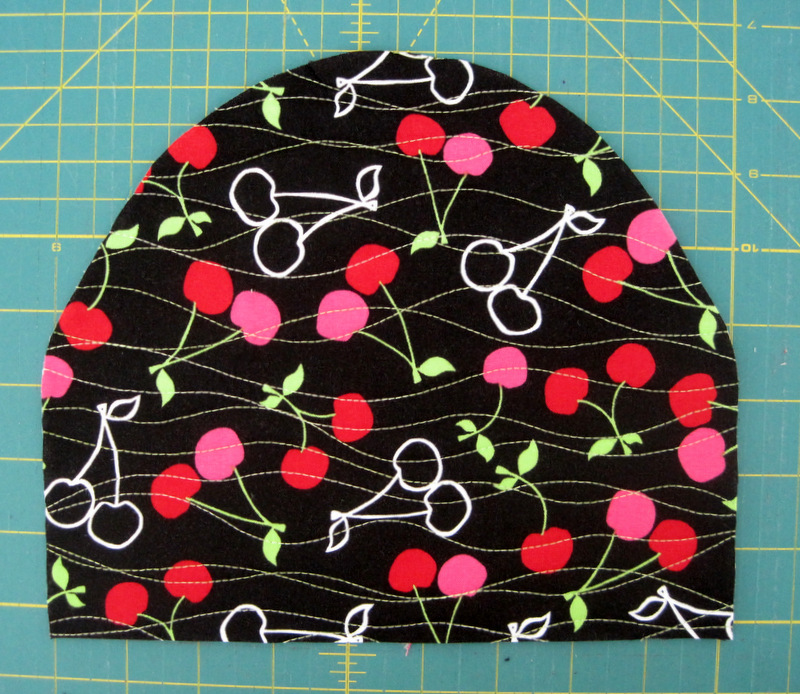
In the two rotary cutter coats pictured at the top of my post, I quilted random wavy lines horizontally in both, although vertical lines would look good too. In the one with the black background I used a 40-wt thread in a contrasting color. Here’s a close-up of that one (after I had cut the pattern out):
2014-10-07 02.07.38
Random Wavy Quilted Lines

In the other one (pictured in the rest of this post), I wanted the thread to blend so I used a 50-wt thread in pale grey.

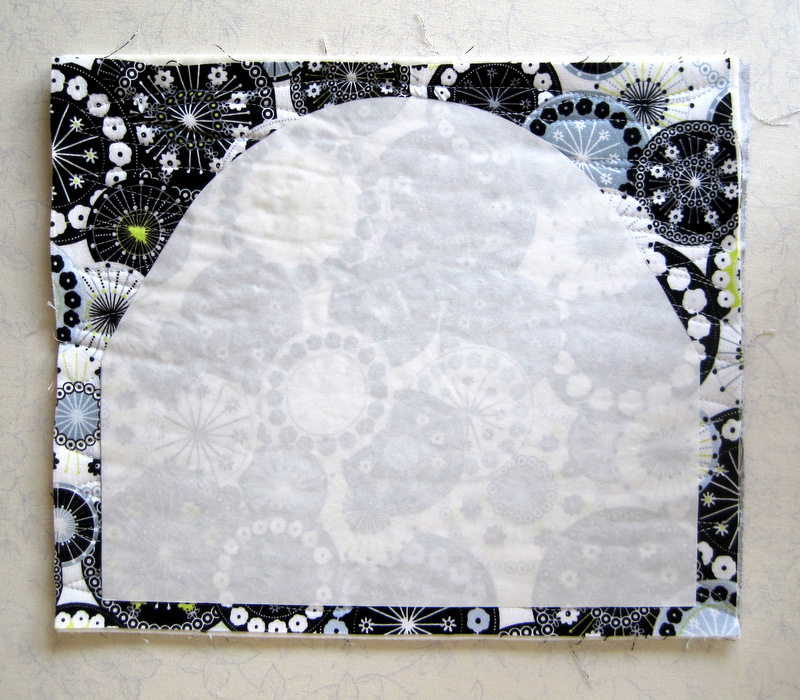
4. Center the freezer paper pattern (shiny side down) on the right side of the quilt sandwich and press with a dry iron:
3
Pattern Ironed to Quilt Sandwich


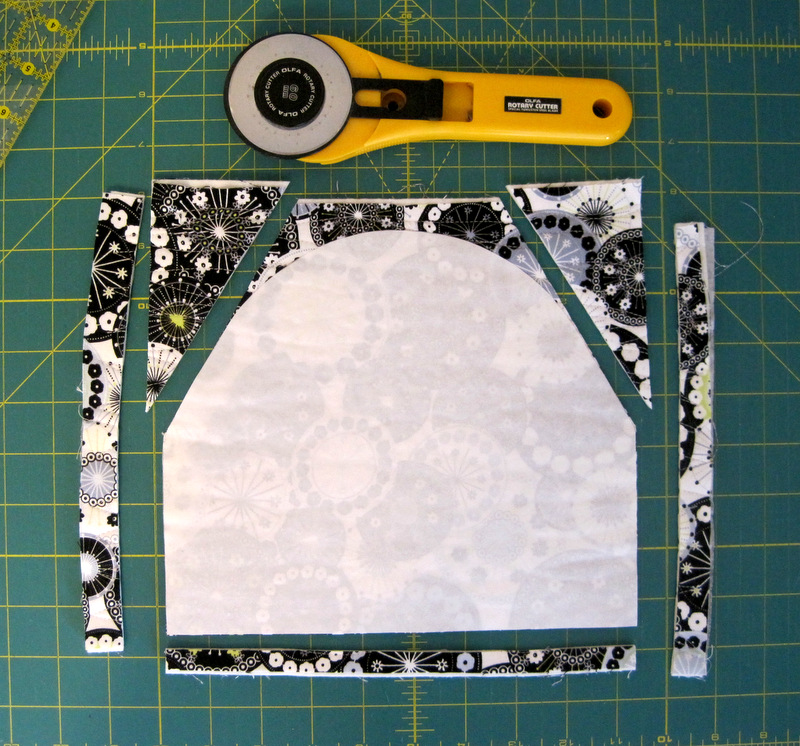
5. You could cut the pattern out with scissors but using your rotary cutter is faster and more accurate. Align the rotary cutter and ruler along the bottom and sides of the pattern and cut. Use the rotary cutter and ruler to cut the beginning of the curves as shown below:
4
Five Straight Cuts with the Rotary Cutter

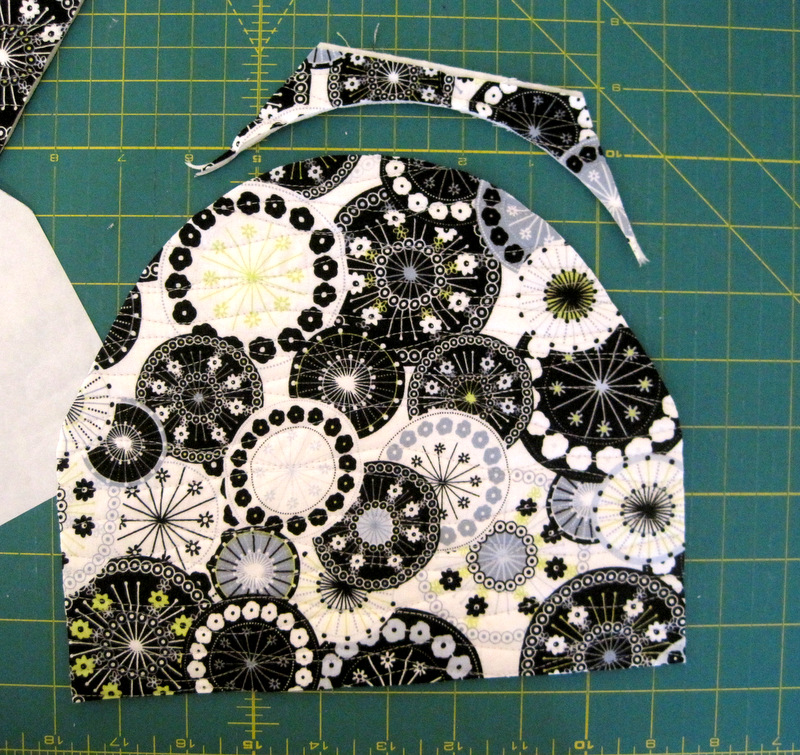
Use scissors to cut the rest of the curve:
5
Remainder of Curve Cut and Sides Rounded Off with Scissors

Peel off freezer paper pattern for repeated use. Use scissors to round off the side edges on the quilt sandwich.

6. Cut 18″ square of binding fabric corner to corner on the diagonal. From each piece cut a strip 2-1/8″ wide along the bias edge. Sew strips together using an angled seam. You need a length about 34″ long. Fold strip in half lengthwise and press.

7. With the walking foot still on your machine, attach binding to the right side of the case as you would for a quilt, starting and ending along the bottom edge. Leave a tail 5-6″ long and begin stitching 1-1/4″ away from the first corner:
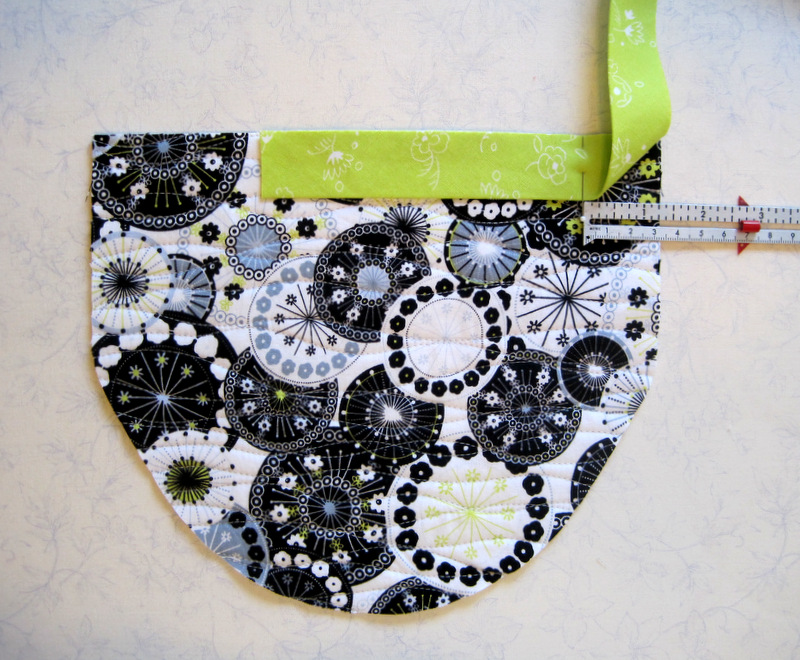
6
Binding Has Begun!

Gently guide the bias binding around the curve of the quilt sandwich, stitching a scant 1/4″ seam. When you get to the other side of the bottom, end your stitching 1″ in from the edge.

8. Use your favorite method of joining the ends of the binding. This is the method I use:
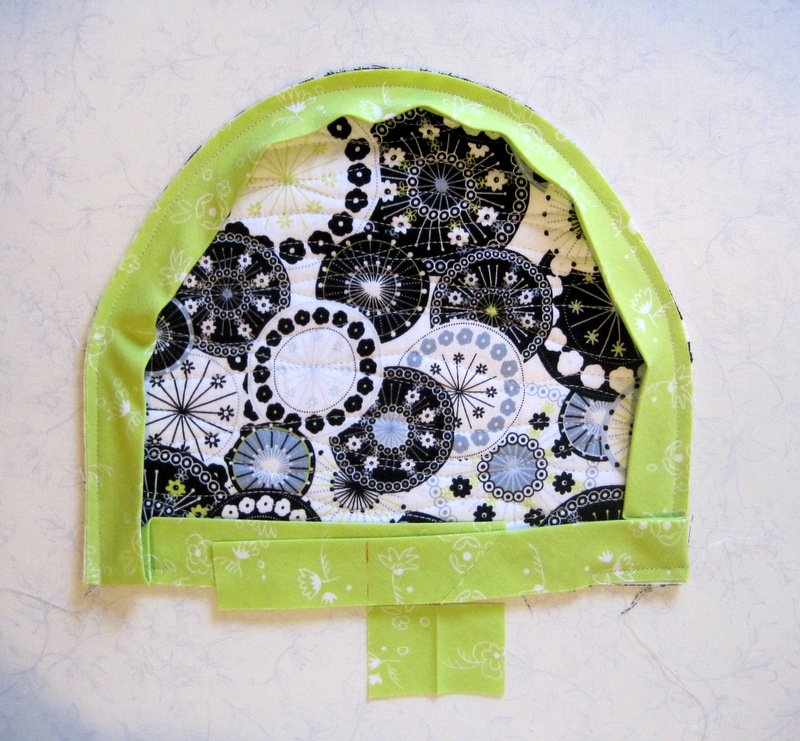
7
Joining the Ends of the Binding Strip

See the red vertical line marked on the binding strip? When I trim the strip there, the two edges of the binding will overlap 2-1/8″, the exact measurement of the binding strip width. (That’s a scrap of the binding fabric at the bottom of the photo, placed there to show you that it’s the same width as the overlap of the two strips.)

Open up the binding strips and join them right sides together at a 90 ° angle, being careful not to twist the strips. See the red line? That’s my stitching line. I’ve got the ends pinned to the ironing board to give you a good look:
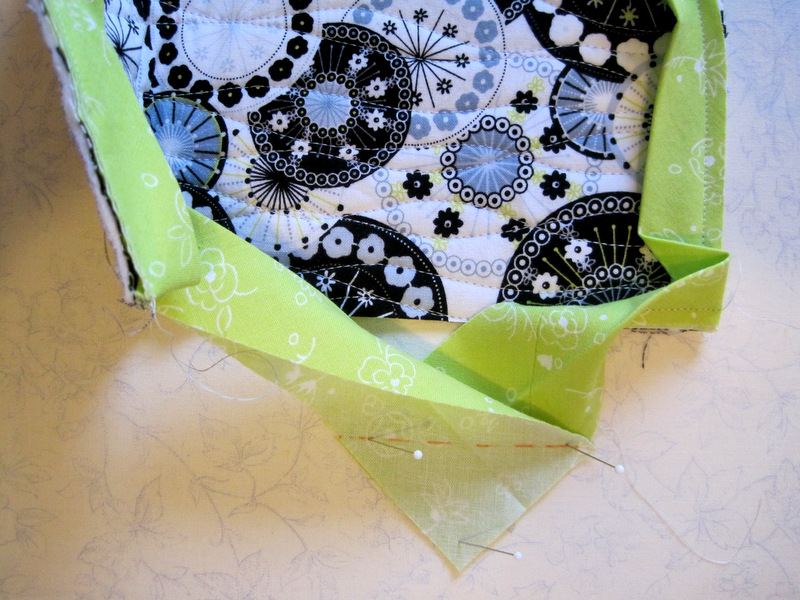
8
Joining the Binding Strips

Stitch the binding seam, trim to 1/4″, press open, and finish stitching the seam along the bottom edge, beginning and ending a few stitches beyond the original stitching lines:
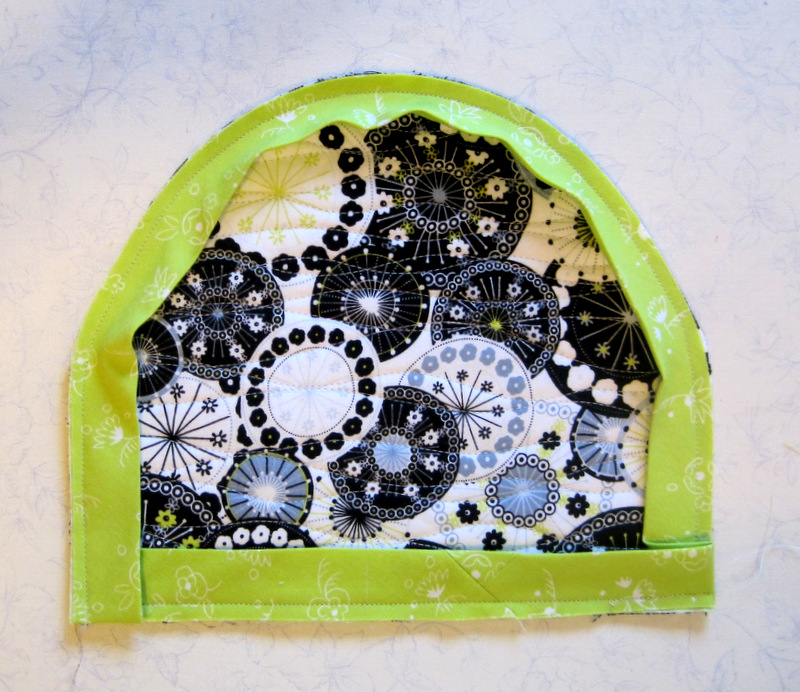
9
Binding is Stitched in Place

9. Turn the binding toward the inside (lining) of the case — it will cup nicely around the curve — and press in place. If the folded edge of the binding doesn’t completely cover the stitching line, trim the seam a bit. I find I usually have to do this around the curved edge.
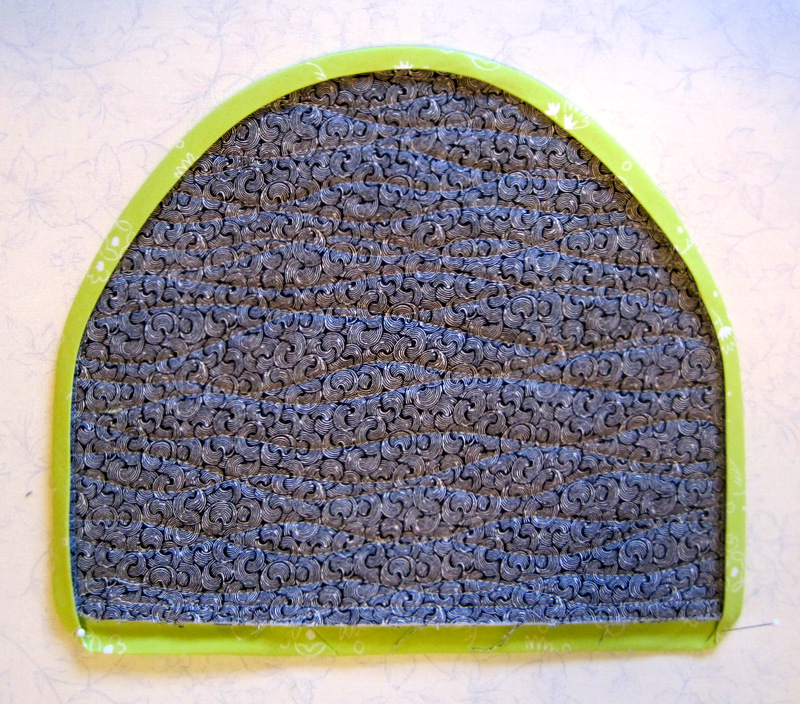
10
The Bottom Edge Awaits Pressing

At this point you could stitch the binding down by hand — but if you can find Steam-a-Seam 2, why not give it a try? It’s a double-stick fusible webbing product made by the Warm Company that makes fast work of finishing a binding. It’s sold by the yard but also comes in rolls ¼” and ½” wide. If you can’t find it on a roll, buy about a half yard and simply cut off ¼” strips as needed.

Using the ¼” wide roll, cut off a strip about 4″ long and peel off the release paper:
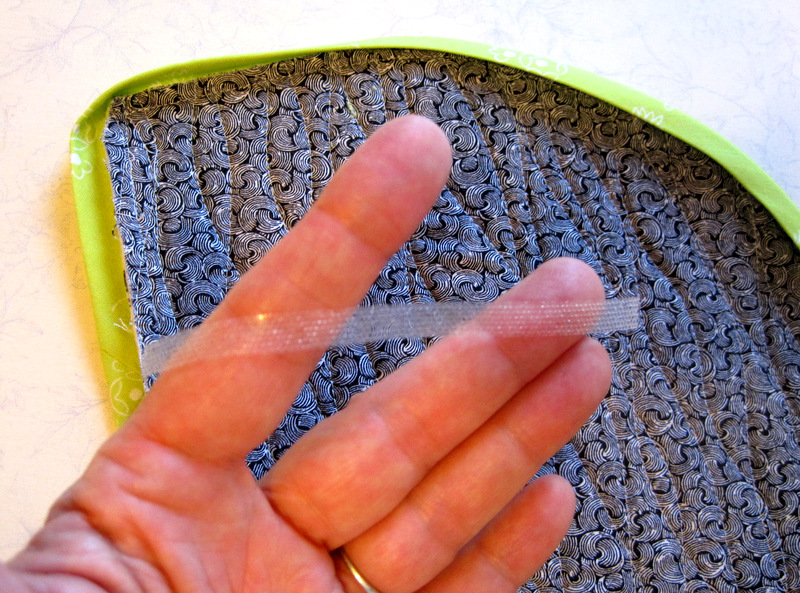
11
Steam-a-Seam 2, Up Close and Personal

The Steam-a-Seam 2 is sticky on both sides but not so sticky that you can’t manipulate it. It goes around curved seams beautifully. Lay the strip of Steam-a-Seam 2 along the seam line, with the edge right next to the stitching:
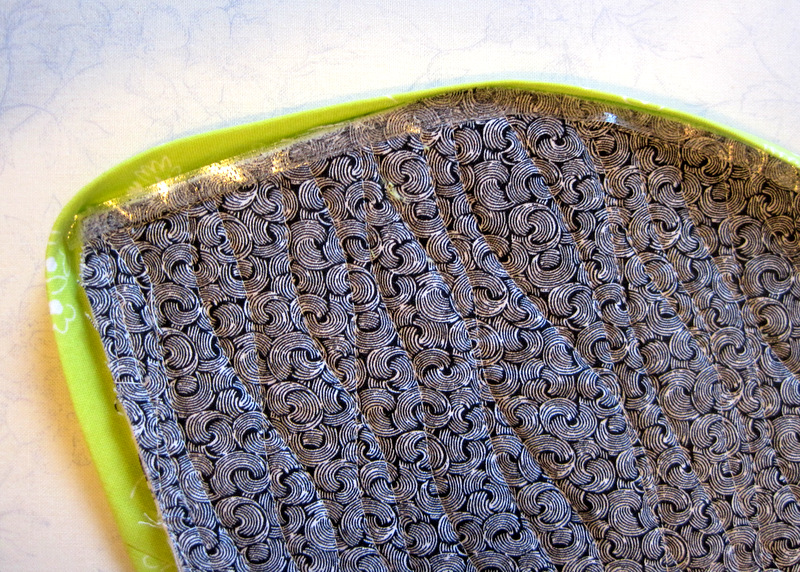
12
Putting the Fusible Webbing in Place

Draw the binding over the seam allowance so that the folded edge just covers the webbing. Hold in place on the ironing board with pins:
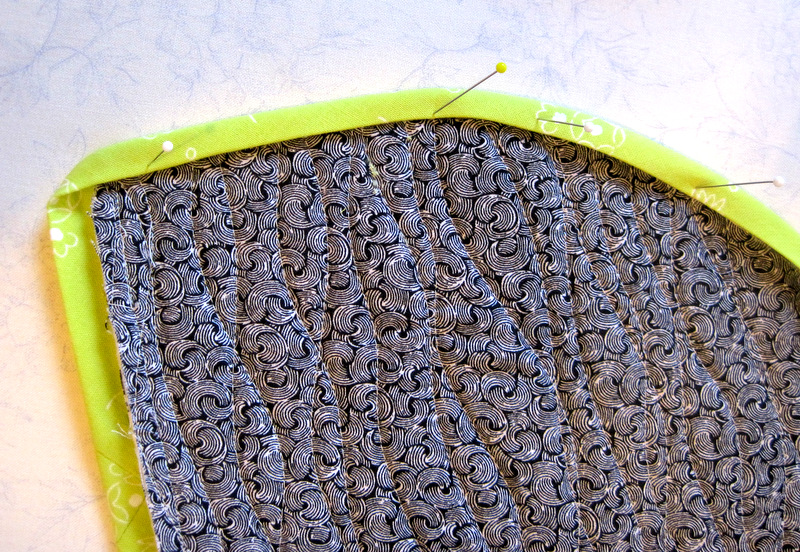
13
Pinning Webbing in Place Before Steam Basting

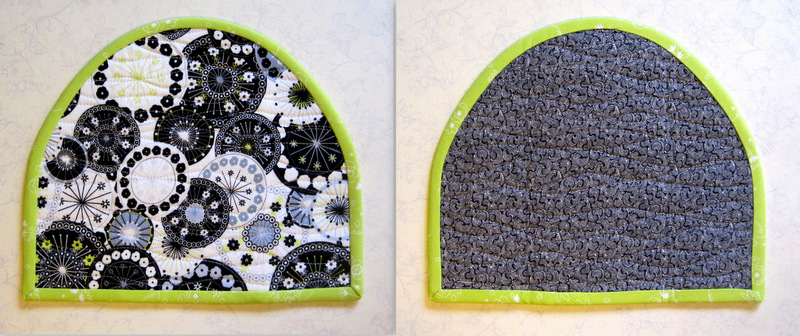
After you have two or three lengths of webbing in place, press the binding briefly to baste the webbing to the fabrics. Leave about an inch of webbing unpressed so that you can lift up the binding and see where the next strip needs to go. When you have worked all the way around, sandwich the rotary cutter coat between a press cloth and steam fully, following the directions on the package of Steam-a-Seam 2. In a very few minutes, your rotary cutter coat will look like this from the front and back:
Camera Uploads36
Front and Back, Binding Done


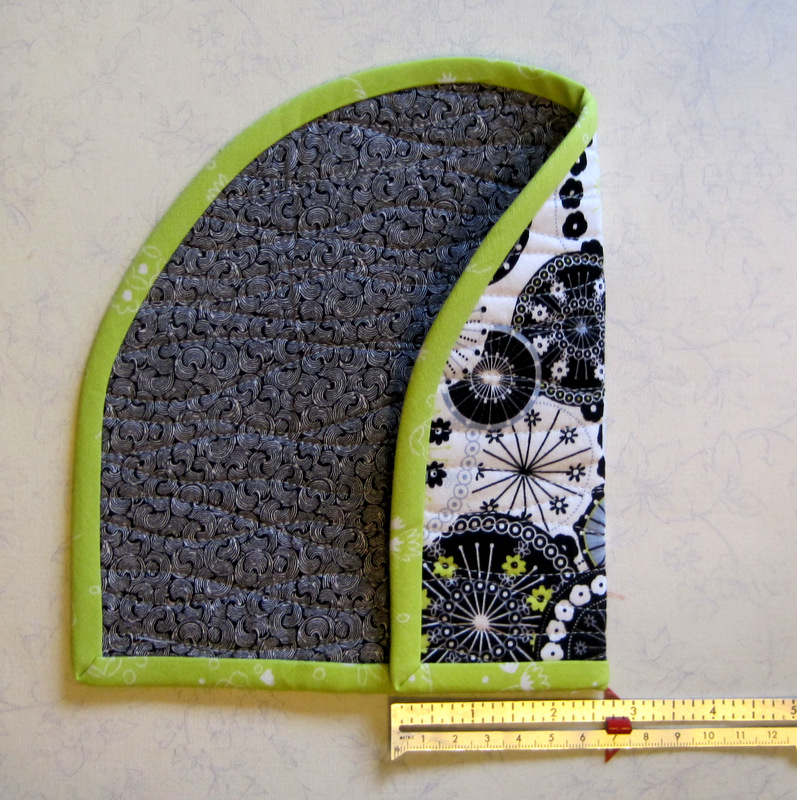
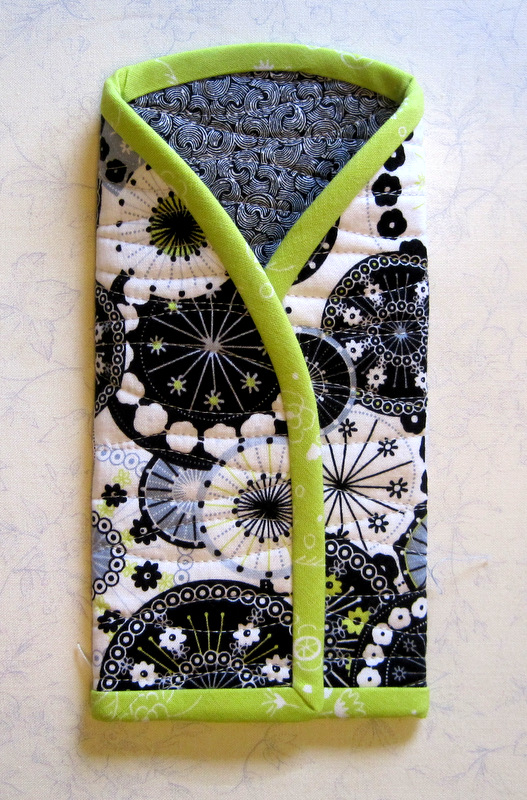
10. Fold case along fold lines, lapping one side over the other in front. (It doesn’t matter which side you lap first.) Both flaps should measure 2¾” from fold to outside edges of binding. Adjust this measurement slightly if necessary so that the finished case measures 3¾” wide. Cut a strip of Steam-a-Seam 2 the same measurement and insert it along the inside bottom edge. Fuse flap in place.
16
First Flap, Ready to Fuse

Fold second flap in place, making sure it also measures 2¾” from the fold to the outside edge:
17
Second Flap, Ready to Fuse

Use another strip of Steam-a-Seam 2 to fuse the bottom of the case completely closed (or whipstitch securely by hand).

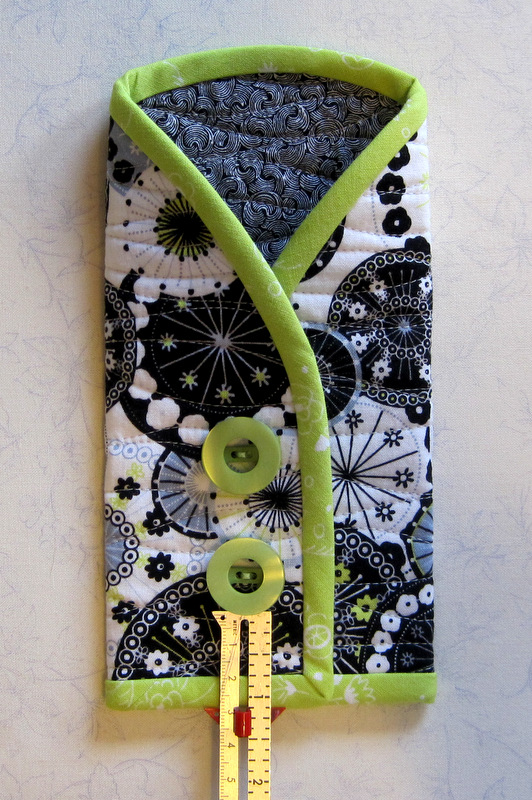
11. Now it’s time to sew on the buttons, which serve no function other than to look beautiful. And they are what makes this little rotary case a coat, so do add them. Sew them in place on the outer flap; no need to sew through both layers.

The bottom of the lower button should be 1-1/8″ or so from the bottom of the case:
18
Buttoning Up Your Overcoat

Let your eye and the size of the buttons guide you.

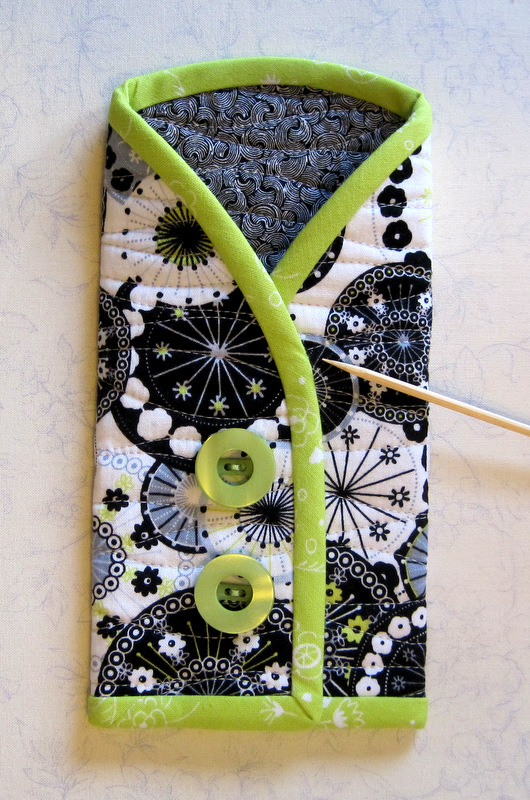
The last step: tacking the binding in place about 1″ down from the point where the bound edges meet:
19
Tacking Binding in Place Near the Top


Now tuck your rotary cutter into its elegant new coat:

20
What the Well Dressed Rotary Cutter Wears


Have fun with this tutorial! If you have any questions or run into a problem, let me know, and I’ll do my best to help you out.


Edit added Nov. 13, 2024:

A faster and less fussy way to join the binding strips is to fold the end of the right tail at a right angle as shown in the photo below (from another project) and take a few stitches very close to the top edge to secure it:
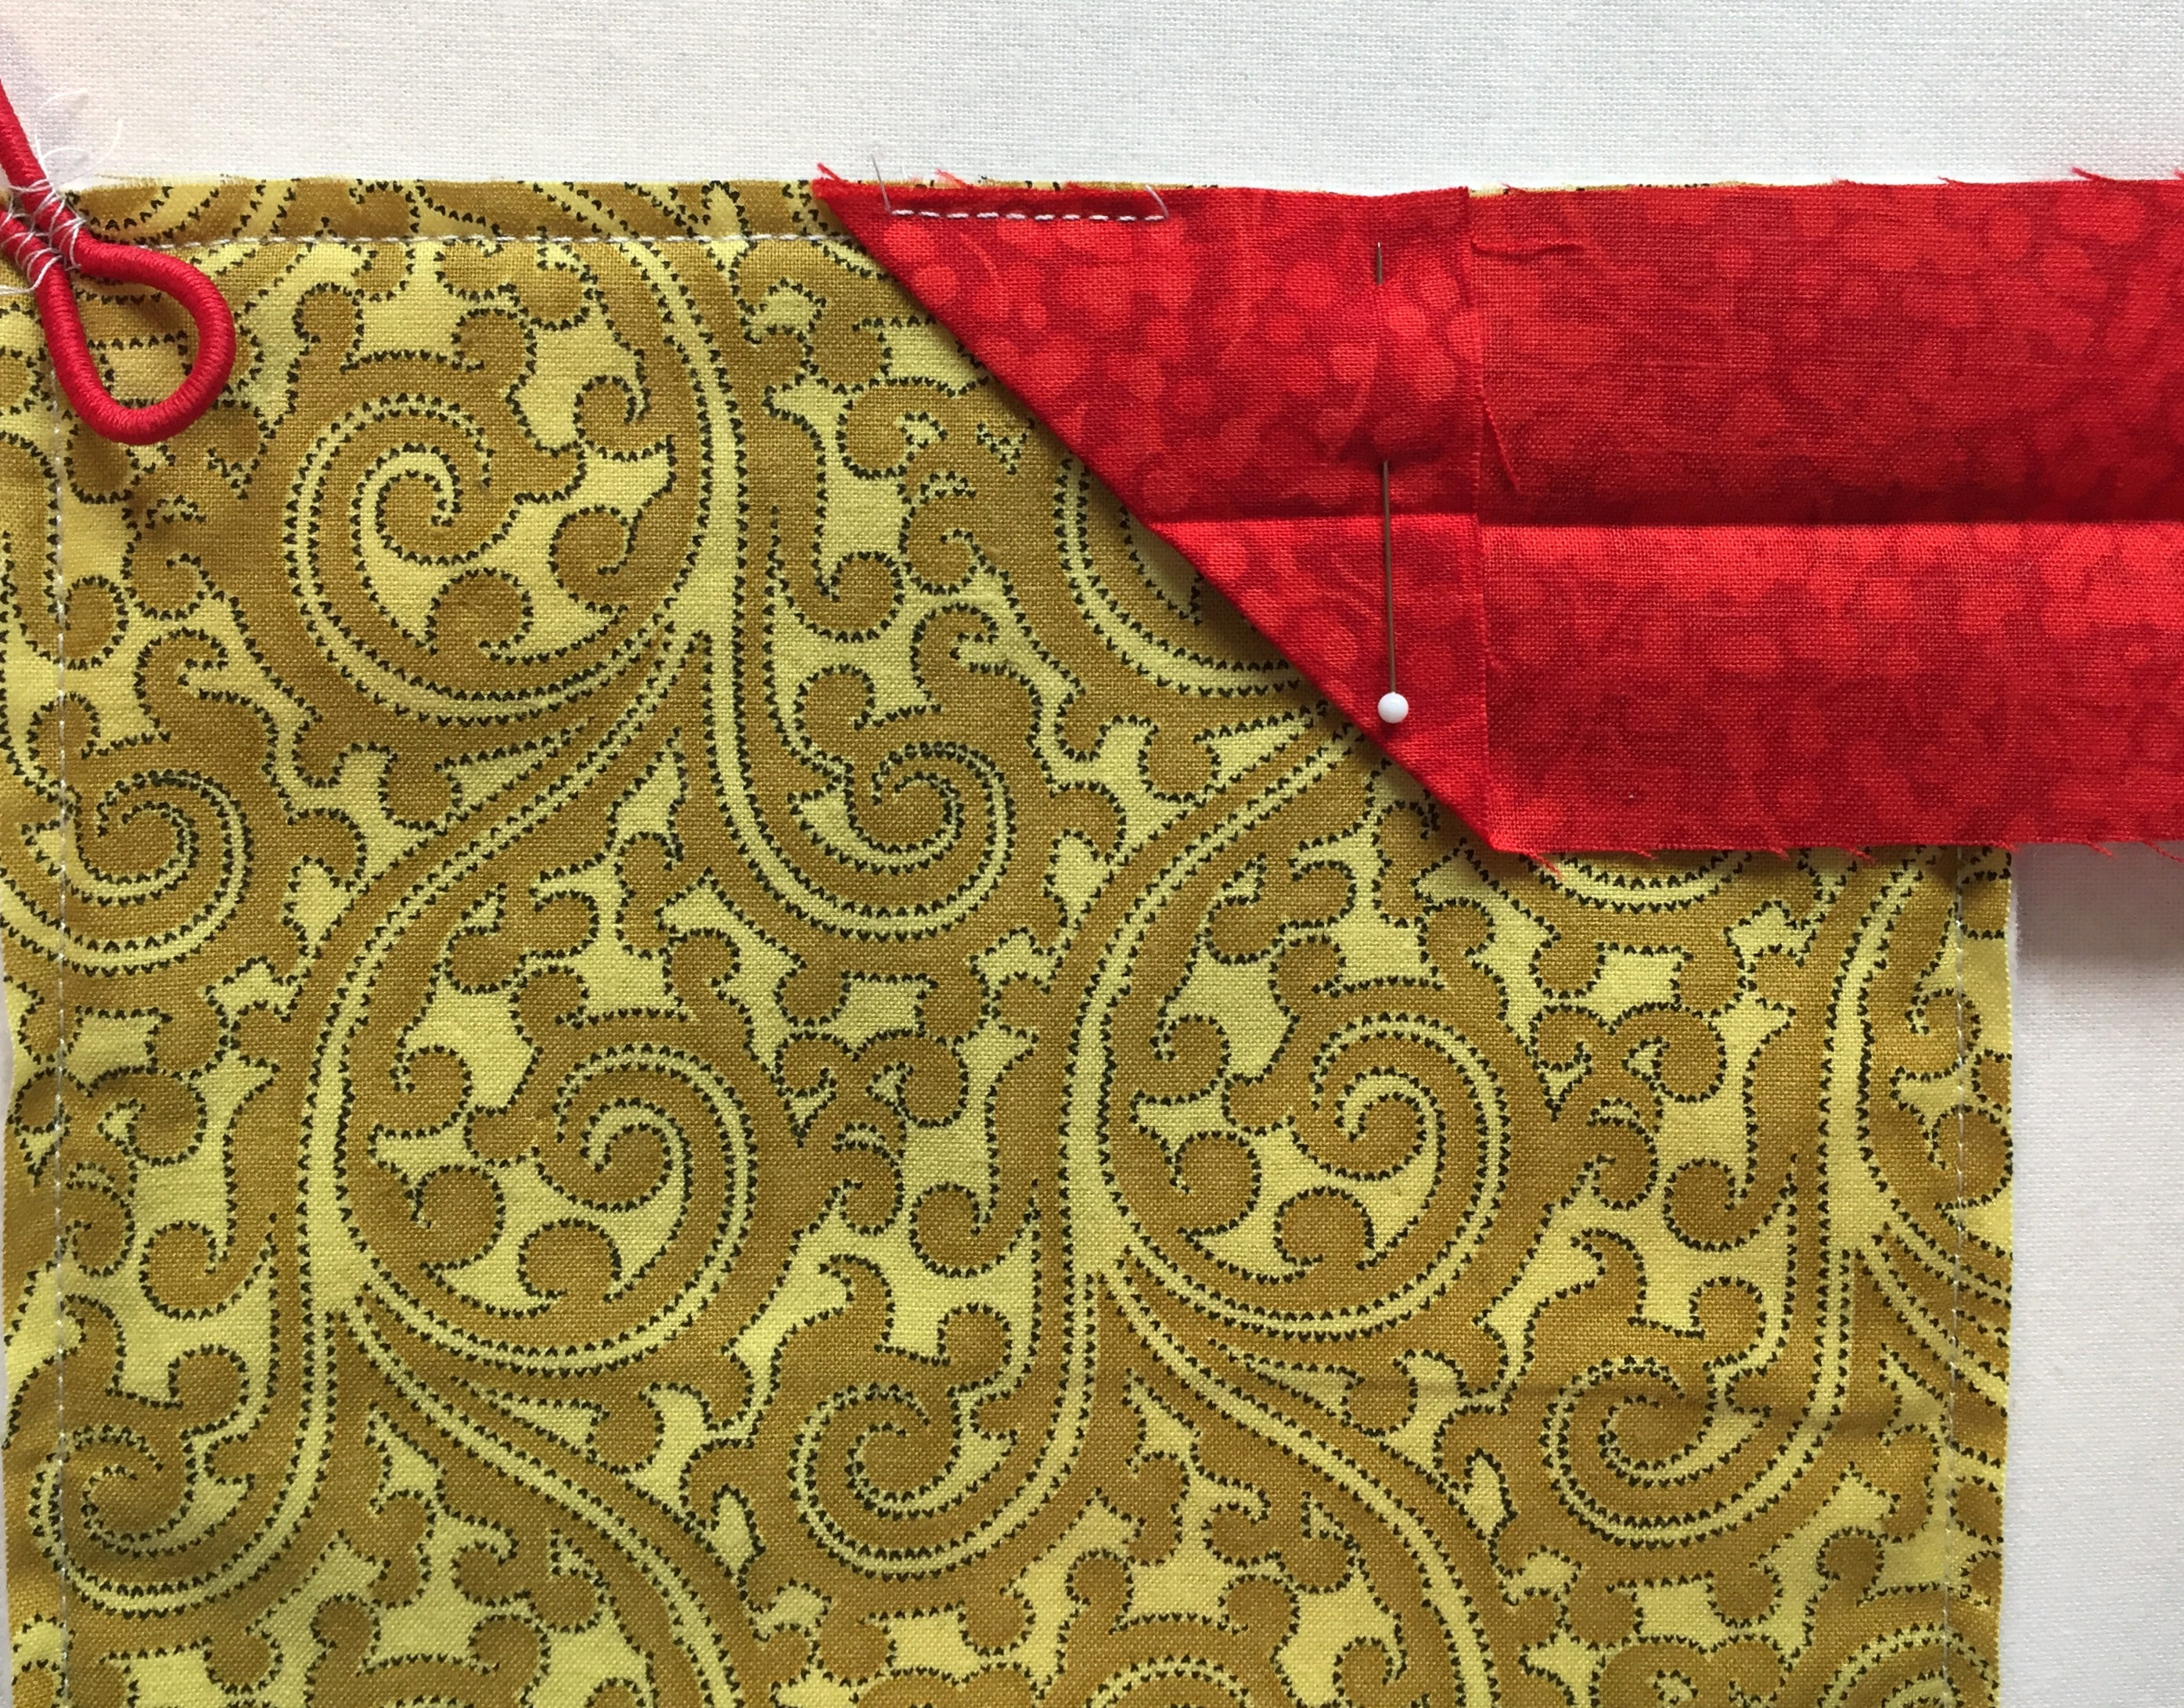
Leaving enough room to tuck the other binding tail into the fold, begin stitching the binding with a scant ¼” seam, stopping ¼” from the end in order to miter the corner:
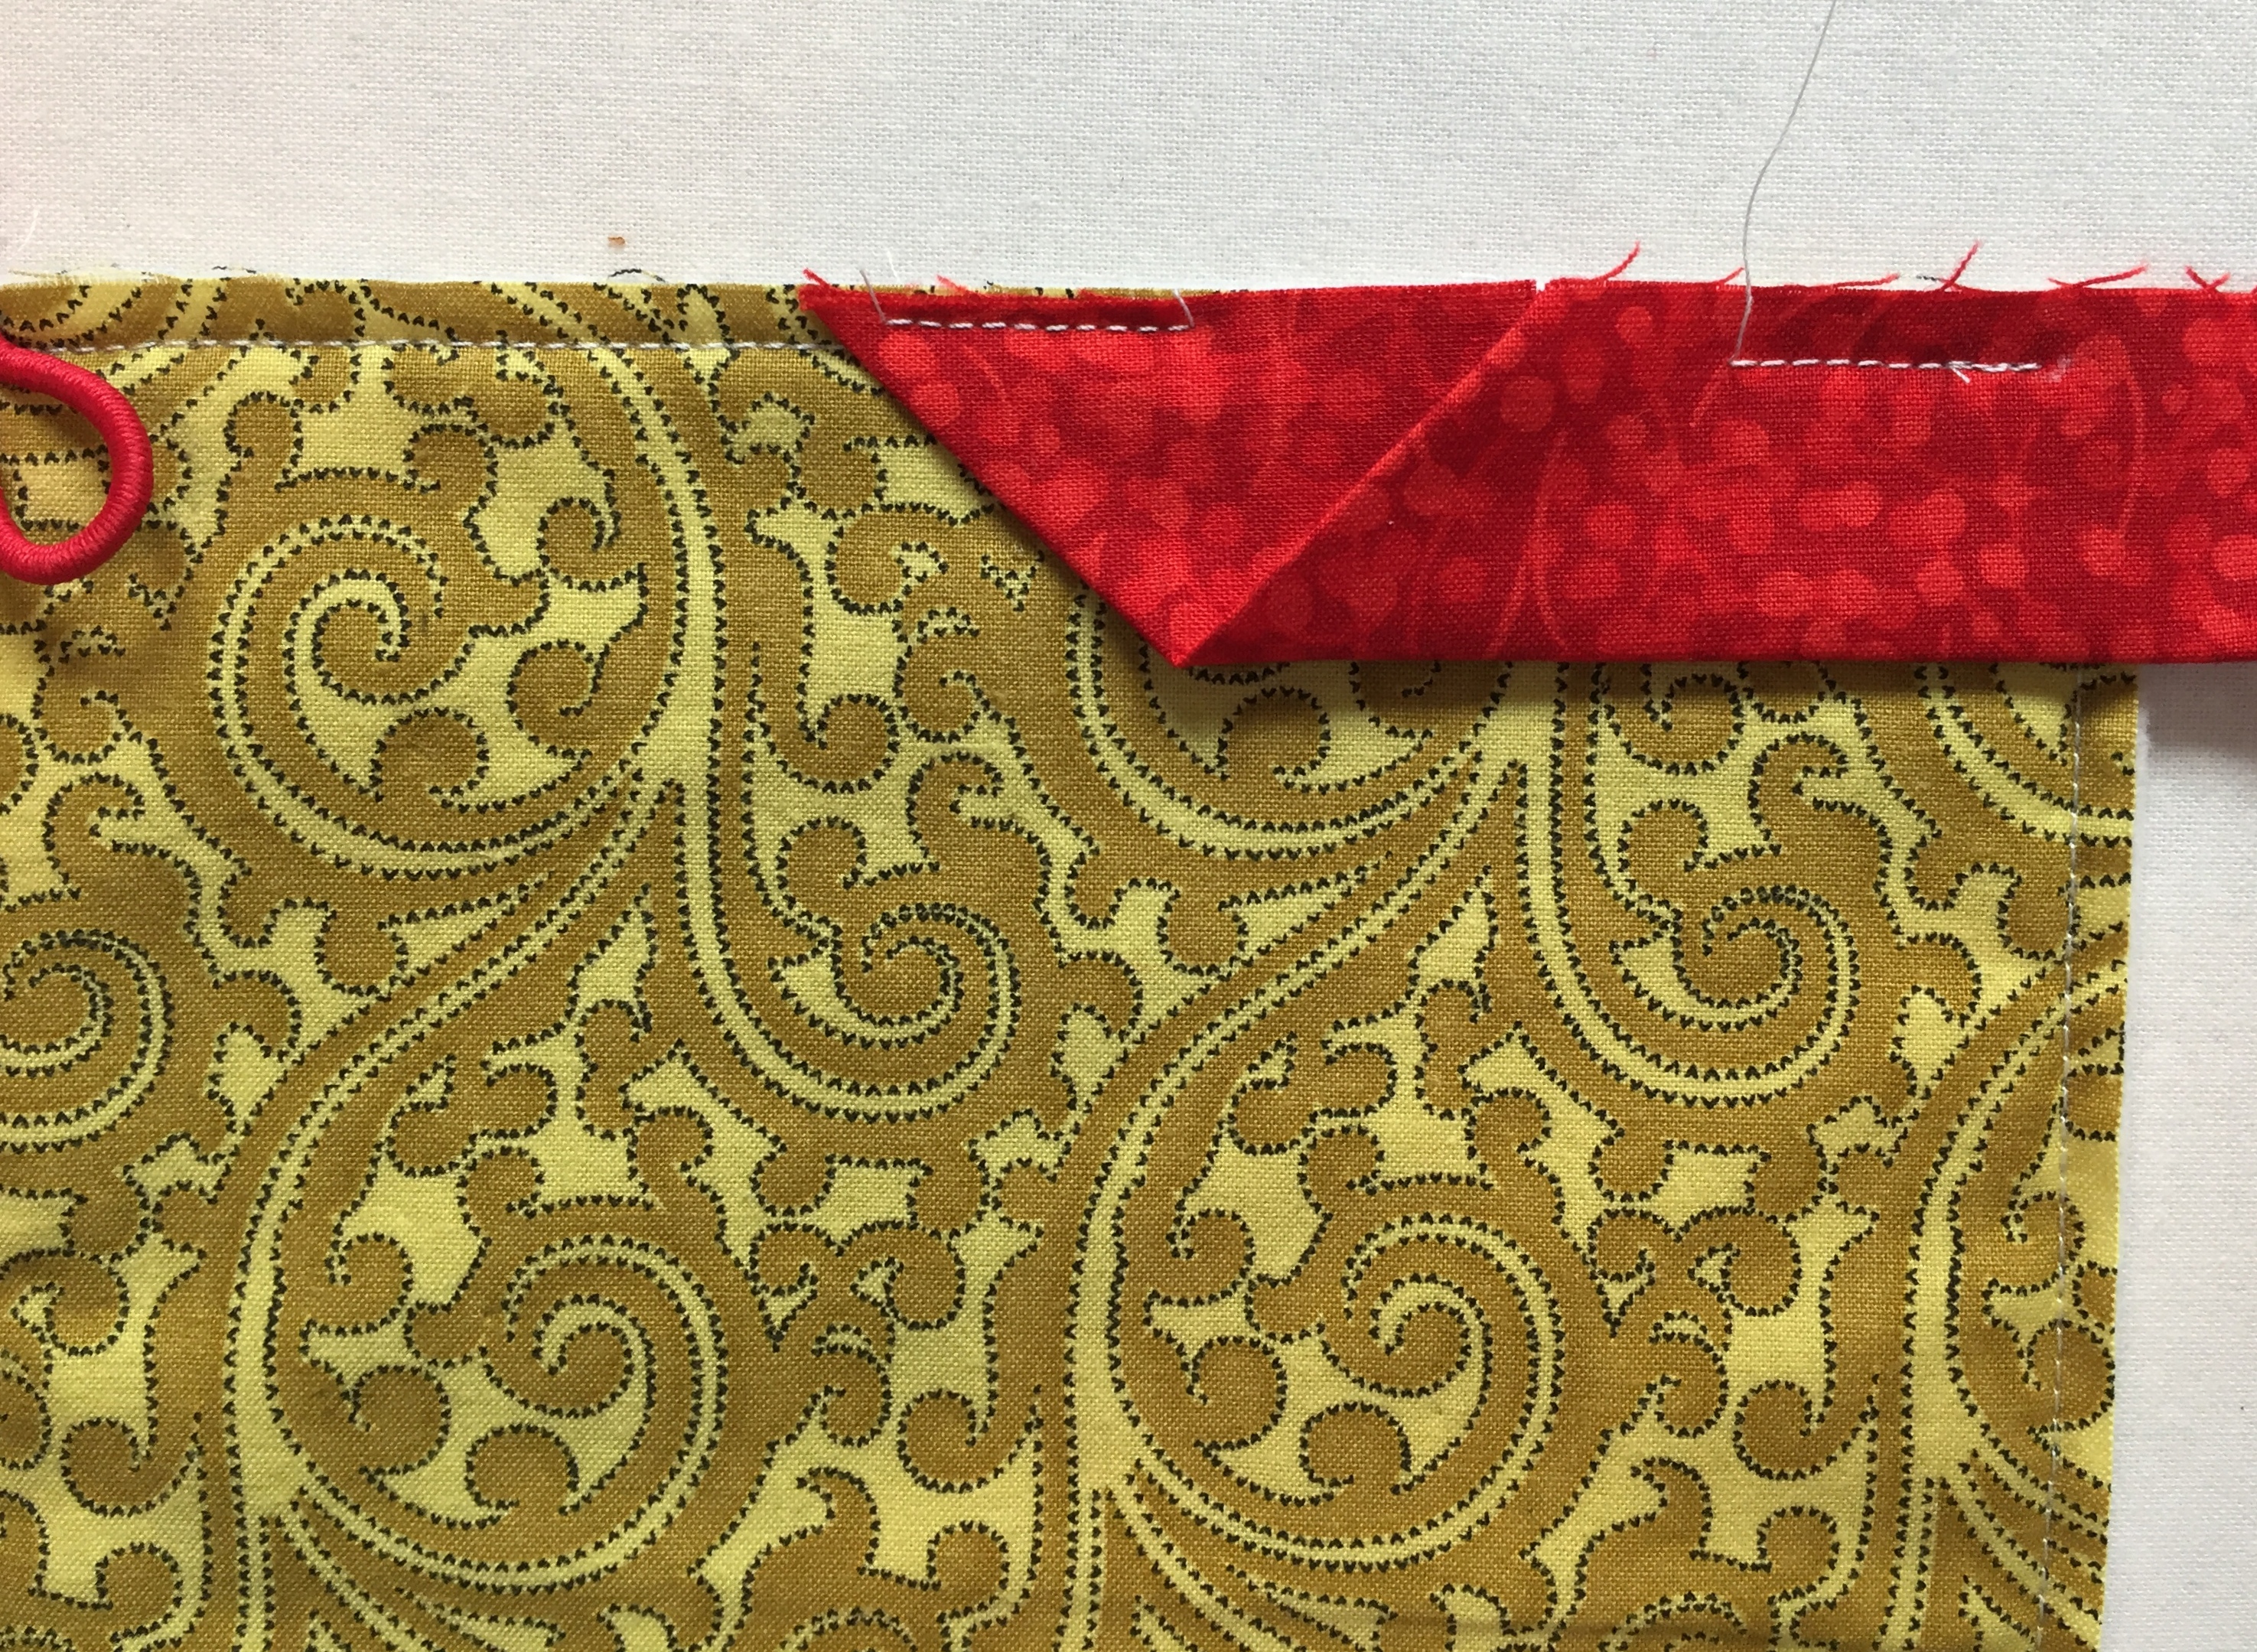
 

Coming around the fourth side, tuck the left tail into the fold of the right tail . . .
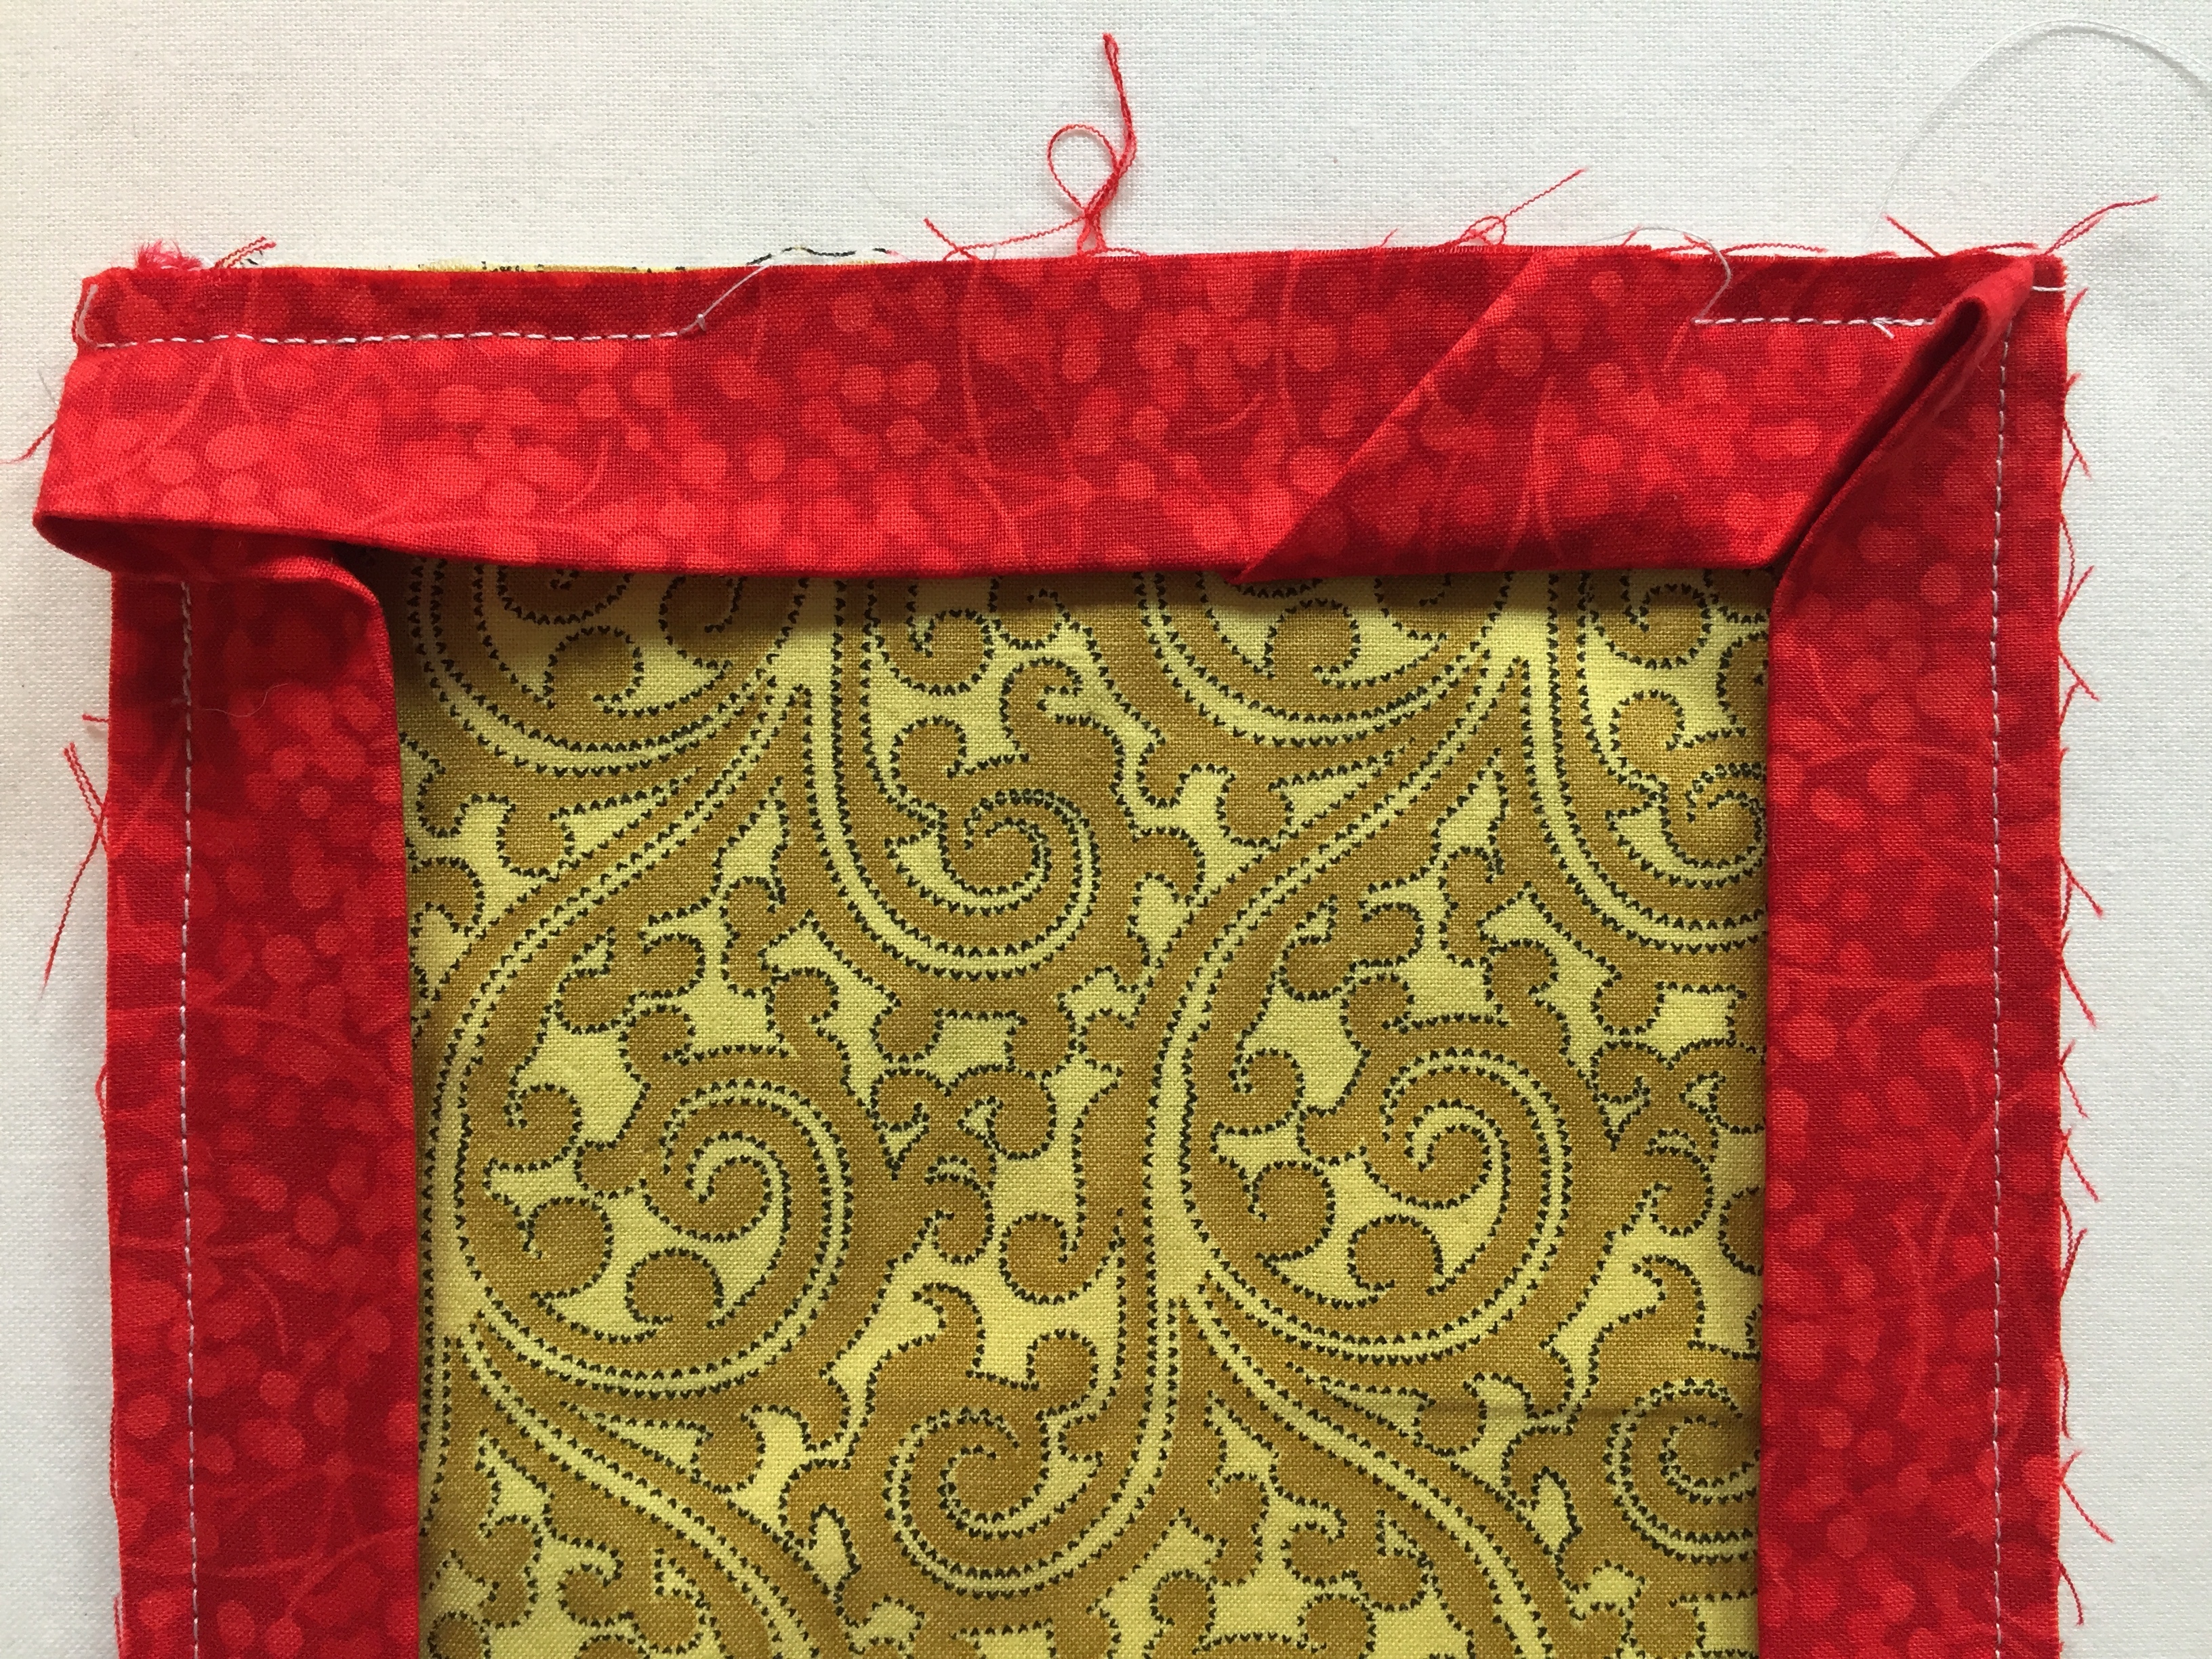
. . . and finish stitching the seam, starting and ending a few stitches beyond the original stitching.


These photos are from my Scissors Case Tutorial. A scissors case would make a nice companion to the Rotary Cutter Coat!

You can see many more examples of Rotary Cutter Coats I have made in the Small Pieces section of my Gallery.
 

Posted in Giveaway, rotary cutter case, update | 34 Comments

Reach for the Stars: All but the Border!

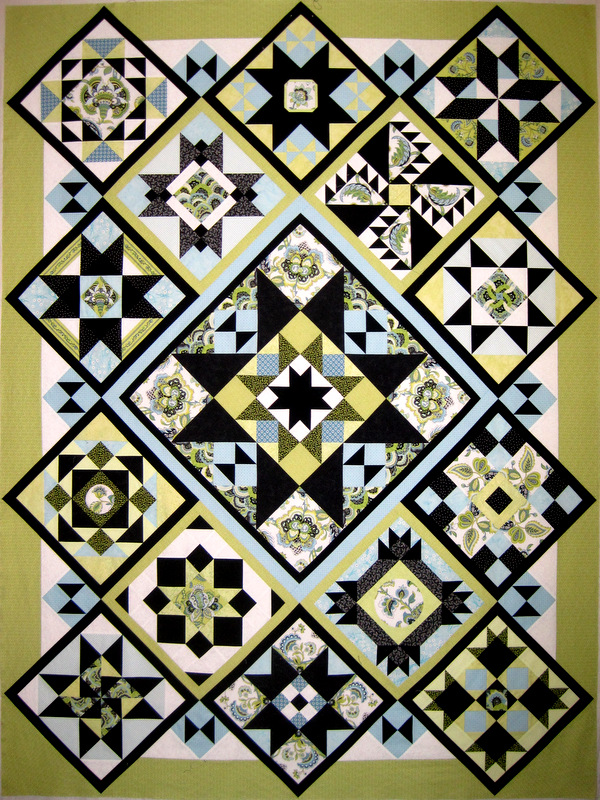
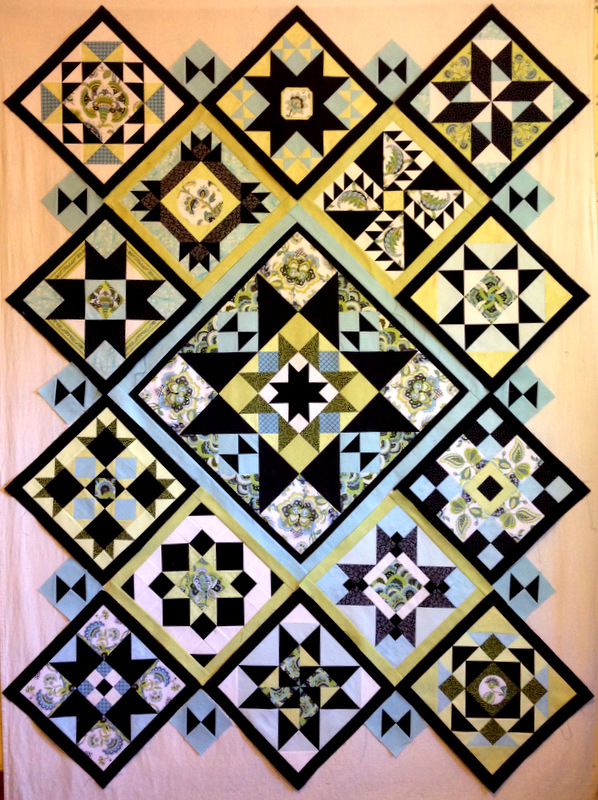
The setting triangles and corners have been added to my Reach for the Stars series sampler quilt. Do take a look:

2014-10, RFTS before borders
Reach for the Stars — Borders to Come


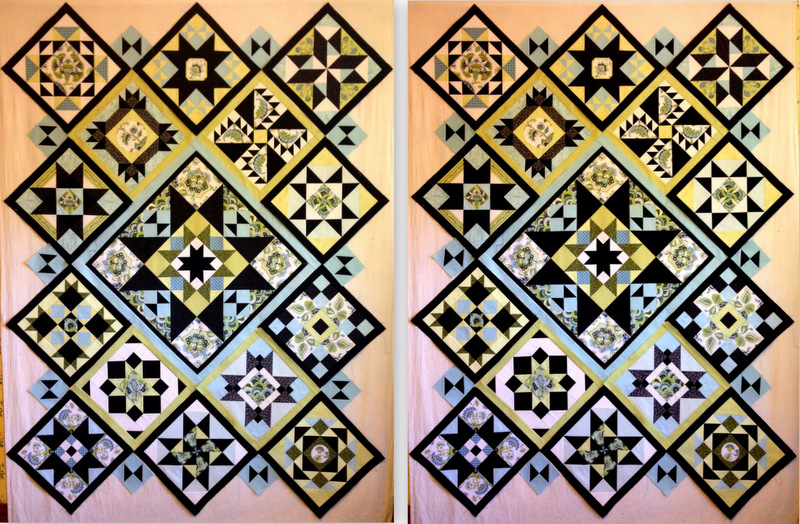
In my last post about Reach for the Stars, I was debating whether to set the hourglass blocks in the setting triangles vertically or horizontally along the long sides of the quilt. To refresh your memory, here’s another look at my two choices:

RFTS setting triangle options
Vertical (Left) or Horizontal (Right)?


I was leaning strongly toward the horizontal placement and asked for feedback. Thanks to all of you who responded! The vast majority liked the hourglass blocks set horizontally. If you scroll up and look at the first photo again, you’ll see that I wound up setting them vertically along the sides.

Oddly enough, it was a nonquilter who helped me make up my mind. My nephew Gary suggested I rotate the photo 90 degrees and view the quilt along the long sides. When I did that, I realized I wanted the hourglass blocks to be horizontal when viewed that way — exactly the way they would look if the quilt were on a queen-size bed.

If I knew for sure I would be displaying the quilt on a wall, I would probably have left them all horizontal. Alas, I have no wall in my 1913 Craftsman house large enough for a quilt that will measure about 86″ x 106″ when finished. I do, however, have a queen-size bed.

Right now my version of Reach for the Stars measures about 60″ x 80″. How exciting to be at this point! I started this quilt at the beginning of the year after seeing Terri Krysan’s original design on the cover of the Oct./Nov. 2013 issue of Quilter’s Newsletter magazine. Directions for the quilt began with that issue and continued for the next six issues. Starting with the center medallion and then making 14 blocks over the better part of a year allowed for a somewhat relaxed sewing schedule — a boon for someone like me who likes to work on multiple projects at the same time.

Now all that’s left are the borders. I say “all that’s left” but in fact there’s much more to the border than four strips of fabric. You’ll see what I mean when you look at Terri’s beautiful quilt:

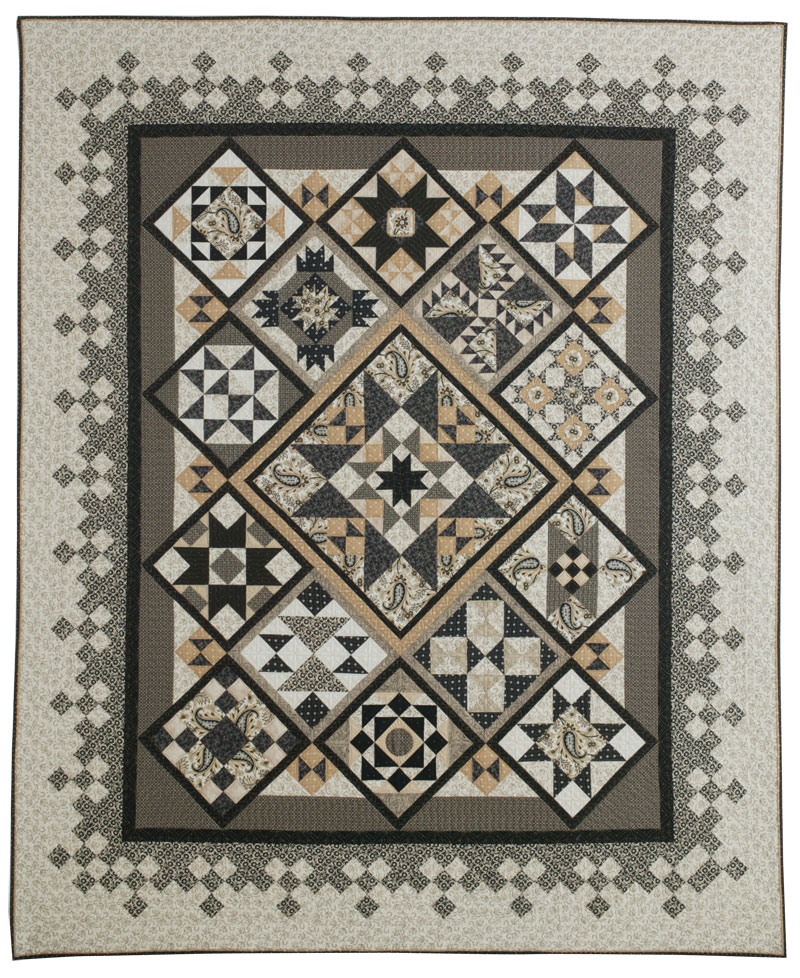
RFTS by Terri Krysan
Terri Krysan’s Quilt, 2012
 (Copyright Quilter’s Newsletter. Used with permission. Photo by Melissa Karlin Mahoney.)

Viewed from afar, the border design looks almost like lace, doesn’t it? That effect is cleverly achieved by setting nine-patch units on point. For some reason, though, the lacy design is not the same in all four corners. The upper right and lower left corners are the same, and the upper left and lower right corners are the same. To me this quilt is all about symmetry. That means I have to figure out a way to make all four corners on my border the same while maintaining the lacelike effect. Just the kind of challenge I relish!


Posted in Reach for the Stars sampler quilt, update | 8 Comments

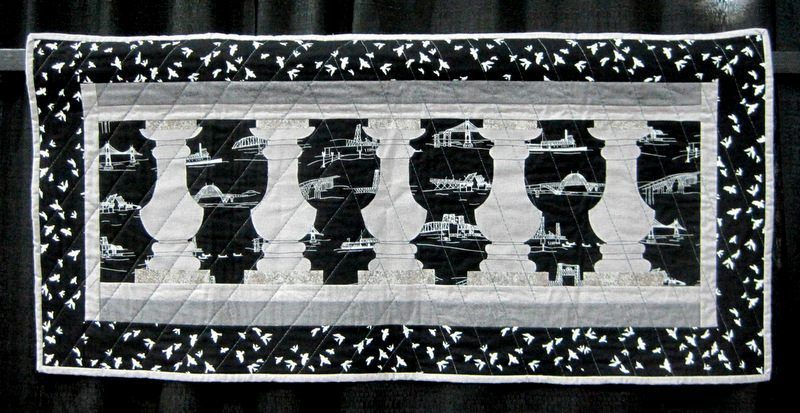
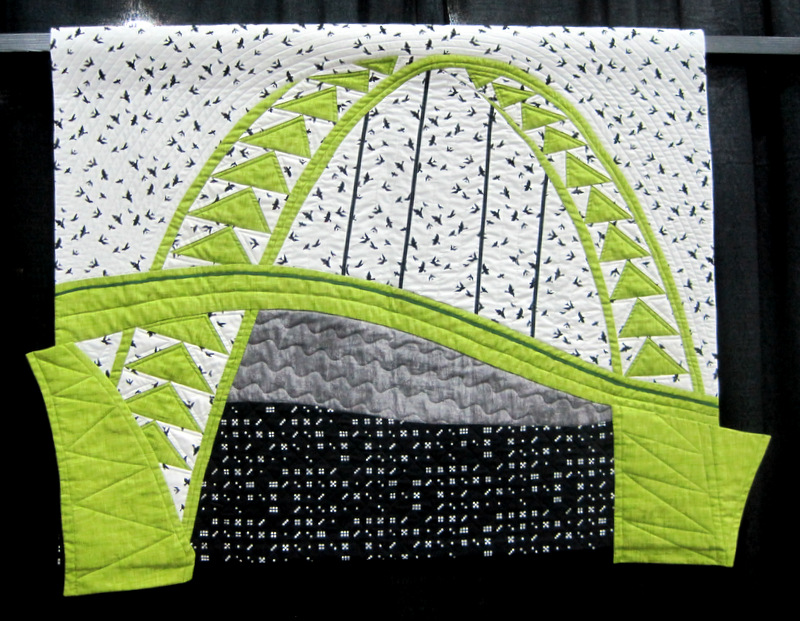
NW Quilting Expo: Bridges of Portland Challenge Quilts

Last Friday four friends and I spent the entire day at the 14th Annual Northwest Quilting Expo. It’s a three-day event, and we could easily have gone back and spent another full day. What a great show! More than 600 quilts were on display, along with a half dozen special exhibits and, of course, an enticing vendor mall.
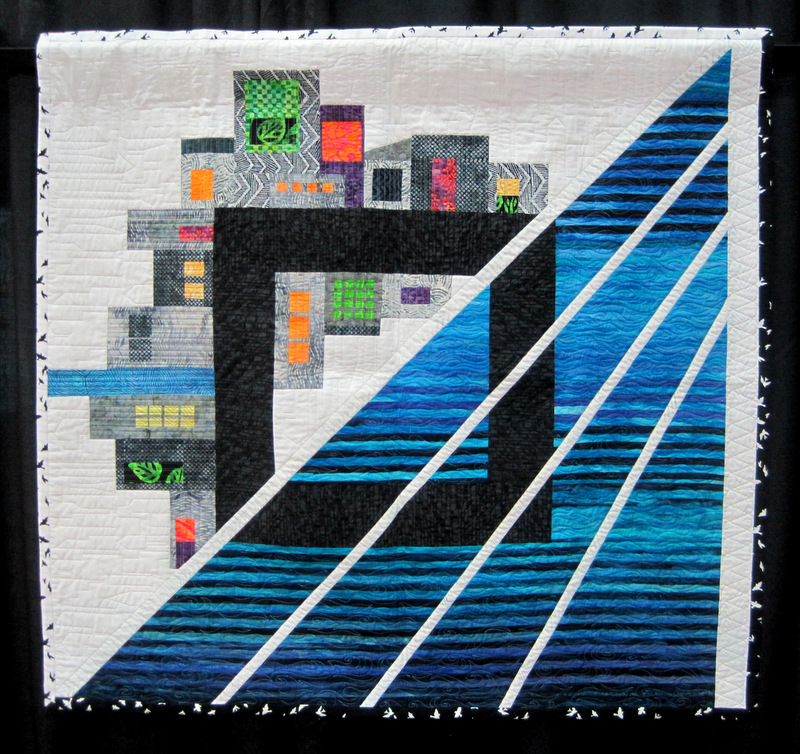
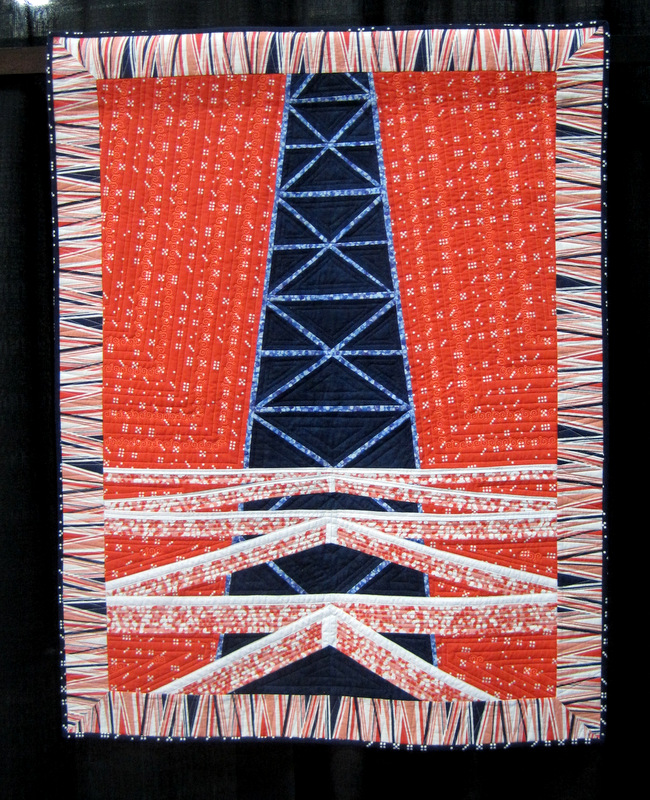
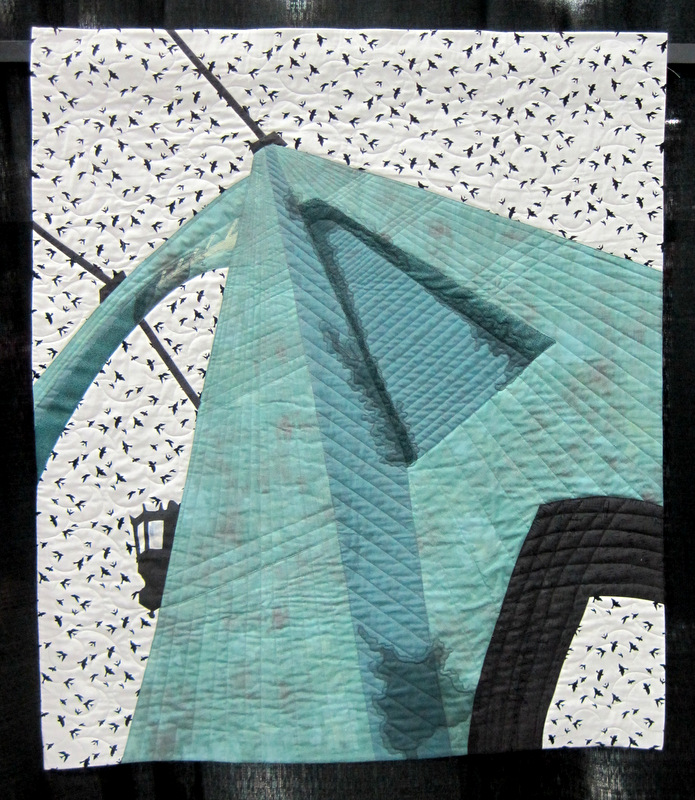
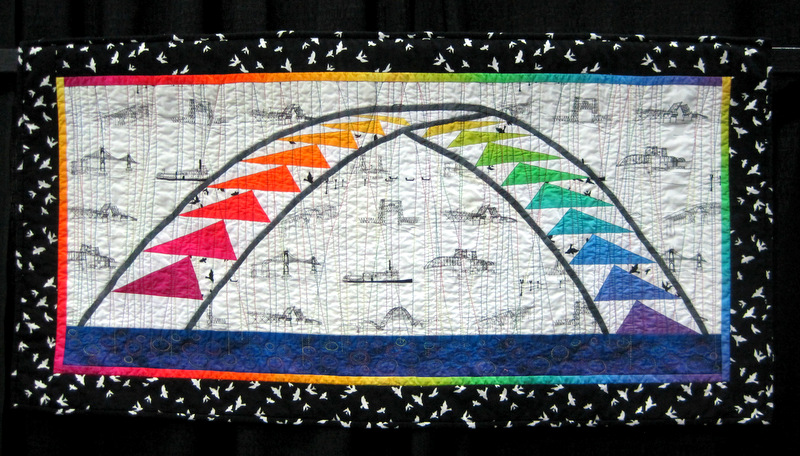
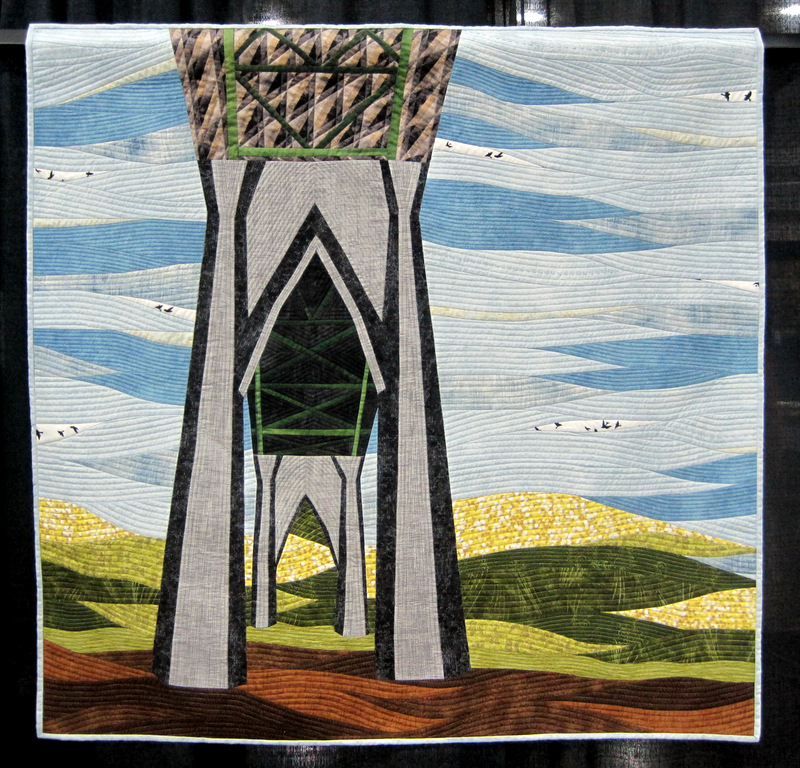
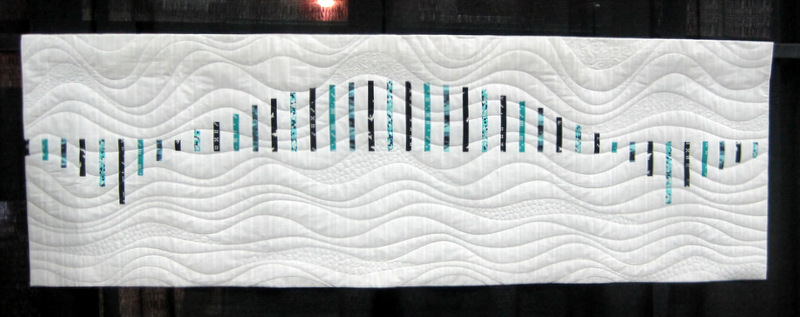
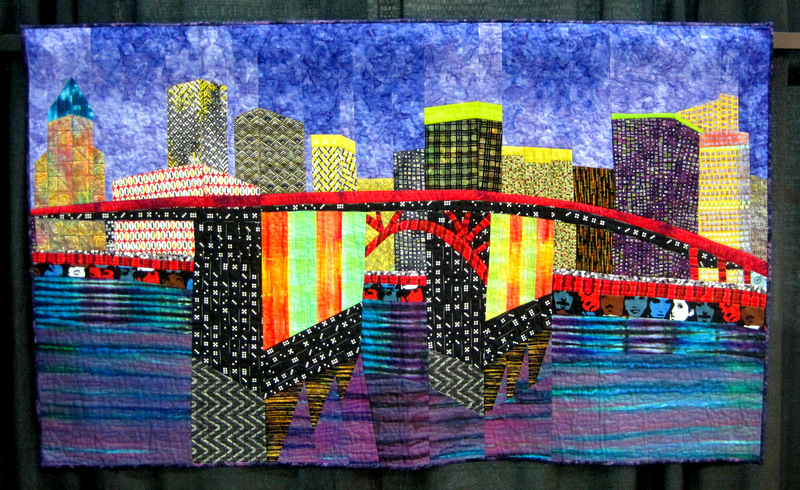
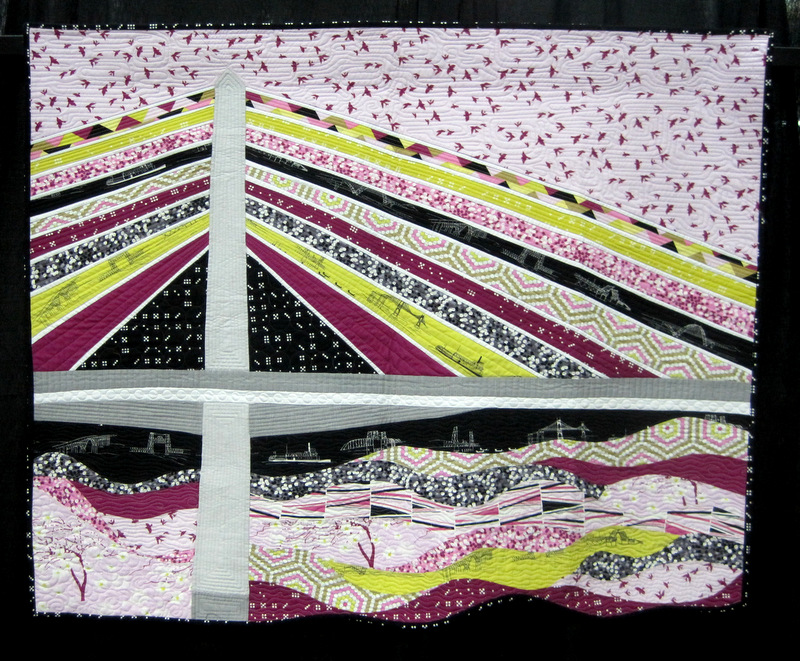
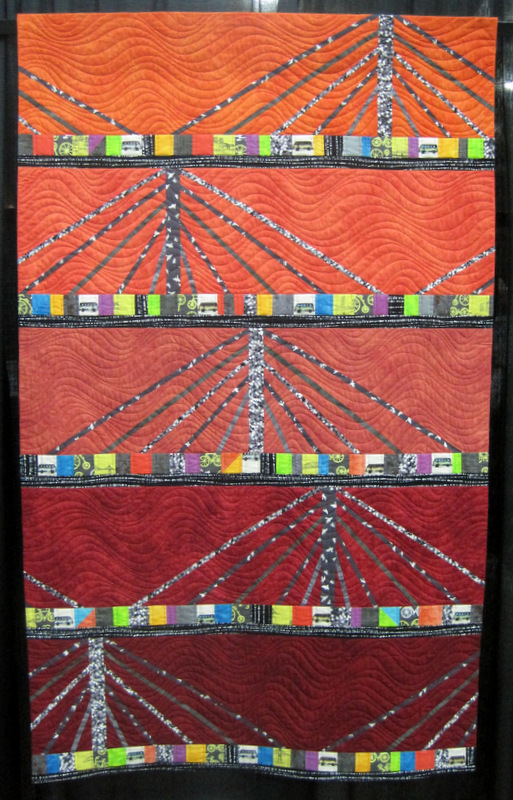
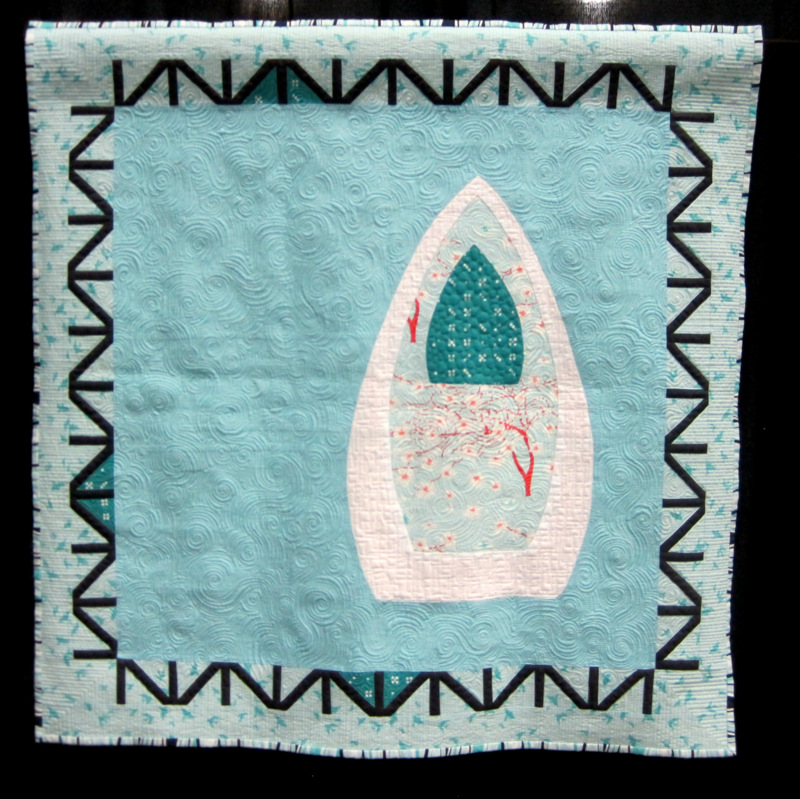
One of the eagerly anticipated displays was the Portland Bridges NOW exhibit sponsored by the WestSide Modern Club. The club was started in 2012 by Geri Grasvik, owner of the Pine Needle Quilt Shop in Lake Oswego. At a meeting of WestSide Modern last year, Geri issued a challenge for quilters to create modern quilts inspired by the 12 bridges of Portland. The quilts had to include one or more fabrics from the Waterfront Park line designed for Michael Miller Fabrics by Portland’s own Violet Craft.

By the time the deadline arrived, 42 quilts had been submitted. Some of the makers are friends and guild mates. Others I know of by reputation. I am completely in awe of their imagination, creativity, and talent.

Here, in no particular order, are a few of the quilts on display:

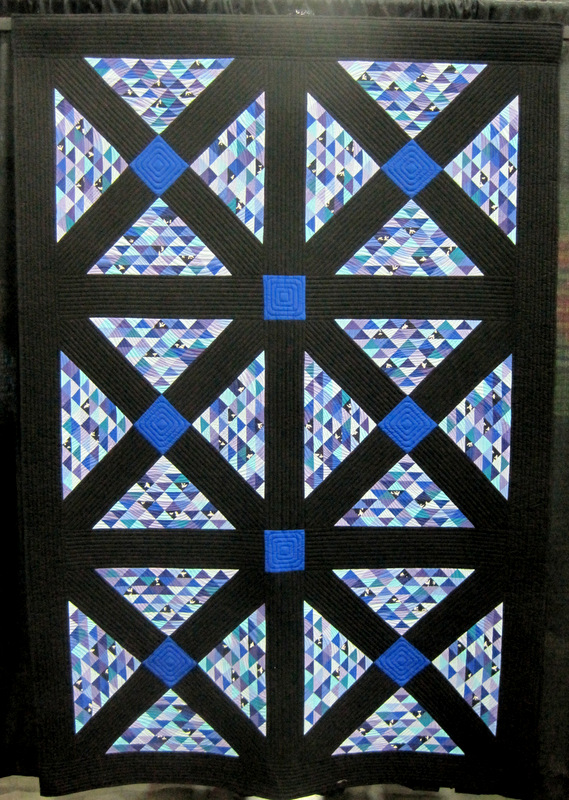
Bridge Challenge, Matching Expectations! by Virginia Hammon
Matching Expectations! by Virginia Hammon


Bridge Challenge, Sunset Under the Morrison Bridge by Judy Liebo
Sunset Under the Morrison Bridge by Judy Liebo


Bridge Challenge, Gothic Beauty by Gerri Thompson
Gothic Beauty by Gerri Thompson


Bridge Challenge, Somewhere Over the Fremont by Peggy Friedl-Yee
Somewhere Over the Fremont by Peggy Friedl-Yee


Bridge Challenge, A Path to St Johns, Carol Wilborn
A Path to St Johns by Carol Wilborn


Bridge Challenge, Fremont Modern by Sally Mayer
Fremont Modern by Sally Mayer


Bridge Challenge, Morrison Bridge at Night by Lisa Crnich
Morrison Bridge at Night by Lisa Crnich


Bridge Challenge, Stumptown Steel, Beth Wells
Stumptown Steel by Beth Wells


Bridge Challenge, Tilikum Crossing by Jolene Knight
Tilikum Crossing by Jolene Knight


Bridge Challenge, The Latest and Greatest by Valri Chiapetta
The Latest and Greatest by Valri Chiapetta


Bridge Challenge, Cathedral Park, AnnMarie Cowley
Cathedral Park by AnnMarie Cowley


Bridge Challenge Burnside Bridge by Connie Brown
Burnside Bridge by Connie Brown


Bridge Challenge, Celery Green Crossing, Barbara Isom (Fremont)
Celery Green Crossing by Barbara Isom


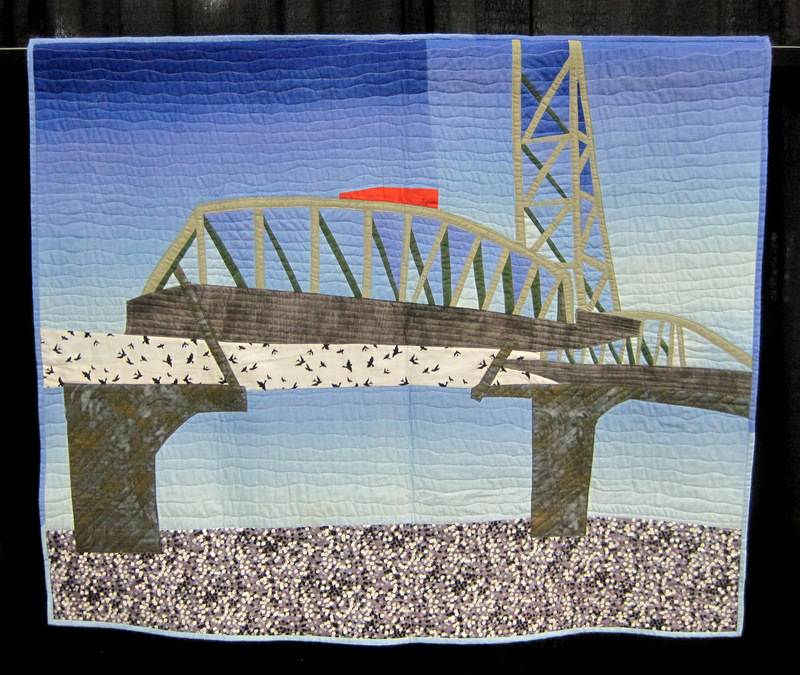
Bridge Challenge, Linda Dyer's quilt
Bridge Lift by Linda Dyer

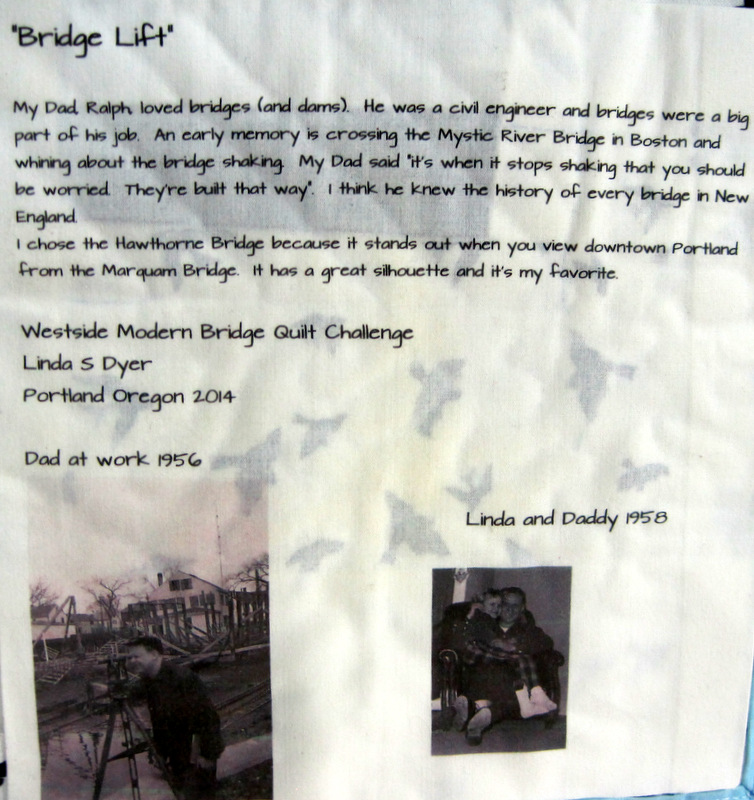
The label on the back of the quilt is part of Linda’s bridge story:

Bridge Challenge, Linda Dyer's label
Linda’s Label


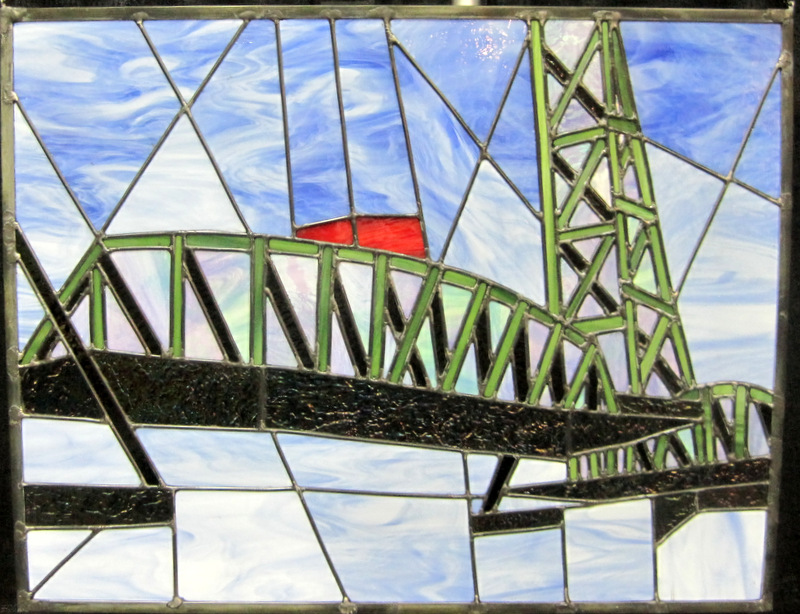
What’s more, Linda made a second version of her quilt — in stained glass:

Bridge Challenge, Linda Dyer's stained glass
Bridge Lift by Linda Dyer (Stained Glass)


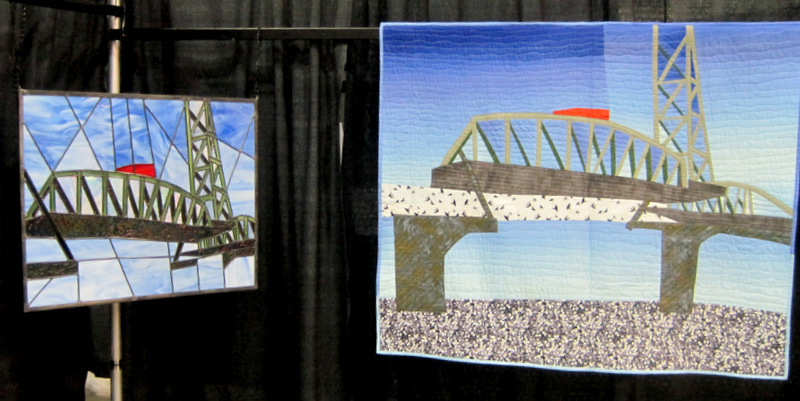
Here are her two creations, side by side:

Bridge Challenge, Linda Dyer's side by side
The Hawthorne Bridge in Glass and Fabric


All in all, a terrific show. And guess what? The quilts will be seen by an even bigger audience! The exhibit will be on display in December at Portland International Airport.


Posted in update | 10 Comments

Rotary Cutter Case

A couple weeks ago the Pine Needle Quilt Shop, where I teach, held its annual fall Open House. I was on hand to promote my upcoming classes and share a sewing project or two. It’s always fun to talk to customers, fondle the newest fabrics in the shop, and visit with the other teachers. Local luminaries Violet Craft, Christina Cameli, and Rachel Kerley are joining the ranks of Pine Needle teachers this fall. I’m in good company!

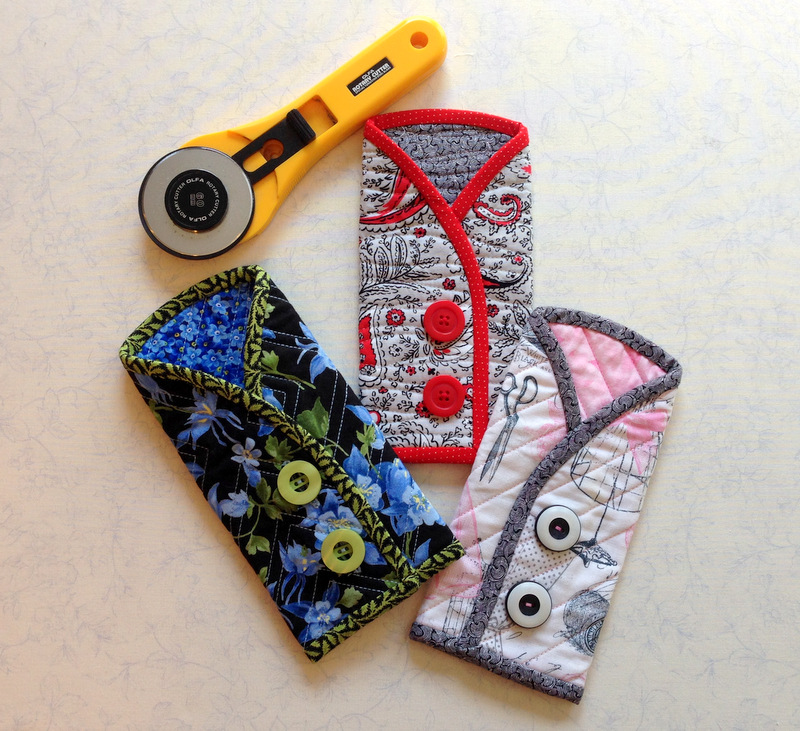
One of the sewing projects I showed off at Open House was a rotary cutter case I designed a couple of years ago. I made up a few samples, which we gave away as door prizes:

Rotary Cutter Cases

These cases are also good for eyeglasses but I prefer them for rotary cutters. Don’t they look like little coats?

They make great gifts. And the holiday season is fast approaching. Hmmm . . . I’m thinking a tutorial is in order (and maybe even a giveaway!). What do you think, readers? Would you like to know how to make an eyeglasses case or rotary cutter coat?


Posted in Giveaway, rotary cutter case, tutorial, update | 17 Comments

Susan Elinor’s Quilt

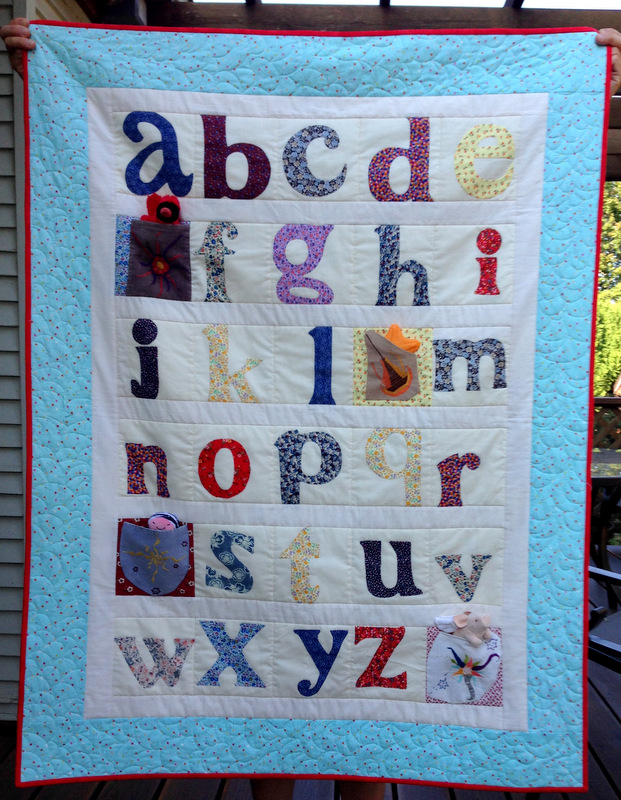
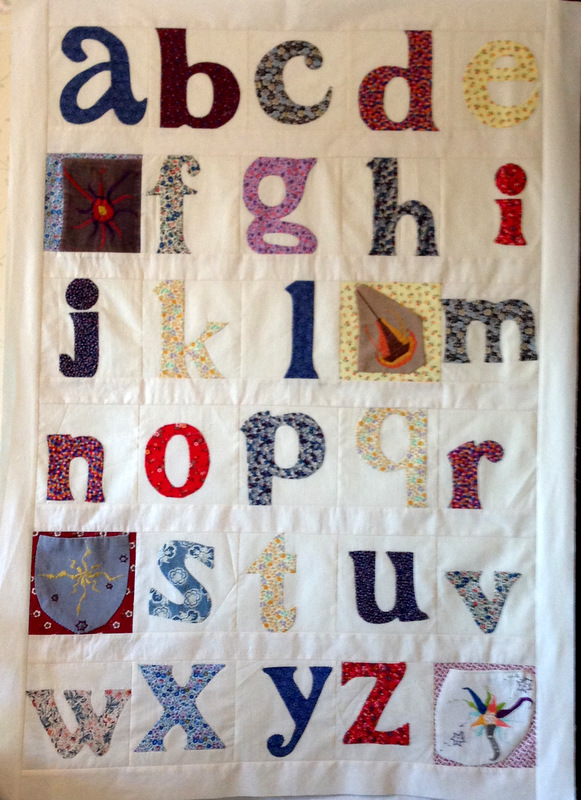
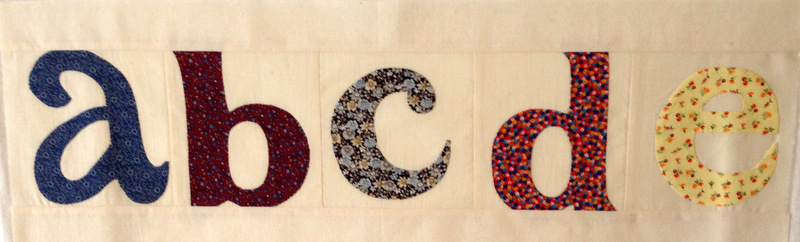
We did it! My neighbor Janice and I completed the alphabet quilt started by Janice’s good friend Susan, who did not live long enough to finish it herself. Susan was making this quilt for her baby granddaughter, also named Susan. She had all the letters of the alphabet appliquéd by hand onto 6″ squares of muslin but, sadly, died of ovarian cancer before she could sew the blocks together and finish the quilt. That labor of love fell to Janice, who enlisted my help.

Over the last couple of weeks Janice and I got together to determine a layout for the blocks and to choose sashing and binding fabrics. I wrote about the process in this post and this one.

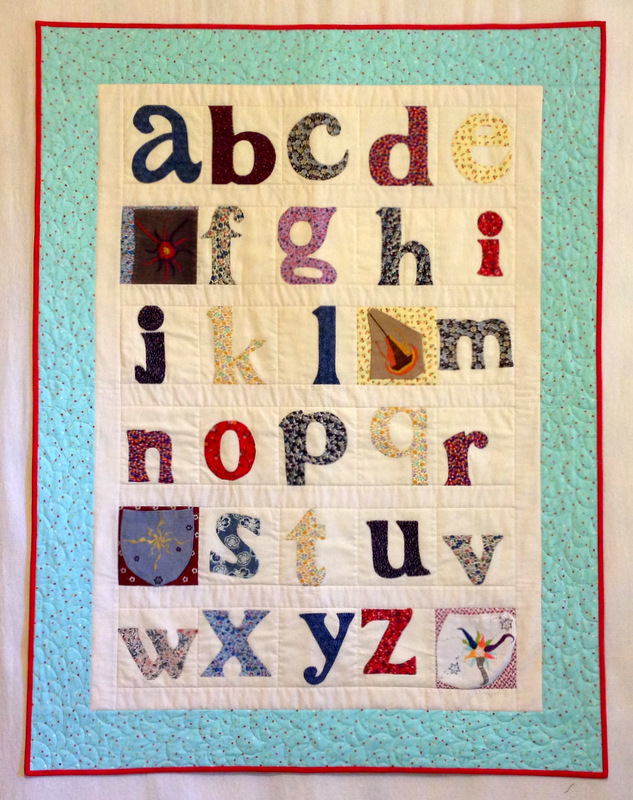
Allow us to present Susan Elinor’s quilt:

Susan's quilt, front
Susan Elinor’s Quilt, 39″ x 50

Don’t you love how the red binding frames the quilt and draws your eye to the red letters?

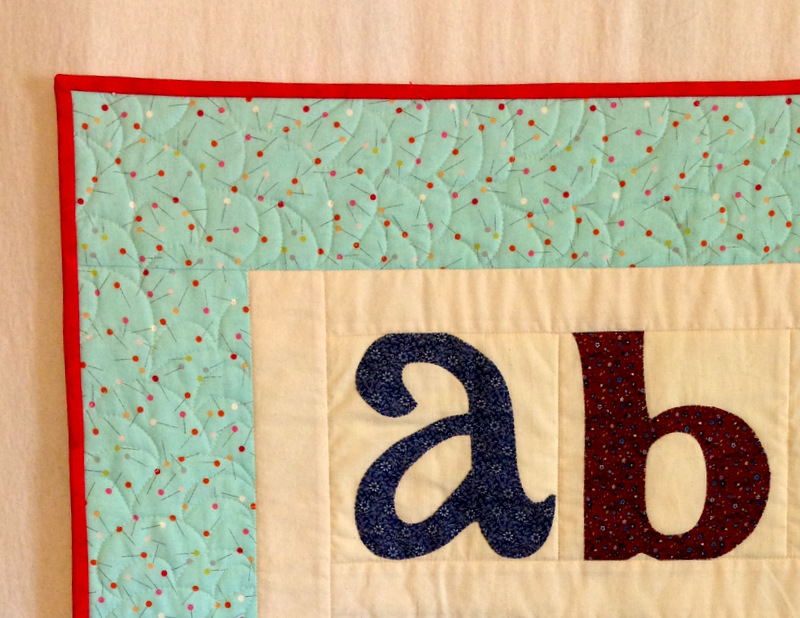
In this close-up you can see the simple free-motion design quilted in the border:

Susan's quilt, detail
Quilting and Binding Detail


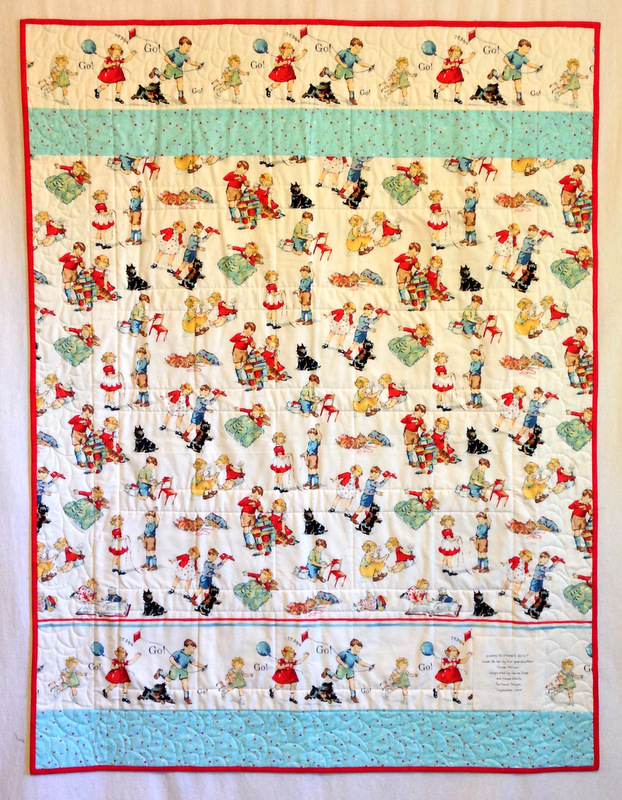
The back of the quilt features a print from the Dick and Jane early reader books — a playful nod to the alphabet letters on the front and very much in keeping with the vintage calicos Susan had chosen for her appliquéd blocks:

Susan's quilt,back
Back of Susan’s Quilt


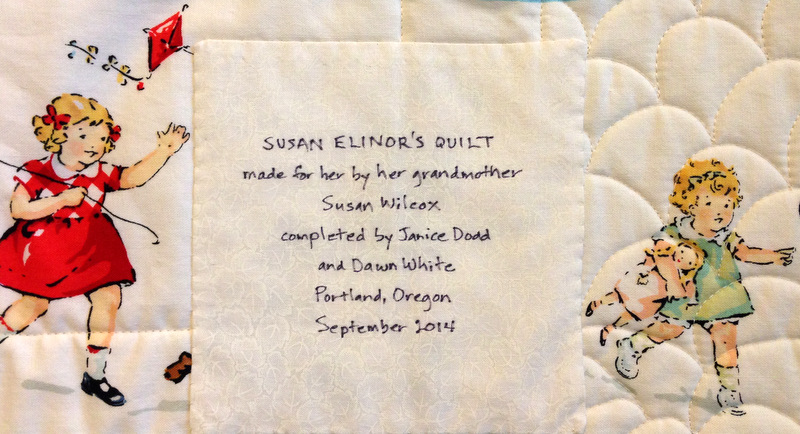
The last step was sewing on the label:

Susan's quilt, label
The Label on Susan’s Quilt


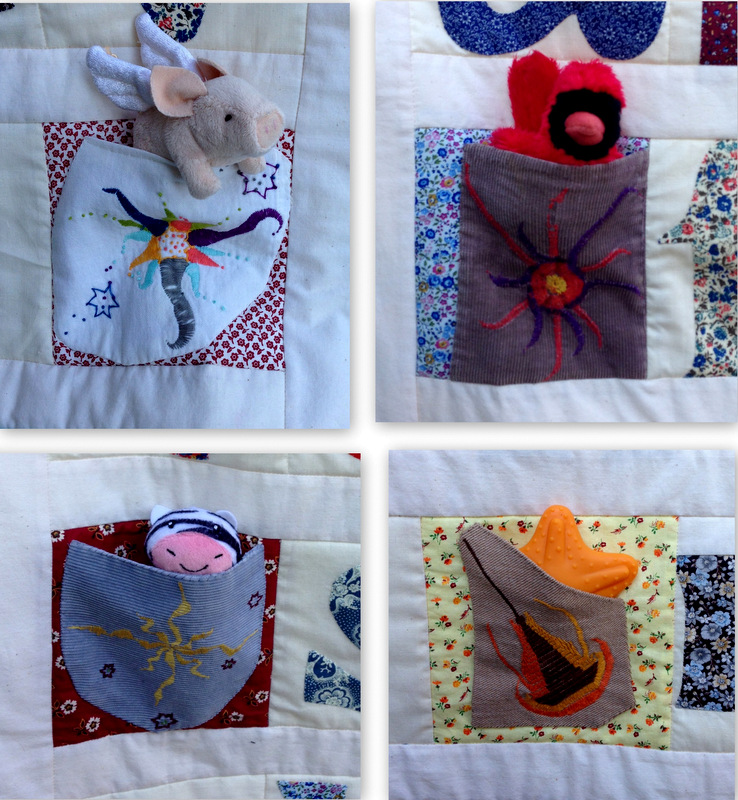
Actually, there was one more step. Janice bought some little finger puppets and toys to put in the four blocks on the quilt containing pockets made from clothes Susan’s daughter Lea wore as a little girl. Look how cute these are!

Susan's quilt pockets filled
A Fun Surprise in Every Pocket

This is how the quilt looks with the pockets filled:

r
Susan Elinor’s Quilt is Extra Special


Susan Elinor is one year old. She will miss the joy of growing up knowing her grandmother but she will have the joy of wrapping herself in a quilt hand-stitched with love by her grandmother. This quilt will be presented tomorrow to Lea and little Susan at the memorial service celebrating Susan’s life.


Posted in baby quilt, family, update | 11 Comments

An Update on Susan’s Quilt

The baby quilt that my neighbor Janice and I are finishing on behalf of her late friend Susan is coming along nicely. The quilt will go to Susan’s granddaughter and namesake, Susan Elinor, who just turned one.

In my last post I showed you the blocks that Susan appliquéd by hand onto muslin squares. Here are those squares set off with simple muslin sashing:

Susan's quilt blocks with sashing
Susan’s blocks, sewn together

In addition to the 26 alphabet blocks, four blocks contain embroidered pockets made from clothing worn by Susan’s daughter Lea (baby Susan’s mother) when she was a little girl.

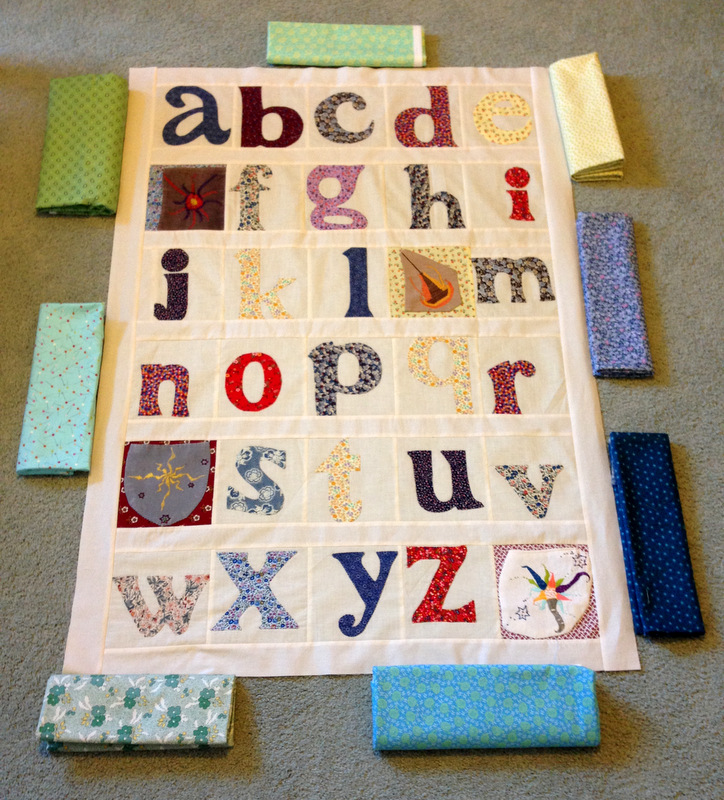
I pulled several pieces of fabric from my stash so that Janice and I could audition the border fabric together:

Susan's blocks with border possibilities
Auditioning the Border Fabric

We both liked the same fabric best — the aqua print on the middle left side (Sew Stitchy by Aneela Hoey for Moda Fabrics).

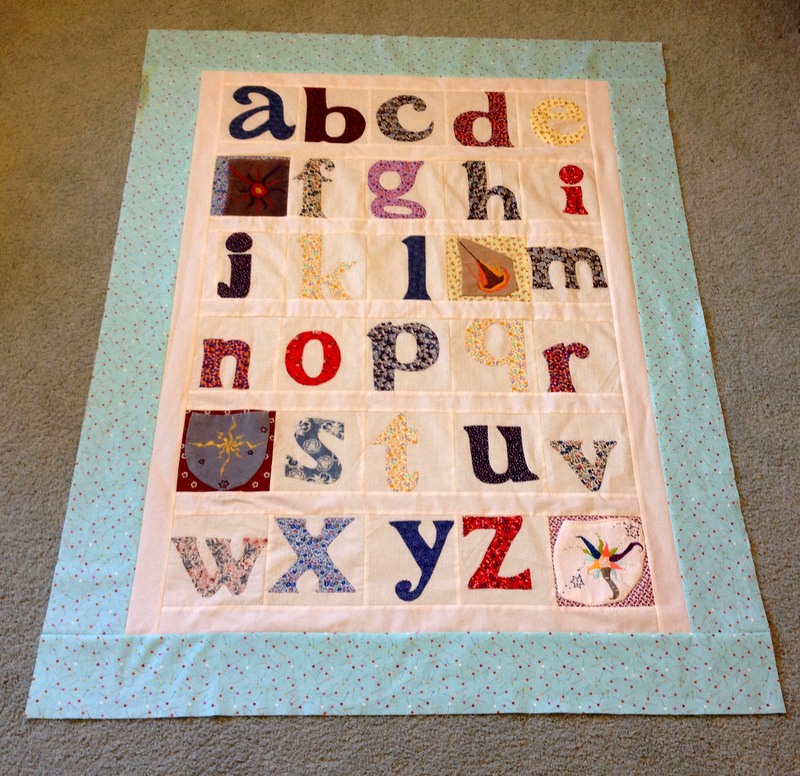
Here’s the quilt top with the border strips added in that fabric:

Susan's blocks with borders
The Winning Border Fabric


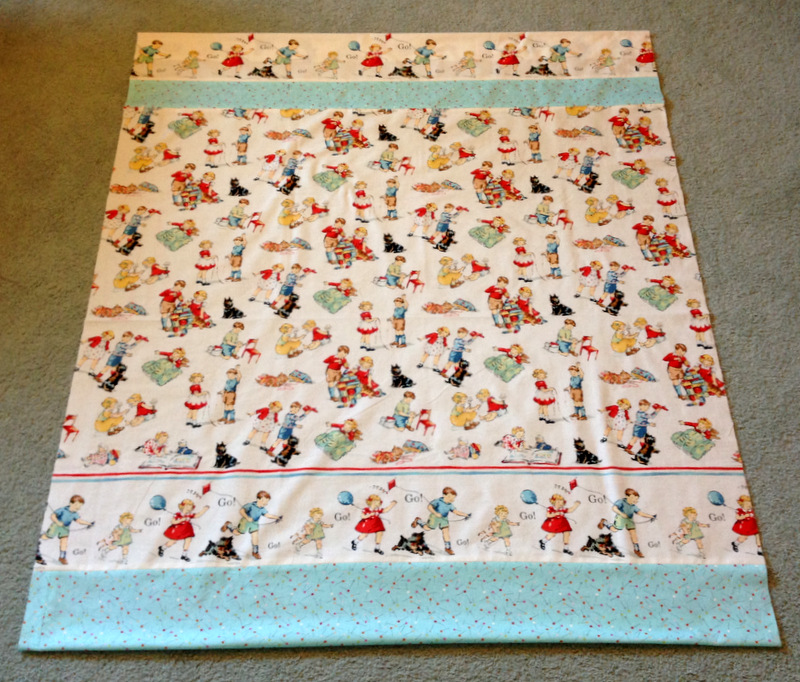
Next we looked at fabrics for the back. The print we chose is absolutely perfect for an alphabet quilt: it’s based on the Dick and Jane early reader books from the last century. It’s a directional design printed across the width of fabric so I inserted some strips of the aqua print border fabric to make the back long enough. Take a look:

Backing Fabric
Fun with Dick and Jane

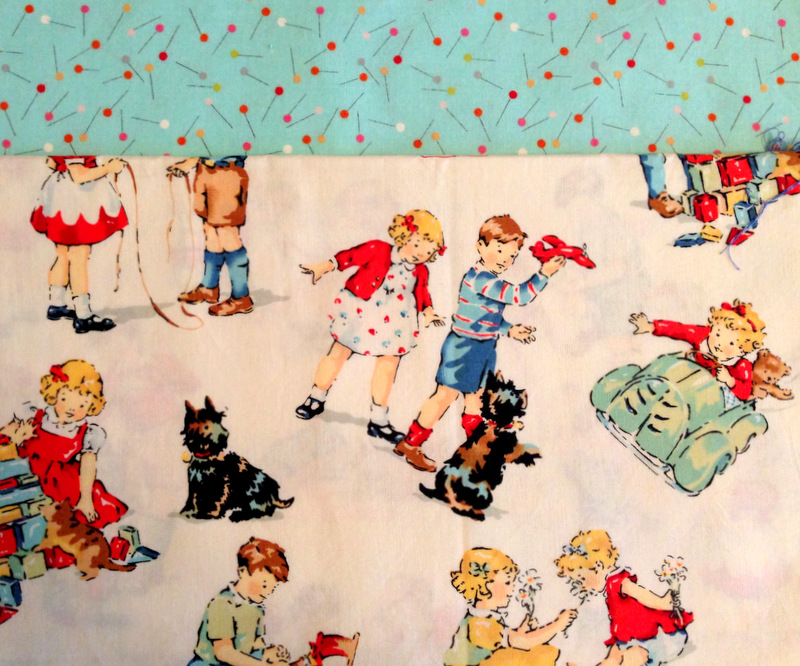
Oh dear, that picture is not in focus. Here’s a better look at the fabrics:

close up of backing fabrics
Dick and Jane (and Spot!)

According to the selvage, the fabric above was released in 1999. It’s called “go! with dick and jane” by Nicole de Leon for Alexander Henry Fabrics. It’s obviously been in my stash for a while.

Next up: quilting. I’m going to stitch-in-the-ditch around the alphabet blocks and free-motion quilt a loop-de-loop design in the borders. Janice and I both like the idea of finishing the quilt with red binding. She is going to do the handwork on the quilt (binding and label), and our plan is to have our project completed by the end of the week.

I hope you’ll check back in a few days to see it!


Posted in baby quilt, family, update | 7 Comments

A Labor of Love

My neighbor Janice asked me to help her finish a quilt started by her dear friend Susan. Susan was working on an alphabet quilt for her baby granddaughter when she lost her battle with ovarian cancer last month. Knowing she wouldn’t be able to complete the quilt in the time she had left, Susan asked Janice to finish it.

Susan had hand-appliquéd the 26 letters of the alphabet onto 6″ squares of muslin. She had also appliquèed four pockets onto print squares; the pockets came from clothes that belonged to her daughter when she was a little girl.

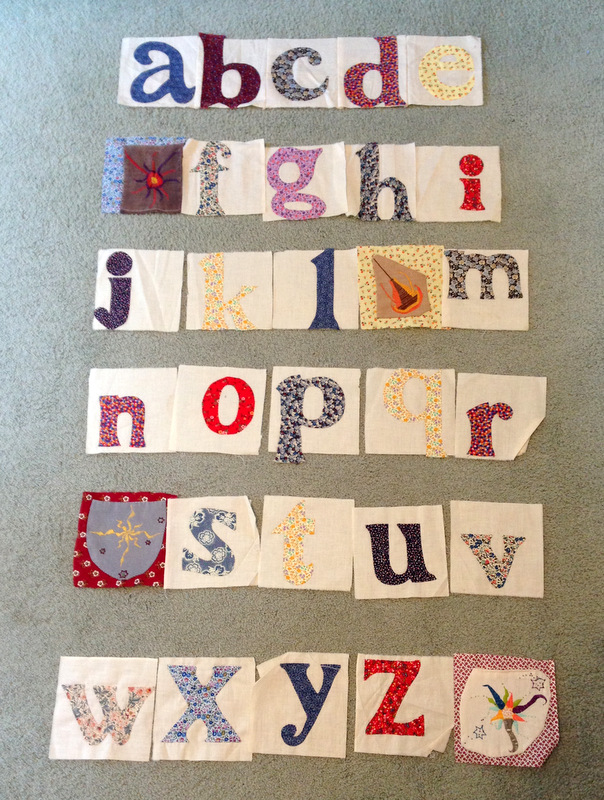
The first thing Janice and I did was lay the blocks out in a 5 x 6 grid, with the four pocket blocks interspersed among the 26 alphabet blocks. We’re pretty sure that’s what Susan had in mind because she had already sewn the first row together:

Susan's blocks
Susan’s Blocks


The fabrics in the alphabet blocks are vintage calicos. The letters seem to have been randomly placed in the muslin squares, rather than centered, giving the blocks a delightfully whimsical appearance. Janice and I decided to separate the rows with sashing strips made from muslin, add muslin sashing strips all around the quilt, then finish it with a 3″ or 4″ border made from calico prints similar to the ones Susan used in her blocks. With a 4″ border, the quilt should finish at about 36″ x 51″.

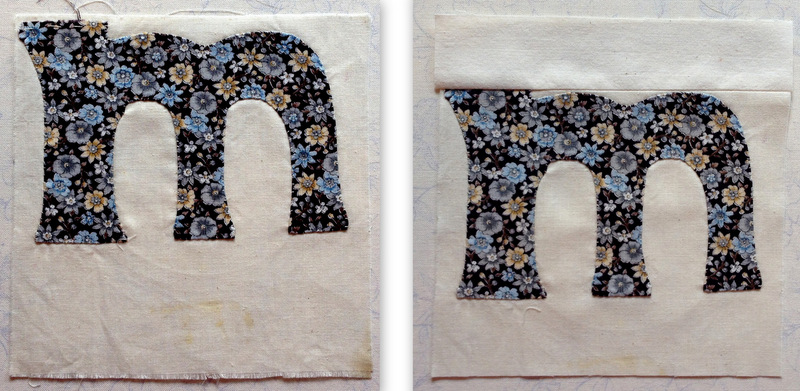
A couple of the letters — j and m — were really too close to one edge of the squares they were attached to so I added strips of muslin and trimmed the blocks. Here is the m block, before and after:

Susan's m block, before and after
Repositioning the Letter


Susan had hand-stitched the first row together with ½” seams. Her stitches were so even I had to look closely to confirm that they were indeed done by hand! I opted to take the stitching out so that all the blocks can be sewn with ¼” seams. That will really help with the letters that are close to the edges of the muslin squares.

Here is the first row with its muslin sashing added:

Susan's quilt, first row
The First Row


This quilt will help tie three generations of women together. I feel honored that Janice has asked me to help her finish it.


Posted in baby quilt, family, update | 12 Comments

Reach for the Stars: Final Layout

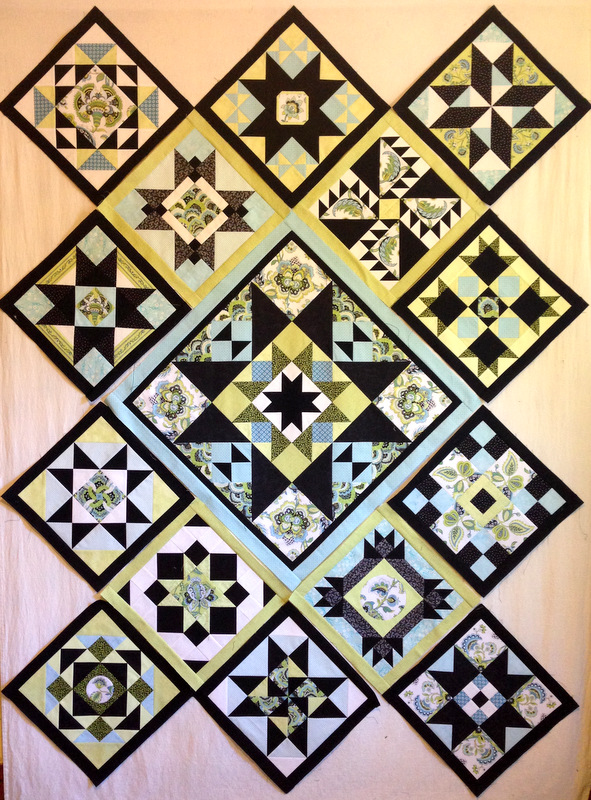
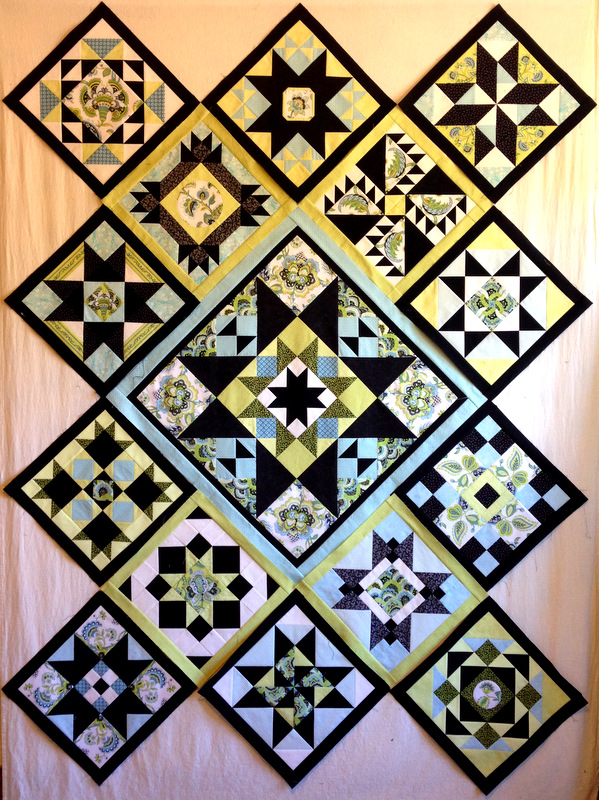
When I showed you my completed Reach for the Stars blocks in my post of Aug. 18, I thought I had settled on a layout. Here’s a photo from that post:

RFTS potential layout
Layout Under Consideration


Nope. I changed a few blocks around:

RFTS final layout 3
The Winning Layout

Now it seems the heavier blocks — the ones that seem to fill up more space in the block, if you know what I mean — are more balanced, and I’m pleased with the distribution of greens and blues in the background. I’m so certain of this layout that I am ready to sew my blocks together!

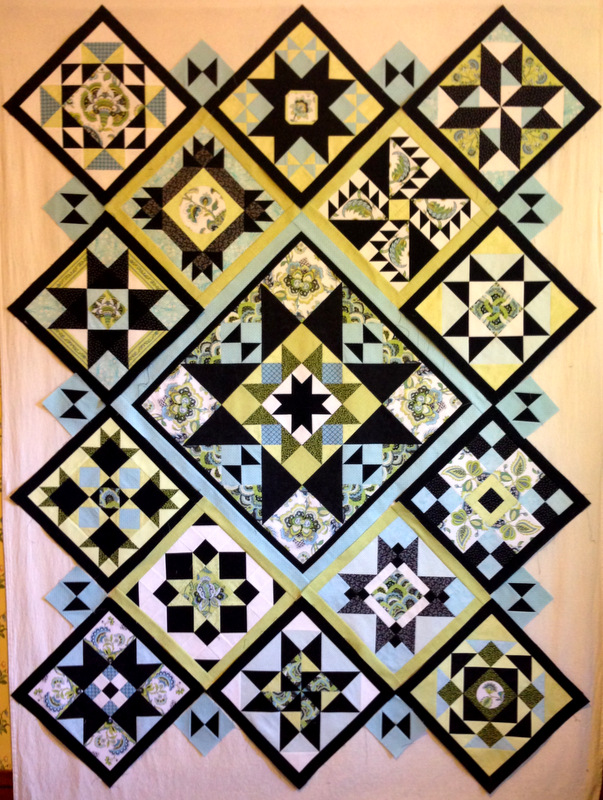
I did discover a bit of a design dilemma after starting to make the setting triangles. They all contain a small hourglass block the same size as the ones in the center medallion. Terry Krysan, the designer of Reach for the Stars, calls for the hourglass blocks to be placed horizontally on the top and bottom of the quilt and vertically on the sides. Here’s what that looks like on my top:

RFTS vertical hourglass
Hourglass Blocks in Setting Triangles: Vertical on the Sides


But I like the look of those hourglass blocks placed horizontally on the sides:

RFTS hourglass horizontal
Hourglass Blocks in Setting Triangles: Horizontal on the Sides


This is the kind of design decision I can easily obsess over. My friends know what I mean.

I’d love to know what you think. Here are my two choices, side by side.

RFTS setting triangle options
Vertical (Left) or Horizontal (Right)?


Which look do you like better? If you’re so inclined, please tell me why. It’s very easy to leave a comment!


Posted in Reach for the Stars sampler quilt, update | 24 Comments

Summer Sew-Along: Good Day Sunshine

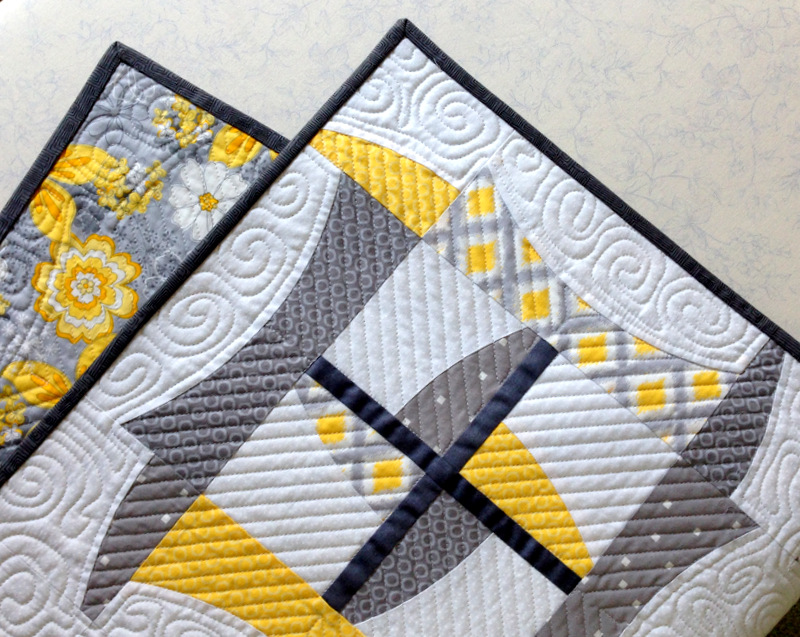
Good Day Sunshine, my version of the new Dancing Churndash pattern, is ready for Show and Tell:

2014-8, Dancing Churndash, front 2
Good Day Sunshine, 43″ x 57.5″ (2014)

More accurately, it’s ready for Thelma’s Labor Day Parade. You see, at the beginning of summer Thelma of Cupcakes’n’Daisies started a Sew-Along, inviting quilters to make any quilt they wished using the Quick Curve Ruler (QCR) designed by Jenny Pedigo of Sew Kind of Wonderful. The only requirement was that the quilt be ready by Labor Day for a parade on Thelma’s blog.

I chose Dancing Churndash, one of three new patterns Jenny and her sister Helen Robinson designed for Cut Loose Press. I got a late start, as the pattern wasn’t available till late July, but the quilt went together quickly, and then I was lucky to find a long-arm quilter who could start working on it right away.

Good Day Sunshine, which gets its name from the Beatles song, was quilted by Jolene Knight of Good Knight Quilts. I met Jolene through the Portland Modern Quilt Guild and have seen examples of her fine work. I asked Jolene to quilt straight lines in the churn dash blocks and a not-too-dense free-motion fill in the white background. She chose one of my favorite quilting motifs, the spiral. Here’s a close-up:

2014-8 Dancing Churndash, quilting detail 2
Quilting Detail

I love the way the spirals play against the curves on the churn dash blocks and the straight lines in the center of the blocks. The quilting is playful, like the design itself.

The medium-dark grey binding, a close match to the fabric in the center of each churn dash block, frames the quilt:

2014-8 Dancing Churndash detail
A Few Shades of Grey


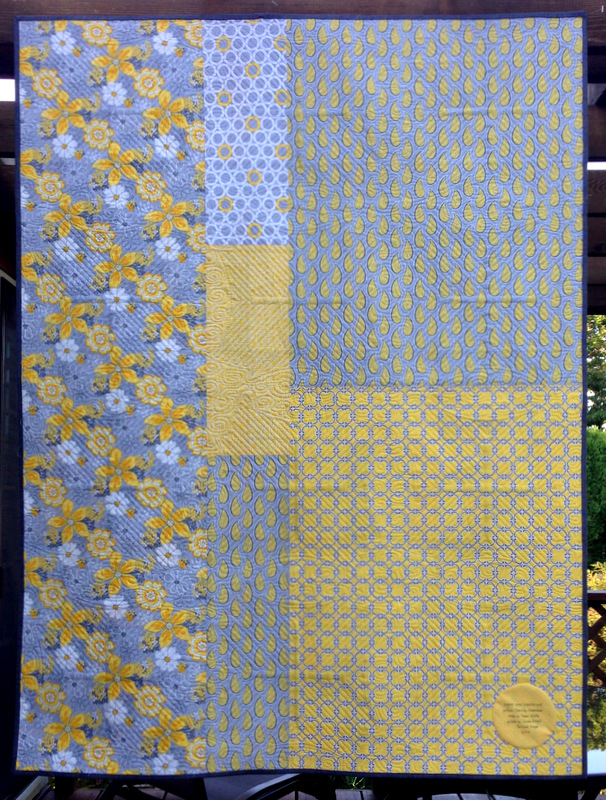
The back is pieced from leftover fabrics used on the front:

2014-8, Dancing Churndash, back
Scrappy Back


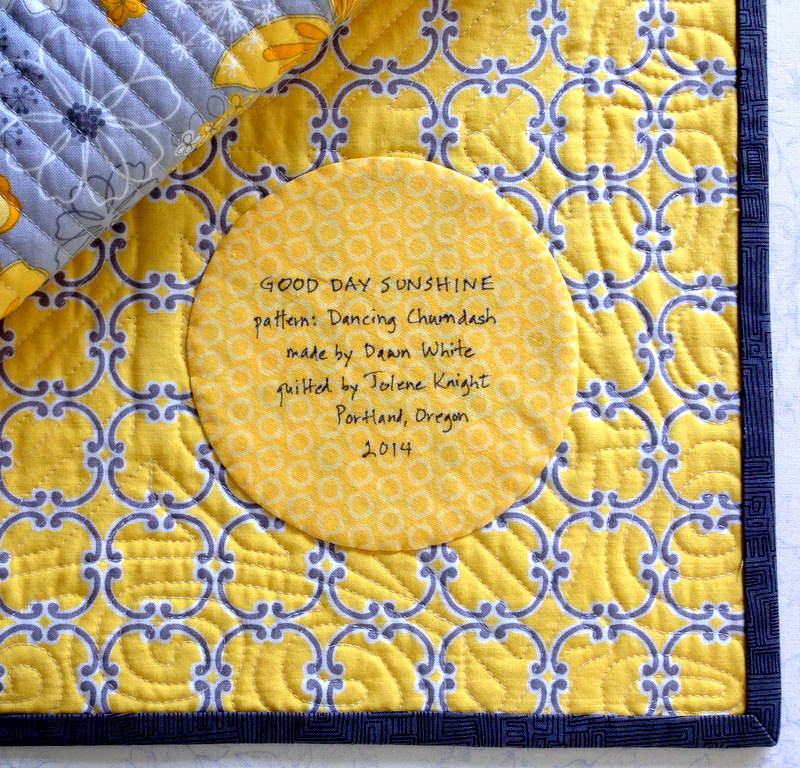
Last but not least: the label.

2014-8 Dancing Churndash label
Important Last Step


My little quilt is finished ahead of schedule. I’m ready for the parade!


Posted in Quick Curve Ruler, Sew-Along, update | 11 Comments

Reach for the Stars: Last Block

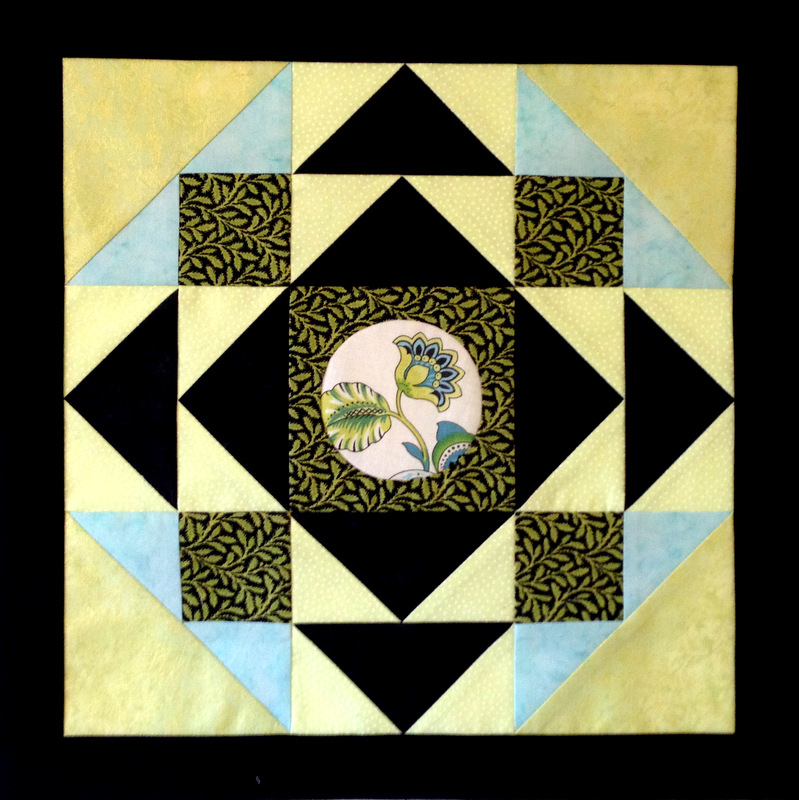
I’ve finished the last of the 14 blocks that surround the center medallion in my version of Reach for the Stars, the queen-size sampler quilt designed by Terry Krysan that I began working on last fall. The block below is actually Block 13 but it was the last one I made:

2014-8, Block 13
Dawn’s Last Reach for the Stars Block


Here it is in its proper position on point:

2014-8, RFTS Block 13 on point
On Point


I’ve been playing with the final arrangement of the blocks. Because I used a variety of blue, green, and black fabrics in the background of the blocks, my goal is to find the right balance of pattern and color across the quilt top.

RFTS potential layout
One Medallion and 14 Blocks

This may well be the final layout — but I reserve the right to change my mind. Once the setting triangles are in place, I think I’ll know for sure.

One thing I know for sure right now: it’s thrilling to be at this point in the process! I’m hoping to have the setting triangles done before the next issue of Quilter’s Newsletter arrives with the seventh and final set of instructions on the making of this series quilt.


Posted in Reach for the Stars sampler quilt, update | 5 Comments