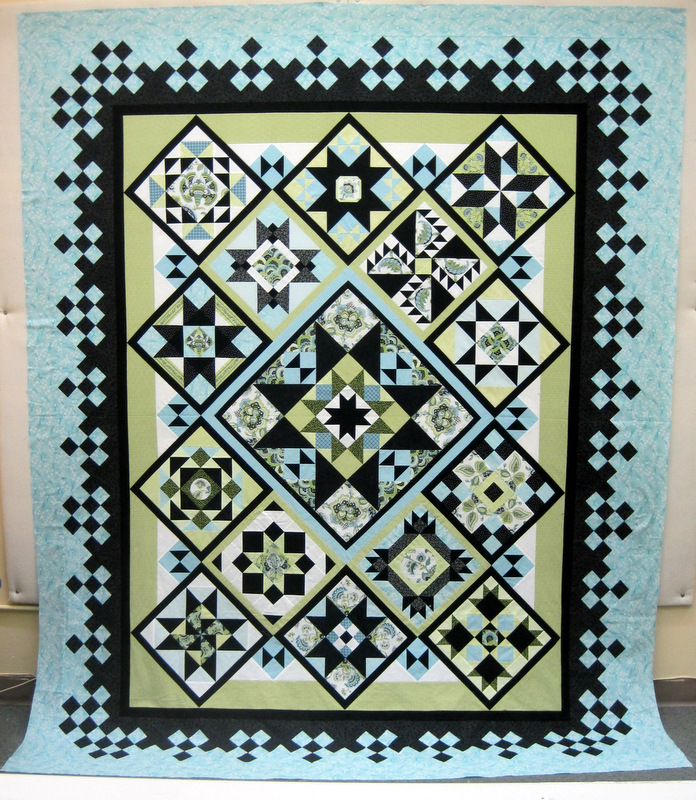
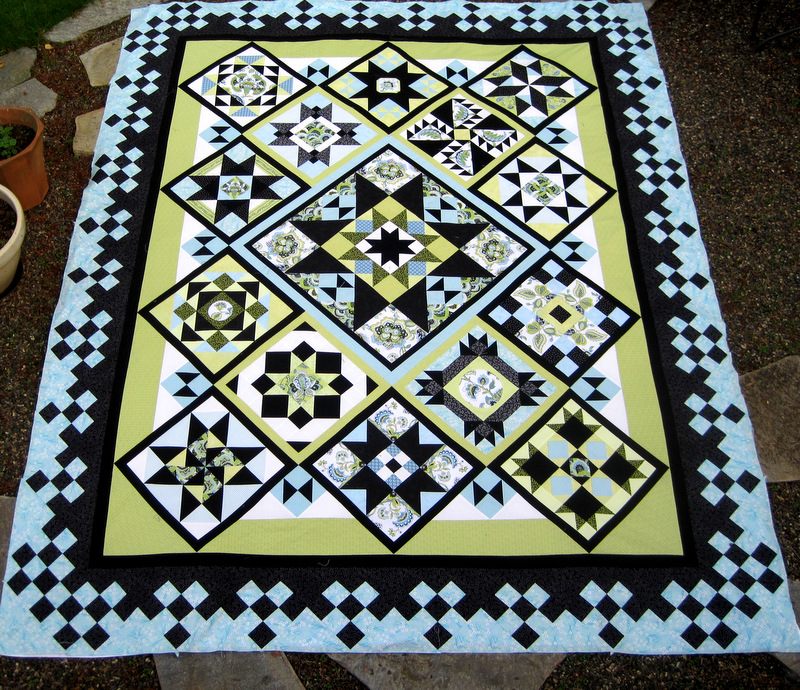
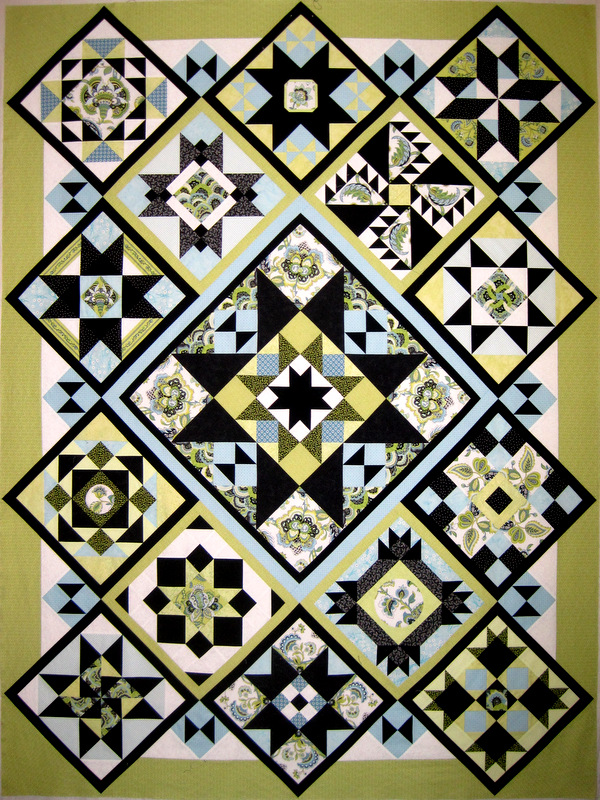
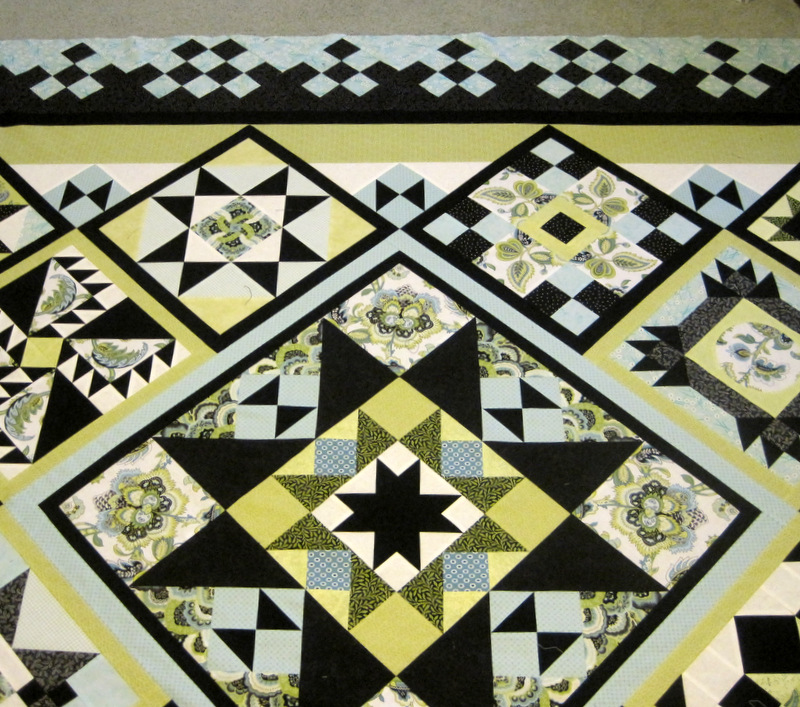
Yes, indeed! My Reach for the Stars quilt top is completely pieced, all 88″ x 108″ inches of it. I finished it at Quilt Camp last week. It’s a bit wrinkled from being all folded up during transport, but here it is:
Dawn’s Version
I like the look of the black squares floating in the outer border, so rather than binding the quilt in solid black to frame it, as originally planned, I’m going to use more of the background fabric.
But I’m getting ahead of myself. The quilt has to be quilted first! I am going to (gulp) invest in custom longarm quilting on this one. The quilter I have chosen is equally at home with free motion and digitized quilting, and I expect my quilt will have some of both. I’ll have a better idea after we meet next week.
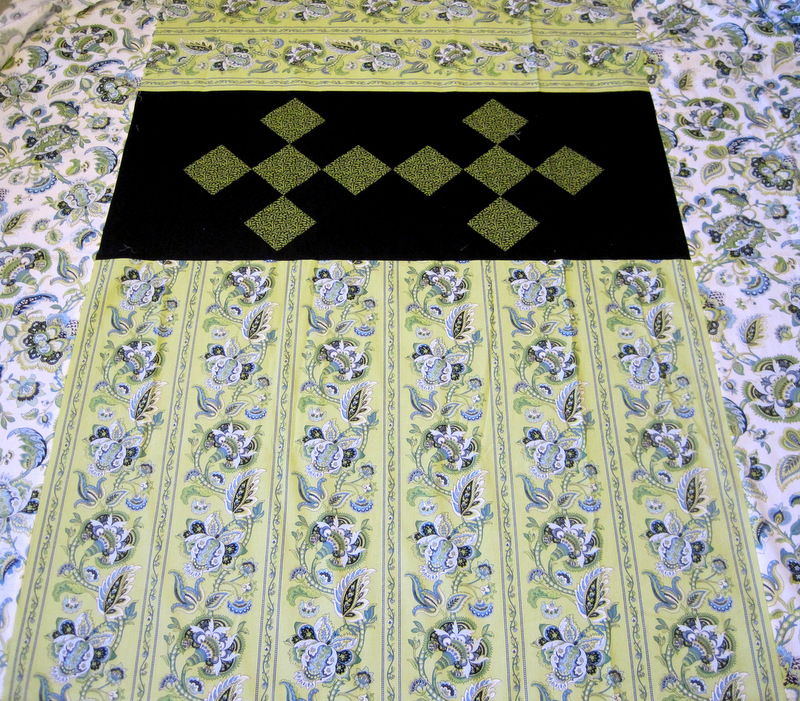
While I was at Quilt Camp I also pieced the back. It measures about 96″ x 116″ and incorporates the two Jacobean floral focus fabrics I used for the fussy-cut images in the center medallion and individual blocks. This is a partial view of the back:
Jacobean Florals on the Back
One of the prints was a border print, so I pieced it in both directions for a bit more visual interest.
I’m still grappling with the realization that this quilt may not fit my queen-size bed. The 88″ width is fine, even if the quilting draws it up a few inches. It’s the length that’s the problem. According to several websites I’ve looked at, the recommended length for a standard queen or king-size quilt is 94″. Even if the quilting shrinks 4″ from the length, it’s still going to be 10″ longer than the recommended length. If this had dawned on me sooner (like when I started making this quilt in January), I might well have resized the blocks. Too late now. But I’m not going to fret about it. Surely I’ll find a good spot to display this quilt.
On a brighter note, I’ve selected a name for my quilt: Catch a Falling Star. If you were around in 1957 (as I was), you’ll recognize it as the name of a song by Italian-American crooner Perry Como.
The final two corners are on my Reach for the Stars quilt top, and already it is huge. It measures 80″ x 100″ — oh my! It will measure 88″ x 108″ once the final borders are on. The custom quilting will shrink it a few inches, of course, but still — I think it’s going to be too big for my queen size bed. I was lamenting this to my twin sister, Diane, who quickly pointed out that she has two king size beds in her home and oh, by the way, wouldn’t this quilt look terrific in the upstairs guest room?
There’s no room in my house big enough to photograph the entire quilt top so I placed an old sheet on the patio out back, centered the quilt on top of it, and took a picture in the waning light:
Final Border to Come
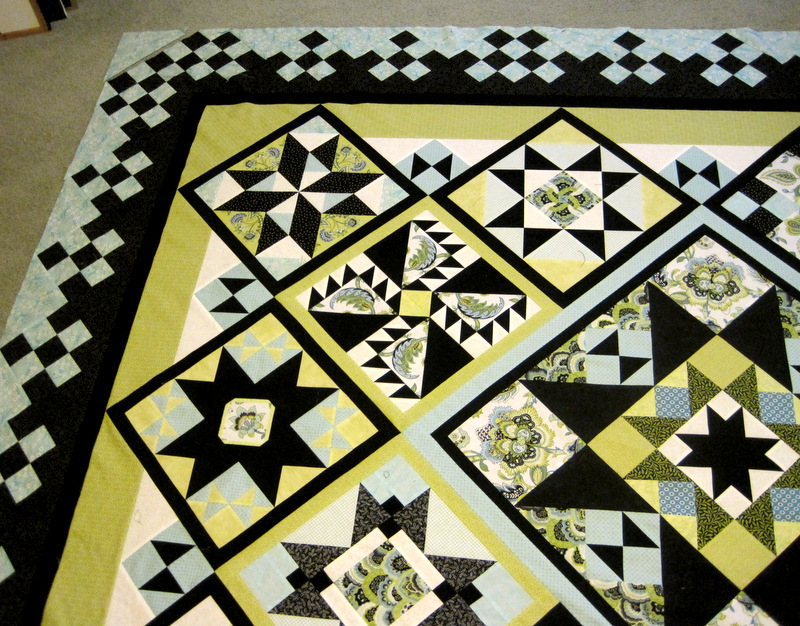
Those of you who have been following my efforts to achieve a symmetrical checked border now have a good look at how it all fits together. Your next view of this will be a finished quilt top!
Border Breakthrough? More of a Corner Crisis. Okay, that’s a bit dramatic. It wasn’t really a crisis, but what I had envisioned as an easy way to extend the points of a narrow inner border into the wide outer border on the corners of my Reach for the Stars quilt turned out to be anything but.
(As regular readers know, my quilt is based on designer Terri Krysan’s quilt of the same name that was recently serialized in Quilter’s Newsletter magazine. I’ve been working on this quilt for the better part of a year, posting progress reports as often as I had something to show. The previous post recounts my efforts to achieve a symmetrical border and to carry the symmetry into the corners. If you haven’t read that post yet, you might want to, as it helps put today’s post in context.)
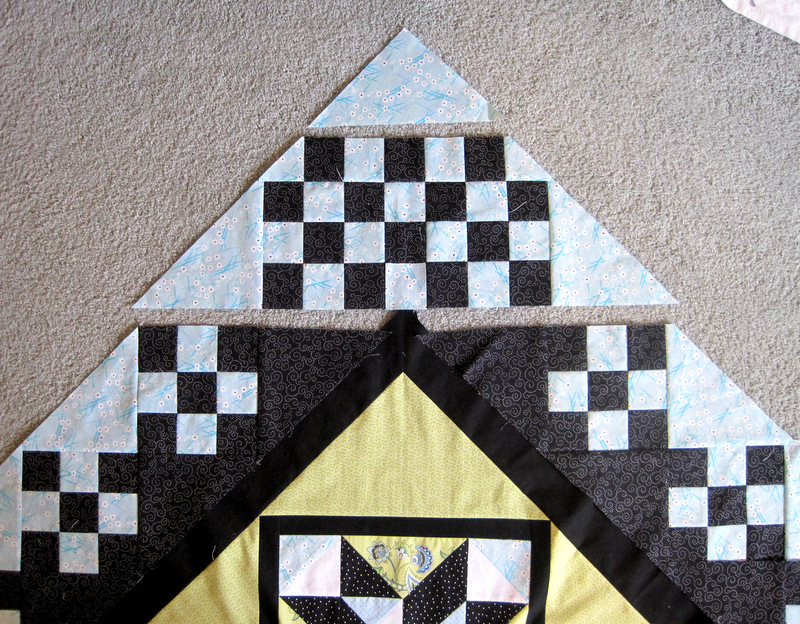
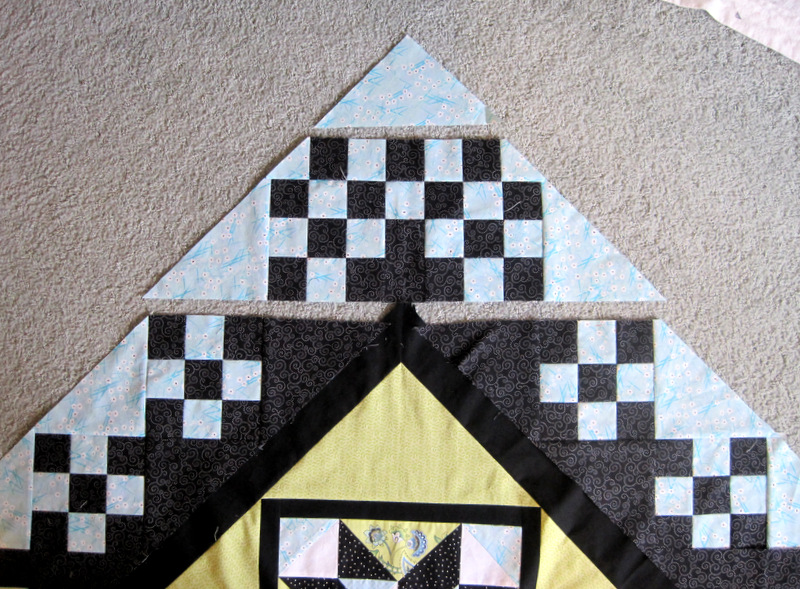
I could have taken the easy way out and simply attached the corner units without fussing with inner border points at all. The quilt has strong diagonal lines, and it probably would have looked just fine:
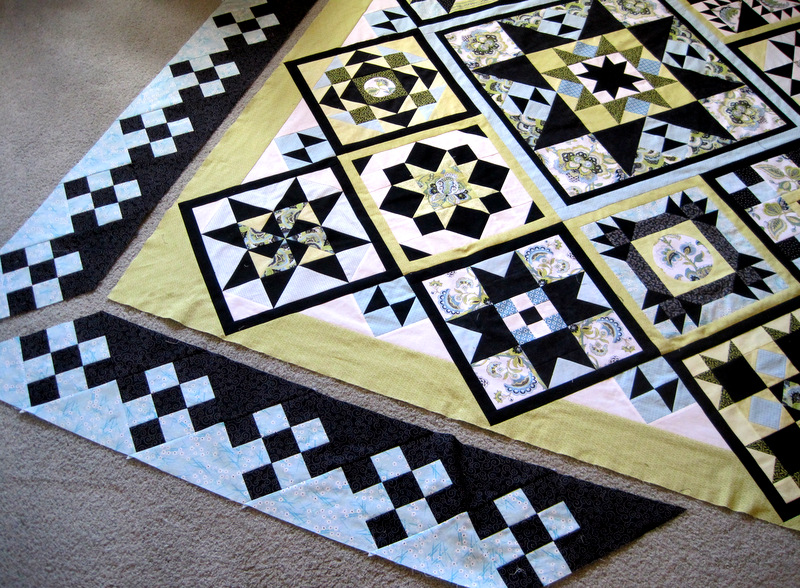
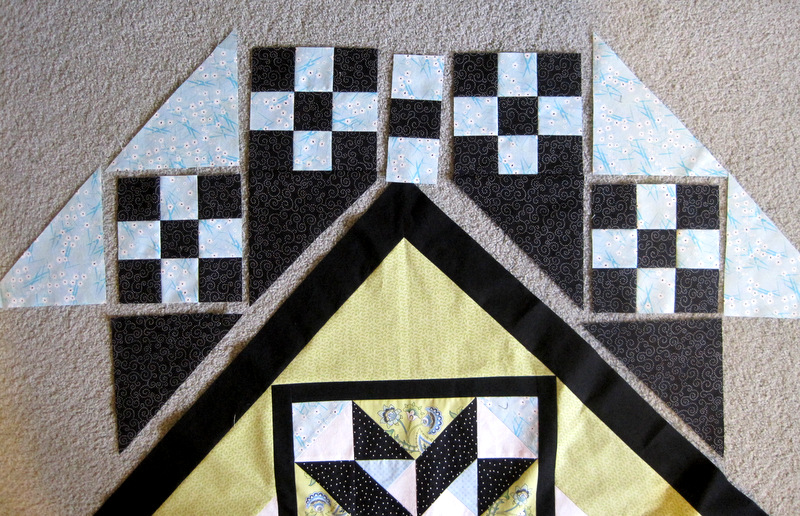
Butting the components up against each other gives you a better idea of what a corner would look like sewn together:
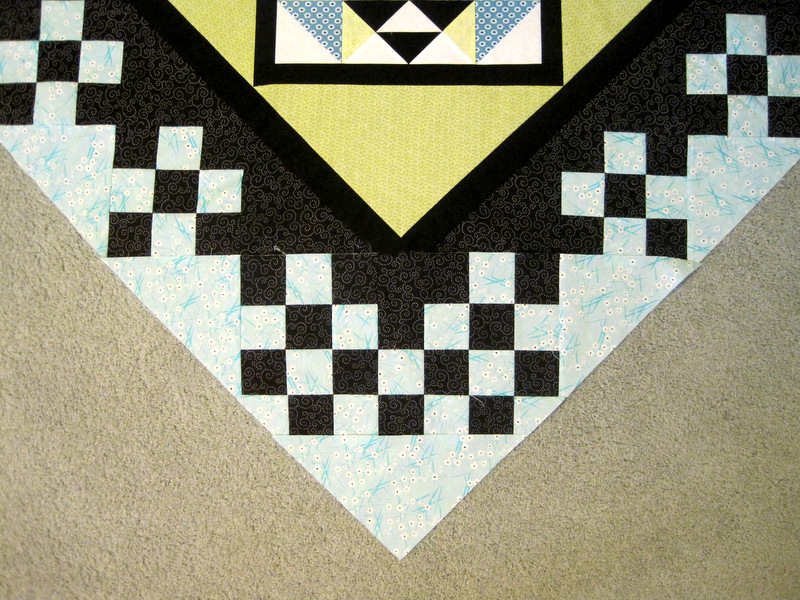
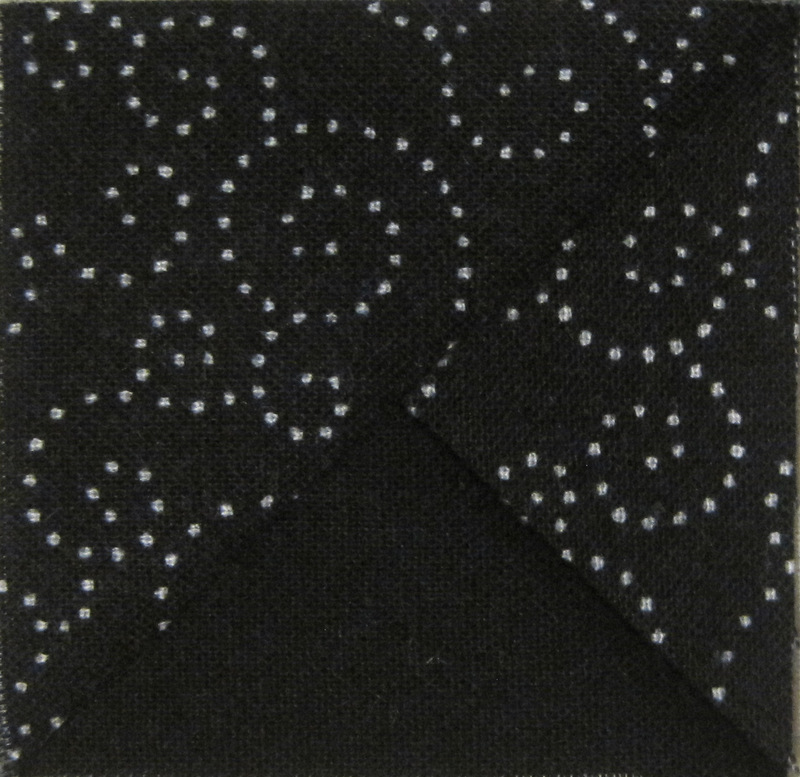
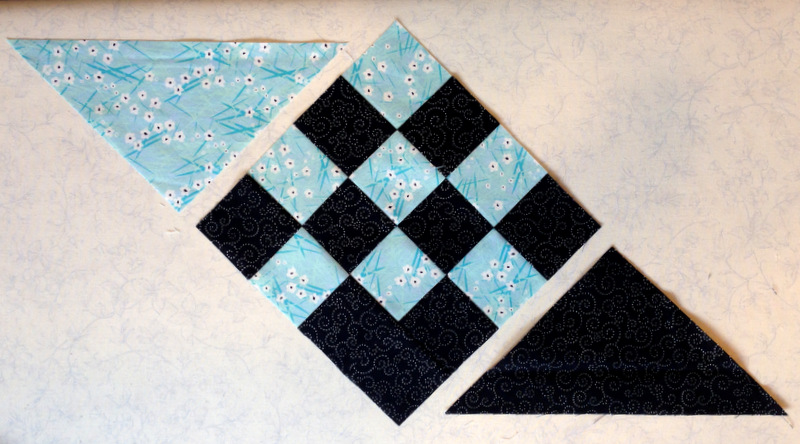
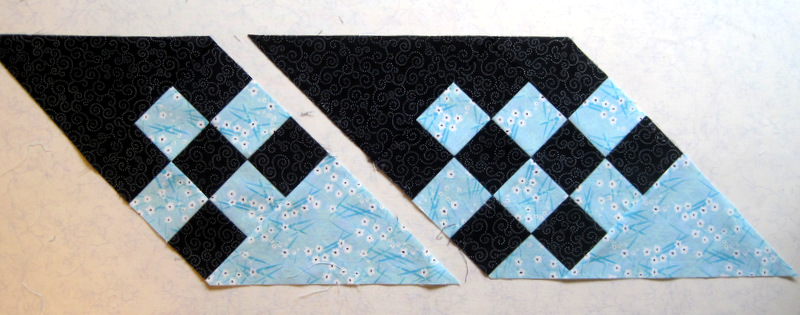
But I wanted the point of the solid black border to extend into the print border. Although I have departed in several ways from Terri Krysan’s design, this was one element I wanted to preserve. All I needed to do — I thought — was replace a 2″ black print square with a block that included a solid black piece, like this one:
Easy enough to make. I toyed with the idea of paper piecing the unit but it was just as fast to sew two half-square triangles to a larger triangle. I made a 2½” block and then trimmed it to the finished size of 2″ square to test its position as a replacement block. Much to my dismay, it was too small. The bottom edges of the triangle didn’t match the seamlines in the solid black border.
The cause of the discrepancy, I finally figured out, was the finished width of the narrow black border: 1⅜”. I had cut the border strips 2½” inches wide, not knowing how wide they would turn out to be, knowing only that the finished width would be determined by where the setting triangles came together at the corners. This is because of the highly unscientific but vaguely mathematical way I figured and constructed the borders. If the narrow black border had finished at 1¼” wide, I think it might have fit.
But it didn’t. What to do?
The solution came to me only when I started thinking outside the box. Literally. Instead of working with a 2½” square (the box), I played with a 2½” x 6½” rectangle of black print — the equivalent of three squares — and larger triangles of the solid black. That gave way to two 2½” x 3½” rectangles when I realized they would give me the shape I desired in the size needed to match the other seams. Let me show you what I mean:
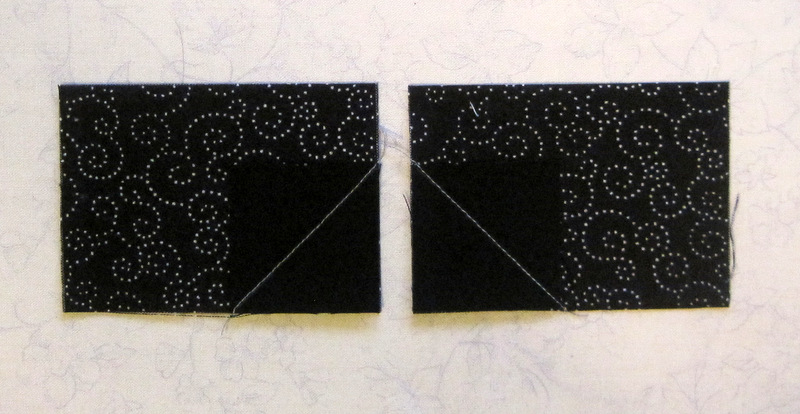
The larger pieces are the 2½” x 3½” rectangles. The solid black pieces are 1⅝” squares, about to become foldover corners:
When I joined the two pieces in the middle and tested the edges of the resized triangle against the seamlines in the black border, they were right where they needed to be. Hurrah!
Here is the new rectangular unit inserted into part of a corner unit . . .
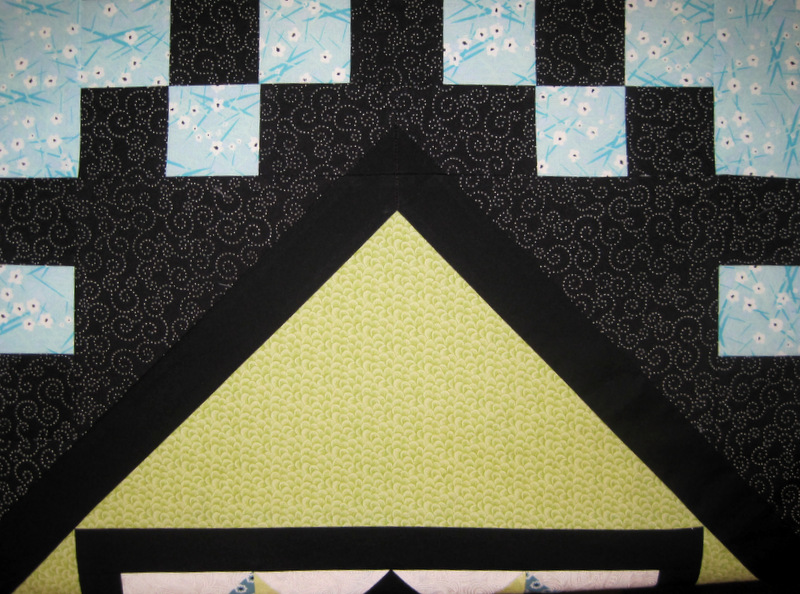
. . . and here is that corner unit joined to the quilt:
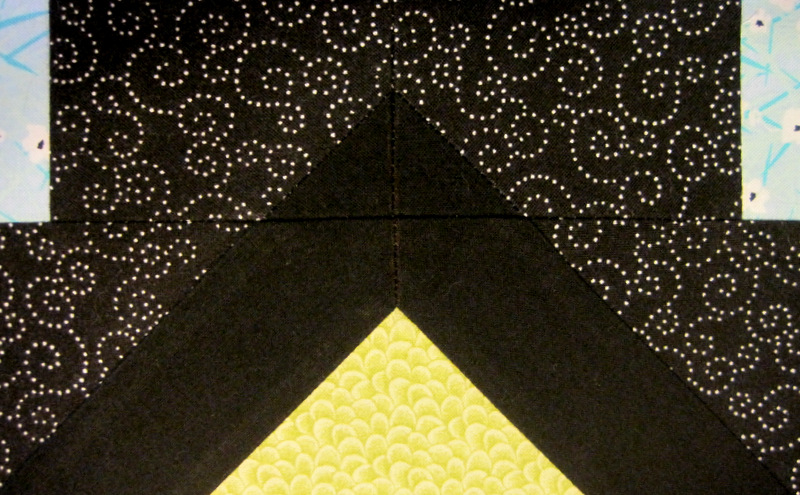
This close-up shows how the seam joining the two solid black triangles becomes, in effect, an extension of the mitered seam in the narrow black border:.
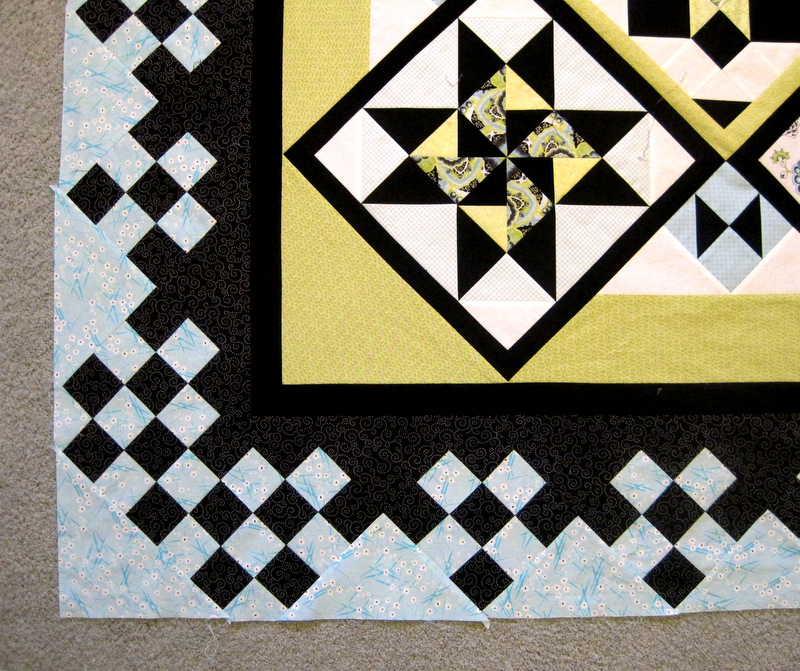
This view of the second corner shows you how it all fits together:
Two more corners to go. Then all that’s left is to add the final border of background fabric, which helps float the nine-patch units. Can you believe it? I am almost done!
. . . I had finished the center medallion and 14 surrounding blocks and was getting ready to tackle the intricate pieced border. I say “tackle” because I knew it would be a challenge figuring out how to get the corners perfectly symmetrical. I knew I wanted to emulate the lacelike effect designer Terri Krysan achieved by putting nine-patch blocks on point in her border, but I also knew I wanted all of my corners to match.
First I added a narrow black border on all four sides, mitering the corners. Next I made several nine-patch units and cut several setting triangles and then just started playing with their positions around the perimeter of the quilt top, which had been moved to the floor after outgrowing my design wall. I walked around the quilt countless times, trying out nine-patch units and setting triangles in different spots along the outer sides.
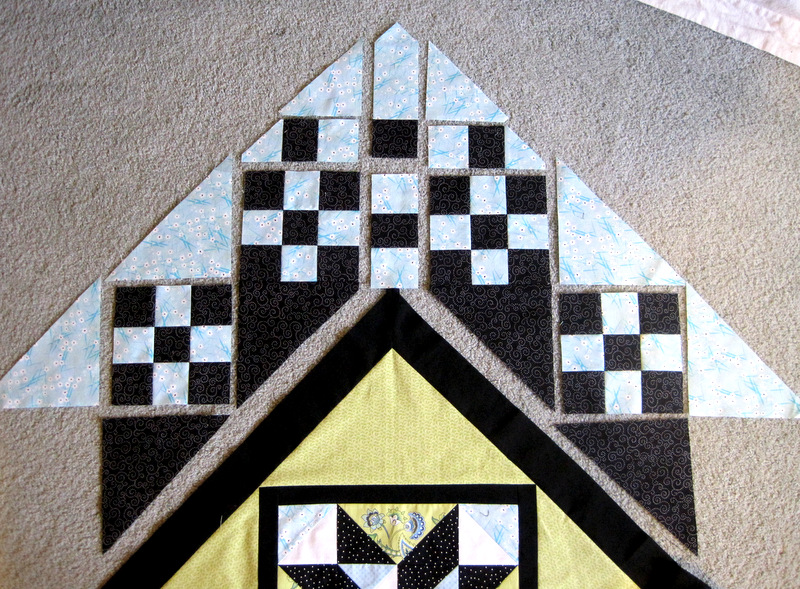
Border Breakthrough #1 occurred when it became apparent to me that the corner design needed to include two nine-patch units with a strip between them, like this:
I mocked up the rest of the corner and even sewed some pieces together. I expected I would need to miter the corner with a seam in the middle of the center strip to match the mitered seam in the narrow black border.
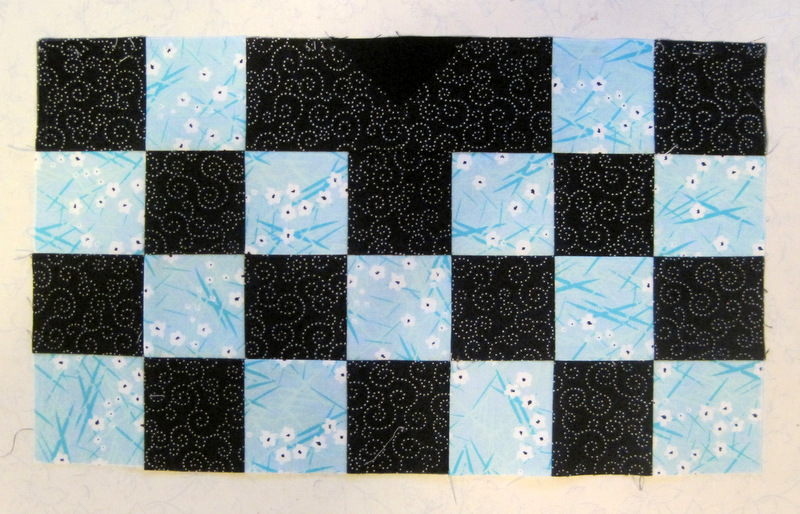
When I looked at the photo I had taken above, it hit me that I didn’t need to miter the seam at all! If you follow the horizontal line at the tip of the narrow black border, you’ll see what I saw. Here is Version 2 of the corner unit . . .
. . . showing a much easier way to finish the corner. And here is Version 3, which assures the continuity of the black print fabric all around the quilt next to the narrow black border:
The position of the black print setting triangles at each corner coincided with a black print setting triangle hitting the exact center of the top and bottom of the quilt. You’ll see what I mean when you look at the next photo:
See the point of the black sashing on the middle block, right where it touches the narrow black border? Follow the line into the border and note how it intersects both the black print setting triangle next to the black border and the blue setting triangle on the outer edge.
Unfortunately, there was no way that same design element was going to hit the middle of the long sides. That’s when Border Breakthrough #2 came into play. After much fiddling around, I determined that if I completely removed one nine-patch unit from a long side and added one more strip to two of the remaining nine-patch units, the middle of a black print setting triangle would hit the middle of the long side. Just what I wanted it to do!
Here’s what the “nine-patch plus” unit looked like just before adding the setting triangles . . .
. . . and here’s what it looked like next to a regular nine-patch:
I sewed all of my blocks together and then discovered that the border strip was about an inch too long (much better than an inch too short!). My solution? To re-sew the nine-patch units taking a full quarter-inch seam rather than my regular scant quarter-inch seam. Doing that with six nine-patch units and two “nine-patch plus” units took up the excess fullness, and my border fit perfectly. Was someone doing the Happy Dance? Oh, yeah!
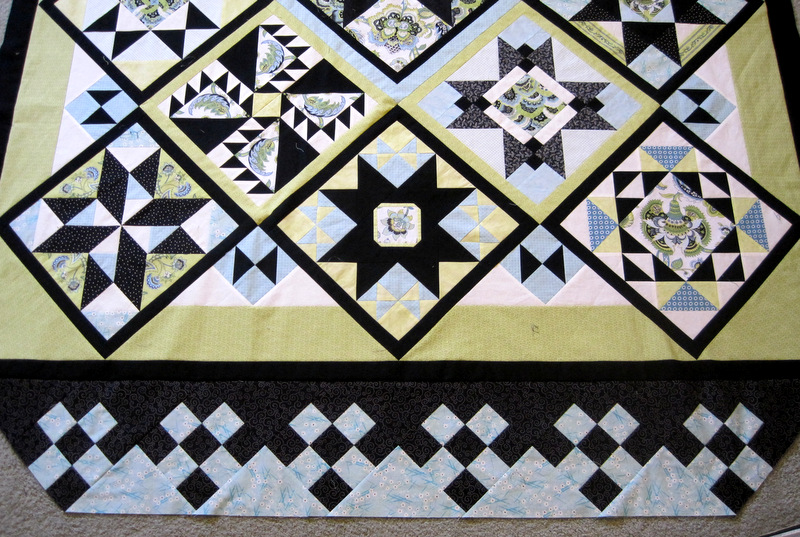
Here’s a look at the middle of one long side, with the setting triangle hitting in just the right spot. Look above the small blue and black hourglass block in the valley between the two blocks near the top center of the photo:
Here you are looking across the quilt to one corner:
The “nine-patch plus” units — the ones with two black print squares on point — are evenly interspersed along the long sides, and even though the two short sides have no “nine-patch plus” units, everything still looks balanced because the borders match. My approach was strictly trial and error — no graph paper, no computer software program, no calculator work — with just a dash of intuition and a lot of luck.
I do have one more thing to figure out. It has to do with preserving the points of the narrow black border and it just may involve some paper piecing. Have I piqued your curiosity? I hope so! Please come back in a few days to see what I’m talking about.
In for a penny, in for a pound. I’ve decided to enter a second quilt in the Fall 2014 Blogger’s Quilt Festival, hosted by Amy Ellis at Amy’s Creative Side. (You can read about my first entry in yesterday’s post.)
Billed as “the biggest quilt show online,” the festival accepts entries Oct. 24-31 in 11 categories. Viewers can nominate a quilt in any category for the Viewer’s Choice award and, beginning Nov. 1, vote for their favorites in all the other categories. This is my first experience entering the festival, and already I’ve seen dozens of fabulous quilts and discovered some new blogs I absolutely must follow.
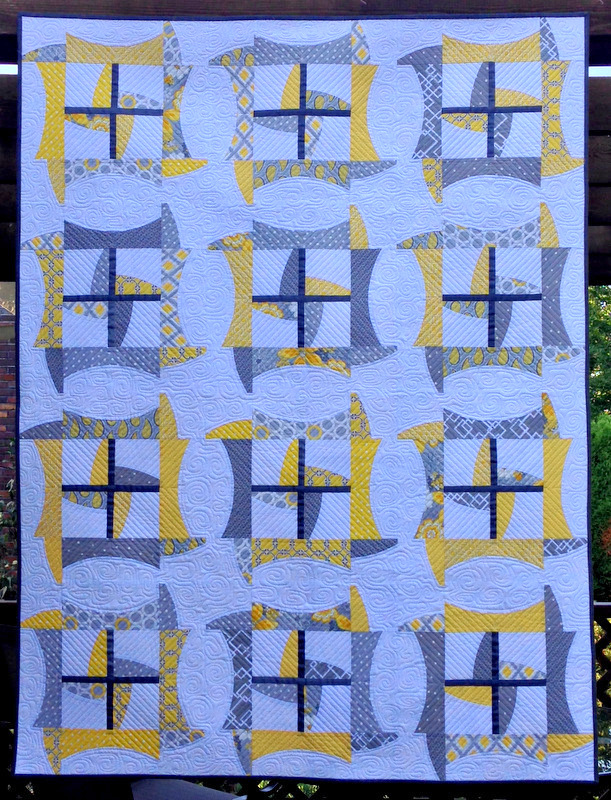
I’m entering Square Dance in the Small Quilts category:
Square Dance (2014)
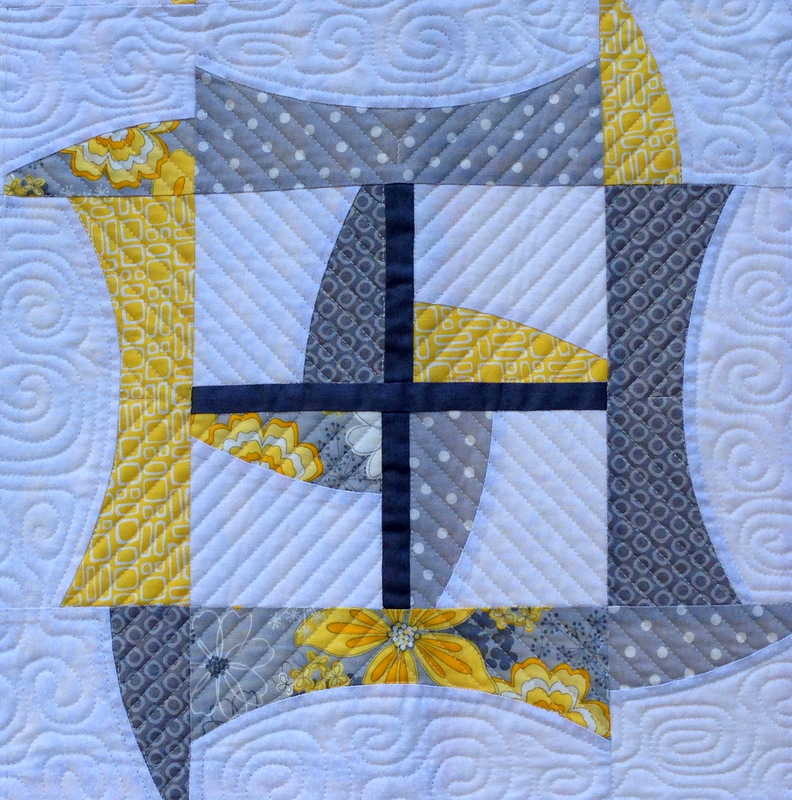
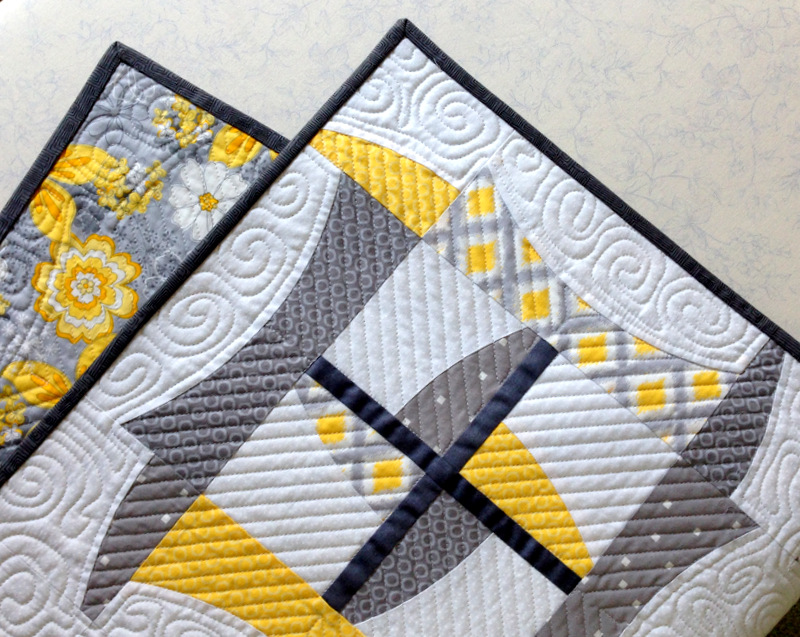
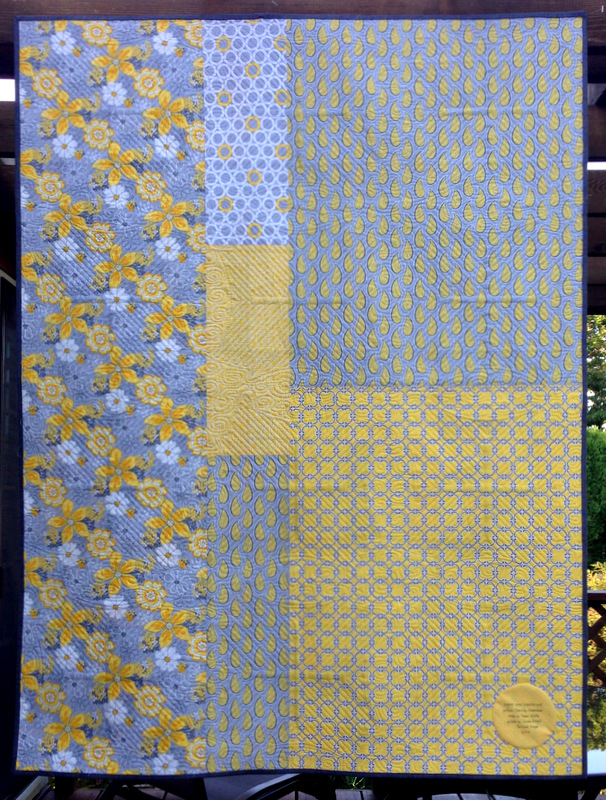
It’s an original design based on the classic Twist block dating back to 1870. Square Dance measures 55½” x 64½” and was quilted by Melissa Hoffman. I wrote about it in this post.
The fall 2014 Blogger’s Quilt Festival is now underway, and I am entering Good Day Sunshine, finished earlier this year, in the Modern category:
Many of you have seen pictures of this quilt already. I hope you don’t mind revisiting it!
Good Day Sunshine was the product of a summertime Sew-Along organized by Thelma of Cupcakes ‘n’ Daisies. The pattern, Dancing Churndash, was designed for Cut Loose Press by sisters Jenny Pedigo and Helen Robinson of Sew Kind of Wonderful. Here’s a look at the entire quilt:
I used quite a few prints from the Gray Matters line by Camelot Cottons and filled in with fabrics from my stash. I’ve loved the combination of gray/yellow/white ever since my mother made me a wool plaid skirt in those colors when I was in high school.
Although there’s a lot of gray in this quilt, it’s offset by the bright and cheerful yellow prints. Each block makes me feel like I’m looking out a window on a sunny day:
That’s what led me to name this quilt Good Day Sunshine, after the Beatles song. It measures 43″ x 57½” and was quilted by Jolene Knight of Good Knight Quilts. A close-up of the quilting:
The back was pieced from leftover fabrics used on the front:
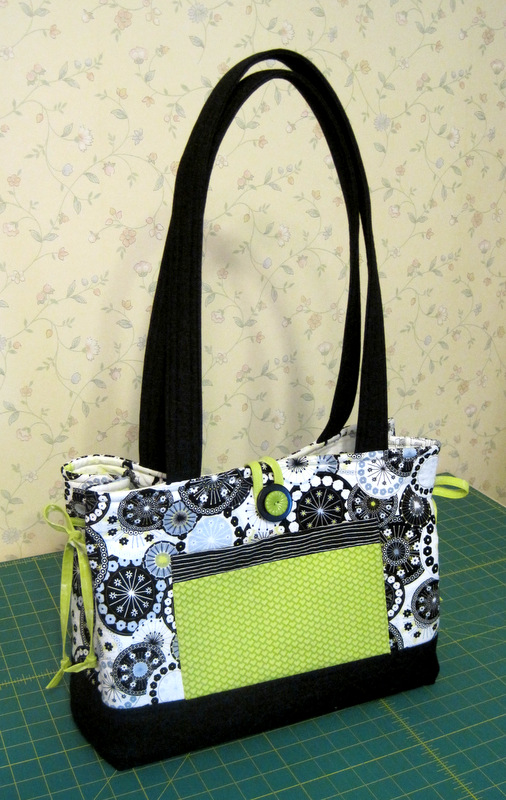
Someone’s got a brand new bag. And it’s not Papa. Take a look:
Dawn’s Central Park Tote
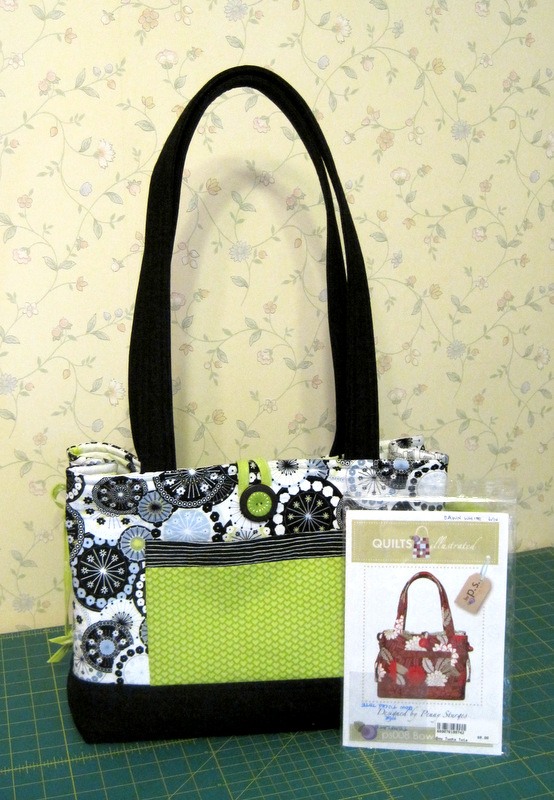
The pattern is Bow Tucks Tote by Penny Sturges of quiltsillustrated.com. It’s 13″ wide, 11″ high, and 5″ deep. As you can see from the picture below, I made the handles on my tote several inches longer:
The Tote and the Pattern
It’s easy to see how the pattern got its name:
Bows and Tucks on the Sides
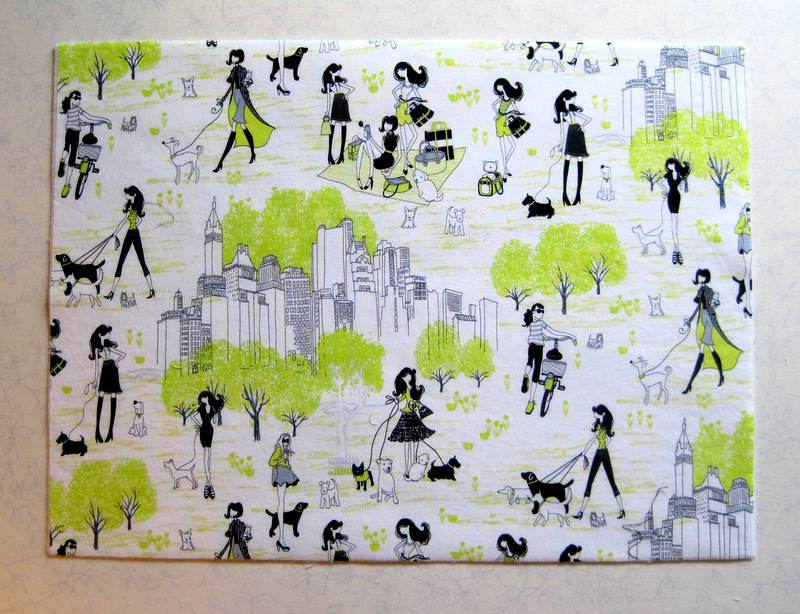
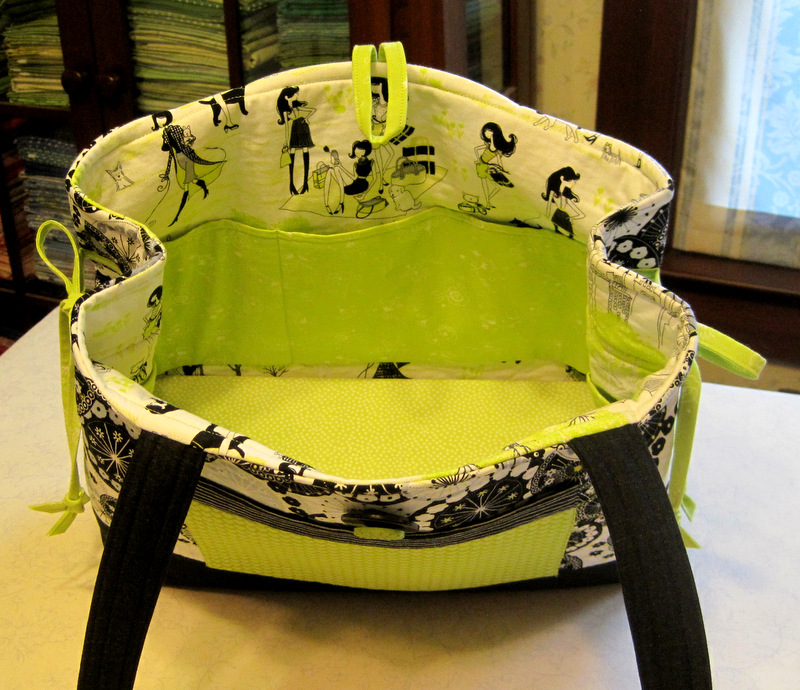
Are you wondering why I am calling it my Central Park tote? It’s all about the fabric! This is what I used for the lining:
City Girls in Central Park
I love New York, and when I saw this print last year from the Central Park line by Timeless Treasures Fabrics, I promptly bought some. It features slightly retro and very chic young women walking their dogs, bicycling, and picnicking in Central Park. When I chose the fabric for the outside of the bag (from the Doodle line by Alice Kennedy, also for Timeless Treasures), it occurred to me that this fabric would go well with it. And it would make me smile every time I looked inside.
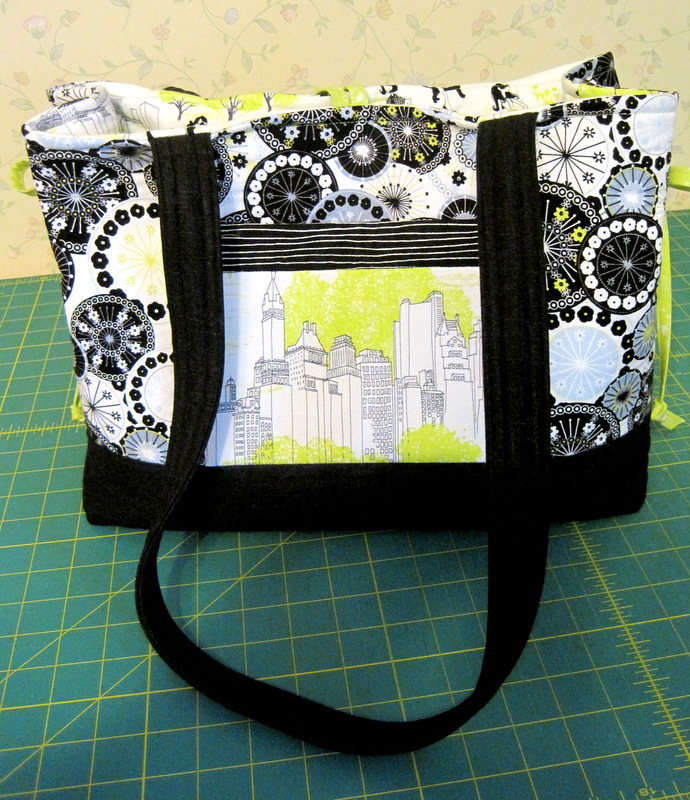
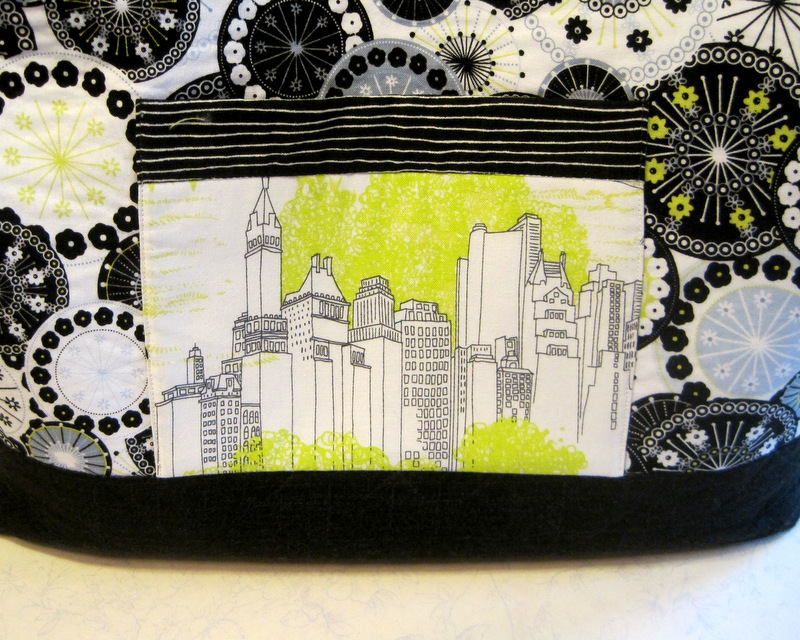
Did you notice the New York skyline in the fabric above? I fussy-cut that scene and added a pocket on the back side of the tote:
A Pocket on the Other Side
A close-up of said pocket:
The View from Central Park
The inside of the bag has divided pockets that go around all four sides:
Pockets All Around
What a great feature! A tote with lots of pockets is a very good thing. On the bottom of the bag is a rectangle of 1/4″-wide foam core covered with a fabric sleeve. The foam core provides stability and helps the boxed corners keep their shape.
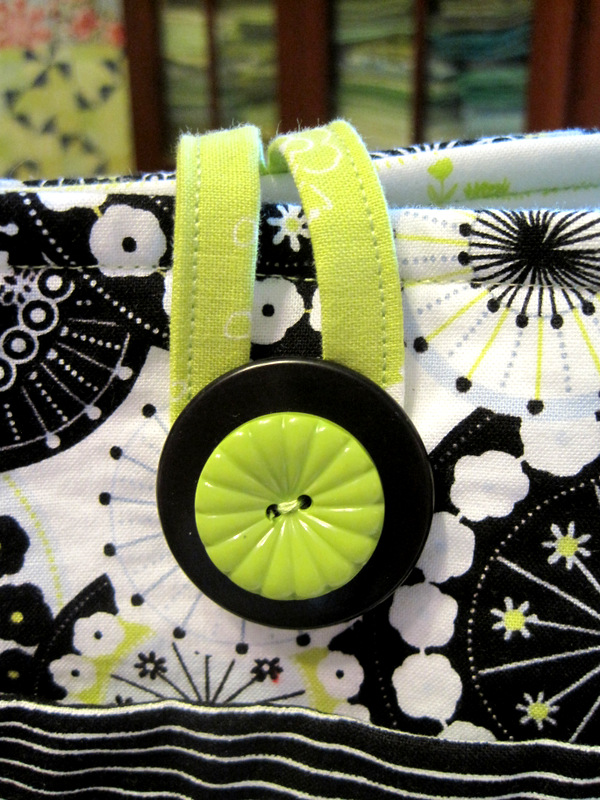
The pattern calls for a button-and-loop closing. I dug around in my vintage button collection and found a button just the right shade of green but too small. I paired it with a larger plain black button, aligned the holes, and sewed both of them onto the bag together:
Vintage Buttons
This is the first tote bag I have ever made for myself. I think I will enjoy using it!
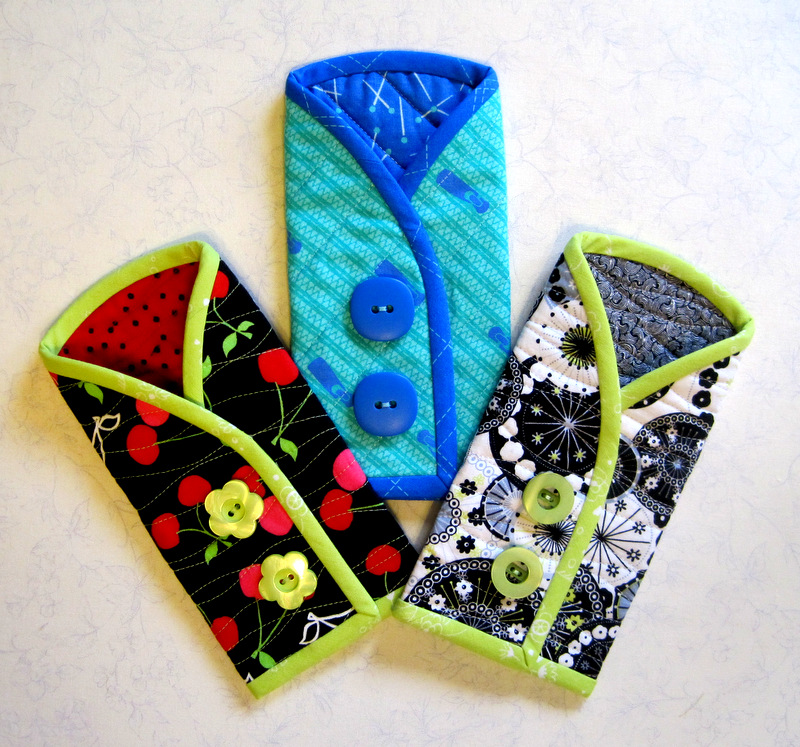
Time to announce the winners of my Rotary Cutter Case giveaway. First, here’s a look at what’s up for grabs:
Rotary Cutter Coats: Free to Good Homes!
I used a Random Number Generator to draw three names. And the winners are:
Bill Volckening
Janet Boundy
Jayne Emsdem
Congratulations, folks!
In their comments, Bill said he liked the rotary cutter coat in the middle best, Janet liked the one on the left, and Jayne said she would be happy with any one of them, so she will get the one on the right. How perfectly providential! Winners, please email me your mailing addresses and I will get them in the mail to you this week.
Didn’t win? Sorry! But you can make a rotary cutter coat for yourself or perhaps one for a friend. Directions are available as a one-page handout or as a full step-by-step tutorial with lots of pictures.
Thanks to everyone who checked out my Giveaway post and to those who left comments. Have a great week!
Would you like to win one of these rotary cutter coats? I’m hosting a Giveaway and will send one of these cases to three lucky winners. To enter all you need to do is add a comment at the bottom of this post answering one of two questions:
1) which case do you like the best and why (fabric? buttons? color combo? something else)?
or
2) how did you find out about my website/blog?
The Giveaway will remain open through this week. I’ll draw three names using a random number generator and announce the winners early next week. I will mail anywhere in the world so international readers are welcome to enter.
A tutorial for making one of these rotary cutter coats can be found here.
Good luck, everyone, and thank you so much for visiting First Light Designs!
Today’s my day to post in the “Around the World Blog Hop.” It’s like a chain letter passed from one blogger to another. What a fun way to meet new quilters and discover new quilting blogs! My assignment is to respond to four questions and then tag another quilter who will post on the same questions a week later.
I was tagged by Debbie Scroggy of All Quilted, LLC. Debbie is a local award-winning professional longarm quilter whose clients keep coming back because she does beautiful work. She takes care to bring out the best in every quilter’s project. I know this because she has quilted two quilts for me — and they will certainly not be the last. I’ve seen examples of quilting Debbie has done for other people as well as quilts she has made herself. You’ll see for yourself when you click on the link above. And when you do, you’ll find a link to the blogger who tagged her. This blog hop takes you backward as well as forward.
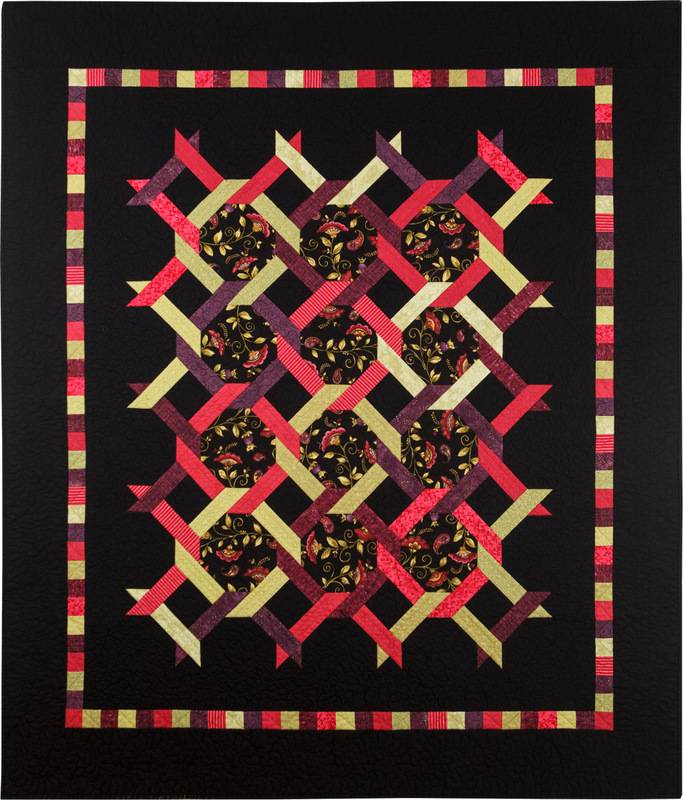
Moving forward, you will hop from Oregon halfway across the North American continent to visit Jennifer Gwyn of Seams Crazy. Jennifer lives in Houston, Texas with her husband and two young children. Despite the demands of working and raising a family, she still manages to get a lot of quilting done. Jennifer’s fabric choices are always pleasing to the eye. I especially admire her ability to go scrappy when the quilt calls for it. I have Jennifer to thank for the project you see below. She wrote about it on her blog late last year and got me hooked.
On to the assignment at hand.
1. What am I working on? Ah, the easy question first. I always have several projects underway. One is my series sampler quilt, Reach for the Stars:
Reach for the Stars Border Puzzle
I’ve been working on this quilt since the beginning of the year, and the end is tantalizingly in sight. At the moment I’m trying to solve the puzzle of how to make the borders match in all four corners, something the original design does not do. The math doesn’t work out, and I’m trying to figure out a creative way to make it work.
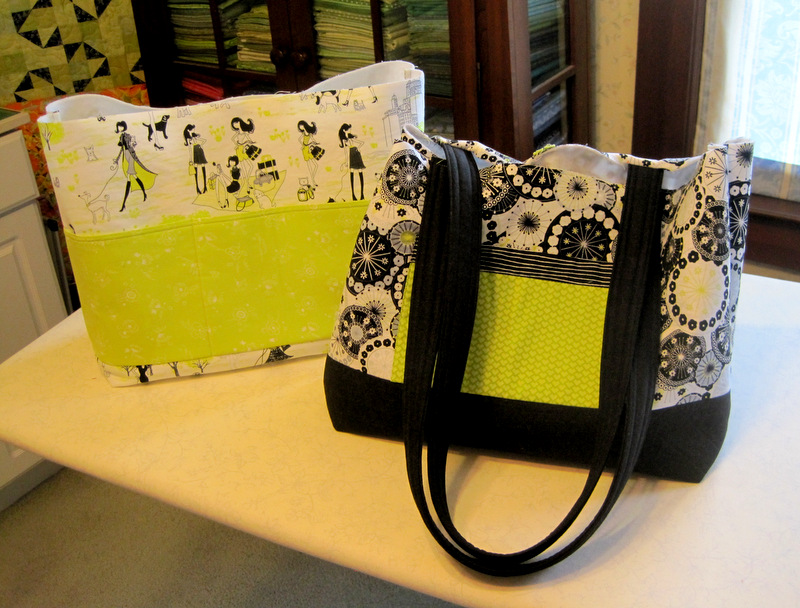
Another work-in-progress is this Bow Tucks Tote, designed by Penny Sturges of quiltsillustrated.com:
Tote Bag in Progress
I’m currently teaching a class on this bag at the Pine Needle and need to make a tote along with my students to demonstrate the steps. In the photo above, that’s the lining you see on the left. The green strip turns into pockets that go around the entire inside of the bag. Clever!
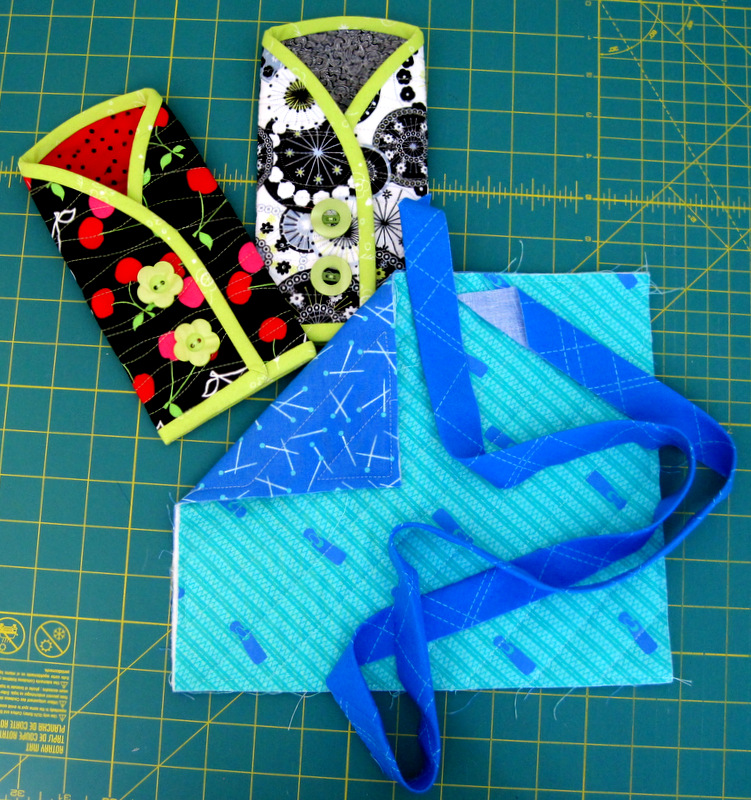
Yet another project is this Rotary Cutter Coat, one of my own designs:
Rotary Cutter Coat in the Works
Look closely at the fabrics in the unfinished project above: those are zipper pulls and zipper teeth on the front and straight pins on the back. So cute! (I posted a tutorial a few days ago that includes a link to the free pattern; perhaps you’d like to make a rotary cutter coat yourself.) As soon as the zipper pull coat above is finished, I’m going to give all three away. I hope you’ll come back later this week for my Giveaway.
2. How does my work differ from others of its genre? I would be hard pressed even to identify what genre my work fits in. I’m all over the map in terms of the kinds of quilts I like — and the kinds of quilts I like to make. Am I a traditional quilter? Absolutely. Non-traditional quilter? Yes. Modern quilter? Yes. Art quilter? That too. I tend to make what pleases me, and most of the time my work pleases others. That’s satisfying on both fronts.
3. Why do I create what I do? It’s all about the fabric. I love fabric! I love to make things with it. My mother taught me to sew when I was 12 years old, and I honestly can’t remember a time I didn’t have some kind of sewing project underway. I made all of my own clothes well into the 1980s (past the time when it was cheaper to make clothing than to buy it), along with pillows and curtains and other “soft furnishings.” By then I had also discovered quilting, which became a creative outlet and antidote to an intense work schedule. When I retired six years ago, quilting — and then teaching quilting — took over my life. Oh, and sewing for my sisters, who think I’m the Home Dec Queen.
4. How does my creative process work? Often an element in a quilt — a block, perhaps, or a border — will catch my eye, and I will think about how I might incorporate it into a quilt of my own. Or I will look at a traditional block and ponder how it might be jazzed up a bit. I will look at a design element and think, “What if I did this or that to it?” Some of my best ideas have come from asking myself, “What if . . .?”
Some of my work is frankly derivative. Case in point: the rotary cutter coats pictured above. A couple of years ago I saw a pattern in a magazine for a quilted eyeglasses case. I was instantly transported back to the age of four, when I got my first pair of glasses. I came home from the optician with glasses on my nose and a faux-leather case to store them in when I wasn’t wearing them. The case was cut along the same lines as the one in the magazine. I examined the eyeglasses case in the photo and said to myself, “What if . . .?” The result was a case (or coat, as I like to call it) designed specifically for a rotary cutter, though it could certainly double as a case for a pair of large eyeglasses.
I find inspiration everywhere: not just in books and magazines but also in nature, the work of other quilters and crafters, designs in fabric, a sidewalk, a coffee cup. I study quilts I like — and quilts I don’t much care for — to understand what appeals to me and why. Straying from the familiar path and trying something new are parts of the creative process, so I take classes whenever I can.
***
Jennifer’s “Blog Hop Around the World” post is due Oct. 20, one week from today. But you don’t have to wait till then to visit her blog. Go there now and see what she’s working on. Not only will you get a glimpse of her Reach for the Stars fabrics, you’ll be able to check out the size of her stash. Oh my!




![churn-dash-2[1] (2)](https://firstlightdesigns.com/wp-content/uploads/2012/04/churn-dash-21-2.jpg)