Category Archives: Junior Billie Bag

That Magic Moment . . .

. . . when a Junior Billie Bag becomes three-dimensional:

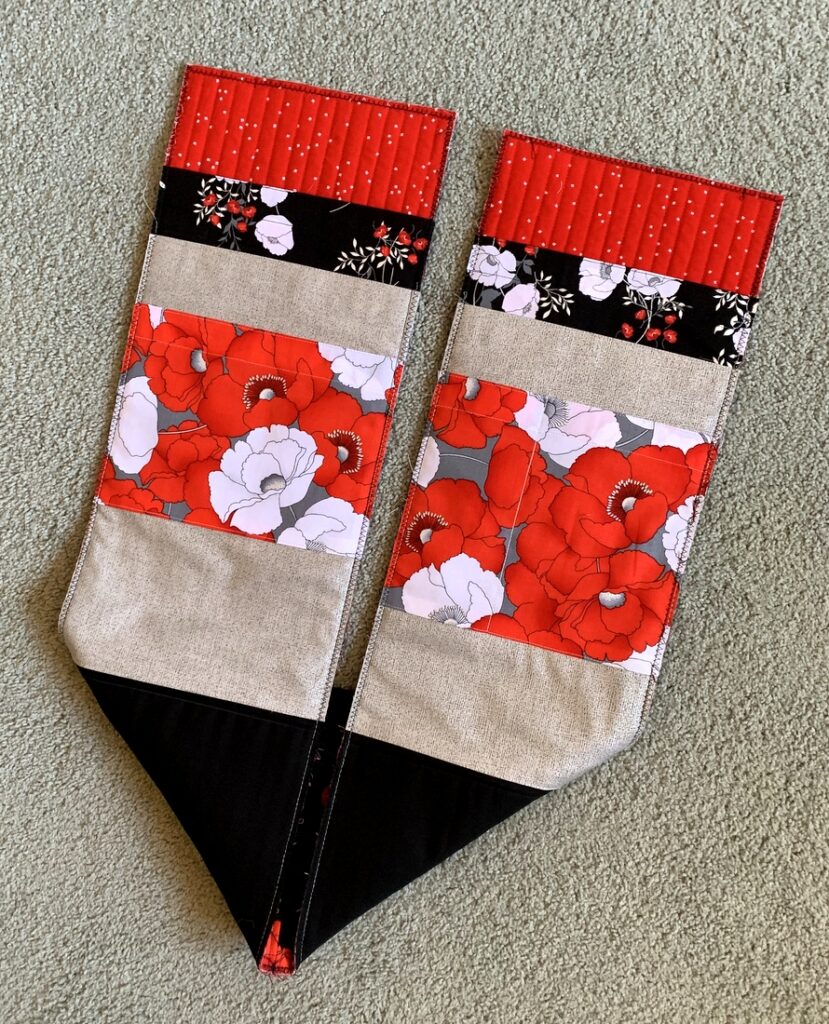
It makes all the work that goes into a JBB totally worth it! You’re looking at the inside of my current Junior Billie Bag-in-progress. You can’t see them all but there are 14 pockets in the three sides in the photo above. The other front/back panel has four pockets, bringing the number of inside pockets to 18.

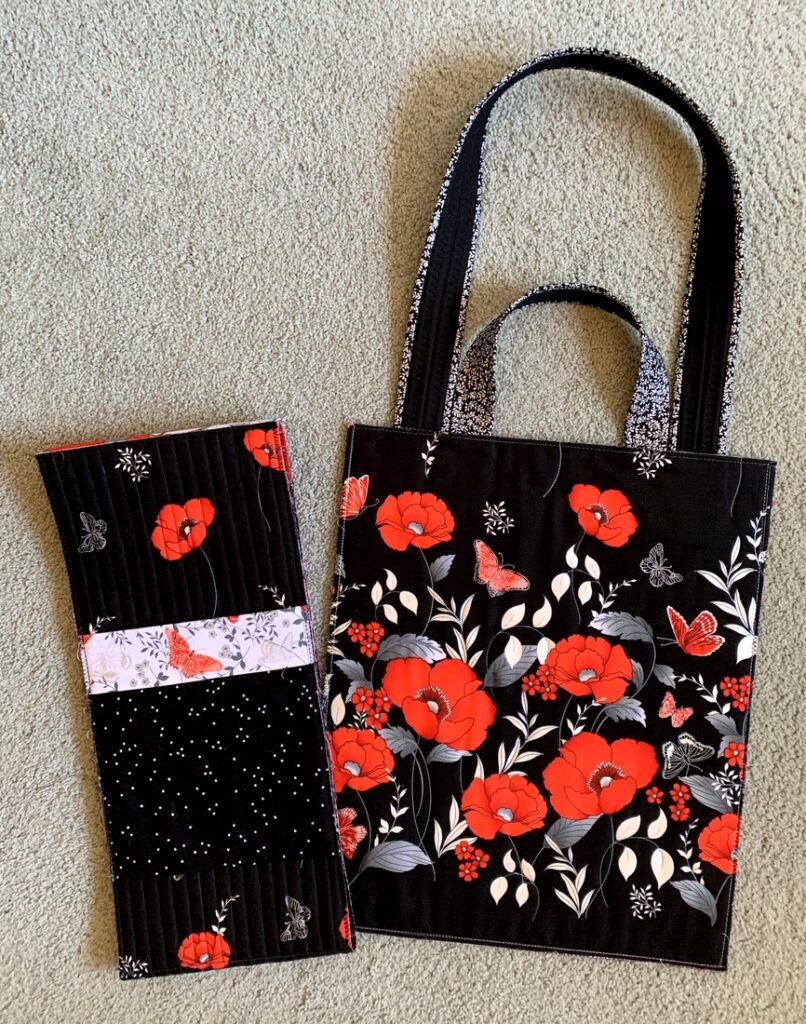
But wait — there’s more! The side panels on the outside of the bag also have pockets. There are three in the photo below . . .

. . . and one more in this next photo, bringing the total number of pockets to 22:

The size of each pocket was carefully measured and made to hold the tools I use most often when I go to take — or teach — a quilt class.

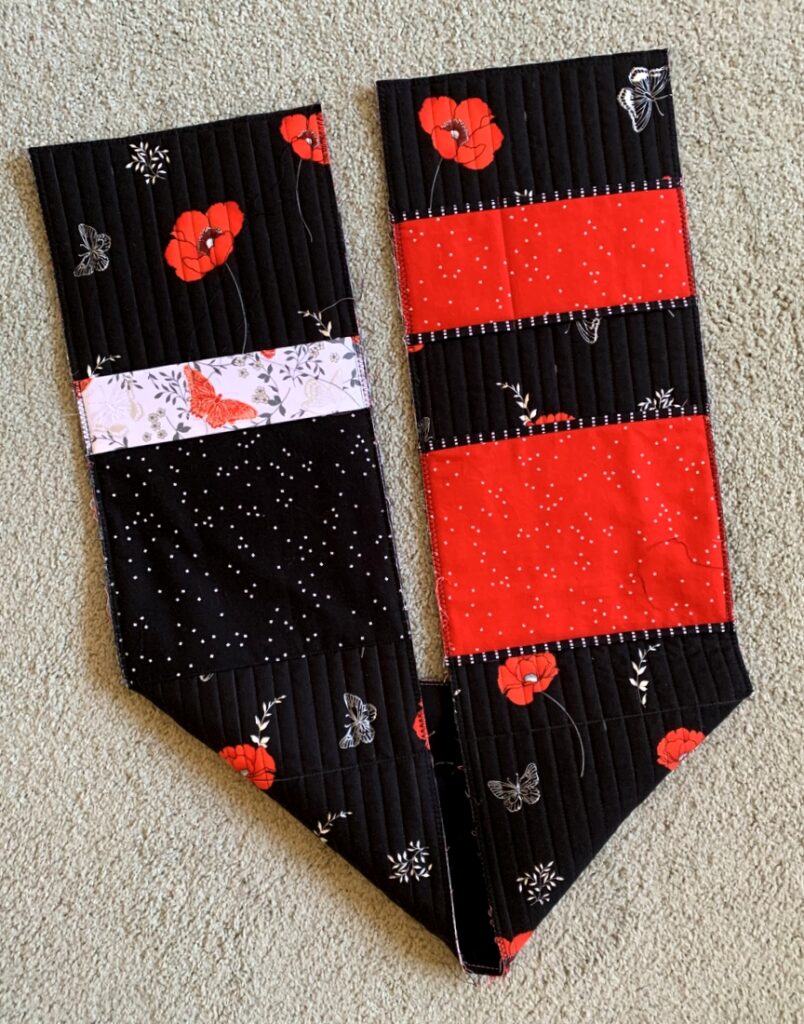
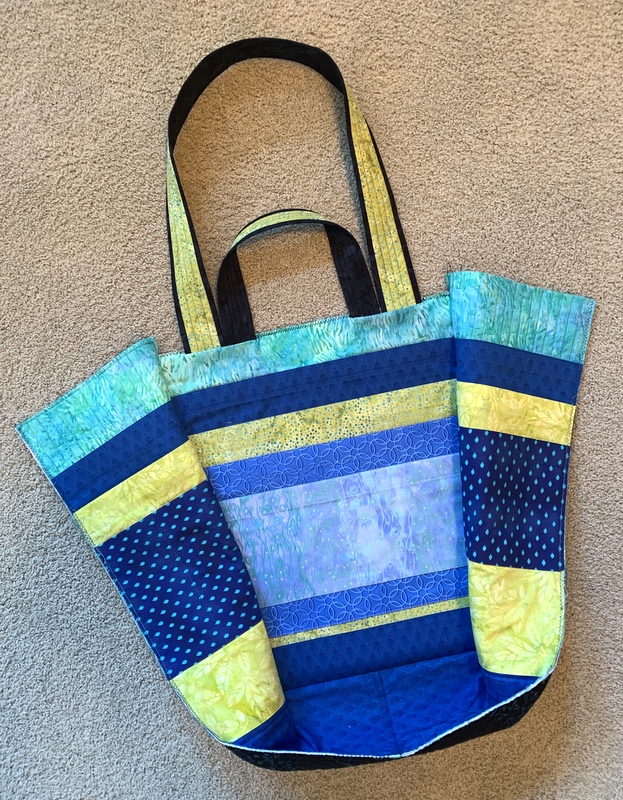
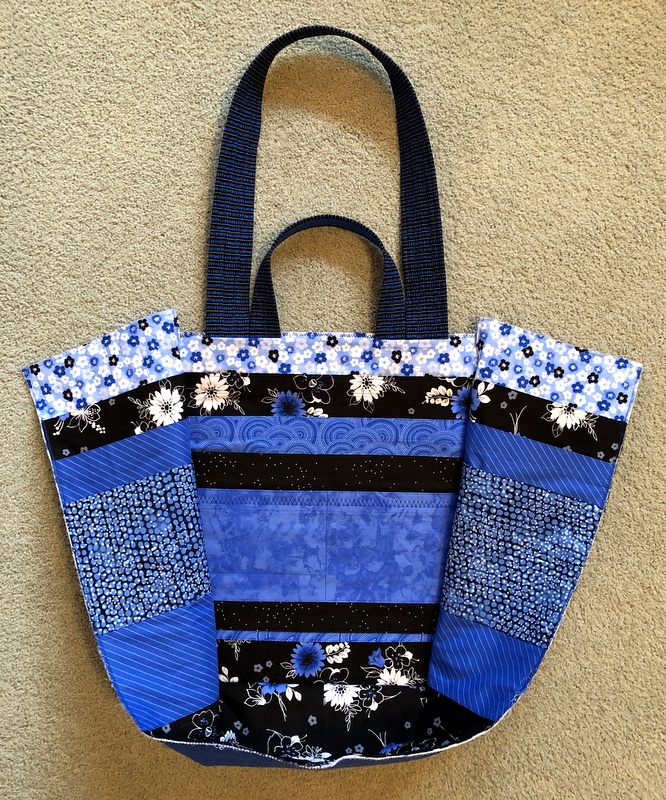
Here’s a look at the side panels/bottom unit on the outside . . .

. . . and on the inside:

I’m absolutely loving the bold poppy prints, all of which have touches of silver. I also used two other silver metallic fabrics in other parts of the bag. I’ve loved every single Junior Billie Bag I’ve made, all of which have been bright and colorful, but this one — #11 — is probably the most elegant.


Posted in Billie Bag, Junior Billie Bag, tote bags, update | 6 Comments

In the Works: Junior Billie Bag #11

Because of the pandemic, it’s been almost three years since I taught a Junior Billie Bag class. That changes tomorrow, when I teach the first of three sessions to a new group of students. I’m pretty pumped!

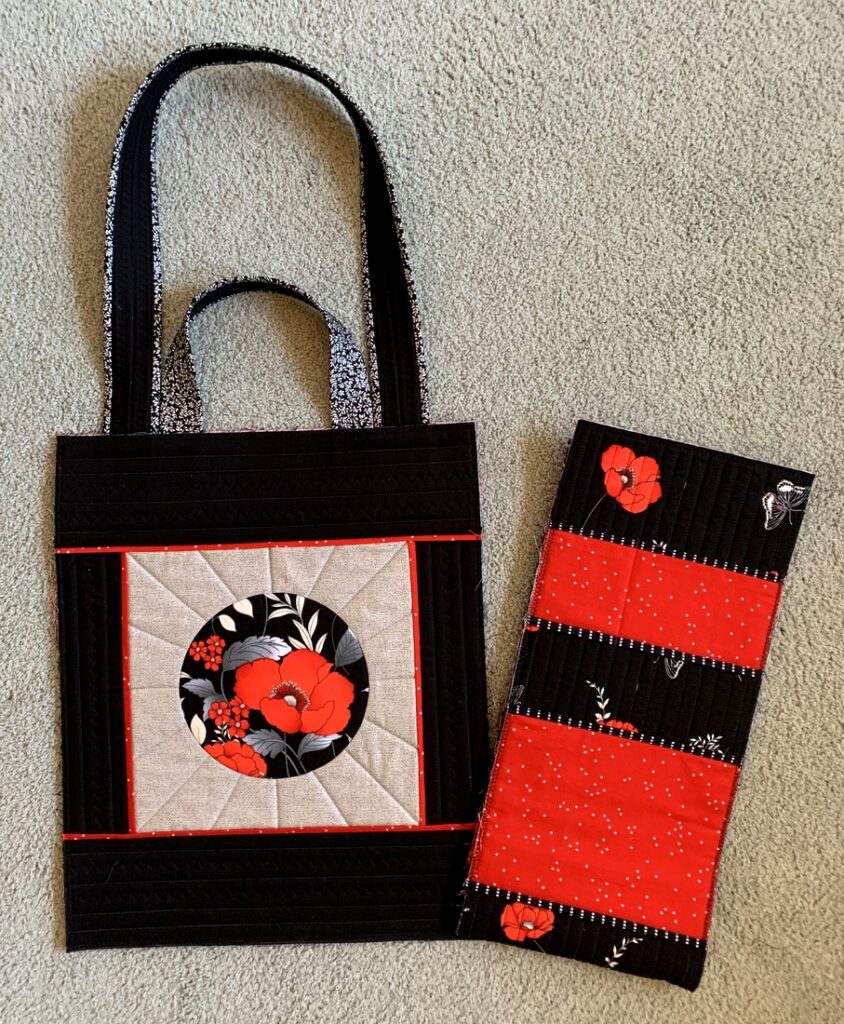
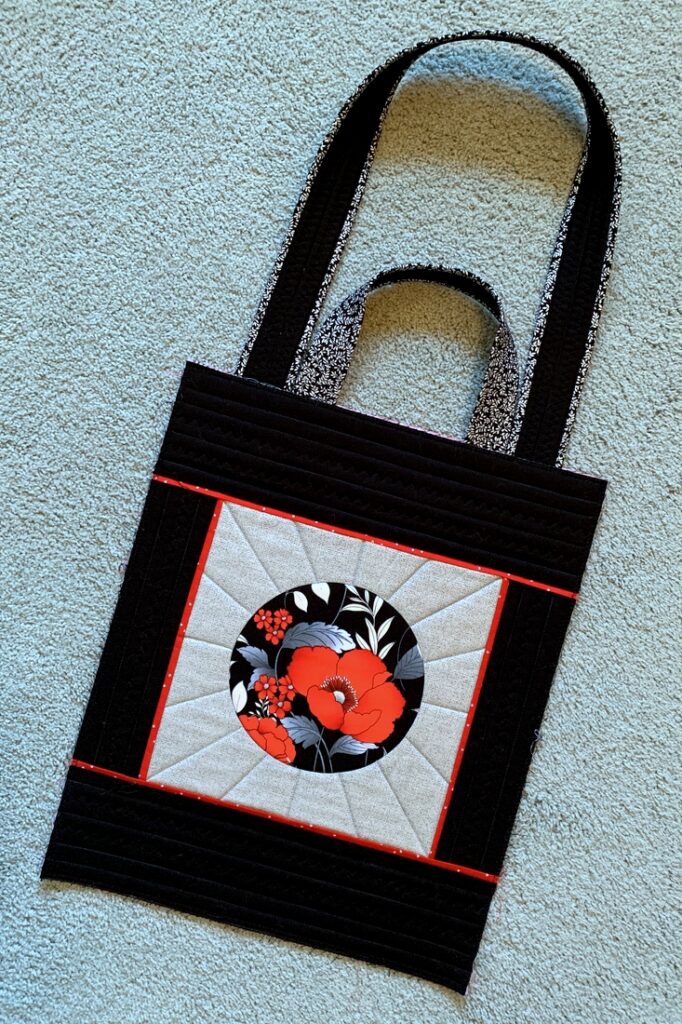
Here’s a look at one of the front/back panels of my current bag:

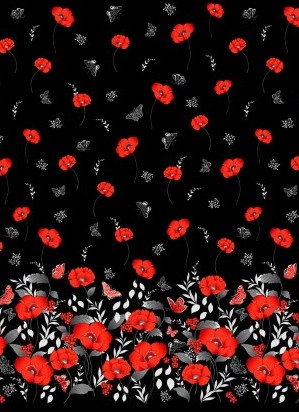
Isn’t that a gorgeous poppy? I’m using several fabrics from the “Poppy Promenade” line designed by Greta Lynn for Kanvas in association with Benartex Fabrics. The line was released a year ago (or was it two?) and I bought a few yards of the main focus fabric, a stunning border print:

My thought was to make myself a sundress (which hasn’t happened yet) but I also purchased a few of the other prints in the line in smaller quantities in case I decided to make a quilt. That hasn’t happened yet, either.

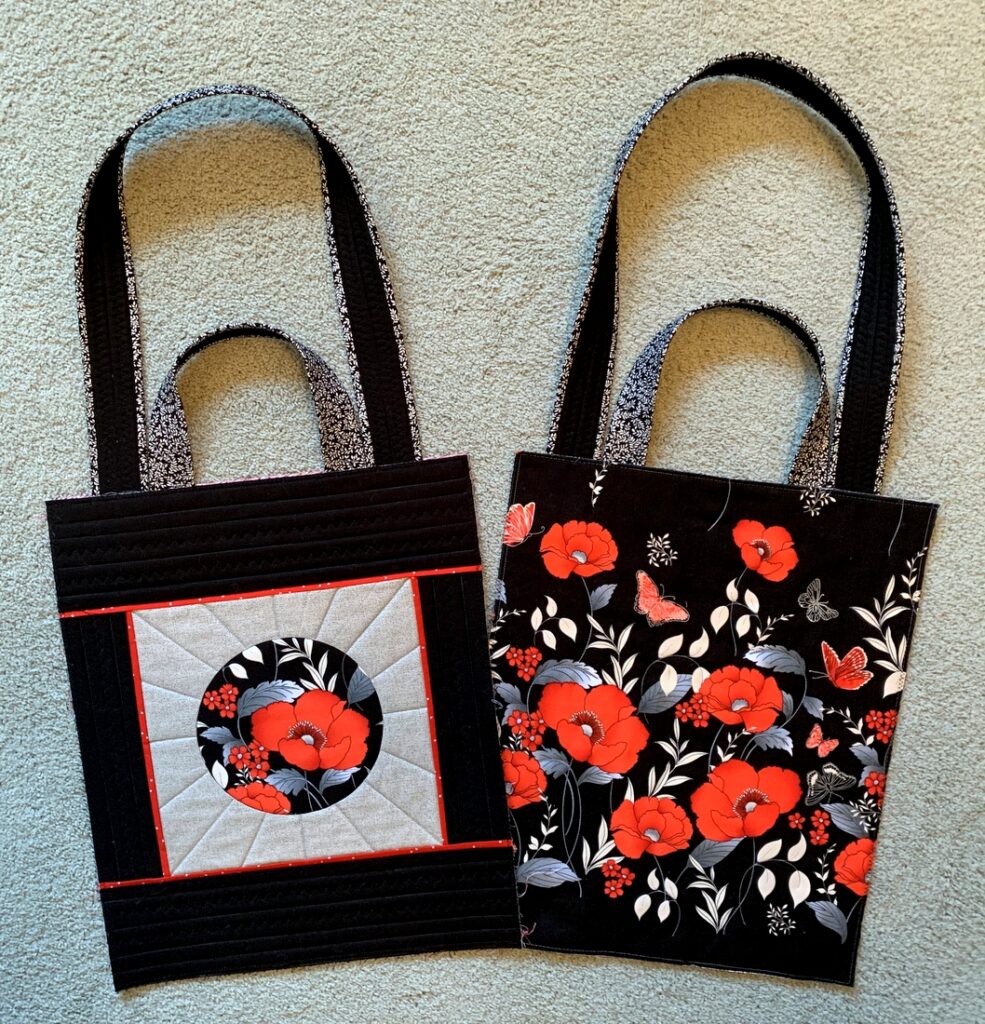
To make the panel you see at the top of the page, I fussycut the border print to isolate a poppy and made an inset circle in the middle of a 10″ block of pearly grey fabric. The block is surrounded by a narrow red print flange, with solid black strips to finish the panel.

Instead of piecing the second front/back panel, I cut one piece of the border print:

I make a new bag with each class so I can show the students the individual components of the JBB and how they go together. Then I assemble the bag right along with the students so that I have a finished product the same time they do. Actually, I’m always a step or two ahead of them!

If you’re new to my blog, this link will explain the history of the Junior Billie Bag and give you a look at the 10 bags I have made over the last 10 years.


Posted in Billie Bag, Junior Billie Bag, update | 7 Comments

JBB Accessories

A year ago at this time I had just finished teaching a class at Montavilla Sewing Center on the one and only Junior Billie Bag, which I like to call “the quintessential quilter’s tote.” I wanted to test my idea for a new Junior Billie Bag Accessories class and had offered my students a bonus class on making four accessories to go along with their newly finished totes.

My idea was to have the students do advance work on all four projects and then finish them up in the space of a four-hour class. Good thing the class was a freebie, as it turned out I had vastly underestimated the time it would take to complete each project. Fortunately, by the time class ended the students were well on their way and would be able to complete their projects at home.

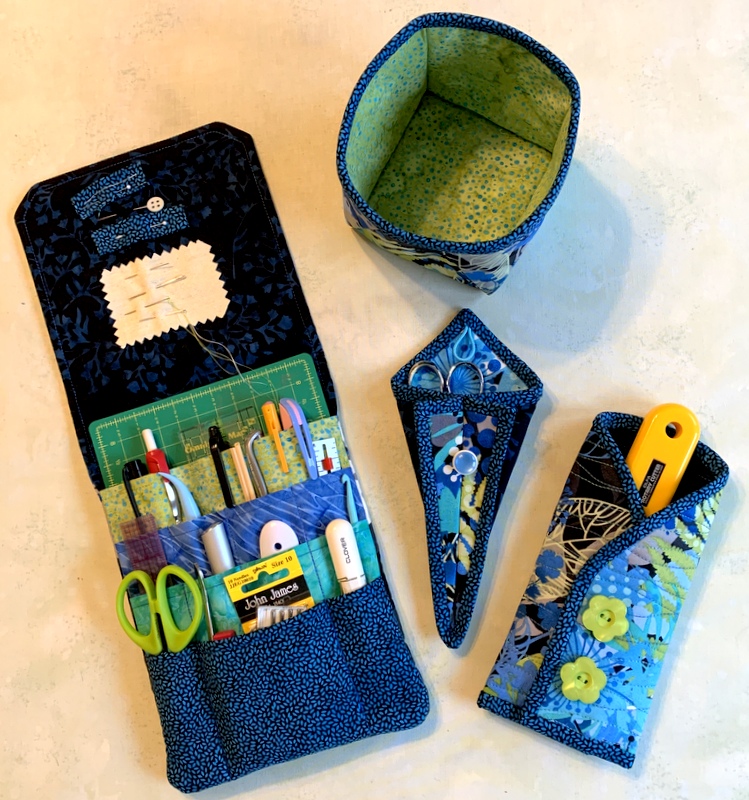
I was making accessories along with my students in order to demonstrate some of my tips and techniques so I too went home with unfinished projects. One year later, my accessories are finally finished:
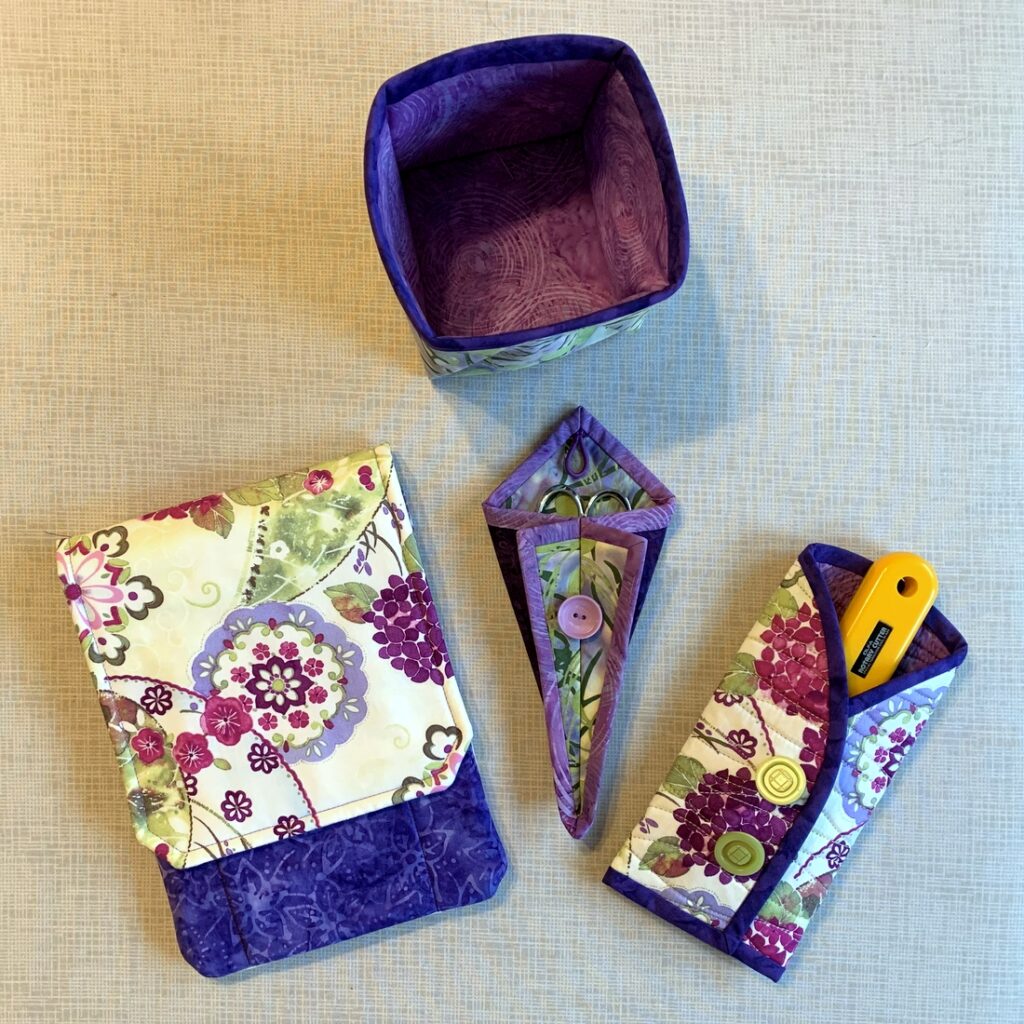
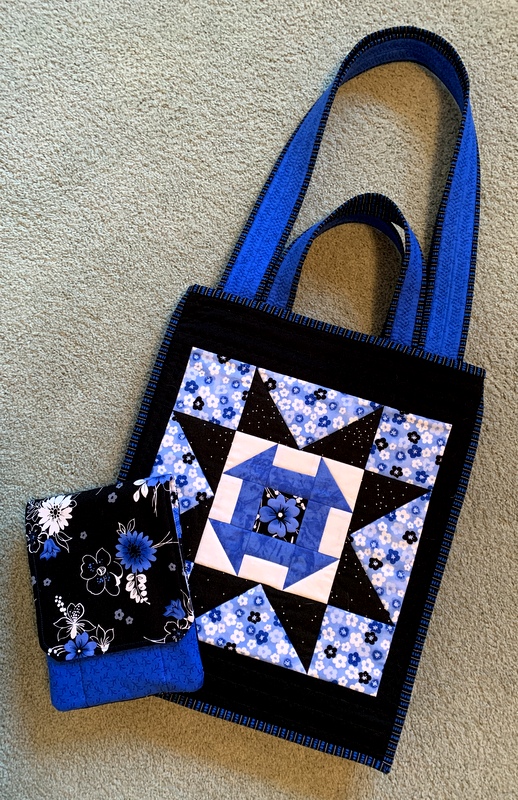
At the top is a 4″ x 4″ x 4″ fabric box, which makes a wonderful threadcatcher. On the bottom left is a tool caddy based on the Travel Case pattern by Pearl Pereira of P3 Designs. In the middle is a little scissors case, and on the right is a rotary cutter coat.

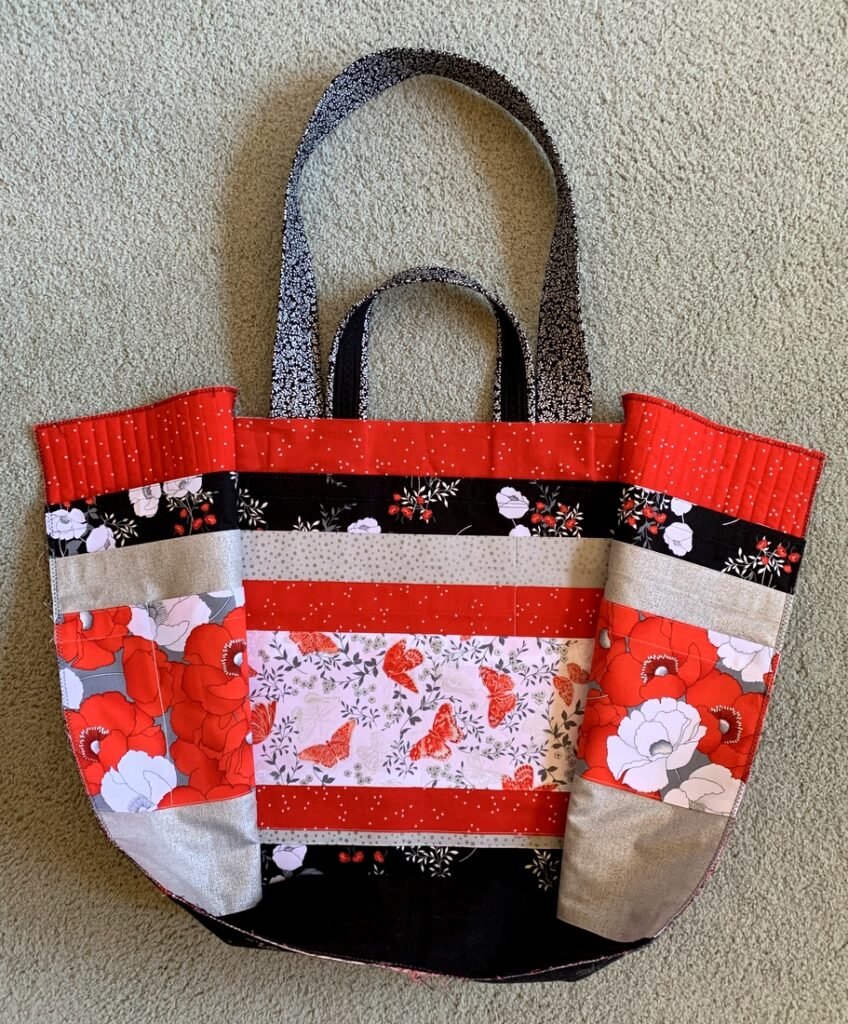
I selected the fabrics you see above because they go so well with a Junior Billie Bag I made a couple of years ago for my dear friend Vickie R.:
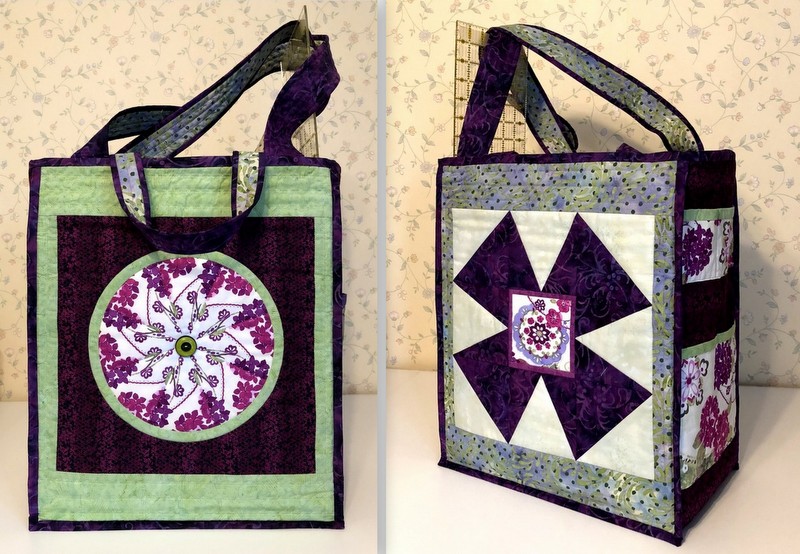

Naturally these latest accessories were made with Vickie in mind, and I am happy to say they are now in her possession.

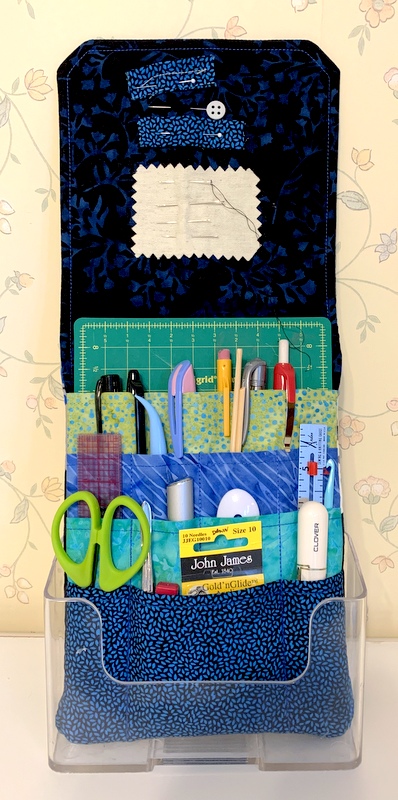
Here’s a look at the inside of Vickie’s tool caddy:
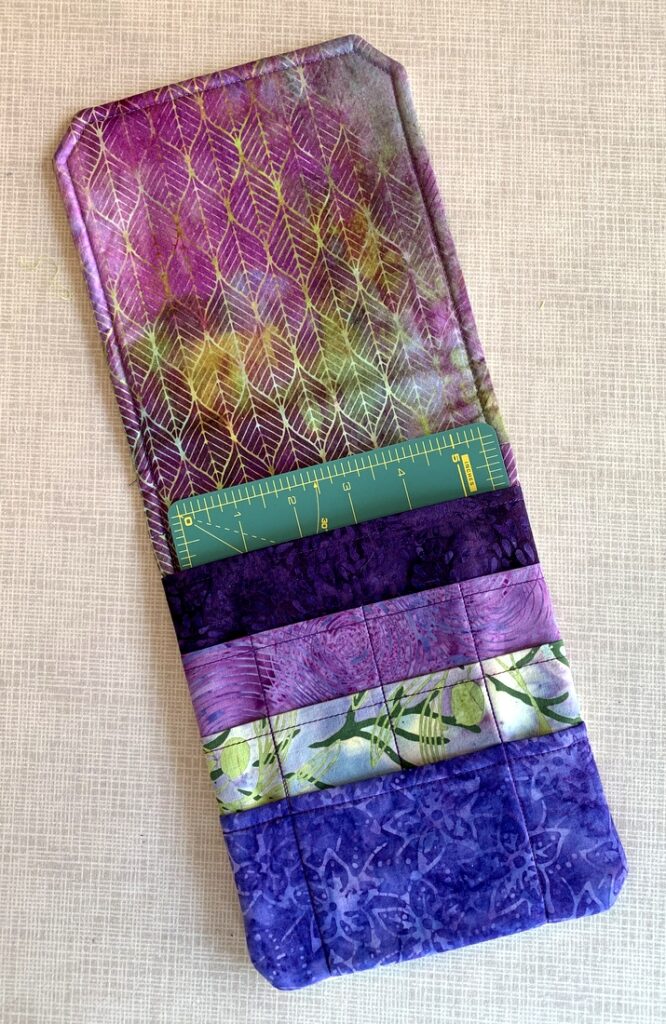

I made some modifications to the original pattern, adding a fourth pocket and making the case a little less wide (I’ll explain why in just a bit). The 6″ x 8″ mini cutting mat made by Olfa fits perfectly inside the case. Vickie will choose which of her tools she wants to put in her case; I put some of my own in just for this photo shoot:
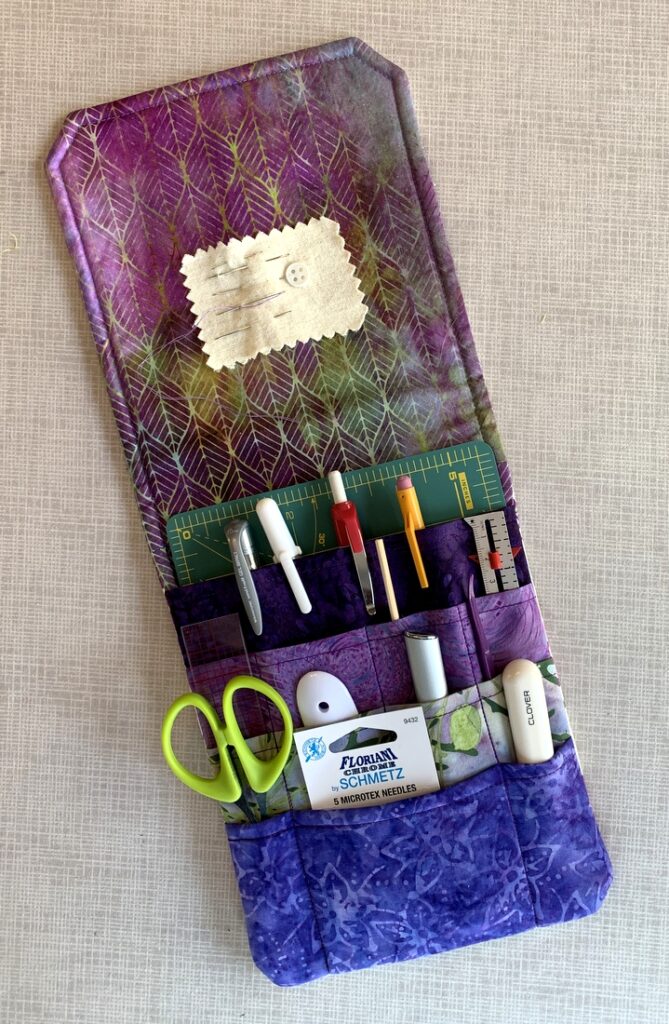
As you can see, it holds a lot! Mine is loaded with even more.

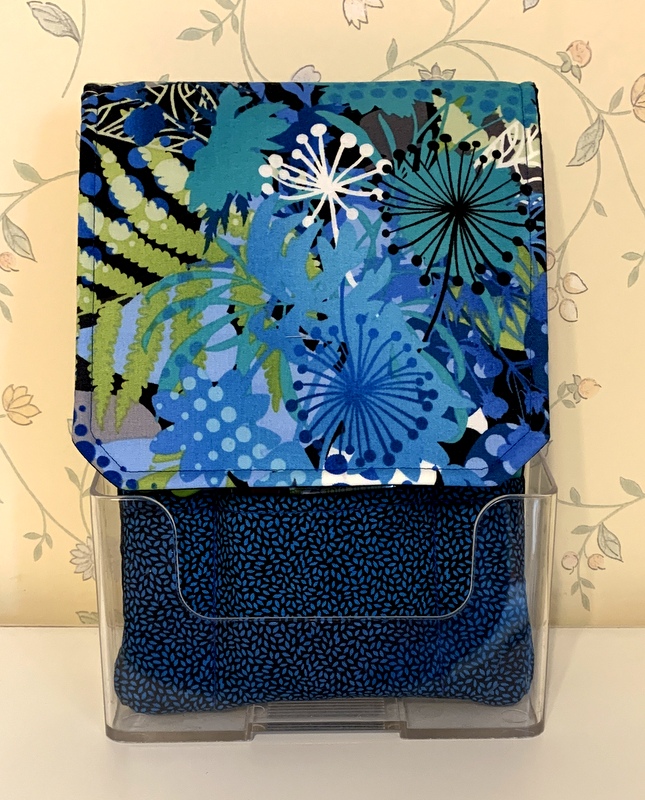
The reason I made the travel caddy a bit narrower than the pattern calls for is to make it fit better in this hard plastic brochure holder:
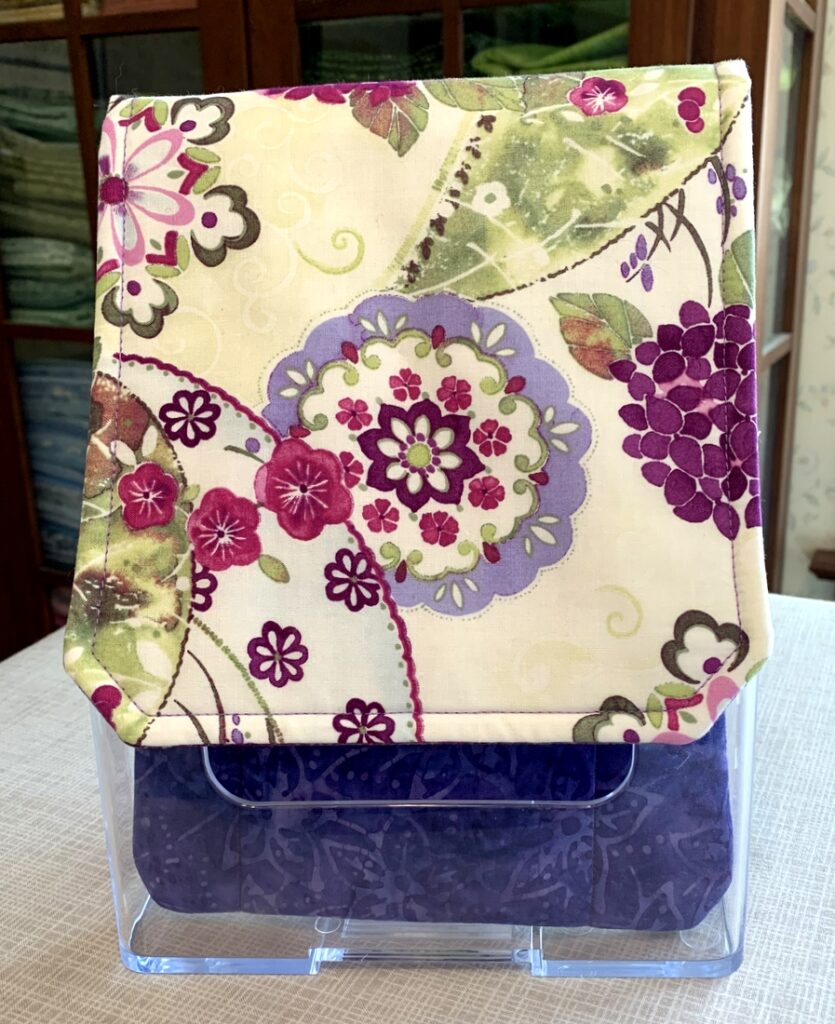
With the flap turned back, all of Vickie’s favorite tools will be right at her fingertips and easy to see. (A huge “thank you” to my guildmate Becky B. for introducing me to the brochure holder.)

That class in February 2020 was one of the last ones I taught before the coronavirus pandemic brought a screeching halt to in-person classes. I miss teaching so much and will savor the day when classes resume. There’s a list of quilters who want to make their own Junior Billie Bag, and I trust some of them will want their own suite of accessories to go with it. If so, I will be ready for them!


Posted in Billie Bag, Junior Billie Bag, rotary cutter case, tote bags, tutorial, update | 8 Comments

Suite Stuff

With a new Junior Billie Bag in my sewing room and a coordinating tool caddy, it was just a matter of time before I gave into the temptation to complete the suite of accessories. Pictured with the tool caddy below are a scissors case, a rotary cutter coat, and a fabric box:


I love these fabrics and colors so much!

You can find picture-heavy tutorials for the scissors case and rotary cutter coat under the Tutorials link at the top of my home page . . . or you can just click on this link.

Speaking of Junior Billie Bag accessories, I forgot to show you the tool caddy I made recently to go with the JBB completed last spring for a class I was teaching:

My friend Cheryl S. was the surprise recipient of this JBB and tool caddy when we were together at Quilt Camp earlier this month.

I’m so ready to shift gears! There’s a new-ish project I’m eager to get back to as soon as I finish up a couple of ongoing projects. And as my twin sister Diane keeps reminding me, the newly remodeled kitchen won’t be complete until I make those valances . . .


Posted in Billie Bag, Churning Stars quilt block, Junior Billie Bag, sewing tool caddy, tote bags, tutorial, update | 3 Comments

Finally a Finish! Here’s Junior Billie Bag #10

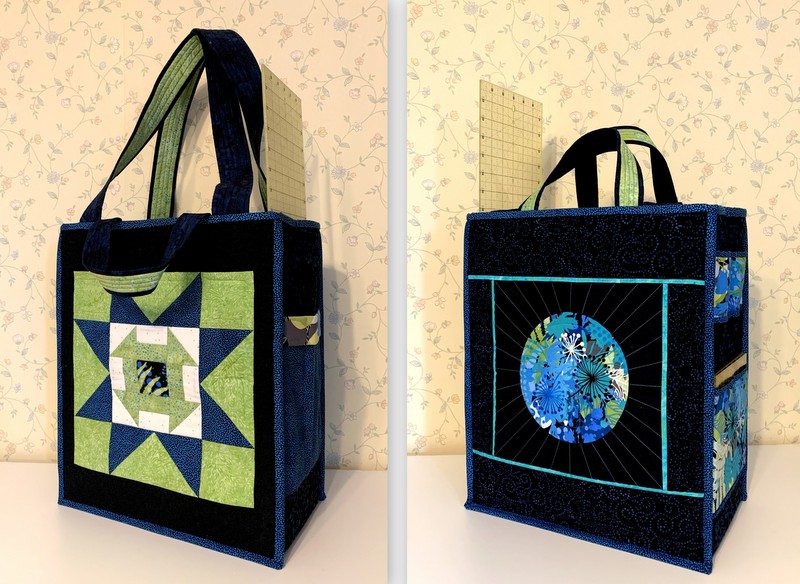
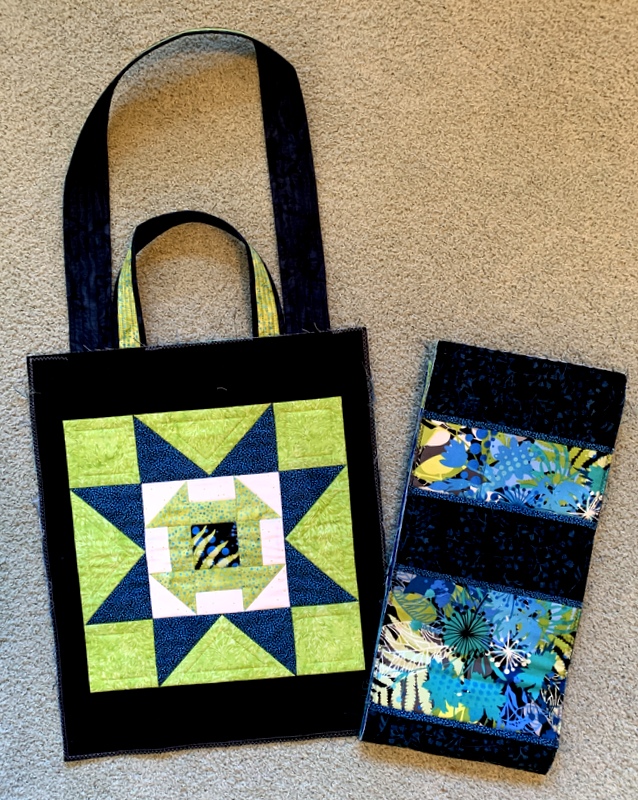
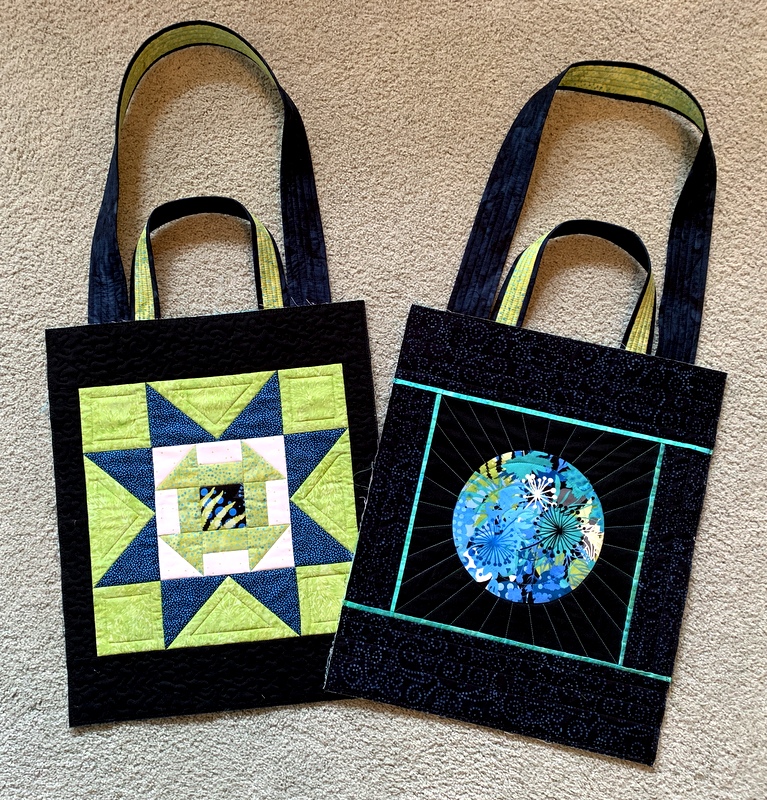
I put the finishing touches on my latest Junior Billie Bag yesterday. Take a look at #10:


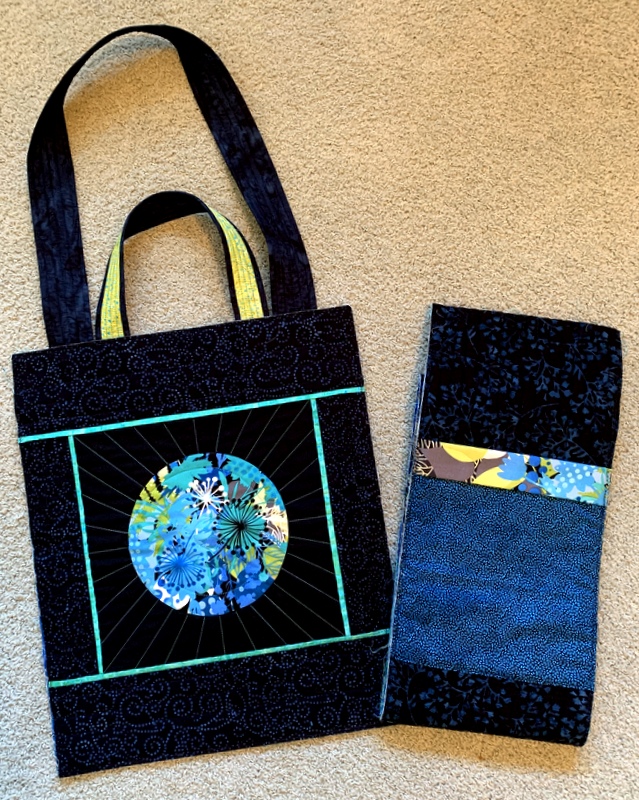
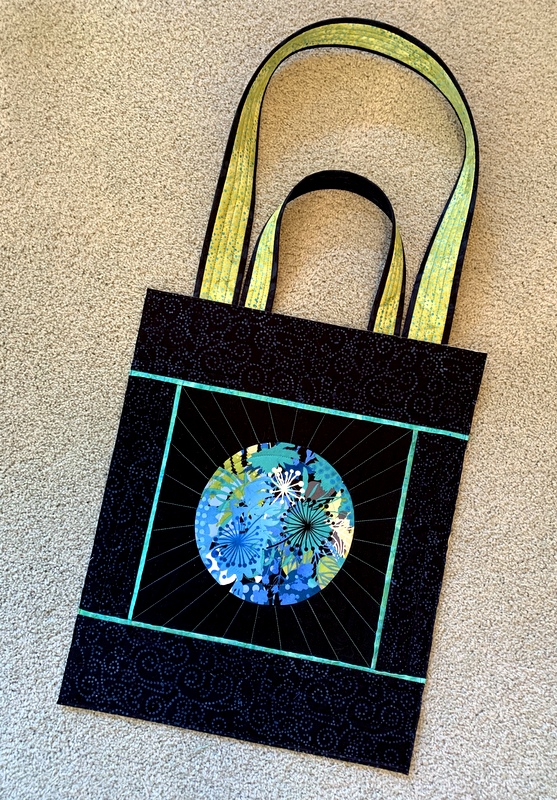
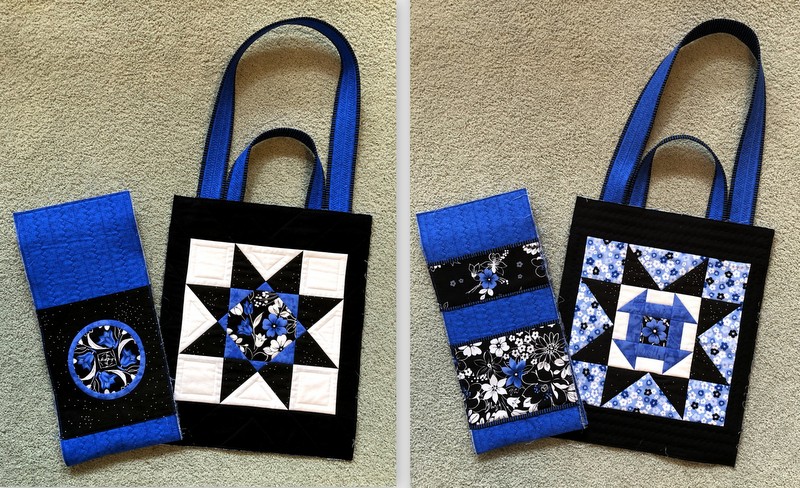
I can’t decide which view I like better! The block on the left is a Sawtooth Star with a Churn Dash in the center. The block on the right features an inset circle set off by a narrow flange. It’s hard to see from the photo that I used a variegated thread of blues and greens to quilt lines radiating from the circle.

I’ve used both block designs before in other projects (including other Junior Billie Bags) because I really like to make them.

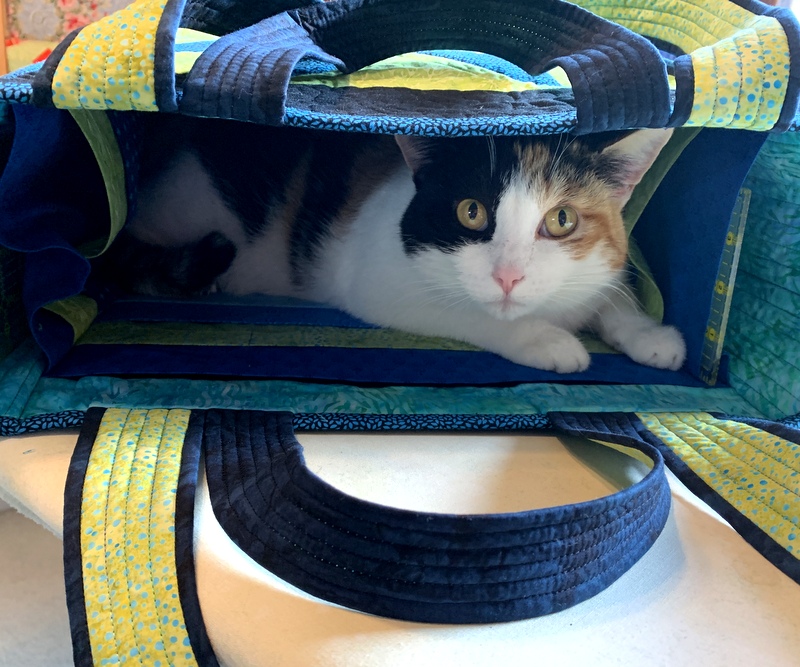
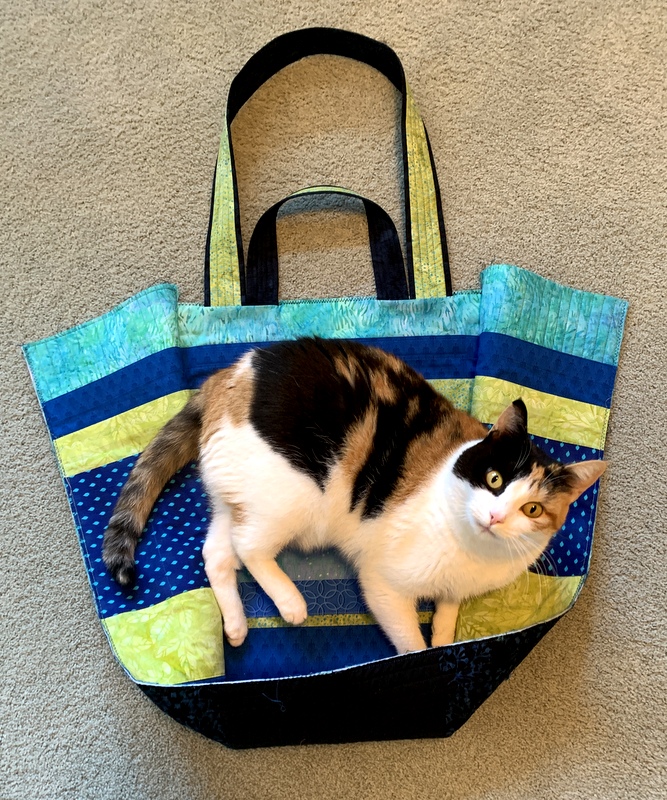
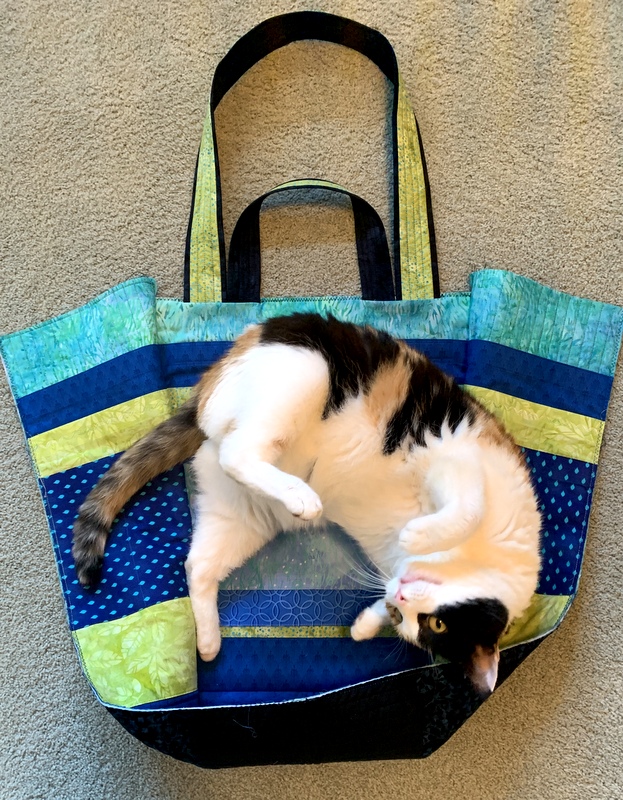
Coco the Cat Inspector approves:

She found it so comfortable that she actually took a little catnap, which is why I don’t have a picture of the inside pockets to show you just now.

This JBB is one that I’m keeping for myself. It’s already loaded with my favorite rulers and other essential tools, as is the coordinating tool caddy I made from the Travel Case pattern from p3designs.com:

I made a few modifications, including the addition of a fourth pocket.

This is what it looks like closed:

I keep it in a plastic brochure rack so that it is always upright, with my smaller tools right at hand.

Still to come: the other accessories I like to make with each Junior Billie Bag, including a rotary cutter coat, a scissors case, and a 4″ square fabric box used as a thread catcher.


Posted in Billie Bag, cats, Churning Stars quilt block, Junior Billie Bag, update | 3 Comments

JBB 3-D

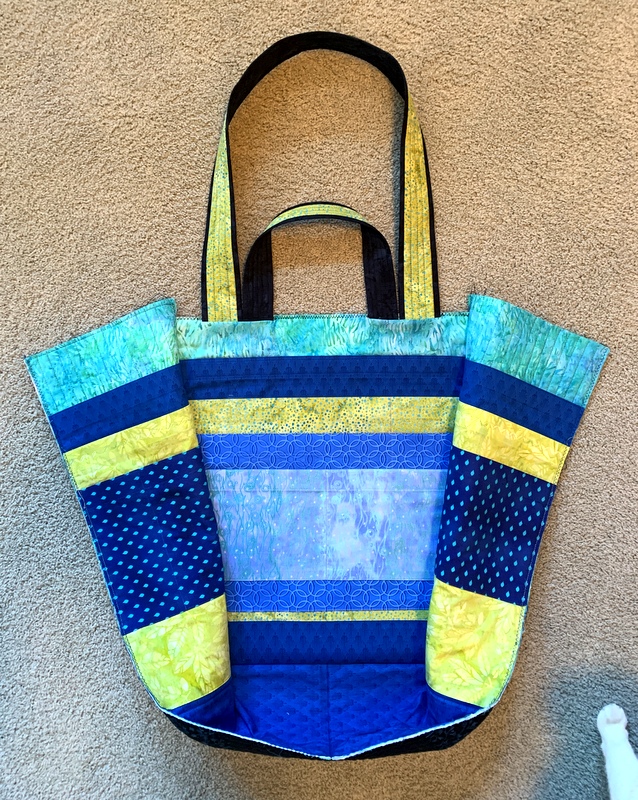
A rather cryptic title for a blog post, I know, but regular readers know what it means. My latest Junior Billie Bag in-the-making has gone three-dimensional:

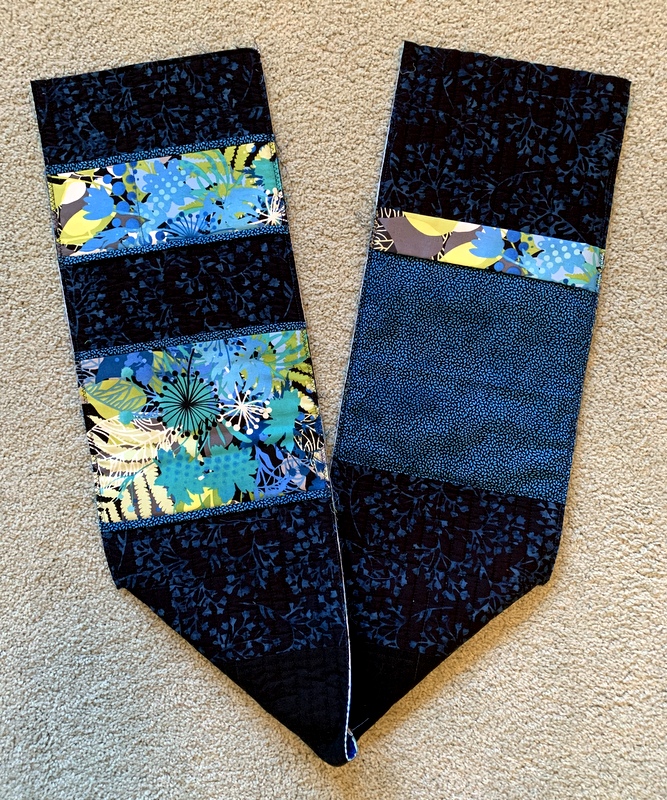
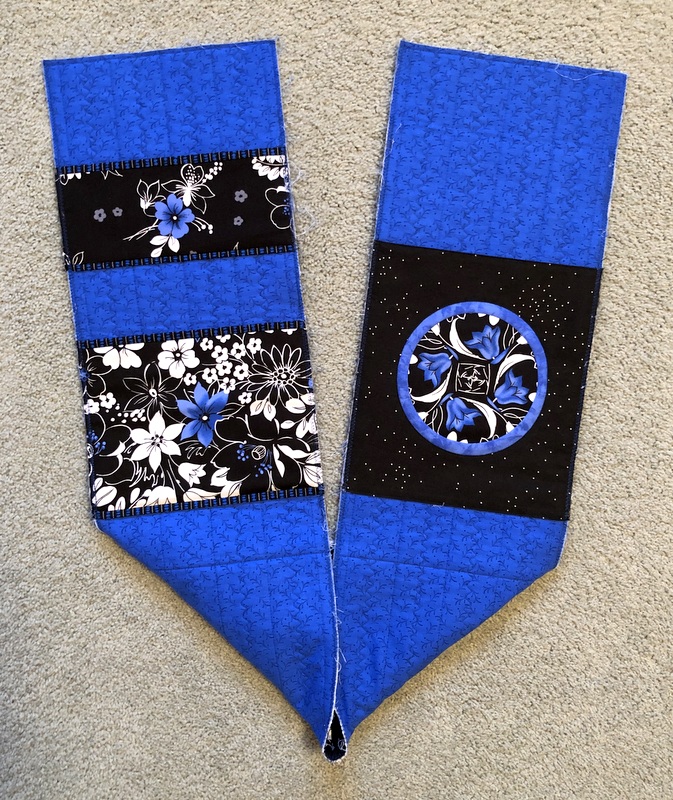
As I’ve mentioned before, this is my favorite part of the process, when a series of flat panels like this . . .

. . . and this . . .

. . . and this . . .

. . . are transformed into the quintessential quilter’s tote known as the Junior Billie Bag.

Junior Billie Bags (JBBs for short) have been a frequent topic on my blog since I started teaching Billie Mahorney’s design three years ago. I have been asked many times about a pattern for this tote but Billie, who owns the copyright on the design, never wanted to create a pattern.

Teaching her design in a hands-on class is by far the best way to go because I can share tips and techniques that have come to me through experience and also troubleshoot problems my students may encounter, just as Billie did when she was teaching. I’m so sorry that quilters across the country and beyond who have seen pictures of various JBBs on my blog don’t have the opportunity to create one of their own.

As I was snapping photos for this post, a little white paw made its way into the frame:


Uh-oh. It can only be Coco the Photobomb!


Posted in Billie Bag, cats, Churning Stars quilt block, free motion quilting, Junior Billie Bag, tote bags, update | 5 Comments

Junior Billie Bag #10: Panels and Pockets

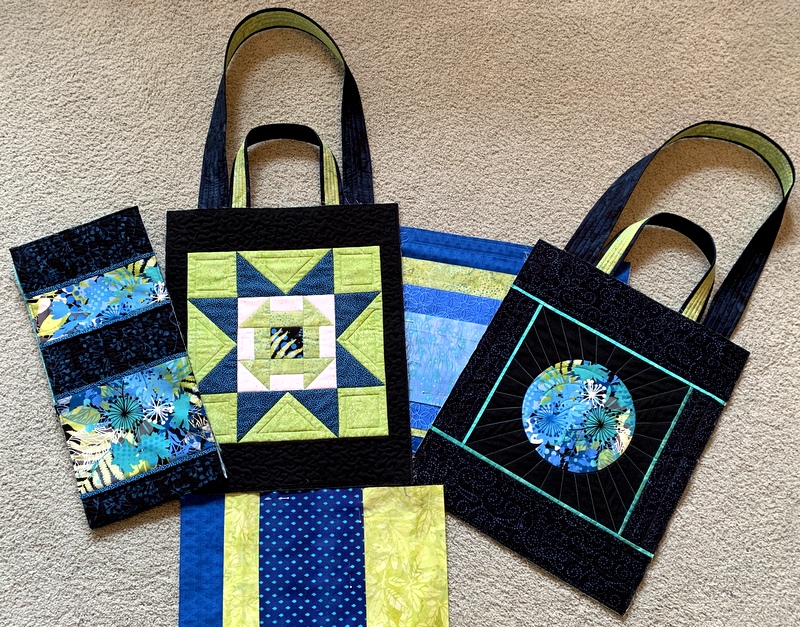
In my last post you saw one of the front/back panels of my current Junior Billie Bag under construction. The second panel is now done. It’s the one on the left in this photo:


I love the look of the small Churn Dash block inside the Sawtooth Star block. I first saw this combination in a quilt by Jenifer Gaston called Churning Stars and liked it so well I used it on my most recent Junior Billie Bag. (Someday I’ll make an entire quilt from this block design but that’s on the back burner for now.)

In the center of the Churn Dash in the photo above is a fussycut square from my focus fabric, a vibrant floral print from In the Beginning Fabrics. You see much more of the floral design in the first panel, which features an inset circle framed by turquoise flanges.

I used the same floral fabric to make two small pockets that go on the outside of the bag on one of the side panels. Those are on the left in this photo:

The other glimpses of fabric are some of the interior pockets. This bag has lots and lots of pockets! It’s been fun diving into my stash to audition these fabric combinations. The most difficult thing is making decisions about which fabrics to use. You may have noticed I like to combine batiks with woven cottons.

The next time you see Junior Billie Bag #10, it will be three-dimensional. I hope you’ll check back soon to see the transformation.


Posted in Billie Bag, Churning Stars quilt block, Junior Billie Bag, tote bags, update | 4 Comments

In the Works: Junior Billie Bag #10

Can you believe I’m up to #10 already? I had already made two Junior Billie Bags when I started teaching the class in 2016. Seven classes, seven more bags. (You can see them all here.)

I make a new bag with each class so I can show the students the individual components of the JBB and how they go together. Then I assemble the bag right along with the students so that I have a finished product the same time they do.

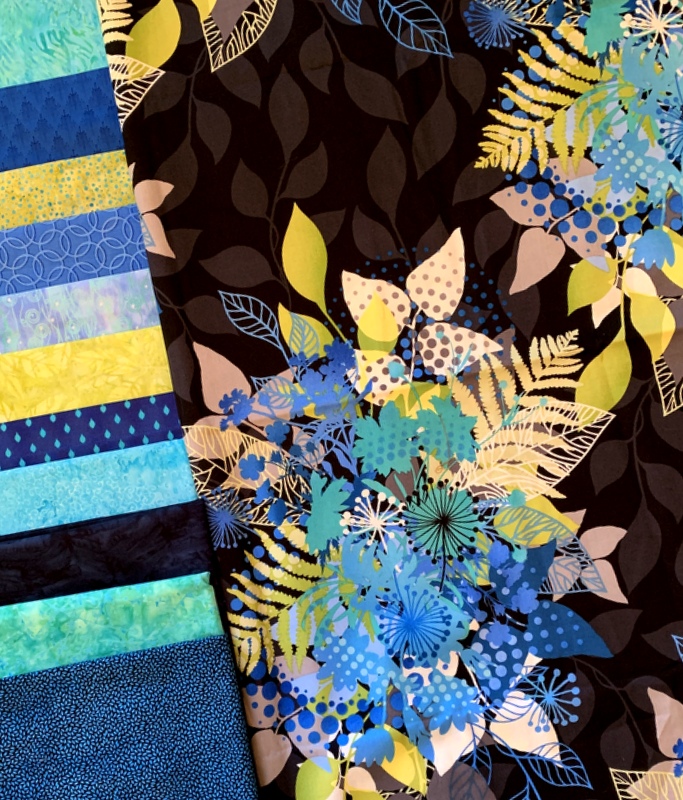
I’m doing the prep work for my eighth class, coming up next week. I have only one of the two front/back panels done so far because I haven’t yet decided what I want to do for the other panel. My focus fabric is a gorgeous floral from the “Unusual Garden” line by Jason Yenter of In the Beginning Fabrics. Here’s a better look at it, along with the fabrics I pulled from my stash for straps and pockets:

My plan this time is to leave the bag unassembled so that I can use it in future classes. My worry is that I’m going to love the components so much I won’t be able to resist sewing it together!


Posted in Billie Bag, Junior Billie Bag, tote bags, update | 7 Comments

Friday Finish: Junior Billie Bag #9

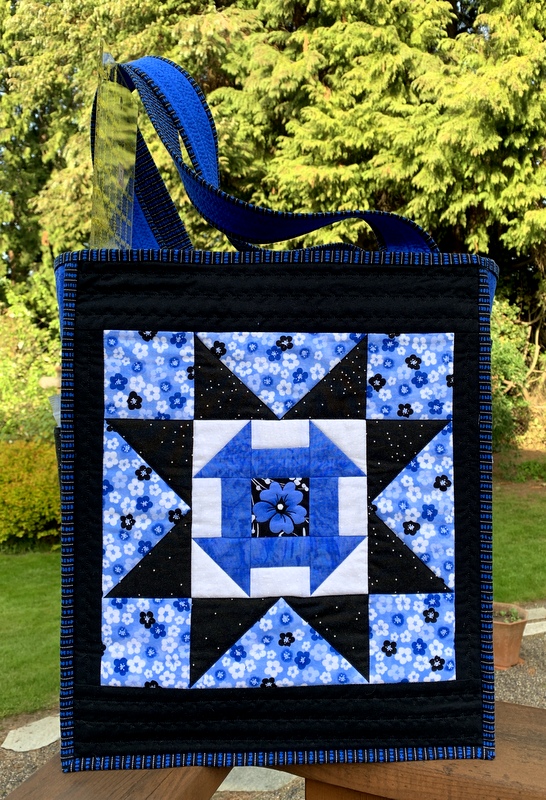
Well, friends, many a Friday has come and gone since my last Friday Finish so I am extra happy to show off my latest Junior Billie Bag. First one side . . .

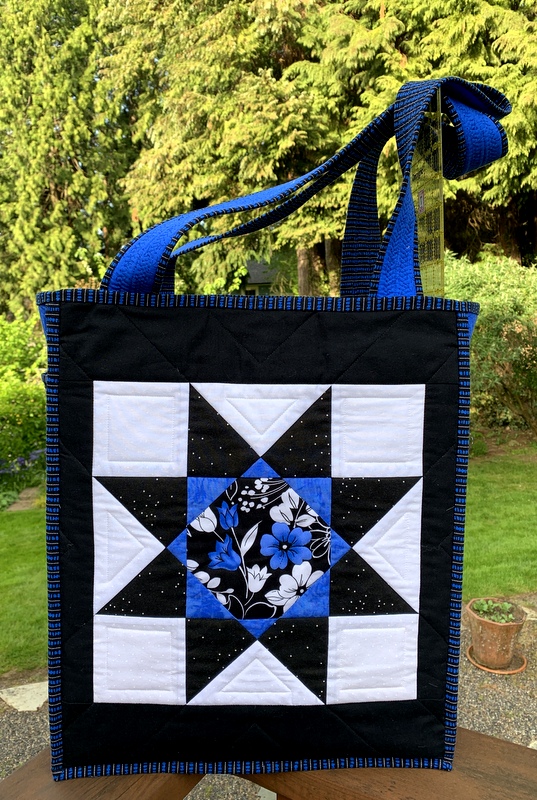
. . . and then the other:

I’m not sure which one I like better! How about you?

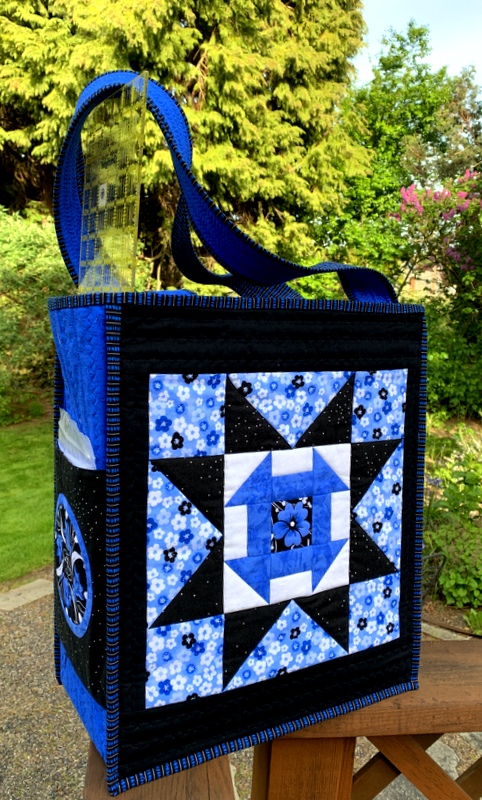
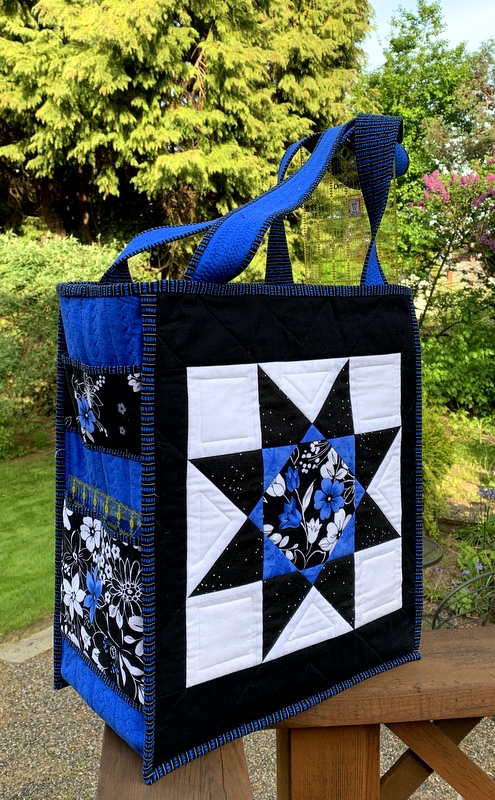
In the next two photos you can see (sort of) the exterior pockets on each side:

I sure do like how the striped binding frames the front and back panels. You can see that I used it on the straps and exterior pockets on one side, too.

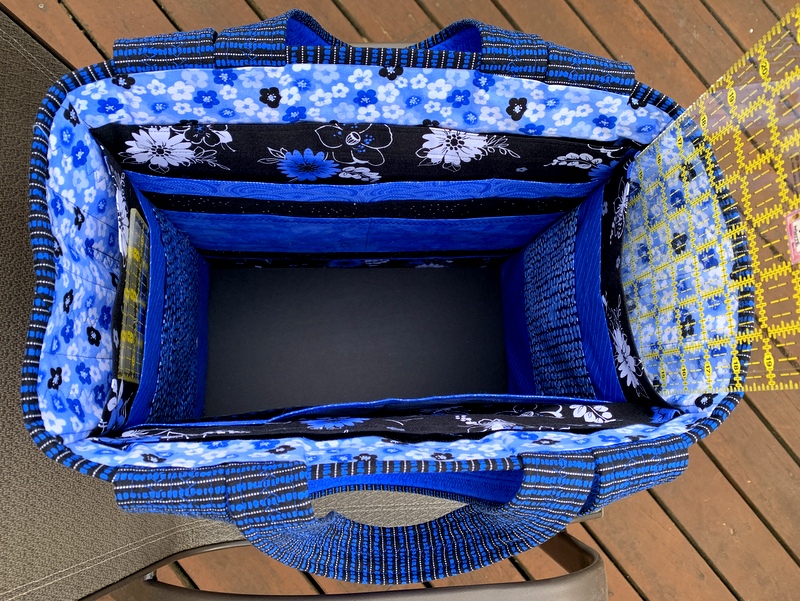
It’s so much fun to customize these quilter’s totes. I’ve used a variety of 12″ blocks in the nine Junior Billie Bags I’ve made and I’ve also played around with the size and number of exterior pockets. Speaking of pockets, here’s a shot from the top down that shows the interior pockets as well as the second set of handles, the smaller ones that allow you to carry the JBB like a satchel:

Here’s a shout out to Billie Mahorney, the designer of the Junior Billie Bag and my mentor. It’s easy to see why I often refer to the JBB as “the quintessential quilter’s tote.”

If you’d like to see the other ones I’ve made, clicking here will take you to the Junior Billie Bag page in my Gallery.

Happy Friday!


Posted in 4-Patch Wonder, Billie Bag, Junior Billie Bag, tote bags, update | 6 Comments

My Favorite Part . . .

. . . of making a Junior Billie Bag is that moment when the bag, until now a series of flat panels . . .

. . . becomes three-dimensional:

You are looking at the inside of my Junior Billie Bag, with the side panels/bottom unit pinned to one of the front/back panels. You may not be able to tell from the photo that there are 14 pockets showing. The other front/back panel (not shown) has five pockets.

Combined with the pockets on the outside of the bag . . .

. . . this JBB has 23 pockets. Now you know why I call it the “quintessential quilter’s tote!”

It’s a lot of fun playing with pocket design for the outside of the bag. For the pockets on the left side above, I trimmed them in the same striped fabric I’m going to use for the binding. (While I love the look of striped binding cut on the diagonal, I opted to cut my strips on the straight of grain for this one.)

For the pocket on the right side, I started with a four-patch kaleidoscope (what I call a Four-Patch Wonder block) and made a double inset circle.

I sure do like that vivid blue against black and white!


Posted in 4-Patch Wonder, Billie Bag, faux-kaleido quilts, Junior Billie Bag, tote bags, update | 3 Comments