
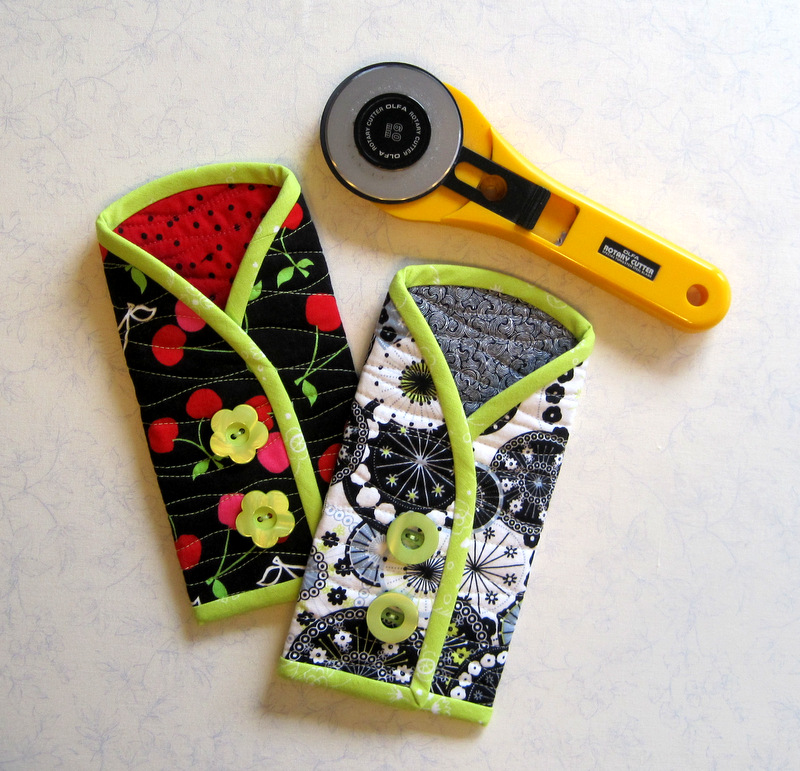
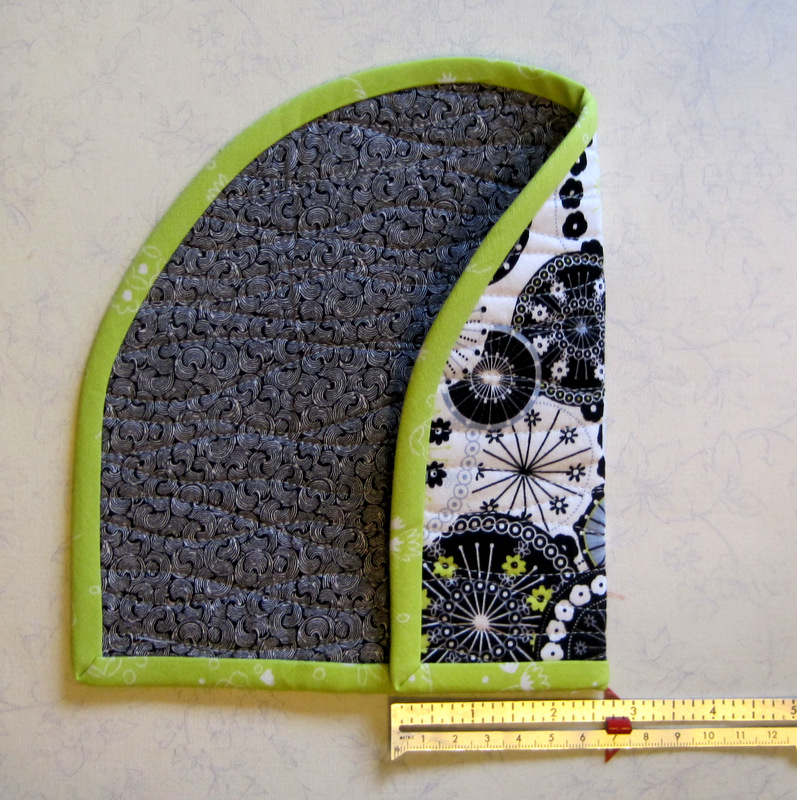
What quilter wouldn’t love one of these quilted cases to hold her rotary cutter? The buttons and contrast trim make the cases look like little coats — so that is what I am calling them. A finished coat measures about 3¾” x 8″.
This tutorial guides you step by step. You can also download a one-page handout.
Fabric and notions
One piece of fabric 9″ x 10½” for outside of coat
One piece of fabric 9″ x 10½” for inside (lining)
One piece of fabric 18″ square for bias binding
One piece of lightweight batting trimmed to 9″ x 10½”
One piece of freezer paper about 10″ x 11″
¼”-wide Steam-a-Seam 2 (double stick fusible web)
Two buttons 7/8″ – 1¼” in diameter
Supplies
Sewing machine with walking foot
Standard sewing supplies (scissors, pins, measuring tape, seam ripper, etc.)
Rotary cutting equipment (mat, rotary cutter, rulers)
The free pattern is available here as a pdf file: Dawn’s rotary cutter case pattern.
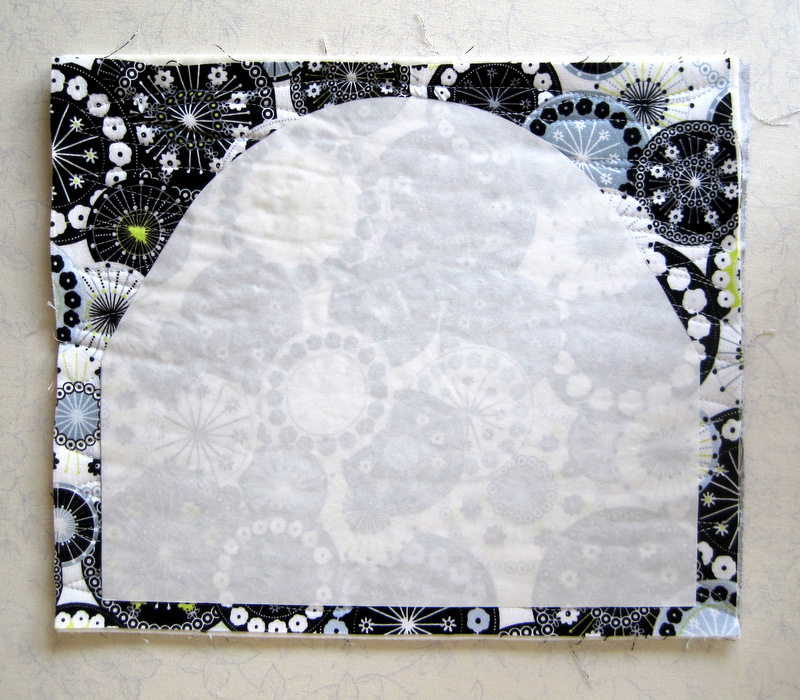
1. Download and print the pattern. The bottom edge of the pattern should measure 9½”. If the measurement is less than that, enlarge the pattern slightly. (If the bottom edge measures 9¼”, the pattern will still work just fine. All you need to do is alter the flap measurement in Step 10 to 2-5/8″.)
2. Trace the pattern onto the flat (not shiny) side of the freezer paper. Cut around the outside edges of the pattern. Set pattern aside.
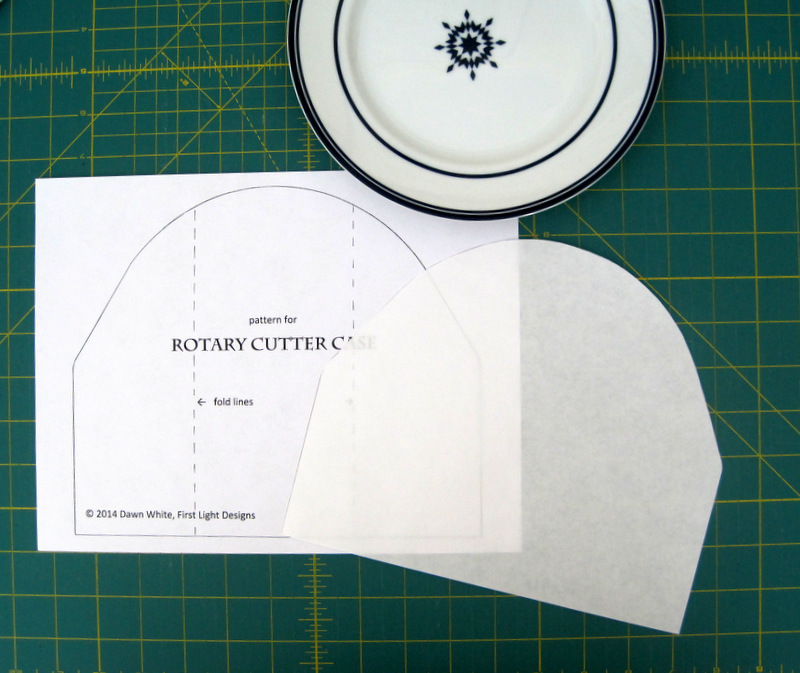
Are you wondering what that blue and white plate is doing in the picture above? I thought it would amuse you to know that’s what gave me the shape for the rounded part of the pattern.
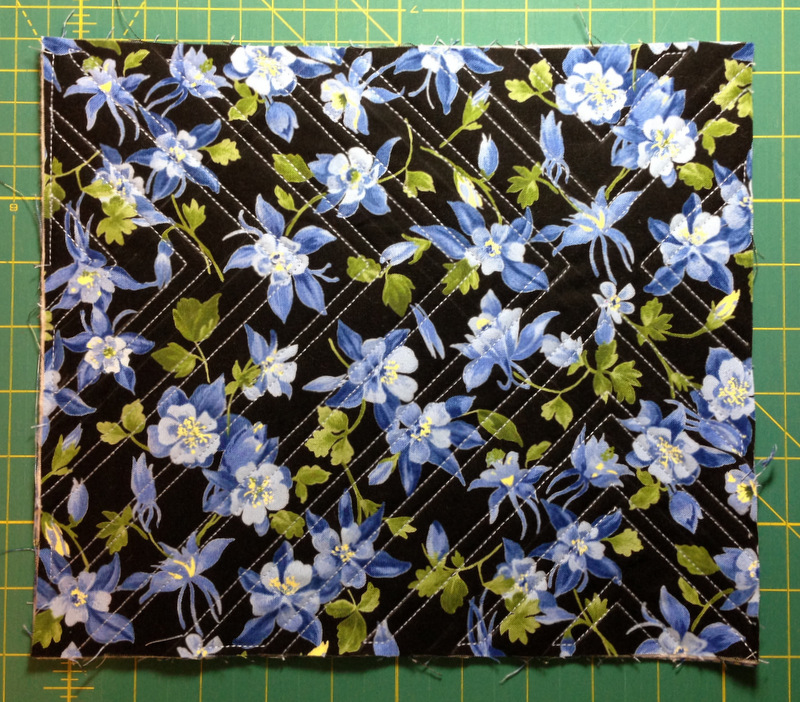
3. Lay the lining fabric wrong side up on a flat surface. Lay the batting fabric on top. Lay the outside fabric right side up on top of the batting. You now have a quilt sandwich. Baste and quilt as desired.
You can quilt any motif you desire. Free-motion quilting is an option but I usually take the easy route and quilt straight lines or random curved lines using my walking foot. With straight lines I often stitch on the diagonal about 1″ apart. In the example below I used straight lines at right angles to form a chevron design:
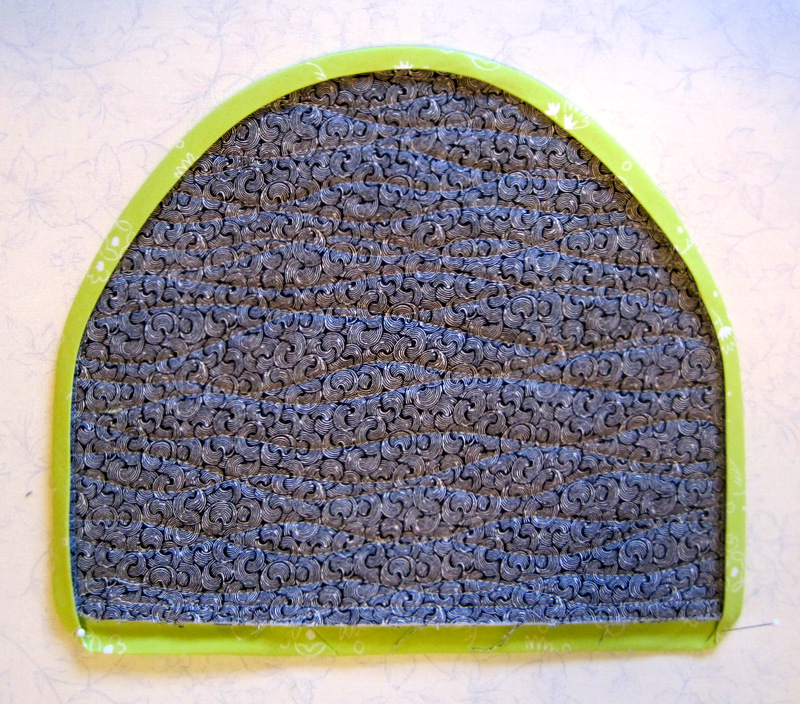
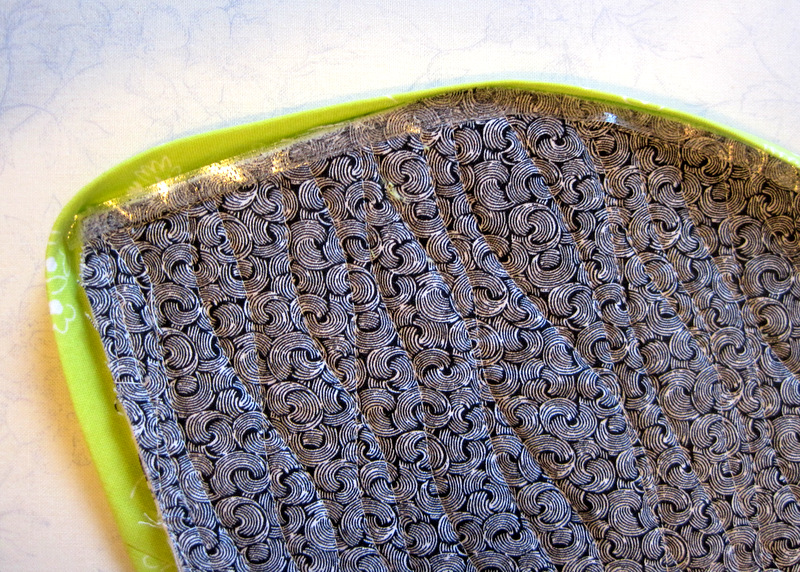
In the two rotary cutter coats pictured at the top of my post, I quilted random wavy lines horizontally in both, although vertical lines would look good too. In the one with the black background I used a 40-wt thread in a contrasting color. Here’s a close-up of that one (after I had cut the pattern out):
In the other one (pictured in the rest of this post), I wanted the thread to blend so I used a 50-wt thread in pale grey.
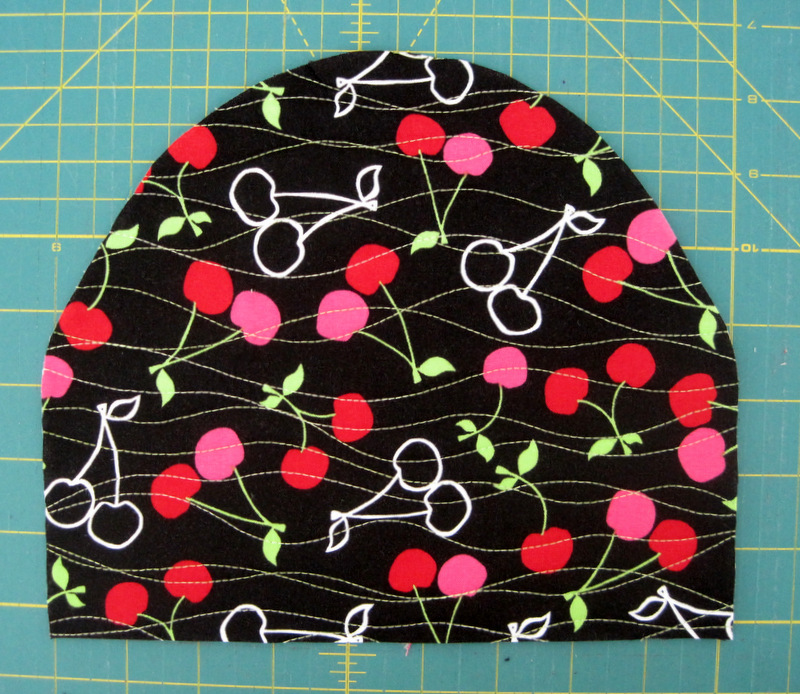
4. Center the freezer paper pattern (shiny side down) on the right side of the quilt sandwich and press with a dry iron:
5. You could cut the pattern out with scissors but using your rotary cutter is faster and more accurate. Align the rotary cutter and ruler along the bottom and sides of the pattern and cut. Use the rotary cutter and ruler to cut the beginning of the curves as shown below:
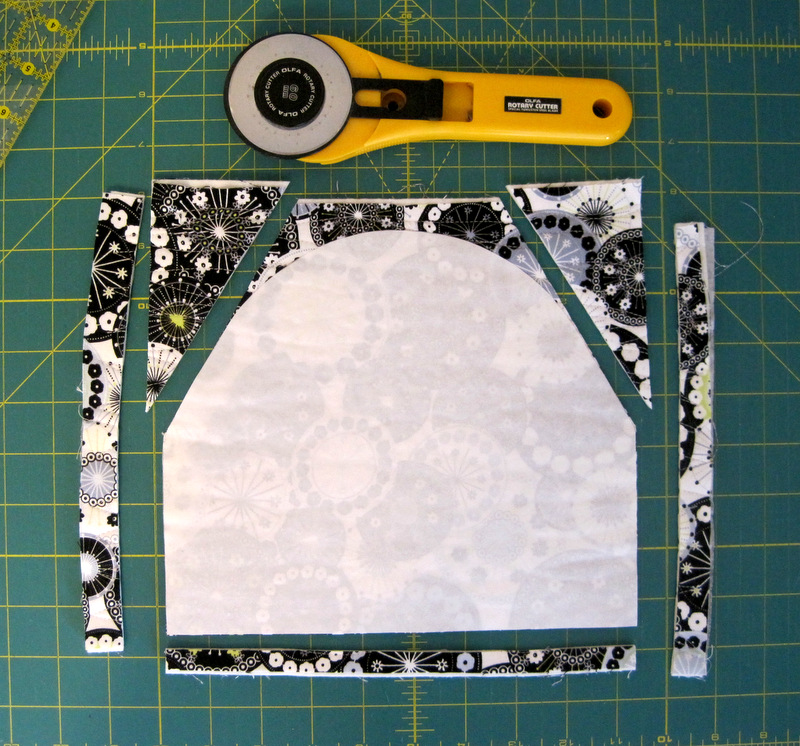
Use scissors to cut the rest of the curve:
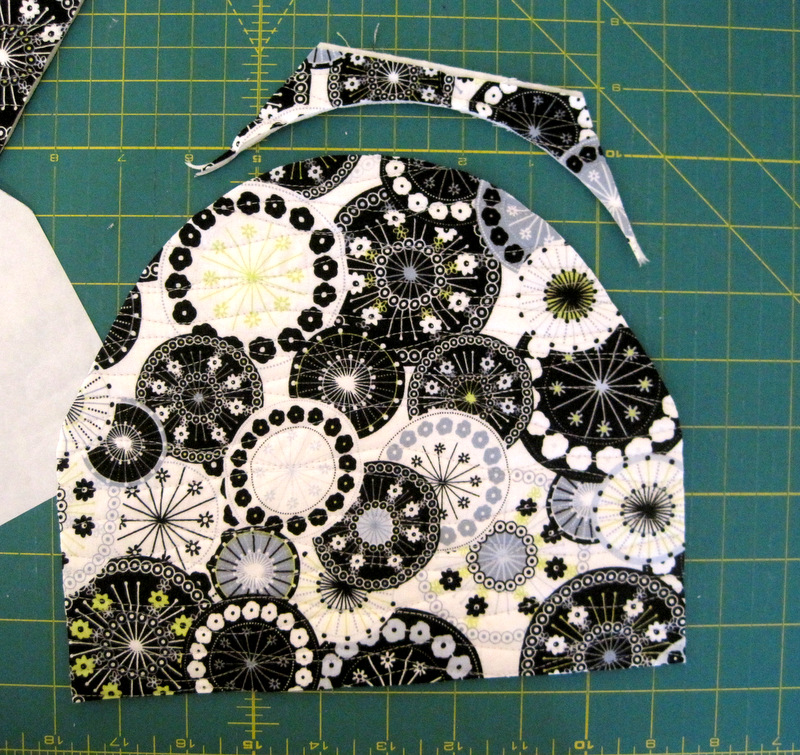
Peel off freezer paper pattern for repeated use. Use scissors to round off the side edges on the quilt sandwich.
6. Cut 18″ square of binding fabric corner to corner on the diagonal. From each piece cut a strip 2-1/8″ wide along the bias edge. Sew strips together using an angled seam. You need a length about 34″ long. Fold strip in half lengthwise and press.
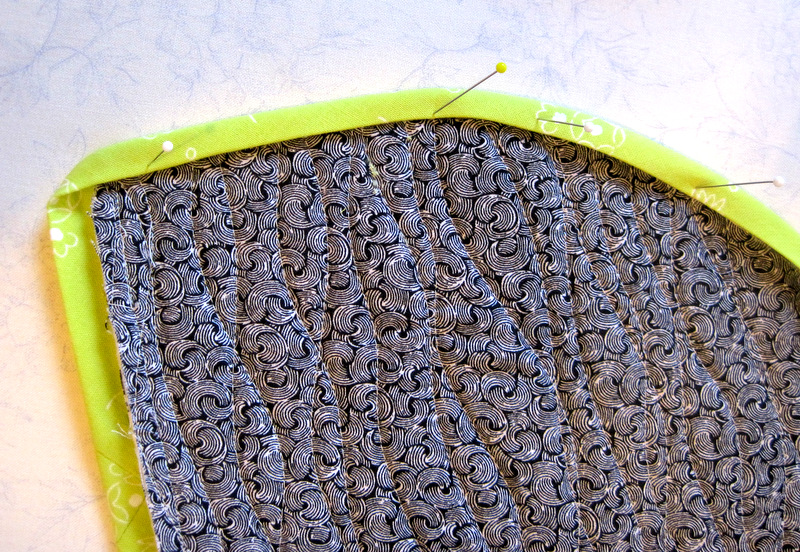
7. With the walking foot still on your machine, attach binding to the right side of the case as you would for a quilt, starting and ending along the bottom edge. Leave a tail 5-6″ long and begin stitching 1-1/4″ away from the first corner:
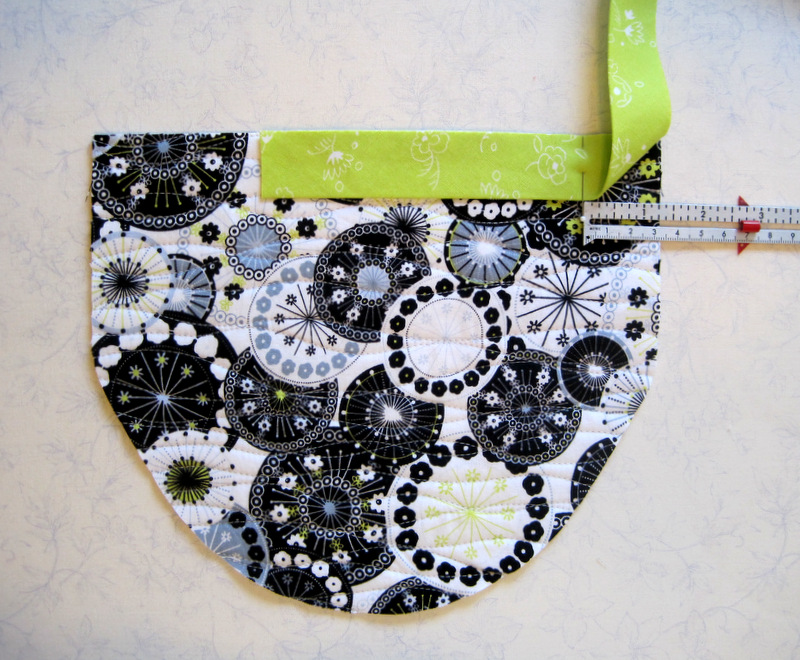
Gently guide the bias binding around the curve of the quilt sandwich, stitching a scant 1/4″ seam. When you get to the other side of the bottom, end your stitching 1″ in from the edge.
8. Use your favorite method of joining the ends of the binding. This is the method I use:
See the red vertical line marked on the binding strip? When I trim the strip there, the two edges of the binding will overlap 2-1/8″, the exact measurement of the binding strip width. (That’s a scrap of the binding fabric at the bottom of the photo, placed there to show you that it’s the same width as the overlap of the two strips.)
Open up the binding strips and join them right sides together at a 90 ° angle, being careful not to twist the strips. See the red line? That’s my stitching line. I’ve got the ends pinned to the ironing board to give you a good look:
Stitch the binding seam, trim to 1/4″, press open, and finish stitching the seam along the bottom edge, beginning and ending a few stitches beyond the original stitching lines:
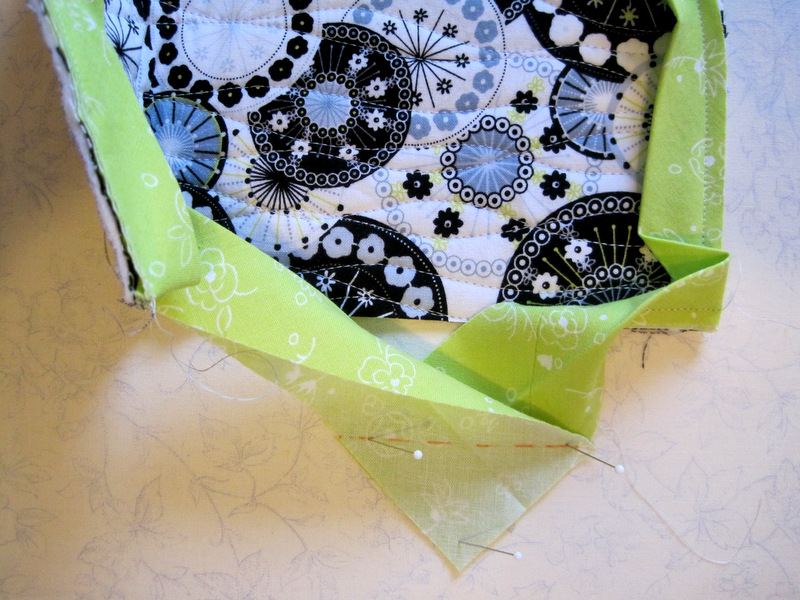
9. Turn the binding toward the inside (lining) of the case — it will cup nicely around the curve — and press in place. If the folded edge of the binding doesn’t completely cover the stitching line, trim the seam a bit. I find I usually have to do this around the curved edge.
At this point you could stitch the binding down by hand — but if you can find Steam-a-Seam 2, why not give it a try? It’s a double-stick fusible webbing product made by the Warm Company that makes fast work of finishing a binding. It’s sold by the yard but also comes in rolls ¼” and ½” wide. If you can’t find it on a roll, buy about a half yard and simply cut off ¼” strips as needed.
Using the ¼” wide roll, cut off a strip about 4″ long and peel off the release paper:
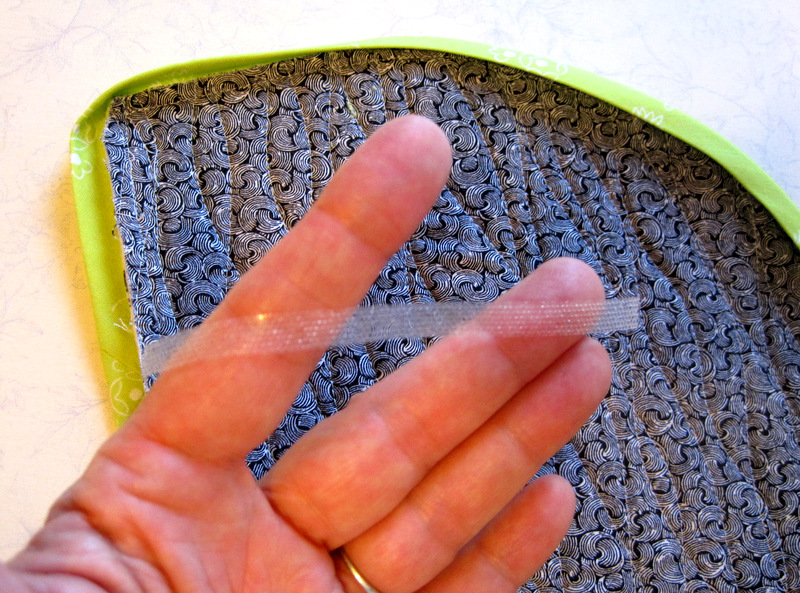
The Steam-a-Seam 2 is sticky on both sides but not so sticky that you can’t manipulate it. It goes around curved seams beautifully. Lay the strip of Steam-a-Seam 2 along the seam line, with the edge right next to the stitching:
Draw the binding over the seam allowance so that the folded edge just covers the webbing. Hold in place on the ironing board with pins:
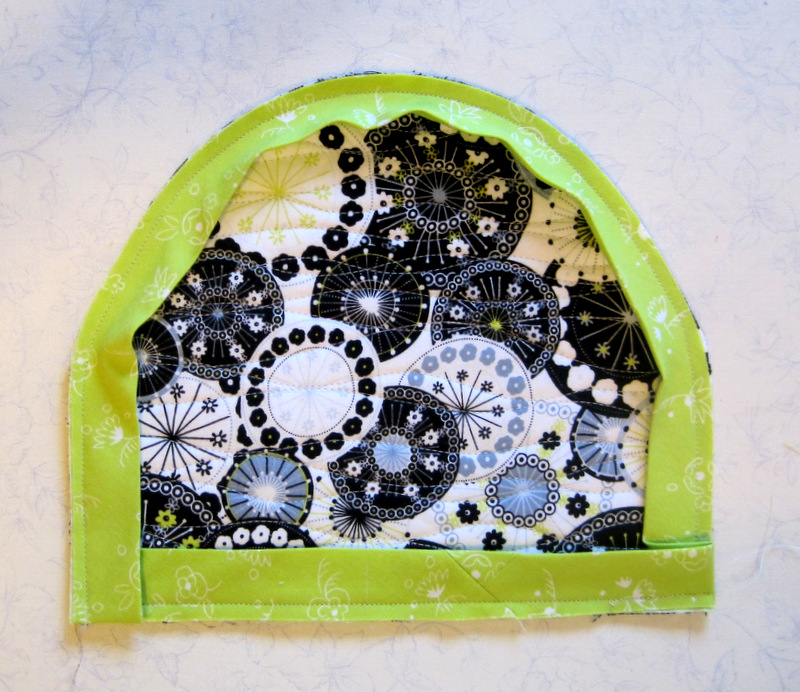
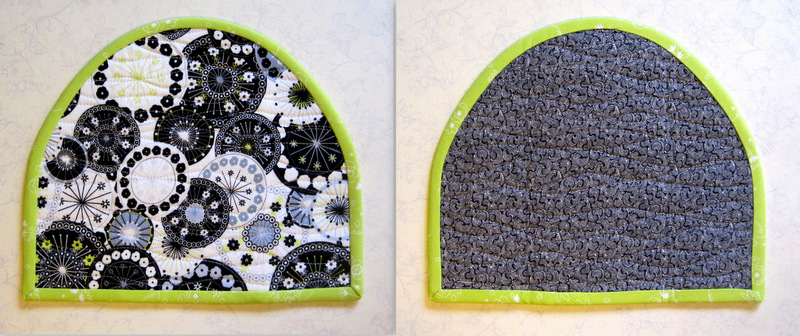
After you have two or three lengths of webbing in place, press the binding briefly to baste the webbing to the fabrics. Leave about an inch of webbing unpressed so that you can lift up the binding and see where the next strip needs to go. When you have worked all the way around, sandwich the rotary cutter coat between a press cloth and steam fully, following the directions on the package of Steam-a-Seam 2. In a very few minutes, your rotary cutter coat will look like this from the front and back:
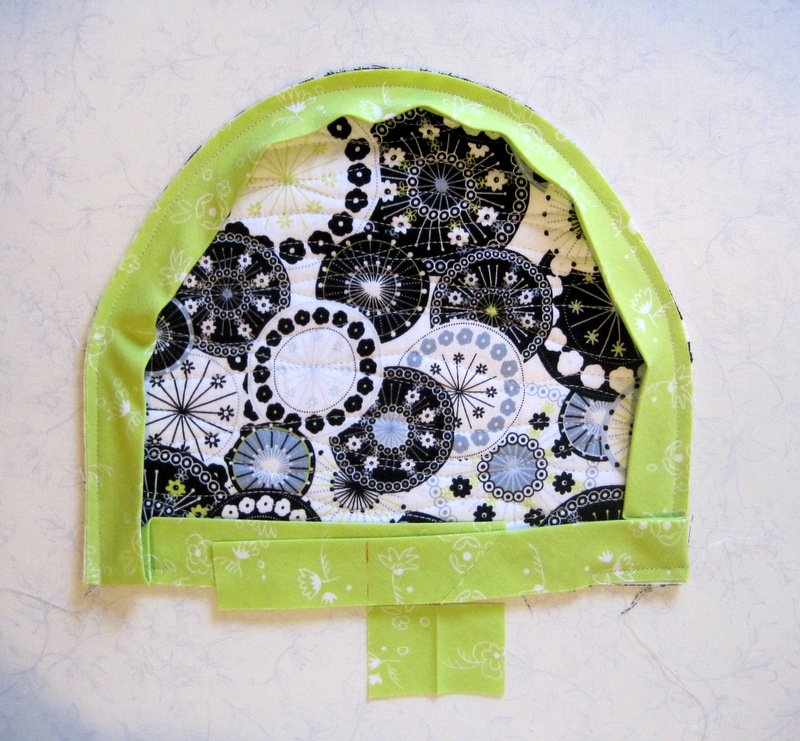
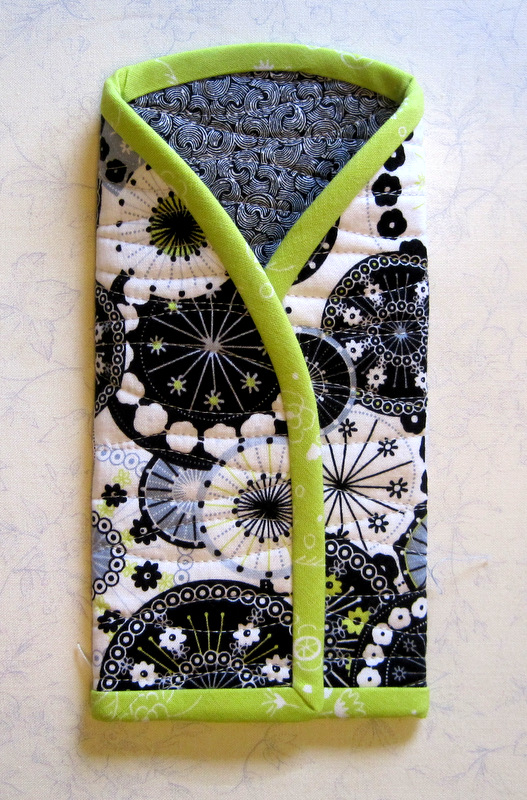
10. Fold case along fold lines, lapping one side over the other in front. (It doesn’t matter which side you lap first.) Both flaps should measure 2¾” from fold to outside edges of binding. Adjust this measurement slightly if necessary so that the finished case measures 3¾” wide. Cut a strip of Steam-a-Seam 2 the same measurement and insert it along the inside bottom edge. Fuse flap in place.
Fold second flap in place, making sure it also measures 2¾” from the fold to the outside edge:
Use another strip of Steam-a-Seam 2 to fuse the bottom of the case completely closed (or whipstitch securely by hand).
11. Now it’s time to sew on the buttons, which serve no function other than to look beautiful. And they are what makes this little rotary case a coat, so do add them. Sew them in place on the outer flap; no need to sew through both layers.
The bottom of the lower button should be 1-1/8″ or so from the bottom of the case:
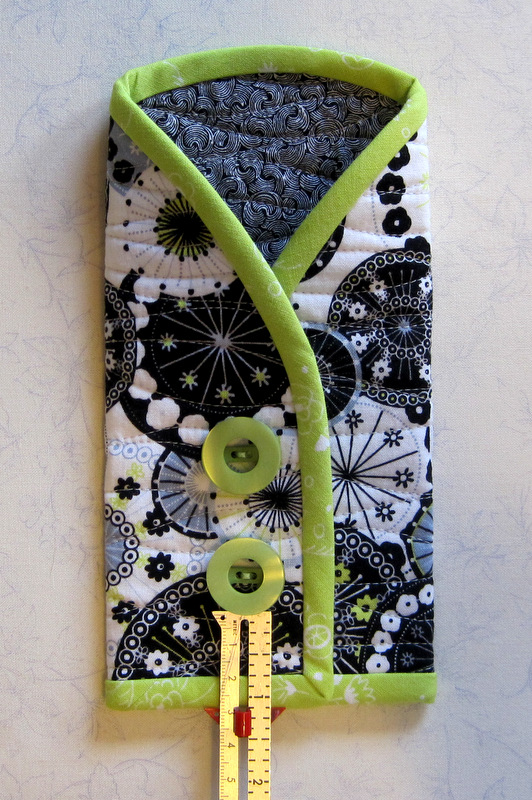
Let your eye and the size of the buttons guide you.
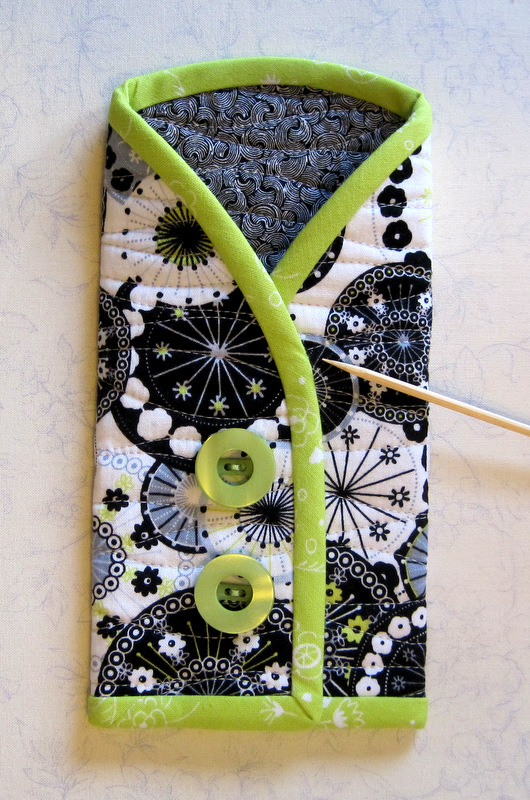
The last step: tacking the binding in place about 1″ down from the point where the bound edges meet:
Now tuck your rotary cutter into its elegant new coat:

Have fun with this tutorial! If you have any questions or run into a problem, let me know, and I’ll do my best to help you out.
Edit added Nov. 13, 2024:
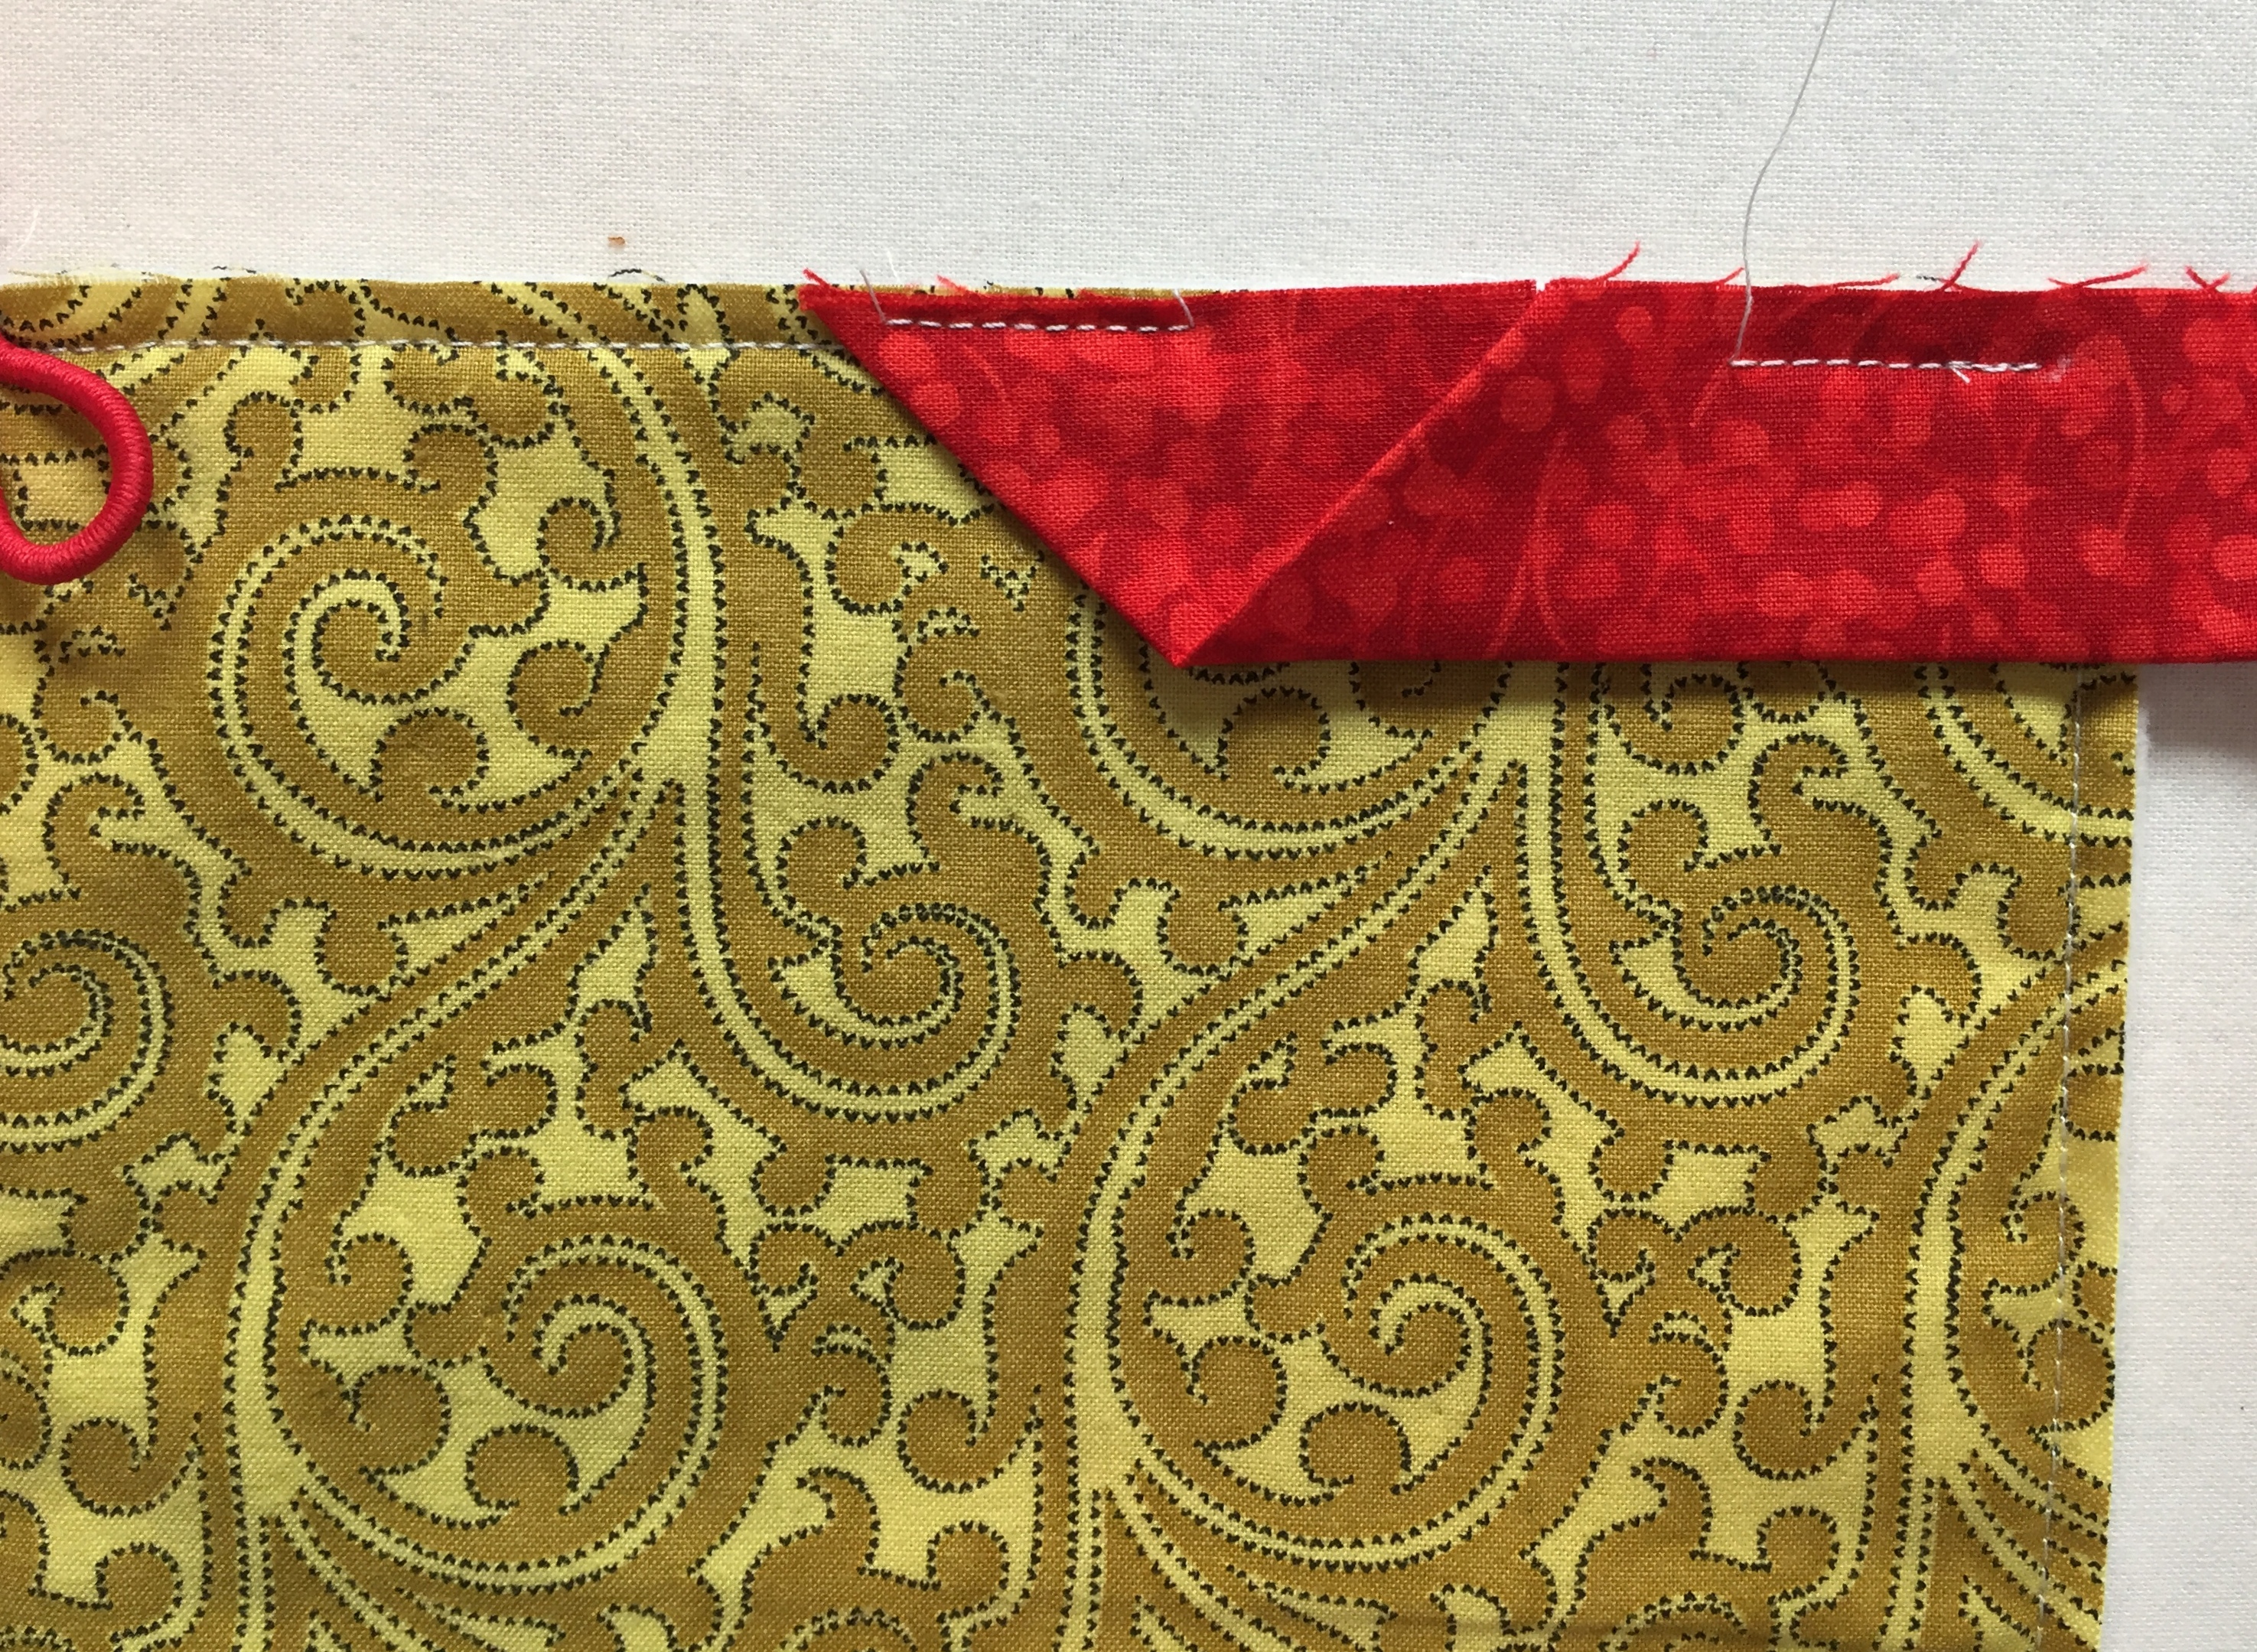
A faster and less fussy way to join the binding strips is to fold the end of the right tail at a right angle as shown in the photo below (from another project) and take a few stitches very close to the top edge to secure it:

Leaving enough room to tuck the other binding tail into the fold, begin stitching the binding with a scant ¼” seam, stopping ¼” from the end in order to miter the corner:
Coming around the fourth side, tuck the left tail into the fold of the right tail . . .
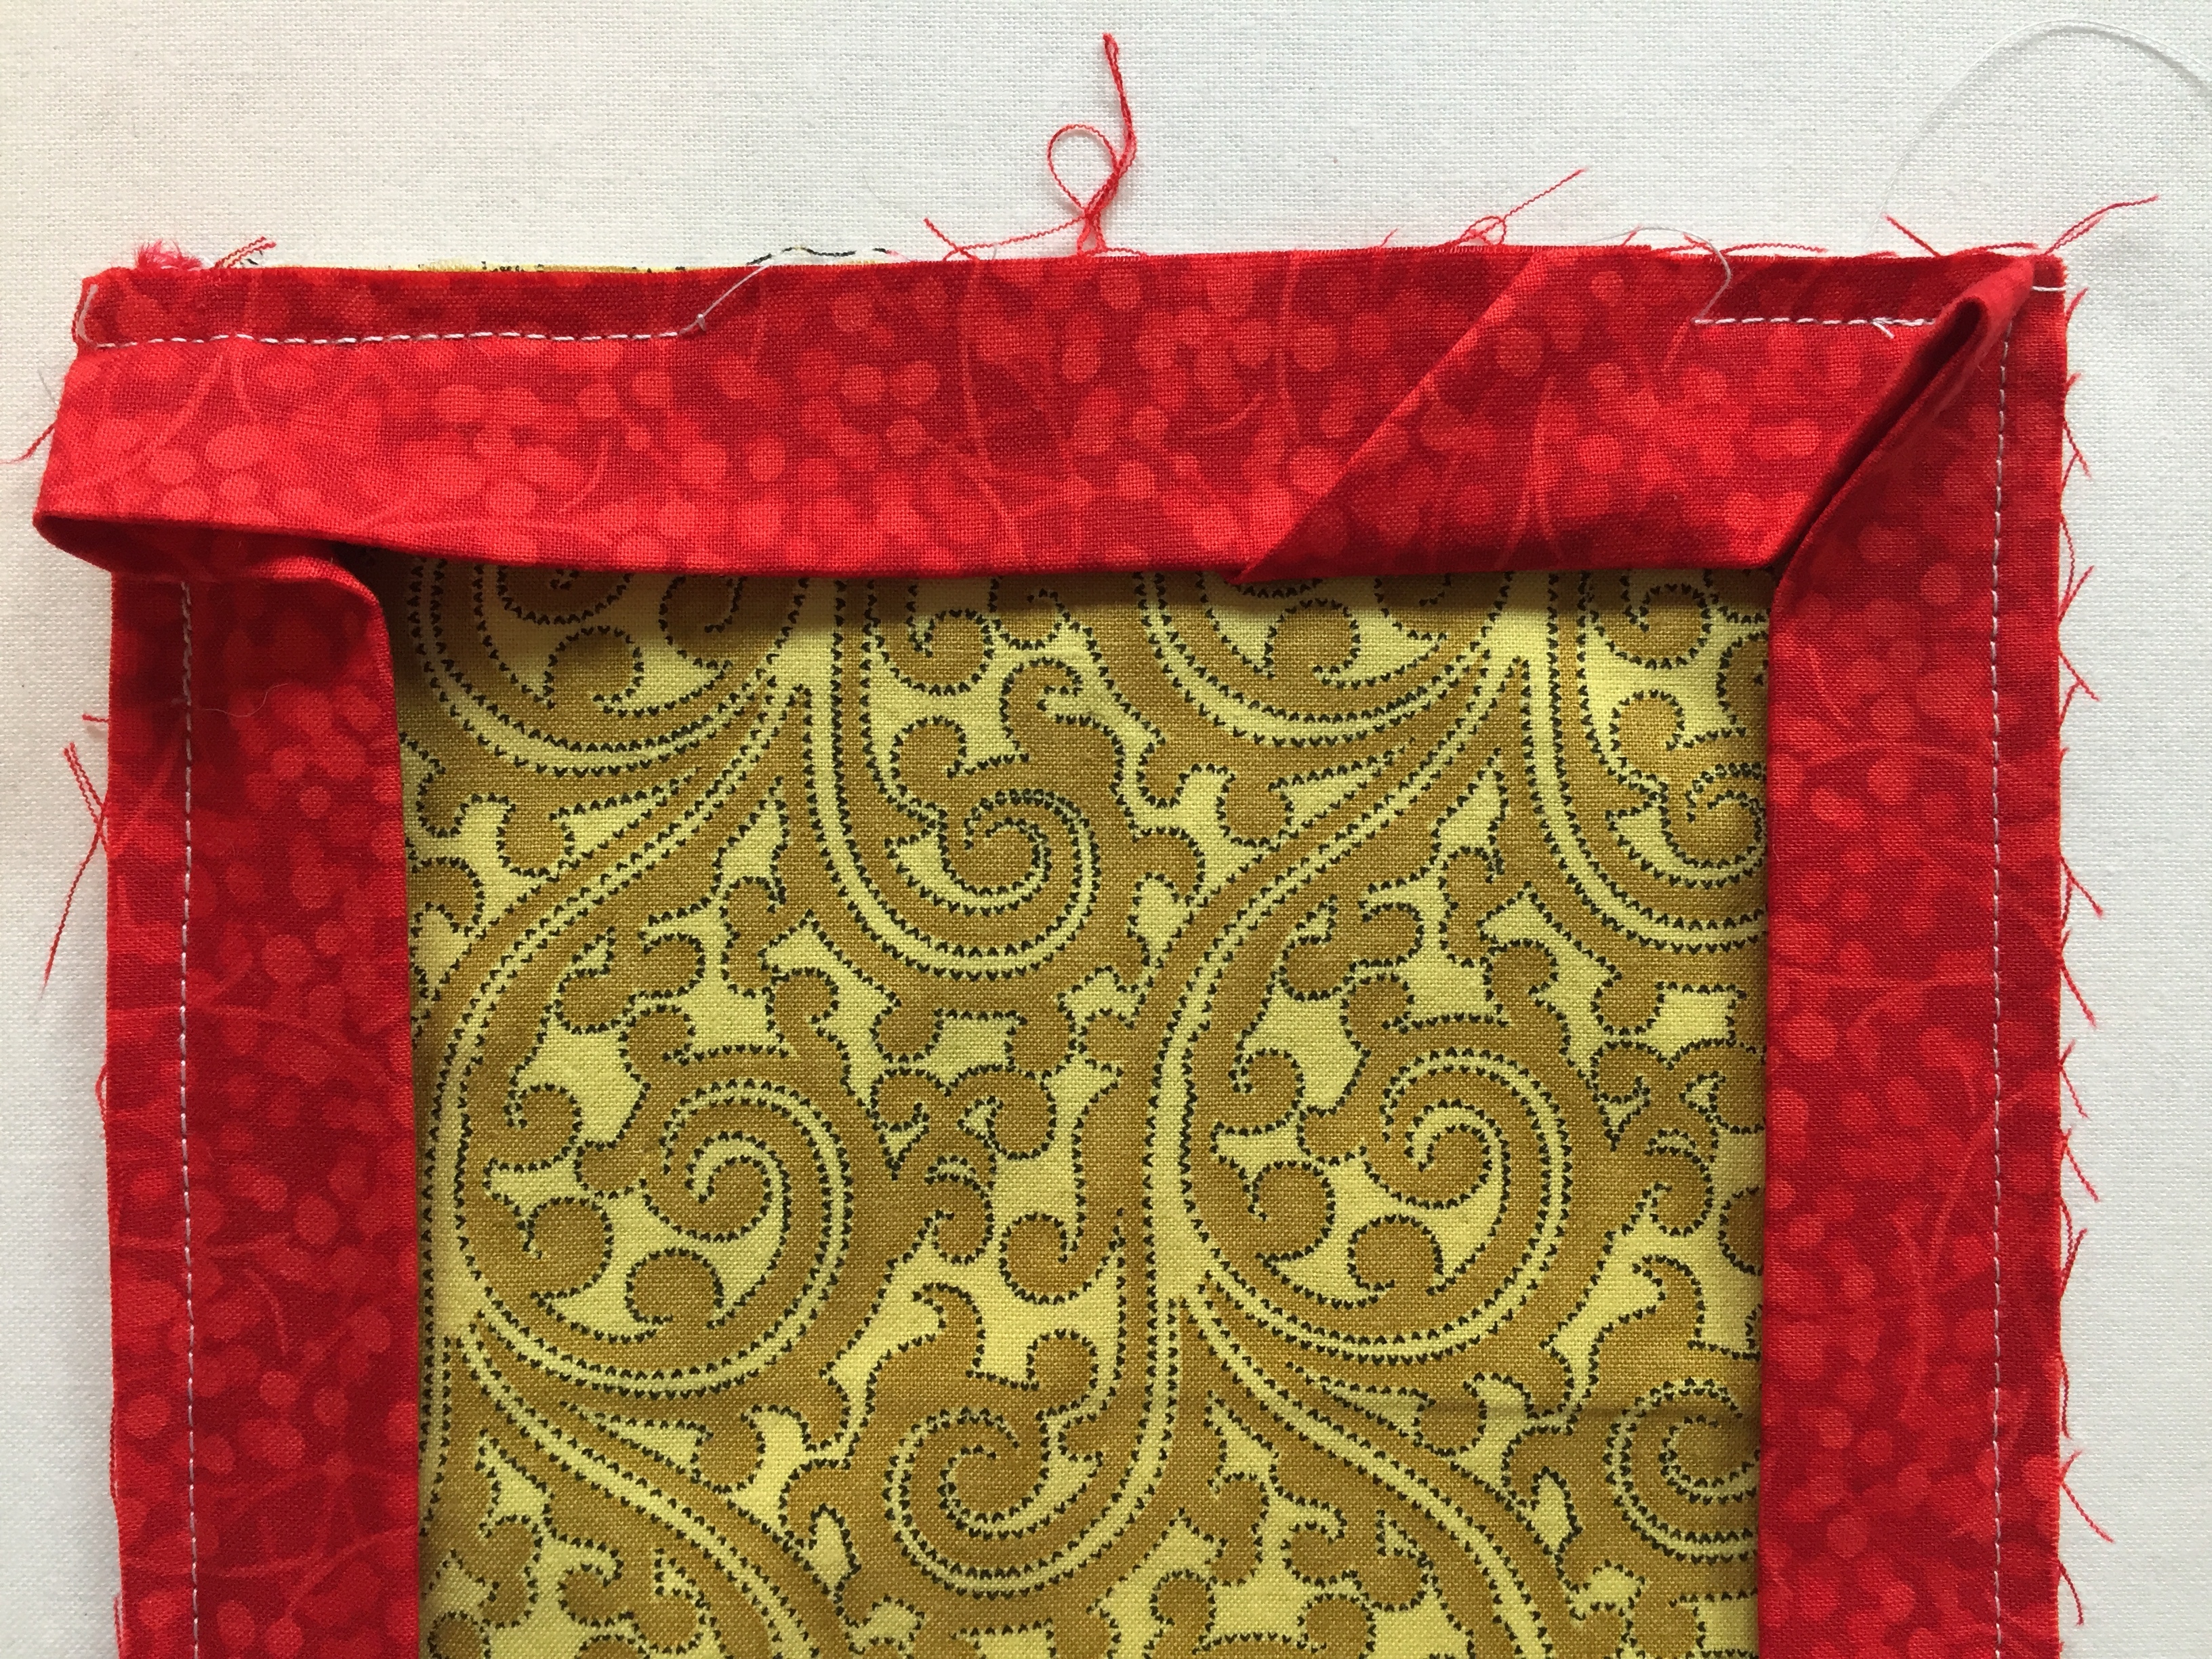 . . . and finish stitching the seam, starting and ending a few stitches beyond the original stitching.
These photos are from my Scissors Case Tutorial. A scissors case would make a nice companion to the Rotary Cutter Coat!
You can see many more examples of Rotary Cutter Coats I have made in the Small Pieces section of my Gallery.
I have been looking and looking for ways to finish a binding without hand sewing it down – your tip on using Steam-a-Seam 2 is a wonder! I will definitely give it a try! What a beautiful job you do on tutorials!
Excellent tutorial, Dawn! I will give this a try over the weekend. I’m visiting my sister next week and this will make a great surprise gift. Thanks!
Dawn, I love your rotary cutter coats. If I win, I will keep one and give the others to two members of my small quilt group for their birthdays. Thanks for the tutorial!
k(dot)castanette(at)Hotmail(dot)com
Hi Kristi. Sorry I didn’t make it clear in my post that I will draw three names when I do the Giveaway. If you are a winner, you will receive one rotary cutter coat. Guess that means you will have to make two to give to your quilt group members! 😉
thanks for sharing. I love this idea.
I love these coats. I found your blog by looking reach for the stars quilt as I purchased one book. I wondered if the gal that designed it had the pattern online. I came across your blog. Your quilt was inspiring to me. If I won one any colour would suit me fine.
Your work is really creative and amazing, Dawn. I enjoy looking through your website even though I have yet to learn how to quilt! I like your latest pillow designs and the choice of fabrics. It is a real treat to see how lovely fabric art can be. When I see you again, I hope to share some items I picked up in Japan where such art form is highly valued.
Happy Thanksgiving!!
[…] […]
I’m part of a group of ladies that get together once a month to sew and quilt. This will be a great project for us!
Glad to hear it. Have fun with your group, Cindy!
I am going to make this but adding a small pocket to hold extra blades.
Made this last night. It came out nice. The buttons were a little difficult to reach when sewing them on. I have already quilted fabric to sew more.
Deborah, you can attach the buttons to the outer flap only — no need to go through all the layers. This information is in the one-page handout referenced near the top of the tutorial but I inadvertently left it out of the full tutorial. Thank you so much for bringing this to my attention! I have updated the instructions (see Step 11).
Can you use stitching witchery instead of steam a seam 2 on this ?
Deborah, I think you could but you would have to use short lengths because it doesn’t curve as easily as Steam-a-Seam 2.
thank you for your reply!
I really love this. I want to make them for my ladies in my quilt group as gifts.
That’s a lovely idea, Phyllis!
If you have trouble sewing the buttons on, attach them before folding the sides. This way you can even sew them by machine.
Just made one! Love it! Thanks for sharing!
The pattern is for a 45mm rotary cutter? I believe. Is there a pattern for a 60 mm cutter?
Actually, Rhonda, I designed this for a rotary cutter with a 60mm blade but a 45mm cutter will fit as well.
Since I use a smaller one than the 45 how much should I decrease pattern? Also is there one for rotary cutter with the comfort grip handle. Thank you for your post as going to make some as Valentine gifts for some of my quilting buddies.
Lovely gift idea, Kathie! I suggest printing a copy of the pattern and folding it on the fold lines. Insert your smaller rotary cutter and/or cutter with the comfort grip handle and see how much the pattern needs to be adjusted. To make it wider, I would cut the pattern in half lengthwise. To make it shorter, cut the pattern in half crosswise. You’ll need to test the results with the actual rotary cutter to determine the best fit.
Love the pattern. My only thing with it was that I printed the tutorial and it was 20 pages long. Wish I would have checked before printing.
Terrific directions. I always read the directions over three times looking for loopholes. Find yours easy and direct. Many thanks. Bobbi.
Love this. Can’t wait to make it.
I’m going to make 3 different widths so will be able to identify which cutter I’m looking for without pulling it out. Great idea.
That looks easy, thanks. I will make one for my rotary cutter and one for my grandchild’s doll as a sleeping bag.
Ah………..this is so cool! I’ve been wondering how to cover my pizza cutter.
good day can you make a folding fan coat for me to see. I believe it might be like the rotary cutter coat but I would like to see it done first.
I made my quilter friends one last spring but had to revisit this site as I need to make some more. I enjoyed making them. I like your quilting as well so used some of them when I made mine. All my quilter friends use them all the time. It is so nice to have the cutters protected. Thank you for sharing.
I have made 7 so far. I think my sewing buddies will like these. Very cute idea for cutters!