. . . (see my last post), I have another finished one to show you, the one I made alongside my students fall term at the Pine Needle. The class ended a few weeks ago but I didn’t put the last touches on the bag until today. It’s for my friend Vickie, who has a late November birthday, but she won’t get it for several more weeks because she’s traveling. You get to see it before she does.
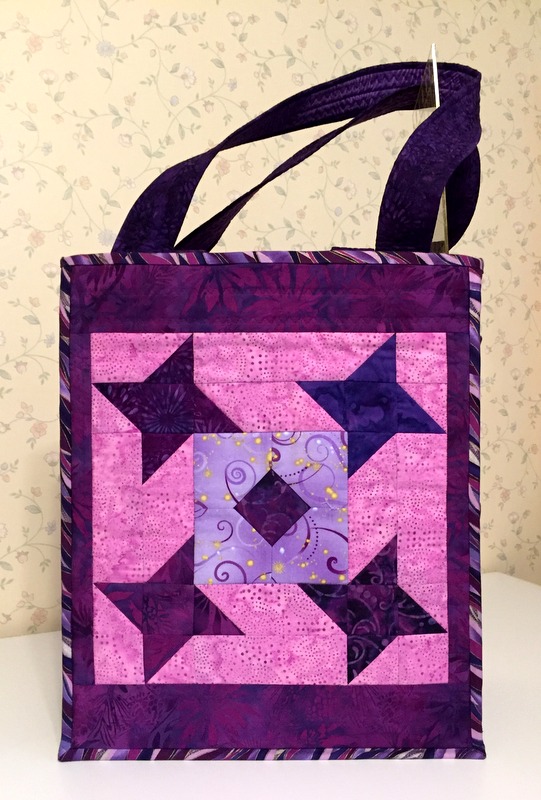
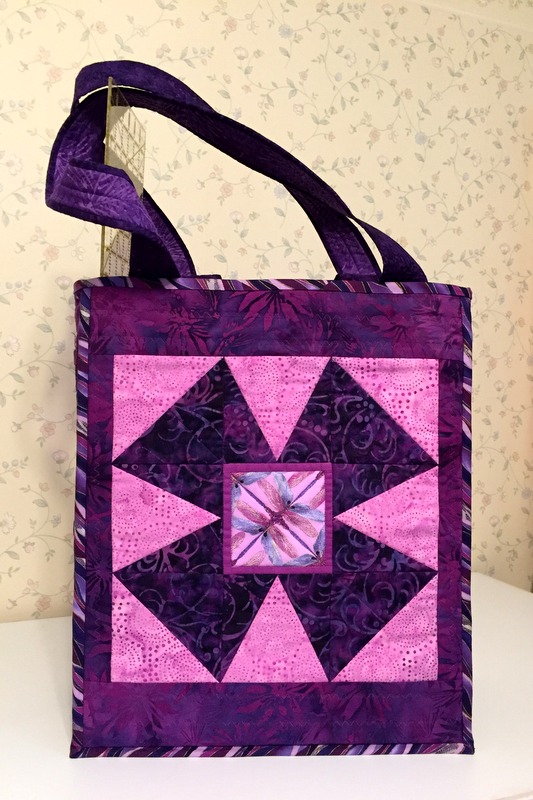
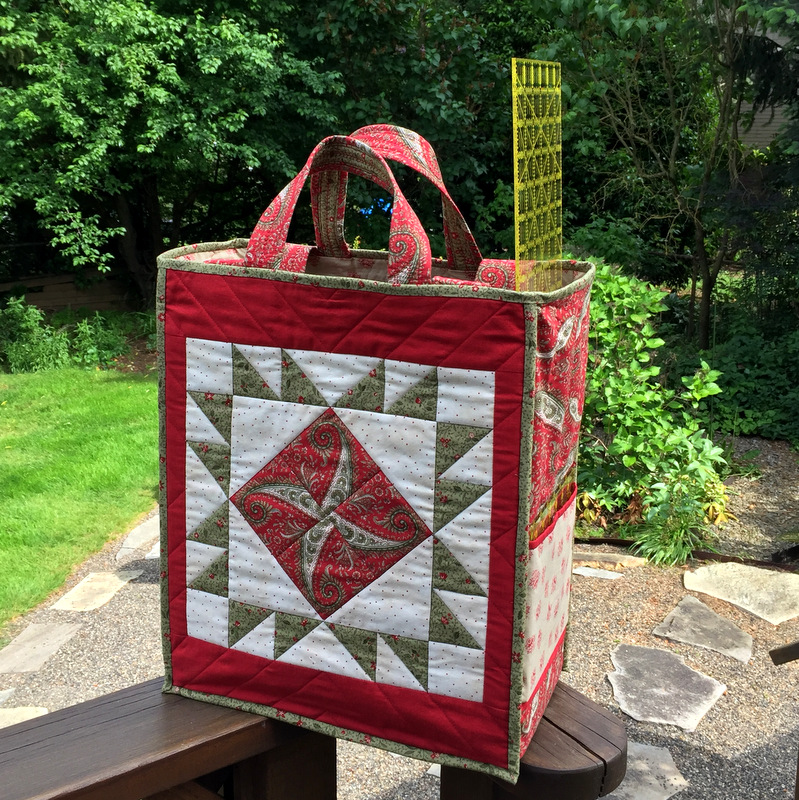
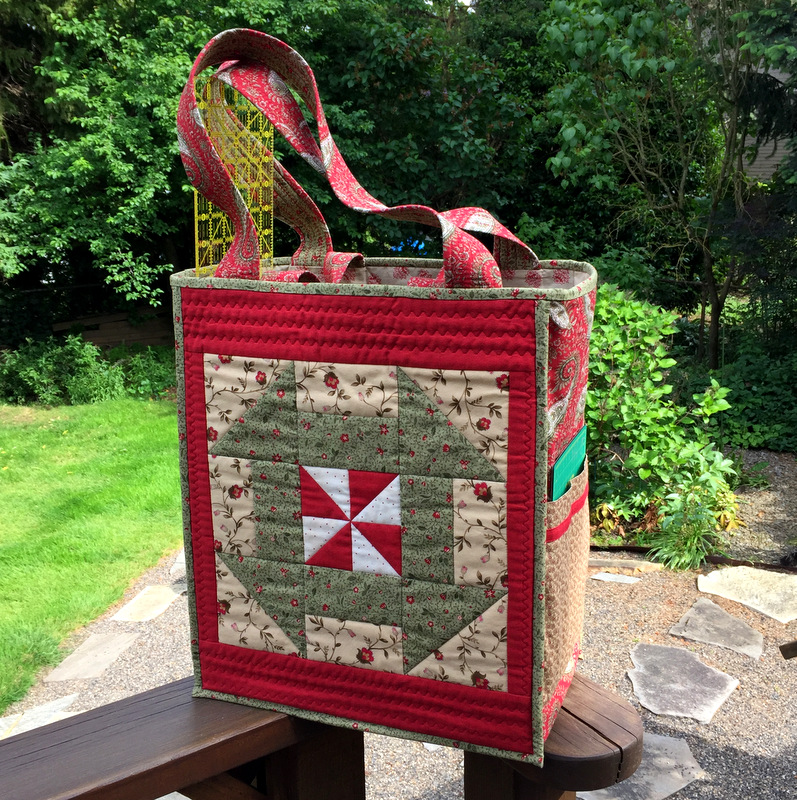
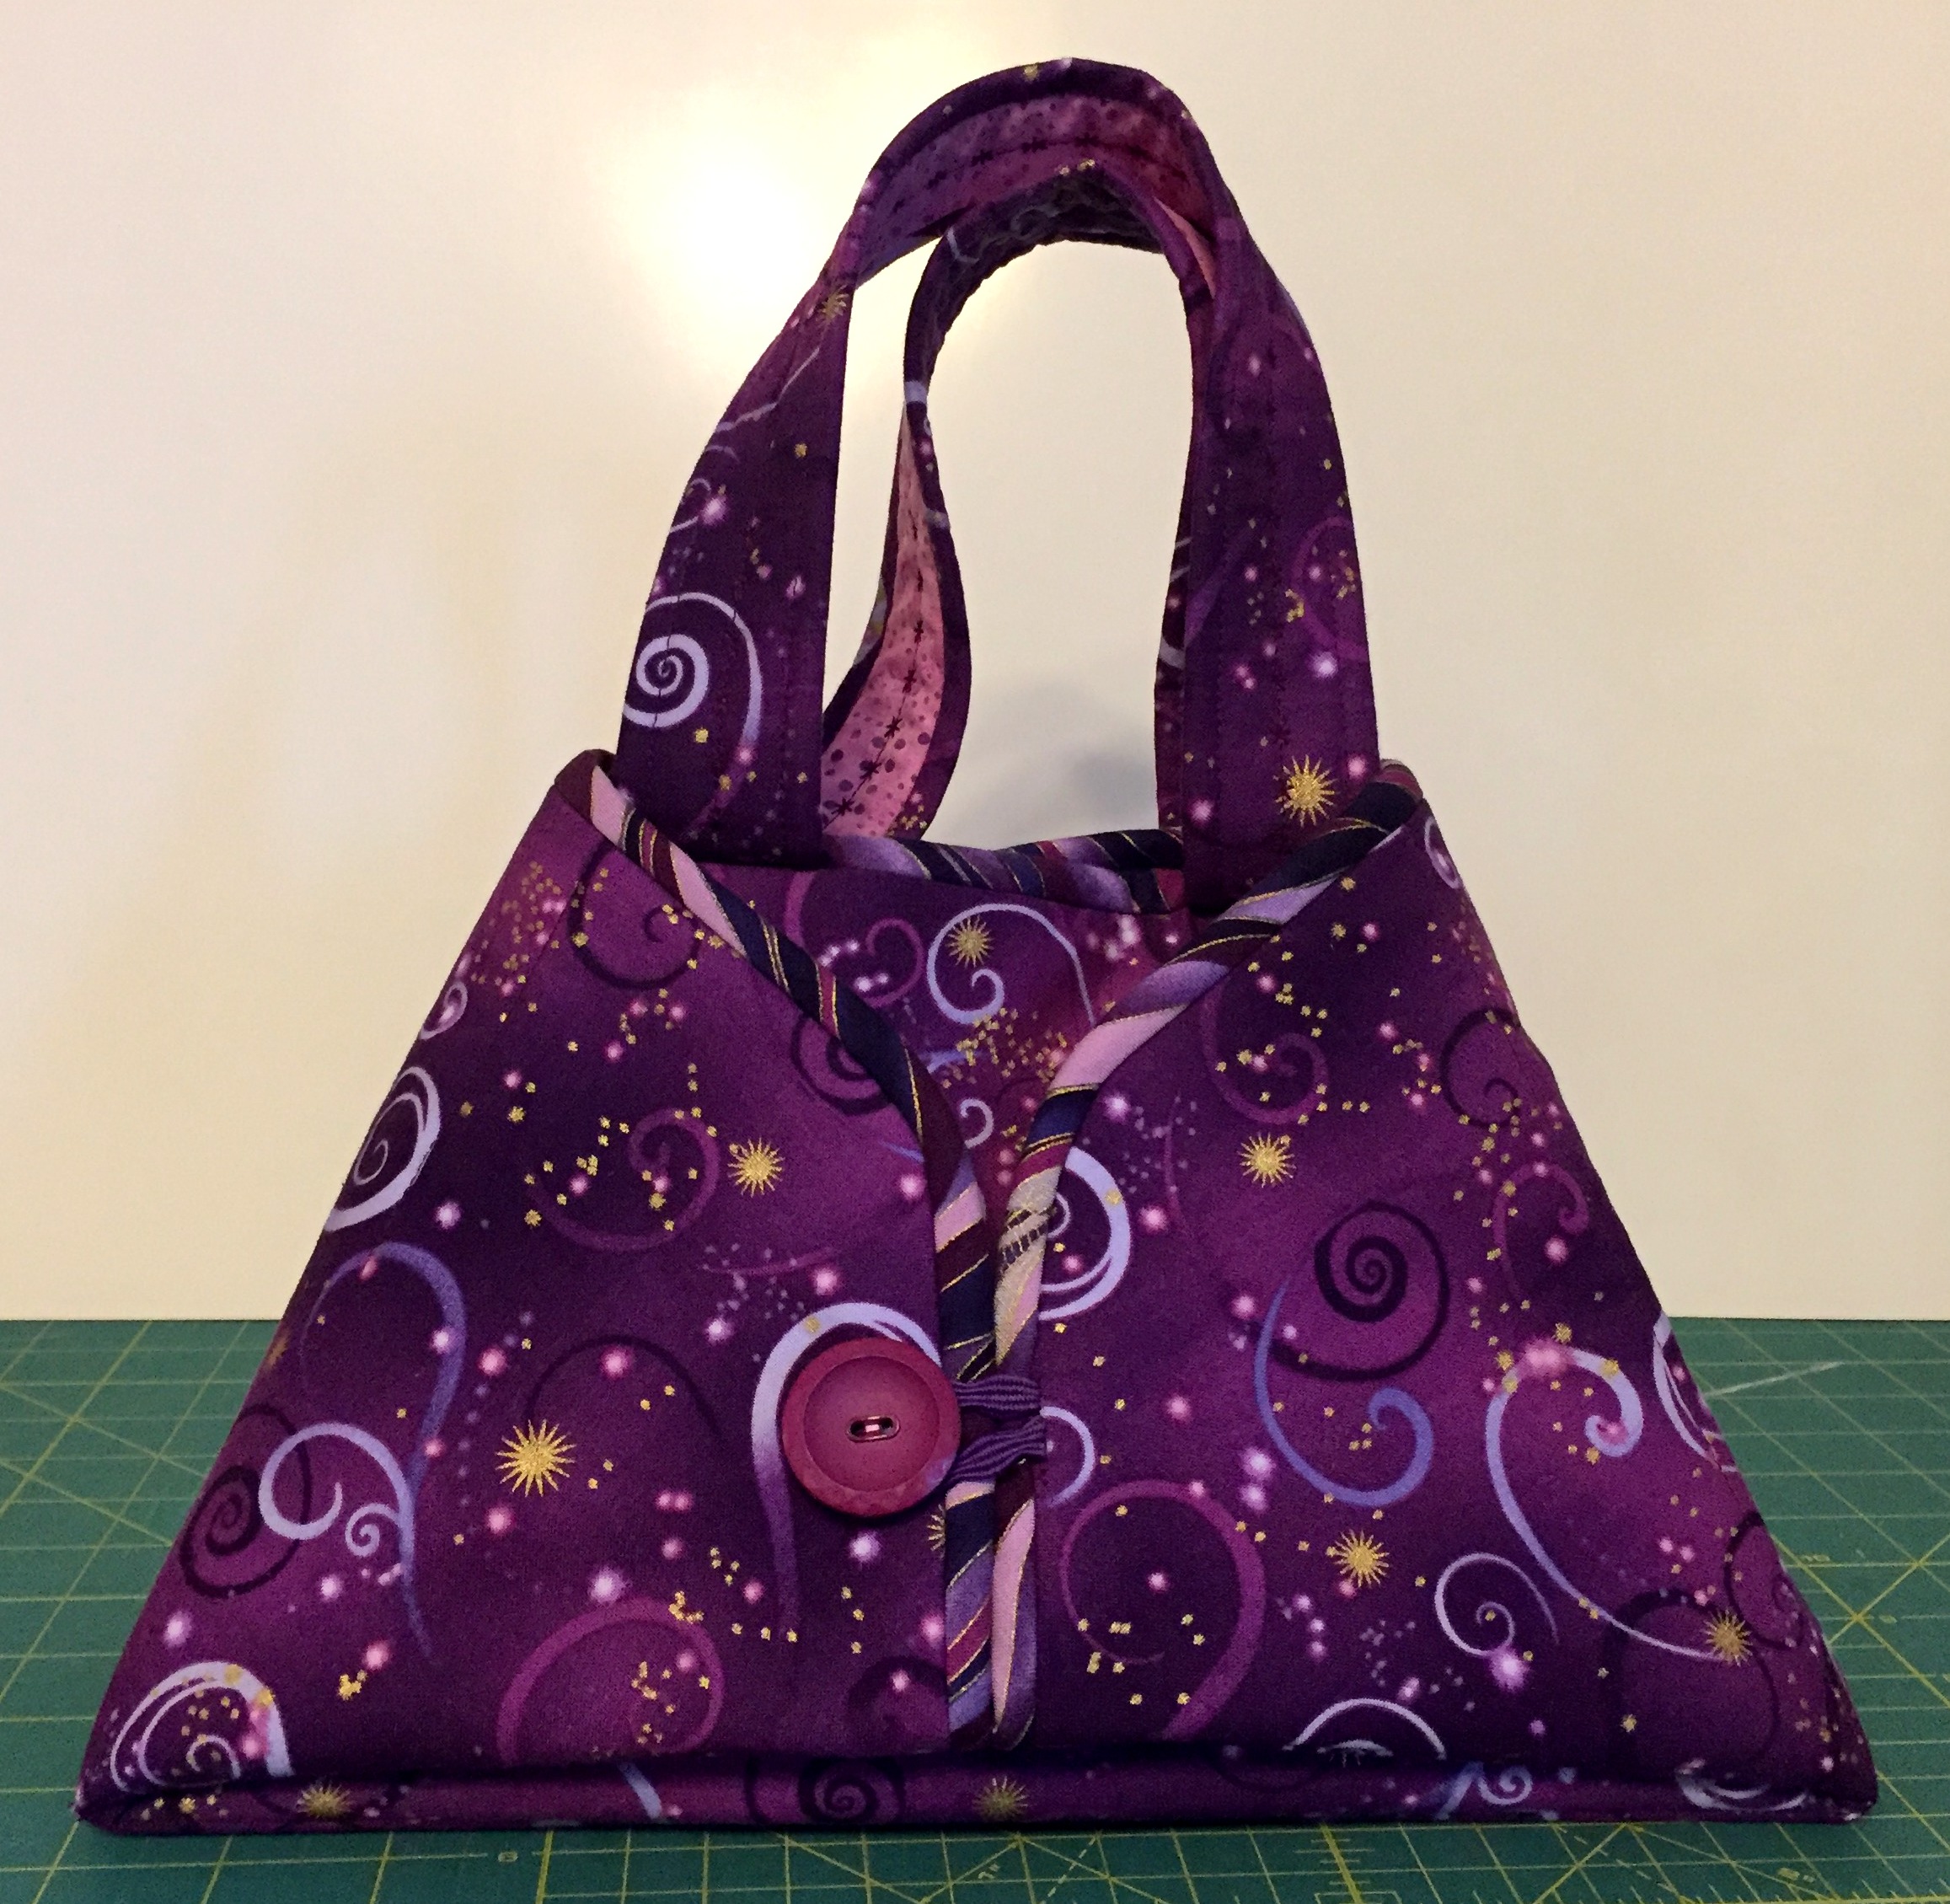
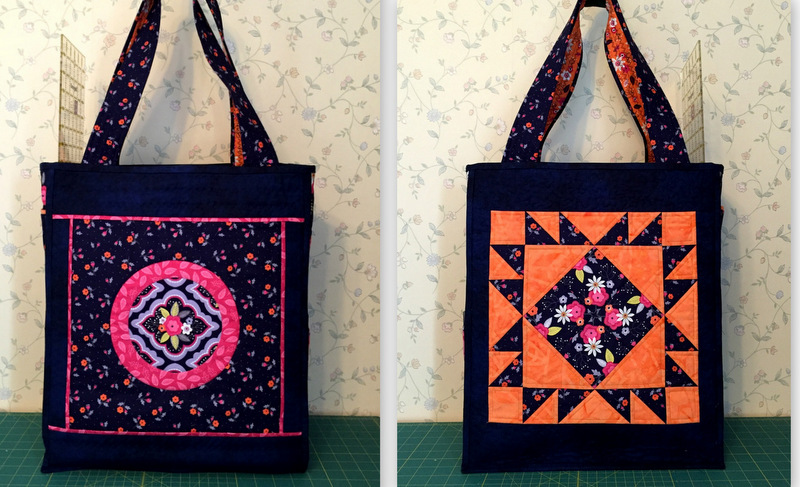
Here are the front and back panels:
I decided early on to cut the binding fabric on the bias because I figured the striped fabric would provide a dramatic frame for the panels. Good call, don’t you think?
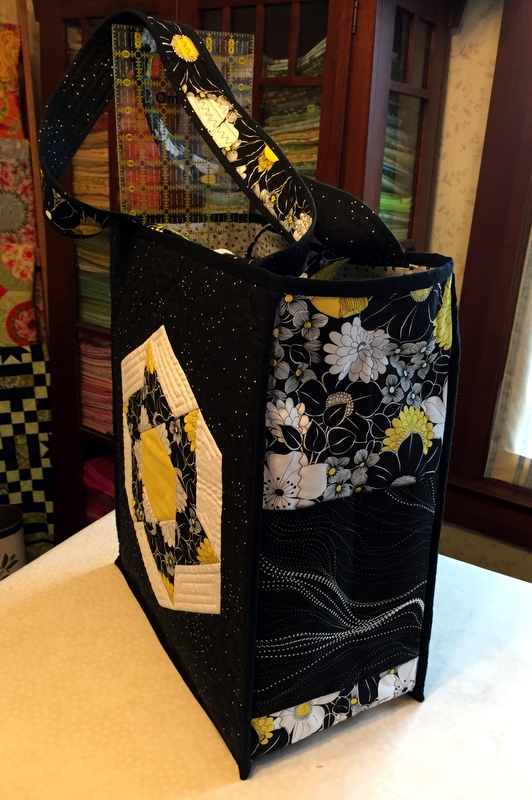
These pictures don’t give a sense of the depth of the bag — 7½” — so here’s a partial side view that also shows you the pockets I put on the outside:
That side has two pockets and the other side has one taller pocket cut from the same wavy stripe I used for the binding:
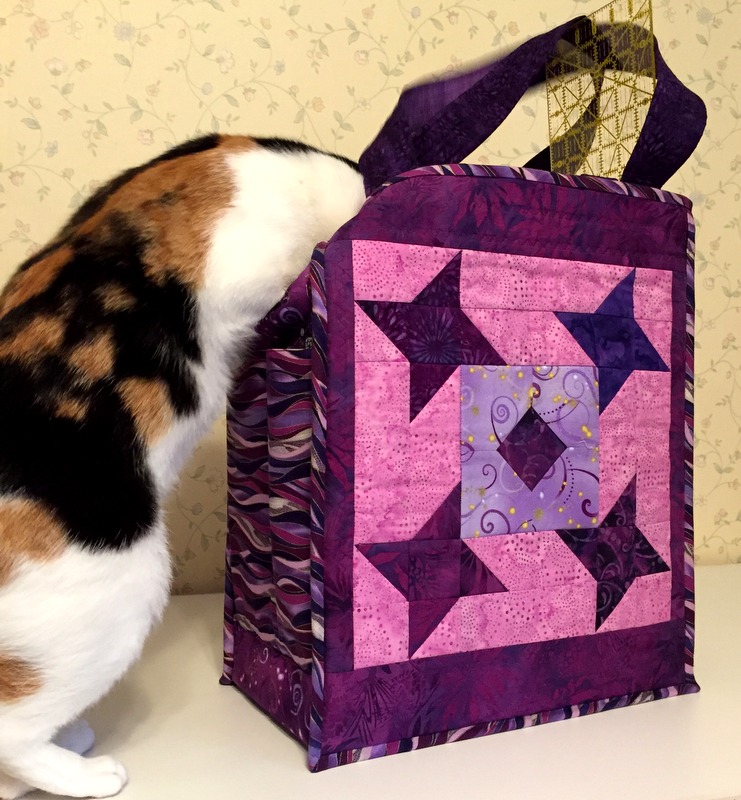
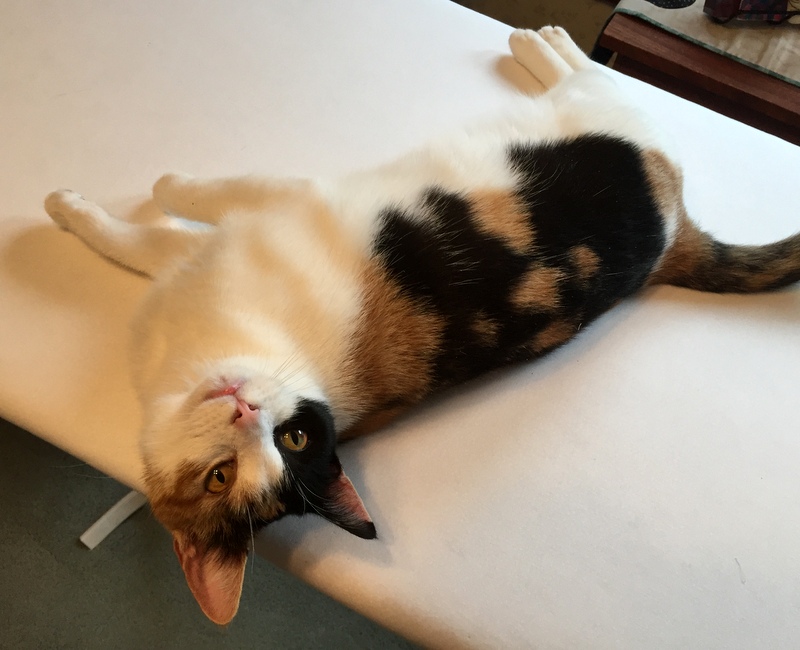
Coco is busy investigating the interior pockets, of which there are many.
A look inside:
It’s really hard to get a good shot of the interior of a finished Junior Billie Bag. This earlier photo should give you a notion of how many pockets there can be (totally up to the whim of the maker):
You can also see there’s a shorter set of handles. Those are tucked out of sight in the photos at the top of this post.
To sum up:
The Billie Bag was designed by Billie Mahorney, who taught for many years at the Pine Needle. The junior version measures 14″ wide, 17″ tall, and 7½” deep.
The panel with Friendship Star blocks was based on a design by Thelma Childers of Cupcakes’n’Daisies. Read here how I modified it for this project. The windmill block is a variation of one designed by Deb Eggers of the Cottage Rose for her pattern A Mid-Winter’s Night.
I started with fabrics from the “Dance of the Dragonfly” line by Benartex and Kanvas Fabrics, adding several batiks from my stash and one blender from P&B Textiles. There can be no doubt what the birthday girl’s favorite color is!
My third Junior Billie Bag of the year is in progress. I’m teaching a class at the Pine Needle next month and need to have the individual components of this quilter’s tote on hand to show my students how the bag is constructed.
Here is the first component, one of the front/back panels:
I’m sure you recognize that windmill block. I like it so much I made a quilt out of it earlier this year and also put it on my most recent Junior Billie Bag.
This JBB is a birthday present for one of the friends in my small quilt group known as the Quisters (a mashup of Quilt Sisters). She knows I’m making her a quilter’s tote and she doesn’t read my blog so I think I’m safe in posting progress pictures.
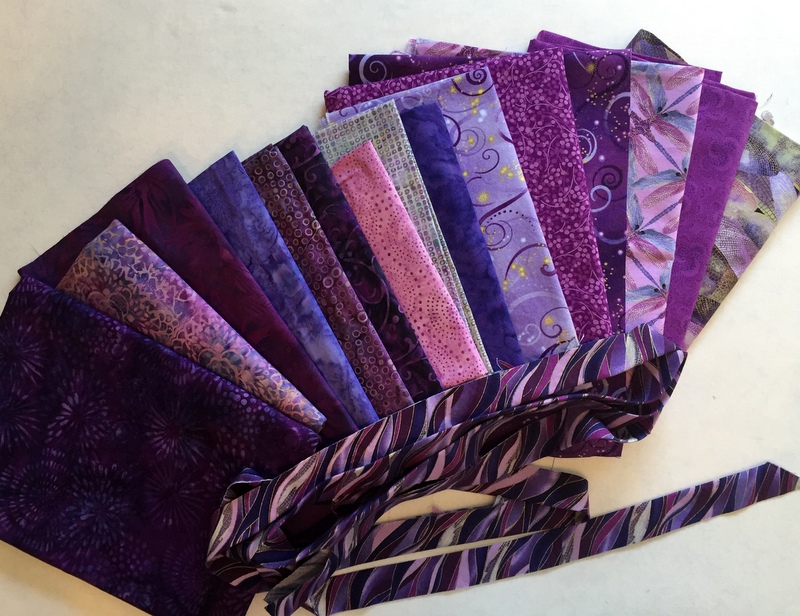
You can guess what her favorite color is. I don’t have a huge stash of purple fabrics but I do have an ample array. These are the ones pulled for consideration:
My friend’s Junior Billie Bag will have somewhere in the neighborhood of 20 pockets so an abundance of fabric choices is a good thing. One thing I knew right away: that striped fabric, cut on the bias, would be perfect for the binding.
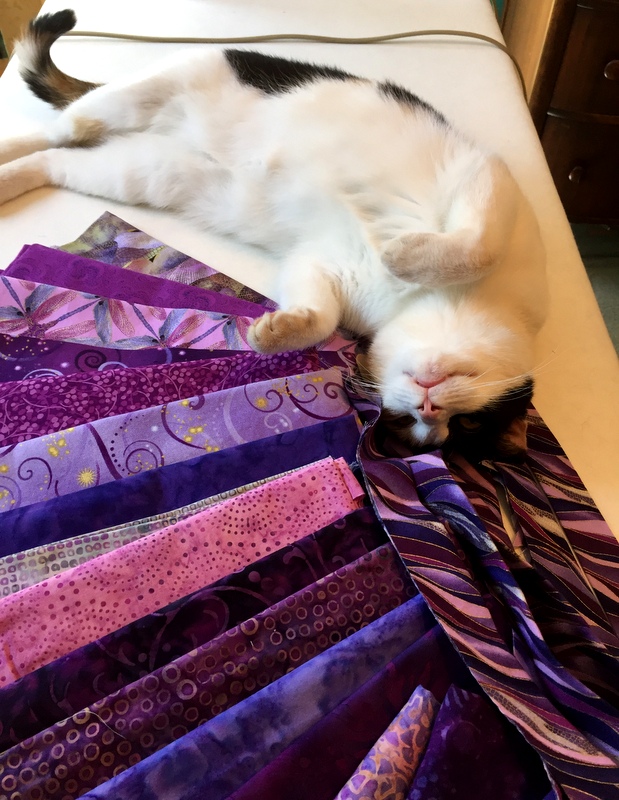
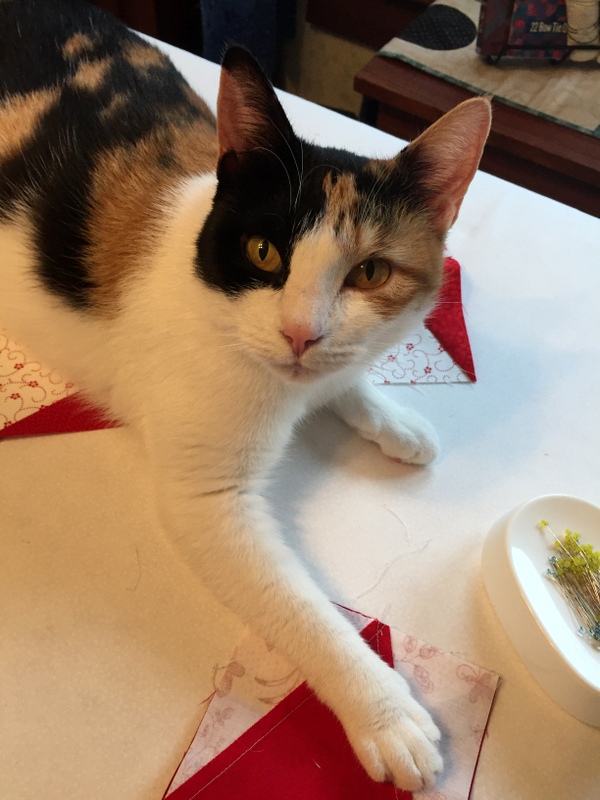
Guess what happened right after I took that photo. Coco jumped up on the ironing board to see what I was up to. It seems she approves of my selection:
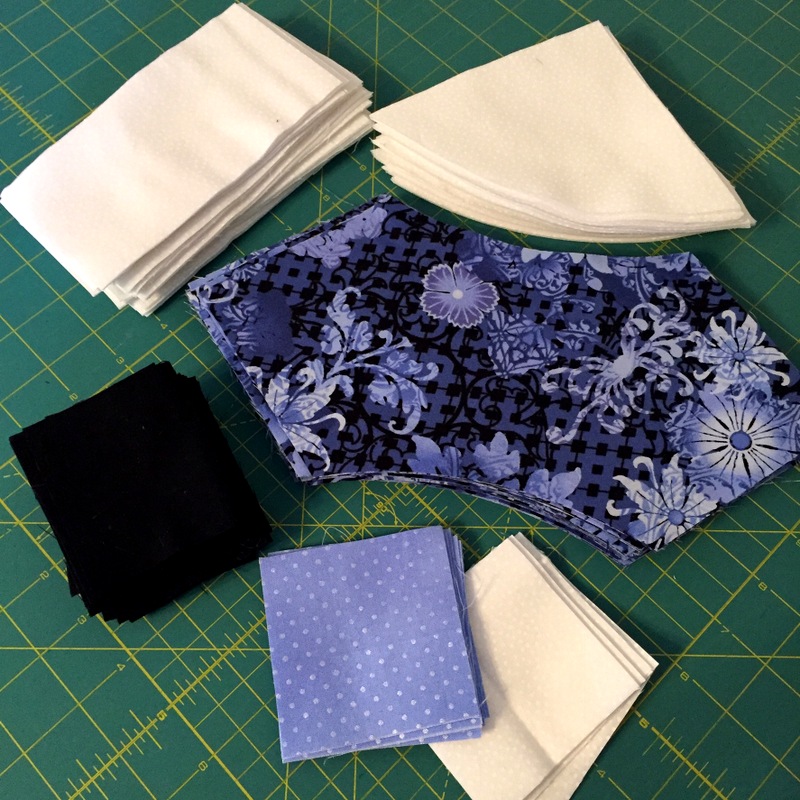
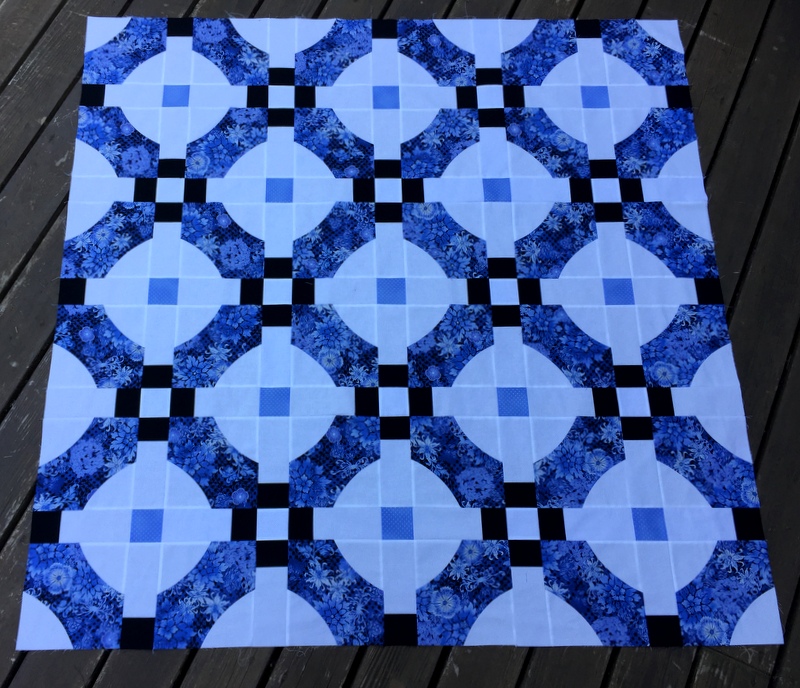
Ah, how satisfying it is to see about 300 pieces of neatly cut fabric transformed into a quilt top in just a few days. Here we are at the outset . . .
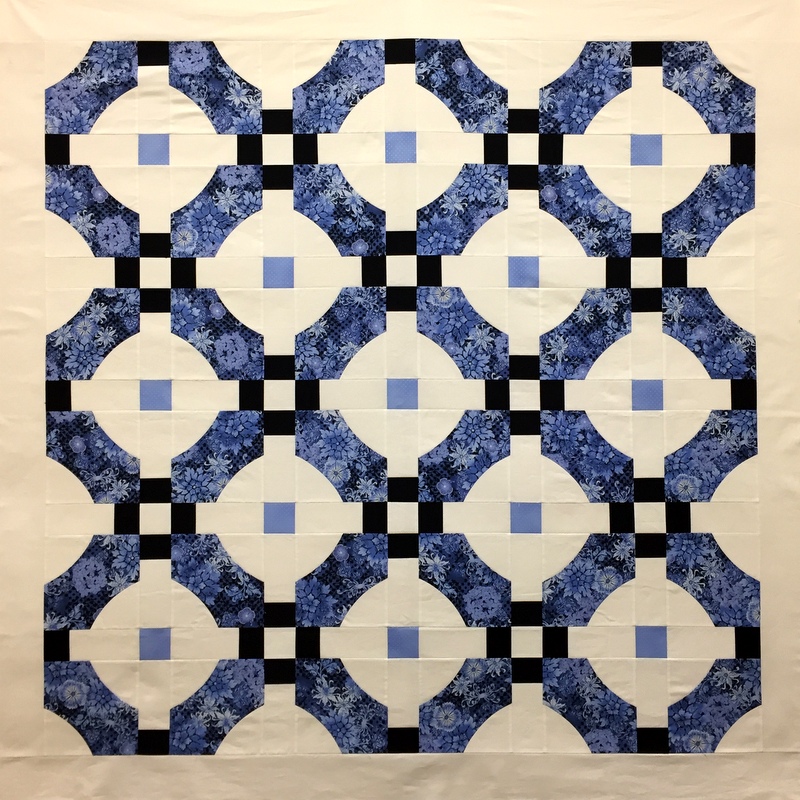
. . . and here we are with a finished quilt top:
This is my “supersized” version of Sew Kind of Wonderful‘s free quilt pattern Mini Mod Tiles. The original MMT block finishes at 10½” square whereas my supersized block finishes at 17½” square. Once my curves were sewn and trimmed, I was surprised at how quickly this quilt top went together.
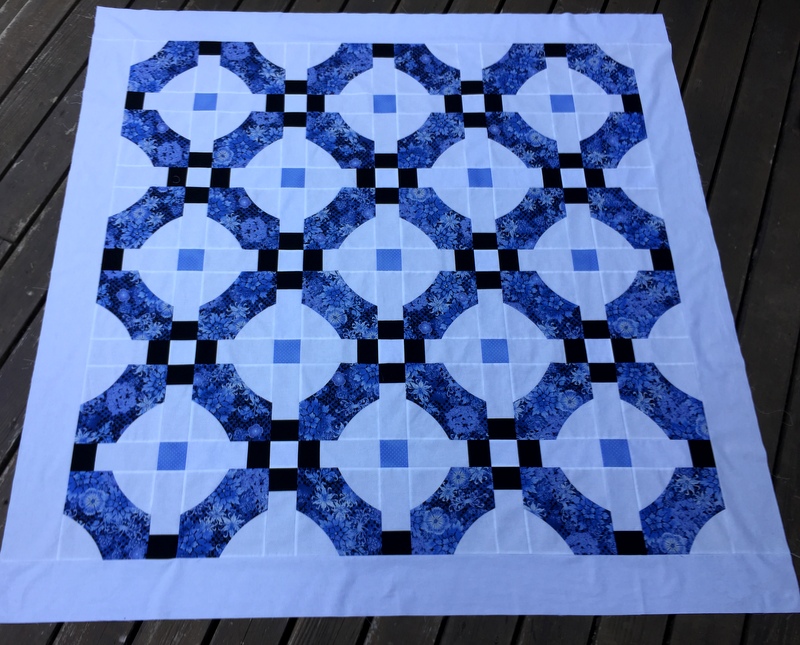
After the blocks were joined I took the top outside to photograph it:
The cornflower blue in the focus fabric is so much more vivid in natural light, isn’t it?
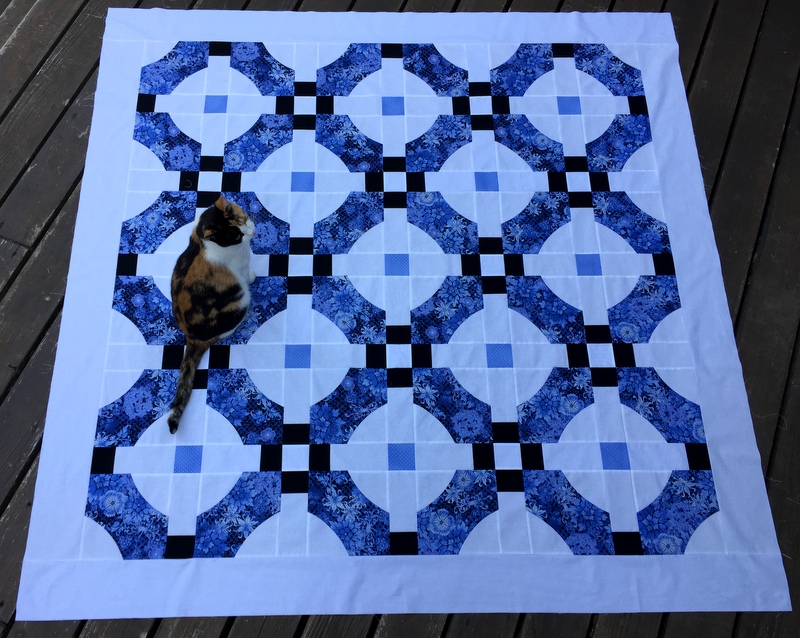
Looking at the quilt from above (I was standing on a chair), I decided I wanted to add a border to make those blocks float. I was back a few minutes later for another shot:
Yes, that’s much better. And there’s Coco, the feline photobomber, doing her thing:
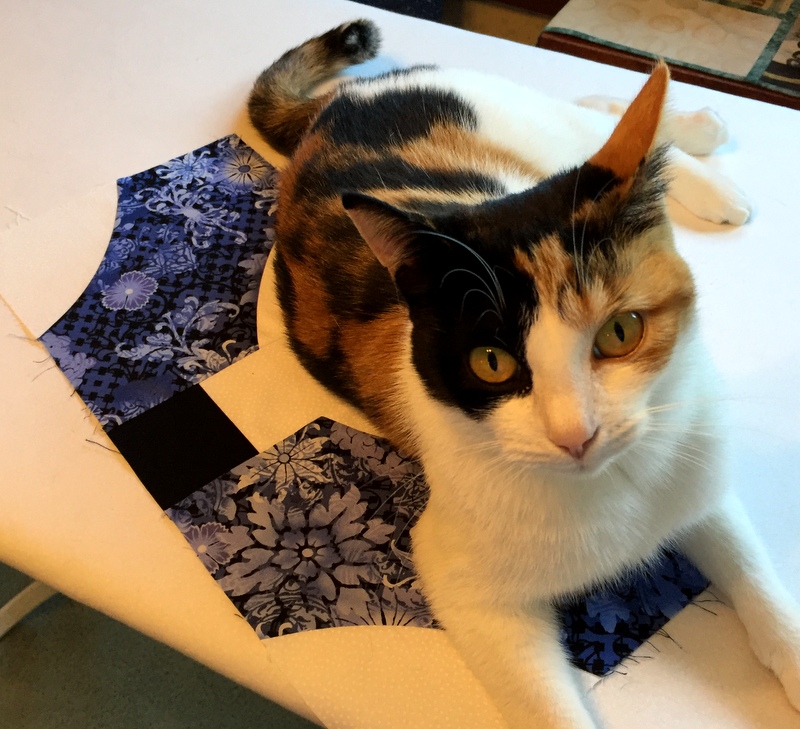
Coco hung out in my sewing room while this quilt top was under construction . . .
. . . so it’s only fitting that she be around at the end.
I am going to call this quilt Terrazzo Tiles for its resemblance to Italian floor tile. Terrazzo is a composite material made by exposing marble chips on the surface of concrete and then polishing until smooth. I like to think that my focus fabric, from the Eclectic Garden line designed by Jason Yenter for In the Beginning Fabrics, gives that same impression. Besides, doesn’t everything sound better in Italian?
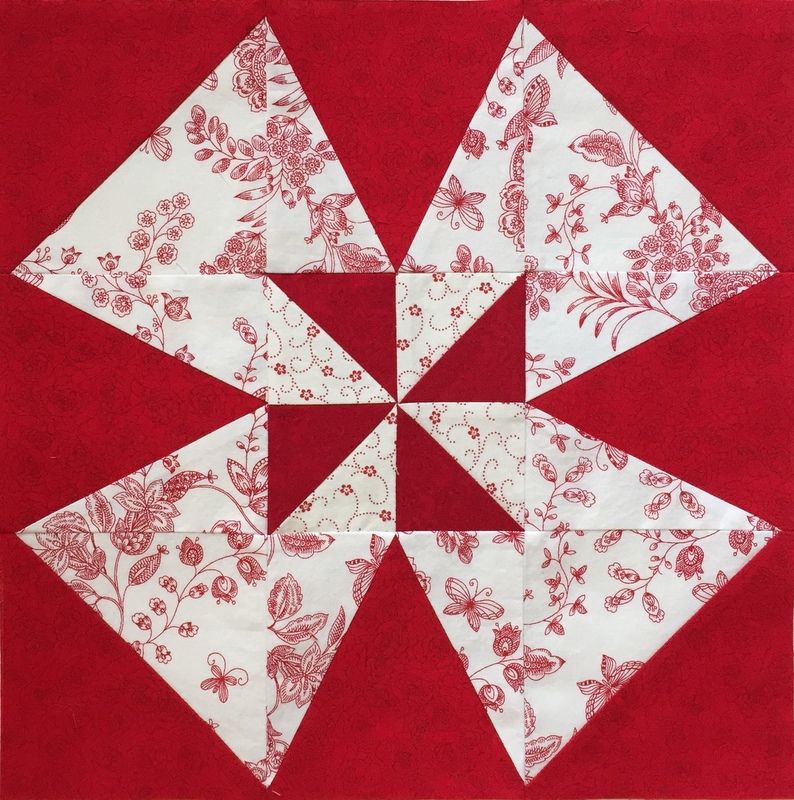
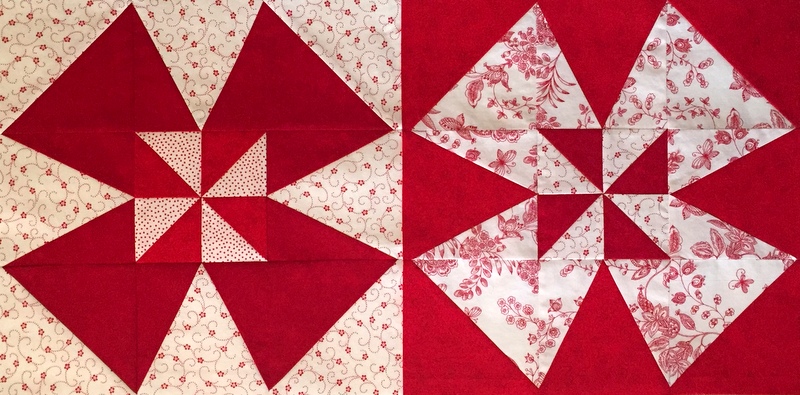
I’m talking about the places on my red and white windmill quilt where the points of the windmills meet. Matching my points turned out to be much more challenging than I had anticipated.
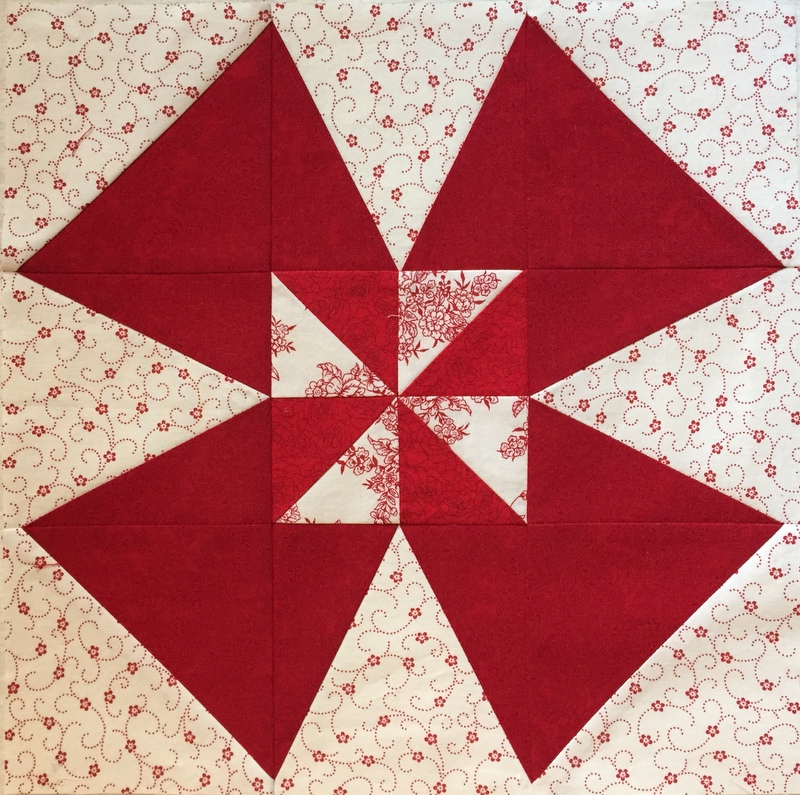
Here’s why. Take a look at a complete block:
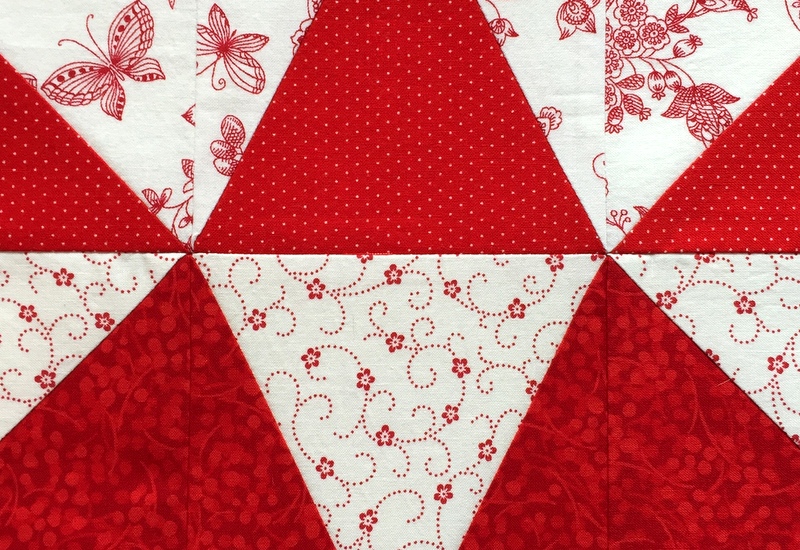
The seams in the Half Square Triangle (HST) corner blocks and in the center pinwheel are sewn at 45° angles . . .
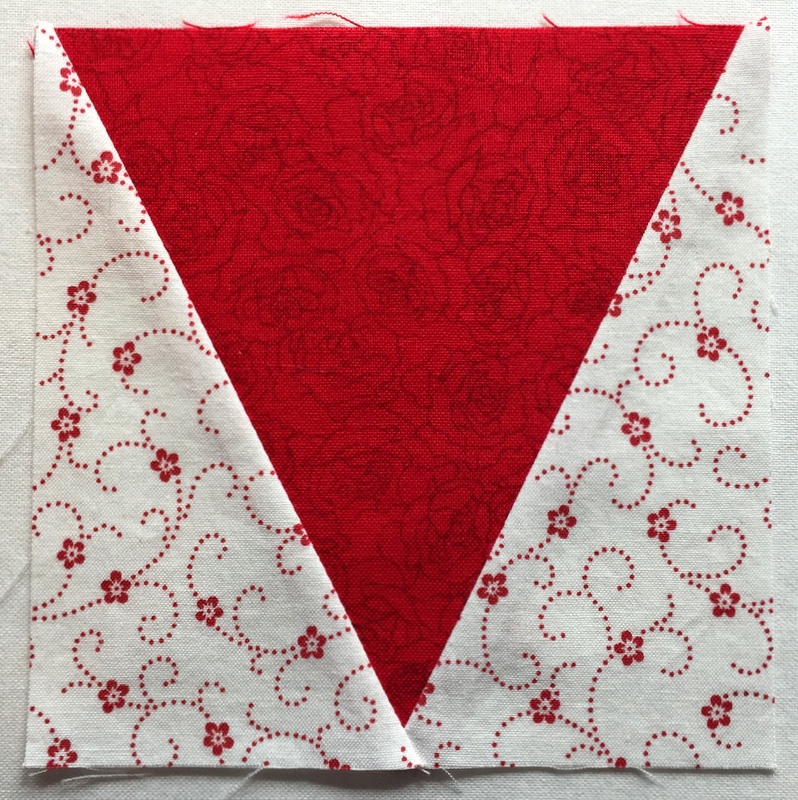
. . . whereas the seams in the V blocks are sewn at sewn at 60° angles:
When a V block is sewn to an HST or pinwheel block, the seams don’t naturally “nest,” even when the seams are pressed in opposite directions. Accuracy in pinning and sewing is essential.
My individual blocks went together nicely. Joining the blocks to form rows and then sewing the rows together was where I ran into problems. I’m a pretty precise piecer but I found that getting my points to line up properly was not just a matter of careful pinning and stitching.
Eight seams come together where the outer points of the windmills meet in adjacent blocks. It’s very difficult to sew them together without some of the seams shifting ever so slightly. With the amount of contrast between light and dark fabrics, points and seams that are even a stitch or two out of alignment are going to stick out like sore thumbs.
The seam between Rows 1 and 2 gave me absolute fits. There was much ripping out and resewing of small sections, accompanied by much gnashing of teeth (and some unpardonable language). I finally resorted to pinning and basting two rows together, then going back to do corrective sewing on the problem points (ripping out, repinning, rebasting . . . multiple times) before sewing the entire seam with a shorter stitch length.
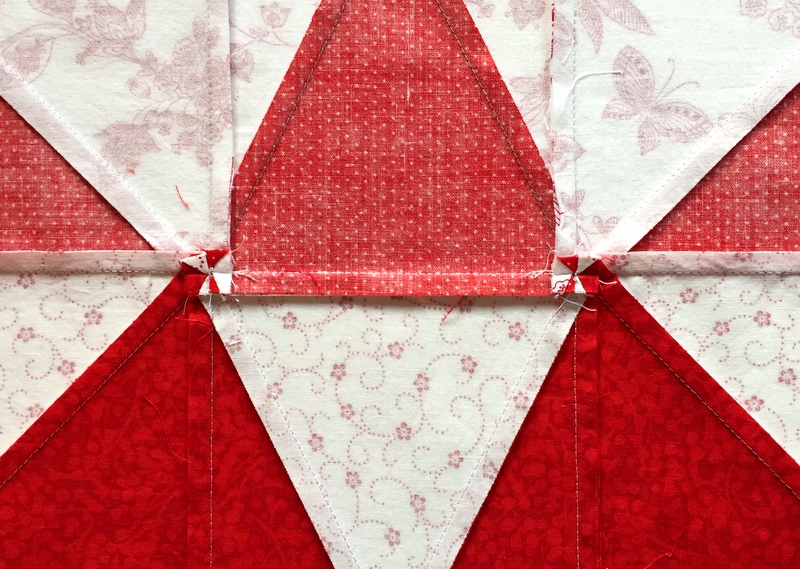
The horizontal seam in the center of the picture below shows two properly joined blocks:
On the back where the eight seams come together, the row seams were popped open to distribute the bulk, forming ½” square pinwheels:
I can now happily report that all of the frustration was worth it. Take a look at my finished quilt top:
Now that all of the blocks are joined, can you see the overlapping circles? You should be able to see both light and dark circles. They are illusions, as there are no curved seams in this quilt top. The quilt block is a variation of the classic Winding Ways block, which employs curved seams to form overlapping circles.
The pattern (A Midwinter’s Night by Cottage Rose) calls for borders with pieced cornerstones but I like the look of this without any borders at all. It measures 48½” x 60½”, a nice sized throw.
And I have a name for it. Because I think of the blocks as windmills, I’m going to call this quilt Dutch Treat. Some of my readers suggested I call it Coco’s Valentine, since my calico kitty seems to like it so much. Truth be told, Coco likes every quilt I make, never missing an opportunity to lounge on a quilt under construction or a finished one.
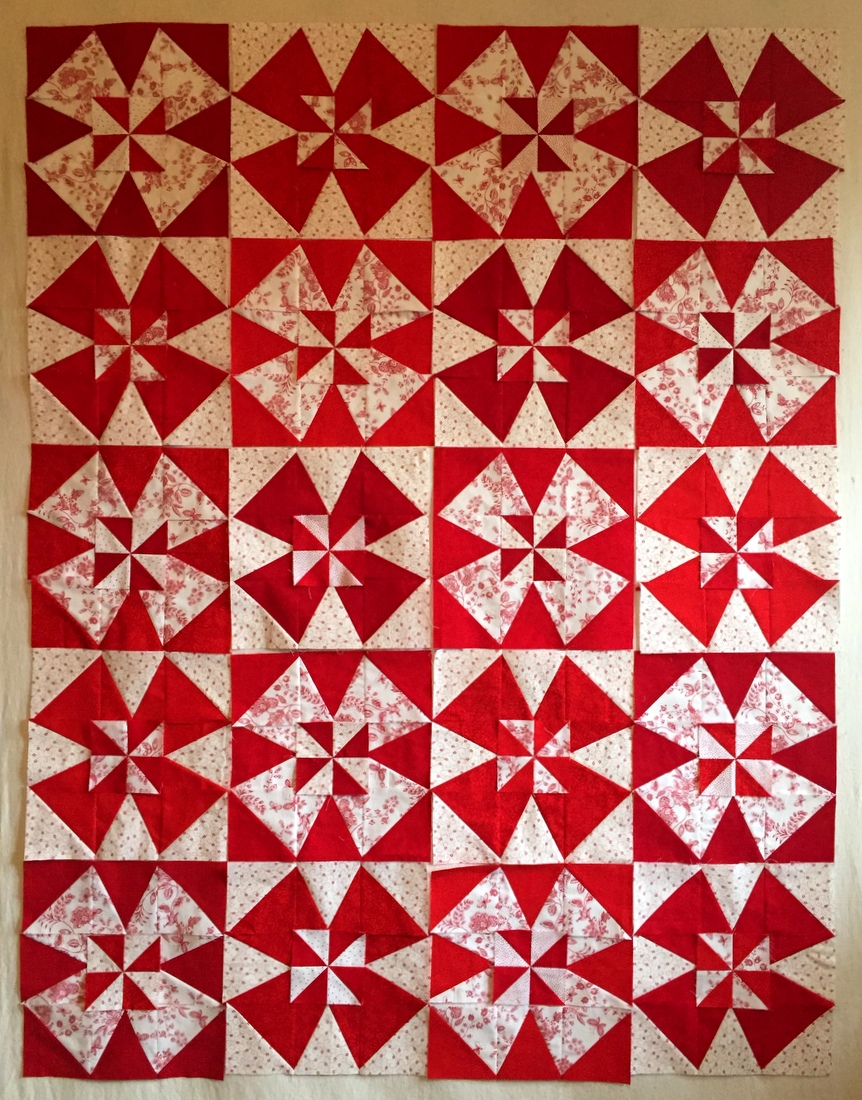
This is the final layout of my scrappy red and white windmill quilt:
The pinwheel centers were the last to go in, as they needed to be balanced with each other as well as inside their respective blocks. And it was a balancing act. First the windmills needed to be positioned so that no like red prints (which read as solids) were in adjacent blocks and then the pinwheels needed to be positioned in the same way. My other self-imposed rule was that the red prints in each pinwheel had to be different from the other reds in the same block.
Since I was working with a limited number of reds, this turned out to be quite a challenge. I wound up with two neighboring blocks with the same red in the pinwheels (not sayin’ where) but I’m not worried about it because the quilt top still looks balanced over-all.
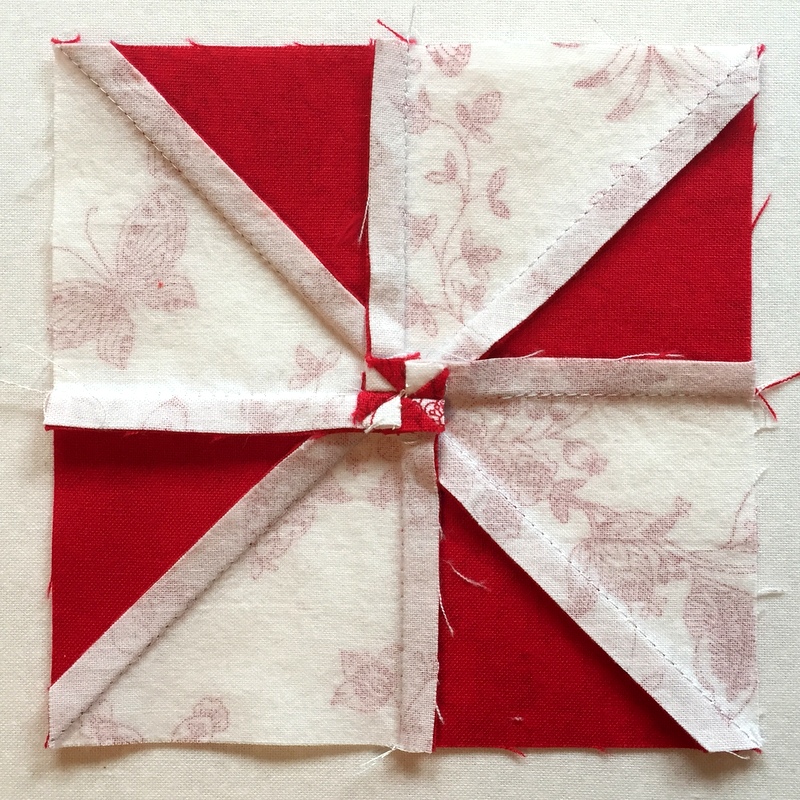
Speaking of pinwheels, those little blocks look pretty cute from the back:
To flatten the center where eight seams intersect, I popped two seams open, creating a teeny tiny pinwheel which no one will ever see once the quilt top is sandwiched.
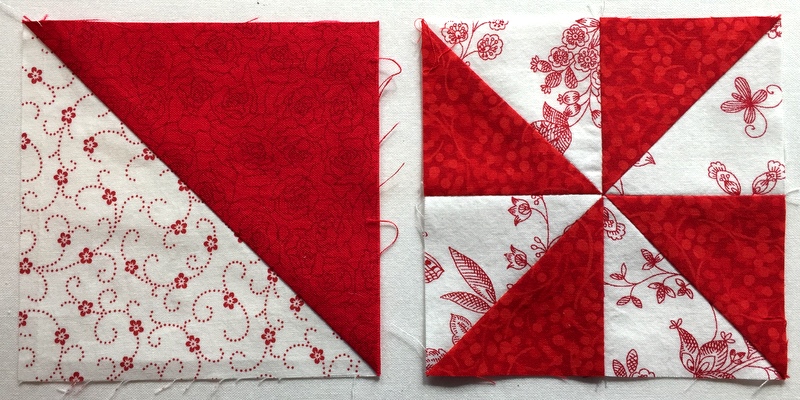
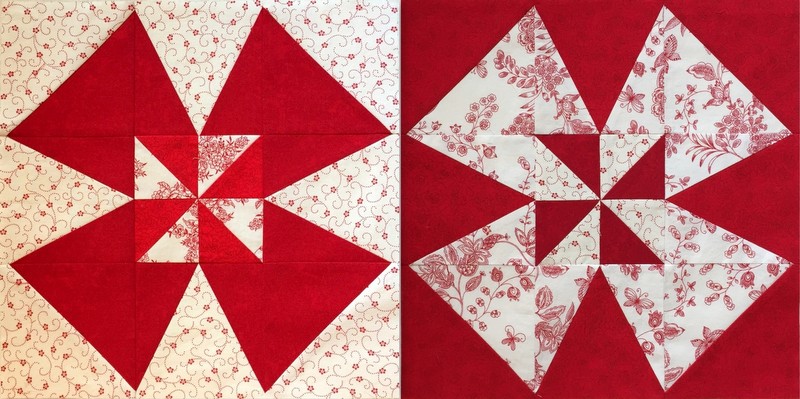
The pattern I am using is A MidWinter’s Night by Deb Eggers of the Cottage Rose. I made one small but significant change to her directions which is best explained by showing you a couple of photos. Here are the first two blocks I made, side by side:
See how the values are reversed in the two blocks so that the windmill is dark in the left block and light in the right? But notice that the dark and light values in the center pinwheels are in the very same position.
Doesn’t it stand to reason that the values in the pinwheel should be reversed as well? I removed the pinwheel in the left block above and replaced it with a pinwheel with reversed values. Now look at the two blocks:
Doesn’t that look better? I sure think so. I’m glad this occurred to me before I sewed 20 pinwheels together the same way.
I am hoping to get all of the blocks sewn together this weekend. I might even get the top completed. My efforts are somewhat hampered by this constant visitor to my sewing room:
Coco likes to make herself at home on my ironing board. She’s always very interested in what I’m doing:
See how she has placed her paw directly on the pieces I am trying to pin? With “help” like that, no wonder I sometimes feel my progress is too slow.
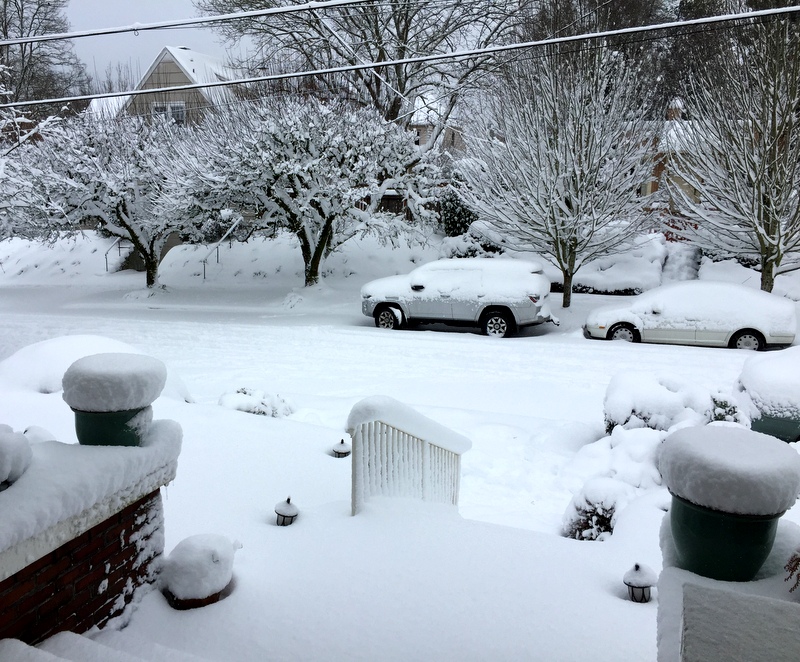
Local pundits are calling it “Snowpocalypse” — the epic snowfall on Wednesday that pretty much shut Portland down. We can go years in Portland without snow in winter but this season it has already snowed four times. The temperatures aren’t rising enough to melt the snow so we are stuck with it for a while.
What a great excuse to hunker down and get some sewing done! This is what I’ve been working on:
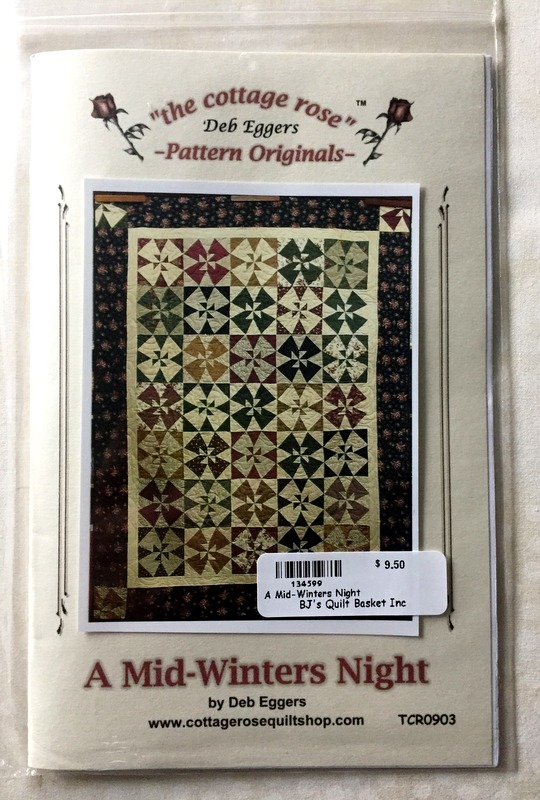
Aren’t those pretty blocks? They remind me of windmills. The pattern is A Mid-Winter’s Night by Deb Eggers of the Cottage Rose Quilt Shop:
The pattern is a reworking of the classic Winding Ways block with a pinwheel in the center. If you look carefully at the quilt pictured on the pattern cover you can see overlapping light and dark circles. The circles are illusions, as all of the cutting and stitching lines are straight. I believe the Winding Ways block is traditionally made with curves resulting in a four-patch block. The method I’m using here results in a nine-patch block.
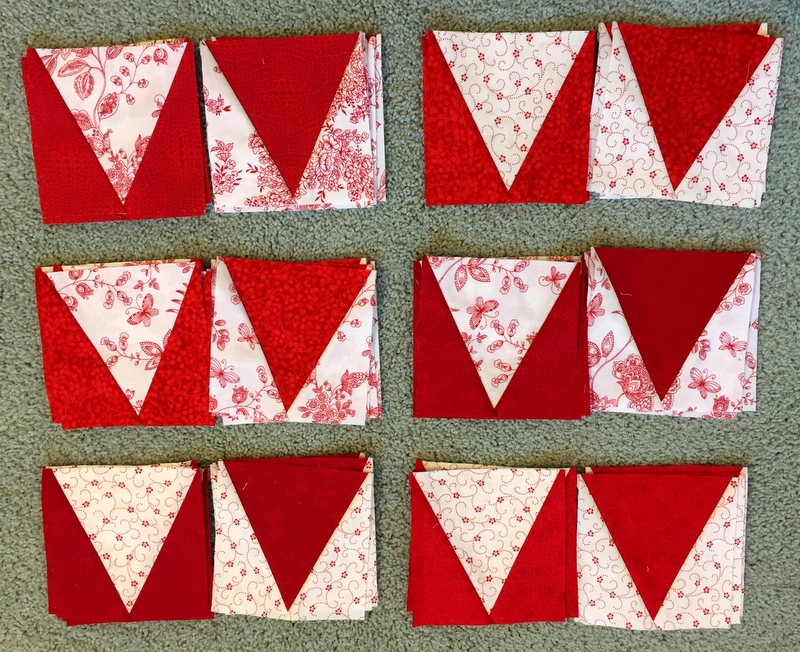
Working strictly from my stash — I couldn’t have driven to a fabric store in this weather even if I’d wanted to! — I pulled out some red tone-on-tone prints that read as solid and a couple of white-on-red prints.
Now I’m making my way through my little piles of V blocks:
The pattern calls for the Tri-Recs rulers, which I own, but I am getting great results from the V Block Trim Down Ruler by Deb Tucker. I resized the block from 9″ to 12″ so the units you see above measure 4½” square. With the V Block Ruler you can trim down blocks for 11 different sizes ranging from 1½” to 6½”.
I may add another red for more variety in my darks. With the exception of a few small pieces in my scrap bin, I’m limited to the vine and toile prints for the lights. I’ll save the smallest pieces for the center pinwheels.
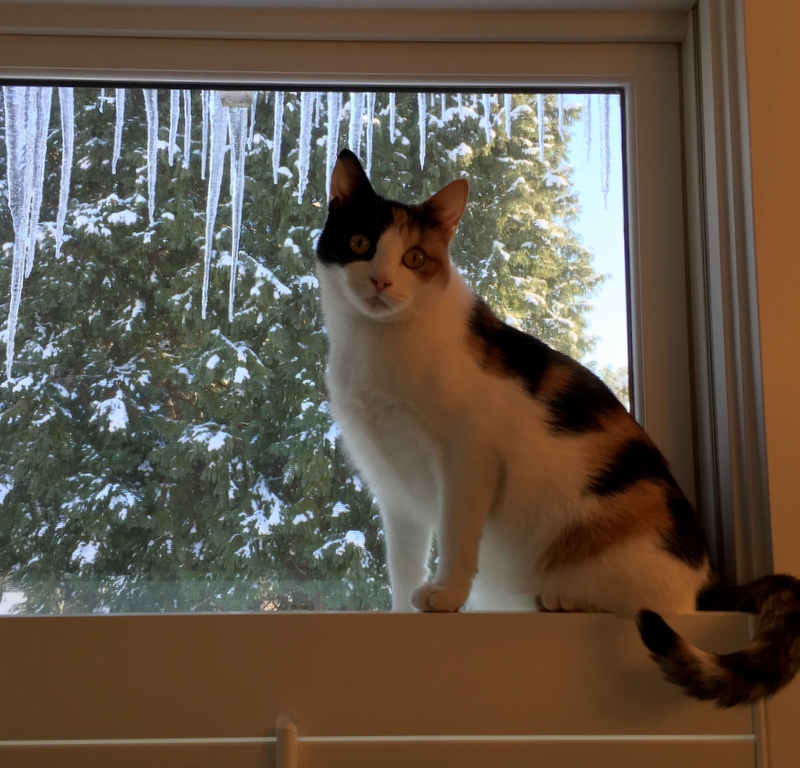
While I am happily ensconced in my sewing room, Coco is keeping tabs on the weather from her perch above the plantation shutters in the master bath:
The icicles start to melt in the morning sun but refreeze when the sun moves out of sight.
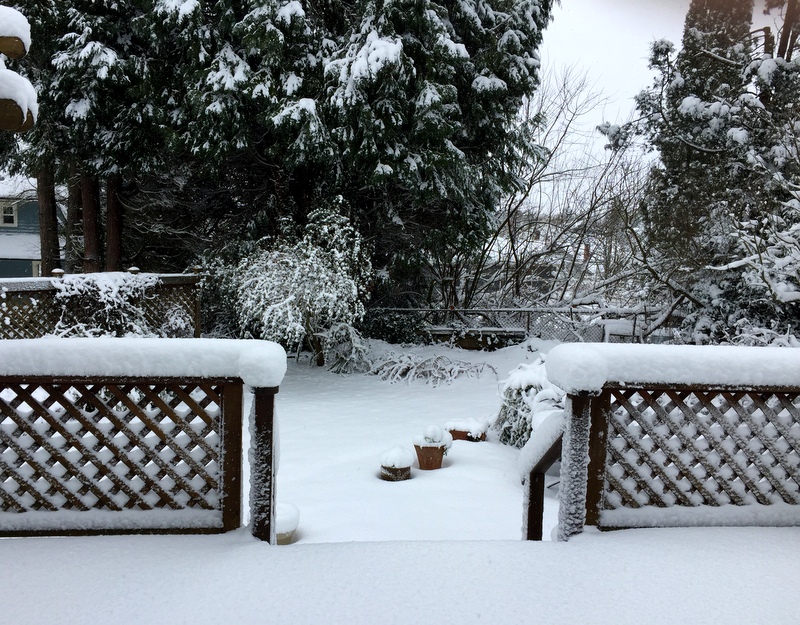
This is our back yard as seen from the kitchen door:
This is the view from the front porch:
You can see why I have no desire to drive anywhere. And freezing temperatures are expected for the next four days!
Here’s to 2017! Specifically, here’s to lots of sewing and quilting in 2017. I’m already looking forward to several projects — and not just new ones. There’s a stack of UFOs beckoning that I am actually enthusiastic about tackling. But not today.
On this fresh new day of the year, I’m looking back on what I created in 2016. Rather than going in chronological order, I’m grouping my finishes by categories.
This was the year of the Junior Billie Bag, the quintessential quilter’s tote designed by Billie Mahorney. I made a bag for myself . . .
. . . and one for my friend Deborah . . .
. . . and one for my friend Miriam:
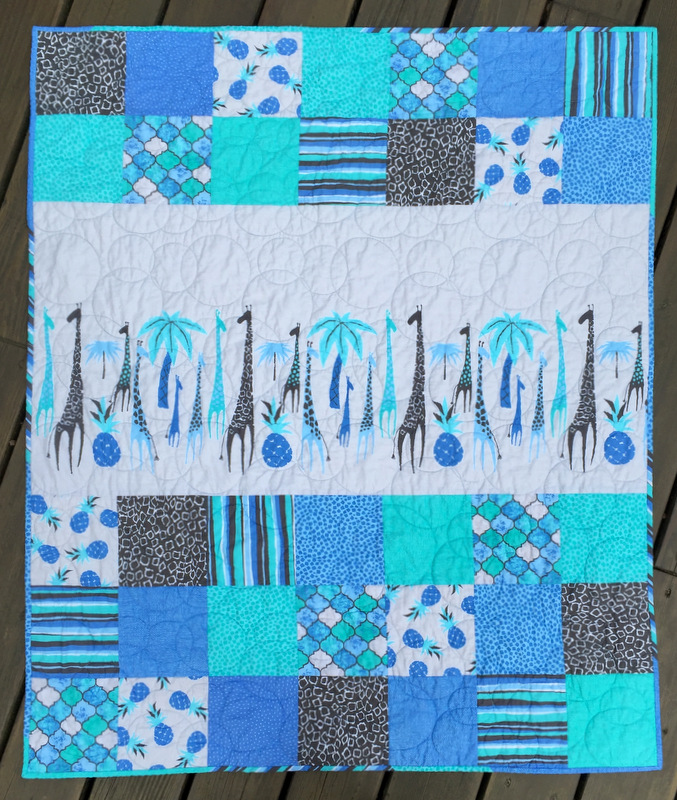
Next category: baby quilts. This is the first of two incorporating a charming giraffe-themed fabric panel:
Abraham’s Quilt, 40″ x 49″ (2016)
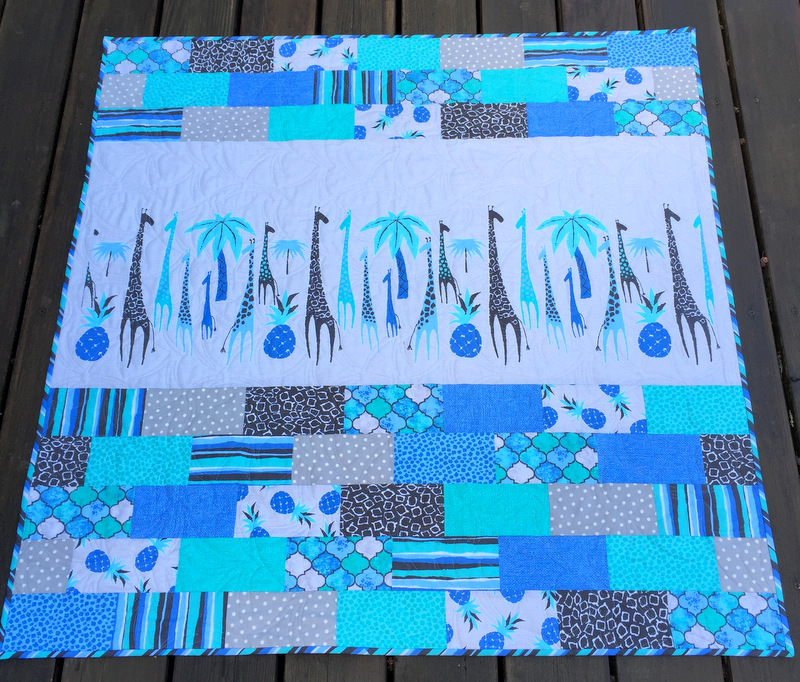
Here’s the second one, using the same fabrics in a slightly different setting:
Malachi’s Quilt, 41″ Square (2016)
I didn’t use a pattern for these quilts, preferring to play with simple shapes (squares and rectangles) so that the giraffes on the fabric panels would be the focal point.
My third baby quilt of the year was this one using the pattern Just Can’t Cut It from All Washed Up Quilts:
Stefan’s Quilt, 46″ Square (2016)
All three were quilted by longarmer Sherry Wadley.
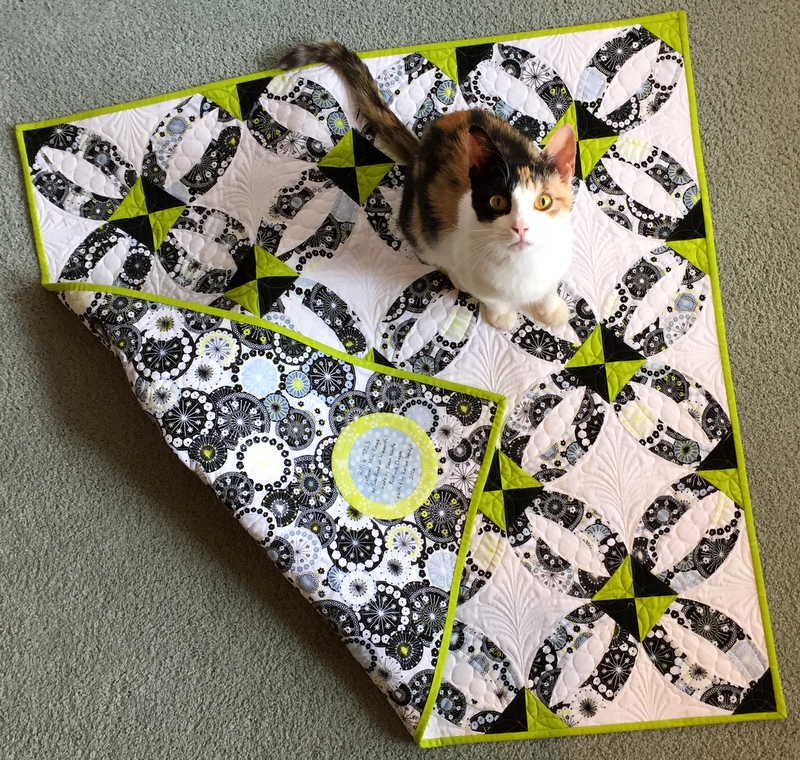
All by itself in the mini quilt category is Ring Toss, based on the pattern Mini Rings by Sew Kind of Wonderful:
Ring Toss, 32″ Square (2016)
Mini Rings was quilted by Karlee Sandell of SewInspired2Day. Oh, and that’s our new rescue kitty Princess Cordelia (Coco for short).
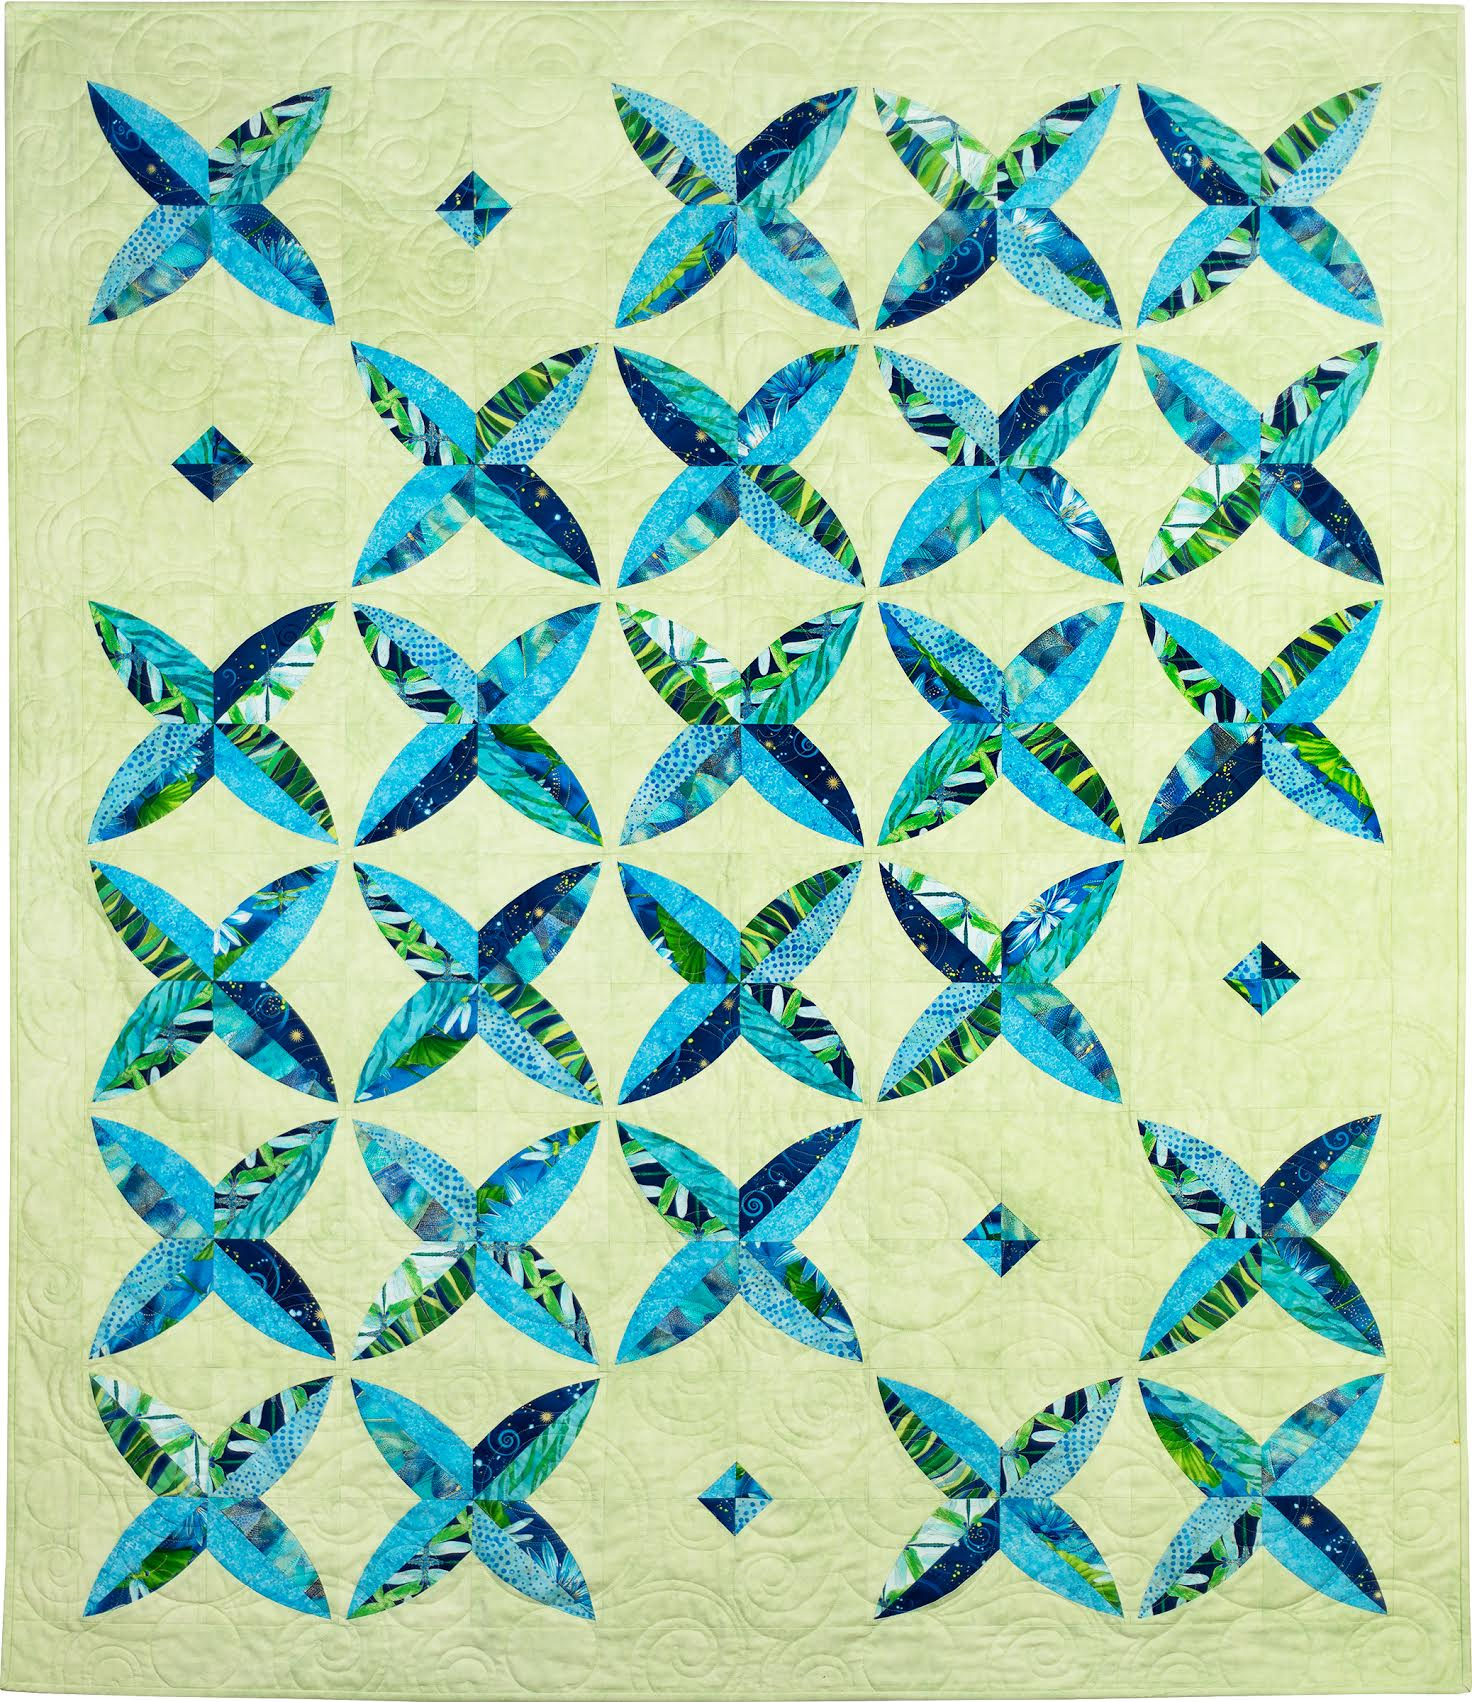
Lap quilts is the next category. Once again I used a Sew Kind of Wonderful design, adapting the pattern Chic Diamonds into this quilt I named Dragonfly Kisses:
It was quilted by Sherry Wadley.
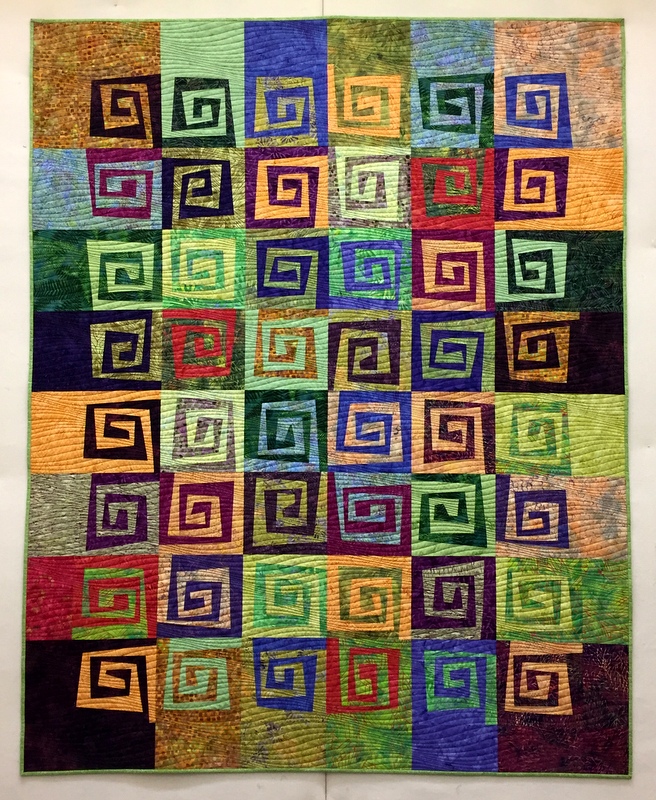
The next quilt, Where It’s @, was started in July in a class with Karla Alexander of Saginaw Street Quilts. It’s based on her pattern Rewind. I really stepped outside my comfort zone with this quilt, and I absolutely love the result:
Where It’s @, 57″ x 72″ (2016)
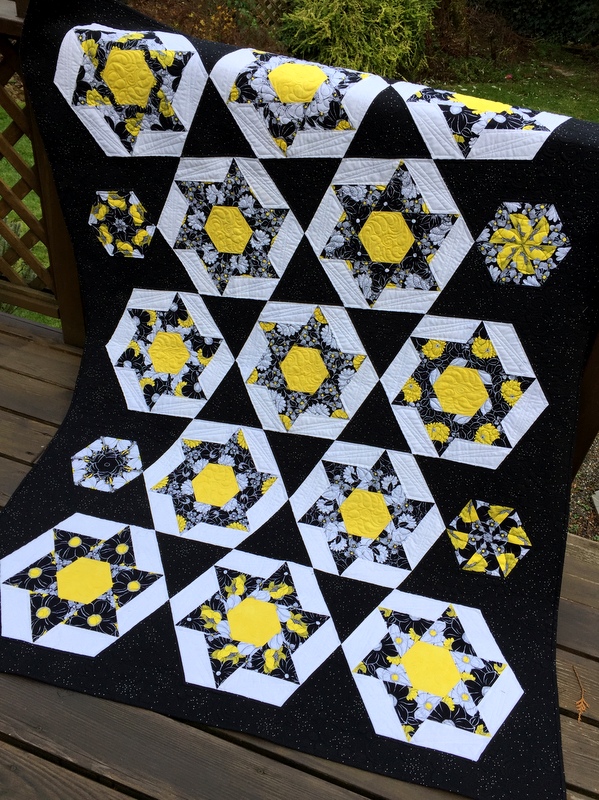
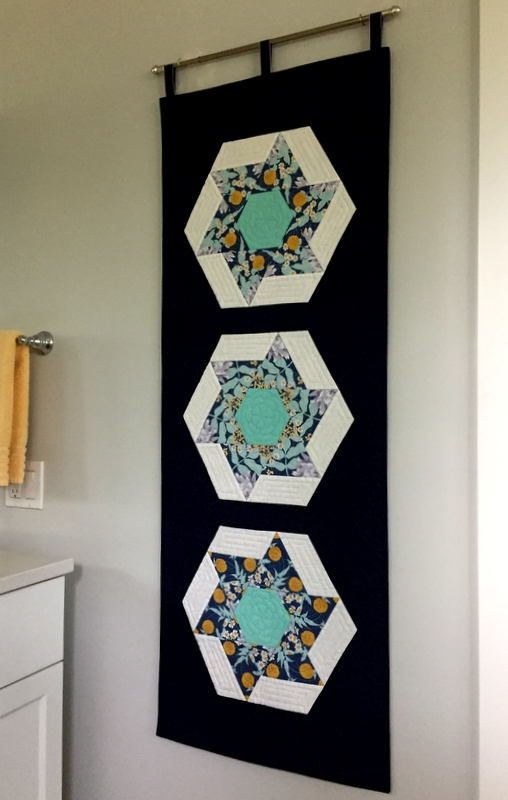
The last quilt in this category is Stella by Starlight, a “kaleido-spinner” using the Spinners block by Heather Peterson of Anka’s Treasures:
Stella by Starlight, 51½” x 71″ (2016)
I call it a “kaleido-spinner” because the six equilateral triangles in each block were cut from identical repeats of the focus fabric, creating a kaleidoscope effect of sorts. The four small hexagon blocks are true kaleidoscope blocks.
Both Where It’s @ and Stella by Starlight were quilted by Karlee Sandell.
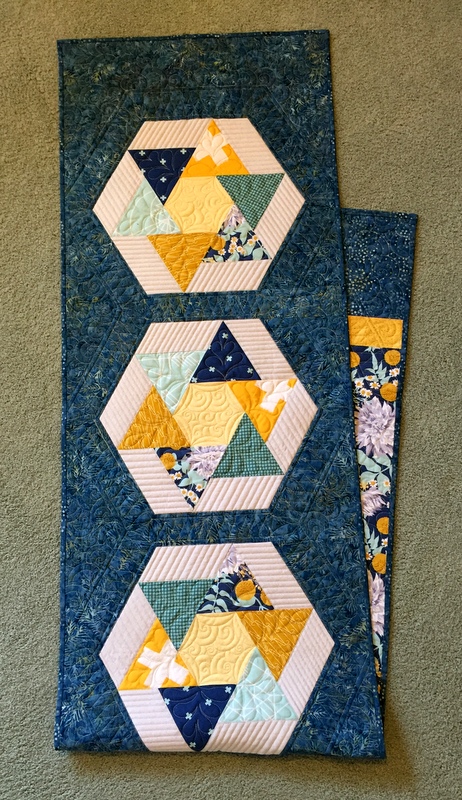
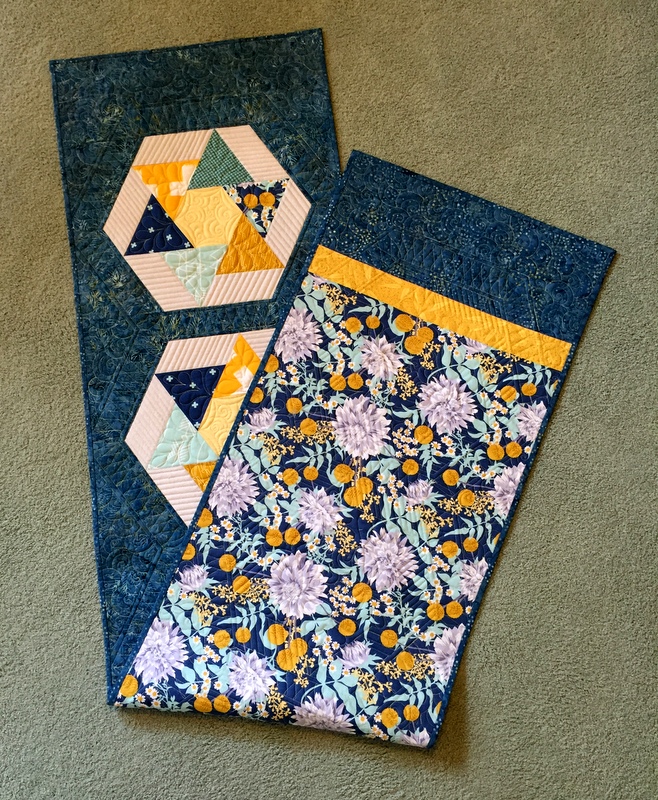
The next category is runners, both bed and table. I made one of each, using the same focus fabric in each (Wander by Joel Dewberry) and the same block design (Spinners by Anka’s Treasures) with completely different outcomes. Here is WanderLust I, the king size bed runner made with five blocks:
WanderLust I, 20″ x 88″ (2016)
I liked the focus fabric so much I made the bed runner reversible:
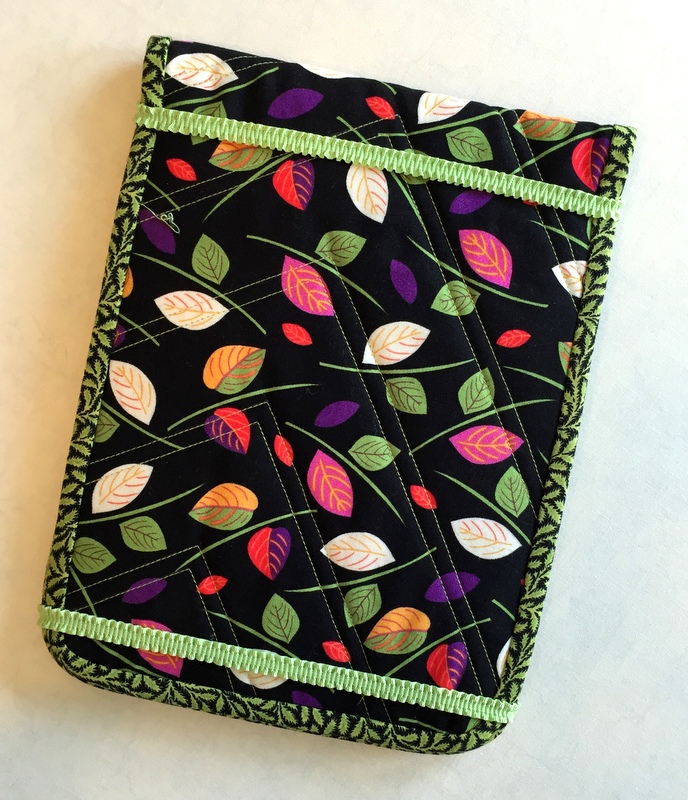
The final category is a bit of a hodgepodge. I made a quilted cover for my stepmother’s new iPad Pro . . .
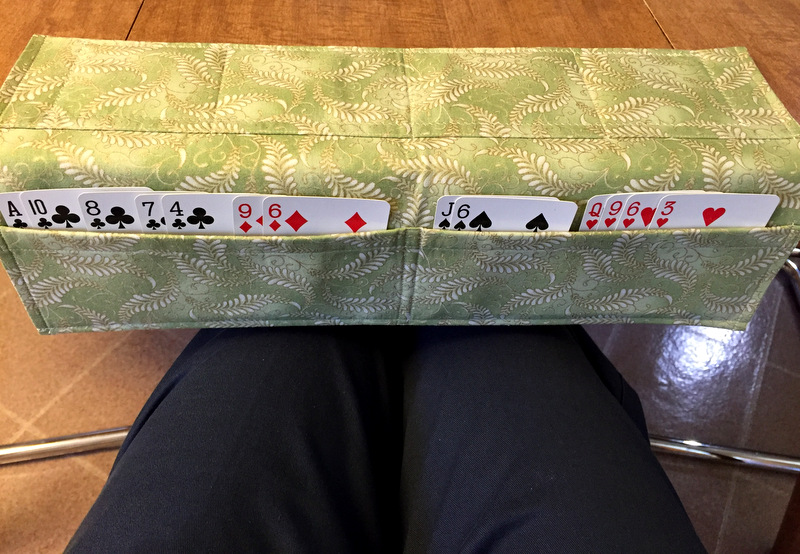
. . . and a cardholder for her bridge hands:
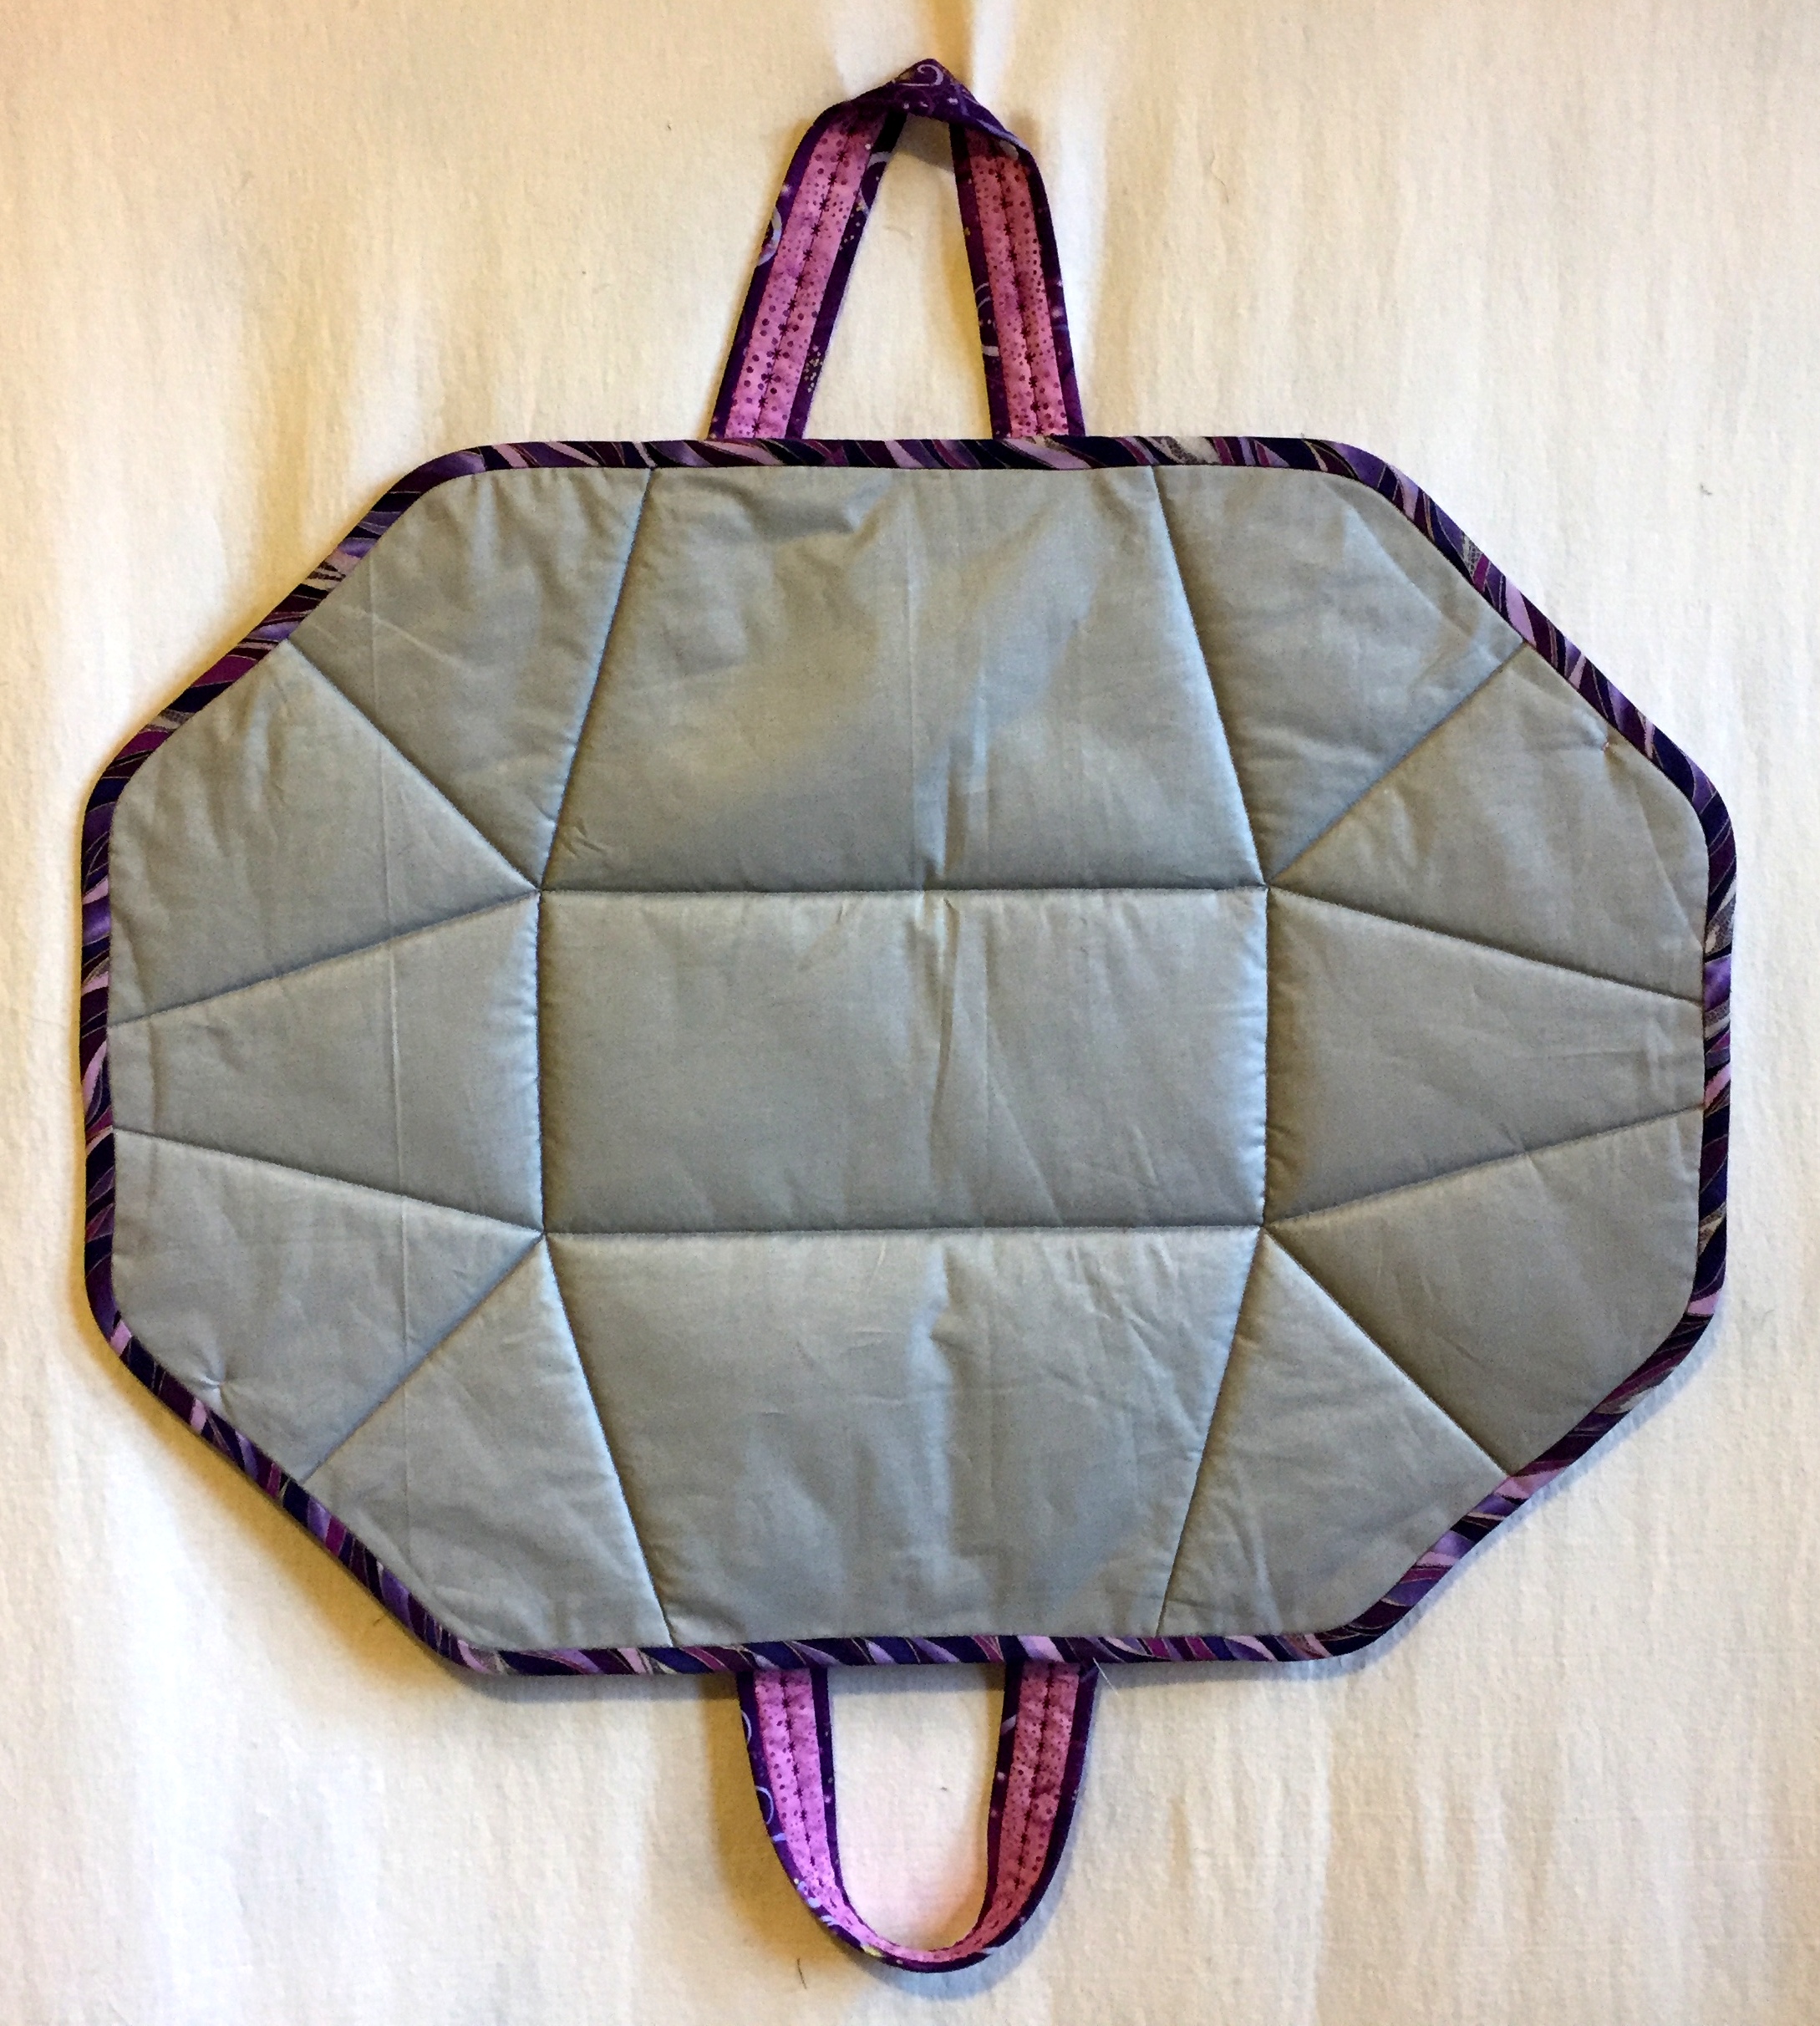
For my friend and fellow Quister (Quilt Sister) Vickie I made an iron caddy that doubles as a pressing mat . . .
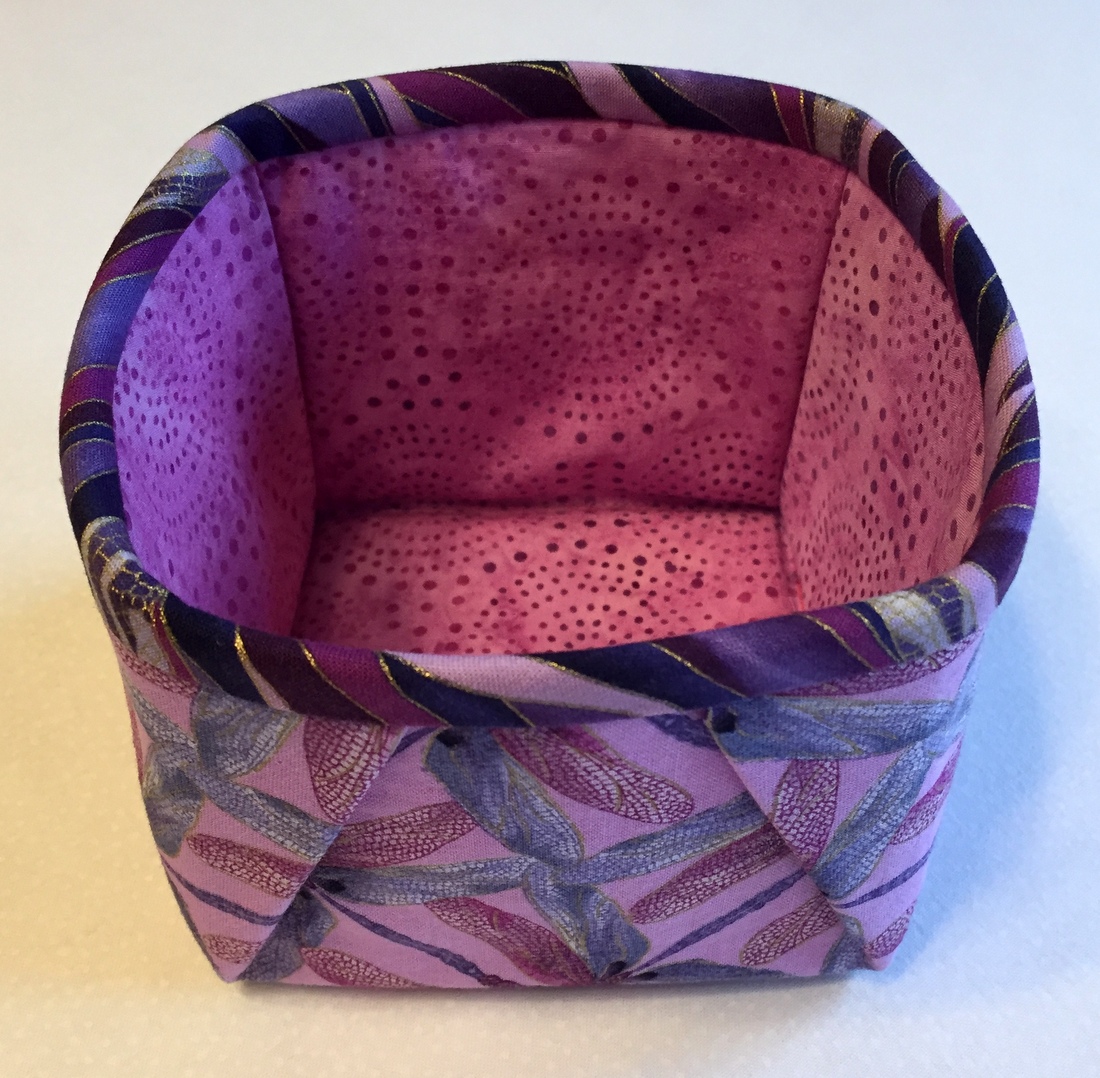
. . . plus a matching 4″ x 4″ fabric box that she can use as a threadcatcher:
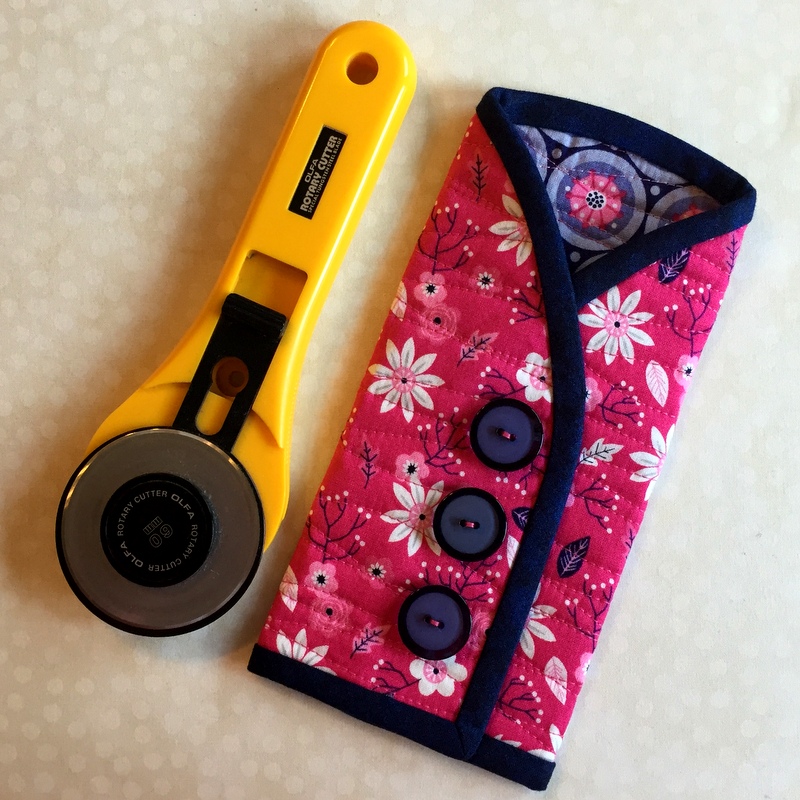
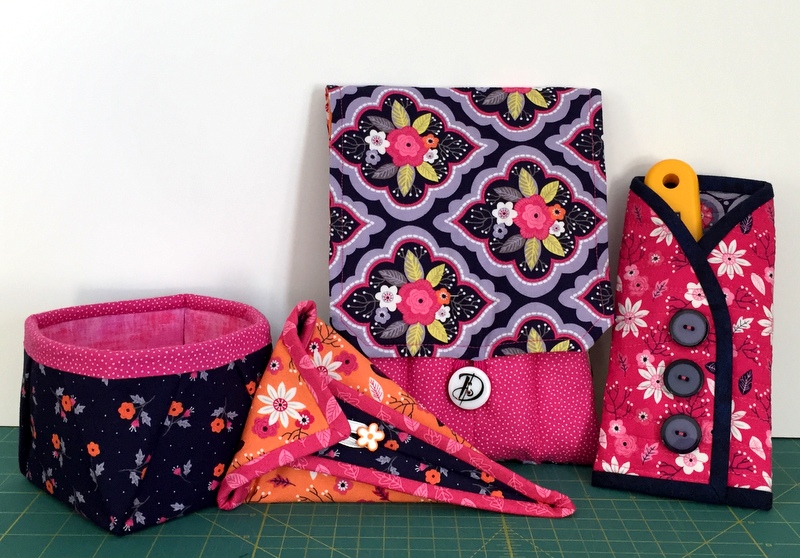
For myself I made some accessories to match my Junior Billie Bag: a rotary cutter coat made from my tutorial . . .
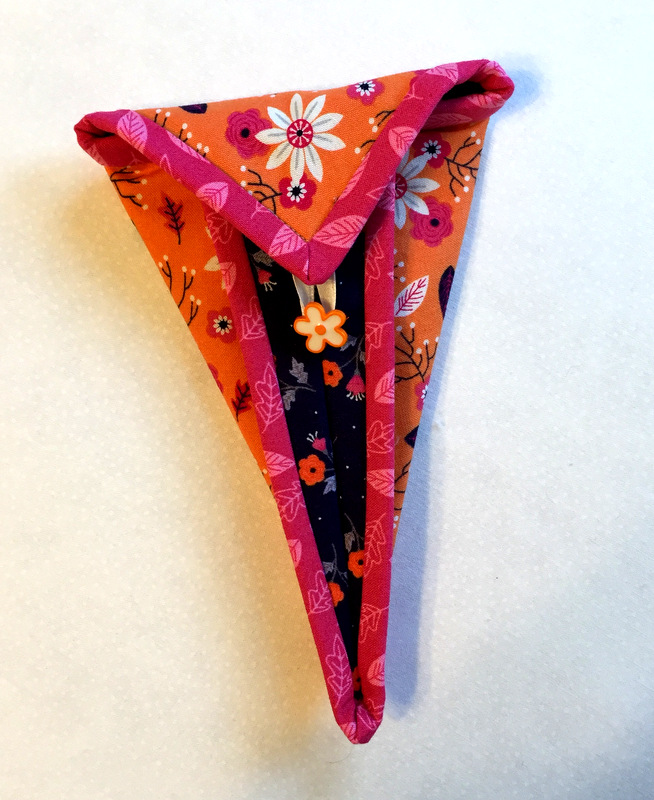
. . . and a scissors case . . .
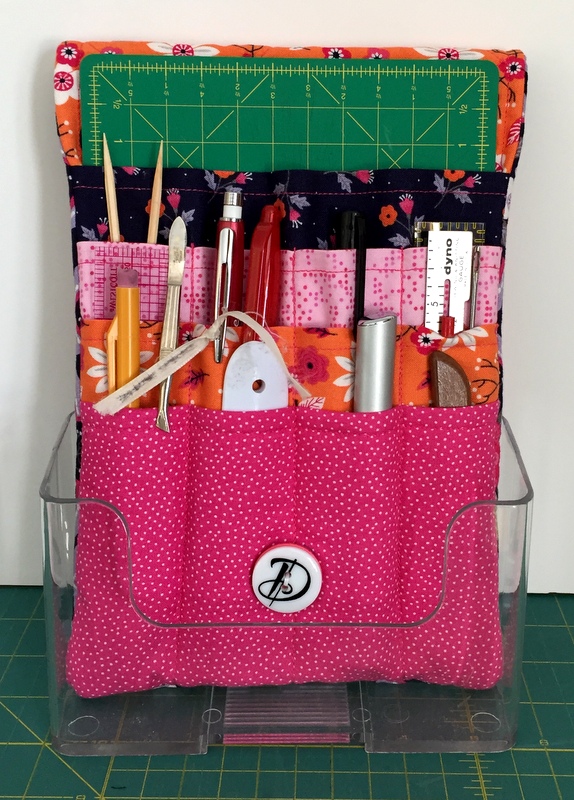
. . . and a sewing caddy that sits upright in a Lucite stand:
A 4″ x 4″ fabric box (yes, it’s a threadcatcher) completes the ensemble:
As you have surmised, I’m crazy in love with that fabric line (Paradise by Alisse Coulter for Camelot Cottons). I expect you’ll see more of it in 2017, as I bought a lot when it was released a couple years ago.
I’m sending a shout out to the talented longarm quilters who transformed my 2016 quilt tops into beautiful quilts — Coleen Barnhardt, Karlee Sandell, Debbie Scroggy, and Sherry Wadley — and to you, my loyal blog readers, for your continuing interest and support of First Light Designs.
I’ve already finished two this year, one for myself and one for a friend. Now I’m making a third one. The reason? I’m teaching a class that begins tomorrow at the Pine Needle. I made my first Billie Bag, designed by Billie Mahorney, about 10 years ago, and found it very challenging. It’s definitely not for beginners.
Now that I am teaching Billie’s design (in a slightly smaller version), I find that the easiest way to give my students the confidence to make their own totes is to demystify the process by showing how the individual components go together. I call it a “deconstructed Billie Bag” but in truth it’s a Billie Bag under construction.
I guess every time I teach this class I will wind up with a new Junior Billie Bag. This one is going to a friend as a surprise.
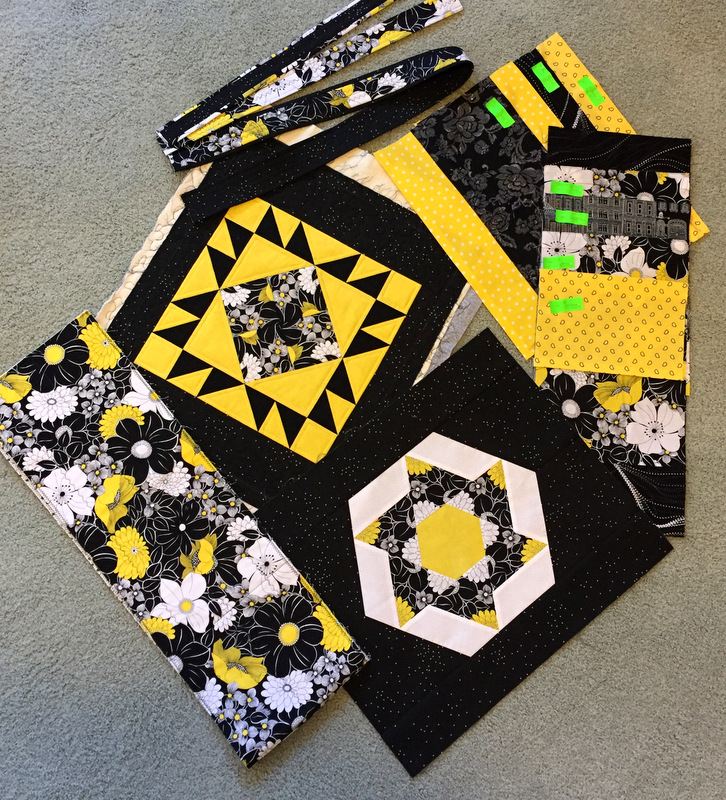
What you are seeing in the photo above are the front and back panels, the side panels/bottom unit, two sizes of straps, and some of the interior pockets. In a few weeks’ time, you will see a finished quilter’s tote measuring 14″ x 17″, with a generous 7½” depth to accommodate a 6″ x 24″ acrylic ruler.
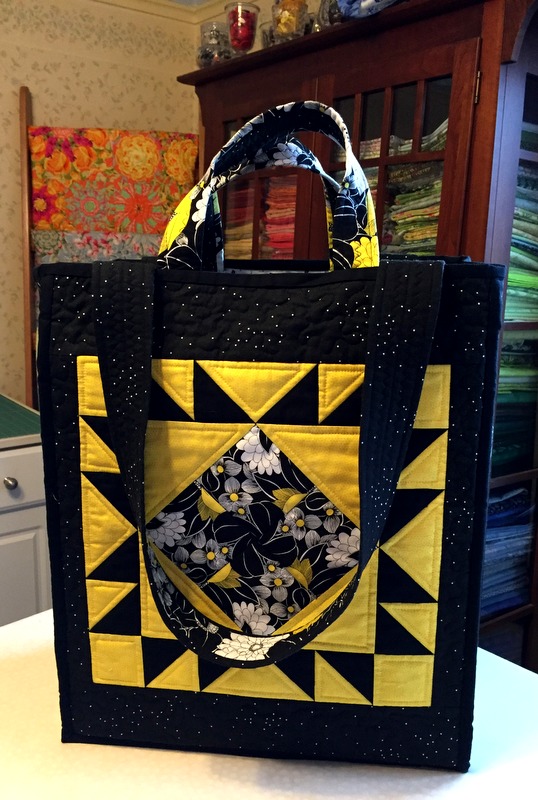
I started out with two 12½” blocks to which strips were added to make two panels that will be trimmed to the proper size after quilting:
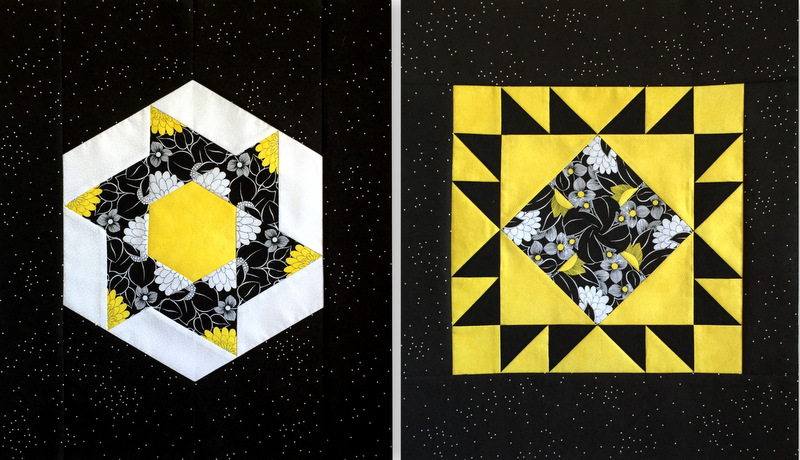
The panel on the left is yet another version of the Spinners block, from the book On the Run Again by Heather Peterson of Anka’s Treasures, that I’ve used in some other projects this year. The one on the right is a traditional star block that I jazzed up with a four-patch kaleidoscope (what I call a 4-Patch Wonder block).
Isn’t that a great black-white-yellow floral print? I found it last summer at a quilt shop in Central Oregon and bought the end of the bolt. It’s by Studio 8 for Quilting Treasures. I paired it with one of Cotton + Steel’s Basics from 2015: “Sprinkle,” designed by Sarah Watts. (I love the Sprinkle design so much I bought it in two other colors.)
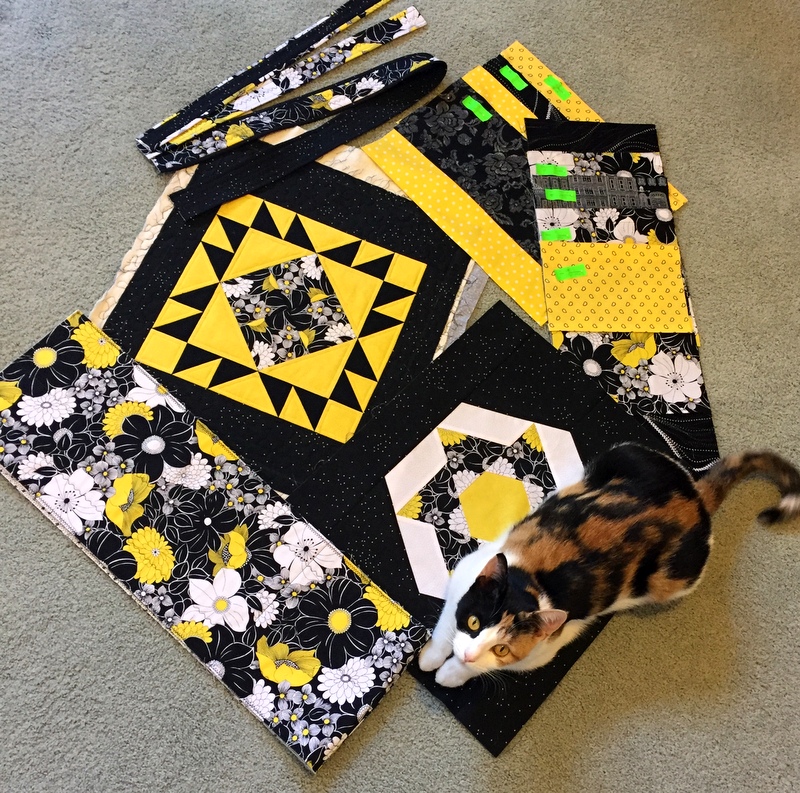
My biggest challenge in making this Junior Billie Bag will be keeping Coco out of my sewing room:
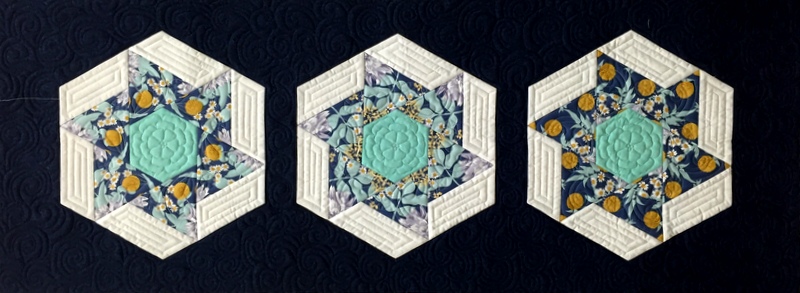
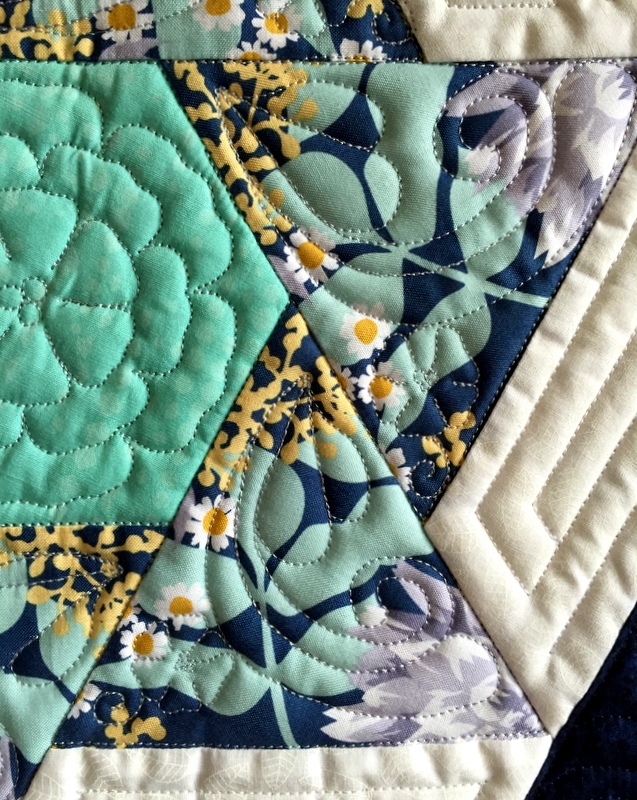
My “kaleido-spinner” runner, based on Heather Peterson’s Spinners block, is back from longarm quilter Debbie Scroggy of All Quilted LLC. Once again I marvel at how much depth quilting adds to a pieced top:
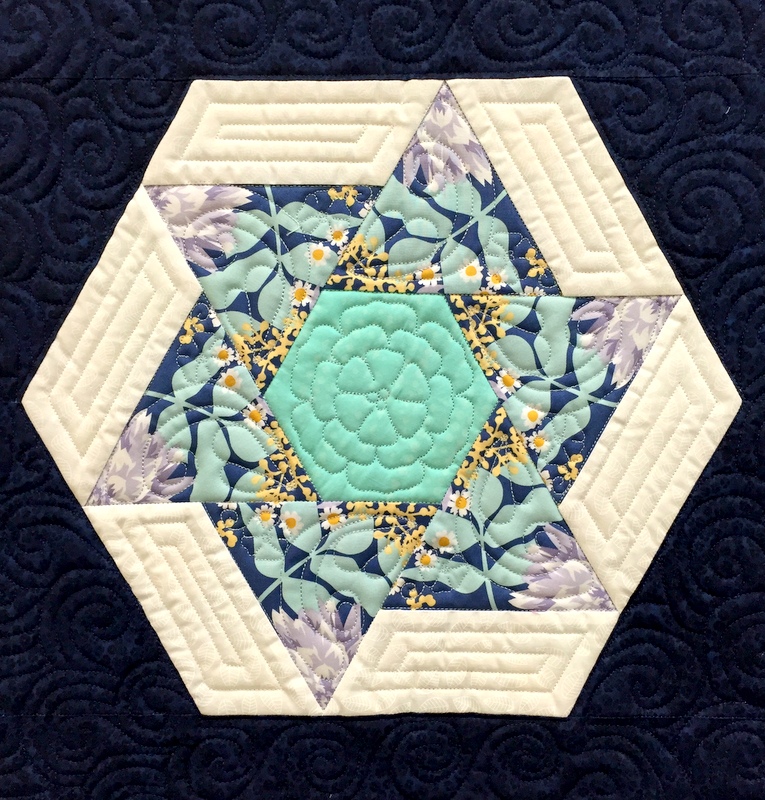
Debbie used a combination of computerized quilting (center hexagons and triangles), ruler work (white strips), and free motion quilting (dark blue background) on my quilt. Look how cleverly the quilting in one corner of each triangle echoes the floral quilting motif in the center hexagon:
You really have to look for that little blossom. I appreciate the way the quilting adds texture and interest to the quilt without overwhelming it.
Debbie quilted spirals, one of my favorite motifs, in the dark blue background. I added some fill light to this photo to give you a better look:
I call this quilt a “kaleido-spinner” because of the effect created by using repeats of the floral fabric in the triangles that spin around the center hexagons.
In my last post, I showed you the five-block bed runner I made using the same block design and the same floral fabric. This is a different shot of the runner:
I named the quilt WanderLust as a nod to the floral fabric, from the Free Spirit line “Wander” by Joel Dewberry. The runner was given to my sister in Idaho, which is why my previous post is titled “WanderLust, at Home in Idaho.”
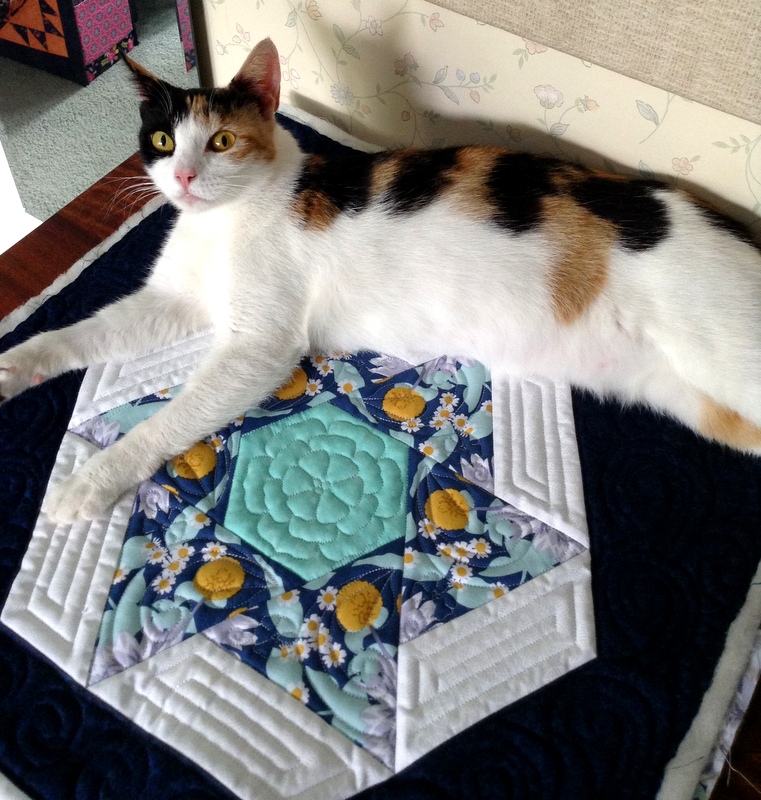
I like the name so much I’m going to call this runner WanderLust, too. It’s staying here in Oregon. Coco has already staked a claim on it:
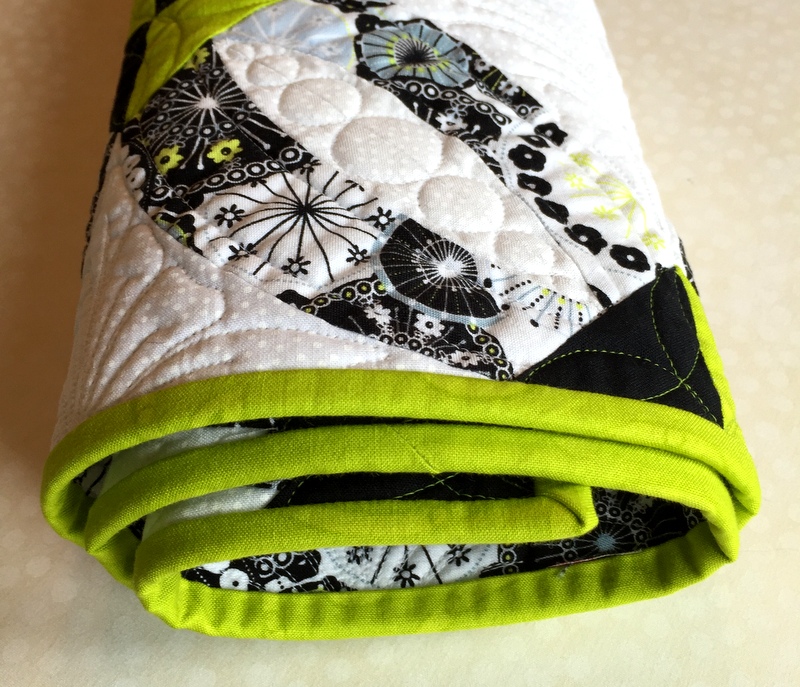
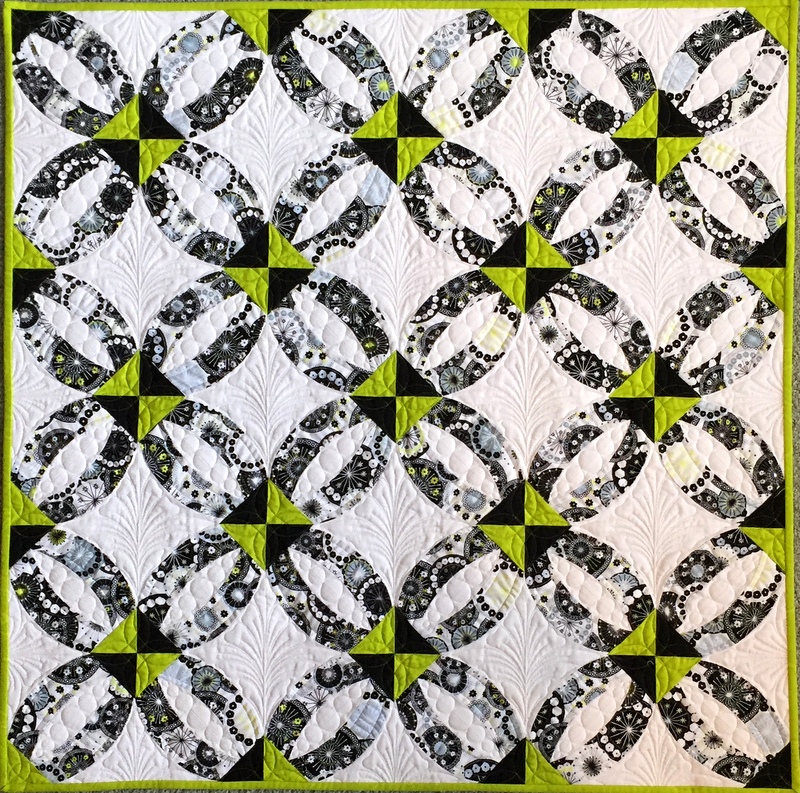
My quilt Ring Toss, based on the double wedding ring block, is finished. It measures 32¼” square. The pattern is Mini Rings by Sew Kind of Wonderful and was made with the mini Quick Curve Ruler.
As much as I liked this little quilt after getting it back from the longarm quilter (Karlee Sandell of SewInspired2Day), I like it even more now that it’s bound:
One of my friends wondered why I chose green for the binding over black. Black would have provided a strong dramatic frame for the quilt, it’s true. So why green?
First, I wanted to draw attention to the playful nature of the focus fabric used in the rings. That fabric (from the Doodle line by Alice Kennedy for Timeless Treasures) is mostly black and white with touches of lime green and light blue. The overlapping circles in the fabric remind me of ferris wheels and fireworks. A bright color seemed more appropriate than black for the happy mood I wanted to emphasize.
Second, instead of piecing a backing for the quilt with different fabrics, as I usually do, I used one piece, the same print used on the front. From a distance, the fabric reads primarily as black and white. If I had pieced the back I would have added quite a bit of lime green to liven it up. Since I wanted the quilt to be bright and cheerful from both sides, green binding was the obvious choice.
Oh, and then there is that third reason, which I think I’ve mentioned a few times before: green is my favorite color.
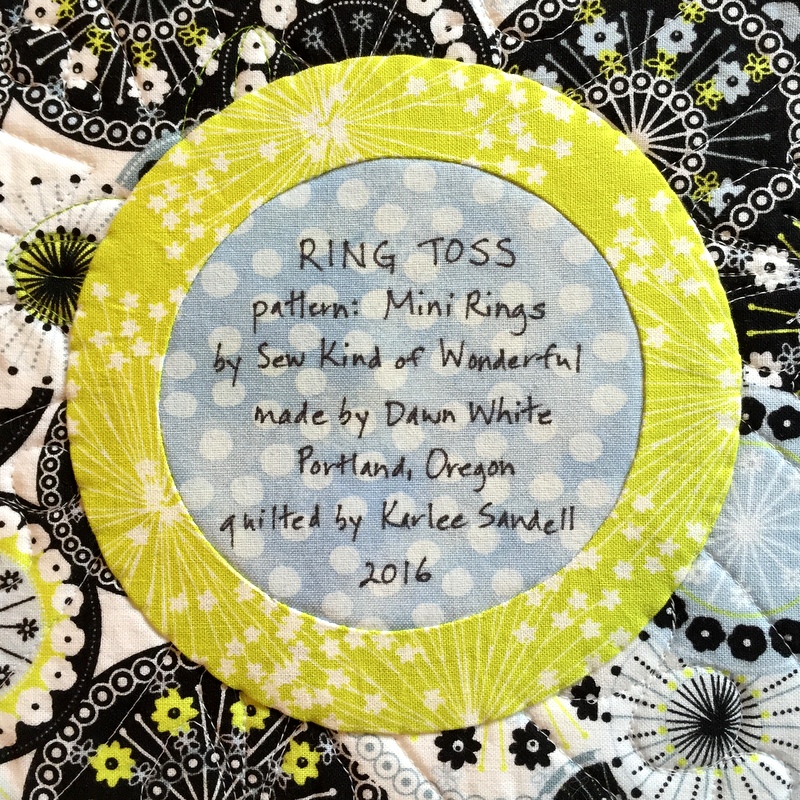
In keeping with the block design, fabric design, and quilt name, the label features — what else? — a double ring:

 I decided early on to cut the binding fabric on the bias because I figured the striped fabric would provide a dramatic frame for the panels. Good call, don’t you think?
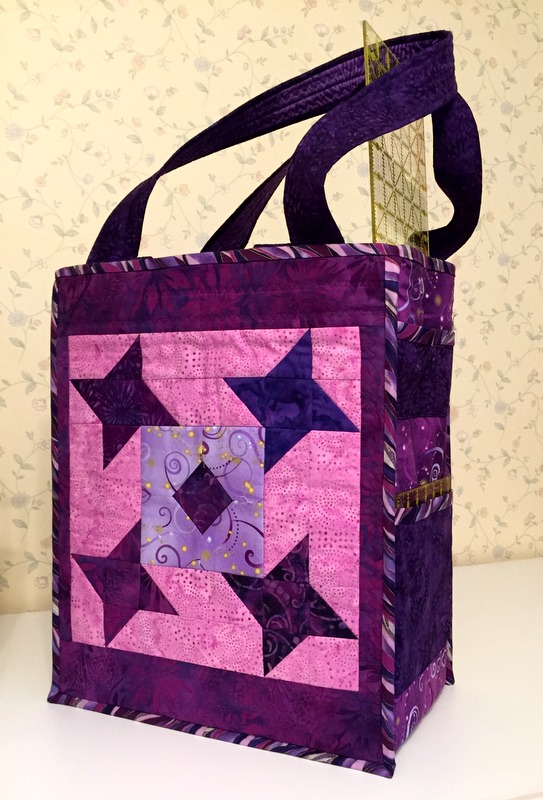

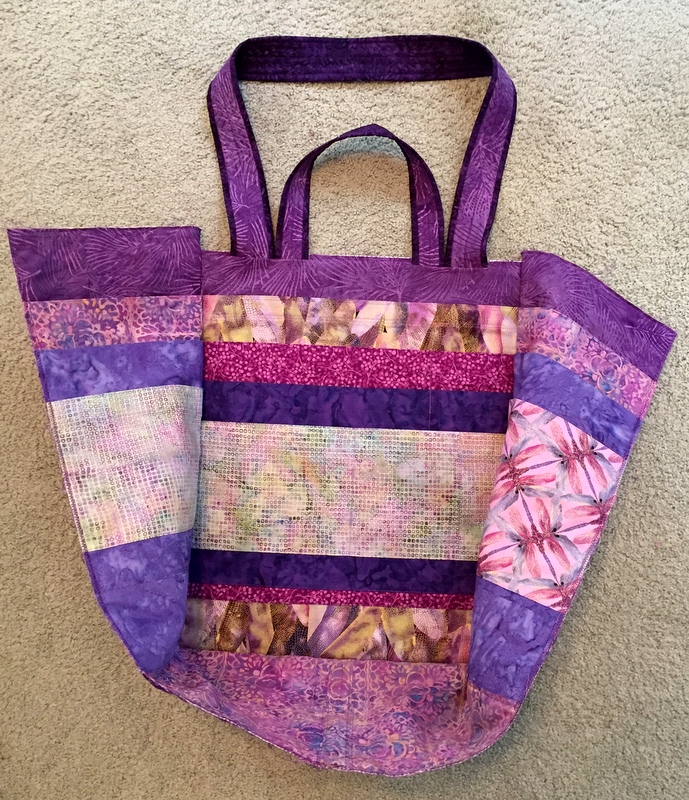 You can also see there’s a shorter set of handles. Those are tucked out of sight in the photos at the top of this post.
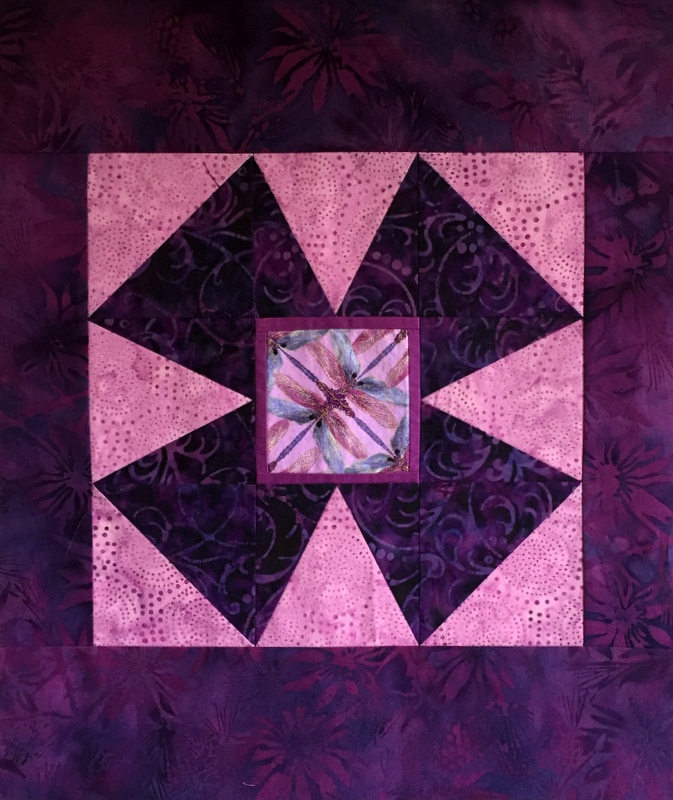


")
 My quilt Ring Toss, based on the double wedding ring block, is finished. It measures 32¼” square. The pattern is Mini Rings by