I got a phone call last night from one of the organizers of Northwest Quilting Expo (coming up later this week in Portland, Oregon) that my quilt Where It’s @ won a second place ribbon. I am thrilled!
If I remember the rest of the phone call correctly (I was a bit dazed), winners will be announced Thursday at 1:30 pm at the quilt show. That was the day I was planning to visit the show with my quilt group, the Quisters, so the timing is perfect.
I started this quilt in July 2016 in a class with Karla Alexander of Saginaw Street Quilts and finished it late last year. The name of her quilt pattern is Rewind. Karlee Sandell of sewinspired2day.com quilted it for me.
Quilters who enter their creations at Northwest Quilting Expo can opt to have their quilts judged. I chose to have mine judged, as I’m always interested in what the experts have to say, hoping I can learn from their remarks.
In 2011 I won a ribbon in a non-juried show. Here’s a look at that quilt:
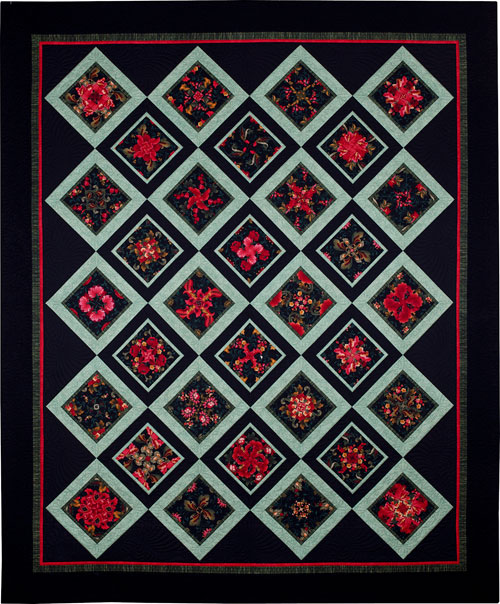
Midnight in the Garden, 66″ x 80″ (2010)
The venue was Quilts in Bloom, a small quilt show held at the Oregon Garden in Silverton, Oregon. Much to my surprise and delight, this quilt won the viewer’s choice award for Best Traditional Quilt. I’m sure that the beautiful custom quilting by Melissa Hoffman contributed to that award. (You can see other examples of Melissa’s beautiful work on her Instagram page, fiddlestitches.)
This quilt is very special to me. It was made from my own pattern 4-Patch Wonder, published in 2010. I originally called the quilt Carmen, after the name of the fabric line from Timeless Treasures, changing it later to Midnight in the Garden. I don’t have it anymore but it’s still in the family. I gave it as a gift to my twin sister Diane as a 60th birthday present. It’s on display in her home in Georgia and I get to enjoy it on my annual visits.
The Northwest Quilting Expo runs Thursday-Saturday, Sept. 28-30, at Portland Expo Center, 2060 N. Marine Drive. Maybe I will see you there!
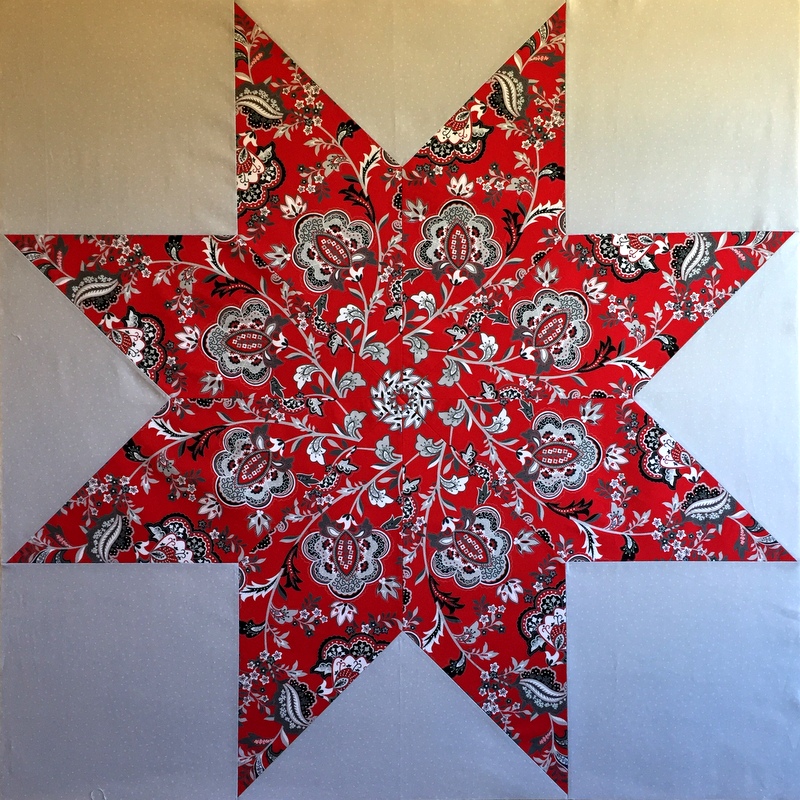
Here’s my second Big Block Star, made using Victoria Findlay Wolfe’s pattern of the same name and her large diamond ruler:
Don’t you love that bold beautiful print? It’s from the “Black, White & Currant 5″ line by Color Principle for Henry Glass Fabrics. I bought a few pieces from the line a couple of years ago. I find it hard to resist Jacobean floral prints and I rarely see them printed on a true red background.
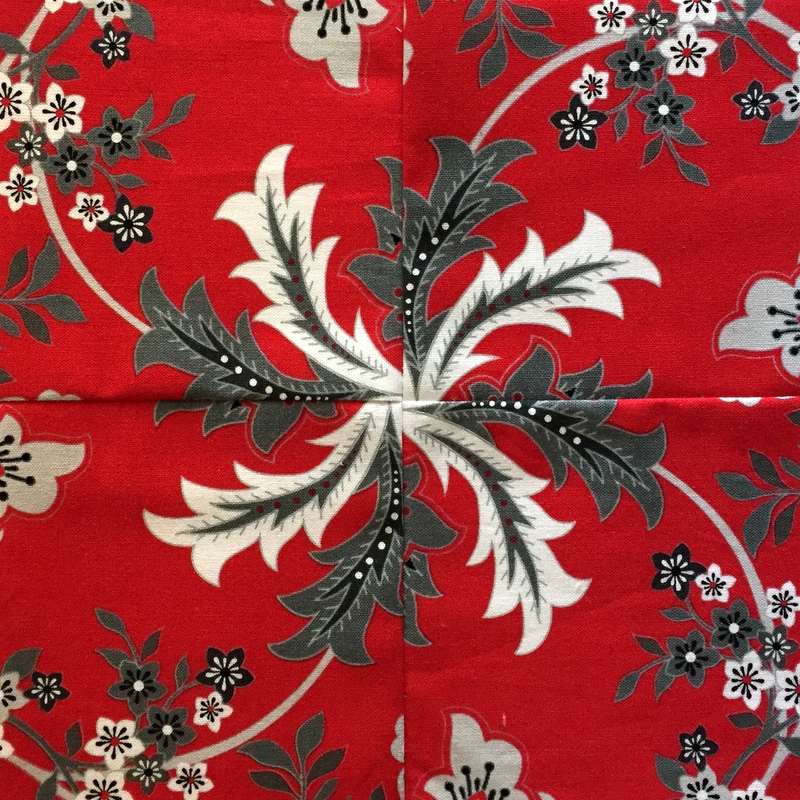
I don’t have enough of the Jacobean print to make three more Big Block Stars — each star finishes at 41″ square — but I do have enough to play around with 4-Patch Wonder blocks (my name for faux-kaleidoscope blocks made from four identical patches). Here’s a test block that measures 8” square:
Do I have a plan for this quilt? Not yet. I could keep it simple, surrounding my Big Block Star with one wide border, perhaps using 4-Patch Wonder blocks as cornerstones, or I could surround the entire Big Block Star with faux-kaleido blocks. No need to decide now. I’ll sleep on it.
And what of Big Block Star, Take One? After not looking at it for a few days, I have come to really like it. Comments from readers who saw my blog post about it or saw it on my Instagram have given me a fresh perspective.
Perhaps you think I meant to say “hit or miss.” Oh no. My latest foray in quiltmaking was both a hit and a miss.
Ever since buying Victoria Findlay Wolfe’s Large Diamond acrylic ruler and Big Block Star pattern a few months ago, I’ve been wanting to try them out.
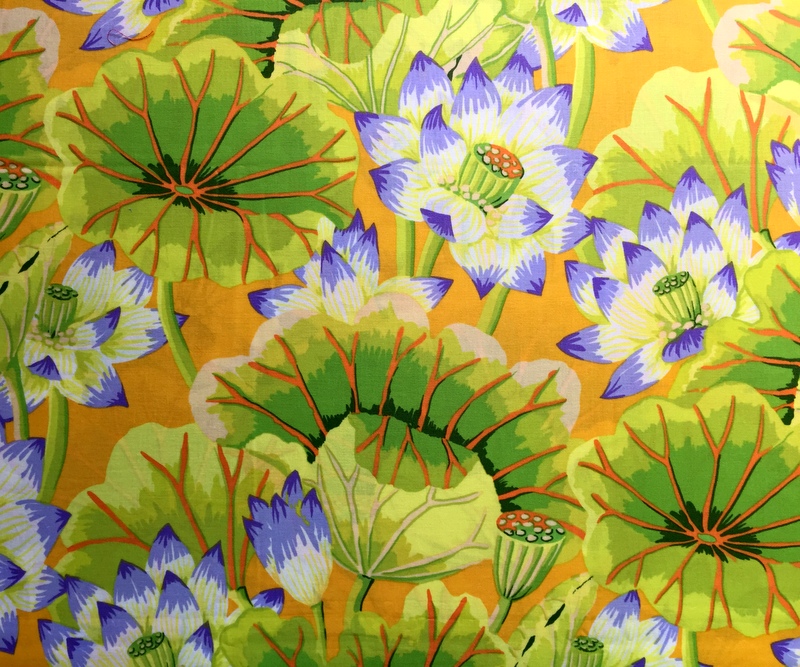
I had the perfect fabric in mind: a Kaffe Fassett print featuring lily pads and lotus blossoms:
I love the kaleidoscopic effect created by using fabric repeats. Part of the fun of making kaleido blocks is that you don’t know what the design will look like until the block is fully assembled.
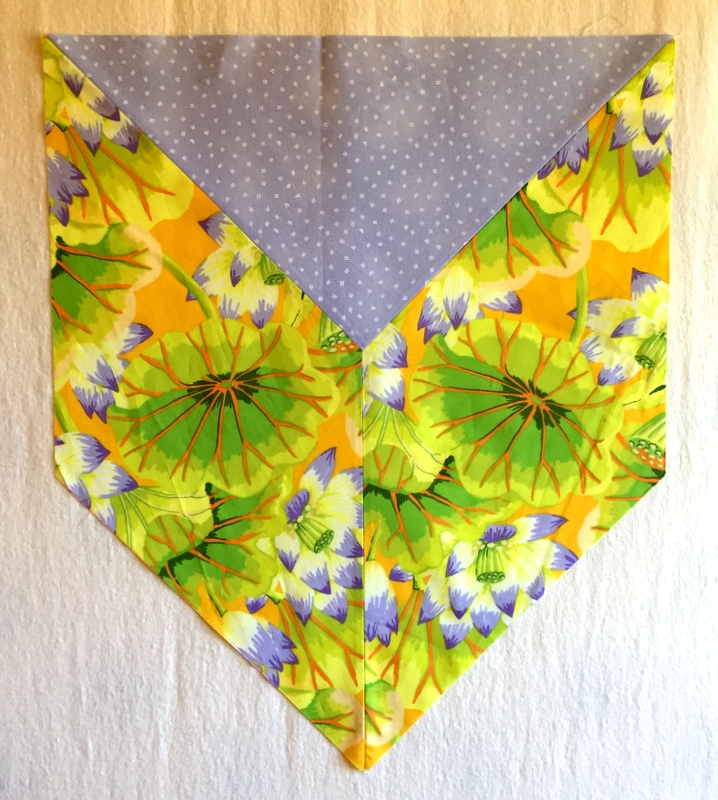
Victoria’s Big Block Star pattern is composed of four star blocks and finishes at 82″ square. I decided to make one star block finishing at 41″ square. From eight repeats of fabric I carefully cut out the diamonds that form the star and sewed the first two together with the center triangle:
Uh-oh. Do you see what I see? I don’t see lily pads and lotus blossoms. I see an animal face with two big . . . sad . . . bloodshot eyes.
I told myself it was just an illusion. I told myself it would look totally different with two more blocks added.
Well, here they are:
Now I see two faces . . . and now they look like owls. Very sad owls.
What to do??
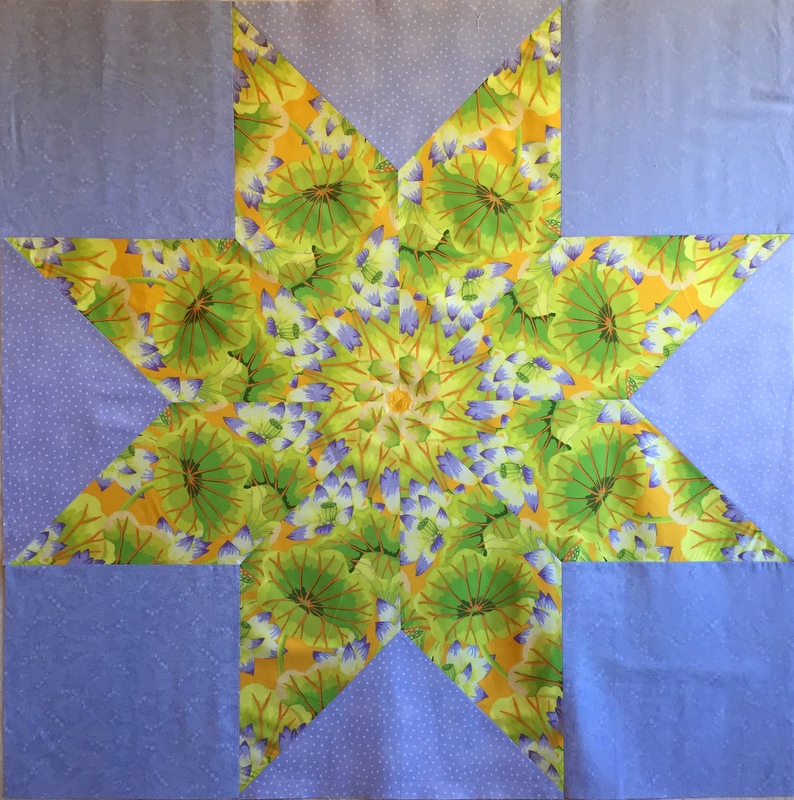
I already had the remaining pieces cut out so I decided to finish the block, hoping that the completed big star would look fine:
Now if I try really hard, I can see that the lily pads form a circle inside the star and there’s even a pleasing starburst shape in the very center of the block. But I can’t escape the feeling that four very sad owls are looking back at me.
Am I in despair? Curiously, no. I consider this experience both a hit and a miss. The design and ruler are definitely on the “hit” side. The block went together quickly because the pieces are all large, and I actually enjoyed sewing all of those Y seams.
The “miss” part of the equation is related to where I placed the ruler when cutting my first diamond. Placing the ruler in a different part of the fabric repeat would have resulted in a completely different look, one I probably would have been happy with.
I’m going to try again. With a different piece of fabric. One with no lily pads.
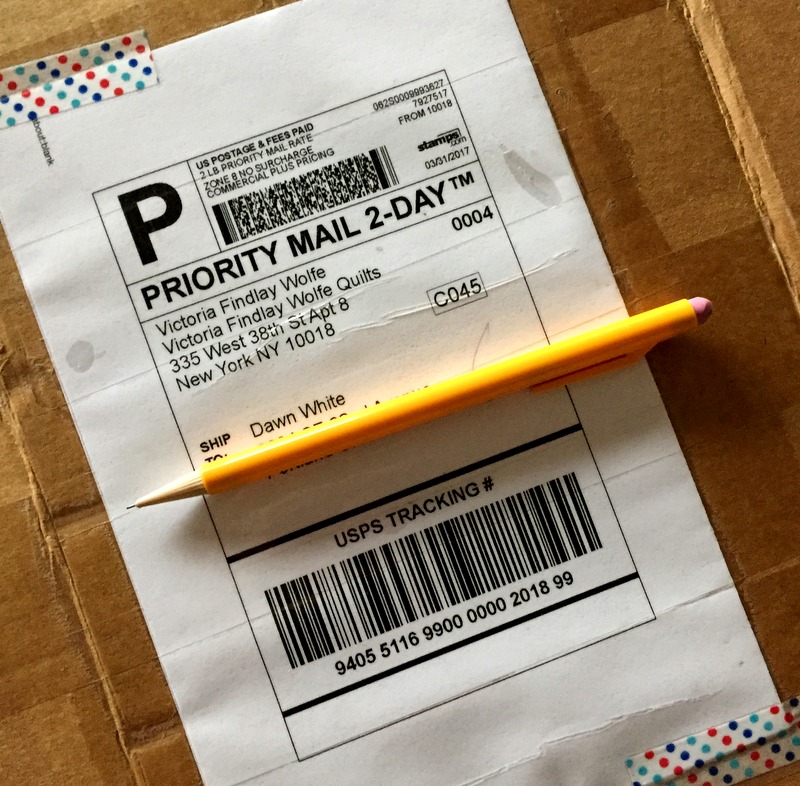
The postman left a package on my front porch today:
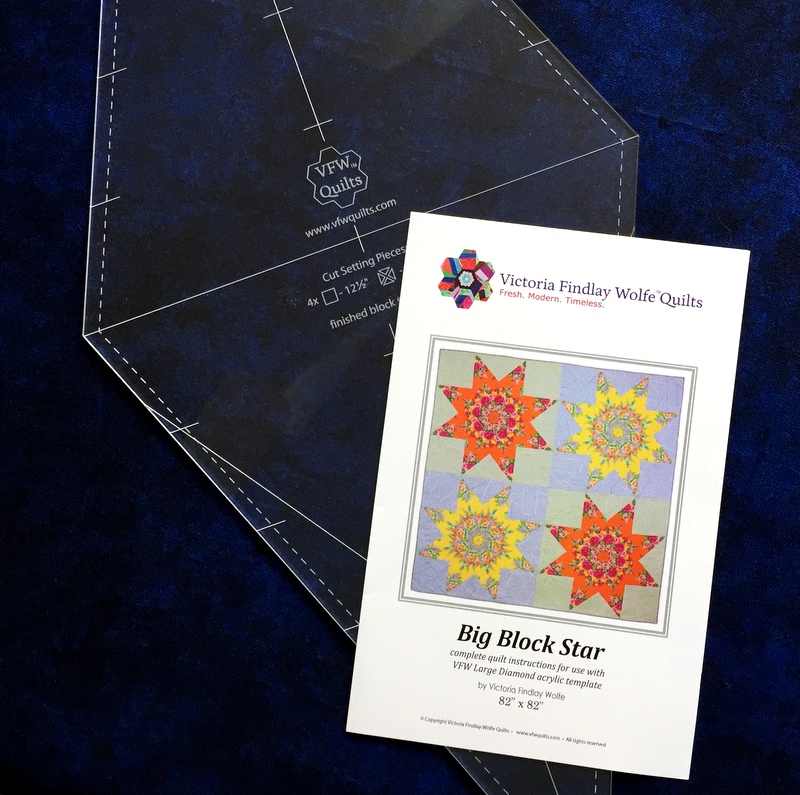
Oh Happy Day! It’s from Victoria Findlay Wolfe, containing a pattern and ruler I ordered just a few days ago.
As a result of visiting Victoria’s shop on my recent trip to New York City (subject of my last post), I visited her website — and found something I really liked. Friends, there’s another kaleidoscope quilt in my future. It will be based on Victoria’s pattern Big Block Star:
When she says “big block,” she really means it: those star blocks are 41″ square. They’re made with the help of Victoria’s acrylic template/ruler, cleverly marked to aid in fussycutting the diamond shapes to create a kaleidoscope effect.
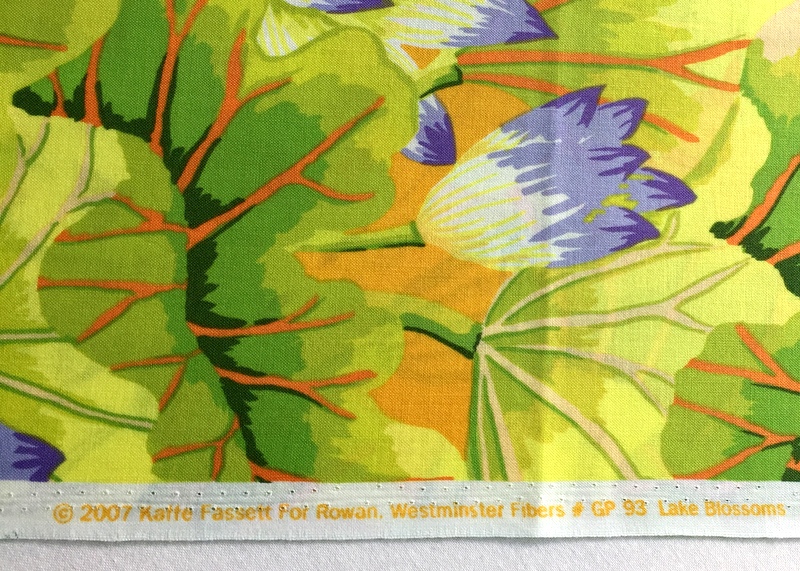
So. . . I have the pattern and I have the ruler. Guess what else I have? The fabric! I’ve been hanging on to this piece of Kaffe Fassett fabric for 10 years, just waiting for the right project to come along:
Ten years! How do I know that? Take a look at the selvage:
The design is called “Lake Blossoms.” There’s something about that particular combination of green, orange, and purple that calls to me.
I would love to jump right into Big Block Star but . . . duty calls. I’m prepping for a new class at the Pine Needle and have promised myself not to start anything new until preparations are completely wrapped up. Then there’s the matter of a few other Works-in-Progress that need some attention. I think I’ll set Victoria’s pattern out where I can see it every day to give myself a little extra incentive to finish those WIPs.
Did you know that March is National Craft Month? Not only that, March 18 is National Quilting Day.
But wait — there’s more!
March 18 is also Worldwide Quilting Day — a day to celebrate the art and craft of quilting with like-minded friends around the globe:
I follow quite a few quilters in other countries through Instagram (are you on Instagram too? You can find me here) so I am delighted to know quilters around the world are celebrating the same day we are.
National Quilting Day is always celebrated on the third Saturday of March, coinciding this year with two quilt shows in the Portland, Oregon metropolitan area.
The 23rd annual “Airing of the Quilts” is this Friday and Saturday, March 17-18, at the Milwaukie Center, 5440 SE Kellogg Creek Drive in Milwaukie, Oregon. It’s a non-juried community quilt show exhibiting old and new quilts, traditional and non-traditional. Show hours are 9:00 am to 4:00 pm both days. For more information, visit www.MilwaukieCenterQuiltShow.org.
“Every Quilt Tells a Story” is the theme of the Metropolitan Patchwork Society’s one-day show Saturday, March 18, at the Beaverton Public Library, 12375 SW Fifth St., Beaverton, Oregon. Hours of the show are 11:00 am to 4:00 pm. This show is also non-juried and features quilts made primarily by MPS members.
I’m a member and have submitted two quilts I completed last year: Stella by Starlight . . .
. . . and Ring Toss:
If you’re in the area, I hope you’ll visit one or both of these quilt shows.
Quiltmakers are always being exhorted to support their local quilt shops. In the spirit of National Quilting Day and Worldwide Quilting Day, consider this a call to support your local quilt guilds as well.
Here’s to 2017! Specifically, here’s to lots of sewing and quilting in 2017. I’m already looking forward to several projects — and not just new ones. There’s a stack of UFOs beckoning that I am actually enthusiastic about tackling. But not today.
On this fresh new day of the year, I’m looking back on what I created in 2016. Rather than going in chronological order, I’m grouping my finishes by categories.
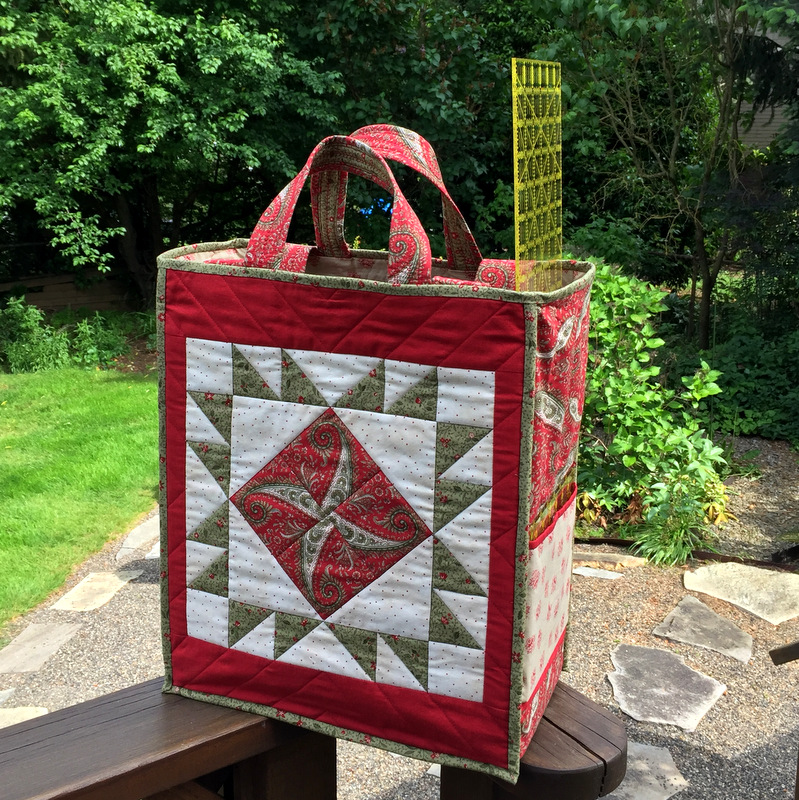
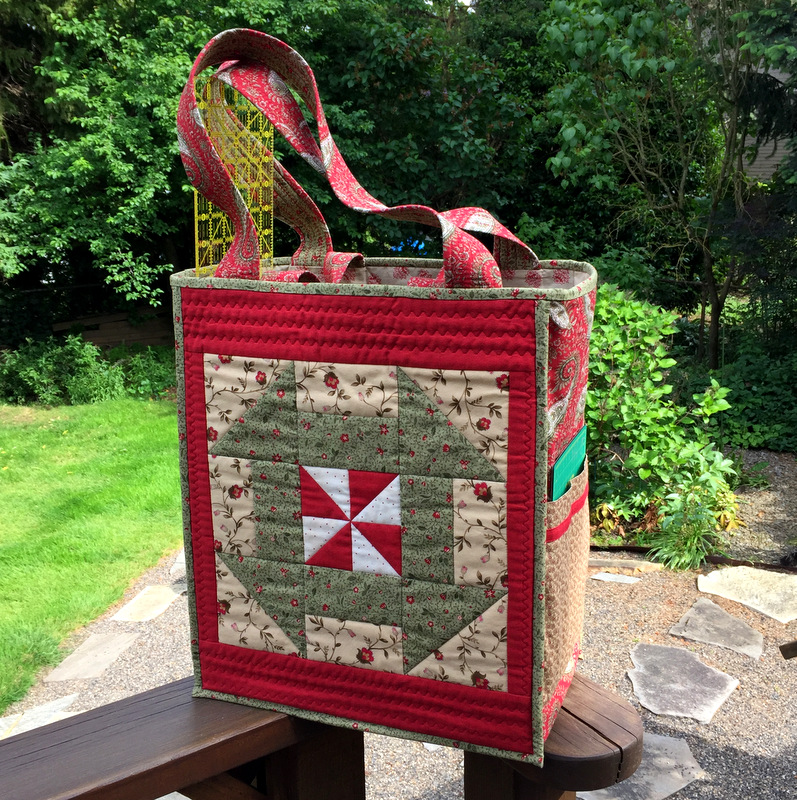
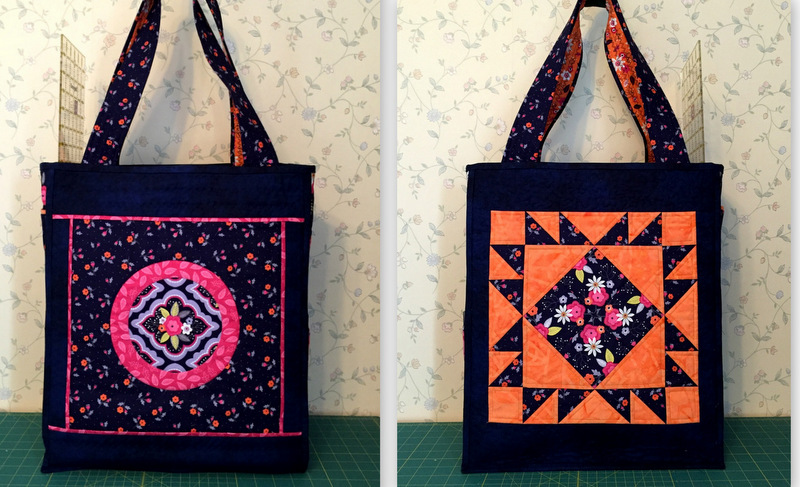
This was the year of the Junior Billie Bag, the quintessential quilter’s tote designed by Billie Mahorney. I made a bag for myself . . .
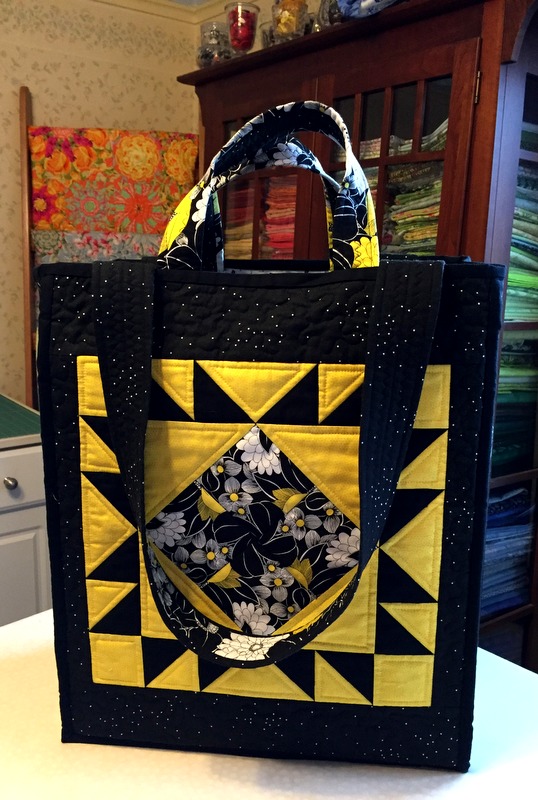
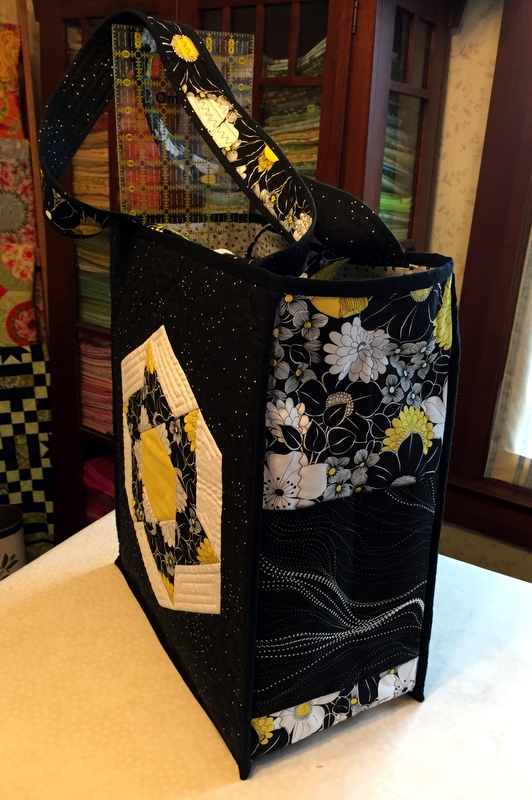
. . . and one for my friend Deborah . . .
. . . and one for my friend Miriam:
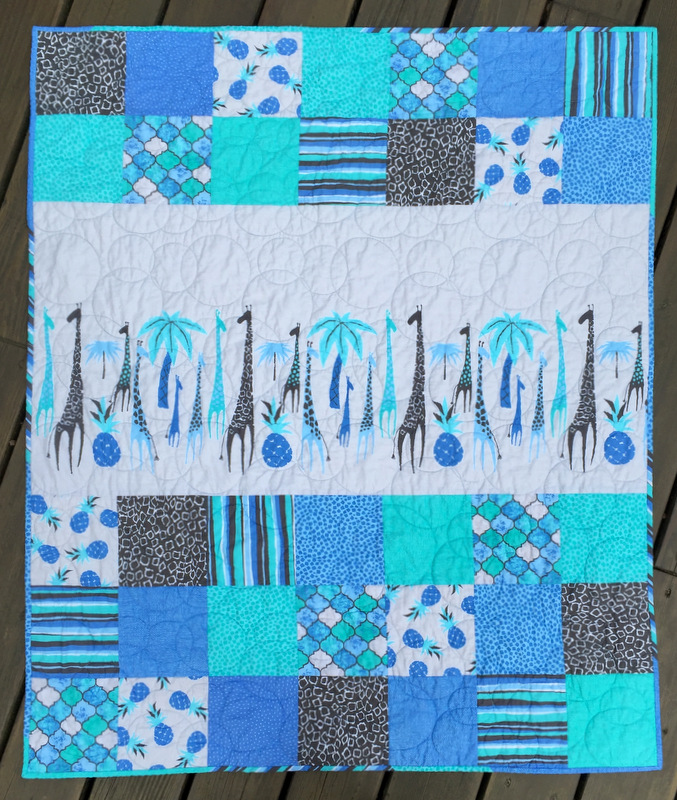
Next category: baby quilts. This is the first of two incorporating a charming giraffe-themed fabric panel:
Abraham’s Quilt, 40″ x 49″ (2016)
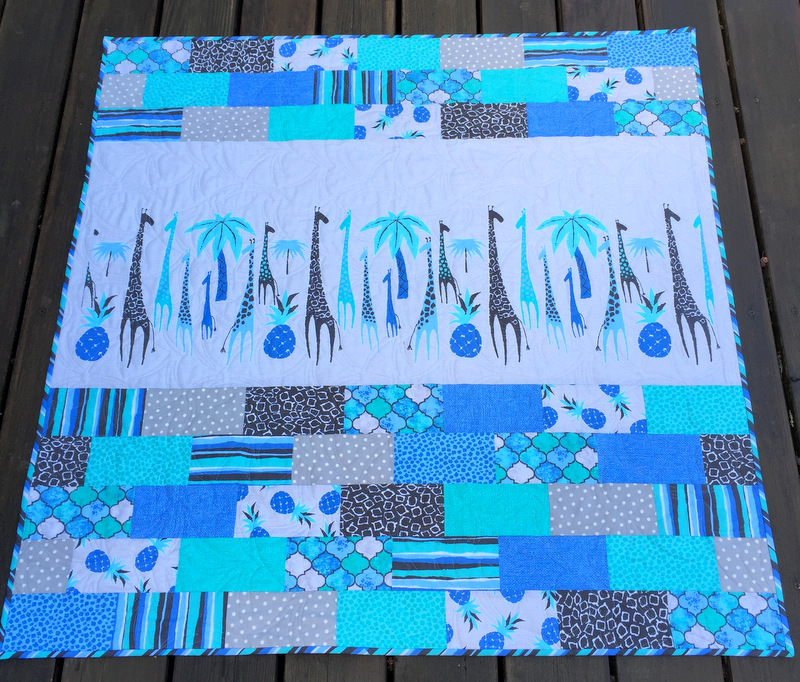
Here’s the second one, using the same fabrics in a slightly different setting:
Malachi’s Quilt, 41″ Square (2016)
I didn’t use a pattern for these quilts, preferring to play with simple shapes (squares and rectangles) so that the giraffes on the fabric panels would be the focal point.
My third baby quilt of the year was this one using the pattern Just Can’t Cut It from All Washed Up Quilts:
Stefan’s Quilt, 46″ Square (2016)
All three were quilted by longarmer Sherry Wadley.
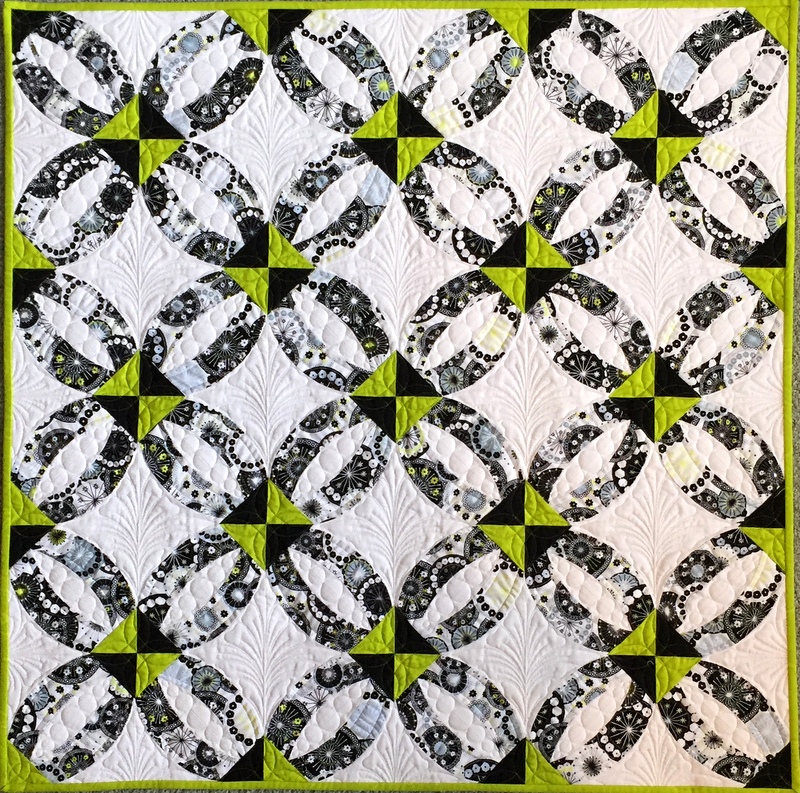
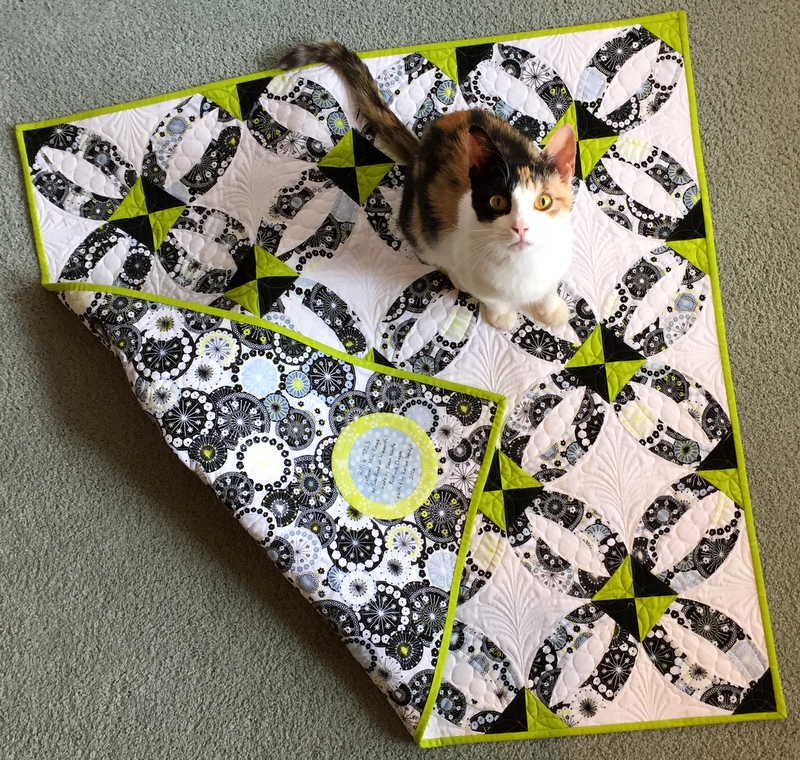
All by itself in the mini quilt category is Ring Toss, based on the pattern Mini Rings by Sew Kind of Wonderful:
Ring Toss, 32″ Square (2016)
Mini Rings was quilted by Karlee Sandell of SewInspired2Day. Oh, and that’s our new rescue kitty Princess Cordelia (Coco for short).
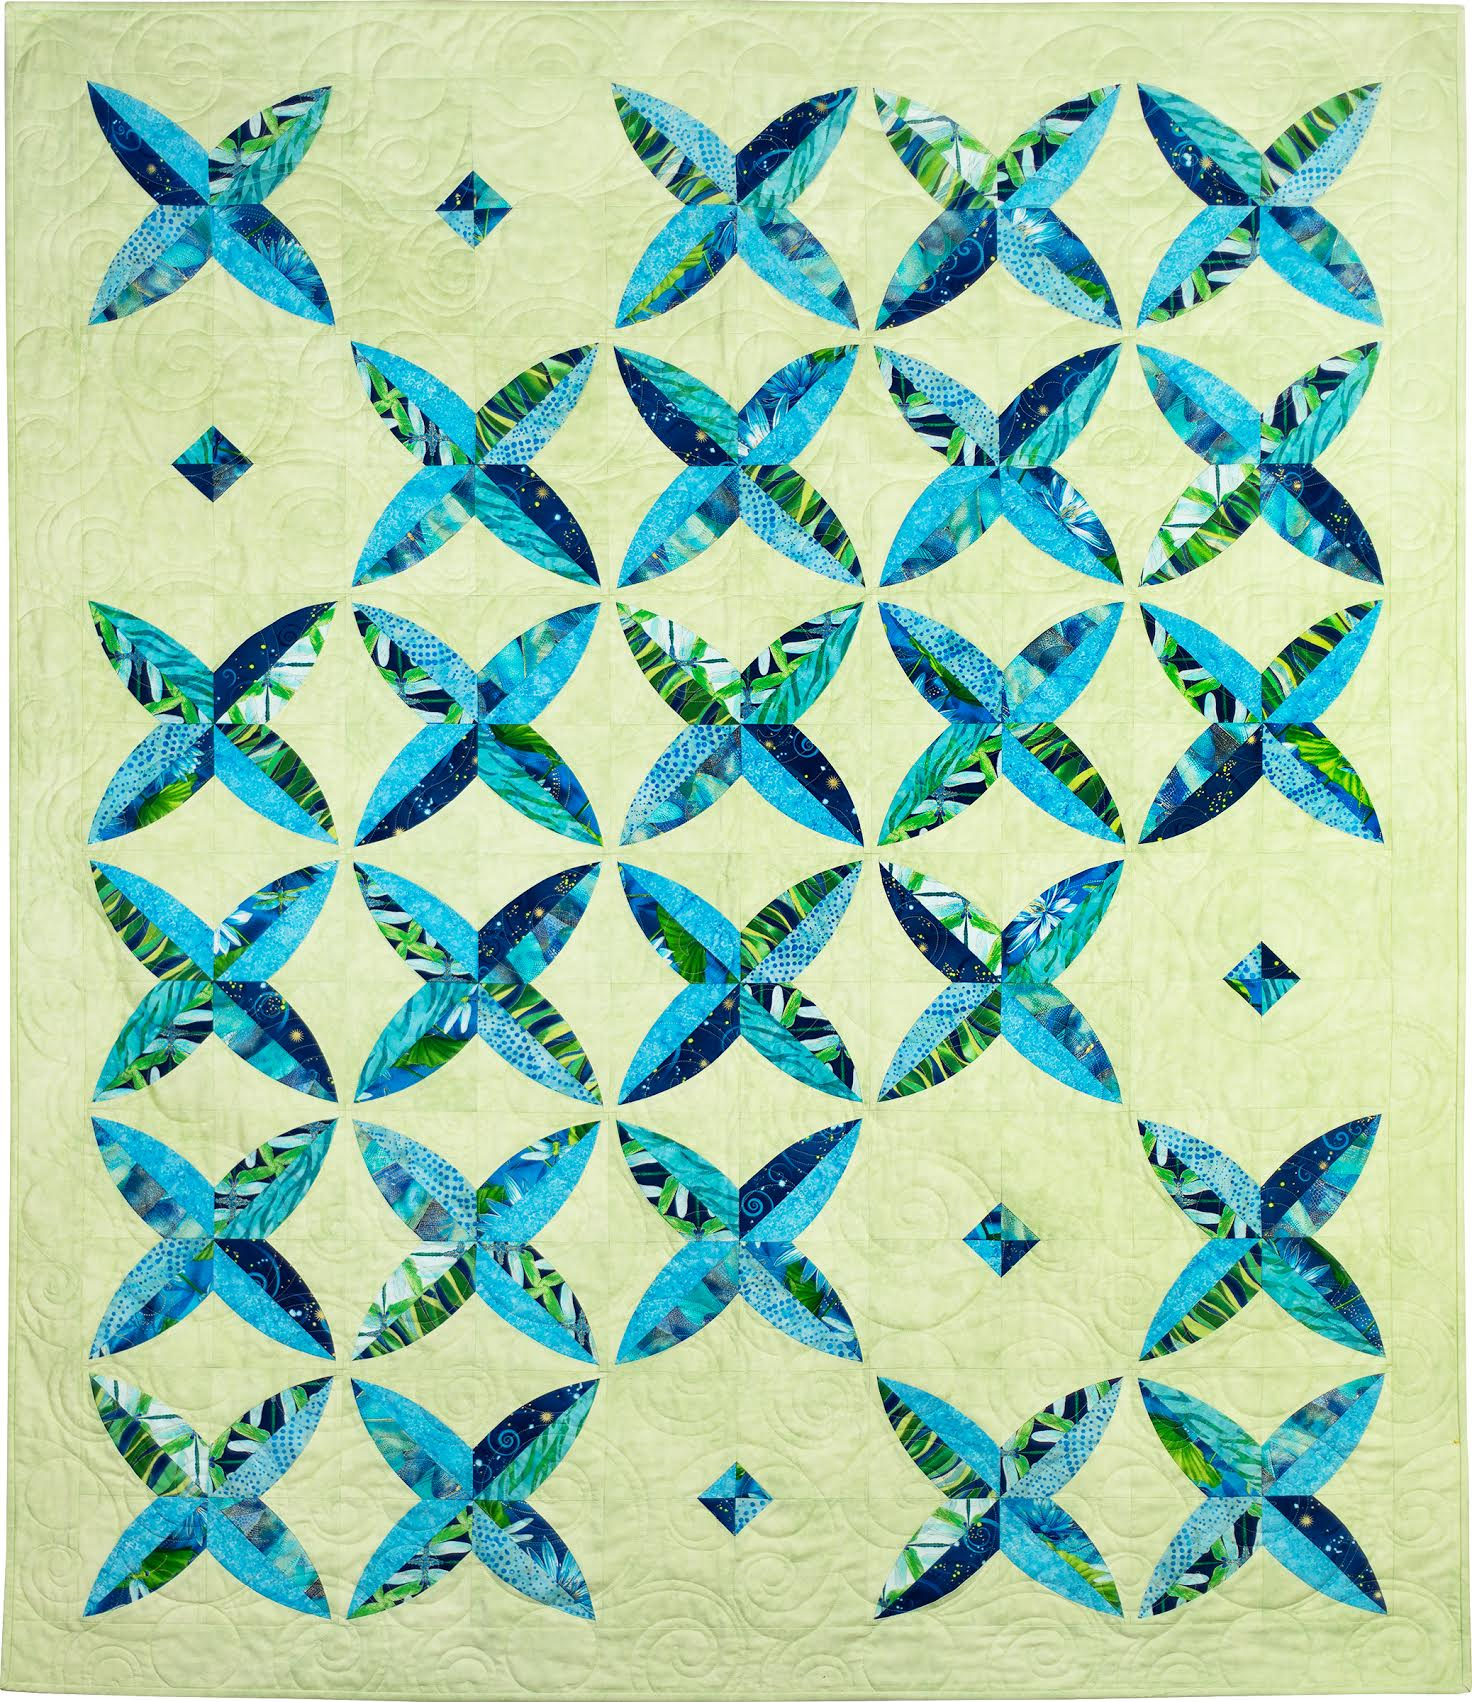
Lap quilts is the next category. Once again I used a Sew Kind of Wonderful design, adapting the pattern Chic Diamonds into this quilt I named Dragonfly Kisses:
It was quilted by Sherry Wadley.
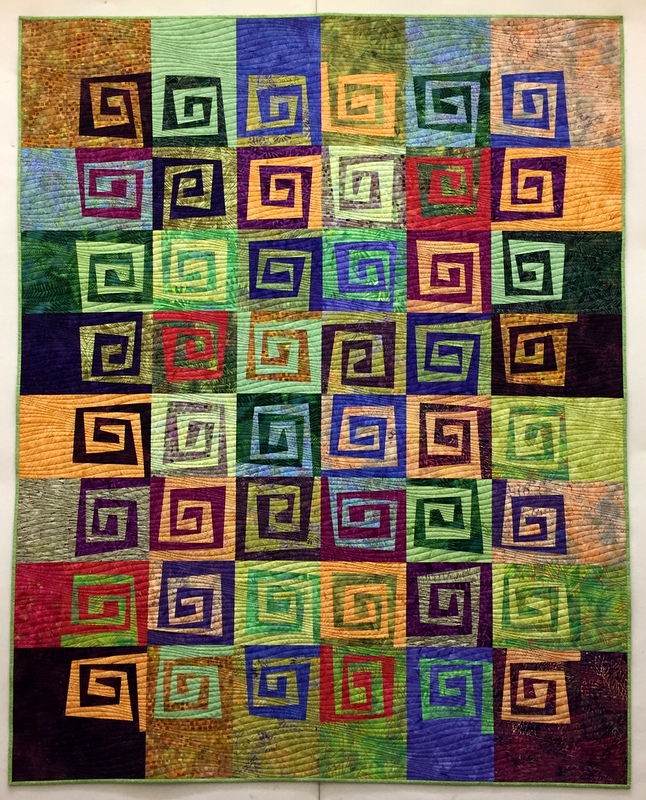
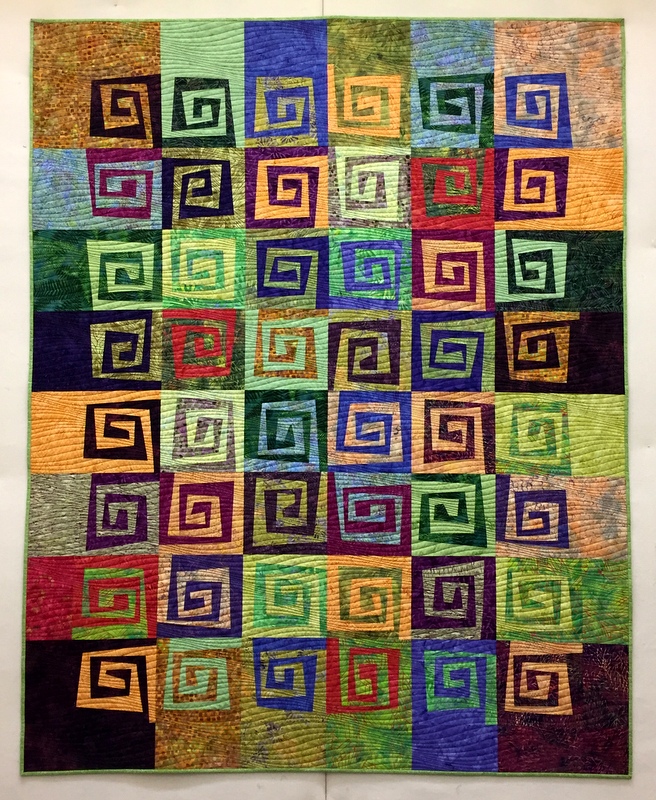
The next quilt, Where It’s @, was started in July in a class with Karla Alexander of Saginaw Street Quilts. It’s based on her pattern Rewind. I really stepped outside my comfort zone with this quilt, and I absolutely love the result:
Where It’s @, 57″ x 72″ (2016)
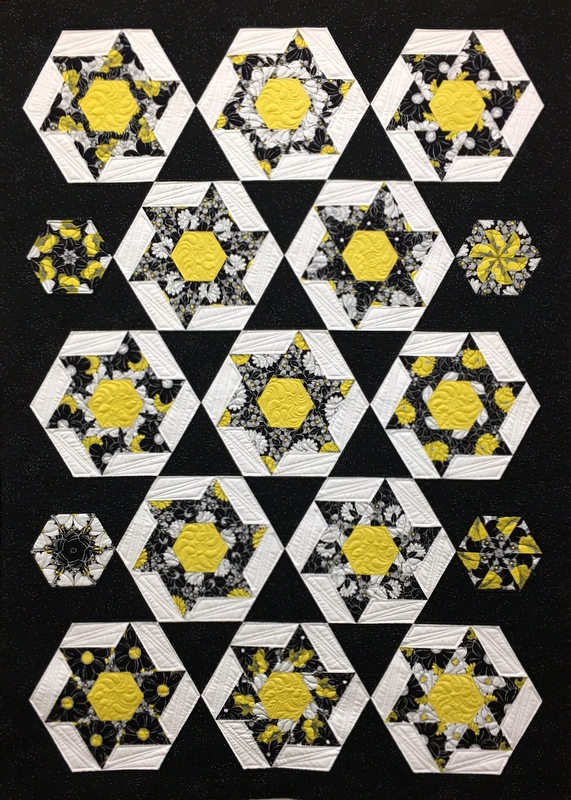
The last quilt in this category is Stella by Starlight, a “kaleido-spinner” using the Spinners block by Heather Peterson of Anka’s Treasures:
Stella by Starlight, 51½” x 71″ (2016)
I call it a “kaleido-spinner” because the six equilateral triangles in each block were cut from identical repeats of the focus fabric, creating a kaleidoscope effect of sorts. The four small hexagon blocks are true kaleidoscope blocks.
Both Where It’s @ and Stella by Starlight were quilted by Karlee Sandell.
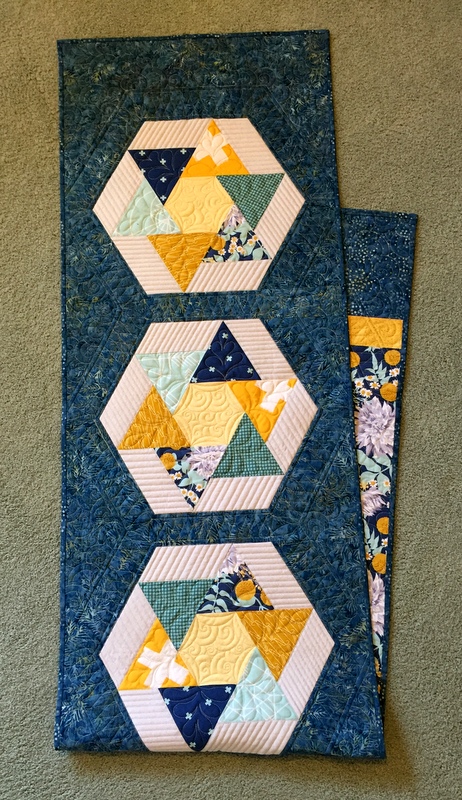
The next category is runners, both bed and table. I made one of each, using the same focus fabric in each (Wander by Joel Dewberry) and the same block design (Spinners by Anka’s Treasures) with completely different outcomes. Here is WanderLust I, the king size bed runner made with five blocks:
WanderLust I, 20″ x 88″ (2016)
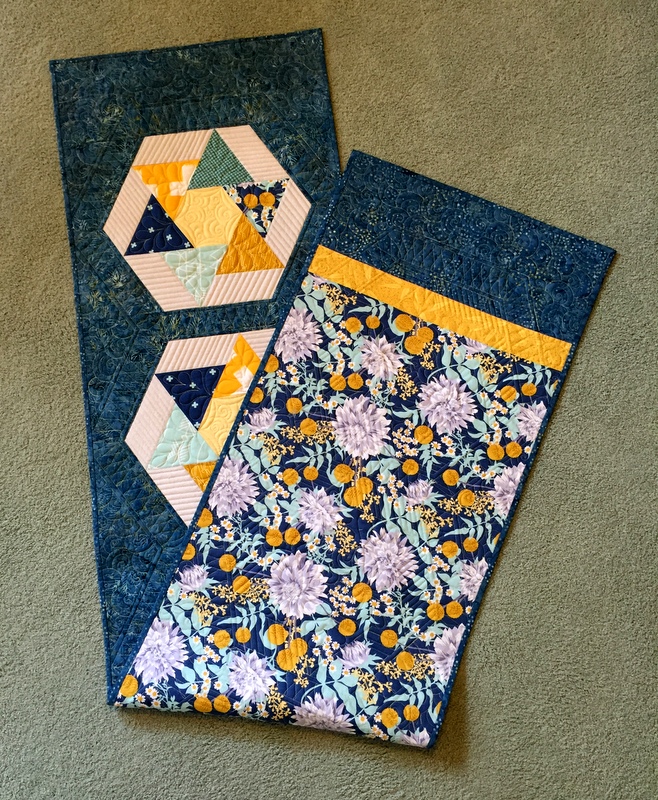
I liked the focus fabric so much I made the bed runner reversible:
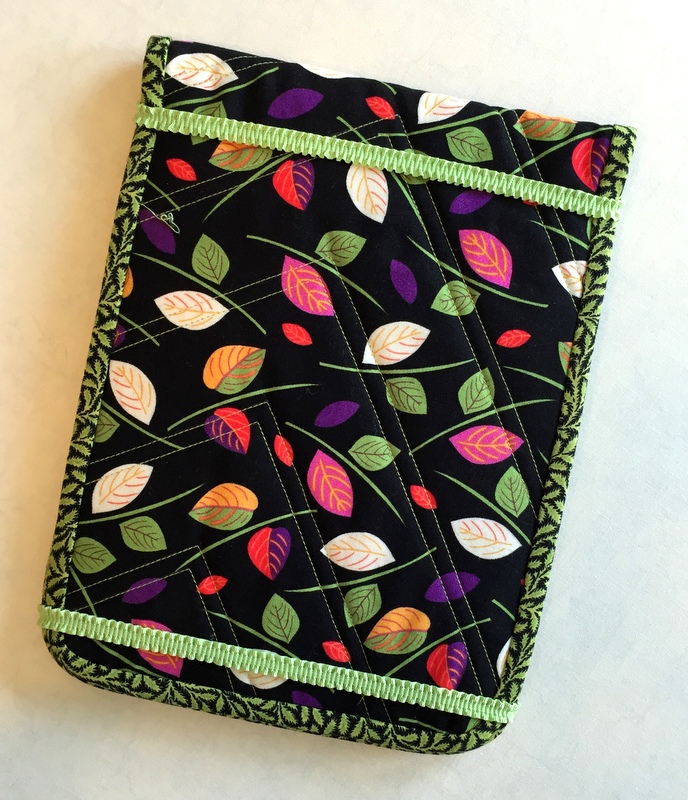
The final category is a bit of a hodgepodge. I made a quilted cover for my stepmother’s new iPad Pro . . .
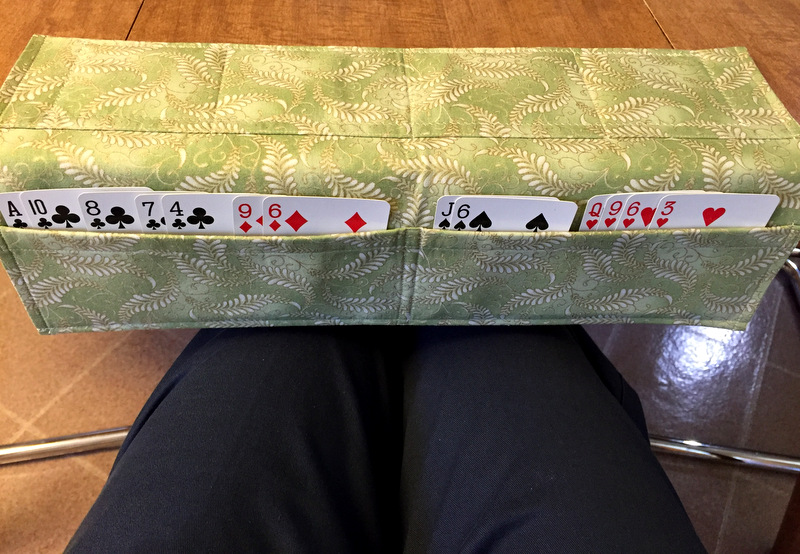
. . . and a cardholder for her bridge hands:
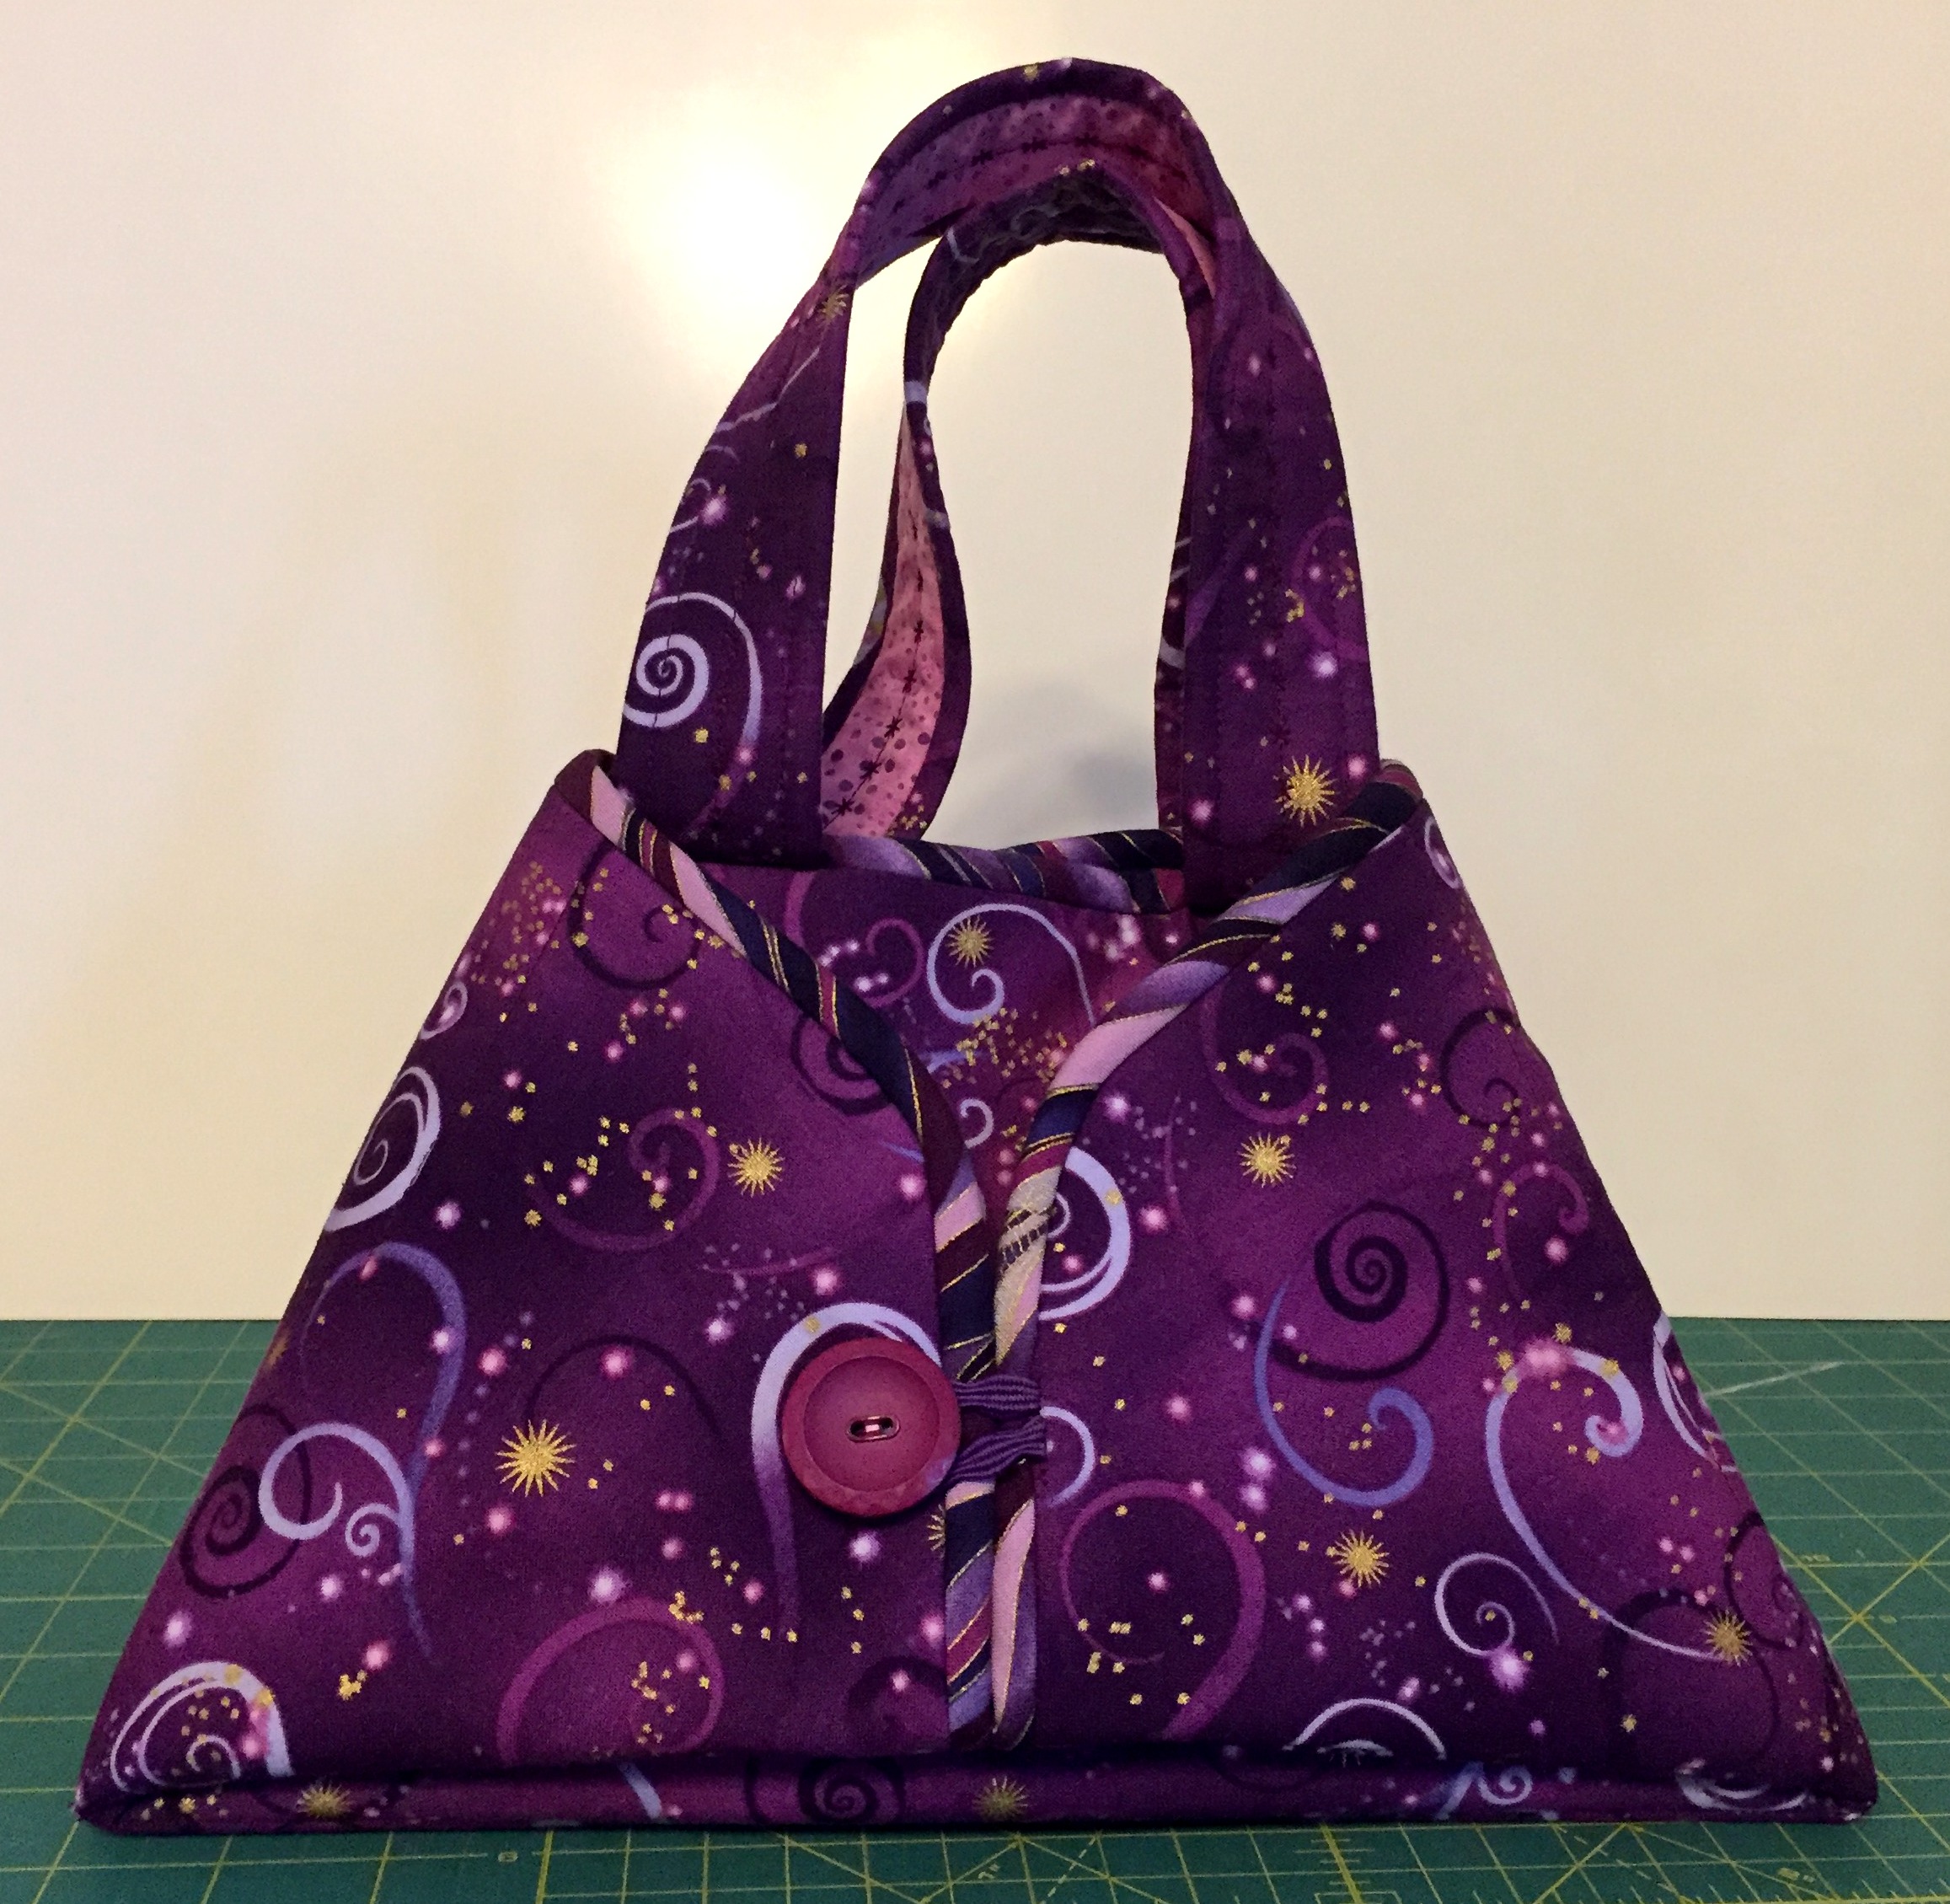
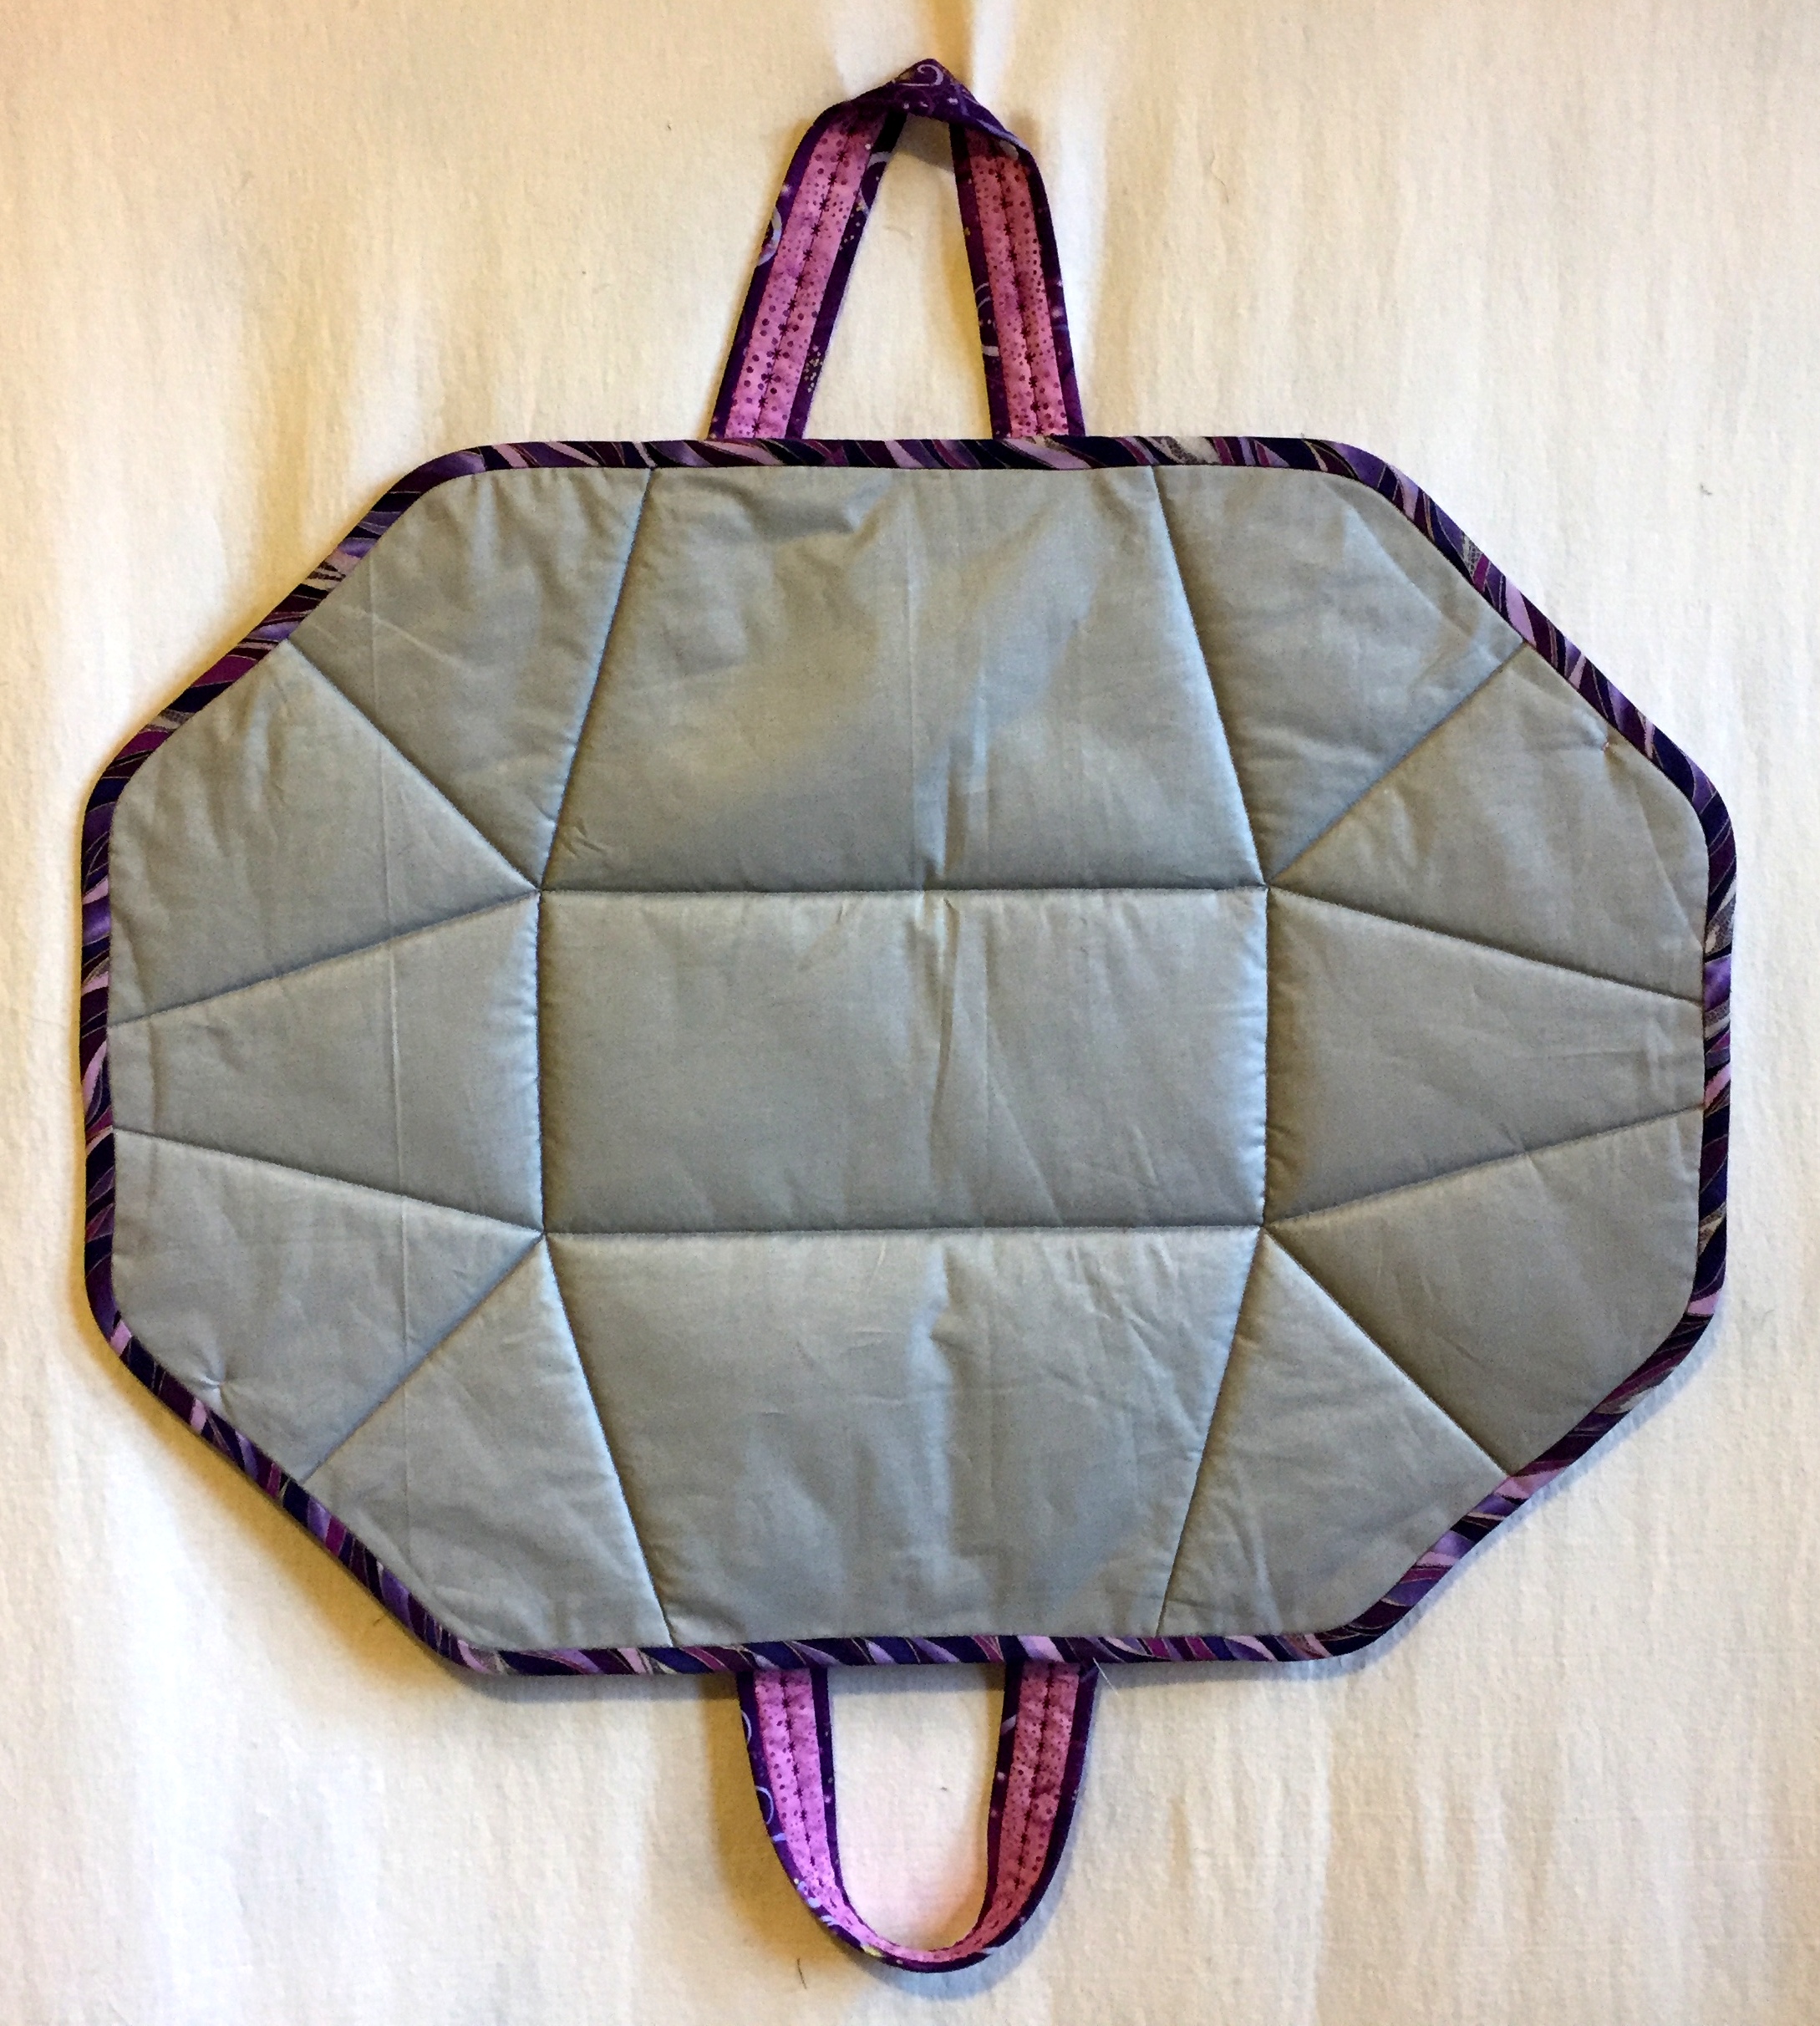
For my friend and fellow Quister (Quilt Sister) Vickie I made an iron caddy that doubles as a pressing mat . . .
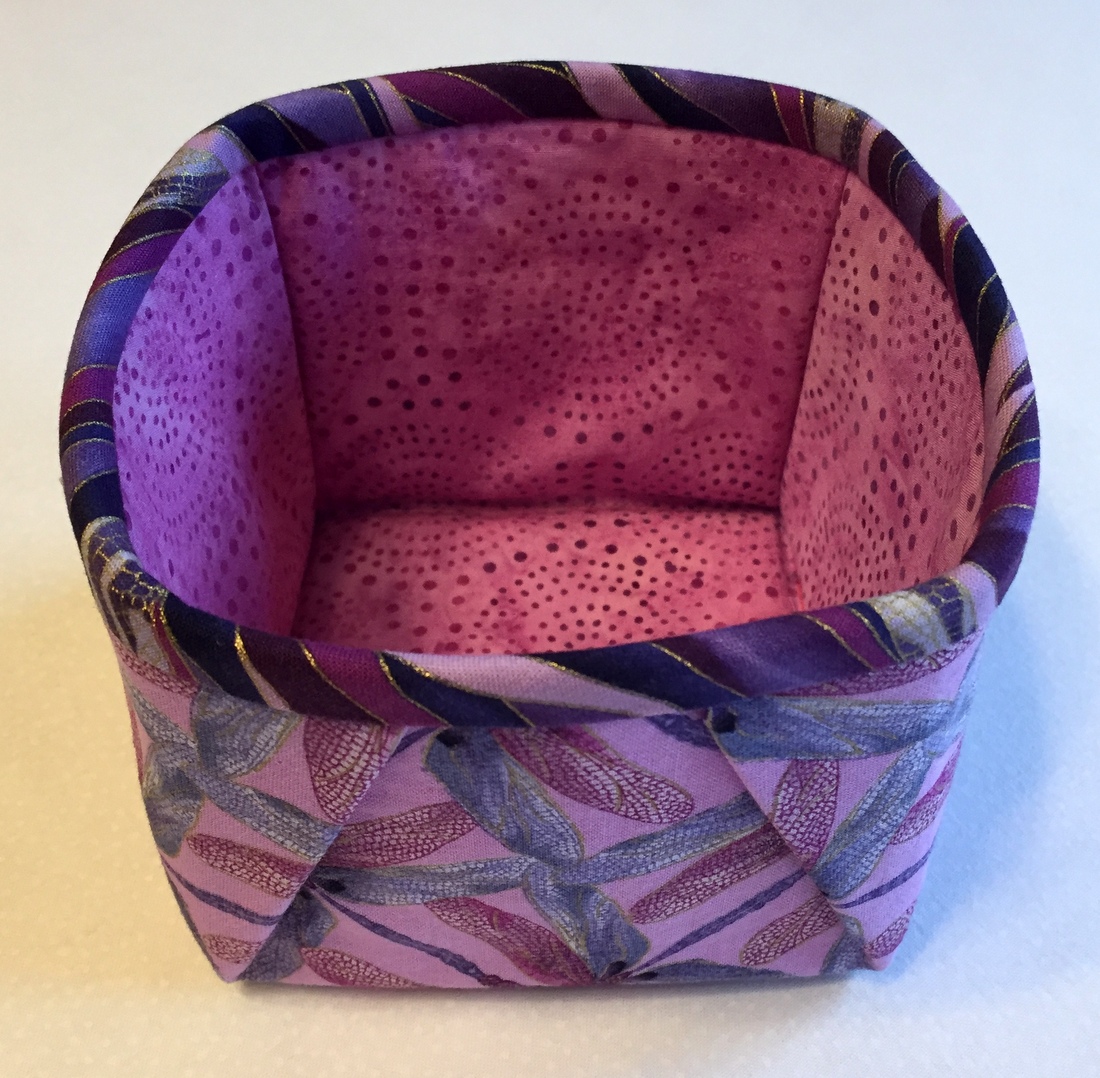
. . . plus a matching 4″ x 4″ fabric box that she can use as a threadcatcher:
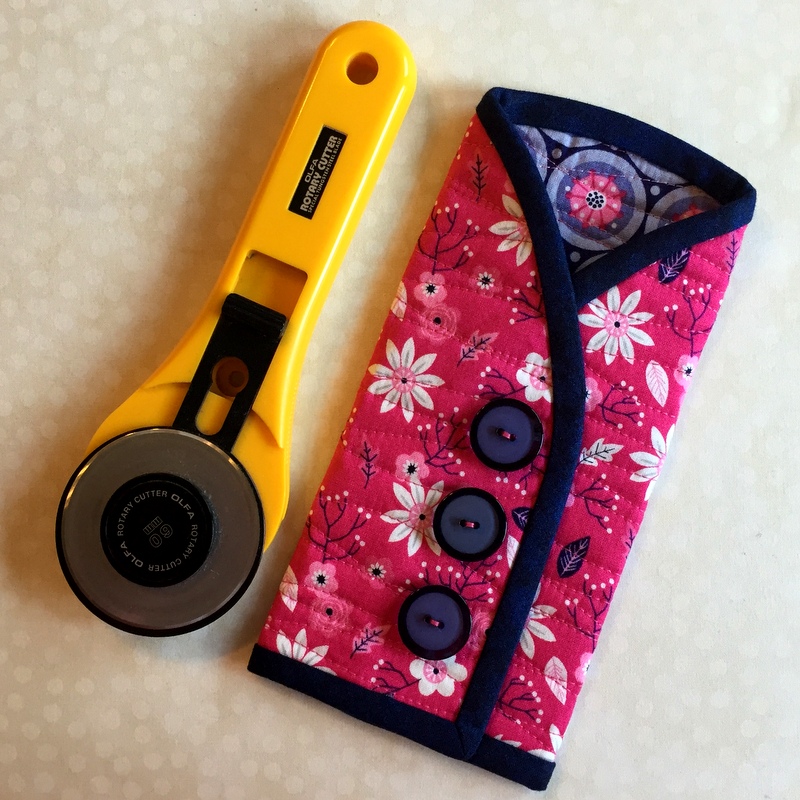
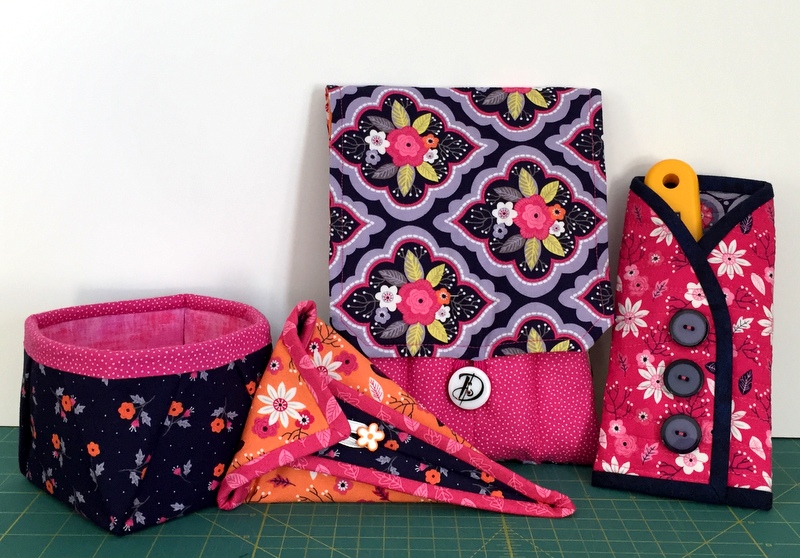
For myself I made some accessories to match my Junior Billie Bag: a rotary cutter coat made from my tutorial . . .
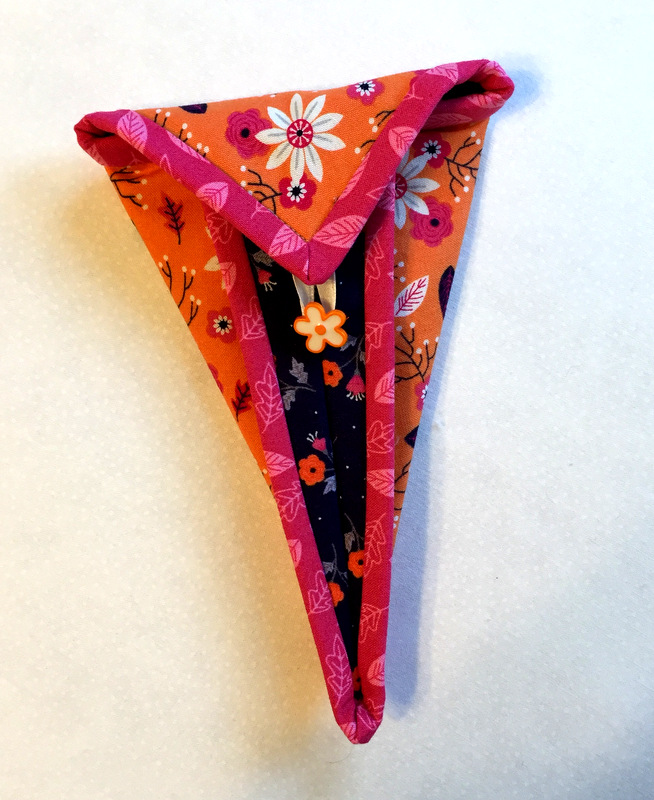
. . . and a scissors case . . .
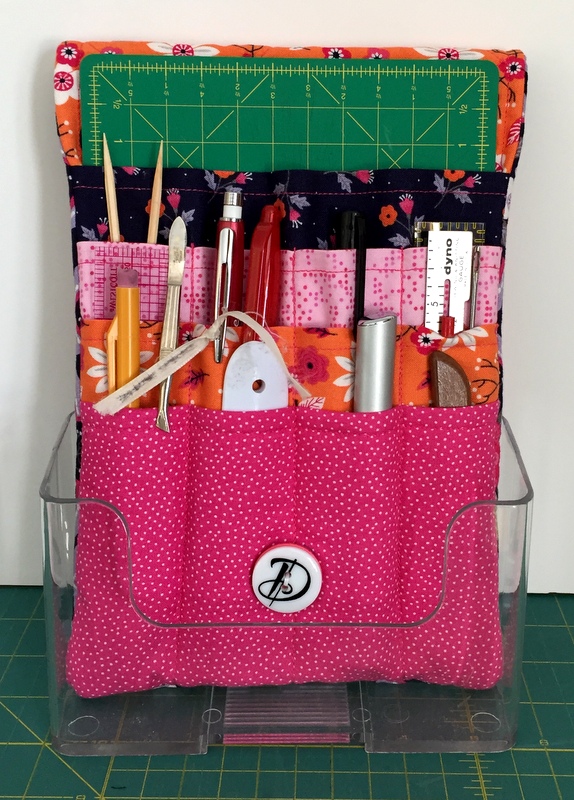
. . . and a sewing caddy that sits upright in a Lucite stand:
A 4″ x 4″ fabric box (yes, it’s a threadcatcher) completes the ensemble:
As you have surmised, I’m crazy in love with that fabric line (Paradise by Alisse Coulter for Camelot Cottons). I expect you’ll see more of it in 2017, as I bought a lot when it was released a couple years ago.
I’m sending a shout out to the talented longarm quilters who transformed my 2016 quilt tops into beautiful quilts — Coleen Barnhardt, Karlee Sandell, Debbie Scroggy, and Sherry Wadley — and to you, my loyal blog readers, for your continuing interest and support of First Light Designs.
Here it is Friday afternoon on Christmas Eve and I was able to put the finishing touches on Stella by Starlight, my “kaleido-spinner” quilt, in time to take it outside for a few photos on the back deck before dusk. Stella by Starlight finished at 51½” x 71″.
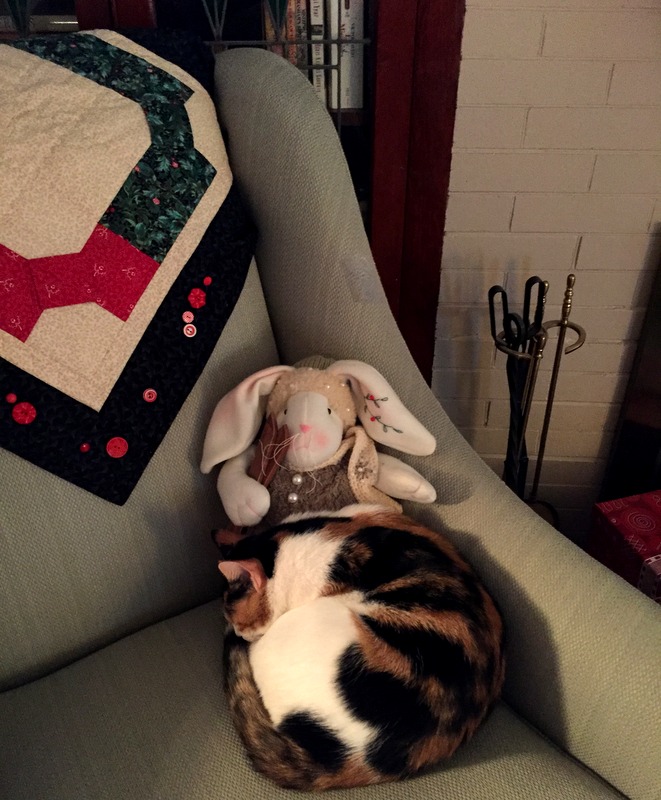
As much as I enjoy sewing down binding, it has become quite a challenge since Coco the cat came into our lives in May. When I’m sitting in a chair with the quilt I’m binding draped around me, she thinks I have made a fort for her to play hide and seek in. Any little movement causes her to leap into action, pouncing wildly here and there, and I seriously worry she is going to do some damage to my quilt. I have to wait till she is napping so I can sneak in a little handwork:
Stella is bound in the same Cotton + Steel fabric (“Sprinkle”) that I used for the background. I love how the tiny white dots look like a sprinkling of stars in the night sky. That’s just one of several reasons why this quilt came to be named Stella by Starlight.
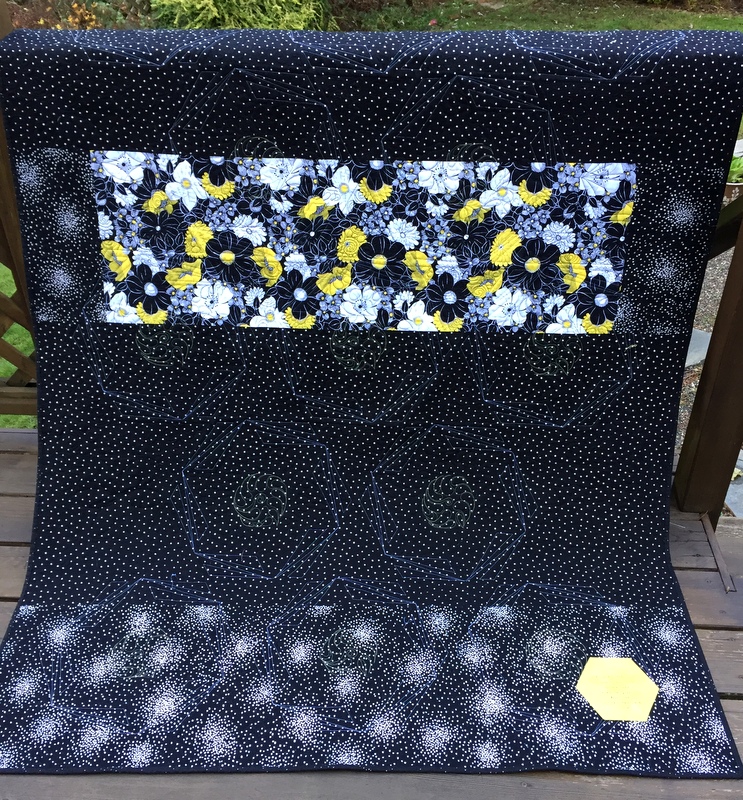
Here’s Stella from the back:
That strip of floral fabric is all I have left after making the kaleido-spinner and kaleidoscope blocks on the front. I also used it in my friend Miriam’s Junior Billie Bag.
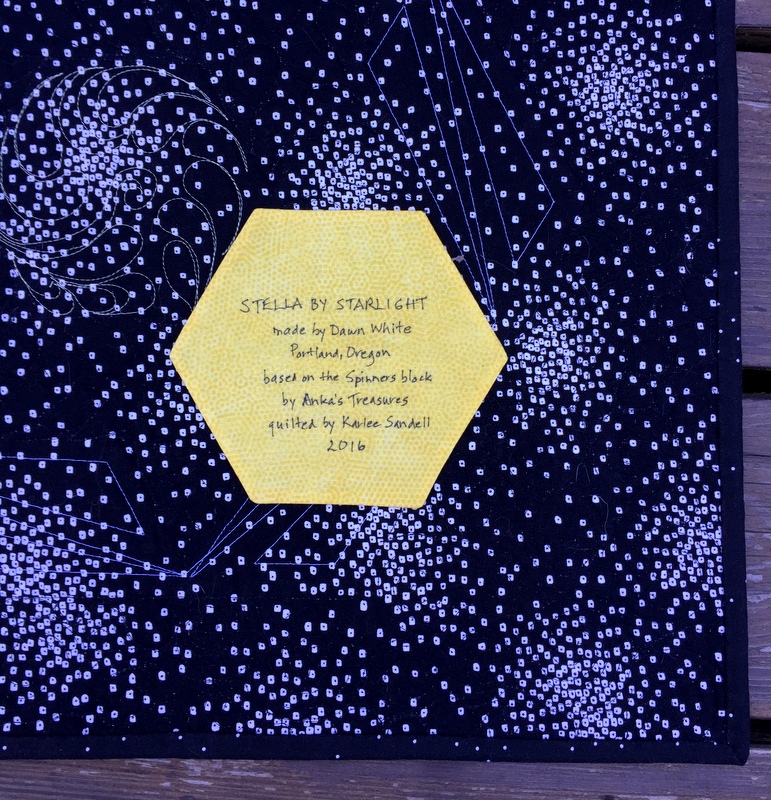
See that little yellow hexagon in the lower right corner? That’s the label. Here’s a closer look:
The label is the same size and shape as the centers of the kaleido-spinner blocks on the front. Same fabric, too. (If you are interested in how I came up with the term “kaleido-spinner” to describe my blocks, you can check this post from October.)
Even though Stella contains only four true kaleidoscope blocks, I am including it in my series of kaleidoscope quilts. I believe this one is #11. The others are pictured in my Gallery under the subheadings Quilts and Table Runners/Wall Hangings.
I hope your next few days are full of fun, family, friends, and — of course! — fabric.
. . . is back from being custom quilted, and she is sparkling:
I wanted this one to be quilted entirely with free motion quilting. Karlee Sandell of sewinspired2day was up to the challenge, and I am so delighted with the result.
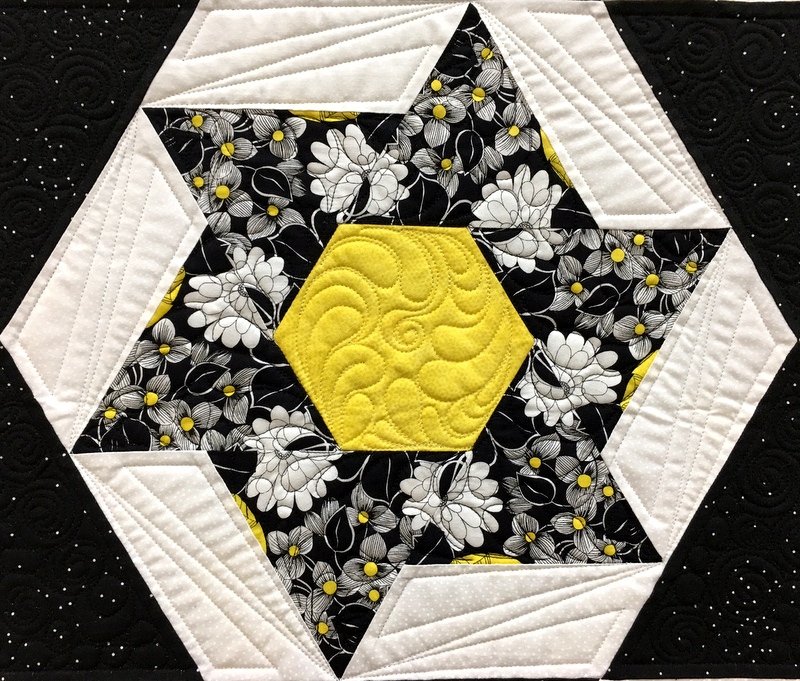
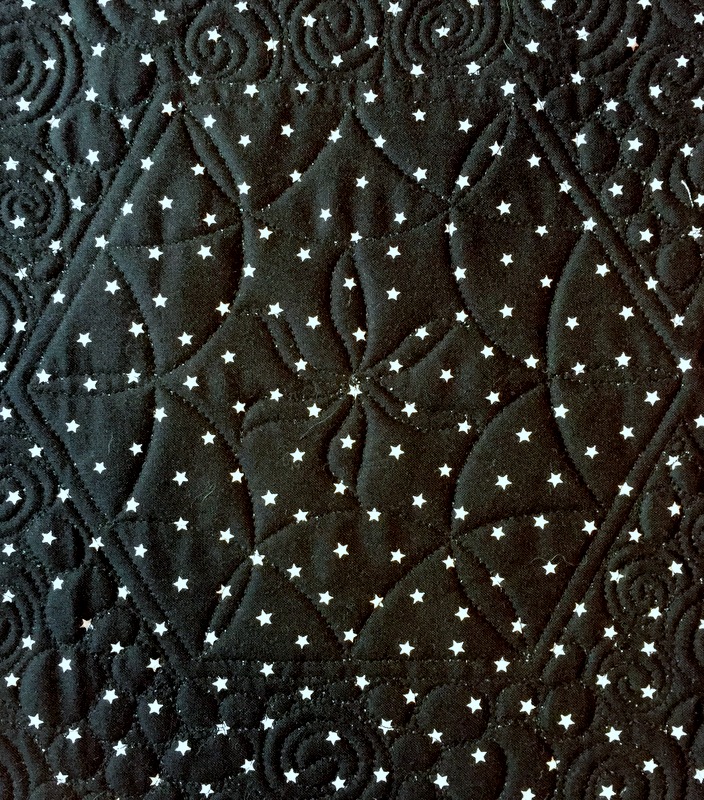
Karlee quilted free-form feathers in the bright yellow center hexagons and in the triangles that spin around the yellow centers:
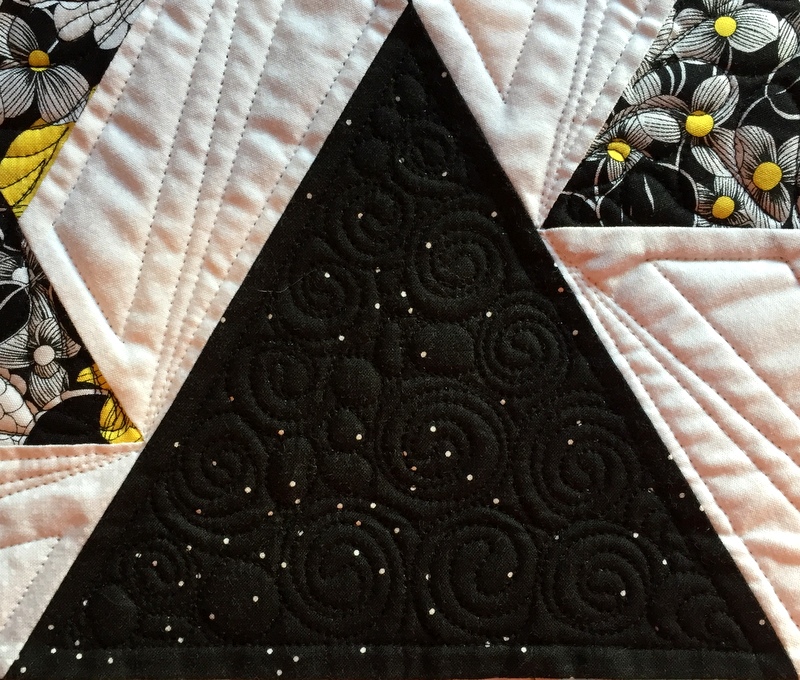
Contrasting with the loops and curves in the feathers are the angled lines in the white trapezoids. And if you look very carefully, you can make out the swirls and pebbles that Karlee quilted in the background. Here’s a better look at those designs:
I love how the random swirls and pebbles play against the random white dots sprinkled on the black background.
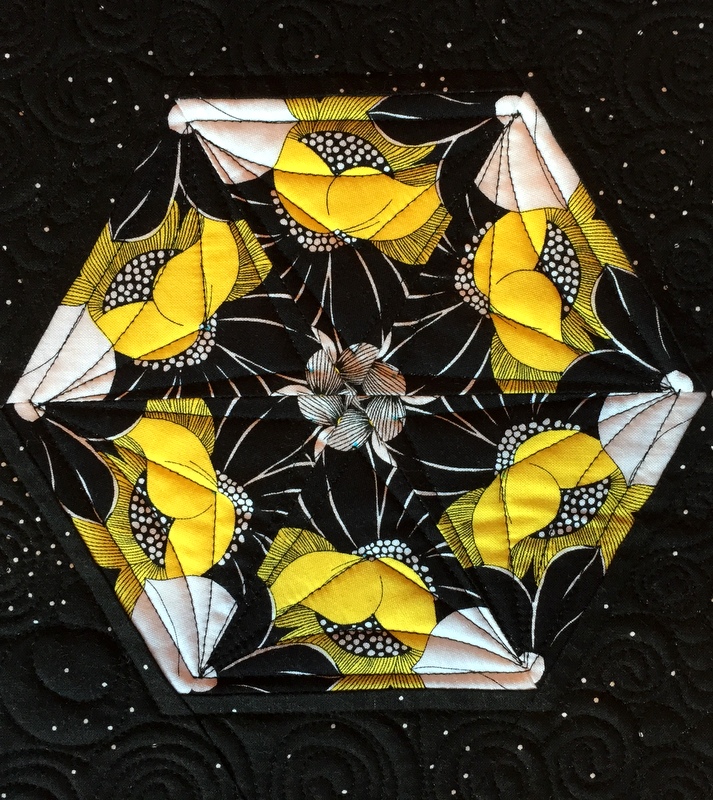
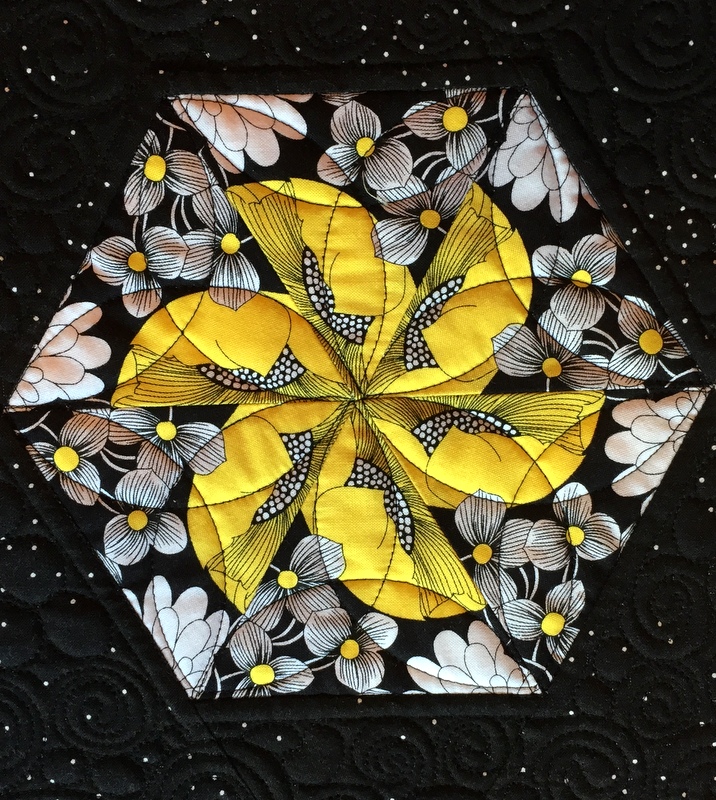
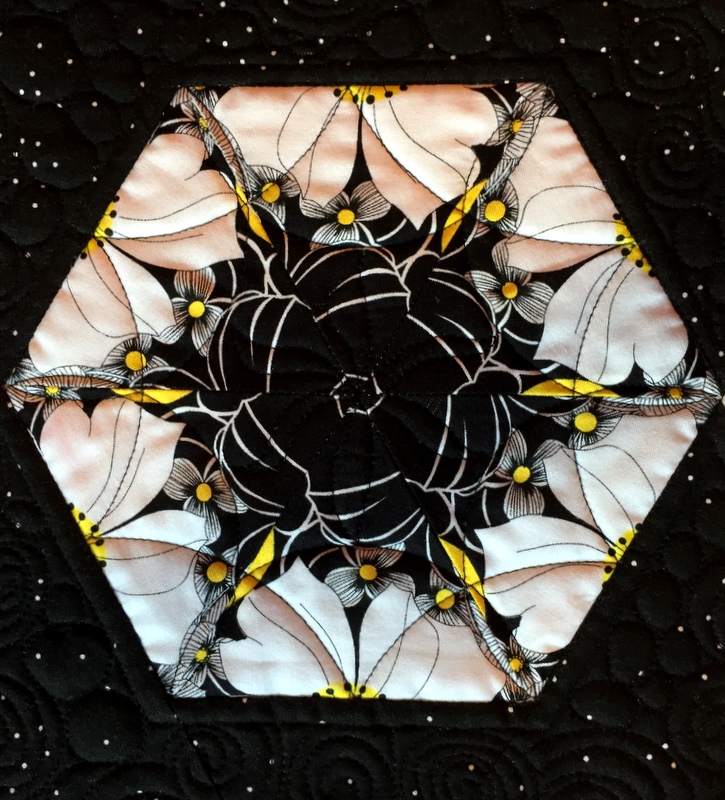
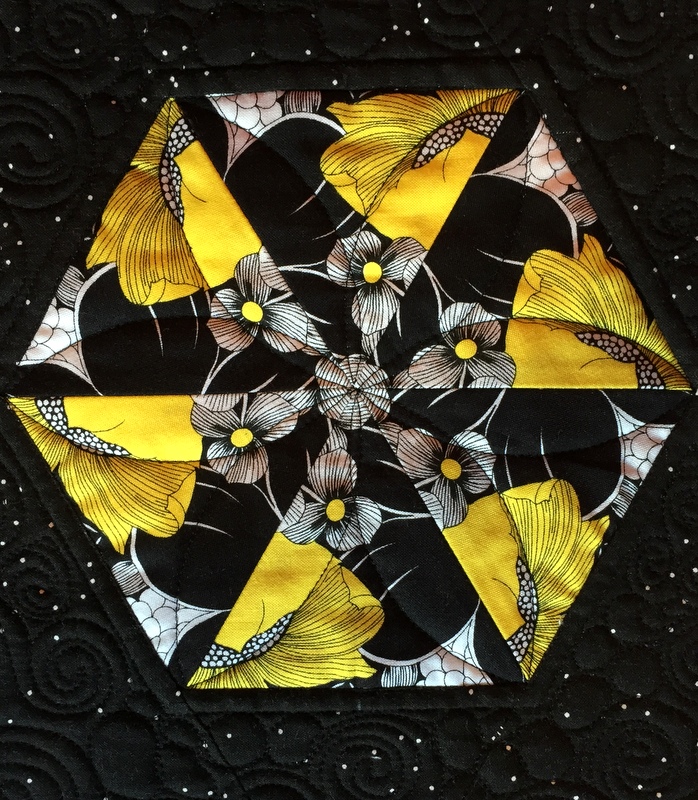
Did you happen to notice the four small kaleidoscope blocks in Rows 2 and 4? Each one is quilted with a different design, a Karlee touch that pleased me immensely:
The fabric in the kaleido blocks is pretty busy so the quilting is easier to see from the back. Here’s the first block in Row 4 as seen from the back:
Yes, I used a starry fabric on the back of the quilt, too. A couple of them, in fact. Stars play such an important role in this quilt that I actually toyed with the idea of naming it Star Crazy.
Go back to the first photo for a moment. Focus on the middle block (Row 3). See how the white trapezoids form a hexagon and the black triangles around the hexagon form a six-pointed star? Stars everywhere you look!
Measuring 53½” x 73½” before quilting, Stella by Starlight now measures 52″ x 72″. I’m going to bind it in the same fabric used in the background so that all of the blocks continue to float in the night sky. I’ll post more photos when the quilt is bound and labeled. I have something fun planned for the label so I hope you will come back soon to check it out.
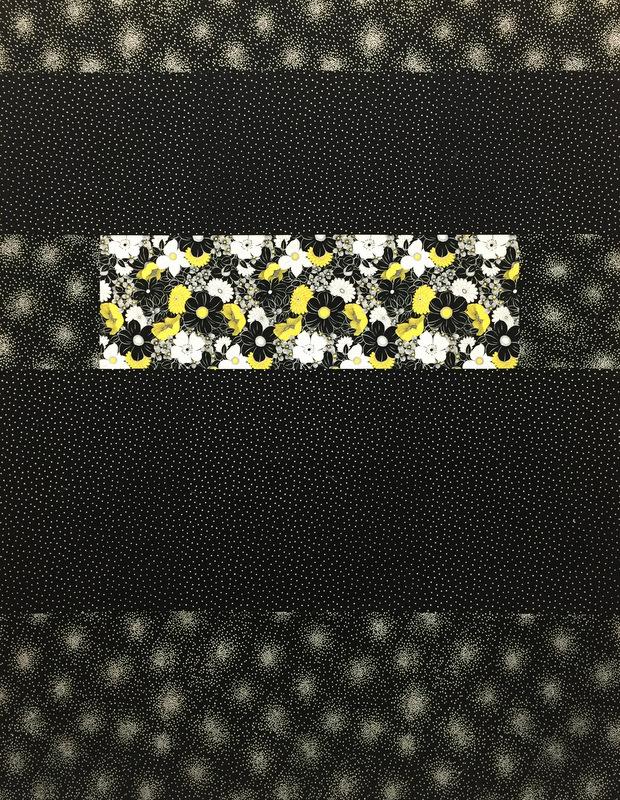
After settling on the name Stella by Starlight for my just completed kaleido-spinner quilt (subject of my last post), I made a simple pieced back for it using fabrics from my stash. I decided to stick to black fabrics for the back since the quilt will be quilted primarily with black thread.
A review of my stash yielded two prints that are perfectly in keeping with the theme of the quilt. How serendipitous! One features tiny white stars on a black background, while the other is a geometric print that from a distance looks like star clusters. Here is the completed back, which measures 60″ x 80″:
The strip of floral fabric near the middle is the focus fabric that created the one-of-a-kind kaleido-spinners in the quilt top:
I’m going to have Stella custom quilted by a local longarmer whose work is, well, stellar.
In my last post I showed you my latest kaleido-spinner project, noting that I planned to reverse the two large blocks in the fourth row. That’s been done, and this is what the quilt top looks like now:
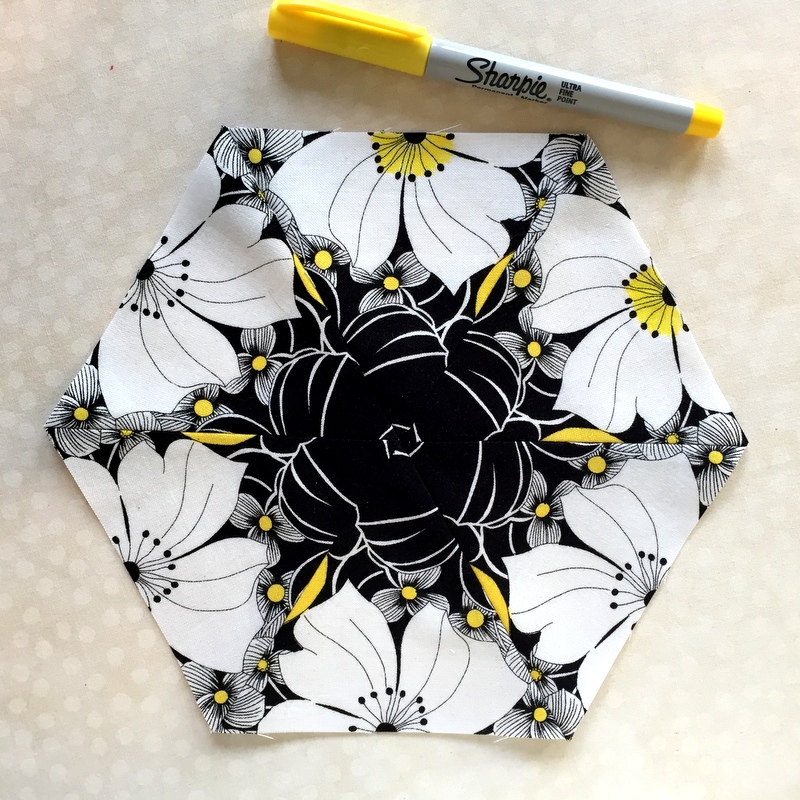
The change was made to better balance the distribution of yellow in the quilt. That small hexagon kaleidoscope on the left side of the fourth row has very little yellow in it, so it needed some help from its neighboring blocks.
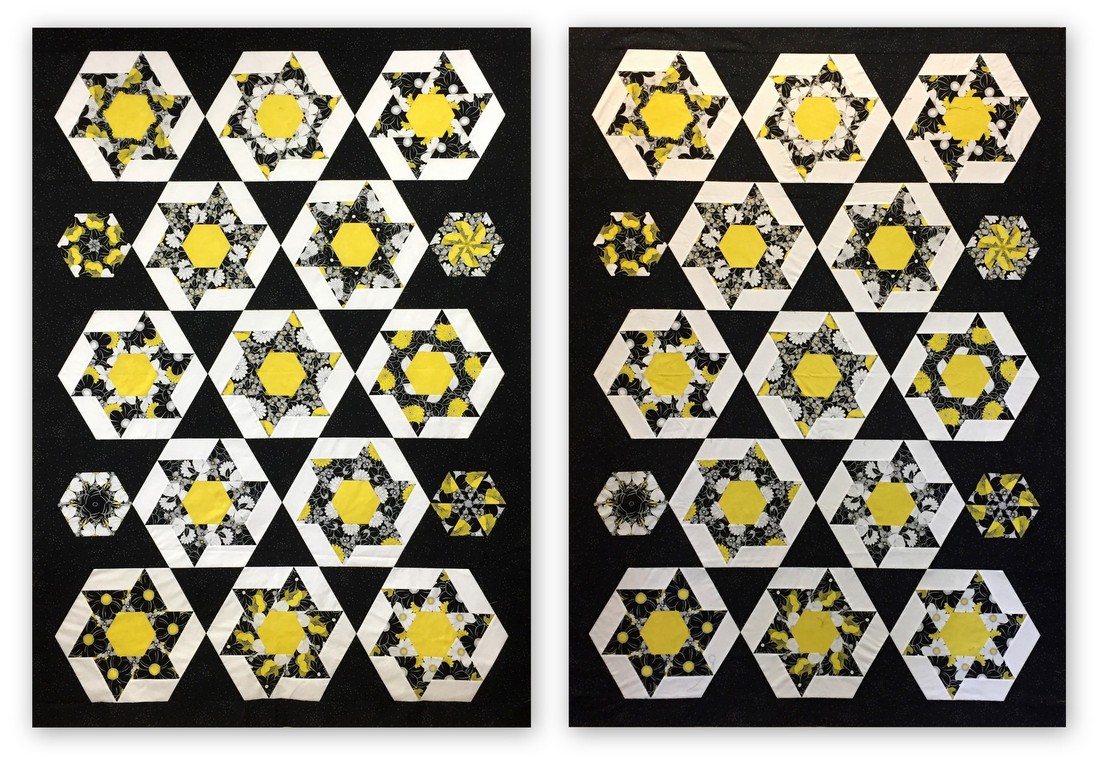
It’s a subtle but significant change. Here’s a look at the quilt top before and after: I was concerned about the lack of color in that hexie kaleido block even before I added it to the quilt so I employed a Sharpie Ultra Fine Tip permanent marker to give it a boost:
This is a trick I learned from a quilt teacher, who referred to permanent markers used in this fashion as “quilter’s caulk.”
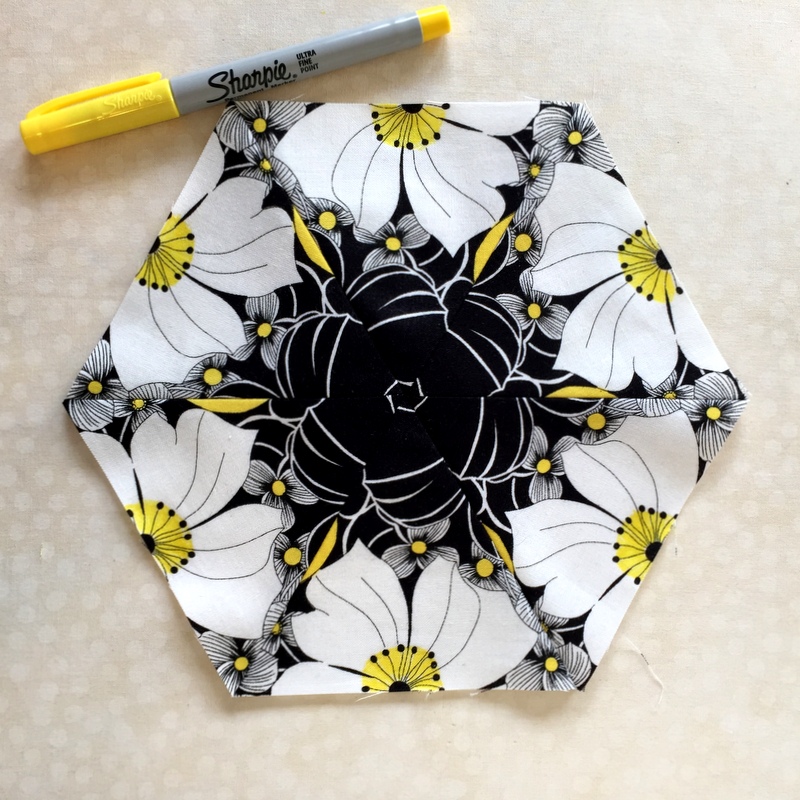
Here’s the block with the color added all around:
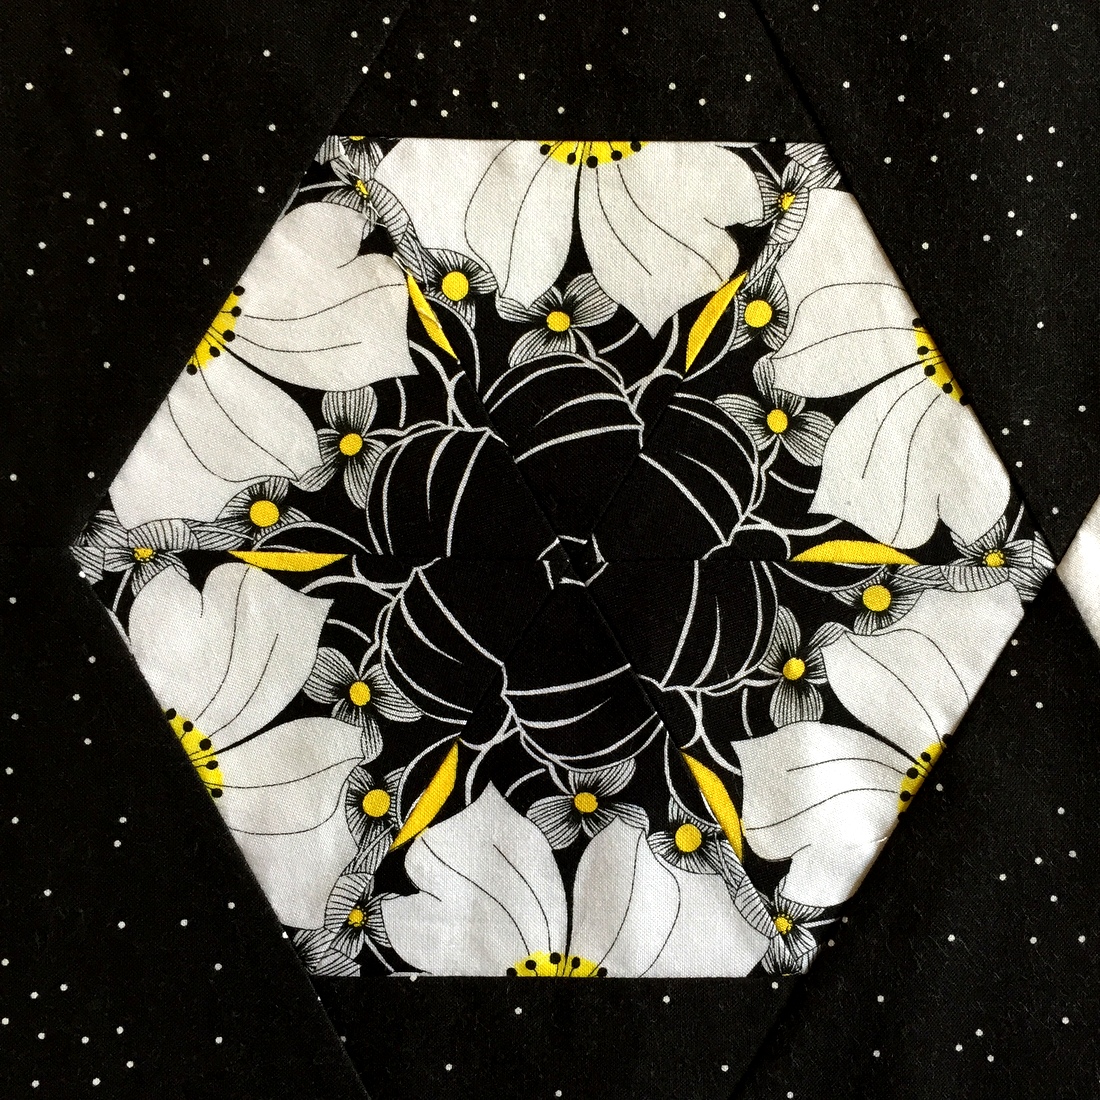
Sadly, much of the yellow on the outside edges disappeared because I had to trim the block before I added the side triangles and then I lost more of the color to the ¼” seam allowance:
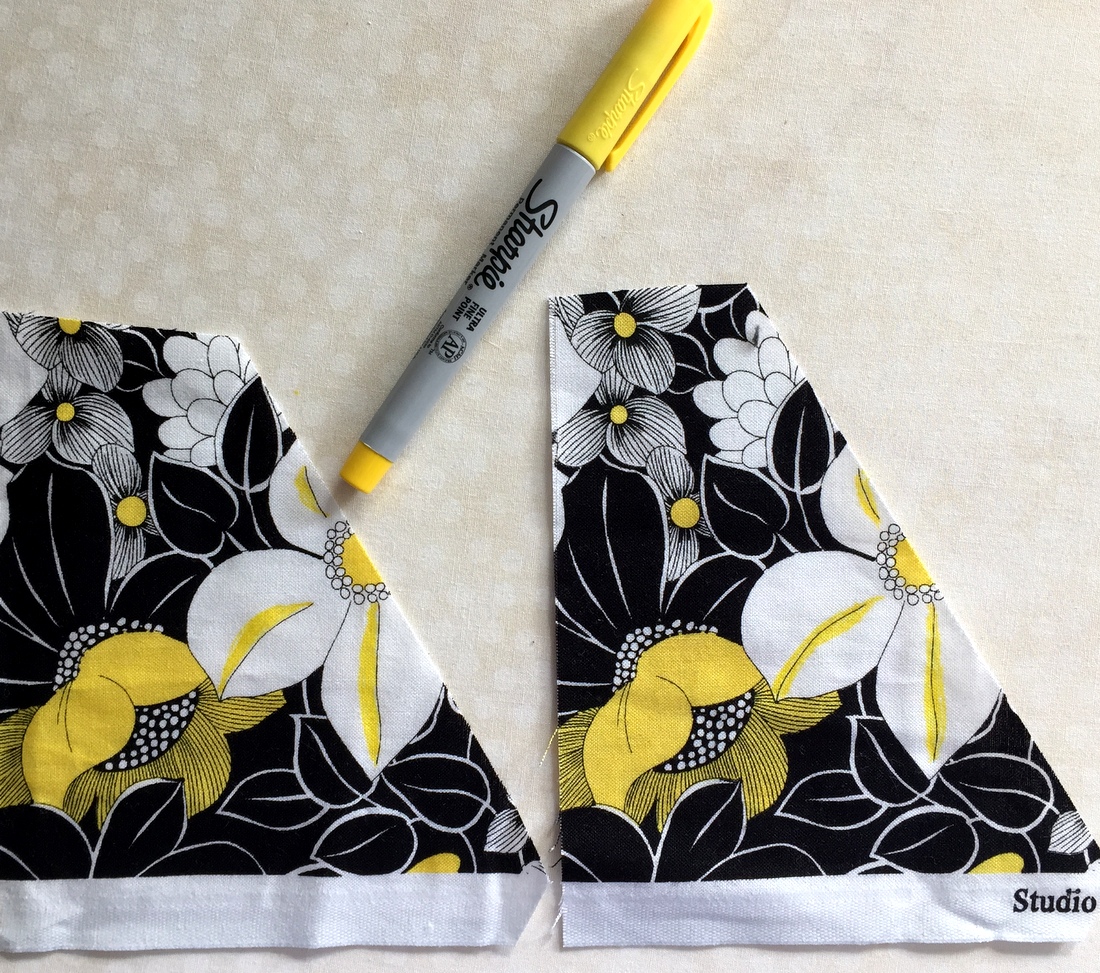
I actually toyed with the idea of adding more yellow in the white flowers, practicing on a couple of scraps . . .
. . . before concluding I was taking my obsession with balance too far. And here’s the thing about using permanent markers on fabric: if you make a mistake, it won’t wash out.
So my kaleido-spinner quilt top is done. I have a small piece left of the original floral fabric to put on the back — people always want to see what the fabric looked like before it was cut into little pieces.
Oh, and my quilt now has a name. It’s Stella by Starlight.


 But wait — there’s more!
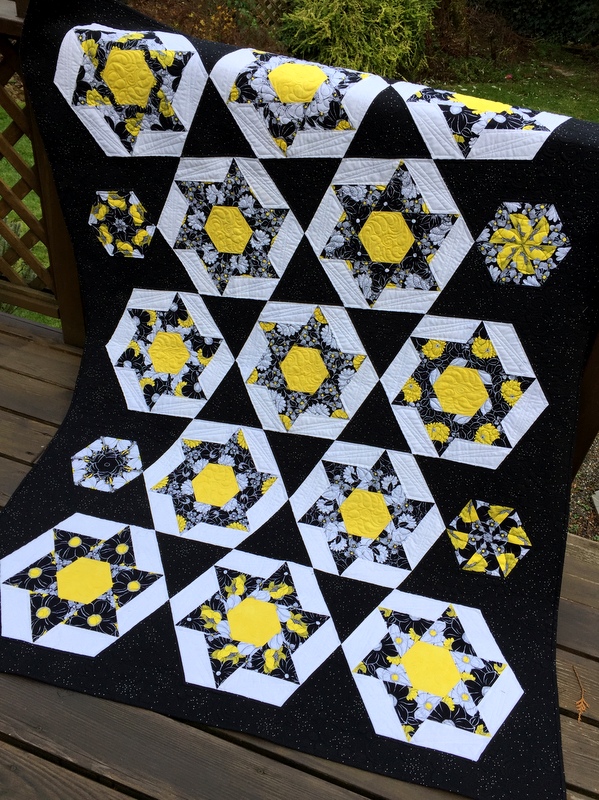

")
 The strip of floral fabric near the middle is the focus fabric that created the one-of-a-kind kaleido-spinners in the quilt top:
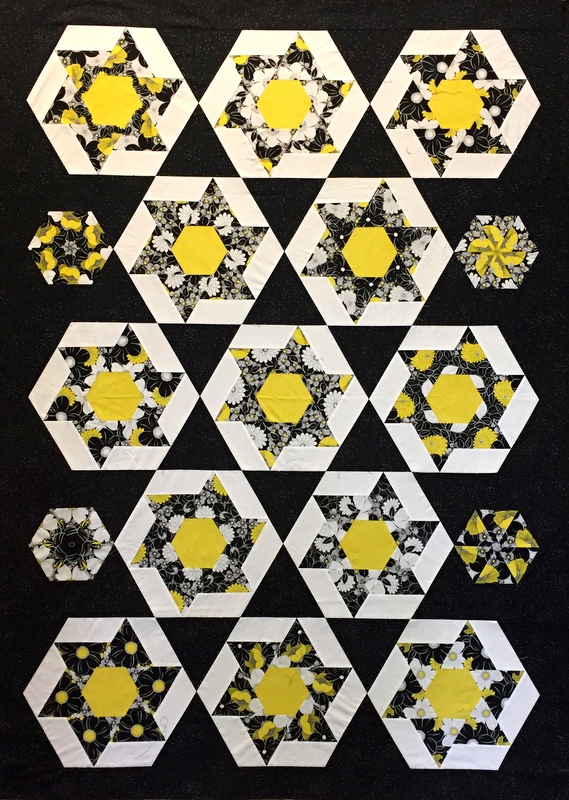
 I was concerned about the lack of color in that hexie kaleido block even before I added it to the quilt so I employed a Sharpie Ultra Fine Tip permanent marker to give it a boost: