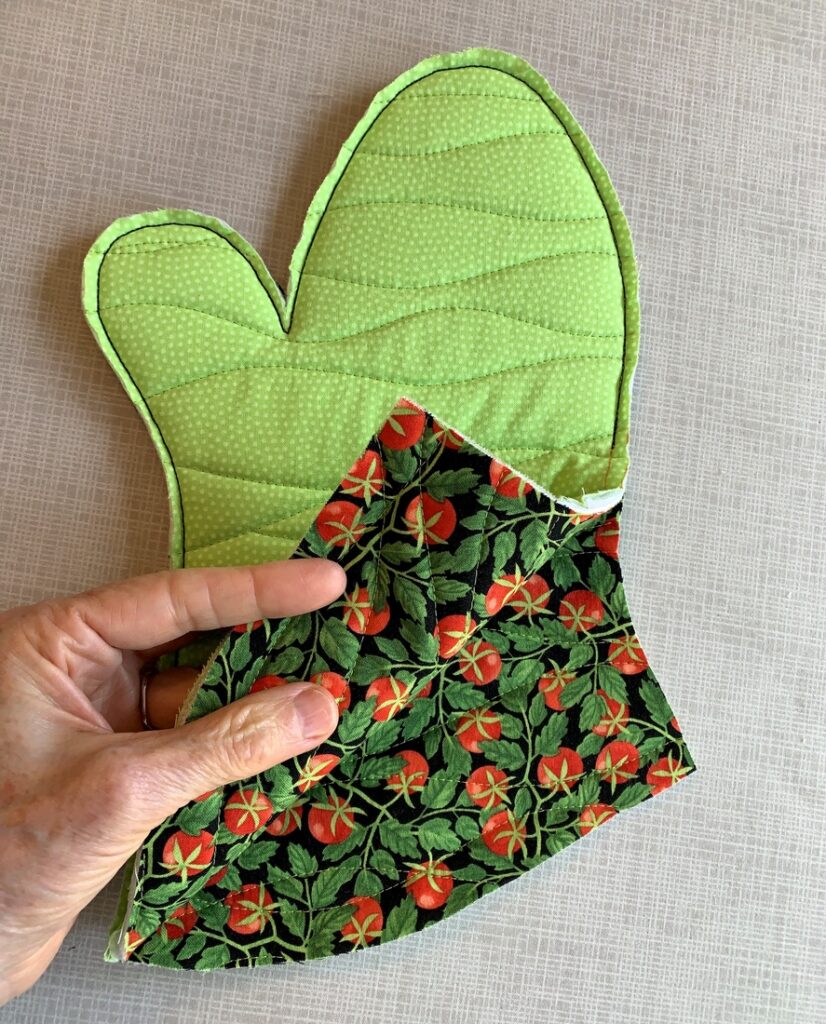
Dashed Hopes


A pattern of green and yellow colors with white backgroundMy elation at finding just the right amount of an older fabric to complete a flange binding on my latest kaleidoscope quilt was short-lived. After purchasing a quarter-yard from an on-line quilt shop in Iowa, I subsequently heard from the shop that the yardage in question was actually no longer in stock. Oh nooooooooo!

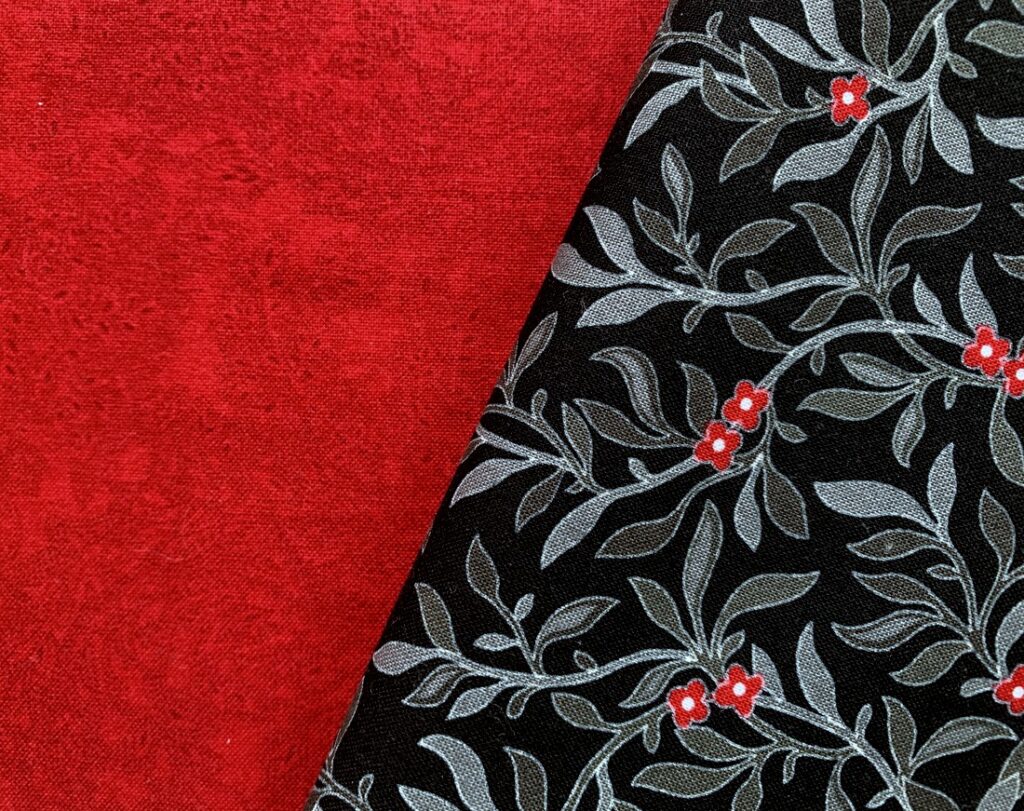
The fabric I need — okay, I want it more than need it — is a particular shade of red, a deep bright red like a currant. In fact, the leaf print I’m using for the border of my quilt is from the line called “Black, White & Currant 5” by Color Principle for Henry Glass Fabrics. I have several red blenders in my stash but not a single one matches the red in that print or the red shown above.

Unless someone reading this post has some Moda Puzzle Pieces Paisley 1007-51 on hand and is willing to part with a small amount, I’m going to have to embark on a search for a replacement, probably a solid currant. I have very few solids in my stash because I don’t care to sew with them but I’m sure there’s a piece out there that will work just fine.

In the meantime, I’m dealing with my disappointment by starting a new project:

A pattern of green and yellow colors with white background

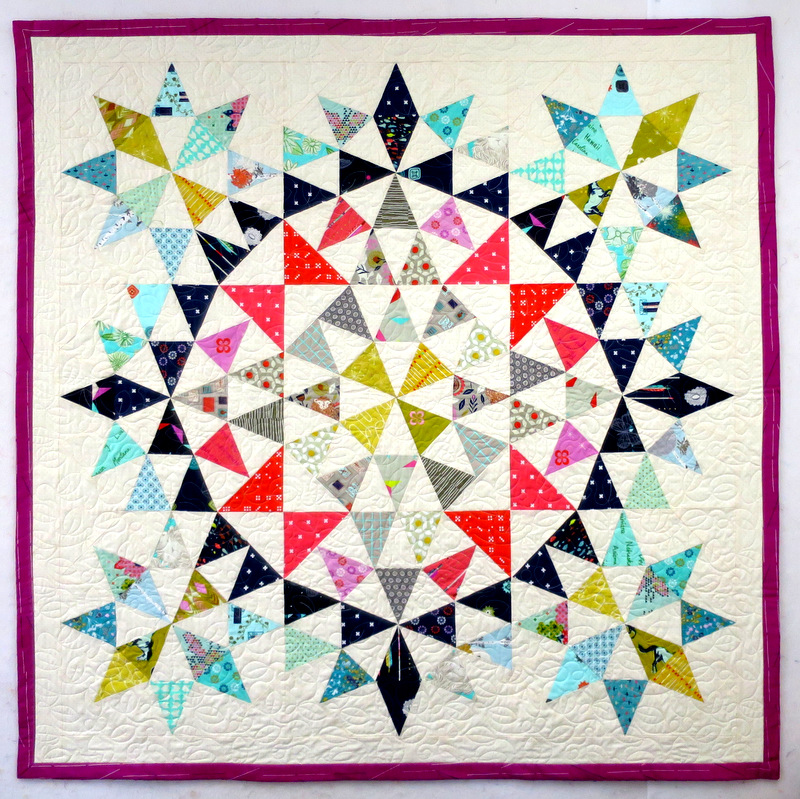
In the works is an 18″ Chicago Star block using this fun group of fabrics. I actually have two quilts in my head using these fabrics plus a few others not shown here.

Kristin at Montavilla Sewing in Lake Oswego, the quilt shop where I teach, introduced this pattern to some of my students and me last month in a Zoom meeting. It’s part of an optional block-of-the-month project we can learn about online while we wait for in-person classes to resume. I’ll be ready for virtual show-and-tell on Wednesday. It will be fun to see what fabrics other quiltmakers have chosen!


Posted in kaleidoscope quilts, update | 6 Comments

Hitting Paydirt


A pattern of green and yellow colors with white backgroundThat’s a funny phrase to use when talking about fabric but it perfectly expresses how I feel after finding a quarter of a yard of fabric online that was a total long shot.

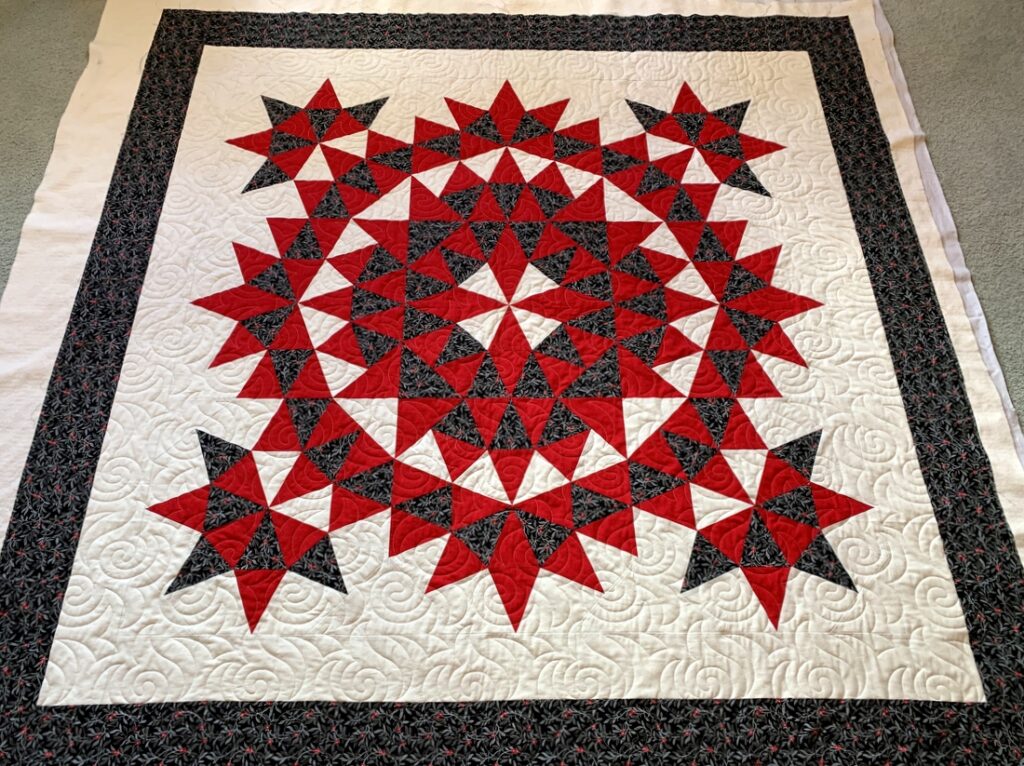
In my last post I showed photos of a kaleidoscope quilt I had just gotten back from the longarm quilter. (The quilt, based on the pattern “Grandma’s Surprise,” was made in a class with Joyce Gieszler six years ago.) In the comment section of the blog post, my friend Vickie asked what I was thinking about for the binding. I replied, “I’m going to bind it in the same black leaf print (shown above) that I used for the border because I want the focus to be on the kaleidoscope in the center of the quilt.” My thought was that binding the quilt in solid black or the red paisley tone-on-tone blender used in the quilt (also shown above) would create a frame around the quilt that might distract from the kaleidscope in the center.

But as I pondered Vickie’s question, the thought of a narrow flange of that red fabric sandwiched between the border and the binding popped into my head. Last night I added this sentence to my reply: “If I had more of the red fabric, though, I would be very tempted to add a narrow flange between the border and the binding.” Only two small rectangles of that fabric remained in my stash and neither scrap had selvage information on it. I had bought it years ago and had no idea if it was even still available.

Sometime between last night and this morning, that idea of a flange took hold. I woke up and thought, “Why not see if I can find that red fabric online?” I tried entering several search phrases with no luck. Then I struck paydirt with “dark red on red paisley blender.” Up popped this image. . .

A pattern of green and yellow colors with white background. . . with a link to an online quilt shop in Waukee, Iowa called Twiddletails. The fabric turned out to be a blender by Moda that was part of a line of blenders called Puzzle Pieces. All that was available was a quarter of a yard — a mere nine inches! Reader, I ordered it on the spot. Between this piece and my two scraps, I think I can eke out enough strips for a flange, provided the dye lots are similar enough. There’s a surprising amount of variation among dye lots. This bit of yardage from Twiddletails is the only one I’ve found so my fingers are firmly crossed.


Posted in kaleidoscope quilts, update | 4 Comments

Kaleidoscopes and Curves


My latest kaleidoscope quilt is back from the longarm quilter! While it was still on Sherry’s frame on Monday, she sent me a couple of sneak peeks:

A pattern of green and yellow colors with white background

A pattern of green and yellow colors with white background

I knew then I’d made the right choice with the quilting motif: “Bordeaux” by Urban Elementz. The motif features spirals and swirls that work really well with the design of the quilt and the leaf print.

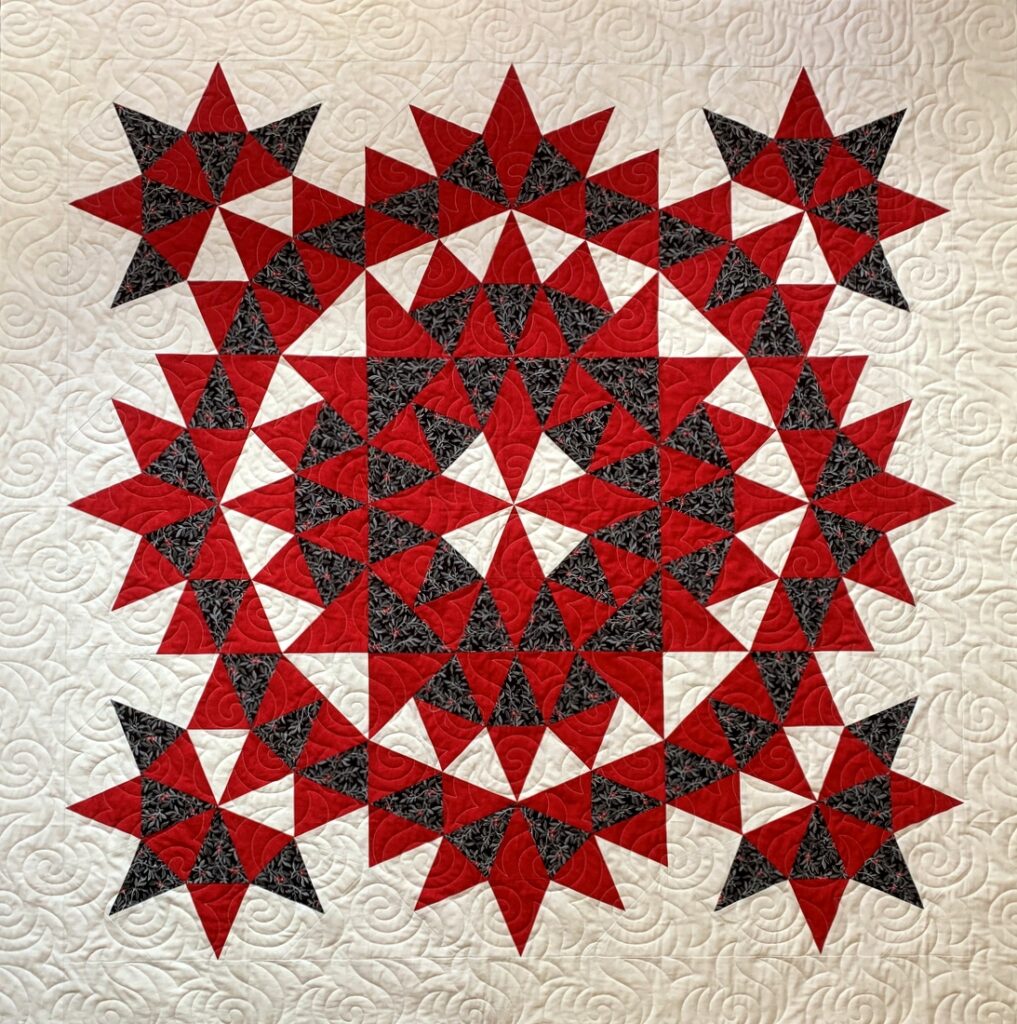
The quilt isn’t trimmed yet but I couldn’t wait to show you more of the quilting:

A pattern of green and yellow colors with white background|
Here’s a shot of the center:

A pattern of green and yellow colors with white background
Even though the quilt pieces are all angular, there’s a suggestion of roundness because of the way the blocks are set. I wanted the quilt motif to have a roundness to it as well. I was also looking for another element to suggest the shape of leaves like the ones in the black print. Perhaps you can see this better in the close-up of the center area:

A pattern of green and yellow colors with white background
Once the quilt has been trimmed, I’ll post a few more pictures and show you the simple pieced backing. This six-year-old UFO is very close to becoming a completed quilt!

Oh, and here’s an update on the migration front. The not-so-good news is that the migration of my website/blog to a new server is not yet complete. The better news is that readers can once again leave comments. So feel free to comment on this post or even the last couple of posts when comments were blocked.

I am especially eager to know if subscribers are also getting notifications of new blog posts — so here’s your chance to let me know. Thank you!


Posted in kaleidoscope quilts, update | 10 Comments

Mixed Veggies — and a Migration


Hello there! I’ve been silent for a few days because my website/blog is undergoing a migration to a new server. I committed to this undertaking last week only to find out — after the fact — that it could take up to 18 days for the migration to be complete. Yikes!

Today I got the green light to make a post to let you all know what’s going on with First Light Designs. I’m taking advantage of that to include a quick update on one of my recent projects:

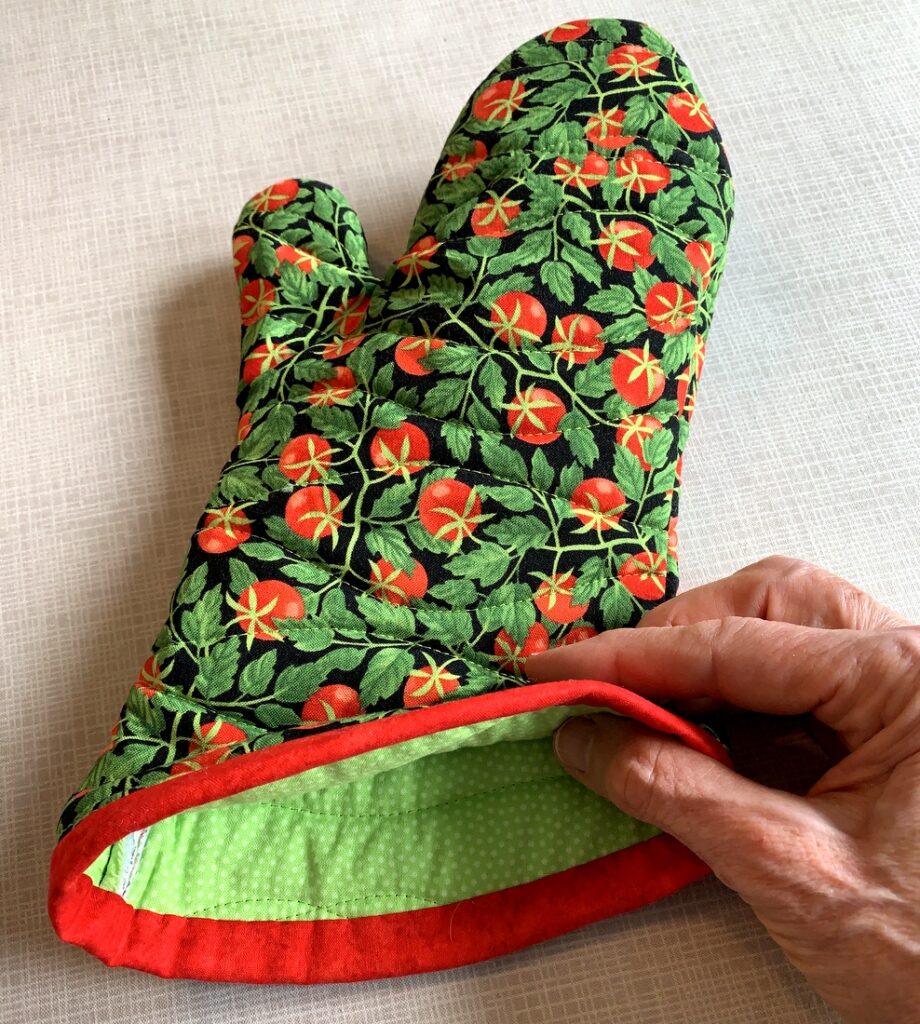
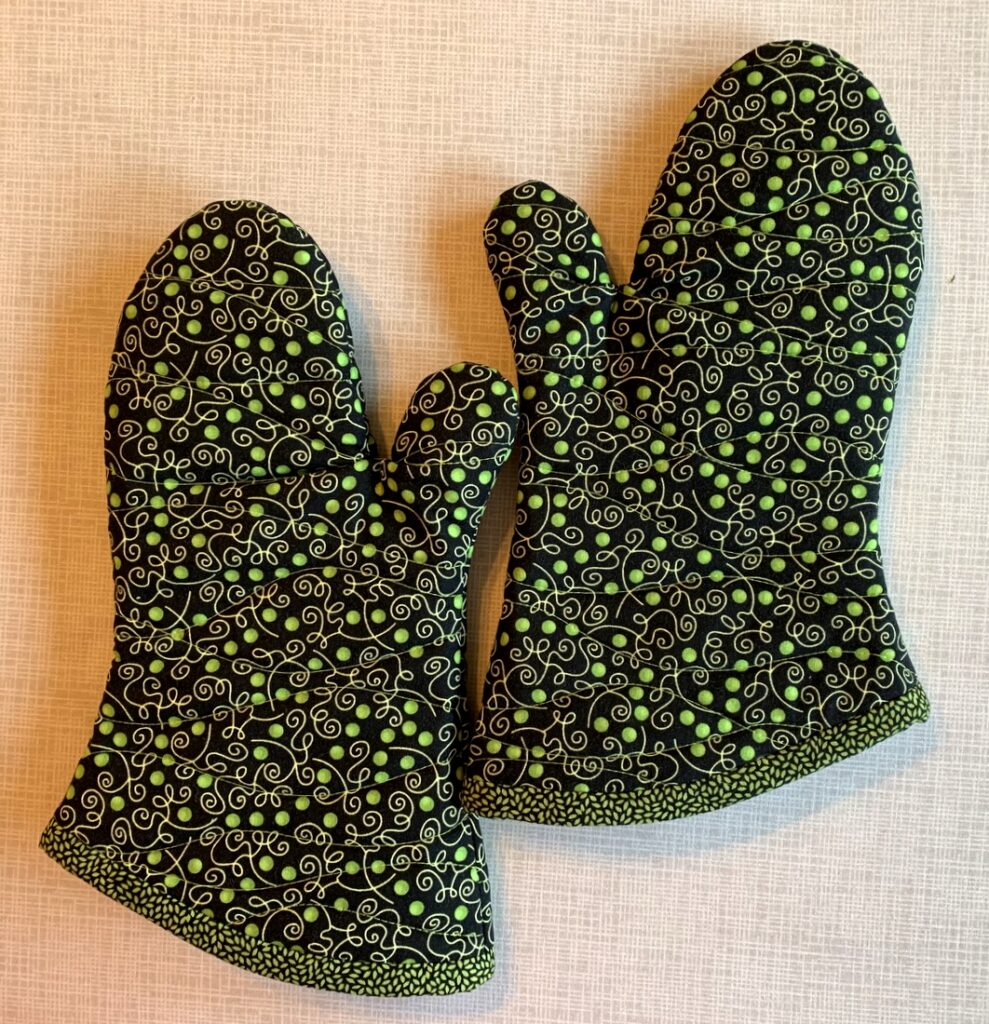
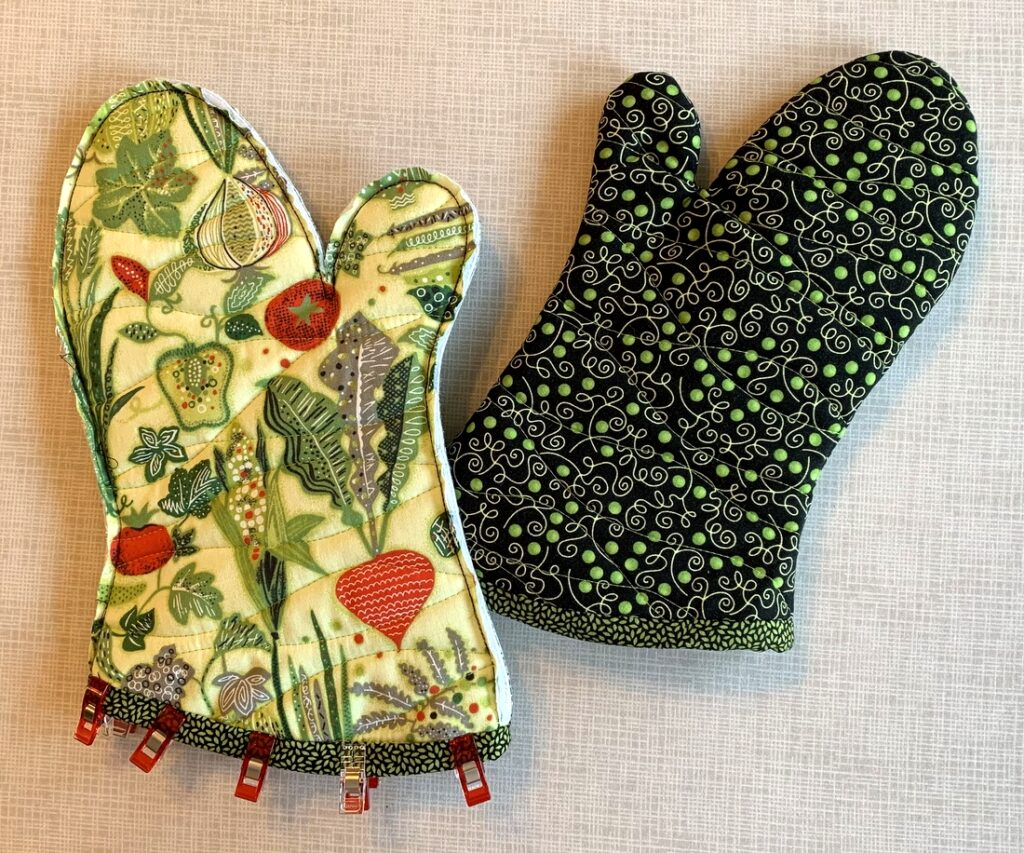
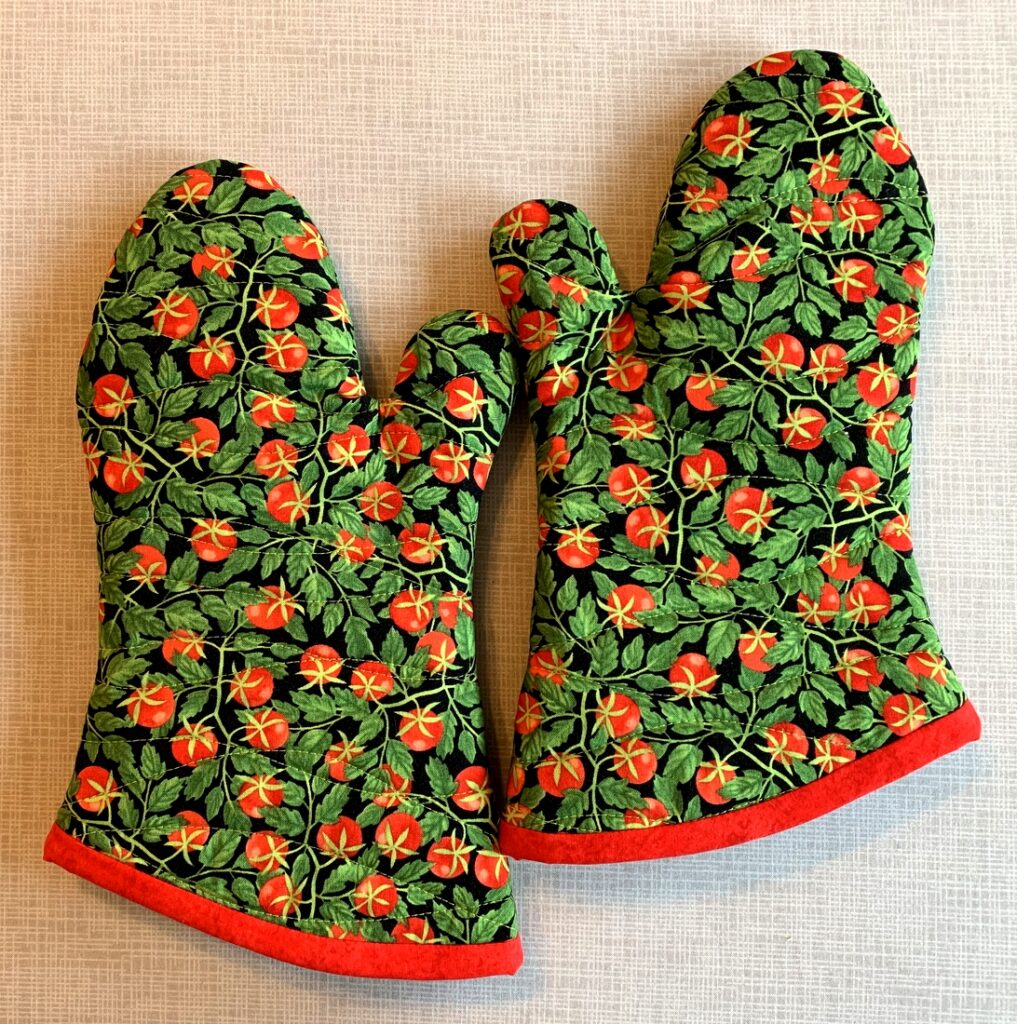
A pattern of green and yellow colors with white backgroundYes, it’s another set of oven mitts following my tutorial posted last month. Aren’t these mitts cute? I made this pair for my friend Debby. She picked the sweet pea fabric for the outside of the mitts and I found the perfect fabric in my stash for the lining fabric that continues the veggie theme:

A pattern of green and yellow colors with white background

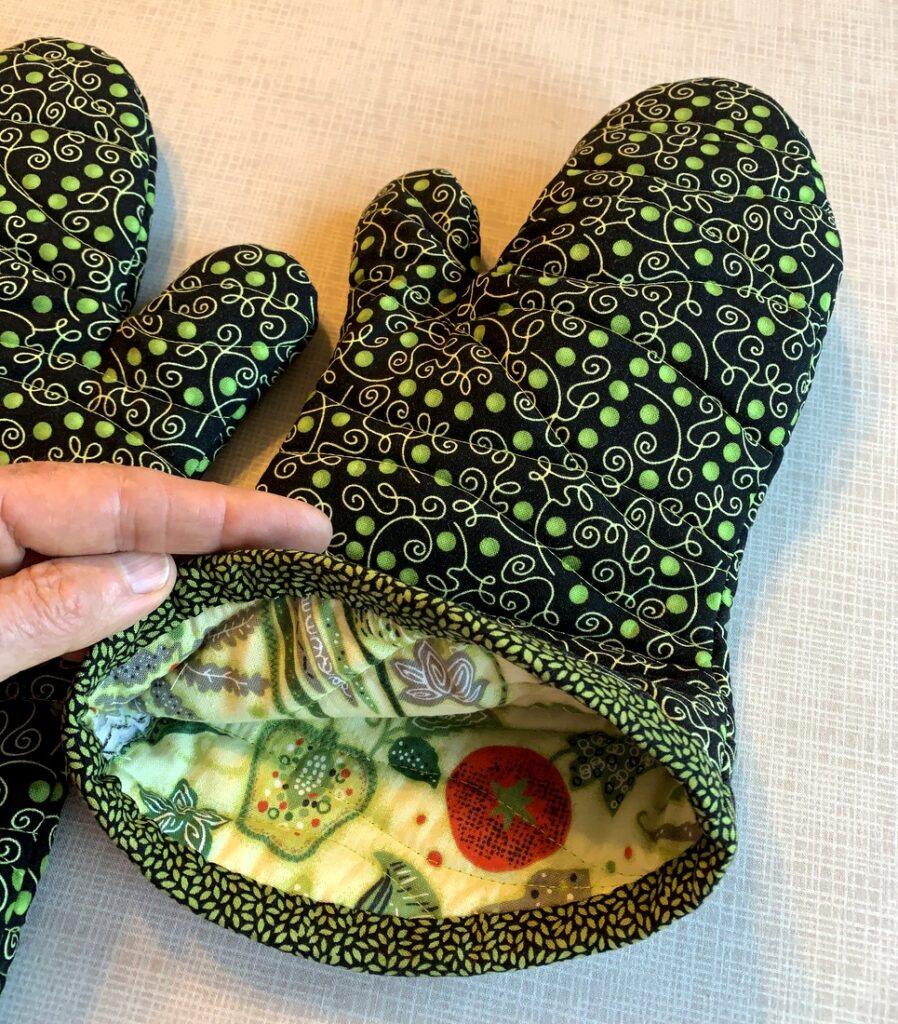
The mitt on the left above is ready for the binding on the cuff edge to be tacked down, at which point the mitt can be turned right side out. I love the surprise of seeing the colorful veggie fabric when you peek inside a mitt:

A pattern of green and yellow colors with white background
An apparent drawback of the current website migration process is that no one can leave comments on my blog for the time being. That’s a big disappointment! Bloggers love to get comments and I have really missed that connection with my regular readers. Let’s hope the migration to the new server is up and running in short order so I can be back in the blogging business (and you can be back in the comment business if you so choose)!


Posted in home dec, oven mitts, update | 2 Comments

Season’s Greetings


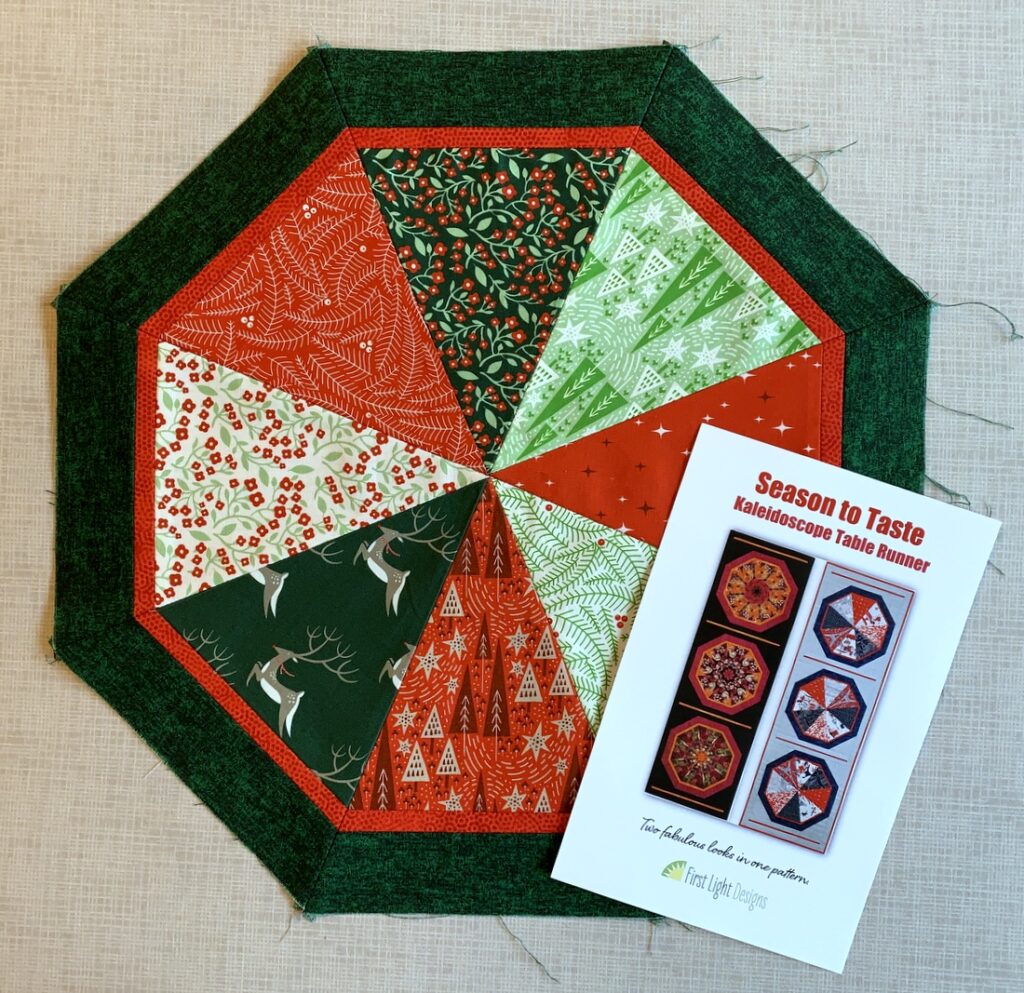
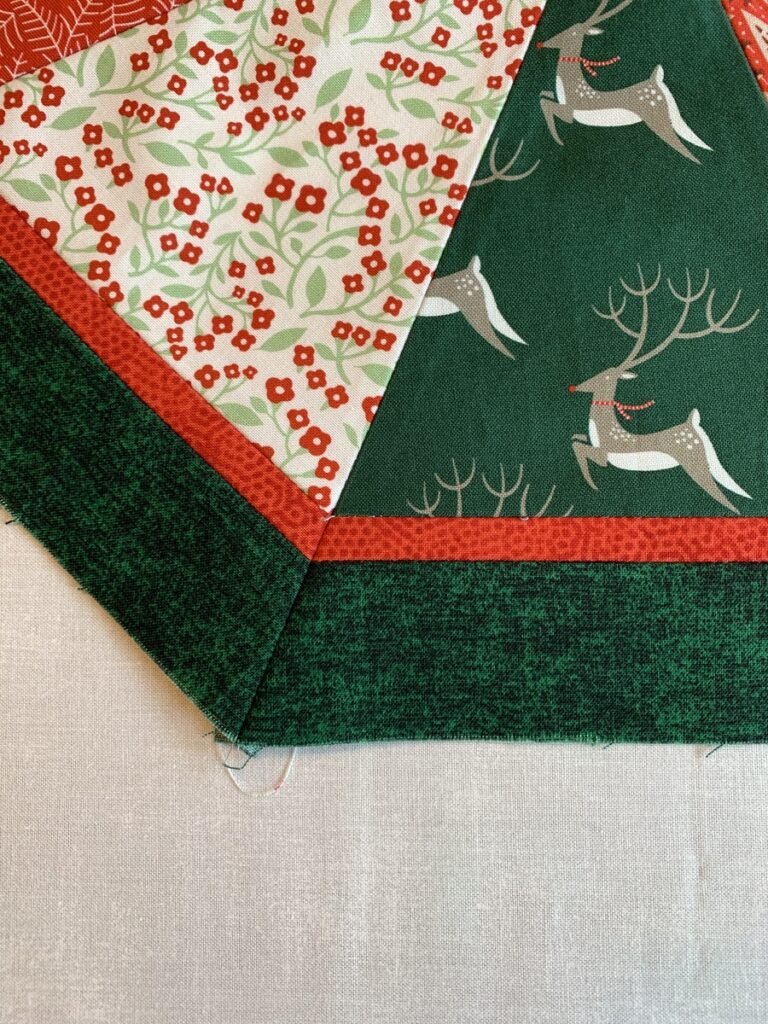
What?? Here we are midway into a glorious spring in Portland, Oregon and my thoughts are on winter. Why, you ask? Because I have finally started work on the fourth and final quilt based on my Season to Taste pattern. This is the first of three blocks:

A pattern of green and yellow colors with white background
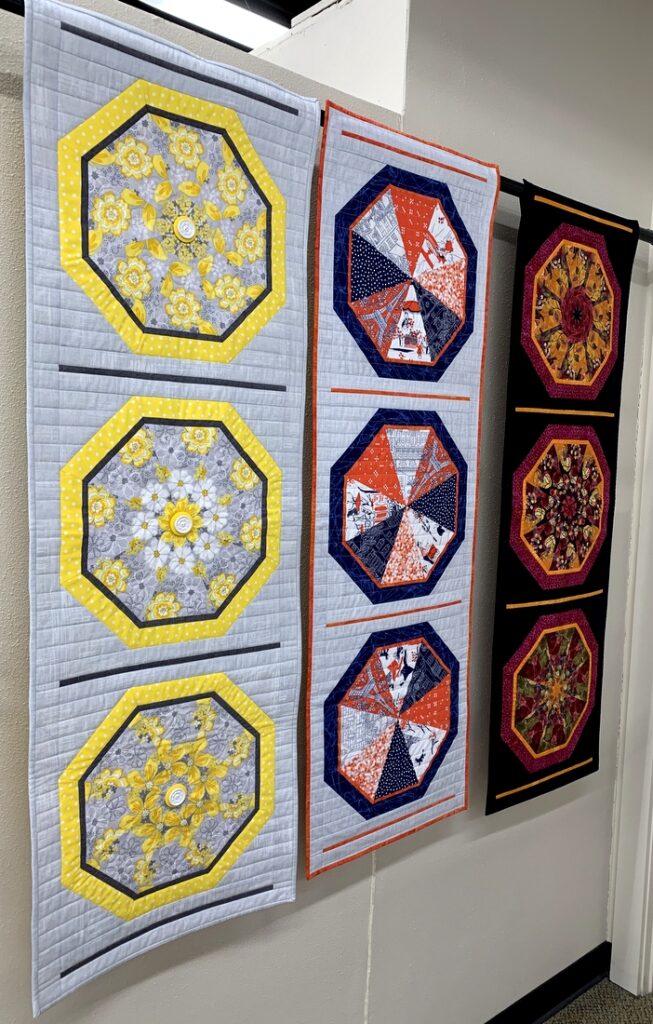
When I designed the pattern in 2014 I envisioned making a wall hanging (or table runner) for each season of the year. I started with the fall version, naming my quilt Autumn Reflections, and the spring version, Under Paris Skies. Those are the ones you see on the pattern cover above.

In 2015 I made a summer version named Sun Flowers. All three were on display last month at Montavilla Sewing Center in Lake Oswego:

A pattern of green and yellow colors with white background
Every so often I would think about making a winter version but I could never settle on fabrics. Did I want something in red and green to evoke the holidays or something in wintry hues of grey and dark blue? Did I want to make kaleidoscope blocks using eight repeats of the same print or a scrappy version using eight different prints?

Months passed. Years passed. (Hmm, my last post was about a quilt I started in 2015 and finished just this year. Do you see a pattern here?)

Then a few weeks ago I saw a photo of a quilt my friend Linda D. had made using a lovely collection of green and red prints. When I inquired about the fabric line (which turned out to be “Northern Light” by Annie Brady for Moda Fabrics), Linda generously offered to give me her leftover fabric. She actually made two bed-size quilts from these fabrics. When she dropped off the “scraps” I could see there was enough fabric in the sack to make a third bed-size quilt!

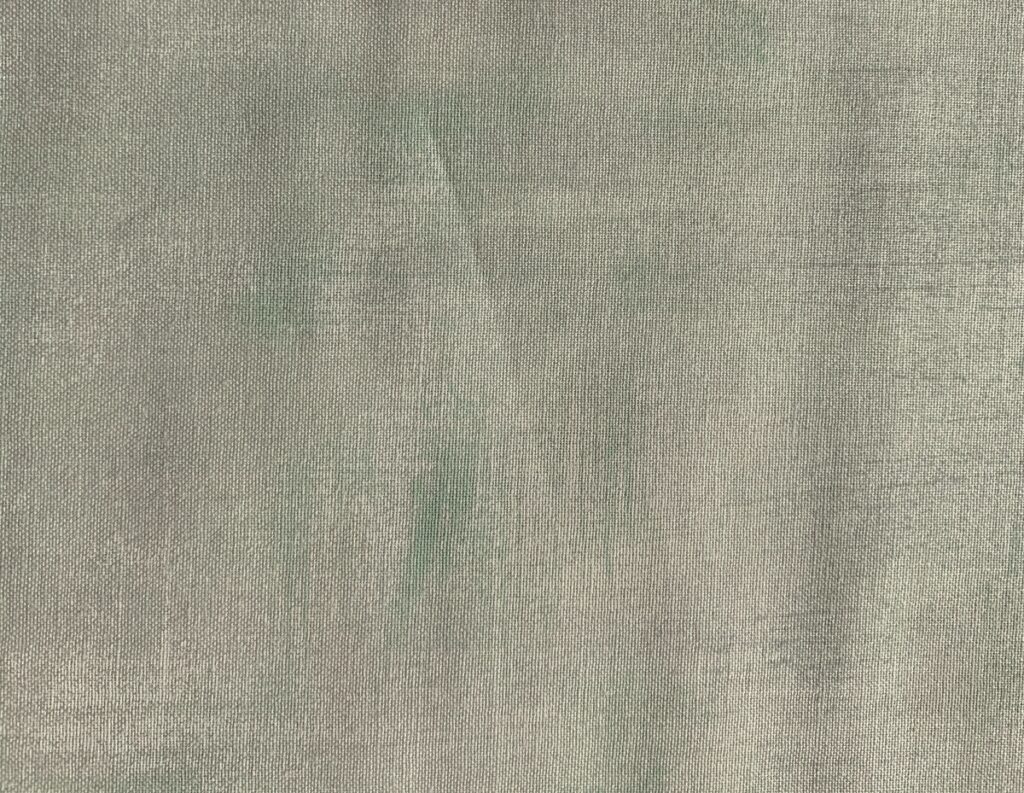
Today I stopped by Montavilla LO to pick up some background fabric. (Hard to believe but nothing in my stash seemed “just right” for this particular project.) At the shop I found a piece of “Grunge” by BasicGrey for Moda Fabrics that seemed like it might work — a creamy white with just a touch of green in the subtle texture and shading:

A pattern of green and yellow colors with white background

Alas, the green looked too minty when placed next to my kaleido block. I was about to give up the search when it occurred to me to flip the fabric over. You may not be able to tell from the next photo but trust me: the wrong side of the Grunge fabric is perfect:

A pattern of green and yellow colors with white background


Posted in kaleidoscope quilts, table runner, update, wall hanging | 2 Comments

My Next Quilt


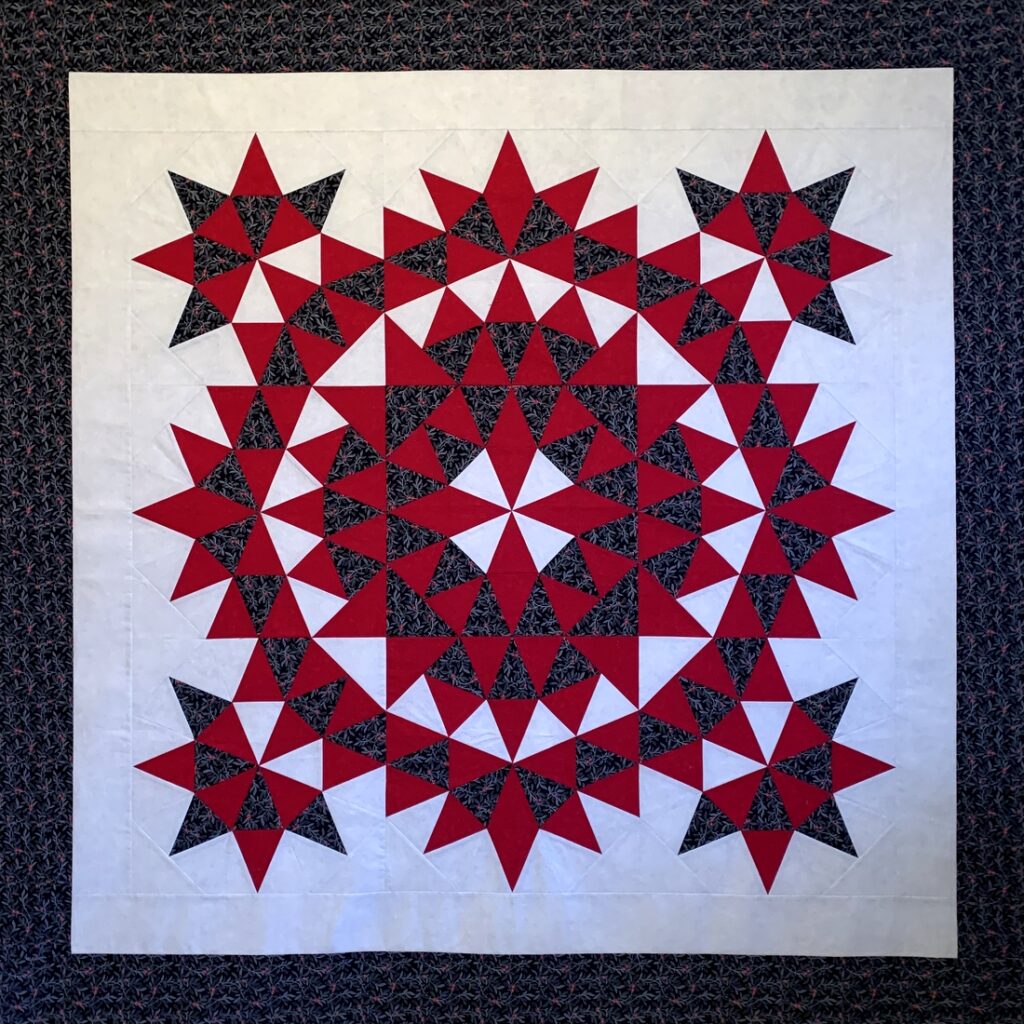
. . . or perhaps I should say “My Next Quilt Finish.” Today I pulled a UFO out of my sewing room closet that’s been waiting in the wings for — oh, the last six years (!) and put a border on it:

A pattern of green and yellow colors with white background
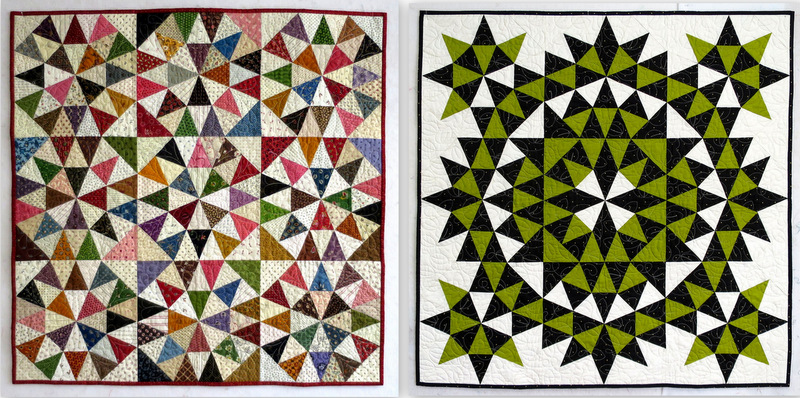
This Unfinished Object dates back to 2015, when I took a class from Joyce Gieszler on Grandma’s Surprise, the quilt pattern featured in her book Then and Now Quilts(Kansas City Star Quilts, 2014). In 2015 Joyce’s colorful version using cotton+steel fabrics had set Pinterest ablaze . . .

A pattern of green and yellow colors with white background

. . . but it was her three-color version shown on the right that I had fallen for:

A pattern of green and yellow colors with white background

Her class was great fun and I made my top pretty quickly, eking out a border of the background fabric with just enough left over to cut binding strips so the image would float. The quilt top finished at 57″ square. Because I like to piece my quilt backs, I put the project on the back burner while waiting for inspiration to strike.

Well, you know what they say: time marches on for all of us. Suddenly, 2021 was well underway and I had never gotten around to the backing. Today, when I pulled the quilt top out to take a look, I decided I wanted it to be a bit larger and added a border of the black leafy print. Now it measures 66″ square, a really nice size for a throw or lap quilt.

And the backing? Some time ago I had purchased a piece of 118″ wide backing fabric in a pale grey leafy print. In the spirit of “get ‘er done!,” why not forget the pieced backing and just make a backing out of one piece? I got ready to cut the 74″ square I needed for the backing — longarmers like the backing to be 4″ larger on all sides — and then discovered a 3″ tear in a spot which made it impossible to cut the backing from one piece.

Boohoo!

It looks like a pieced backing is in the cards after all.


Posted in kaleidoscope quilts, update | 6 Comments

Oven Mitt Tutorial from First Light Designs: Part 2 of 2


A pattern of green and yellow colors with white backgroundWelcome to Part 2 of my Oven Mitt Tutorial, which covers the sewing of the mitt and contrasting band around the cuff edge as well as the final step of tacking the band down before turning the mitt right side out.

Part 1 of my tutorial covers fabric requirements, instructions for downloading and printing the pattern, assembling the layers, and quilting the resulting “quilt sandwich.” Click here to see Part 1.

Click here to download the free pattern:
Oven Mitt Pattern, page 1 of 2
Oven Mitt Pattern, page 2 of 2

Click here to see the Prequel to the Tutorial, in which I explain why I decided to write a tutorial and offer some tips on making sure my pattern fits your hand.

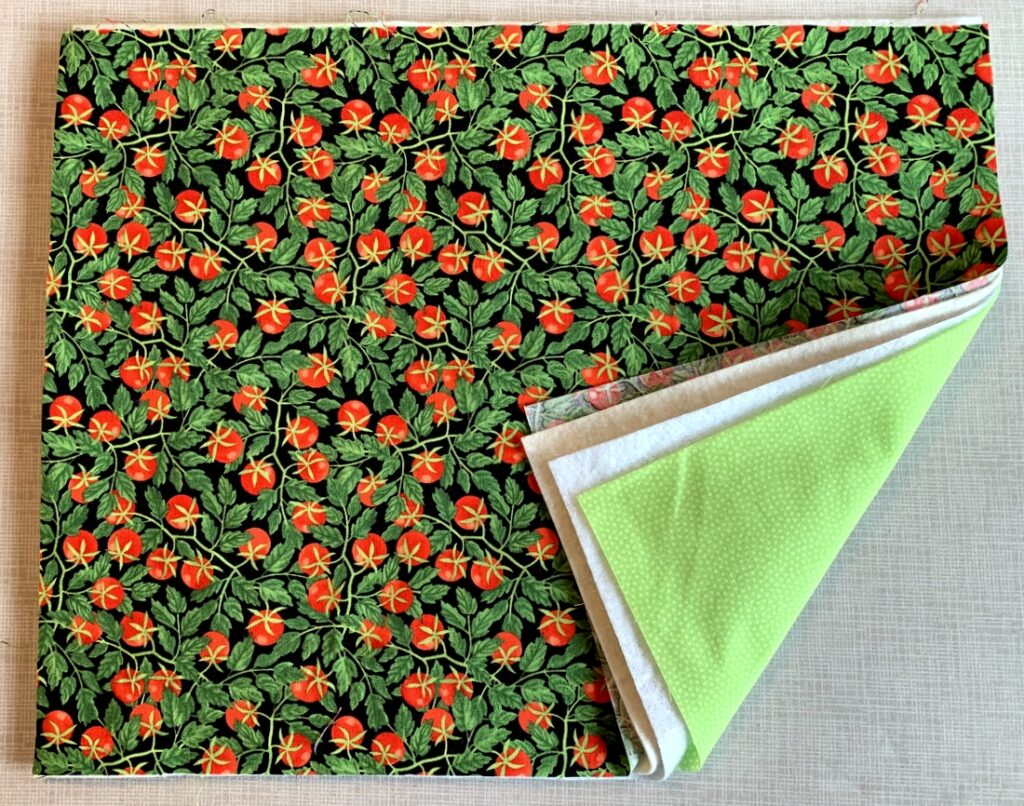
In Part 1 you create a 19″ x 14″quilt sandwich” composed of four layers: outer fabric, cotton batting, insulated cotton batting (Insul-bright), and lining fabric:
A pattern of green and yellow colors with white background

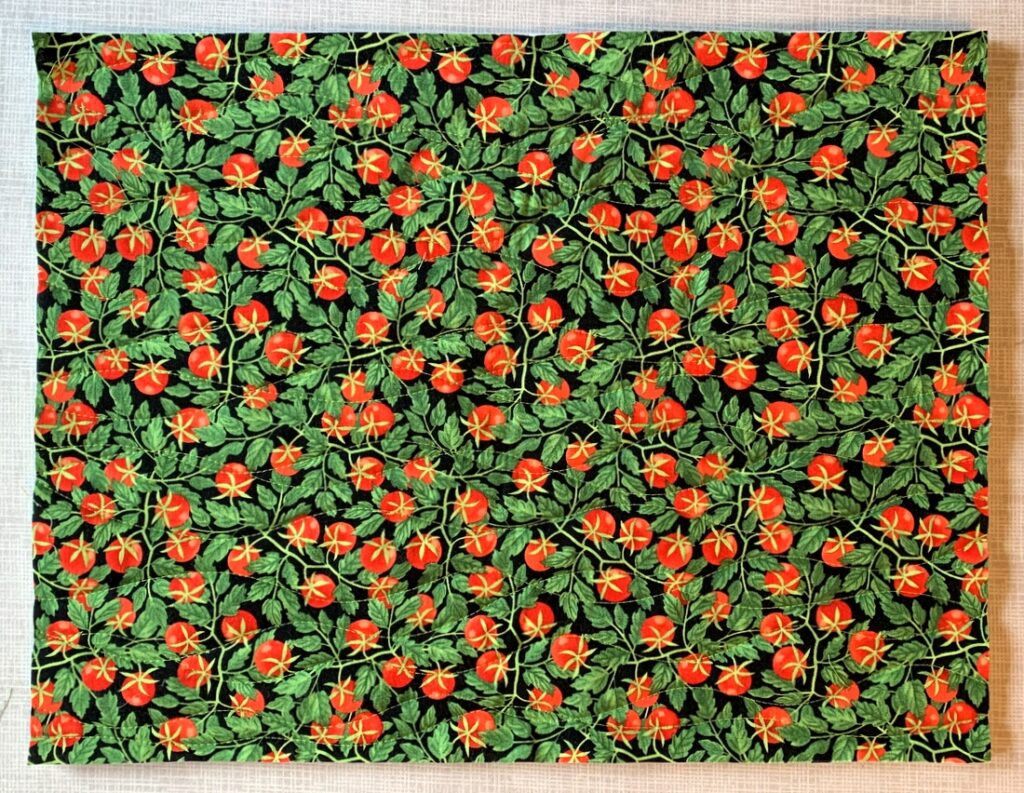
After quilting the four layers you trim them to 18″ x 13″:
A pattern of green and yellow colors with white background

Part 2 starts right now!

Fold the quilt sandwich in half, right sides together, with the fold on the left. Lay the freezer paper pattern on the fabric, shiny side down, making sure you have at least a half-inch clearance all around. Use a hot dry iron to press the pattern in place:
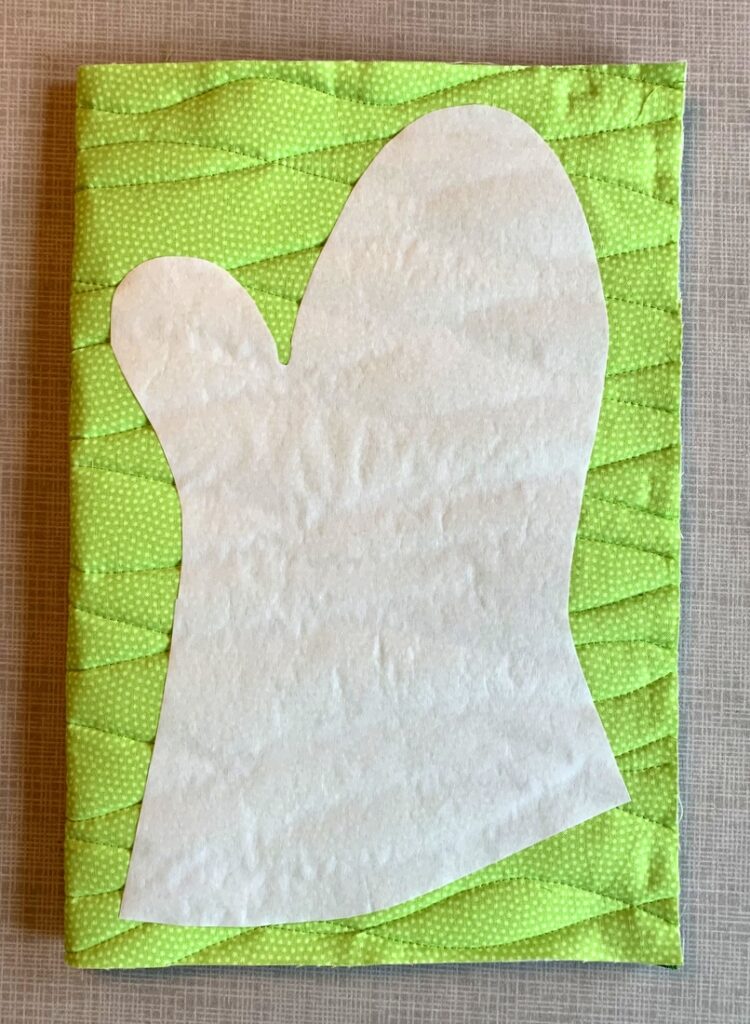
A pattern of green and yellow colors with white background
Using a marking pen or pencil, make a small dot on the fabric next to the pattern about halfway down the finger side of the pattern (see arrow in photo below). Draw a line along the edge of the pattern from the dot to the bottom edge. Draw a second line ¼” to the right starting ¼” above the arrow:
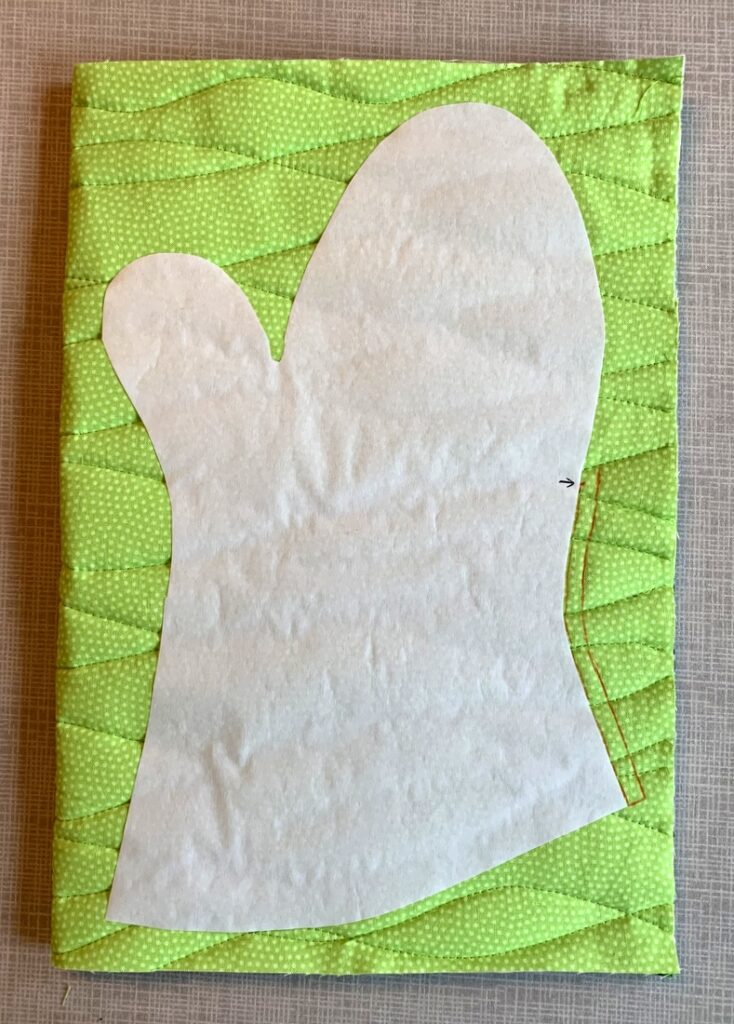
A pattern of green and yellow colors with white backgroundThat second line is the cutting line.

Use Wonder Clips around the raw edges of the quilt sandwich. You don’t need a lot of clips – just enough to hold the layers together:
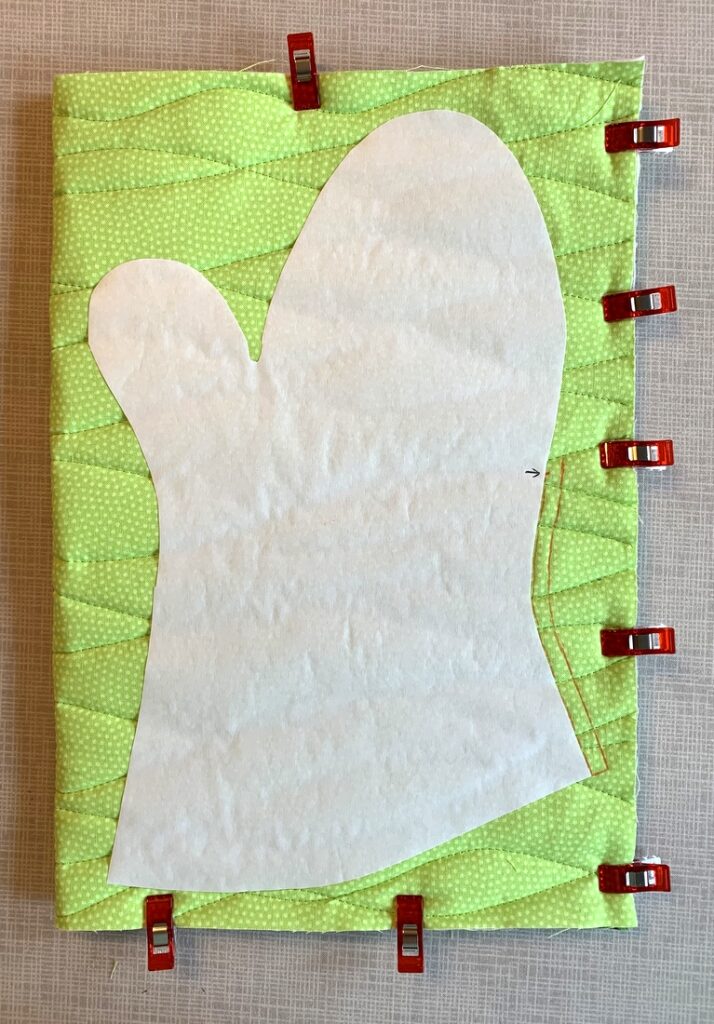
A pattern of green and yellow colors with white background
Now you’re ready to sew.

Before you start stitching: make sure the thread in your machine matches the dominant background color of the outer fabric. Once you turn the mitt right side out, you’ll be able to see thread stitches along the seamline. (This is also true of store-bought mitts, by the way.) It’s because you are stitching through eight layers; that’s a big load for two interlocking threads to carry, especially when four of the eight layers have some bulk to them. (There may be times when your bobbin thread is a different color than the top thread. It’s the bobbin thread you are likely to see once the mitt is turned.)

Using an open-toed walking foot, which feeds the eight layers together evenly, sew from the bottom edge of the thumb side of the mitt (see photo below) with the needle right next to the freezer paper, stopping when you get to the dot on the opposite side. Backstitch at the beginning and end of the stitching line.
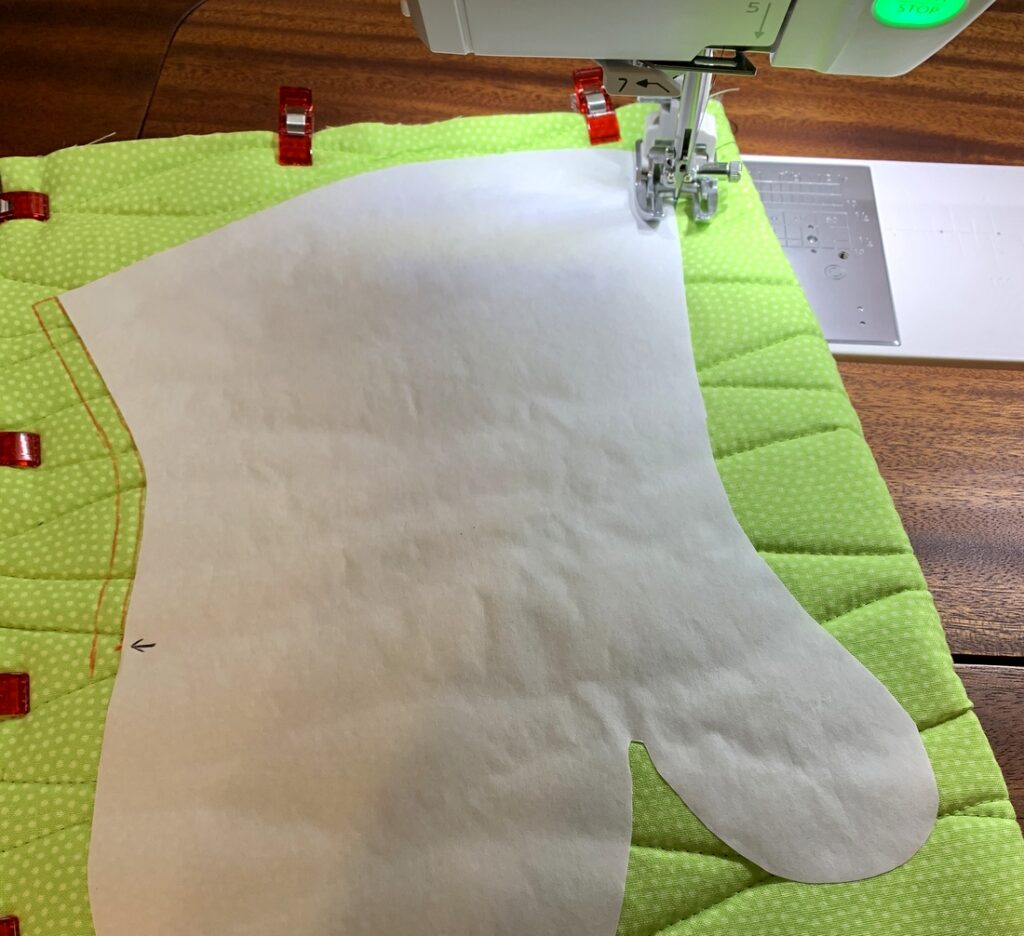
A pattern of green and yellow colors with white backgroundThe secret to not getting any sharp points as you stitch around the curves of the thumb and finger portions is to go slowly, stopping when necessary to lift the presser foot and rotate the mitt ever so slightly to keep the line of the curve going smoothly. Any points that get stitched in will be visible when the mitt is turned right side out.

Here’s a close-up of the stitching in process:
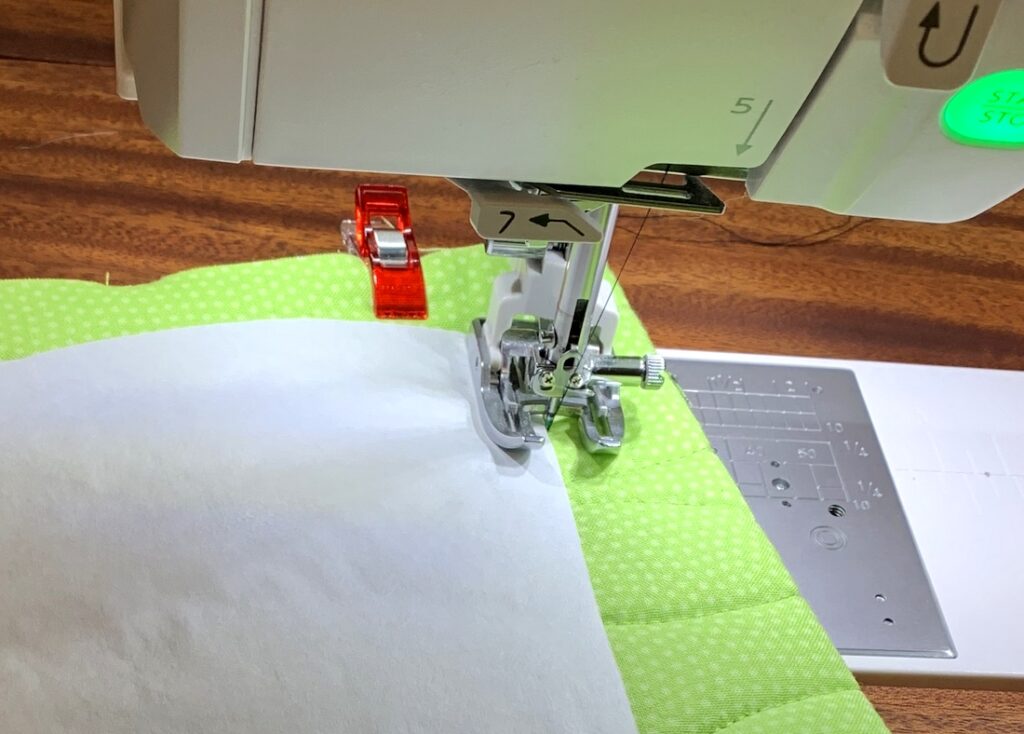
A pattern of green and yellow colors with white backgroundYou can see why an open-toed foot is important: you need to see the needle going in and out of the fabric right next to the freezer paper.

Using very sharp sewing scissors, cut along the bottom edge (only) as shown:
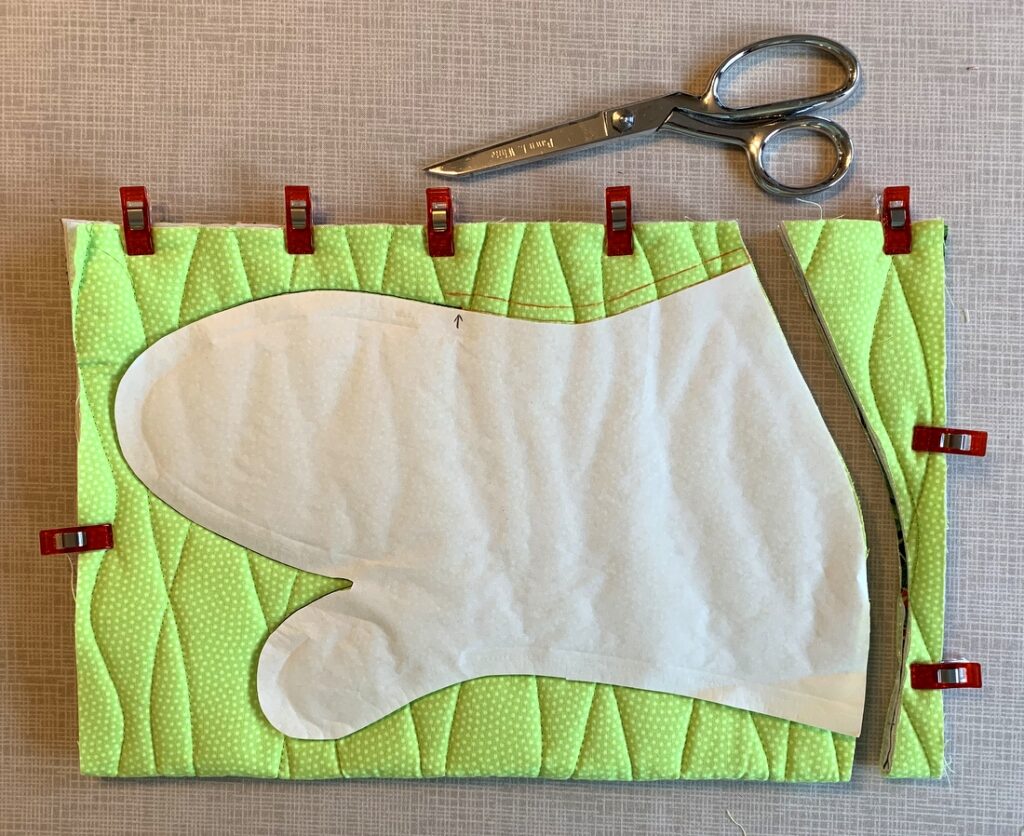
A pattern of green and yellow colors with white background
Gently peel off the freezer paper pattern:
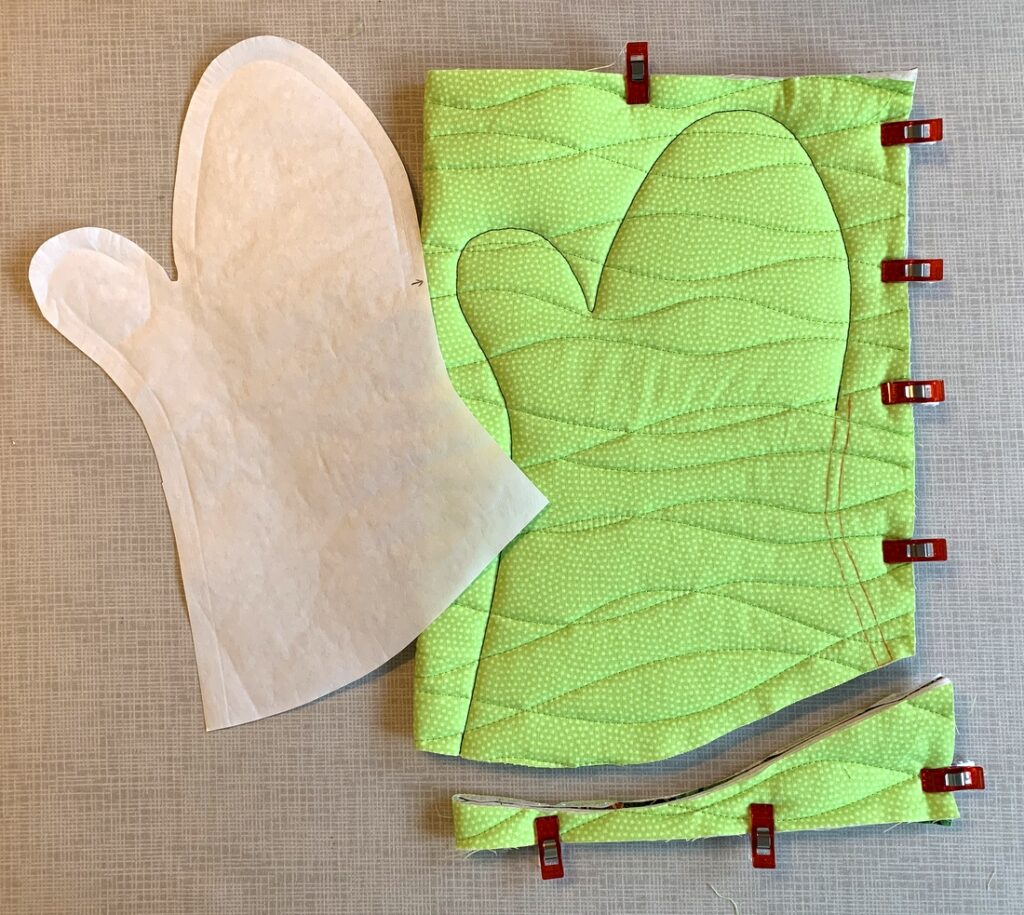
A pattern of green and yellow colors with white background(You can use the pattern over and over again.)

Return to the sewing machine and stitch around the mitt again on the same stitching line, backstitching at the beginning and end:
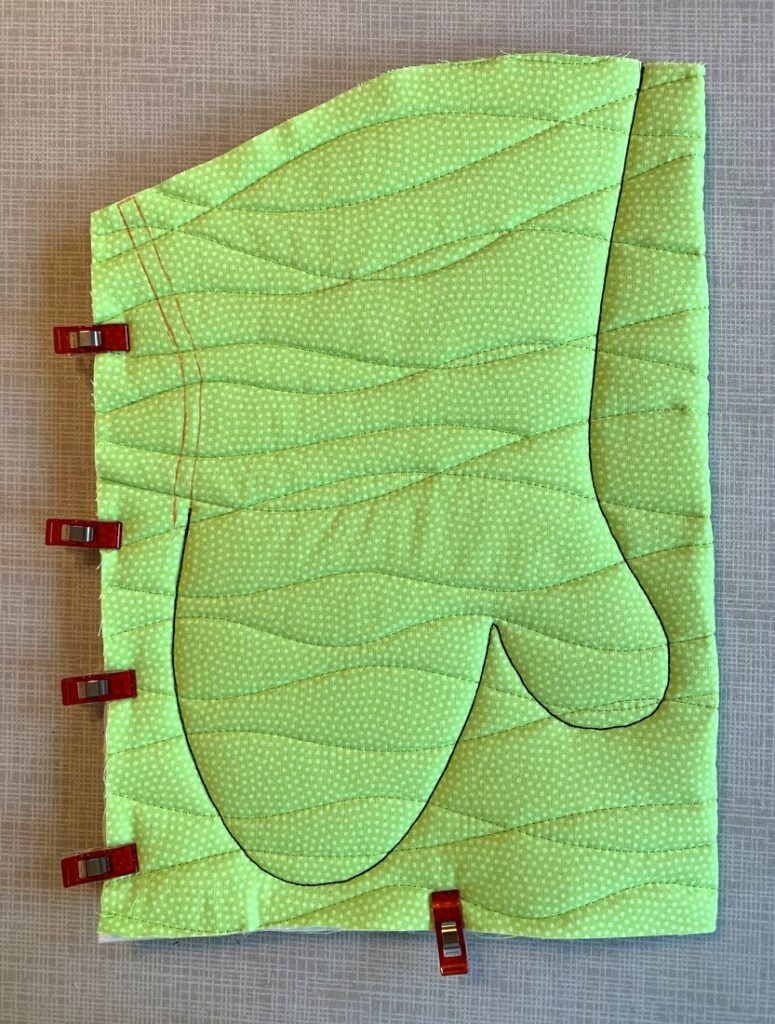
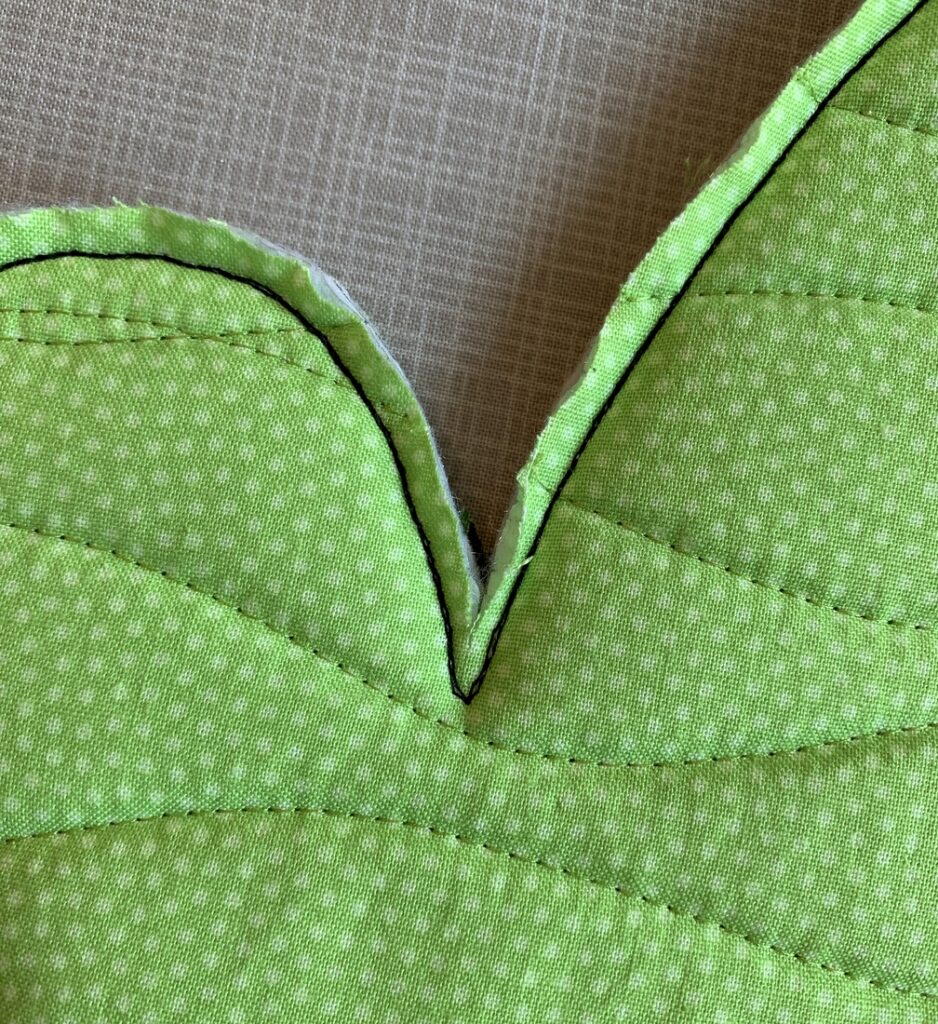
A pattern of green and yellow colors with white backgroundThis step is important to strengthen the seam and relieve some of the stress on the stitching line when the mitt is turned. The stress is greatest on the notch between the thumb and finger sections.

Be as exact as you can stitching on top of the first stitching line. In this close-up of the notch you can see that I took two stitches in a slightly V shape:
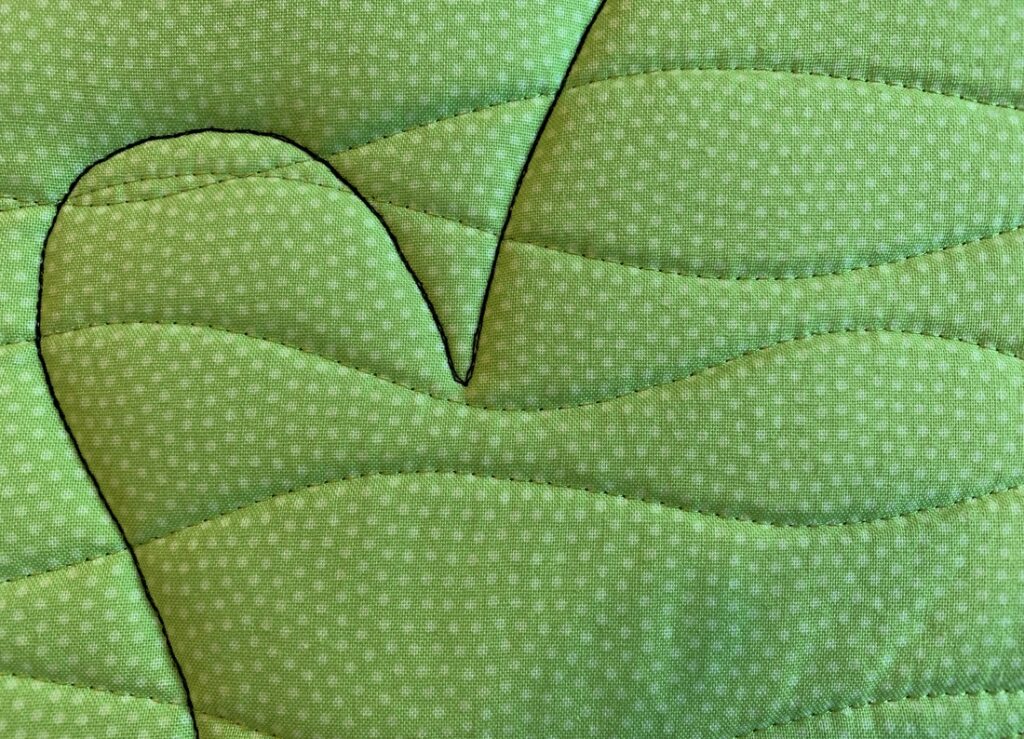
A pattern of green and yellow colors with white backgroundYou can also pivot at the end of the thumb curve, take two very small stitches straight across, pivot again and start up the finger curve. I’ve tried both ways and it doesn’t seem to make a difference when the mitt is turned.

You can see I used black thread here. That’s because the background color on the right side of this mitt is black. When the mitt is done, you will not be able to see black thread on the inside of the mitt at all.

Now it’s time to trim the seam allowance.

Starting on the side with the partial seam where you marked the outside line (¼” away from the stitching line), cut along that outside line until you are a quarter inch beyond the dot you marked:
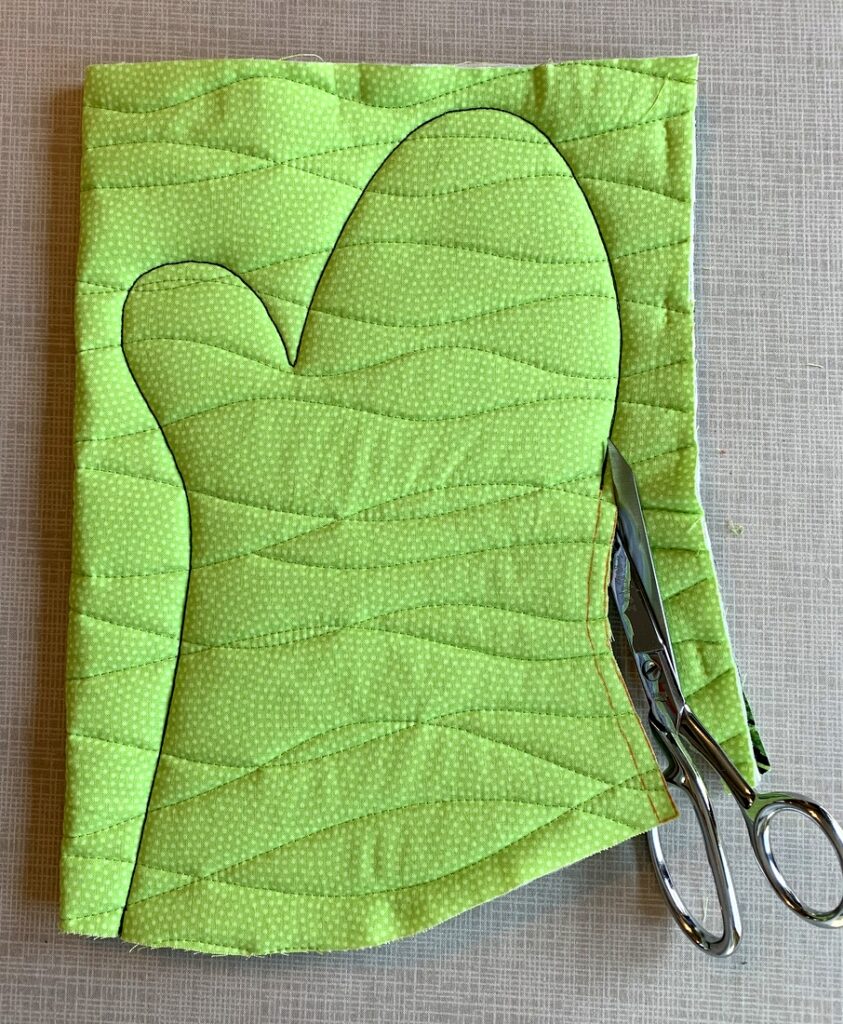
A pattern of green and yellow colors with white background
Taper to a full 1/8″ seam allowance and continue cutting around the finger portion, stopping when you get close to the notch between the thumb and finger portion:
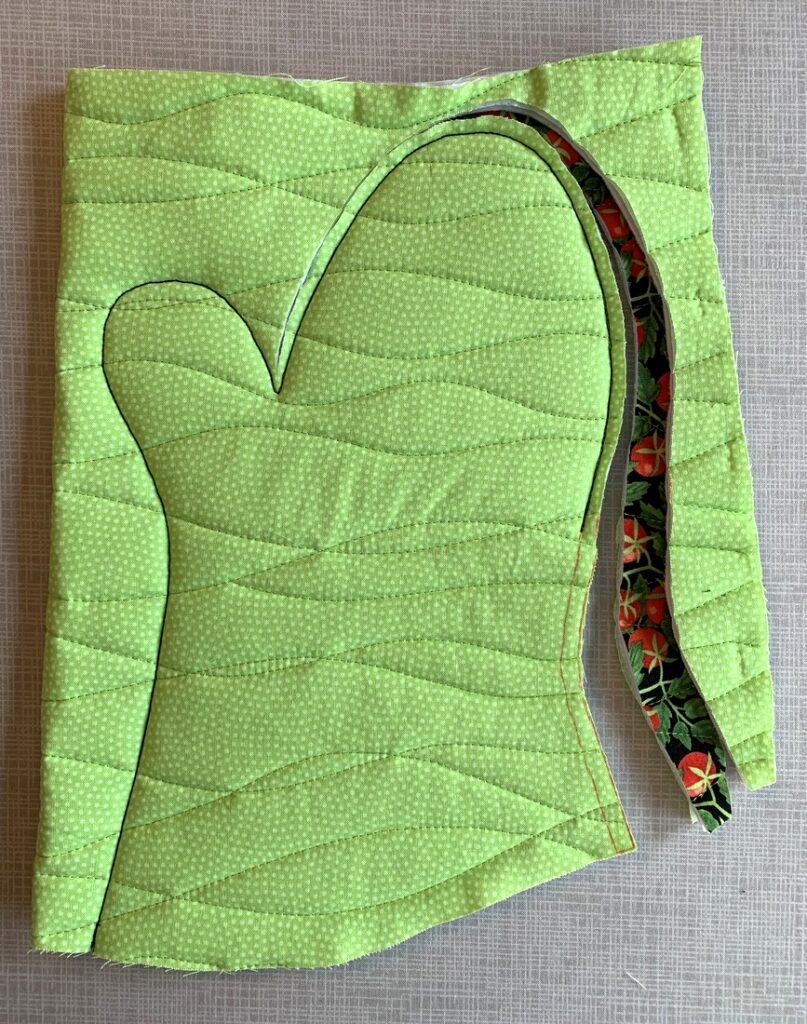
A pattern of green and yellow colors with white backgroundIf a 1/8″ seam allowance makes you nervous, shoot for 3/16″. It is not necessary to cut a ¼” seam allowance; in fact, it will make it harder to turn the mitt inside out and won’t give your mitt as smooth a look around the curves.

Flip the mitt over and start cutting from the other lower side, working your way around the thumb curve:
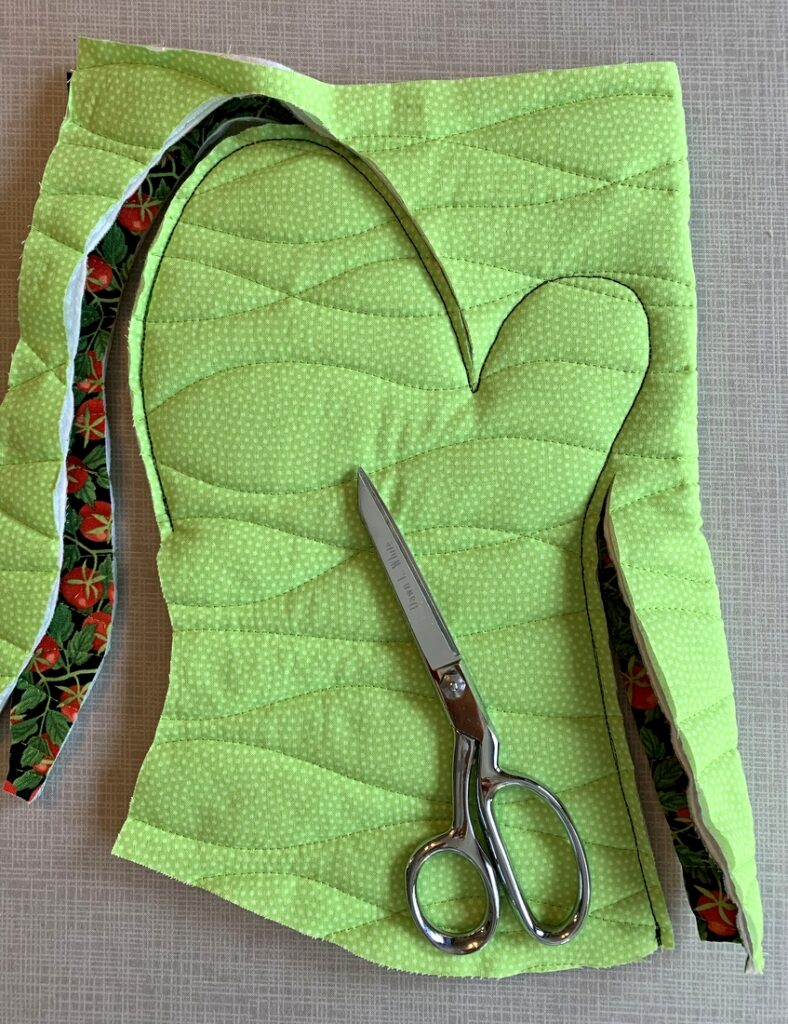
A pattern of green and yellow colors with white background
When you get to the notch, carefully trim to within 1/8″ of the stitching line:
A pattern of green and yellow colors with white background
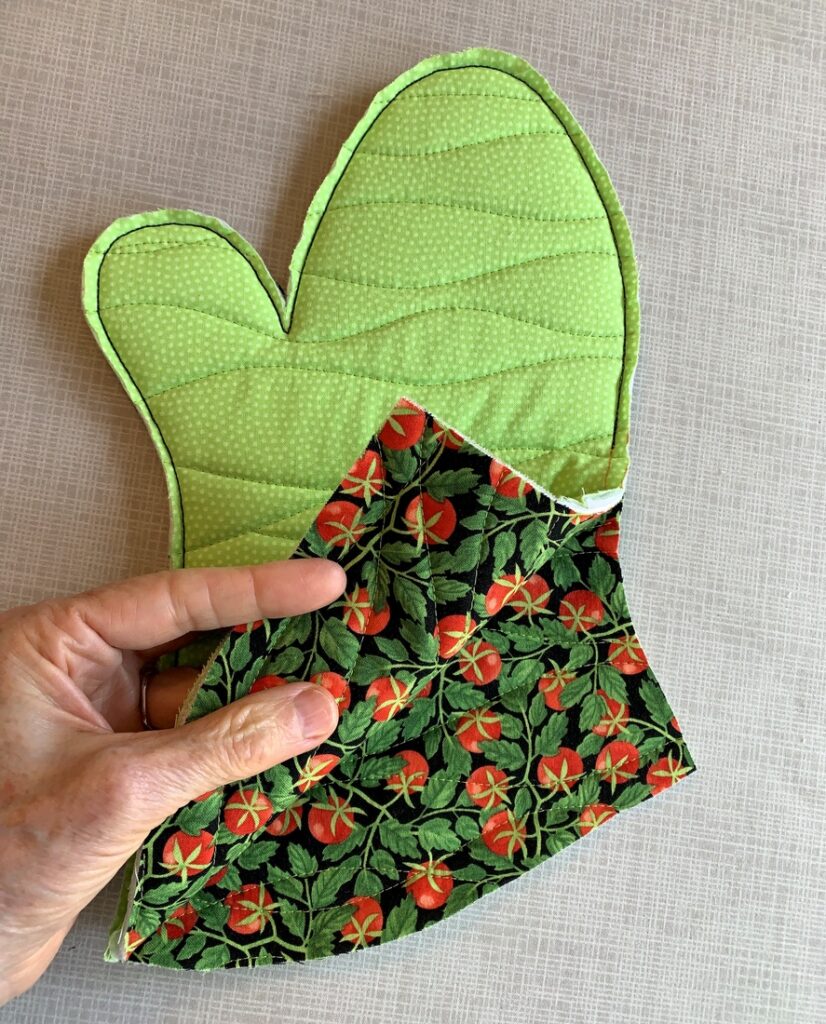
Because you left a partial seam, it’s going to be quite easy to apply the binding:
A pattern of green and yellow colors with white background

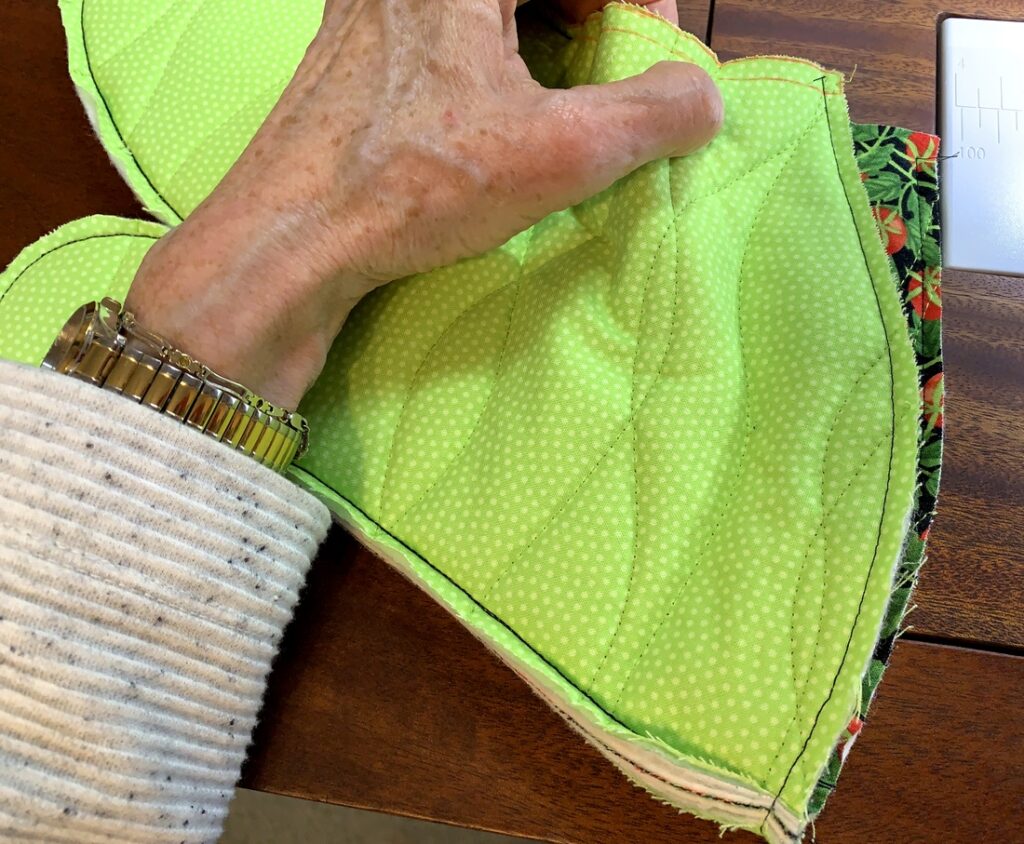
Check first to see if you need to baste the layers together at the bottom edge. I find that when I quilt my sandwich with overlapping wavy lines, I often need to take this extra step. Here you can see I basted a quarter-inch from the edge:
A pattern of green and yellow colors with white background
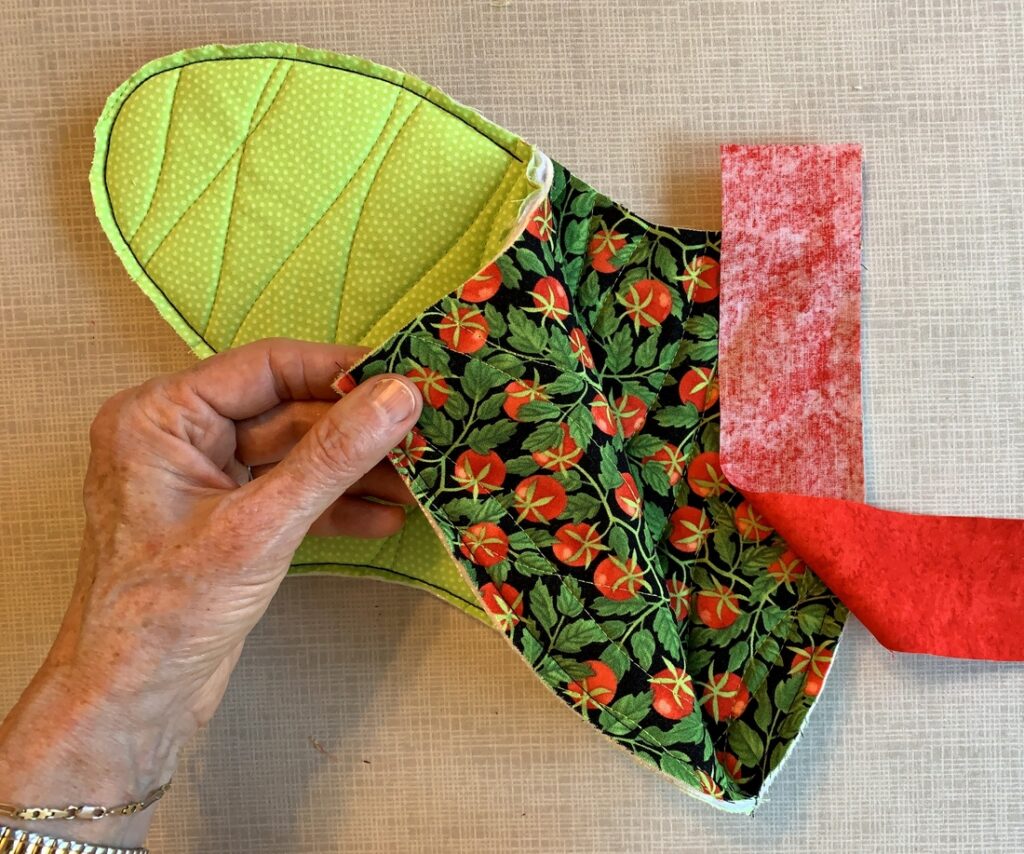
From the 2″ x WOF binding strip, cut an 18″ strip. (Save the remainder of the strip for a second mitt.) With the mitt opened up, align the strip along the lower edge, right sides together. Extend the top of the strip one inch beyond the side edge of the mitt:
A pattern of green and yellow colors with white background
Starting at the top of the binding strip, sew around the bottom edge with a 3/8″ seam. It is not necessary to pin the strip to the mitt first. Stop stitching when necessary to make sure the edges are aligned and remember that both sides of the mitt are gently curved along the cuff edge. You’ll need to stop every few stitches to adjust the fabrics as you approach the side seam but you should find it fairly easy to manipulate the fabric under the needle while keeping the edges aligned properly.
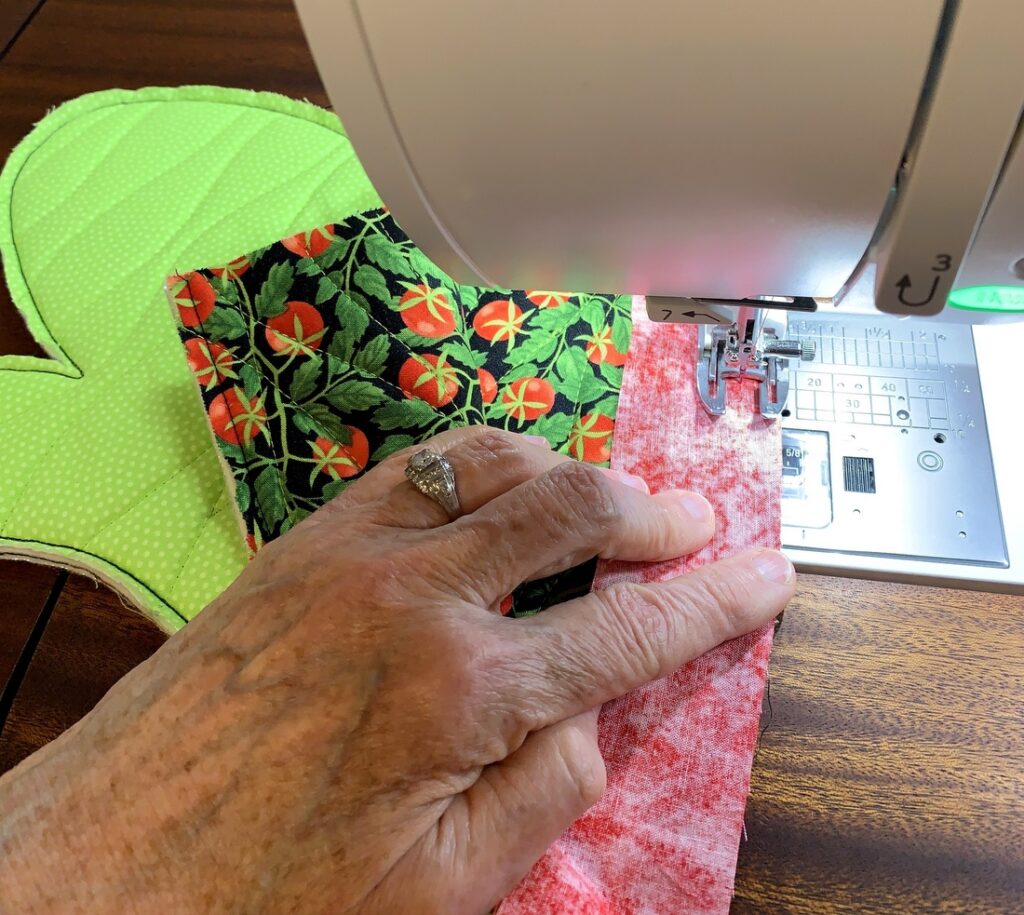
A pattern of green and yellow colors with white background
When you get to the end of the strip sew right off the edge of the fabric. Here’s what the mitt looks like now:
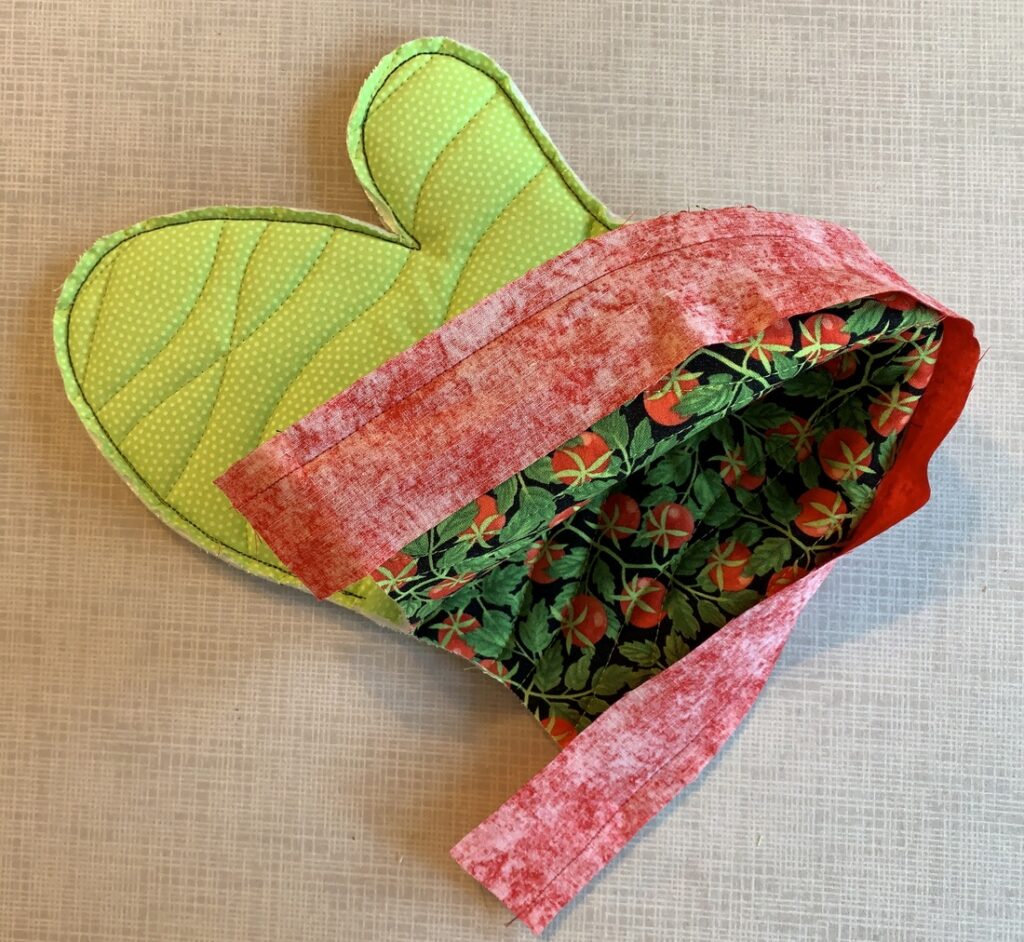
A pattern of green and yellow colors with white background

To finish sewing the seam, clip the edges together, making sure the edges of the binding strip are aligned at the top and bottom edges:
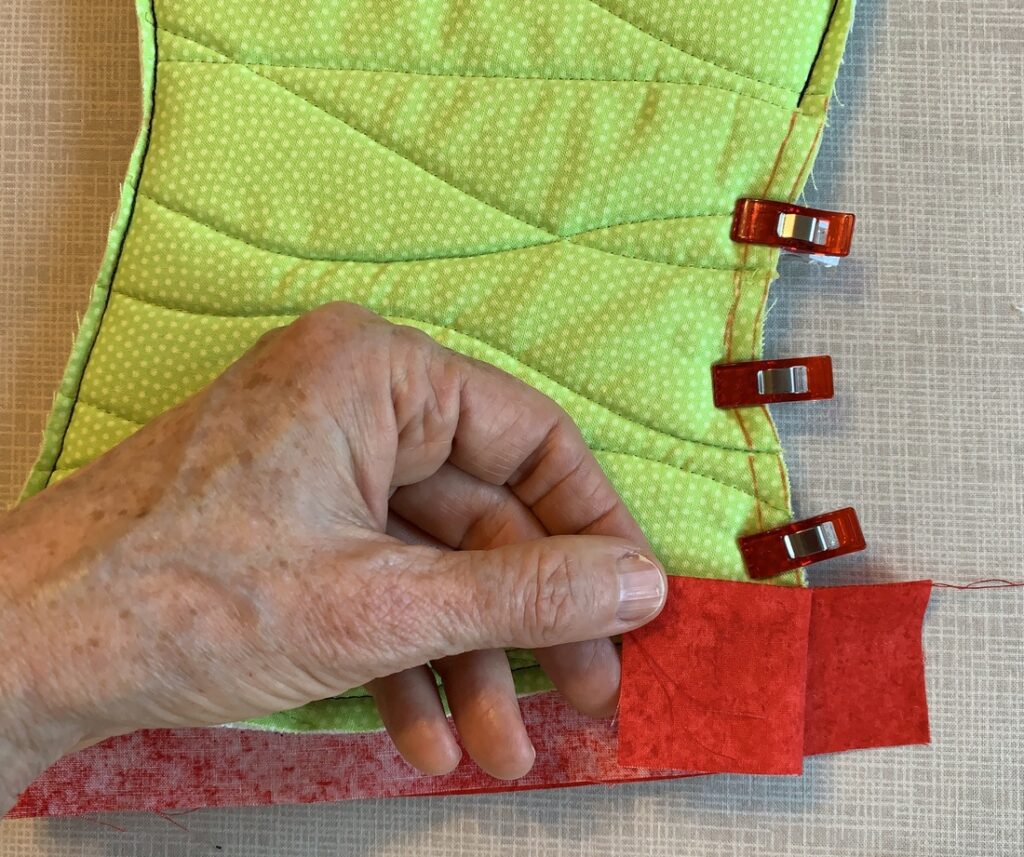
A pattern of green and yellow colors with white background

Note that the seam allowances at the top of the binding strip are folded down (see next photo too).

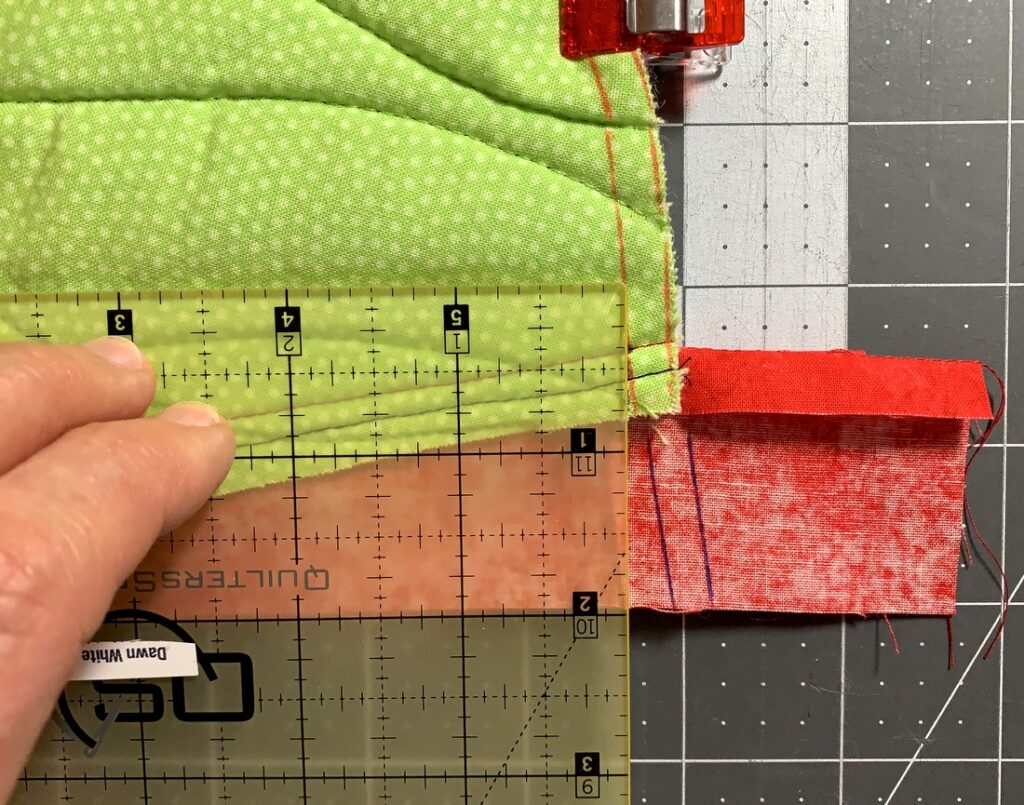
Look very carefully at the next photo. You will see that I have drawn two solid lines visually extending the cutting and stitching lines drawn earlier on the mitt. But I don’t want to sew on that stitching line in the binding strip portion because the binding strip will be too loose; in other words, it won’t fit snugly around the open edge of the mitt when the strip is folded in place.The dotted line to the left of the solid lines is the actual stitching line:
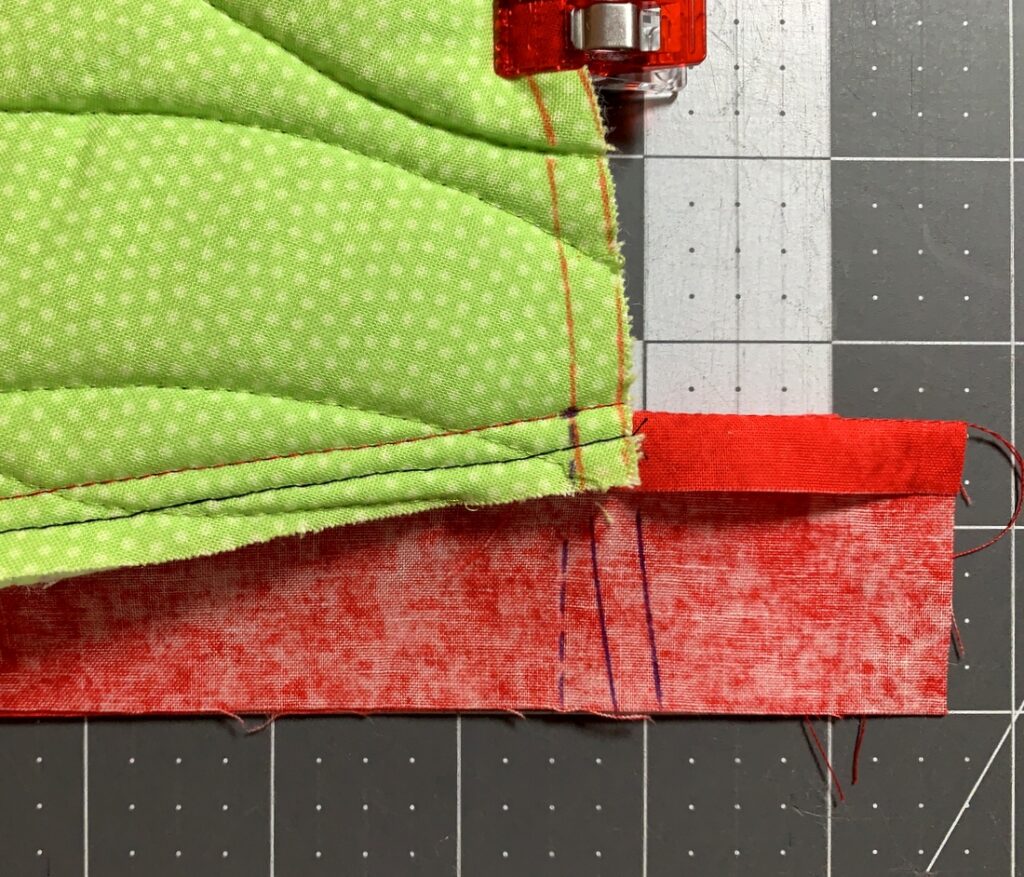
A pattern of green and yellow colors with white background

To mark the stitching line place a ruler with a horizontal marking (in this example the 2″ line) aligned with the bottom edges of the binding strip. Draw a dotted line from the dot on the seamline (where the mitt and binding strip were joined) to the bottom of the binding strip. Note that the dotted line is at a 90Ëš angle to the horizontal line on your ruler:
A pattern of green and yellow colors with white background

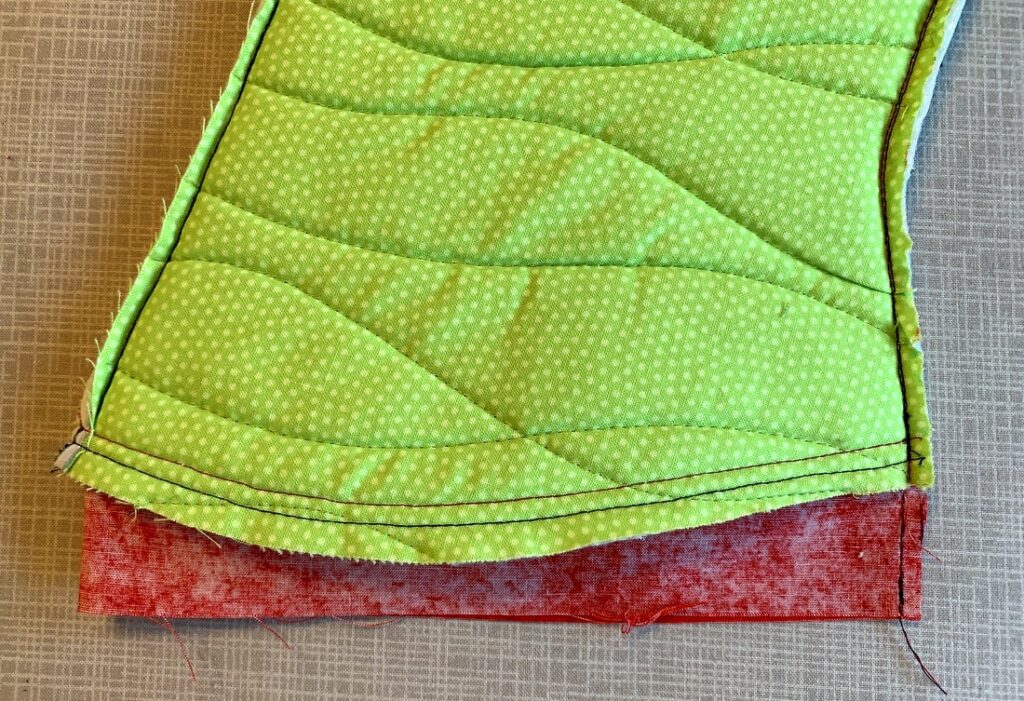
Now you can finish stitching the seam, backstitching at the beginning and end. Trim the seam allowance to a generous 1/8″ just as you did around the rest of the mitt:
A pattern of green and yellow colors with white background

At this point I know you are eager to turn the mitt inside out but you will find it so much easier to tack down the binding if you do it before turning. So . . .

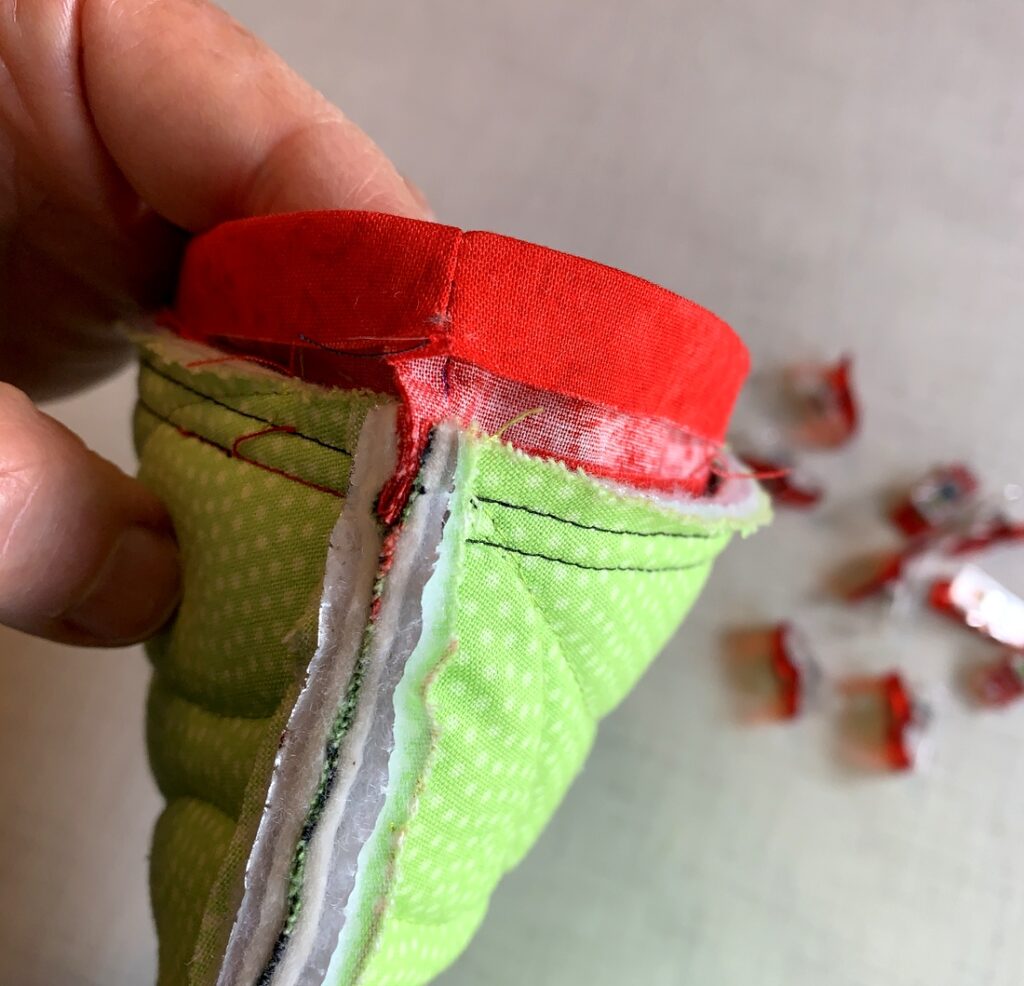
Start at the seam. Finger press the seam to one side and turn the top edge of the binding strip down about a half-inch:
A pattern of green and yellow colors with white background

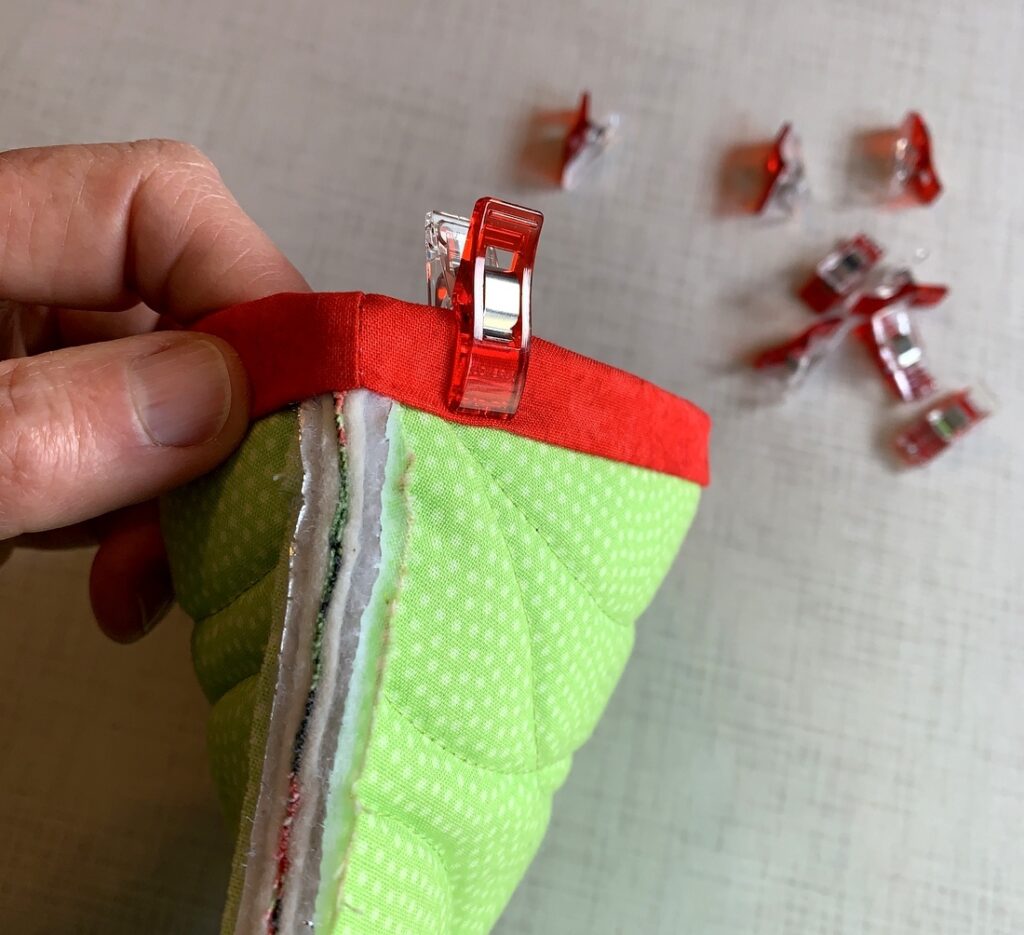
Turn it own one more time, pulling it snugly over the seamline and making sure the folded edge covers the line of stitching. Hold in place with a clip:
A pattern of green and yellow colors with white background
Place a clip on the other side of the seam (where my thumb is) and work your way around the cuff edge, placing a clip every couple of inches:
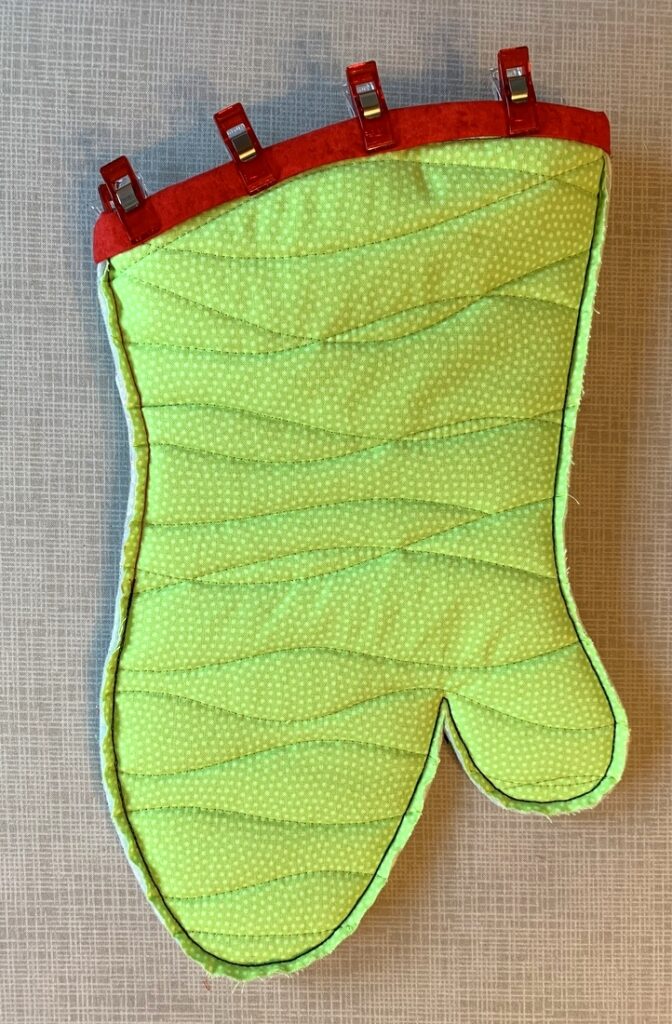
A pattern of green and yellow colors with white background
Using thread to match the binding fabric, tack the folded edge of the binding in place:
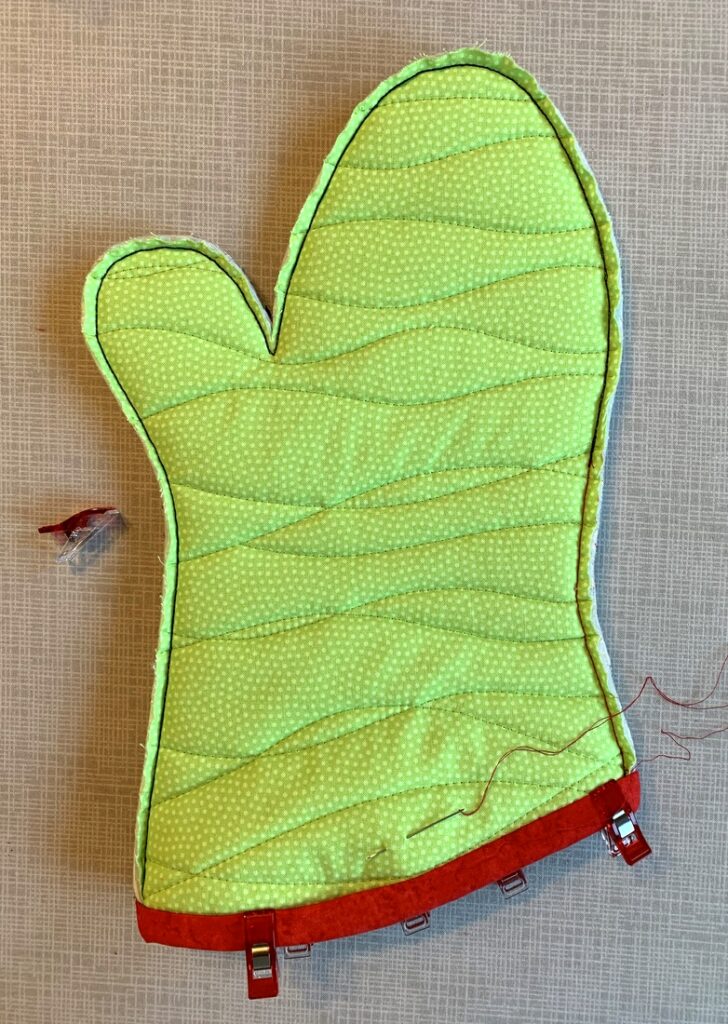
A pattern of green and yellow colors with white background

Now you are ready to turn the mitt!

You’ll find that the finger portion turns quite easily but it may take some time to work the thumb through. Be patient with this step and do not give in to the temptation to use some object to push the thumb out from the inside. Use your fingers and thumb only until the mitt is fully turned.

Voila! You have a beautiful functional oven mitt. . .
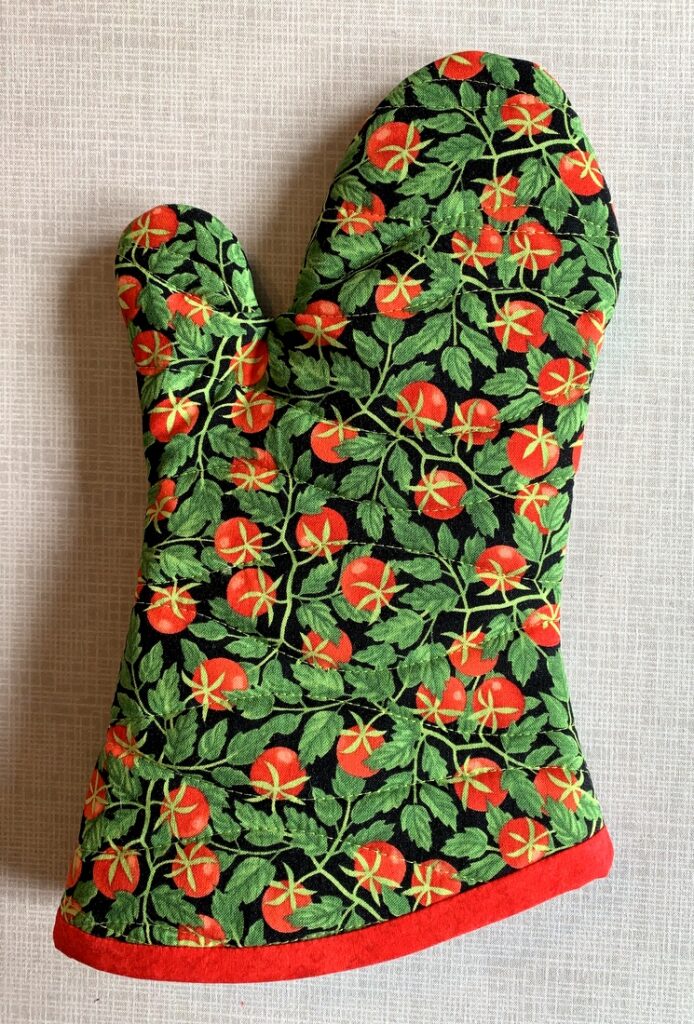
A pattern of green and yellow colors with white background

. . . with a pretty interior . . .

A pattern of green and yellow colors with white background

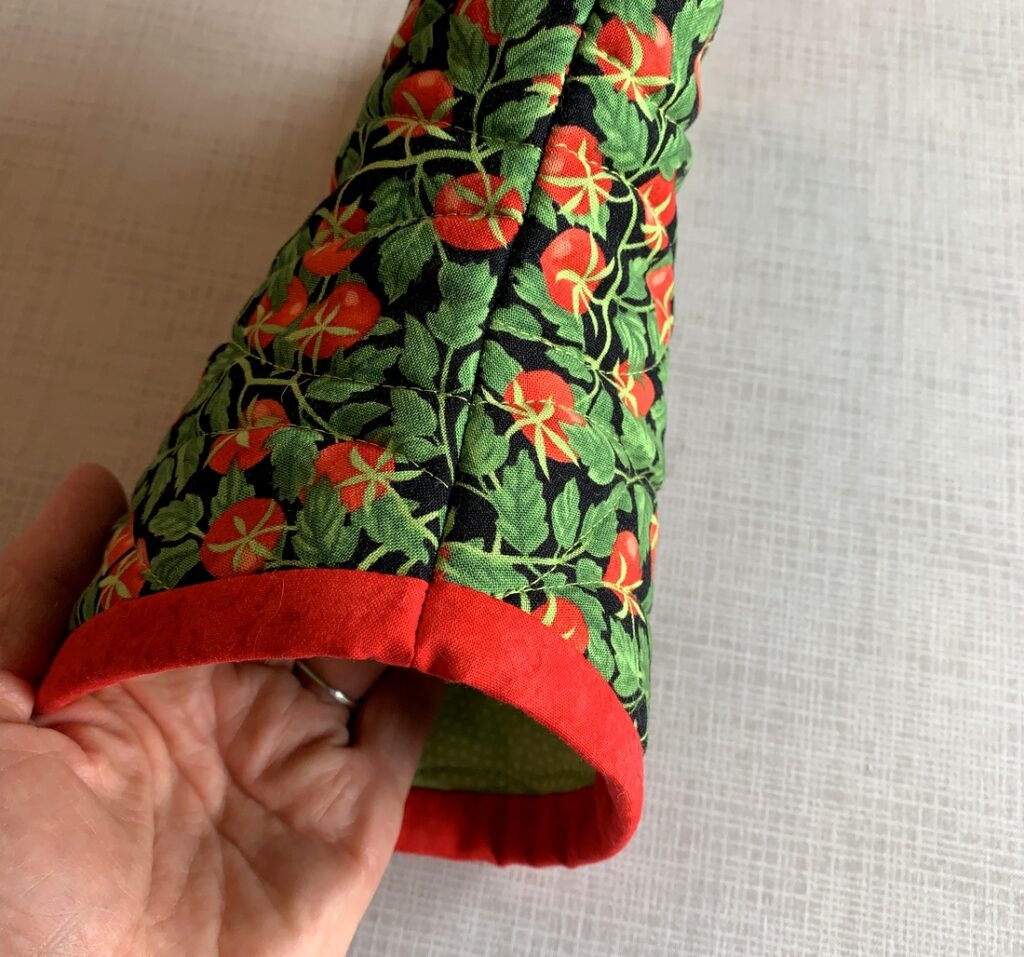
. . . and a beautifully finished accent strip around the opening:
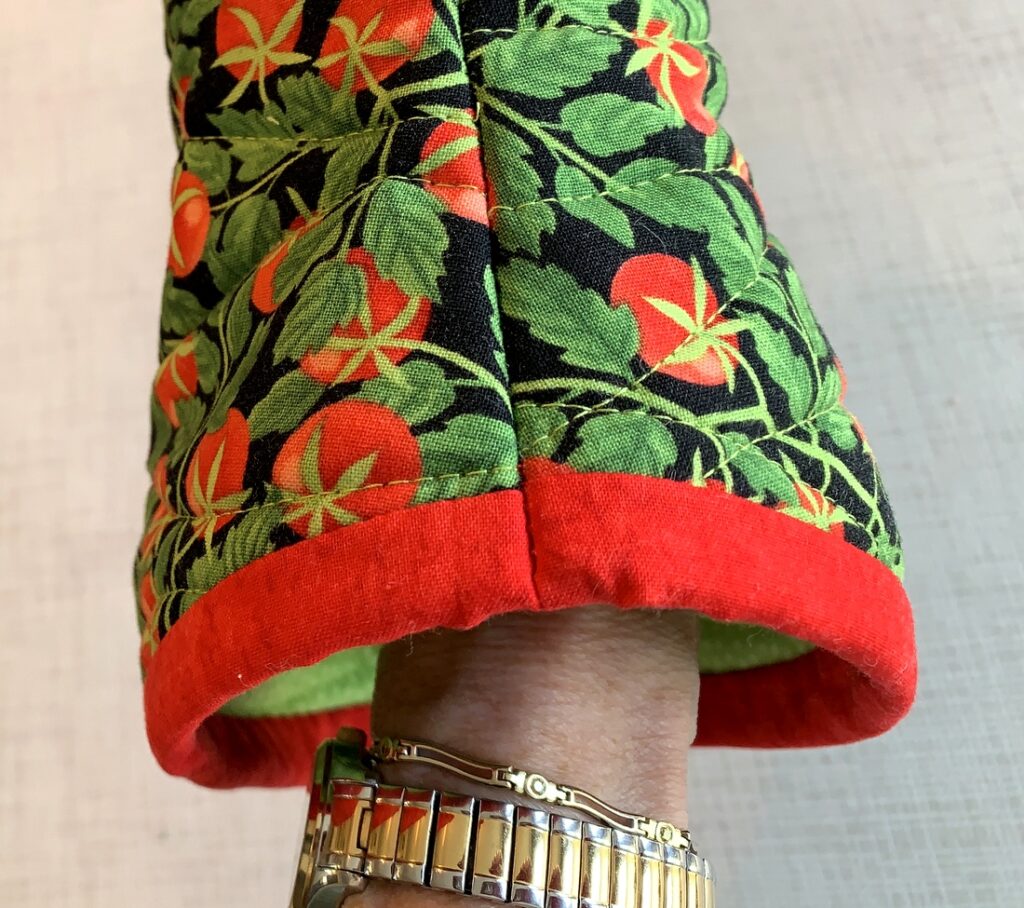
A pattern of green and yellow colors with white backgroundNow all it needs is a mate!

This mitt is heat-resistant (mainly because of the Insul-bright batting) but not heat-proof, so use care when wearing it just as you would with a commercial oven mitt made of cotton fabric.

Oven mitts made with this tutorial and using the fabrics specified can be thrown in the washer and dryer. Wash them in warm or cold water and dry them on medium heat.

Please let me know if you have any questions or concerns after reading this tutorial. I’ll be happy to respond!


Posted in home dec, oven mitts, tutorial, update | 3 Comments

Oven Mitt Tutorial from First Light Designs: Part 1 of 2


I’m delighted to bring you Part 1 of my Oven Mitt Tutorial. (Part 2 will be fast on its heels!) I think you will find my method of making a top-quality oven mitt to be fast and efficient, eliminating extra steps in tutorials I found when searching online for a pattern and instructions. My directions include a nifty way to add a contrasting band at the cuff edge.

You’ll also find this a really fun project to work on. So pick out a fabulous 100% cotton print and get ready to dress up your kitchen!

Part 1 covers fabric requirements, instructions for downloading and printing the pattern, assembling the layers, and quilting the resulting “quilt sandwich.”

Part 2 covers the sewing of the mitt and contrasting band around the cuff edge as well as the final step of tacking the band down before turning the mitt right side out.

A pattern of green and yellow colors with white background

Fabric and notions for two mitts
½ yard (or two fat quarters) 100% cotton for outer fabric
½ yard (or two fat quarters) 100% cotton for the lining
â…› yard 100% cotton for the contrast binding at cuff edge
½ yard insulated heat-resistant batting (Insul-bright)
100% cotton batting (enough to cut two 14″ x 19″ rectangles)
100% cotton thread

For the outer fabric choose fabrics that are medium to dark in value; light-colored fabrics are not practical for oven mitts (but they work very well for the lining).

For the insulated batting I prefer Insul-bright, made of polyester fibers needled through a reflective metalized polyester film. According to the Warm Company, maker of Insul-bright, the fibers “resist conduction while the reflective metalized polyester film reflects radiant energy, hot and cold, back to its source.” Insul-bright doesn’t have a right or wrong side.

Supplies
Sewing machine with open-toed walking foot
New needle in your sewing machine (90/14 Jeans or Sharp recommended)
Standard sewing supplies (scissors, pins, measuring tape, seam ripper, etc.)
Rotary cutting equipment (mat, rotary cutter, rulers)
Wonder Clips
One piece of white freezer paper about 10″ x 14″

Part 1. Download and print the free pattern. Click on the links below:
Oven Mitt Pattern, page 1 of 2
Oven Mitt Pattern, page 2 of 2

Check the 1″ registration line to make sure the pattern printed at 100%.

Trace the pattern directly onto the flat (not shiny) side of the freezer paper, matching the top and bottom pieces on the dotted lines. Lay your own hand on the pattern to see if it fits. Make any changes you feel necessary. For tips on making adjustments to the pattern, see my post Oven Mitts that Fit: the Prequel.

Cut around the outside edges of the pattern. Do not add a seam allowance. Set aside the pattern for now.

Part 2. Cut the fabrics
For each mitt:
Cut (1) piece 19″ x 14″ from outer fabric*
Cut (1) piece 19″ x 14″ from lining fabric*
Cut (1) piece 19″ x 14″ of Insul-bright
Cut (1) piece 19″ x 14″ of medium-weight cotton batting
Cut (1) strip 2″ x WOF from binding trim fabric. (It’s important to cut across the width of fabric rather than the length because you want the strip to have a bit of give. One 2″ strip x WOF will provide binding strips for two mitts.)

*If using directional fabric, keep the direction of the design in mind (as well as the quilting motif if it is directional too). In the photo below, both the design and quilting motif are going across the width of the mitt, not the length:

A pattern of green and yellow colors with white background

Part 3. Prepare the quilt sandwich
On a flat surface make a quilt sandwich of your four layers in this order: lining fabric right side down, Insul-bright, cotton batting, outer fabric right side up.

A pattern of green and yellow colors with white background

The thread color you use on the outer fabric can blend or contrast; that’s a personal choice. Match the bobbin thread to the lining fabric if you want it to blend. Use your preferred method to baste the layers together and quilt as desired.

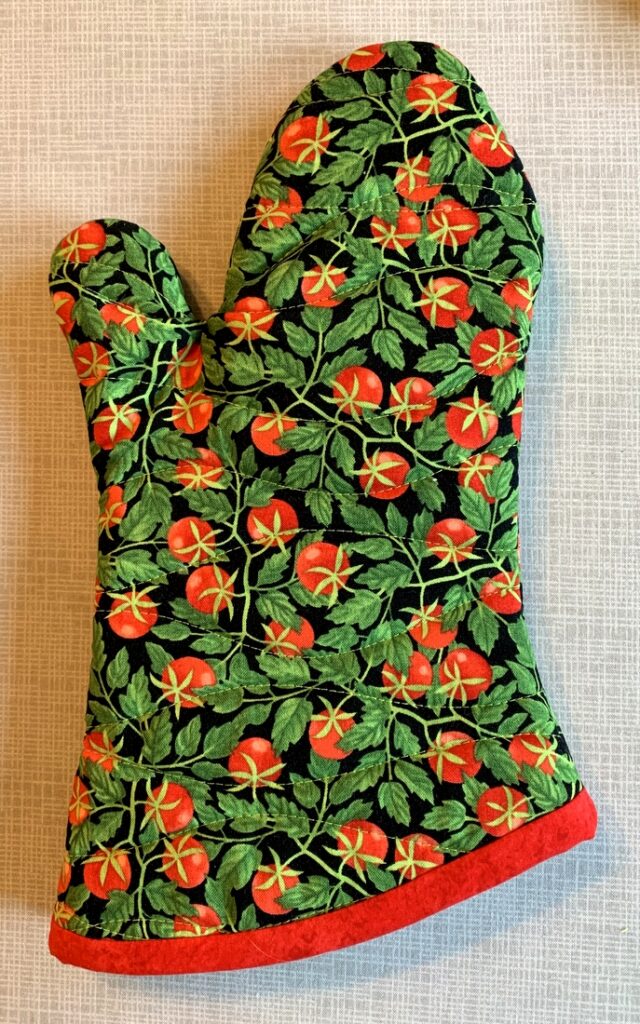
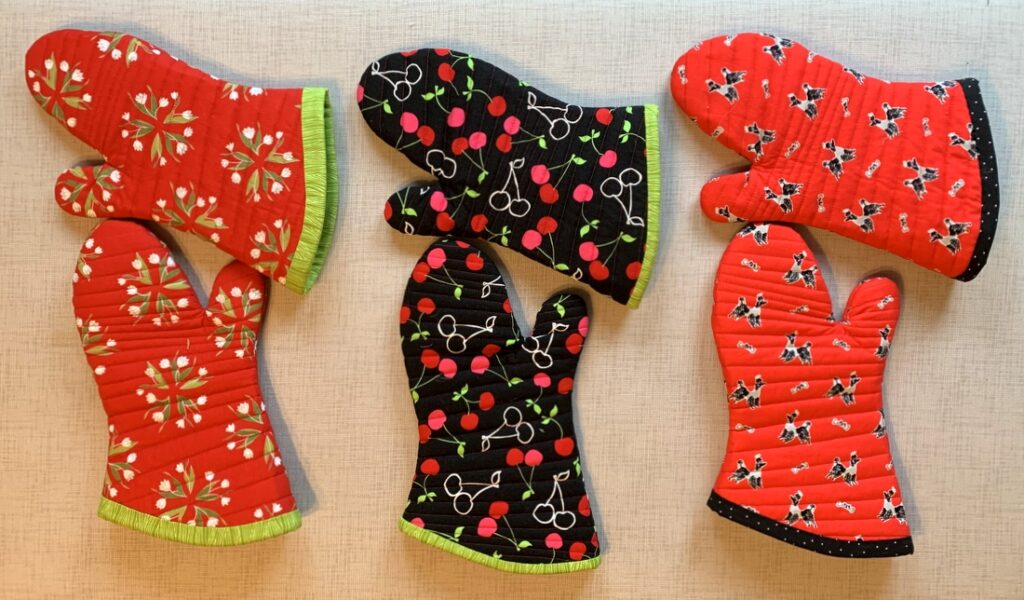
Sometimes I quilt a 1″ grid as I did on these mitts . . .

A pattern of green and yellow colors with white background

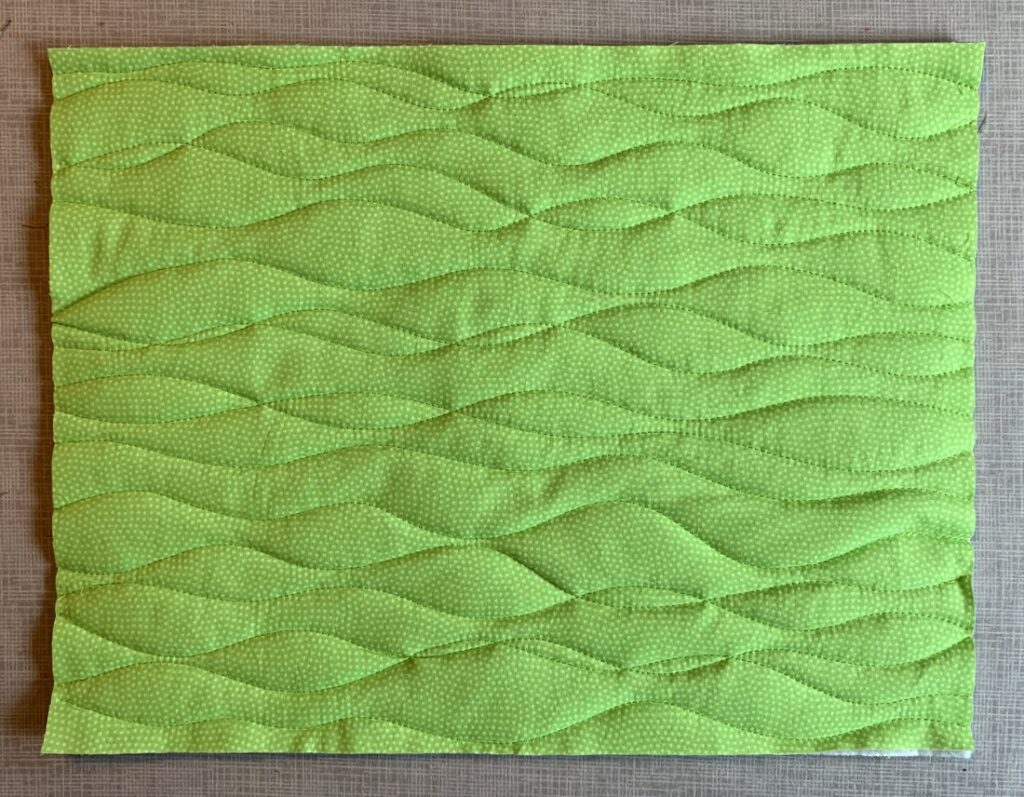
. . . but most often I quilt random wavy lines, some of which cross each other, because it’s fast and easy and I don’t have to mark a grid:

A pattern of green and yellow colors with white background

The wavy quilting motif is easier to see on the lining side:

A pattern of green and yellow colors with white background

Trim the sandwich to 18″ x 13″:

A pattern of green and yellow colors with white backgroundFold the quilt sandwich in half, right sides together, with the fold on the left. Lay the freezer paper pattern on the fabric, shiny side down, making sure you have at least a half-inch clearance all around. Use a hot dry iron to press the pattern in place:

A pattern of green and yellow colors with white background

The sandwich is now ready to be transformed into an oven mitt.

Proceed to Part 2.


Posted in home dec, oven mitts, tutorial, update | 4 Comments

Oven Mitts that Fit: the Prequel


A pattern of green and yellow colors with white background

The prequel to the tutorial, that is.

My oven mitt tutorial is almost ready to go. Before I hit “publish” on the post, I want to give you a bit of background (by way of explaining my obsession with making a beautifully finished oven mitt) and a couple of hints on making a pattern for a mitt that fits your own hand.

For the last three or four years I was on the lookout for new oven mitts but was never able to find suitable replacements. The ones in stores were either too big or poorly made, sometimes both. My twin sister Diane was in the same boat. We actually bought our mitts at the same time years ago and they had definitely seen better days. We were bemoaning the lack of good store-bought oven mitts around Thanksgiving last year. At that point I decided to make my own — and make a pair for Diane to boot.

In preparation I went online and checked out several printed tutorials. Boy, was I surprised! Some of the tutorials were way too much work. Some had you cutting out left and right hand patterns. Why on earth . . . ? The mitts are the same shape on both sides, for heaven’s sake.

Others had you make two mitts – one from the main fabric and one from the lining fabric; you inserted the lining mitt into the main mitt and sewed the two together, meaning you were doing twice as much cutting and sewing – and not even getting a mitt that was quilted all the way through. Not one tutorial gave what I considered good instructions for a nicely finished cuff edge made with a contrasting fabric.

There had to be a great method out there somewhere, I thought, and if I couldn’t find one – well, I would just have to figure one out for myself. But I needed a pattern to get started. I downloaded a couple of free templates. When they were printed I could tell they were too big. What to do? Why, make my own pattern.

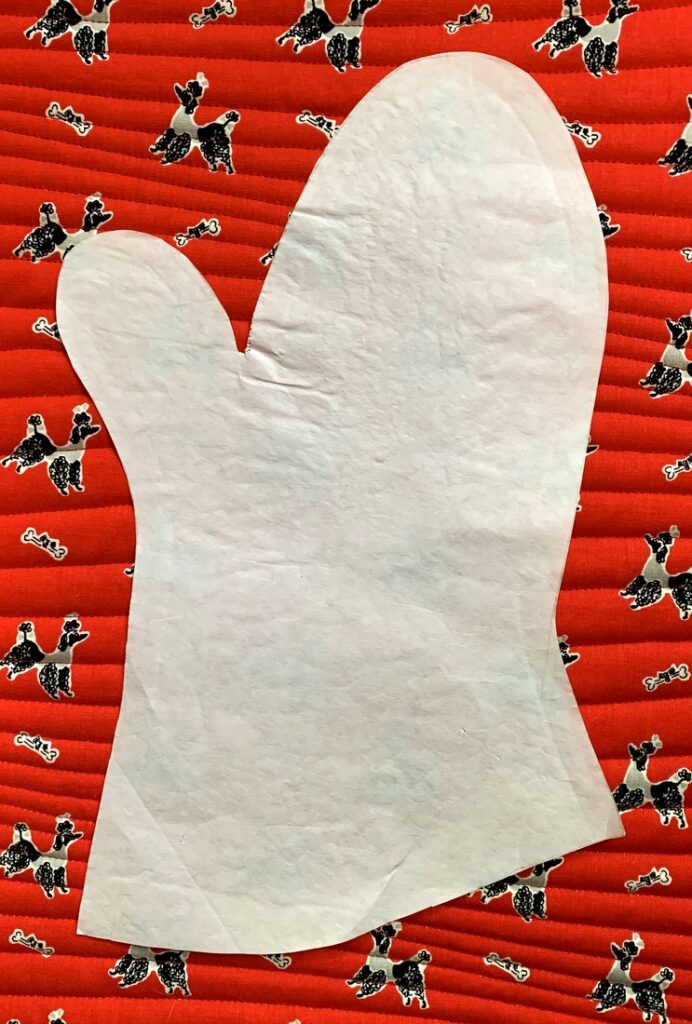
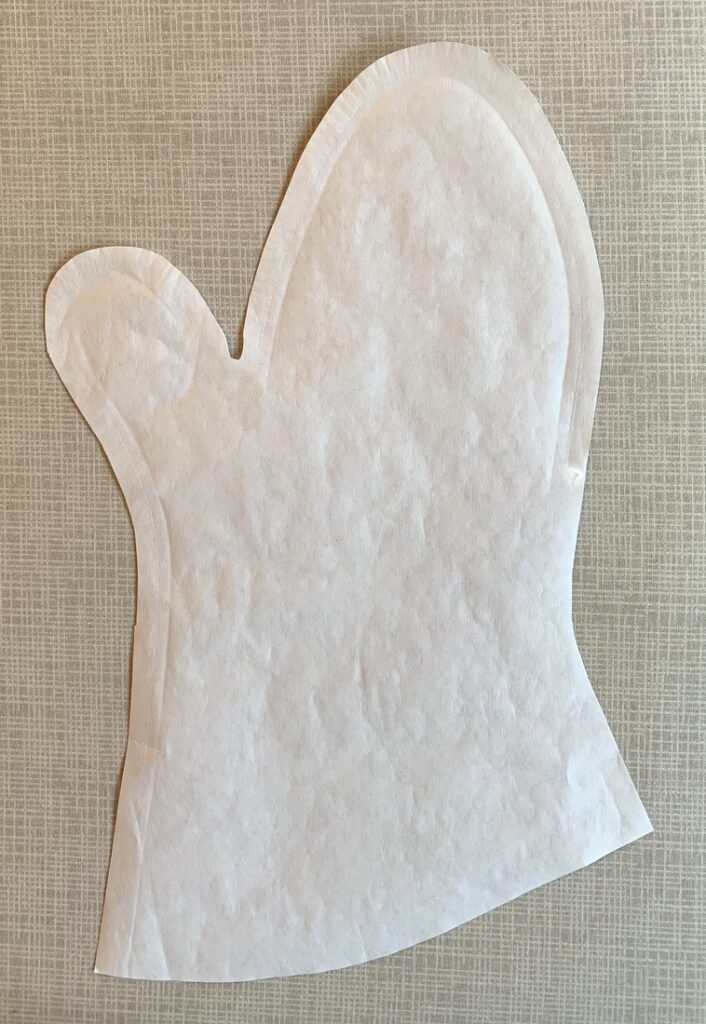
I simply traced around my favorite old mitt on a piece of freezer paper:

A pattern of green and yellow colors with white background

Did you notice that the pattern is flared at the bottom? That makes the mitt easier to slip on if you are wearing a garment with long sleeves.

For those of you unfamiliar with freezer paper, it has a shiny coating on one side that allows it to be ironed temporarily onto fabric. No need to use pins. The freezer paper can be peeled off easily, leaving no residue — and it can be used over and over again. The best place to get your freezer paper? The grocery store! The only brand I’ve ever seen is by Reynolds Kitchens. Crafters and quilters love it.

Combining what seemed to be the best elements of some online tutorials, I made a test mitt. That was the easy part. The hard part was applying the binding strip around the cuff edge. The opening of the mitt is relatively small, presenting a challenge first in moving it under the needle of the sewing machine and then in joining the raw edges neatly. Most tutorials are maddeningly vague about this step or produce results that leave something to be desired.

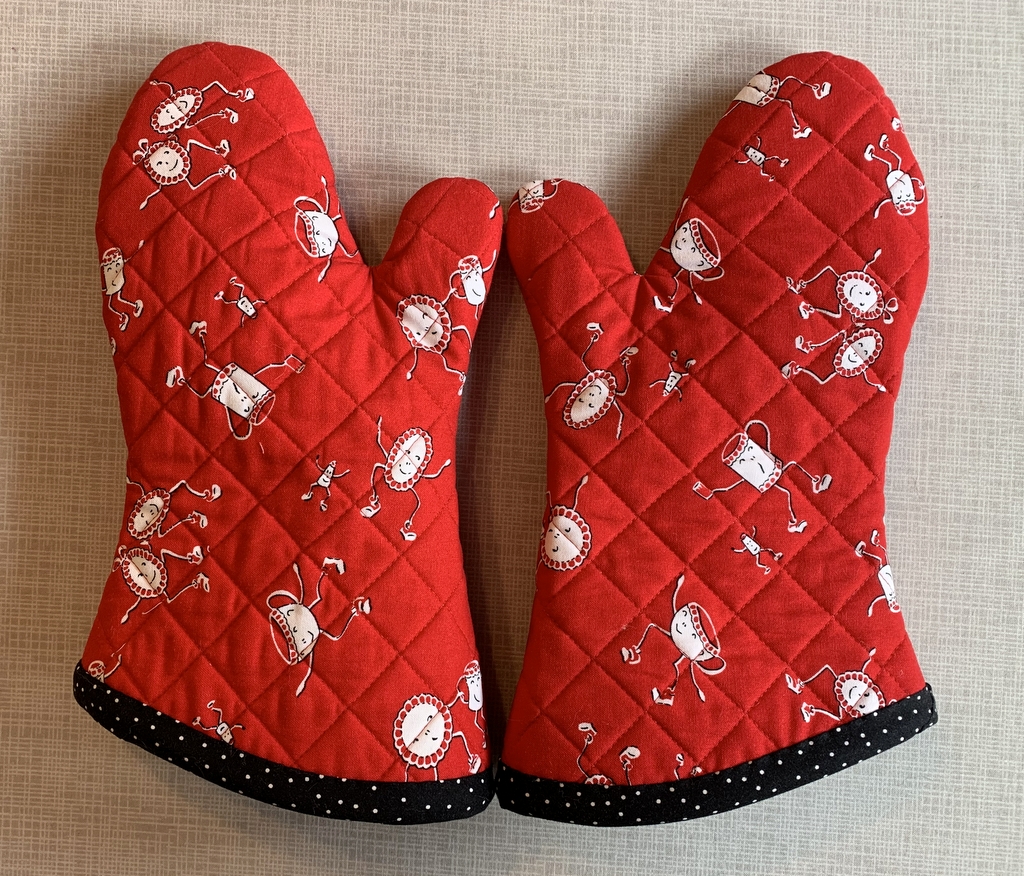
I experimented with different widths of binding strips and various techniques for joining the ends, making several sets of mitts in the process, including this early pair for Diane:

A pattern of green and yellow colors with white backgroundThe results were satisfactory . . . but I was looking for something more. The best solution came to me last month in a “what if?” moment. It seems so obvious now.

Want to know my secret? A partial seam!

A pattern of green and yellow colors with white background

That’s right. By leaving one side seam only partially sewn, there was more room around the cuff edge to manipulate the fabric while applying the binding strip. And then I could finish sewing the side seam, which now includes the binding strip, giving me a beautifully finished mitt when the strip was turned down and tacked to the inside:

A pattern of green and yellow colors with white background

Are you intrigued? Want to make your own? I hope so!

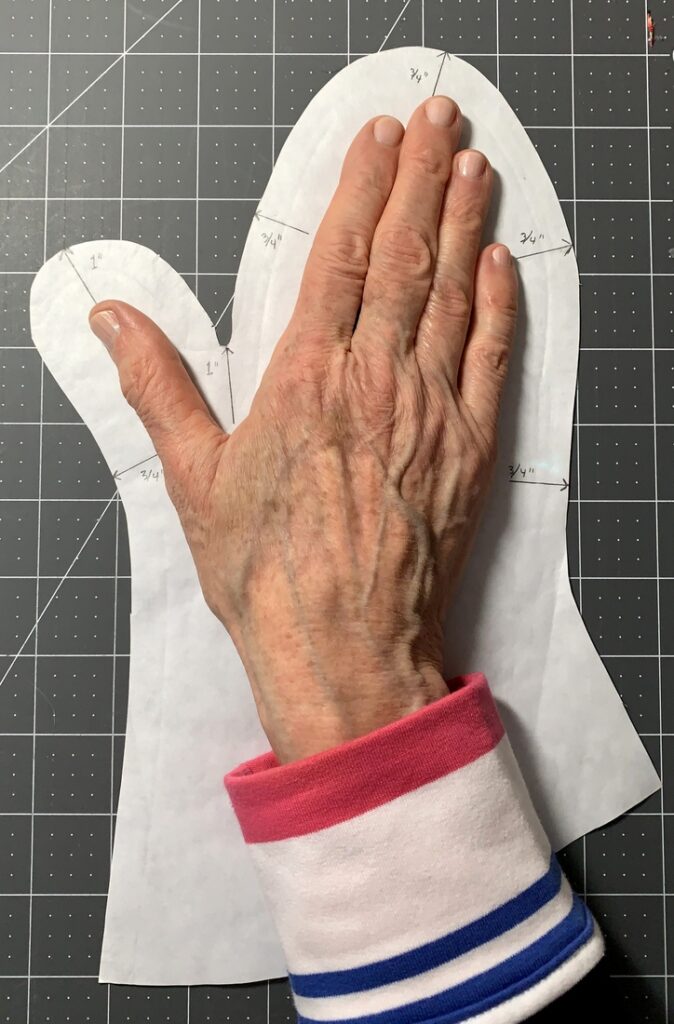
My tutorial will come with a link to a printable template so you can make your own freezer paper pattern. Or you can do what I did and draw around a mitt you already have.If you use my pattern you can modify it to fit your own hand. If you make your own pattern by tracing around an existing mitt, you can place your hand on it to test the fit as I do in the photo below.

The edges of the pattern should be at least ¾” wider than your hand around the thumb and finger portions. There should also be at least 1″ from the notch between your thumb and fingers to the notch of the pattern and from the tip of your thumb to the end of the thumb on the pattern. Note the arrows:

A pattern of green and yellow colors with white background

It may look like my hand would be swimming in a mitt that size but you need room to turn the mitt inside out and still have room for the seam allowance.

My tutorial is so detailed and picture-laden that it is coming to you in two parts. Part 1 covers fabric requirements, instructions for downloading and printing the pattern, assembling the layers, and quilting the resulting “quilt sandwich.”

Part 2 covers the sewing of the mitt and band around the cuff edge as well as the final step of tacking the band down.


Posted in family, home dec, oven mitts, tutorial, update | 10 Comments

Obsessed with Oven Mitts


Hello there! I’m still around, working hard on my oven mitt tutorial while dreaming of quilts yet to be made.

This may be one of the most detailed tutorials I’ve ever worked on, with lots of process photos. Each time I think I’ve taken the best photos, I find something that needs to be improved. That means making yet another mitt. The result is that the publishing date of my tutorial keeps getting pushed down the road. I really want to get it right so I hope those of you waiting for the tutorial will be patient a bit longer. Every mitt I make brings me closer to the desired end product.

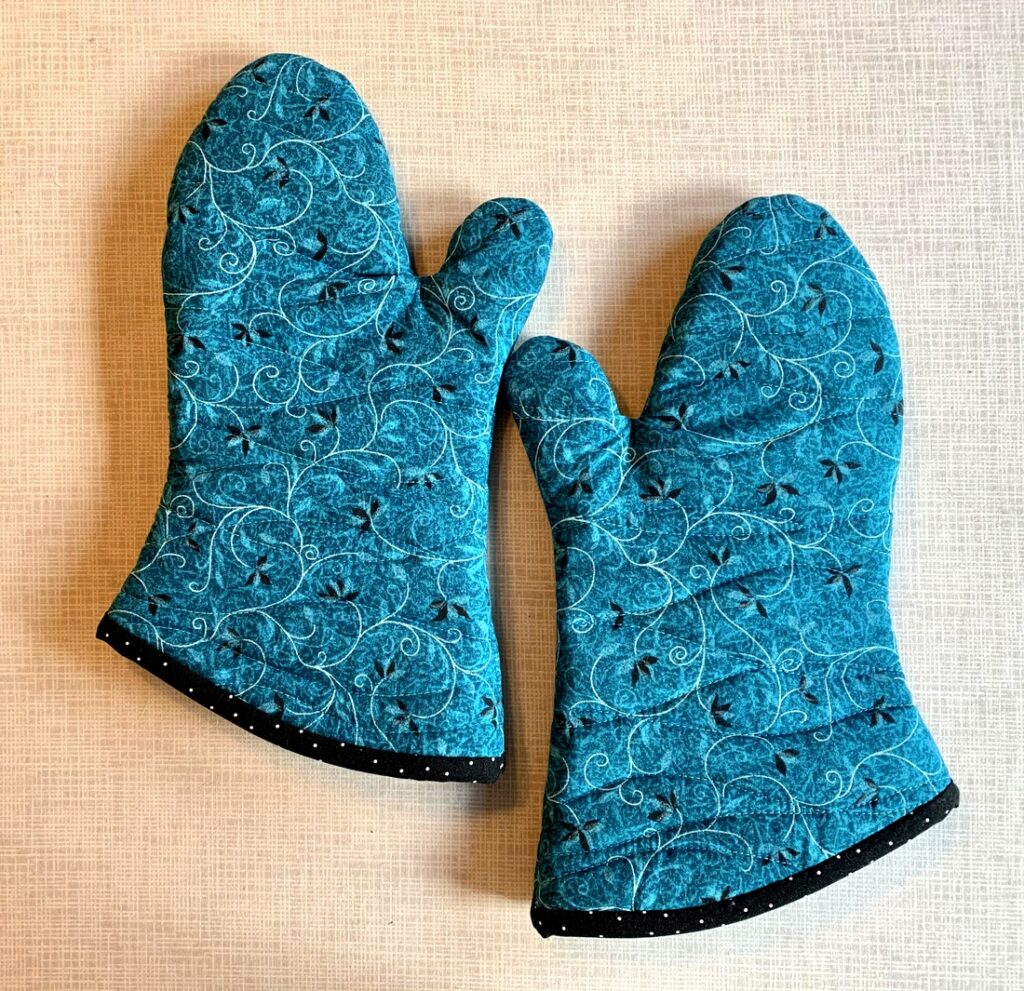
Here’s a pair I made recently for my friend Nancy:

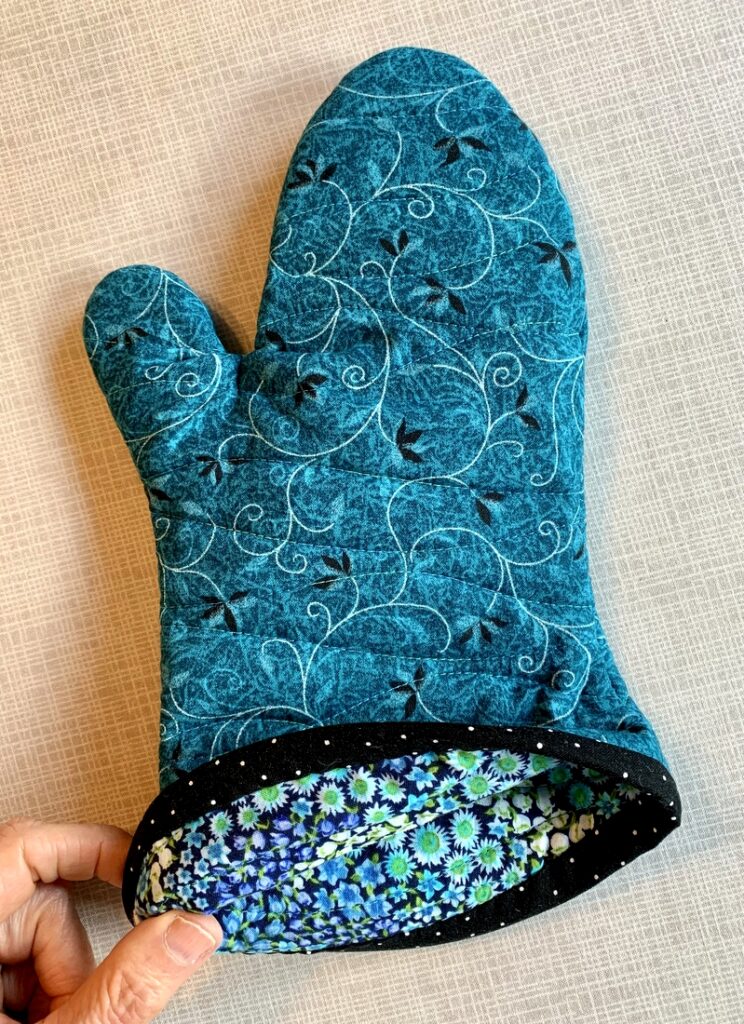
A pattern of green and yellow colors with white backgroundShe wanted mitts in turquoise or burgundy. I found a great turquoise fabric in my stash dating back to 1999. I know this because the date is on the selvage.

Nancy is a fabulous gardener so I found a lovely floral fabric for the inside of the mitts. Take a peek:

A pattern of green and yellow colors with white backgroundIn exchange for the mitts, Nancy is bringing me a pie made by her husband Cliff, who is known for his delicious pie crusts. I call that a win-win!


Posted in home dec, oven mitts, update | 4 Comments