Grab Your Partner

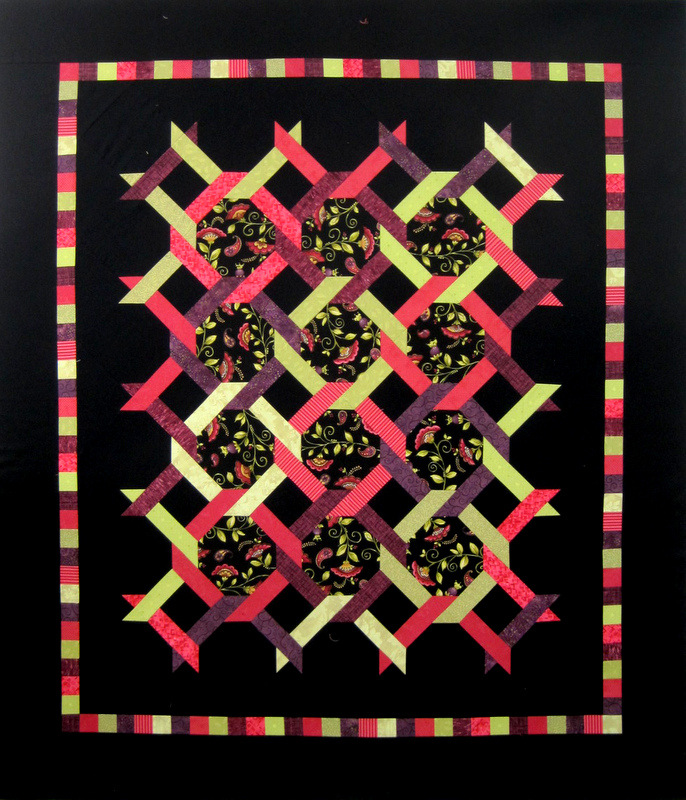
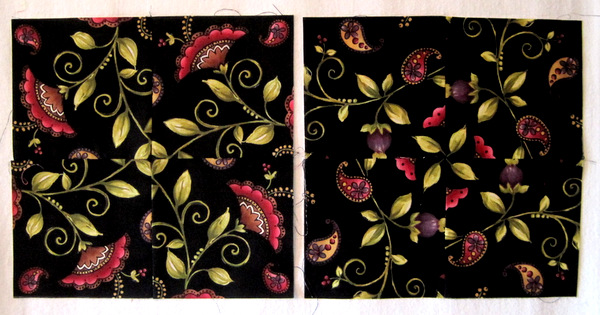
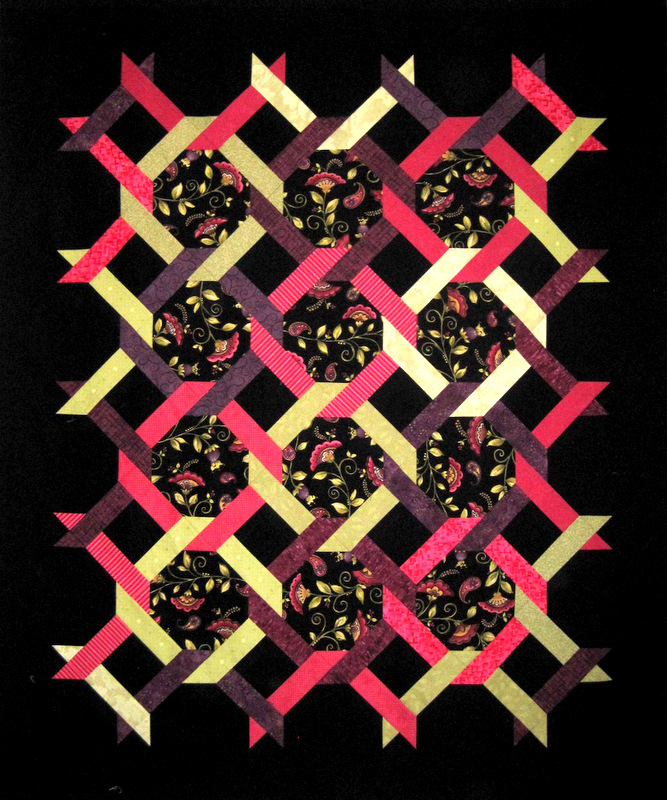
My newly finished quilt top has a name: Square Dance. Something about those interlocking lattice strips made me think of arms joined at the elbow — “allemande left and do-si-do” — and that was before I added the border of squares:

2013-9, Square Dance top 57 x 67

The quilt top measures 57″ x 67.” To read more about the making of Square Dance, click here.

Thanks for stopping by!


Posted in update | 2 Comments

Day for Night

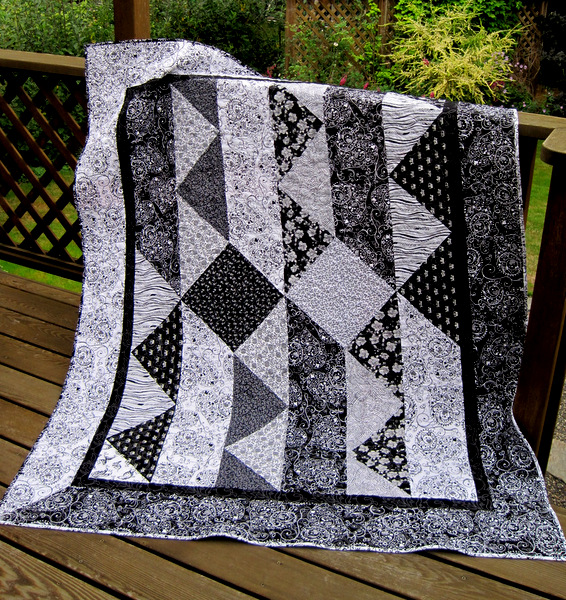
Another UFO bites the dust! That’s right, I have a finished quilt to present to you: Day for Night, begun in June 2012, finished today. It measures 56″ x 69″.

2013-9, Day for Night, front

I made the top in a couple of afternoons last year, when I was in the mood for something fast and fun. You can read about it here.

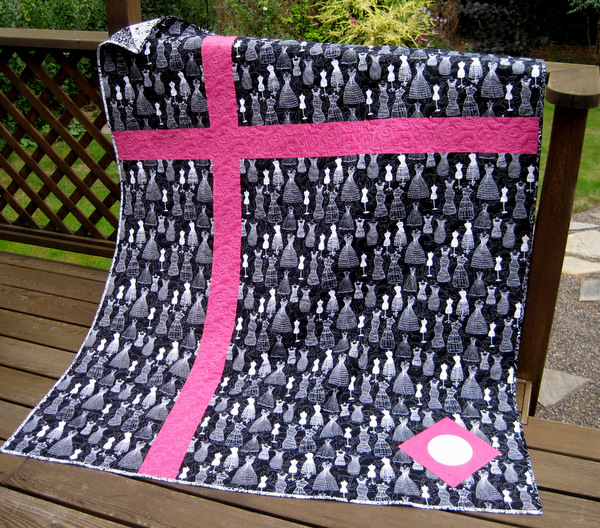
Why did it take so long to finish? One reason is that I hadn’t decided what to put on the back. I often use leftover blocks and strips on my quilt backs but in this case I had given them to one of my nieces for a sewing project. This summer I finally pulled a whimsical black-and-white print from my stash, pairing it with a dotted fuchsia for a jolt of color:

2013-09-16 02.24.22

That’s the label you see in the lower right-hand corner. I fused it to a square of the fuchsia fabric and set it on point to echo some of the blocks on the front.

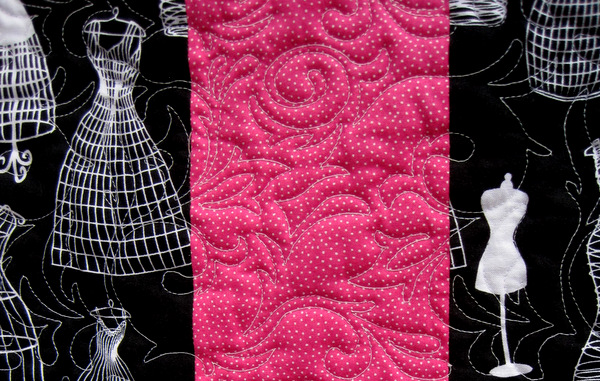
Nancy Stovall of Just Quilting quilted a swirly edge-to-edge design that blends in perfectly on the front and complements the whimsy of the backing fabric. Here’s a close-up of the back:

2013-9, Day for Night, back, quilting detail
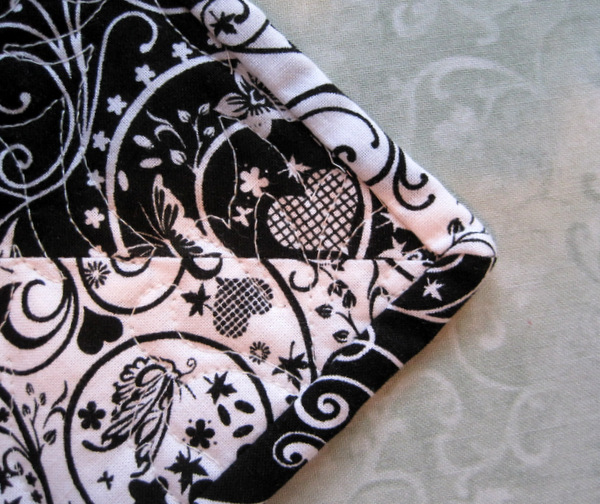
Did you happen to notice that the binding is two different fabrics? I wanted to play with the black-white/positive-negative theme by binding the quilt with fabric that’s the reverse of the fabric right next to it. This was a fun challenge because I had to figure out how to miter the corners where the black and white fabrics meet:

2013-9, Day for Night, binding detail
With double-fold binding (also known as French binding), quilters make it a point to avoid having a seam in a mitered corner but in this case it was deliberate.

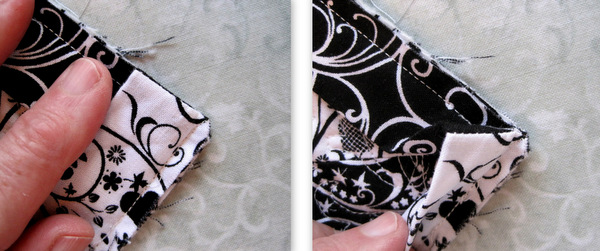
I expected that the seam joining the black and white fabrics would be on the diagonal. Turns out the seam needs to be on the straight of grain. Not only that, when the binding strip is folded on the quilt edge to form the miter, the seam needs to be exactly on the edge that is even with the raw edges of the quilt:

Camera Uploads22
I trimmed the seams to 1/8″. There’s a little extra bulk in the corners but it wasn’t a problem. In fact, now that I know how to do it, I may make another quilt in the future in which the binding fabric changes at the mitered corners.

All in good time, though. I have a few other UFOs and WIPs to tackle first.


Posted in mitered corners, update | 7 Comments

Susan’s Sewing Machine Dust Cover

One of the first things I noticed when I started reading quilt blogs was that many quilting bloggers (blogging quilters?) offer giveaways. It seems like such a nice way to thank the people who visit blogs regularly and offer supportive comments. So after releasing my Sewing Machine Dust Cover pattern in late June, I launched my first Giveaway, offering a half dozen patterns plus a custom made cover for one winner. That winner turned out to be Susan S. of Milledgeville, Georgia.

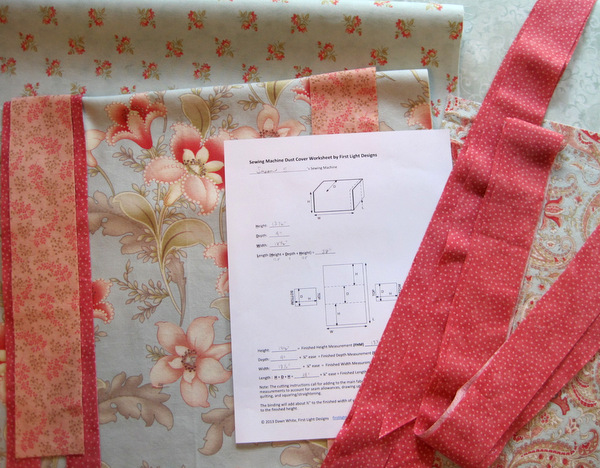
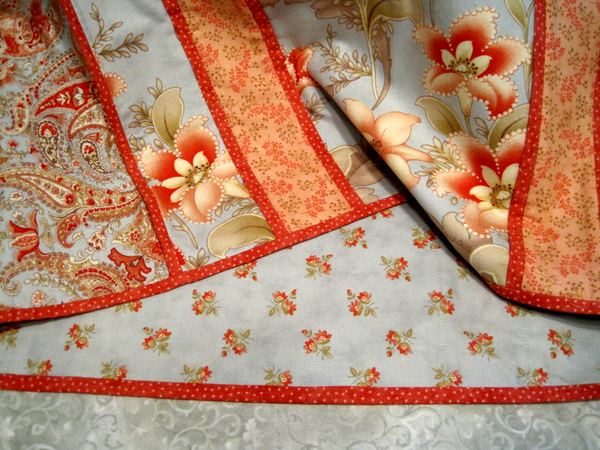
Susan emailed me the dimensions of her Janome embroidery machine and I emailed her photos of four different combinations of fabrics from my stash to choose from. I would have enjoyed making her a cover from any of the four combinations, but she happened to choose one I especially liked: a peach, coral, and aqua combo featuring prints from the Martinique line by 3 Sisters for Moda:

Susan's fabric choices for custom dust cover

How I love Moda fabrics! A couple of other fabrics in my stash were chosen to complement the 3 Sisters prints.

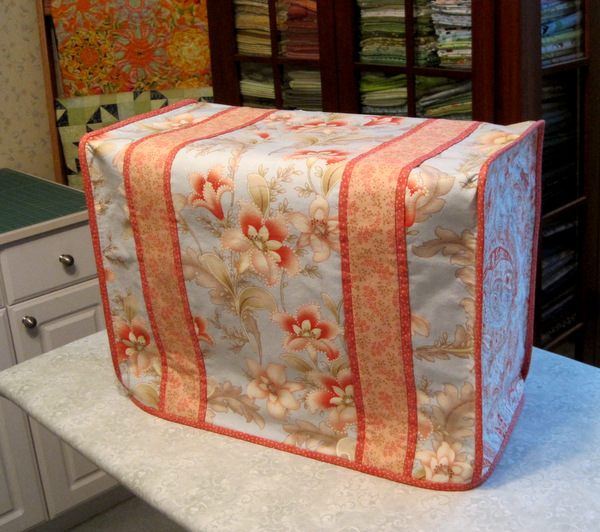
I finished Susan’s sewing machine dust cover last week and took a few photos before popping it in the mail on Monday:

Susan S's sewing machine dust cover 2
In the photo below you can see the fabric on the inside of the dust cover:

Susan's sewing machine dust cover --inside
Susan’s sewing machine dust cover arrived at its destination today, and she sent me the nicest message:

“GUESS WHAT I GOT IN THE MAIL TODAY??!!!!!! A beautiful sewing machine dust cover that fits my machine perfectly!! I love the gorgeous fabrics you used and it is constructed so very nicely. It really brightens up my sewing room . . . I’m loving it!! Thank you so very much — Susan”

You are welcome, Susan! It was a pleasure to make it for you.


Posted in Giveaway, sewing machine cover, update | 8 Comments

The Accidental Work-in-Progress

I didn’t plan to start a new quilt, honest. I’ve been working this year on reducing the number of my Works-in-Progress, not adding to it. But it seems I’m slipping. Case in point: a new WIP on my hands. Take a look:

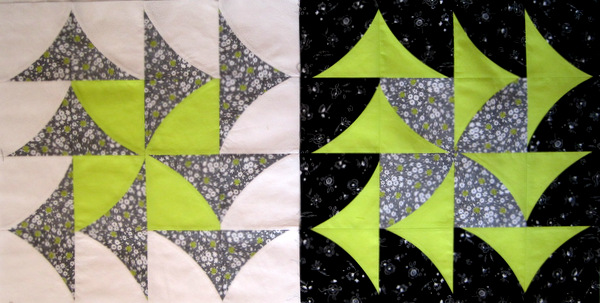
2013-9, curvy geese blocks
Curvy Geese blocks (finish at 16″ square)


This is what happened. The Pine Needle, where I teach, is having its fall Open House this Friday and Saturday, Sept. 13 and 14. I will be there both days demonstrating new products and talking about my upcoming classes, one of which is Urban Tiles. (My version of Urban Tiles is pictured here.) The pattern was designed by Jenny Pedigo of Sew Kind of Wonderful. Jenny also designed the Quick Curve Ruler© used to make the curves.

Geri, the owner of the Pine Needle, asked me to make a demo block for Open House using the Quick Curve Ruler, something that would showcase its versatility. After all, a quilter who is considering investing in a specialty ruler is more likely to buy one if she knows it can be used in many ways. I was happy to comply because I have been wanting to try out Jenny’s new Curvy Geese block, introduced in a Quilt-Along she hosted on her blog recently.

So I made a block. And then I couldn’t help myself. I made another. Those are the blocks you see above, and I can hardly wait to make some more! I’m using fabrics from a new line from Timeless Treasures called Doodle, designed by Alice Kennedy, which I found on the Hawthorne Threads website. I don’t often buy fabric on line, because we have such wonderful quilt shops in Portland, but when I saw this line I was instantly smitten.

I’m heading back to my sewing room right now to work on a different WIP, but I’m already thinking about which Doodle fabrics will go into my next Curvy Geese block.


Posted in update | 4 Comments

Hunky-Dori

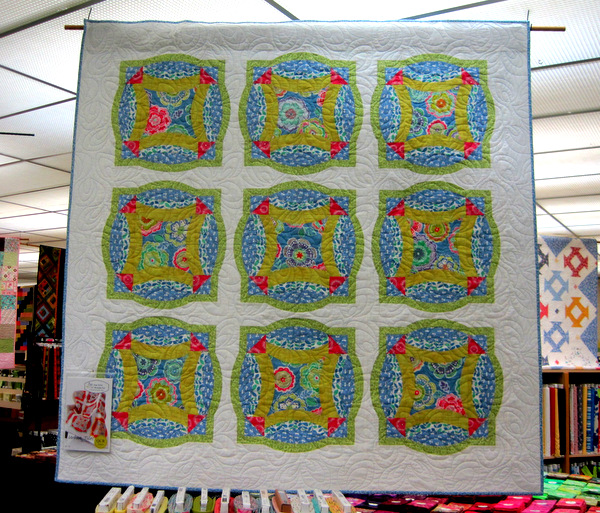
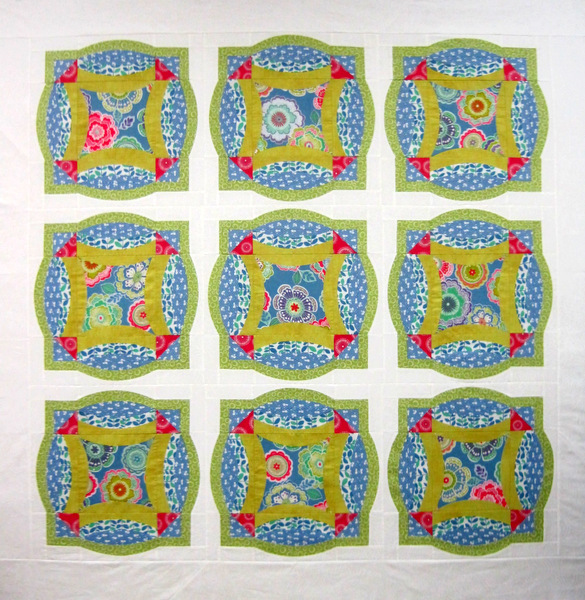
That’s the name of this quilt I recently finished based on the pattern Urban Tiles by Jenny Pedigo of Sew Kind of Wonderful. It’s such a cheerful little quilt!

2013-09-04 23.03.49
Hunky-Dori, 57″ Square (2013)


Why the name Hunky-Dori? You’ve probably heard the expression “hunky-dory,” which essentially means “fine and dandy.” Well, that’s how this quilt makes me feel! Four of the fabrics, including the focus fabric in the middle of each block, are from the Dori line by Mitzi Powers for Benartex. Just a little play on words.

Of the remaining fabrics, the chartreuse fabric next to the focus fabric is by Windham and the white-on-white background fabric is by P&B Textiles. Fans of Violet Craft’s Madrona Road line for Michael Miller will recognize the small blue and white print next to the outer green curves. The fabric on the back of the quilt is also part of the Dori line.

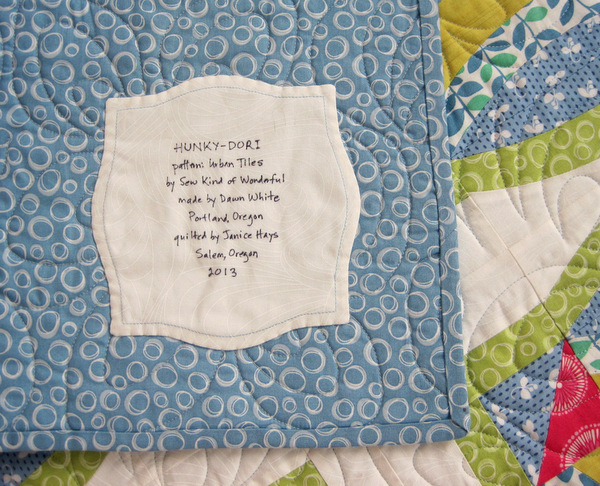
Just for fun, I made a label for the back shaped like the tile block on the front:

2013-9, Hunky-Dori label

The photo above also gives you a better look at the lovely edge-to-edge quilting done by longarm quilter Janice Hays.

Hunky-Dori is on display at the Pine Needle Quilt Shop in Lake Oswego, Oregon. If you’re in the neighborhood, please stop by for a look. And if you’re inclined to make your own version of Urban Tiles, I’m teaching a class in October at the Pine Needle. Kits available!


Posted in Quick Curve Ruler, update | 5 Comments

The Big Reveal: My Little Neighbor’s Quilt Top

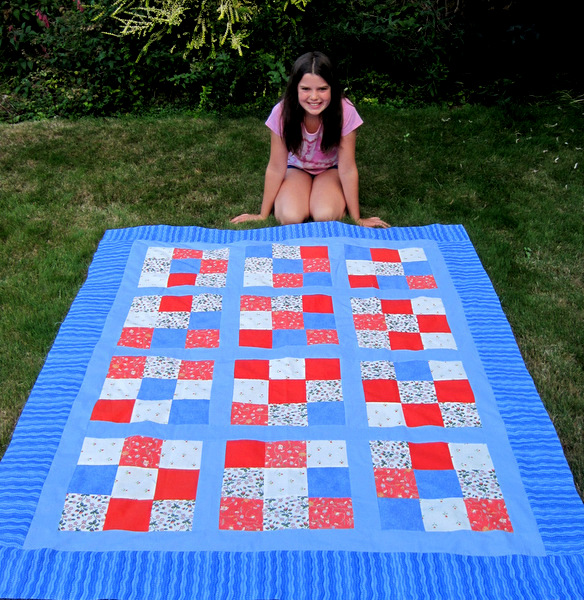
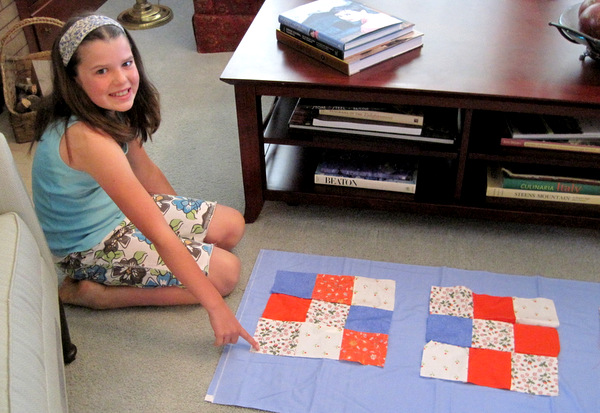
2013-9, MLN with her 9-patch
My Little Neighbor with her First Quilt (56″ x 70″)


Isn’t it beautiful?! She finished it yesterday, on Labor Day. Just in time, too, because school starts this week.

Once My Little Neighbor is back in the swing of things where school is concerned, we’ll get together to talk about the next step: making the quilt back. MLN has one 9-patch block left over, which she plans to put on the back. Of course!


Posted in My Little Neighbor, update | 7 Comments

My Little Neighbor: Making Progress

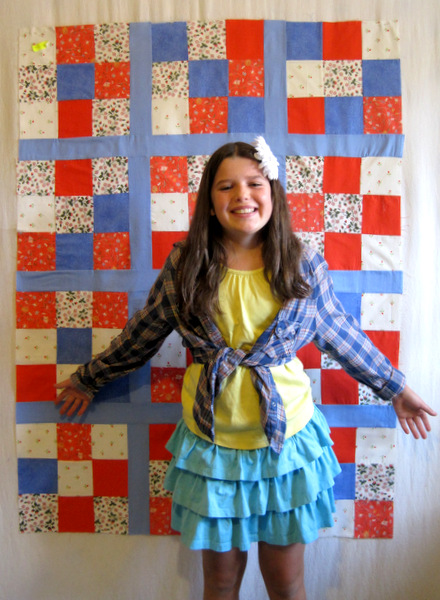
MLN August 2013

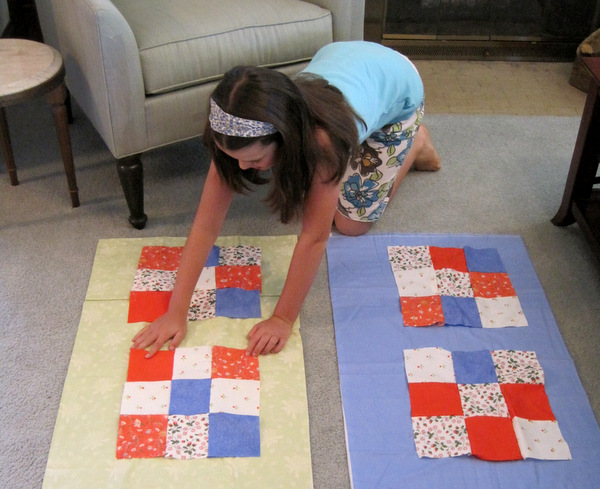
As you can see, My Little Neighbor (MLN) is back at work on her first quilt, a colorful 9-patch, and she’s pretty excited about it. She started this quilt last year as a hand-sewing project to keep her occupied while sidelined with a broken foot.

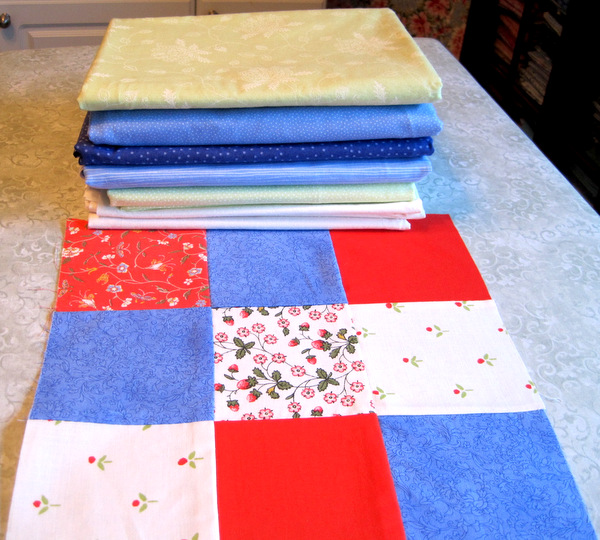
Earlier this summer she came over with most of her 9-patches sewn together, and we discussed setting options. MLN would like her quilt to be a good-sized throw so the idea of adding sashing between the blocks appealed to her. We had a discussion about value, and she auditioned several fabrics from my stash, looking for a sashing fabric that would complement the blocks but not compete with them:

2013-06-09 00.00.17


MLN narrowed the candidates down to a medium-light green and a medium-light blue:

2013-6, auditioning sashing fabric -- blue or green

And the clear winner — blue:

2013-06-07 22.31.37


Fast forward a few weeks to early August, when my two youngest granddaughters, Bonnie and Beatrice, were visiting from San Francisco. All the girls made four-patch coasters — you can see Bea’s and MLN’s here — using my sewing machine. At that point MLN decided she would rather finish her quilt by machine than by hand. What a good idea! We couldn’t think of one good reason to finish it by hand — and a lot of good reasons to finish it by machine.

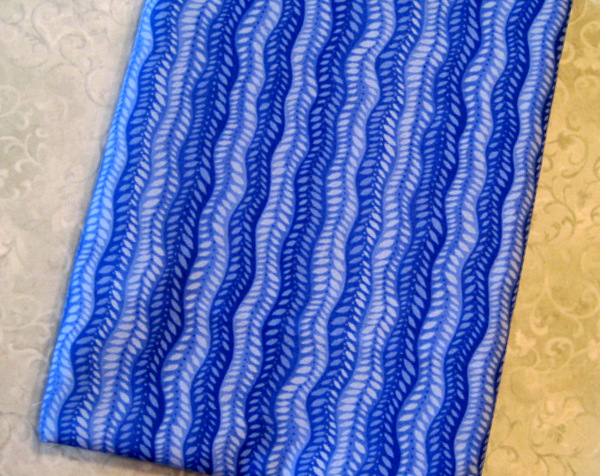
In the photo at the top of this post, MLN had already added the sashes by machine. Next came the border strips, out of the same blue fabric scattered with tiny white polka dots. She determined she would like another border, to make the quilt larger and to add visual interest. We were thinking of something in red when she spotted this fabric in my stash:

outer border MLN

We both think it’s the perfect choice. She is in the process of adding the final borders. Please stop by tomorrow for the Big Reveal!


Posted in 4-patch coasters, My Little Neighbor, update | 2 Comments

Playing Around with the Twist Block

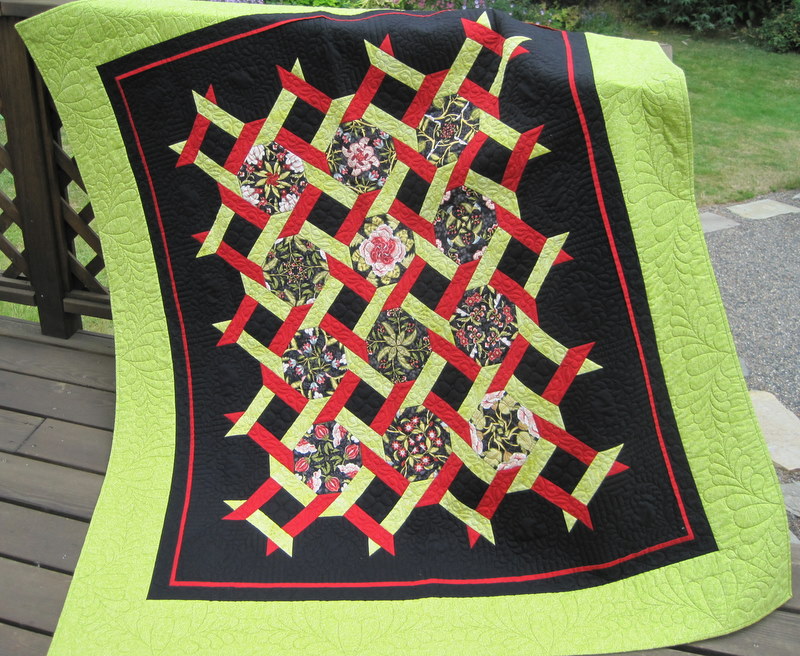
Time to show you more of the project I’ve been working on since my last post. I actually started this project over a year ago, when I got a bug to make a new quilt based on my 4-Patch Wonder with a Twist pattern. This is the first quilt, which is on the cover of the pattern:

2011-9, It's All in the Twist, 57x65

The 12 snowball blocks are very different from each other but they are all from the same piece of focus fabric, made into 4-Patch Wonder blocks (my name for blocks made of four identical layers of fabric that are stacked, cut in squares, and then rotated to make a pleasing symmetrical design). An alternating block — red and green in this case, on a black background — helps create the illusion of interlocking strips. The quilt looks contemporary but the twist block actually dates back to 1870.

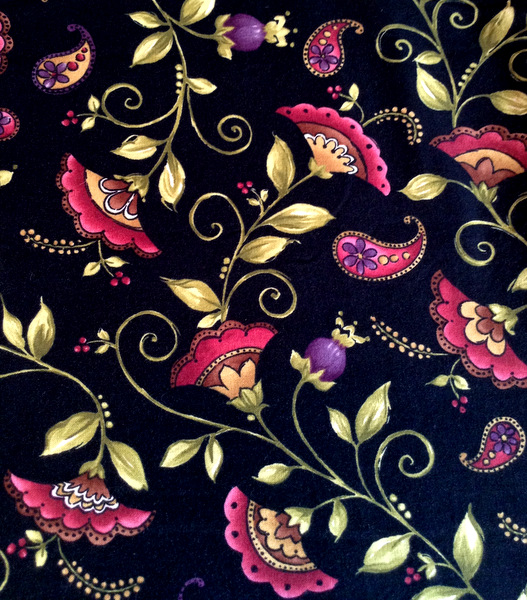
The fabric I had in mind for a second version was this lovely print, Ella, by Kathy Brown for Red Rooster Fabrics:

Ella fabric

I was attracted to the folk-art feel of her design and the rose and purple tones set off by green vines on a black background. My thought was to make the lattice strips out of three colors — rose, purple, and green — instead of two colors as I did in my first quilt. And I thought the Ella print would make great 4-Patch Wonder blocks

Trouble was, the first couple 4-Patch Wonder blocks I made were — well, they were pretty but not nearly as pretty or as interesting as the original fabric:

Ella 4-pw blocks

I abandoned the plan for 4-Patch Wonder blocks and simply cut squares. Then I dug into my stash for the rose, purple, and green fabrics needed for the twist strips. I pulled out quite a few pieces, all reading as textured solids. Pretty soon I had several options for each color. (What does this tell you about the size of my stash?)

Somewhere along the line I got the idea of using four different fabrics for each of the three colors. That’s right — 12 different fabrics for the twist strips. I just about drove myself crazy deciding which strips would go where, and then devising a way to keep track of them once their positions were assigned. Maybe that’s why I made just a few blocks and put the project away for over a year. Another Work-in-Progress, languishing . . .

Out it came last week, ready for some close personal attention, and here is the result so far:

Ella 800p

I’m very pleased with it! Still to come: borders. With quite a few 2½” strips left over from the lattice, I’m thinking about making an inner border of 2″ squares using all 12 lattice fabrics. I hope you’ll check back in a few days to see what I’ve done.


Posted in 4-Patch Wonder, faux-kaleido quilts, snowball blocks, update | 5 Comments

The Fastest Snowball Block Ever!

I’m working on a quilt (another Work-in-Progress, begun over a year ago) that contains several snowball blocks — you know, the ones that have a triangle sewn to each corner, like this:

corner triangles #8

I’ve seen these edges referred to as foldover corners and stitch-and-flip corners. Whatever they’re called, the usual method of making them is to place a small square in each corner of the larger square, sew diagonal lines from corner to corner, trim the seams, and press the resulting triangles to complete the square.

Pretty basic, pretty fast. Except that it’s usually necessary to draw a stitching line on the small squares and sometimes to pin them to the larger square. It can get pretty tedious drawing all those lines on fabric, and it’s surprisingly difficult to stitch a perfectly straight diagonal line, especially when you are starting out at a corner.

Well! I recently learned a new way to sew these squares that doesn’t involve either pins or drawing lines. It’s faster than the old method and has resulted in improved accuracy in my stitching. I experimented a bit with the method and the materials, and this is what I came up with that works best for me:
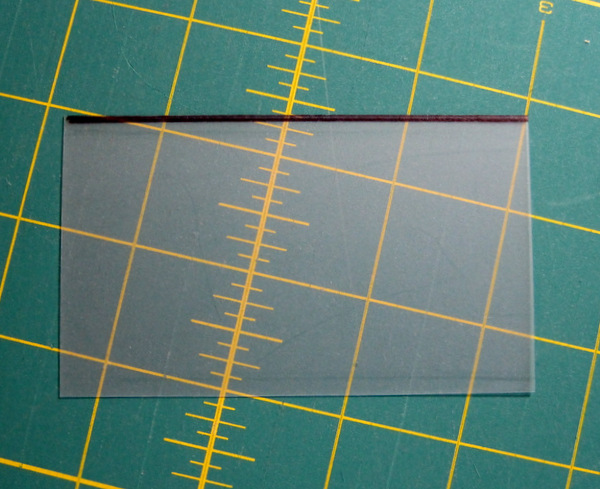
corner triangles #1

It’s a piece of template plastic, about 4½” wide and 2½” long, the perfect size for a block that finishes at 6″. I placed the plastic on a piece of scratch paper and, using an acrylic ruler and black Fine Point Sharpie pen, drew a thin line along one long edge. You’ll see what the dark edge is for in a moment.

Here is my large square and the four smaller squares I need to make the corner triangles:
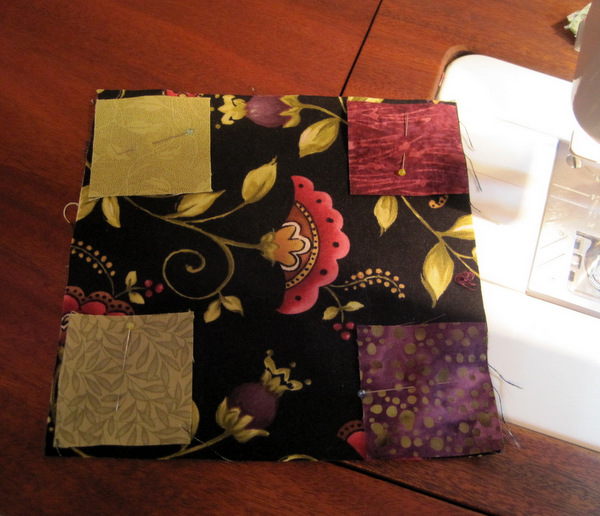
corner triangles #2

(The only reason I have pins in the smaller squares is to make sure they are in the correct position for the quilt I am making. If I were using the same fabric in all four corners, I wouldn’t need pins at all.)

I start by positioning one of the smaller squares right side down in one corner of the larger square. Then I lay the template plastic right along the stitching line, from corner to corner, with the edges of the template plastic extending beyond the beginning and ending points of the stitching line. The inked side of the template plastic helps me see the edge of the plastic better on light fabric:
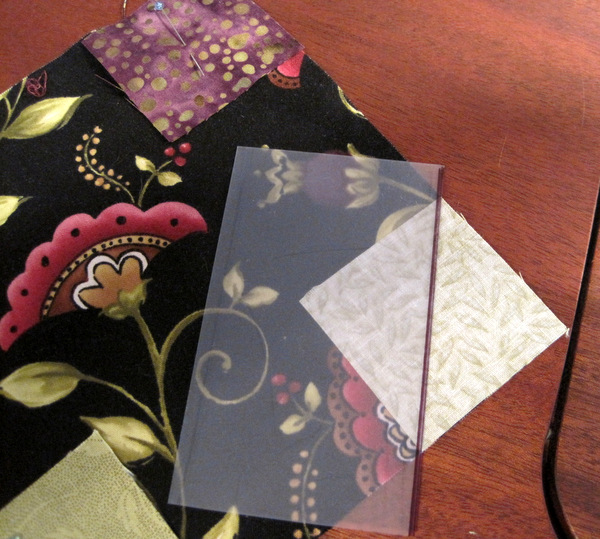
corner triangles #3

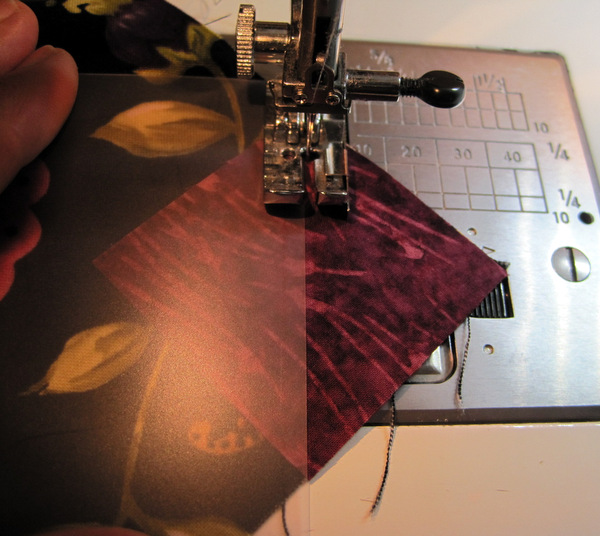
Next I position the fabric with my needle (in the down position) right next to the template at the exact corner of the small square. Holding my left hand (not shown in the photo below) firmly on the template plastic, I start stitching right at the corner:
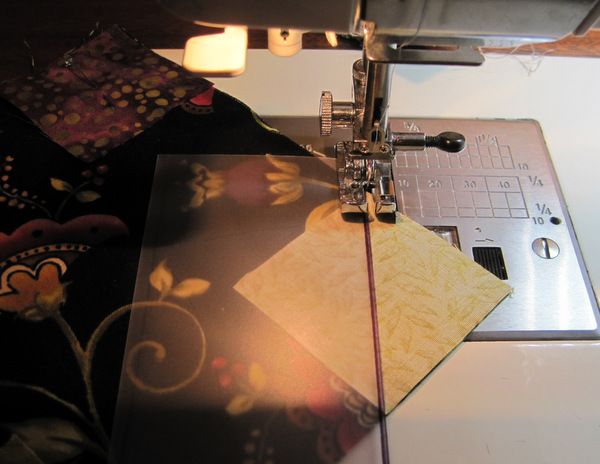
corner triangles #4

You can see the needle is right next to the edge of the template plastic, eliminating the possibility of straying off the stitching line:
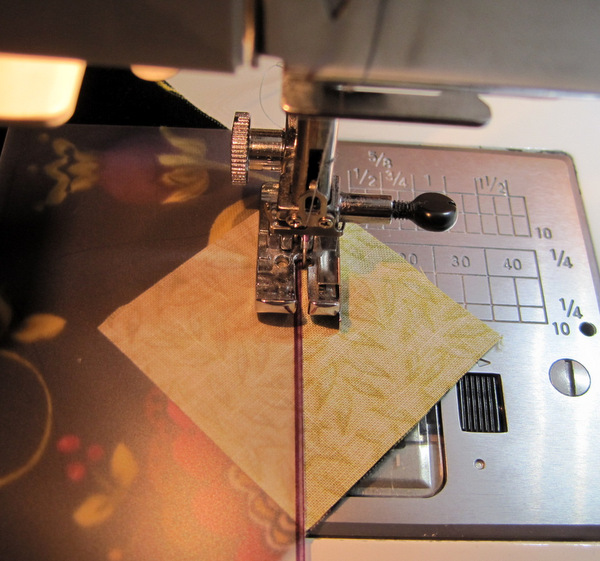
corner triangles #5

It feels a little bit like stitching in the ditch, with the edge of the template plastic serving as the ditch. Being able to see the fabric through the plastic helps me make sure the fabric isn’t shifting.

I use the uninked long edge of the template on dark fabrics, as it is easier to see the needle as it goes in and out right next to the edge of the template plastic:
corner triangles #6
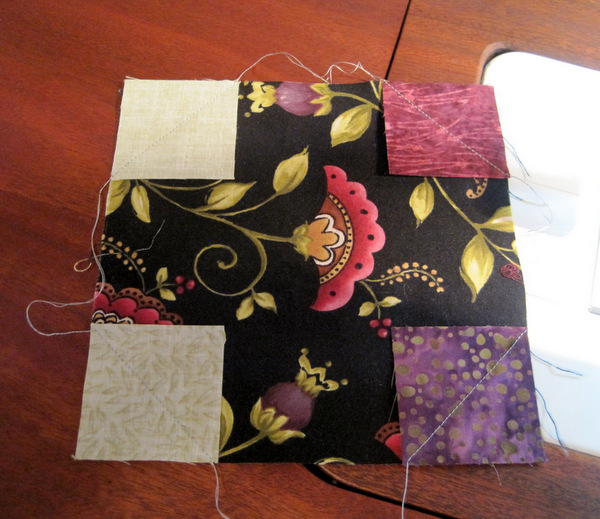
I sew all four corners in this manner, rotating the large square as I go and not cutting the thread between corners:
corner triangles #7
Now all I have to do is cut the threads, trim the seams, and press. Voila! My snowball block is done:

corner triangles #8
This method works for flying geese blocks, sawtooth edges, just about any block that calls for a triangle to be made from a square or rectangle. The templates can be made with cardboard or other stiff materials, but I’m sticking with template plastic because I like being able to see through it as I sew along next to it. I’ll make larger templates for larger blocks.

My thanks to Kelly at BlueBird Sews for introducing me to this new method. I love learning from fellow quilters!


Posted in snowball blocks, stitch-and-flip corners, tutorial, update | 8 Comments

Mission Accomplished

I’ve been working on a quilt top based on the pattern Urban Tiles by Jenny Pedigo of Sew Kind of Wonderful. The top is done, and here it is:

UrbanTiles 600
Urban Tiles Quilt Top, 58½” Square


This was fun to work on because the fabrics are so bright and cheerful. I could see this as a table topper or a little girl’s quilt.

Now to consider quilting motifs. . . . I could go with an all-over design. On the other hand, maybe I should choose a motif that highlights the secondary design in the white fabric around the blocks. What do you think?


Posted in table topper, update | 4 Comments