Category Archives: home dec

Cue Vivaldi

Imagine you are hearing the strains of Vivaldi’s “Four Seasons” as you view all four versions of my Season to Taste table runner/wall hanging design:

Four versions of Dawn’s pattern Season to Taste

Aligning with Vivaldi’s concerti, the presentation begins with spring, followed by summer, fall, and winter. The winter version, named Winterwood, was the last one to be made:

Winterwood (2021)

When I started working on this quilt using fabrics with a holiday vibe (red and green prints, though not overtly Christmas-y), I thought about making a second winter version that is weather-related, i.e. not associated specifically with the holidays. The other day I found a piece of fabric in my stash that may just fill the bill. I’m not sure when work will begin on it but I’m giving myself until winter 2022 to finish it. (Do you think that’s enough lead time??)

The 45-degree triangles in the spring and winter versions were made with a selection of fabrics while the summer and fall versions, seen below, were each made with one focus fabric for a true kaleidoscopic effect:

Sun Flowers (2015) and Autumn Reflections (2014)

The fabric I have in mind for the second winter version would yield this kind of design.

I’m happy with the way all of of these turned out but I confess I have a favorite. It’s my spring version, Under Paris Skies:

Under Paris Skies (Sous Le Ciel de Paris) (2014)

The quilt contains fussycut images of street scenes of Paris that always make me smile (in addition to which spring is my favorite season). Here are a couple of those street scenes:

So . . . what about you? Of the four quilts pictured here, do you have a favorite?


Posted in free motion quilting, home dec, kaleidoscope quilts, Paris, table runner, update, wall hanging | 6 Comments

Welcome . . .

. . . to my sister Diane’s glamorous garage! This is the last of three posts devoted to the new window treatments I made while visiting her over Thanksgiving. To hide the brackets, Diane added tassels:

Such an easy fix, and it ramps up the glam factor considerably. Here’s a close-up:

Over the 20 years Diane and her husband have lived in this house, the garage has undergone a gradual transformation. Since guests enter their home mainly through the garage, it’s important to her that it look nice. She is fortunate to have found a very talented handyman who not only installed the wainscoting but also built the large storage cabinets on the left side of the garage:

Among other things, the cabinets hold her Christmas decorations. No more hauling them down from the attic!

A longer view of the right side:

If you didn’t see part of the garage door on its track above, you might think this was an interior room. I swear, I could live in this garage!


Posted in family, home dec, update, valance | 9 Comments

Garage Glamour Update

I’ve been working at a leisurely pace on my current sewing project for my twin sister Diane’s garage windows. (That’s another way of saying I am easily distracted by any and all invitations to play Scrabble.) Here’s a look at the first valance in place:

As mentioned in my last post, the plan was to make gathered valances attached to a flat rod pocket accented with grey grosgrain ribbon. I was going to make the rod pocket the width of the grosgrain ribbon — 1-1/2″ — but then realized that if I centered the ribbon on a larger piece of contrasting fabric it would make the grosgrain ribbon really stand out.

Here’s a close-up of the valance in process. You can see the grosgrain ribbon has been attached to a strip of yellow gold fabric:

(Pay no attention to the fabric in the background. It was used to cover Diane’s ironing board.) That yellow gold fabric? It was left over from another project I made for Diane at least 10 years ago, the valance over the kitchen window:

The rod pocket trim fabric is almost the same color as the garage walls and ties in nicely with the gray and gold patterned rug at the door leading into the house:

This picture is also proof that Diane and Ed actually do park their cars in the garage! Diane wants me to explain that she wants a nice-looking garage because 99% of the people who visit enter the house through the garage rather than climbing 26 steps to the front door. Earlier this year Diane and Ed had the oil-stained cement floor treated so it could be covered with a multilayered epoxy treatment. It certainly elevated the look of the garage, and Diane reports the floor is easy to clean.

The second valance is finished but our project is not quite done. Both Diane and I don’t like the fact that the brackets holding the curtain rods are visible and have devised a plan to block them from view. (Stay tuned for the final reveal.)

My friends already know I’m a bit obsessive-compulsive. Now you know: it’s a twin thing.


Posted in family, home dec, Scrabble, update, valance | 5 Comments

Garage Glamour

Greetings from Georgia, where my husband Charlie (aka the Dear Husband) and I are enjoying our annual visit over Thanksgiving with my twin Diane and her Dear Husband, Ed. As usual I have a home dec project to work on and this time the site is the garage, of all places.

Several years ago Diane bought a pair of beautifully made custom valances at a garage sale (how appropriate), although I’m certain the valances initially adorned an interior room. The valances featured a charming toile print with a gathered ticking stripe underneath. After years in the garage the striped ticking disintegrated from exposure to sun streaming in through the windows but the tailored valances survived. Take a look:

Diane framed vintage images of scenes from Portland and the Columbia River Gorge to remind her of her native Oregon:

But I digress. Here’s a close-up of one of the valances:

Now it’s time to replace them. (By the way, have you ever seen such a clean garage? Mine sure doesn’t look like that!)

Last week my twin and I went shopping not only for her valances but for valances I am going to make for our stepmother — my next home dec project. Diane and I found fabrics for both at the very first place on our list. This is Diane’s valance fabric, a lovely floral linen print:

The plan is to make valances that are softly gathered at the top and bottom and to accent the rod pocket with grey grosgrain ribbon. I’m going to line the valances with whiteout fabric to add body and protect the linen from the ravages of the sun.

And what of the valances we took down? They are still in good shape. And we have an idea on how they might be repurposed elsewhere in Diane and Ed’s home. Subject of a future post, no doubt!


Posted in family, home dec, update, valance | 9 Comments

Winterwood: Almost a Wrap

With the holidays fast approaching, I decided it was time to finish the winter version of seasonal wall hangings based on my pattern Season to Taste. This is Winterwood:

I finished the top in June and wrote about the making of it here. If you’re curious about where the name Winterwood came from, you’ll find the explanation in that June post.

Winterwood is quilted very simply with horizontal lines. Unfortunately, I forgot to extend the stitching lines across the borders, and now that the binding is on I’m not entirely happy with the result. I’m going to give it a good press and then decide if I need to add some after-the-fact quilting in the borders.

Winterwood was made to be a wall hanging but I decided to piece the back in such a way that it could double as a holiday table runner:

That’s a 7″ inset circle in the middle. I’m going to make a label using a compact disc as a pattern and put the label on the circle, figuring that I can put a candle or plate on top of the label to hide it. Because the tree fabric is directional, I deliberately arranged it so that the trees go in both directions.

Once this winter version is finished, I’ll show you how it looks with the spring, summer, and fall versions. Do I have a favorite? Why yes, I do. Perhaps you will, too!


Posted in home dec, kaleidoscope quilts, quilt labels, single-fold binding, table runner, update, wall hanging | 1 Comment

“Just So”

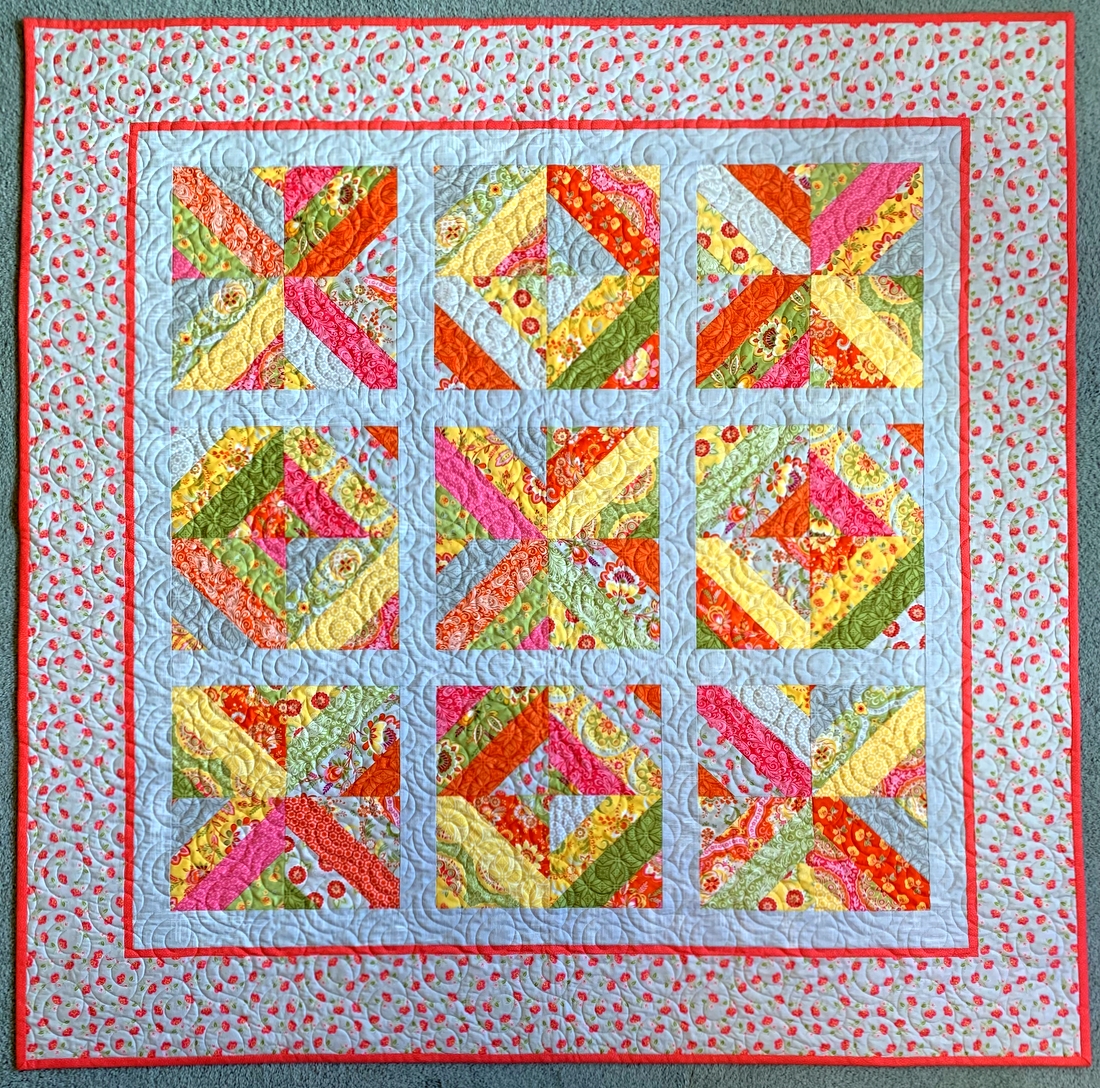
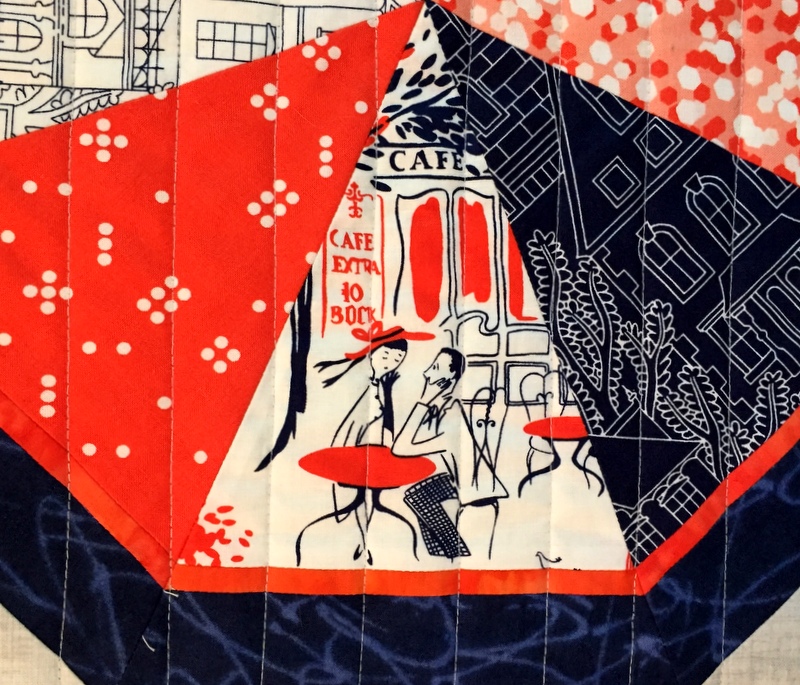
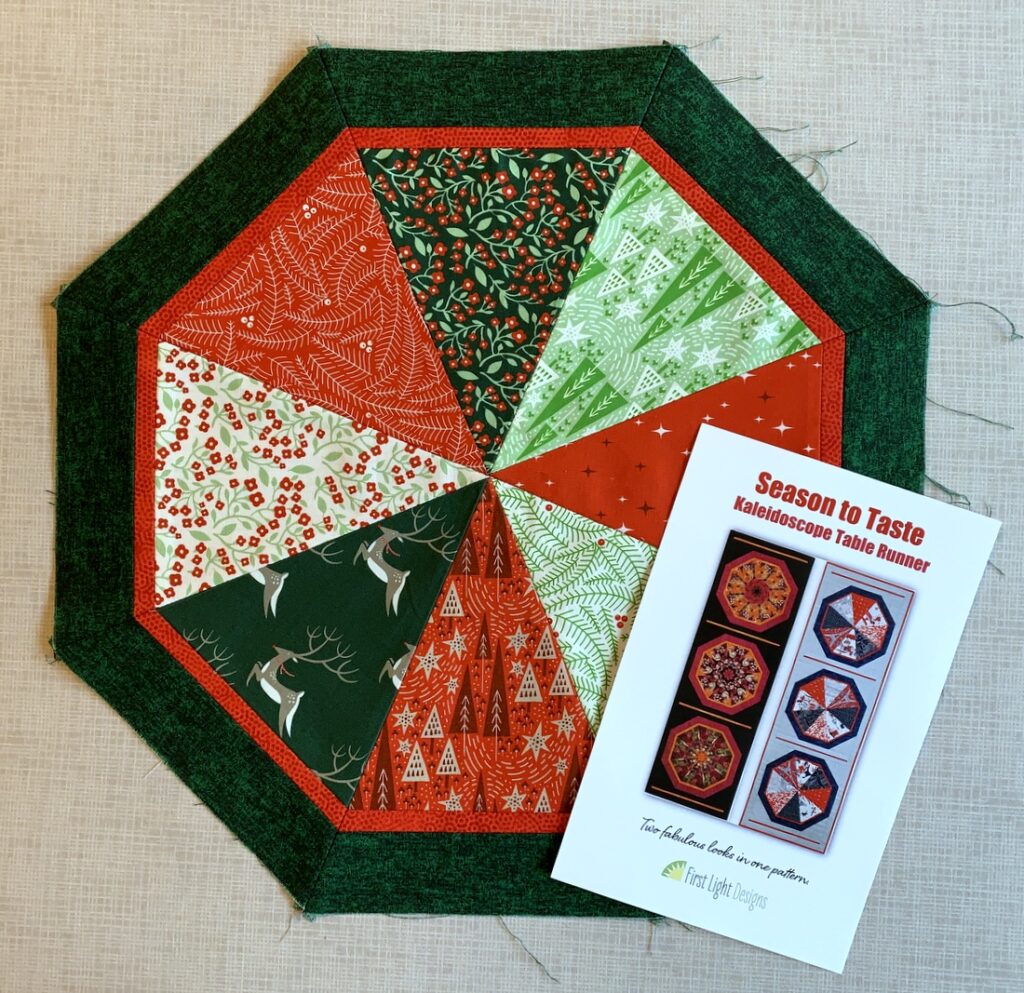
In my last post I promised to explain my method of getting the narrow accent strips on my kaleidoscope blocks to line up just so:


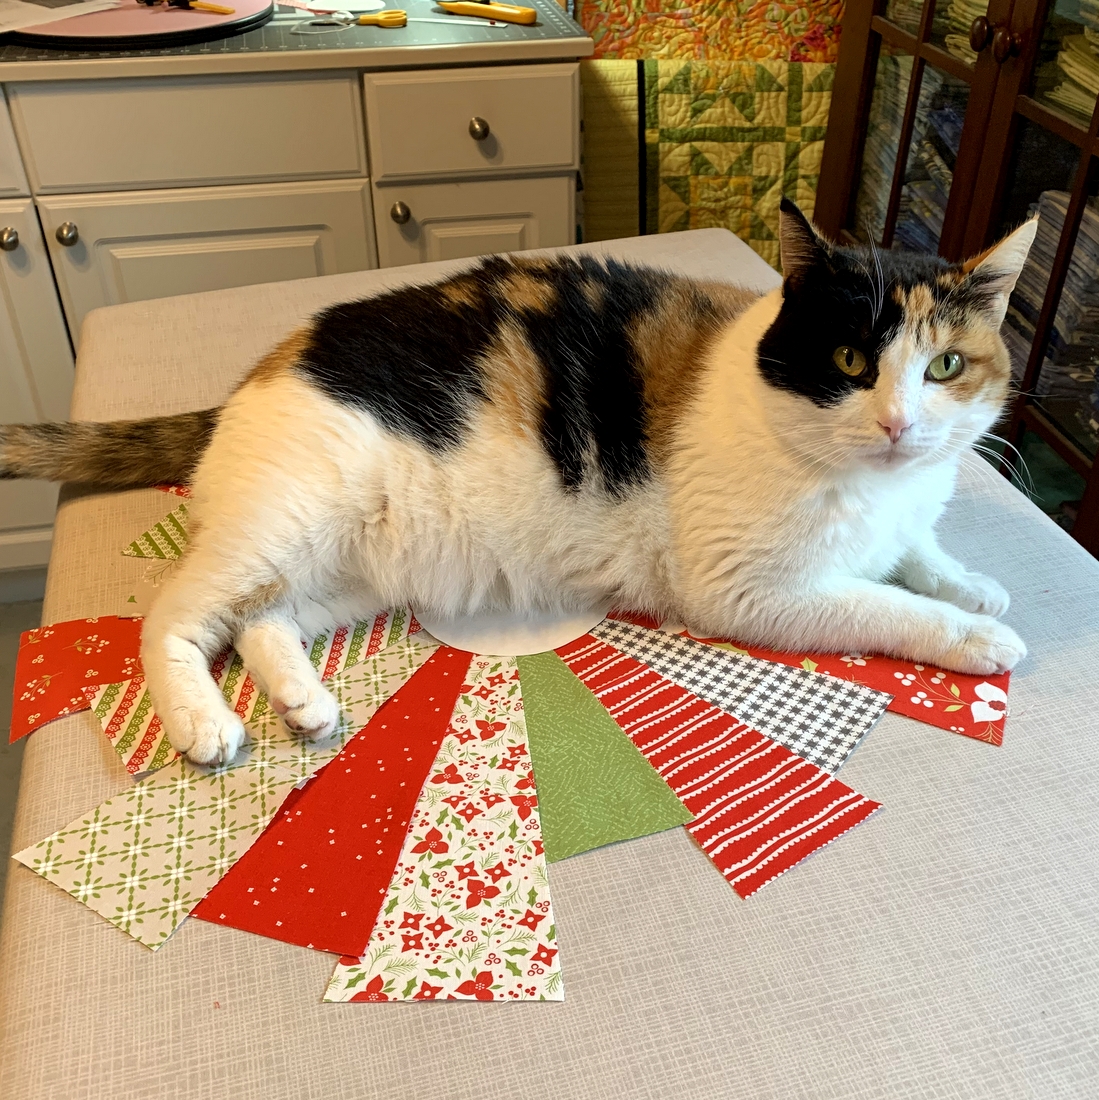
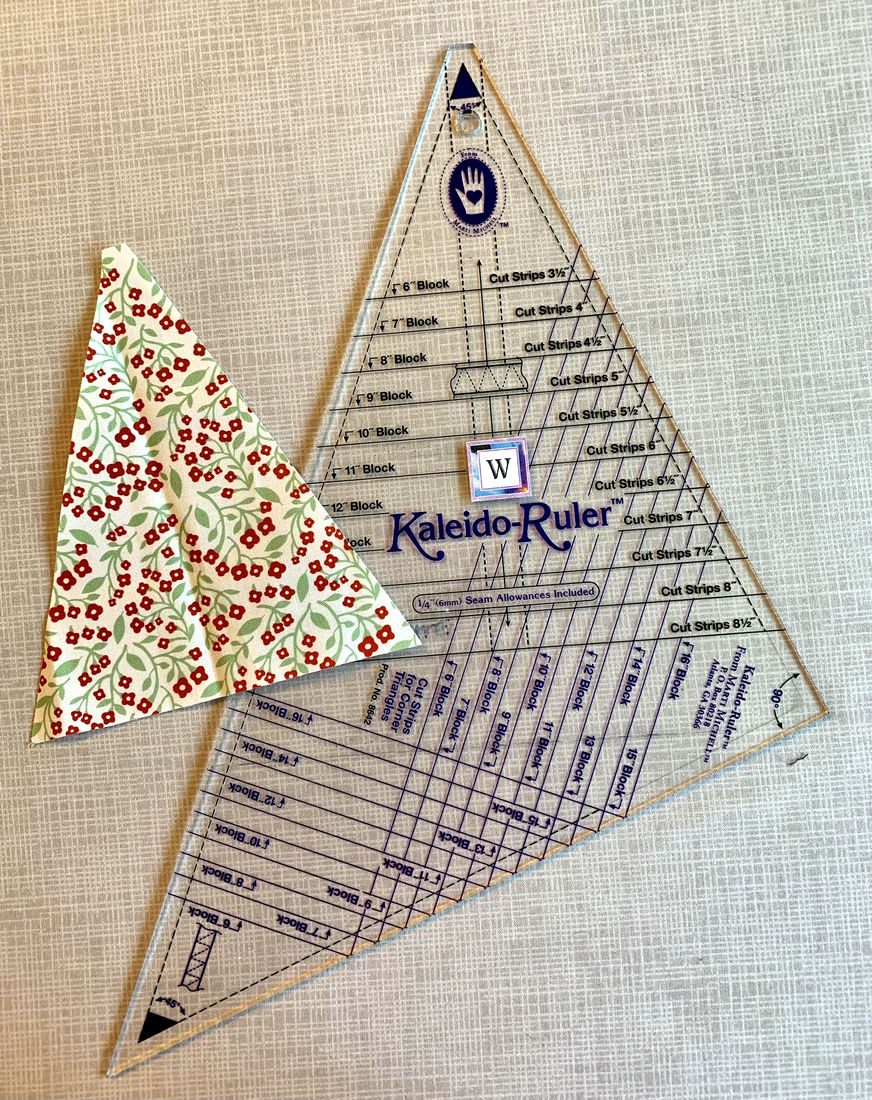
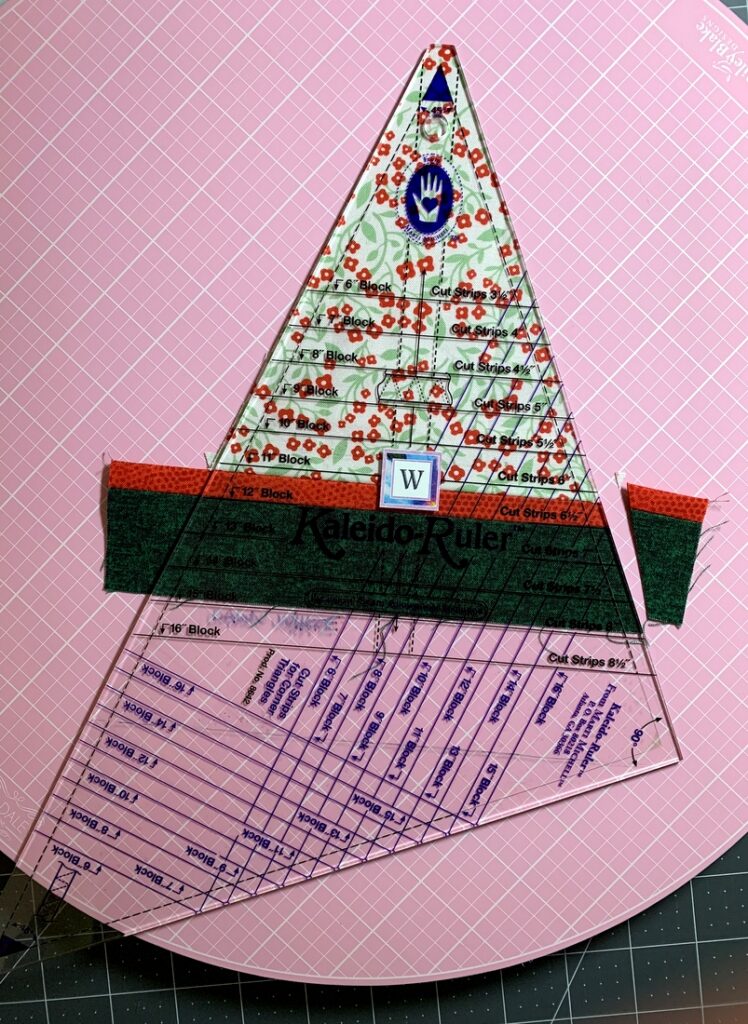
In this example I’m starting with a 45˚ triangle cut from a 6½” strip of fabric using the Marti Michell Kaleido-Ruler . . .

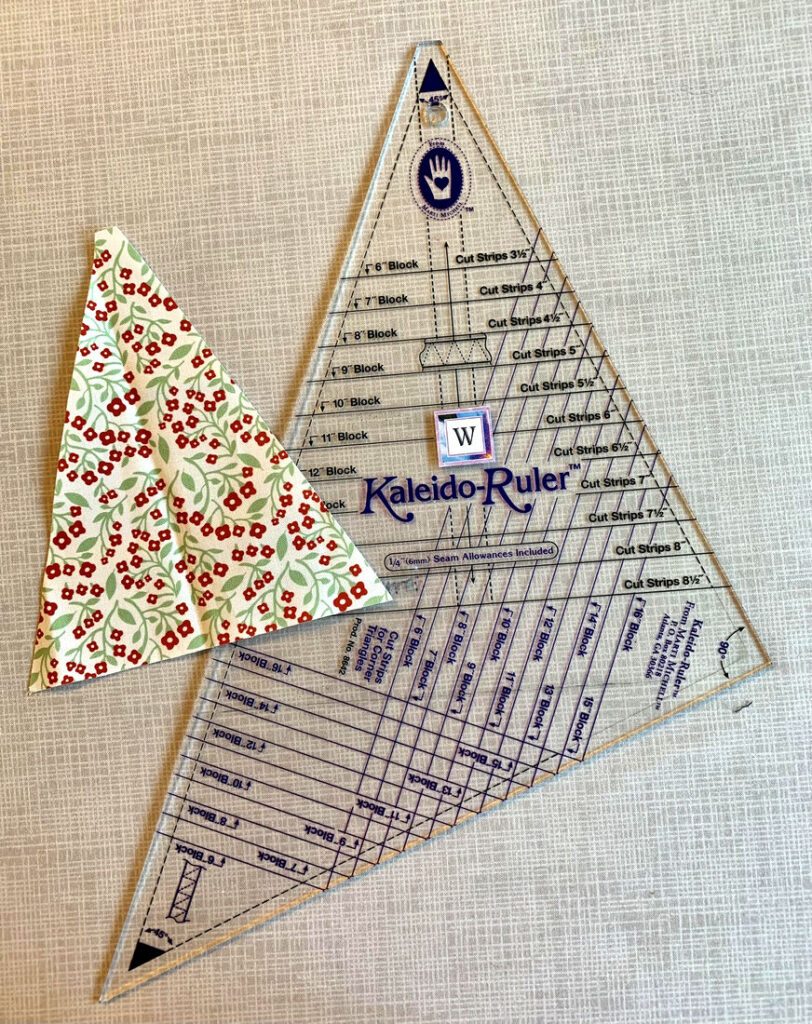
. . . but this technique will work with other sizes of triangles and strips.

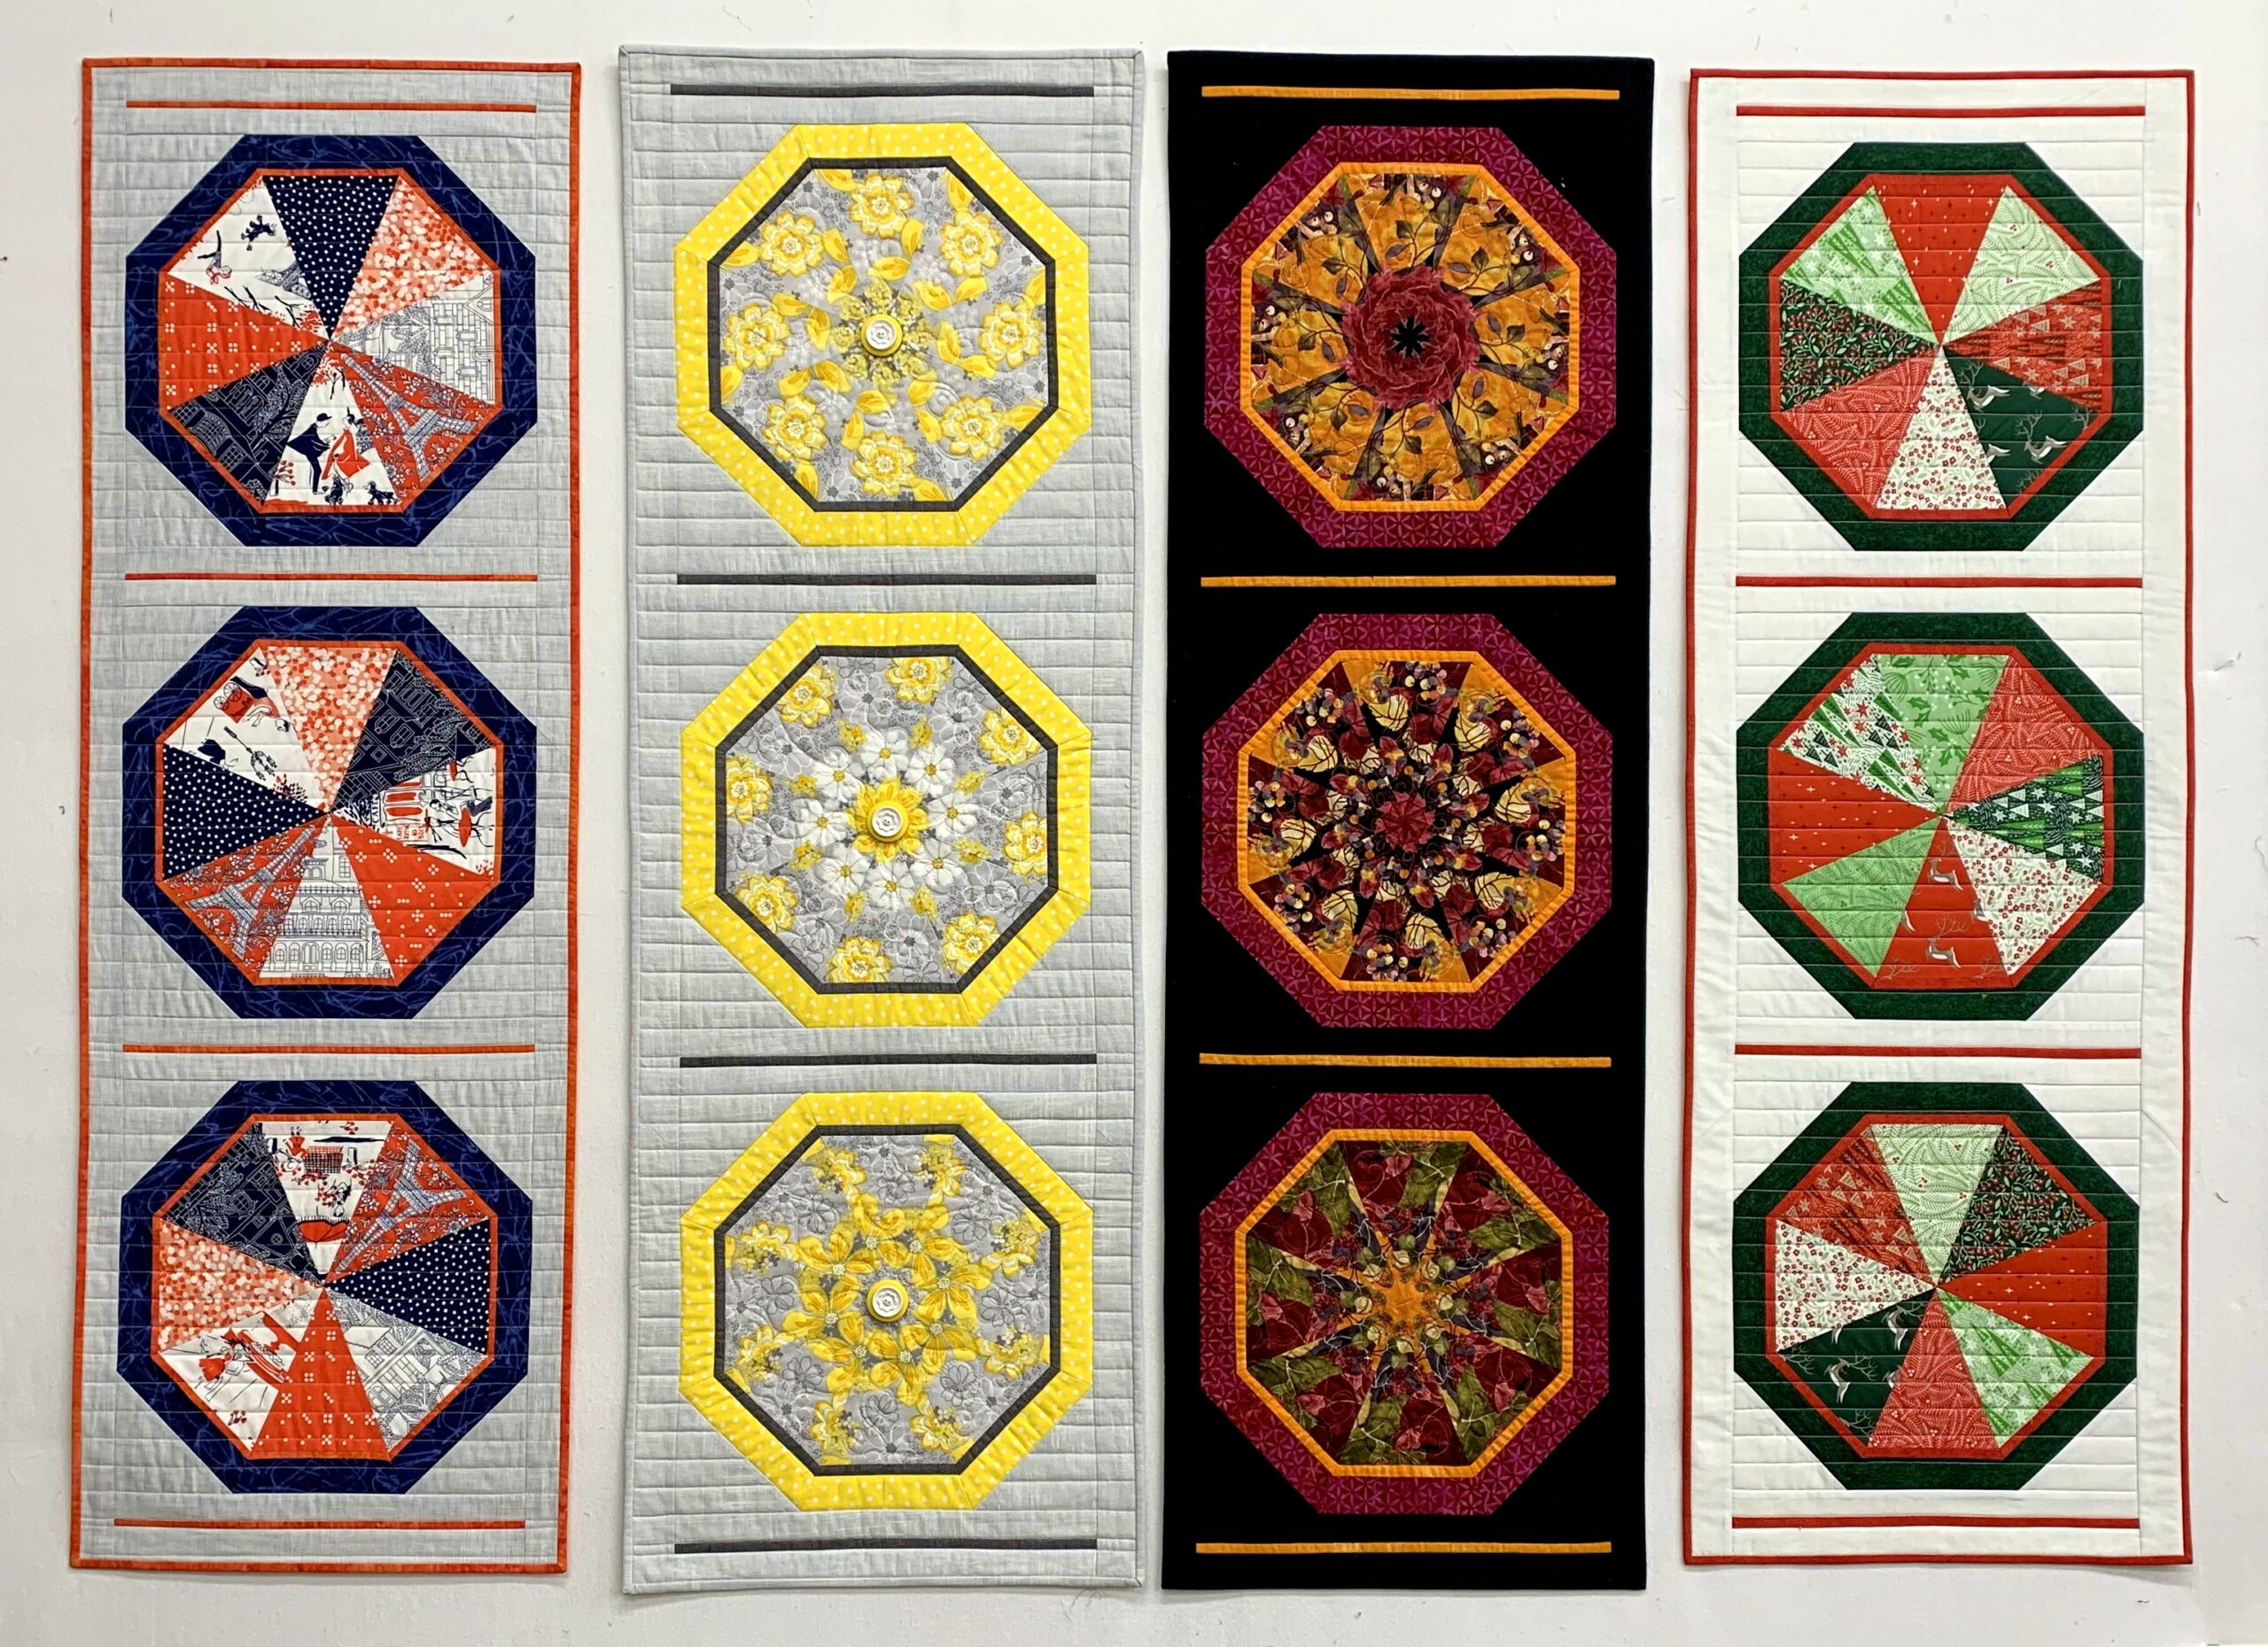
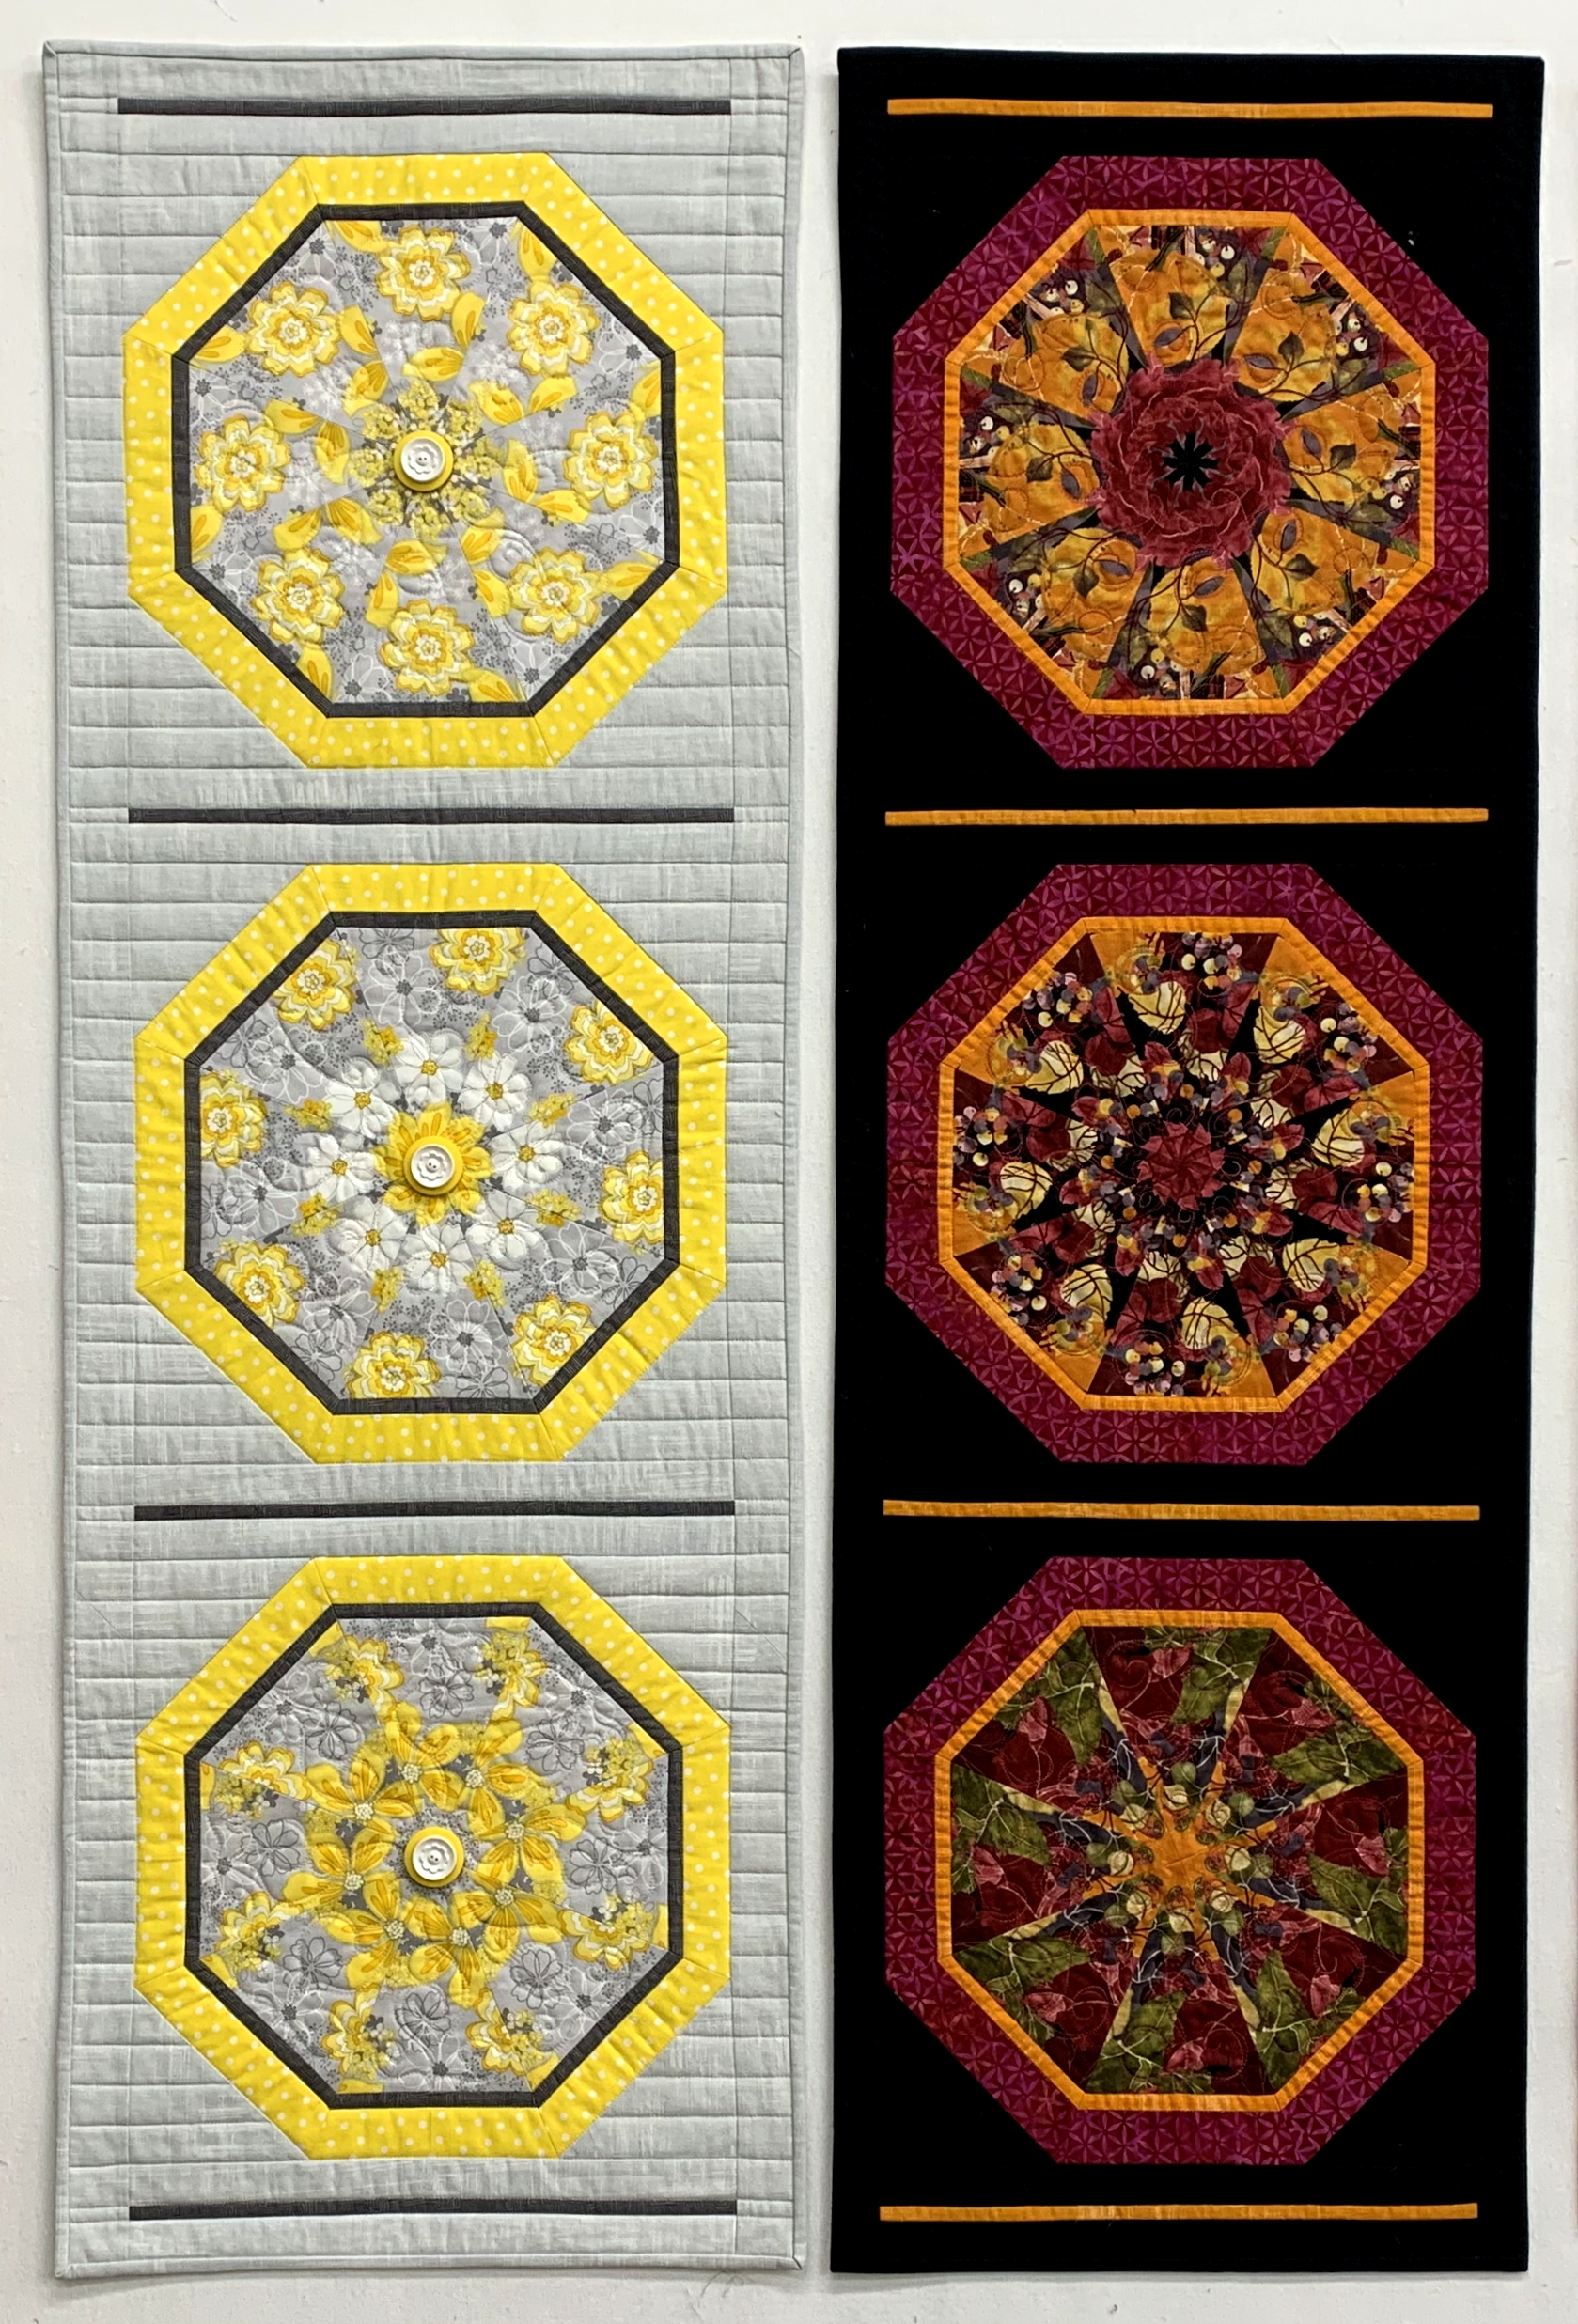
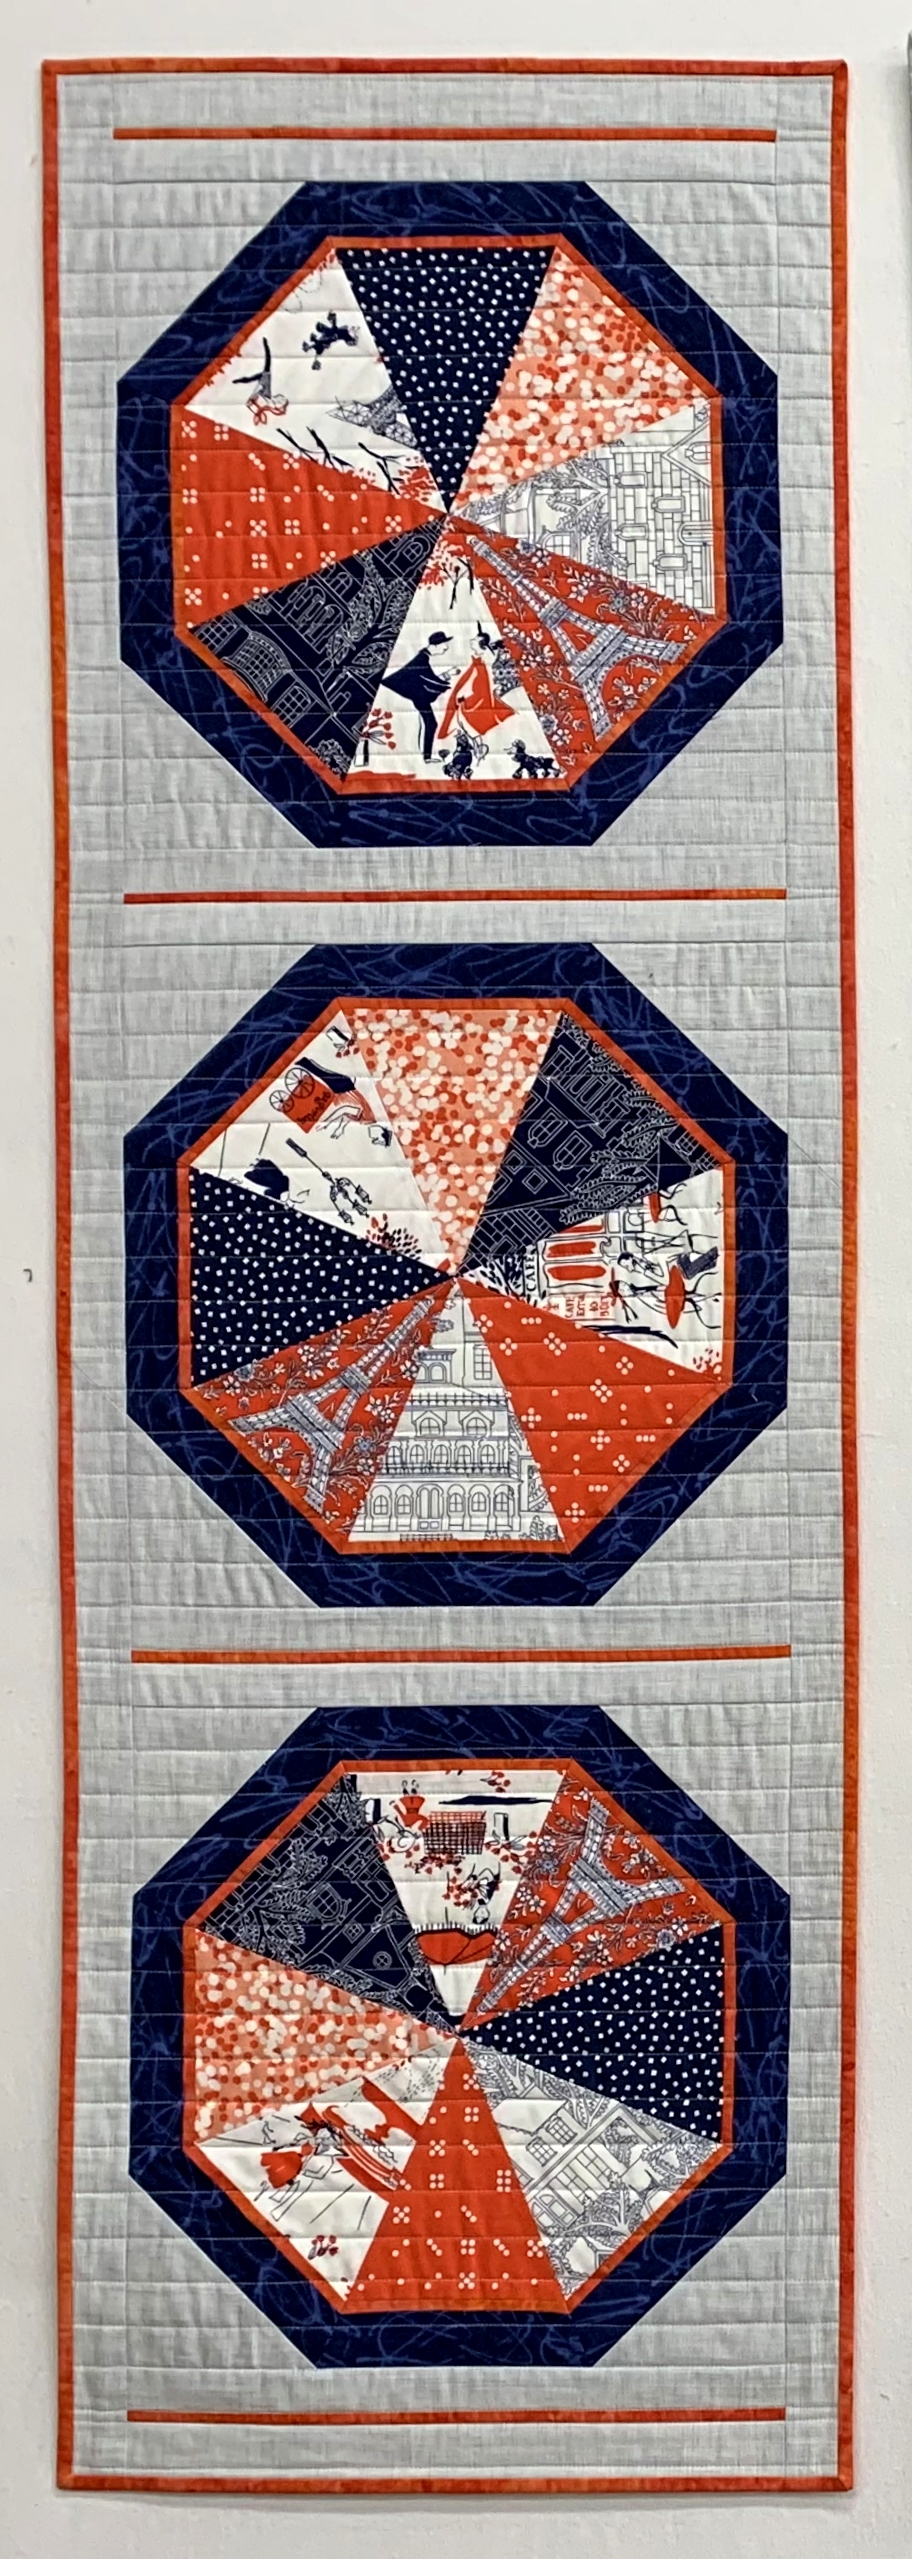
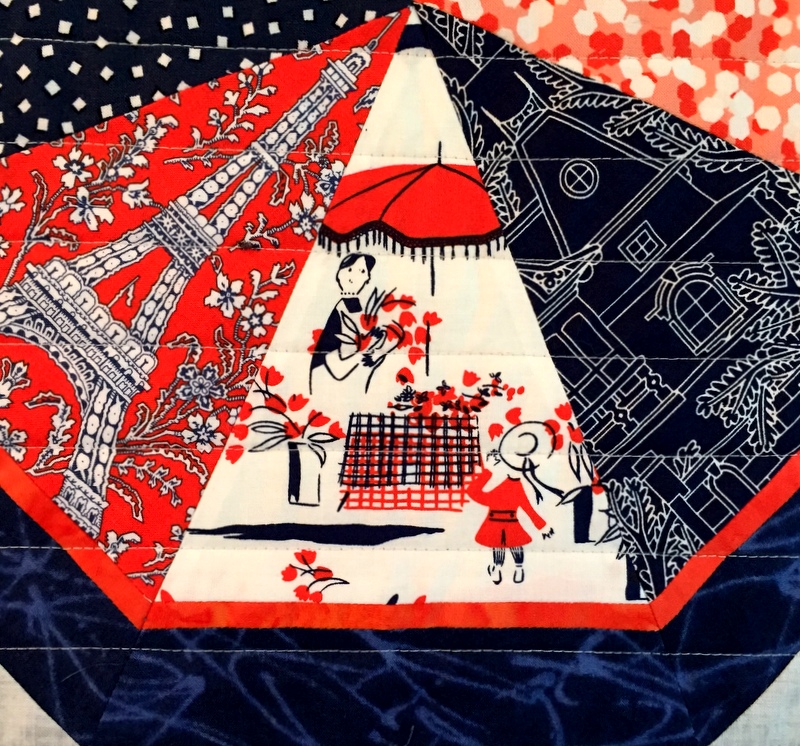
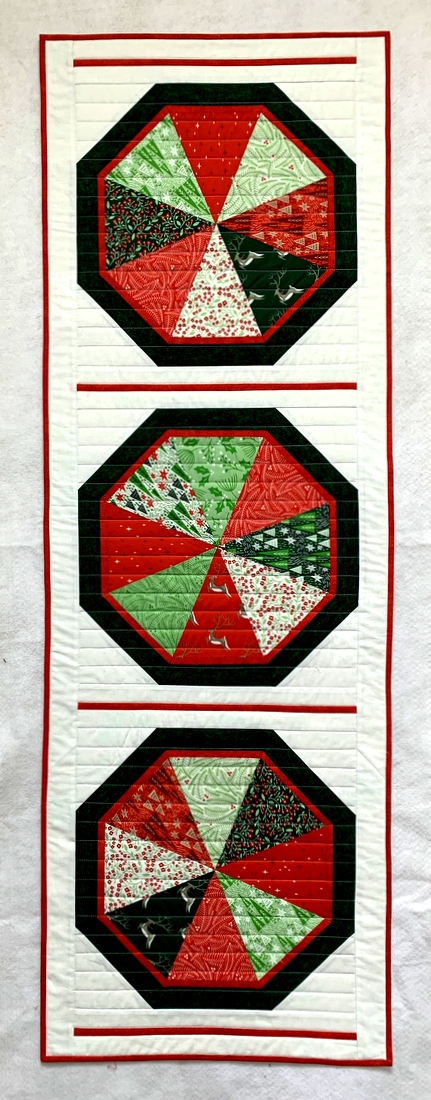
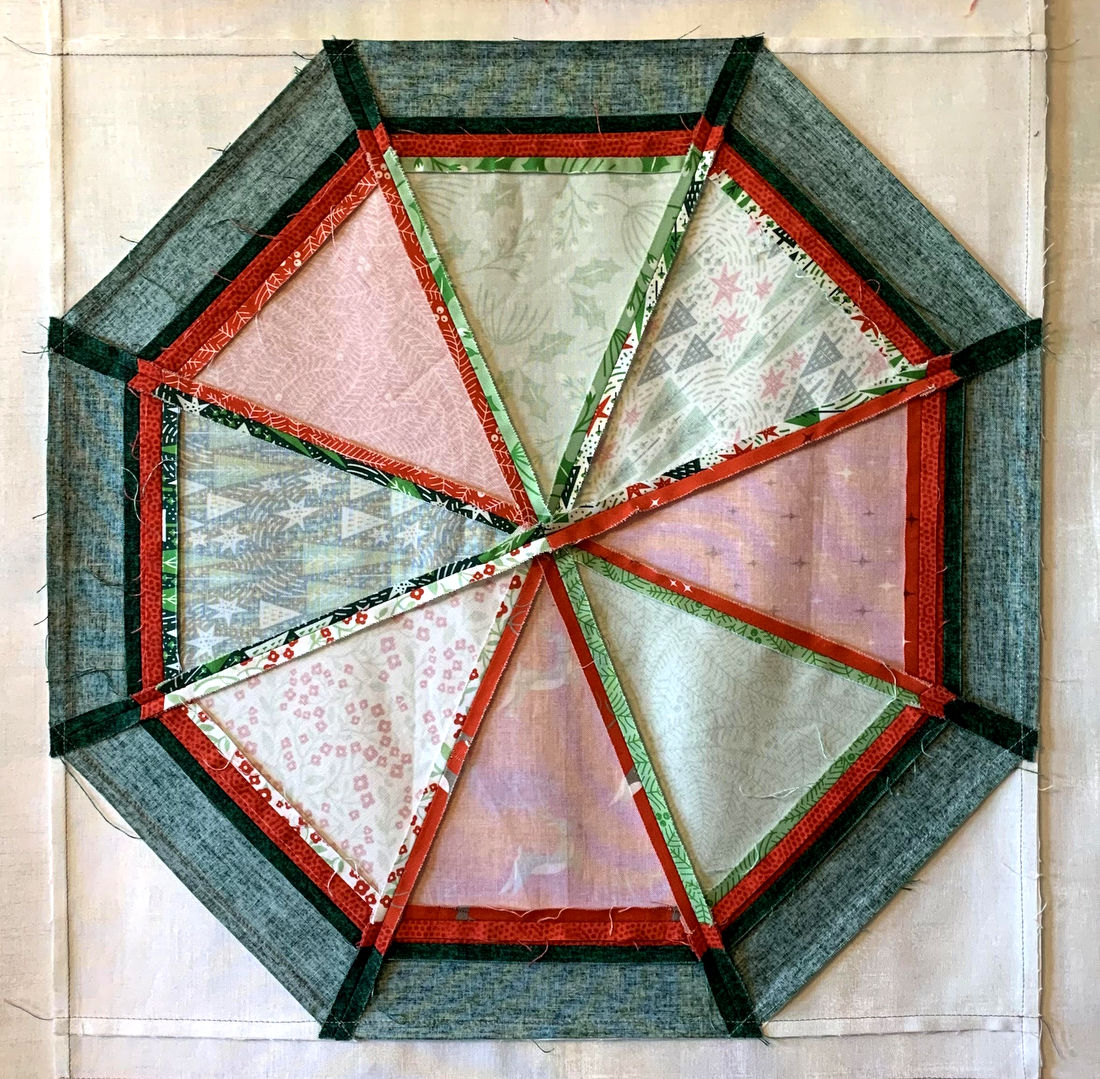
Eight of these triangles (from a 6½” strip) sewn together result in a 12″ kaleidoscope block. With the addition of the narrow and wide accent strips, the block will finish at 15″ square:


The narrow accent strips finish at ⅜”. This calls for ⅞”-wide strips, to allow for ¼” seams on either side but I find it difficult dealing with strips less than an inch wide, especially when it comes to pressing. For this reason I cut my strips a quarter of an inch wider — 1⅛” — and trim them to size after sewing them on to the wider accent strip.

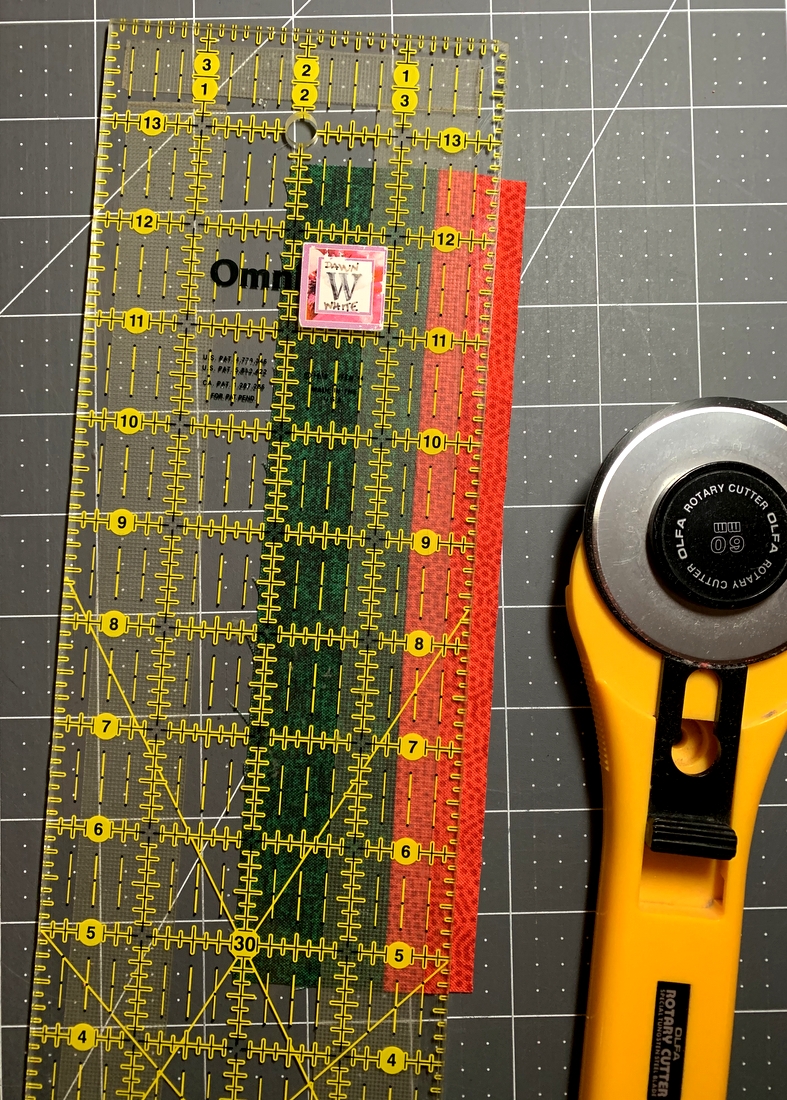
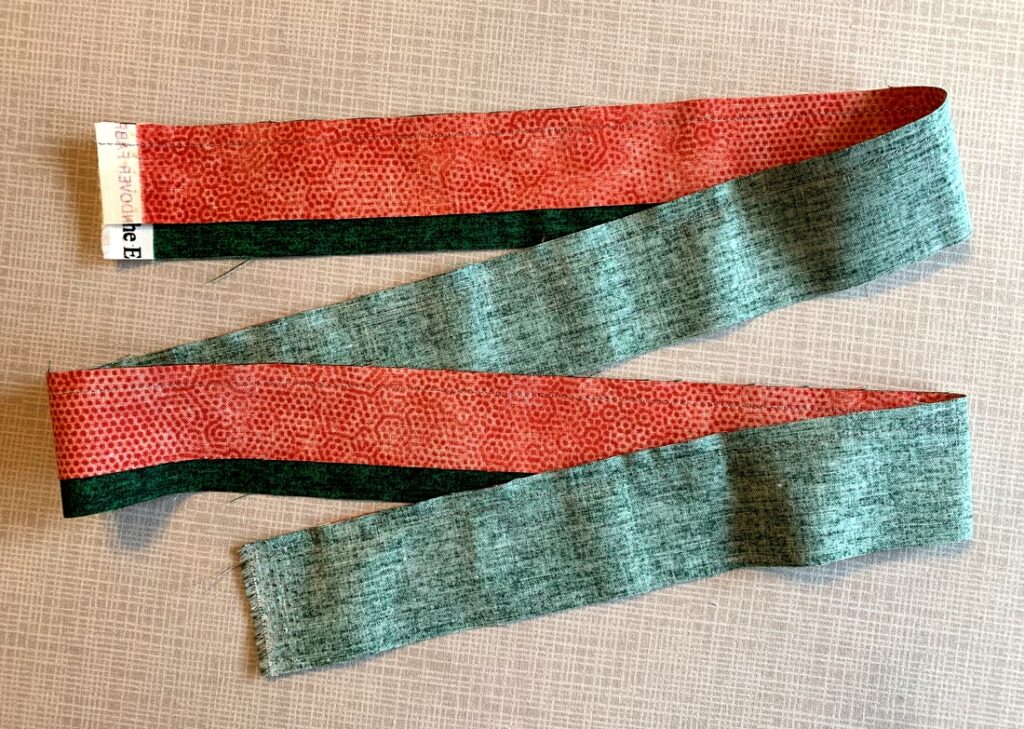
So:  my narrow accent strips are cut 1⅛” x WOF (width of fabric). The wide accent strips are cut 1¾” x WOF. The narrow and wide accent strips are sewn together with a scant ¼” seam:

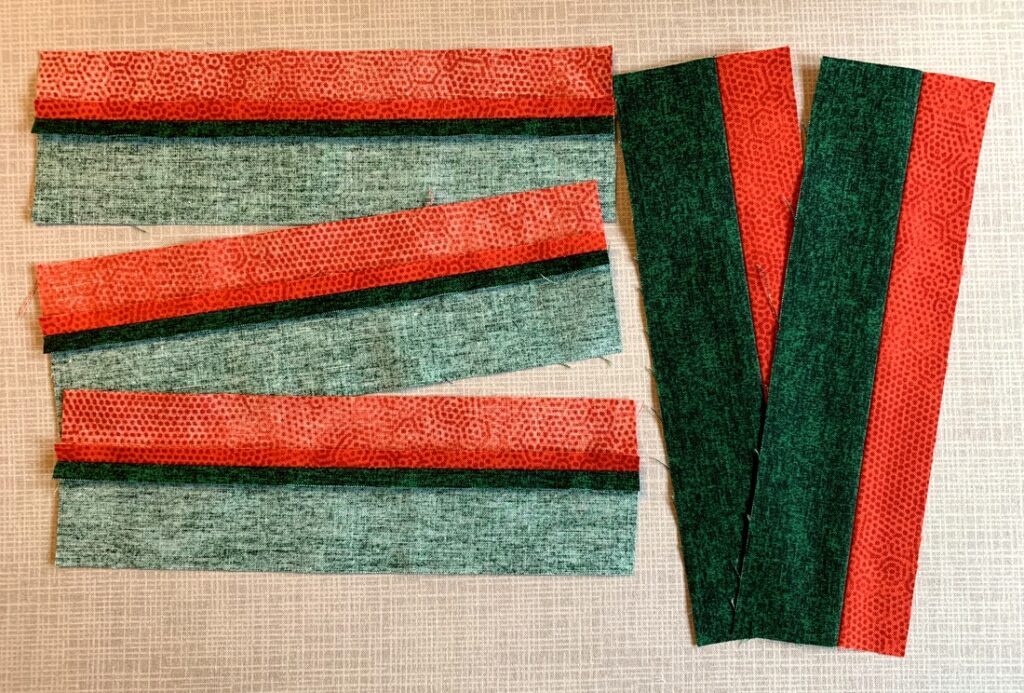
Before pressing the seam open, the strip is subcut into five 8″ lengths:

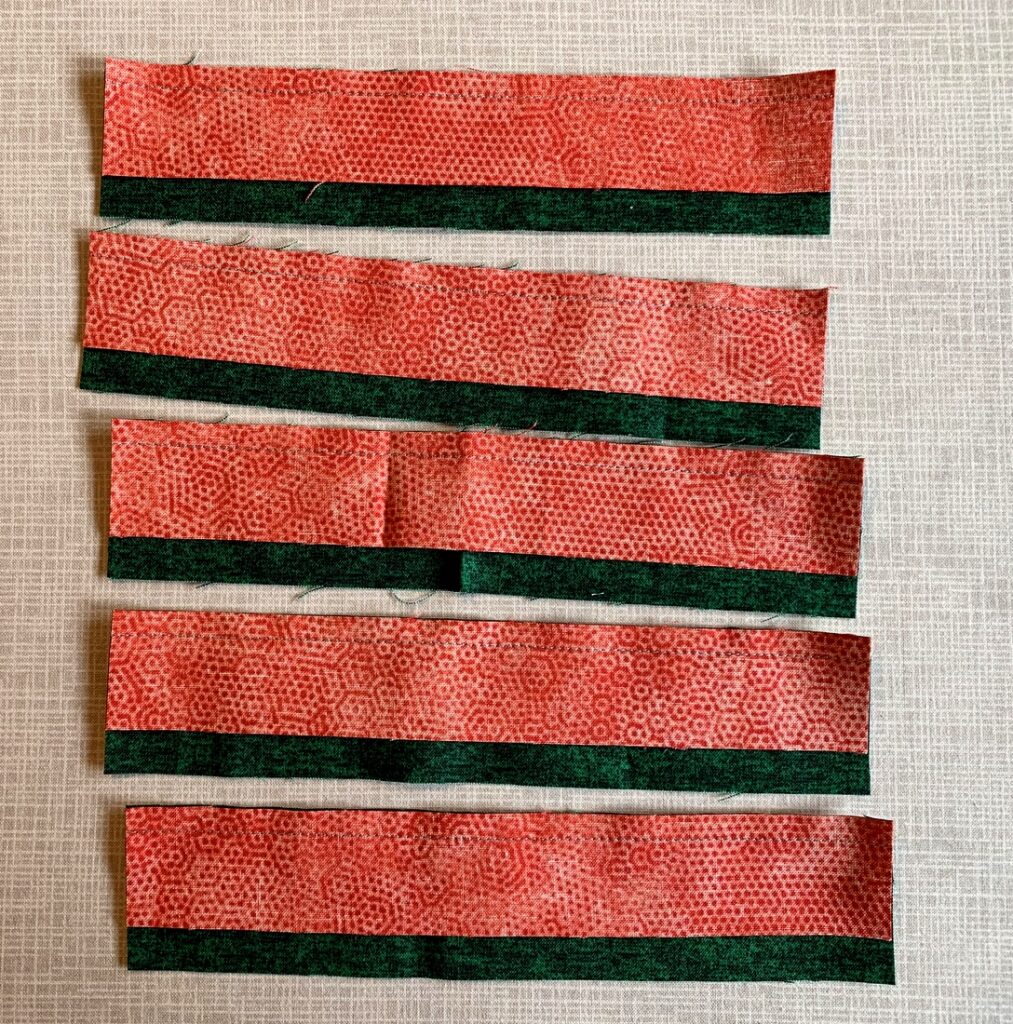
(I need eight of these strips for one kaleido block so a second strip set is needed.)

Why do I subcut the strip set before pressing? Because it’s extremely difficult to press a seam on a 45″ length of fabric without creating a curve. By cutting my long strip into shorter pieces, I can carefully press the seam on each piece open using just the tip of my iron without much distortion:


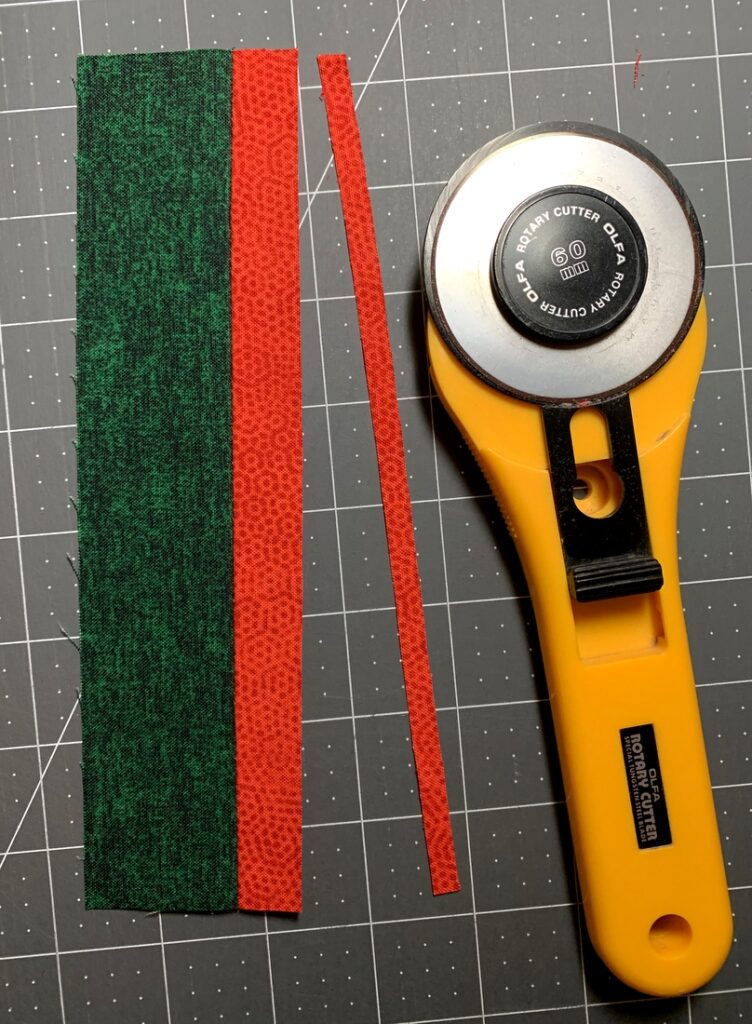
The next step is to trim a quarter inch off the narrow strip. I do this by aligning the ⅝” line on my ruler with the seamline . . .

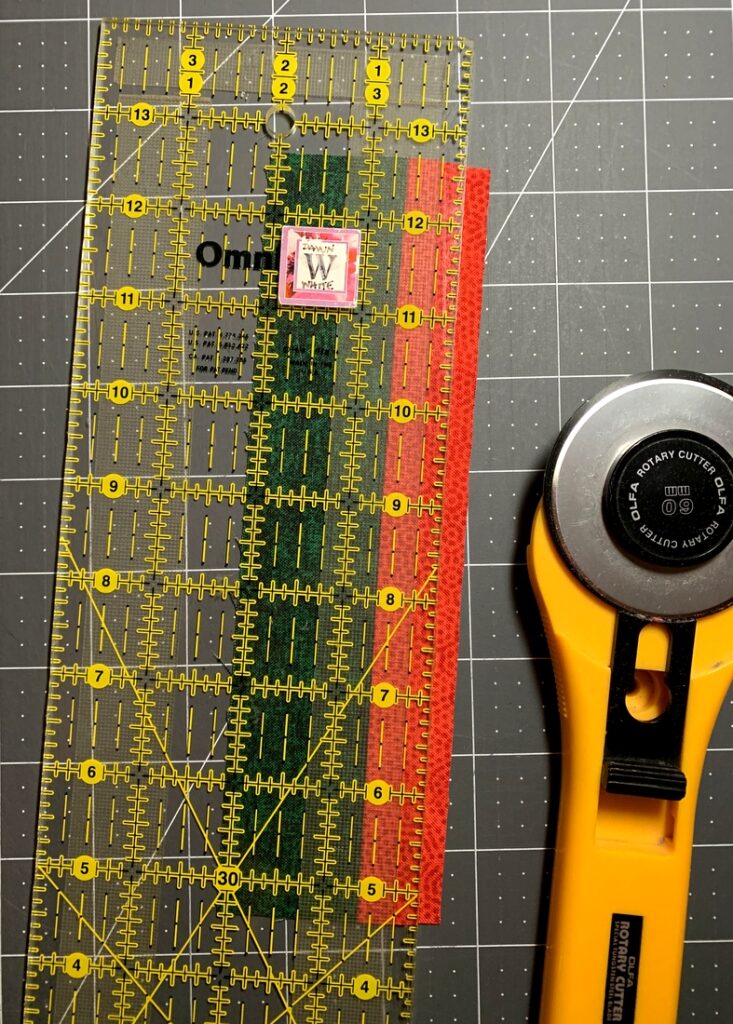
. . . and trimming the excess quarter inch:

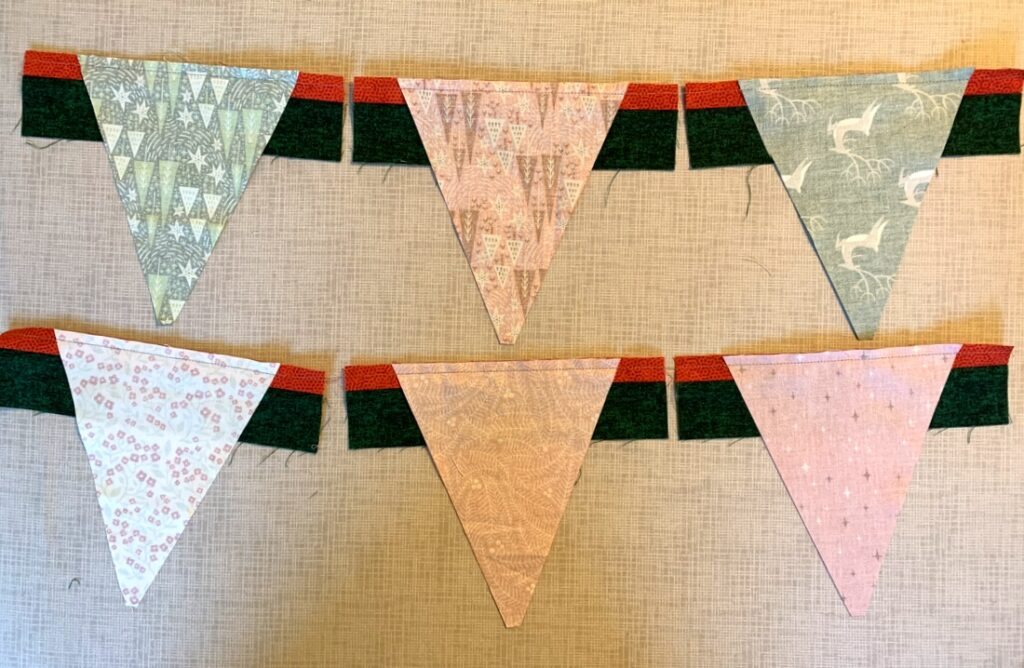
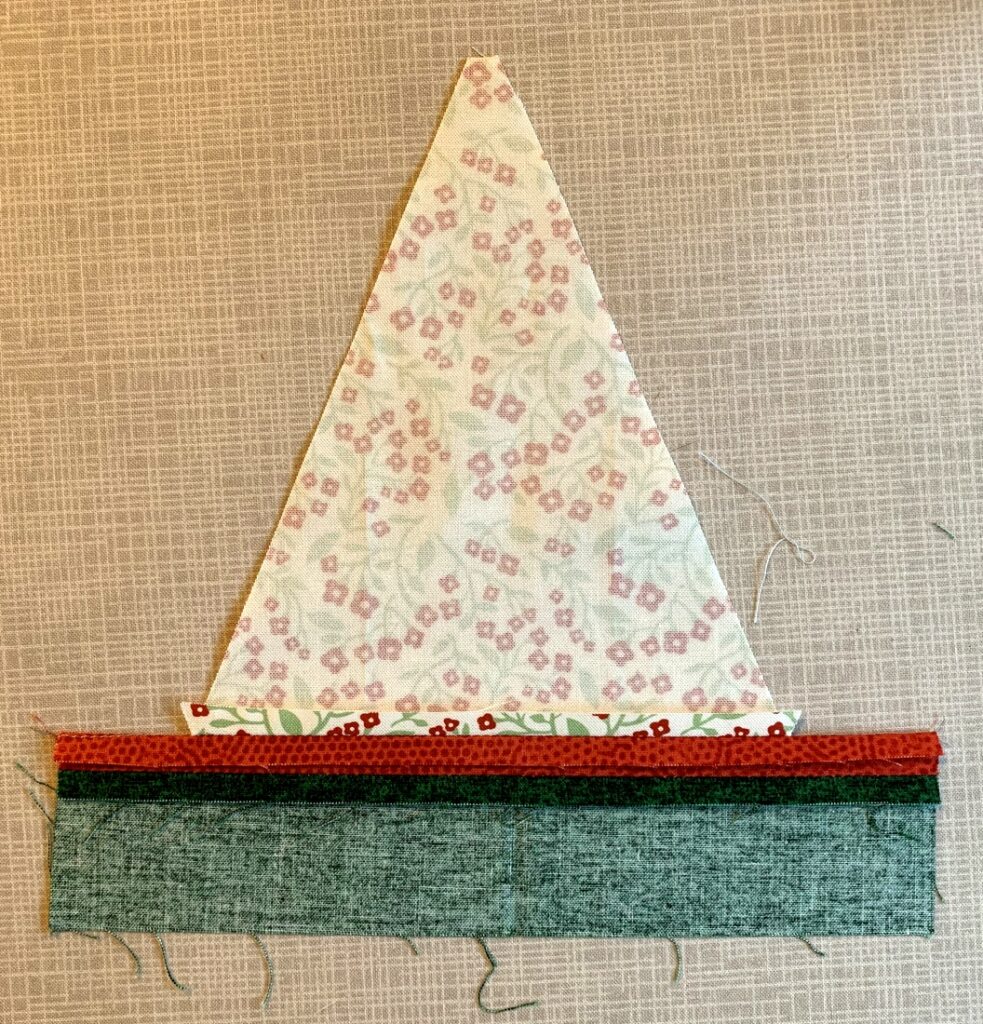
Now I can chain piece the triangles to the trim pieces, centering each triangle on its trim strip:

I press this seam open as well, taking care to use the point of the iron (no steam) and not letting the iron touch the bias edges of the triangle:

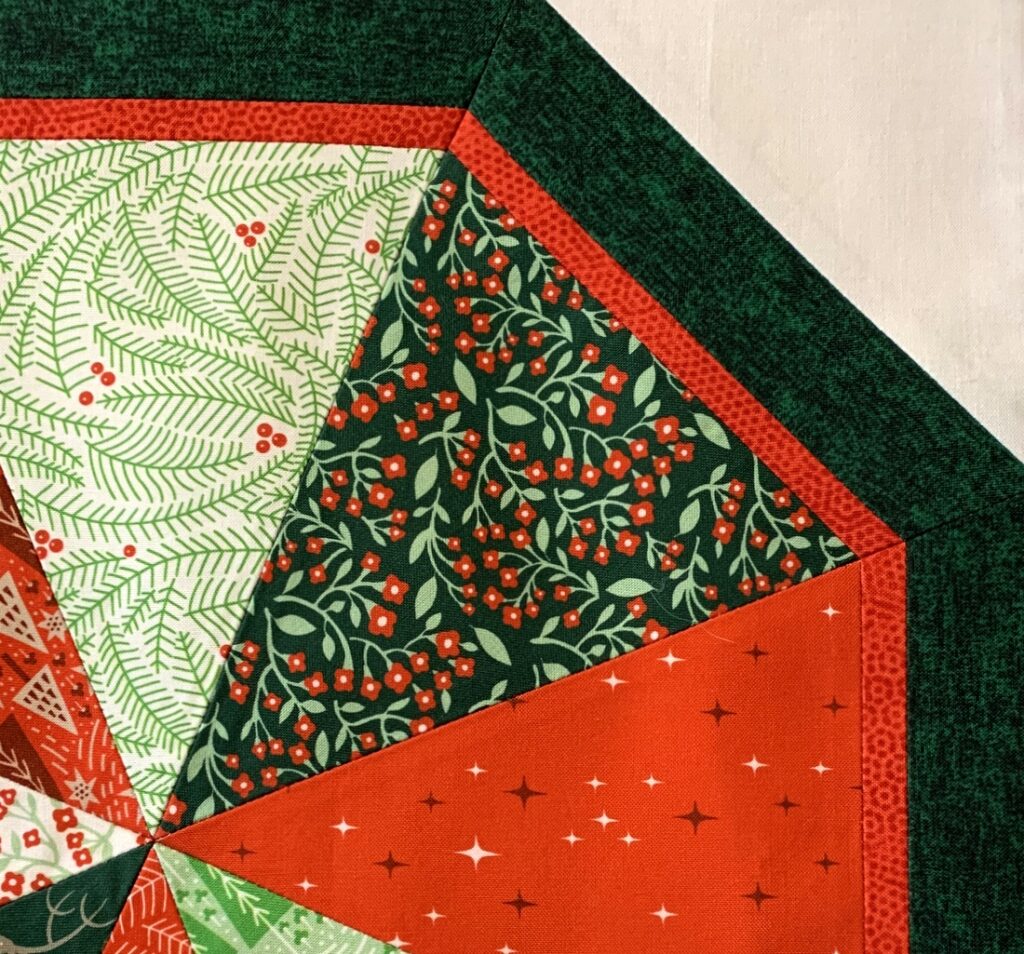
Note that with both seams pressed open, the seam allowances on the narrow trim overlap each other slightly.

Now I can lay the Kaleido-Ruler over the triangle and trim the right side:

I’m cutting this one on a rotating mat, which means I can turn it around and trim the other side just by moving the mat. If you don’t have a rotating mat, it’s very easy to butt up a second ruler right next to the Kaleido-Ruler . . .

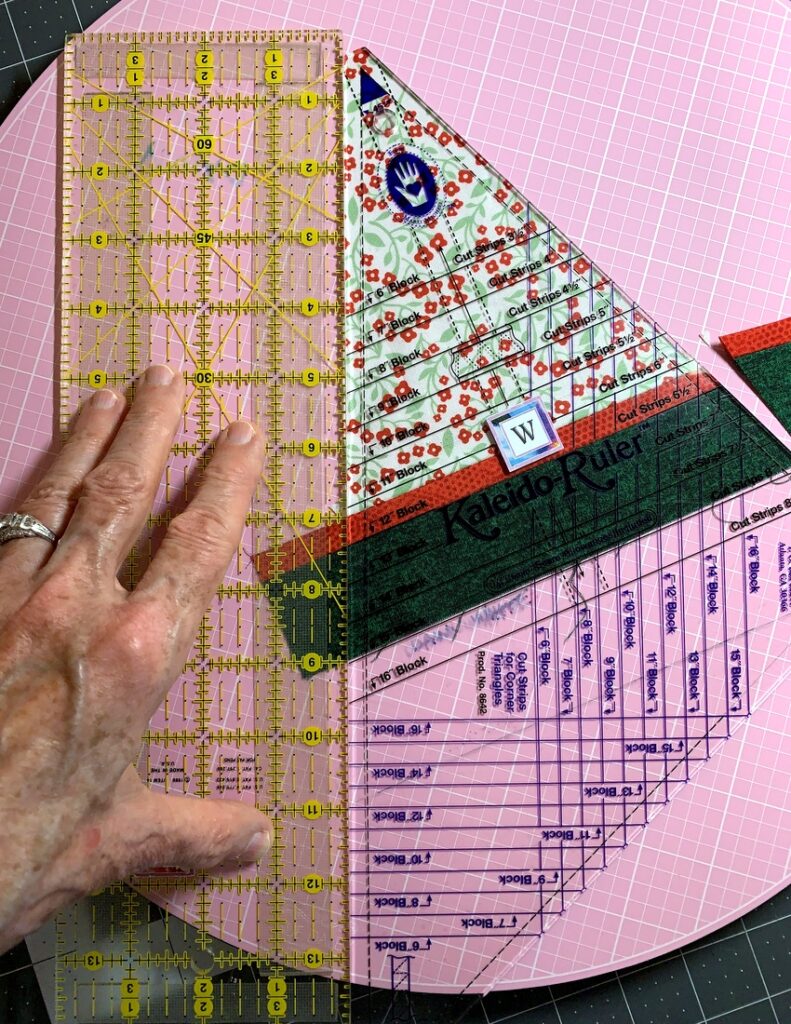
. . . slide the Kaleido-Ruler out of the way, and make the second cut.

Here’s the trimmed triangle:


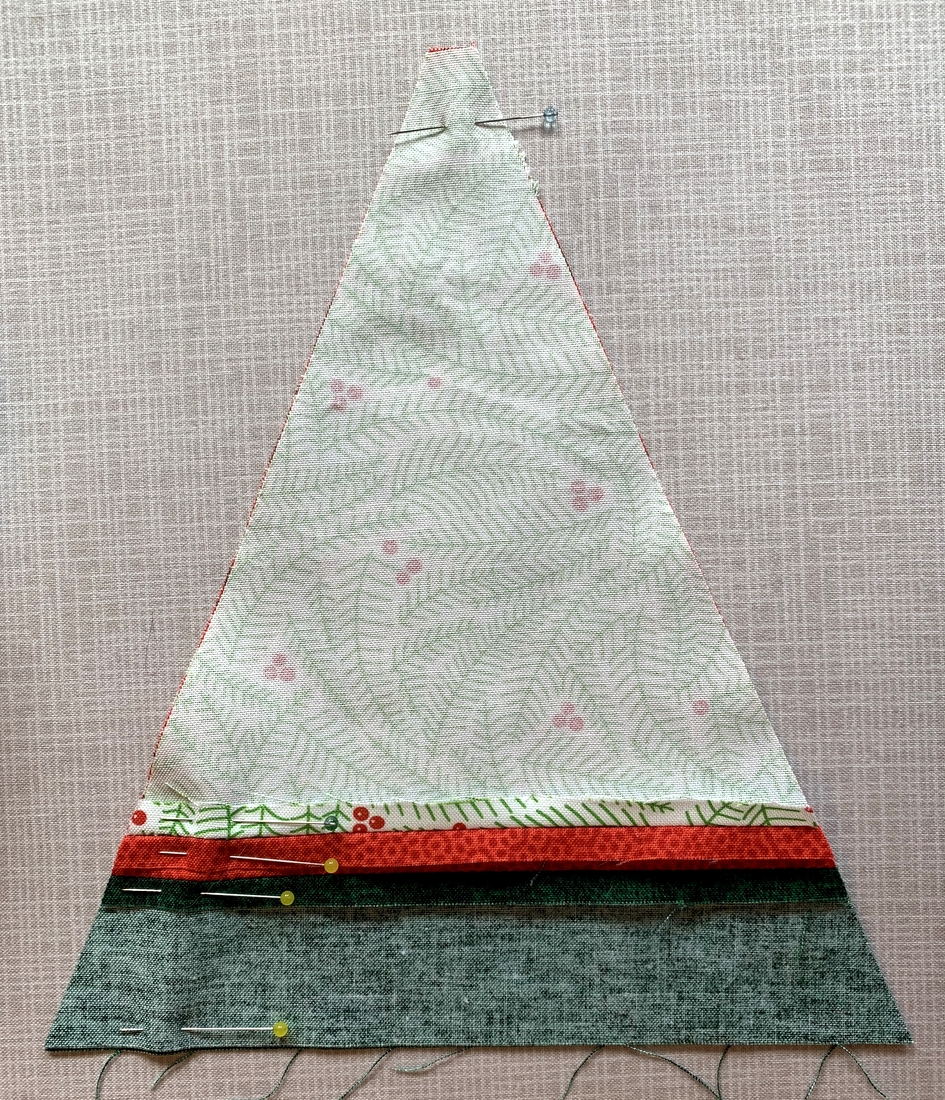
Now to sew it to another triangle! Here’s how I pin the two triangles:

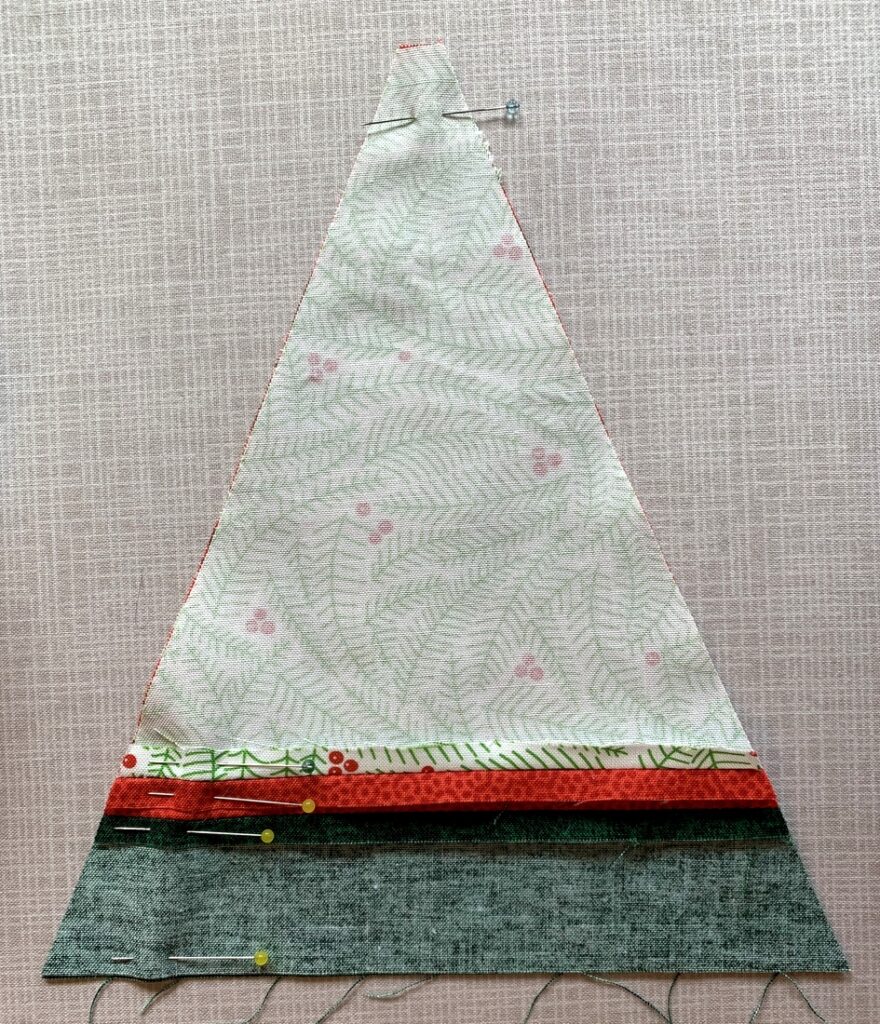
After lining up the seams on the two triangles, I place pins to hold the seams in place. Note that the points of my pins are toward the outside edge. When I flip the triangles over and pull one side back from the edge, I can clearly see that the trim seams on my triangles match exactly:


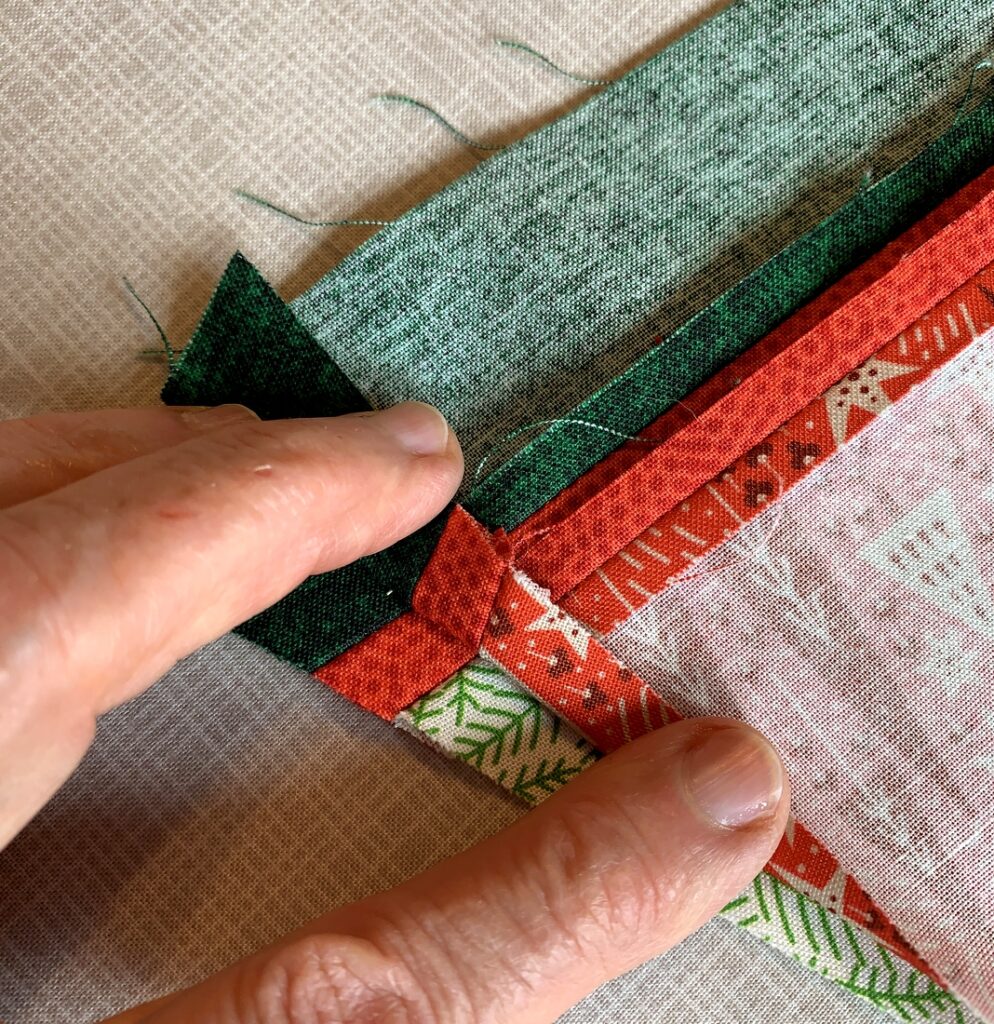
I can repin if necessary (and sometimes must) to make sure the seams are properly aligned.

When I’m ready to sew the seam — starting from the wide end and going toward the point — I can pull each pin back slightly so that the point is not in the seam allowance, leaving the pins in place until the seam is completely sewn.

The seams are pressed open — again without steam and again using just the tip of the iron to nudge the seams open:


Once the block is complete and I’m satisfied my center points match, that’s when I move the iron setting to steam! I sometimes use a bit of starch or starch alternative (like Mary Ellen’s Best Press) to make sure my finished block lies nice and flat.

I hope you found this post helpful! I’m going to add it to my Tutorials page as a companion piece for my Season to Taste pattern.

Thanks for stopping by — and happy first day of summer!
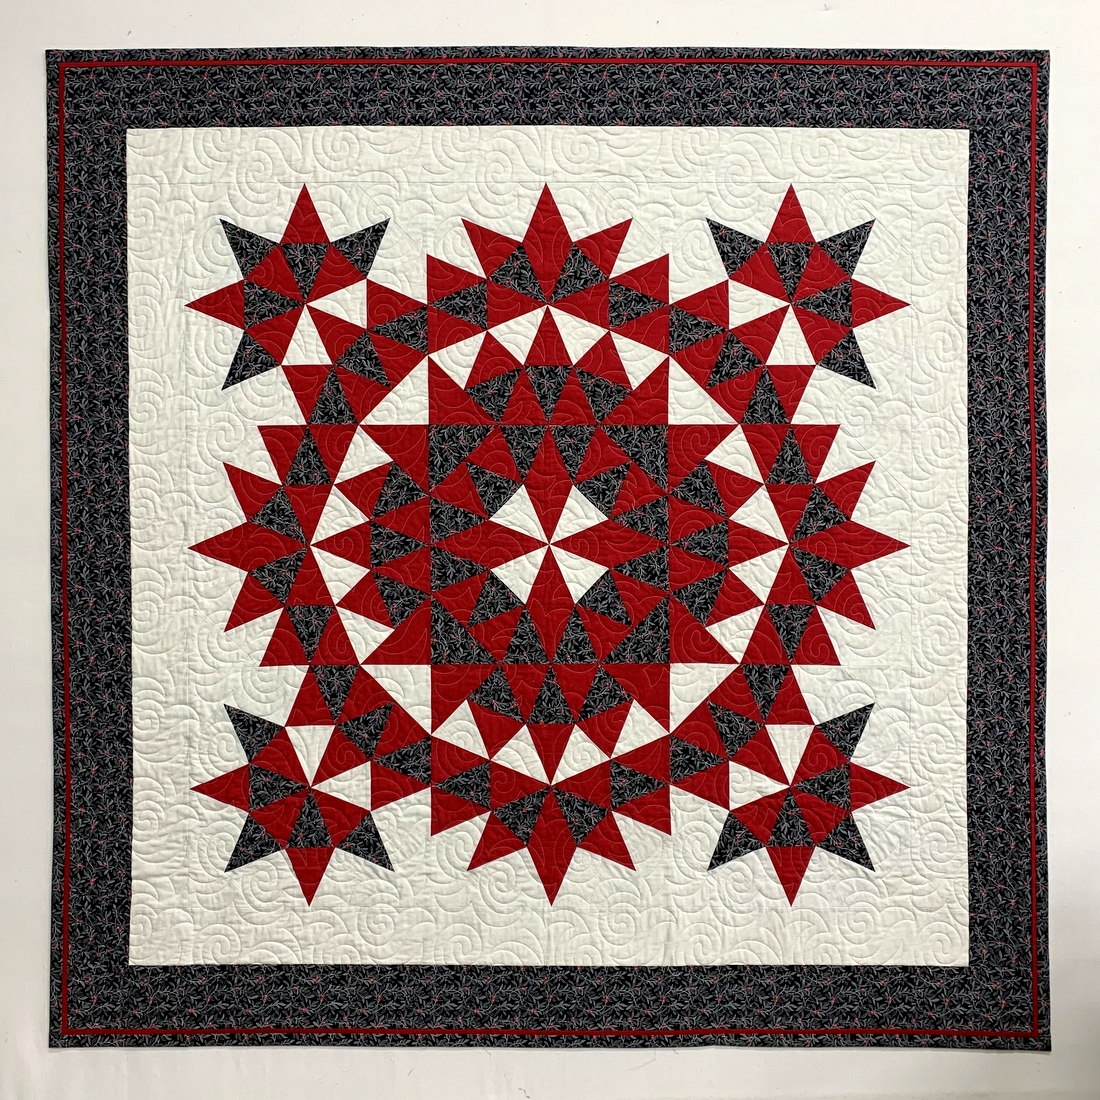
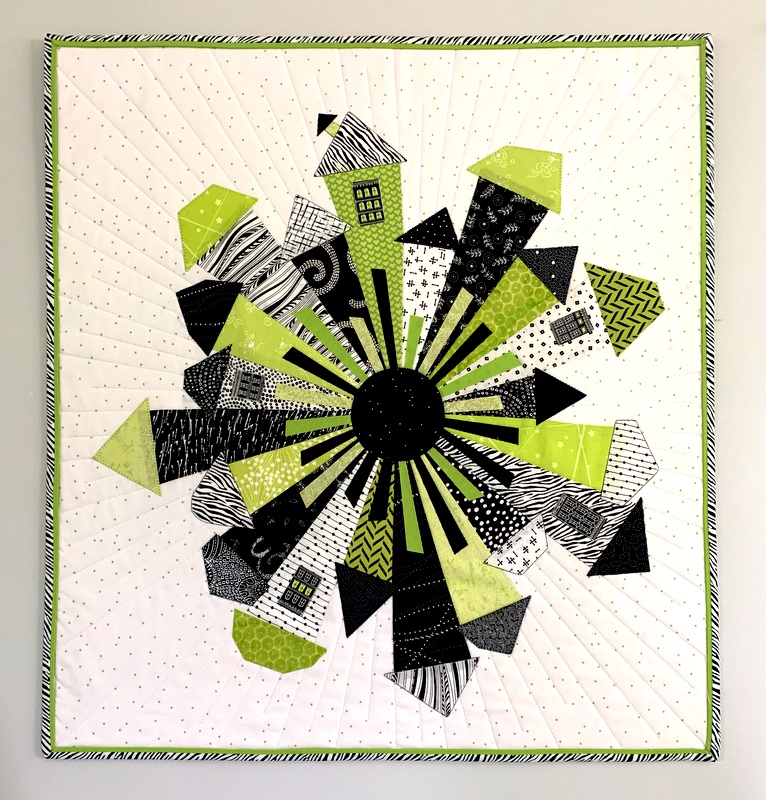
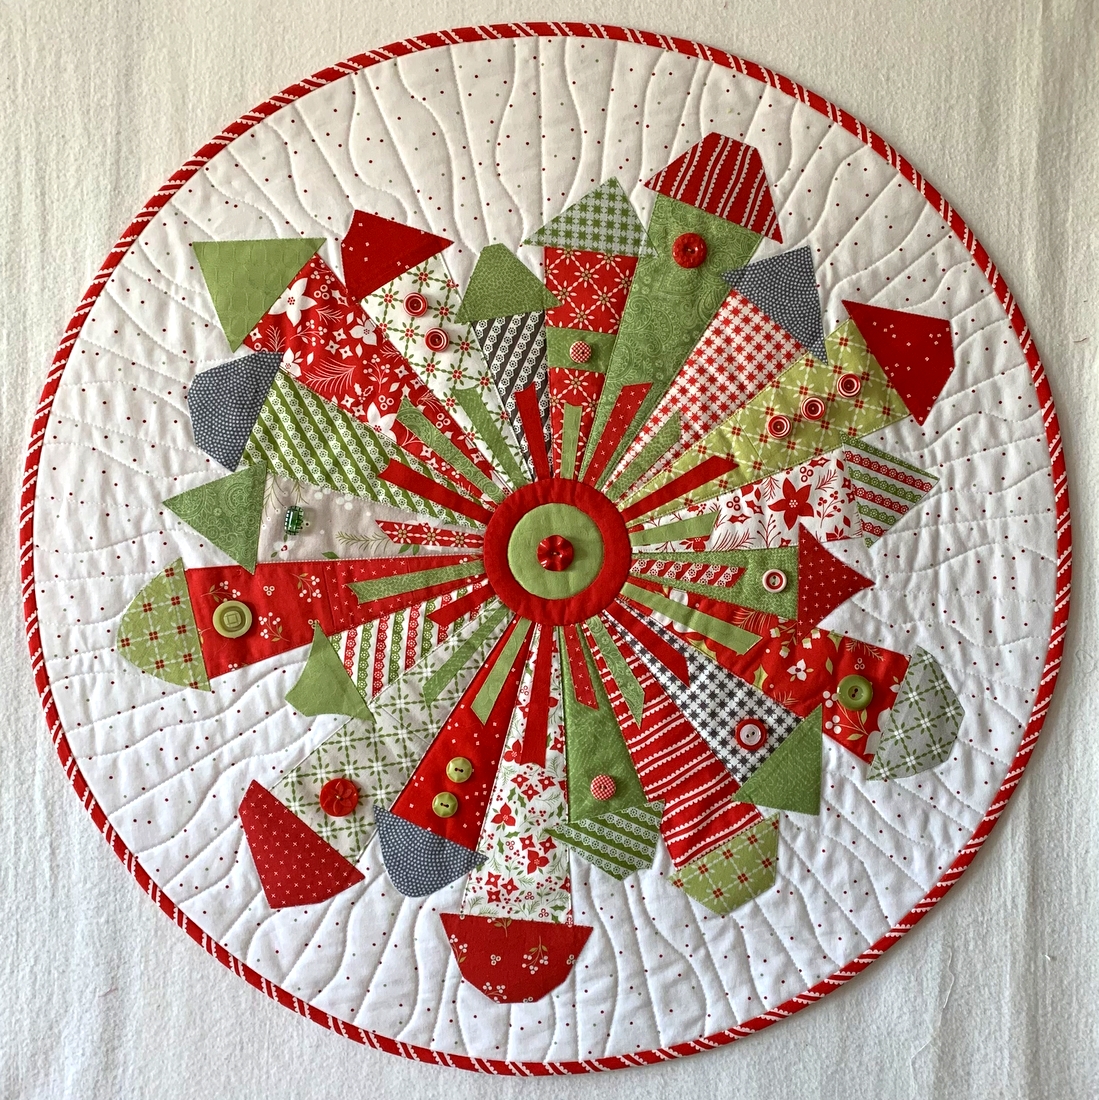


Posted in home dec, kaleidoscope quilts, table runner, tutorial, update | 5 Comments

Winterwood

Here’s the completed quilt top of my winter version of Season to Taste:

It measures 18½” x 55½”.

Season to Taste is a kaleidoscope quilt pattern I created in 2014 with the idea of making one wall hanging or table runner representing each of the four seasons. You’ve seen my spring, summer, and fall versions before on the pages of this blog. I’ll post a photo of all four when I get this last one quilted.

My winter version will be called Winterwood in a nod to one of my favorite songs, written by Don McLean. You may be more familiar with his blockbuster hit “American Pie” from the album of the same name. “Winterwood” is from the same album which was released in 1971. Oh my! That means it’s 50 years old this year.

In my next post I’ll explain my method of getting the narrow accent strips (they finish at ⅜”) on my triangles to line up just so:


Posted in home dec, kaleidoscope quilts, table runner, update, wall hanging | 3 Comments

Mixed Veggies — and a Migration

Hello there! I’ve been silent for a few days because my website/blog is undergoing a migration to a new server. I committed to this undertaking last week only to find out — after the fact — that it could take up to 18 days for the migration to be complete. Yikes!

Today I got the green light to make a post to let you all know what’s going on with First Light Designs. I’m taking advantage of that to include a quick update on one of my recent projects:

Yes, it’s another set of oven mitts following my tutorial posted last month. Aren’t these mitts cute? I made this pair for my friend Debby. She picked the sweet pea fabric for the outside of the mitts and I found the perfect fabric in my stash for the lining fabric that continues the veggie theme:

The mitt on the left above is ready for the binding on the cuff edge to be tacked down, at which point the mitt can be turned right side out. I love the surprise of seeing the colorful veggie fabric when you peek inside a mitt:


An apparent drawback of the current website migration process is that no one can leave comments on my blog for the time being. That’s a big disappointment! Bloggers love to get comments and I have really missed that connection with my regular readers. Let’s hope the migration to the new server is up and running in short order so I can be back in the blogging business (and you can be back in the comment business if you so choose)!


Posted in home dec, oven mitts, update | 2 Comments

Oven Mitt Tutorial from First Light Designs: Part 2 of 2

Welcome to Part 2 of my Oven Mitt Tutorial, which covers the sewing of the mitt and contrasting band around the cuff edge as well as the final step of tacking the band down before turning the mitt right side out.

Part 1 of my tutorial covers fabric requirements, instructions for downloading and printing the pattern, assembling the layers, and quilting the resulting “quilt sandwich.” Click here to see Part 1.

Click here to download the free pattern:
Oven Mitt Pattern, page 1 of 2
Oven Mitt Pattern, page 2 of 2

Click here to see the Prequel to the Tutorial, in which I explain why I decided to write a tutorial and offer some tips on making sure my pattern fits your hand.

In Part 1 you create a 19″ x 14″quilt sandwich” composed of four layers: outer fabric, cotton batting, insulated cotton batting (Insul-bright), and lining fabric:

After quilting the four layers you trim them to 18″ x 13″:

Part 2 starts right now!

Fold the quilt sandwich in half, right sides together, with the fold on the left. Lay the freezer paper pattern on the fabric, shiny side down, making sure you have at least a half-inch clearance all around. Use a hot dry iron to press the pattern in place:


Using a marking pen or pencil, make a small dot on the fabric next to the pattern about halfway down the finger side of the pattern (see arrow in photo below). Draw a line along the edge of the pattern from the dot to the bottom edge. Draw a second line ¼” to the right starting ¼” above the arrow:

That second line is the cutting line.

Use Wonder Clips around the raw edges of the quilt sandwich. You don’t need a lot of clips – just enough to hold the layers together:


Now you’re ready to sew.

Before you start stitching: make sure the thread in your machine matches the dominant background color of the outer fabric. Once you turn the mitt right side out, you’ll be able to see thread stitches along the seamline. (This is also true of store-bought mitts, by the way.) It’s because you are stitching through eight layers; that’s a big load for two interlocking threads to carry, especially when four of the eight layers have some bulk to them. (There may be times when your bobbin thread is a different color than the top thread. It’s the bobbin thread you are likely to see once the mitt is turned.)

Using an open-toed walking foot, which feeds the eight layers together evenly, sew from the bottom edge of the thumb side of the mitt (see photo below) with the needle right next to the freezer paper, stopping when you get to the dot on the opposite side. Backstitch at the beginning and end of the stitching line.

The secret to not getting any sharp points as you stitch around the curves of the thumb and finger portions is to go slowly, stopping when necessary to lift the presser foot and rotate the mitt ever so slightly to keep the line of the curve going smoothly. Any points that get stitched in will be visible when the mitt is turned right side out.

Here’s a close-up of the stitching in process:

You can see why an open-toed foot is important: you need to see the needle going in and out of the fabric right next to the freezer paper.

Using very sharp sewing scissors, cut along the bottom edge (only) as shown:


Gently peel off the freezer paper pattern:

(You can use the pattern over and over again.)

Return to the sewing machine and stitch around the mitt again on the same stitching line, backstitching at the beginning and end:

This step is important to strengthen the seam and relieve some of the stress on the stitching line when the mitt is turned. The stress is greatest on the notch between the thumb and finger sections.

Be as exact as you can stitching on top of the first stitching line. In this close-up of the notch you can see that I took two stitches in a slightly V shape:

You can also pivot at the end of the thumb curve, take two very small stitches straight across, pivot again and start up the finger curve. I’ve tried both ways and it doesn’t seem to make a difference when the mitt is turned.

You can see I used black thread here. That’s because the background color on the right side of this mitt is black. When the mitt is done, you will not be able to see black thread on the inside of the mitt at all.

Now it’s time to trim the seam allowance.

Starting on the side with the partial seam where you marked the outside line (¼” away from the stitching line), cut along that outside line until you are a quarter inch beyond the dot you marked:


Taper to a full 1/8” seam allowance and continue cutting around the finger portion, stopping when you get close to the notch between the thumb and finger portion:

If a 1/8” seam allowance makes you nervous, shoot for 3/16”. It is not necessary to cut a ¼” seam allowance; in fact, it will make it harder to turn the mitt inside out and won’t give your mitt as smooth a look around the curves.

Flip the mitt over and start cutting from the other lower side, working your way around the thumb curve:


When you get to the notch, carefully trim to within 1/8” of the stitching line:


Because you left a partial seam, it’s going to be quite easy to apply the binding:

Check first to see if you need to baste the layers together at the bottom edge. I find that when I quilt my sandwich with overlapping wavy lines, I often need to take this extra step. Here you can see I basted a quarter-inch from the edge:


From the 2″ x WOF binding strip, cut an 18″ strip. (Save the remainder of the strip for a second mitt.) With the mitt opened up, align the strip along the lower edge, right sides together. Extend the top of the strip one inch beyond the side edge of the mitt:


Starting at the top of the binding strip, sew around the bottom edge with a 3/8” seam. It is not necessary to pin the strip to the mitt first. Stop stitching when necessary to make sure the edges are aligned and remember that both sides of the mitt are gently curved along the cuff edge. You’ll need to stop every few stitches to adjust the fabrics as you approach the side seam but you should find it fairly easy to manipulate the fabric under the needle while keeping the edges aligned properly.


When you get to the end of the strip sew right off the edge of the fabric. Here’s what the mitt looks like now:

To finish sewing the seam, clip the edges together, making sure the edges of the binding strip are aligned at the top and bottom edges:

Note that the seam allowances at the top of the binding strip are folded down (see next photo too).

Look very carefully at the next photo. You will see that I have drawn two solid lines visually extending the cutting and stitching lines drawn earlier on the mitt. But I don’t want to sew on that stitching line in the binding strip portion because the binding strip will be too loose; in other words, it won’t fit snugly around the open edge of the mitt when the strip is folded in place. The dotted line to the left of the solid lines is the actual stitching line:

To mark the stitching line place a ruler with a horizontal marking (in this example the 2″ line) aligned with the bottom edges of the binding strip. Draw a dotted line from the dot on the seamline (where the mitt and binding strip were joined) to the bottom of the binding strip. Note that the dotted line is at a 90˚ angle to the horizontal line on your ruler:

Now you can finish stitching the seam, backstitching at the beginning and end. Trim the seam allowance to a generous 1/8″ just as you did around the rest of the mitt:

At this point I know you are eager to turn the mitt inside out but you will find it so much easier to tack down the binding if you do it before turning. So . . .

Start at the seam. Finger press the seam to one side and turn the top edge of the binding strip down about a half-inch:

Turn it own one more time, pulling it snugly over the seamline and making sure the folded edge covers the line of stitching. Hold in place with a clip:


Place a clip on the other side of the seam (where my thumb is) and work your way around the cuff edge, placing a clip every couple of inches:


Using thread to match the binding fabric, tack the folded edge of the binding in place:

Now you are ready to turn the mitt!

You’ll find that the finger portion turns quite easily but it may take some time to work the thumb through. Be patient with this step and do not give in to the temptation to use some object to push the thumb out from the inside. Use your fingers and thumb only until the mitt is fully turned.

Voila! You have a beautiful functional oven mitt. . .

. . . with a pretty interior . . .

. . . and a beautifully finished accent strip around the opening:

Now all it needs is a mate!

This mitt is heat-resistant (mainly because of the Insul-bright batting) but not heat-proof, so use care when wearing it just as you would with a commercial oven mitt made of cotton fabric.

Oven mitts made with this tutorial and using the fabrics specified can be thrown in the washer and dryer. Wash them in warm or cold water and dry them on medium heat.

Please let me know if you have any questions or concerns after reading this tutorial. I’ll be happy to respond!


Posted in home dec, oven mitts, tutorial, update | 3 Comments

Oven Mitt Tutorial from First Light Designs: Part 1 of 2

I’m delighted to bring you Part 1 of my Oven Mitt Tutorial. (Part 2 will be fast on its heels!) I think you will find my method of making a top-quality oven mitt to be fast and efficient, eliminating extra steps in tutorials I found when searching online for a pattern and instructions. My directions include a nifty way to add a contrasting band at the cuff edge.

You’ll also find this a really fun project to work on. So pick out a fabulous 100% cotton print and get ready to dress up your kitchen!

Part 1 covers fabric requirements, instructions for downloading and printing the pattern, assembling the layers, and quilting the resulting “quilt sandwich.”

Part 2 covers the sewing of the mitt and contrasting band around the cuff edge as well as the final step of tacking the band down before turning the mitt right side out.

Fabric and notions for two mitts
½ yard (or two fat quarters) 100% cotton for outer fabric
½ yard (or two fat quarters) 100% cotton for the lining
⅛ yard 100% cotton for the contrast binding at cuff edge
½ yard insulated heat-resistant batting (Insul-bright)
100% cotton batting (enough to cut two 14″ x 19″ rectangles)
100% cotton thread

For the outer fabric choose fabrics that are medium to dark in value; light-colored fabrics are not practical for oven mitts (but they work very well for the lining).

For the insulated batting I prefer Insul-bright, made of polyester fibers needled through a reflective metalized polyester film. According to the Warm Company, maker of Insul-bright, the fibers “resist conduction while the reflective metalized polyester film reflects radiant energy, hot and cold, back to its source.” Insul-bright doesn’t have a right or wrong side.

Supplies
Sewing machine with open-toed walking foot
New needle in your sewing machine (90/14 Jeans or Sharp recommended)
Standard sewing supplies (scissors, pins, measuring tape, seam ripper, etc.)
Rotary cutting equipment (mat, rotary cutter, rulers)
Wonder Clips
One piece of white freezer paper about 10″ x 14″

Part 1. Download and print the free pattern. Click on the links below:
Oven Mitt Pattern, page 1 of 2
Oven Mitt Pattern, page 2 of 2

Check the 1” registration line to make sure the pattern printed at 100%.

Trace the pattern directly onto the flat (not shiny) side of the freezer paper, matching the top and bottom pieces on the dotted lines. Lay your own hand on the pattern to see if it fits. Make any changes you feel necessary. For tips on making adjustments to the pattern, see my post Oven Mitts that Fit: the Prequel.

Cut around the outside edges of the pattern. Do not add a seam allowance. Set aside the pattern for now.

Part 2. Cut the fabrics
For each mitt:
Cut (1) piece 19” x 14” from outer fabric*
Cut (1) piece 19” x 14” from lining fabric*
Cut (1) piece 19″ x 14″ of Insul-bright
Cut (1) piece 19” x 14” of medium-weight cotton batting
Cut (1) strip 2” x WOF from binding trim fabric. (It’s important to cut across the width of fabric rather than the length because you want the strip to have a bit of give. One 2″ strip x WOF will provide binding strips for two mitts.)

*If using directional fabric, keep the direction of the design in mind (as well as the quilting motif if it is directional too). In the photo below, both the design and quilting motif are going across the width of the mitt, not the length:

Part 3. Prepare the quilt sandwich
On a flat surface make a quilt sandwich of your four layers in this order: lining fabric right side down, Insul-bright, cotton batting, outer fabric right side up.

The thread color you use on the outer fabric can blend or contrast; that’s a personal choice. Match the bobbin thread to the lining fabric if you want it to blend. Use your preferred method to baste the layers together and quilt as desired.

Sometimes I quilt a 1” grid as I did on these mitts . . .

. . . but most often I quilt random wavy lines, some of which cross each other, because it’s fast and easy and I don’t have to mark a grid:

The wavy quilting motif is easier to see on the lining side:

Trim the sandwich to 18″ x 13″:

Fold the quilt sandwich in half, right sides together, with the fold on the left. Lay the freezer paper pattern on the fabric, shiny side down, making sure you have at least a half-inch clearance all around. Use a hot dry iron to press the pattern in place:

The sandwich is now ready to be transformed into an oven mitt.

Proceed to Part 2.


Posted in home dec, oven mitts, tutorial, update | 4 Comments