Category Archives: Hazel’s Diary Quilt

Susan’s Star, Embellished

I didn’t think the block I made last month called Susan’s Star could get any better but I embellished it today by appliquéing a round fussycut flower in the center square, and I’m so happy with the result:

Credit for this idea goes to my quilting cousin, Patricia, who follows my blog and suggested the addition after reading my post of March 3. Good call, Patricia!

Susan’s Star is one of three 18″ blocks in a sampler quilt I’m working on that also features 6″ and 12″ blocks. The other two 18″ blocks have a blossom in the center, one pieced and one appliquéd:

Patricia thought my third 18” block would benefit from having a flower in the middle as well. For the block on the right I used a method other than needleturn applique. For Susan’s Star, though, I decided the time had come to give needleturn appliqué another go. If you are new to my blog, you may not know I learned needleturn appliqué in 2019 making this quilt.

Because three years had passed since I’d done any needleturn appliqué, I approached this task, simple and small though it be, with some trepidation. To be honest, I’m not sure I did everything correctly but it turned out just fine.

I started by drawing a dotted circle (my stitching line) on the fabric using a jar lid as a template and cutting a scant quarter inch away from the stitching line. After finger-pressing the stitching line I pinned the piece in place:

Stitching has commenced! Off to a good start:

After the first few stitches I felt like I had found my rhythm. Do you suppose doing needleturn appliqué is like riding a bike?

And here we are where we started, with the finished block:

I haven’t been spending nearly enough time in my sewing room lately so getting this little project completed felt very good. It was my way of celebrating National Quilting Day.


Posted in appliqué, Hazel's Diary Quilt, needleturn appliqué, sampler quilt, update | 6 Comments

Printing Quilt Labels on Fabric: A Tutorial

Back in May — doesn’t that seem like a hundred years ago? — I wrote about a method I discovered quite by accident of printing computer-generated labels on fabric. It requires only two items: fabric and fusible interfacing — no freezer paper involved. I described my method and promised to write a proper tutorial on it. Here is that tutorial. Better late than never, right?

I’ve written this tutorial in two parts. Part 1 is all about getting the fabric ready. Part 2 is about creating the label on your computer.

Part 1, Preparing the Fabric for Your Label

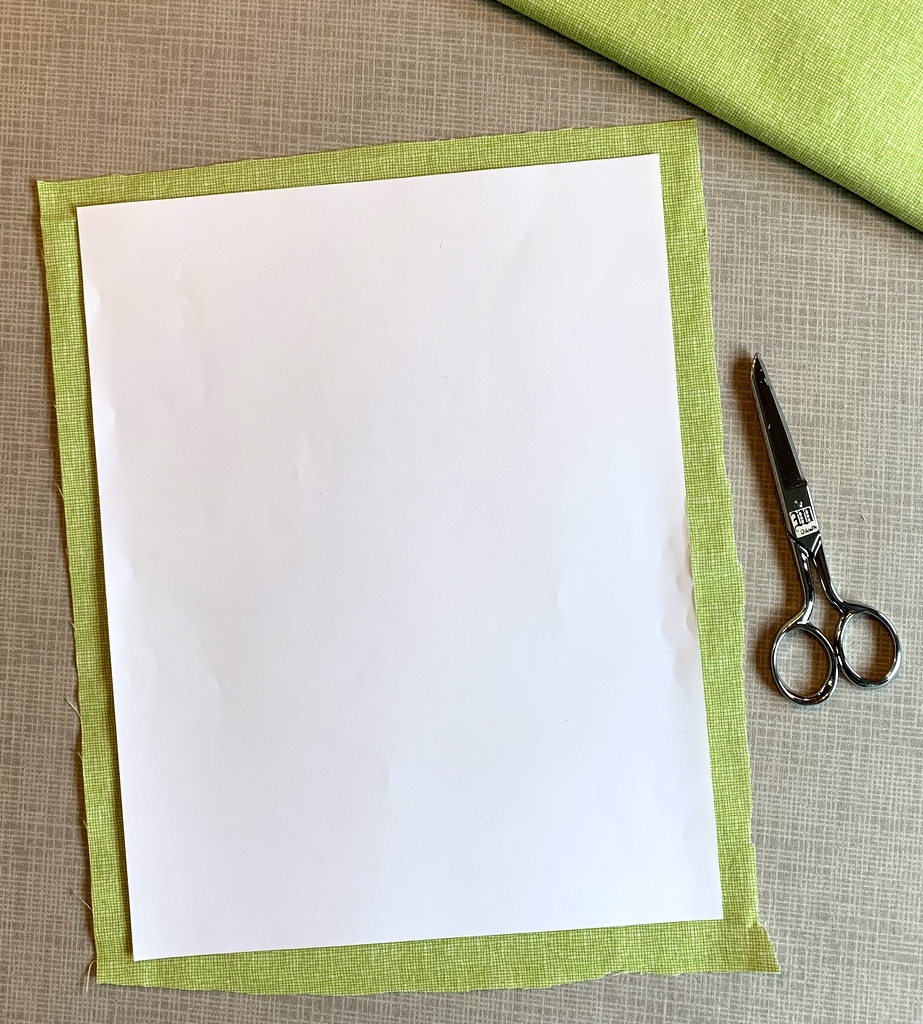
Step 1. Choose a fabric for your label that allows the type to show clearly. The fabric can be a solid or tone-on-tone print in a light to medium-light value. You might also be able to use a printed fabric — perhaps one you used in your quilt – if it’s not too busy or too dark in value to make the printed label hard to read. I’m illustrating this tutorial by making a label for my most recent UFO finish, Lilacs in September, using a medium light spring green fabric with a crosshatch design.

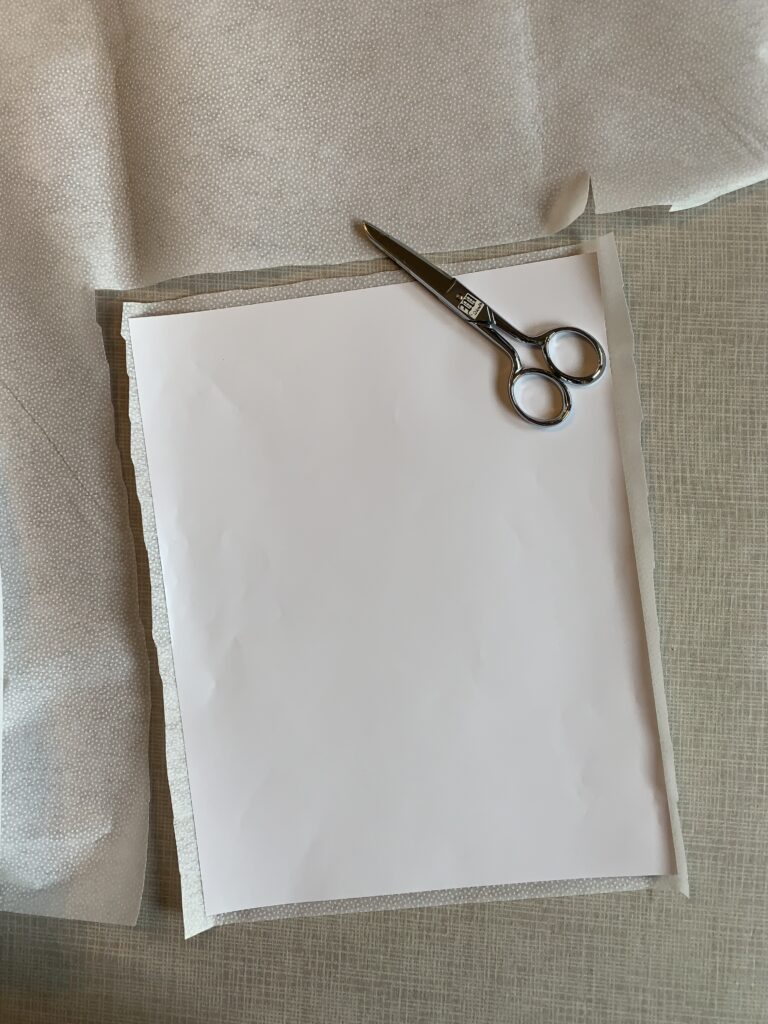
Step 2. Cut the label fabric about ½” larger all around than a printed page. In the United States the standard paper size is 8½” x 11” so you would cut your fabric about 9½” x 12”. It doesn’t have to be exact. I just lay a piece of paper on top of my label fabric and cut around it with scissors:

Step 3. Choose a featherweight or lightweight fusible interfacing. I use Pellon 911FF (the FF stands for featherweight fusible) for most of my labels but other brands will work equally well.

Step 4. Cut the fusible interfacing slightly smaller than you cut the label fabric. I do this the same way, by laying a piece of paper on top of the interfacing and cutting around it with scissors:

Cutting the interfacing slightly smaller assures that you won’t accidentally fuse it to your ironing board cover when you iron it to the label fabric. No need to ask me how I know that . . .

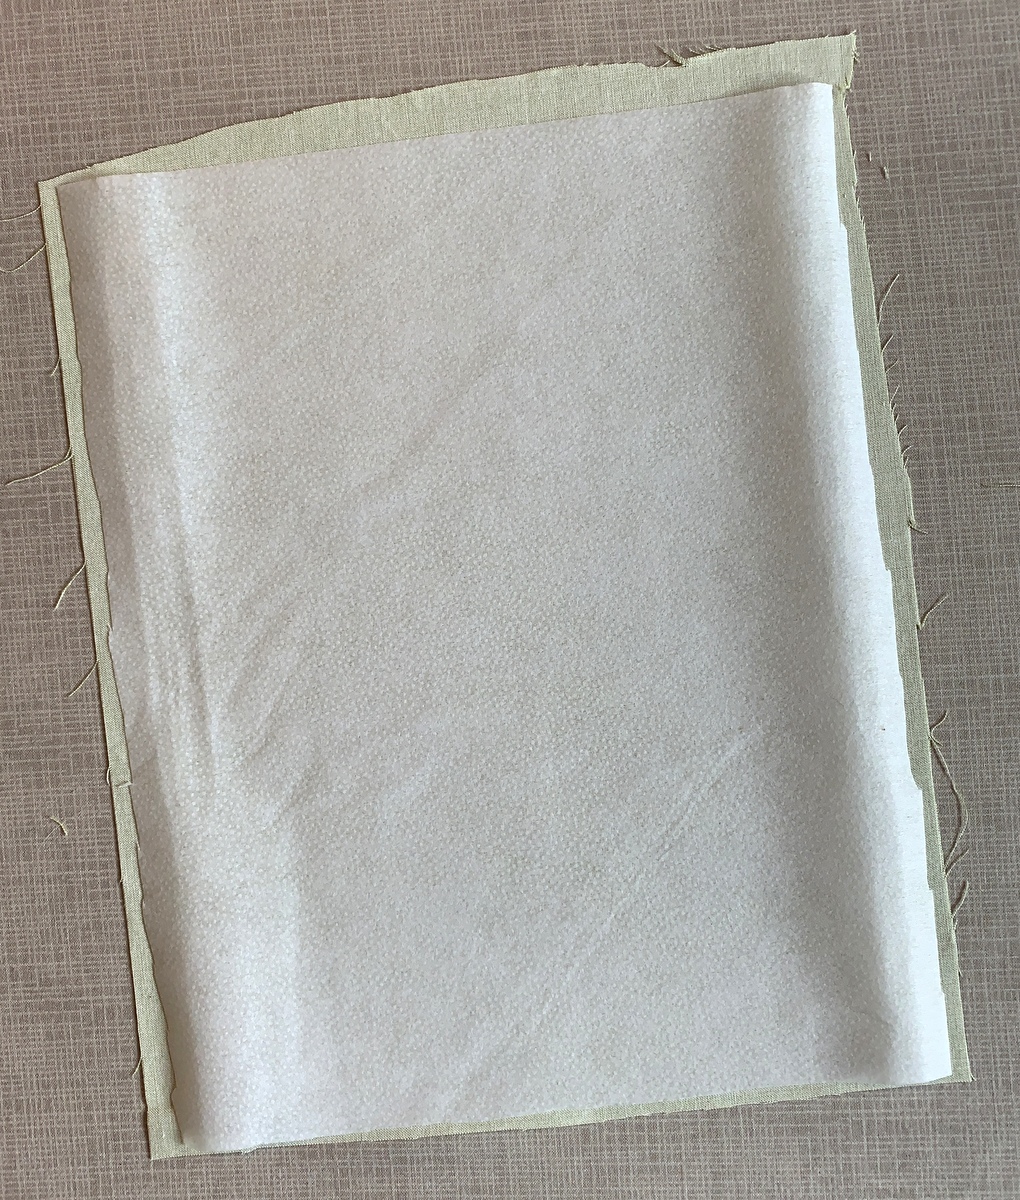
Step 5. Place the fusible side of the interfacing on the wrong side of the label fabric, making sure none of the fusible extends beyond the edges of the label fabric . . .

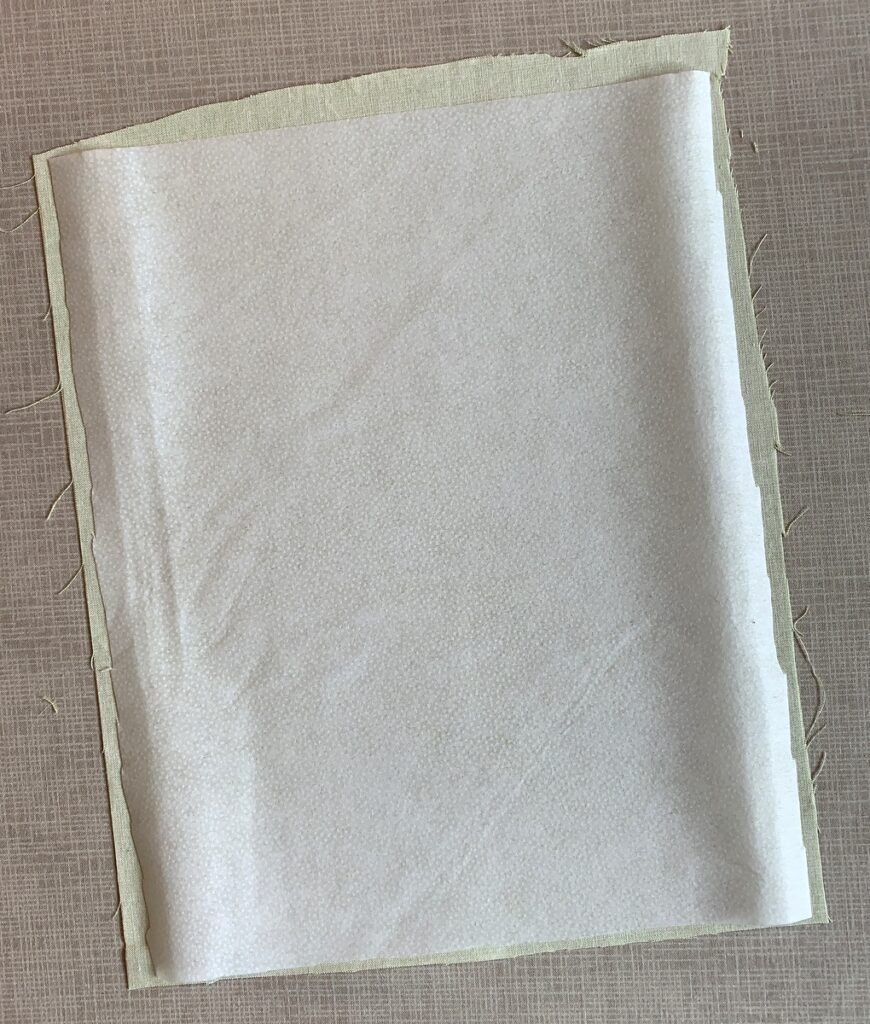
. . . and fuse in place following the manufacturer’s directions.

Step 6. Place the fabric on your cutting mat interfacing side up. Trim to 8½” x 11”:

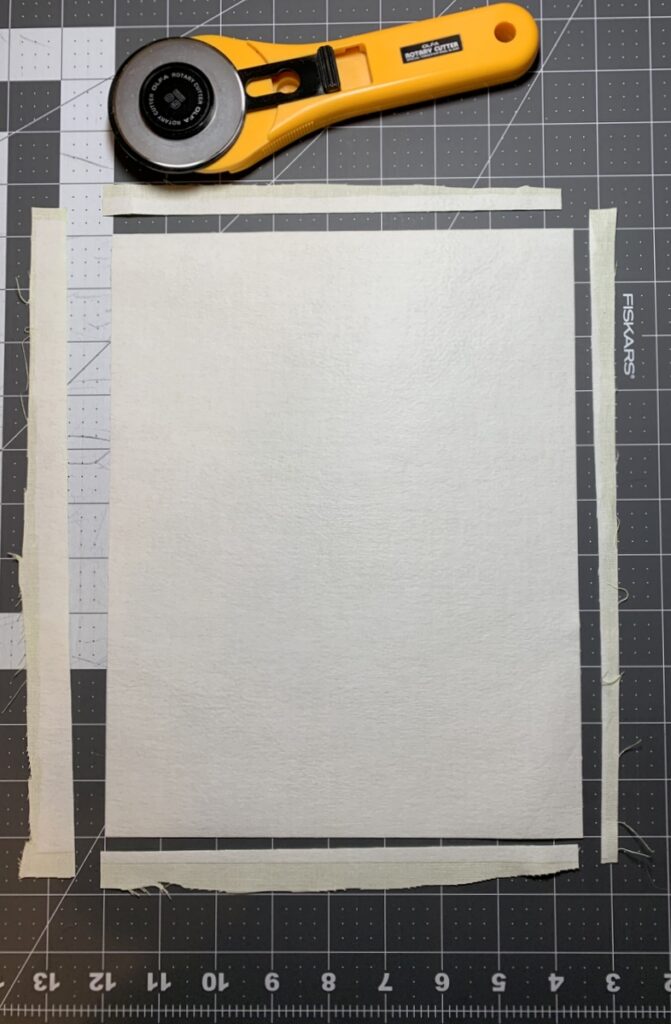
Make sure your cutting is precise because the piece of interfaced fabric needs to fit perfectly in the paper tray of your inket printer.

Step 7. Place the fabric in your printer’s paper tray. (Make sure you know whether the fabric side needs to go in the tray right side down or right side up, as it varies from printer to printer. It goes right side down in my HP Office Jet Pro 8620.) Now print the label:

Voilà! It should slide out of the printer just as if it were a piece of paper. (You’ll notice I put two labels on my page; I’ll explain why in Part 2.)

One more thing to do:

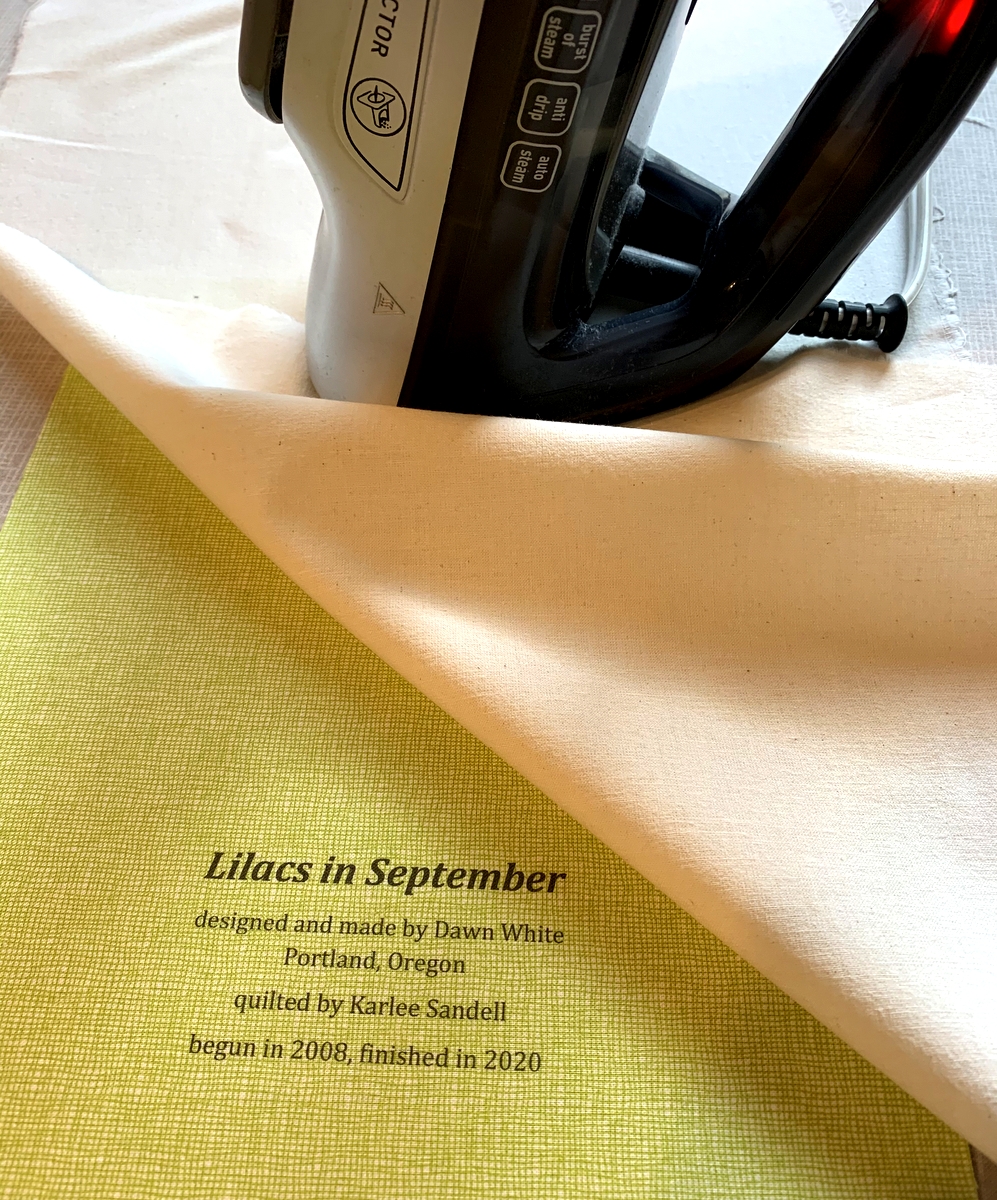
Step 8. Heat-set the ink on the label using a press cloth and plenty of steam:

This helps to keep the ink on the label from fading with repeated washings. Irons vary widely so let me caution you not to have the iron too hot as it may scorch the label, even with a press cloth on it. I like to set my iron on medium high and, with the press cloth on top, steam the writing on the the label for 10 seconds. I let it cool and steam it for 10 more seconds.

Now you’re ready to finish your label and attach it to your quilt. You’ll see in Part 2 below that I like to make my labels round but yours can be any shape you want. Squares and rectangles are popular and easy because all you need to do is turn and press the raw edges under ½” or so and stitch the label to the quilt.


Part 2. Creating the Label on Your Computer

Step 1. Open up a new document on your computer and type the information you want to include about your quilt. What you put on your label is entirely up to you. At a minimum I always include:

the name I have given my quilt
my name
my city and state
the name of my quilter (if I didn’t quilt it myself)
the year of completion

Notice that each line is centered.

If my quilt is an original design I might say “designed and made by Dawn White.” If the quilt was made from one of my own patterns I might include the name of the pattern or say “designed and made by Dawn White of First Light Designs.”

If my quilt was made using someone else’s design, I always credit the designer:

If I tweaked someone’s design, added my own design elements, or significantly changed construction techniques, I might add a line such as “based on (pattern) by (name of designer)” or “inspired by (name of designer)”:

Step 2. Determine the point size and typeface of your label. The point size refers to the size of the type, e.g. 12 point, 14 point, etc. The typeface refers to the design, or style, of the lettering. Most word processing programs offer dozens of typefaces to choose from. On my computer these typefaces are called “theme fonts.” (Did you know that font is the French word for face? Now doesn’t the word typeface make more sense?)

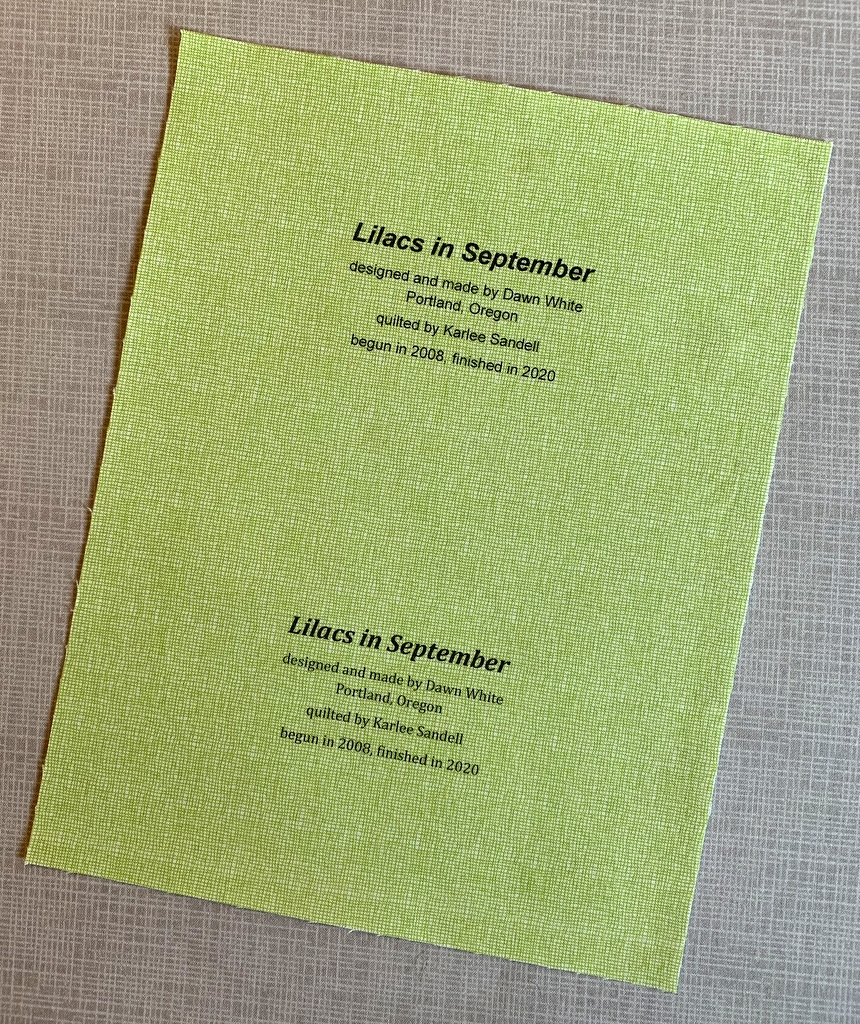
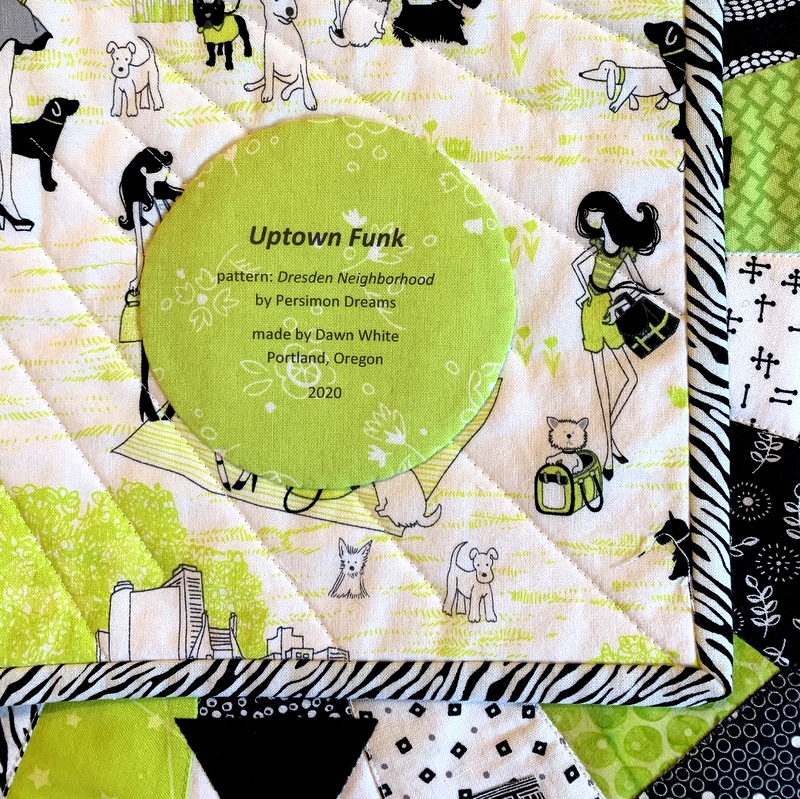
The point sizes you choose depend on the size and shape of your finished label and how much information you want to include. My label for Lilacs in September has five lines of copy. I put the name of the quilt in 24 point boldface and italic. The lines underneath are in 14 point. I auditioned a sans serif type face called Arial and a serif typeface called Cambria. Both labels fit on one page so I could make my final decision on which one to use after this page was printed on fabric. (Putting two labels on one page is just an option, of course. You could create one label and center it on the page, which would give you a lot of flexibility in deciding later on the shape of your label.)

Step 3. Save your document.

Step 4. Print your label on paper. This gives you a good sense of what the label will look like printed on fabric. Here is my label for Lilacs in September, printed with black ink:

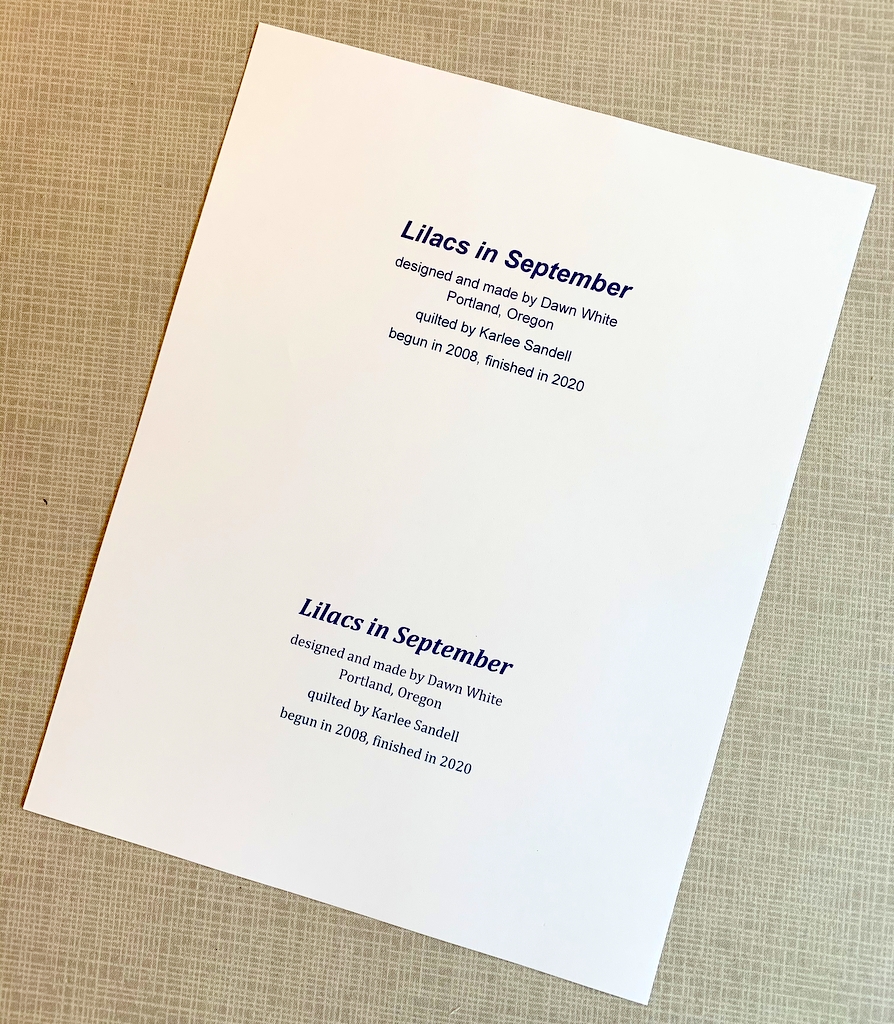
If you have a color printer you can experiment with different colors of ink. Print the labels on paper first to test the depth of color. You may find the ink doesn’t look quite as dark or as vivid on fabric as it did on paper.

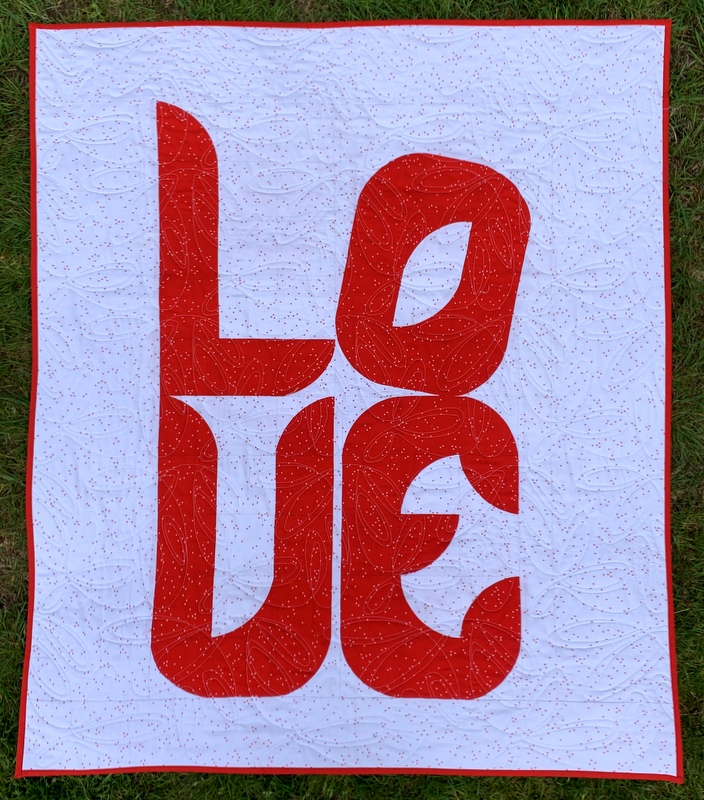
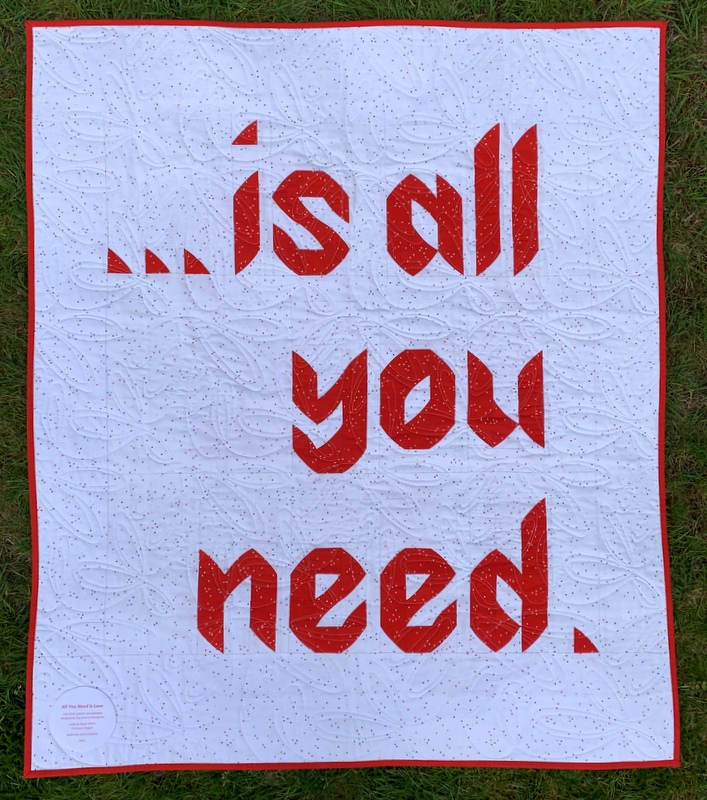
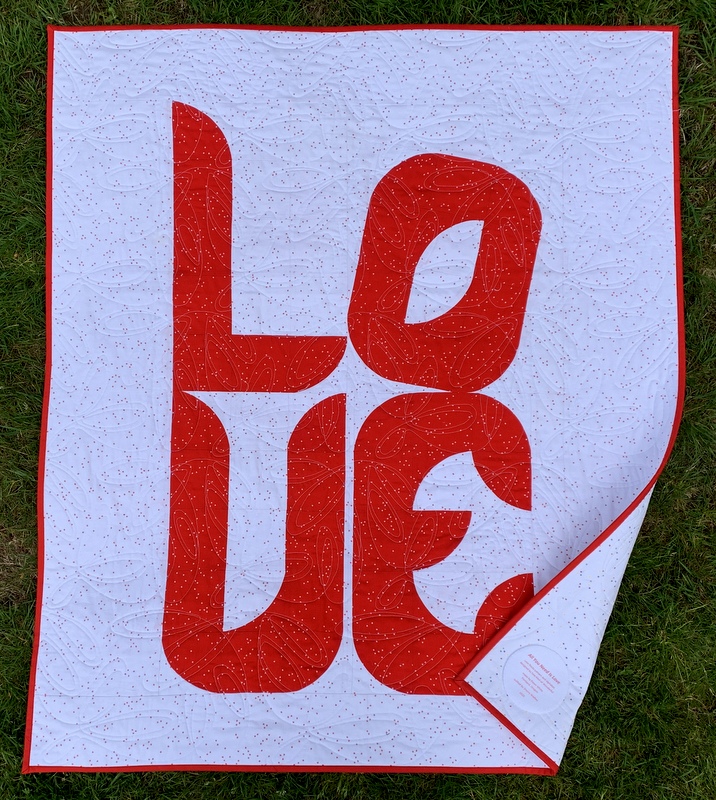
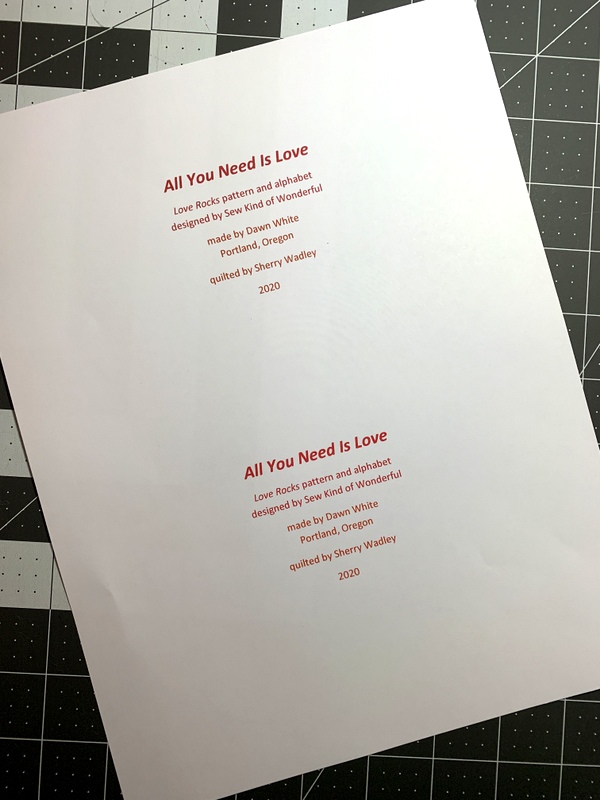
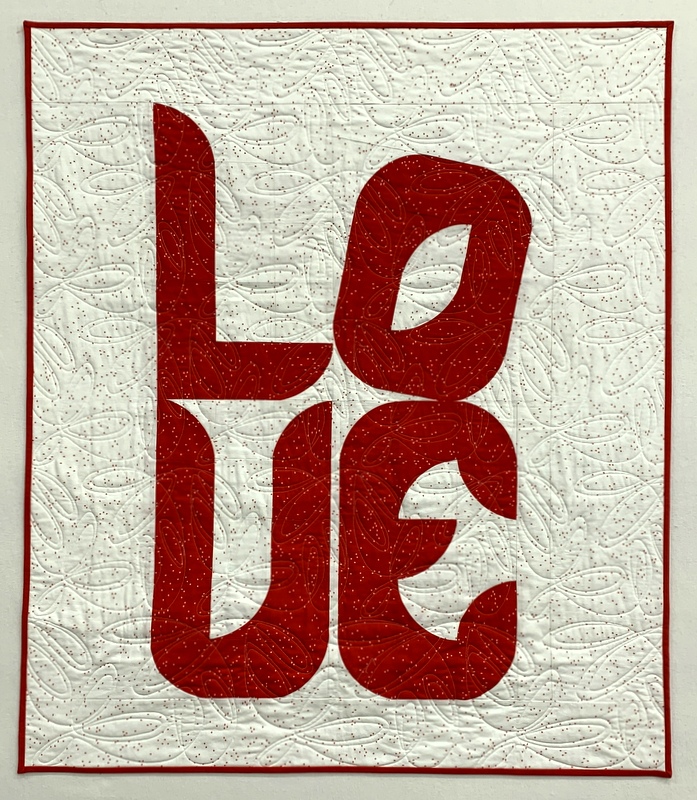
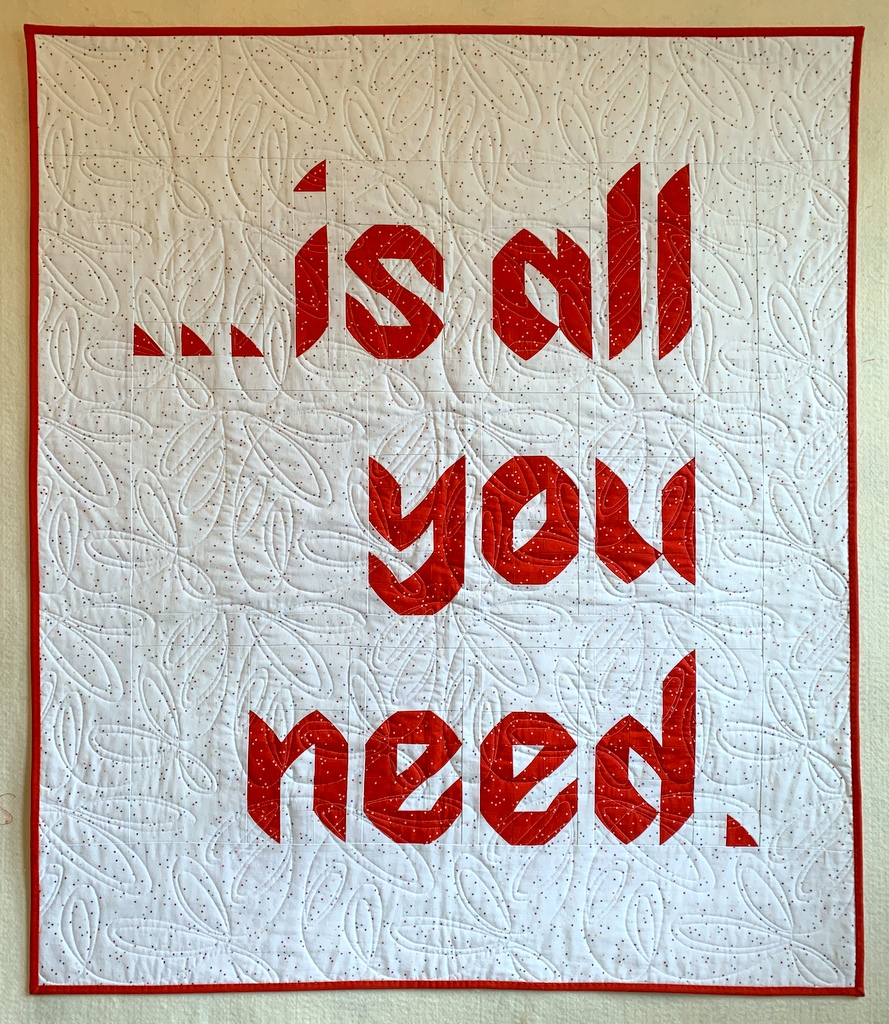
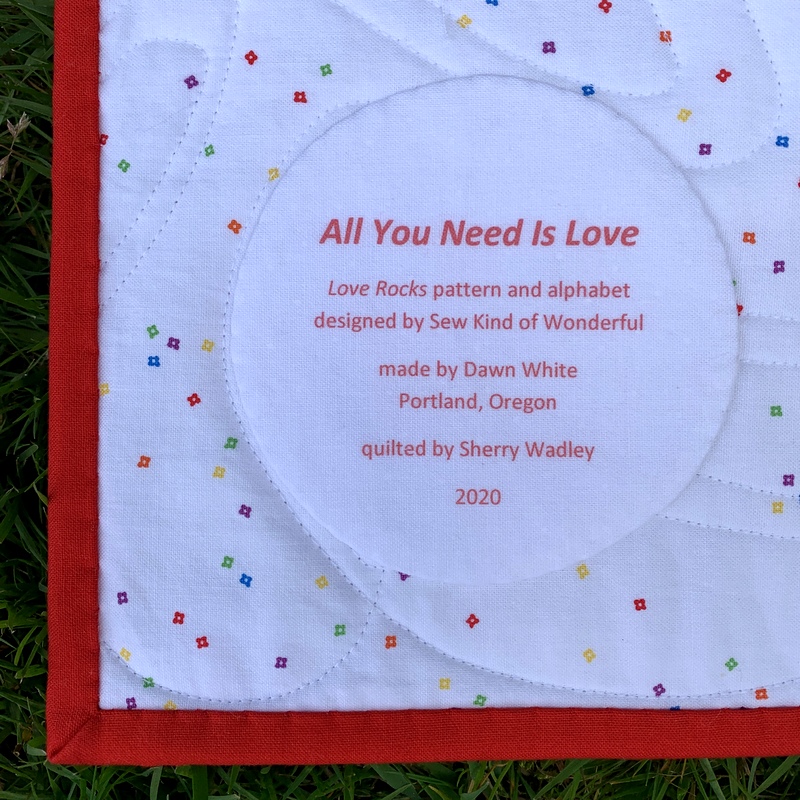
I used red ink on my label for All You Need is Love:

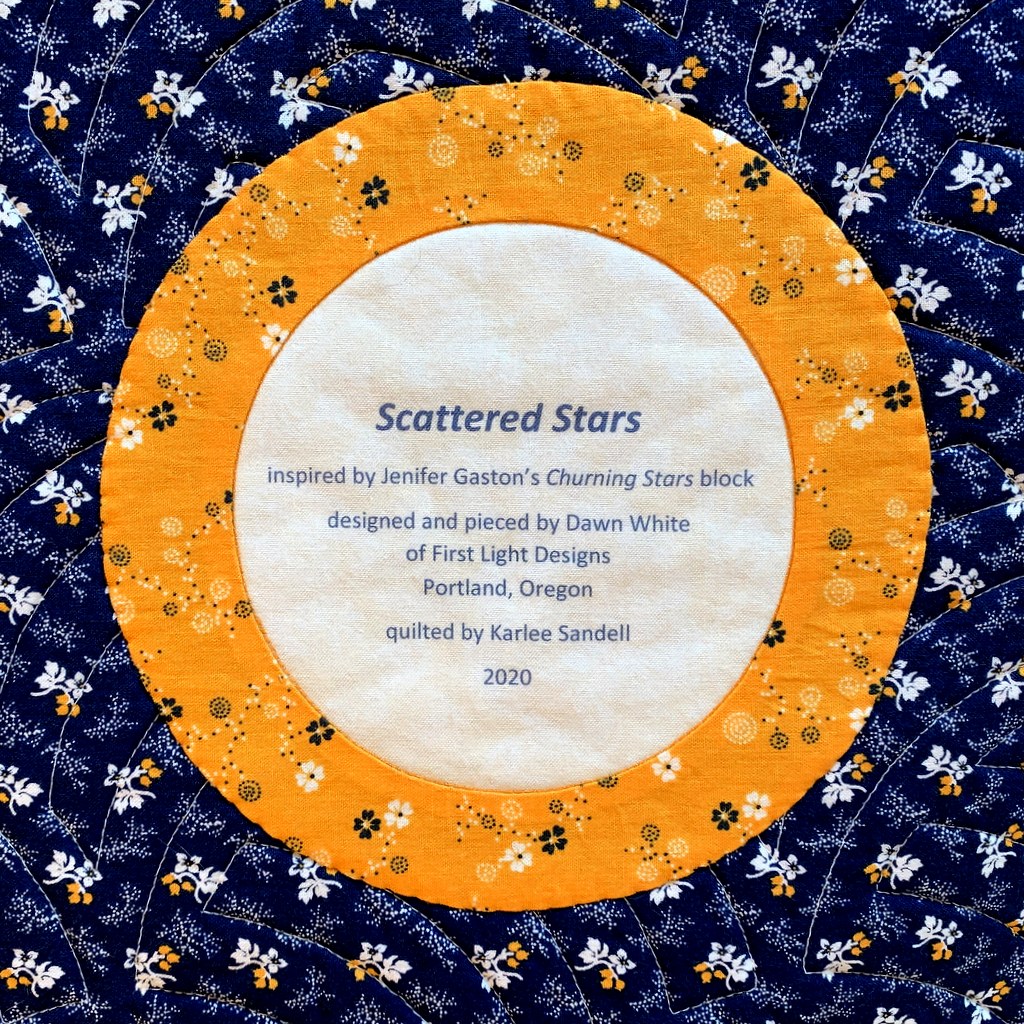
Take another look at the label for Scattered Stars, my cheddar and indigo quilt. I used indigo ink which turned out to be not as dark as I was expecting but I still chose it over black:


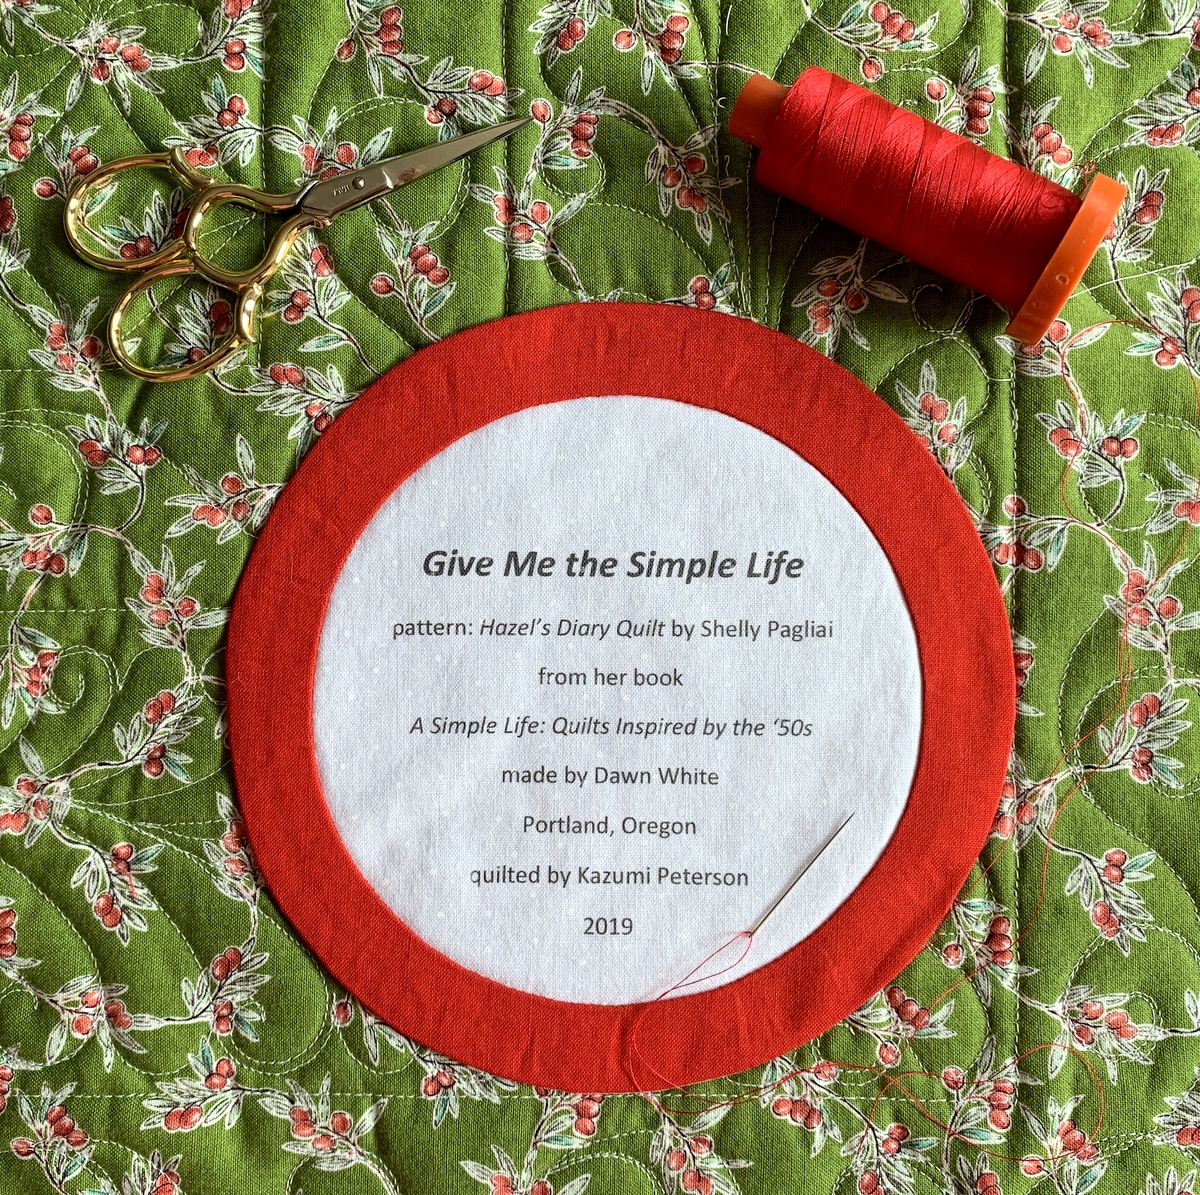
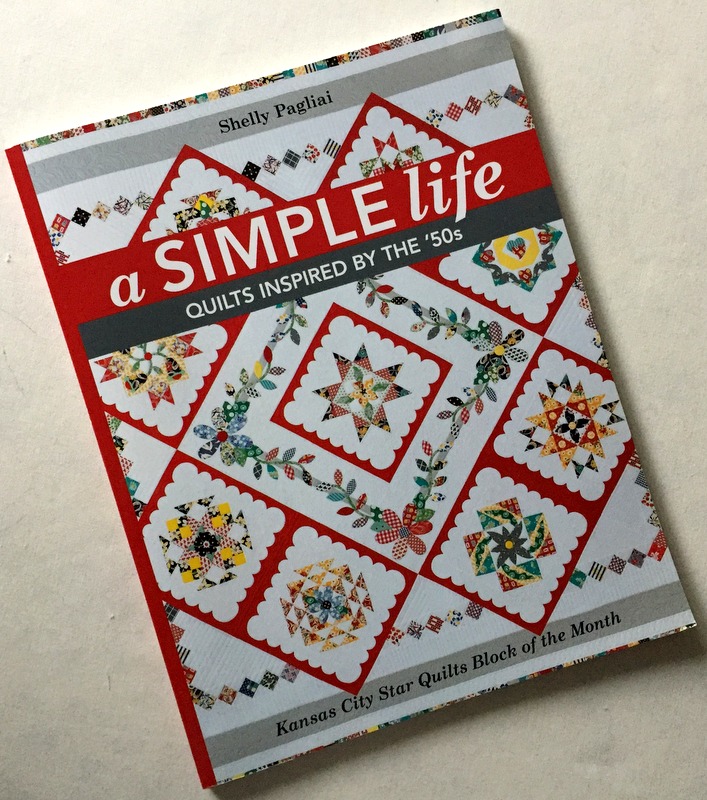
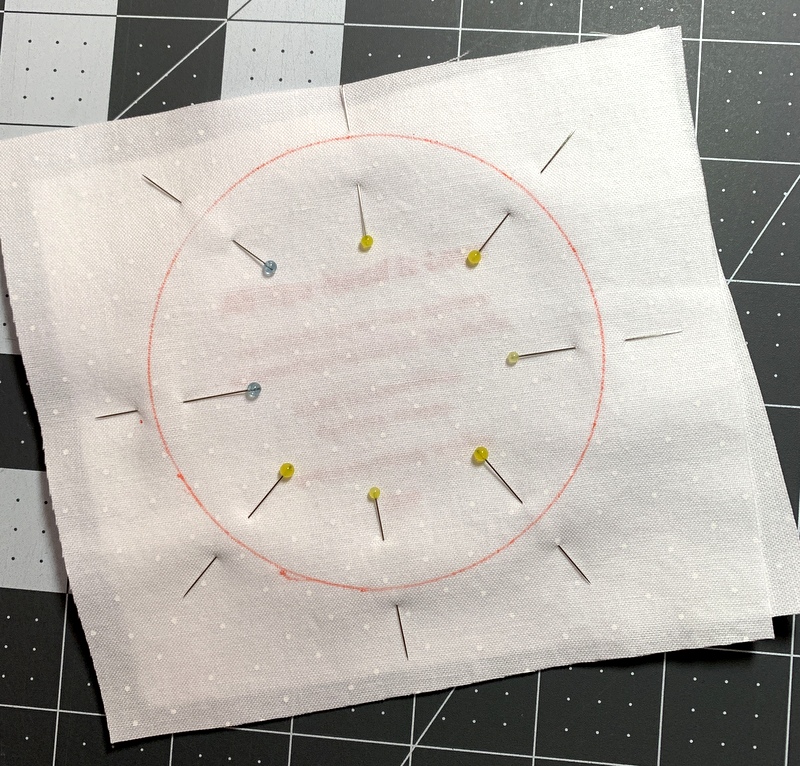
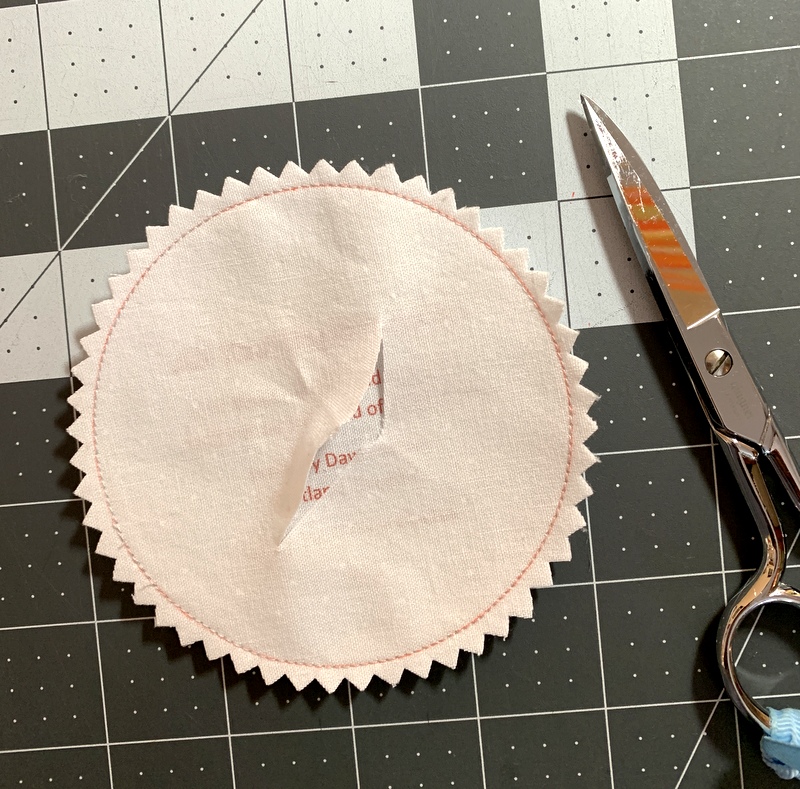
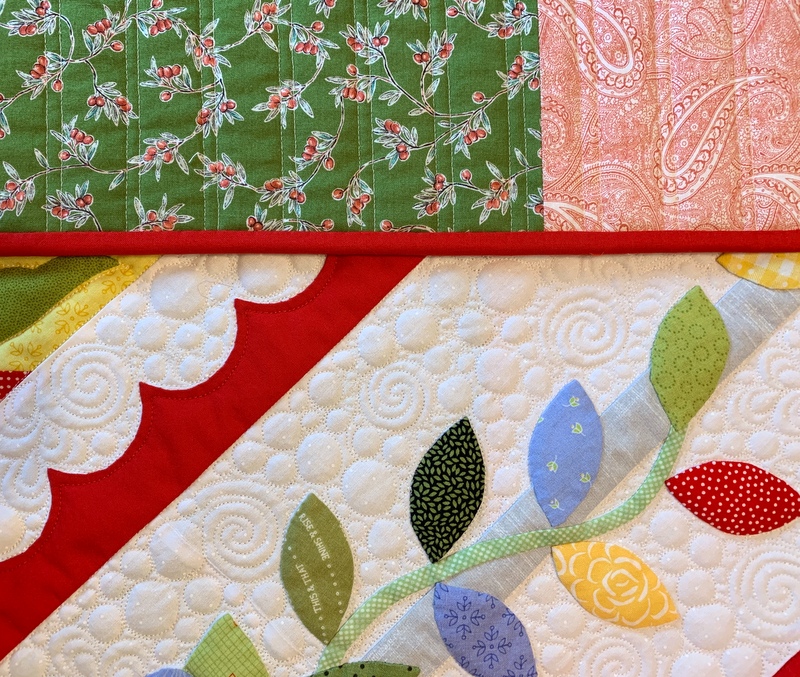
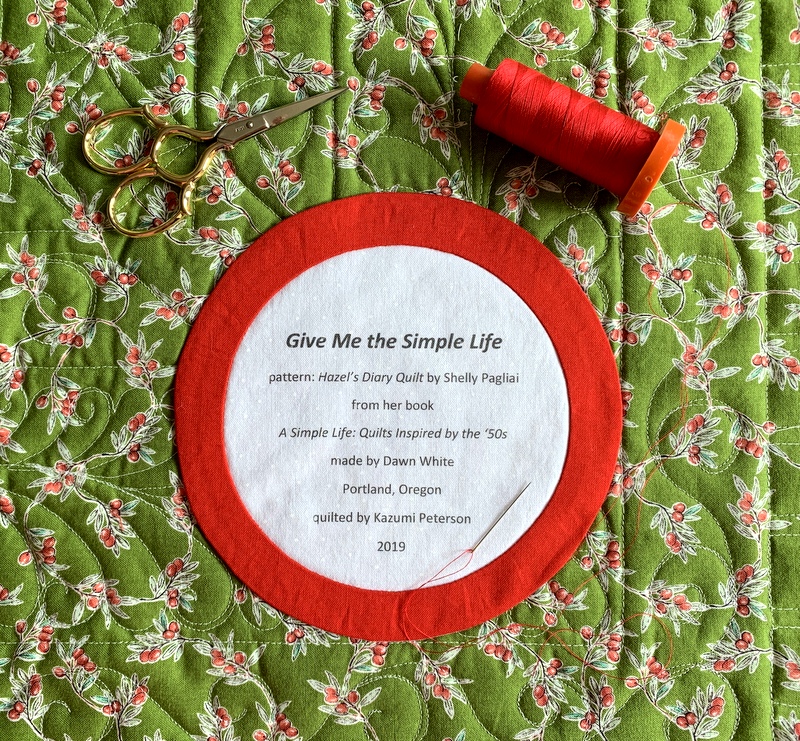
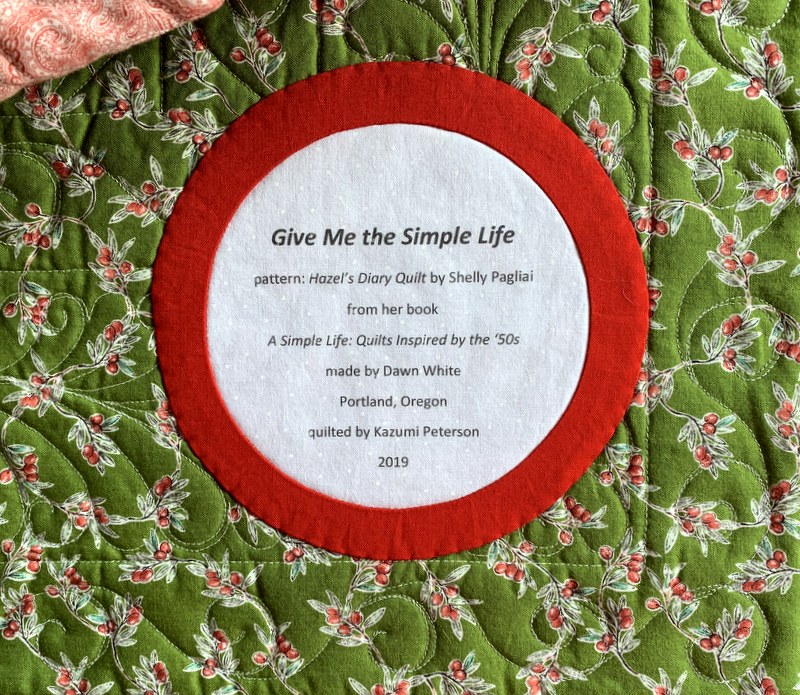
Most of my round labels are made using a compact disc as a pattern. A CD measures 4⅝” in diameter so a label with a few lines of text fits inside that circle nicely. My label for Give Me the Simple Life has eight lines but still fits inside the compact disc pattern size:

The addition of the red ring made the label finish at about 6″ in diameter.

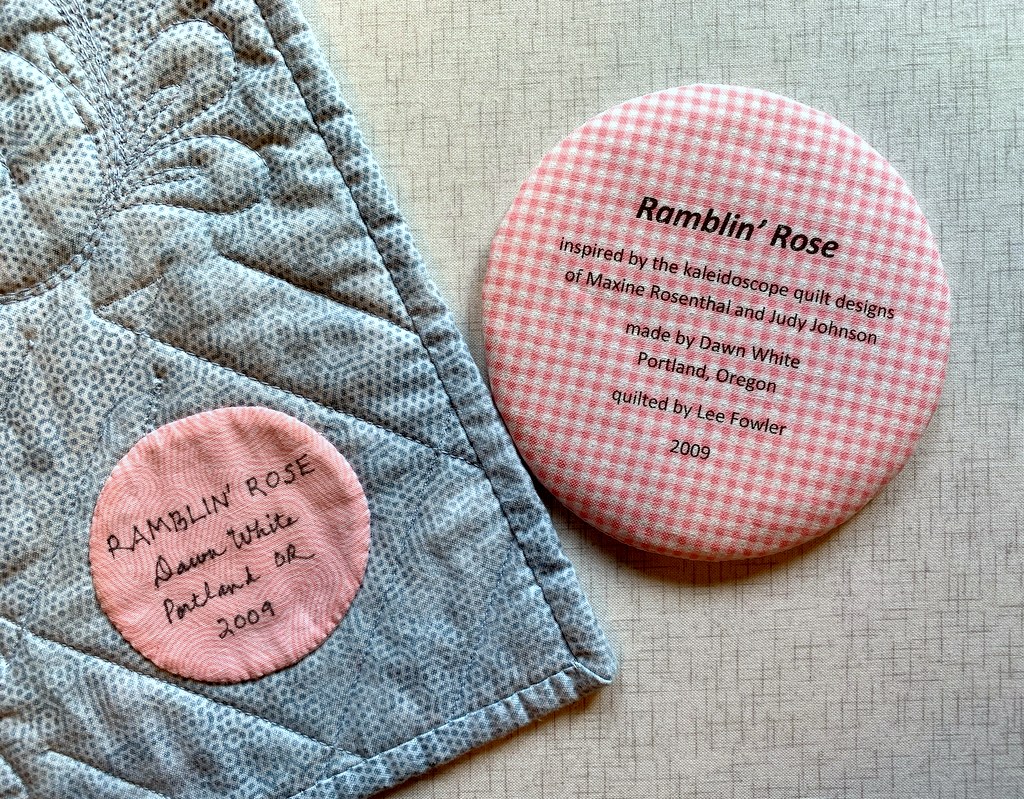
Below is a computer-generated label I made in May to replace a label on Ramblin’ Rose, made several years ago. I had omitted two significant pieces of information — the inspiration for my quilt and the name of the longarm quilter — and wanted to correct those oversights. In the photo below the original label is still on the quilt, about to be removed and replaced with the one on the right:

I used to write all of my labels by hand, a time-consuming endeavor. Creating them on the computer and printing them directly onto fabric has turned out to be quick and easy — and rather fun to do. I don’t think I’ll ever go back to hand-printed labels.

I hope you find my tutorial helpful. Be sure to let me know if you have any questions. As always, thank you for visiting First Light Designs!


Note: I followed up this tutorial with a new one, posted Nov. 6, about how I make my round labels using a compact disc. You can find it here.


Posted in appliqué, cheddar and indigo, Churning Stars quilt block, Hazel's Diary Quilt, quilt labels, tutorial, update | 9 Comments

Signing On

A few weeks ago Shelly Pagliai of Prairie Moon Quilts made a request on her blog for signature blocks for a quilt she is planning. She wants to make a very large quilt out of very small blocks — they will finish at only three inches! Here’s my block:


I’ve never met Shelly but I’m a big fan. In some ways I feel like I know her. She is the author of this book . . .

. . . which includes the instructions for Hazel’s Diary Quilt, pictured on the cover.

I was lucky enough to see Shelly’s original quilt on a trip to Paducah, Kentucky in 2017:


Her quilt inspired me to make my own version, Give Me the Simple Life, completed in 2019:

While working on this quilt I was struggling with a particularly difficult needleturn appliqué shape — if memory serves it was a very small five-pointed star — so I dashed off an email asking for advice. Shelly answered my email quickly and offered a suggestion that helped immensely. I’ve always been grateful.

Since I’ve made one of her quilt designs I thought it would be fun to make a block for her signature quilt. Other than the size of the block, Shelly’s only requirements are that the background fabric be a bright color and the signature portion be solid white.

I chose one of the bright yellow prints I used in Give Me the Simple Life for the background fabric. I don’t have a solid white in my stash so I used the wrong side of a very tiny white-on-white dot fabric for the signature portion. It happens to be the same white fabric I used for the background in Give Me the Simple Life (although I used the right side!). I’m pretty sure it will pass muster.

Soon my little block will be winging its way from my home in Portland, Oregon to Shelly’s home in Wien, Missouri 1,863 miles away. And who knows? Maybe in a post-pandemic world I will get to meet her.


Posted in appliqué, Hazel's Diary Quilt, needleturn appliqué, update | 9 Comments

Of Luck and Labels

I made a serendipitous discovery today when making the label for All You Need Is Love, my latest quilt. Before I explain, let me show you a few photos of the quilt taken outdoors this afternoon. The photos are so much better than the indoor shots I showed you in my last post. I’m especially loving the contrast between the red of the quilt and the green of the grass:


Did you happen to notice the label in the lower left corner in the photo above?

No? How about in the photo below, showing the front of the quilt with one corner turned back?

It’s not very noticeable, is it? That was my goal!

Here’s a close-up:

The label contains important information: the name of the quilt, who designed it, who made it, where it was made, who quilted it, and the year it was finished. But I wanted the label to take a back seat to the message on the back of the quilt.

To achieve that I did three things: printed the label from my computer so that I could use smaller letters than I can comfortably write by hand; used red ink, which blends into the background better than black ink would; and reduced the size of my circle pattern from my usual measurement of 4⅝” in diameter (the width of a compact disc) to 3¾” in diameter . The quilt finishes at 38″ x 44″ so a smaller label was definitely called for.

This is my second experience printing a label using my inkjet printer. The first time was a few months ago when I made the label for Give Me the Simple Life. The procedure was pretty straightforward. You start with label fabric and freezer paper that are both cut larger than a standard piece of paper, press the shiny side of the freezer paper to the wrong side of the label fabric, and trim the result very carefully to exactly 8½” x 11″. You create a label on your computer, determining the font and point size based on the desired finished size of your label. You insert the fabric/freezer paper combo into your printer and print the label.

When I tried this the first time I found I had to use two layers of freezer paper to get my printer to accept the combo and even then it was a bit temperamental, jamming my printer a couple of times until I got the the result I wanted.

I would have followed the same procedure this time but for my concern that the bright little flowers on my background fabric would show through the white label fabric. I was using the same white fabric for the back of the label but I wanted an extra layer in the middle to make sure those bright little flowers stayed hidden.

I decided to try fusing featherweight interfacing to the back of my label fabric before pressing it to one layer of freezer paper. I’m so glad I did! The interfacing gave the fabric just the right amount of body to feed smoothly through my printer. Serendipity!

I previewed my label first on paper using two different shades of red:

The bottom red was a better match with the red in the quilt. Next I printed the label on my fabric/interfacing/freezer paper combo:

The ink on fabric wasn’t quite as bright as the ink on paper but would certainly be fine for my purpose.

After determining a circle 3¾” in diameter would work well as a finished label size (based on the width of the longest line), I wandered around my kitchen opening cupboard doors until I found something just the right size to trace around for the back of the label:

In the next photo the fabric for the back of the label is on top of the label fabric, right sides together and pinned in place. You can just make out the printing on the label through the top layer:


After stitching all the way around the circle (taking out the pins as I come to them) and trimming very close to the stitched edge with pinking shears, I cut a slit in the back of the label so it can be turned inside out:


With the label turned, pressed, and hand appliquéd in place, the slit in the back will never be seen. And I’m very happy with the result:

I have a feeling I will be using this method on future labels!


Posted in appliqué, Hazel's Diary Quilt, quilt labels, update, Wonder Curve Ruler | 9 Comments

Love Rocks

Always has, always will!

May I present my latest quilt finish? It’s called All You Need Is Love based on the pattern Love Rocks from the new book Text Me from Sew Kind of Wonderful:

The book features several sizes of alphabets made using Sew Kind of Wonderful’s new Wonder Curve ruler. I like to piece the backs of my quilts so I decided to have some fun with the alphabet and carry a message from the front of the quilt to the back:

My little quilt — 38″ x 44″ — sports an edge-to-edge quilting design. I wanted something modern and was attracted to this design that looks a bit like doodling:

“Modern Ties” is a whimsical design that offers a pleasing counterpoint to the precision of the letters. Sherry Wadley did such a nice job on this for me. The quilting enhances the design of the quilt without overpowering it, just the effect I was going for.

A lot of quilters I know don’t enjoy binding their quilts but I do. Stitching down the binding on this quilt was a breeze both because the quilt is small and because I used a nifty little “sticky thimble” to push the needle through the fabric:


The thimble is called a Poke-a-Dot — how cute is that? — and comes in a little round tin containing 24 dots. Each thimble can be used multiple times so I probably have a lifetime supply. I could have ordered just the small tin of Poke-A-Dots but I treated myself to a bigger tin — the full Appliqué Set from Jillily Studio — several weeks ago:

Having learned how to do needleturn appliqué last year in the making of Give Me the Simple Life, I’m interested in learning other approaches. And I do confess that the tin this appliqué set comes in influenced my decision to purchase it. (This is not a paid endorsement, by the way; I just happen to like these products.)

Another confession: I jumped the gun in showing you my latest quilt. It’s not quite finished. Still to come: the label.


Posted in appliqué, Hazel's Diary Quilt, needleturn appliqué, update, Wonder Curve Ruler | 5 Comments

Throwback Thursday: Give Me the Simple Life (2019)

It’s time for the tenth and final installment in my Throwback Thursday series looking at quilts made in the last decade. Coming up with my choice for 2019 was easy: it was the only quilt I completed last year! Here is Give Me the Simple Life:

Give Me the Simple Life, 95″ square (2019)

The pattern is Hazel’s Diary Quilt by Shelly Pagliai of Prairie Moon Quilts. Regular readers followed the making of this quilt from my very first block (and post) in January 2018 till its completion in September 2019.

I’m very proud of this accomplishment, as I made it my goal to become proficient in needleturn appliqué during the making of the quilt. It certainly provided ample opportunities for practice! Longarm quilter Kazumi Peterson did the amazing quilting.

Approved by Coco the Cat Inspector

Give Me the Simple Life will be on display later this month at Northwest Quilters’ 46th annual show, “A Festival of Quilts,” in its new venue, Camp Withycombe, in Clackamas, Oregon. Dates are Friday and Saturday, March 20 and 21. If you are in the neighborhood, please stop by. There’ll be over 300 quilts on display and lots of vendors selling wonderful things (like fabric).

Thank you so much for joining me in this 10-week lookback at some of my favorite quilts!


Posted in appliqué, cats, free motion quilting, Hazel's Diary Quilt, needleturn appliqué, Throwback Thursday, update | 6 Comments

The Judges’ Comments

Give Me the Simple Life (95″ square), made by Dawn White, quilted by Kazumi Peterson, 2019. Design: Hazel’s Diary Quilt by Shelly Pagliai.

Give Me the Simple Life, my version of Hazel’s Diary Quilt, is home again after hanging for three days at last week’s Northwest Quilting Expo. I entered my quilt for judging in the traditional category and received the judges’ comments when I picked my quilt up this morning.

Here’s what the judges said:

“A very compelling combination of a primary color palette. Presentation inside scalloped sashings is so appealing and beautifully executed.” Credit is due Shelly Pagliai of Prairie Moon Quilts, who designed Hazel’s Diary Quilt and cheered me on every step of the way as I posted my progress on Instagram and on this blog.

“Hand appliqué stitch is very well done.” This comment means a lot to me because I took on the challenge of making this quilt to become proficient at needleturn appliqué.

“Machine piecing is precisely done.” Thank you, judges.

“Quilting motifs are well chosen to fill the spaces.” Kudos to Kazumi Peterson, whose free motion quilting skills and precise ruler work greatly enhanced the finished product.

“Outside edge of quilt should be straight and corners square.” This comment caught me by surprise. Were the corners really not square? I used a square ruler to trim my quilt before attaching the binding.  Of course I got out that ruler and checked the corners. The first three were perfectly square. But guess what? The fourth corner was an eighth of an inch off!

I know there are many other imperfections in this quilt but all in all, I am very happy with how it turned out. Most of all, I am glad that it’s done!!


Posted in appliqué, free motion quilting, Hazel's Diary Quilt, needleturn appliqué, Northwest Quilting Expo, update | 7 Comments

Hazel’s Diary Quilt: Finished!

I hope I’m not overloading you with pictures of Give Me the Simple Life, my version of Hazel’s Diary Quilt. All you saw in my last post was the folded quilt because it’s too big to photograph on any wall at home. Here it is pinned to the wall at Montavilla Sewing Center’s Lake Oswego store:

I’m so excited it’s finally finished! I started working on this quilt in January 2018; my first post about it shows the original quilt designed by Shelly Pagliai.

The last thing to do was sew the buttons back on that had to be removed before longarm quilter Kazumi Peterson could work her magic. Buttons? Yes; three of my nine pieced blocks have buttons in the center of the appliquéd flower.

Coco was very interested in what I was doing:

Fortunately, I got that last button sewn on before she could bat it off the quilt and have a little frolic with it.

A word about my backing fabrics, neither of which appears on the front:

My goal was to find fabric that looked like it belonged on the front and was light enough on the back side that it wouldn’t show through. Guess I was a little nervous about all that white fabric on the front of the quilt. The light red paisley print was a lucky find but I couldn’t get enough in one continuous piece of yardage to cover the entire back. I could have ordered the rest online but feared the dye lot would be different so I filled in with a green print that complements it nicely.

Give Me the Simple Life has been accepted in Northwest Quilting Expo’s big quilt show coming up in Portland Sept. 26-28. If you are anywhere in the vicinity, please come and see my quilt in person!


Posted in appliqué, Hazel's Diary Quilt, needleturn appliqué, update | 6 Comments

Hazel’s Diary Quilt: Bound and Labeled


It didn’t take forever to bind my version of Hazel’s Diary Quilt; it just felt like it. This quilt is big. After trimming and binding, it measures about 95″ square. That’s 380″ inches of binding to tack down. I take about three stitches to the inch so I figure there are close to 1200 stitches in my binding.

This quilt is also heavy. Think about it: queen size to begin with, it contains eight blocks with lots of little pieces (which means lots of seam allowances on the back side), appliqué in the center of each block, reverse appliquéd scalloped borders around the blocks, and more appliqué in the center medallion. Even with wool batting, which I specifically chose because it’s the lightest of the batts, the quilt packs quite a heft.

I usually hand print my quilt labels but this time I printed one on my inkjet printer using instructions from a fellow quilt guild member. (Thanks, Marcia!) Here’s the label ready to be tacked down on the lower right side of the back . . .

. . . and here it is stitched in place:

I named my quilt Give Me the Simple Life, though the making of the quilt was anything but simple. As the label indicates, the quilt pattern is from the book A Simple Life: Quilts Inspired by the ’50s by Shelly Pagliai of Prairie Moon Quilts. The name I gave my quilt is both homage to Shelly’s mother Hazel Ilene, who was the inspiration for Shelly’s book and the quilts and projects in it, and a nod to the 1945 song of the same name, with music by Rube Bloom and lyrics by Harry Ruby. For you music trivia lovers, the song was first recorded by Bing Crosby singing with Jimmy Dorsey and his orchestra. To hear it, click here.


Posted in appliqué, Hazel's Diary Quilt, needleturn appliqué, update | 8 Comments

Hazel’s Diary Quilt: Quilted!

Here it is, your first glimpse of Hazel’s Diary Quilt fresh from the longarm quilter:


The quilting — all free-motion and hand-guided — is by Portland quilter Kazumi Peterson. I am so impressed with her abilities. And I am completely in love with this quilt.

The indoor lighting is not ideal but I think you can get a sense of Kazumi’s amazing quilting. Here’s a close-up of the center block . . .

. . . and here’s a shot of the full center medallion:


The white background in the interior of the quilt is filled with spirals and pebbles. All of the pieced blocks have extensive stitching in the ditches and Kazumi carefully quilted around the appliquéd flowers and leaves in the middle of each block and also the ones in the center medallion:

In the setting triangles and gray border I asked for free-motion feathers. Here’s one of the corner triangles . . .

. . . and one of the side triangles:

I was so happy a couple weeks ago when I got the top finished. “I’m finally done!” I remember thinking, completely forgetting that when it came home from the quilter it would still need to be trimmed, bound, and labeled. Okay then! I’d better get busy.


Posted in appliqué, Hazel's Diary Quilt, needleturn appliqué, update | 23 Comments