In fact, it may even have concluded. I haven’t decided yet about adding more quilting in the background. After stitching around the green and red circles in the center, I stitched along the sides of the houses to secure the layers of the quilt sandwich, extending the lines from the roofs into the background.
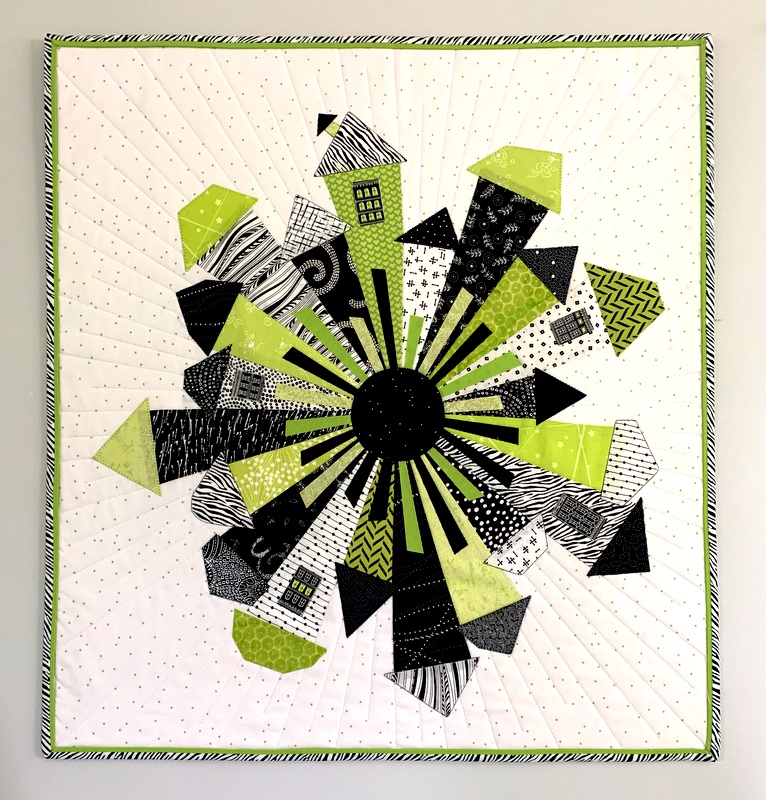
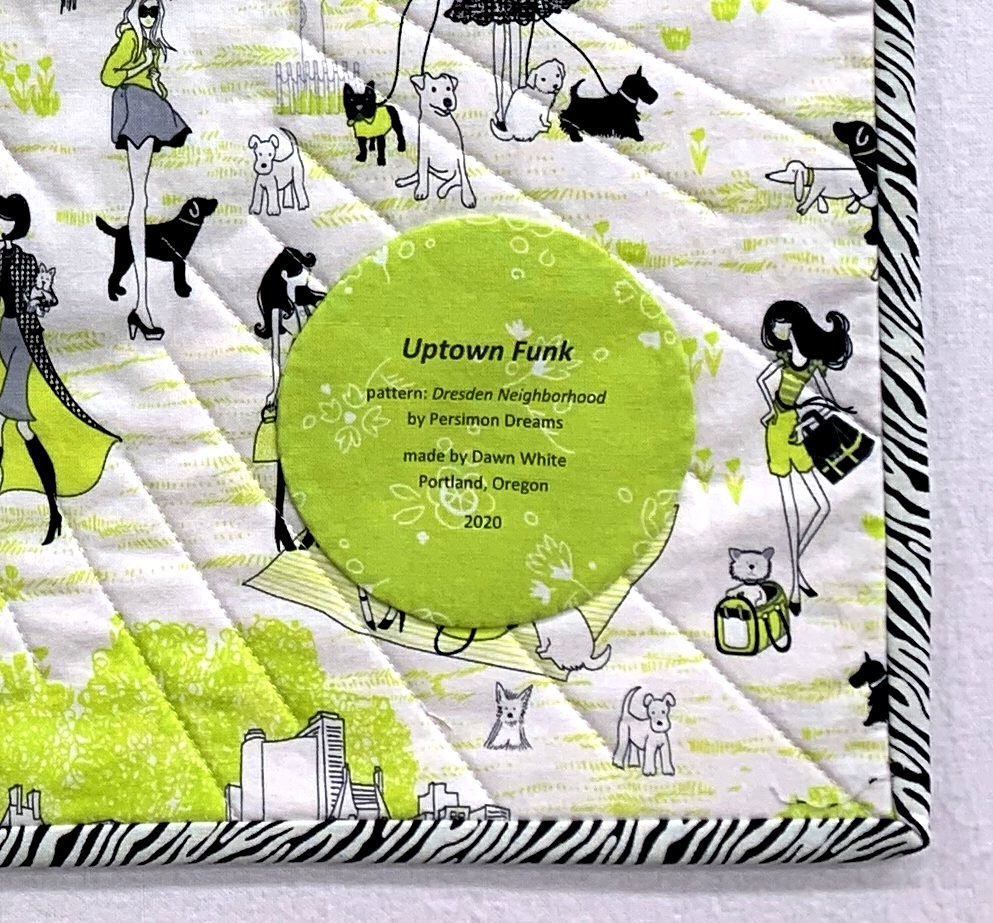
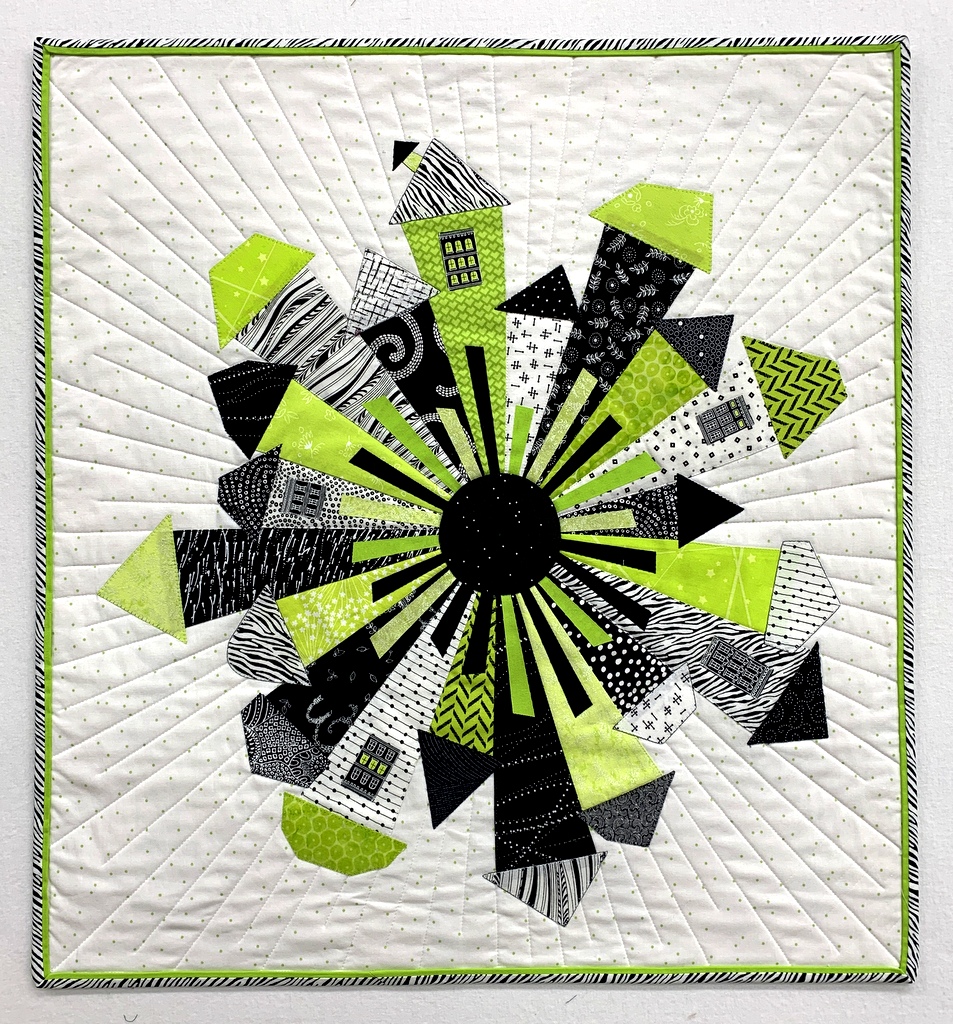
I did something similar with my first wonky Dresden Neighborhood quilt, Uptown Funk, but added more quilting lines and staggered the ends of some of them:
I really like the effect of rays emanating from the roofs, echoing the doors, which also give the impression of rays emanating from the center circle.
Here’s a look at the back of my current version:
The fabric is a piece of yardage from Corey Yoder’s “Holliberry” line for Moda, the same line I used in most of the dresden blades. Somehow I overlooked this particular print when cutting my 20 blades; it would have been a nice addition to the neighborhood!
The next step is to transform this square piece into a circle. Then I’ll decide whether it needs more quilting. I’ve already decided which fabric I’m going to use for the binding. I think you’ll like my choice!
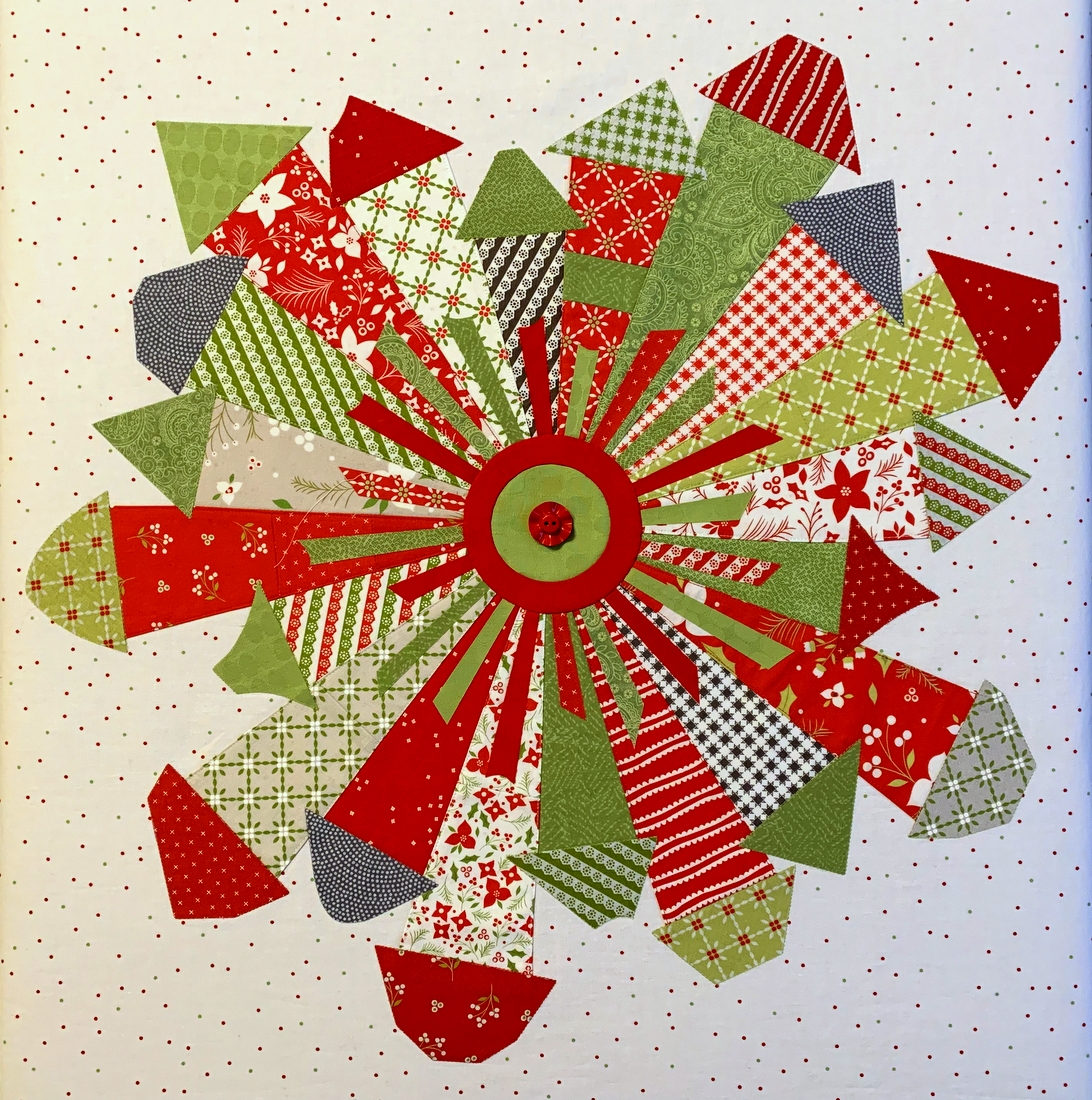
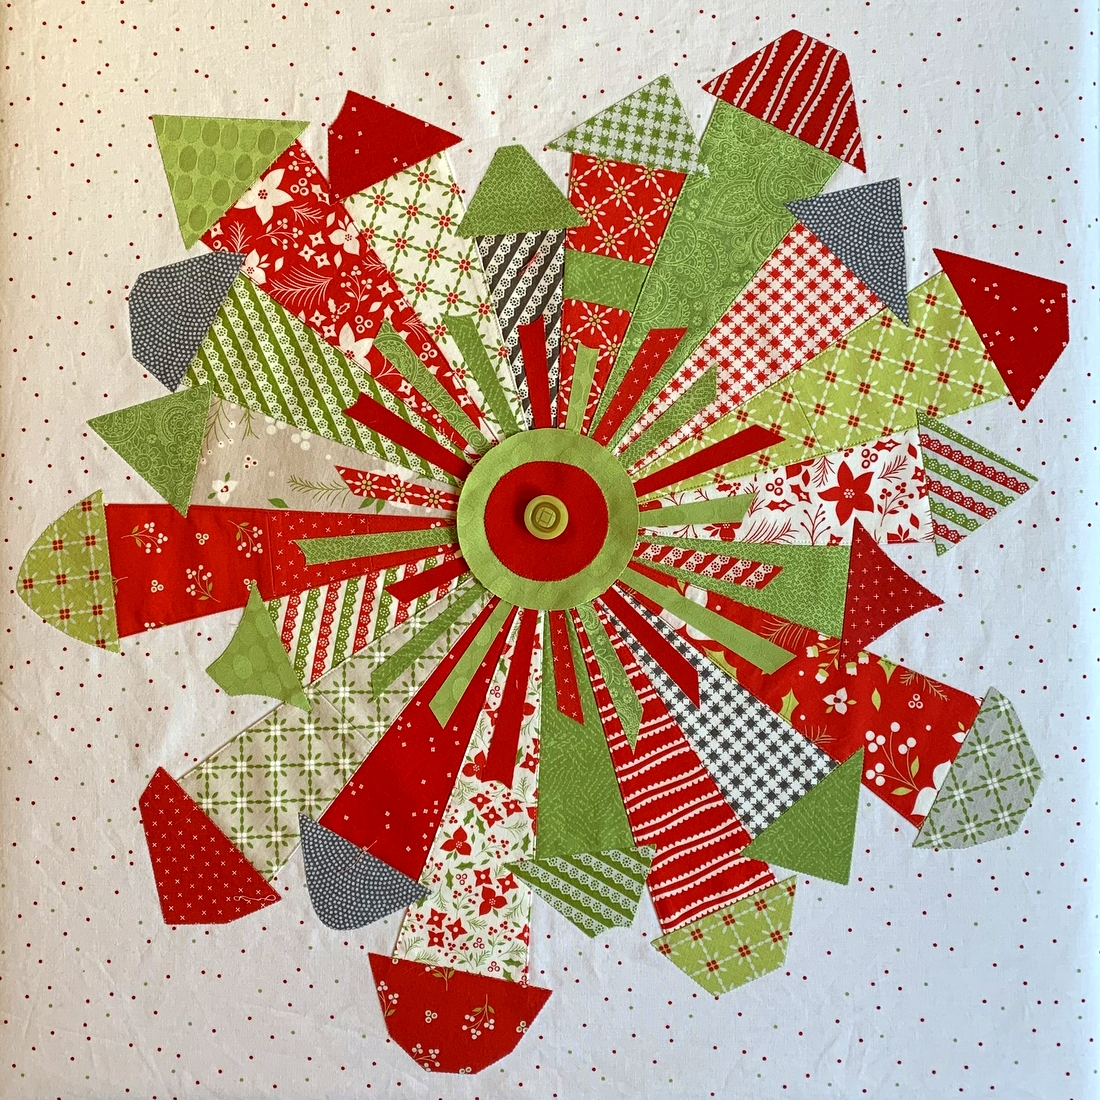
The votes have been tallied — and my thanks to you who weighed in! The red button on the small green center . . .
. . . was by far the most popular choice among those who helped me solve My Button Dilemma (subject of my last post). I truly think if I had started and ended with the green button I would have been pleased with the outcome, but as my friend Colleen noted, the red button “just sings!” For those of you who preferred the green button on the small red circle, do not despair. That green button will definitely find a home on my wonky Dresden Neighborhood mini quilt.
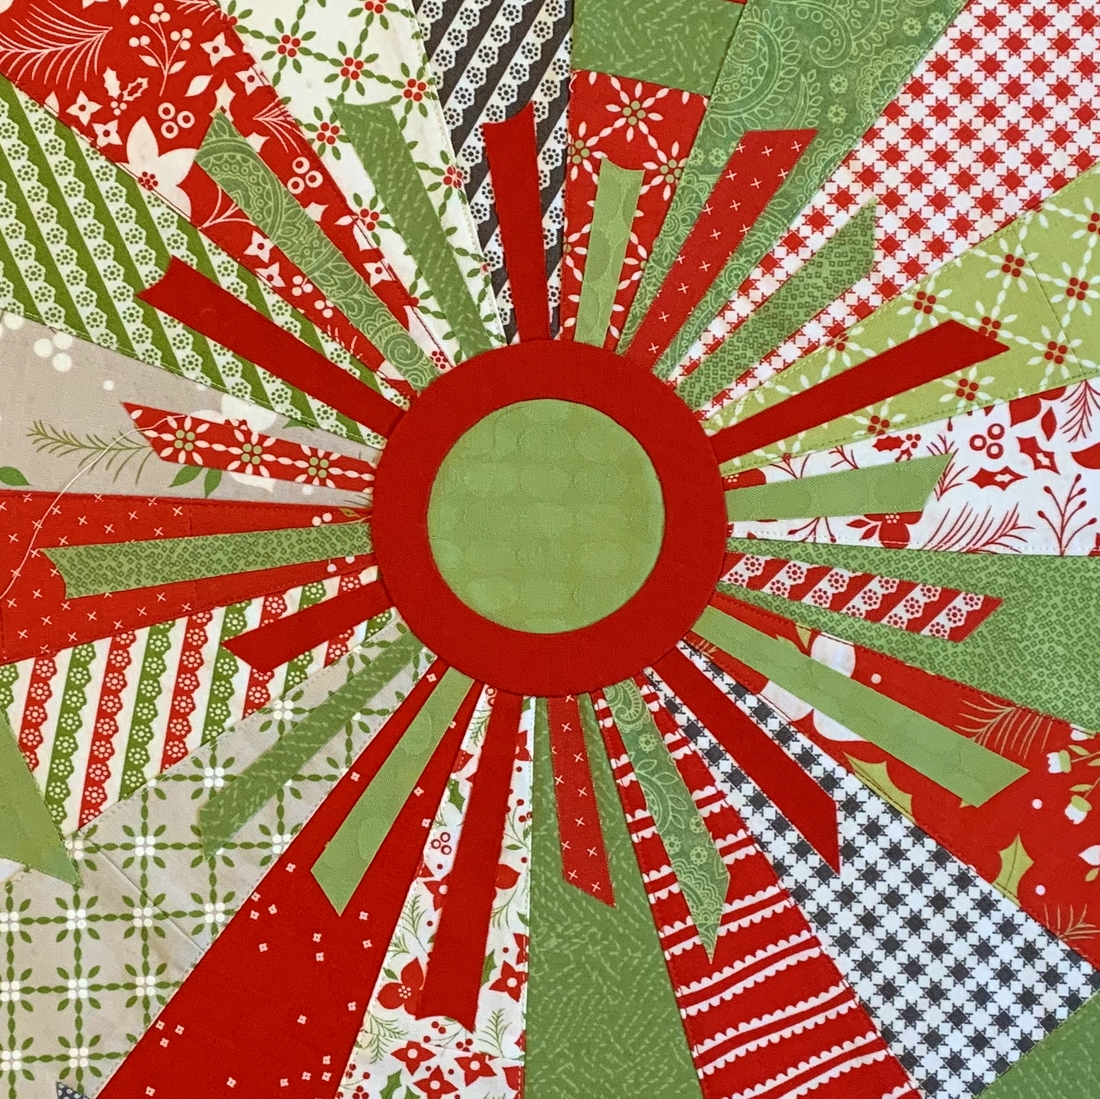
On the photo above, the red and green circles have been attached to the quilt top. (The red button is just there for the photo op. It will get sewn on much later.) Here’s a close-up of the center:
Although I could have done a raw edge appliqué technique to attach the green circle to the red one, I chose instead to inset a green circle into a larger red square. All I needed to do next was convert the square into a circle. I did that by drawing the properly sized circle on a scrap of fusible interfacing (using the base of a milk pitcher as my template!), putting the two pieces right sides together, and stitching all the way around the circle.
Then I cut into the back side (interfacing layer only) so I could turn the circles inside out, which meant the fusible side was now on the outside and ready to fuse onto the quilt top:
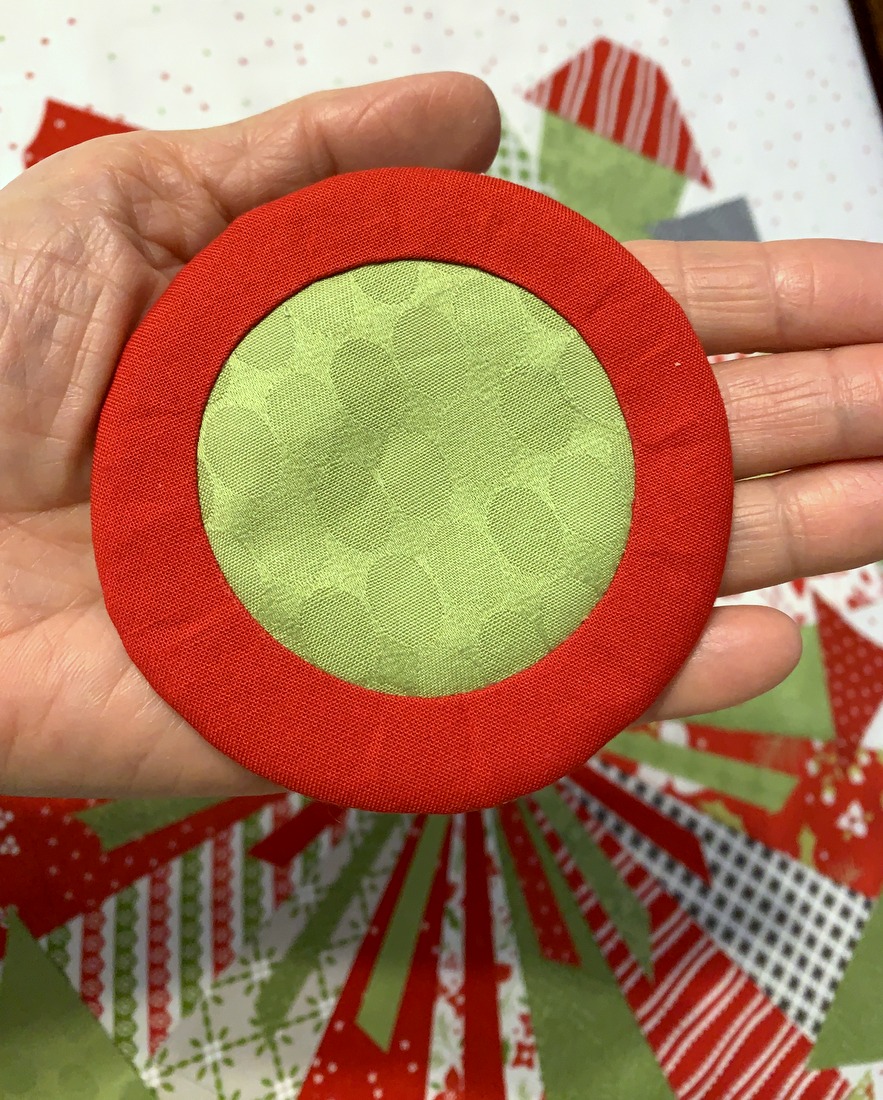
Here’s the front after turning:
Fusing it onto the quilt top flattened the circles but I still stitched all the way around the outside circle by hand for a more finished look. When I’m ready to quilt the top by machine, I’ll stitch in the ditch around the inner and outer circles and from there stitch down some of the blades to hold the layers securely together.
With every step, I am loving my wonky Dresden Neighborhood even more!
Thank you all for weighing in on the color combo you prefer for the center of my Dresden Neighborhood mini quilt. The green outer circle/red inner circle got the most votes but my twin sister Diane — who is not even a quilter — suggested that I audition the buttons I have in mind for this quilt before making a final decision. Now why didn’t I think of that? Her suggestion was echoed by my friend Arden, who is a quilter, so I’m going to do just that.
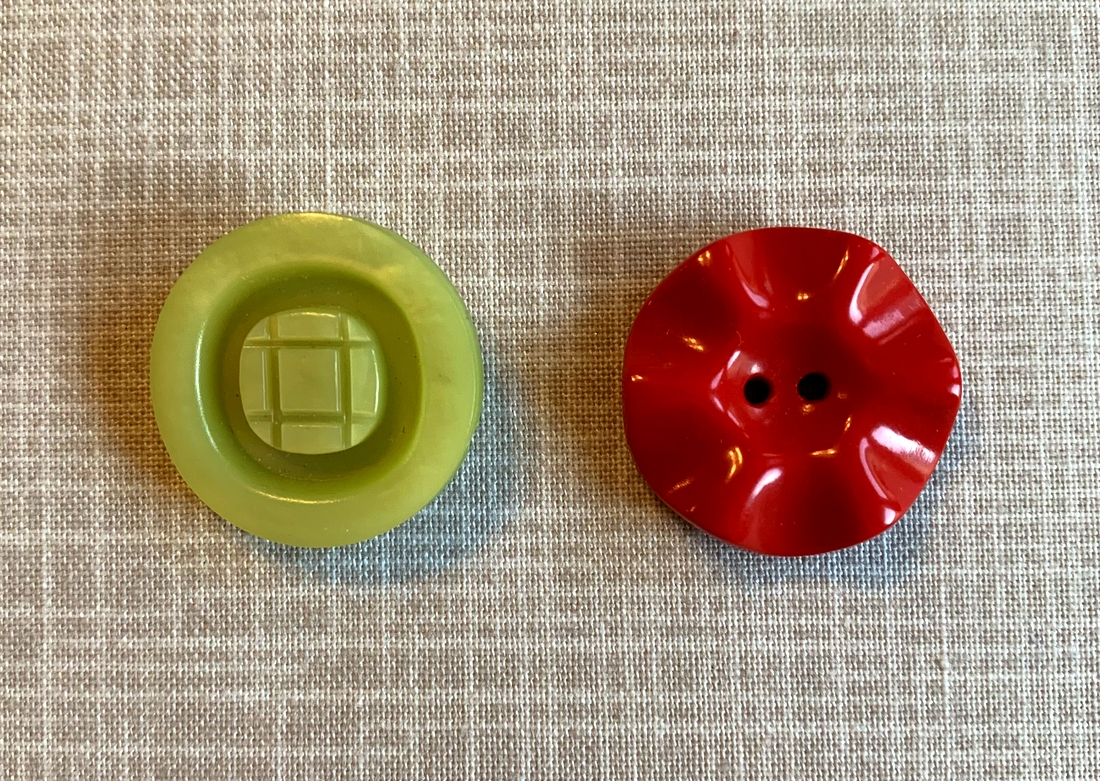
First let me show you the leading button candidates:
Aren’t they beautiful? They are both vintage but I’m pretty sure the red one is older. I love the scalloped shape of the red button but the green button also appeals to me because its center design is reminiscent of a Churn Dash quilt block. Both buttons measure 7/8″ in diameter.
Let’s take a look at the buttons in place on the quilt top. (Nothing is sewn down; the circles are just plunked down in the middle with a button on top.) Behind Door #1:
Behind Door #2:
And finally, the contenders side by side:
Oh, what a dilemma! I love them both but I am leaning toward one. How about you?
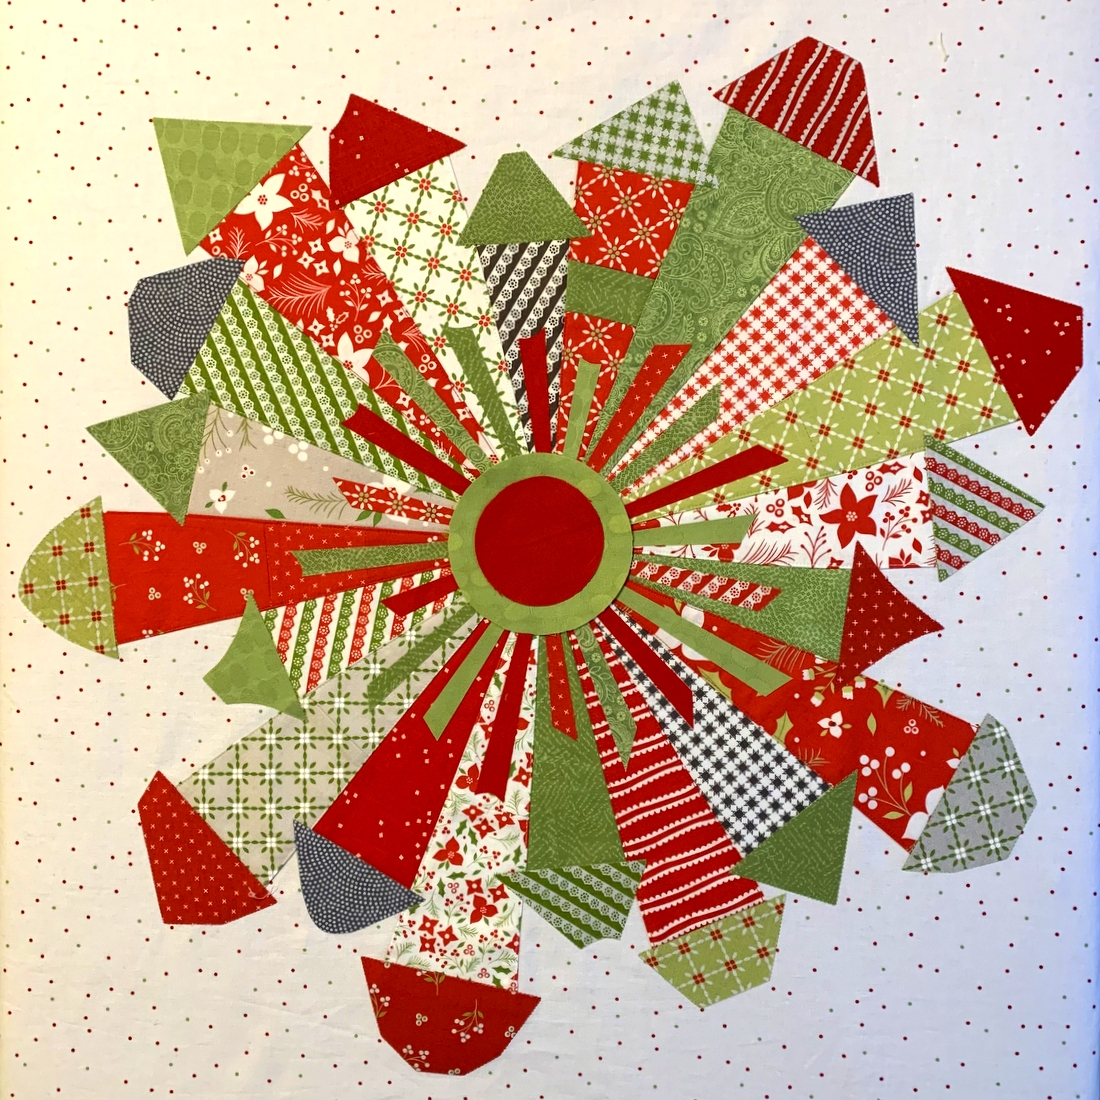
In my last post I showed my thought progression in auditioning red and green circles for the center of my Dresden Neighborhood mini quilt. My final decision (or so I thought) was a green circle, which I really liked after adding a smaller red circle on top of it. Here’s a reminder of what that looks like:
One of my friends from Quilt Camp came out strongly in favor of red so I took another look. I still felt the red by itself was too bold but I hadn’t thought about placing a smaller green circle on top of it. When I did, I really liked it too:
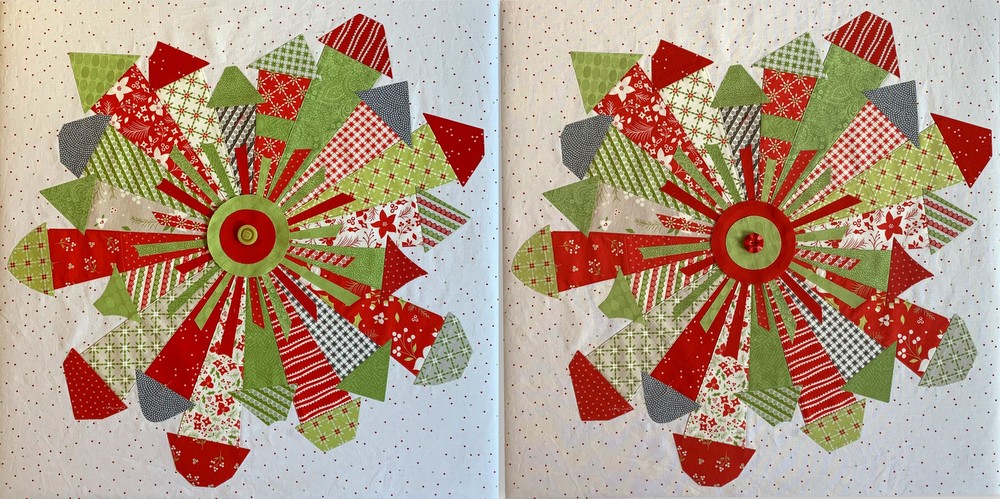
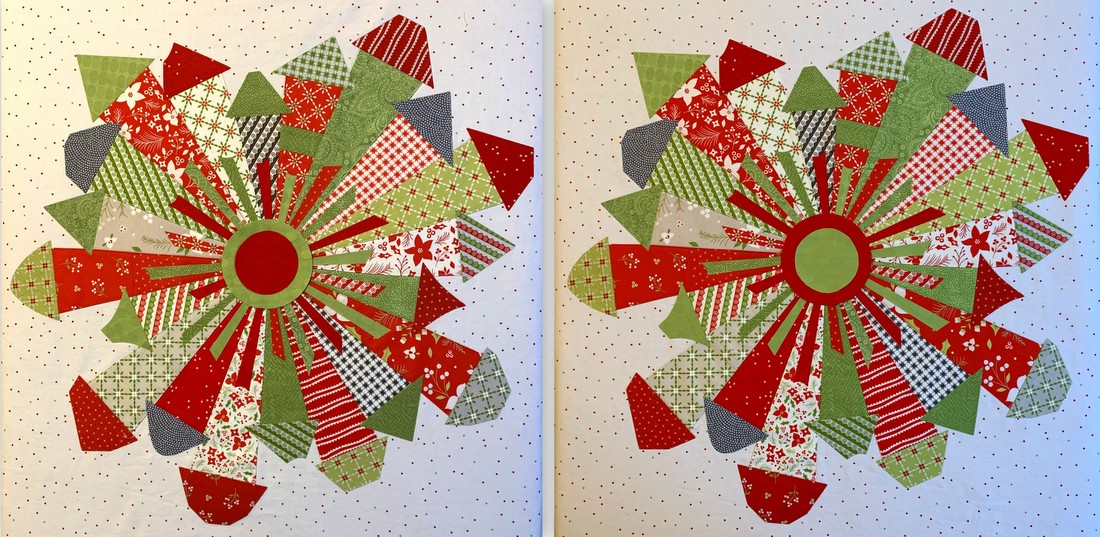
Now I can’t decide which one I like better. Here are the two possibilities side-by-side:
(You will surely notice how different the background fabric looks in the two photos. They were taken on different days in the same spot in my sewing room, with weak afternoon light coming in a south window. Depending on the time of day and weather, the colors can look so different.)
The doors are on my wonky Dresden Neighborhood mini quilt:
I cut the strips for my doors a little taller than designer Kim Lapacek’s pattern calls for. That’s because my house fabrics are pretty busy and I wanted to tone down the prints with some longer strips of solid fabrics — or at least fabrics that read as solid. In fact, there’s only one solid, the true red.
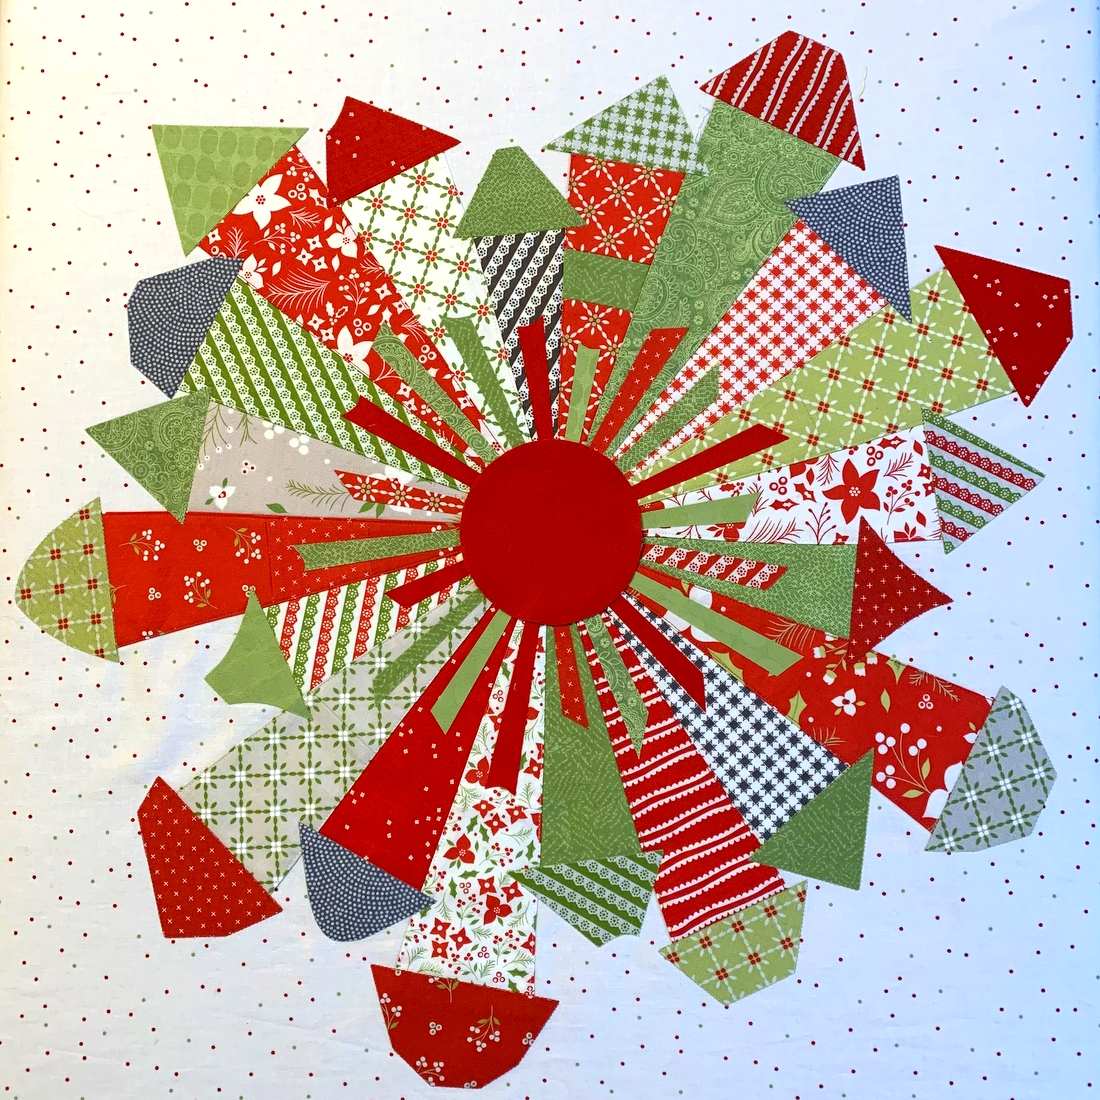
The next decision? What to use for the circle that goes in the center. First I auditioned a scrap of the solid red:
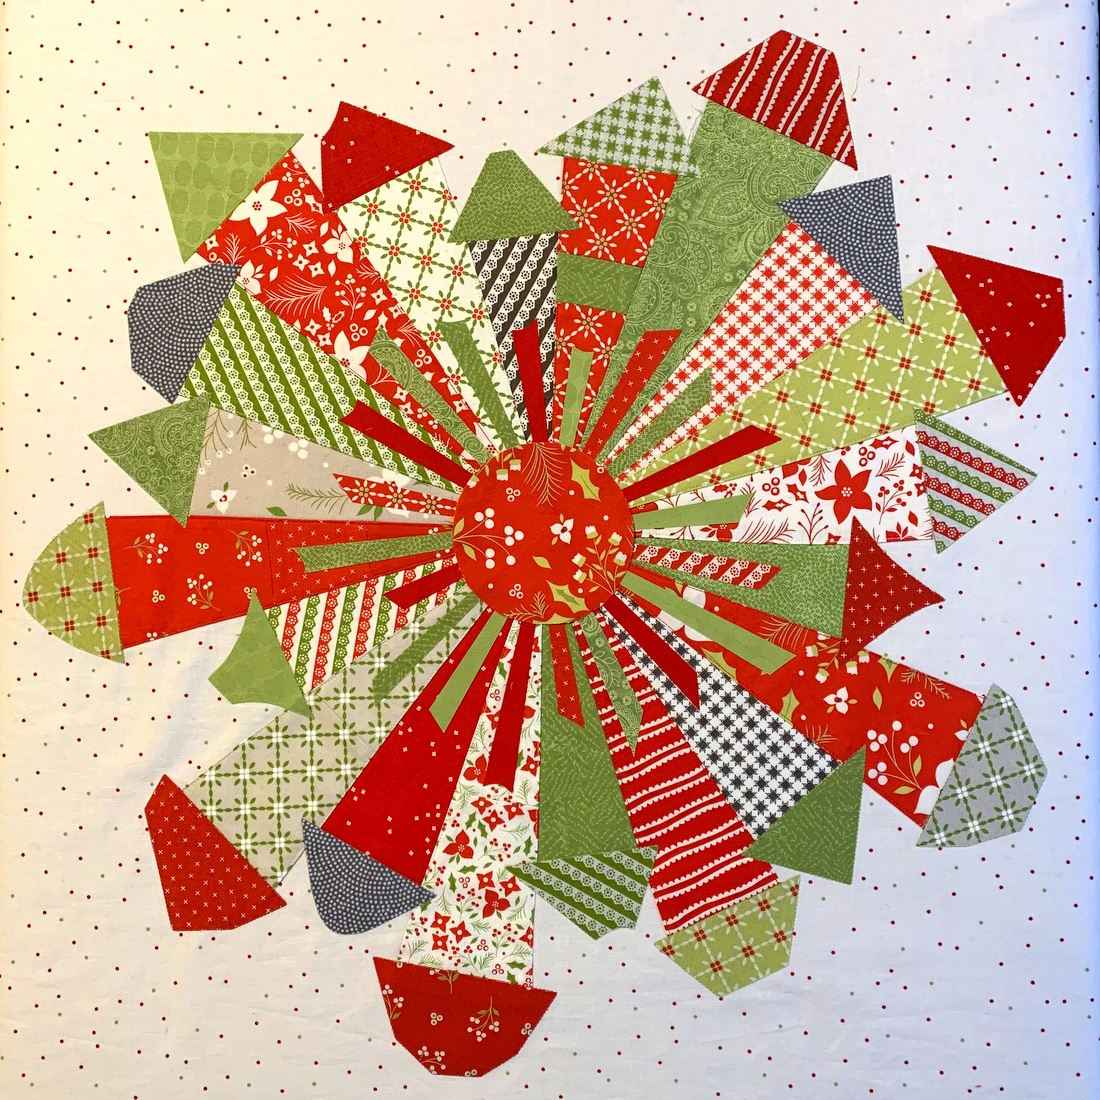
I liked it but felt it was too strong. Maybe one of the red prints would work better? I cut a circle out of a scrap and stuck it on:
As much as I like this print (one of my favorites from Corey Yoder’s “Holliberry” line), it seemed to add to the busy-ness of the prints rather than calm them down.
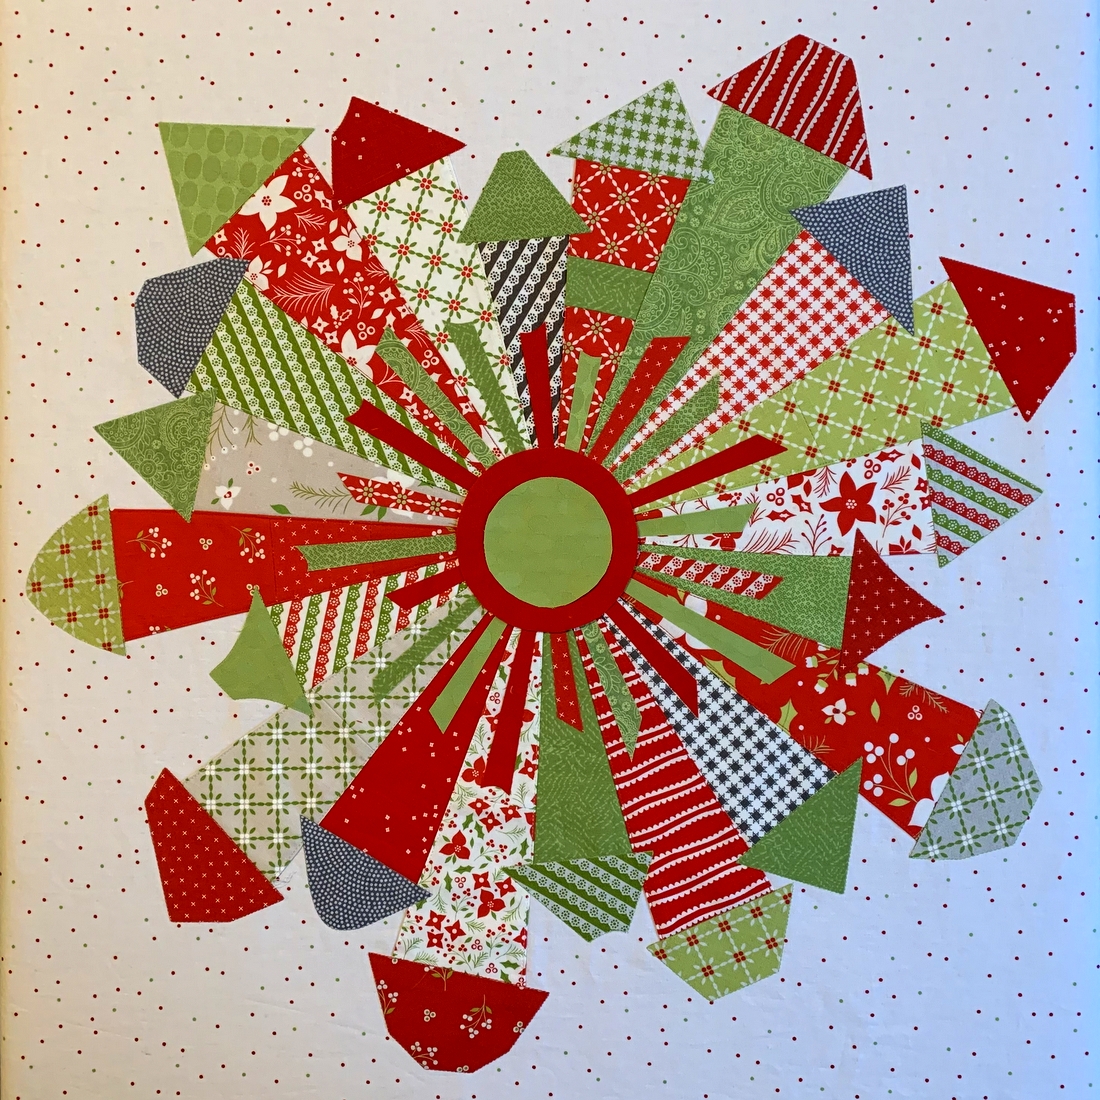
Next I tried one of the greens:
Okay, this is more like what I had in mind. (And you shouldn’t be surprised. Green is my favorite color, after all.)
But then I wondered: how would it look with a smaller solid red circle on top of the green one?
Oh, yeah! I’m liking this a lot. As Henry Higgins would say, “By George, I think she’s got it!”
But guess what else I’m seeing? A big green button on top of the red circle. Maybe even a smaller red button on top of the green one. What do you think? Can you see it too?
One of the pleasures of working on a project like this is letting it evolve. Each quilter who makes this charming pattern (Dresden Neighborhood by Persimon Dreams) winds up with a unique project, totally subject to the whims and preferences of its maker.
Now that I have a plan, I’ll inset a red circle into a larger green scrap and turn that scrap into a circle so that I can applique it (by hand) into place. Then I’ll be ready to add the batting and backing and turn it into a quilt sandwich.
Working on this project is making me smile. Always a good thing on a cold and rainy January day!
Happy New Year, friends and treasured blog followers! I’m popping in to say hello and point out the stitching around the roofs on my wonky Dresden Neighborhood mini quilt:
It’s still under construction but you can see the rest of the neighborhood here.
I used a simple straight stitch to outline each roof, using my open-toed walking foot so I could easily see every stitch as it was being made:
The threads I used — light green, red, and medium gray — were chosen to blend with the roof fabrics rather than offer contrast. The effect is very subtle but gives the roofs in my wonky little neighborhood a nicely finished look.
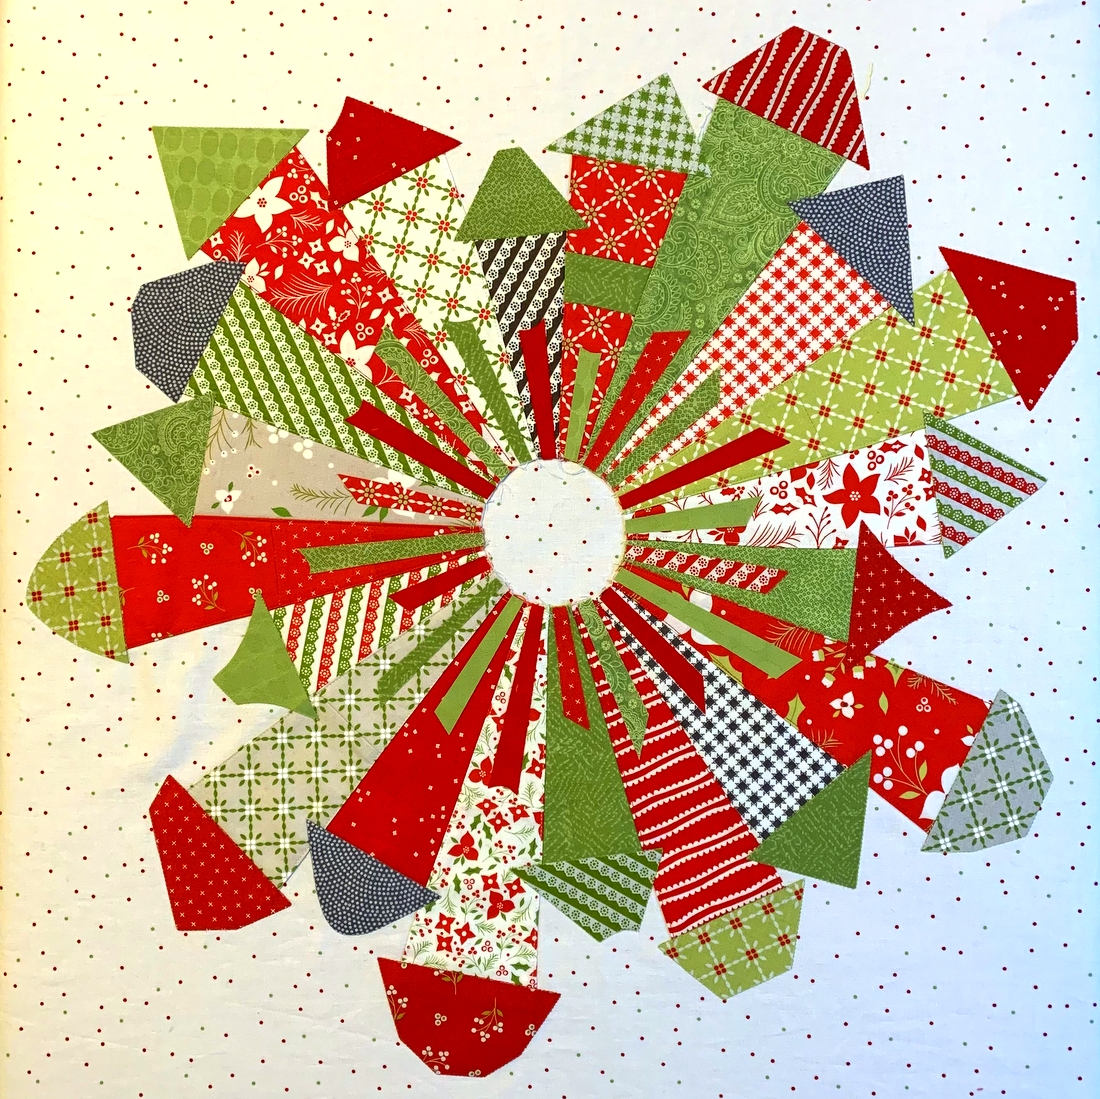
My Dresden Neighborhood homes now have roofs over their heads. I just finished fusing 20 slightly wonky roofs in place. But before I show you, take a look at the “before” photo, with the dresden blades attached to the background fabric:
Who doesn’t love polkadots?! I especially love them when they’re scattered randomly across fabric. They add an extra touch of whimsy, don’t you think?
Now for the roofs:
(That’s a circle of freezer paper in the middle, put there just to cover the raw edges.)
Next up: stitching around each roof. I used a heavy duty fusible on them so I’ll use a straight stitch around the edges of each roof rather than a decorative stitch. Doors and windows get fused on next. Hmmm, wouldn’t it be fun to use buttons for some of the windows? I have some really neat vintage buttons that might find their way onto the finished quilt . . .
Preparing to teach a class on this pattern (Dresden Neighborhood by Persimon Dreams) has given me an excuse to play in my sewing room. (As if I needed an excuse!)
Since this is my second version of Dresden Neighborhood — you can see my first one here — I’m going to try out some new ideas (buttons being one of them). As designed, this mini quilt finishes at 24″ square but I’m toying with the idea of making it round. To that end I cut my background fabric about 31″ square. We’ll see where that takes me after I’ve finished decorating the houses.
For crafters and quilters in the area who might be interested in my class, clicking here will take you to the class information page at Montavilla Sewing Center in Lake Oswego.
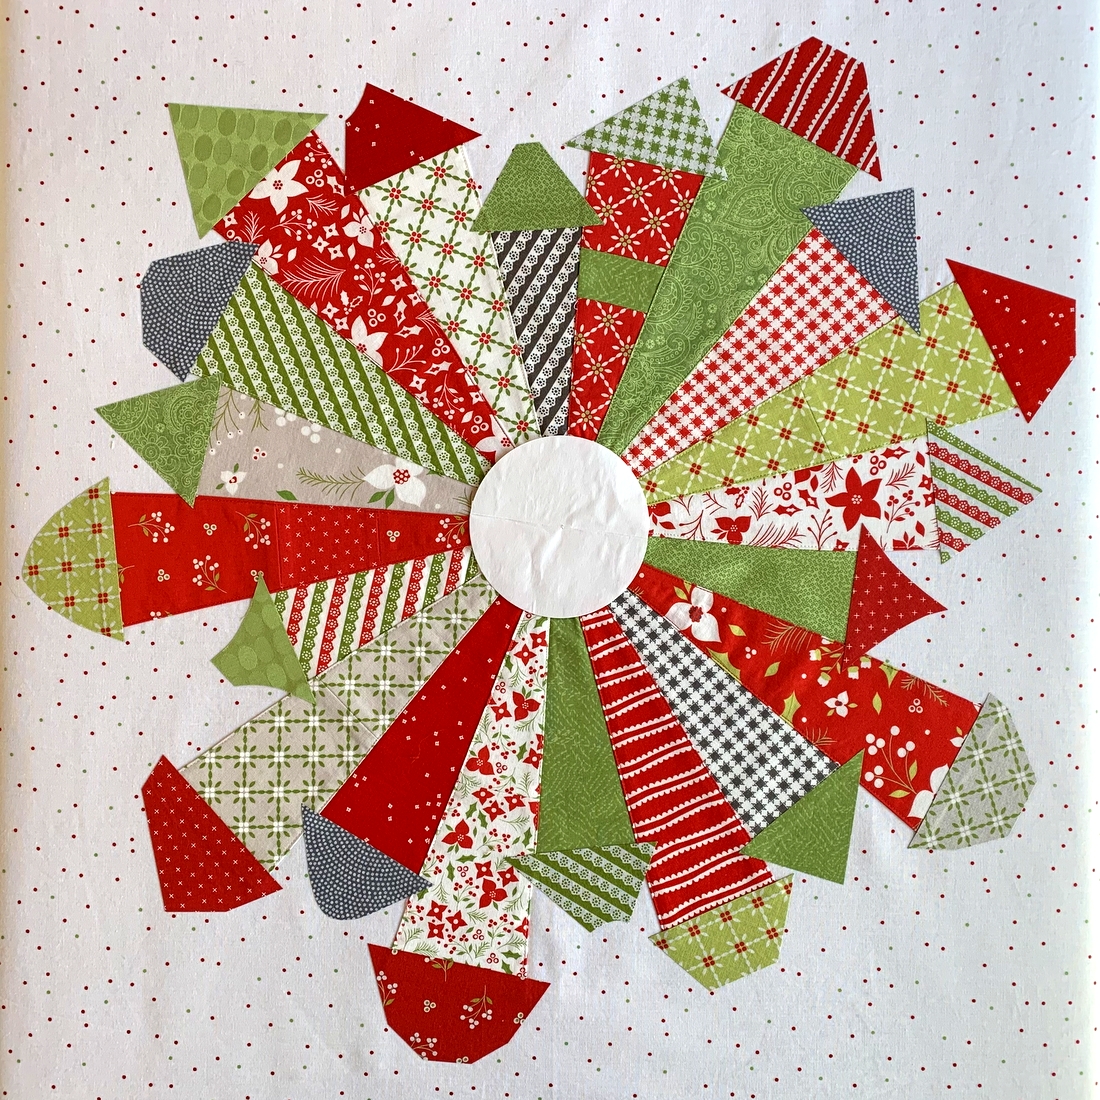
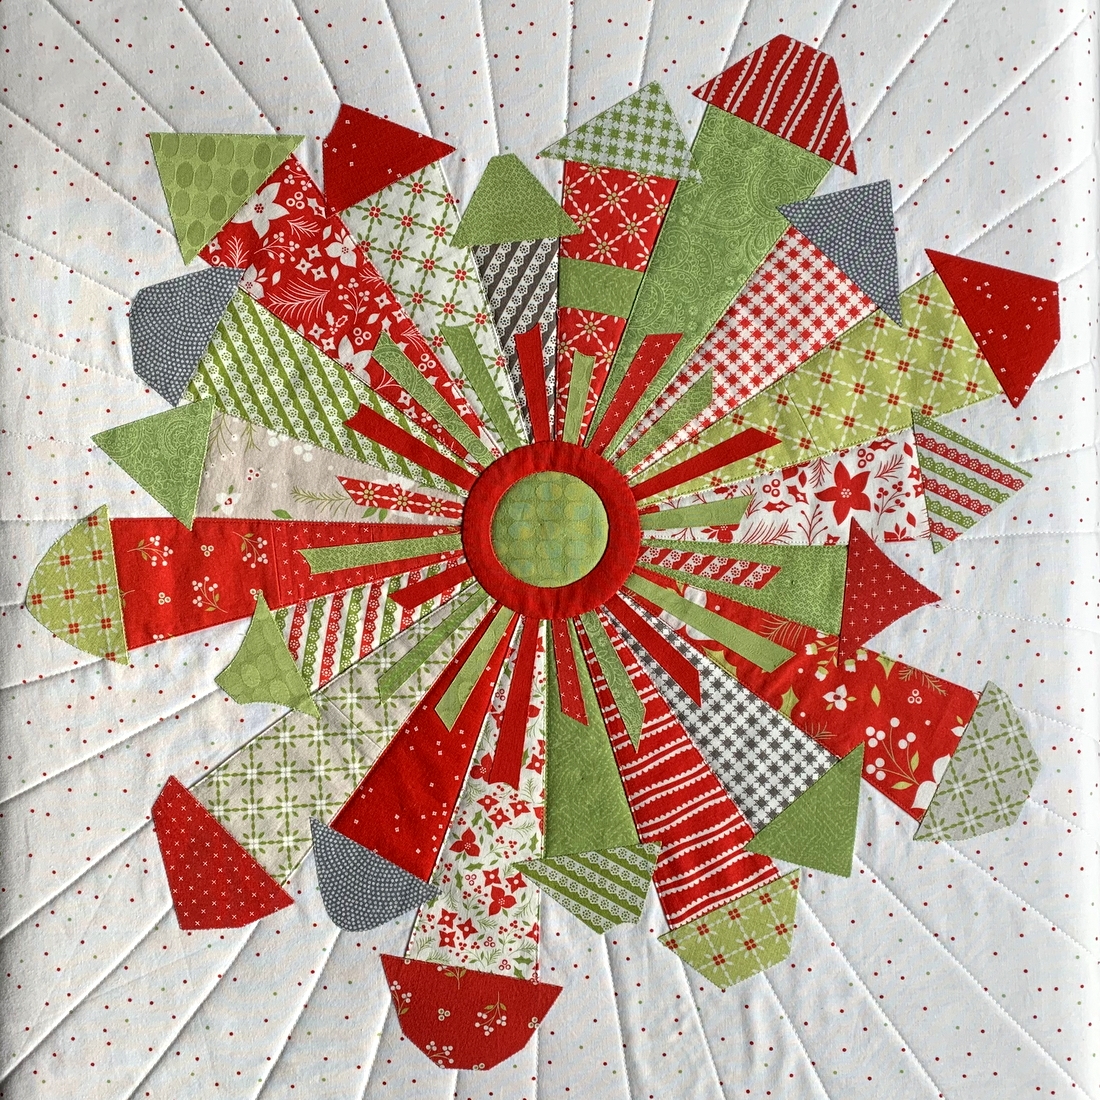
My current work-in-progress is a second version of the delightfully whimsical pattern Dresden Neighborhood by Kim Lapacek of Persimon Dreams. I’m using scraps from Corey Yoder’s “Holliberry” line from last year plus a few other red and green fabrics culled from my stash:
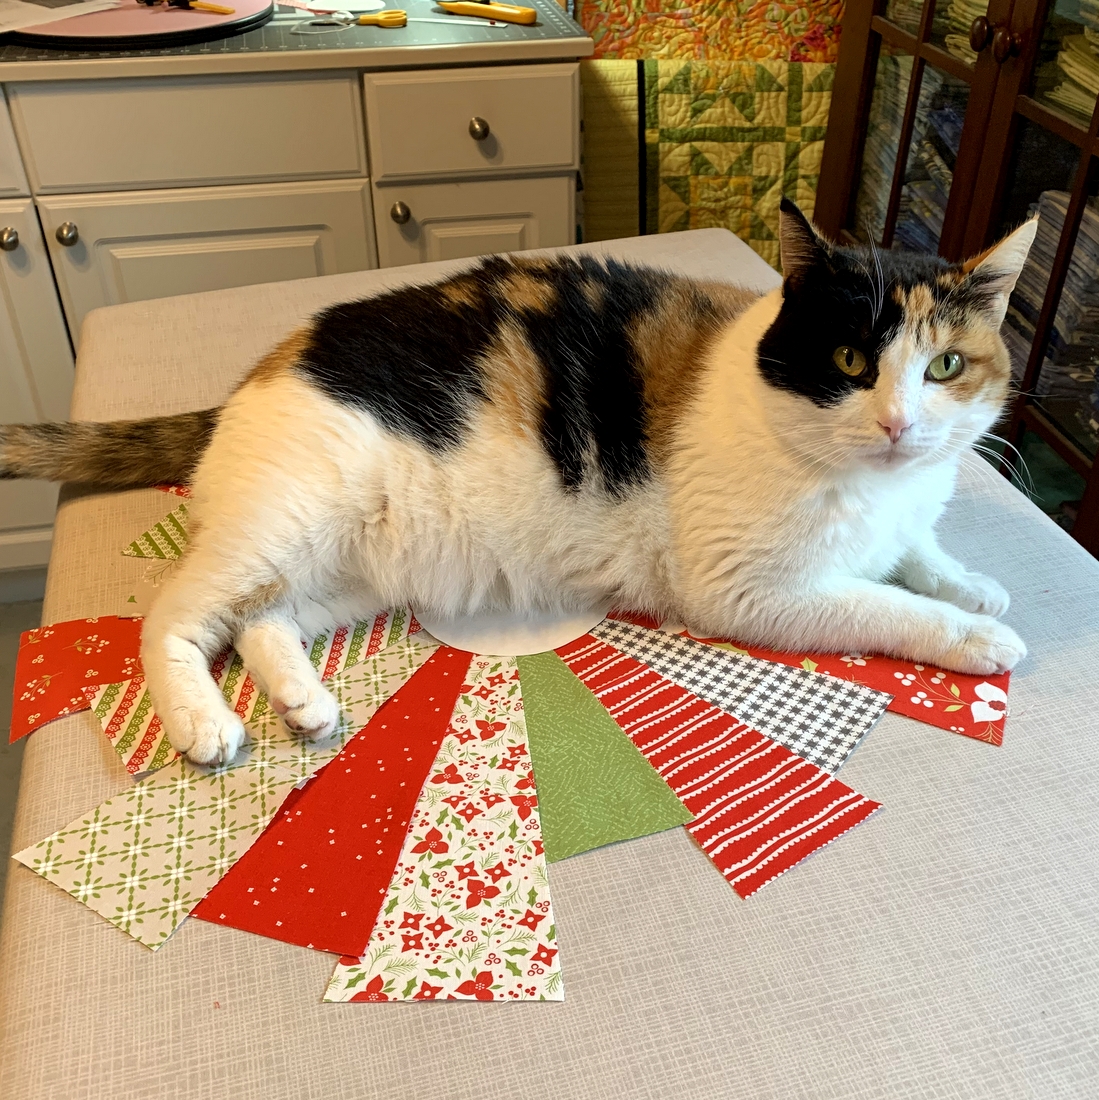
As you can see, progress was interrupted by the arrival of Princess Cordelia (Coco for short), who did her thing: flopping down on top of whatever project happens to be on my ironing board. When she finally deigned to depart I was able to sew the dresden blades together:
Having blades of different lengths topped off by lopsided roofs, windows, and doors is what makes the Dresden Neighborhood so delightfully wonky as you can see in my first version, Uptown Funk:
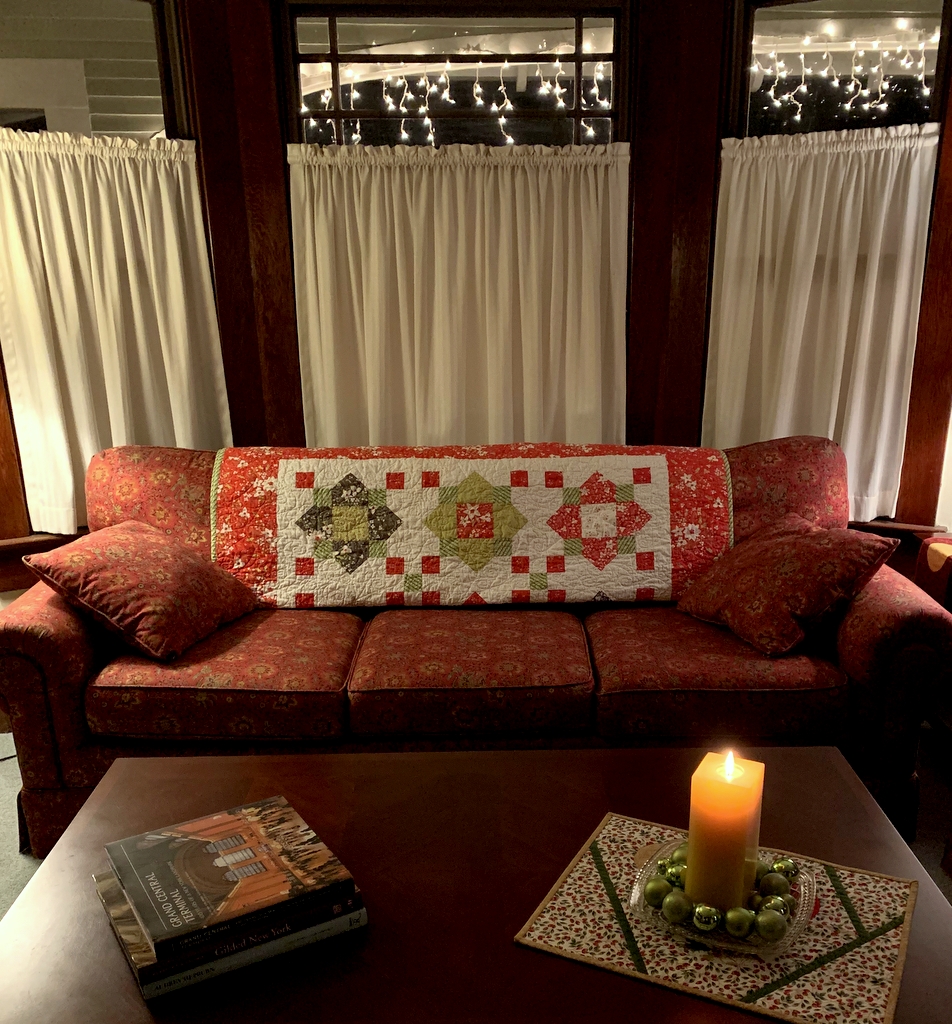
I love the idea of a holiday version. The “Holliberry” fabric I’m using made its first appearance in my quilt ‘Tis the Season, currently on rotation on the back of our couch because — of course — ’tis the season:
In spring next year I’ll be teaching “Wonky Dresden Neighborhood” at Montavilla Sewing Center’s Lake Oswego store and also for the Oregon Coastal Quilters Guild. Making a second version is part of my preparation. It will refresh my memory on what I learned the first time around and allow me to try out some different ideas in customizing my neighborhood. What fun!
Cheryl at Meadow Mist Designs is hosting a Best of 2020 Linky Party, inviting bloggers to highlight their top five posts of the year. It’s a fun way to look back over the last 12 months and identify some of the high points. (And wouldn’t we all much rather dwell on the high points of 2020 than the low points?!)
My top five are below, in reverse order. Clicking on the links will take you to the original posts.
5. Uptown Funk. My version of Dresden Neighborhood by Kim Lapacek of Persimon Dreams. It was so much fun to make!
Uptown Funk (24″ x 26″) by Dawn White (2020)
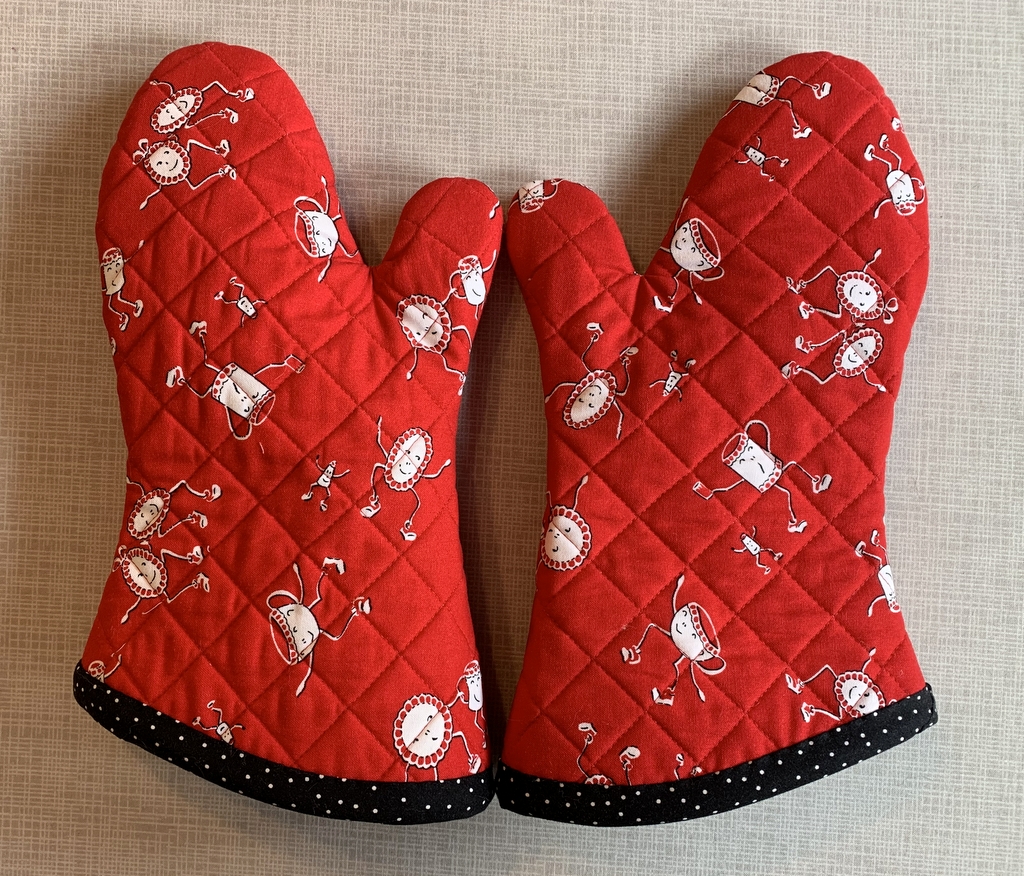
4. Something in Red: New Oven Mitts. Every oven mitt I’ve tried on in a store has been oversized, and every tutorial I’ve found online has included a pattern that’s too big. What’s a quilter to do? Why, make her own, of course! I just started making oven mitts in December and am still tweaking my process but I plan to offer my own tutorial and free pattern in early 2021.
Mitts that Fit! Made by Dawn White (2020)
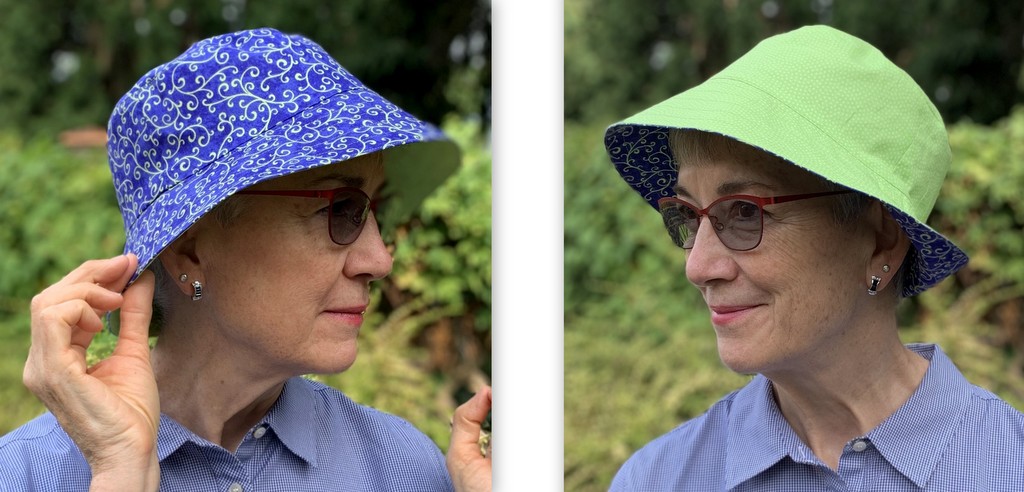
3. A Bee in my Bucket Hat. A reversible hat made using the Sorrento Bucket Hat pattern from Elbe Designs.
Dawn’s Sorrento Bucket Hat (2020)
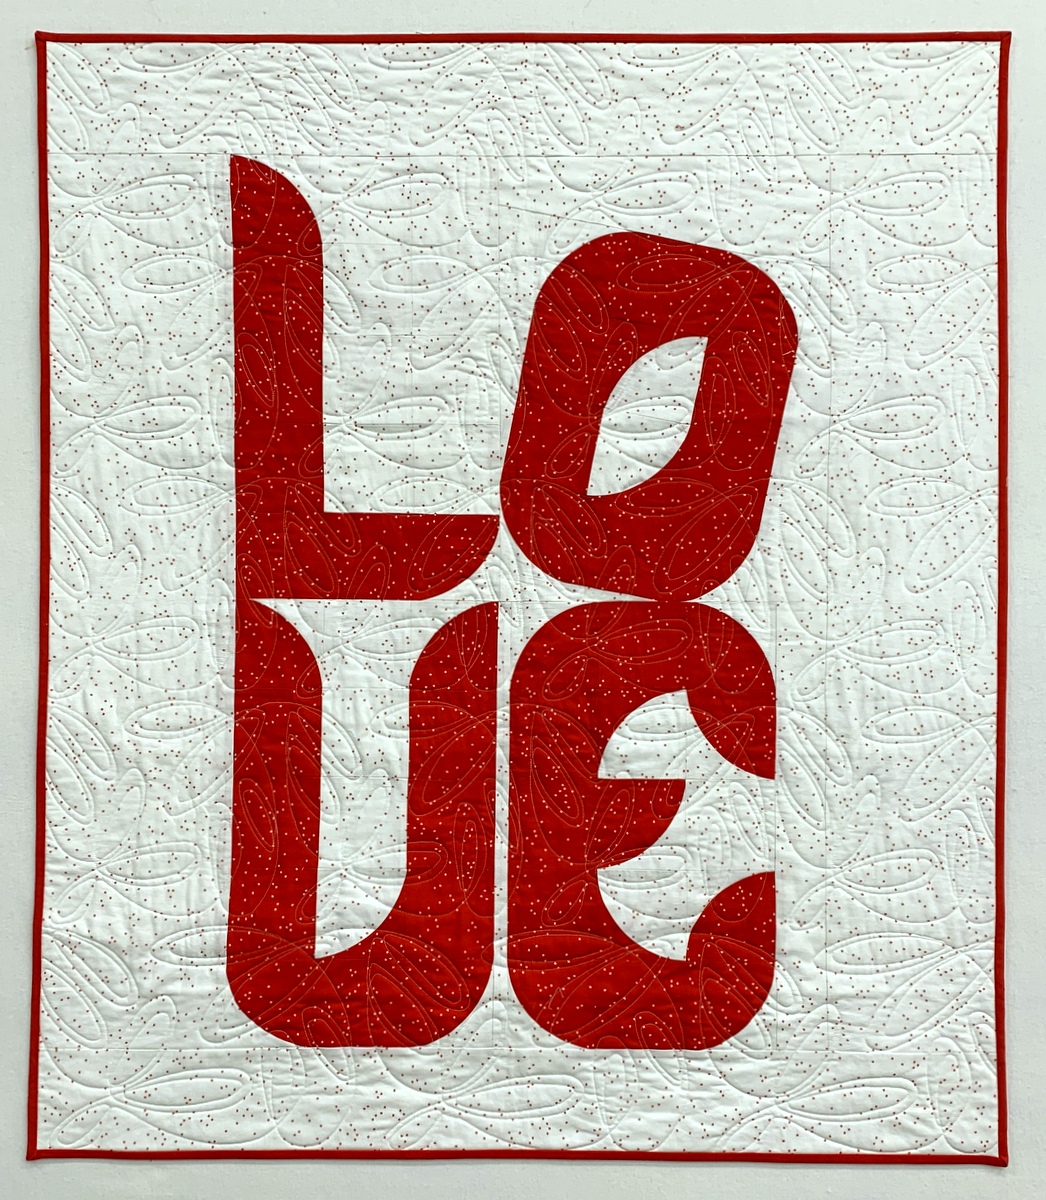
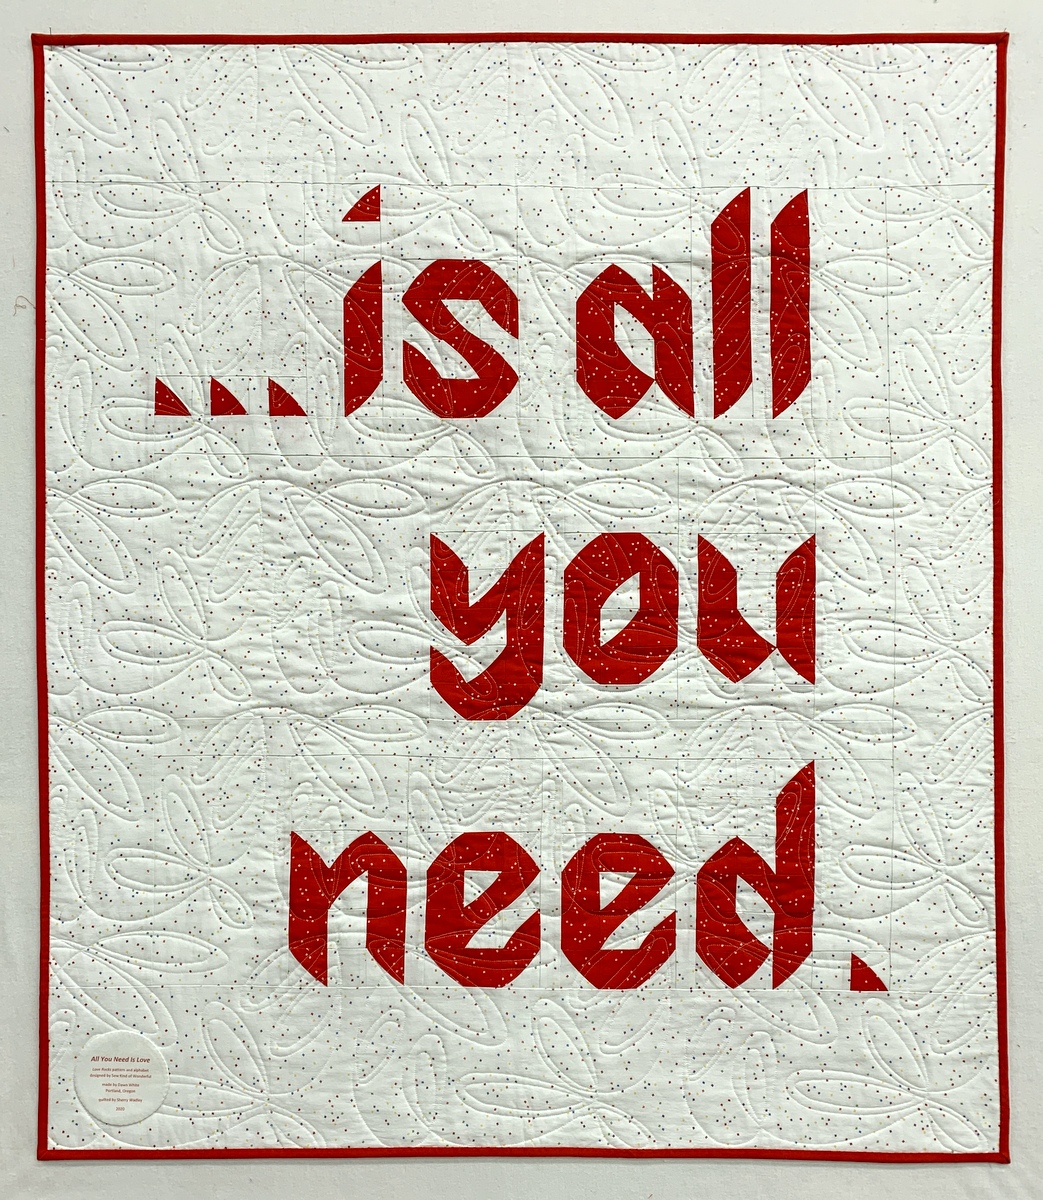
2. Love Rocks. All You Need Is Love, made using the Love Rocks pattern and alphabet (both contained in Sew Kind of Wonderful’s latest book, Text Me) and the Wonder Curve ruler.
Love Is All You Need (38″ x 44″) by Dawn White, quilted by Sherry Wadley (2020)back of All You Need Is Love (38″ x 44″) by Dawn White, quilted by Sherry Wadley (2020)
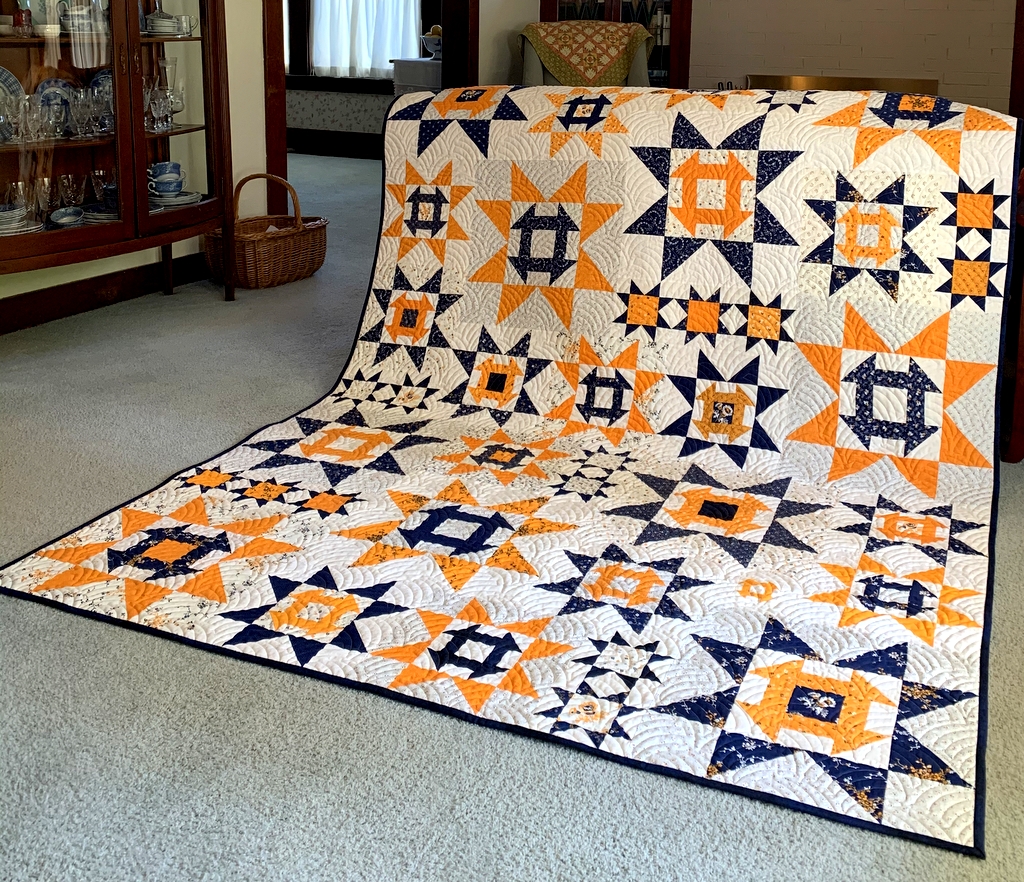
1. Scattered Stars, an original design using a block first seen in Jenifer Gaston’s quilt Churning Stars.
Scattered Stars (66″ x 88″), made by Dawn White, quilted by Karlee Sandell (2020)
Thank you so much for checking out my “top five” blog posts. If you’re a blogger, you can join Cheryl’s party, too. The link is open until January 2. Be sure to check out the top five posts of the other quilting/blogging partygoers — and prepare to be inspired!
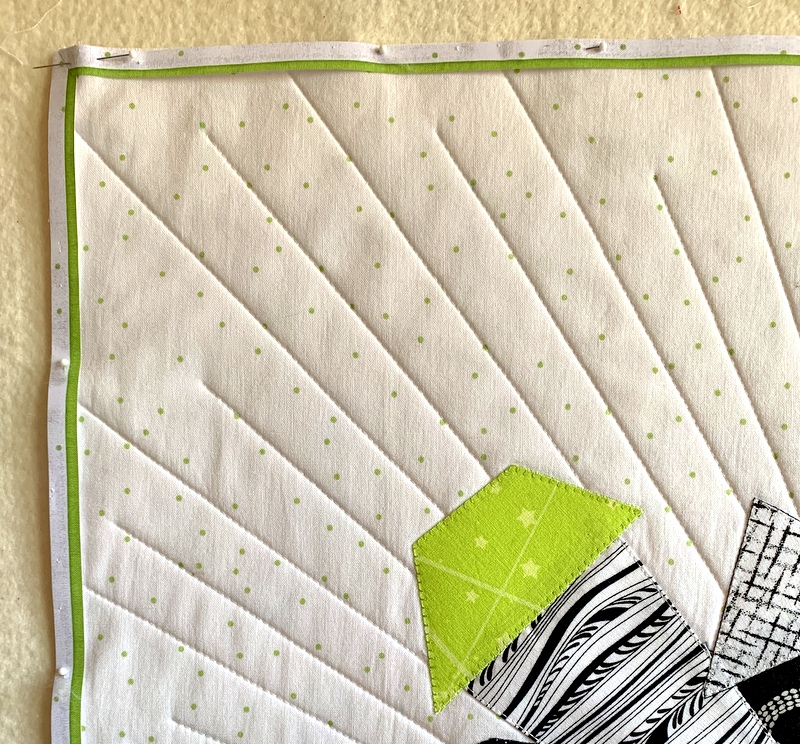
And now you know, if you’ve been following along as I pondered four binding options, that Option #1 — the lime green faux flange with the zebra fabric — was the winner.
But guess what? It wasn’t my first choice. Nope. I was going with Option #4, the green flange with the white background fabric as the binding. Here’s the mockup I showed you in my last post, with paper strips made from photocopied fabric:
Why this choice? I liked the idea of the white background fabric extending to the edges, almost as if the quilt were faced rather than bound, with that thin flange as a bright but understated accent. Plus it was an unexpected choice. (I have to thank my friend Deborah for suggesting white fabric. It never would have occurred to me, as I was gravitating to the black prints used in my quilt.)
I made my binding accordingly and started to apply it. Normally binding is stitched to the right side of the quilt and turned to the back. With this faux flange method, however, you sew the binding to the wrong side of the quilt and turn it to the right side to expose the flange. When I got ready to miter the first corner, I turned the binding to the right side. And this is what I saw:
Oh no! You can clearly see the green fabric through the white fabric in the binding. With this particular treatment the seam allowance must be pressed toward the binding fabric for the flange to lie flat. I tried pressing it the other way but it was a “no go.” There was no way I could see to remedy this problem.
Back to the drawing board — er, cutting table. My second choice for the binding was the zebra fabric. That was my husband’s first choice and also my twin sister’s. Some of my readers liked it too so I figured it was a keeper. (Thank you, Vickie R., for suggesting the zebra fabric. Like the white background fabric, it wasn’t even on my radar initially.)
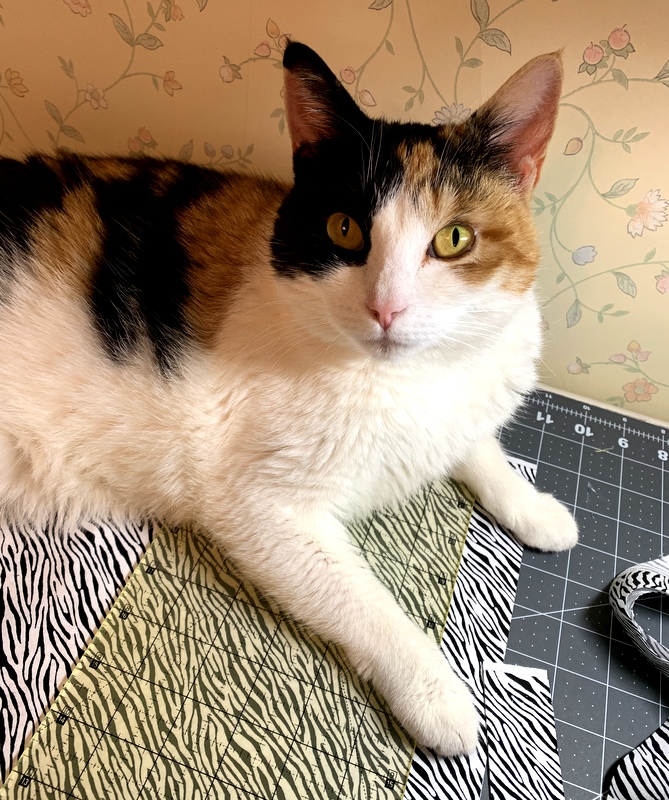
I started cutting more binding strips . . . until a certain feline came to investigate:
Princess Cordelia (Coco for short) was gently ejected from my sewing room so I could proceed. The binding went on very nicely.
The conventional way to finish a faux flange binding is to machine stitch in the ditch where the flange meets the binding fabric. Instead of doing that I fused the binding down with Steam-a-Seam-2, a double-sided fusible web.
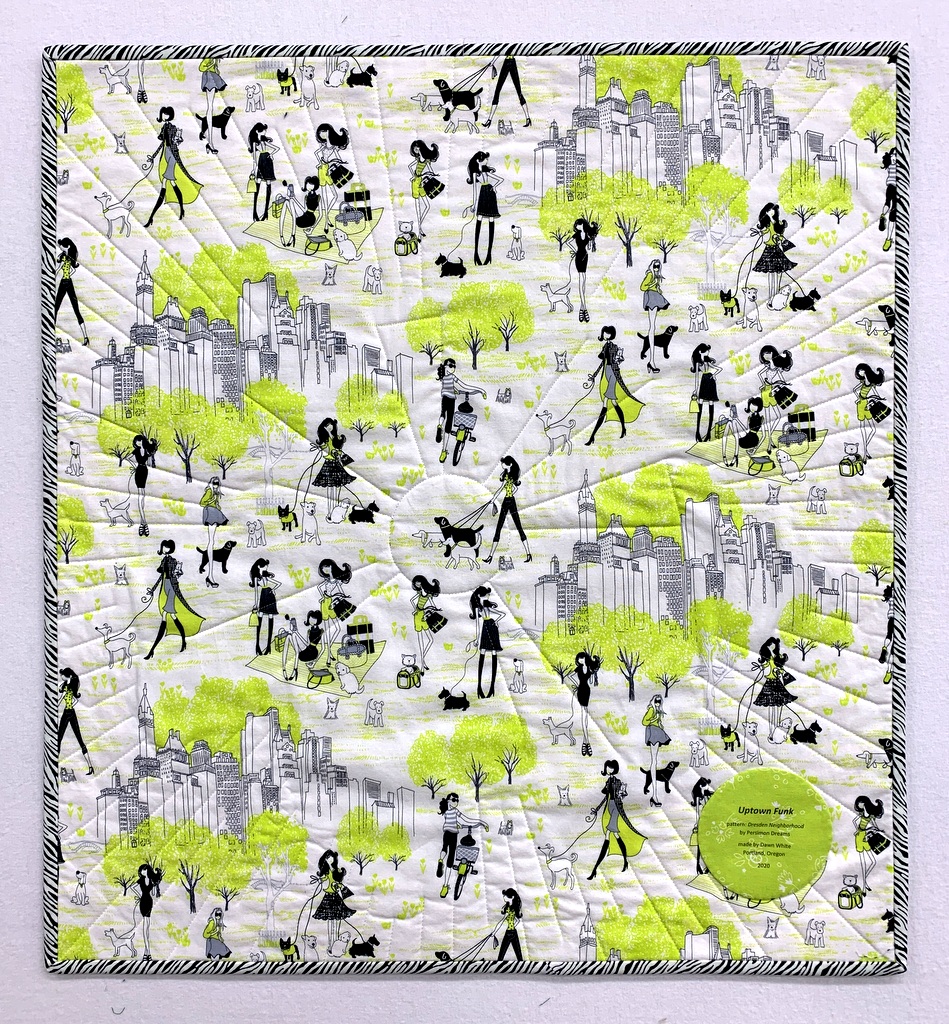
Here’s the back of Uptown Funk:
I love the way the binding looks with the backing fabric.

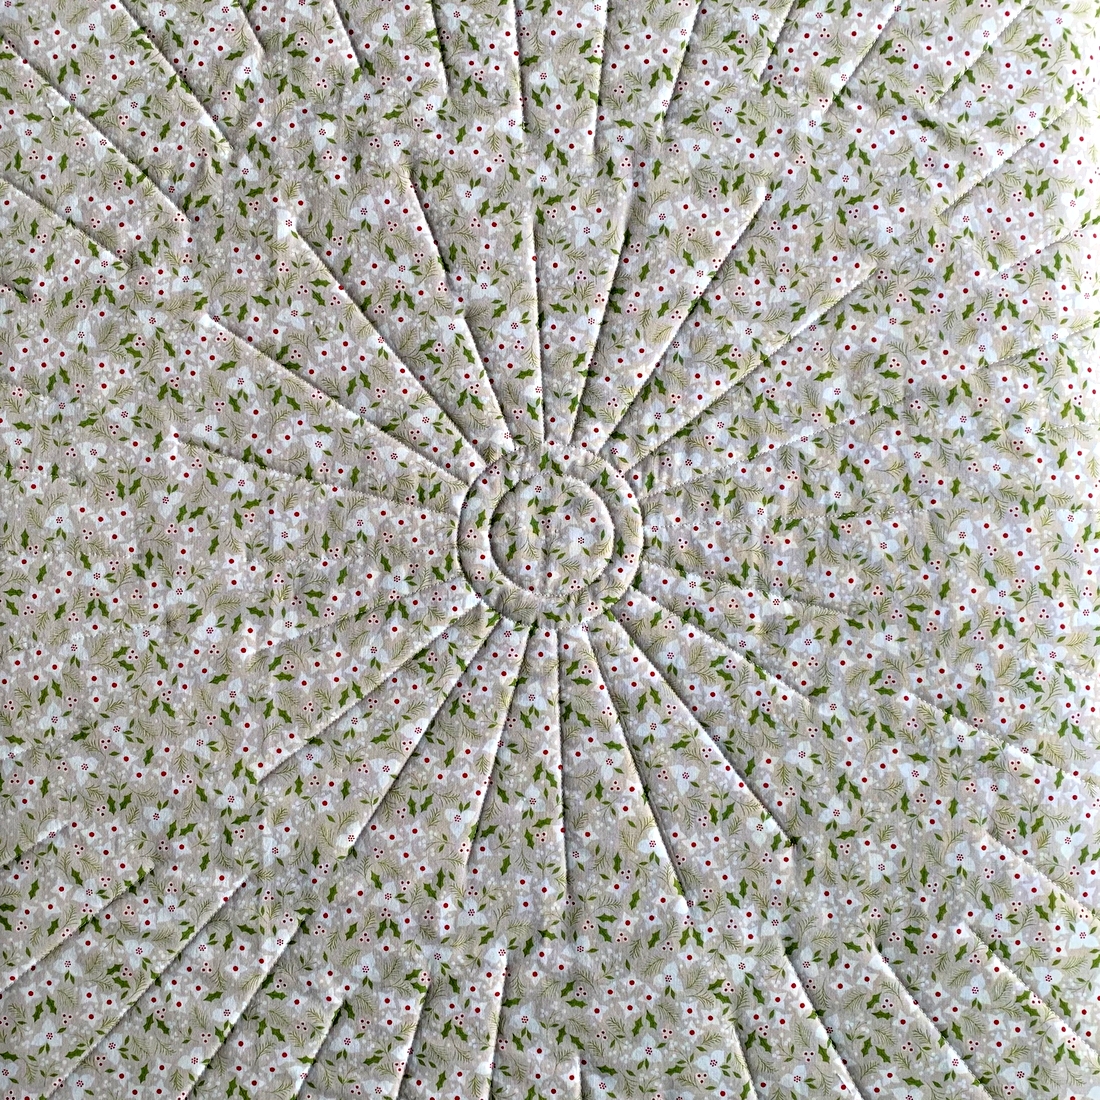 The fabric is a piece of yardage from Corey Yoder’s “Holliberry” line for Moda, the same line I used in most of the dresden blades. Somehow I overlooked this particular print when cutting my 20 blades; it would have been a nice addition to the neighborhood!