The good news: the test valance I made for my stepmother Shirley’s living room windows last month was a great success. You’ll recall from my last post that I’m helping her update her living room by making bespoke valances out of an elegant furnishing fabric. The Dear Husband and I enjoyed a quick trip to Central Oregon at the end of September to visit her and test out the valance and drapery rod in her home.
The bad news: at some point during that trip I was exposed to Covid-19. I woke up at home on Friday, Oct. 7, with mild cold symptoms, took a Covid test, and looked in dismay at the second pink line on the home test. The DH and I immediately went into isolation mode per CDC guidelines.
The good news: my bout with Covid hasn’t been bad. My cold symptoms never worsened although I did experience three days of fatigue. Neither my stepmother nor a dear friend I had lunch with in Bend came down with Covid. The DH tested negative five days in a row.
The bad news: on the sixth day the DH tested positive. I arranged a video conference the next day with a physician who prescribed the anti-viral drug Paxlovid for the DH. By then I was one day beyond my five-day isolation period and was able to mask up and get that prescription for him.
The good news: within 24 hours of taking the first dose, my husband was feeling remarkably better.
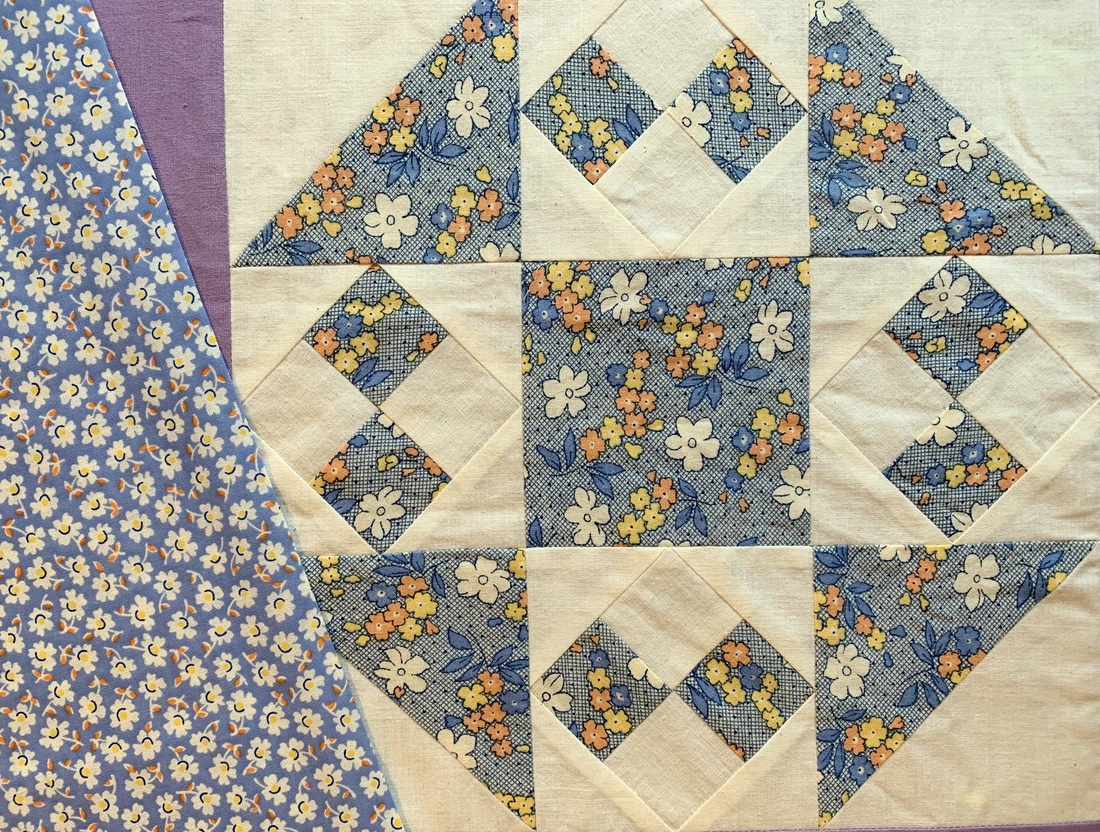
More good news: yesterday I got the borders sewn onto the ’30s reproduction quilt top found at my guild’s silent auction in August. This is the border print next to a corner block:
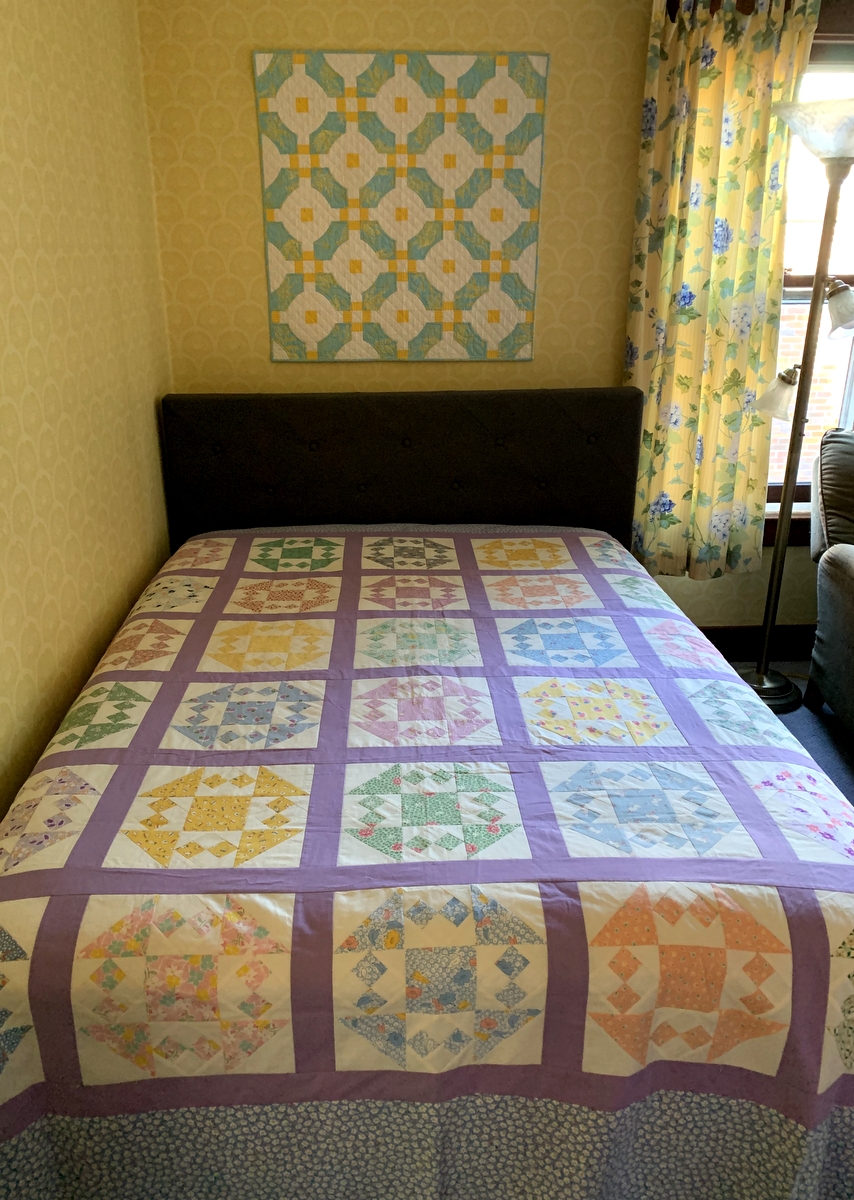
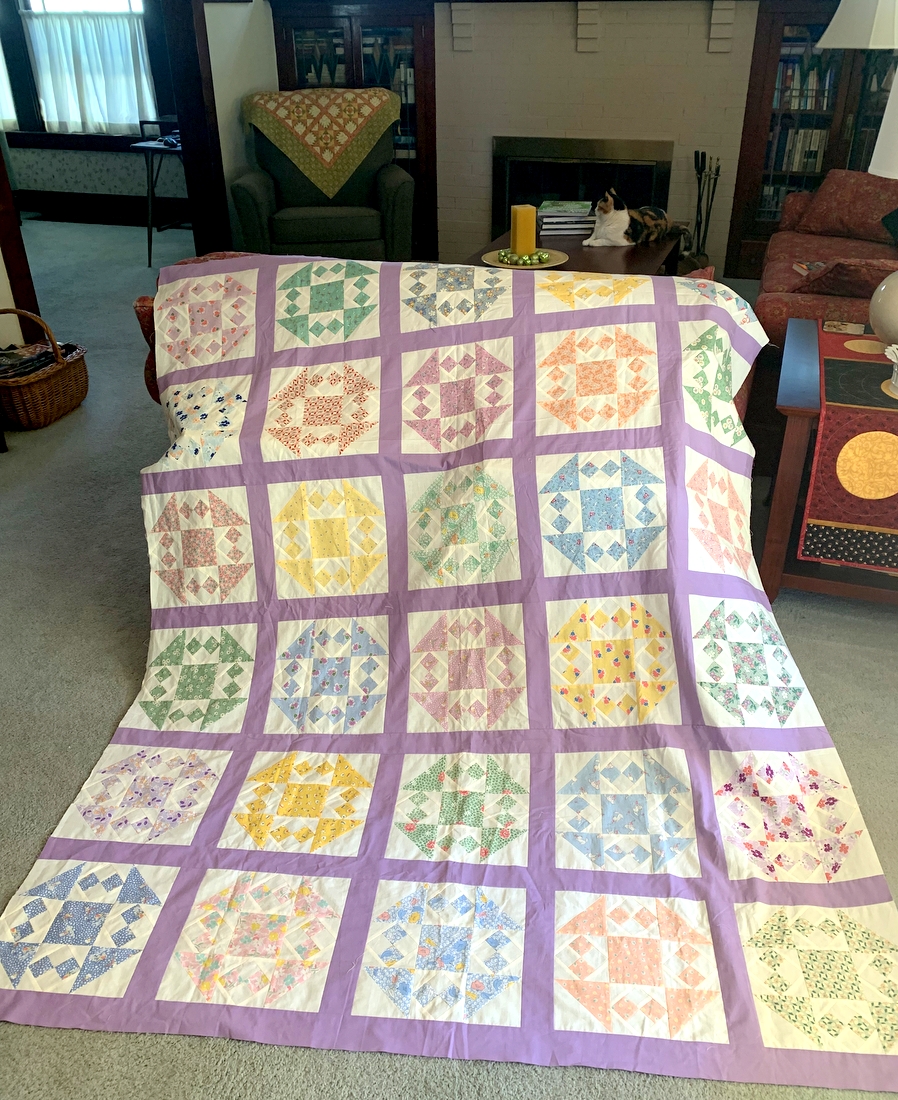
Here’s a look at the top on a double bed:
Isn’t that pretty? I’m very happy with my choice of fabric for the outer border. The top measures 81½” x 93½” right now; it will shrink a bit from quilting and laundering.
It sure felt good hearing the sewing machine in my sewing room humming again! I’m now primed to cut into that gorgeous decorator fabric with the goal of heading over to Central Oregon before the end of the month with the finished valances.
It’s been more than a minute since my last post, that’s for sure. The year has flown by but September flew by faster than usual. Between working alongside the Dear Husband in the garden (and harvesting the results), resuming classes at Montavilla Sewing Center after a break during August, taking visiting relatives around Portland and through the Columbia Gorge, and continuing my usual everyday pursuits of reading, trying new recipes, and playing Scrabble, very little time has been spent in my sewing room.
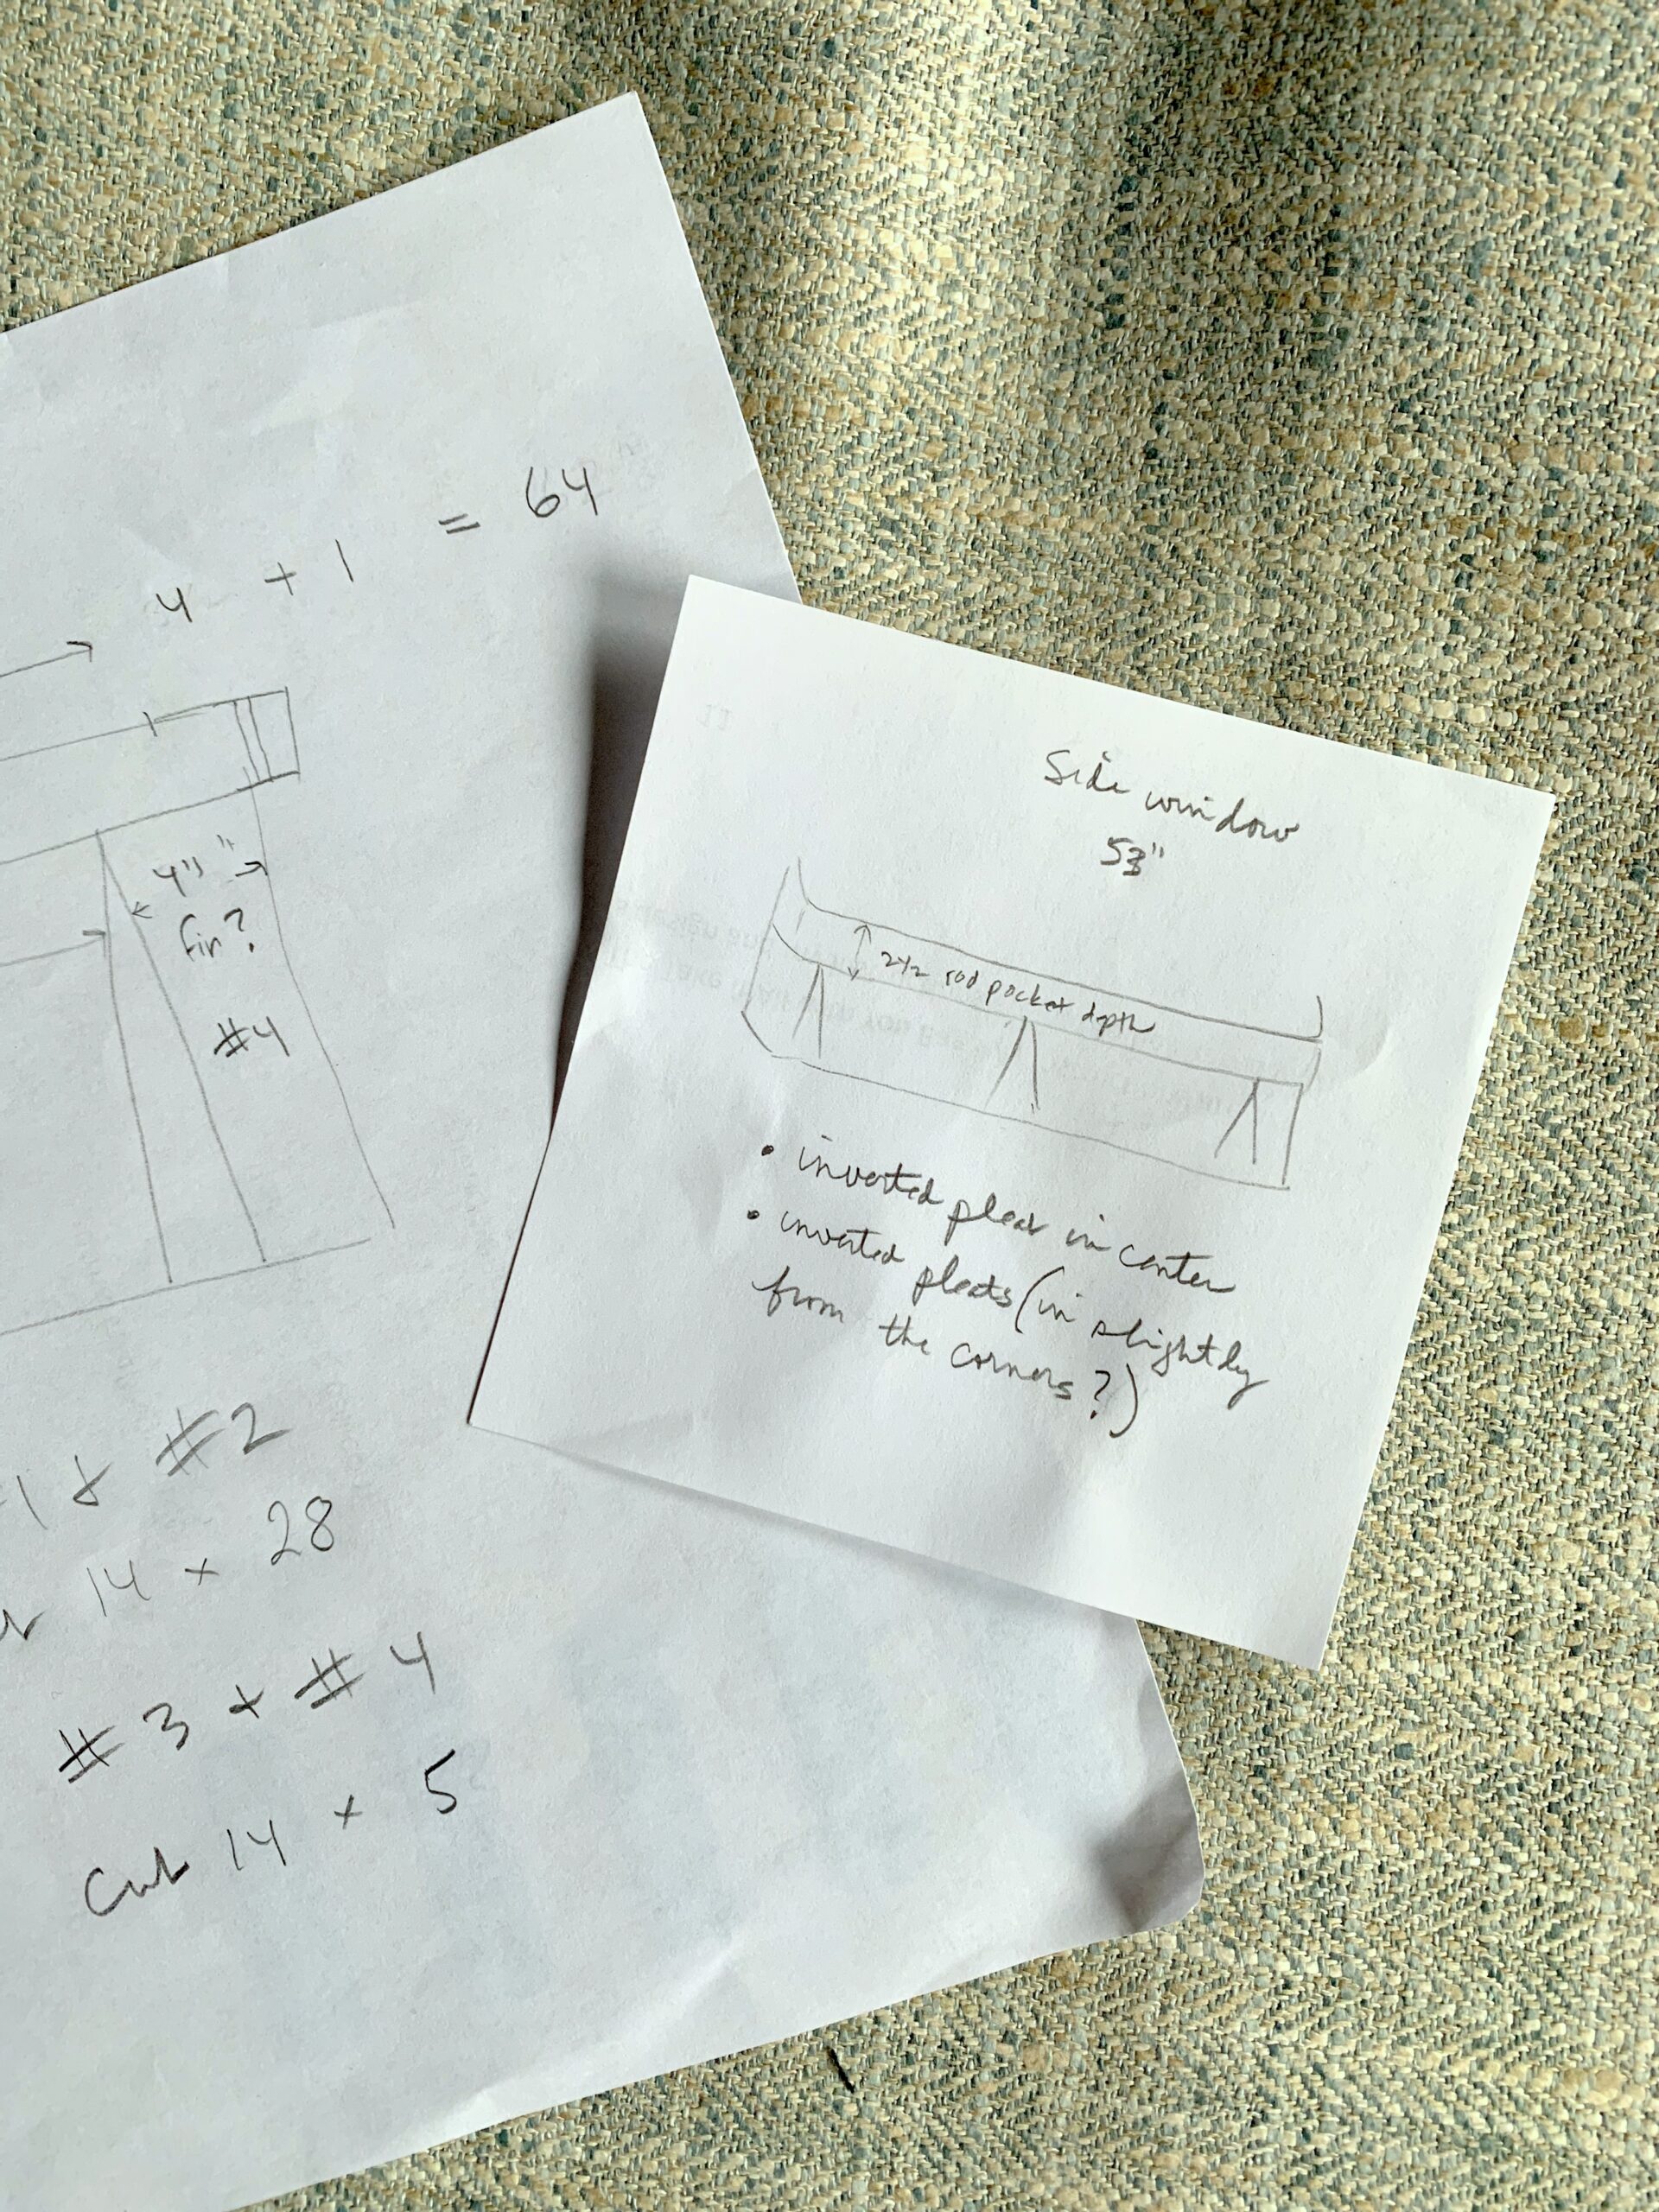
I thought for sure I’d have the borders added by now to the 1930s reproduction quilt started by my friend Vivienne years ago but all I’ve managed to do is cut the strips. I can claim only one accomplishment: a prototype of the tailored valances I’m making for my stepmother. Here’s a look at the beautiful furnishing fabric and a rough sketch:
This home dec project was actually launched a year ago. My stepmother bought new upholstered furniture for her living room and asked if I would make valances for the three windows plus one in the hallway. This is just the kind of home dec challenge I love so of course I said yes. Then, during my annual November trip last year to my twin sister’s home in Georgia, we found this lovely tweedy herringbone fabric.
Finding the proper drapery hardware after I got home proved unsuccessful. Good thing my stepmother is a patient soul because I dithered for months before finding the right curtain rods online. I ordered only one so I could test it first with the valance design.
The math indicates we have enough furnishing fabric for four valances but not enough to cover a mistake, hence the need for a prototype. I used some old fabric I had on hand from a home dec project years ago. It was important to test my sketch because I’m departing from the usual way of making inverted pleats. I’ll fill you in later on my plan. At the moment, the DH and I are getting ready to head over to my stepmother’s home in Central Oregon to test the mock valance in place along with the drapery hardware.
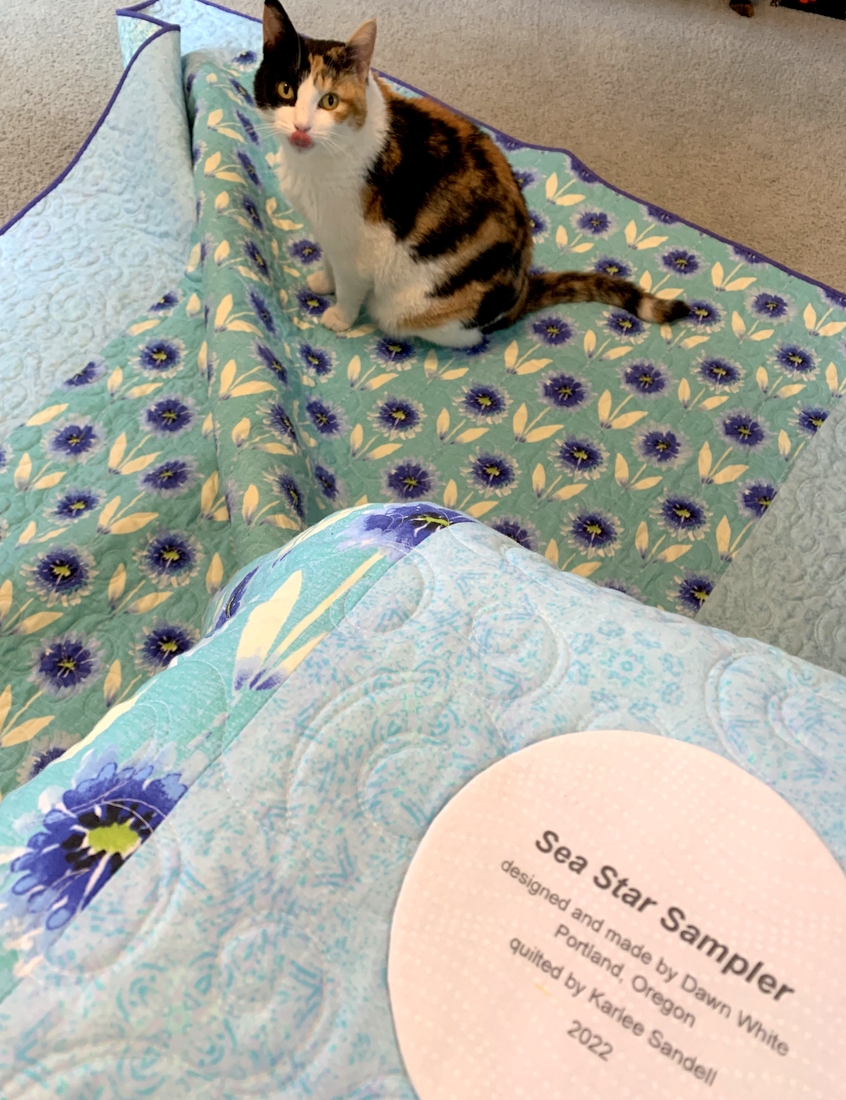
I was getting ready to appliqué the round label onto the back of my Sea Star Sampler quilt today when Princess Cordelia (aka Coco) wandered into my sewing room. She promptly planted herself on my quilt, as she is wont to do:
As you can see, I caught her with her little pink tongue sticking out.
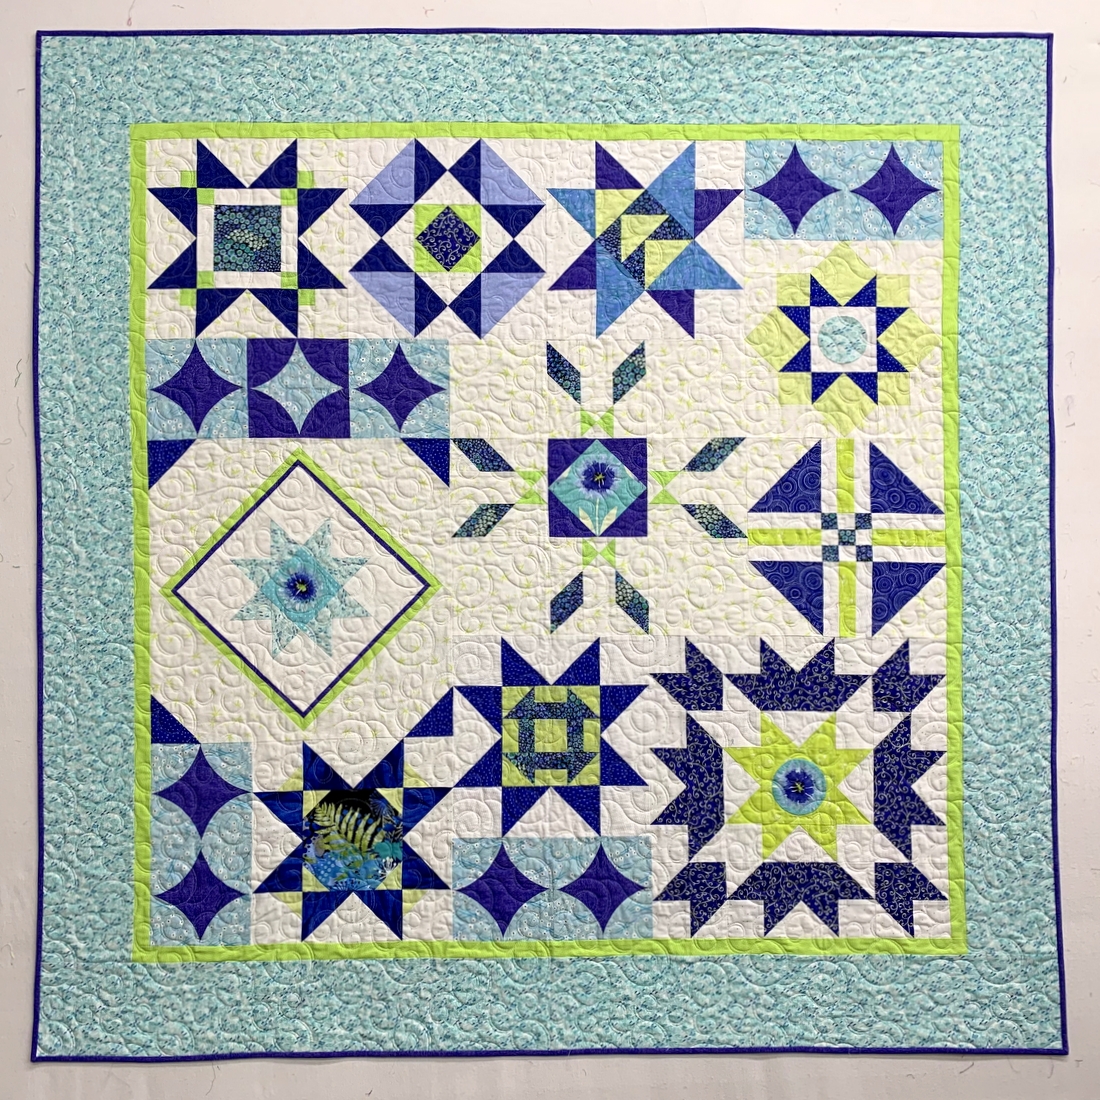
Here’s a look at the front of the finished quilt, measuring 60″ square:
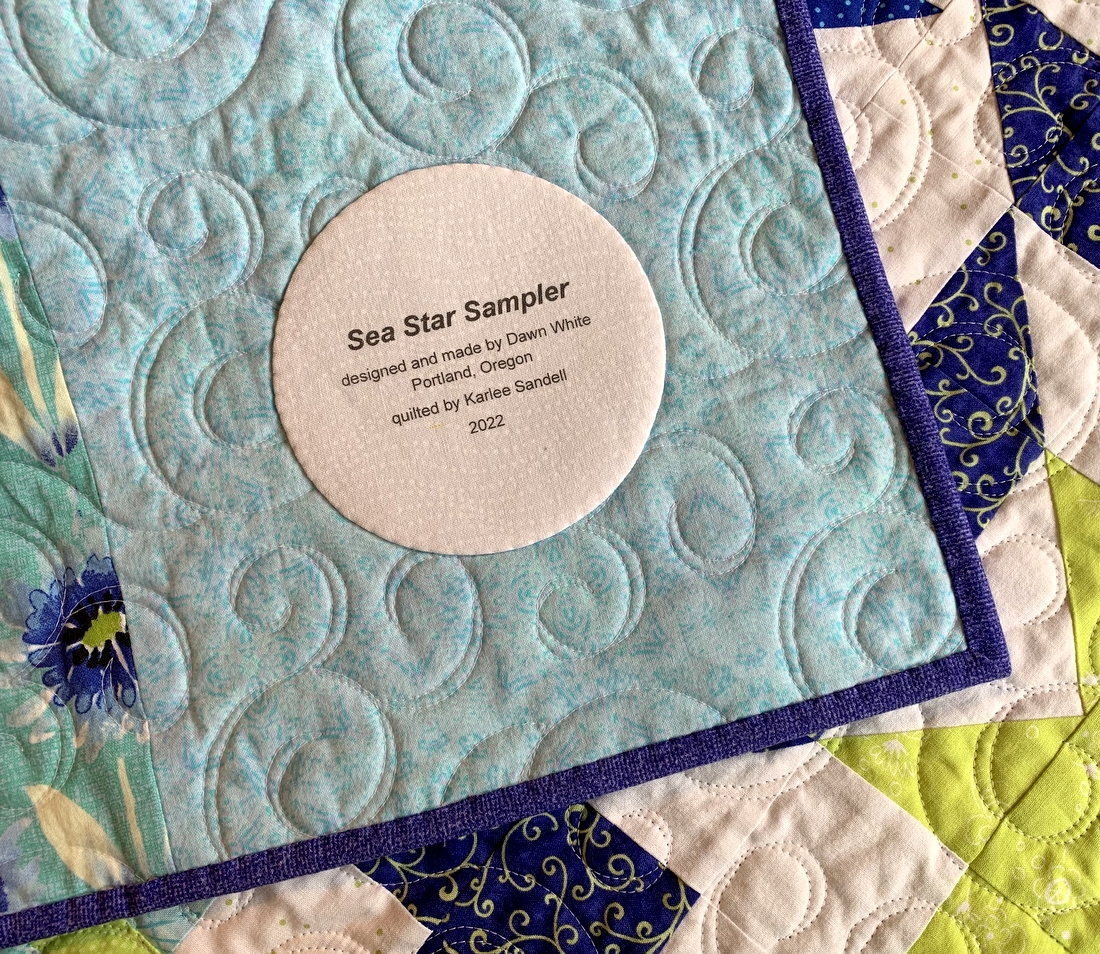
. . . and a better look at the label on the back:
Here’s one more shot, taken minutes after the quilt was pulled from the dryer:
Who doesn’t love the crinkled look of a quilt washed for the very first time?! By the way, the finished size after laundering is 59″ square.
Two blocks from this quilt were part of an optional Block of the Month project designed by Kristin at Montavilla Sewing Center and offered over Zoom starting in May 2021. In-person classes were suspended in March 2020 due to Covid-19 so several of us jumped at the chance the following year to engage with the folks at Montavilla via Zoom. By the time in-person classes resumed last September, most of us were “Zoomed out” and the BOM sort of faded away. I had already veered off on my own path and wound up choosing nine other blocks to complete my sampler quilt.
The “Sea” part of the name developed when I realized many of my fabrics were evocative of the sea: starfish, schools of fish, sea anemones, seaweed, water, waves . . . you get the idea. And all but two of the blocks are stars so it was reasonable to call it a “Star Sampler.” You know how much I love alliteration; it wasn’t long before my Sea Sampler had morphed into my Sea Star Sampler.
Like many of my quilts, this one evolved over time. If you’re interested in the progression (admittedly slow) of this project, simply click on “sampler quilt” under the CATEGORIES list on the right side of my home page to see all of the posts in reverse chronological order.
Third time’s the charm, they say. It took trips to three local quilt shops before I found the perfect print for the outer border on the reproduction ’30s quilt top I bought at my quilt guild’s recent silent auction:
The delicate floral print is from the “Aunt Grace Basket of Scraps” line designed by Judie Rothermel for Marcus Fabrics. It’s shown with one of two blocks in the quilt (out of 30) that have a similar colorway. This is the other one:
I brought the quilt top with me to the shop so I could audition border fabrics with it in hand. One thing I noticed right away is that reproduction prints in quilt shops now have whiter backgrounds. When this top was pieced 20 years ago or so, the prints were creamier. I’m confident the border fabric will work well, though.
After choosing the border fabric, I strolled around the shop looking for a vintage-y print that would work on the back. I found some lovely ones but none that had that ’30s vibe. Guess what I came back to. Yep — I bought enough of the border fabric to make a backing. I actually bought the rest of the bolt — almost 10 yards — thinking I might want to make a pair of pillowcases to go with the quilt.
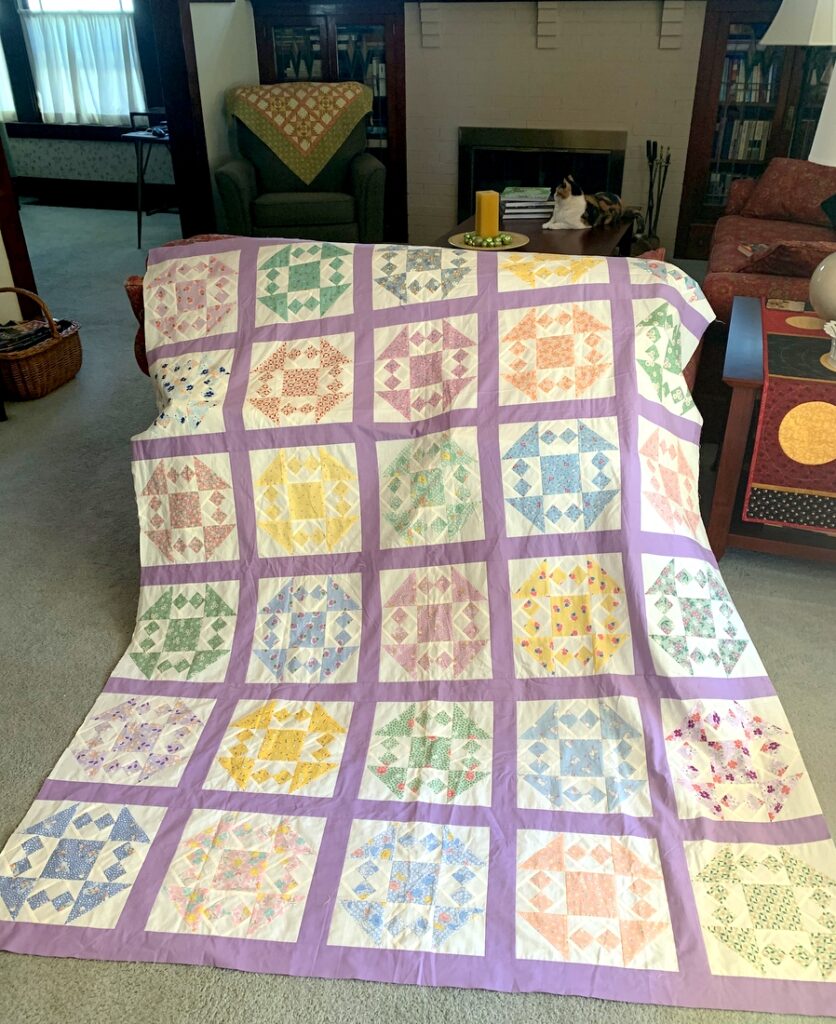
As a reminder, here’s a look at the entire top (I’ll add lavender strips to the sides to complete the narrow first border):
Each of the 30 blocks was made with a different print. Most of the prints are floral but several represent characters and scenes from children’s storybooks (think Humpty Dumpty and Little Bo Peep) and a couple prints are of kittens chasing balls of yarn. You know I like to name my quilts. I’m thinking of calling this one Vintage Vignettes.
In my post the other day about this quilt top (by an unknown maker) that I bought recently at my guild’s annual auction, I lamented that I would never be able to match the solid lavender sashing fabric that was missing from the sides of the quilt top. I was wrong but you’ll never guess the reason why.
The same day that I posted the photo of the quilt top and explained how I acquired it, I heard from the quiltmaker herself — and it turned out to be Vivienne Moore, who also happens to be a good friend of mine! Vivienne follows my blog and immediately recognized the quilt top. It turns out that she is also good friends with two of my Metropolitan Patchwork Society guildmates who organized the auction. Viv was cleaning out her sewing room earlier this year so she donated a few bags of fabric and tops for the auction. She lives 50 miles away so I would never have predicted she would be the maker.
But wait, there’s more. Vivienne was pretty sure she had a piece of that lavender sashing fabric in her stash. And she did! Yesterday’s mail brought a remnant of the fabric large enough to cut sashing strips for the sides. A perfect match, of course. I’ll have to work around a few fade lines to piece the sashing strips but that’s easily done.
Vivienne told me she made the quilt top over 20 years ago. She remembers that the lavender fabric was from a line of solids produced about 30 years ago by one of the manufacturers of 1930s reproduction fabrics. The solids were pink, green, yellow, blue and lavender, and were supposed to be authentic to the time period.
Viv isn’t sure why she didn’t finish the quilt but thinks it may be that her interest in pastels and ’30s reproduction fabrics had waned by the time she neared the end of piecing it. In addition, she was doing all of her quilting by hand at that point and probably didn’t want to invest the time to finish the quilt in that manner.
“I still can’t quite believe that this quilt ended up in your hands,” she told me, “but I’m so happy it did!”
There’s yet another coincidence. The photo I posted the other day was taken in my living room and in the background you can see a small quilt draped over the chair:
That too was made by Vivienne Moore! It’s a miniature Feathered Star measuring 33″ square. Vivienne gave it to me as a gift in 2011. At the time we were both in the same small quilt group, the Quisters (short for Quilt Sisters). It was our group’s custom to give each other birthday gifts, usually something quilty or crafty that we had made. I had no idea I was taking a photo last week of two quilts made by the same person.
Here’s a close-up of the Feathered Star quilt, showcasing more of Vivienne’s exquisite work:
Each star block is only 6½” square. And those little green feathers? A mere one-half inch each.
As far as the auction quilt goes, the search is on to find a suitable ‘30s reproduction print for an outer border so I can finish the top and get it quilted. With a wide border added to the quilt, it will easily fit a double or queen-size bed.
It tickles me to know that when this quilt is complete, my friend’s name will be on the label along with mine.
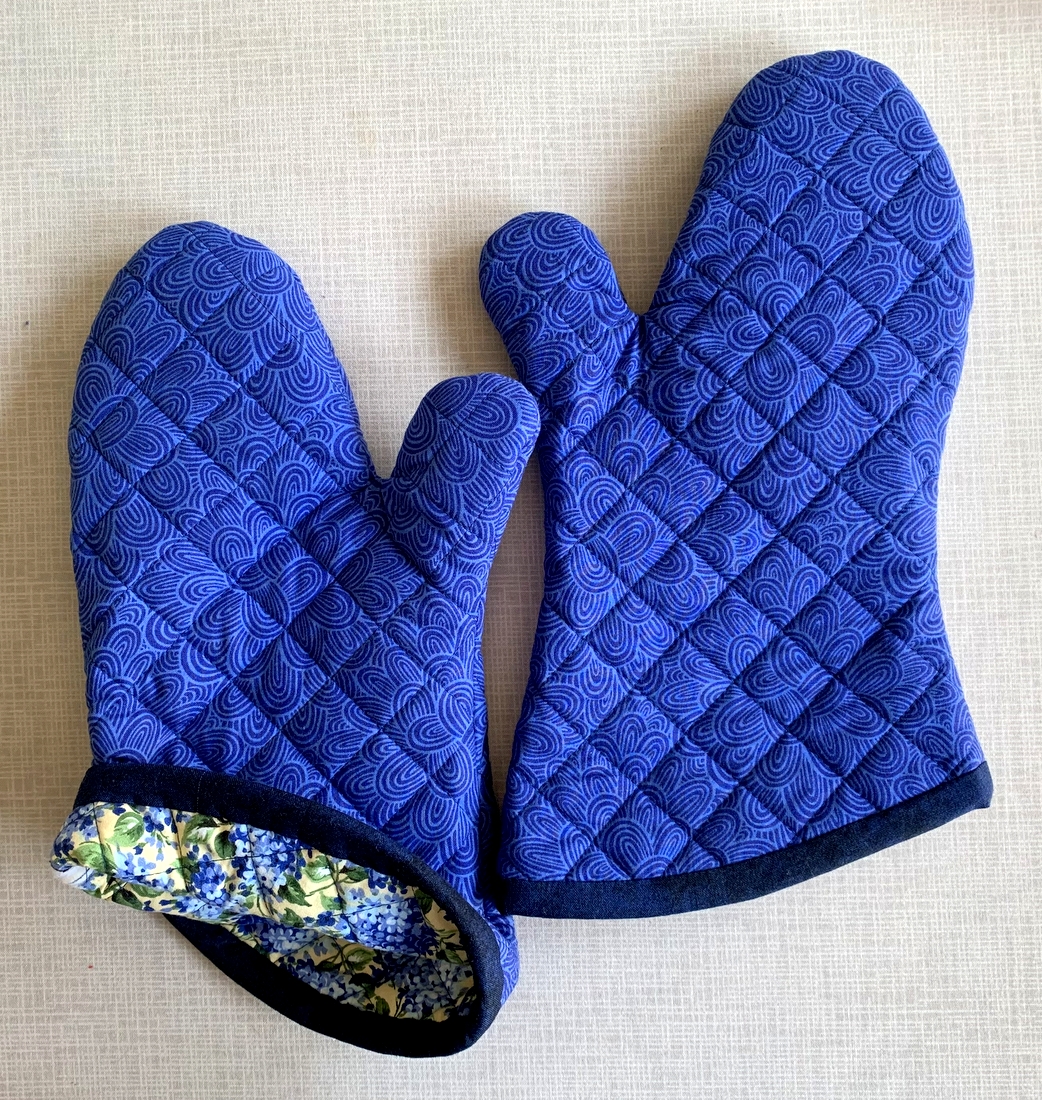
Way back in May I promised my sister Reigh a pair of oven mitts. Good thing she’s a patient person! I finished the mitts last week . . .
. . . and popped them in the mail.
Reigh had requested yellow and blue. I chose a medium dark blue tonal print for the outside of the mitt — a practical choice and one I’ve used before — and a lovely blue and yellow floral print for the lining. I must have bought a lot of that floral print back in the day because I used it close to 20 years ago to make a ruffled bedskirt for my twin Diane that was eventually swapped for a more tailored one. It also went into a couple of cloth napkins that are in constant rotation at the Portland White House.
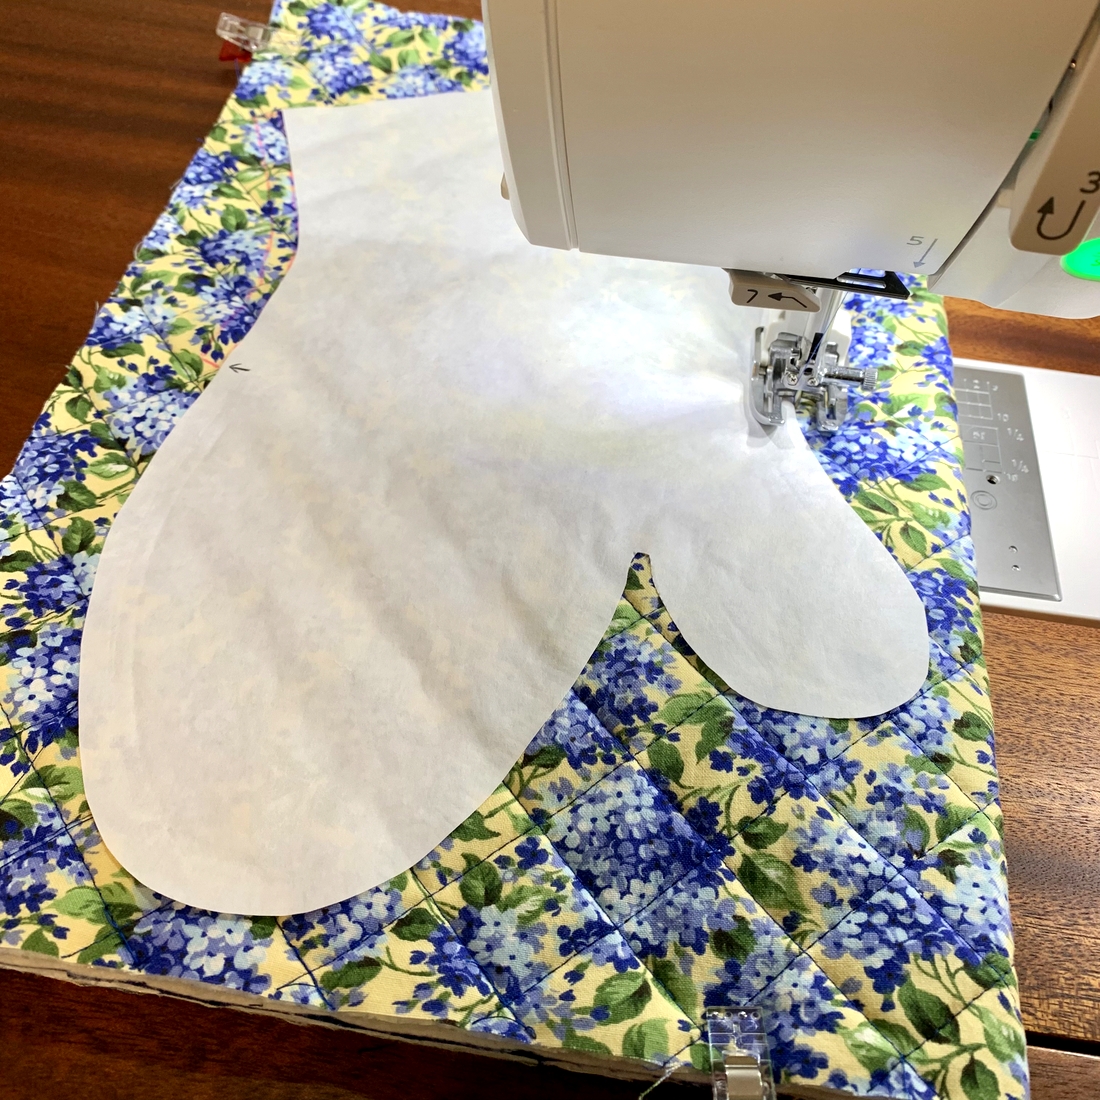
You can see more of the lining fabric in this process photo:
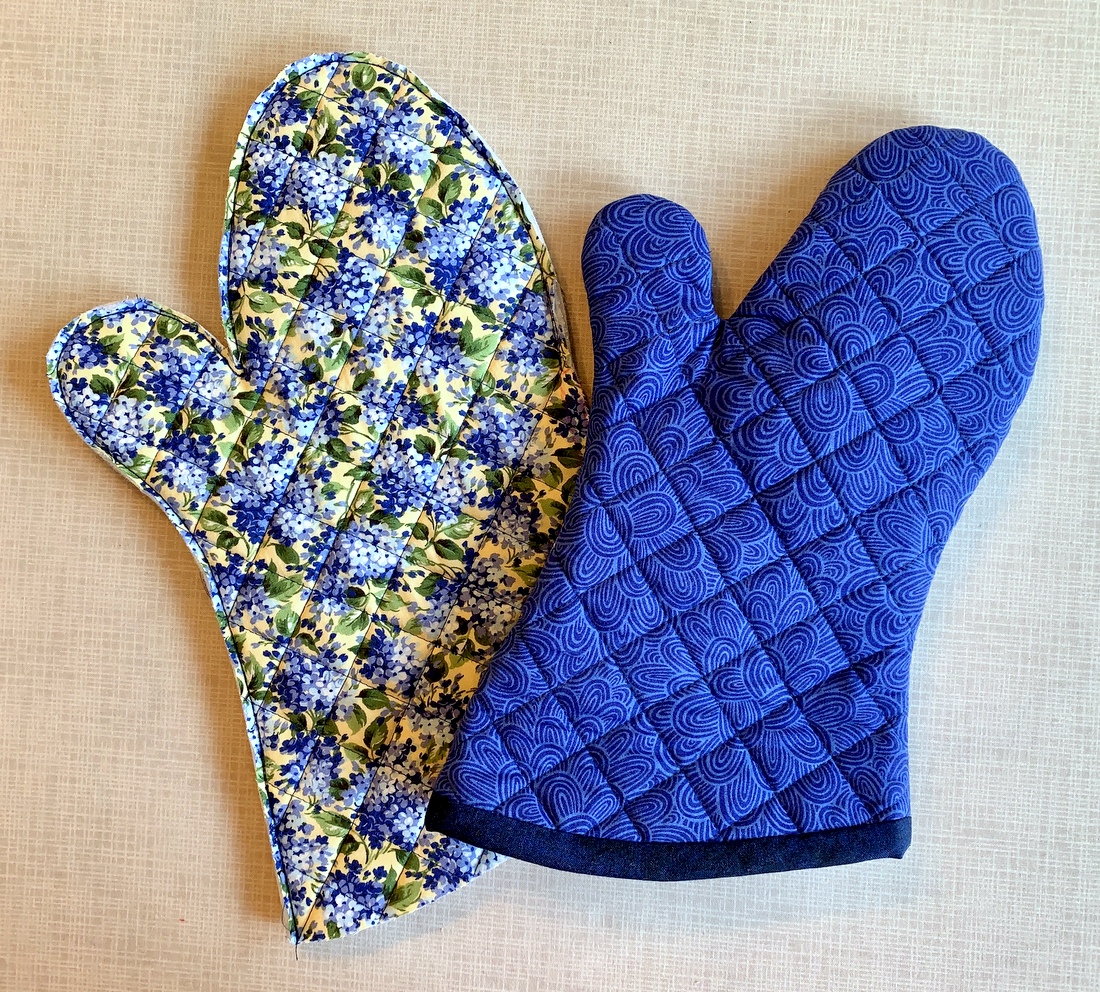
That’s a freezer paper pattern I’m sewing around. When the mitt on the left below is trimmed and the cuff is bound, the mitt is turned inside out and looks just like the mitt on the right:
Reigh’s mitts have arrived — she likes them! — and my guess is she has already put them to good use.
Just in case you’re new to my blog, here are links to my tutorials on how to make these oven mitts yourself:
My quilt guild held its annual auction last week, selling over 200 items. My goodness, I’ve never seen such an array of generously bundled fabrics along with books, patterns, sewing notions, vintage linens, and even a Singer Featherweight machine. And what did I come home with? This beautifully pieced quilt top:
We all know the last thing I need is another quilt top when I have so many of my own begging to be finished, but friends, I could not resist. The final bid was $20 — an absolute steal. Truth be told, I would have paid more but the top didn’t seem to be drawing a lot of interest. Was it because I was hovering in the background willing my guildmates to keep passing it by? I also lingered nearby (inconspicuously, I hope) as the auction drew to a close, making sure no one could squeeze in at the last minute to outbid me.
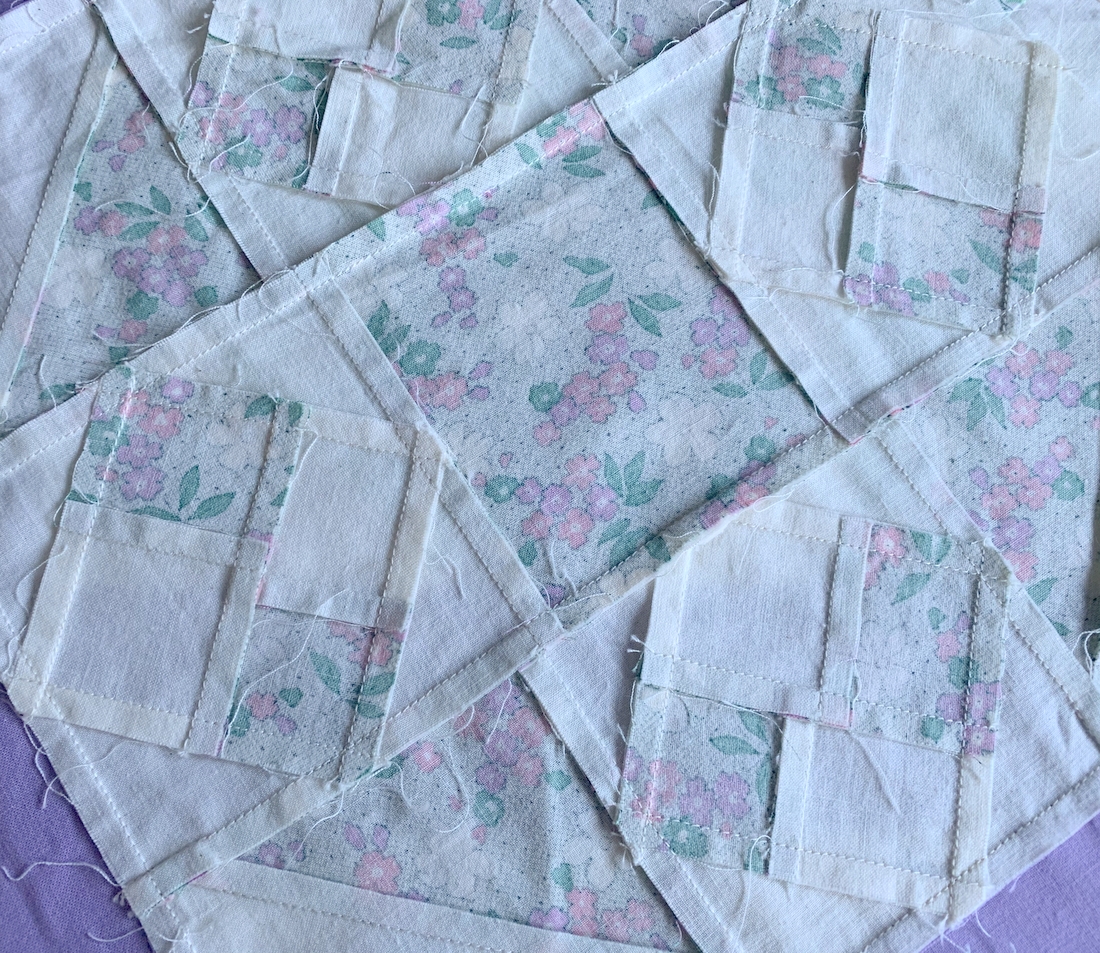
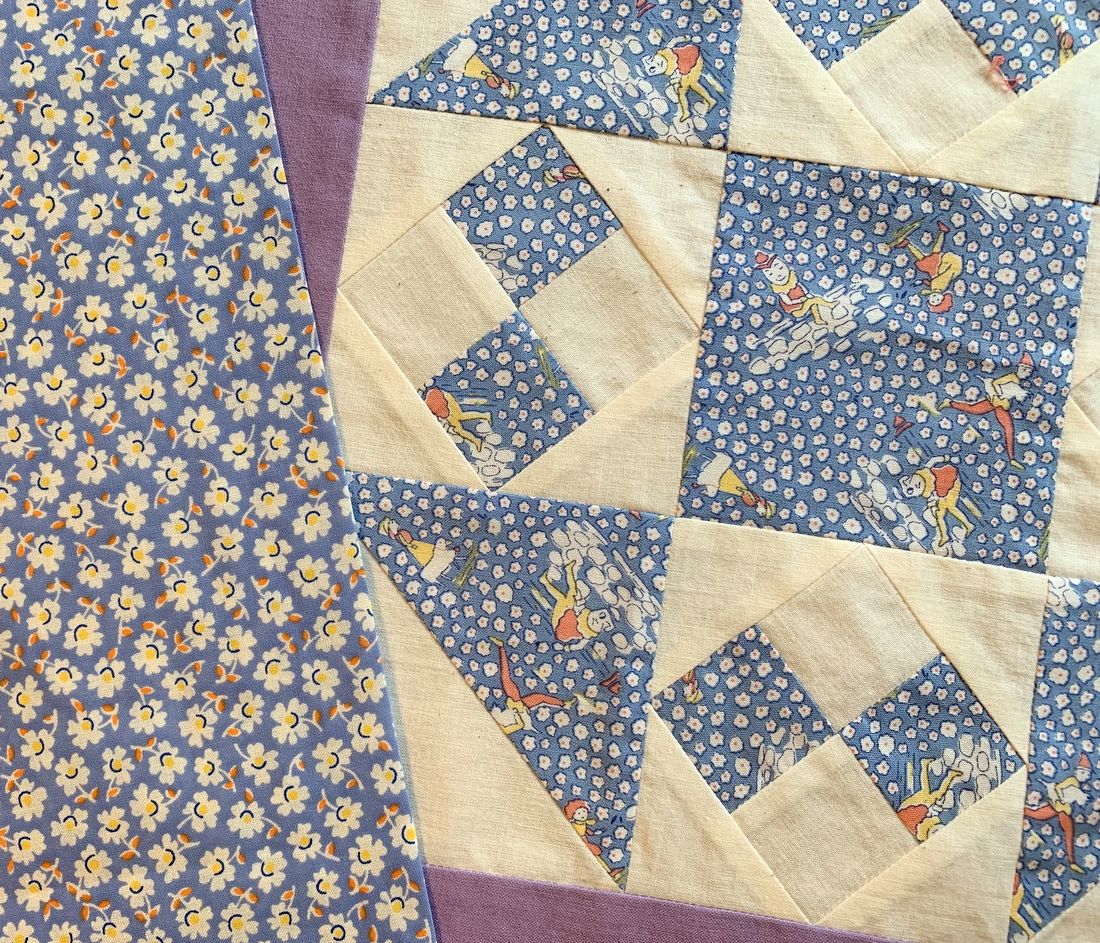
I have no idea how old this top is or who made it. Judging by the looks of it, the fabrics are 1930s reproductions rather than vintage pieces. What struck me as I unfolded it to get a better look was how beautifully it was pieced. The quiltmaker sewed consistent quarter-inch seams . . .
. . . and every single point on the front is perfect as a result:
That makes my little wannabe perfectionist heart go pitty-pat. It also argues for the top being more recent. My guess is that the quiltmaker used a rotary cutter and made very accurate cuts before piecing the top so accurately.
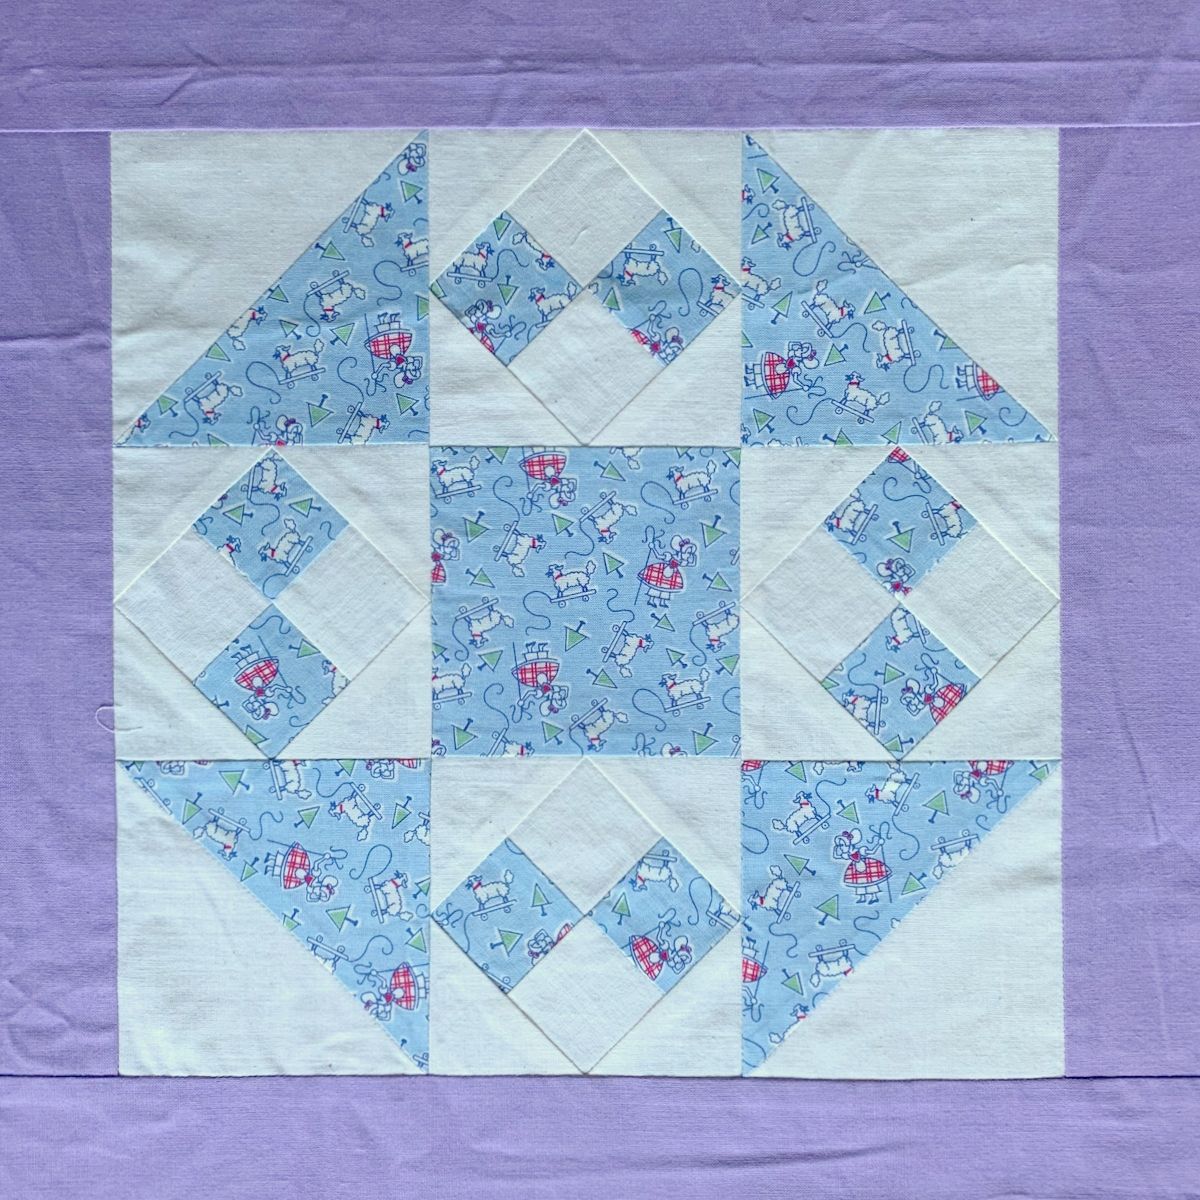
I hadn’t seen that block design before but it seemed to be a variation on the Shoofly block. I did a little research from the best source of all: Barbara Brackman’s Encyclopedia of Pieced Quilt Patterns. Looking in the index under Shoofly, it didn’t take long to find the block, which has several names. It’s known as Richmond, Aunt Vina’s Favorite, Pin Wheel, Butterfly, and Lucy’s Four and Nine:
Brackman notes that the earliest publication she has seen for the pattern is Hearth & Home magazine about 1915 under the name Richmond.
The quiltmaker used a 5 x 6 setting, separating the blocks with 2″-wide sashing. The blocks finish at 10½” square, which seems a bit unusual to me. Right now the top measures 61″ wide by 77½” long. But here’s something a bit odd: there’s a border strip of the lavender lattice fabric on the top and bottom of the quilt top but not on the sides. Look back at the first photo to see what I mean. Could the quilt have been abandoned because the maker didn’t have enough of the lavender fabric to complete the border?
I’ll never be able to find the exact shade of lavender to add side borders. What are my options? Well, I could add side borders with a reasonably close match to the original lavender but in my heart of hearts I know that’s not going to happen. I could remove the top and bottom borders and find a different fabric — perhaps a reproduction print containing many of the colors in the quilt top — to border the blocks. Or I could cut down the lavender fabric on the top and bottom borders and make borders for the sides with what is cut off. Then I could add a larger border of print fabric. Just an idea — but I’m leaning in that direction.
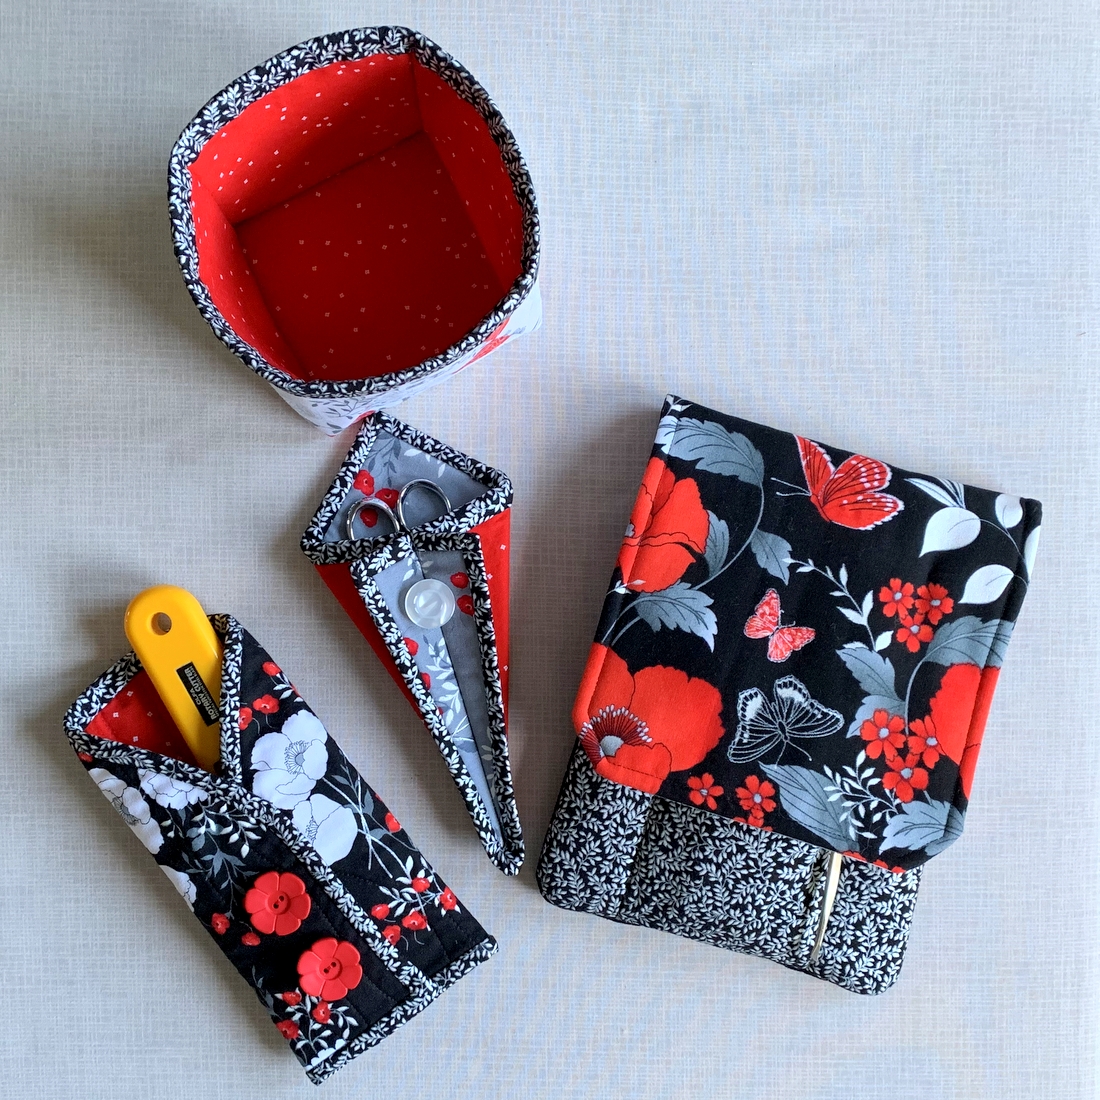
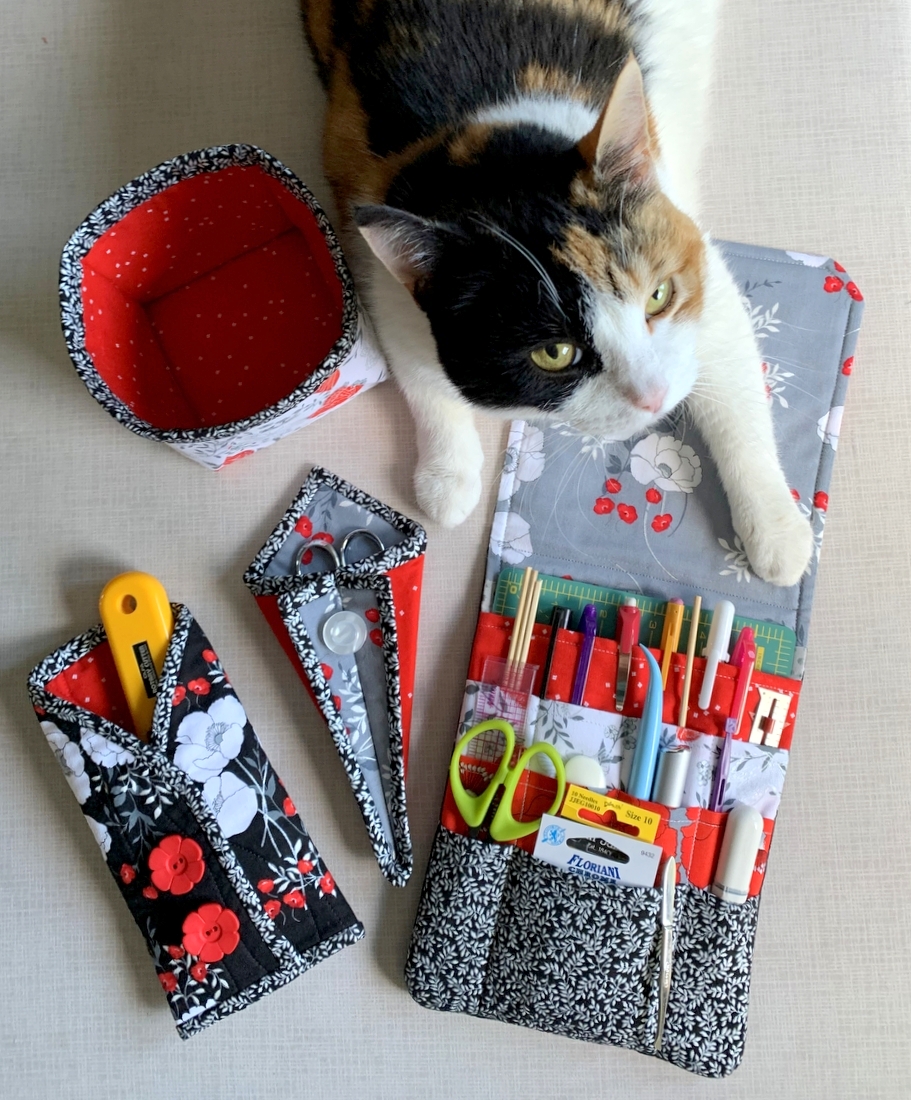
Having recently finished my 11th Junior Billie Bag, it was inevitable that I would make a suite of accessories to go with it:
In clockwise order starting at the top, you can see a 4 x 4 fabric box (which I use as a threadcatcher), a quilter’s tool caddy (an embellished version of P3 Designs’ Travel Case pattern), a rotary cutter coat, and a scissors case. Directions for the rotary cutter coat and scissors case are on my Tutorials page.
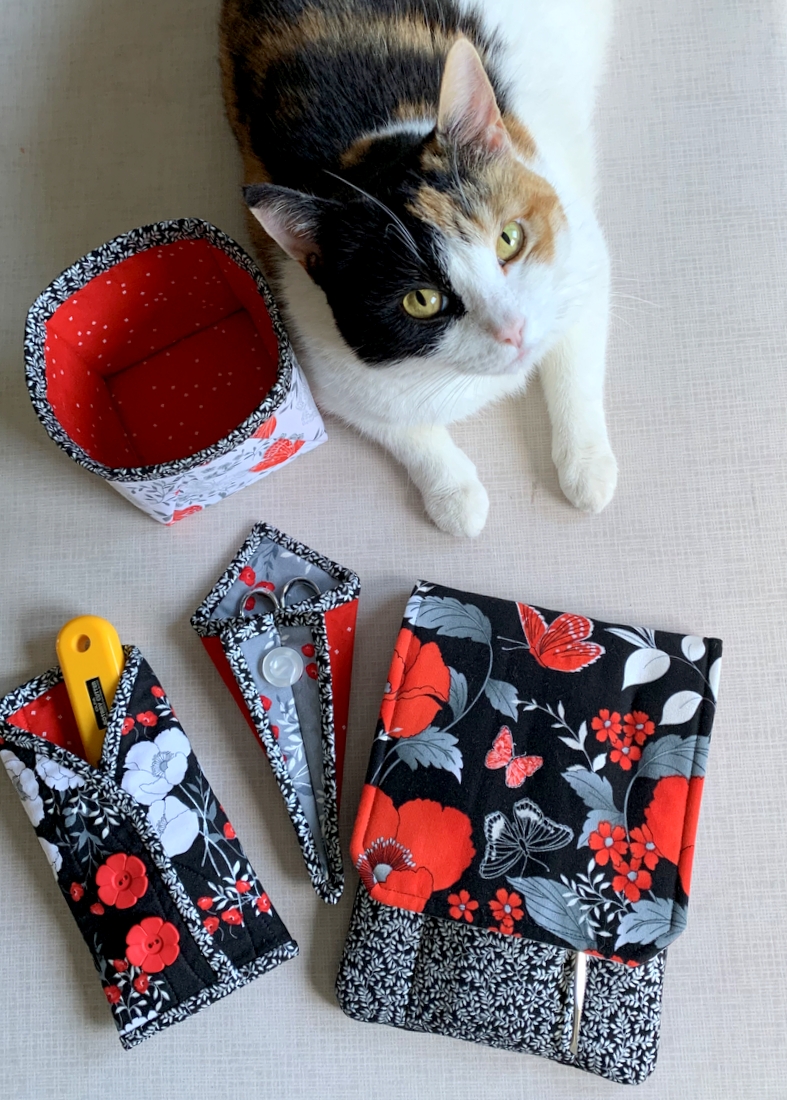
It was also inevitable that Princess Cordelia aka Coco would photobomb my picture-taking efforts:
I shooed her off the ironing board so I could take a photo of the quilter’s tool caddy in its open position . . .
. . . and she returned to photobomb that as well. Notice the proprietary paw placed firmly on the tool caddy:
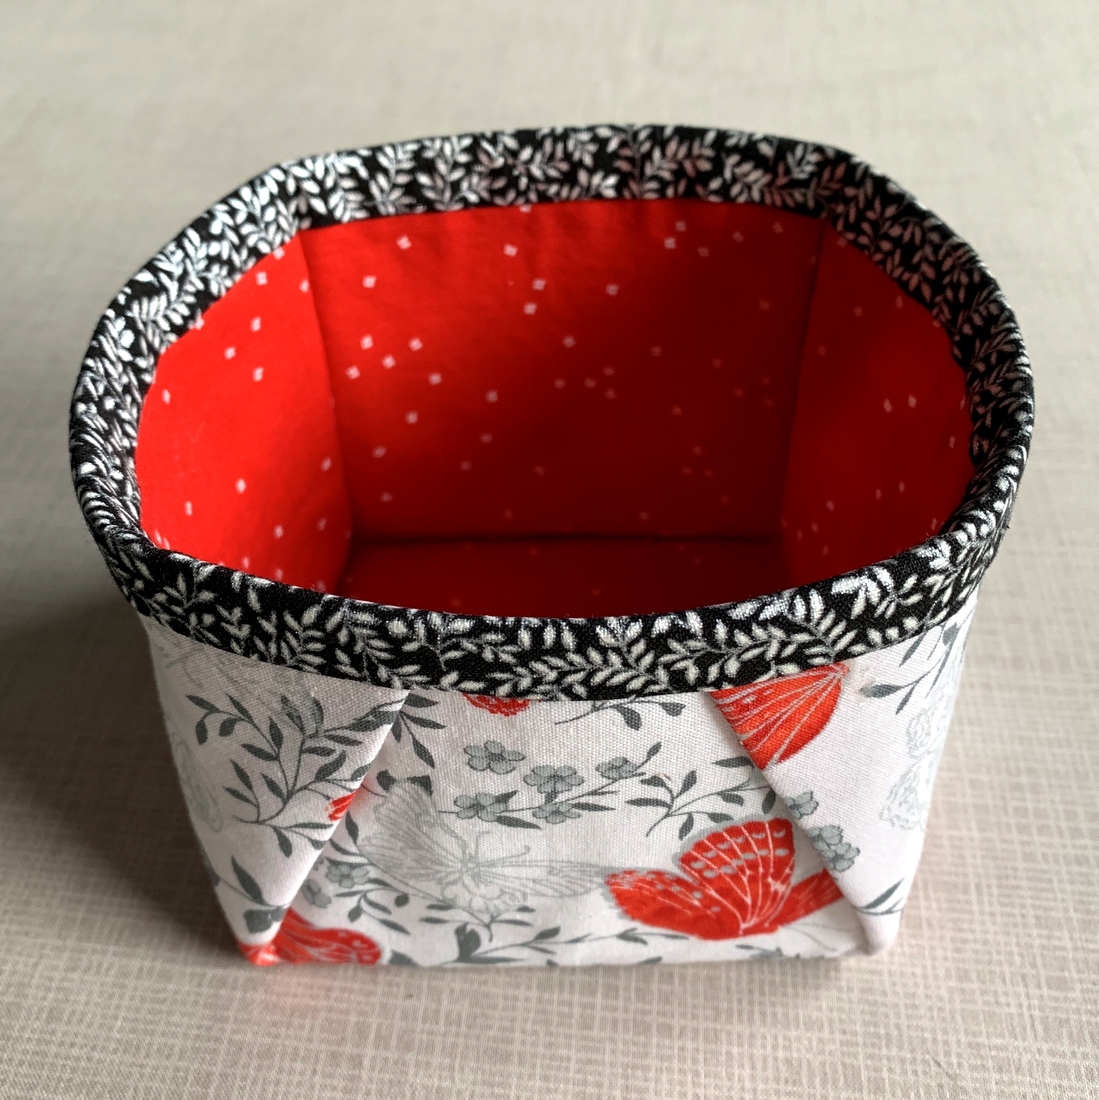
Here’s a better look at the threadcatcher:
I’ve devised a way to attach the binding that does not involve sewing!
This fall I’ll be teaching a class at Montavilla Sewing Center in Lake Oswego on how to make all four of these accessories. The class, called “Quilter’s Tote Accessories,” is intended as a companion to my Junior Billie Bag class but these accessories would be welcome additions to any quilter’s tote.
If you’re in the Portland metropolitan area and would like to treat yourself to some useful accessories or perhaps make gifts for your best quilting buddies, this may be the class for you. Thanks for stopping by!
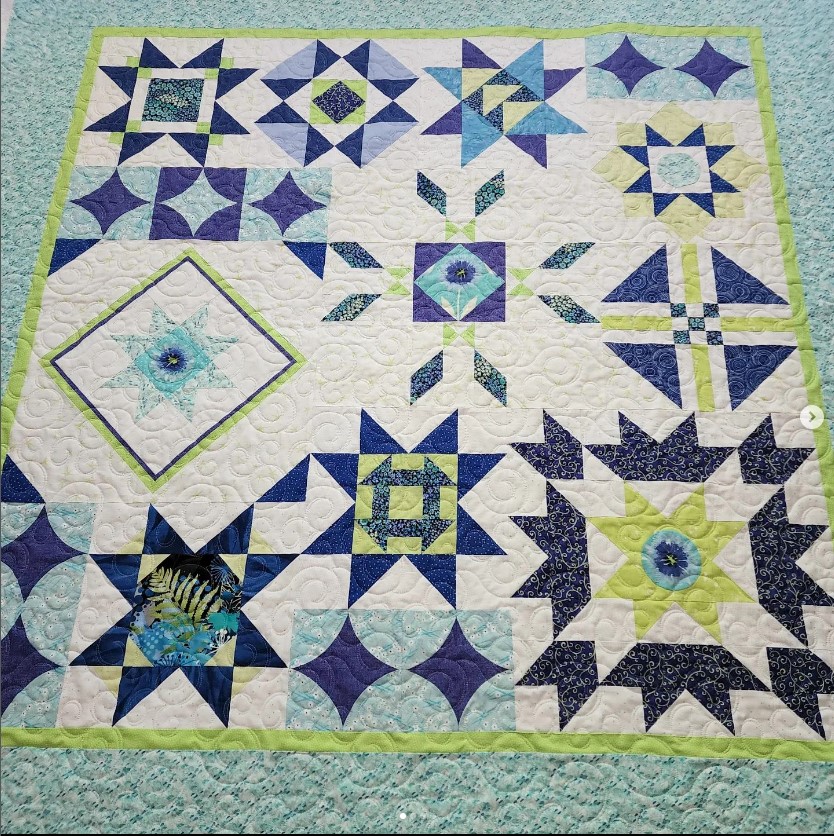
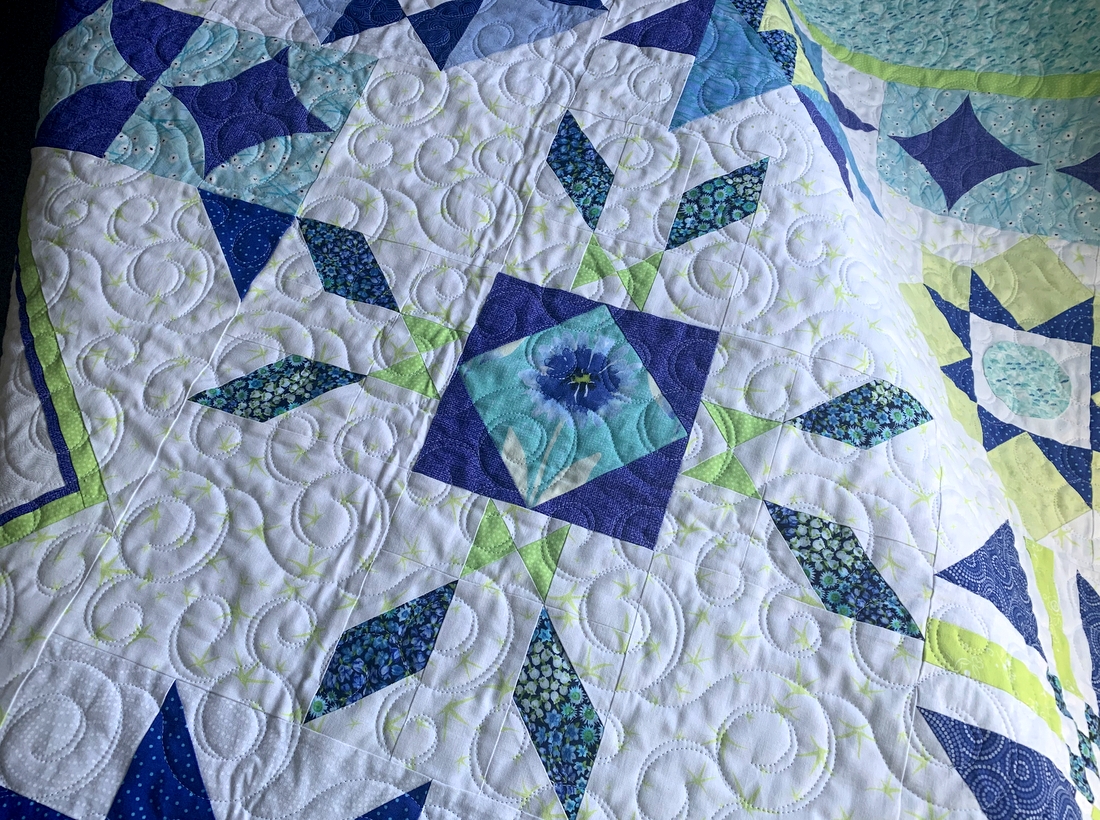
. . . is back from the longarm quilter! Here’s a glimpse of the front:
This photo was taken by Karlee at SewInspired2Day, who has quilted several of my quilts. Karlee’s photo turned out better than the one I took inside today so I borrowed it (with her permission) from her Instagram page.
There’s quite a bit of negative space in my Sea Star Sampler, especially in two of the three large blocks that finish at 18″ square, so I was looking for a quilt design that would look good in the background without distracting from the sampler blocks. The motif we settled on is “Embellish” by Quilts Complete, and I must say I like it a lot! In keeping with my theme of selecting fabrics evoking the sea, you could almost say the quilting looks like swirling water.
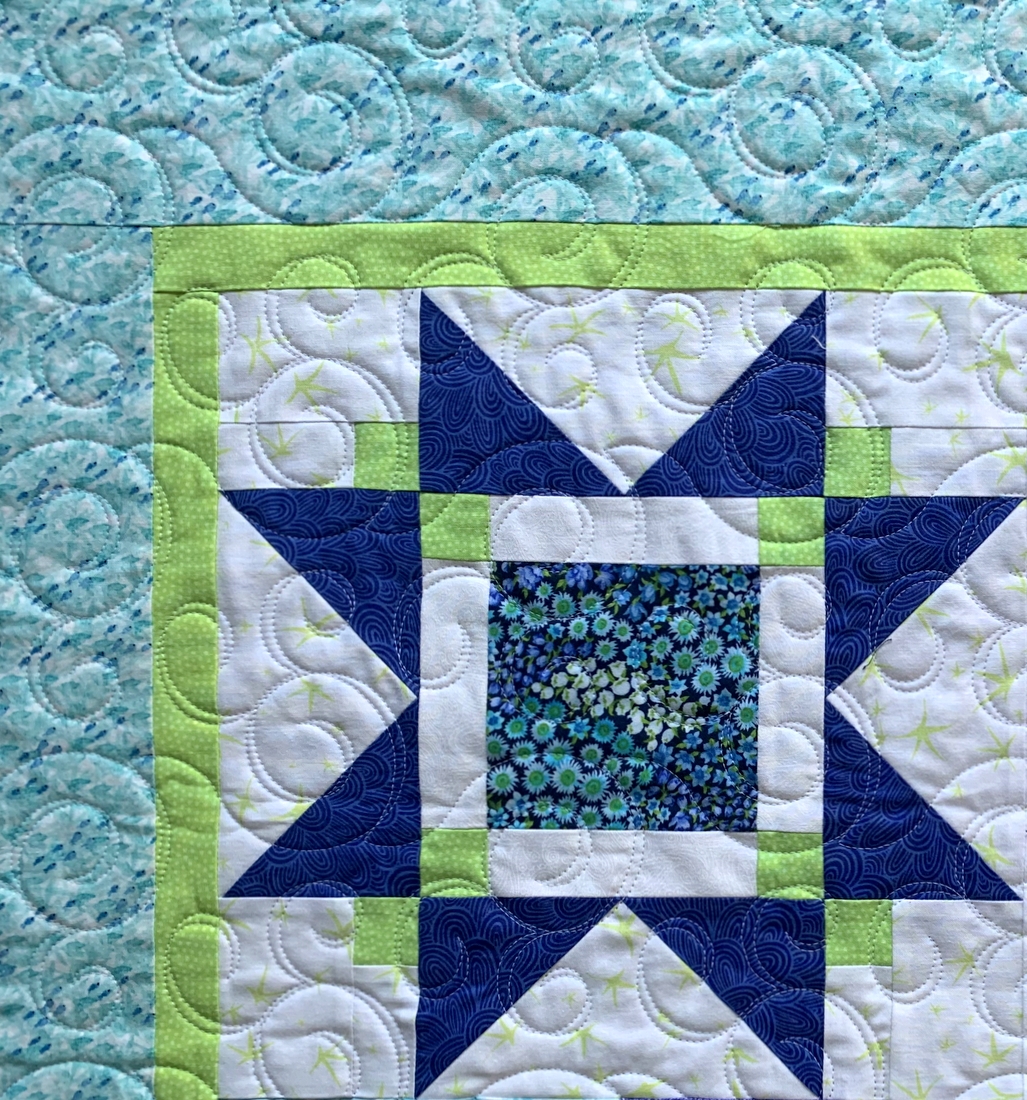
Here are a few close-ups:
The simple pieced back features just two fabrics:
The trimmed quilt measures 60½” square. I have just enough left of the purple fabric used in the 6″ curved Atomic Star blocks to make the binding. I’ll be back with photos when the binding and label are finished.
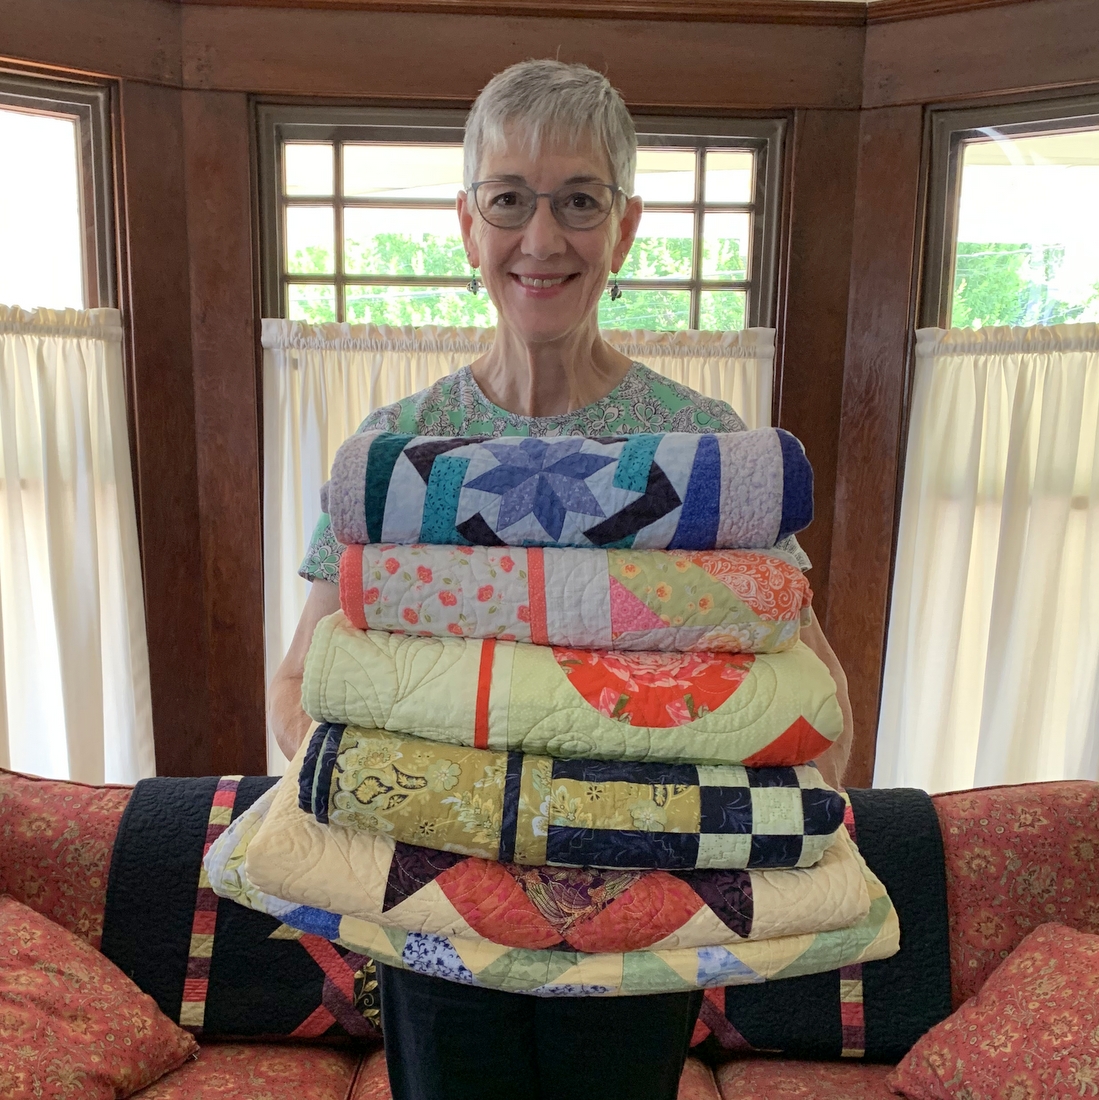
When I showed a picture on my blog a couple weeks ago of a stack of six quilts I had donated to Hopewell House, a hospice care facility in Southwest Portland, some of my readers asked to see pictures of the full quilts. Three of the quilts pictured above were made before starting my website/blog in 2012 so I thought it would be fun to do a “Throwback Thursday” post and show you these early quilts as well as the more recent ones.
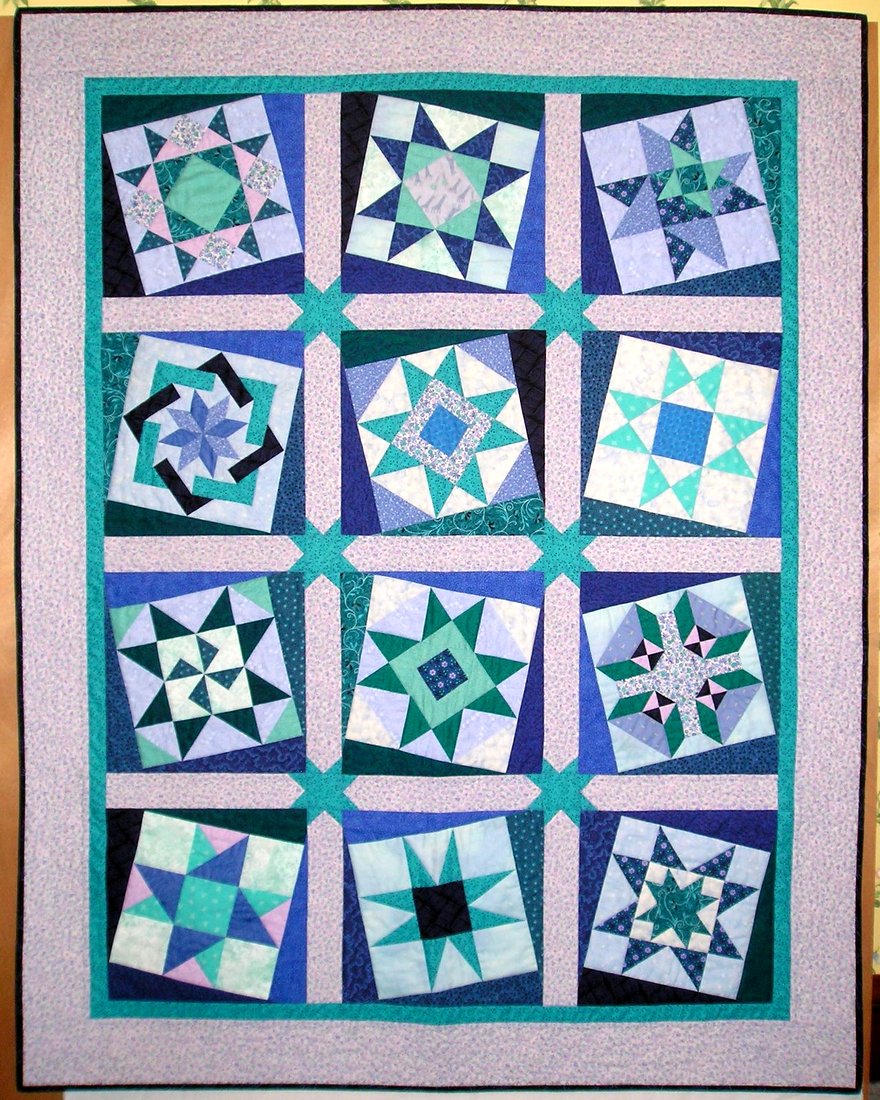
We start with the the quilt at the top of the stack — Swinging on a Star, the quilt I pieced in 2005 under Billie Mahorney’s tutelage in Quiltmaking III, the third installment of the Quiltmaking class she taught for so many years at the Pine Needle Quilt Shop in Lake Oswego (current home of the Lake Oswego branch of Montavilla Sewing Center):
Swinging on a Star, 46″ x 58″ (2006)
In this class Billie taught us how to draft blocks (including some from Quiltmaking II) that finish at 9″ square, and how to set them in a “Twist ‘n Turn” technique described by Sharyn Squier Craig in her 1996 book of the same name. At the time I started this quilt my focus was on using up cottons I had accumulated in the 1980s while making charity quilts for babies. Little did I know that setting foot in a quilt shop 20 years later would cause me to abandon all hope of using up that old fabric as I quickly began accumulating a much larger amount of new fabric that would become known as “my stash.”
Swinging on a Star was the first of my quilts that included free motion quilting (FMQ). Billie insisted that we learn how to do that. I stitched in the ditch around the star blocks and did free motion quilting in the borders. Happily the ditsy print in the borders hid a multitude of FMQ sins.
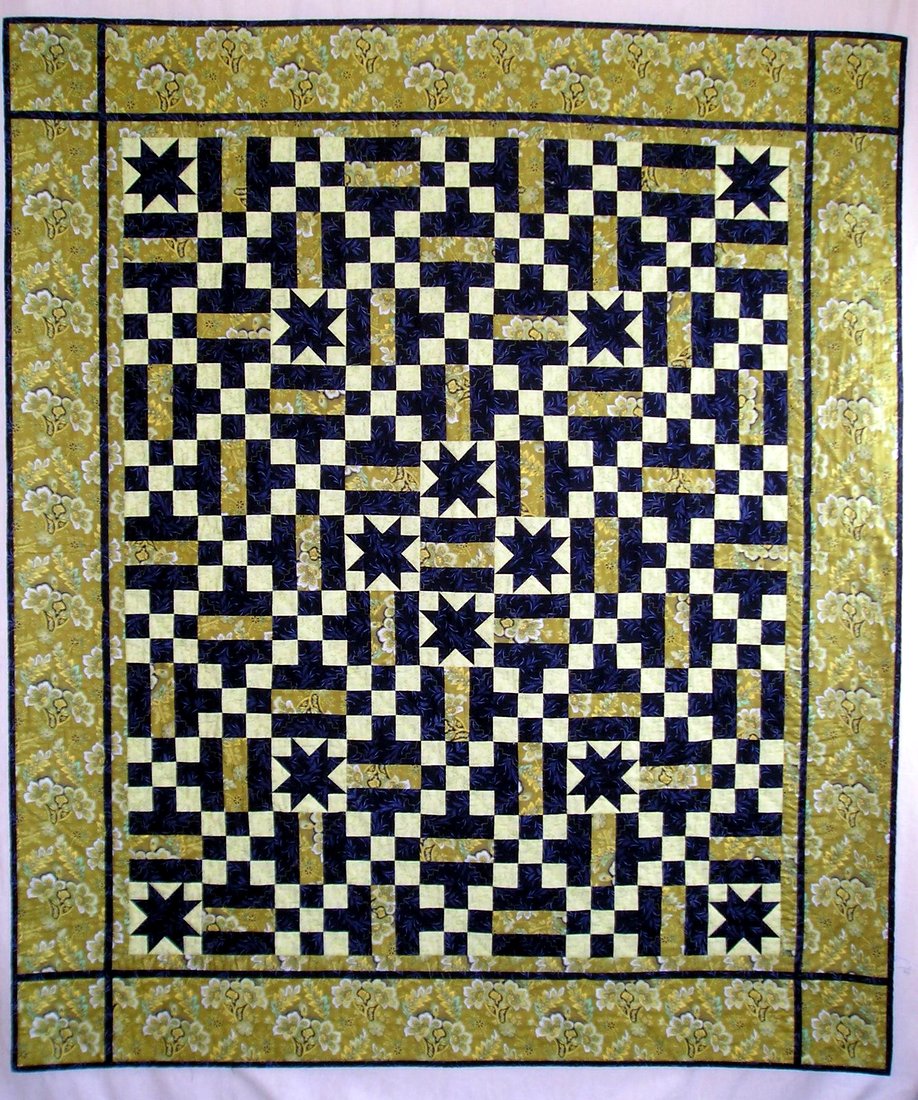
The fourth quilt I am holding in the first photo is Starry 9-Patch, finished in 2007. I took Billie’s Quiltmaking series out of order, starting with the second class. I learned so much in Quiltmaking II and III that I decided to take Quiltmaking I when she offered it again. The basic design was a combination of 9-Patch and Rail Fence blocks but I threw in some Sawtooth Stars to jazz it up a bit:
Starry 9-Patch, 56″ x 63″ (2007)
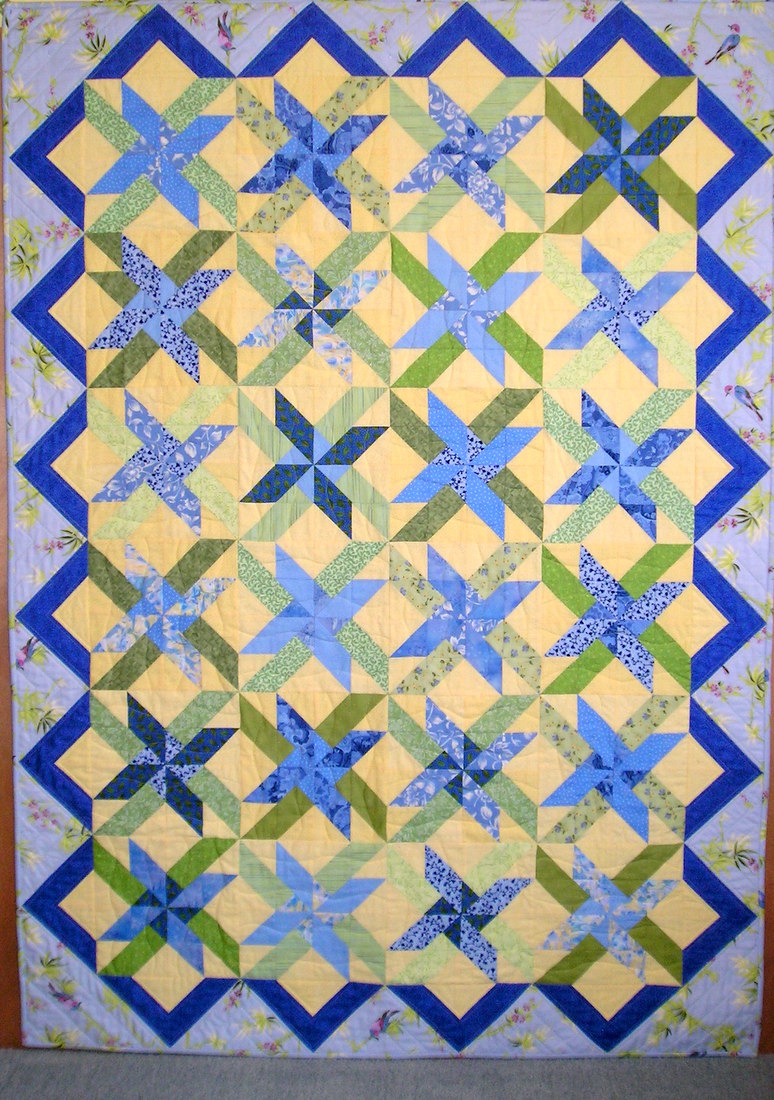
The bottom quilt in the stack pictured is based on Billie’s original design called Maisie’s Garden. She taught this class at the Pine Needle in 2007 and I happily jumped in, using a palette of blues, greens, and yellows, a combination I still love to this day:
Star Garden, 44″ x 62″ (2007)
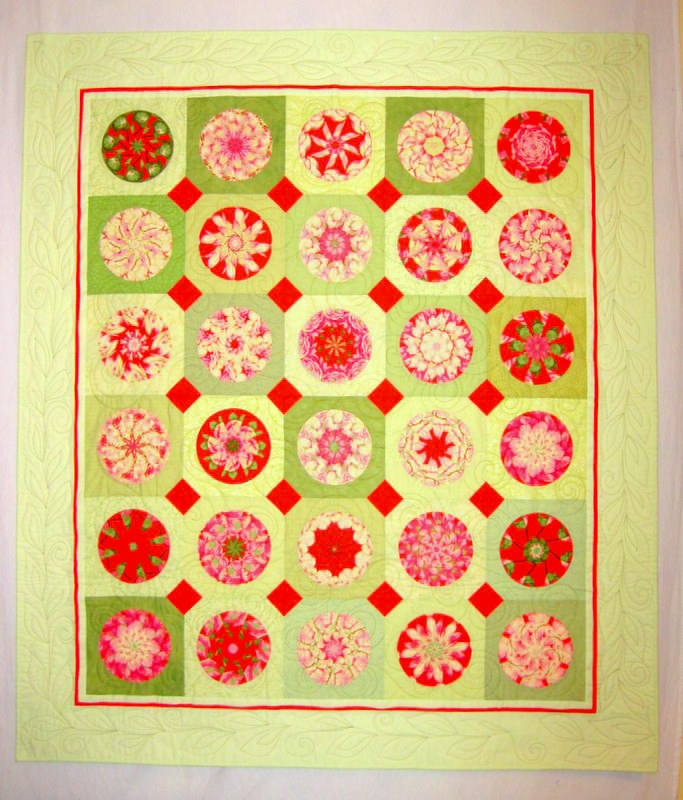
The next quilt in chronological order is V8, a quilt I designed to highlight my discovery of kaleidoscope blocks and inset circles:
V8, 55″ x 64″ (2010)
Every circle is a revelation! You don’t know what a block will look like until you have sewn eight 45-degree triangles together. I named my quilt V8 because the colors reminded me of the vegetables that go into the making of the vegetable juice blend.
One thing I can definitely say after posting these photos is that digital photography has certainly improved over the last 15 years!
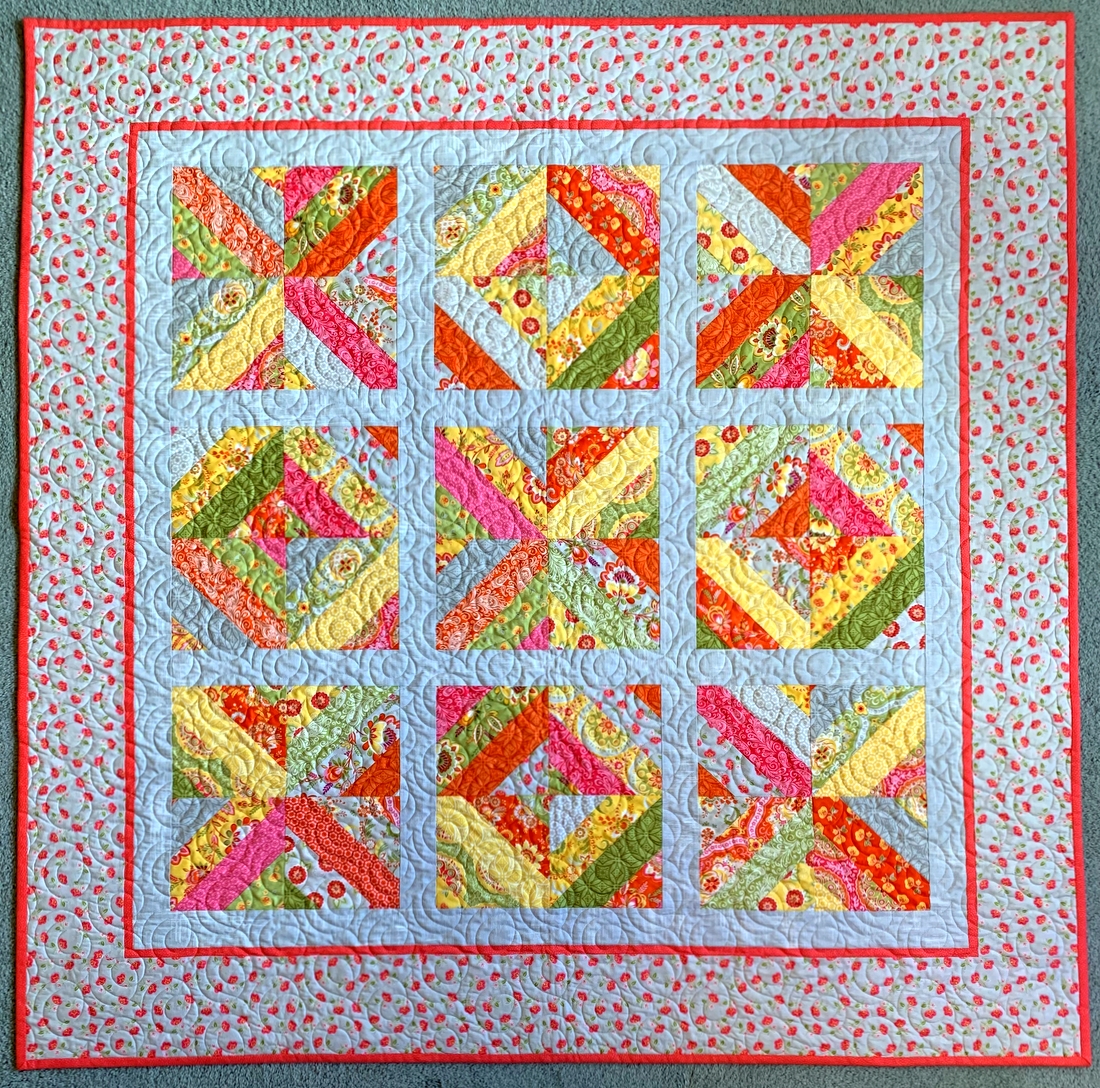
Number 5 in the grouping of quilts is Simply Dashing, also an original design, this one focusing on four-patch kaleidoscope blocks, the ones I call “4-Patch Wonder” or “faux kaleidoscope” blocks:
Simply Dashing, 55″ x 64″ (2010)
In this quilt the centers of the Churn Dash blocks (on point) and the alternating blocks (also on point) are 4-Patch Wonder blocks.
The final quilt I donated to Hopewell House is a recent one, Tea Time on High Street, finished in 2021:
Tea Time on High Street, 55″ Square (2021)
Was it hard to part with these quilts? To be honest, yes. The first three have a lot of sentimental value because of their association with my teacher and mentor Billie Mahorney. The other three represent steps I took in trying out my own designs and/or moving outside my comfort zone. The hospice patients and their families who become the recipients of these quilts may never know their significance in my quilting journey but the fact that they are helping people on a different kind of journey makes it all worthwhile.


 We all know the last thing I need is another quilt top when I have so many of my own begging to be finished, but friends, I could not resist. The final bid was $20 — an absolute steal. Truth be told, I would have paid more but the top didn’t seem to be drawing a lot of interest. Was it because I was hovering in the background willing my guildmates to keep passing it by? I also lingered nearby (inconspicuously, I hope) as the auction drew to a close, making sure no one could squeeze in at the last minute to outbid me.