Among the many special exhibits at last week’s Northwest Quilting Expo (held in Portland, Oregon) was a small one called “Reach for the Stars” featuring quilts made using Minnesota quilter Terri Krysan’s design of the same name. The quilts were made by Portland quilters who had seen my version on display at the Pine Needle and wanted to make their own.
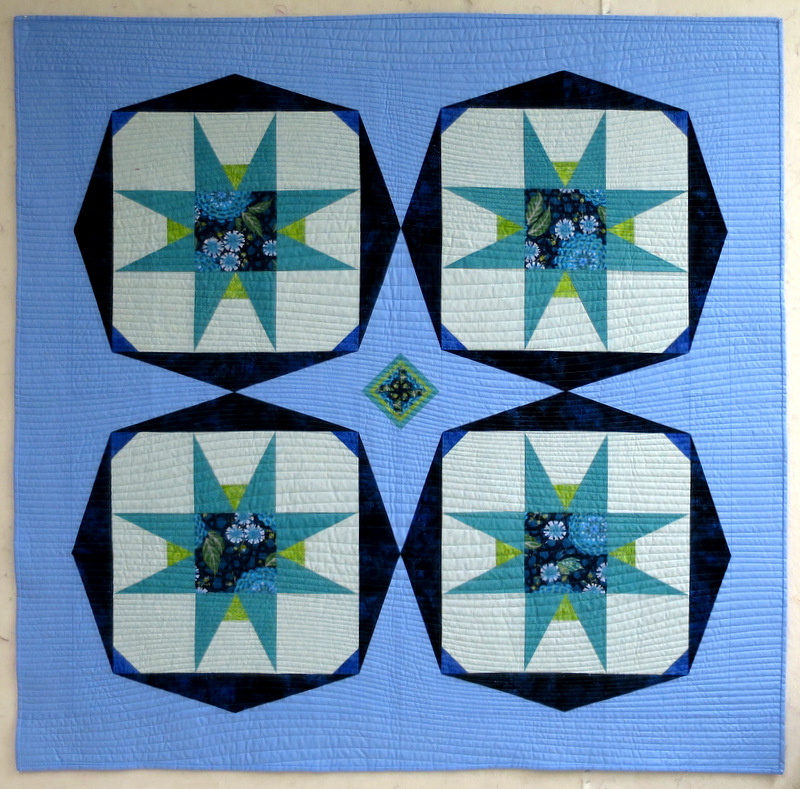
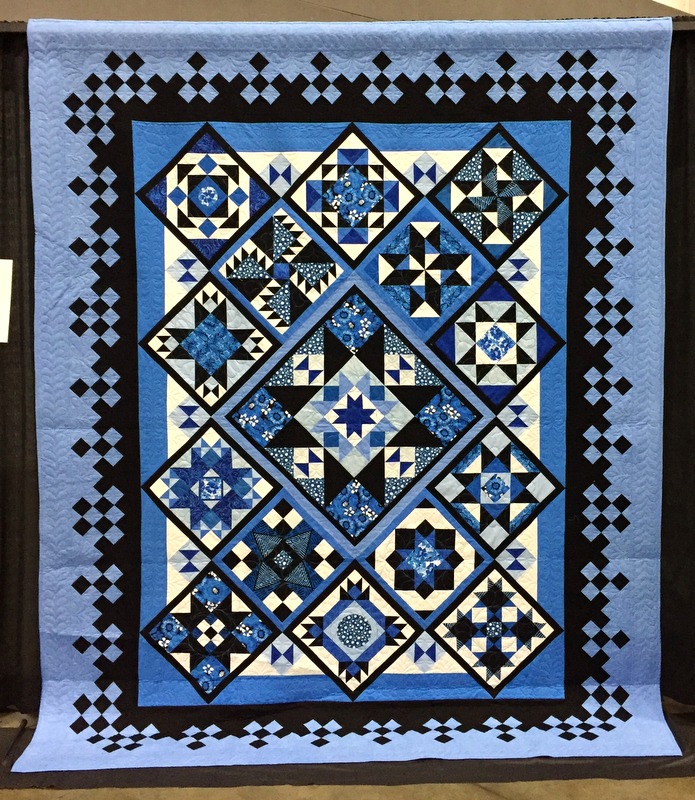
Here is Maxine’s bold and beautiful quilt in black, white, and blue:
Blue Giant, Made and Quilted by Maxine Borosund
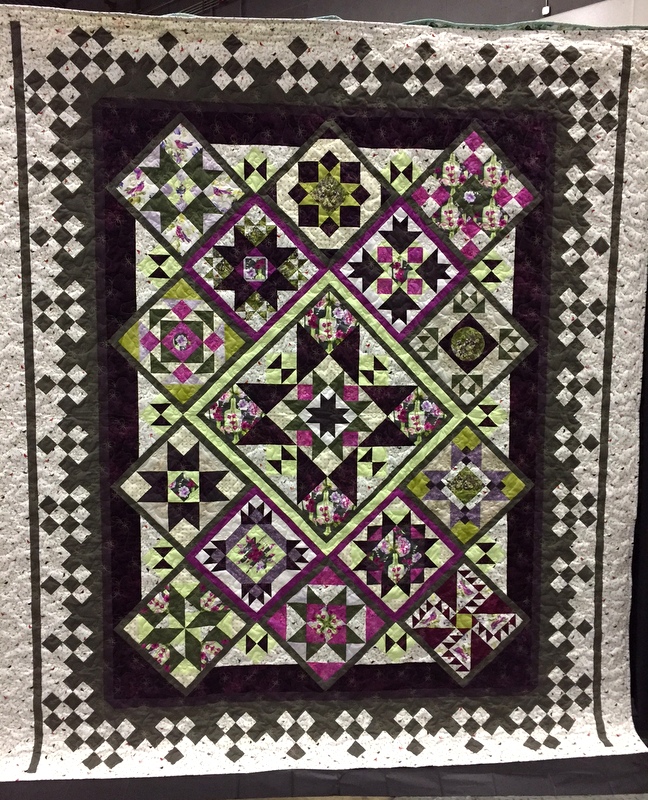
Joie’s quilt is a vision in green and purple, one of my favorite color combinations:
Made by Joie Lattz, Quilted by Debbie Scroggy
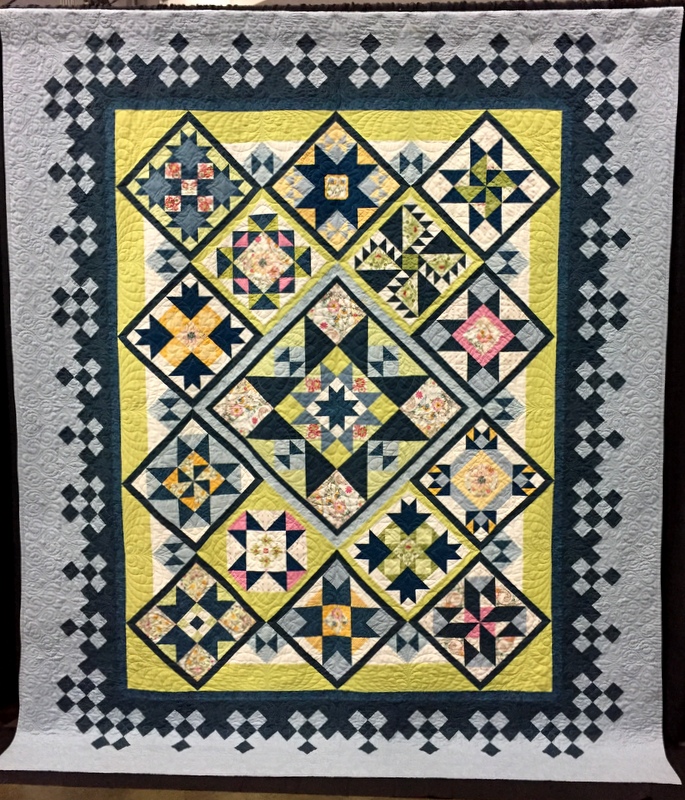
Lana’s lovely quilt was made as a fundraiser for her grandson’s school (it sold for over $2000!):
Made by Lana Kamerer
The owners of the quilt graciously loaned it to Lana so it could be part of the special exhibit.
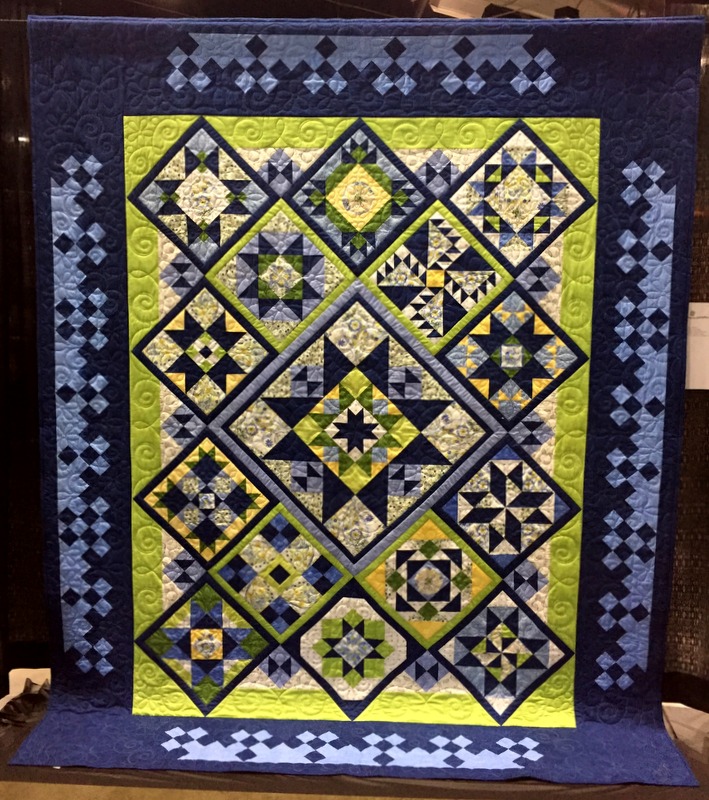
Andrea’s quilt was made from the same line of fabrics as Lana’s but with a more limited palette of blues and greens:
Star Bright, Made by Andrea Hinderhofer, Quilted by Kazumi Peterson
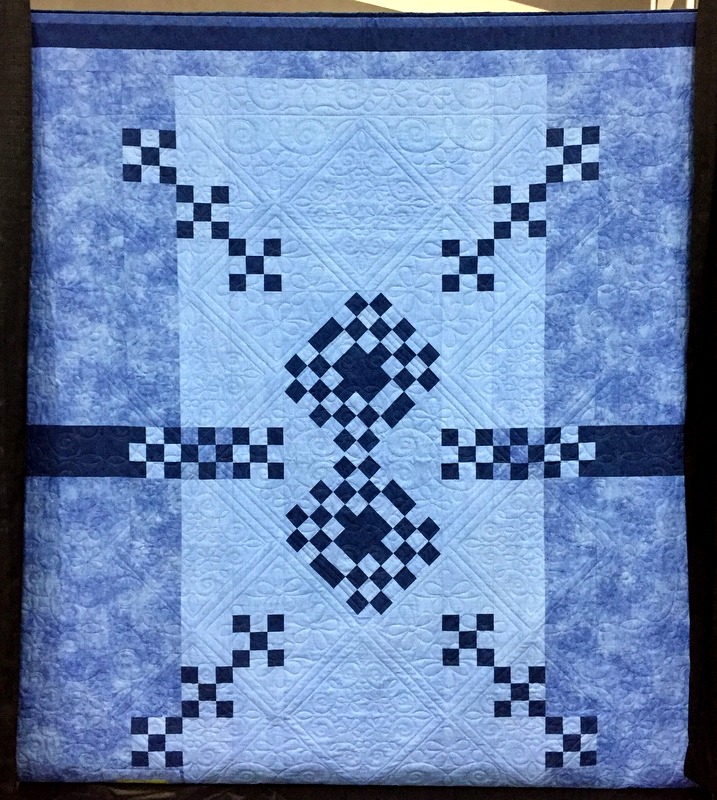
So serene! Did you notice the different border treatment? Andrea opted not to carry the checkerboard blocks to the outer borders so she put the unused ones on the back:
Back of Andrea Hinderhofer’s Reach for the Stars Quilt
You can see some of the lovely motifs that longarmer Kazumi Peterson used.
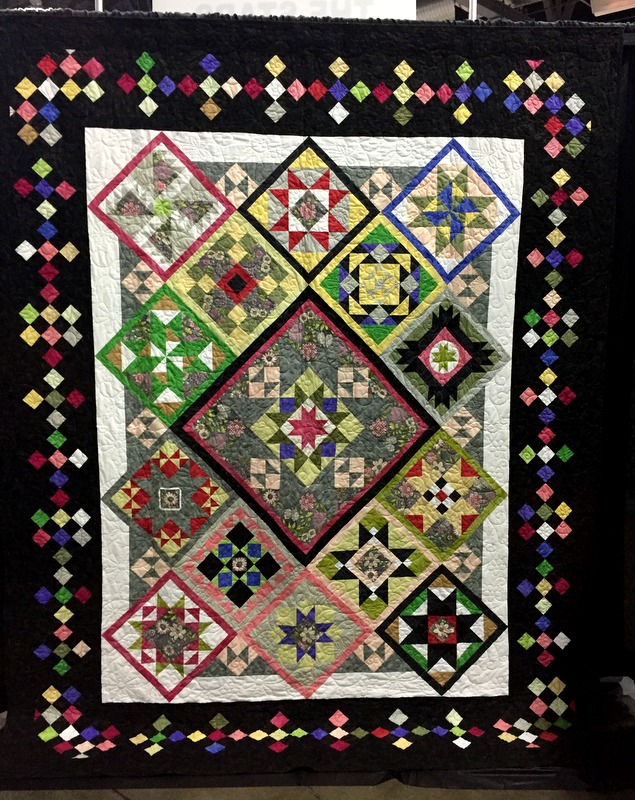
Sharon R.’s scrappy checkerboard border cleverly pulls together all the colors used in her blocks:
Made by Sharon Ripley, Quilted by Melissa Hoffman
Sharon S. used the bright colors in her butterfly focus fabric to great dramatic effect, then calmed it down with her earthy brown and black checkerboard border:
Made by Sharon Schaper, Quilted by Melissa Hoffman
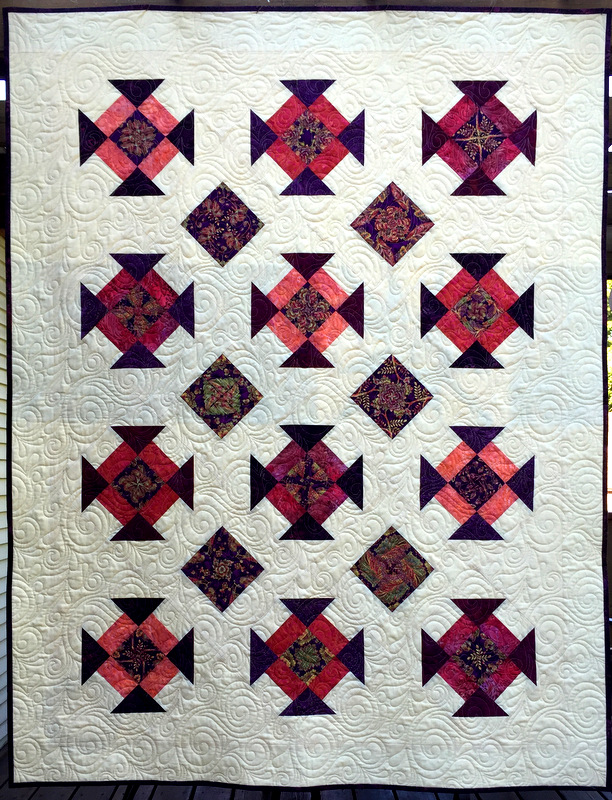
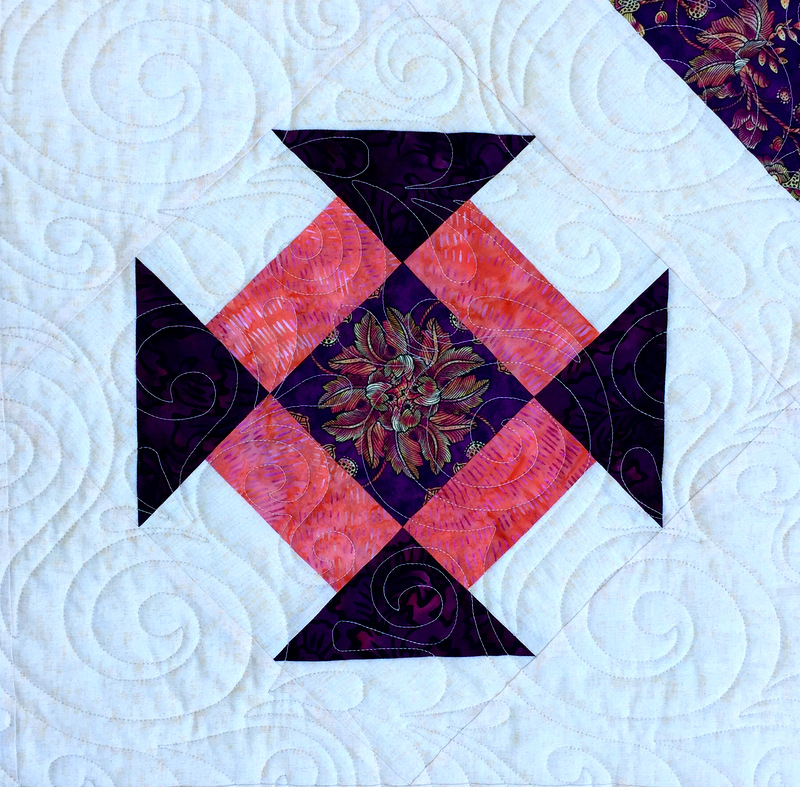
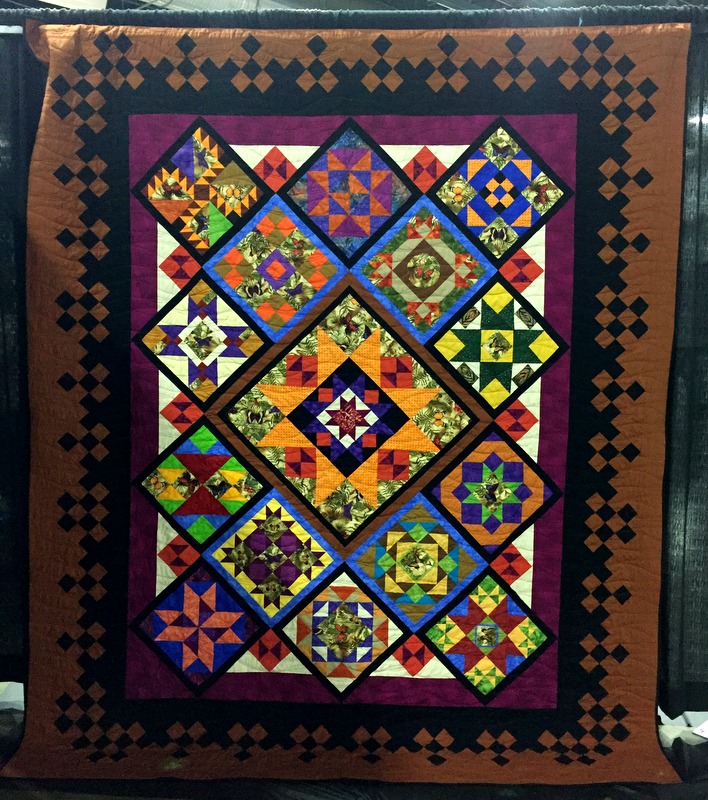
This is my version, also displayed in the exhibit:
Catch a Falling Star, Made by Dawn White, Quilted by Loretta Orsborn
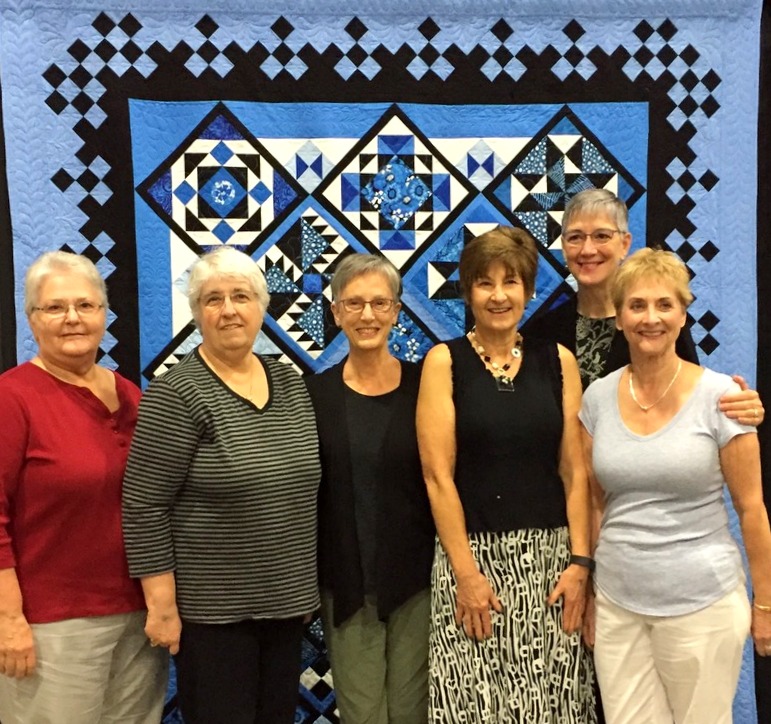
Andrea was out of town during the quilt show but the remaining six of us gathered for group shots in front of each quilt. Here we are in front of Maxine’s:
Left to right: Sharon Schaper, Sharon Ripley, Joie Lattz, Maxine Borosund, Dawn White, and Lana Kamerer. With us in spirit: Andrea Hinderhofer.
I got a phone call last night from one of the organizers of Northwest Quilting Expo (coming up later this week in Portland, Oregon) that my quilt Where It’s @ won a second place ribbon. I am thrilled!
If I remember the rest of the phone call correctly (I was a bit dazed), winners will be announced Thursday at 1:30 pm at the quilt show. That was the day I was planning to visit the show with my quilt group, the Quisters, so the timing is perfect.
I started this quilt in July 2016 in a class with Karla Alexander of Saginaw Street Quilts and finished it late last year. The name of her quilt pattern is Rewind. Karlee Sandell of sewinspired2day.com quilted it for me.
Quilters who enter their creations at Northwest Quilting Expo can opt to have their quilts judged. I chose to have mine judged, as I’m always interested in what the experts have to say, hoping I can learn from their remarks.
In 2011 I won a ribbon in a non-juried show. Here’s a look at that quilt:
Midnight in the Garden, 66″ x 80″ (2010)
The venue was Quilts in Bloom, a small quilt show held at the Oregon Garden in Silverton, Oregon. Much to my surprise and delight, this quilt won the viewer’s choice award for Best Traditional Quilt. I’m sure that the beautiful custom quilting by Melissa Hoffman contributed to that award. (You can see other examples of Melissa’s beautiful work on her Instagram page, fiddlestitches.)
This quilt is very special to me. It was made from my own pattern 4-Patch Wonder, published in 2010. I originally called the quilt Carmen, after the name of the fabric line from Timeless Treasures, changing it later to Midnight in the Garden. I don’t have it anymore but it’s still in the family. I gave it as a gift to my twin sister Diane as a 60th birthday present. It’s on display in her home in Georgia and I get to enjoy it on my annual visits.
The Northwest Quilting Expo runs Thursday-Saturday, Sept. 28-30, at Portland Expo Center, 2060 N. Marine Drive. Maybe I will see you there!
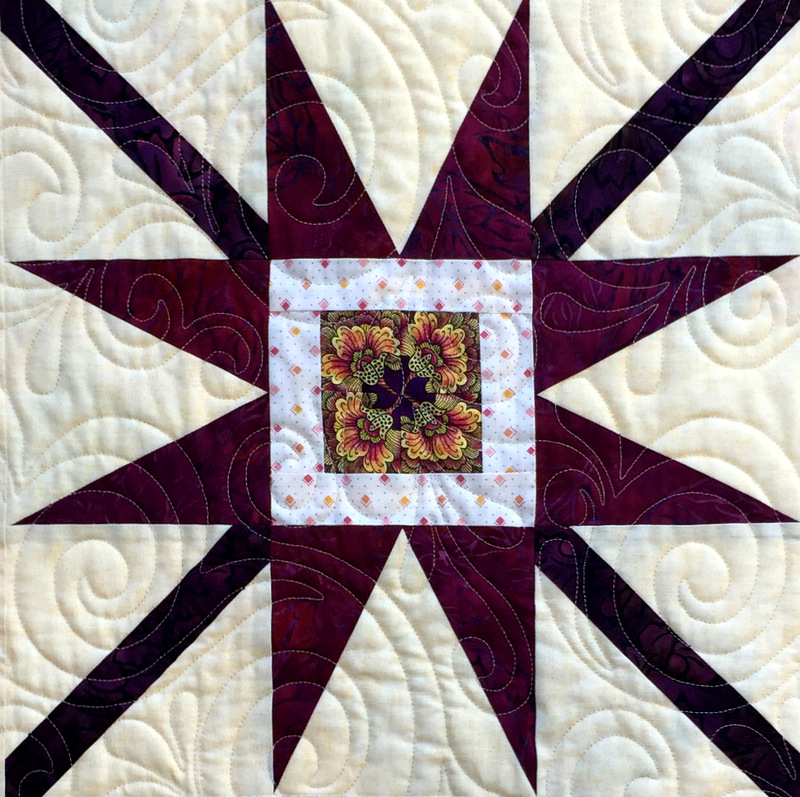
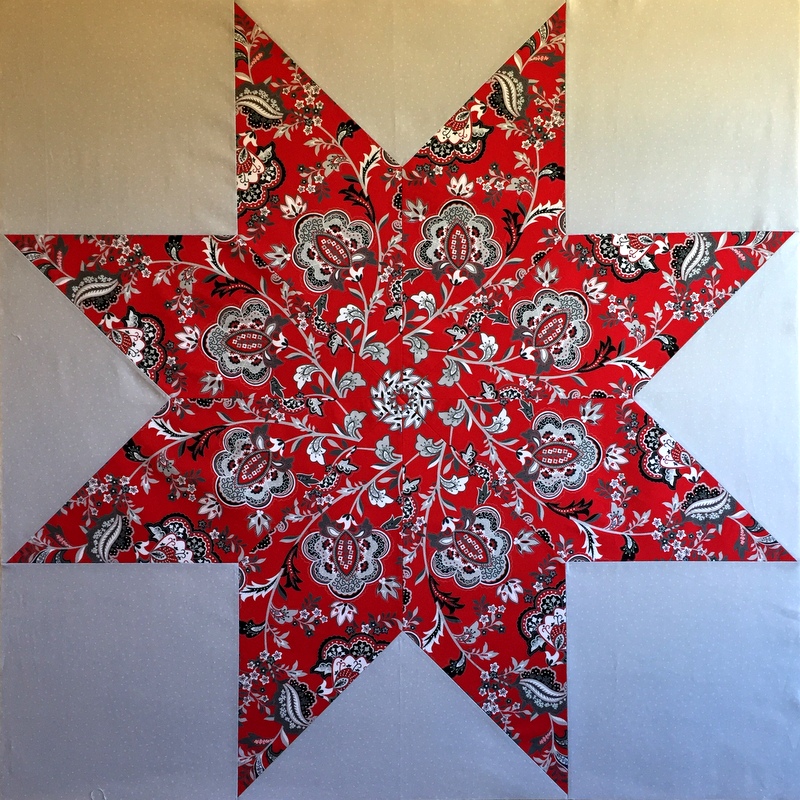
Here’s my second Big Block Star, made using Victoria Findlay Wolfe’s pattern of the same name and her large diamond ruler:
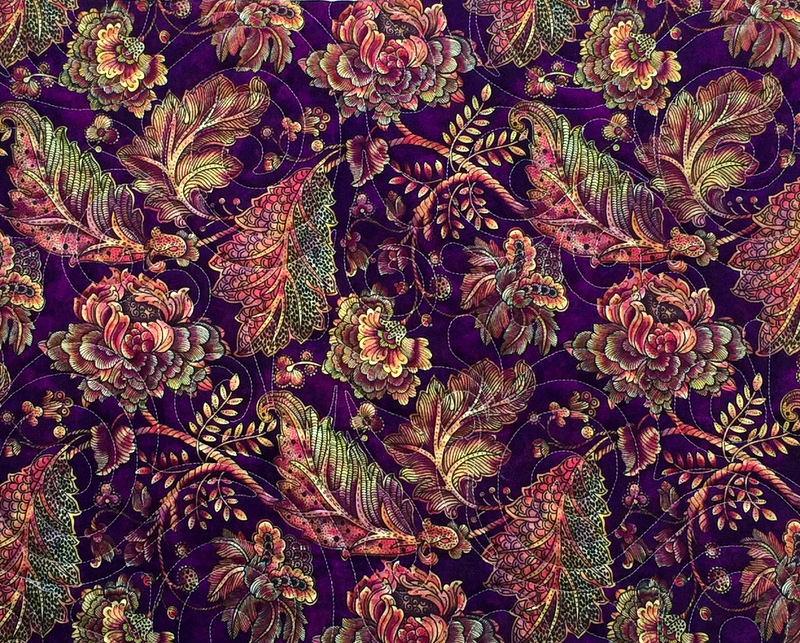
Don’t you love that bold beautiful print? It’s from the “Black, White & Currant 5″ line by Color Principle for Henry Glass Fabrics. I bought a few pieces from the line a couple of years ago. I find it hard to resist Jacobean floral prints and I rarely see them printed on a true red background.
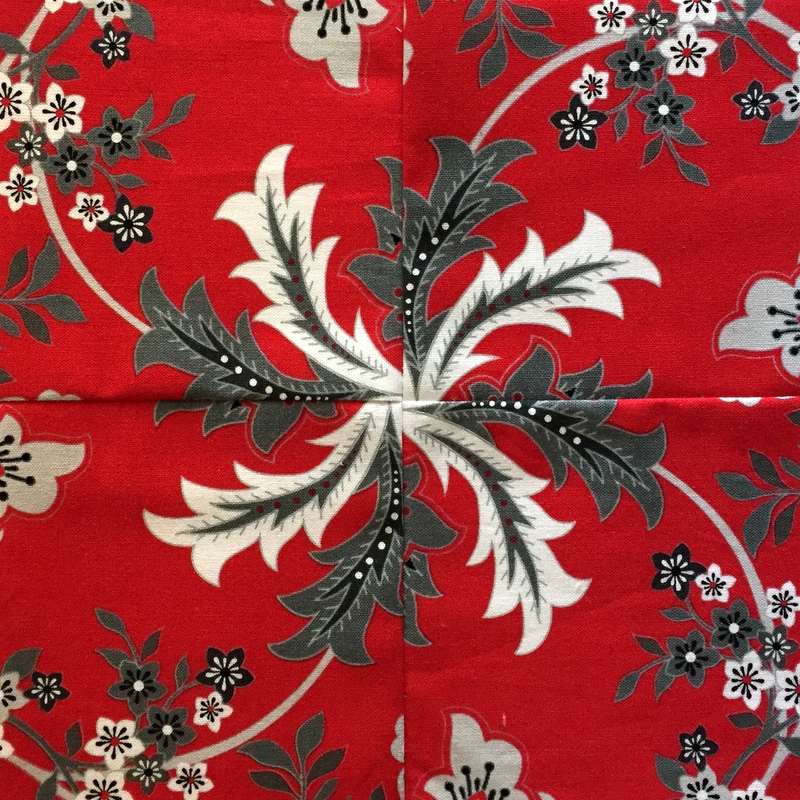
I don’t have enough of the Jacobean print to make three more Big Block Stars — each star finishes at 41″ square — but I do have enough to play around with 4-Patch Wonder blocks (my name for faux-kaleidoscope blocks made from four identical patches). Here’s a test block that measures 8” square:
Do I have a plan for this quilt? Not yet. I could keep it simple, surrounding my Big Block Star with one wide border, perhaps using 4-Patch Wonder blocks as cornerstones, or I could surround the entire Big Block Star with faux-kaleido blocks. No need to decide now. I’ll sleep on it.
And what of Big Block Star, Take One? After not looking at it for a few days, I have come to really like it. Comments from readers who saw my blog post about it or saw it on my Instagram have given me a fresh perspective.
Here’s to 2017! Specifically, here’s to lots of sewing and quilting in 2017. I’m already looking forward to several projects — and not just new ones. There’s a stack of UFOs beckoning that I am actually enthusiastic about tackling. But not today.
On this fresh new day of the year, I’m looking back on what I created in 2016. Rather than going in chronological order, I’m grouping my finishes by categories.
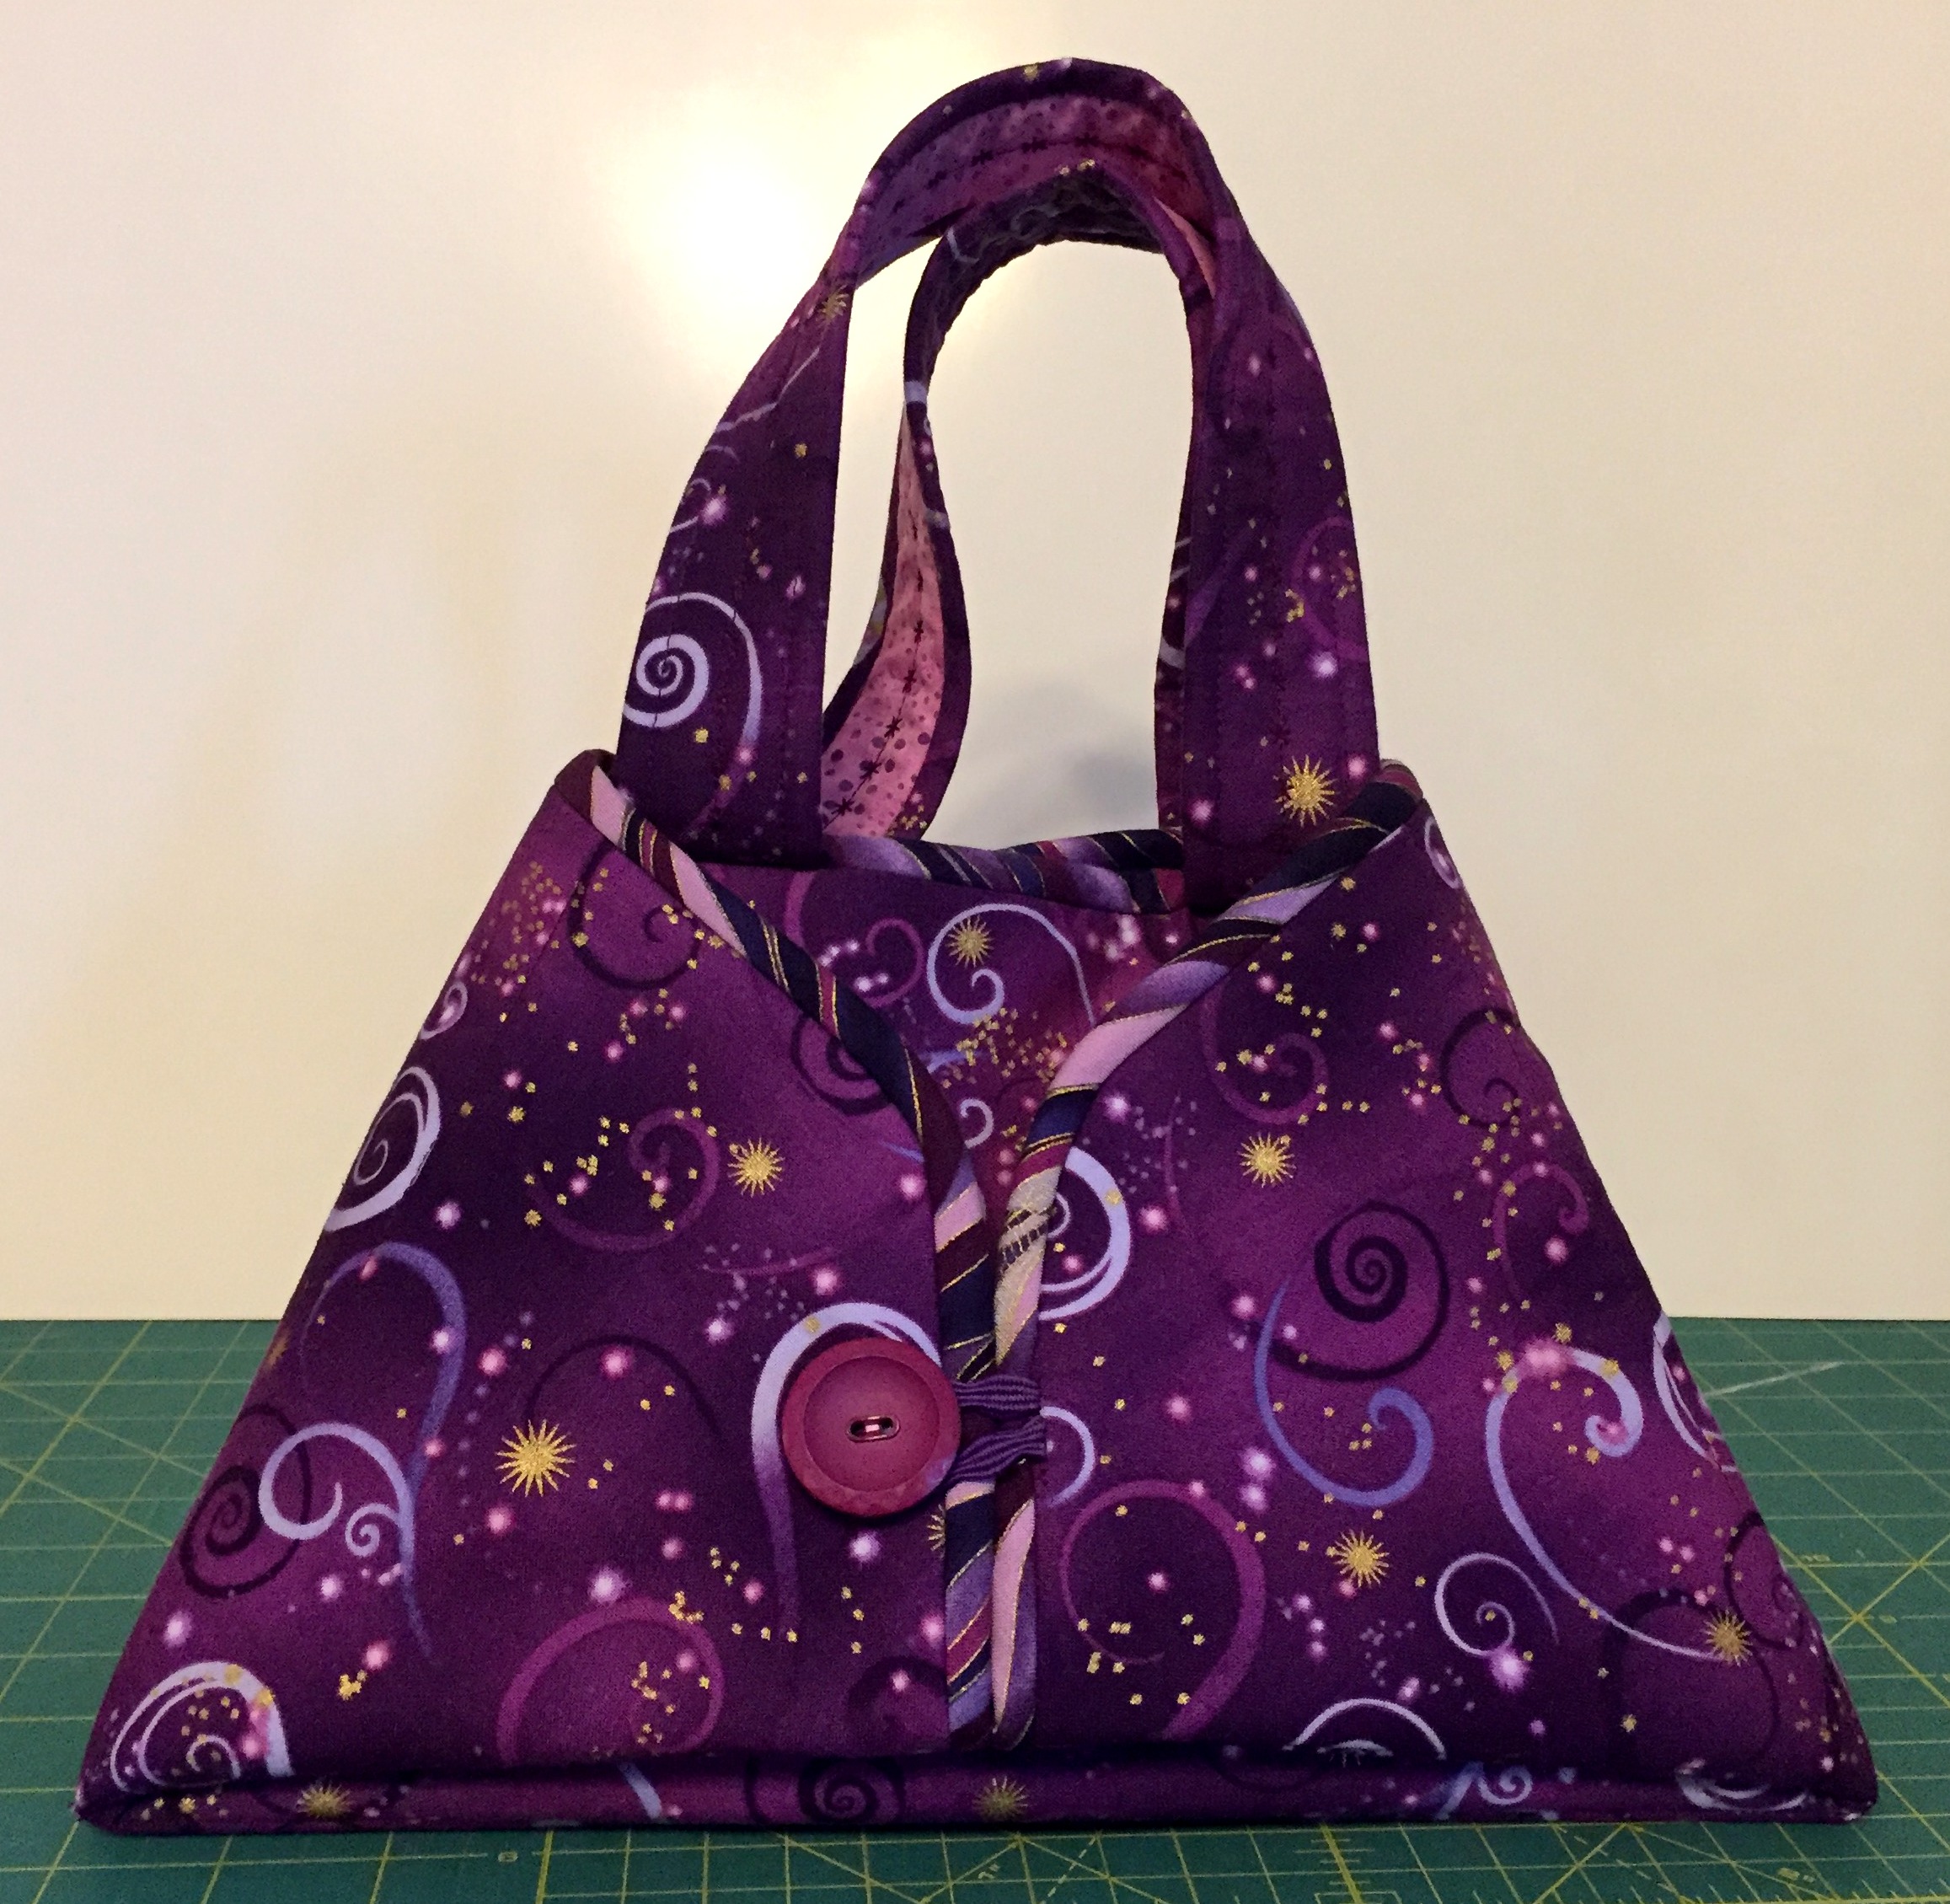
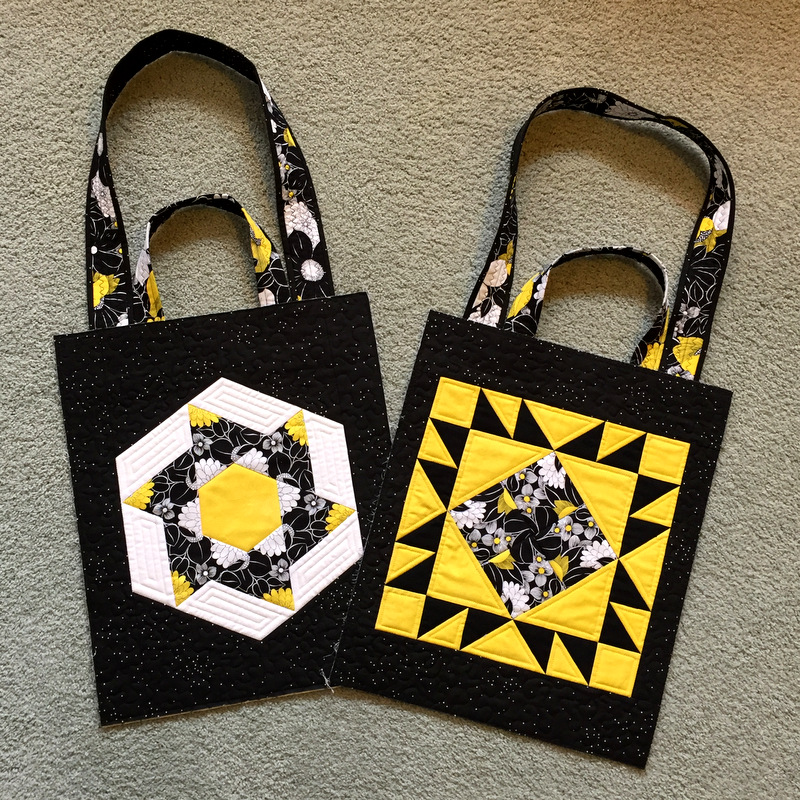
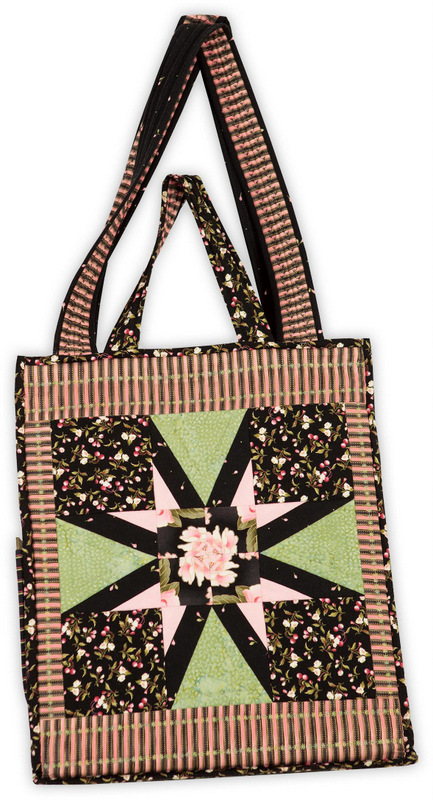
This was the year of the Junior Billie Bag, the quintessential quilter’s tote designed by Billie Mahorney. I made a bag for myself . . .
. . . and one for my friend Deborah . . .
. . . and one for my friend Miriam:
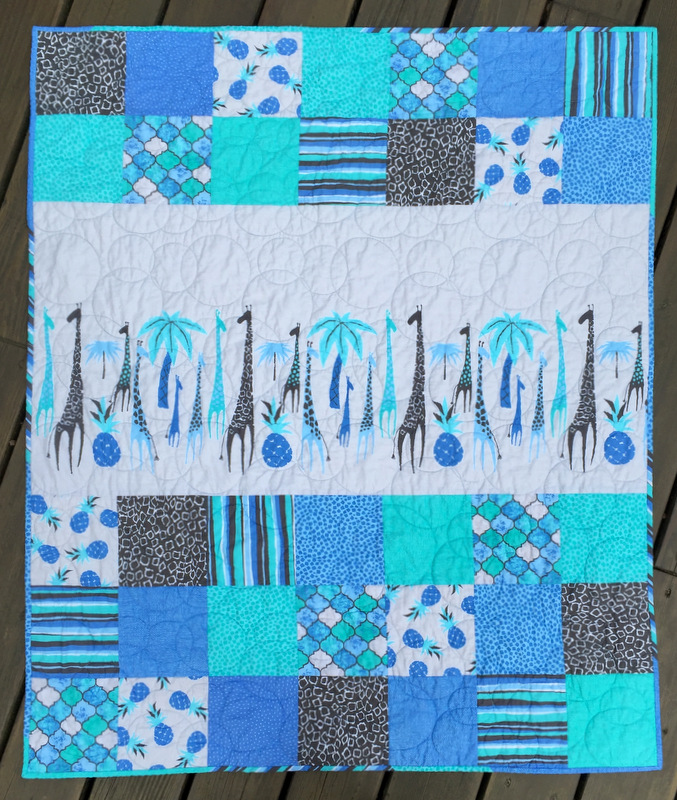
Next category: baby quilts. This is the first of two incorporating a charming giraffe-themed fabric panel:
Abraham’s Quilt, 40″ x 49″ (2016)
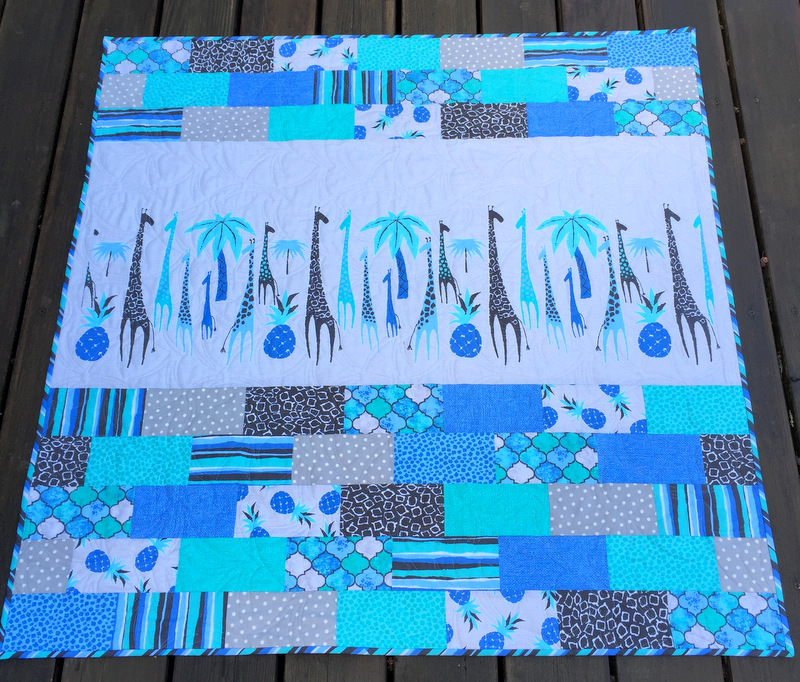
Here’s the second one, using the same fabrics in a slightly different setting:
Malachi’s Quilt, 41″ Square (2016)
I didn’t use a pattern for these quilts, preferring to play with simple shapes (squares and rectangles) so that the giraffes on the fabric panels would be the focal point.
My third baby quilt of the year was this one using the pattern Just Can’t Cut It from All Washed Up Quilts:
Stefan’s Quilt, 46″ Square (2016)
All three were quilted by longarmer Sherry Wadley.
All by itself in the mini quilt category is Ring Toss, based on the pattern Mini Rings by Sew Kind of Wonderful:
Ring Toss, 32″ Square (2016)
Mini Rings was quilted by Karlee Sandell of SewInspired2Day. Oh, and that’s our new rescue kitty Princess Cordelia (Coco for short).
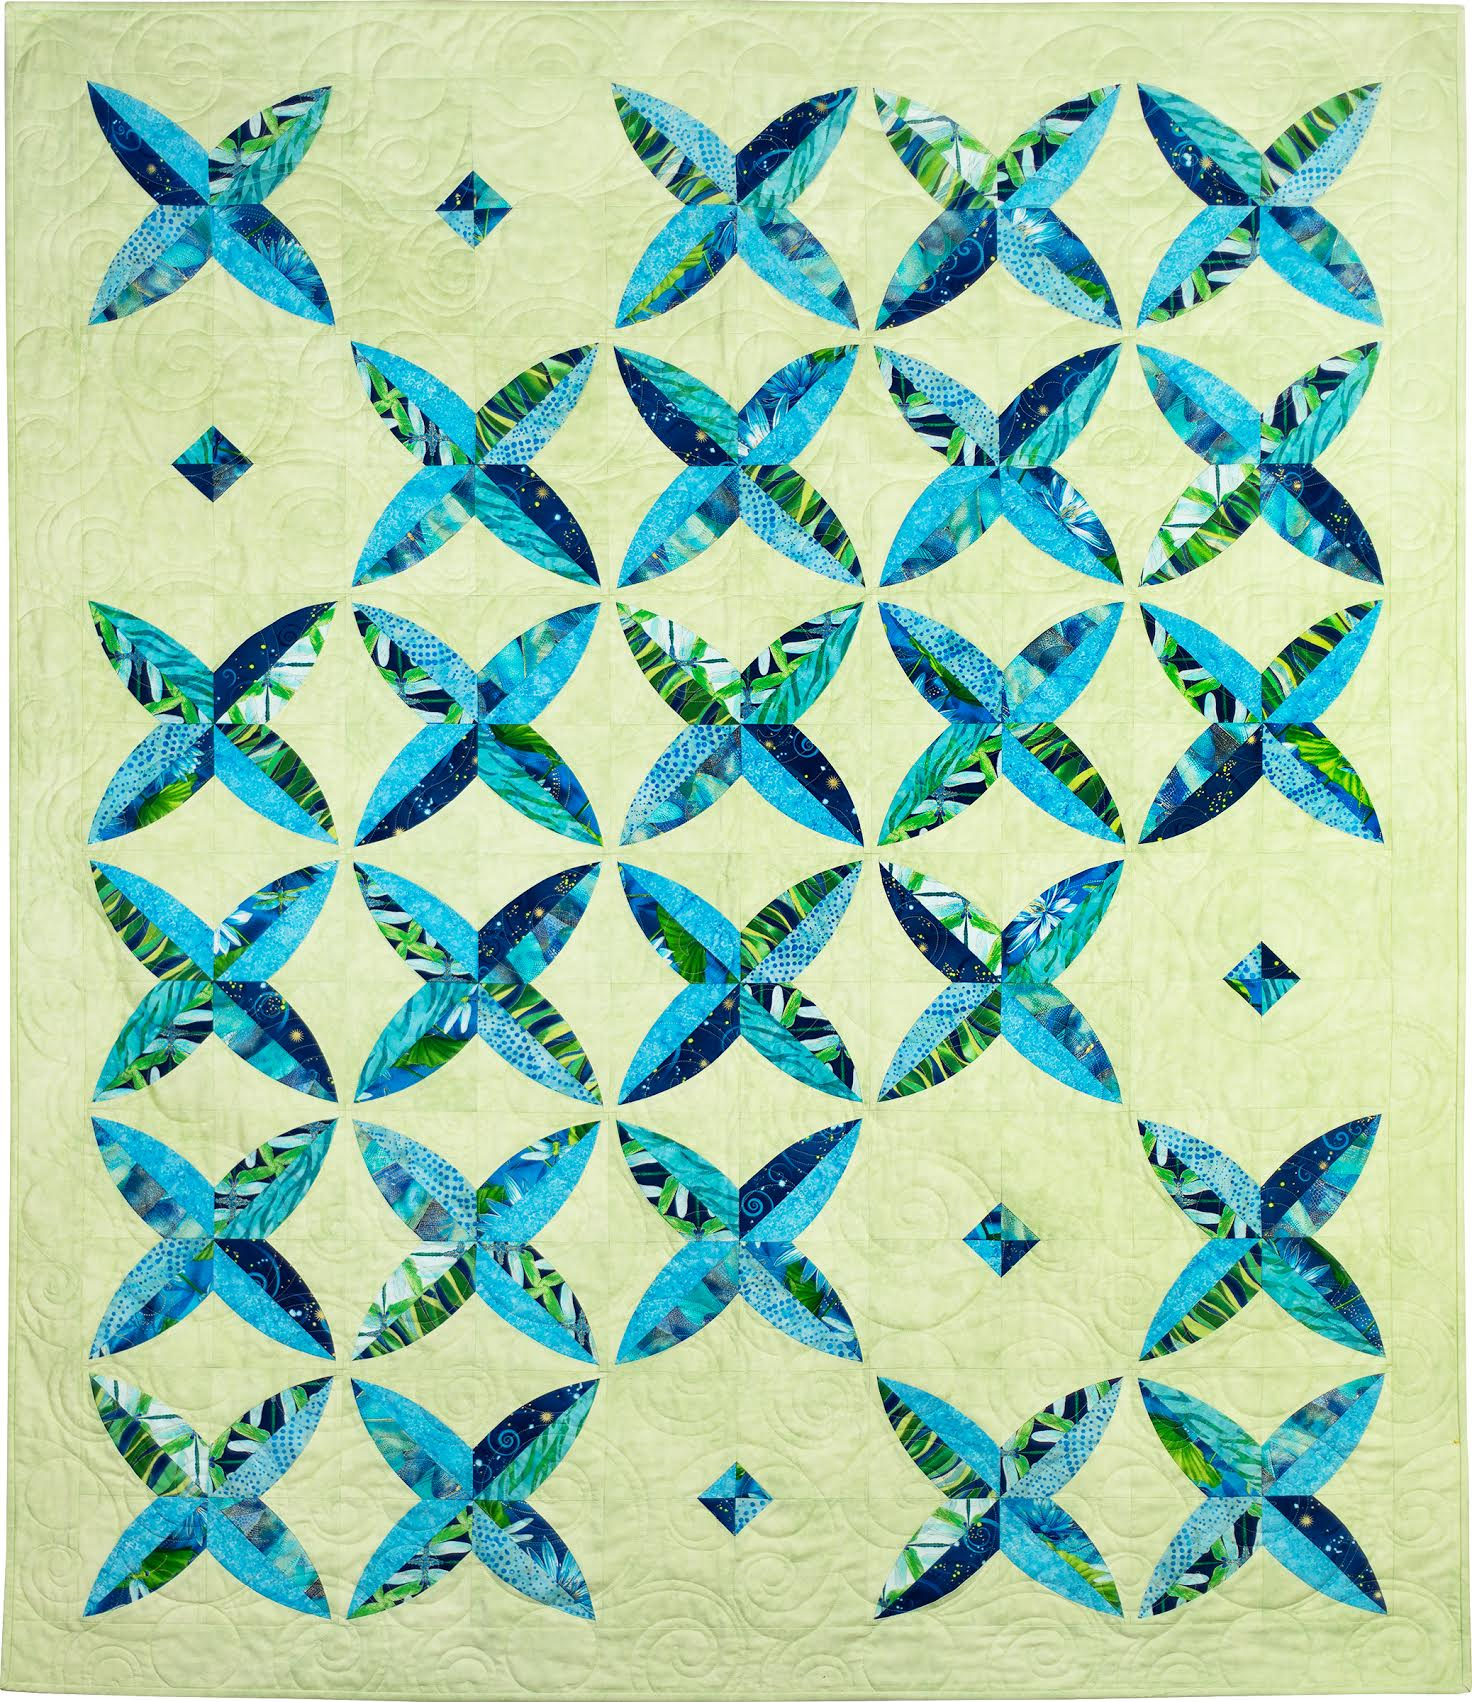
Lap quilts is the next category. Once again I used a Sew Kind of Wonderful design, adapting the pattern Chic Diamonds into this quilt I named Dragonfly Kisses:
It was quilted by Sherry Wadley.
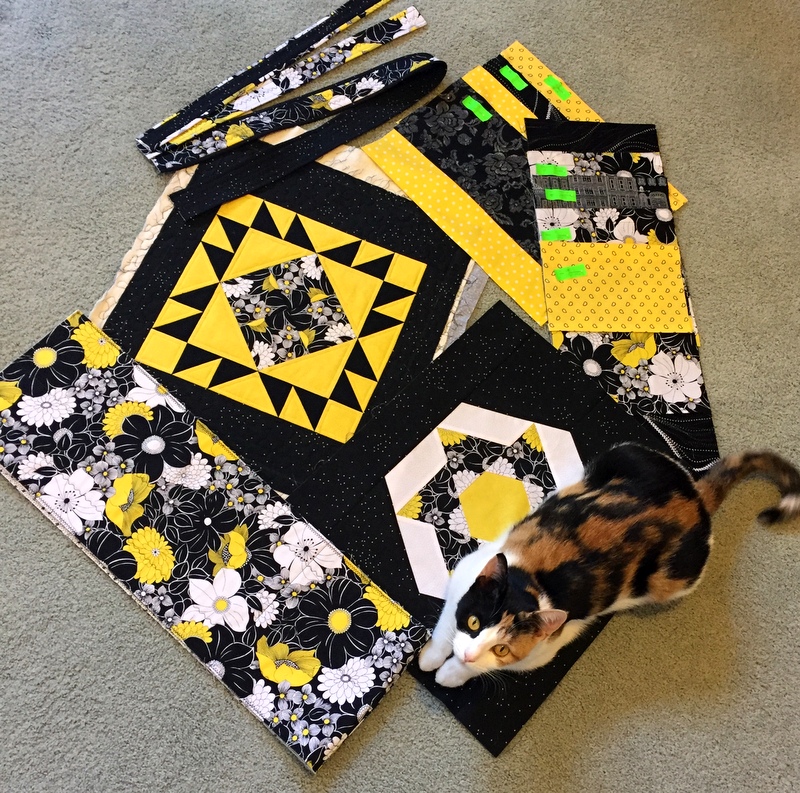
The next quilt, Where It’s @, was started in July in a class with Karla Alexander of Saginaw Street Quilts. It’s based on her pattern Rewind. I really stepped outside my comfort zone with this quilt, and I absolutely love the result:
Where It’s @, 57″ x 72″ (2016)
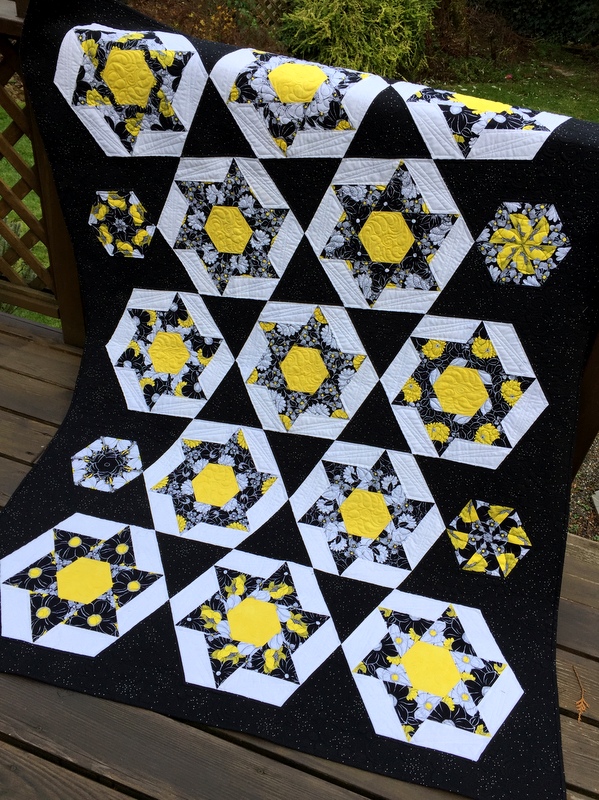
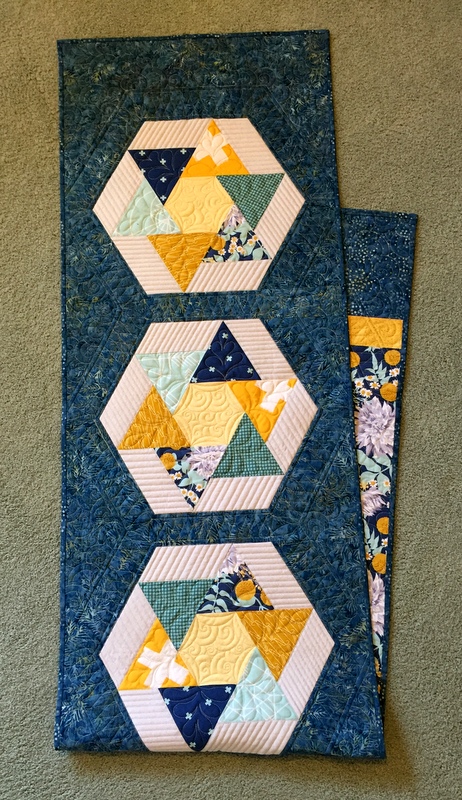
The last quilt in this category is Stella by Starlight, a “kaleido-spinner” using the Spinners block by Heather Peterson of Anka’s Treasures:
Stella by Starlight, 51½” x 71″ (2016)
I call it a “kaleido-spinner” because the six equilateral triangles in each block were cut from identical repeats of the focus fabric, creating a kaleidoscope effect of sorts. The four small hexagon blocks are true kaleidoscope blocks.
Both Where It’s @ and Stella by Starlight were quilted by Karlee Sandell.
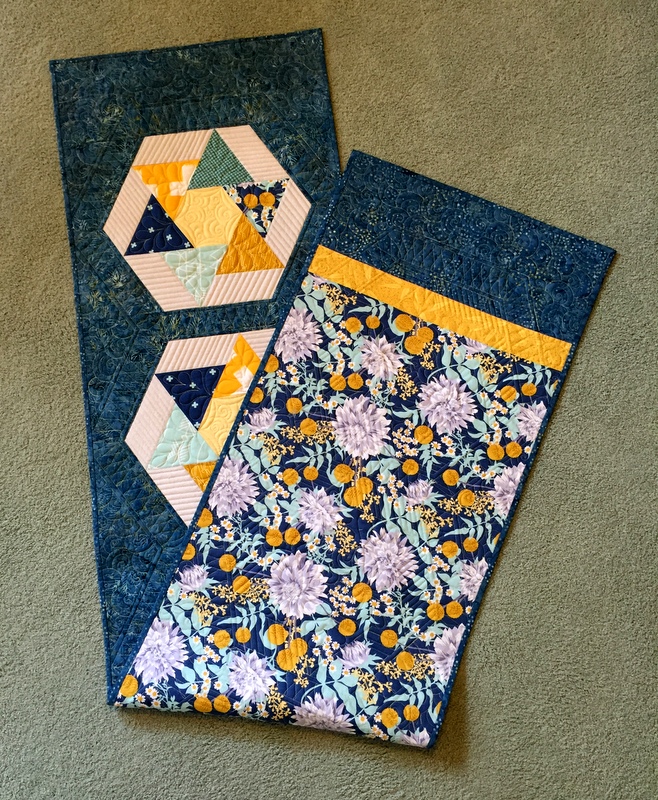
The next category is runners, both bed and table. I made one of each, using the same focus fabric in each (Wander by Joel Dewberry) and the same block design (Spinners by Anka’s Treasures) with completely different outcomes. Here is WanderLust I, the king size bed runner made with five blocks:
WanderLust I, 20″ x 88″ (2016)
I liked the focus fabric so much I made the bed runner reversible:
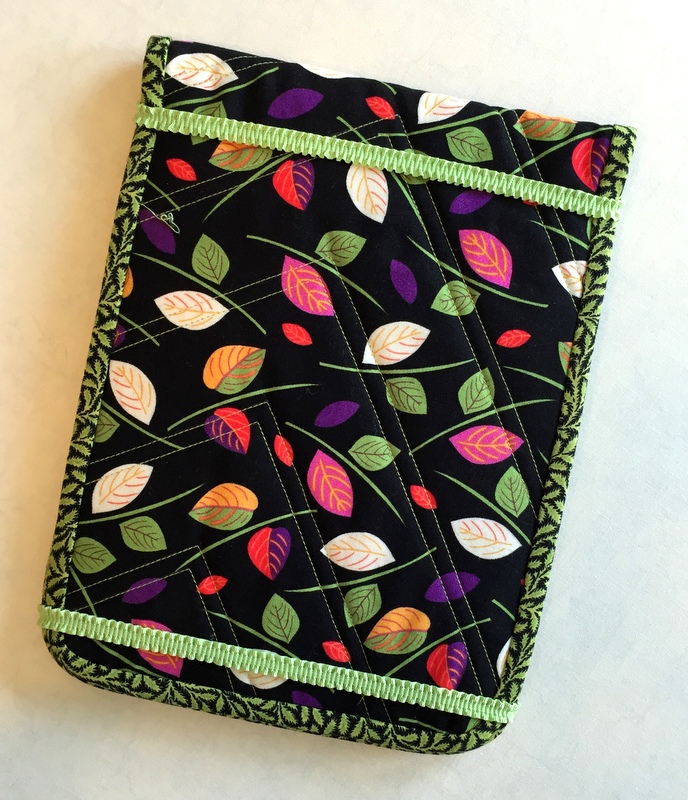
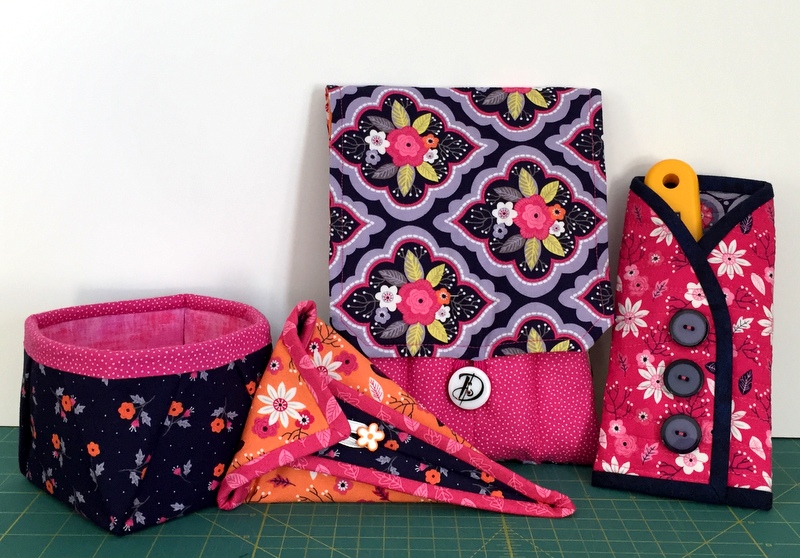
The final category is a bit of a hodgepodge. I made a quilted cover for my stepmother’s new iPad Pro . . .
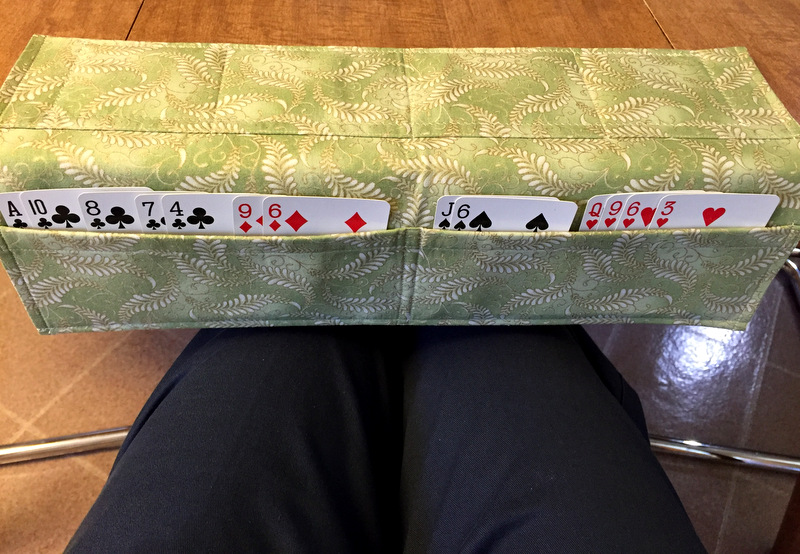
. . . and a cardholder for her bridge hands:
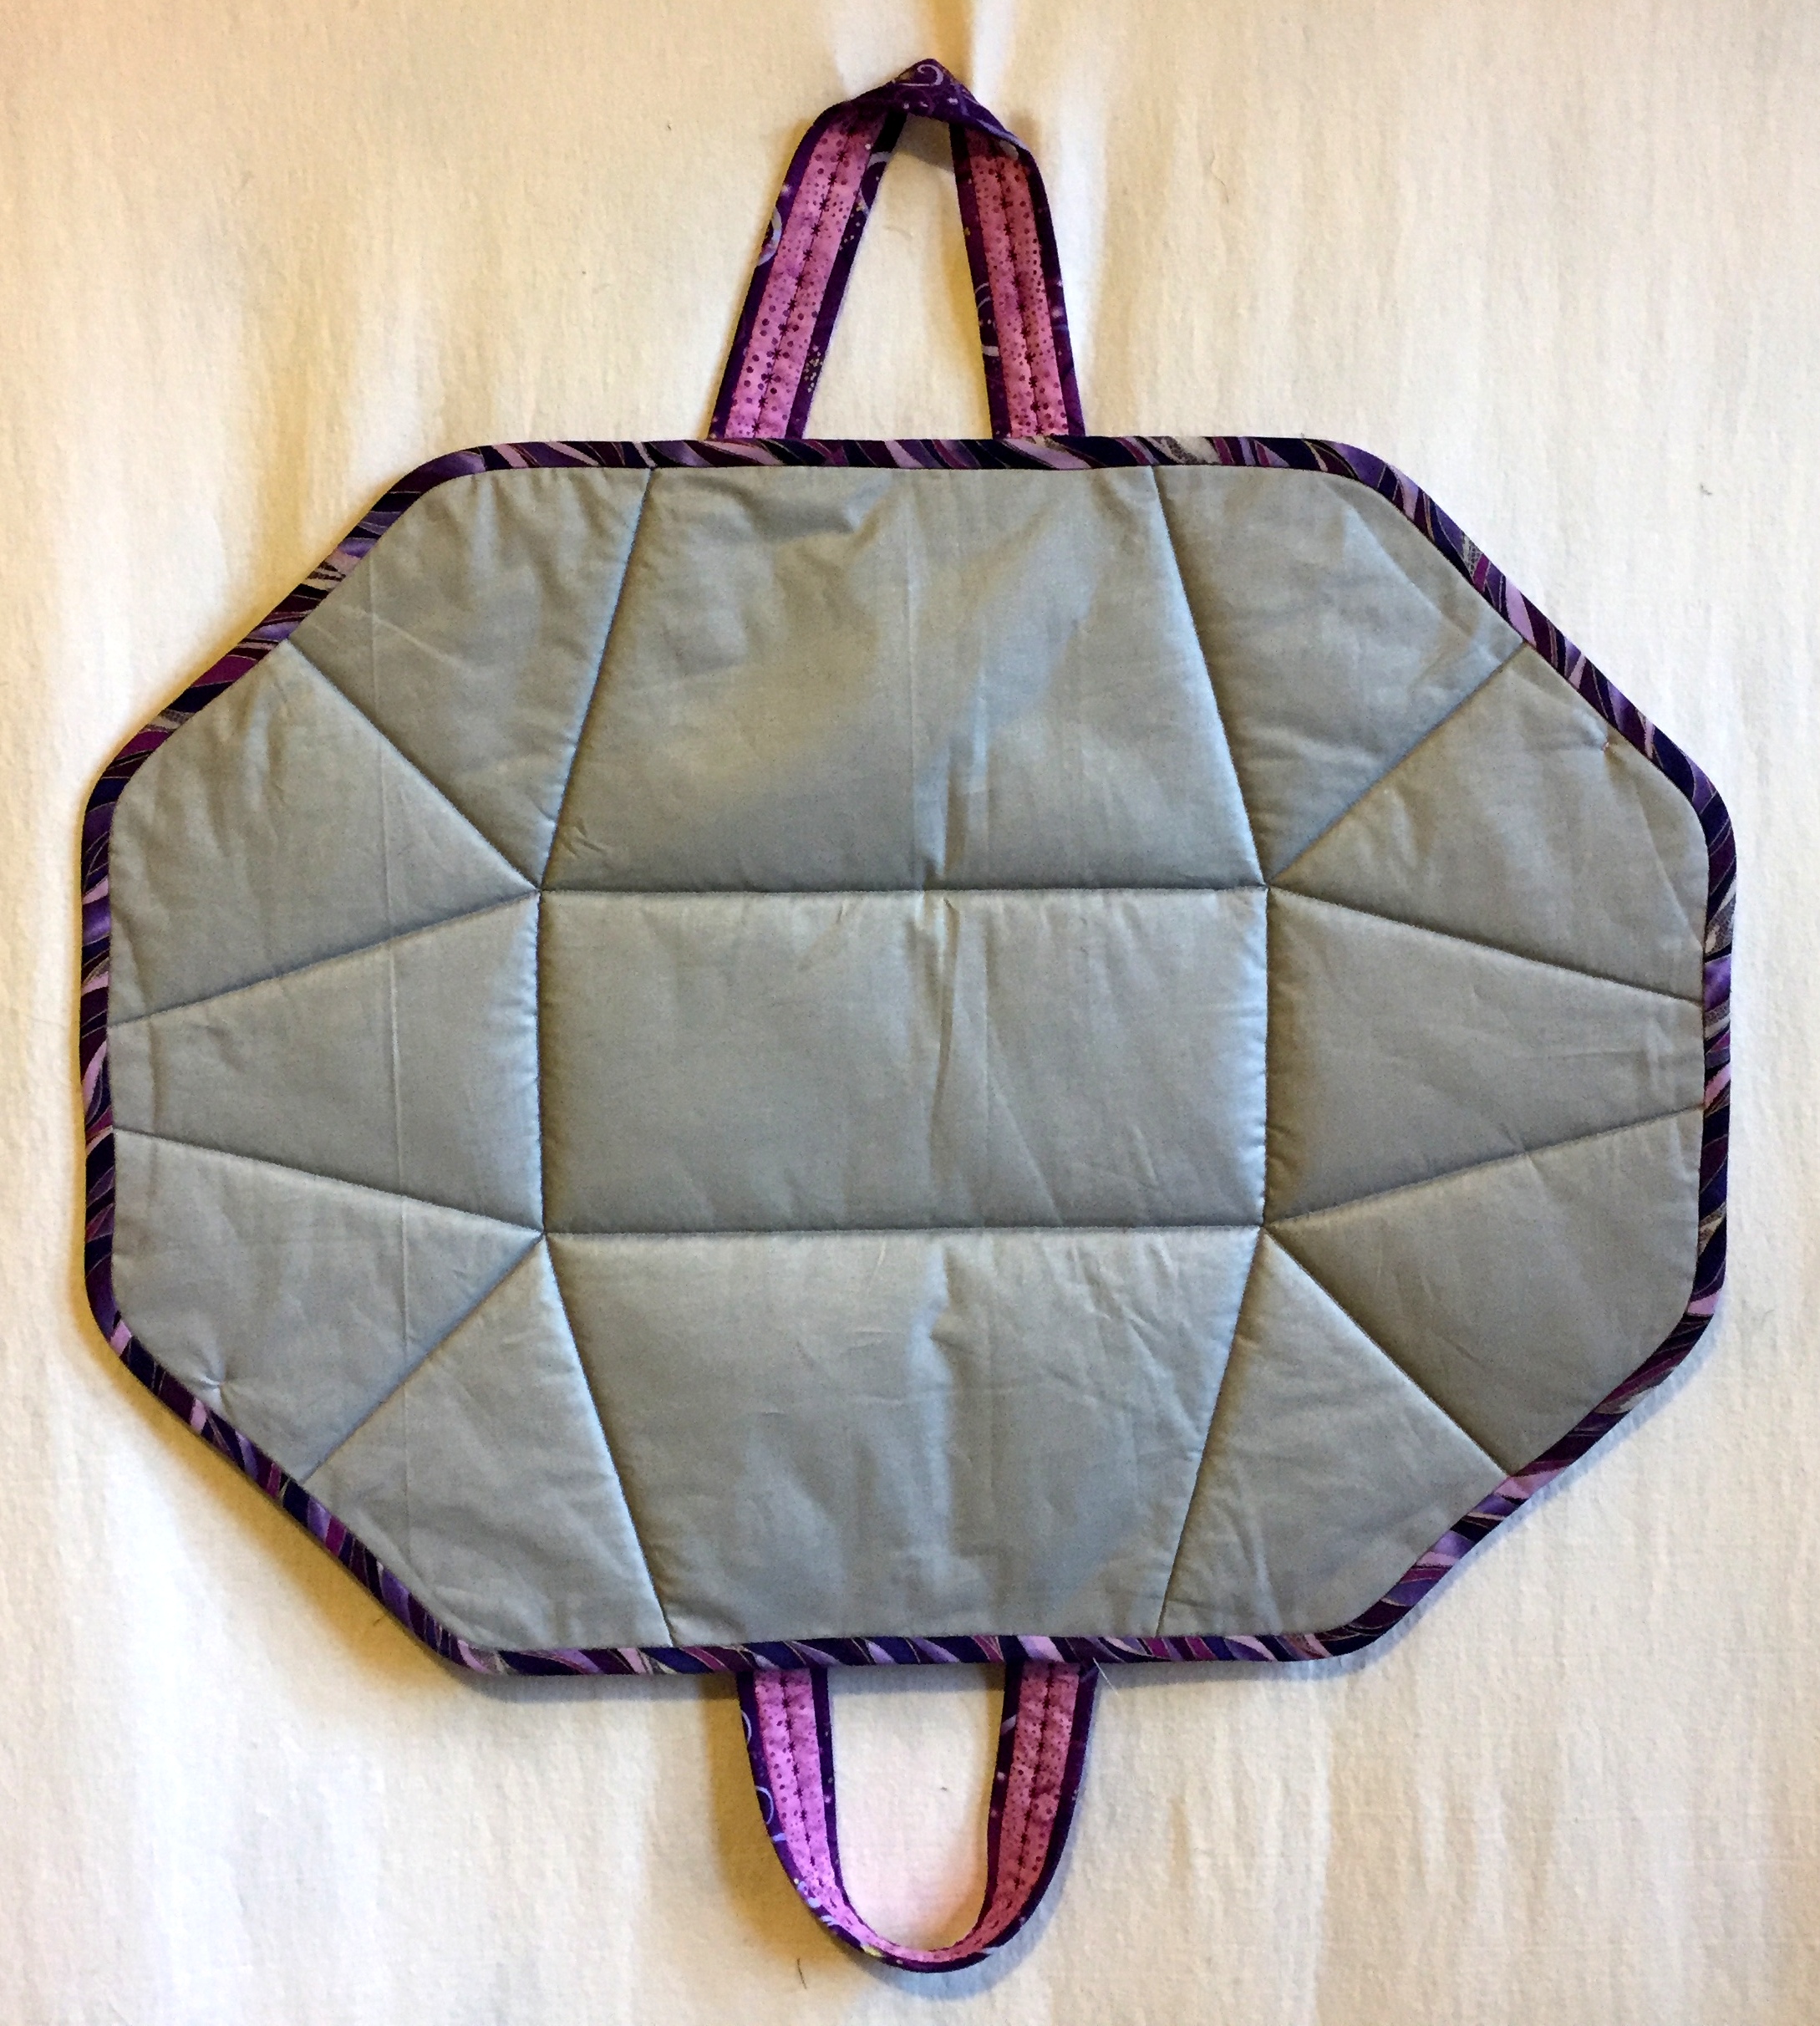
For my friend and fellow Quister (Quilt Sister) Vickie I made an iron caddy that doubles as a pressing mat . . .
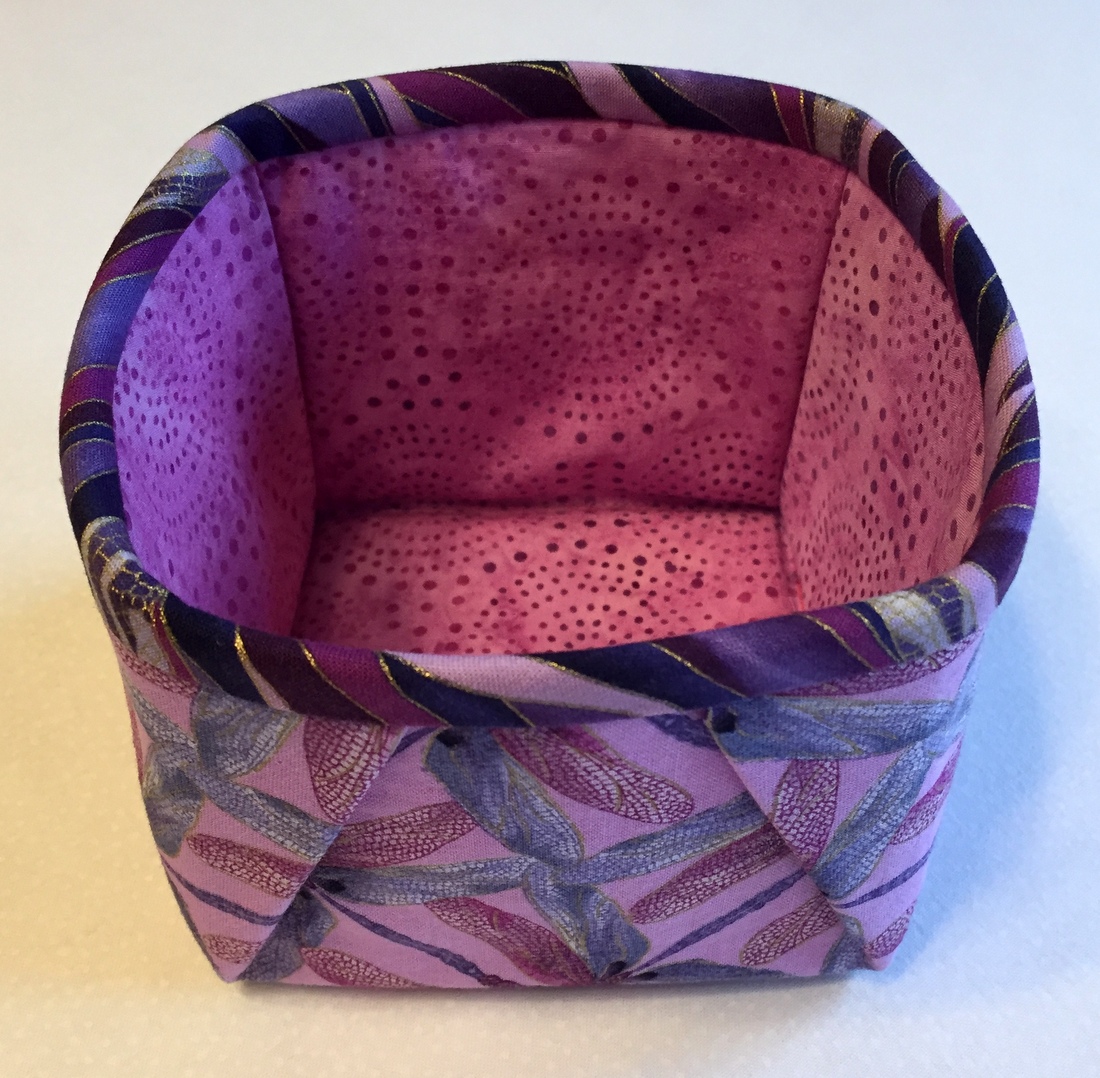
. . . plus a matching 4″ x 4″ fabric box that she can use as a threadcatcher:
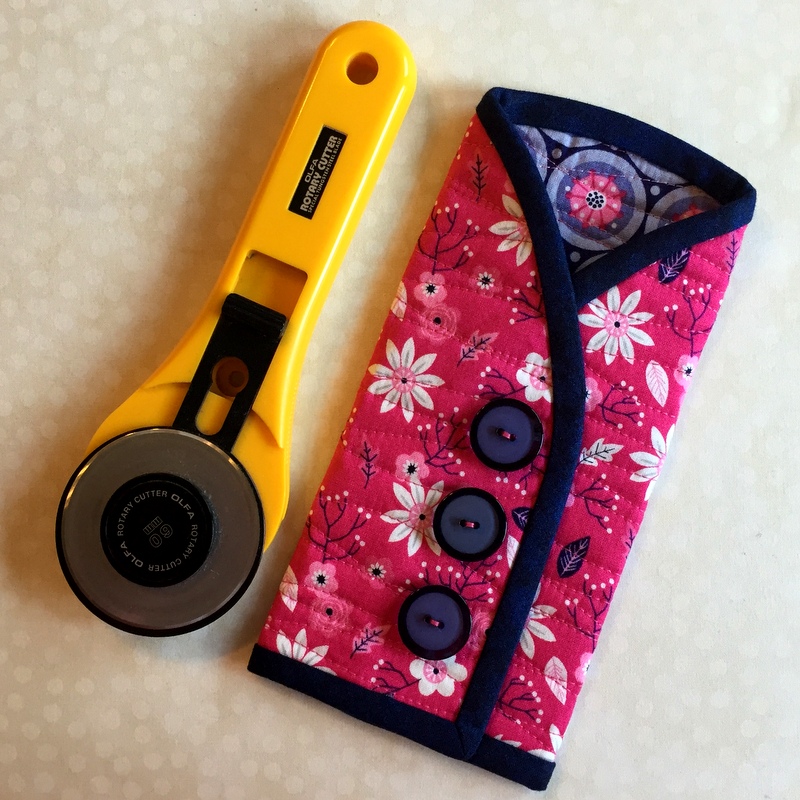
For myself I made some accessories to match my Junior Billie Bag: a rotary cutter coat made from my tutorial . . .
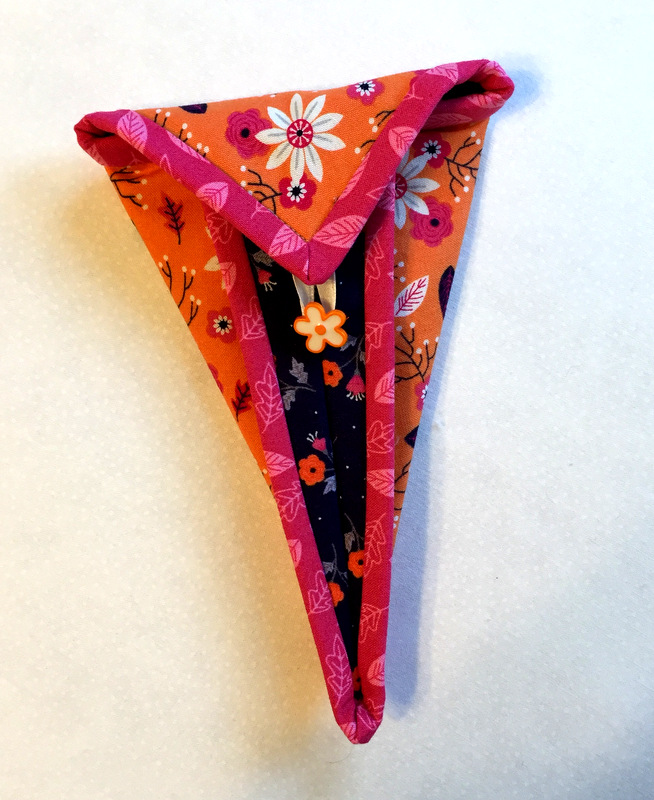
. . . and a scissors case . . .
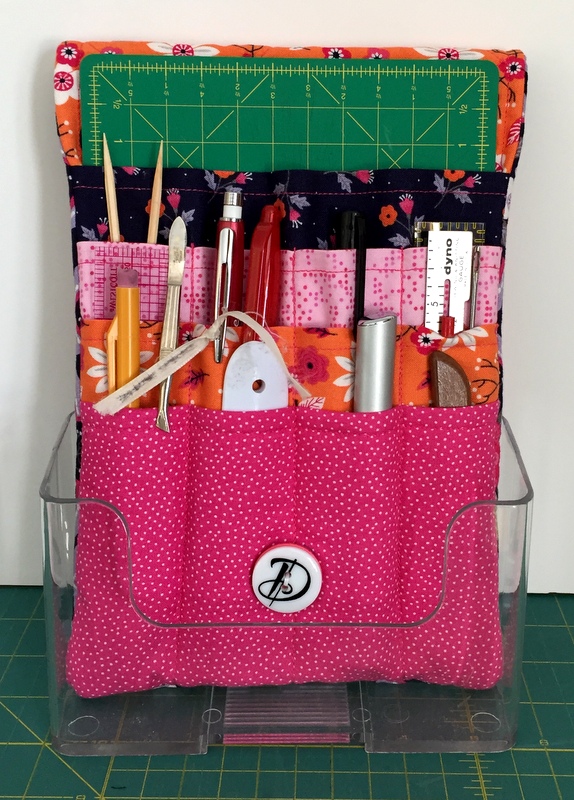
. . . and a sewing caddy that sits upright in a Lucite stand:
A 4″ x 4″ fabric box (yes, it’s a threadcatcher) completes the ensemble:
As you have surmised, I’m crazy in love with that fabric line (Paradise by Alisse Coulter for Camelot Cottons). I expect you’ll see more of it in 2017, as I bought a lot when it was released a couple years ago.
I’m sending a shout out to the talented longarm quilters who transformed my 2016 quilt tops into beautiful quilts — Coleen Barnhardt, Karlee Sandell, Debbie Scroggy, and Sherry Wadley — and to you, my loyal blog readers, for your continuing interest and support of First Light Designs.
JBB? That’s the Junior Billie Bag, the most versatile quilter’s tote I’ve ever seen. I’m teaching a class on it at the Pine Needle, making one along with my students but staying a couple steps ahead to show them how the bag, designed years ago by Billie Mahorney, comes together. (You can see what a finished Junior Billie Bag looks like here, and you can see my first post about the JBB currently under construction here.)
The front and back panels are now quilted, with the lining and two sets of handles attached:
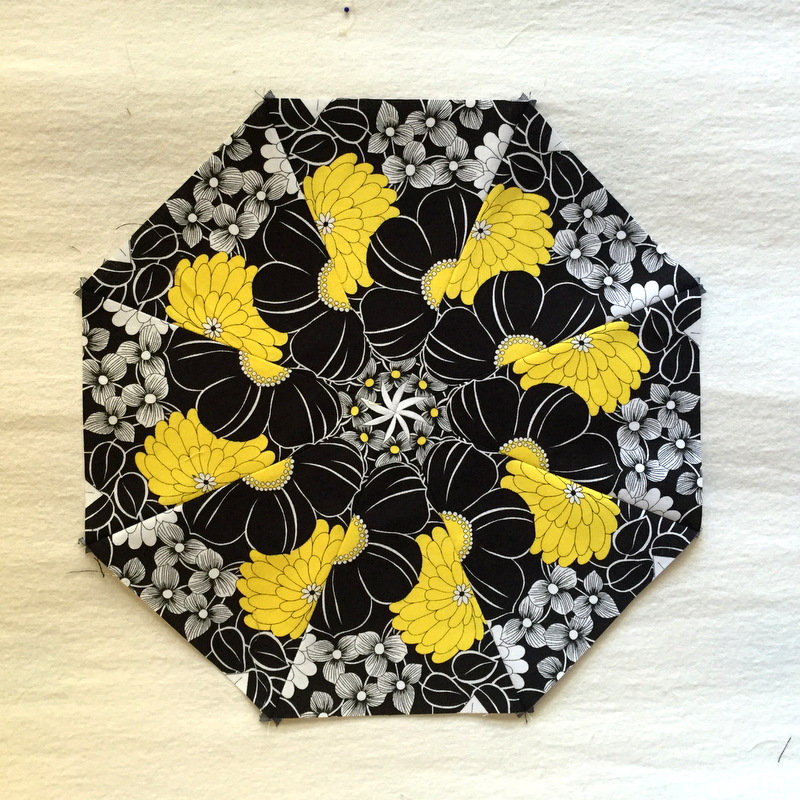
Back in August, before making the two blocks you see above, I used a strip of that bold floral fabric to make a test kaleidoscope block, thinking I might use it on a front or back panel:
It didn’t make the cut. I liked it but didn’t love it. Still, I thought there might be a way to use it in the Junior Billie Bag. And there was. I decided to incorporate the kaleido block into an exterior pocket.
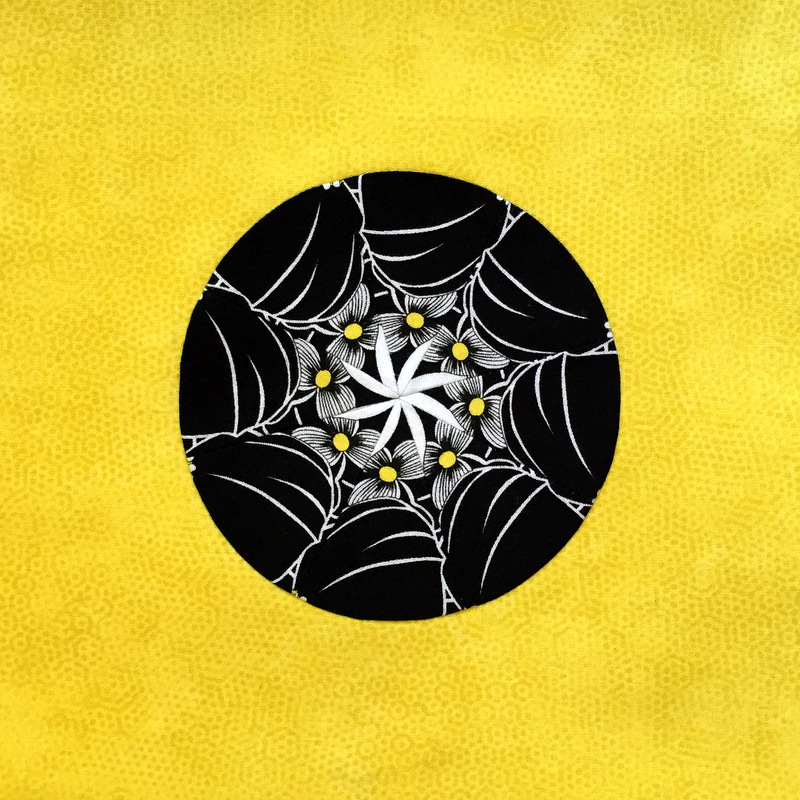
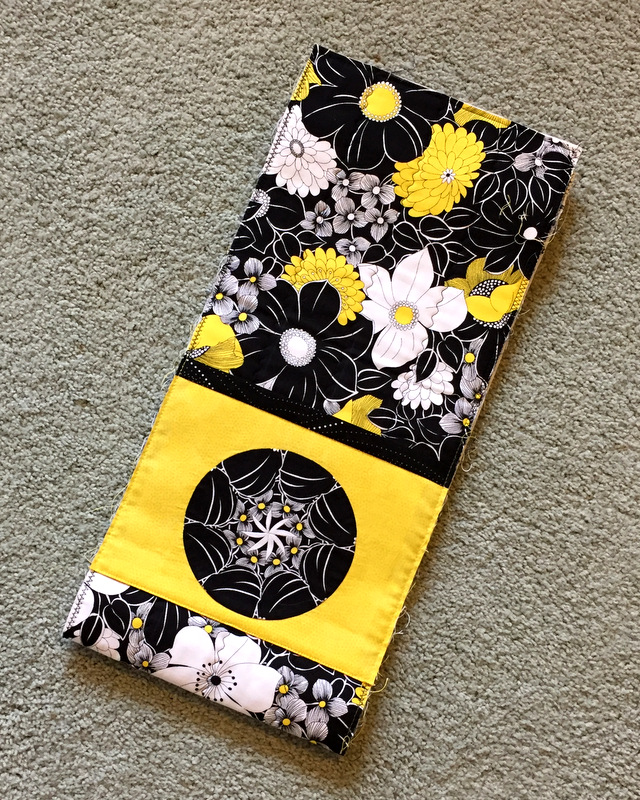
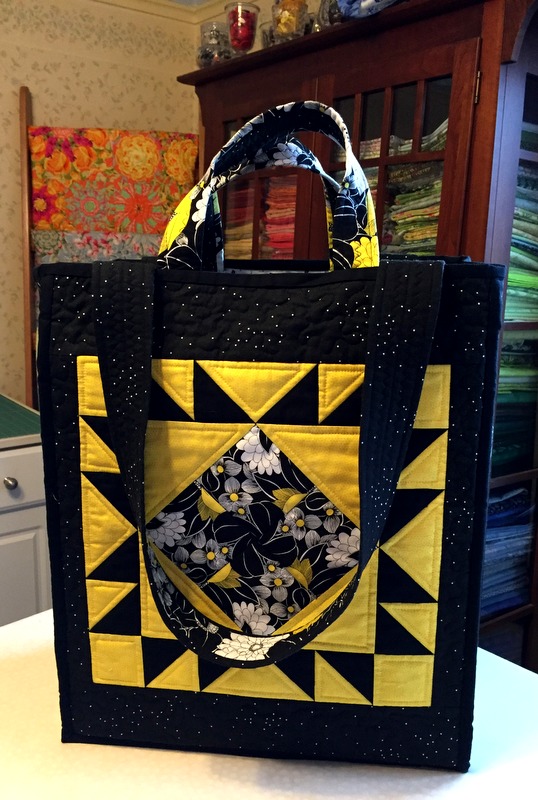
A kaleidoscope block made of eight 45° triangles forms an octagon. I downsized it and converted it into a smaller circle, surrounding the circle in the brightest lemon yellow fabric I could find:
Here’s what it looks like now, made into a pocket attached to one of the side panels of the Junior Billie Bag:
The circle is 4⅝” in diameter and the pocket is 6″ deep.
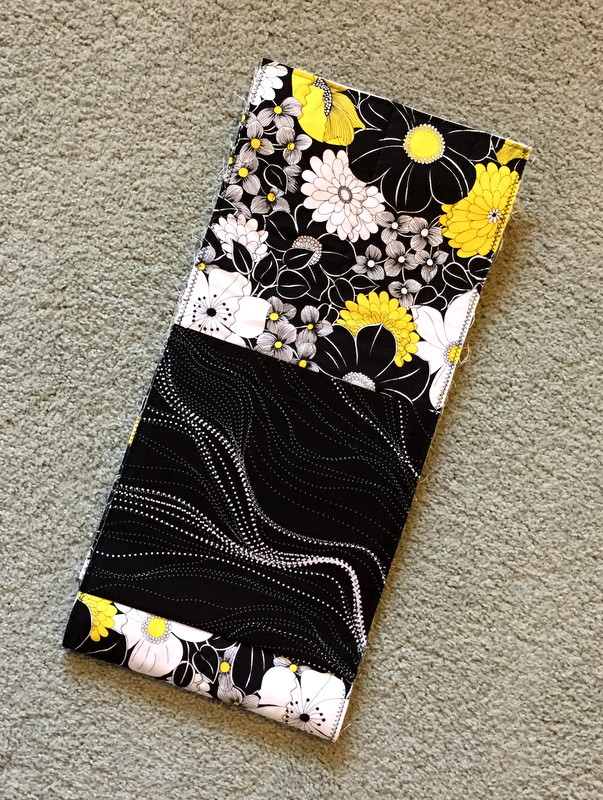
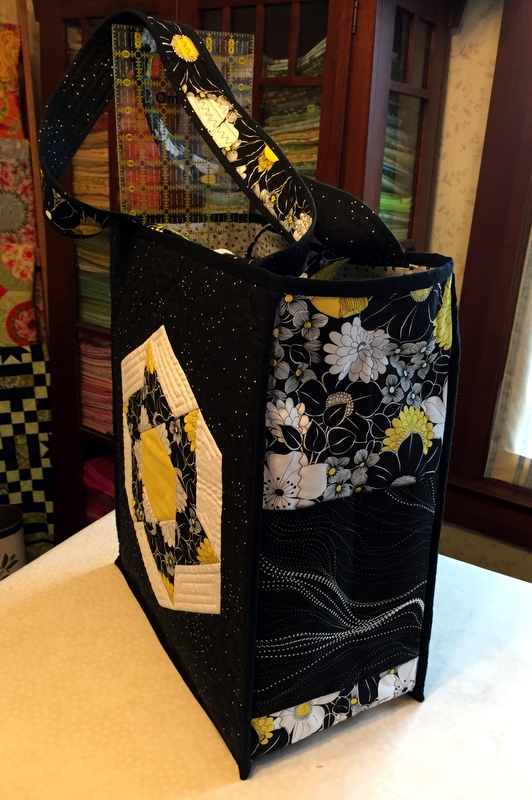
See that band of black fabric at the top of the pocket? I used the same fabric to make a slightly deeper pocket (8″) on the other side panel:
I love how the wavy lines on the pocket fabric play against the lush floral you see above it.
In an upcoming post I’ll show you the pockets on the inside of the bag — lots of them, specifically sized for the tools quiltmakers use most. Please come back for a look.
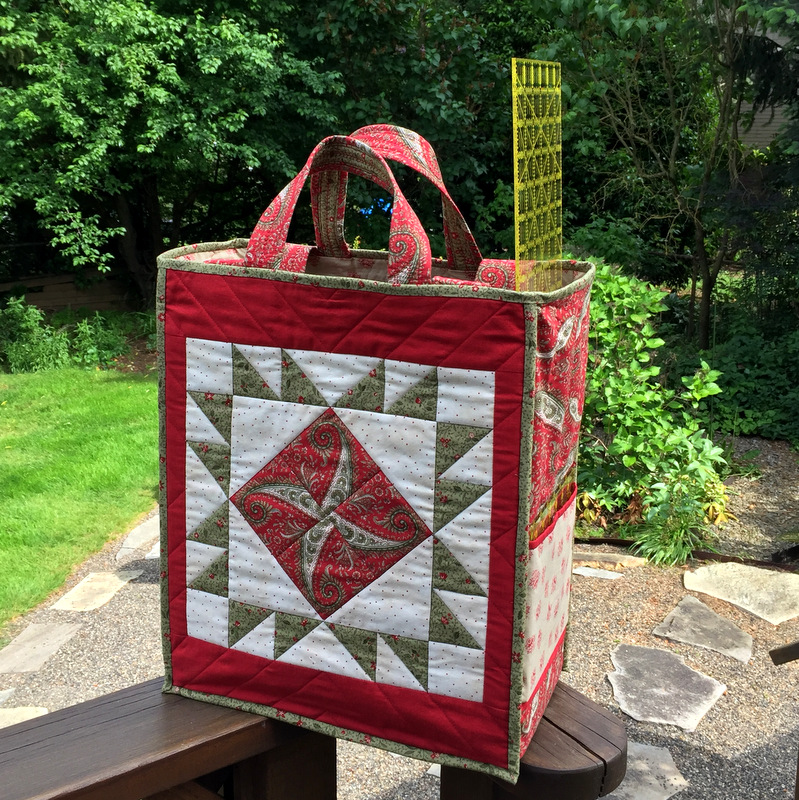
I’ve already finished two this year, one for myself and one for a friend. Now I’m making a third one. The reason? I’m teaching a class that begins tomorrow at the Pine Needle. I made my first Billie Bag, designed by Billie Mahorney, about 10 years ago, and found it very challenging. It’s definitely not for beginners.
Now that I am teaching Billie’s design (in a slightly smaller version), I find that the easiest way to give my students the confidence to make their own totes is to demystify the process by showing how the individual components go together. I call it a “deconstructed Billie Bag” but in truth it’s a Billie Bag under construction.
I guess every time I teach this class I will wind up with a new Junior Billie Bag. This one is going to a friend as a surprise.
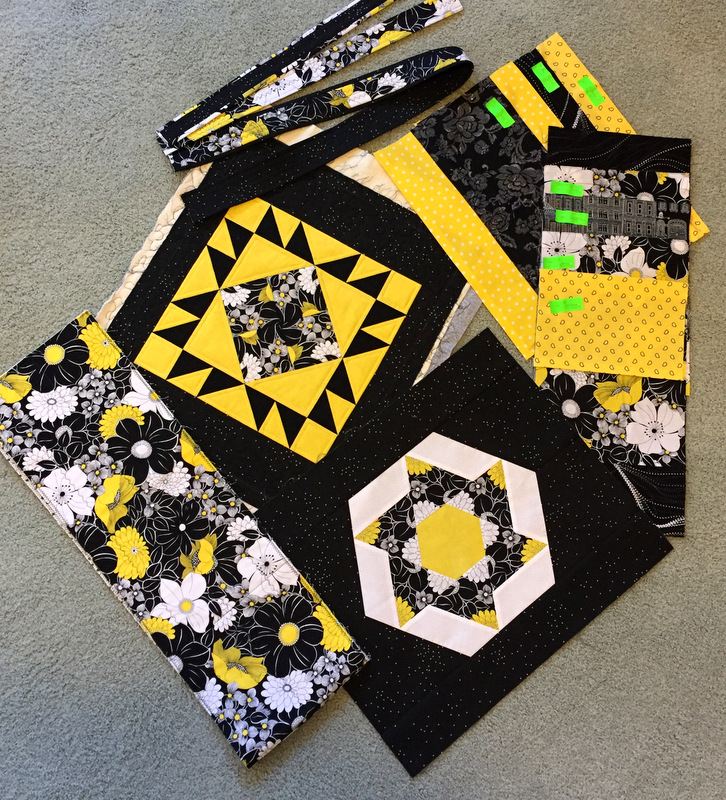
What you are seeing in the photo above are the front and back panels, the side panels/bottom unit, two sizes of straps, and some of the interior pockets. In a few weeks’ time, you will see a finished quilter’s tote measuring 14″ x 17″, with a generous 7½” depth to accommodate a 6″ x 24″ acrylic ruler.
I started out with two 12½” blocks to which strips were added to make two panels that will be trimmed to the proper size after quilting:
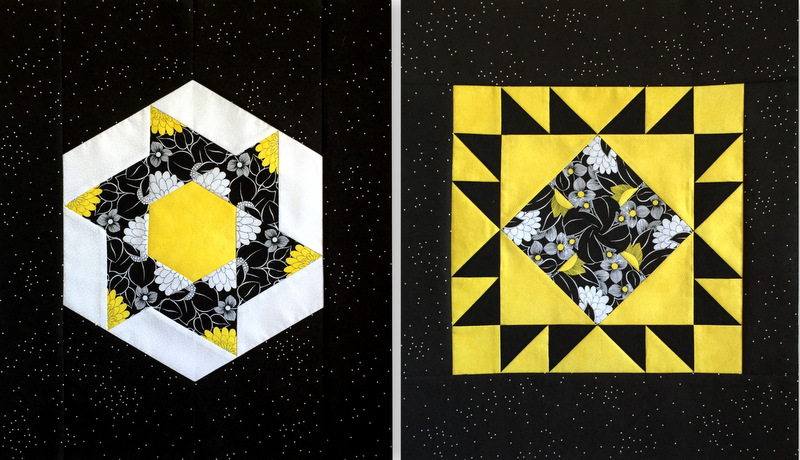
The panel on the left is yet another version of the Spinners block, from the book On the Run Again by Heather Peterson of Anka’s Treasures, that I’ve used in some other projects this year. The one on the right is a traditional star block that I jazzed up with a four-patch kaleidoscope (what I call a 4-Patch Wonder block).
Isn’t that a great black-white-yellow floral print? I found it last summer at a quilt shop in Central Oregon and bought the end of the bolt. It’s by Studio 8 for Quilting Treasures. I paired it with one of Cotton + Steel’s Basics from 2015: “Sprinkle,” designed by Sarah Watts. (I love the Sprinkle design so much I bought it in two other colors.)
My biggest challenge in making this Junior Billie Bag will be keeping Coco out of my sewing room:
The first day of 2016 is here! It’s a time for looking ahead but also a time for looking back. Specifically, looking back at what I accomplished in my sewing room in 2015. I never accomplish as much as I think I will, especially when it comes to finished quilts, but I have to remember that I made a variety of small pieces and craft items last year in addition to quilts. It will be fun to revisit them as well.
First up, the quilts.
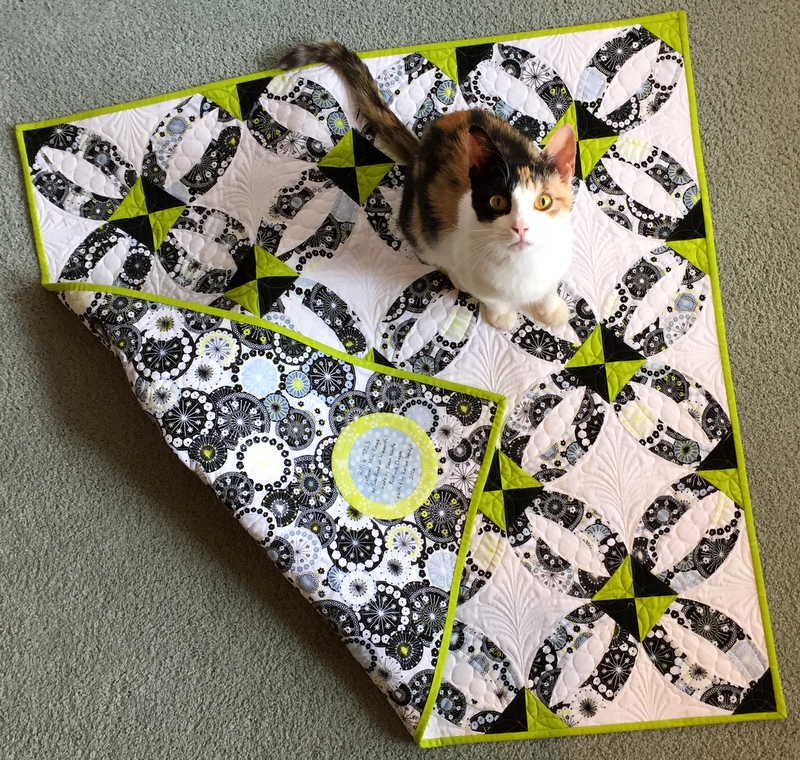
My first finish of 2015 was Catch a Falling Star, based on Terri Krysan’s star sampler, Reach for the Stars:
Then came Toile Story (73″ x 89″), started in 2009 but not finished till 2015. Designed by Alex Anderson and featuring fabrics she designed as well, Toile Story was quilted by Debbie Scroggy of All Quilted LLC:
Next: Olivia Twist, a 31″ x 76″ bed runner made using my own 4-Patch Wonder with a Twist pattern. It was quilted by Jolene Knight of Good Knight Quilts:
Using leftover fabric from Olivia Twist, I made Billie’s Star (56″ x 55″), an original design inspired by my favorite quilt teacher Billie Mahorney, who taught me a lot about drafting and sewing star blocks:
Billie’s Star was quilted by Nancy Stovall of Just Quilting.
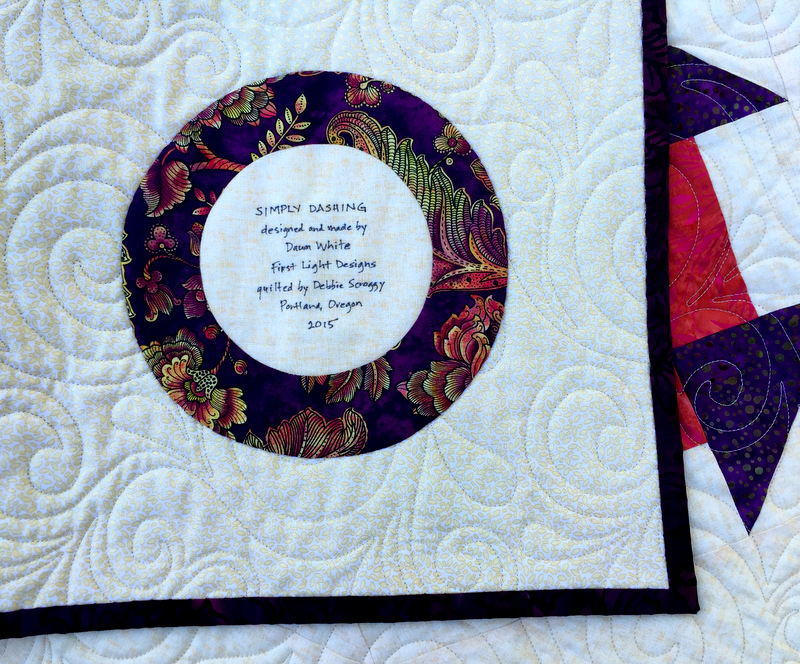
Next came Simply Dashing (58″ x 74″), a simple design that combines 4-Patch Wonder blocks (my name for four-patch kaleidoscope blocks) and Churn Dash blocks set on point. Simply Dashing was featured on the cover of the Pine Needle Quilt Shop’s fall 2015 catalog. Quilted by Debbie Scroggy of All Quilted LLC.
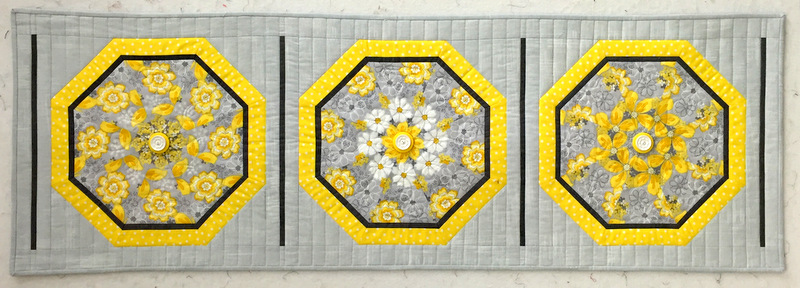
Pieced in 2014, I finished Sun Flowers, a wall hanging based on my Season to Taste pattern. It’s #9 in my series of kaleidoscope quilts and the third of four quilts I’m making to reflect the seasons of the year. It measures 18½” x 55½”:
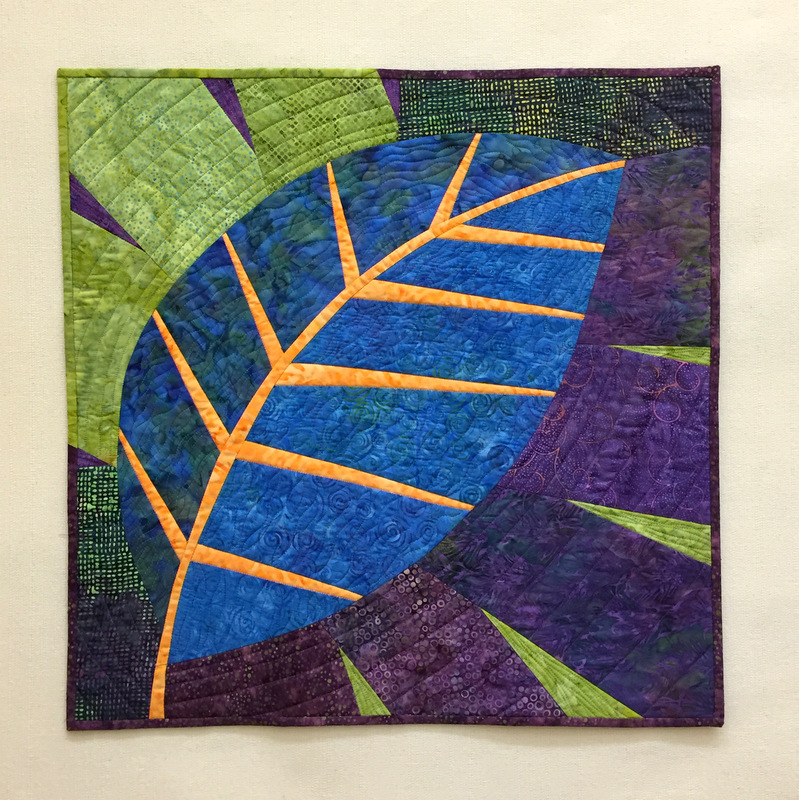
My final quilt finish of 2015 was Loose Leaf, begun in a workshop with fiber artist Pat Pauly. Made from her New Big Leaf design, it finishes at 24½” square:
I quilted the last two pieces myself but was happy to have the larger quilts go out to some extremely talented longarm quilters.
In my next post I’ll show you the array of Pretty Little Things I made in 2015.
Back in 2009, when my favorite quilt teacher Billie Mahorney moved from Oregon to Idaho, she suggested I take over the teaching of her popular quilter’s tote. Billie, who taught at the Pine Needle Quilt Shop in Lake Oswego, named her tote “The Take It All With You Bag” but over the years it has become known among local quilters as the “Billie Bag.”
Each Billie Bag is unique because the maker can put whatever design she wants on the front and back of the bag, and the inside pockets are customized to hold the maker’s favorite quilt supplies. The bag holds an amazing amount, including a 6″ x 24″ acrylic ruler, thanks to the 7½” width of the side panels.
I had made the bag once in a class with Billie several years ago. While I loved the finished product, I found the process very challenging. Not only did I not relish the idea of making another bag, I couldn’t even imagine teaching others how. After all, I had never taught a quilt class before.
In 2011, Billie returned to the Pine Needle as a visiting instructor and offered the class again. I was so delighted she was teaching again that I signed up for her class, conveniently forgetting I had sworn never to make another Billie Bag. Good thing, too, because I thoroughly enjoyed the class and was delighted with my new Billie Bag, shown above, a slightly smaller version of the original.
By the time I made this second Billie Bag, I was teaching at the Pine Needle myself. Still, it took another four years before I felt I was ready to take on the challenge of teaching Billie’s design. I talked to Billie a few weeks ago to see where she stood on the issue. Happily, she still thinks it’s a fine idea and has given me her blessing to carry on with the teaching.
The Pine Needle scheduled a class in March and April 2016, which filled almost immediately when word got out. That’s how popular Billie Bags are! What else could the Pine Needle do but add a second class? (You can find more information on the upcoming classes here.)
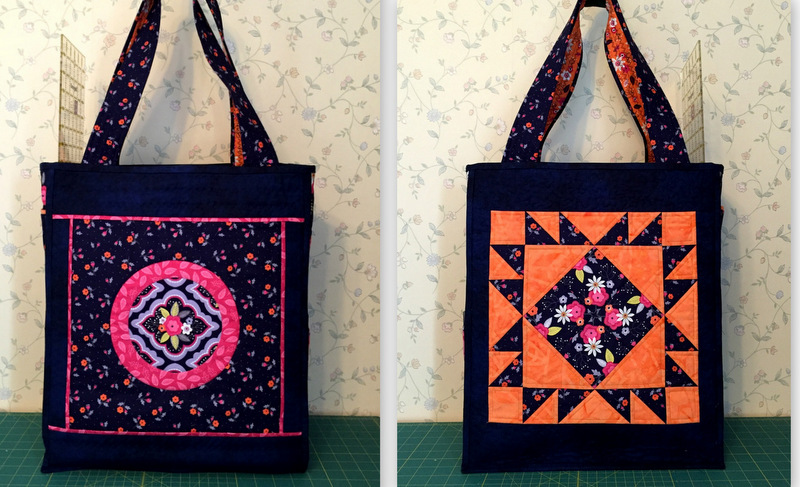
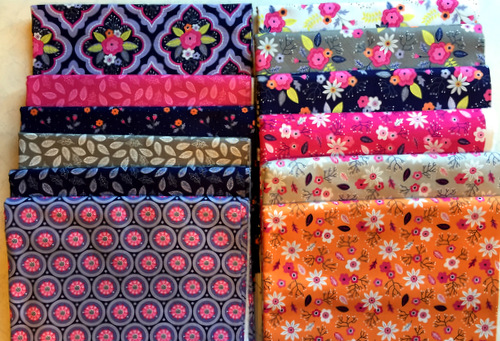
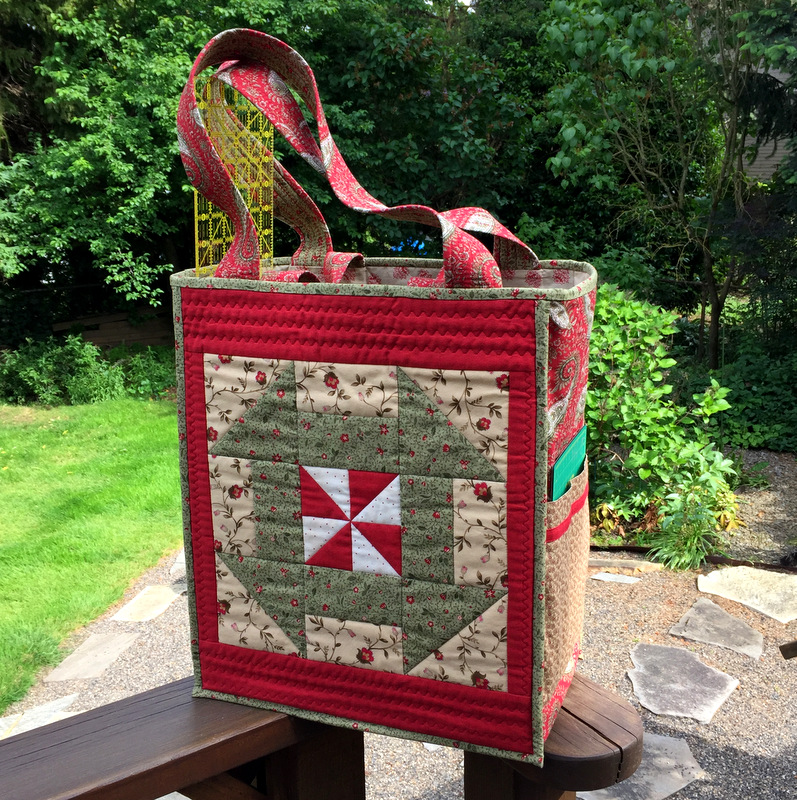
With classes now scheduled, I am in the process of making another bag to refresh my memory on the process. Billie’s original bag measures 21″ x 21″ x 7½”. I’m teaching the smaller size: 14″ x 17″ x 7½”. It’s been dubbed the “Junior Billie Bag,” and I’m making my new version from fabrics in the Paradise line designed by Alisse Courter for Camelot Fabrics. You may remember from this post last summer that I fell in love with this line of fabrics and went on a bit of a shopping spree at Hawthorne Threads:
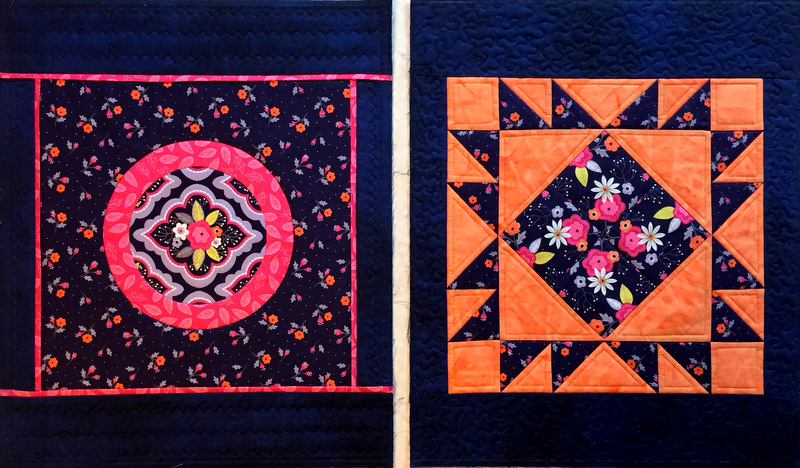
Here are my front and back panels pieced and quilted:
The panel on the left features two inset circles, made using my favorite freezer paper method, and narrow flanges framing the 12″ block. The panel on the right contains a 4-Patch Wonder block (my name for a four-patch kaleidoscope) in the center. I used an orange batik in my stash to set off the floral fabrics.
More of the Paradise prints are being used on the inside pockets. Lots of prints; lots of pockets.
I’ll be posting pictures as my Junior Billie Bag comes together. I hope you’ll come back to see my progress!
The Pine Needle Quilt Shop in Lake Oswego, Oregon is having its annual Fall Festival this Friday and Saturday, Sept. 11 and 12. The Pine Needle is my home away from home. I teach there, meet friends there, buy fabric there. When I get into my car to head to the Pine Needle, I don’t even need to steer; my car seems to know the way. Just kidding, of course, but it gives you an idea of the amount of time I spend there.
Those of us who teach at the Pine Needle will be on hand Friday and Saturday to tell you about our new classes and demonstrate popular quilting products. My new quilt, Simply Dashing, is one of the first quilts you see when you come into the shop:
Simply Dashing at the Pine Needle
Not only that, it made the cover of the Pine Needle’s fall catalog:
I’m a Cover Girl!
The Pine Needle does a brisk mail order business, sending out thousands of catalogs to quilters who don’t live close enough to visit the shop in person. It tickles me to think my quilt is the first thing these people will see when they pull the catalog out of their mailbox.
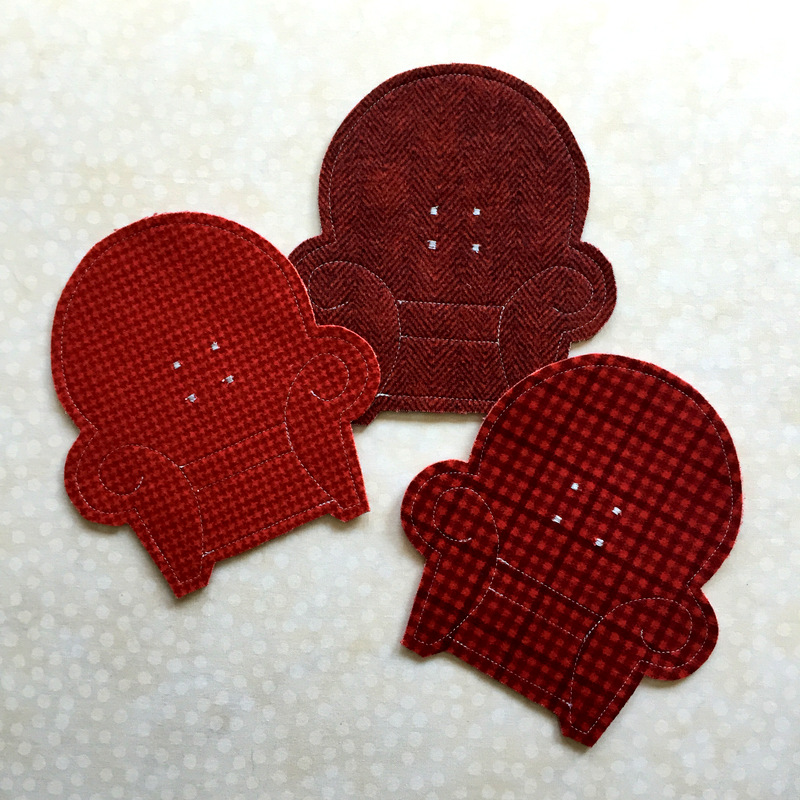
I usually try to come up with a little quilt or craft project to share with the people who come to the Pine Needle’s open houses. Since the shop is well known for its extensive inventory of flannels, my Fall Festival project is a flannel coaster in the shape of an overstuffed armchair, inspired by a felt coaster I bought some 30 years ago at a holiday craft sale.
Aren’t these cute? And very practical, too, because they’re reversible. The pattern and instructions are free with any flannel purchase. A quarter yard each of two flannels is enough to make four coasters.
During Open House the Pine Needle is doing lots of drawings for prizes — including a $50 gift basket each day. A few sets of my Cozy Flannel Armchair Coasters will be raffled off as well. Do come if you are in the neighborhood. I’d love to see you — and you just might be a winner!
Following up on my last post, I have a few more photos to show you of my new quilt, Simply Dashing (60″ x 76″ before quilting, 58″ x 74″ after quilting).I took photos late this afternoon on the back deck. It was difficult to get any good still shots, as a light wind kept the quilt in motion, billowing in and out as it hung from the arbor. This was the straightest shot I was able to get:
It does give you a good look at the lovely edge-to-edge quilting done by longarmer Debbie Scroggy of All Quilted LLC. The batting is Tuscany Wool by Hobbs, a blend of 80% cotton/20% wool that’s lightweight, drapes beautifully, and provides a bit of extra loft to give the quilting definition.
As usual, I put my favorite block in the upper left hand corner:
Isn’t it interesting how turning a block on point gives it a completely different look? You have to tilt your head at an angle to see that it’s a Churn Dash block.
Here’s a look at the back of Simply Dashing:
That block you see on the back was a test block that I ultimately rejected:
Don’t get me wrong: I love this block. It’s from the pattern Cosmic Delight by Freckled Whimsy. I will make a quilt from this pattern someday. The issue here is that the center square finished at 3″, not large enough to do justice to the focus fabric. The square in this block turned out well but I could tell I wouldn’t be getting enough contrast with additional 3″ square faux kaleido blocks.
A leftover strip of focus fabric on the back shows where all those faux kaleido 4-Patch Wonder blocks on the front came from:
Last but not least, the label:
Initially I was planning to float the blocks completely by binding the quilt in the pale yellow background fabric. In the end I went with a high contrast ½”-inch wide binding. The blocks still float but now they’re within a frame. A good decision, I think.
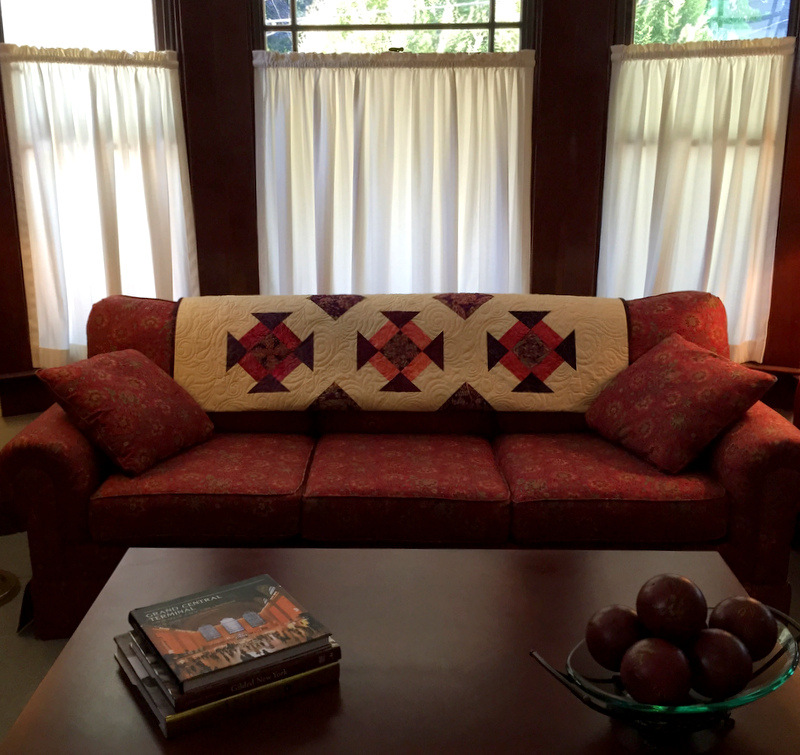
I mentioned in my last post that after hanging for a while in the Pine Needle Quilt Shop, Simply Dashing will go on the back of the sofa in my living room. Here’s a preview:


 Left to right: Sharon Schaper, Sharon Ripley, Joie Lattz, Maxine Borosund, Dawn White, and Lana Kamerer. With us in spirit: Andrea Hinderhofer.

")