Category Archives: home dec

Tutorial: Folded Flap Hot Pads from First Light Designs
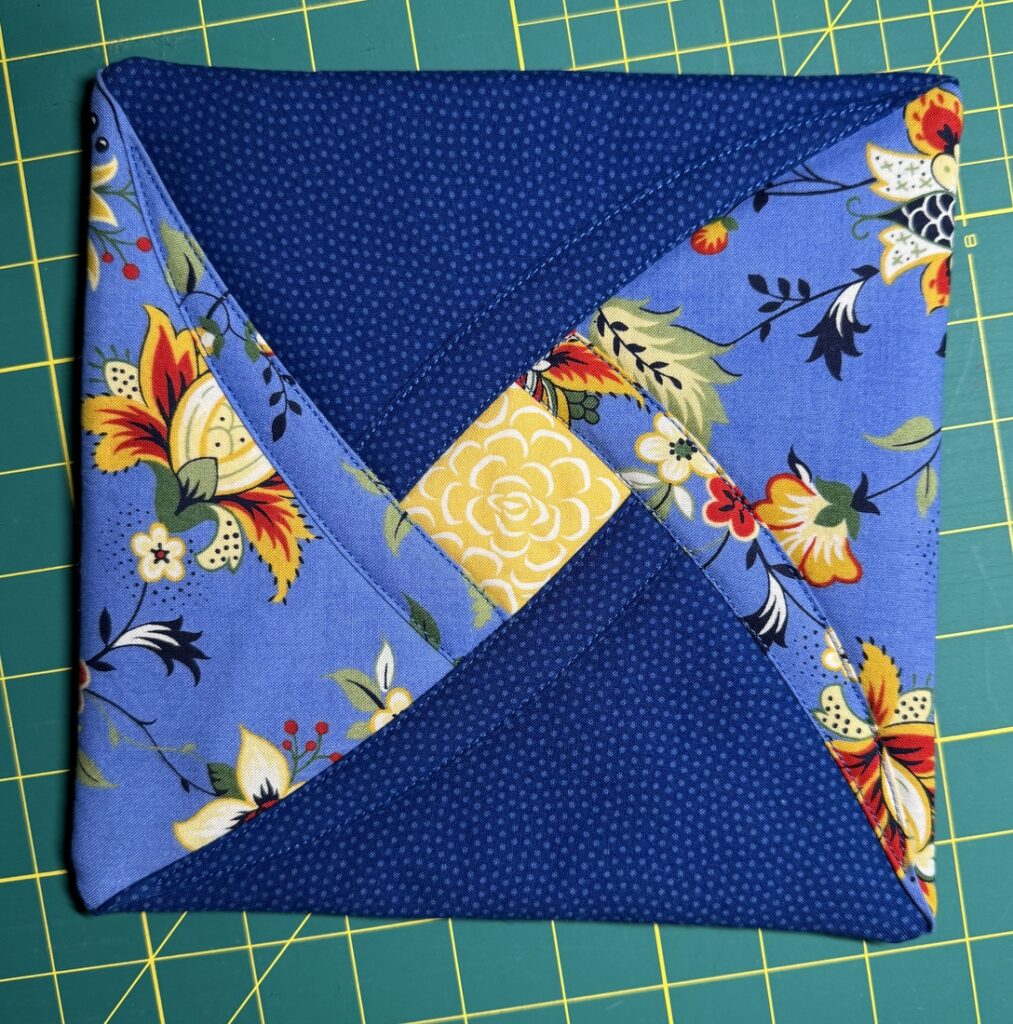
Here’s an easy and fun tutorial to get your New Year off to a crafty start.

With six squares of fabric plus one square of insulated heat-resistant batting, you can quickly assemble and sew a sturdy and stylish hot pad. You probably wouldn’t guess from looking that the design is created with four folded triangles, each of which creates a flap that is folded back to reveal a contrasting fabric diamond in the center.

My tutorial results in hot pads that finish about 8″ square but you can make them larger or smaller. See my “Notes” at the bottom of the tutorial.

These hot pads make great gifts — but don’t you want to make a couple first for your own kitchen?

Supplies
Sewing machine with walking foot, open-toed if possible
Standard sewing supplies (scissors, thread, seam ripper, etc.)
New needle — 90/14 sharp or jeans needle, as you will be sewing through multiple layers
Rotary cutting equipment – mat, cutter, rulers (4” x 14” comes in handy)
Wonder Clips (small size)
Gently pointed instrument, such as a bone folder, to poke out corners

Fabric
For one hot pad you’ll need six 9″ squares of 100% cotton fabric: one for the “diamond” fabric in the center of the hot pad, four for the triangles (made from folded squares) that go around the center diamond, and one for the back.

You’ll also need one 9-inch square of Insul-bright*, an insulated heat-resistant batting.

(*Insul-bright is made of polyester fibers needled through a reflective metalized polyester film. According to the Warm Company, maker of Insul-bright, the fibers “resist conduction while the reflective metalized polyester film reflects radiant energy, hot and cold, back to its source.” You could use two squares of 100% cotton batting as an alternative to Insul-bright but they wouldn’t have the reflective property.)

Choose at least three fabrics that go well together and offer good contrast. The fabric for the center diamond should be fairly bold, as you don’t see much of it. The fabric for the back can be any of the three that show on top or a completely different fabric. Because these hot pads are meant to be used, I advise steering clear of light-colored fabrics. Choose fabrics that are medium to medium-dark in value. Just being practical!

This design is fat-quarter friendly. One fat quarter yields four 9” squares. A regular or long quarter (9” x width of fabric, usually about 42”) also yields four 9” squares.  A fat quarter of three different fabrics yields enough 9” squares for two Folded Flap Hot Pads.

Cutting and pressing the fabric
Cut four 9” squares for the top (two each of two different fabrics. We’ll call them Fabric A and Fabric B.)

Cut one 9” square for the center diamond (Fabric C).

Cut one 9” square for the back (Fabric A, B or C — or another of your choosing).

Cut one 9” square of Insul-bright.

Press the squares of Fabric A and B in half, wrong sides together, to form triangles.

Putting it together
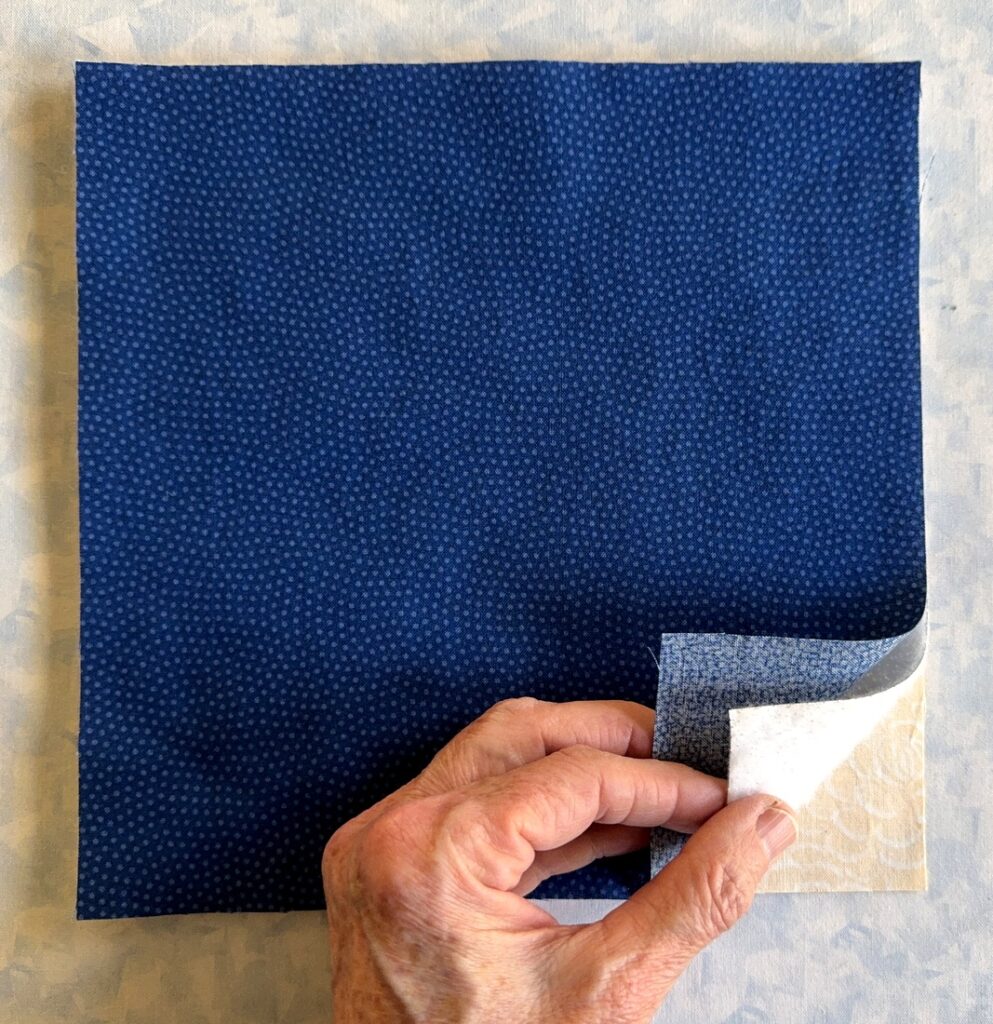
1. On a flat surface start layering the fabrics in this order:

Fabric C (center diamond fabric), right side down
Insul-bright (it does not have a right or wrong side)
Back fabric, right side up:
2. Next come two triangles of Fabric A, with folded edges meeting in the middle, forming a diagonal line across the square from upper right to lower left. These are Triangles 1 and 2, with Triangle 1 being the one in the upper left side:
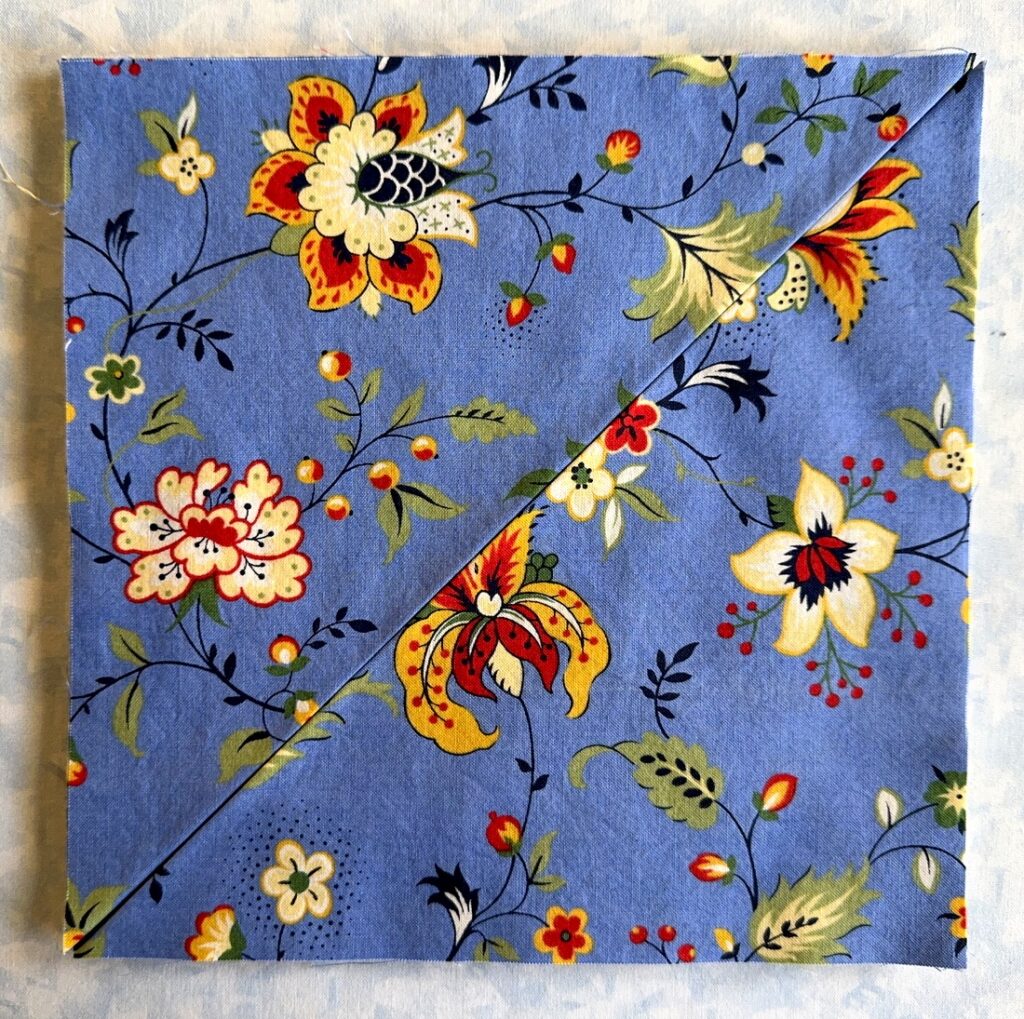
3. Now layer the two triangles of Fabric B, with folded edges meeting in the middle, forming a diagonal line in the opposite direction:
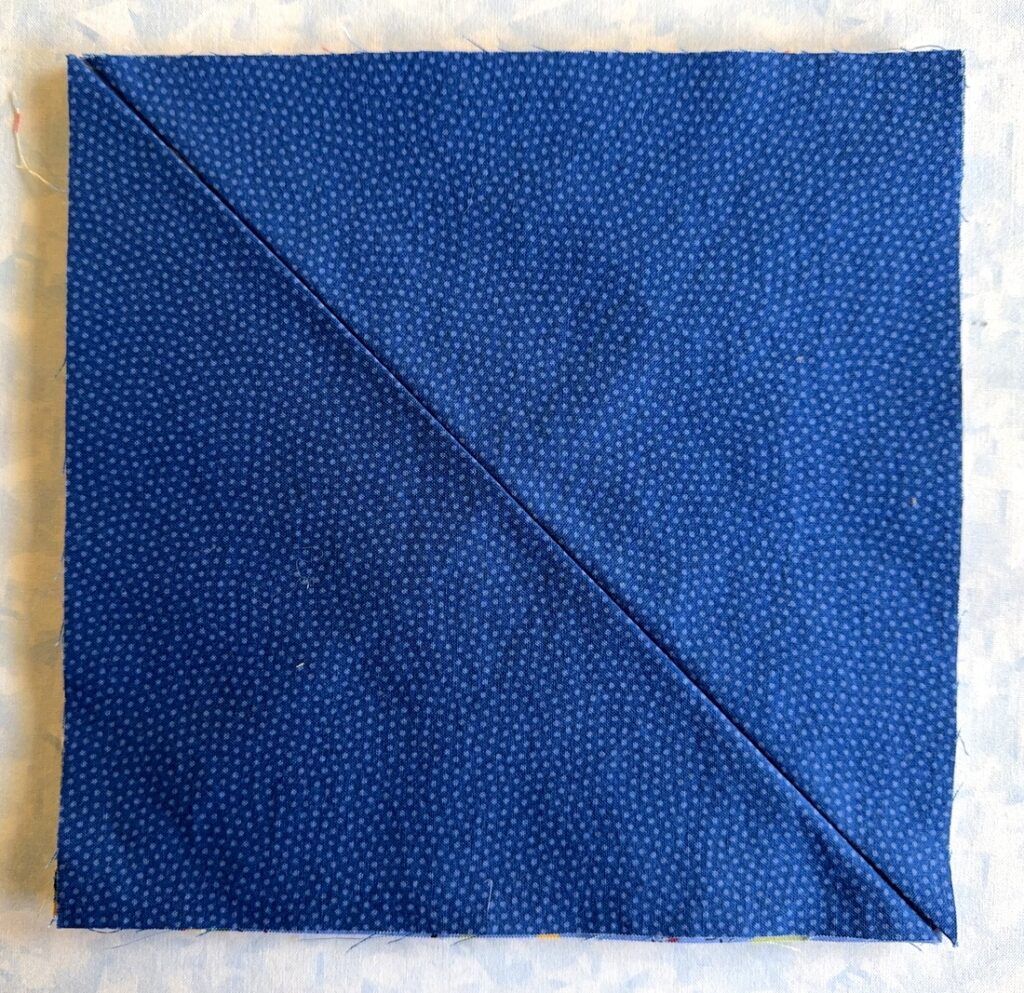
Make sure raw edges are aligned all around. These are Triangles 3 and 4, with Triangle 3 being the one on the upper right side. With all your layers in place, Triangles 3 and 4 are the only ones you see.

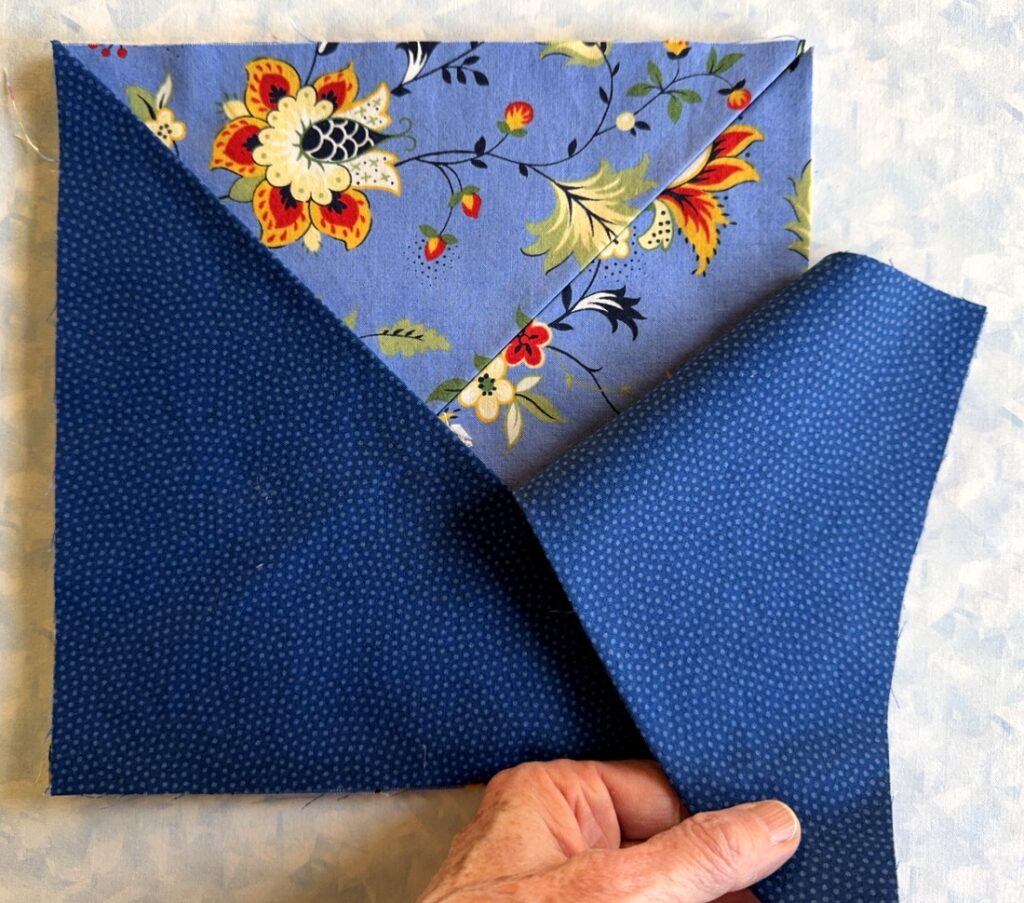
4. Pull back the upper top left corner of Triangle 3 to expose the two pieces of Fabric A underneath:
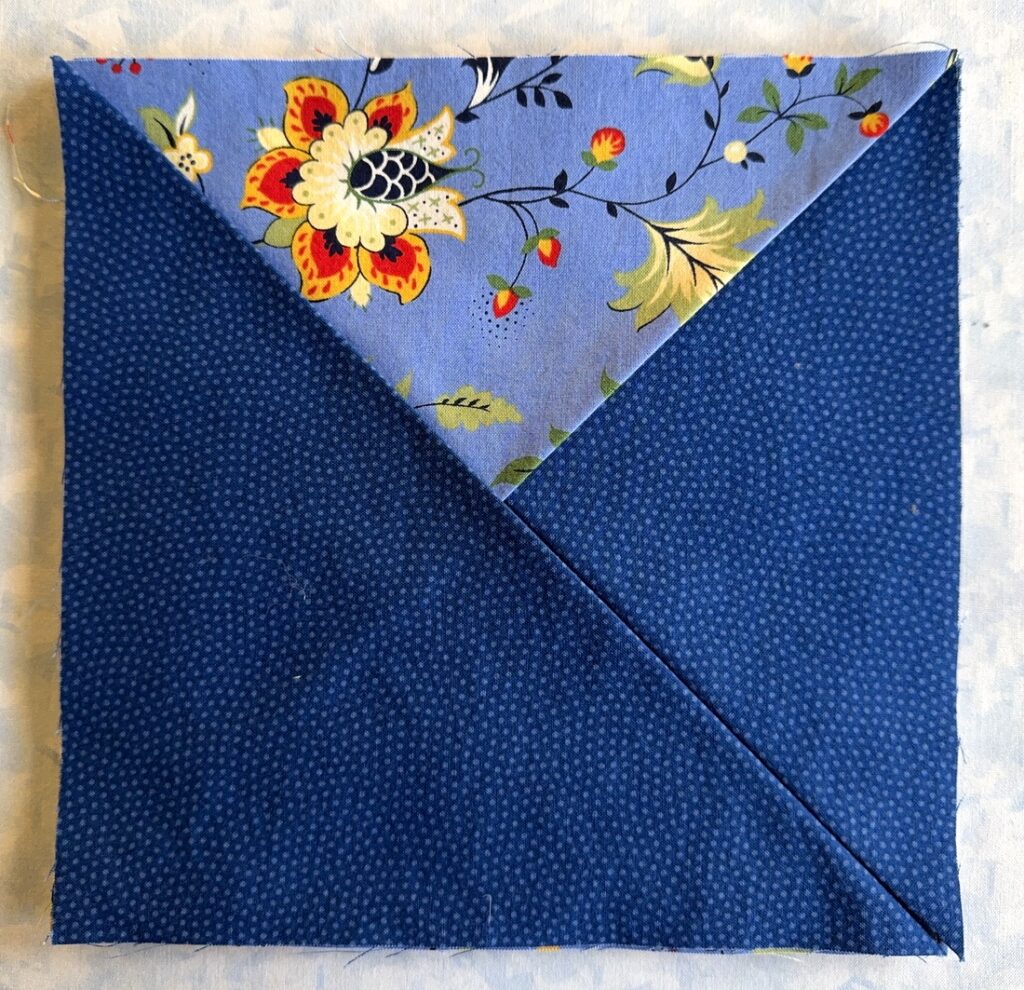
5. Pull back the upper right corner of Triangle 1 (Fabric A) and tuck Triangle 3 underneath it. It should look like this:
6. Pull back the lower bottom right corner of Triangle 4 to expose the two pieces of Fabric A underneath:
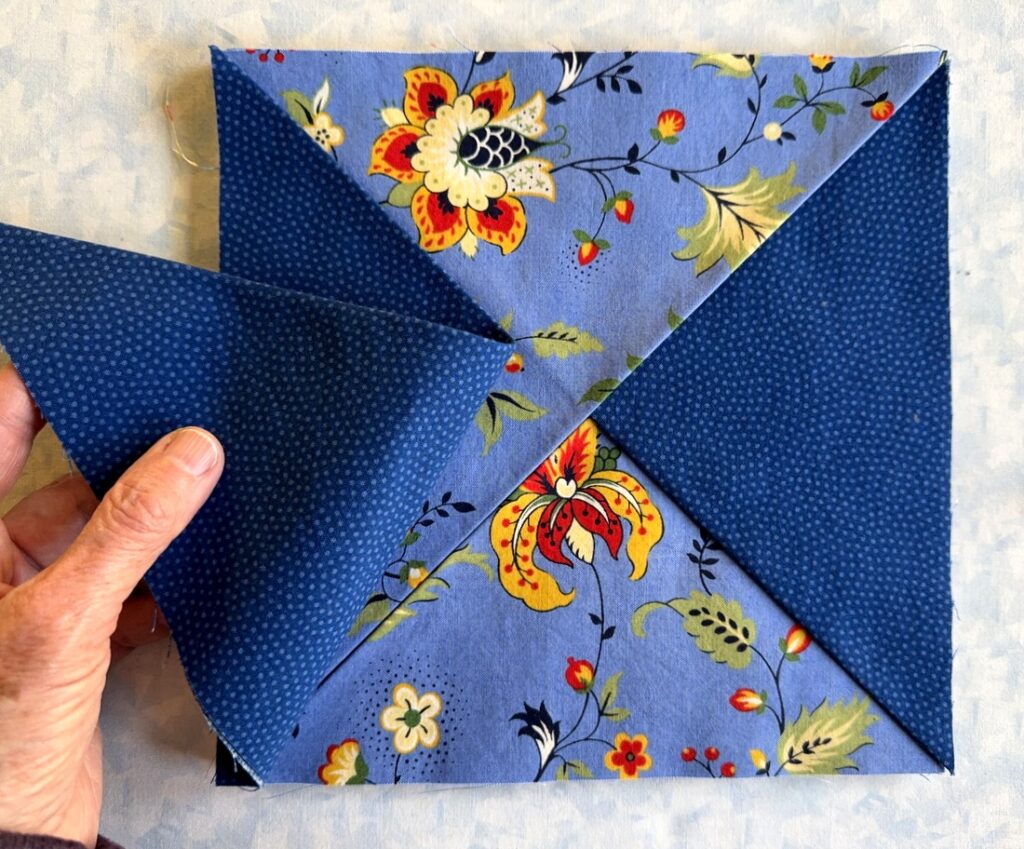
7. Pull back the lower left corner of Triangle 2 and tuck Triangle 4 underneath it.

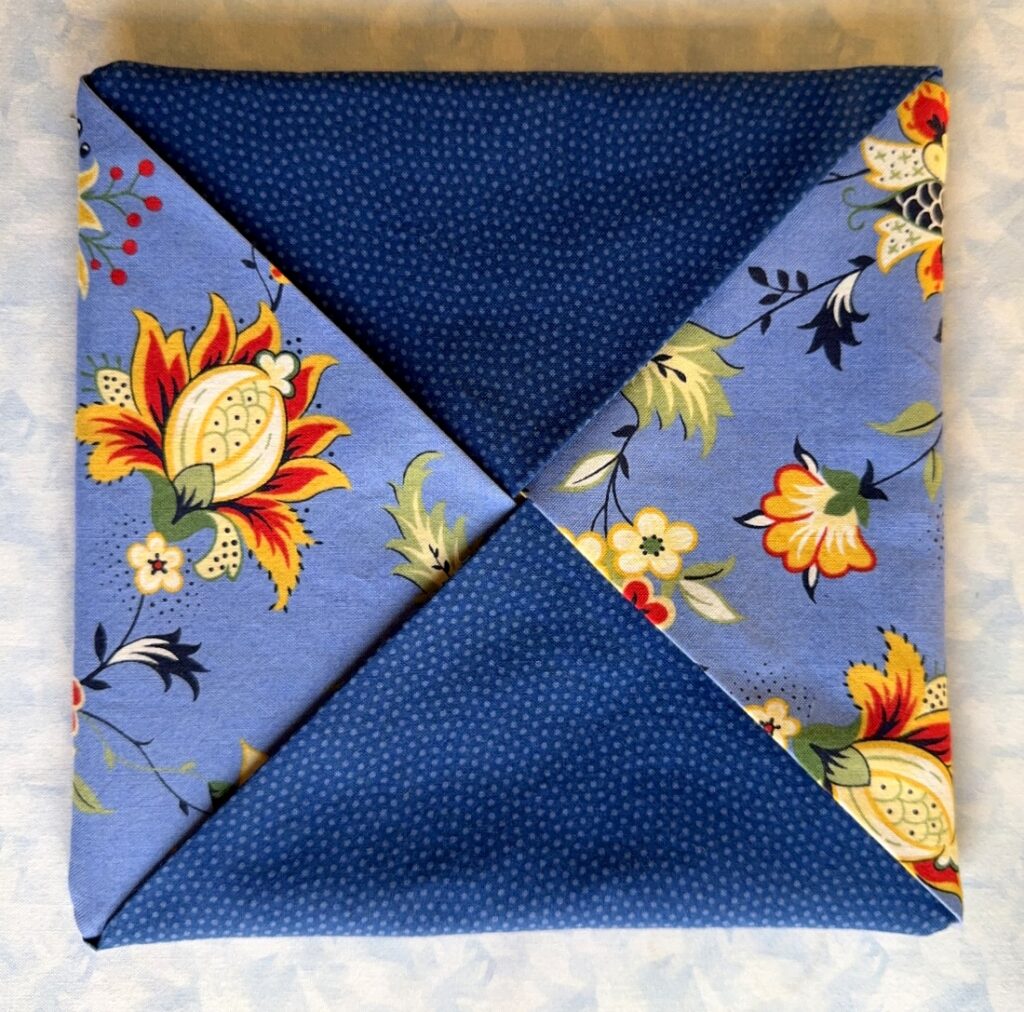
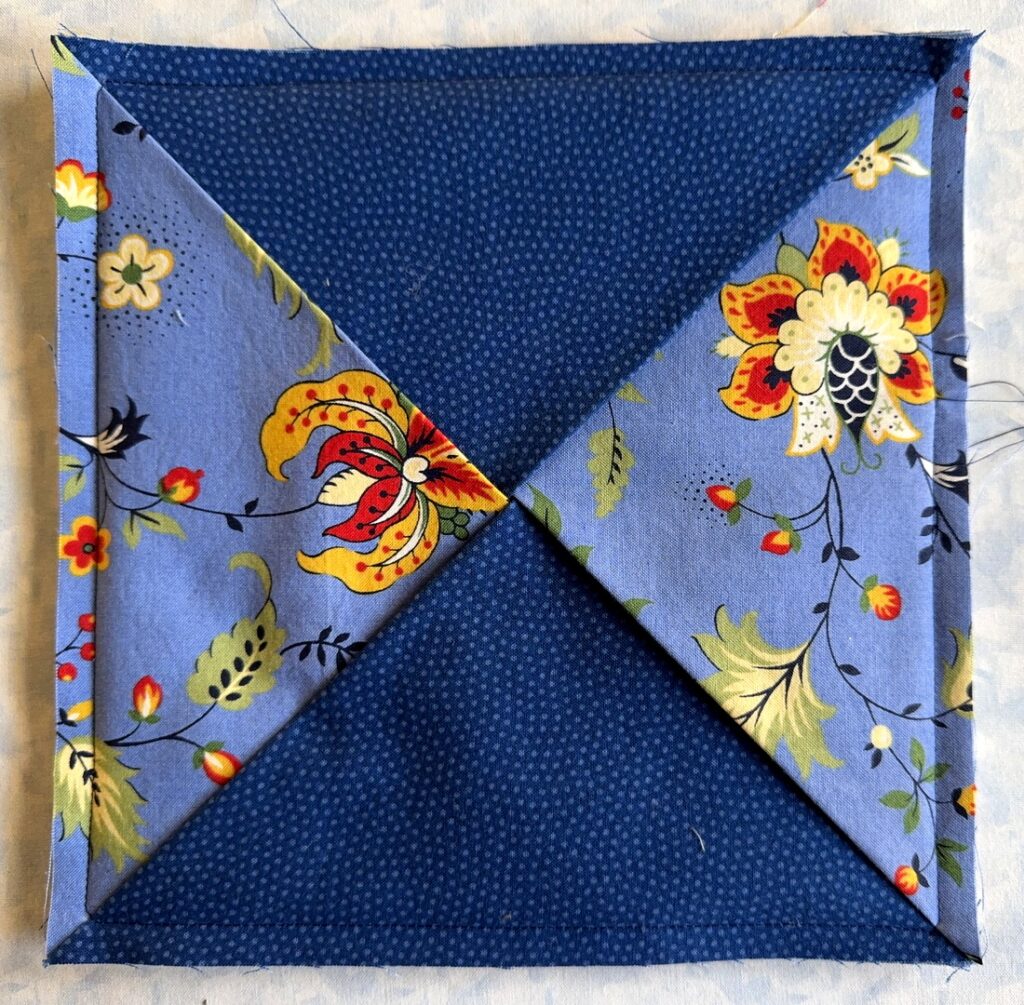
You now have an X design, with two triangles of Fabric A opposite each other and two triangles of Fabric B opposite each other:
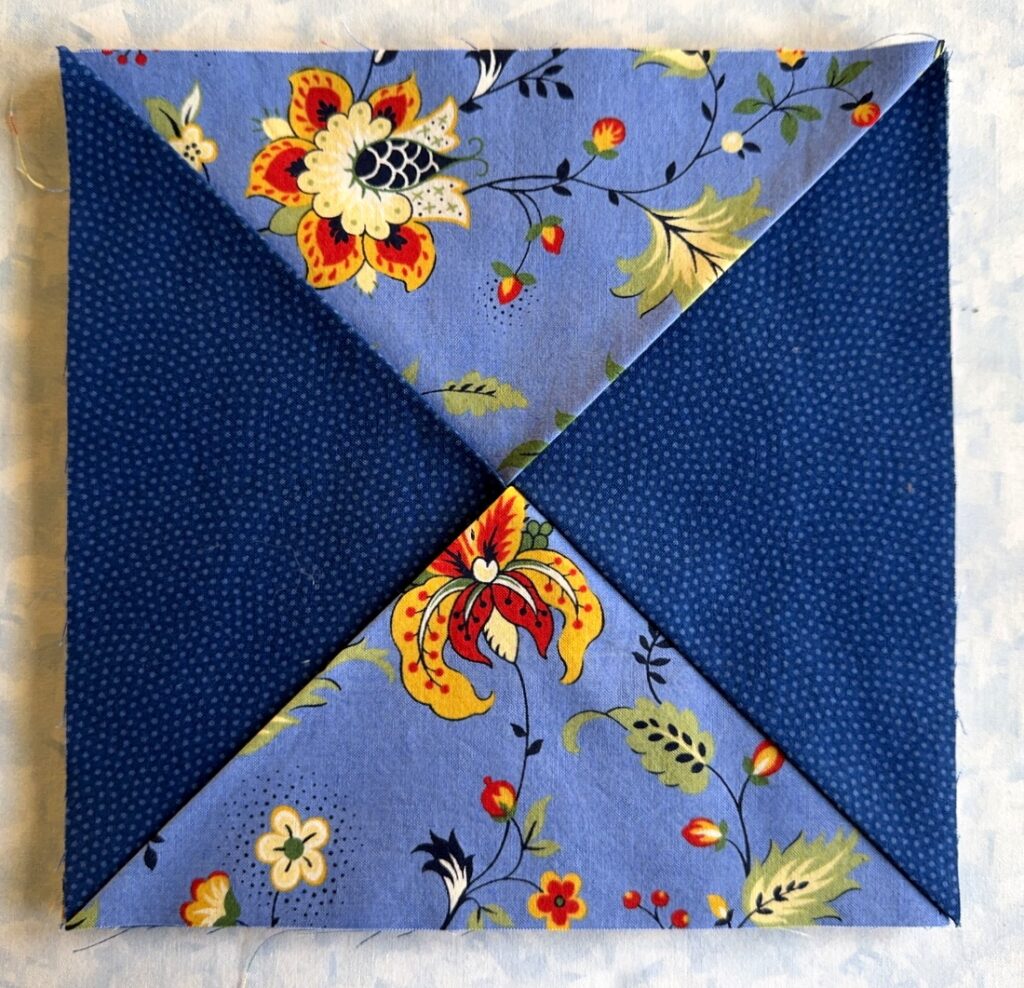
It may seem a little vague as you’re reading it for the first time but when you are actually arranging the triangles, it should become very clear.

8. Use Wonder Clips around all four sides to hold the layers in place:
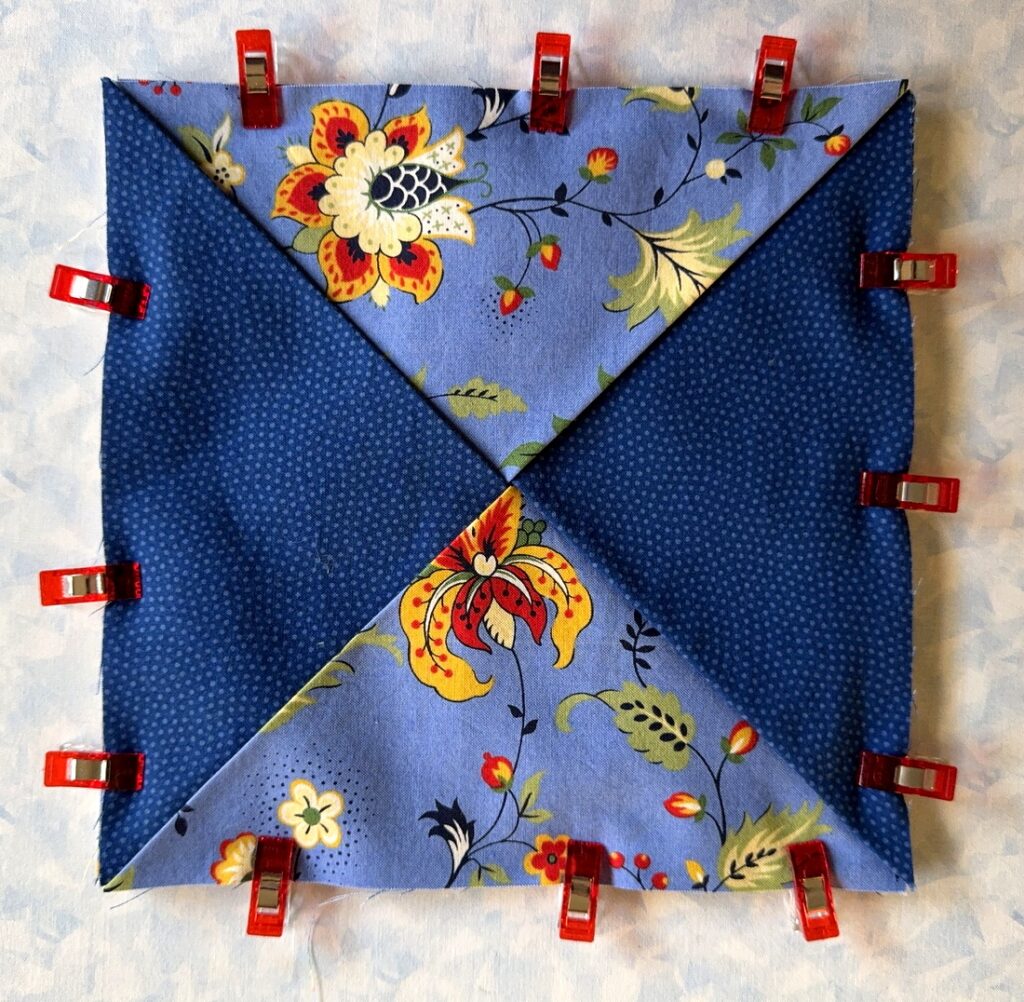
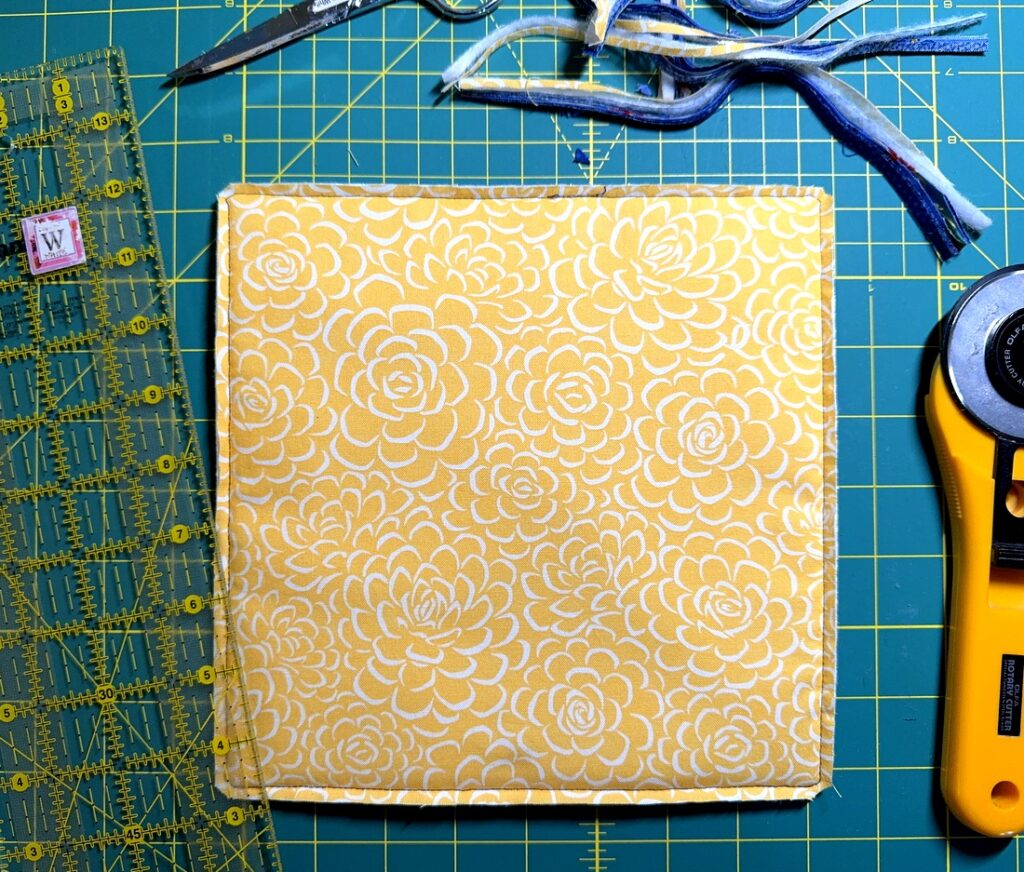
Check the back to make sure the fabric is smooth with no puckers:
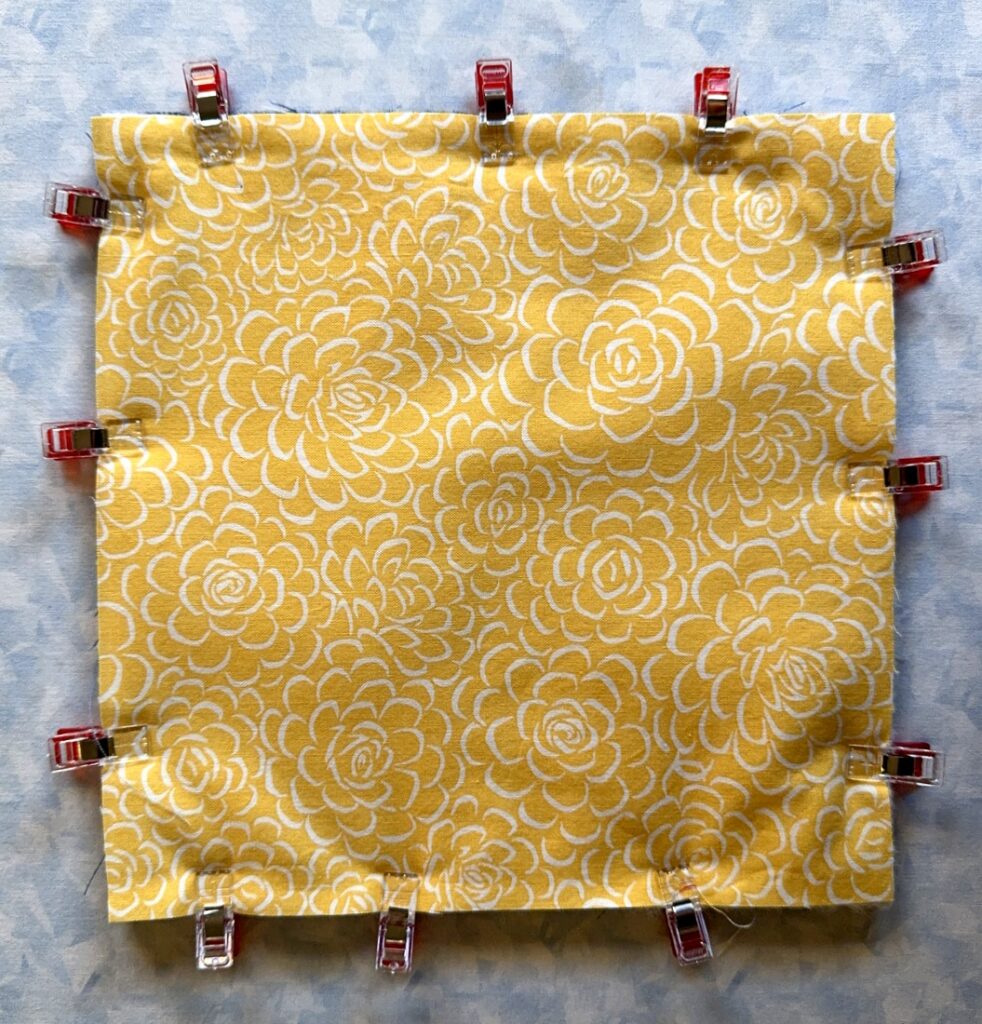
9. Using a walking foot, start in the middle of any side and stitch a 3/8” seam around the entire square. Stop just before the corner where the folded edges meet, pivot, and take two stitches diagonally across the corner, pivoting again to stitch the next straight side. Sew a few stitches beyond the original starting point:

Clip the threads.

Here’s a close-up of one corner showing the two diagonal stitches:
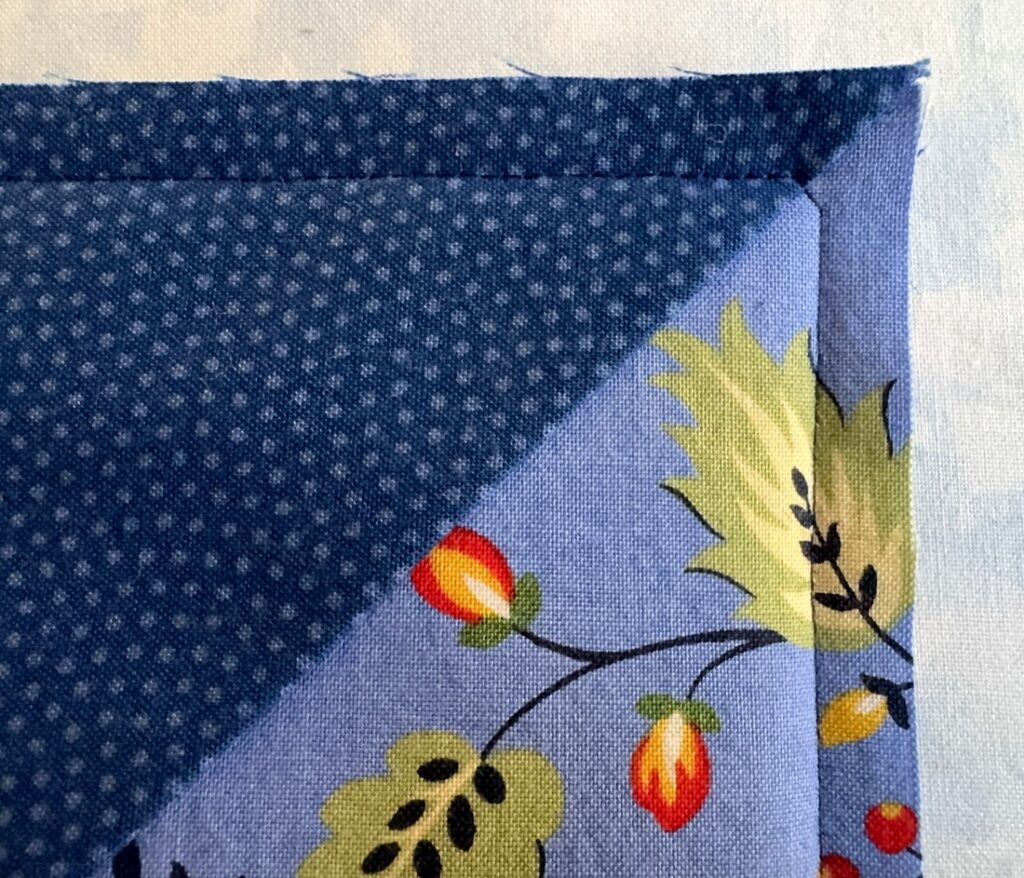
10. Using a rotary cutter or sharp scissors, trim 1/8” from the stitched edge. Clip across corners. I trimmed from the back for the simple reason that I could see my stitching lines more easily:

11. Insert fingers through folded edges of the center and turn hot pad right side out. Carefully poke the corners with a bone folder or other gently pointed instrument. Because of the bulk, you’ll get softly rounded corners:

Press the hot pad.

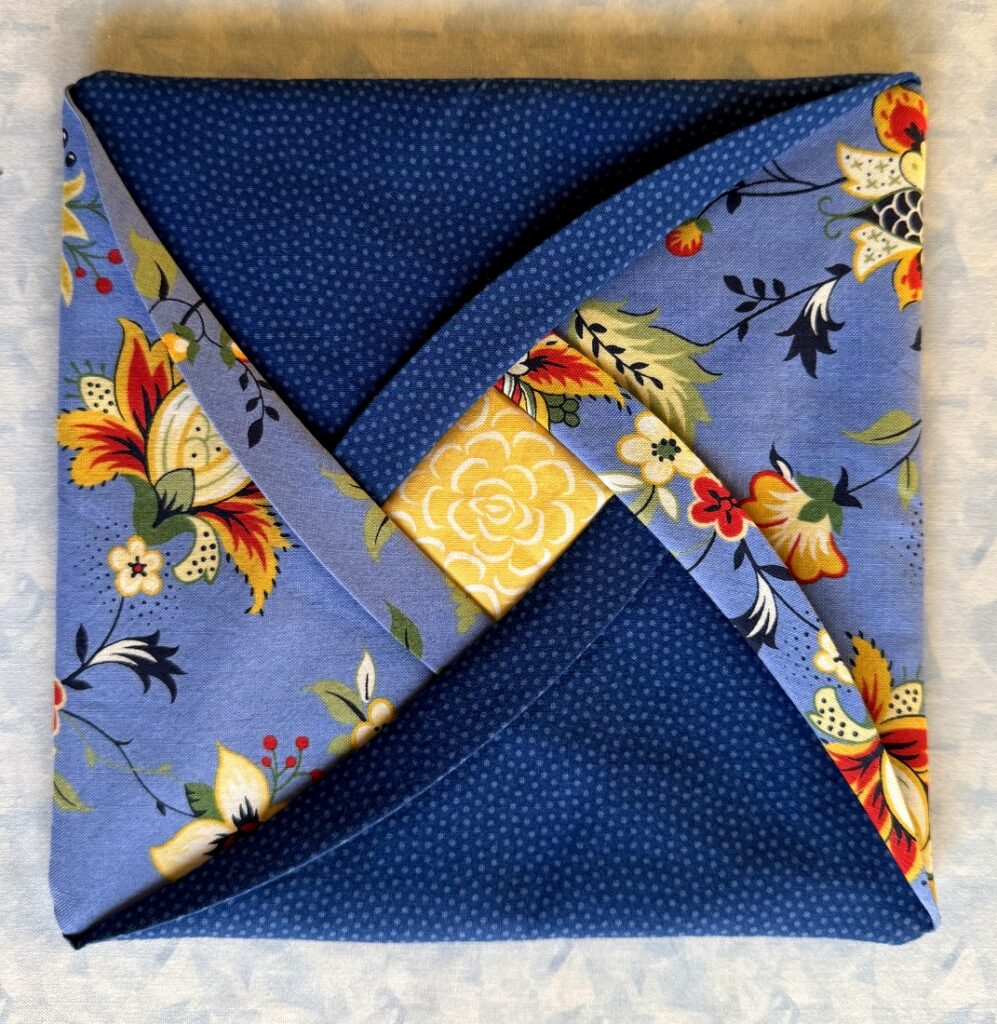
12. Turn back the folded edge of each triangle in the center to form a flap, with the widest part of the flap at the center (about ¾”), tapering to almost nothing at the outer edges. Press all four flaps down, exposing the center diamond shape of Fabric C:

Optional:  Stitch around the flaps through all thicknesses, using a straight or decorative machine stitch, to permanently anchor the flaps:
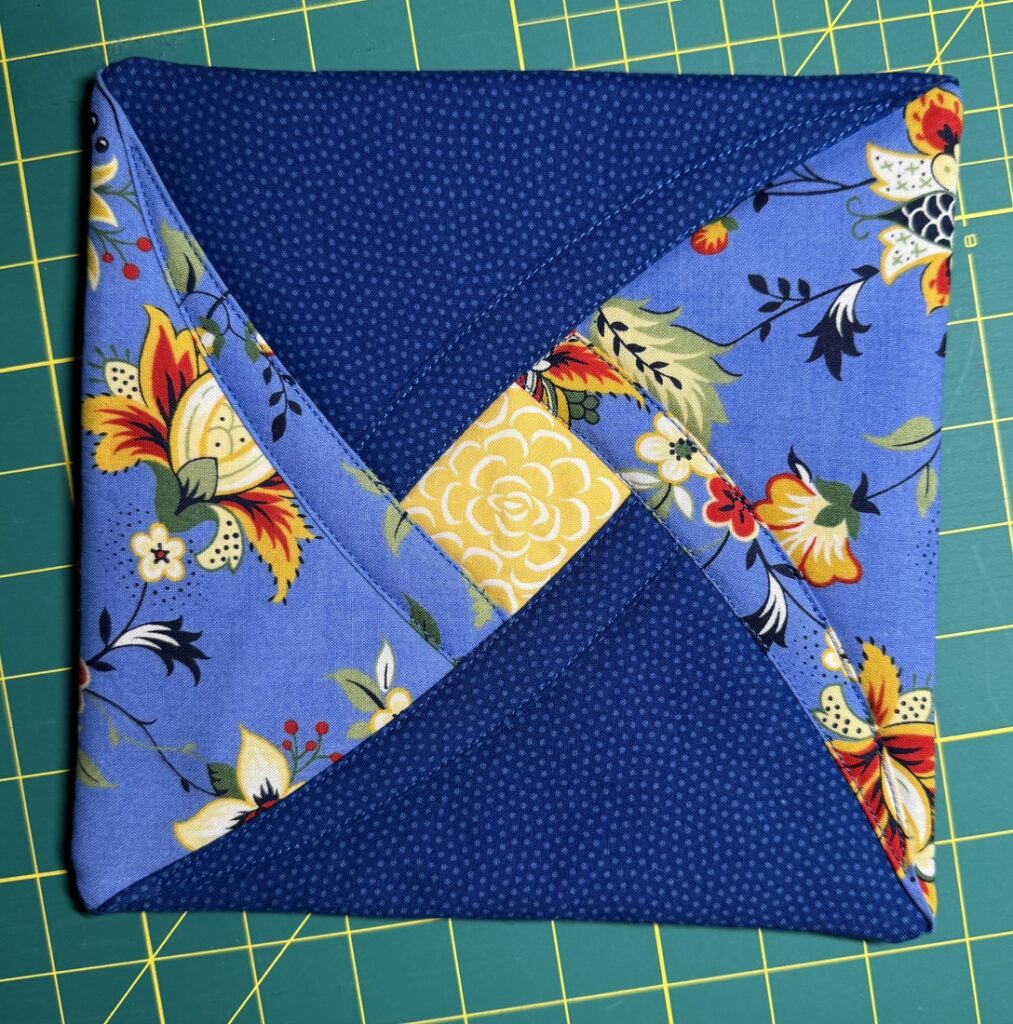
I strongly recommend this extra step, as it helps keep the shape of the hot pad if it is machine washed and dried.

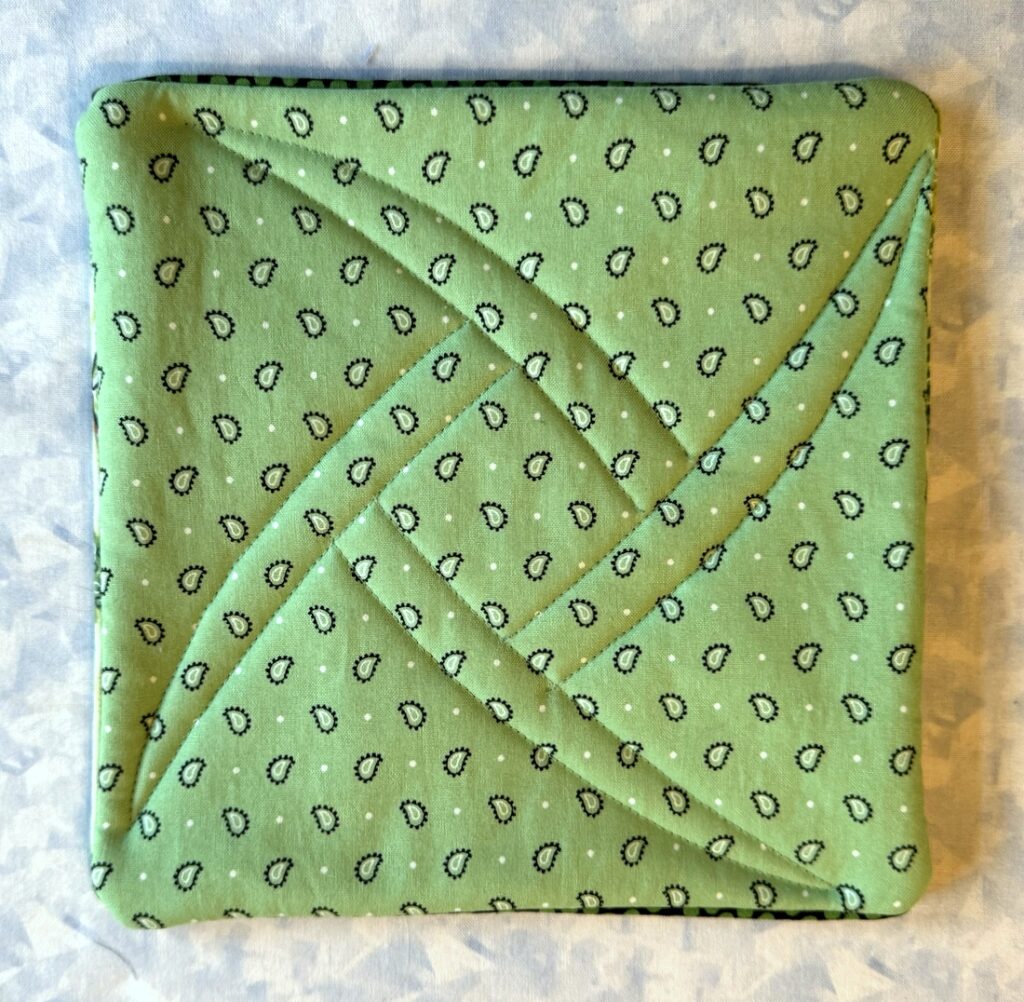
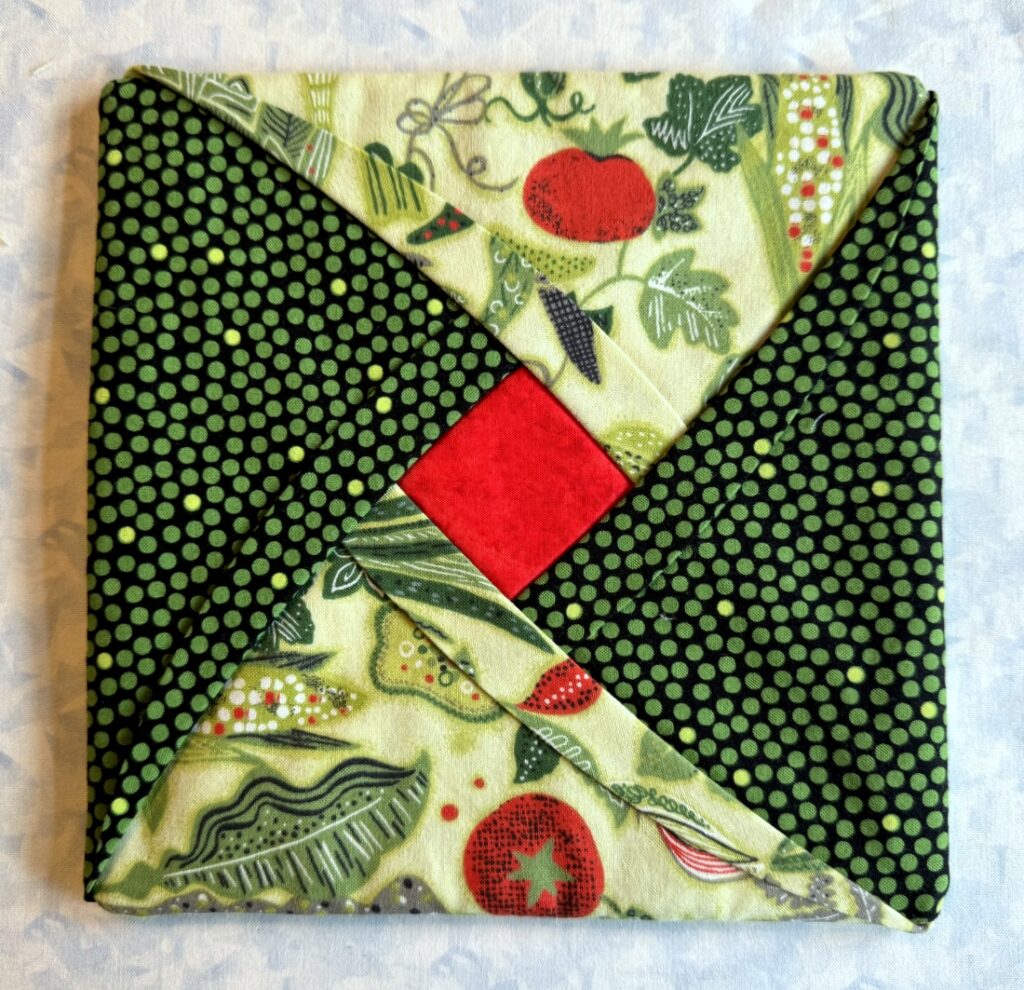
Here’s a look at the back:
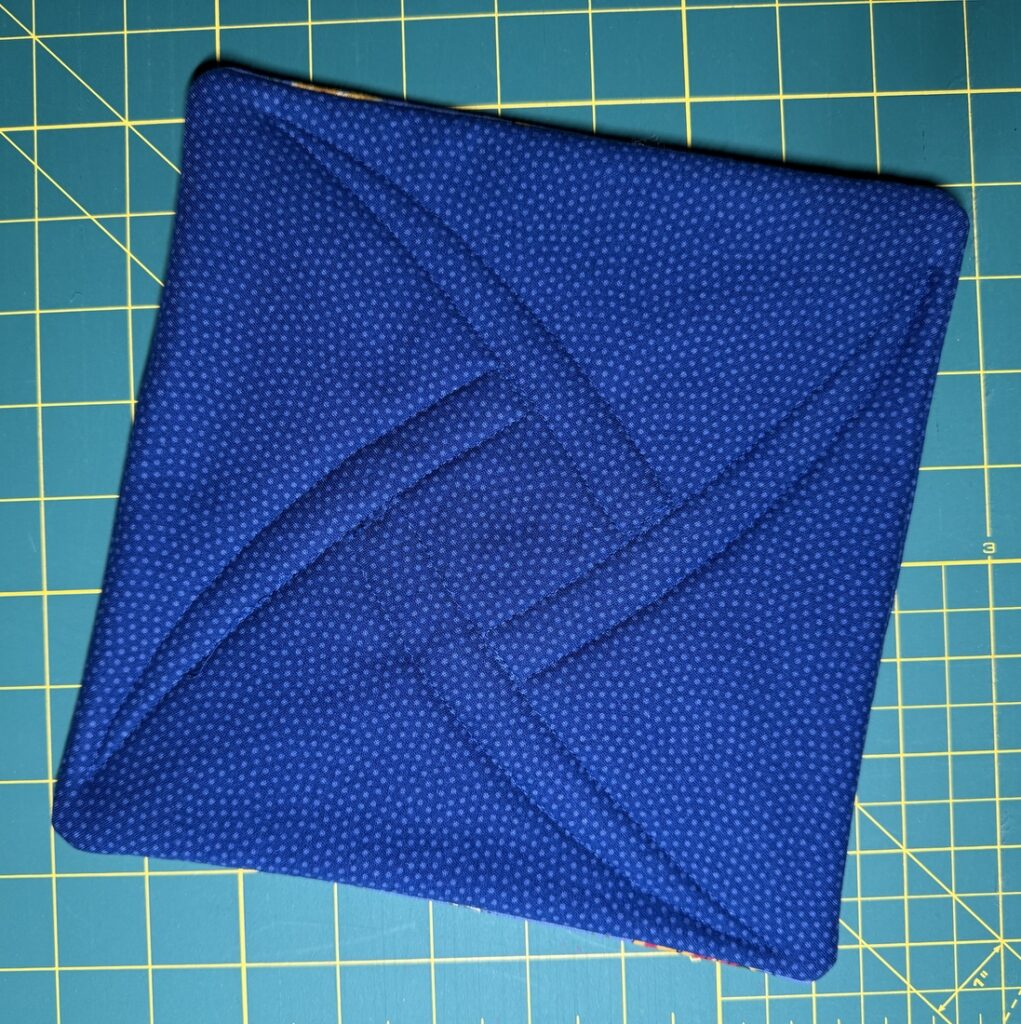
It looks good enough from the back to be reversible!

This hot pad looks right at home in my kitchen:
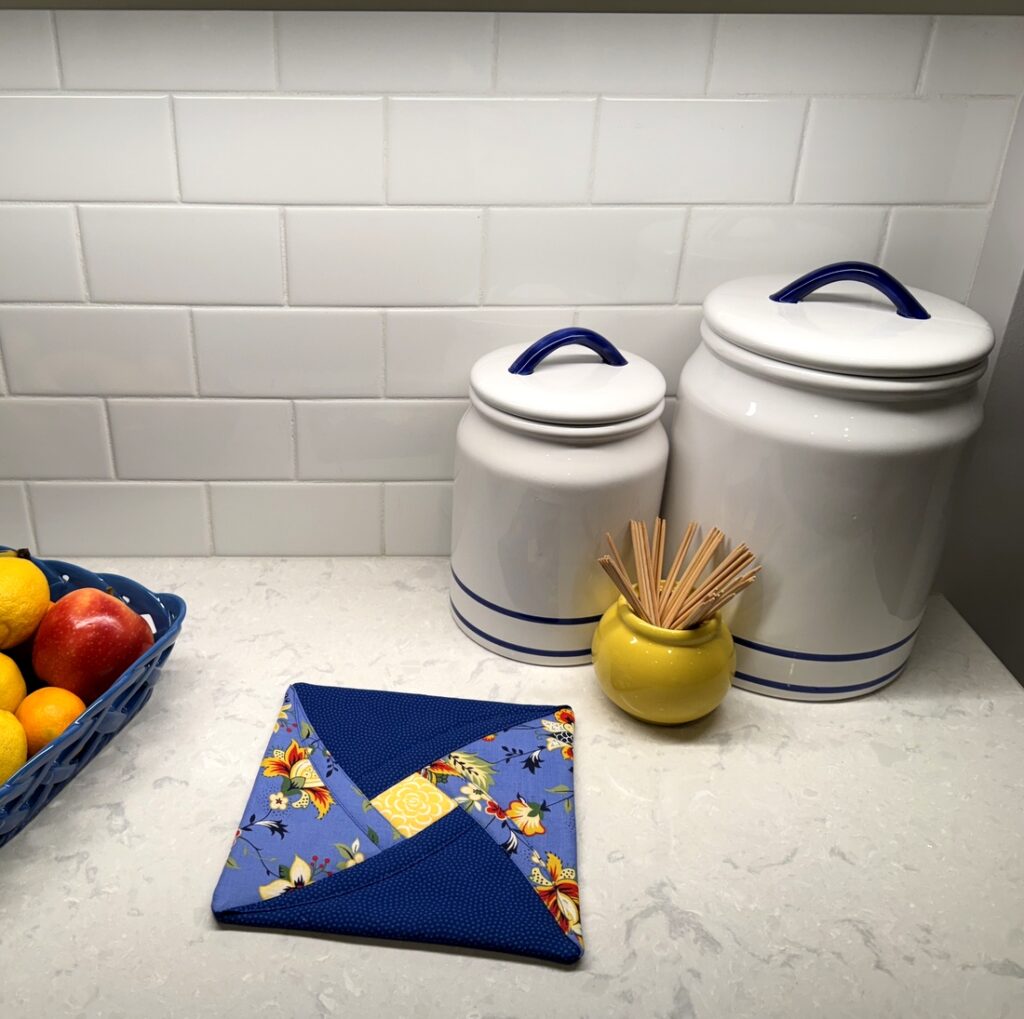
The only thing it’s missing is a mate.

Notes
1. Use the same fabric for all four sides of the top – or four different ones for a scrappy look. It’s up to you!

2. The hot pads can be made larger or smaller. For example, if you have a stack of pre-cut 10″ squares from a single line of fabric, you can make Folded Flap Hot Pads that finish at 9″ — or cut the squares down to 9″ so they finish like mine at about 8″ square. Just remember that the finished hot pad will be 1″ smaller than the starting size of your cut squares.

3. The center “diamond,” cut from a square, is the focal point of the hot pad. Think about the possibilities for fussy-cut centers! Perhaps you are wondering if the bright yellow blossom in the center of my sample hot pad was fussy-cut. Why yes, as a matter of fact it was.

4. For a look at a pair of Folded Flap Hot Pads I made years ago and finished just last month, see this post.



Posted in folded flap hot pads, home dec, hot pads, tutorial, update | 1 Comment

“What Are You Doing New Year’s Eve?”

Do you know that lovely song written in 1947 by Frank Loesser? If not, you owe it to yourself to listen to the incomparable Ella Fitzgerald’s lush rendition. You can do that right here. This New Year’s Eve I’ll be putting the finishing touches on my final quilt finish of the year, Wonderful World. It will be the subject of my first post of 2025.

In the meantime, here are a few images of our decorating at the Portland White House to keep the holiday vibe going. I love seeing the elaborate decorations some of my fellow quilters have posted on their blogs and Instagram pages, especially because my decorating seems to get more minimal every year. We do keep our decorations up until Twelfth Night (January 5 in 2025) so we have a few more days to enjoy them.

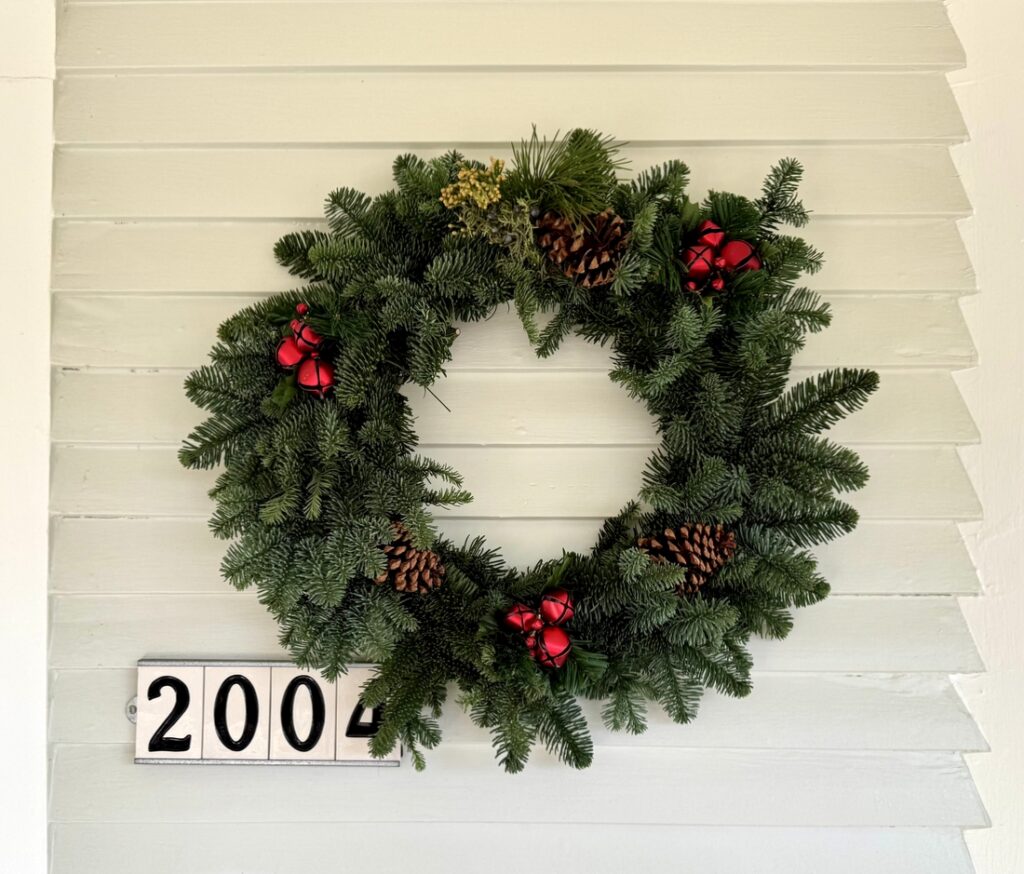
I bought this lovely wreath at Trader Joe’s in early December and added the clusters of red bells:

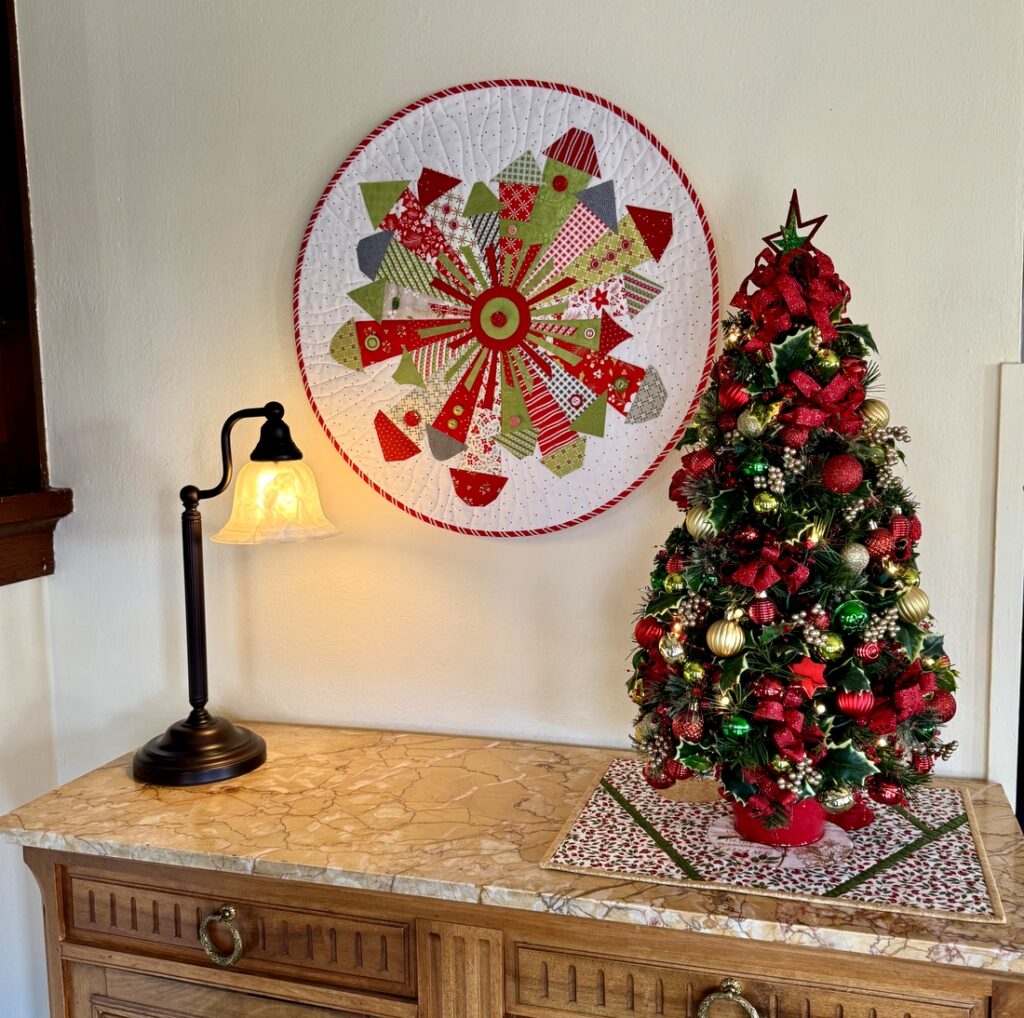
We had the exterior of our house painted this year. The door and mailbox were painted a lovely shade of green. The lights you see reflected in the door and windows are icicle lights on the curved arch on the front porch. From the sidewalk you can see our tiny tree and my little round quilt, Holliberry Circle:
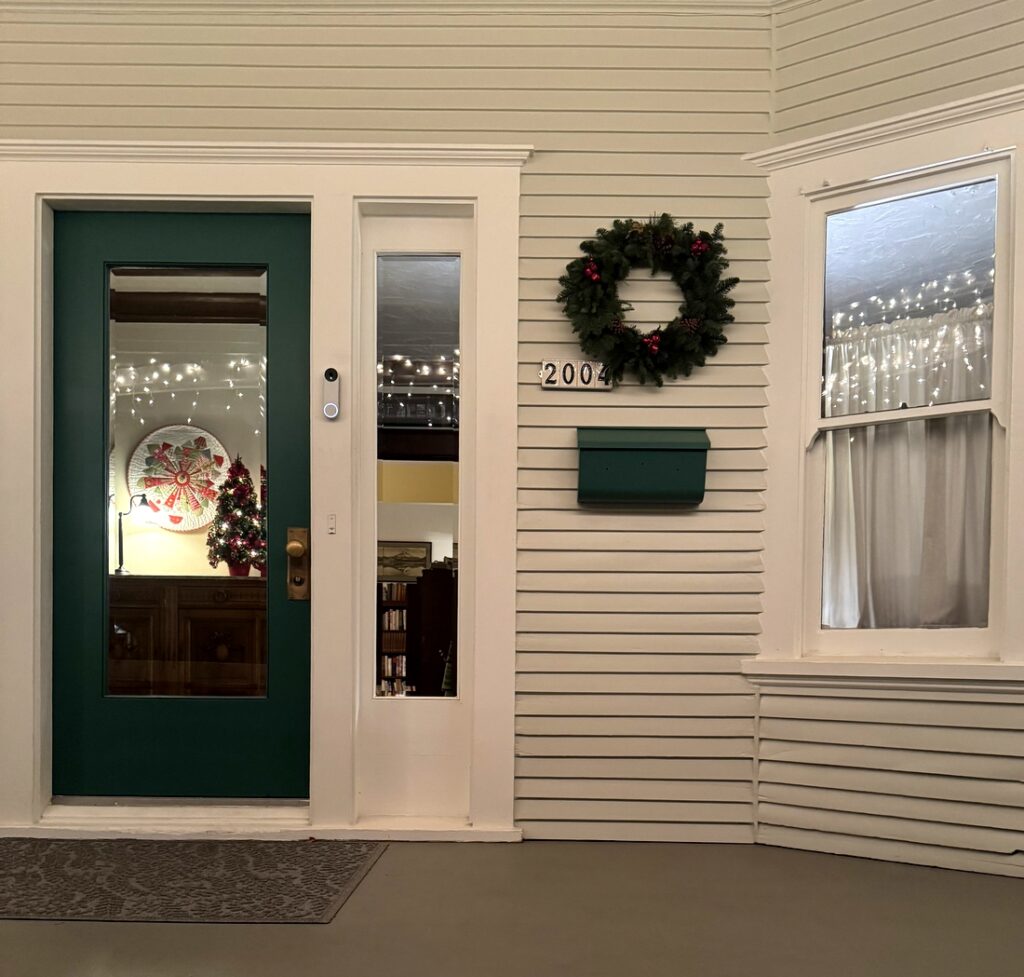
Here’s a closer look:

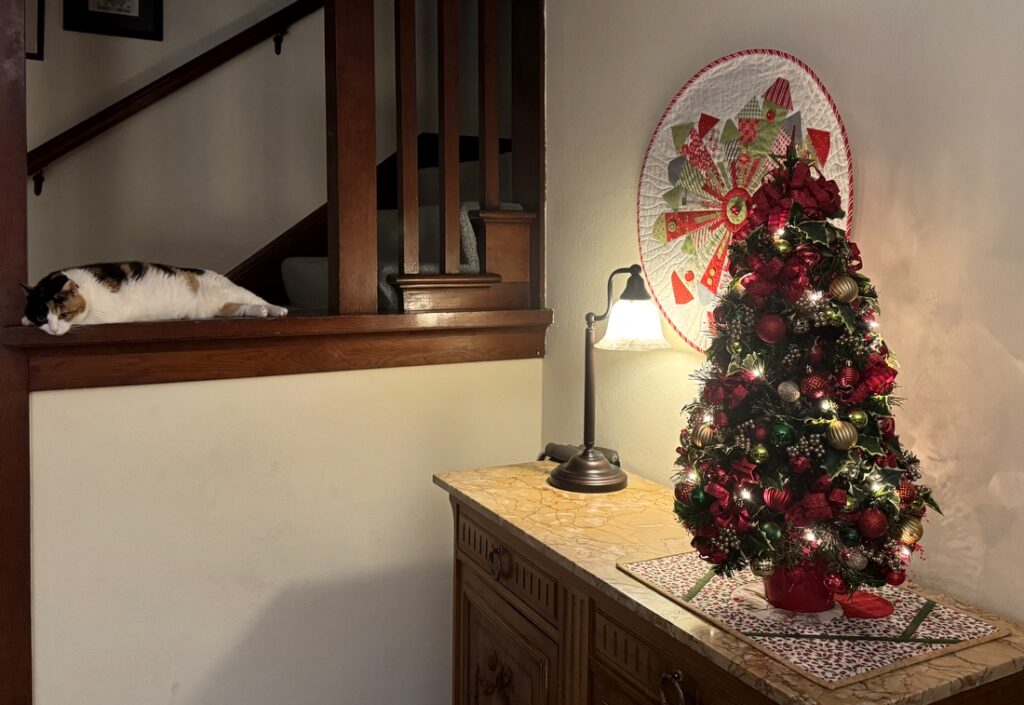
From her perch a very relaxed Coco has a view out the front door:

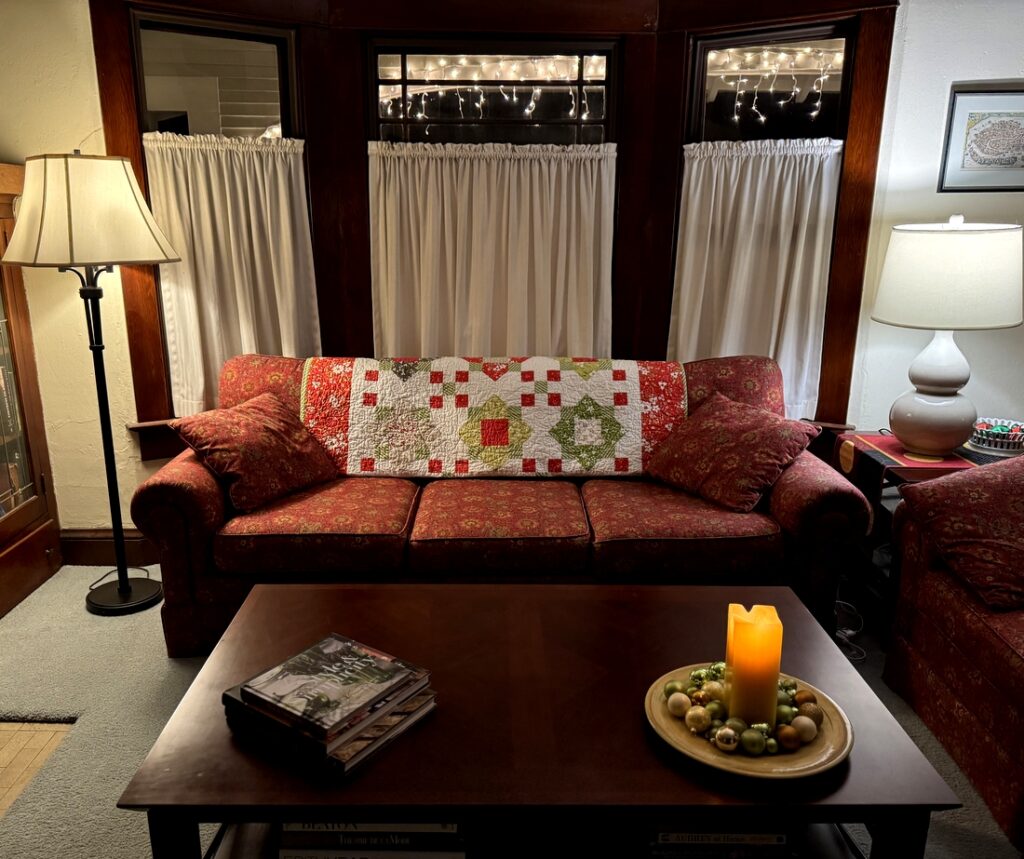
My other Christmas quilt, Tis the Season, is currently on rotation on the sofa:

The Dear Husband and I wish you all a safe and Happy New Year. I’ll be back in 2025!


Posted in cats, family, home dec, Quatrefoil, Ribbon Box quilt, update, wall hanging, wonky Dresden neighborhood | 5 Comments

‘Tis the Season . . .

. . . to be crafty. Yes, the holidays are winding down but crafting useful and beautiful items is never out of season, right? These cheerful hot pads in the traditional Christmas colors of red and green are right in style all year round:

Pair of Hot Pads, Finishing at 8″ Square

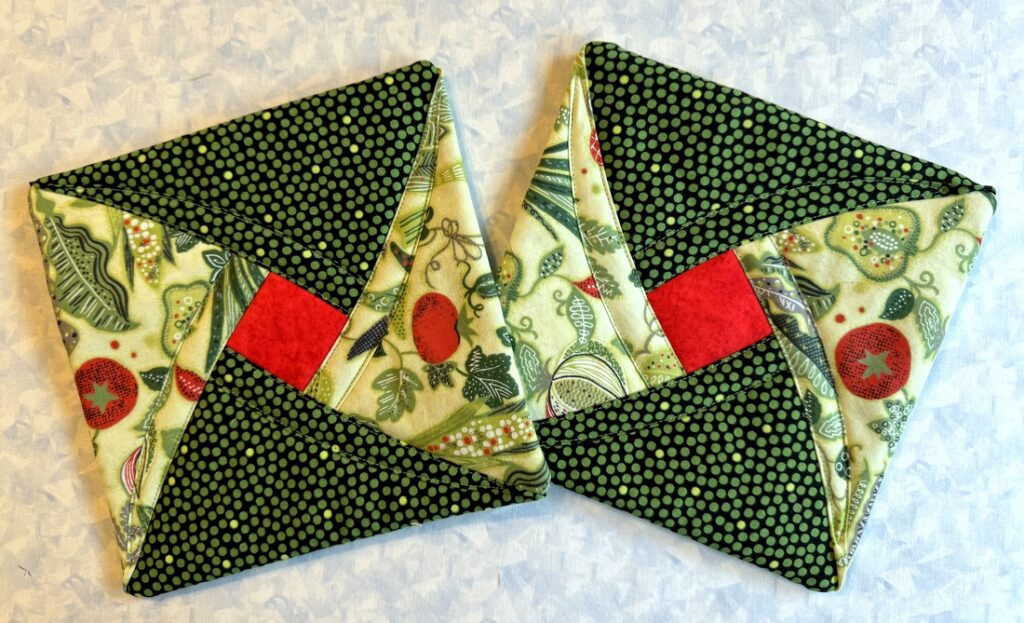
When my twin Diane was visiting over Thanksgiving, we went through project bins in my sewing room, deciding which projects I should finish and which I should recycle or donate. In one bin I was surprised to find a pair of hot pads that were almost completely finished. All that was missing was the final step of stitching through the layers to hold them in place.

Based on my notes found in the bin, I probably made these back in 2011 when I was teaching a class at the Pine Needle Quilt Shop, now home to the Lake Oswego branch of Montavilla Sewing Center. I didn’t want them anymore but Diane sure did so I promised to finish them before she went home. Both of us forgot all about them until well after she returned home to Georgia in early December.

Each hot pad is made from six 9″ squares of cotton fabric and a 9″ square of InsulBright, an insulating thermal batting. Here’s a close-up of one before the final step of stitching through the layers:

The stitching is optional but I always recommend it because it helps keep the shape of the hot pad if it’s machine washed and dried. And I like the way it looks from the back:

Off they went in the mail to Diane last week. They arrived yesterday so now I can show them to you.


Posted in family, home dec, hot pads, update | 6 Comments

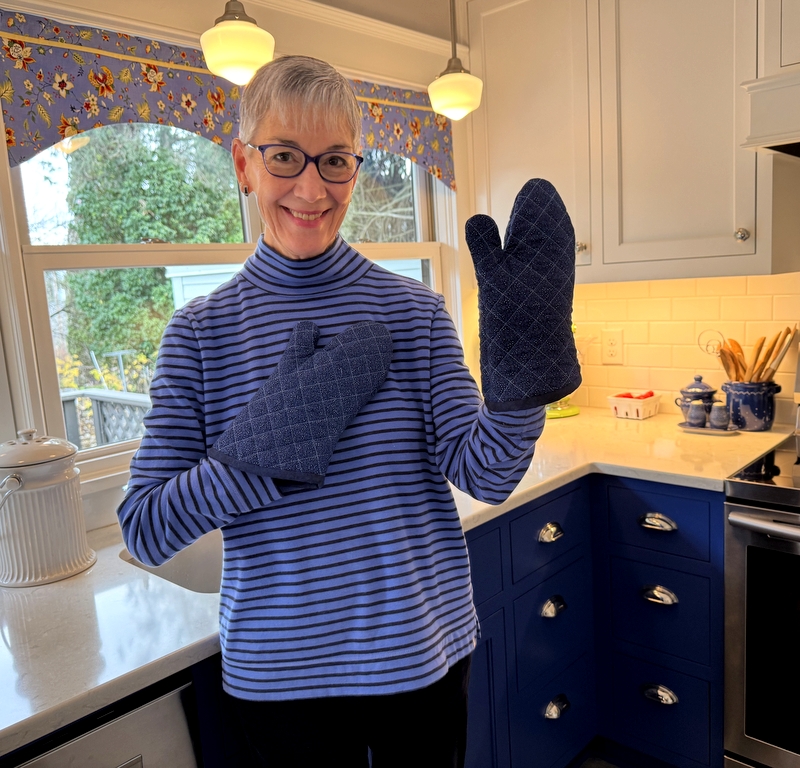
Blue on Blue

If you were a teenager in the 1960s, as I was, you probably remember a hit song by Bobby Vinton called “Blue on Blue.” Bobby was singing about heartache but I’m singing — well, writing — about my new oven mitts.  Behold:

The other day I spotted a tiny hole in one of my old mitts. I don’t know how it got there but it was enough to prompt me to make a new one (and of course I had to have a matching pair). My fabric of choice was a lovely vintage blue-on-blue print that I won recently at a meeting of my quilt guild, the Metropolitan Patchwork Society. The print was my favorite of the four dark blue blenders in my winning bundle.

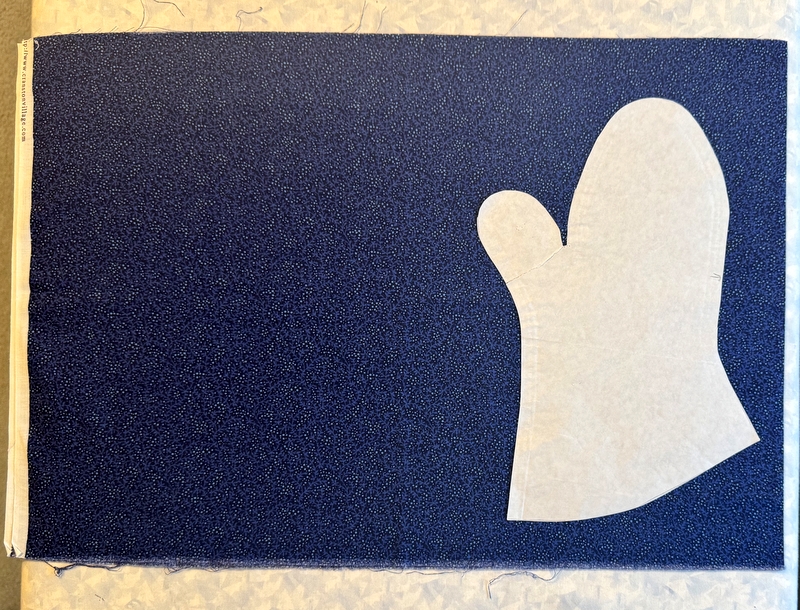
Following my own tutorial (more on that at the bottom of this post), I made a new pair. I had only a 15″ length of fabric but it was enough for two mitts. Here you see the doubled width of fabric with my freezer paper pattern on it for scale:

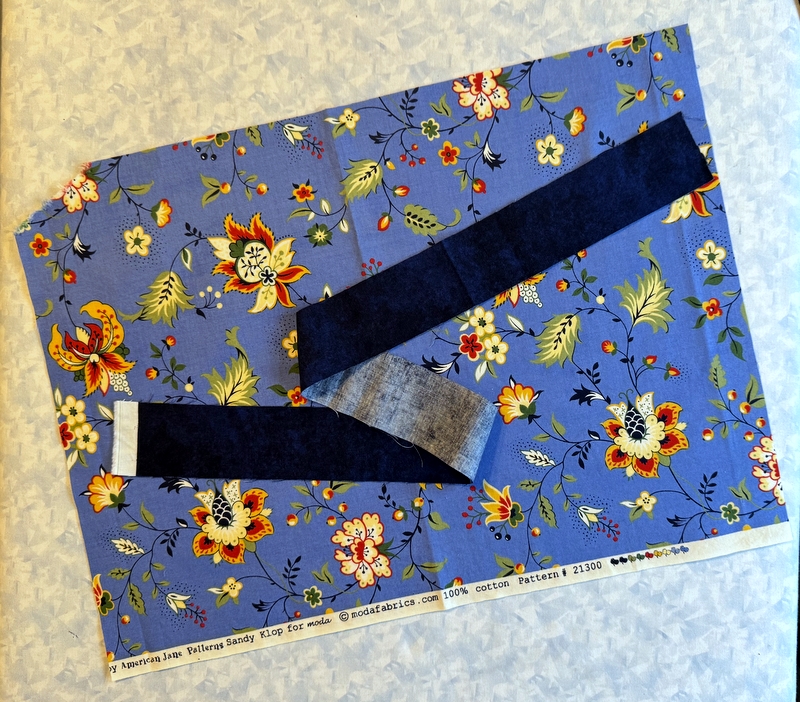
For the lining of the mitts I drew on this French provincial print from my precious stash of Sandy Klop’s “A Breath of Avignon” line, which I’ve had for well over a decade:

Did you happen to notice the valance fabric in my kitchen? It’s the same fabric used inside my new oven mitts. That strip of mottled navy “Shadowplay” by Maywood is for the contrast binding at the cuff.

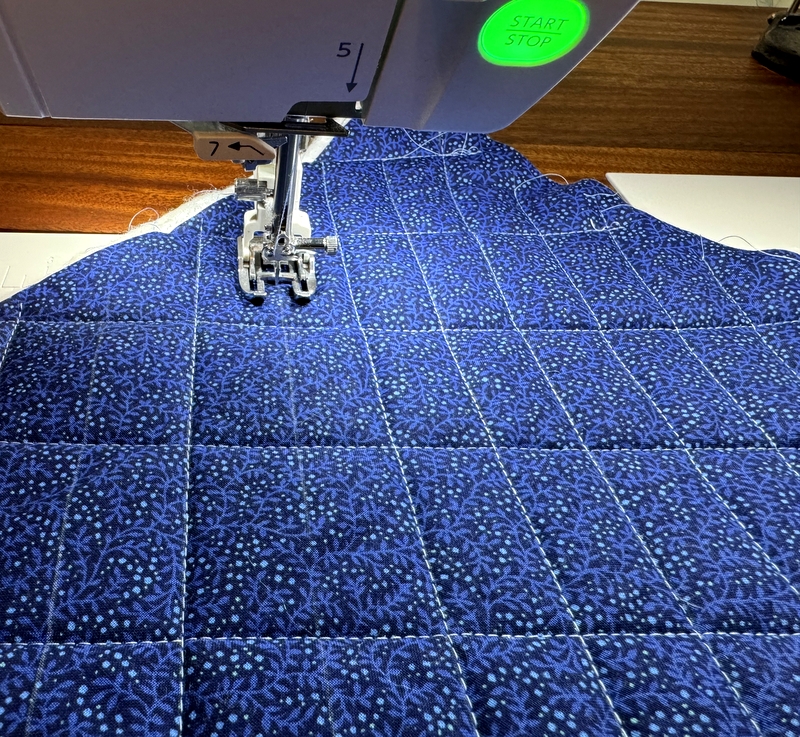
The next photos show you how I quilted the mitt with a 1″ grid. I often quilt my mitts with random wavy lines, which goes very quickly. It takes more time to quilt a grid but it sure does look nice.

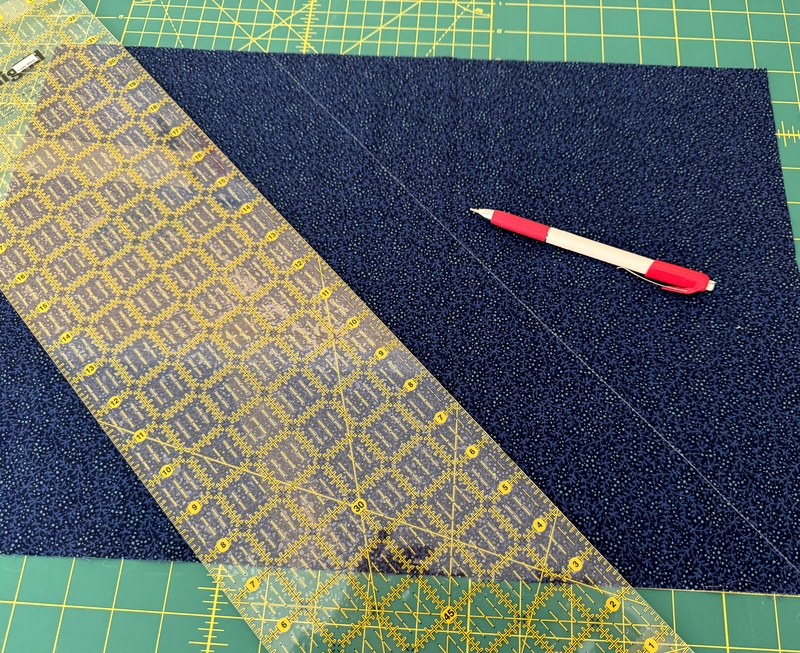
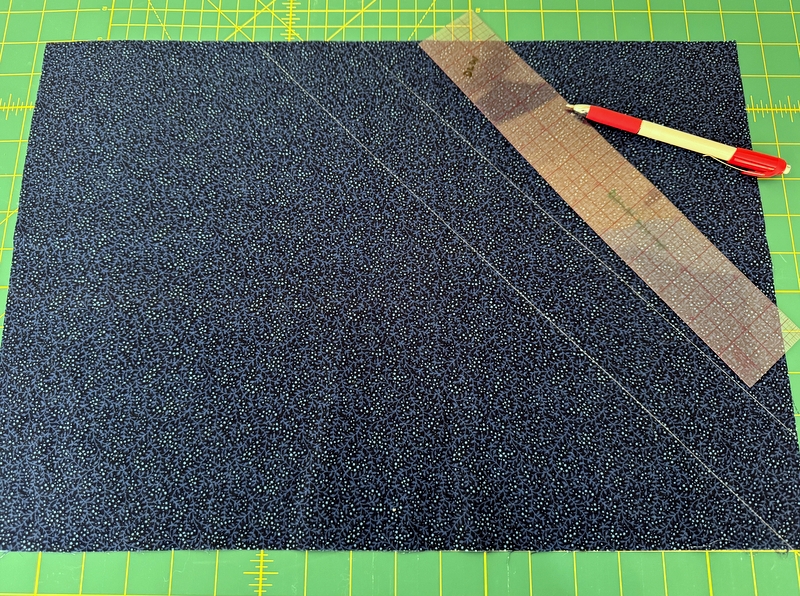
First I marked the top fabric with a 45 degree line following the diagonal mark on my cutting mat:

My favorite marking tool for dark fabrics is this Bohin mechanical chalk pencil, which gives such a nice thin line.

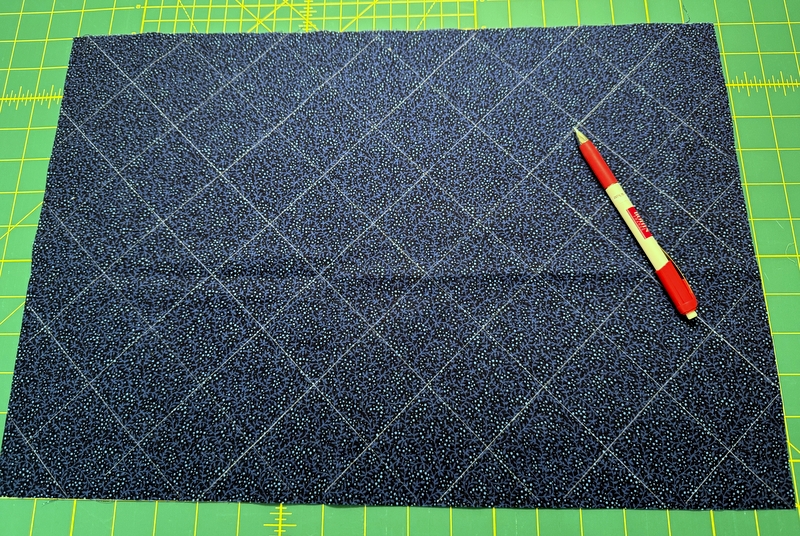
Then I used a 2″ wide clear plastic ruler to mark the rest of the lines in 2″ increments going in the same direction:

I repeated the marking with lines going in the other direction:

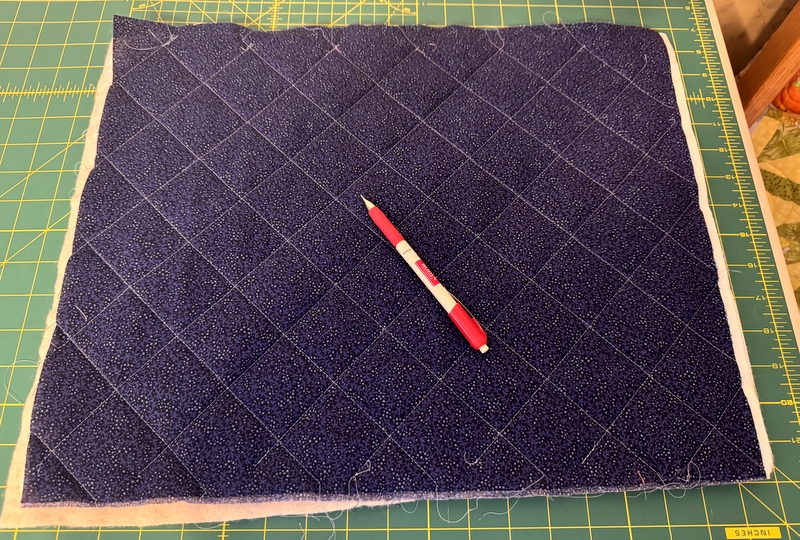
After lining up my four layers — top, 100% cotton batting, Insul-bright (an insulated heat-resistant batting), and lining — I quilted all of the lines in one direction and then all the lines in the other direction:

I chose a medium light blue thread so the quilting would stand out. By the way, I didn’t bother to pin the layers. I simply stitched a line (starting with one of the longest ones) and smoothed the bottom layer if it needed it before stitching the next line.

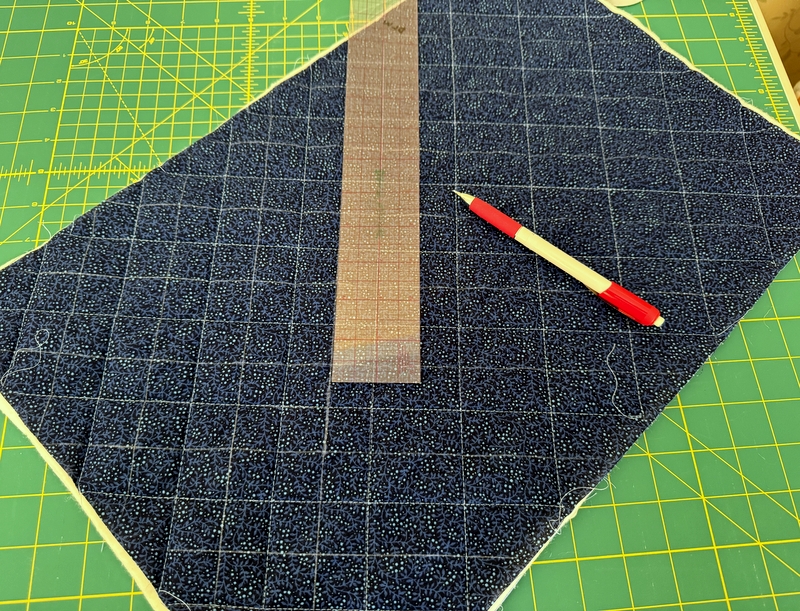
Next it was time to mark between the stitched line to create the 1″ grid. I could probably have eyeballed the space between the stitched lines but my obsessive-compulsive gene kicked in:

In any case, it didn’t take much time to mark the lines and move on to sewing them.

My open-toed walking foot was essential for this project. You really need to be able to see the needle going in and out of the fabric.

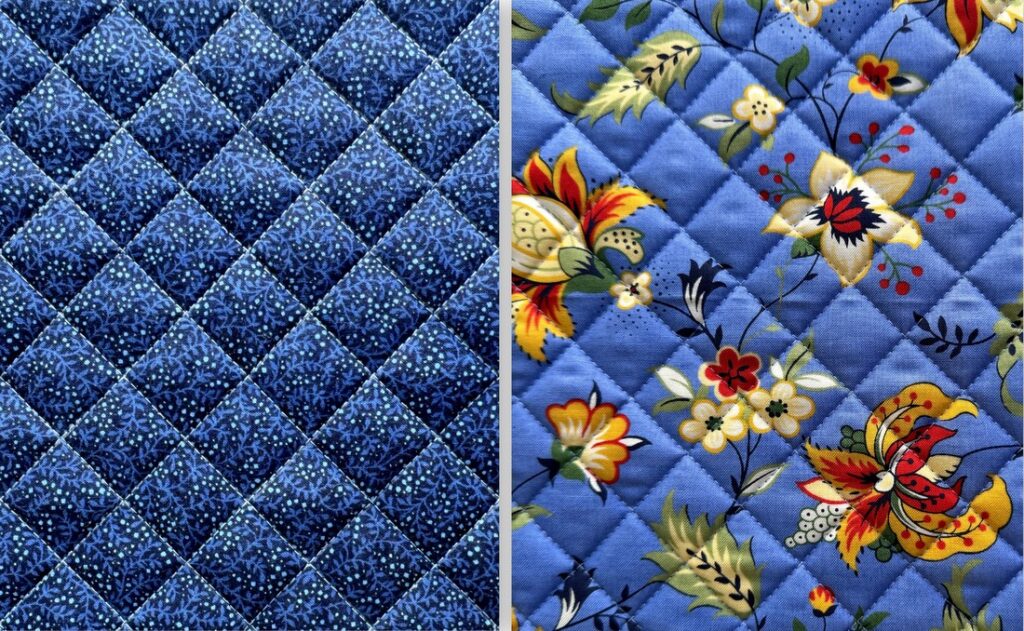
A close-up of both sides quilted:

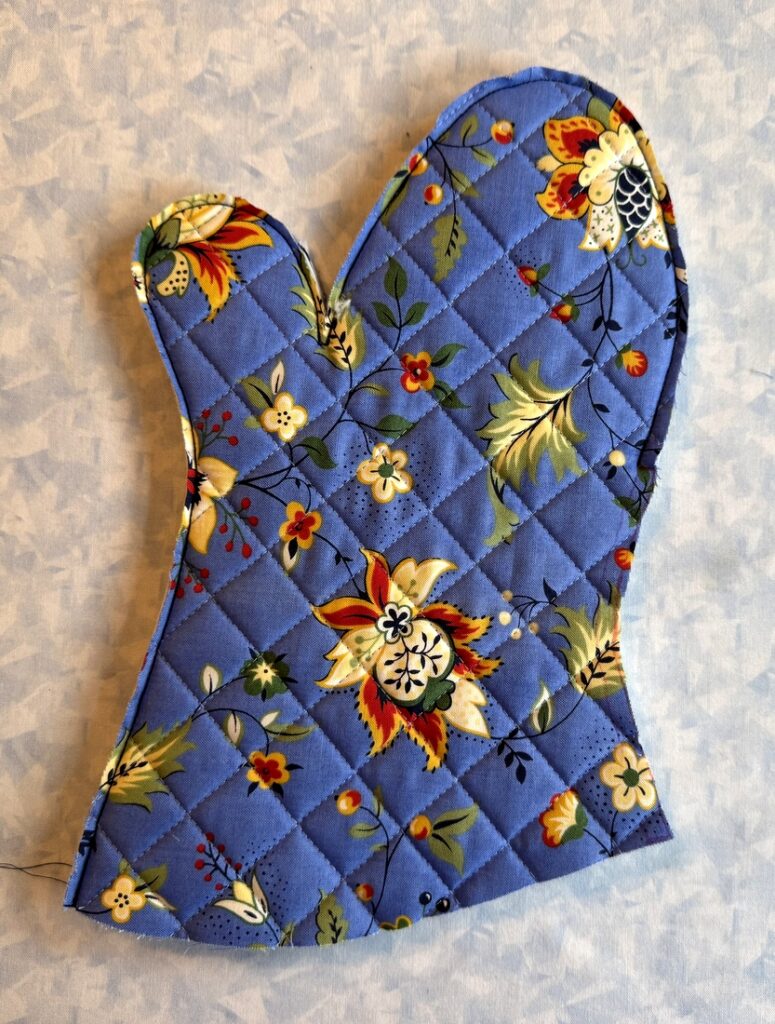
The oven mitt partially sewn together . . .

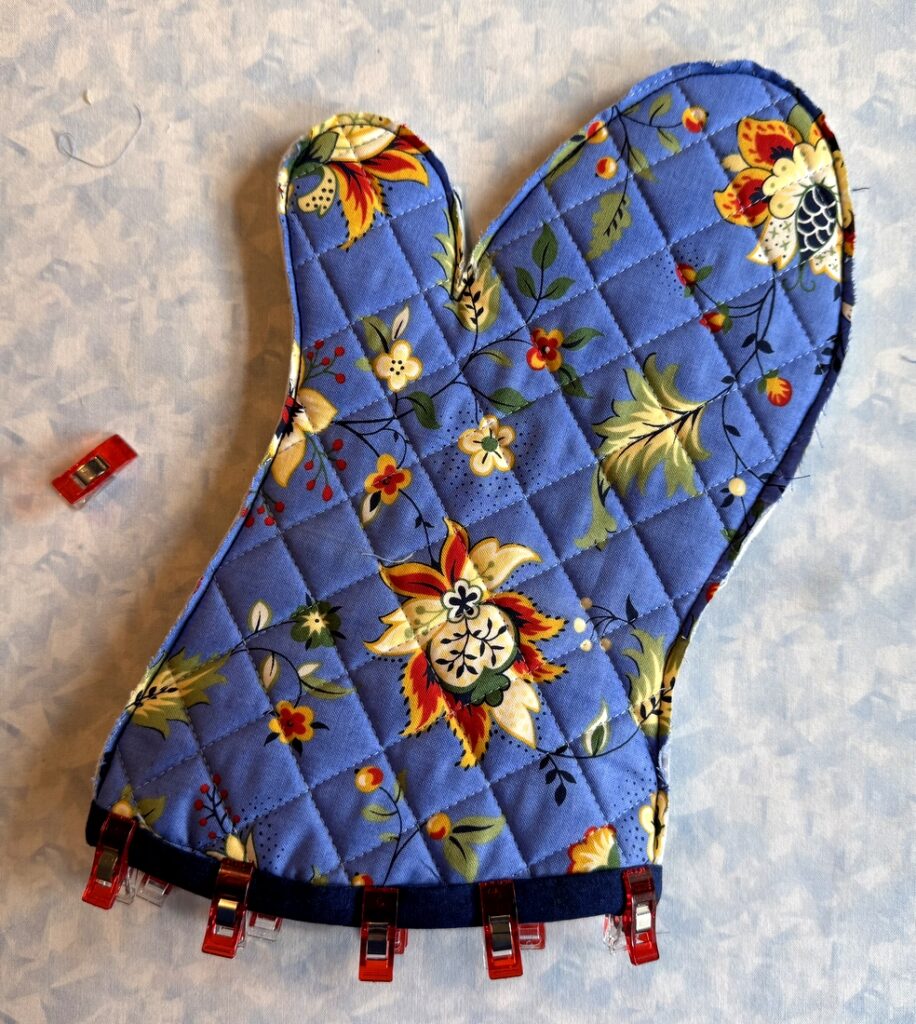
. . . and now with the contrast binding at the cuff edge applied and ready to tack down:

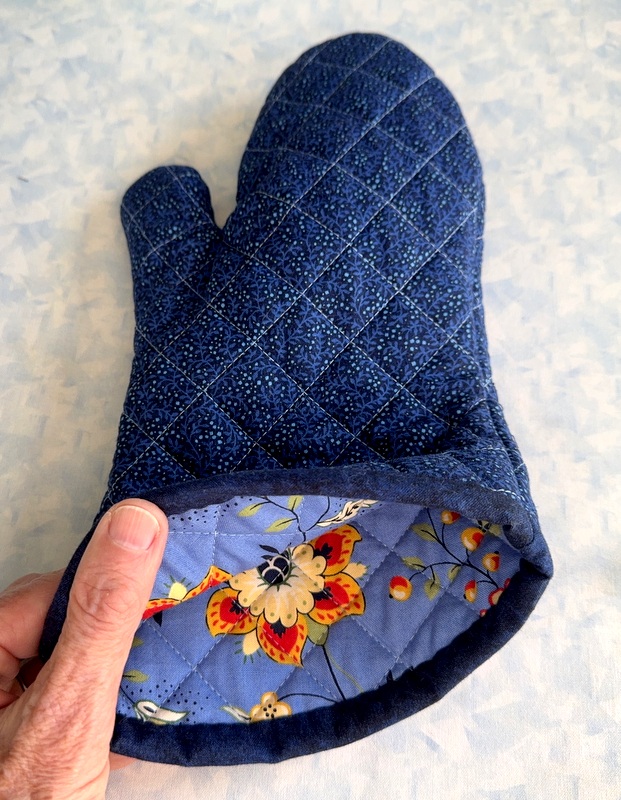
Here’s the finished mitt, with a peek inside to see the lovely lining:


Ready to make a pair? The links below will take you to my oven mitt tutorial, broken into three parts. The first part (the Prequel) explains why I made my own pattern and how to make one that fits your own hand.

The second one (Part 1) covers fabric requirements, instructions for downloading and printing the pattern, assembling the layers, and quilting the resulting “quilt sandwich.”

The third one (Part 2) covers the sewing of the mitt and contrasting band around the cuff edge as well as the final step of tacking the band down before turning the mitt right side out.

Here you go:

21, Oven Mitts that Fit: Prequel to the Tutorial (April 13, 2021)
21, Oven Mitt Tutorial from First Light Designs, Part 1 (April 18, 2021)
21, Oven Mitt Tutorial from First Light Designs, Part 2 (April 19, 2021)

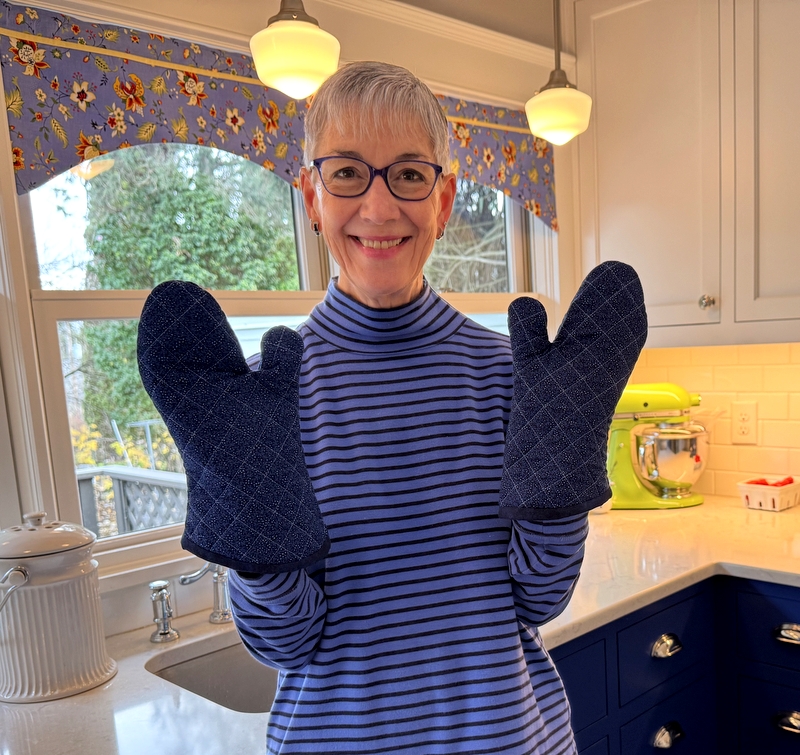
Here I am again with my new blue-on-blue oven mitts. And the blue-on-blue top I’m wearing? Total coincidence!


Posted in home dec, Metropolitan Patchwork Society, oven mitts, tutorial, update, valance | 4 Comments

Off to the Quilter!

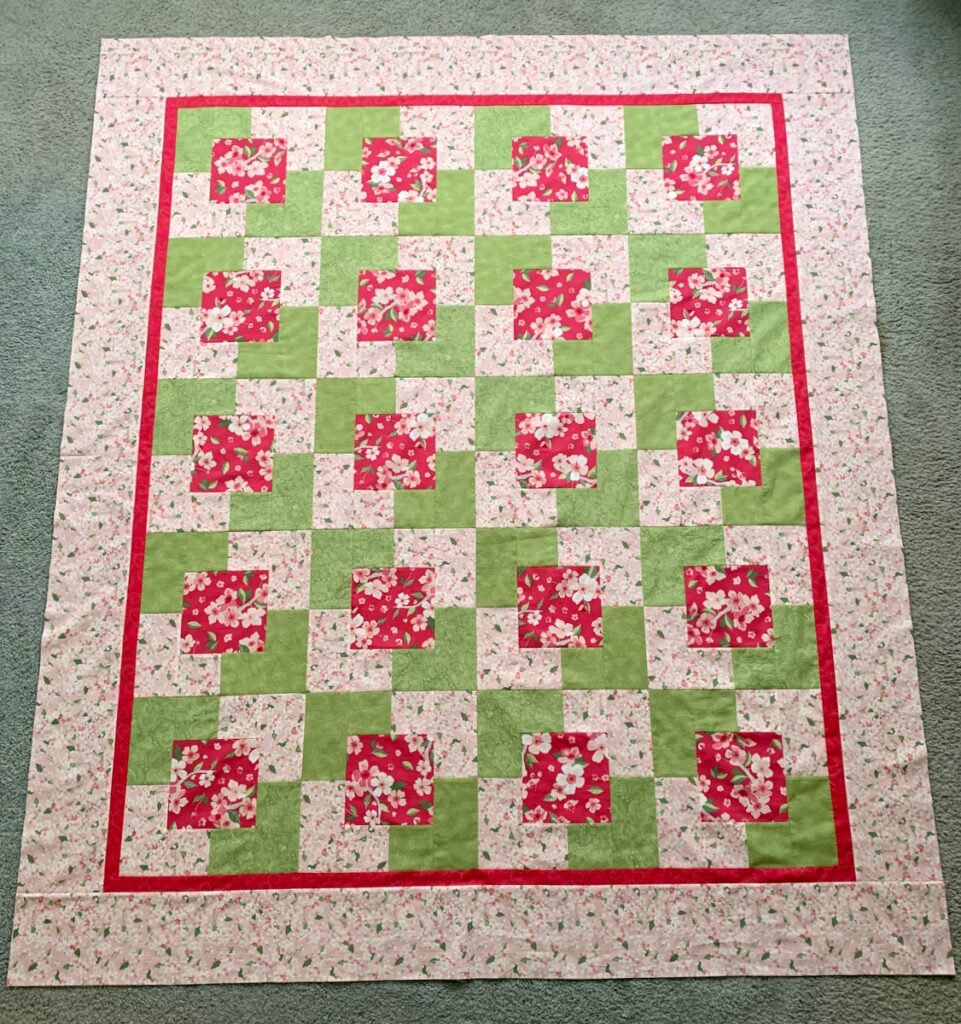
The borders are on my cherry blossom quilt . . .

. . . and it’s ready to be delivered to my longarm quilter.

Don’t you love the freshness of the cherry blossom fabrics against the two spring green tone-on-tone prints? I sure do. The simplicity of the pattern (Town Square by Fabric Cafe) really lets the fabrics take center stage, which is always my goal.

I made a simple pieced backing incorporating two quilt blocks that were too similar to ones on the front. Celebrating Spring is the leading contender for my new quilt’s name but I’m open to other suggestions. Just sayin’.

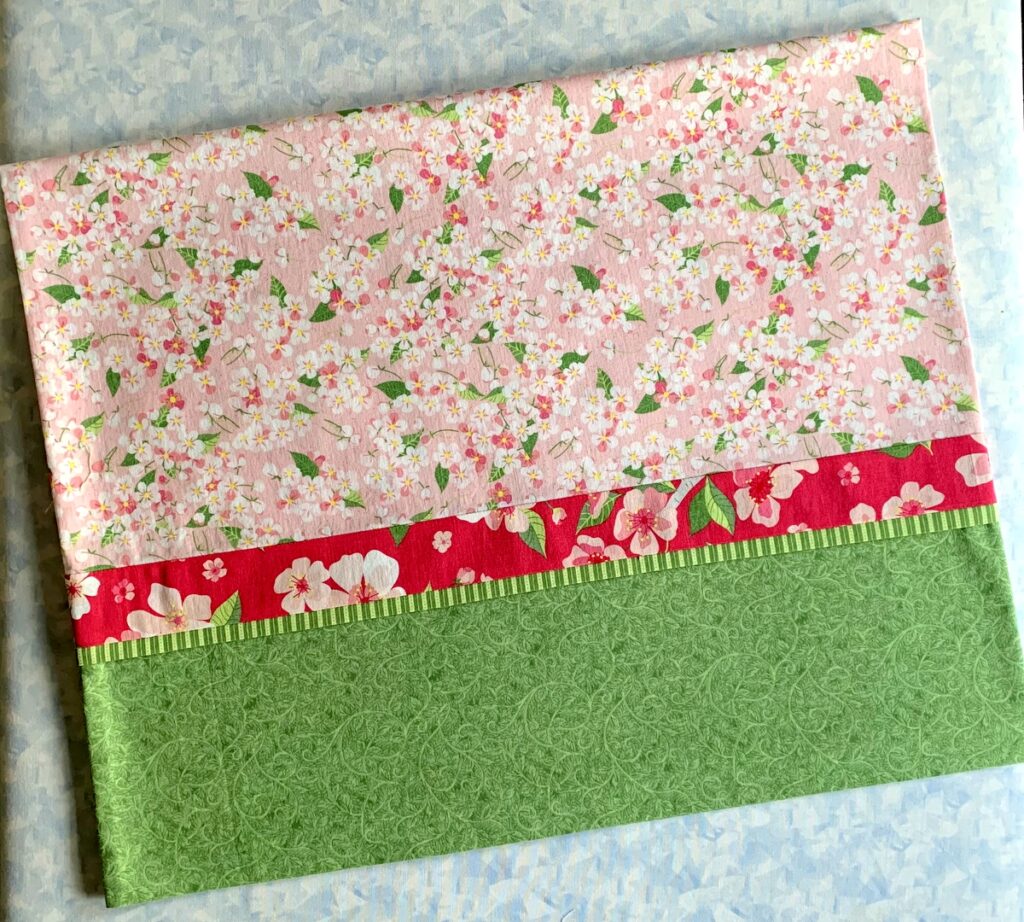
There was enough of the small focus fabric print left to make a pillowcase for a loved one to go with her new bed linens:

It was made with my own tutorial, which you can see here.

I like this pillowcase so much that I’m sorely tempted to order more fabric to make a pair for the Portland White House. But seriously, the Dear Husband and I have enough other cases to sleep on. If I made pillowcases for every line of fabrics I fall in love with, we’d be sleeping on different cases every night.

Anyway, I’ve embarked on yet another new project that I’m eagerly looking forward to showing you. I hope you’ll stop by to see what it is!


Posted in cherry blossom quilt, family, home dec, pillowcases, roll-it-up pillowcases, tutorial, update | 3 Comments

Accessorizing the Home

I’ve been spending a wee bit of time in my sewing room over the last week. It could have been more but I had my nose in a book. A big book:  715 pages, to be exact. It’s Abraham Verghese’s bestselling novel The Covenant of Water. I actually bought it last summer but was reluctant to begin such a lengthy tome until after my cataract surgeries in June and August. Reading is once again a great pleasure, and this freezing cold snap in the Pacific Northwest over the last several days presented an ideal opportunity to curl up with a good book with either a cat or a quilt (sometimes both) on my lap.

I did venture into my sewing room from time to time, working around the schedules of the workmen repairing the walls and ceiling in the upstairs hallway following water damage from a rain storm. The hallway now looks brand new — a touch of irony in a house that’s 111 years old — but the texture on the walls beautfully mimics the original lath and plaster so you’ll hear no complaints from me. All the hallway needs now is a coat of primer and two coats of color.

I’ve been working on some small things:

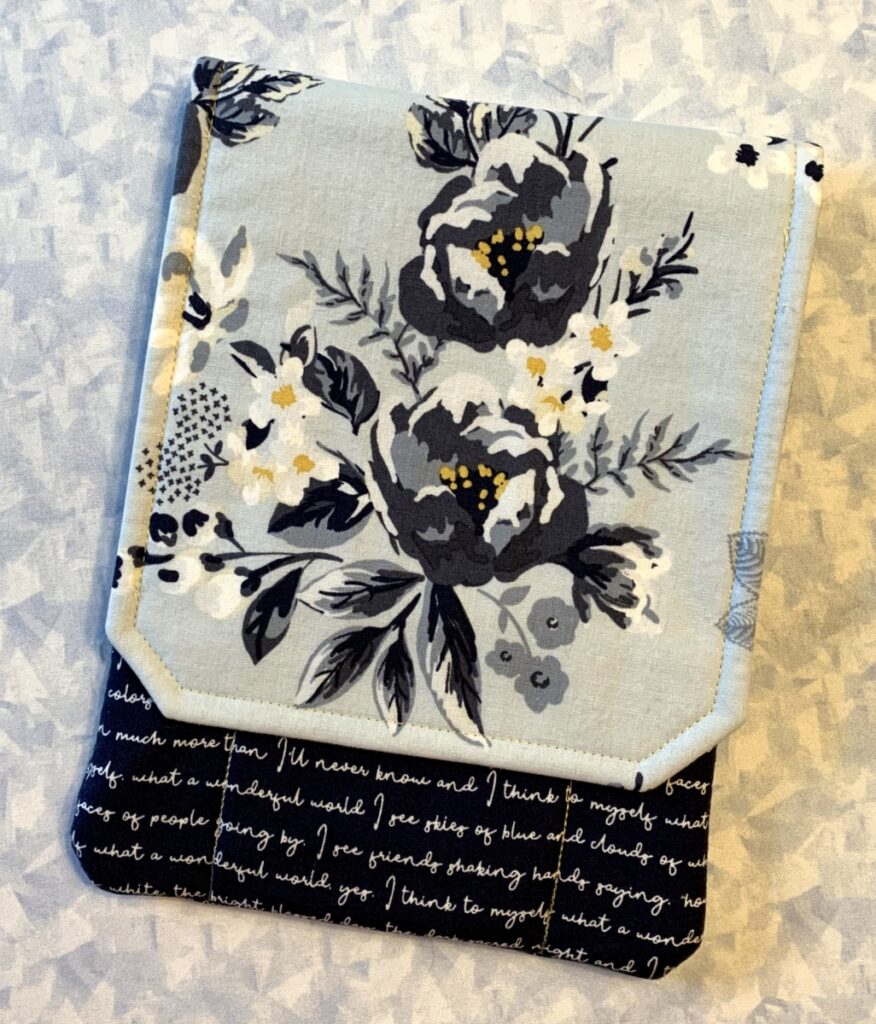
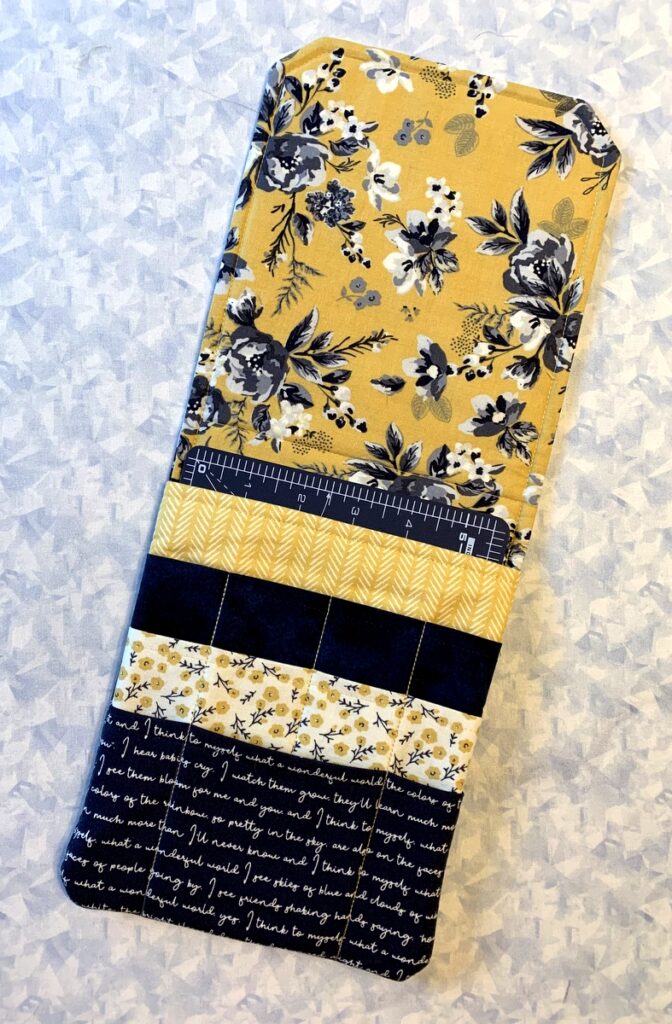
This is a quilter’s tool caddy, using the pattern Travel Case by Pearl Pereira of P3 Designs. I’ve made several versions over the years, modifying the design in a few ways but most importantly by adding a fourth pocket so the caddy holds more:

The tool caddy is one of four accessories to go with my current Junior Billie Bag-in-progress. I’ll finish it soon along with three other accessories that go with it — a rotary cutter coat, a scissors case, and a fabric box that I use as a threadcatcher. I’m so enjoying the fabrics — most of them from the Gingham Foundry line by Riley Blake that came out in 2021.

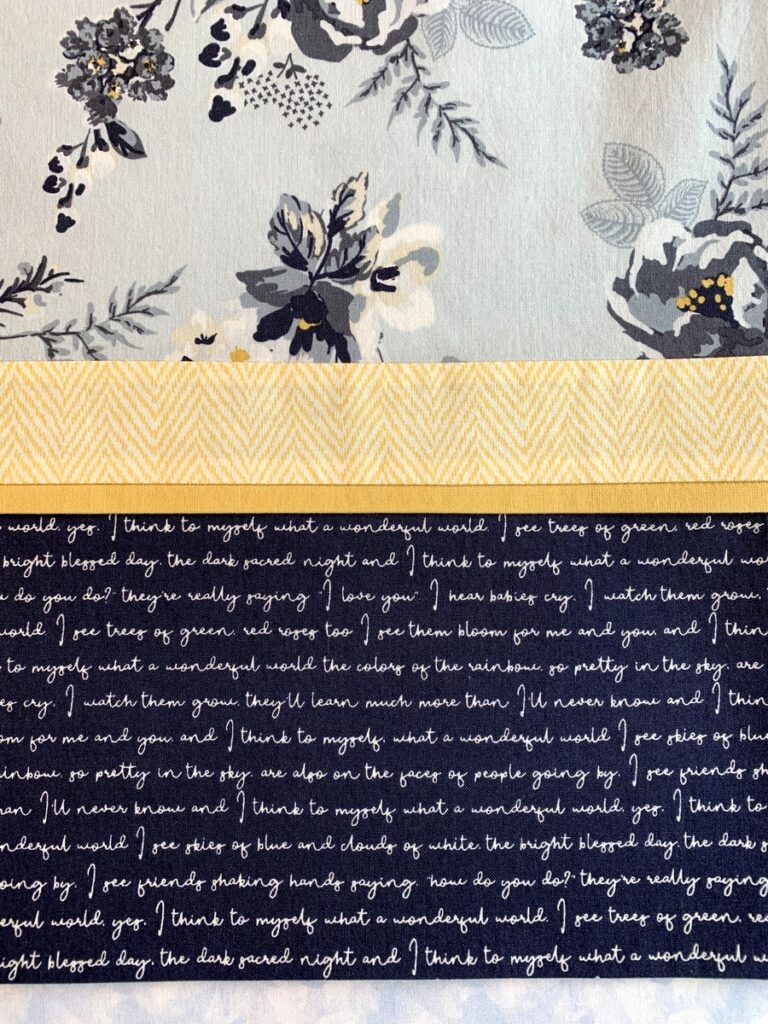
You may remember I used the same fabric last October in a pair of pillowcases made for the Portland White House. I just finished a second pair for my twin Diane, who arrives on Saturday for a two-week visit. Ordinarily she would be surprised by seeing them wrapped up with a ribbon in the guest bedroom but she reads my blog so as soon as she sees this post she’ll know they await.

I couldn’t resist fussycutting the text print on the band so that the refrain “I think to myself what a wonderful world” appears on the top and bottom lines of the band:

A bit obessive-compulsive? Umm, yes.

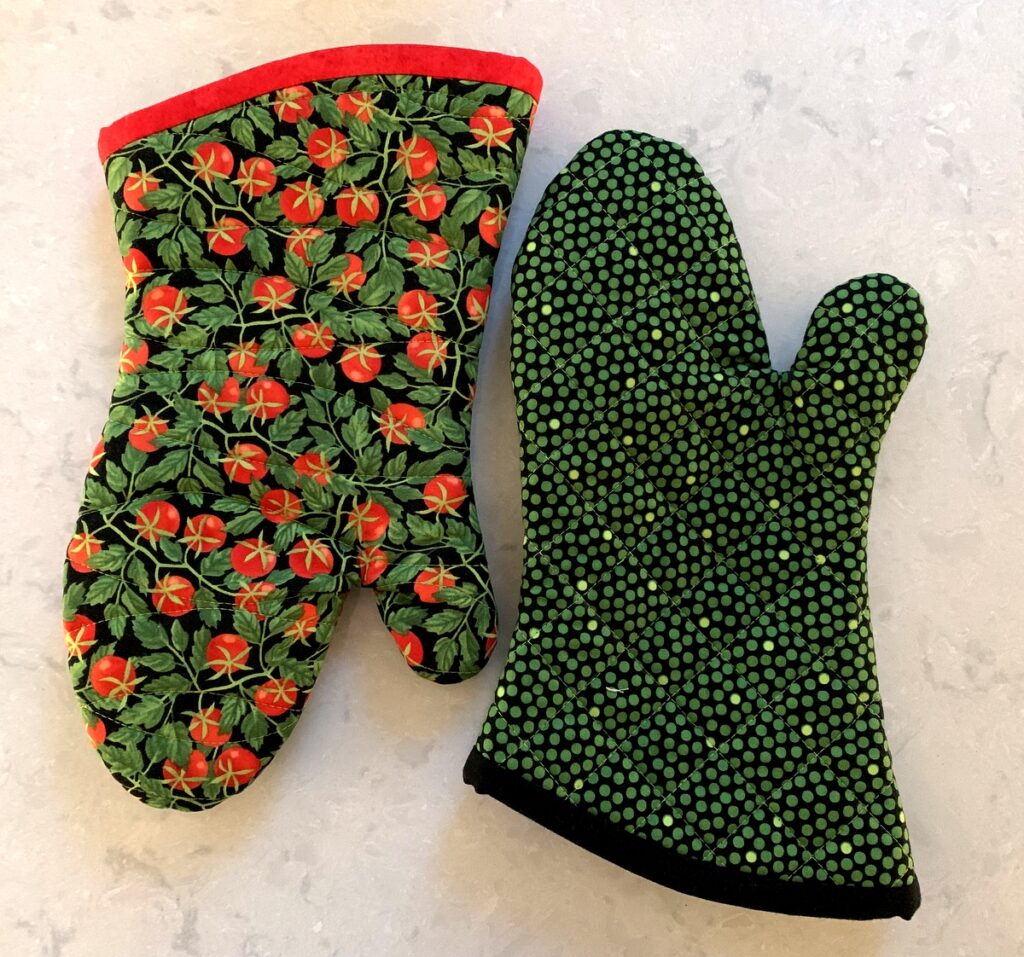
I also made myself a new oven mitt (from my own tutorial) but got two in the bargain:

I had cut out the fabric and batting weeks ago for the mitt on the right; the materials were stacked in my sewing room closet just waiting for me. I can’t remember why I got out the tub that my oven mitt supplies are stored in but when I did I was surprised to find there was a mitt inside that was almost finished! All I needed to do was tack the red band down and turn the mitt right side out. I adore that tomato print and thought I had used the last of it. Now I well and truly have.

So much for accessories. What about quilts? Well, I have two quilts I started last year that I really need to finish but I’m already dreaming about starting a new one. . .


Posted in Billie Bag, cats, family, home dec, Junior Billie Bag, oven mitts, pillowcases, roll-it-up pillowcases, rotary cutter case, sewing tool caddy, tote bags, tutorial, update | 4 Comments

It’s Summer Somewhere . . .

Happy New Year, friends! The weather forecast in Portland, Oregon calls for “frozen mix” on six of the next 10 days, with temperatures heading down to 15 degrees Fahrenheit. That is very unusual for Portland. The residents of the Portland White House, including Coco the cat, are hunkering down.

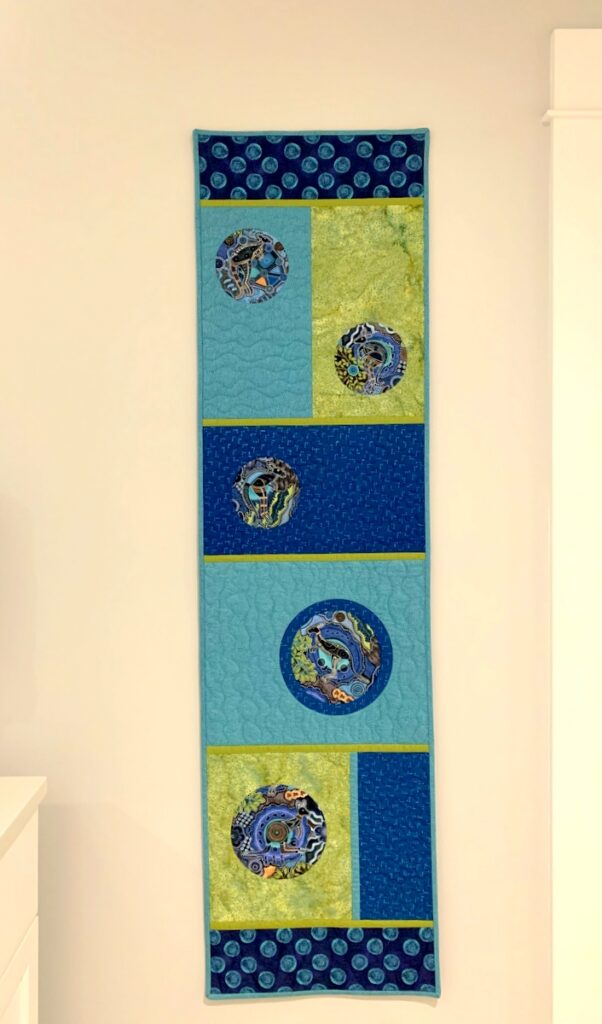
As we all know, “It’s five o’clock somewhere.” And it’s also summer somewhere — the Southern Hemisphere, to be precise. I’m trying to bring a bit of summer into our home during these dark winter days by hanging my quilt Hip Hop in the master bathroom:

Hip Hop is made of a delightful aboriginal focus fabric highlighting five playful kangaroos. I made this quilt in 2018 from my own pattern Full Moon Rising, which features inset circles. It measures 16″ x 59″ and works well as a wall hanging or table runner. Click here to see close-ups of a couple of blocks taken in better light.

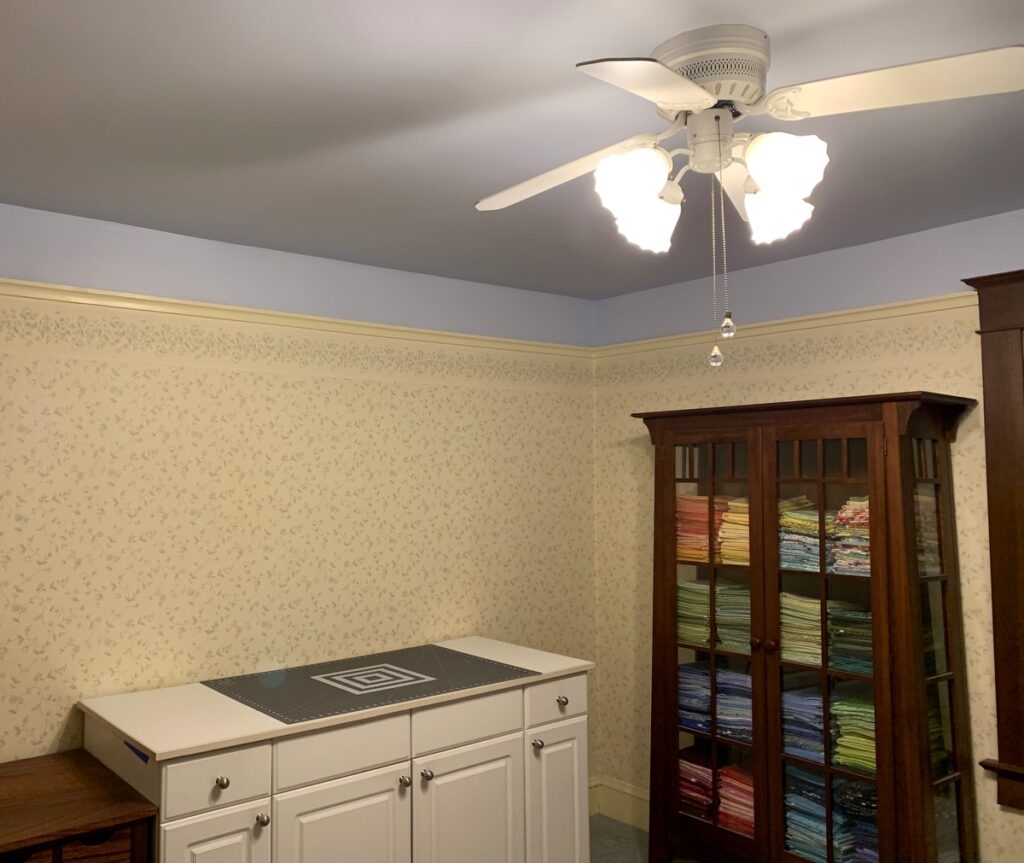
It’s hard to believe that we’re almost two weeks into the New Year and I’ve not sewn a single stitch. Sad but true! What I have done is edit the contents of my sewing room following the December wind and rainstorm that resulted, at great inconvenience, in a beautiful new ceiling:

Most of the contents of the room had to be moved out temporarily, and it gave me pause to consider how much stuff I had crammed into it over the years. What a great opportunity to downsize! Case in point:  I had more than a dozen vintage spooners and celery vases filled with buttons on top of my sewing cabinet. I replaced them with three bandboxes filled with sewing notions:

The bandboxes, covered with vintage wallpaper, were purchased years ago at an antique mall in Atlanta while visiting my sister. They used to be on the floor next to the cabinet. I guess you could say they have risen in stature, ha ha! The buttons (which, to be honest, gathered layers of dust in those spooners) are now housed in two very large jars in my sewing room closet.

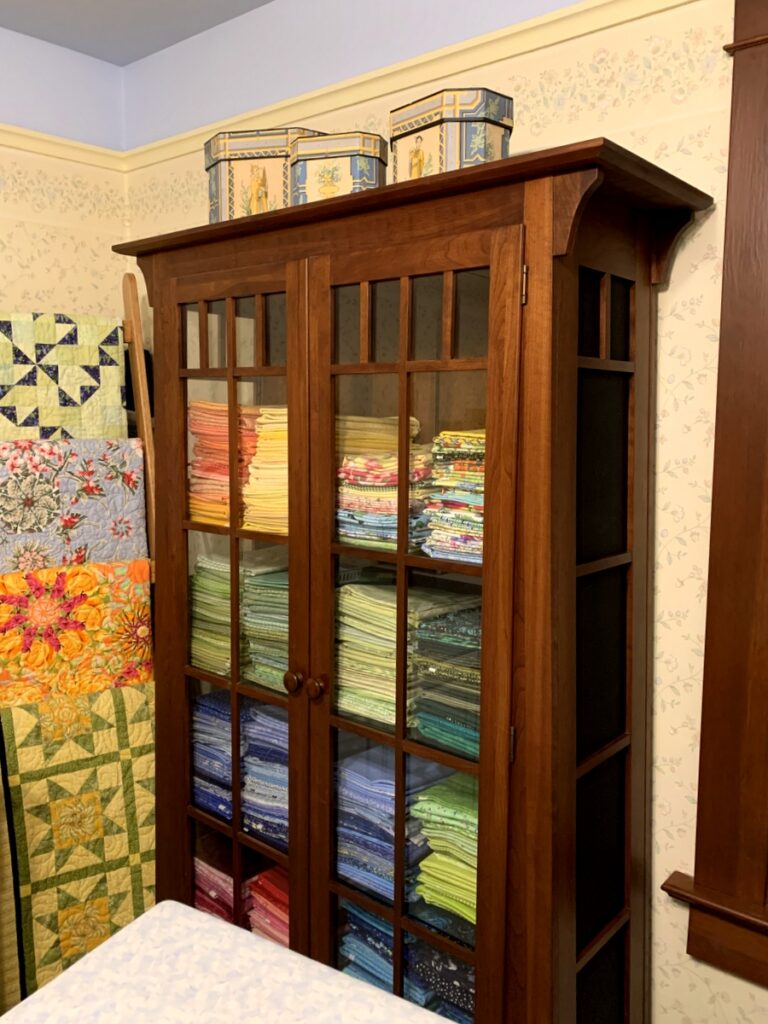
I have been going through the contents of the cabinet, pulling out fabrics I am no longer in love with and can happily donate. (Please don’t tell anyone this represents only a small portion of my stash.)

The other thing I did is cover the glass doors on the right side of the cabinet with blackout film to block the light coming in from the windows right next to them. This prevents the fabrics from developing fade lines from the light. Prior to that I had hung an old table runner over that side of the cabinet, anchoring it with those vintage spooners. It wasn’t a great look, and every time I took a photo for my blog that included the cabinet I would flip the table runner on top of the cabinet to get it out of the way. This is a much better solution.

I am really enjoying the cleaner look of my sewing room. Once everything is in its proper place, I may be inspired to give you a little tour of my precious sewing space. It won’t happen immediately, though. Now that the bathroom and sewing room ceilings have been repaired, the crew is tackling the damage to the walls and ceiling of the hallway. As Yogi Berra so eloquently put it, “It ain’t over till it’s over.”


Posted in cats, home dec, table runner, update | 5 Comments

Auntie Claus?

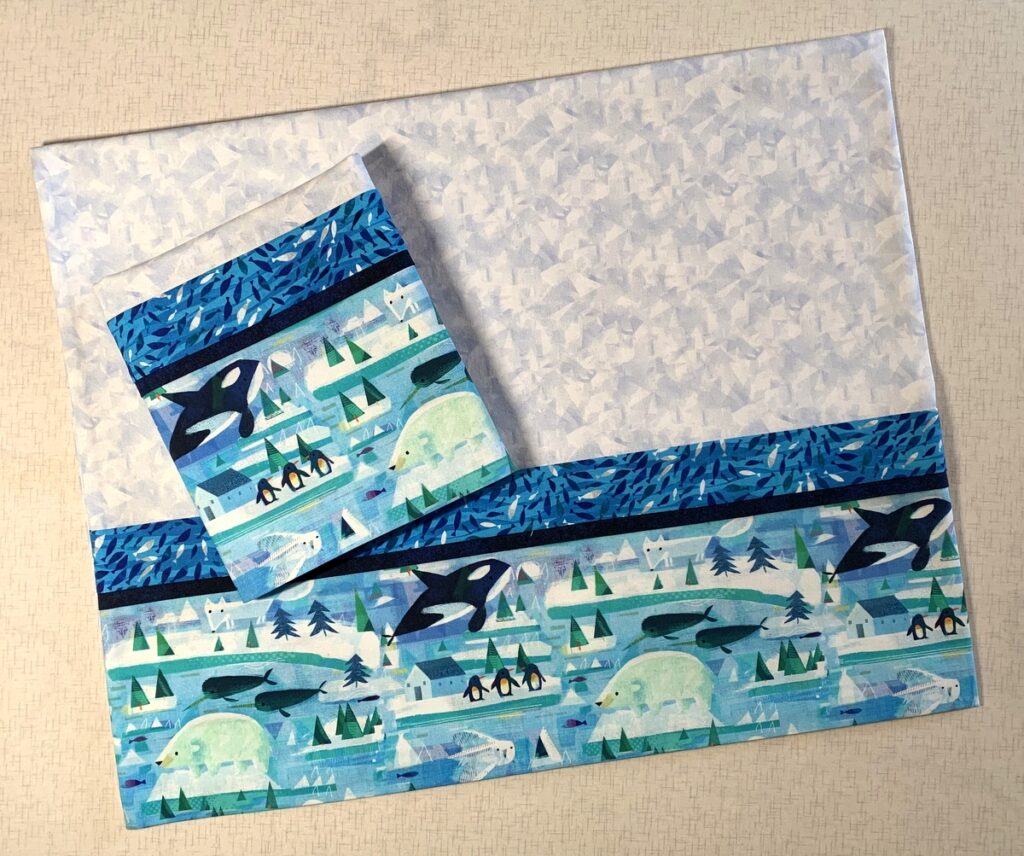
You’ve heard of Santa Claus, of course. But have you heard of Auntie Claus? That’s me! I made a pair of pillowcases this week as a surprise Christmas gift for my 20-something great-niece Megan:

Megan still has the pillowcases I made for her when she was a little girl. It was her mother’s clever idea to have these pillowcases be from “Auntie Claus.” Megan will be puzzled when she reads the tag but will know as soon as she opens the package that the pillowcases were made by her Auntie Dawn. These pillowcases are finished with French seams — no raw edges in sight. You can find the free tutorial for my roll-it-up or burrito-style pillowcases right here.

And don’t you just love the fabrics? They’re from the “Icy World” line by Gareth Lucas for Windham Fabrics. If you’re a regular reader, you’ve already seen these delightful folk art fabrics in a quilt I made a year ago called Arctic Stars as well as a simple ruffled valance I made just a few weeks ago for my stepmother’s guest bathroom. When I fall in love with a fabric line, it tends to make appearances in multiple projects.

It seems especially appropriate to be looking at Arctic scenes today as it happens to be the first day of winter and the shortest day of the year in the Northern Hemisphere. Each day after the Winter Solstice brings more daylight. Bring it on, I say!


Posted in family, home dec, pillowcases, roll-it-up pillowcases, tutorial, update, valance | 4 Comments

One of These Days . . .

. . . I’ll get back to the business of quiltmaking. For now I seem to be in an extended home dec phase. Between making valances for my stepmother’s home and continuing my construction of Junior Billie Bag #12 for the class I am teaching, the quilt blocks on my design wall have been unattended for weeks. I will get back to them. All in good time.

It was work on my current Junior Billie Bag that interrupted quilt progress. When I posted about the JBB, I included a link to the Gingham Foundry fabric line I was using. Little did I know the link would lead me down a rabbit hole! You see, Montavilla Sewing Center, where I teach the JBB class, carried part but not all of the Gingham Foundry line. When I included a link to the entire line, I spied a fabric I could not live without. (You know what I mean, right?)

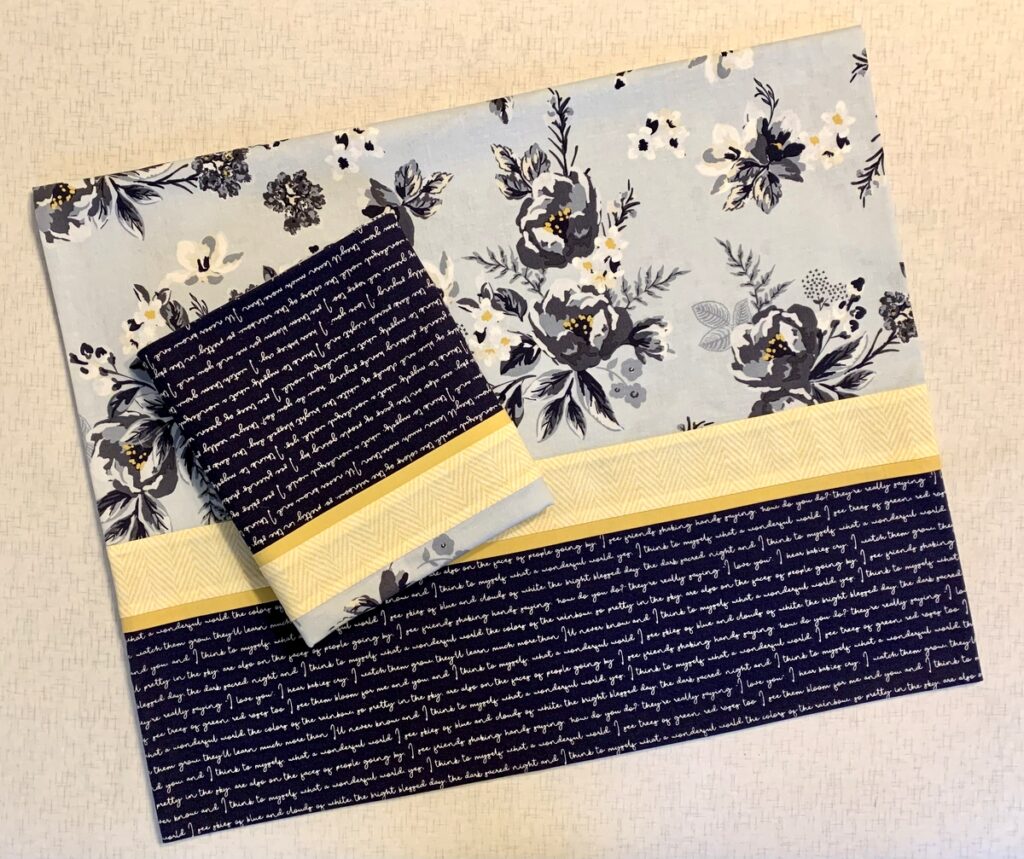
It was the main focus fabric in a background called “mist,” a pale blue gray. I knew in a heartbeat that I needed to get some of that fabric to make a pair of pillowcases for the Portland White House. Why? Because I could so clearly see the text print with lyrics to the song “What a Wonderful World” as the band at the bottom of the cases and the “mist” focus print as the body of the cases. Surely you agree!

Lucky for me, I found what I was looking for at an online quilt shop in Texas. The fabric arrived a few days ago, and this is what I have to show for it:

“What a Wonderful World” is one of my favorite songs. I am especially fond of the renditions by Louis Armstrong and Israel Kamakawiwo’ole but I also love the duet by Tony Bennett and k.d. lang. Is there another version I should know about?


Posted in Billie Bag, home dec, Junior Billie Bag, pillowcases, roll-it-up pillowcases, tutorial, update | 2 Comments

Whale Watching

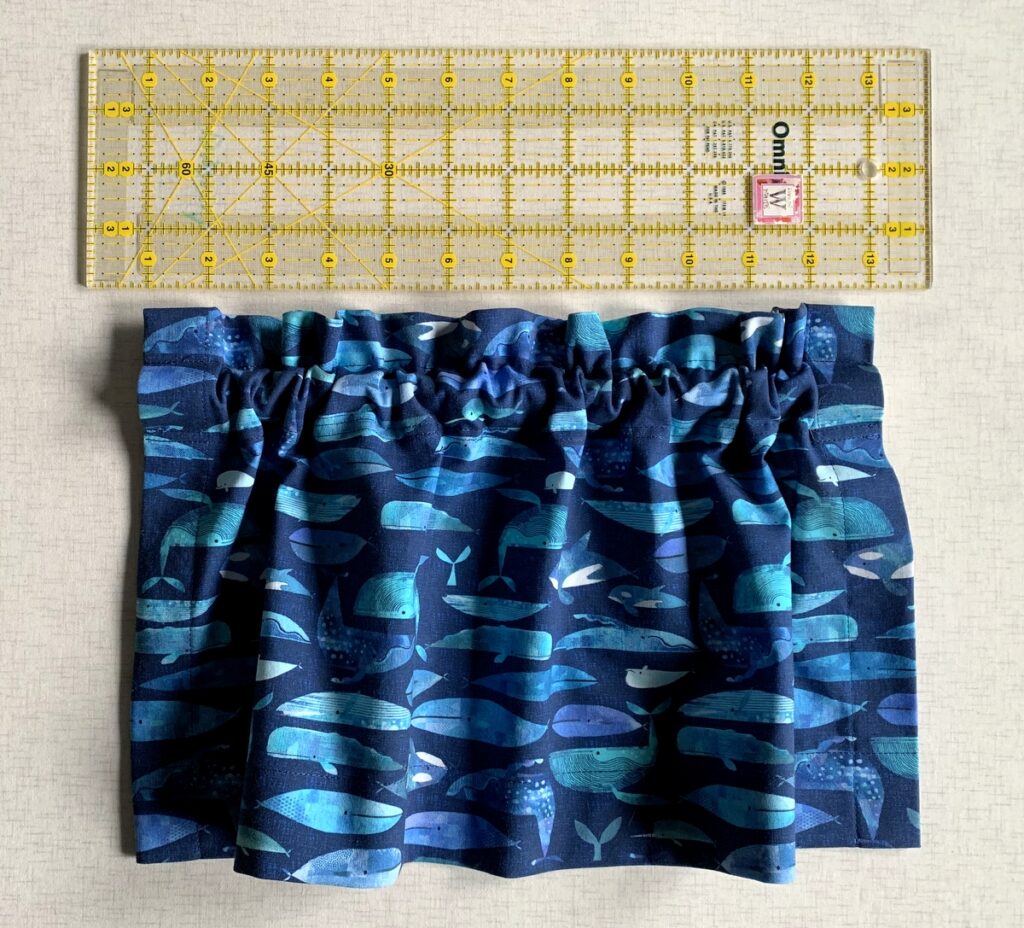
This might just be the world’s smallest valance! The window it’s made for — the guest bathroom in my stepmother Shirley’s home — is only 12¼” wide so the spring tension rod inside the valance is set for that width. The valance itself is 8¾” long.

I just mailed the valance off to Shirley in Bend, Oregon and will wait for her to send me a photo of how it looks before I make valances (out of a different fabric) for the two windows in her master bath. The fabric for this one is from the “Icy World” line designed by Gareth Lucas for Windham Fabrics.

Other fabrics from “Icy World” starred (literally!) in my Arctic Stars quilt finished last December. I’d not seen this particular print from the line until my sister Diane and I spotted it at the Quilt Basket on our trip to Bend in August and decided it would be perfect for Shirley’s guest bath.

We’ve gone quite a bit inland for whale watching!


Posted in family, home dec, update, vintage quilts | 2 Comments