Category Archives: Billie Bag

My Favorite Part . . .

. . . of making a Junior Billie Bag is that moment when the bag, until now a series of flat panels . . .

. . . becomes three-dimensional:

You are looking at the inside of my Junior Billie Bag, with the side panels/bottom unit pinned to one of the front/back panels. You may not be able to tell from the photo that there are 14 pockets showing. The other front/back panel (not shown) has five pockets.

Combined with the pockets on the outside of the bag . . .

. . . this JBB has 23 pockets. Now you know why I call it the “quintessential quilter’s tote!”

It’s a lot of fun playing with pocket design for the outside of the bag. For the pockets on the left side above, I trimmed them in the same striped fabric I’m going to use for the binding. (While I love the look of striped binding cut on the diagonal, I opted to cut my strips on the straight of grain for this one.)

For the pocket on the right side, I started with a four-patch kaleidoscope (what I call a Four-Patch Wonder block) and made a double inset circle.

I sure do like that vivid blue against black and white!


Posted in 4-Patch Wonder, Billie Bag, faux-kaleido quilts, Junior Billie Bag, tote bags, update | 3 Comments

Along for the Ride

When I confessed in my last post that I was tempted to drop everything and start a new project, my friend Vickie responded at once with these words: “Resistance is futile. Give into the temptation.” Thank you, Vickie! All it took was that bit of encouragement for me to abandon my current quilting projects — only temporarily, you understand. I spent a delightful few hours Sunday afternoon petting my stash of cheddar and indigo fabrics, playing with possible fabric combinations, and finally making a couple of blocks using Jenifer Gaston’s Churning Stars block design.

I already knew Jenifer’s block was a winner. I tested it a couple weeks ago for the Junior Billie Bag I’m working on and couldn’t wait to make some blocks for an actual quilt.

Most of the fabrics I’m working with are from the “Cheddar and Indigo” line by Penny Rose Studio, a division of Riley Blake Fabrics. It came out in 2015. Here’s the entire line:


I had eight of the fabrics: four of the cheddars but only two navies and only two background fabrics. How perfectly providential, then, to find a complete fat quarter bundle for sale last weekend on eBay! It was not a bargain but I snagged it anyway. With a full selection from the line plus a few fabrics pulled from other sources I’ll be able to make what I call a “controlled scrappy” quilt.

As you can see, the prints are very traditional but I’m throwing some modern prints into the mix. The first block I made contains a cheddar print from Victoria Findlay Wolfe’s “Futurum” line:

That navy and white print is vintage. There’s no selvage information and I don’t remember where I got it but I had to cut away fabric where the sun had faded it along the fold lines.

The cheddar in my second block is from the “Barcelona” line by Zen Chic for Moda:

The first block measures 12½” square, the second 18½” square. Here they are together:

Apparently I’m going to play around with different size blocks until I land on an overall design. I have no idea where this is taking me but I’m sure going to enjoy the journey!


Posted in Billie Bag, cheddar and indigo, Churning Stars quilt block, Junior Billie Bag, update | 10 Comments

It’s Beginning to Look a Lot Like . . .

. . . a Junior Billie Bag!


Yes indeed. I’ve been hard at work on the components of this quilter’s tote in preparation for teaching a workshop later this month. The front/back panels are quilted and trimmed and the two sets of handles have been made.

The design of the handles is very clever. You start with strips of different widths, resulting in the wider strip wrapping around to the underside to form a faux piping. In the photo below you can see both sides of the handles:

The dark stripe would ordinarily go on the outside but I’m loving that jolt of royal blue with the contrasting piping so much I’ve decided to put it on the outside. That’s how the straps are positioned in the first photo.

I did some stash diving to come up with fabrics for the various and sundry pockets that make this quilter’s tote such a delight to use. Here you can see a few of the pockets I’ve made for the inside of the bag:

Still to come: pockets for the outside. All told, this Junior Billie Bag will have over 20 pockets, all thoughtfully sized to hold a quilter’s favorite tools.

When I started working on this tote I thought I might give it away. Now I don’t think I can bear to part with it!


Posted in Billie Bag, Junior Billie Bag, tote bags, update | 6 Comments

A Bee in my Bonnet

Last night I got the proverbial bee in my bonnet and made this 12½” quilt block:

I’ve been wanting to make a test block since spotting Jenifer Gaston’s Churning Stars quilt in her book Primitive Style: Folk-Art Quilts and Other Finery (Martingale Press, 2015):

I’ve always liked the classic Churn Dash block and I love seeing it in the center of a Sawtooth Star block. I could see making an entire quilt using Jenifer Gaston’s charming design. In fact, I have a collection of indigo and cheddar prints that would be perfect for such a quilt.

For now, though, I am sticking with one block because it’s destined to be one of the front/back panels on my next quilter’s tote, namely the Junior Billie Bag.

See how well the new block goes with the star block I made the other day?

Not content to stop after making the block, I added the sashing strips that will make both blocks the correct size for the front/back panels of the Junior Billie Bag:

It’s going to be striking, isn’t it?!


Posted in Billie Bag, Churning Stars quilt block, Junior Billie Bag, tote bags, update | 6 Comments

A Slight Miscalculation. . .

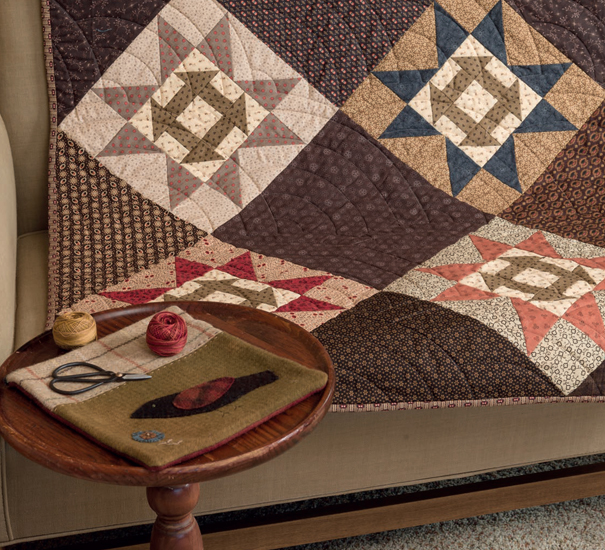
Have you ever made a block that didn’t turn out quite like you expected? Perhaps you were surprised by one of the elements but kept on making the block, not realizing you had made an error. That’s what happened to me a few days ago when I made a test block of Star Drops, designed by Margot Languedoc of the Pattern Basket.

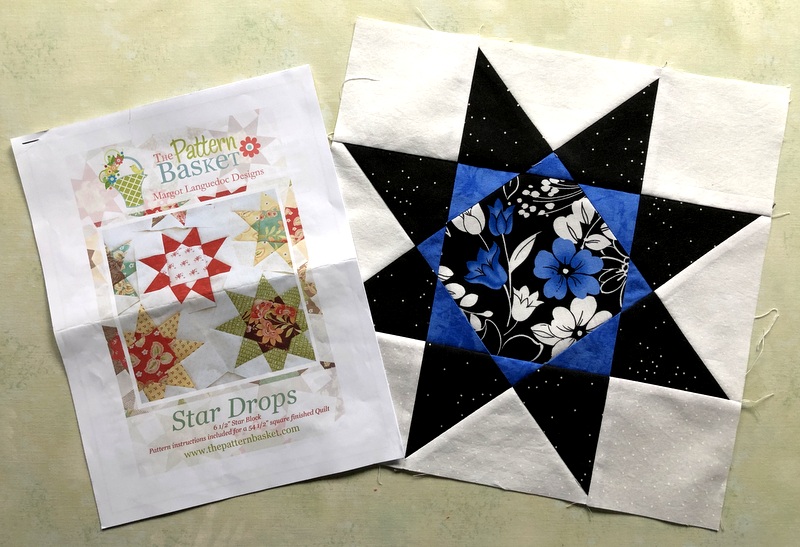
Before I bought the pattern I had studied the design, guessing (correctly) that the outer star points were made from hourglass units that were trimmed on one long side. When I made my test block I resized it from 6″ to 12″ finished, adding an additional design element at the last minute. I wrote about that in my last post.

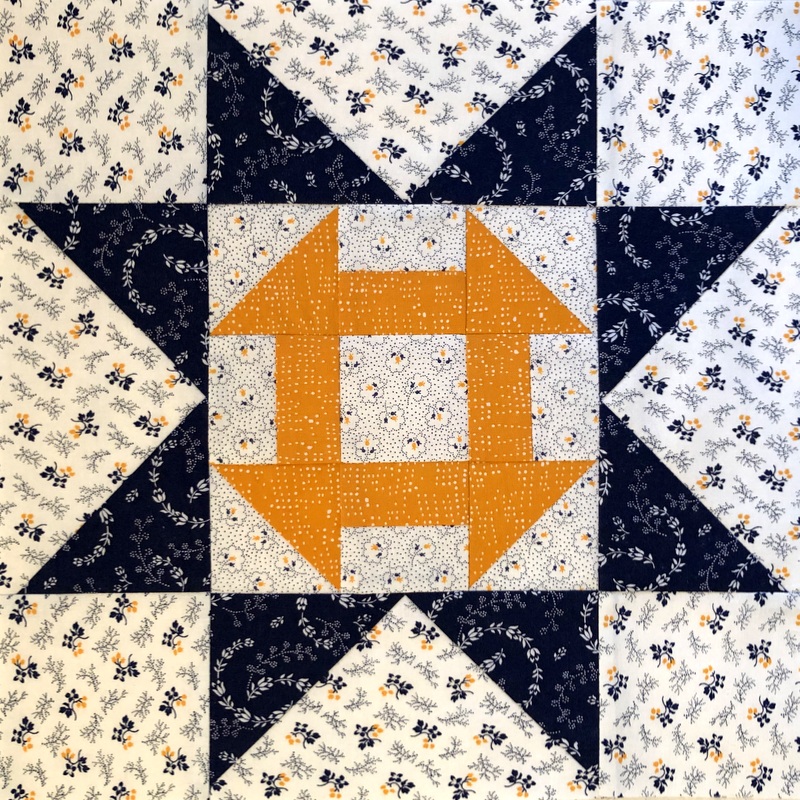
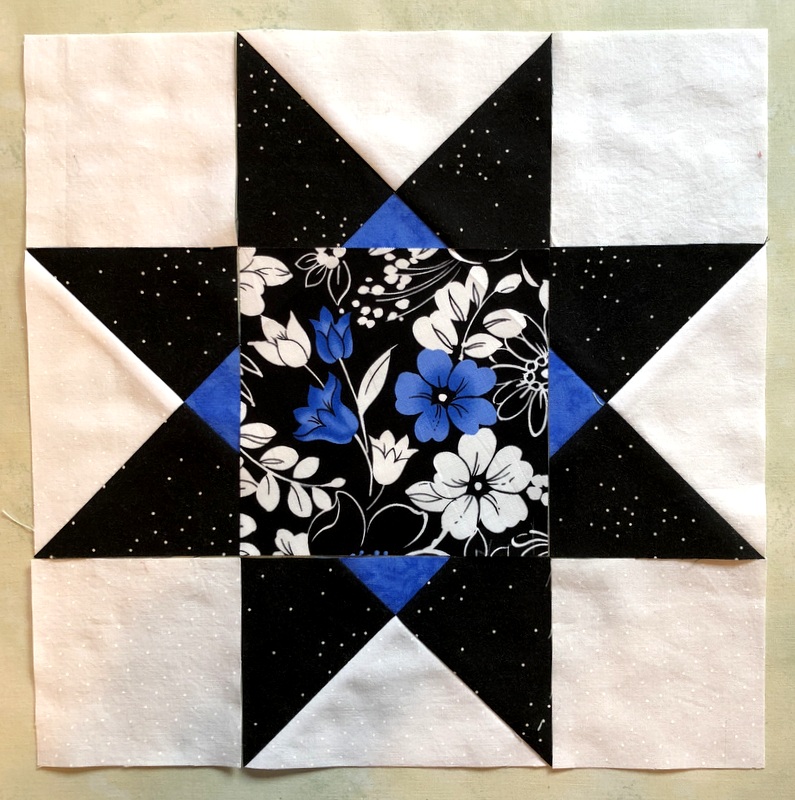
When I trimmed the hourglass units using the calculations I had made for a block that was double in size, I was surprised that the small triangle in the center wasn’t larger. And when I converted the center square into a snowball block by adding a triangle at each corner, I was surprised that the triangles were larger than the ones in the hourglass blocks. I concluded it was because the center square is larger than the other blocks.

I was wrong.

I had cut a quarter-inch too much off the hourglass units. That’s why the blue triangles were smaller than I expected. Oops! And then I cut the four corner squares a quarter of an inch too small. Oops again. My block was supposed to measure 12½” unfinished but it’s a half-inch shy of that.

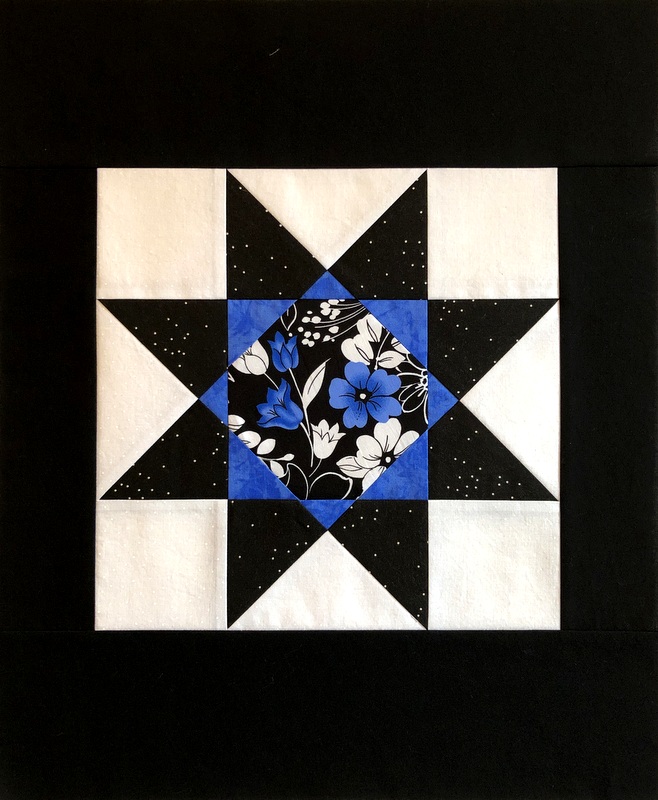
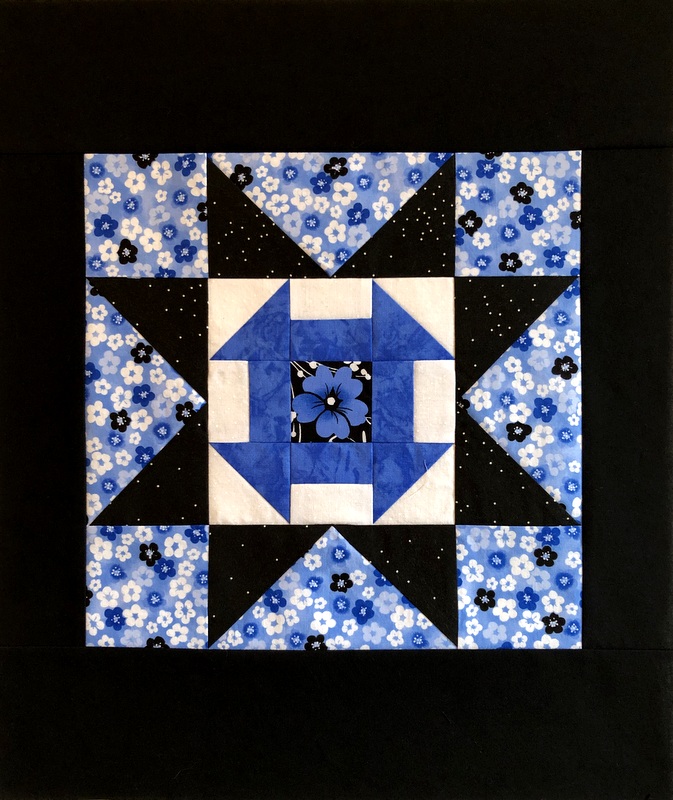
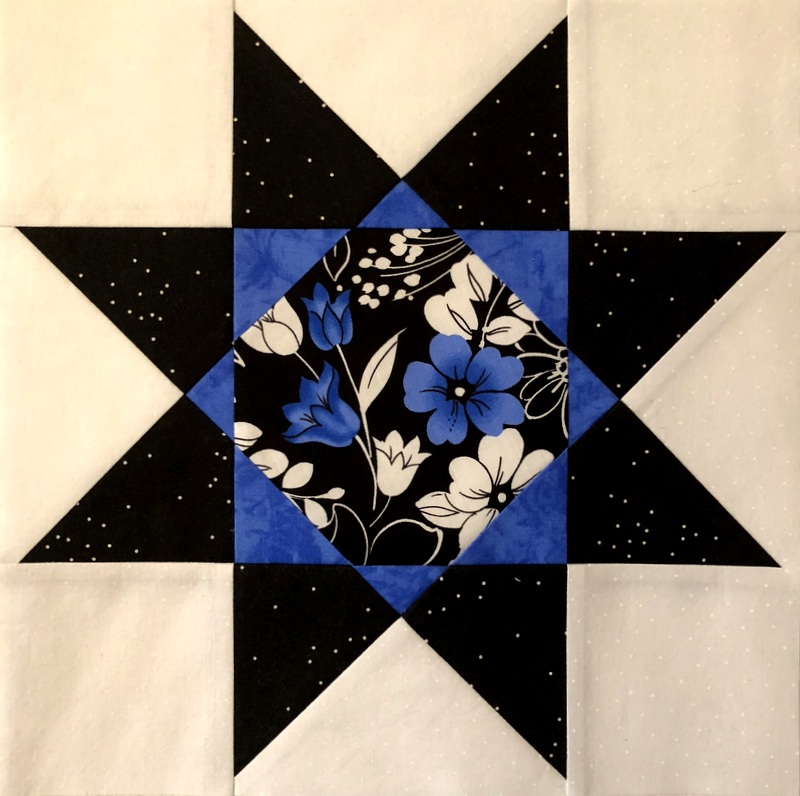
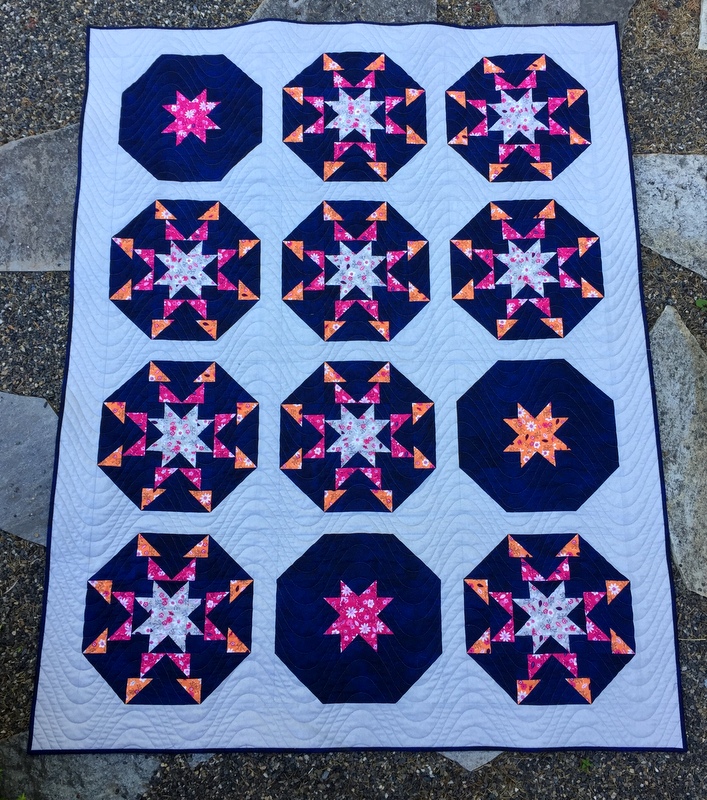
To illustrate the difference, I drew the blocks in the software program EQ7:

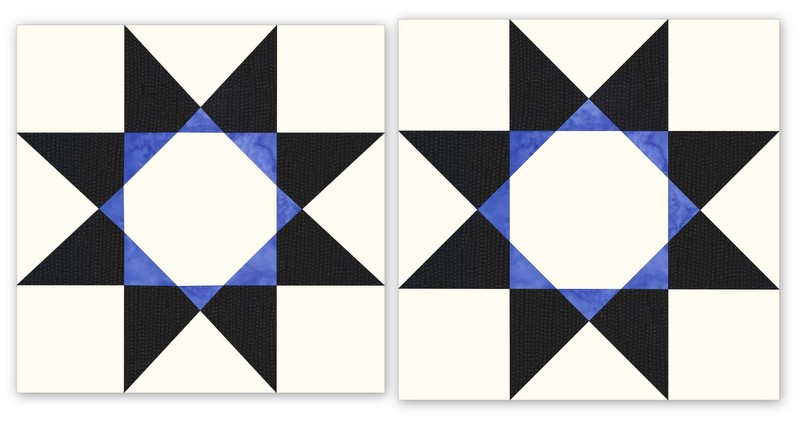
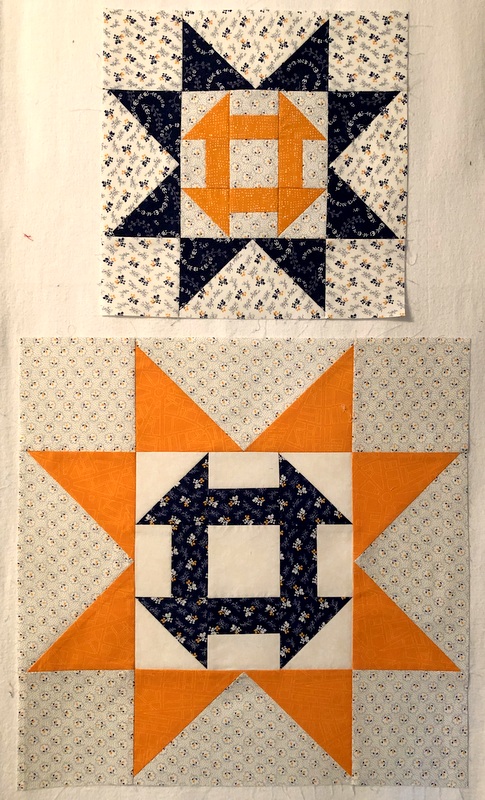
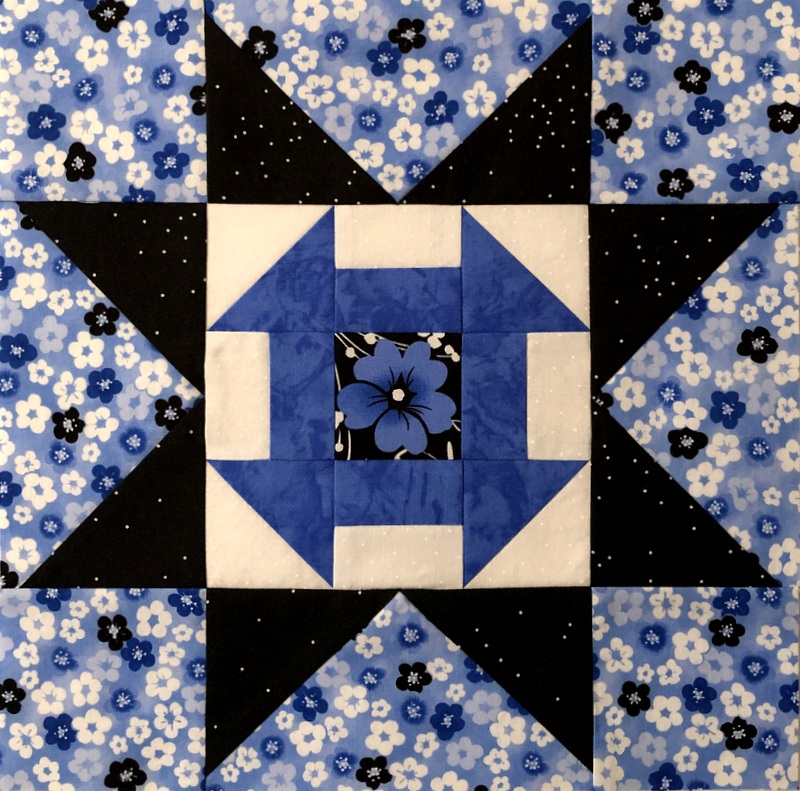
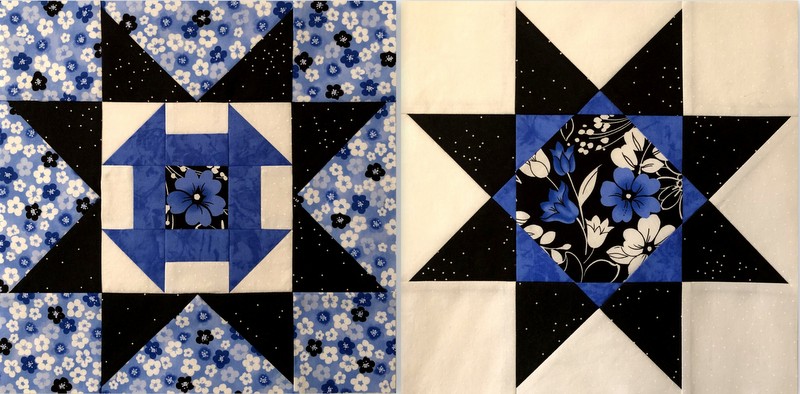
The one on the left is a mock-up of the block I made. You can see that four of the triangles are larger than the other four. This block measures 12″ unfinished, 11½” finished.

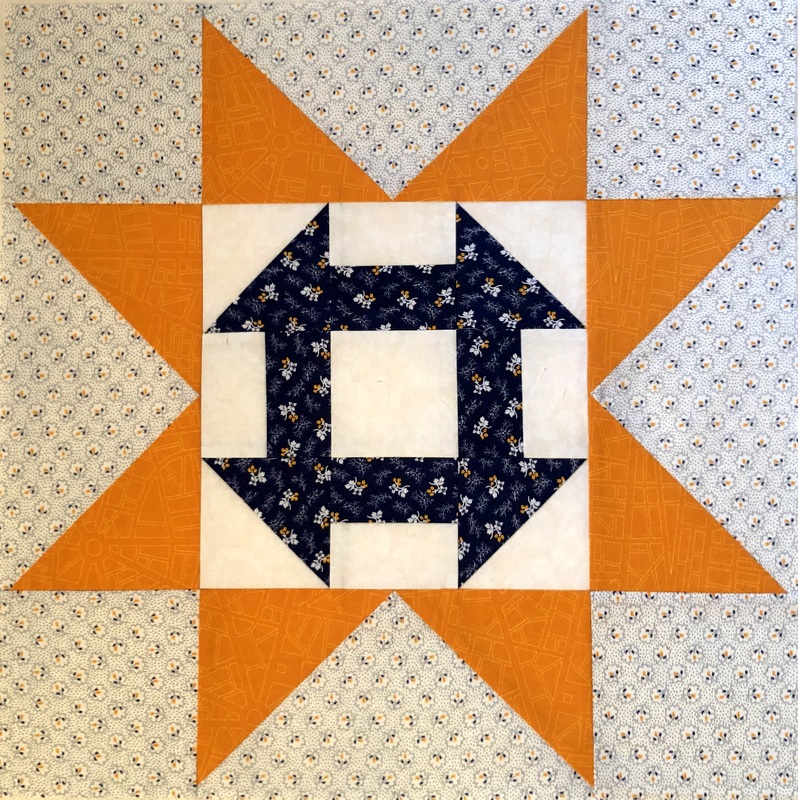
The block on the right is a mock-up of what my block would have looked like had I trimmed the hourglass blocks properly and made the corner squares the correct size. It measures 12½” unfinished, 12″ finished. (I’m sure this star block has been made many times before and has a name but I haven’t actively searched for it yet. If you happen to know, kindly leave a comment.)

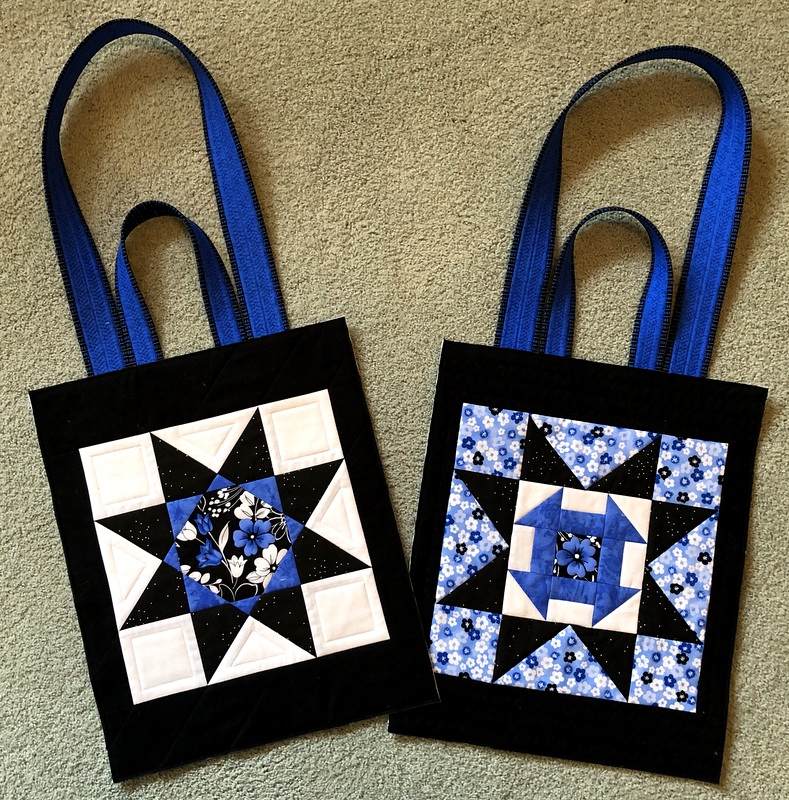
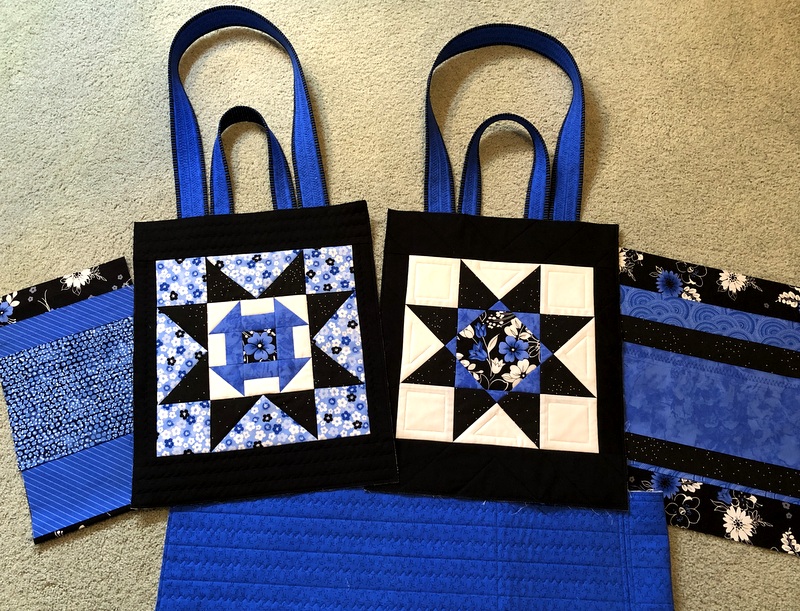
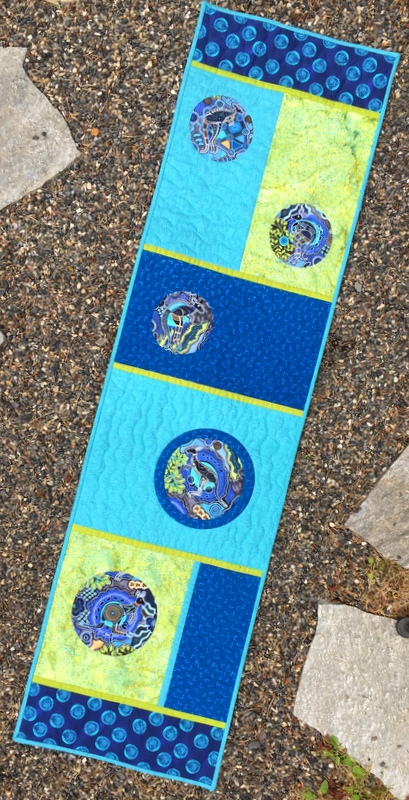
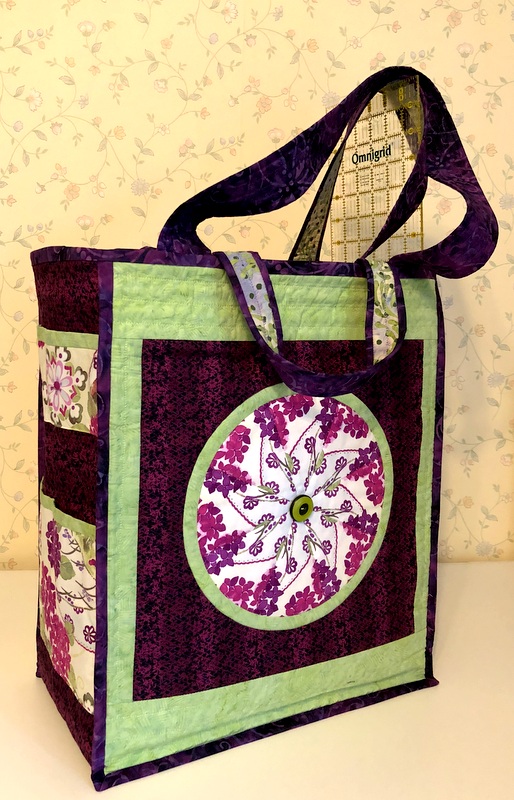
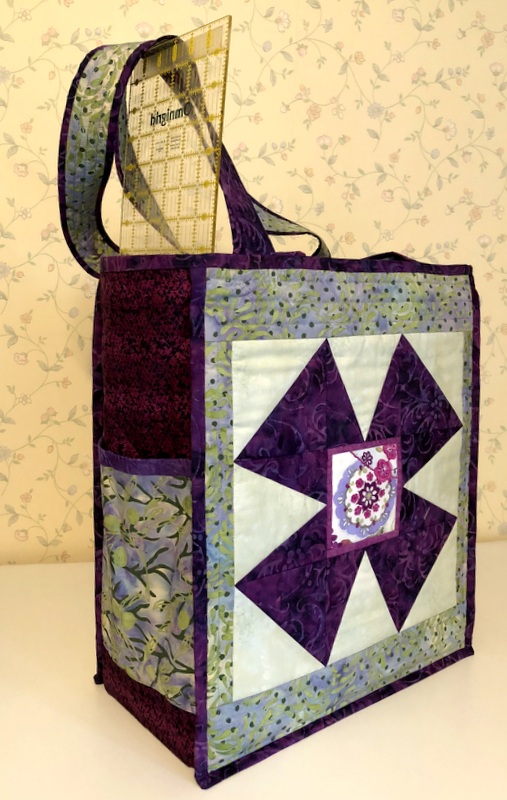
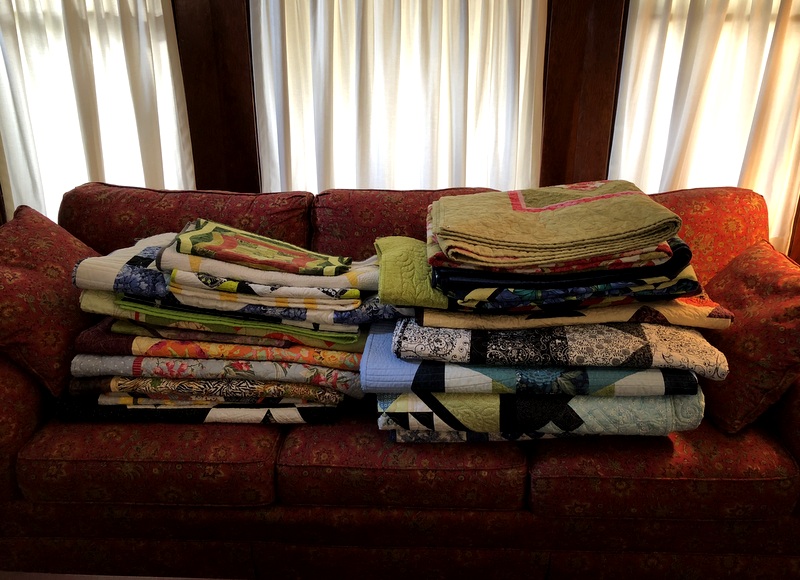
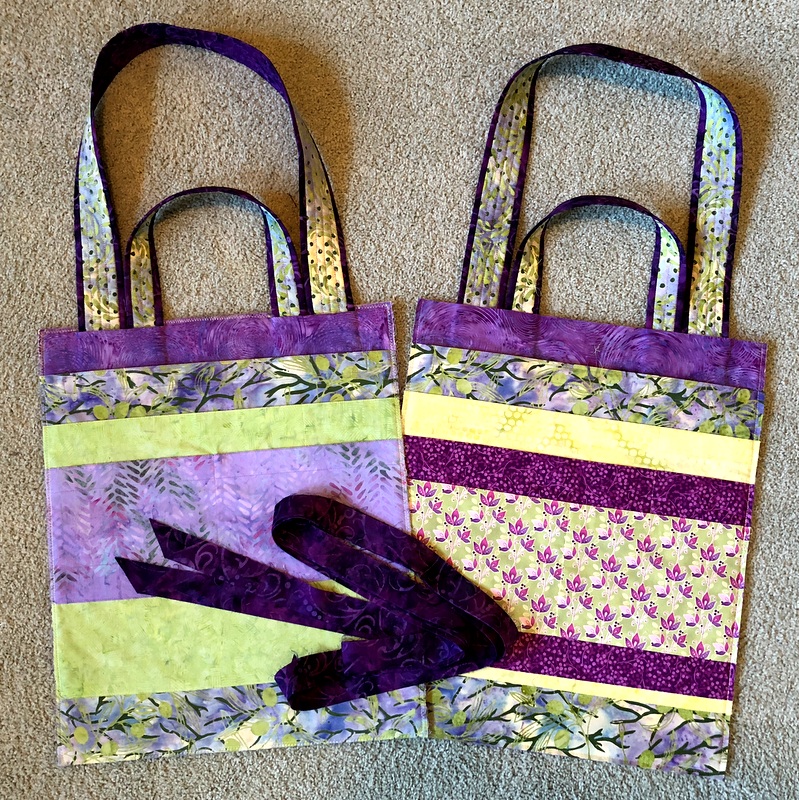
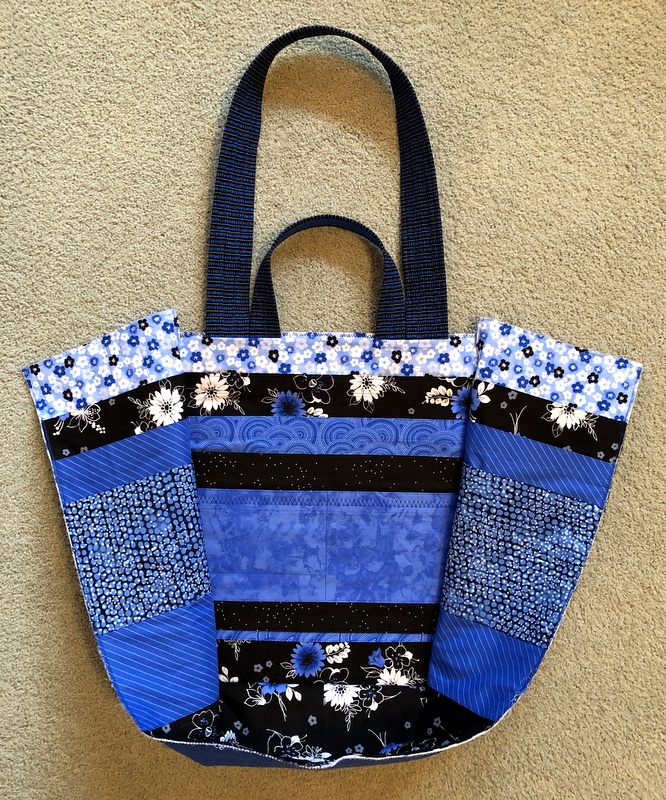
What to do about my oddly sized block? Well, if it were destined for a quilt of 12″ finished blocks, I’d have a real problem. Happily, I am planning to incorporate this block into a Junior Billie Bag panel that finishes at 14″ x 17″ so I’ll simply cut the sashing strips a bit wider to compensate.

So my block is actually a mistake. But you know what? I love it anyway!
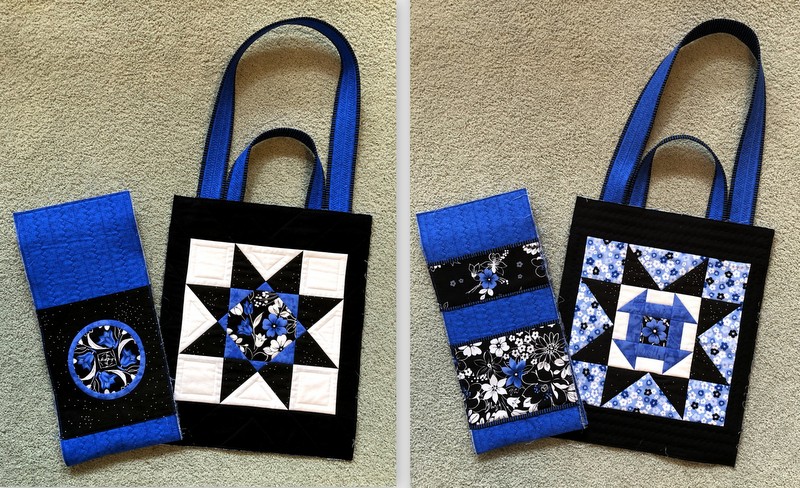
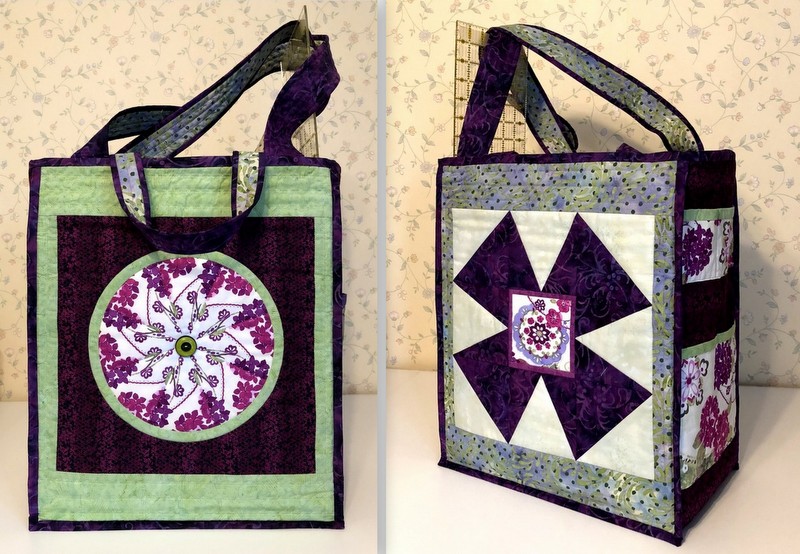
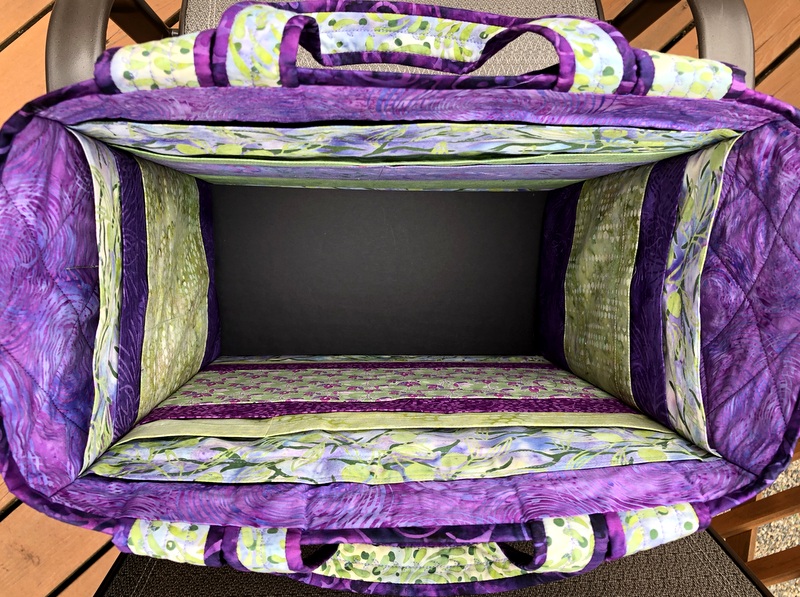
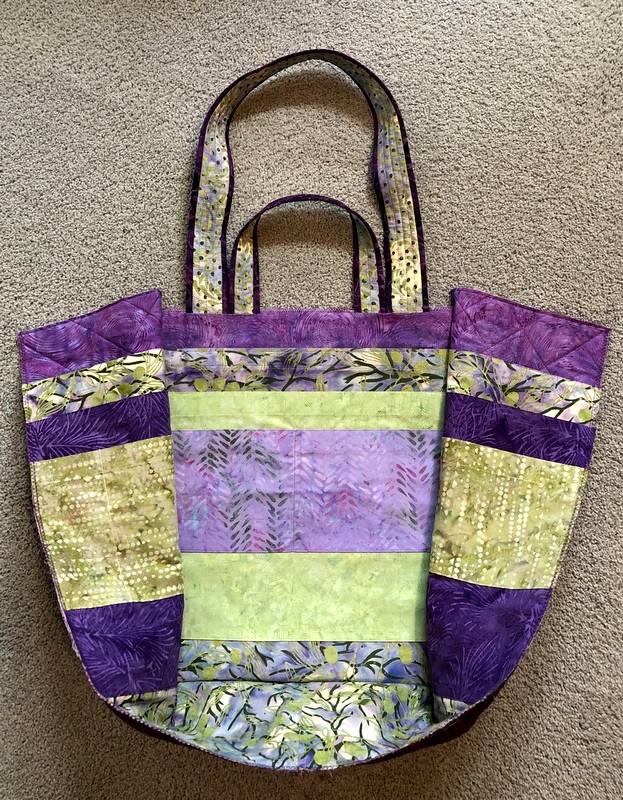


Posted in Billie Bag, Junior Billie Bag, snowball blocks, stitch-and-flip corners, update | 6 Comments

The Perfect Excuse

I’m teaching a Junior Billie Bag workshop next month so I had the perfect excuse to make a 12″ test block for one of the front/back panels. I’ve been wanting to try Margot Languedoc’s Star Drops pattern since first seeing her charming design on Instagram last year. She has several patterns I want to make, all of which are pictured on her website, the Pattern Basket.

I bought the pattern and studied the construction. Her block finishes at 6″ so I resized it to finish at 12″. Here are the components of my block ready to sew together:


Just as I was getting ready to pin the rows, a thought occurred to me. What would the block look like with eight blue points instead of four? I made a snowball block from the center square using the stitch-and-flip method and wound up with this:


I have double Star Drops! The blue triangles are larger around the center square because the center block is larger than all the other blocks.

As good as the block looks as a square, look at it on point:

Is that not sensational??

It appears my next Junior Billie Bag will be black and blue and white. The floral print in the center of the block is one of several pieces I bought last April in a fit of fabric lust and wrote about here. I think I will make a kaleidoscope block out of that floral for the other front/back panel of my Junior Billie Bag.


Posted in Billie Bag, Junior Billie Bag, snowball blocks, stitch-and-flip corners, update | 6 Comments

Looking Back on 2018

Cheryl at Meadow Mist Designs is hosting a Best of 2018 Linky Party, inviting bloggers to highlight their top five posts of last year. It’s a fun way to look back over the past 12 months and identify some of the high points.

Finished projects are always high points for me so that’s where I’m taking you now, showing you five projects in random order. Clicking on the links below will take you to the original posts where you can read more about the finishes and see more photos.

Number 1. Quilt Finish: Checkerboard Curves

This 44″ square quilt was made from the pattern Dancing Churndash by Jenny Pedigo and Helen Robinson of sewkindofwonderful.com. I’ve made several quilts using their Quick Curve Ruler; this is one of my favorites.

Number 2. Quilt Finish: Hip Hop

A lively print featuring kangaroos was the inspiration for this wall hanging made using my pattern Full Moon Rising. Finished size: 16″ x 59″.

Number 3. Quilt Finish: Bluebirds for Bethany

Scraps from another quilt went into this lap quilt for granddaughter Bethany featuring Karin Hellaby’s method of making pineapple blocks. The quilt measures 57″ x 58″.

Number 4. Project Finish: Junior Billie Bag #8

The essential quilter’s tote, designed by Billie Mahorney. It’s 14″ wide, 17″ tall, and 7½” deep. I’ve been teaching Billie’s design for three years now and make a bag every time I teach a class. This one is a gift for a dear friend.

Number 5. Quilt Finish: Spokesong

I became quite enamored with Corey Yoder’s pattern Idyllic and taught it at a quilt retreat last year. This quilt was my class sample. It’s a lively design so I simplified three blocks to give the eye a place to rest. The quilt measures 53½” x 67″.

Joining the Best of 2018 Linky Party has been a useful exercise in reviewing my quilting accomplishments over the last year. I’m also inspired by looking at the work of other  quilters who blog. Take a few minutes right now and join the party! Clicking on the link will transport you right there.


Posted in Billie Bag, free motion quilting, home dec, Idyllic, pineapple quilt block, Quick Curve Ruler, quilt retreat, update, wall hanging | 2 Comments

Junior Billie Bag #8

I finished this quilter’s tote, the one and only Junior Billie Bag, last month and plum forgot to post pictures. Better late than never!

The bag, a scaled down version of the original tote designed by Billie Mahorney, measures 14″ across, 17″ high, and 7½” deep. You’ll notice the bag is wide enough for a 6½” x 24″ ruler. That’s my favorite feature of Billie’s wonderful design because it’s an awkward size ruler to carry around.

Here’s a look from the other side:


Every time I make a Junior Billie Bag (or JBB, as I like to call it) I have a lot of fun picking out fabrics and deciding what 12″ blocks to incorporate on the front and back panels. The inset circle shown in the first photo is a favorite design; this one was made from an octagonal kaleidoscope block. A more recent favorite is the windmill block shown above. I fussycut the bloom in the center into a square and added a ¼” strip around it.

Take a peek inside the bag, where you can see layers of pockets on all four sides:


Flat items like file folders, books, and patterns fit nicely in the larger pockets, and the smaller pockets hold a plethora of smaller items. There are outside pockets, too. All told, this Junior Billie Bag has somewhere around two dozen pockets. Anything too big too fit into a pocket can go in the center of the bag.

This JBB bag is currently hanging as a class sample in Montavilla Sewing Center‘s Lake Oswego store. In February and March I will teach a three-part workshop so experienced quilters can make their own versions. (Incidentally, in January I will teach a class called “Going in Circles” that highlights the no-pin freezer paper method of making inset circles, a variation of Dale Fleming’s method. More on both classes here.)

After the class is over I’ll have the pleasure of giving the JBB to a very dear friend.

This JBB is the eighth one I have made. If you’d like to see the first seven bags, you’ll find them here.


Posted in Billie Bag, Junior Billie Bag, update | 6 Comments

A Busy Week . . .

. . . is coming up and I couldn’t be happier about it.

In just a few minutes I’m leaving for Quilt Camp — four days and three nights with a group of terrific women I’ve had the pleasure of “camping out” with for several years. In the past few years we’ve gone to Camp Tilikum in Newberg, Oregon, just about an hour away from home. It’s a popular spot for quilt retreats.

I’m packed and ready to go:

Project boxes and fabric tub? Check. Sewing machine and wraparound table? Check. Suitcase? Check. Billie Bag? Check. Big board? Check.

Camp ends at 4:00 pm Wednesday but I’m heading back early, picking up the Dear Husband and heading to the Oregon coast where I’m doing a trunk show and lecture for a quilt guild on Thursday and teaching Part 2 of my Junior Billie Bag workshop on Friday. The DH and I are staying an extra day for a mini-vacation.

The quilts I’m taking for the trunk show are stacked on the couch, ready to be packed into bags when I get back:


I can’t wait to see the progress my students have made on their Junior Billie Bags in the couple of weeks since the first workshop. Speaking of which, I couldn’t resist seeing what my current one is going to look like when it’s sewn together. I’ll be demonstrating this step at the second workshop so for now I simply pinned the side/bottom panel unit to one of the front/back panels:

One of the fabrics I chose for pockets on the side panels is a batik with directional bubbles. Just for fun I made the bubbles horizontal on one side and vertical on the other.  They may not be easy to see once the bag is all put together but I like knowing they are there.

No more work on this till after Quilt Camp. I’ll be working on Hazel’s Diary Quilt. Here’s hoping I make a lot of progress on it!


Posted in Billie Bag, family, Hazel's Diary Quilt, Junior Billie Bag, quilt retreat, tote bags, update | 2 Comments

Mixing It Up

When I pulled fabrics a few weeks ago for my current Junior Billie Bag, these were my picks:

You can see at a glance this is a combination of batiks and regular woven cottons. Some quilters work exclusively with one or the other but I really like to mix ’em up.

You’ve already seen the front and back panels of my JBB in progress:

Now here’s a look at the pockets on the inside of the front and back panels:


I also have the side panels/bottom unit done (not pictured) and my binding made. This bag is ready to become three-dimensional! That happens next week, when I demonstrate how it’s done for a marvelous group of students from the Oregon Coastal Quilting Guild.

When this bag is finished it will go on display at Montavilla Sewing Center in Lake Oswego. Why? Because I’m teaching a Junior Billie Bag workshop there in February and March of next year. When the class is over the JBB goes home with a dear friend of mine who loves the color purple.


Posted in Billie Bag, Junior Billie Bag, kaleidoscope quilts, tote bags, update | 8 Comments