Category Archives: tutorial

Tutorial: Folded Flap Hot Pads from First Light Designs
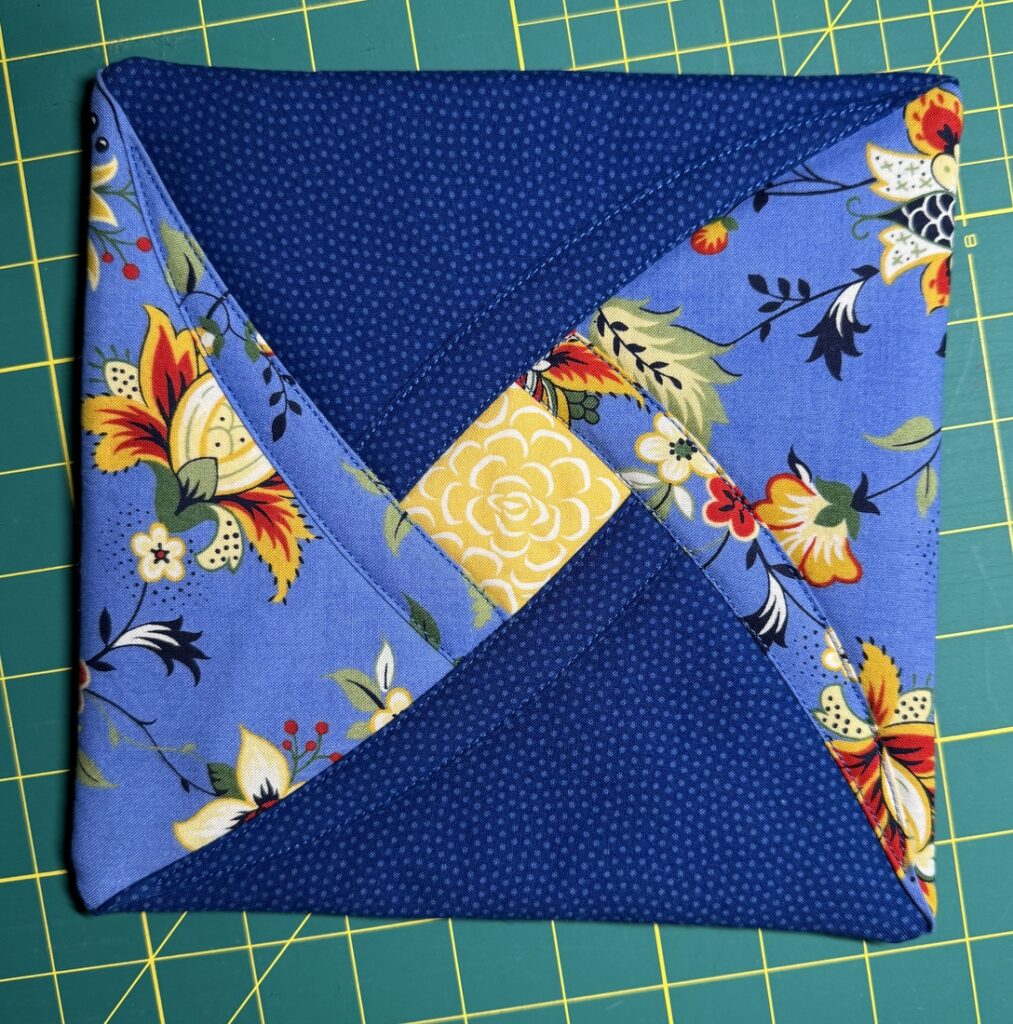
Here’s an easy and fun tutorial to get your New Year off to a crafty start.

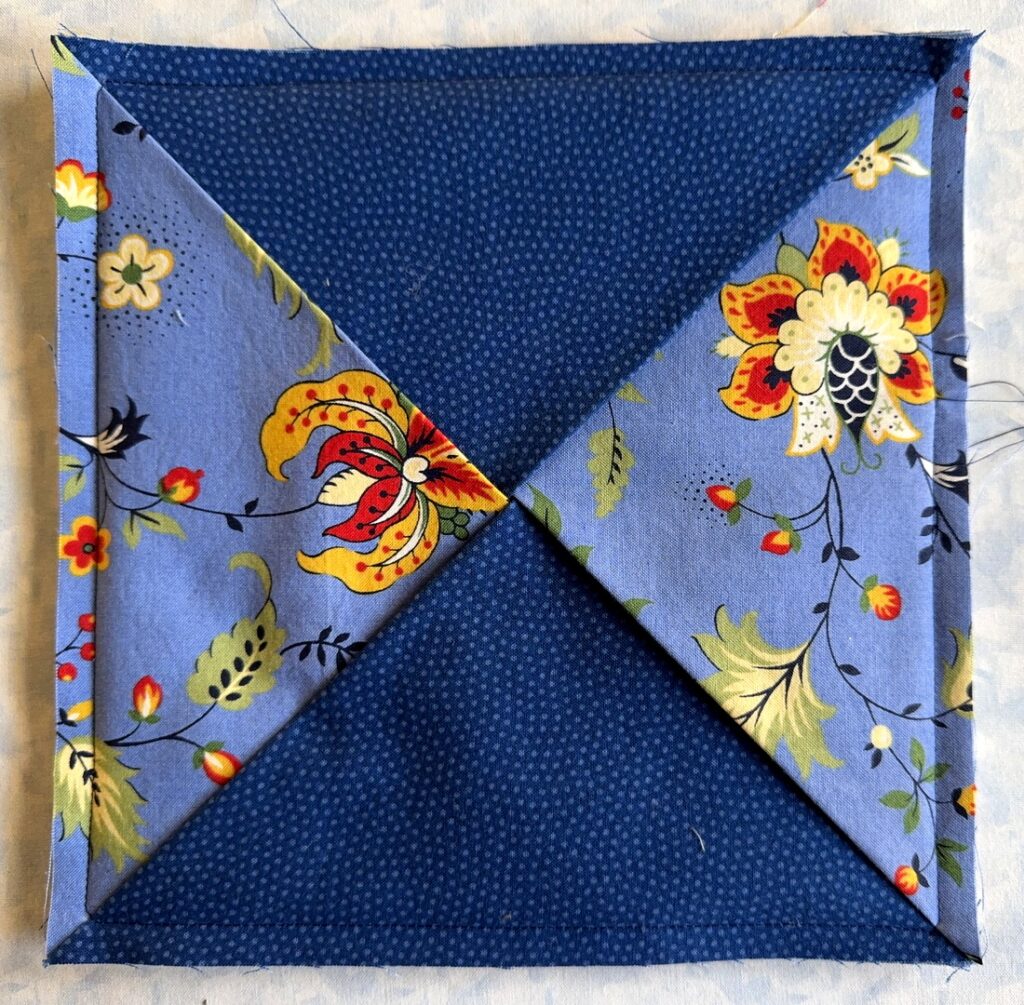
With six squares of fabric plus one square of insulated heat-resistant batting, you can quickly assemble and sew a sturdy and stylish hot pad. You probably wouldn’t guess from looking that the design is created with four folded triangles, each of which creates a flap that is folded back to reveal a contrasting fabric diamond in the center.

My tutorial results in hot pads that finish about 8″ square but you can make them larger or smaller. See my “Notes” at the bottom of the tutorial.

These hot pads make great gifts — but don’t you want to make a couple first for your own kitchen?

Supplies
Sewing machine with walking foot, open-toed if possible
Standard sewing supplies (scissors, thread, seam ripper, etc.)
New needle — 90/14 sharp or jeans needle, as you will be sewing through multiple layers
Rotary cutting equipment – mat, cutter, rulers (4” x 14” comes in handy)
Wonder Clips (small size)
Gently pointed instrument, such as a bone folder, to poke out corners

Fabric
For one hot pad you’ll need six 9″ squares of 100% cotton fabric: one for the “diamond” fabric in the center of the hot pad, four for the triangles (made from folded squares) that go around the center diamond, and one for the back.

You’ll also need one 9-inch square of Insul-bright*, an insulated heat-resistant batting.

(*Insul-bright is made of polyester fibers needled through a reflective metalized polyester film. According to the Warm Company, maker of Insul-bright, the fibers “resist conduction while the reflective metalized polyester film reflects radiant energy, hot and cold, back to its source.” You could use two squares of 100% cotton batting as an alternative to Insul-bright but they wouldn’t have the reflective property.)

Choose at least three fabrics that go well together and offer good contrast. The fabric for the center diamond should be fairly bold, as you don’t see much of it. The fabric for the back can be any of the three that show on top or a completely different fabric. Because these hot pads are meant to be used, I advise steering clear of light-colored fabrics. Choose fabrics that are medium to medium-dark in value. Just being practical!

This design is fat-quarter friendly. One fat quarter yields four 9” squares. A regular or long quarter (9” x width of fabric, usually about 42”) also yields four 9” squares.  A fat quarter of three different fabrics yields enough 9” squares for two Folded Flap Hot Pads.

Cutting and pressing the fabric
Cut four 9” squares for the top (two each of two different fabrics. We’ll call them Fabric A and Fabric B.)

Cut one 9” square for the center diamond (Fabric C).

Cut one 9” square for the back (Fabric A, B or C — or another of your choosing).

Cut one 9” square of Insul-bright.

Press the squares of Fabric A and B in half, wrong sides together, to form triangles.

Putting it together
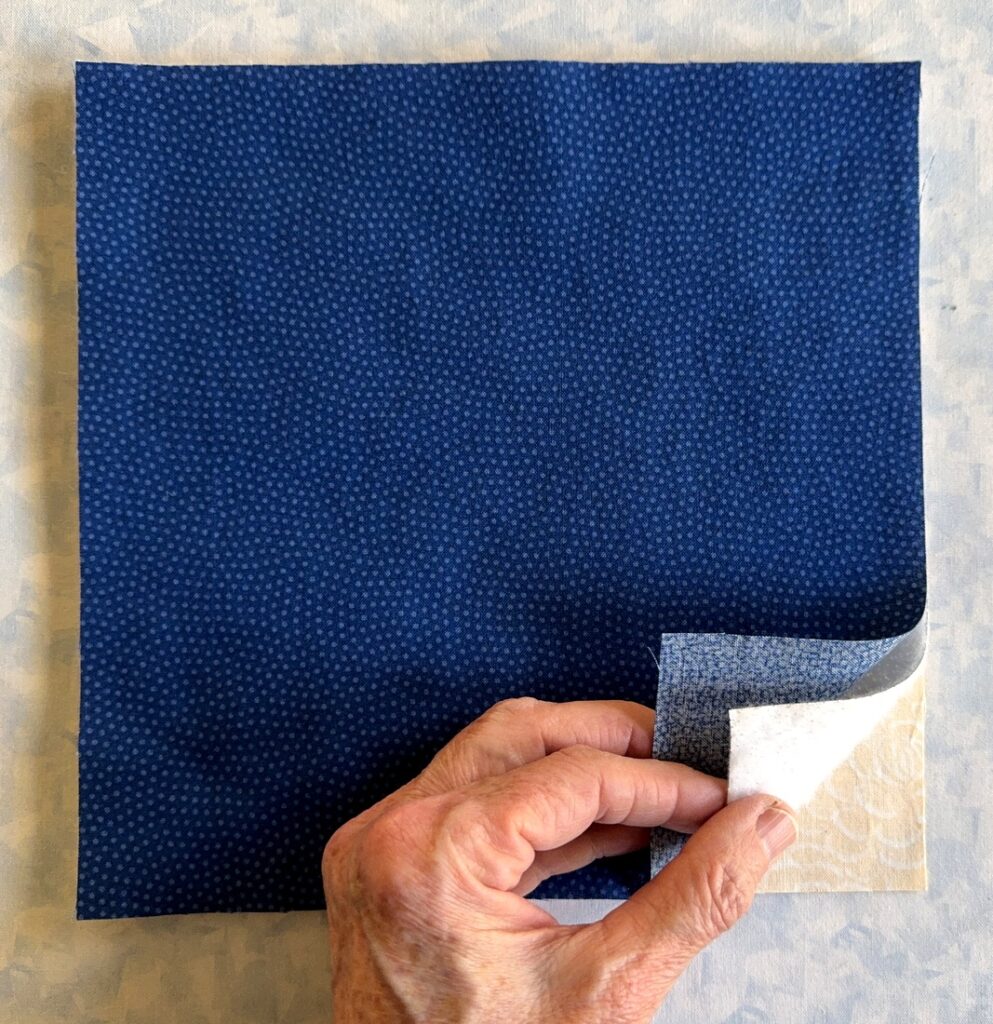
1. On a flat surface start layering the fabrics in this order:

Fabric C (center diamond fabric), right side down
Insul-bright (it does not have a right or wrong side)
Back fabric, right side up:
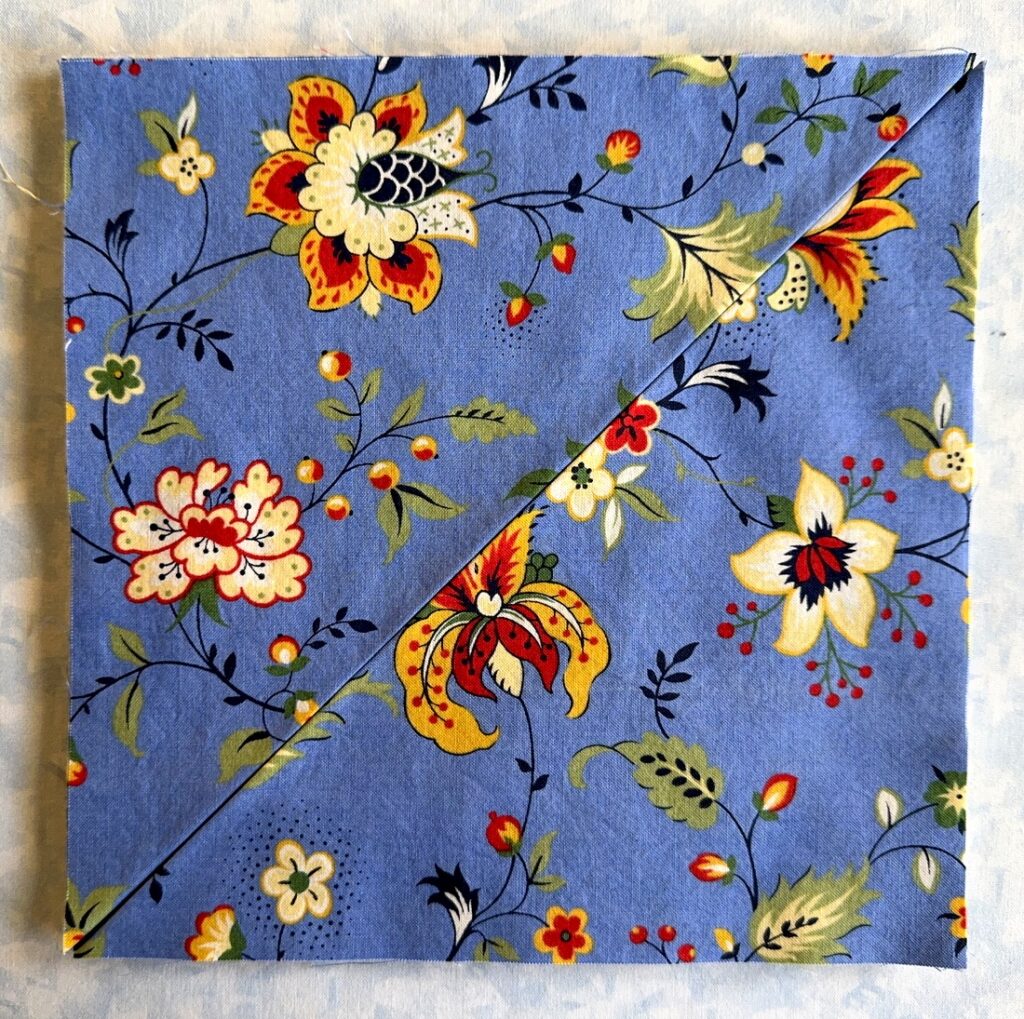
2. Next come two triangles of Fabric A, with folded edges meeting in the middle, forming a diagonal line across the square from upper right to lower left. These are Triangles 1 and 2, with Triangle 1 being the one in the upper left side:
3. Now layer the two triangles of Fabric B, with folded edges meeting in the middle, forming a diagonal line in the opposite direction:
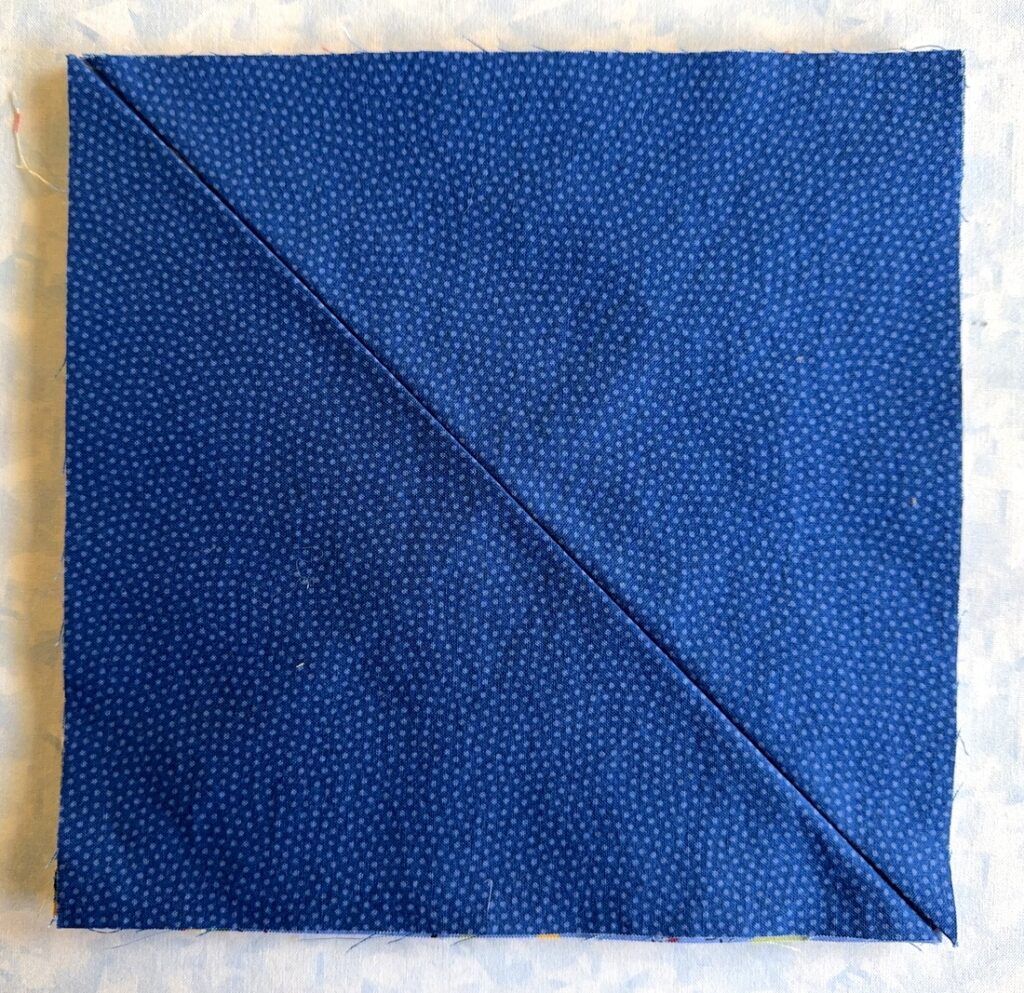
Make sure raw edges are aligned all around. These are Triangles 3 and 4, with Triangle 3 being the one on the upper right side. With all your layers in place, Triangles 3 and 4 are the only ones you see.

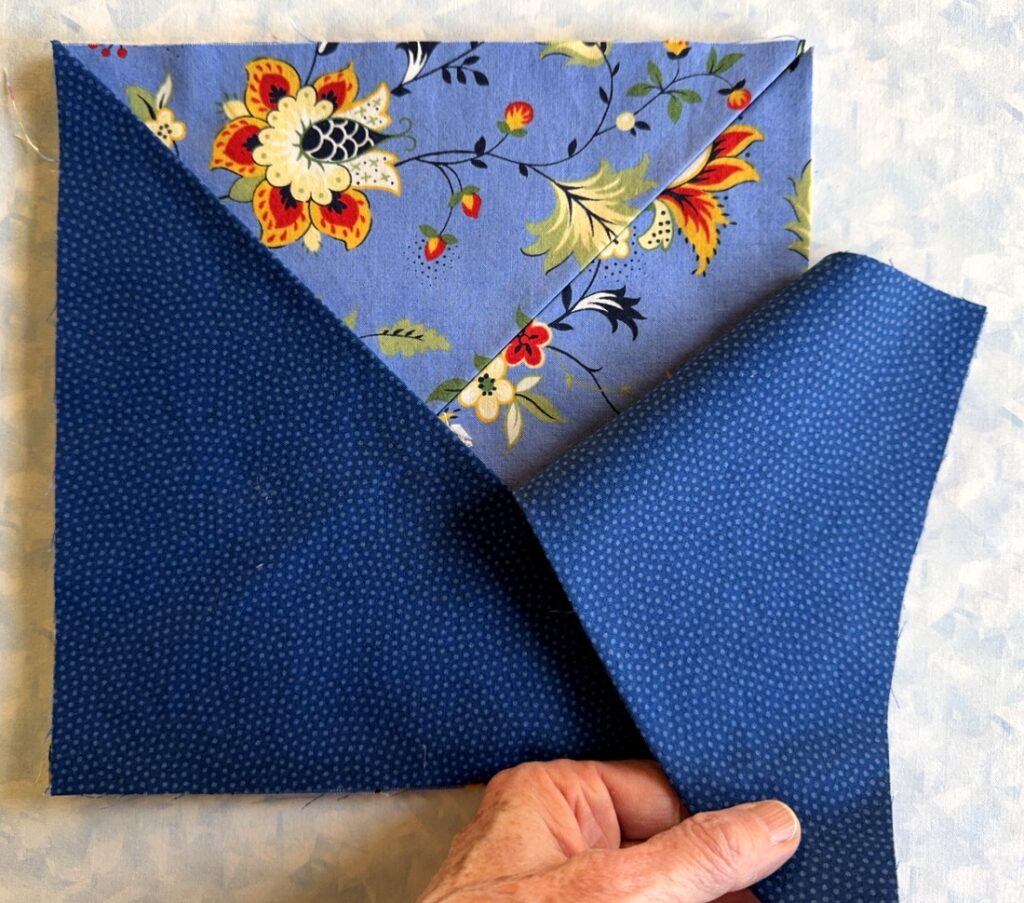
4. Pull back the upper top left corner of Triangle 3 to expose the two pieces of Fabric A underneath:
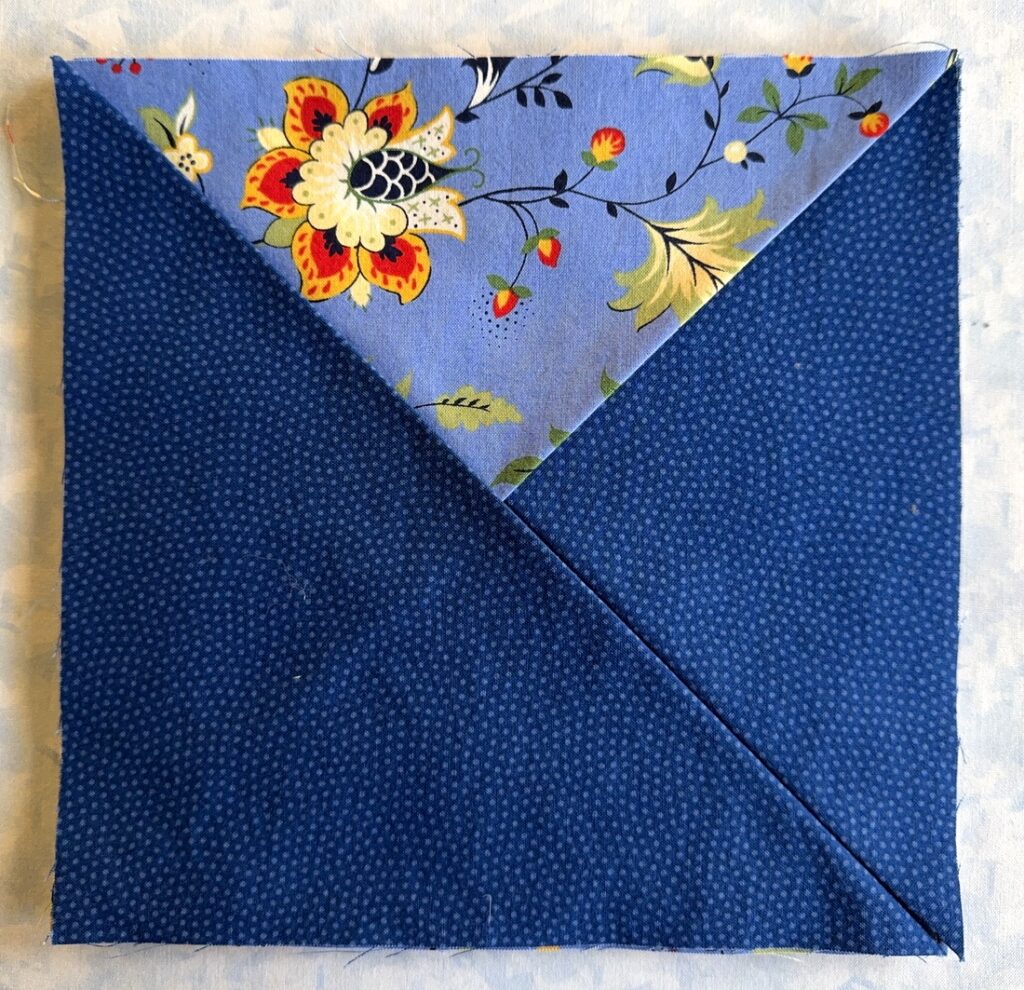
5. Pull back the upper right corner of Triangle 1 (Fabric A) and tuck Triangle 3 underneath it. It should look like this:
6. Pull back the lower bottom right corner of Triangle 4 to expose the two pieces of Fabric A underneath:
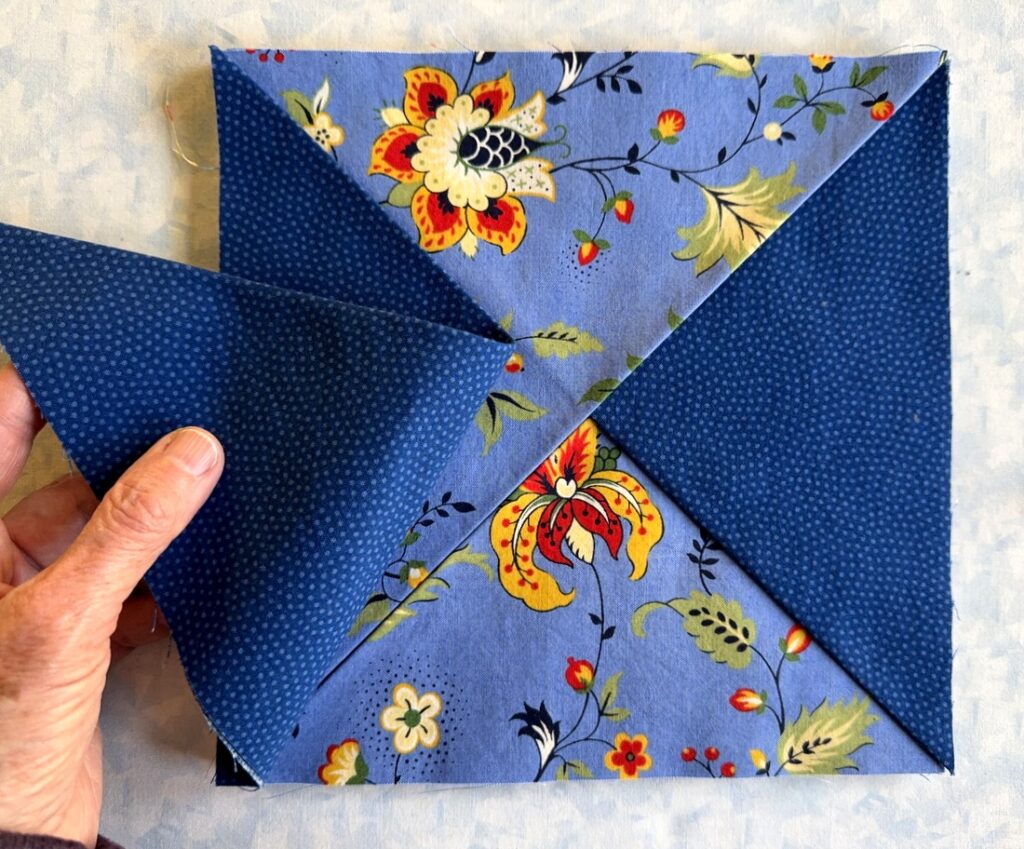
7. Pull back the lower left corner of Triangle 2 and tuck Triangle 4 underneath it.

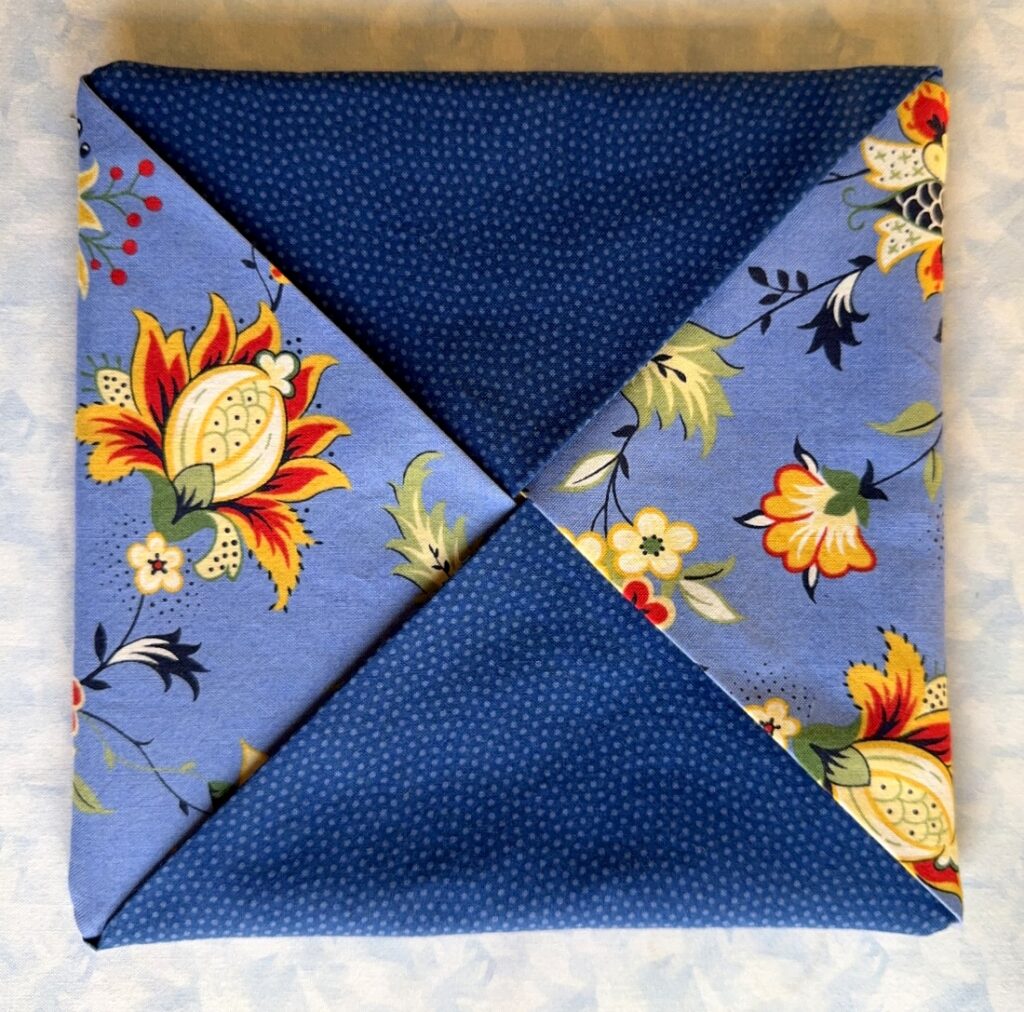
You now have an X design, with two triangles of Fabric A opposite each other and two triangles of Fabric B opposite each other:
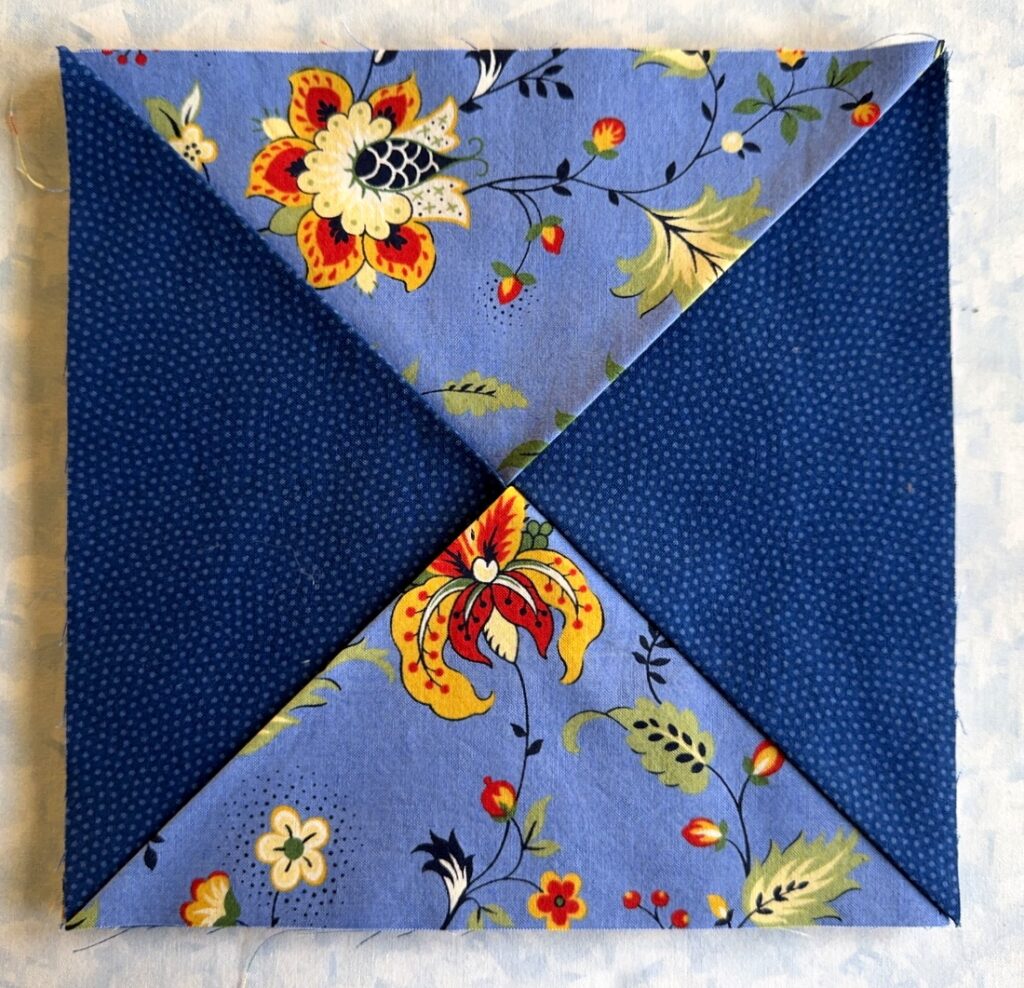
It may seem a little vague as you’re reading it for the first time but when you are actually arranging the triangles, it should become very clear.

8. Use Wonder Clips around all four sides to hold the layers in place:
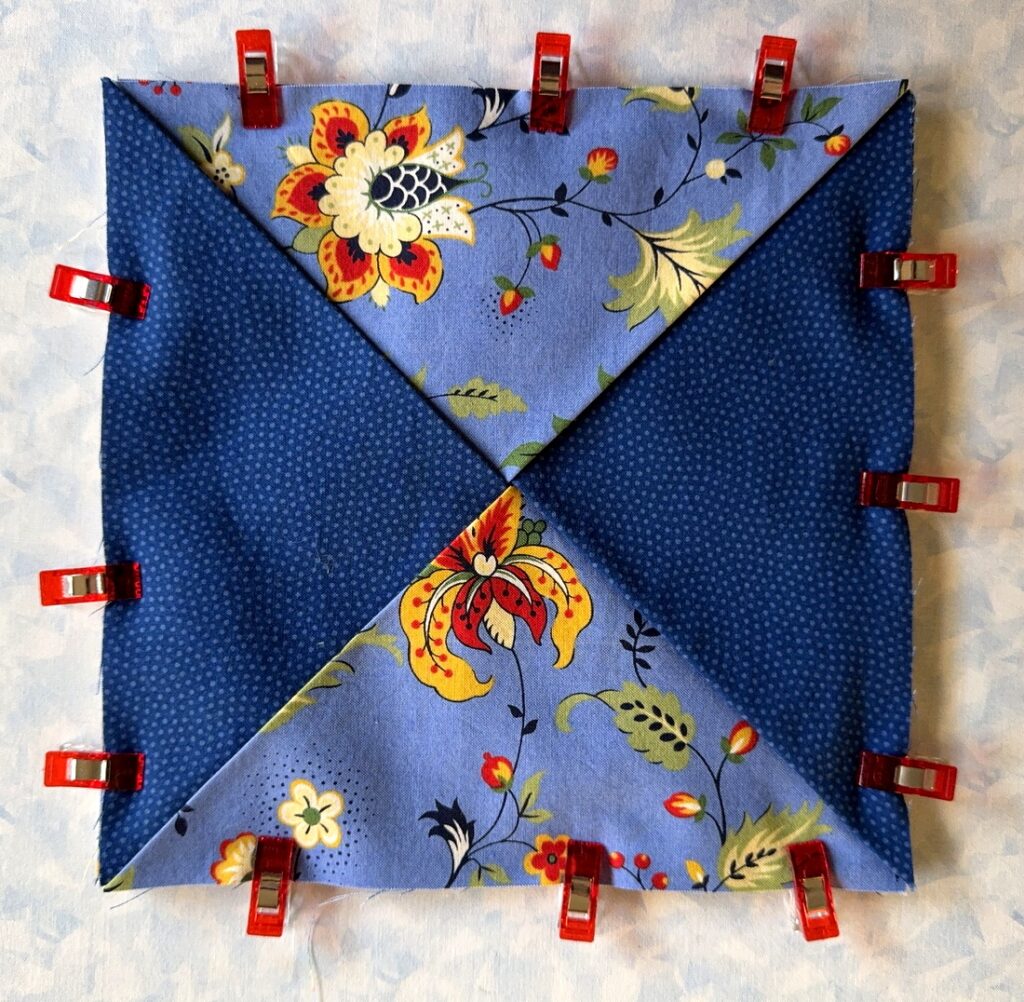
Check the back to make sure the fabric is smooth with no puckers:
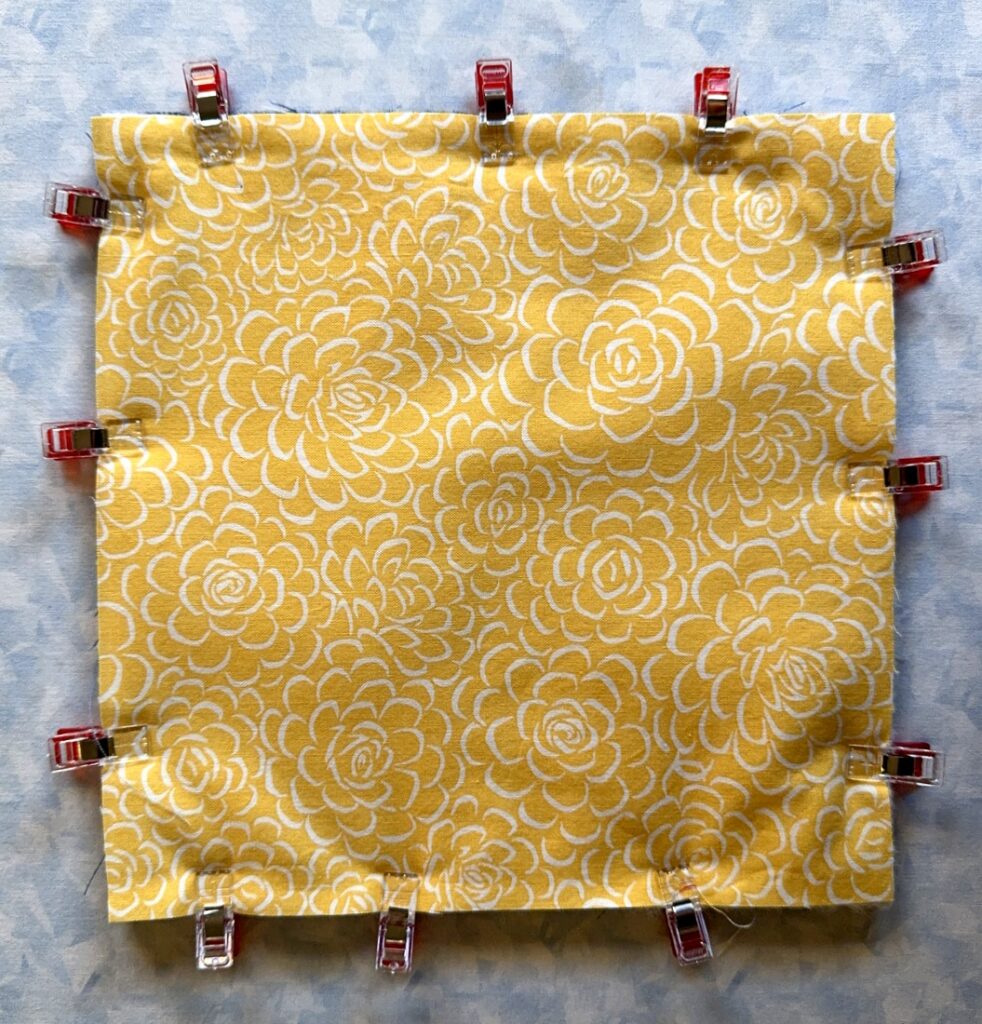
9. Using a walking foot, start in the middle of any side and stitch a 3/8” seam around the entire square. Stop just before the corner where the folded edges meet, pivot, and take two stitches diagonally across the corner, pivoting again to stitch the next straight side. Sew a few stitches beyond the original starting point:

Clip the threads.

Here’s a close-up of one corner showing the two diagonal stitches:
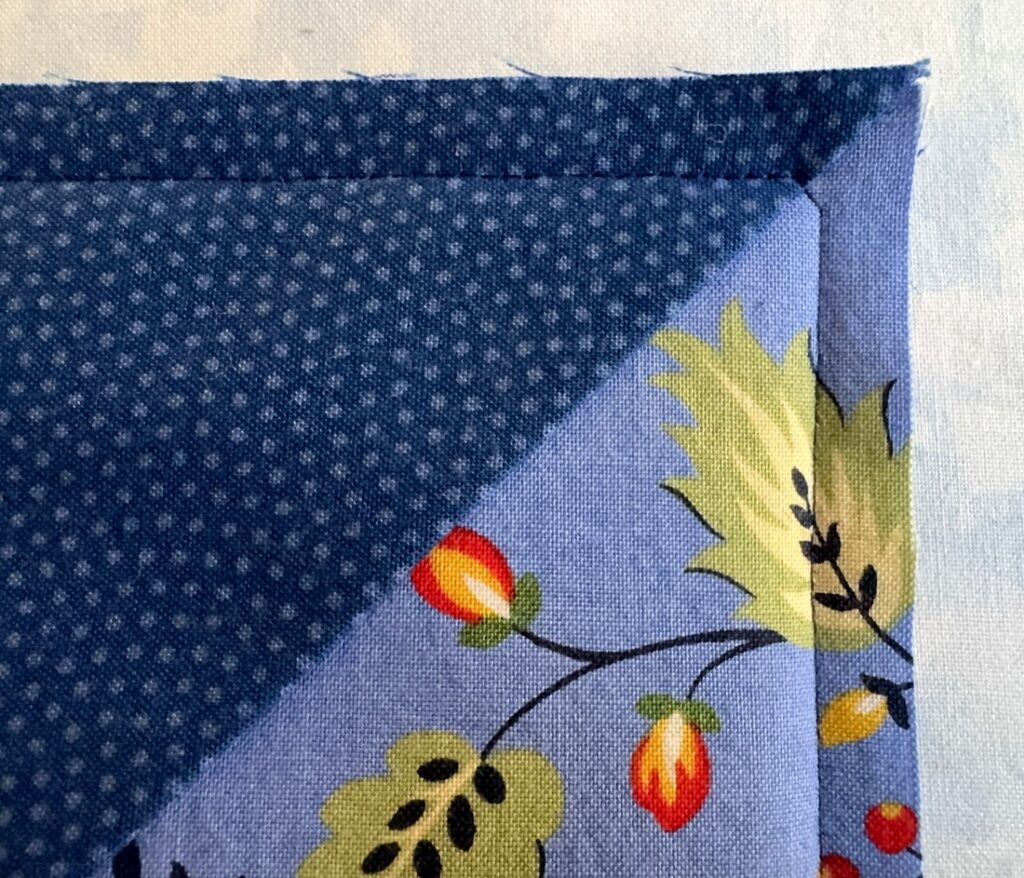
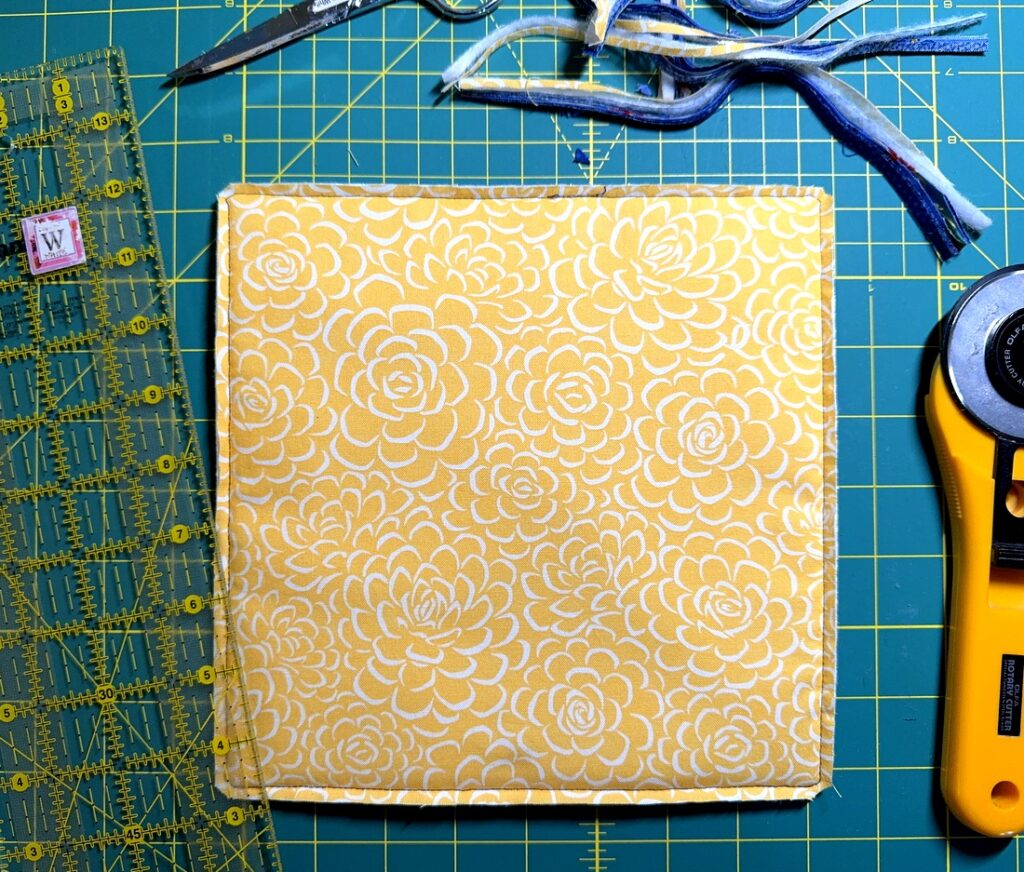
10. Using a rotary cutter or sharp scissors, trim 1/8” from the stitched edge. Clip across corners. I trimmed from the back for the simple reason that I could see my stitching lines more easily:

11. Insert fingers through folded edges of the center and turn hot pad right side out. Carefully poke the corners with a bone folder or other gently pointed instrument. Because of the bulk, you’ll get softly rounded corners:

Press the hot pad.

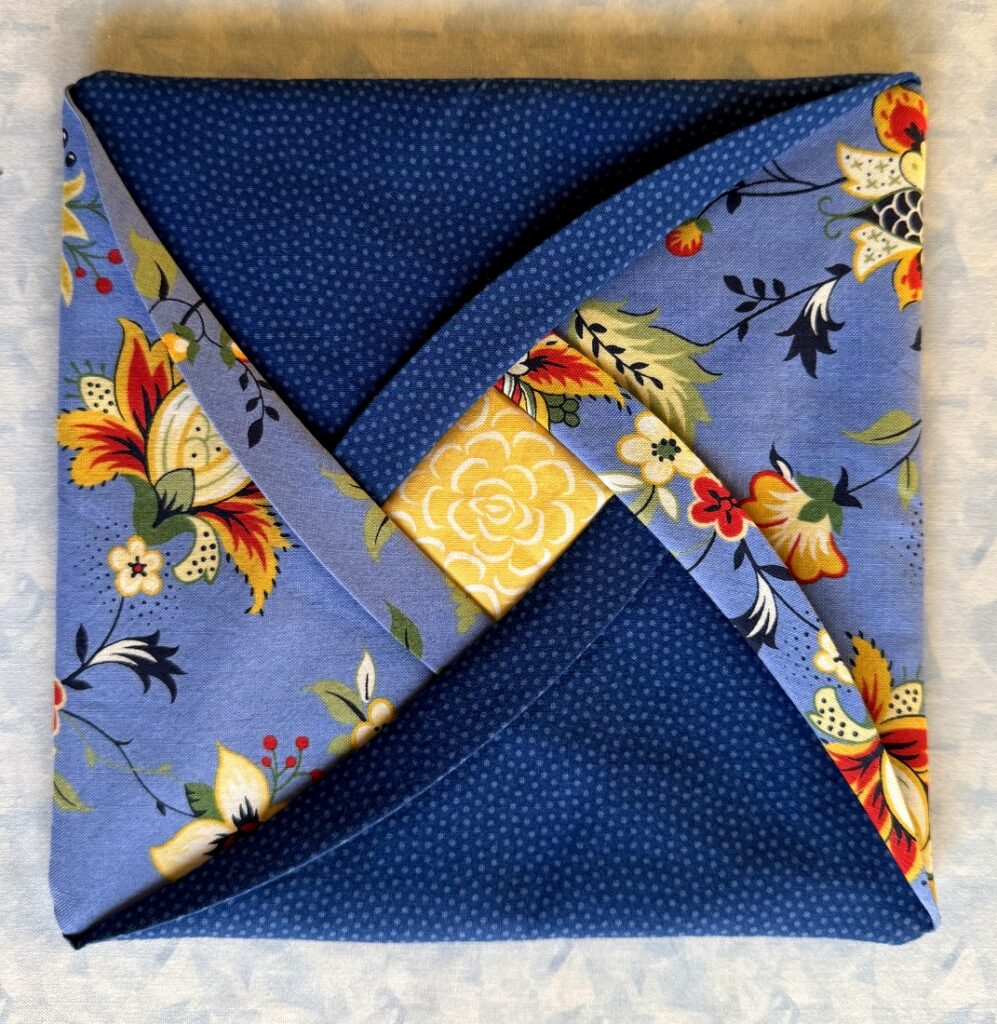
12. Turn back the folded edge of each triangle in the center to form a flap, with the widest part of the flap at the center (about ¾”), tapering to almost nothing at the outer edges. Press all four flaps down, exposing the center diamond shape of Fabric C:

Optional:  Stitch around the flaps through all thicknesses, using a straight or decorative machine stitch, to permanently anchor the flaps:
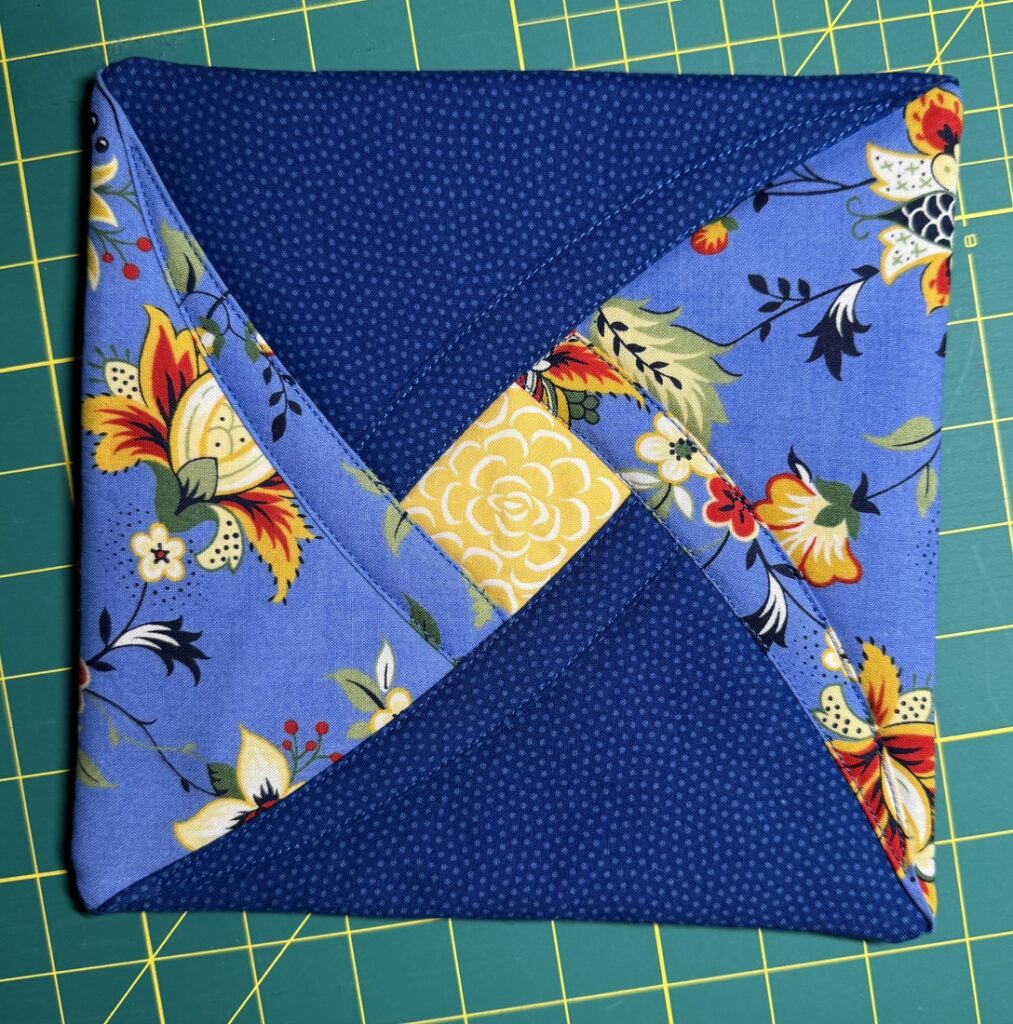
I strongly recommend this extra step, as it helps keep the shape of the hot pad if it is machine washed and dried.

Here’s a look at the back:
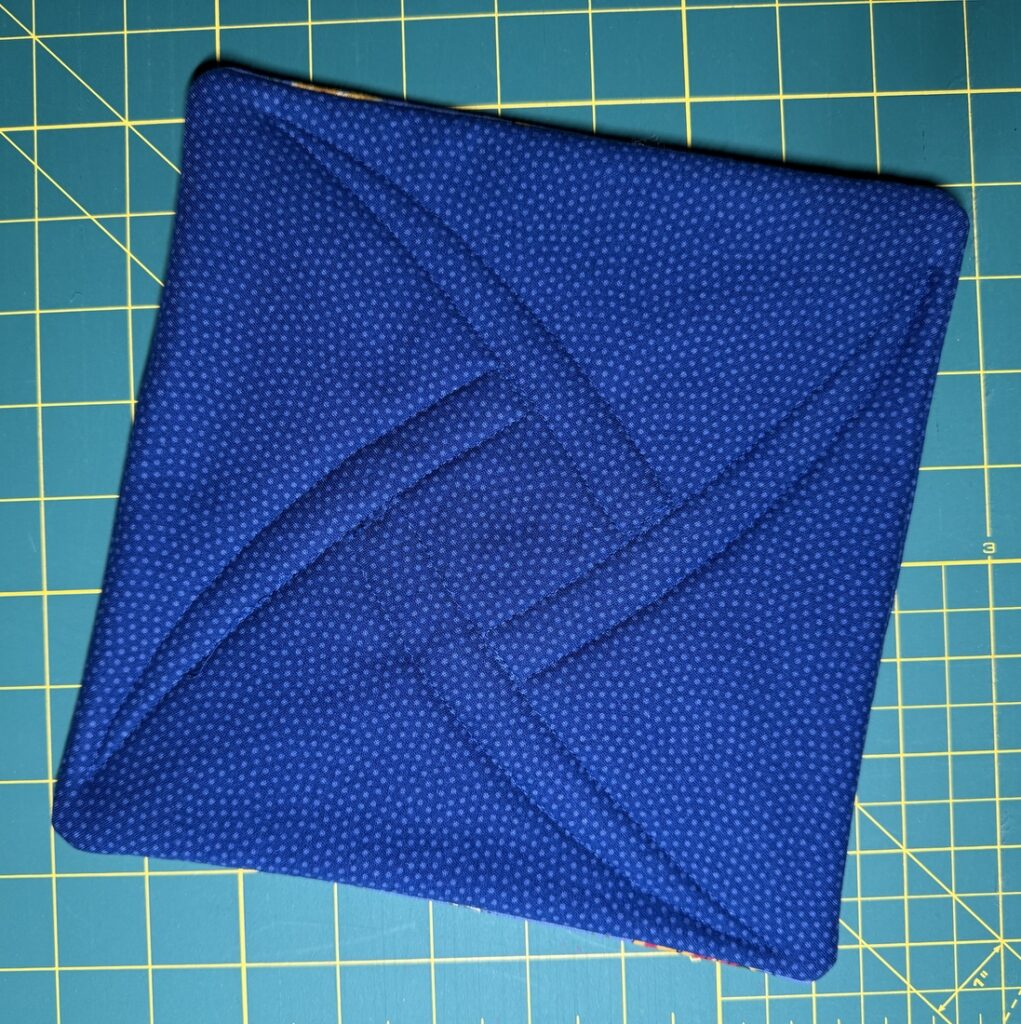
It looks good enough from the back to be reversible!

This hot pad looks right at home in my kitchen:
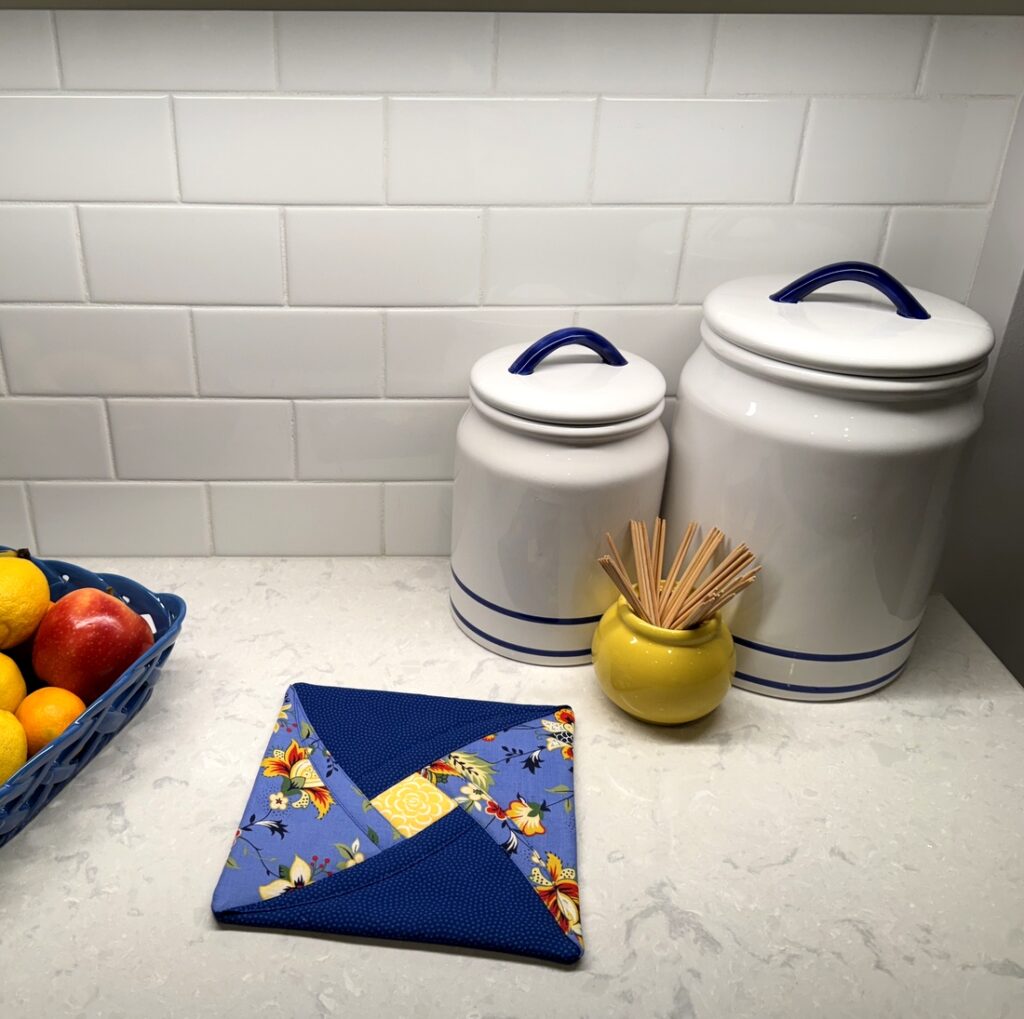
The only thing it’s missing is a mate.

Notes
1. Use the same fabric for all four sides of the top – or four different ones for a scrappy look. It’s up to you!

2. The hot pads can be made larger or smaller. For example, if you have a stack of pre-cut 10″ squares from a single line of fabric, you can make Folded Flap Hot Pads that finish at 9″ — or cut the squares down to 9″ so they finish like mine at about 8″ square. Just remember that the finished hot pad will be 1″ smaller than the starting size of your cut squares.

3. The center “diamond,” cut from a square, is the focal point of the hot pad. Think about the possibilities for fussy-cut centers! Perhaps you are wondering if the bright yellow blossom in the center of my sample hot pad was fussy-cut. Why yes, as a matter of fact it was.

4. For a look at a pair of Folded Flap Hot Pads I made years ago and finished just last month, see this post.



Posted in folded flap hot pads, home dec, hot pads, tutorial, update | 1 Comment

Blue on Blue

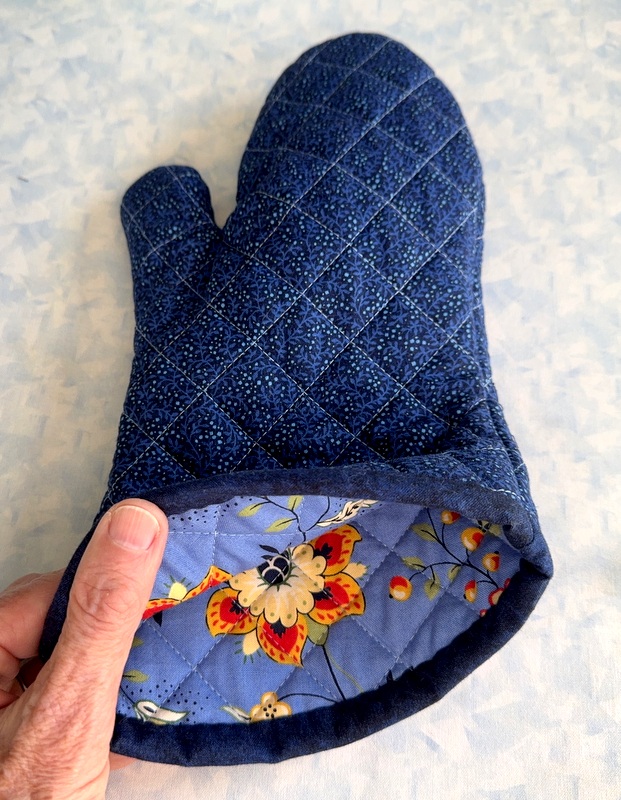
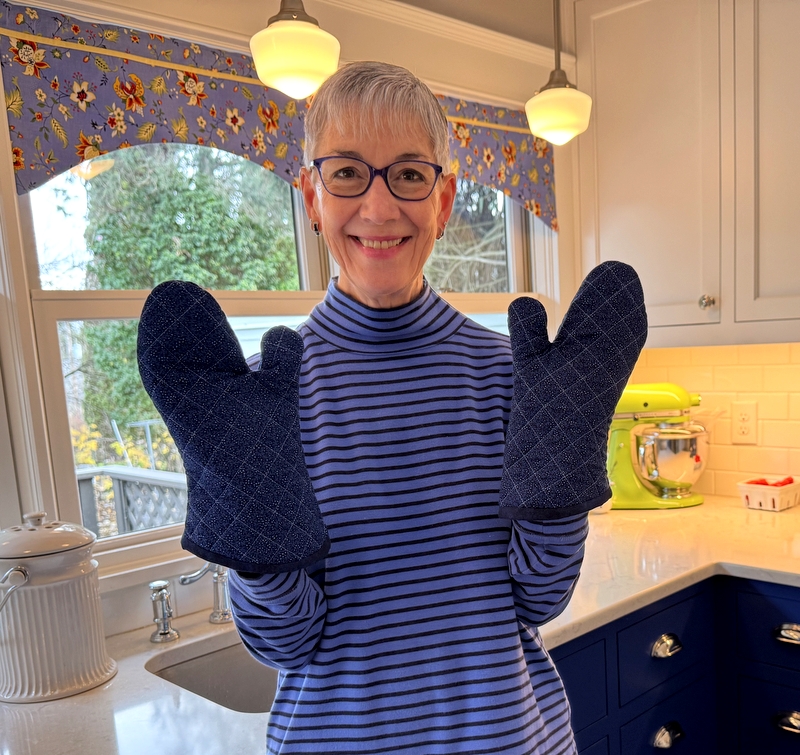
If you were a teenager in the 1960s, as I was, you probably remember a hit song by Bobby Vinton called “Blue on Blue.” Bobby was singing about heartache but I’m singing — well, writing — about my new oven mitts.  Behold:

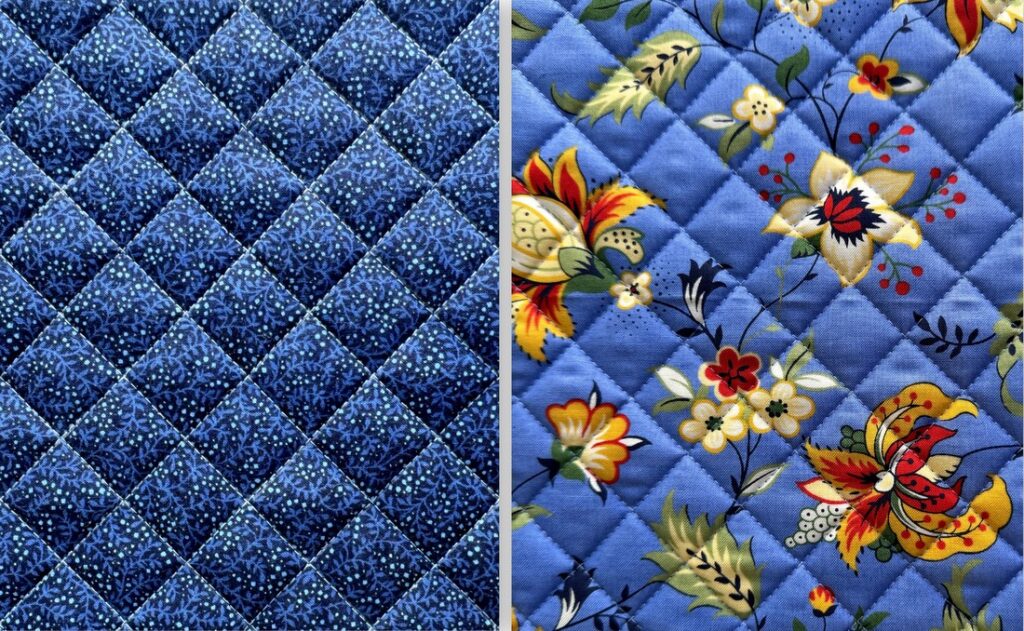
The other day I spotted a tiny hole in one of my old mitts. I don’t know how it got there but it was enough to prompt me to make a new one (and of course I had to have a matching pair). My fabric of choice was a lovely vintage blue-on-blue print that I won recently at a meeting of my quilt guild, the Metropolitan Patchwork Society. The print was my favorite of the four dark blue blenders in my winning bundle.

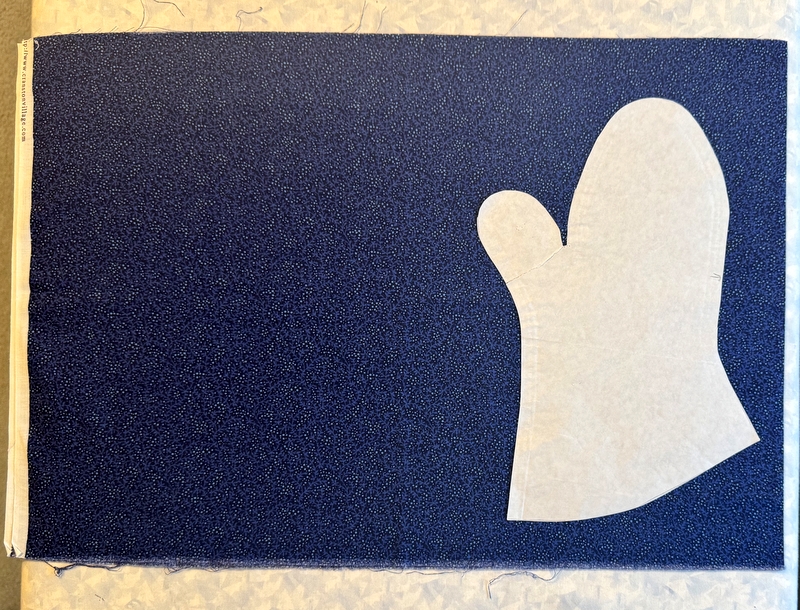
Following my own tutorial (more on that at the bottom of this post), I made a new pair. I had only a 15″ length of fabric but it was enough for two mitts. Here you see the doubled width of fabric with my freezer paper pattern on it for scale:

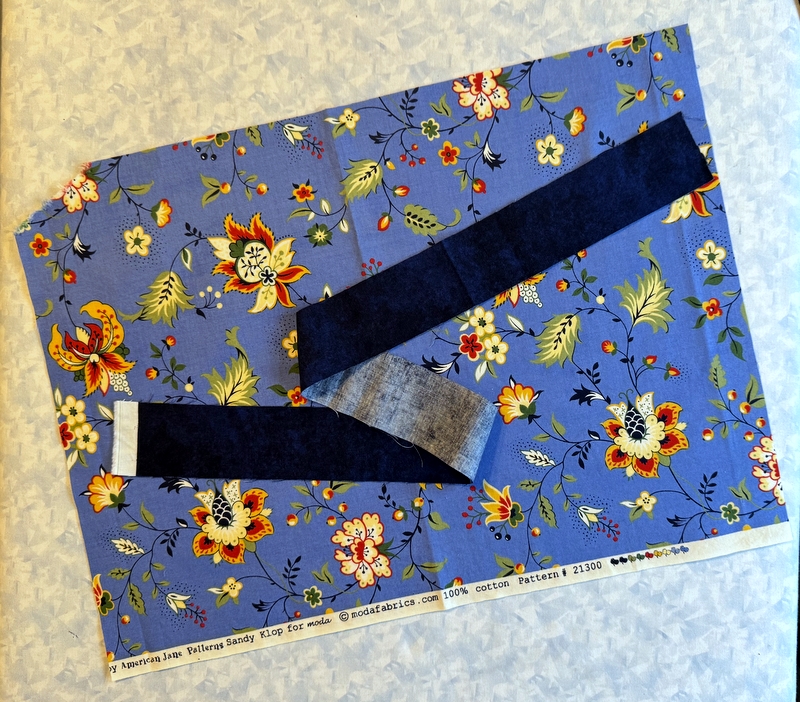
For the lining of the mitts I drew on this French provincial print from my precious stash of Sandy Klop’s “A Breath of Avignon” line, which I’ve had for well over a decade:

Did you happen to notice the valance fabric in my kitchen? It’s the same fabric used inside my new oven mitts. That strip of mottled navy “Shadowplay” by Maywood is for the contrast binding at the cuff.

The next photos show you how I quilted the mitt with a 1″ grid. I often quilt my mitts with random wavy lines, which goes very quickly. It takes more time to quilt a grid but it sure does look nice.

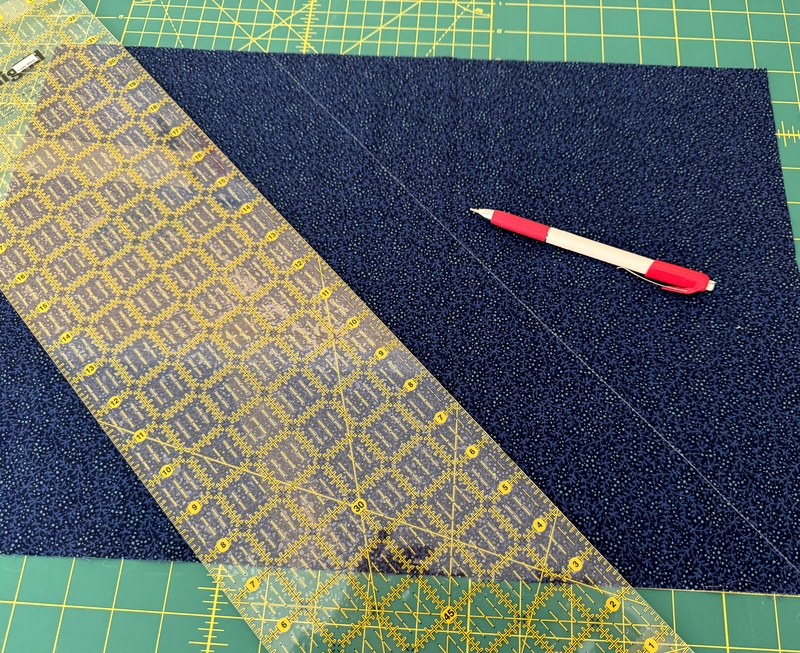
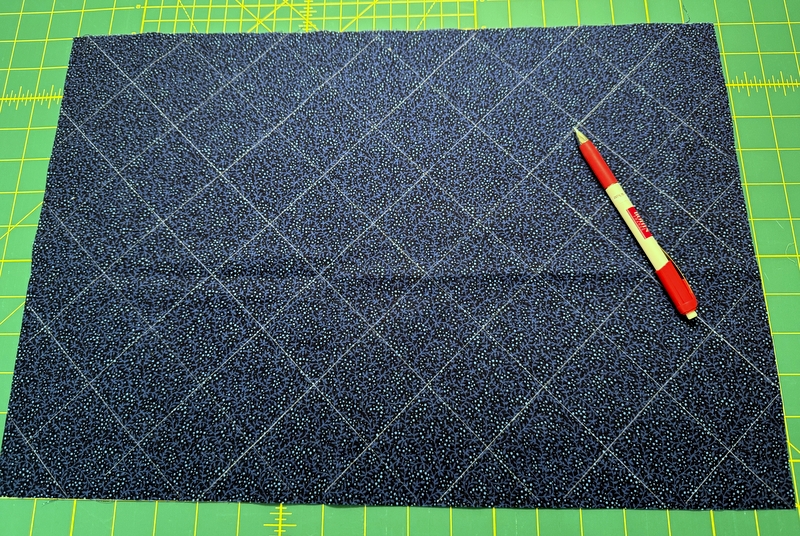
First I marked the top fabric with a 45 degree line following the diagonal mark on my cutting mat:

My favorite marking tool for dark fabrics is this Bohin mechanical chalk pencil, which gives such a nice thin line.

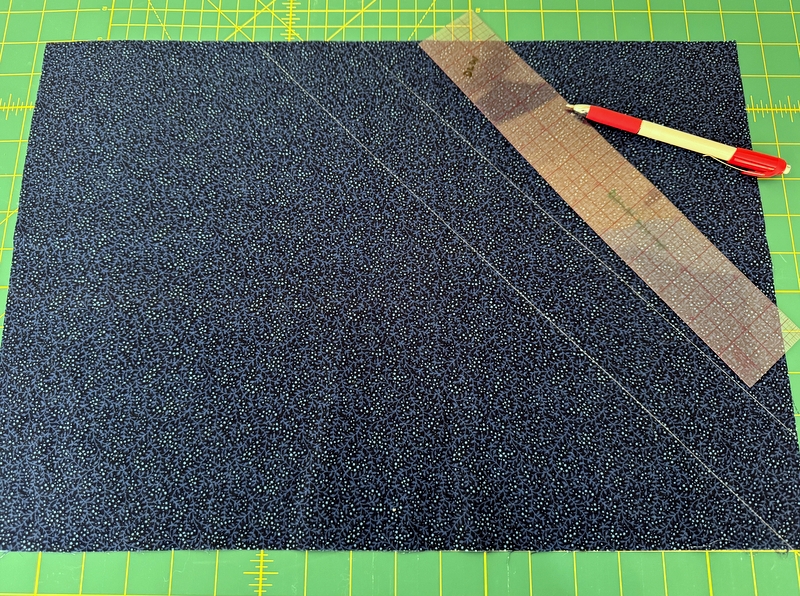
Then I used a 2″ wide clear plastic ruler to mark the rest of the lines in 2″ increments going in the same direction:

I repeated the marking with lines going in the other direction:

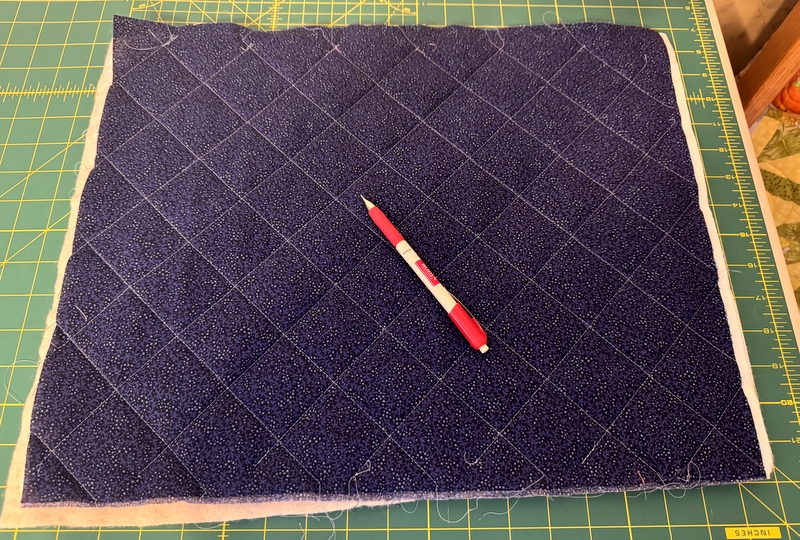
After lining up my four layers — top, 100% cotton batting, Insul-bright (an insulated heat-resistant batting), and lining — I quilted all of the lines in one direction and then all the lines in the other direction:

I chose a medium light blue thread so the quilting would stand out. By the way, I didn’t bother to pin the layers. I simply stitched a line (starting with one of the longest ones) and smoothed the bottom layer if it needed it before stitching the next line.

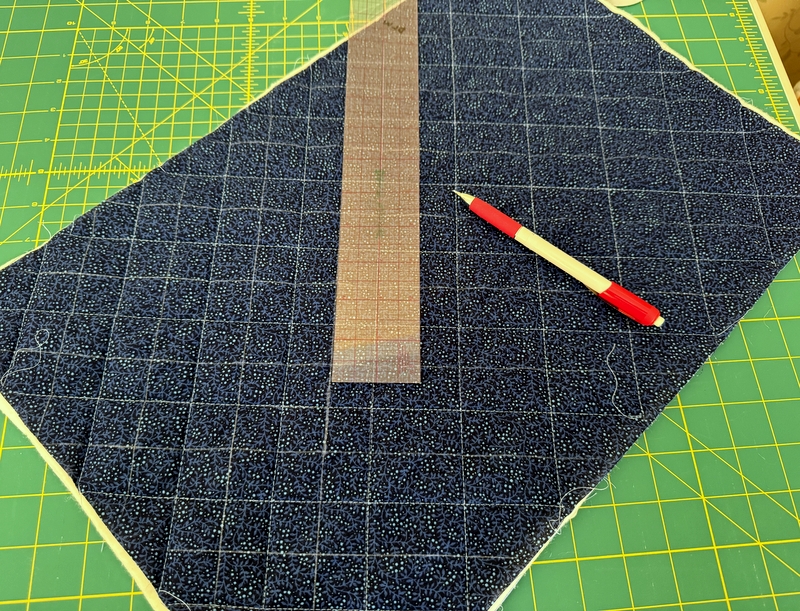
Next it was time to mark between the stitched line to create the 1″ grid. I could probably have eyeballed the space between the stitched lines but my obsessive-compulsive gene kicked in:

In any case, it didn’t take much time to mark the lines and move on to sewing them.

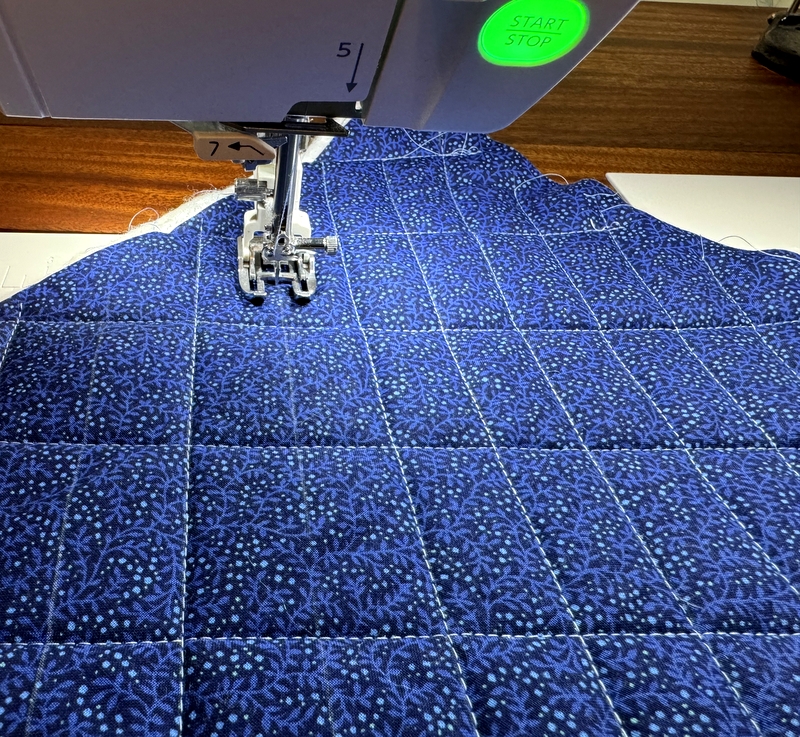
My open-toed walking foot was essential for this project. You really need to be able to see the needle going in and out of the fabric.

A close-up of both sides quilted:

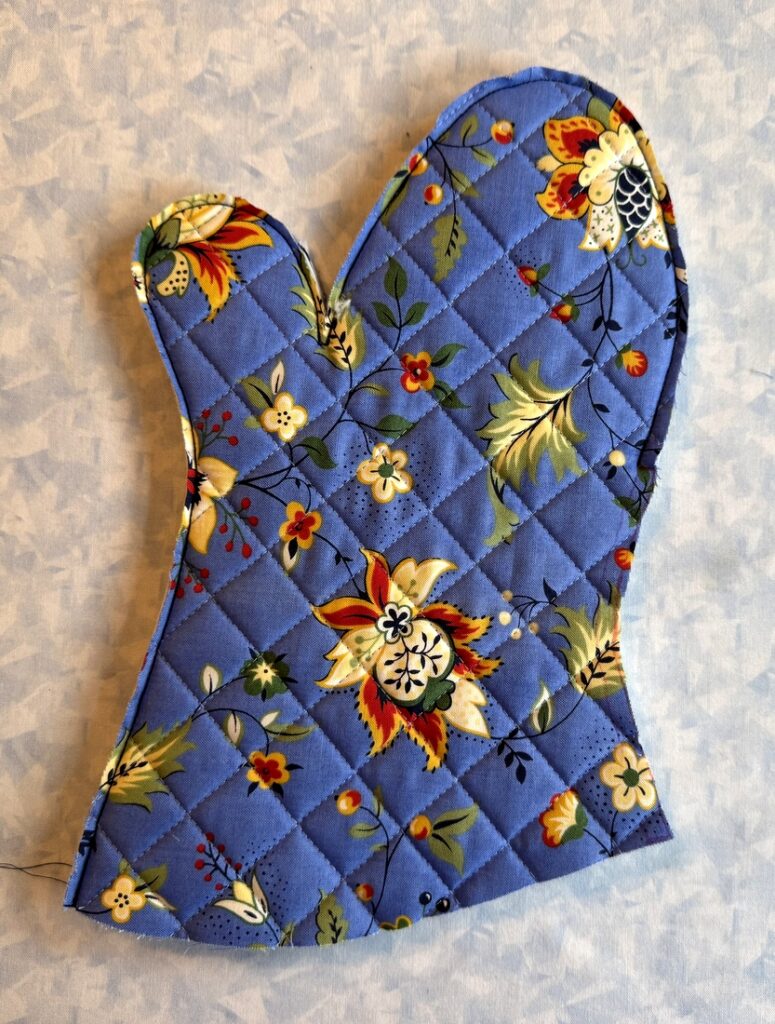
The oven mitt partially sewn together . . .

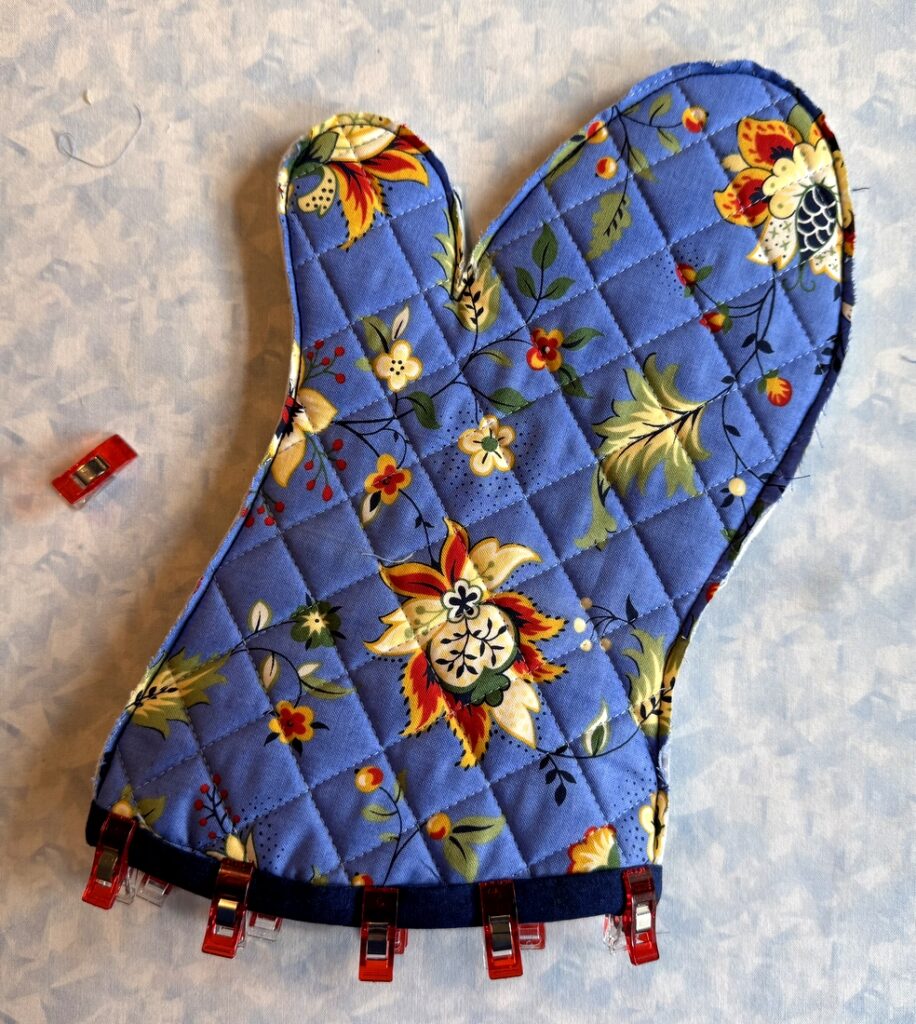
. . . and now with the contrast binding at the cuff edge applied and ready to tack down:

Here’s the finished mitt, with a peek inside to see the lovely lining:


Ready to make a pair? The links below will take you to my oven mitt tutorial, broken into three parts. The first part (the Prequel) explains why I made my own pattern and how to make one that fits your own hand.

The second one (Part 1) covers fabric requirements, instructions for downloading and printing the pattern, assembling the layers, and quilting the resulting “quilt sandwich.”

The third one (Part 2) covers the sewing of the mitt and contrasting band around the cuff edge as well as the final step of tacking the band down before turning the mitt right side out.

Here you go:

21, Oven Mitts that Fit: Prequel to the Tutorial (April 13, 2021)
21, Oven Mitt Tutorial from First Light Designs, Part 1 (April 18, 2021)
21, Oven Mitt Tutorial from First Light Designs, Part 2 (April 19, 2021)

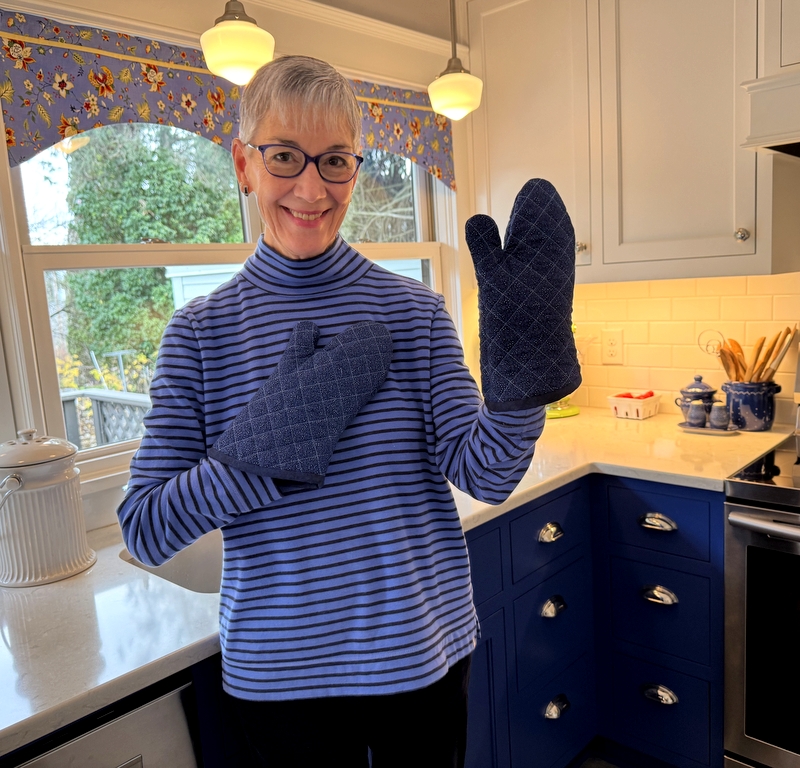
Here I am again with my new blue-on-blue oven mitts. And the blue-on-blue top I’m wearing? Total coincidence!


Posted in home dec, Metropolitan Patchwork Society, oven mitts, tutorial, update, valance | 4 Comments

Off to the Quilter!

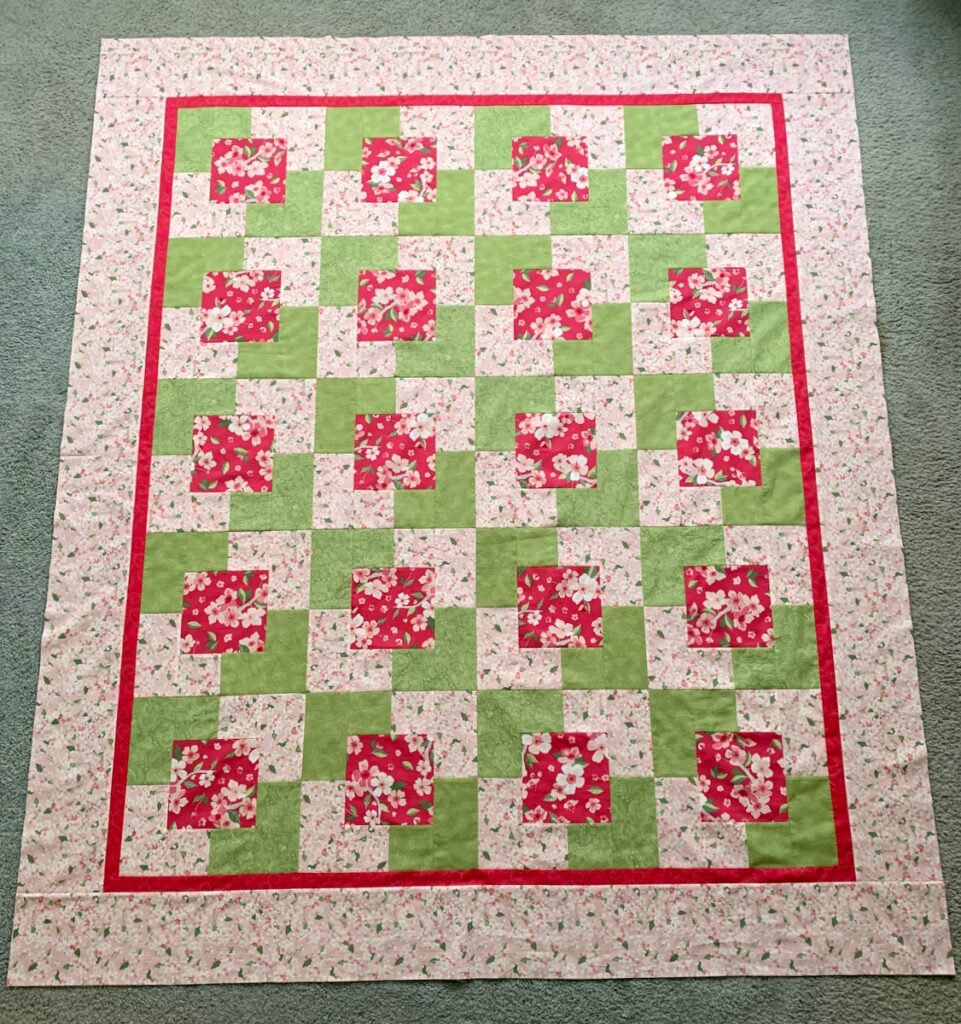
The borders are on my cherry blossom quilt . . .

. . . and it’s ready to be delivered to my longarm quilter.

Don’t you love the freshness of the cherry blossom fabrics against the two spring green tone-on-tone prints? I sure do. The simplicity of the pattern (Town Square by Fabric Cafe) really lets the fabrics take center stage, which is always my goal.

I made a simple pieced backing incorporating two quilt blocks that were too similar to ones on the front. Celebrating Spring is the leading contender for my new quilt’s name but I’m open to other suggestions. Just sayin’.

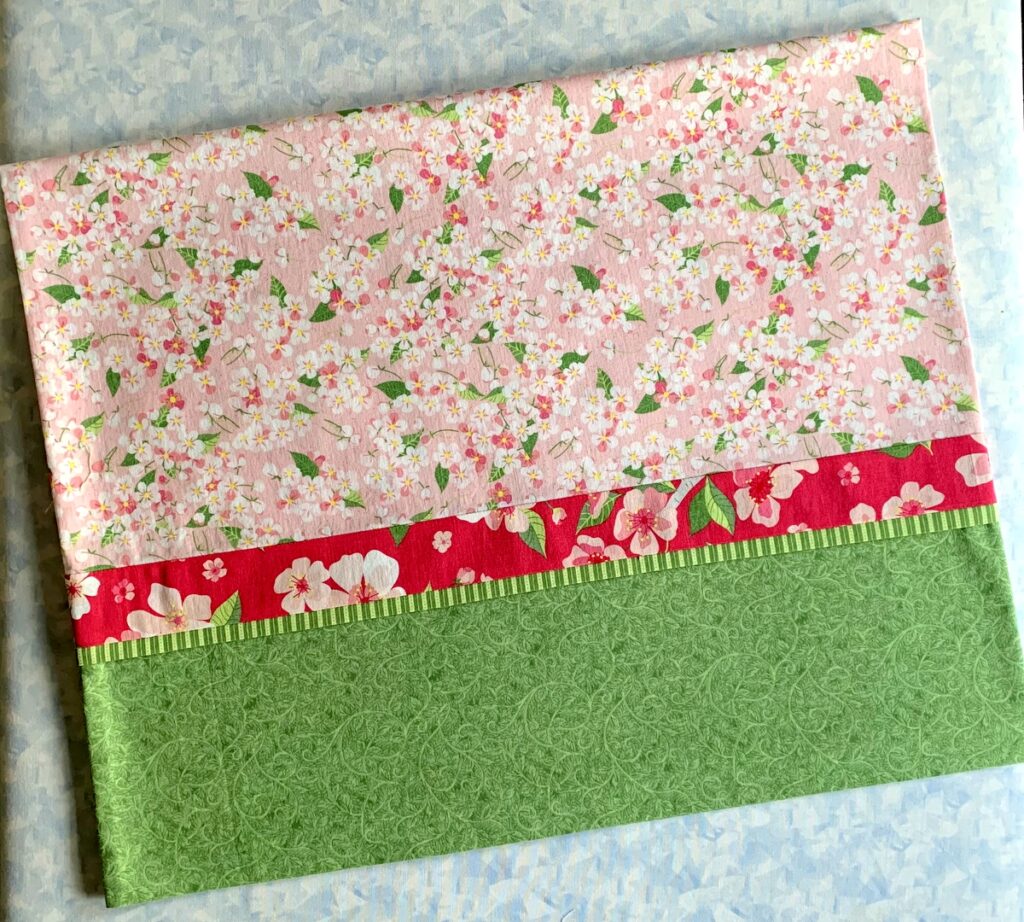
There was enough of the small focus fabric print left to make a pillowcase for a loved one to go with her new bed linens:

It was made with my own tutorial, which you can see here.

I like this pillowcase so much that I’m sorely tempted to order more fabric to make a pair for the Portland White House. But seriously, the Dear Husband and I have enough other cases to sleep on. If I made pillowcases for every line of fabrics I fall in love with, we’d be sleeping on different cases every night.

Anyway, I’ve embarked on yet another new project that I’m eagerly looking forward to showing you. I hope you’ll stop by to see what it is!


Posted in cherry blossom quilt, family, home dec, pillowcases, roll-it-up pillowcases, tutorial, update | 3 Comments

Accessorizing the Home

I’ve been spending a wee bit of time in my sewing room over the last week. It could have been more but I had my nose in a book. A big book:  715 pages, to be exact. It’s Abraham Verghese’s bestselling novel The Covenant of Water. I actually bought it last summer but was reluctant to begin such a lengthy tome until after my cataract surgeries in June and August. Reading is once again a great pleasure, and this freezing cold snap in the Pacific Northwest over the last several days presented an ideal opportunity to curl up with a good book with either a cat or a quilt (sometimes both) on my lap.

I did venture into my sewing room from time to time, working around the schedules of the workmen repairing the walls and ceiling in the upstairs hallway following water damage from a rain storm. The hallway now looks brand new — a touch of irony in a house that’s 111 years old — but the texture on the walls beautfully mimics the original lath and plaster so you’ll hear no complaints from me. All the hallway needs now is a coat of primer and two coats of color.

I’ve been working on some small things:

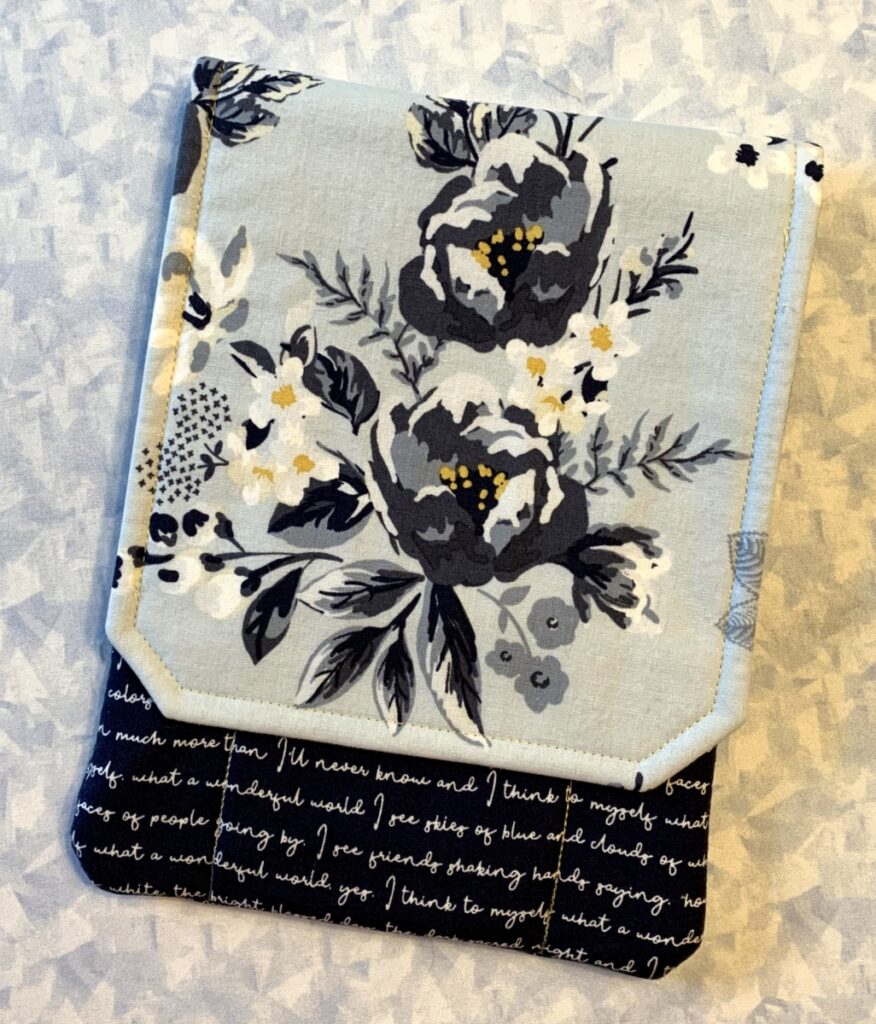
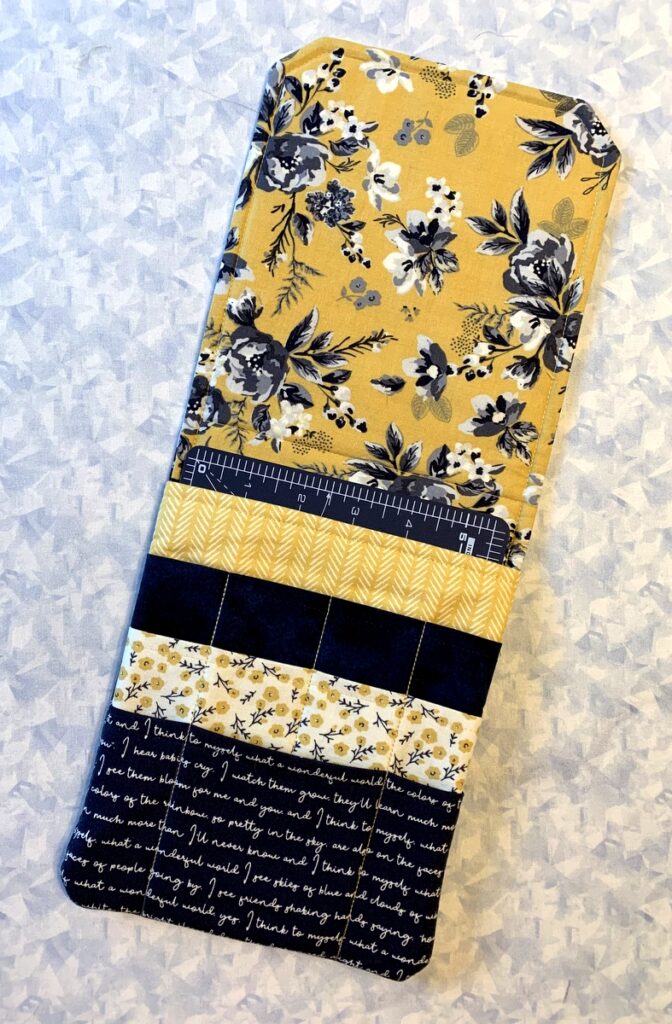
This is a quilter’s tool caddy, using the pattern Travel Case by Pearl Pereira of P3 Designs. I’ve made several versions over the years, modifying the design in a few ways but most importantly by adding a fourth pocket so the caddy holds more:

The tool caddy is one of four accessories to go with my current Junior Billie Bag-in-progress. I’ll finish it soon along with three other accessories that go with it — a rotary cutter coat, a scissors case, and a fabric box that I use as a threadcatcher. I’m so enjoying the fabrics — most of them from the Gingham Foundry line by Riley Blake that came out in 2021.

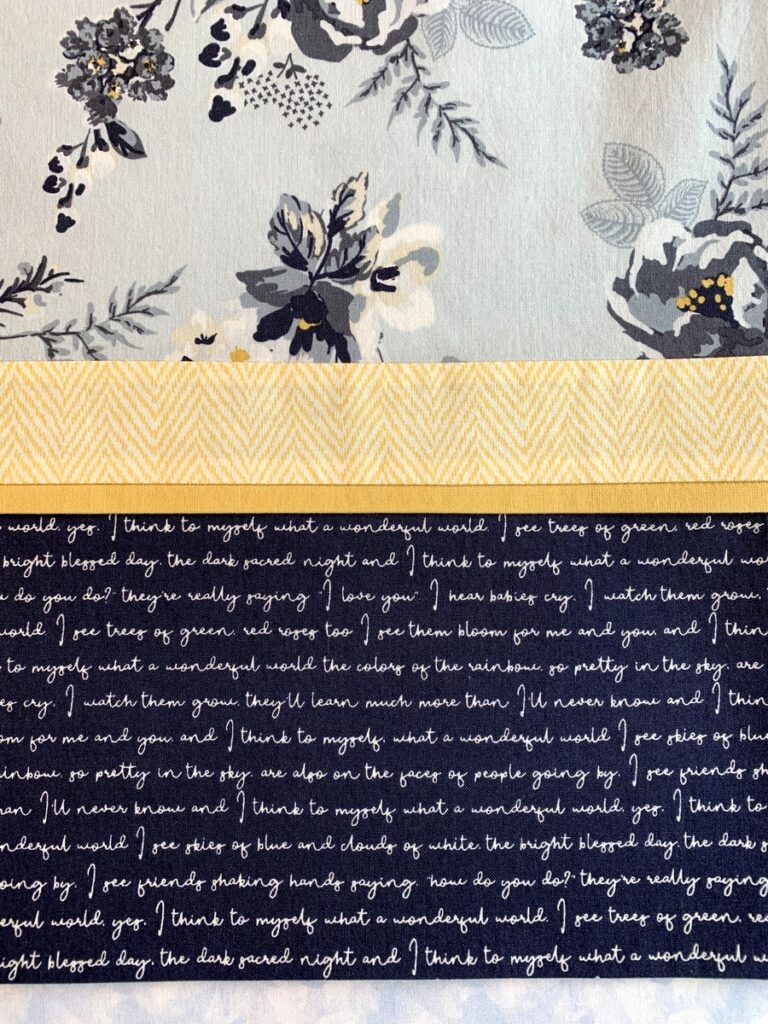
You may remember I used the same fabric last October in a pair of pillowcases made for the Portland White House. I just finished a second pair for my twin Diane, who arrives on Saturday for a two-week visit. Ordinarily she would be surprised by seeing them wrapped up with a ribbon in the guest bedroom but she reads my blog so as soon as she sees this post she’ll know they await.

I couldn’t resist fussycutting the text print on the band so that the refrain “I think to myself what a wonderful world” appears on the top and bottom lines of the band:

A bit obessive-compulsive? Umm, yes.

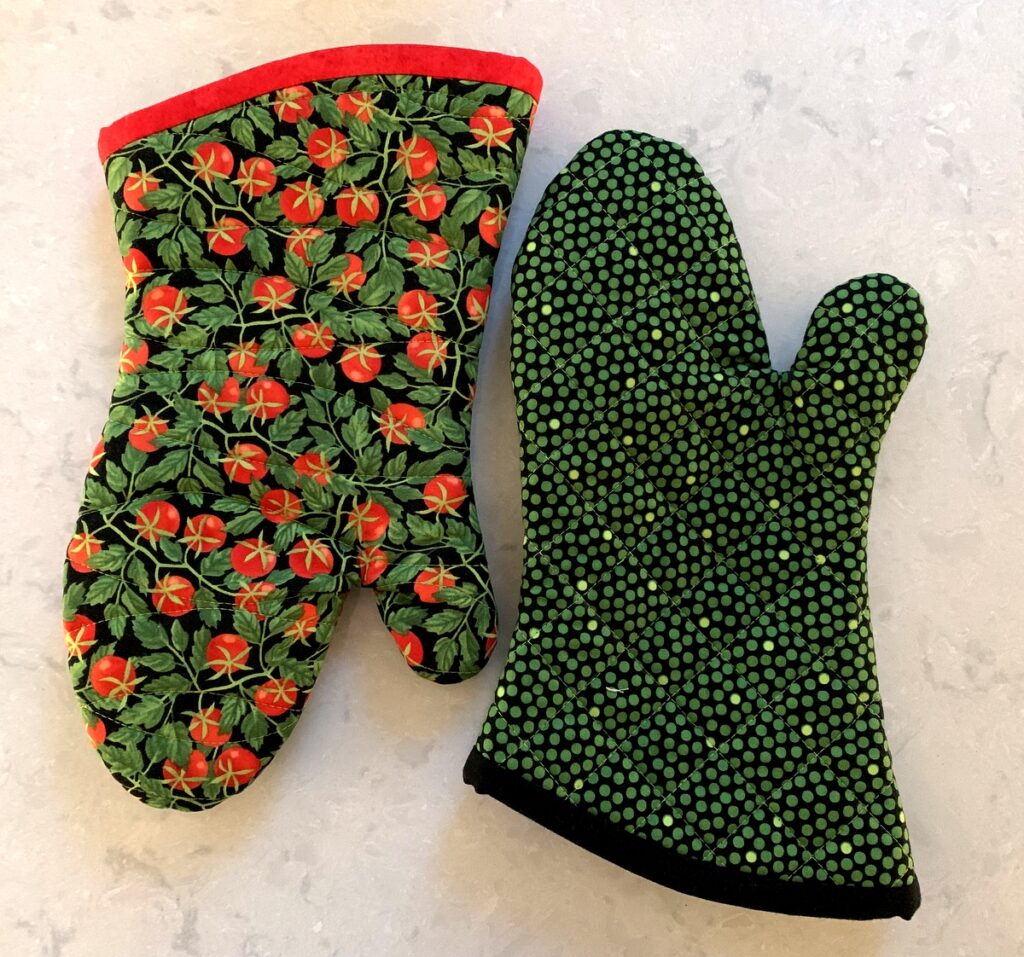
I also made myself a new oven mitt (from my own tutorial) but got two in the bargain:

I had cut out the fabric and batting weeks ago for the mitt on the right; the materials were stacked in my sewing room closet just waiting for me. I can’t remember why I got out the tub that my oven mitt supplies are stored in but when I did I was surprised to find there was a mitt inside that was almost finished! All I needed to do was tack the red band down and turn the mitt right side out. I adore that tomato print and thought I had used the last of it. Now I well and truly have.

So much for accessories. What about quilts? Well, I have two quilts I started last year that I really need to finish but I’m already dreaming about starting a new one. . .


Posted in Billie Bag, cats, family, home dec, Junior Billie Bag, oven mitts, pillowcases, roll-it-up pillowcases, rotary cutter case, sewing tool caddy, tote bags, tutorial, update | 4 Comments

Auntie Claus?

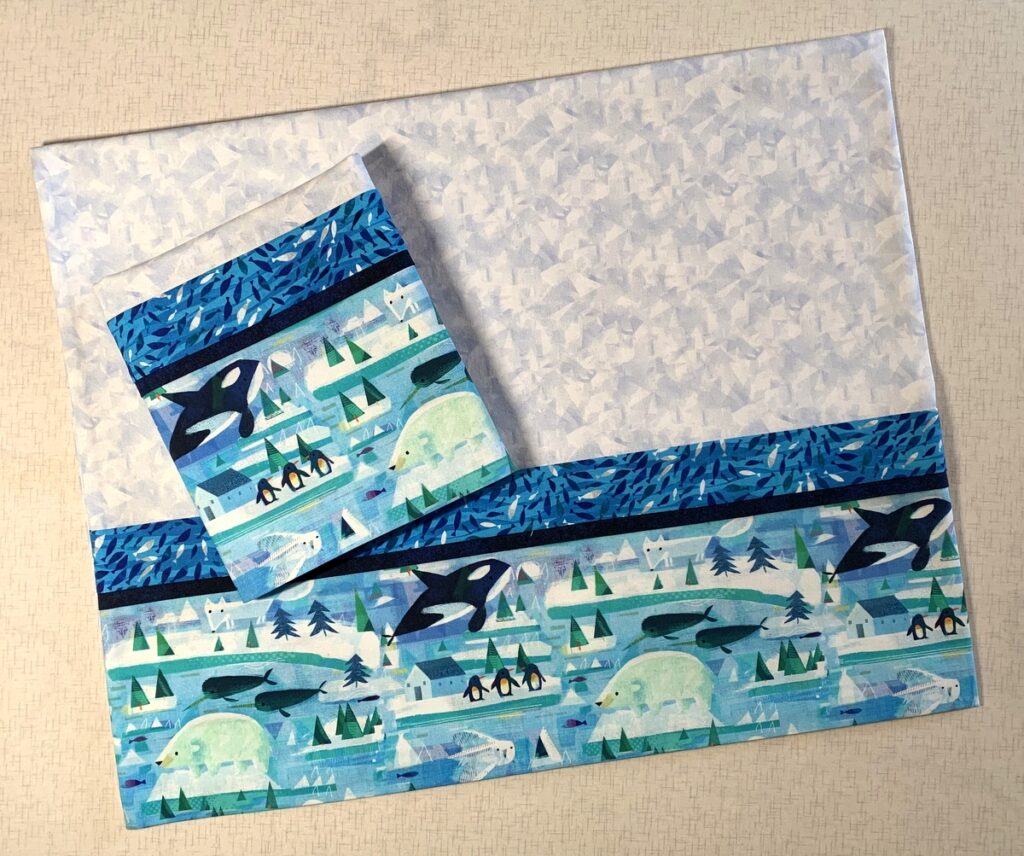
You’ve heard of Santa Claus, of course. But have you heard of Auntie Claus? That’s me! I made a pair of pillowcases this week as a surprise Christmas gift for my 20-something great-niece Megan:

Megan still has the pillowcases I made for her when she was a little girl. It was her mother’s clever idea to have these pillowcases be from “Auntie Claus.” Megan will be puzzled when she reads the tag but will know as soon as she opens the package that the pillowcases were made by her Auntie Dawn. These pillowcases are finished with French seams — no raw edges in sight. You can find the free tutorial for my roll-it-up or burrito-style pillowcases right here.

And don’t you just love the fabrics? They’re from the “Icy World” line by Gareth Lucas for Windham Fabrics. If you’re a regular reader, you’ve already seen these delightful folk art fabrics in a quilt I made a year ago called Arctic Stars as well as a simple ruffled valance I made just a few weeks ago for my stepmother’s guest bathroom. When I fall in love with a fabric line, it tends to make appearances in multiple projects.

It seems especially appropriate to be looking at Arctic scenes today as it happens to be the first day of winter and the shortest day of the year in the Northern Hemisphere. Each day after the Winter Solstice brings more daylight. Bring it on, I say!


Posted in family, home dec, pillowcases, roll-it-up pillowcases, tutorial, update, valance | 4 Comments

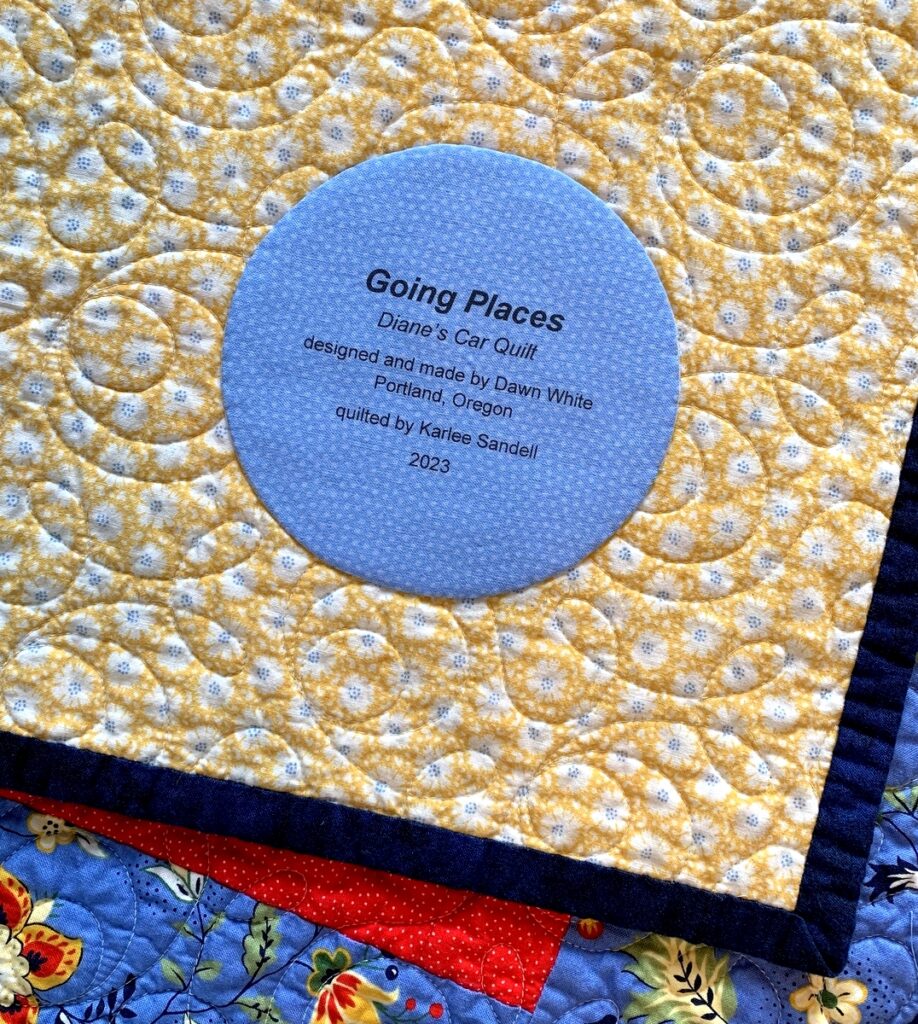
Going Places

Happy first day of December! I’m just popping in to tell you that Diane’s Car Quilt has a new and improved name:

After seeing my post of November 25 with pictures of Diane’s finished quilt, I heard from Sandy P., a mutual friend of Diane’s and mine. Sandy said she liked the way the Flying Geese look like arrows pointing in different directions and suggested Going Places as a possible name. How clever of Sandy! It’s the perfect name for a car quilt, yes?


Posted in family, quilt labels, tutorial, update | 4 Comments

It’s A Wrap: Diane’s Car Quilt

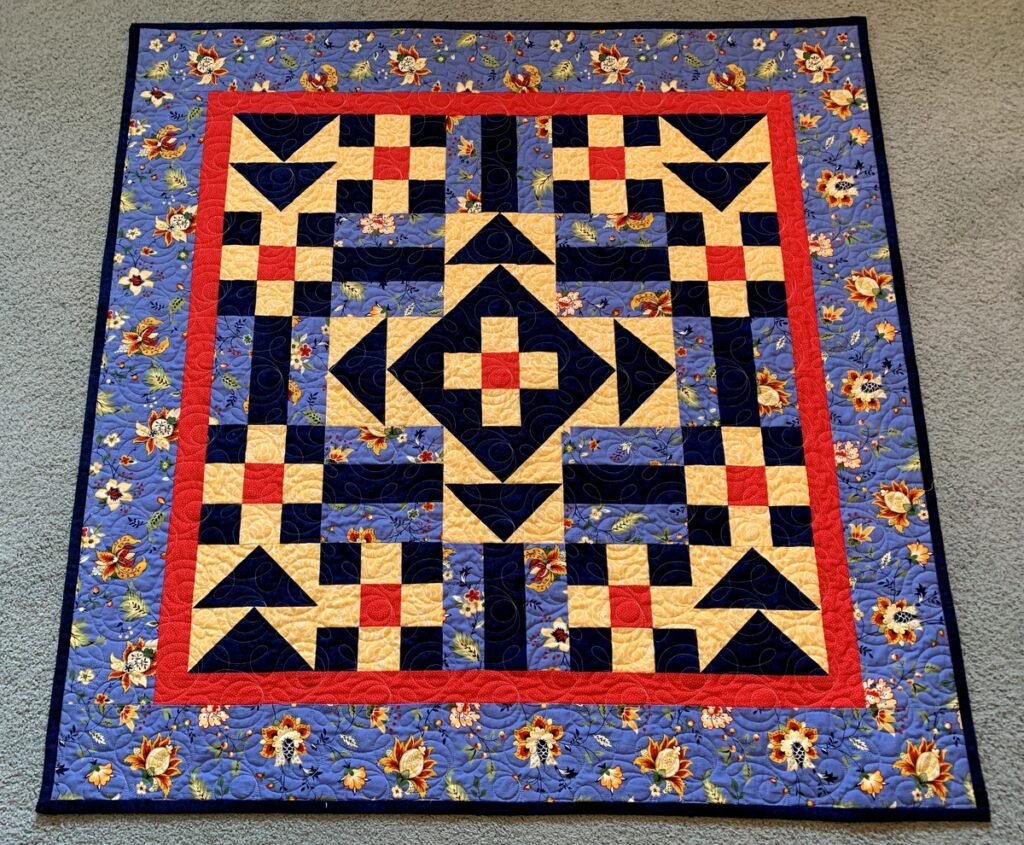
Finally! My sister Diane’s car quilt is bound and labeled. I wasn’t able to come up with a clever name for the quilt but Diane is quite content to have it identified as her car quilt. Here’s a look at the front so you can see how nicely the ½”-wide binding frames the quilt:

Diane’s Car Quilt, 42″ Square (2023)

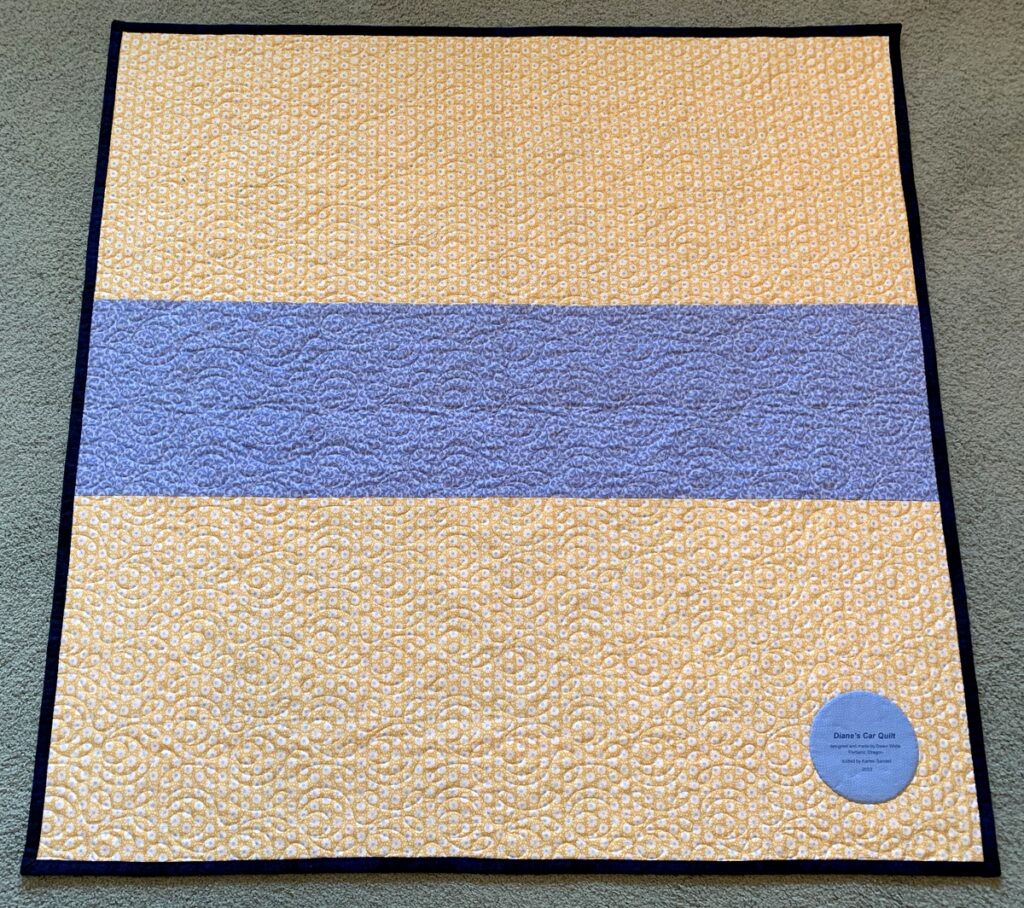
Here’s a look at the back:

The blue and yellow prints pulled from my stash work very well with the French provincial border fabric on the front.

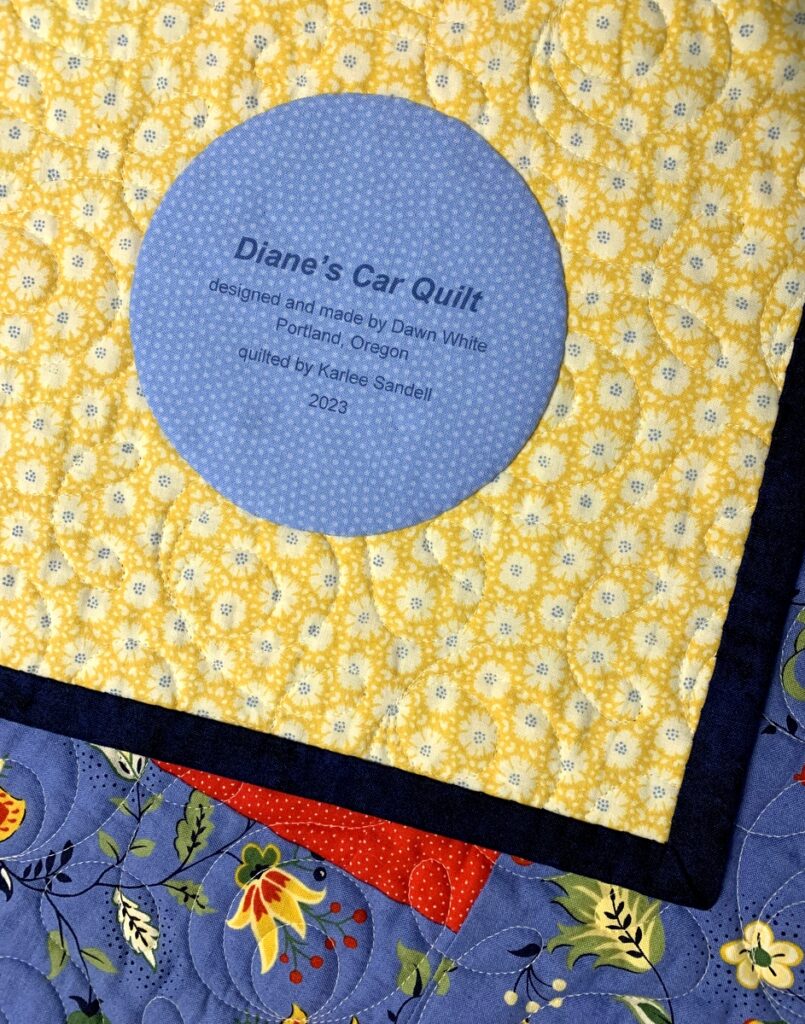
Here’s a close-up of my signature round label:

It was made using a compact disc as a pattern. You can find my picture-heavy tutorial on that method right here.

A couple of you asked about the pattern. I didn’t use a pattern; I designed this very simple quilt for a beginning quiltmaking class and it became my class sample. I started with alternating Nine-Patch and Rail Fence blocks. The blocks finish at 6″ square so the strips were cut 2½” wide for both blocks. Then, to give my students some additional options, I replaced some of the blocks with Flying Geese units; two units make a block that finishes at 6″ square.

This is the initial design rendered in the software program EQ7 and colored to match the palette of Diane’s quilt:

If you look carefully at the center of the quilt, you’ll see that the center block is a simple Nine-Patch. Notice that the corners of the block are navy blue. The addition of navy and yellow Flying Geese units around the center block creates the illusion of a navy diamond. I really like the effect and feel that it adds visual interest. With the right combination of fabrics, even a simple design like this can make a quilt sing.

If there is interest, I will write up my measurements and directions in a future post. The priority now, though, is to pop Diane’s Car Quilt into the washing machine and dryer for that wonderful crinkly effect.


Posted in family, quilt labels, Quiltmaking 101, tutorial, update | 4 Comments

One of These Days . . .

. . . I’ll get back to the business of quiltmaking. For now I seem to be in an extended home dec phase. Between making valances for my stepmother’s home and continuing my construction of Junior Billie Bag #12 for the class I am teaching, the quilt blocks on my design wall have been unattended for weeks. I will get back to them. All in good time.

It was work on my current Junior Billie Bag that interrupted quilt progress. When I posted about the JBB, I included a link to the Gingham Foundry fabric line I was using. Little did I know the link would lead me down a rabbit hole! You see, Montavilla Sewing Center, where I teach the JBB class, carried part but not all of the Gingham Foundry line. When I included a link to the entire line, I spied a fabric I could not live without. (You know what I mean, right?)

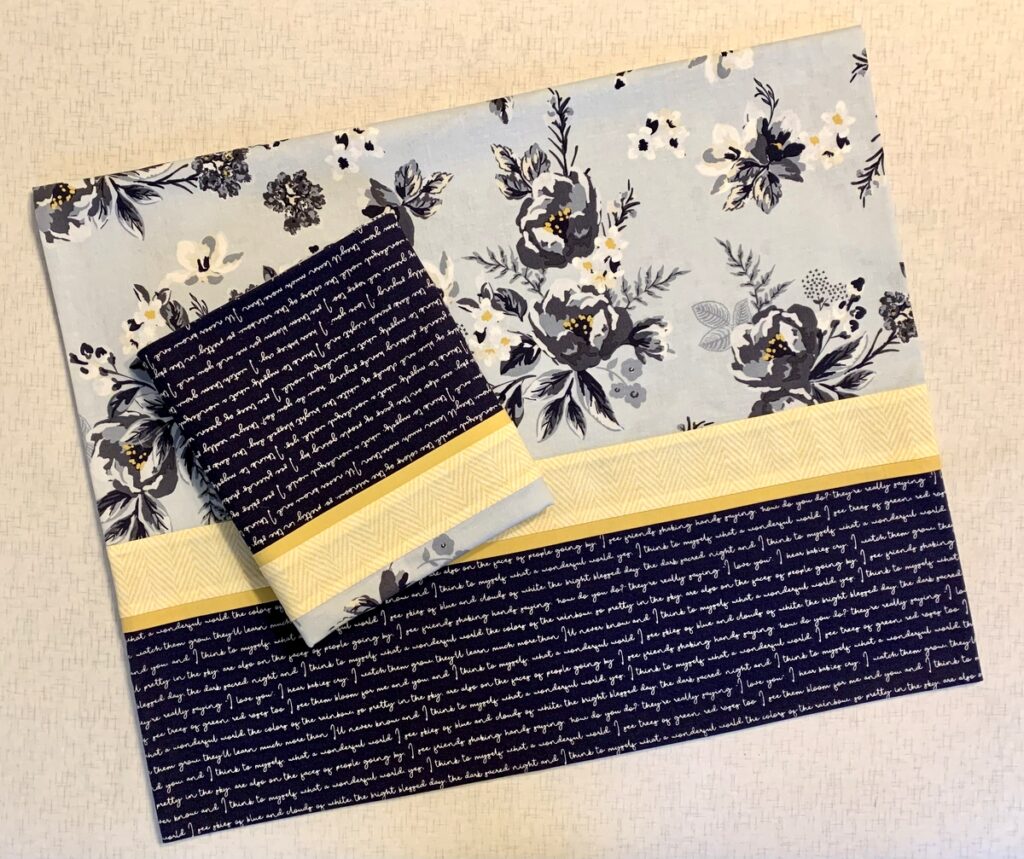
It was the main focus fabric in a background called “mist,” a pale blue gray. I knew in a heartbeat that I needed to get some of that fabric to make a pair of pillowcases for the Portland White House. Why? Because I could so clearly see the text print with lyrics to the song “What a Wonderful World” as the band at the bottom of the cases and the “mist” focus print as the body of the cases. Surely you agree!

Lucky for me, I found what I was looking for at an online quilt shop in Texas. The fabric arrived a few days ago, and this is what I have to show for it:

“What a Wonderful World” is one of my favorite songs. I am especially fond of the renditions by Louis Armstrong and Israel Kamakawiwo’ole but I also love the duet by Tony Bennett and k.d. lang. Is there another version I should know about?


Posted in Billie Bag, home dec, Junior Billie Bag, pillowcases, roll-it-up pillowcases, tutorial, update | 2 Comments

This Time the Dream’s On Me

What’s with the title of my blog post? It’s the name of a 1941 song written by Harold Arlen with lyrics by Johnny Mercer. You’ll understand as you read on . . .

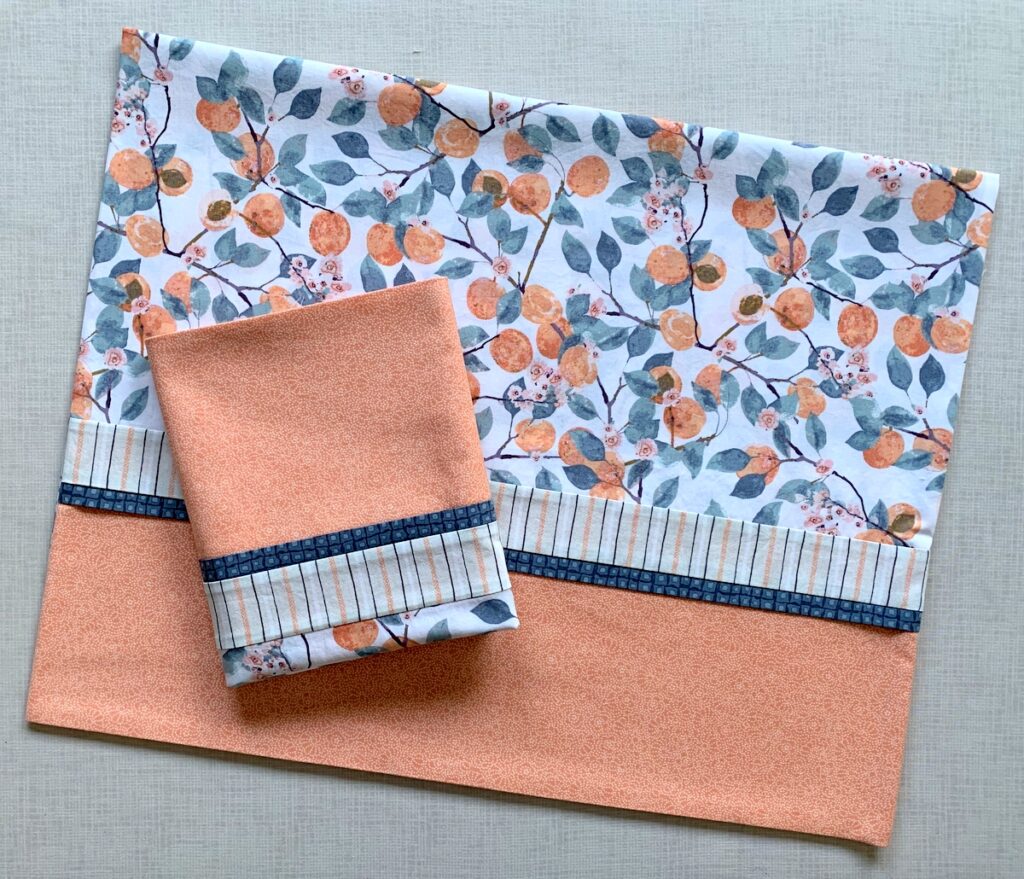
I gave myself the day off today from working in the yard to play in my sewing room.  What do you think of my new pillowcases for the Portland White House?

The main body, accent strip, and flange are from the “Mindscape” line of fabric designed by Katarina Roccella for Art Gallery Fabrics. The apricot-colored band at the bottom of the cases is a treasured piece of “Gypsy Girl” designed by Joanna Figueroa of Fig Tree & Company. If these four fabrics look familiar, it’s because I’m using them in my current Work-in-Progress, which I wrote about here.

That WIP has been on the back burner for most of May because the Dear Husband and I have been taking advantage of an unusually long stretch of warm dry weather to work outside. In a perverse sort of way, I’m wishing for a little rain to come our way so I can spend more time in my sewing room. Kidding! (Well, maybe not . . .)

It feels so good to finish a project. Pillowcases provide a fast way to achieve sewing satisfaction. Not instant gratification but pretty darn close. By the way, I followed my own tutorial to make what I call “Perfect Pillowcases.”

I’ll bet you can guess what the DH and I are sleeping on tonight! I predict sweet dreams.


Posted in family, home dec, pillowcases, roll-it-up pillowcases, tutorial, update | 9 Comments

Addendum: Hanging Quilts with 3M Command Strips

After seeing my last post on using 3M Command Strips to hang quilts, one of my readers asked an excellent question: “Can you successfully remove the strip from the back of the quilt?”

The answer is “yes” — but there’s a surprise involved. When you take a quilt off the wall that was hung with Command Strips, the strips stay on the wall — not the quilt! And there is no residue whatsoever on the back of the quilt.

I discovered something else quite by accident: if you’re planning to take one quilt down and put up another one of the same or slightly wider width, you can reuse the strips that are already attached to the wall. Serendipity!

On one wall in our main floor bath I took down Uptown Funk (now on loan to a quilt guild for an upcoming workshop) . . .

Uptown Funk, 24″ x 26″ (2020)

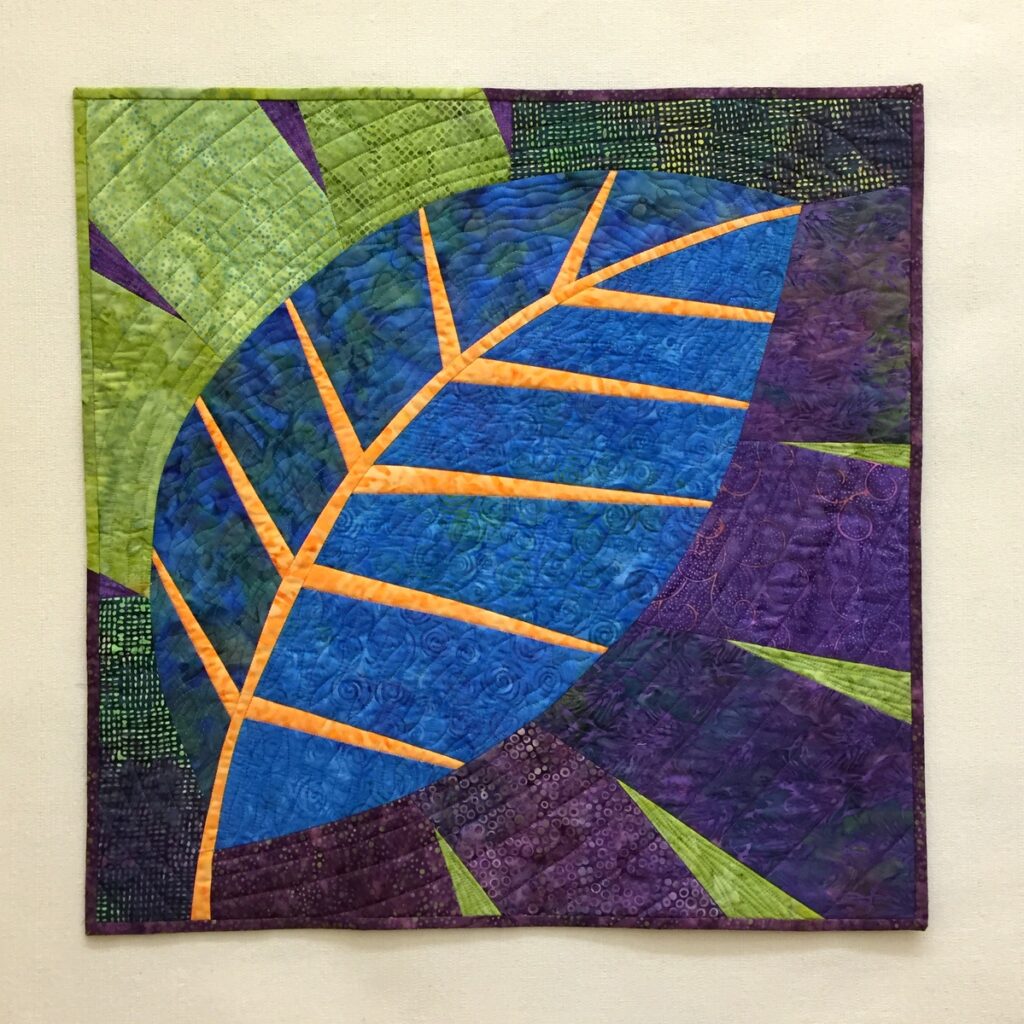
. . . in order to hang Loose Leaf:

Loose Leaf, 24 1/2″ square (2015)

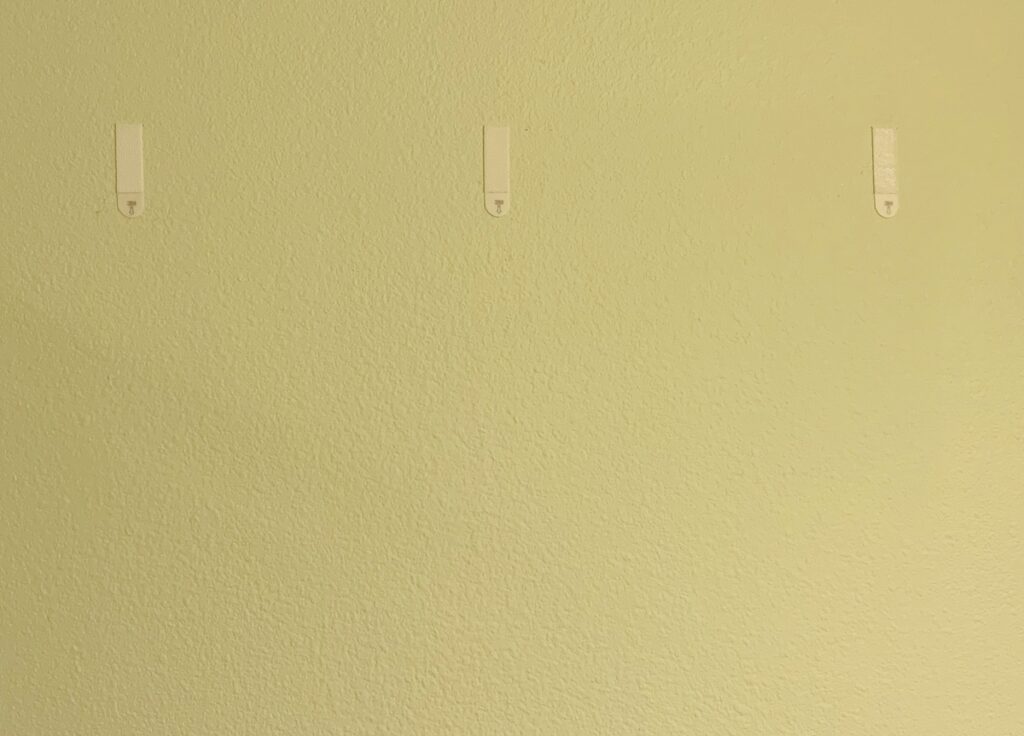
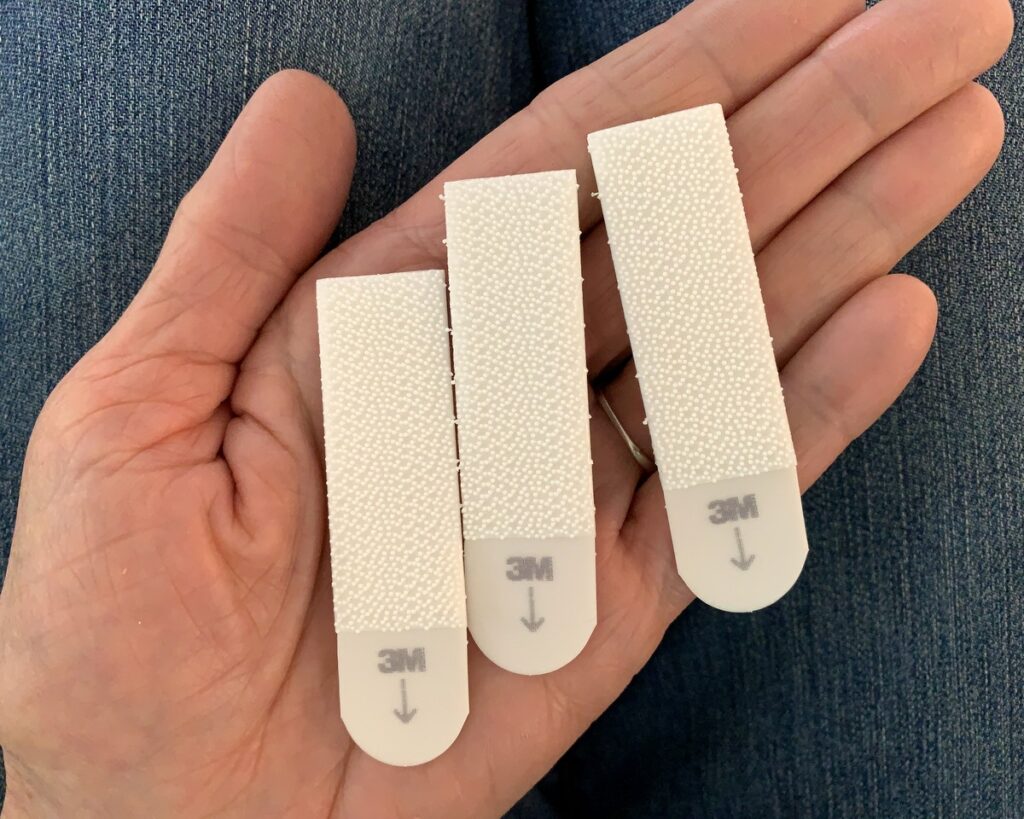
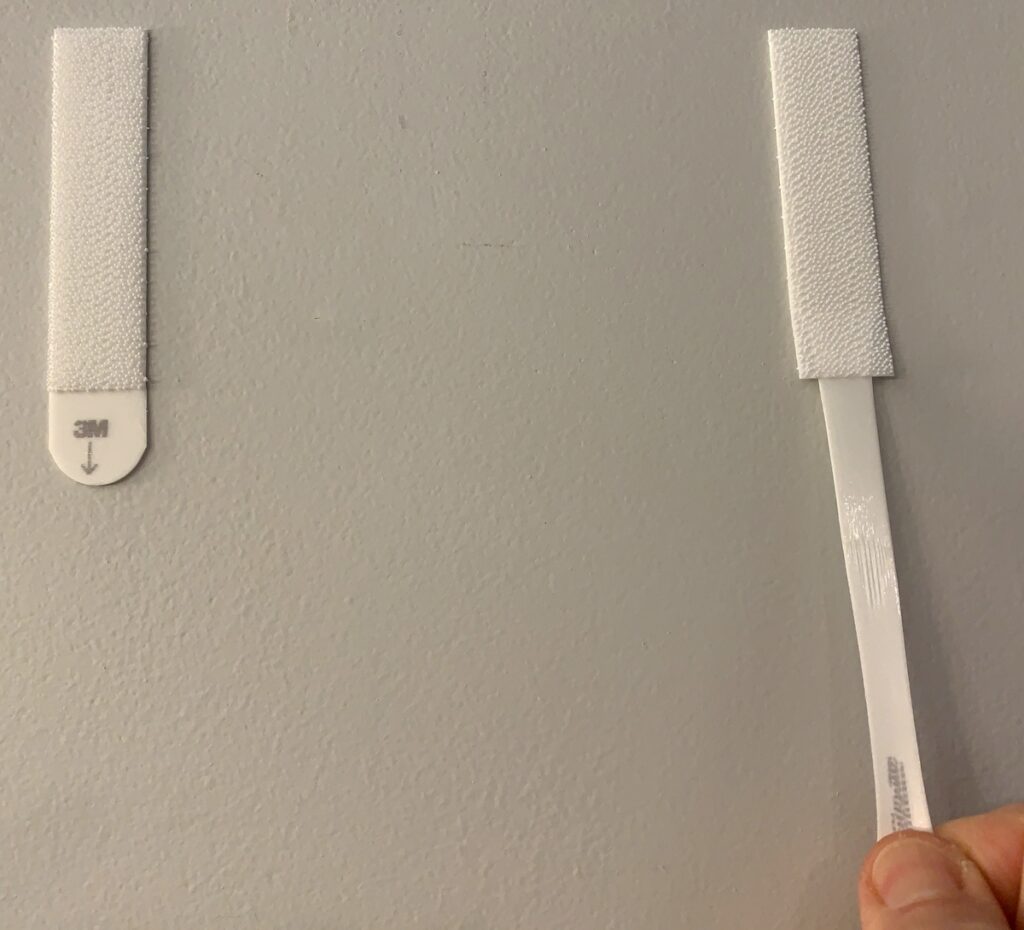
I saw that I had hung Uptown Funk using Medium-size Command Strips, which measure ¾” x 2¾”. All I had to do was separate the top strip from the bottom strip of each pair on the wall. You will remember from my previous post that the strips work in pairs, with the Velcro-like textured sides coming together with an audible click. It’s quite easy to separate them, leaving one half of the pair on the wall with the Velcro-like side exposed:

I took three new strips from the package (each strip is half of a pair) . . .

. . . and pressed each Velcro-like side to its mate on the wall. Then I peeled off the paper backing to expose the adhesive and pressed Loose Leaf into place. Easy as pie! It took less than two minutes.

If you’re the least bit apprehensive about attaching adhesive strips to either your wall or your quilt, I have a suggestion. Start with one pair of Command Strips. Remove the paper backing from one strip and attach it to the back of one of your quilts. Remove the paper backing from the other strip and attach it to a wall in an inconspicuous place — perhaps behind a door or a piece of furniture. Leave both strips in place for a week or two. Then remove the strips, remembering to pull straight down and very slowly on the rounded tab . . .

. . . until the strips completely separate from the fabric and the wall.

Pulling slowly and straight down on the tab is what loosens the bond between the adhesive and whatever it is attached to (fabric or wall). If you pull the tab out from the wall instead of straight down, you run the risk of pulling part of the wall or paper off with the tab. (This has never happened to me, by the way). If you pull too fast, the strip will snap you like a rubber band when it comes off. (This has happened to me but it won’t ever again, I assure you.)

I predict that trying this experiment will give you the confidence to hang your own quilts with Command Strips.


Posted in home dec, New Big Leaf, tutorial, update, wall hanging, wonky Dresden neighborhood | 2 Comments