Category Archives: quilt labels

Printing Quilt Labels on Fabric: A Tutorial

Back in May — doesn’t that seem like a hundred years ago? — I wrote about a method I discovered quite by accident of printing computer-generated labels on fabric. It requires only two items: fabric and fusible interfacing — no freezer paper involved. I described my method and promised to write a proper tutorial on it. Here is that tutorial. Better late than never, right?

I’ve written this tutorial in two parts. Part 1 is all about getting the fabric ready. Part 2 is about creating the label on your computer.

Part 1, Preparing the Fabric for Your Label

Step 1. Choose a fabric for your label that allows the type to show clearly. The fabric can be a solid or tone-on-tone print in a light to medium-light value. You might also be able to use a printed fabric — perhaps one you used in your quilt – if it’s not too busy or too dark in value to make the printed label hard to read. I’m illustrating this tutorial by making a label for my most recent UFO finish, Lilacs in September, using a medium light spring green fabric with a crosshatch design.

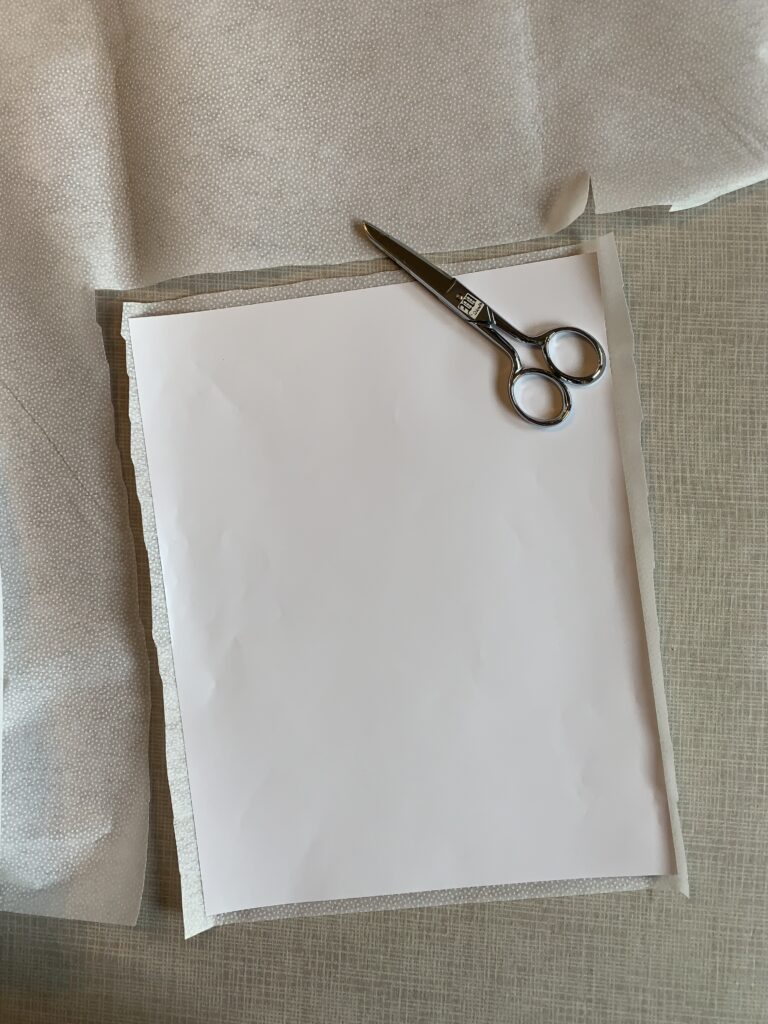
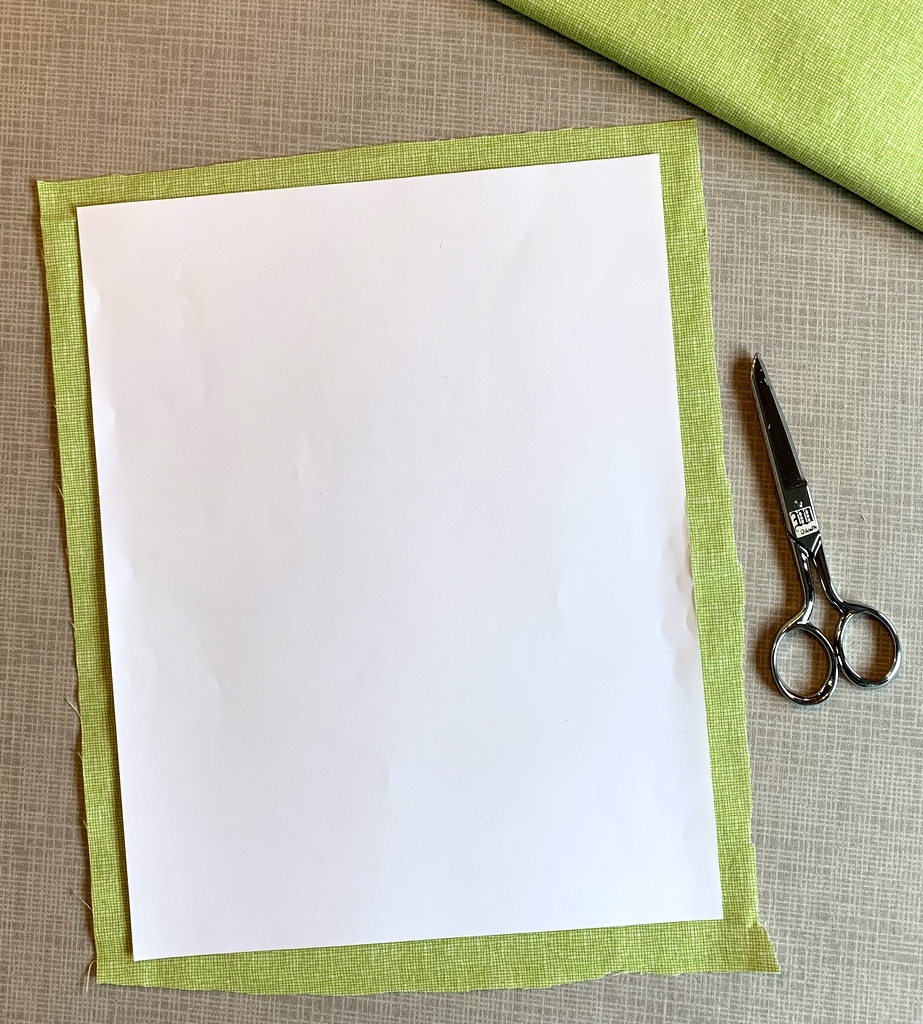
Step 2. Cut the label fabric about ½” larger all around than a printed page. In the United States the standard paper size is 8½” x 11” so you would cut your fabric about 9½” x 12”. It doesn’t have to be exact. I just lay a piece of paper on top of my label fabric and cut around it with scissors:

Step 3. Choose a featherweight or lightweight fusible interfacing. I use Pellon 911FF (the FF stands for featherweight fusible) for most of my labels but other brands will work equally well.

Step 4. Cut the fusible interfacing slightly smaller than you cut the label fabric. I do this the same way, by laying a piece of paper on top of the interfacing and cutting around it with scissors:

Cutting the interfacing slightly smaller assures that you won’t accidentally fuse it to your ironing board cover when you iron it to the label fabric. No need to ask me how I know that . . .

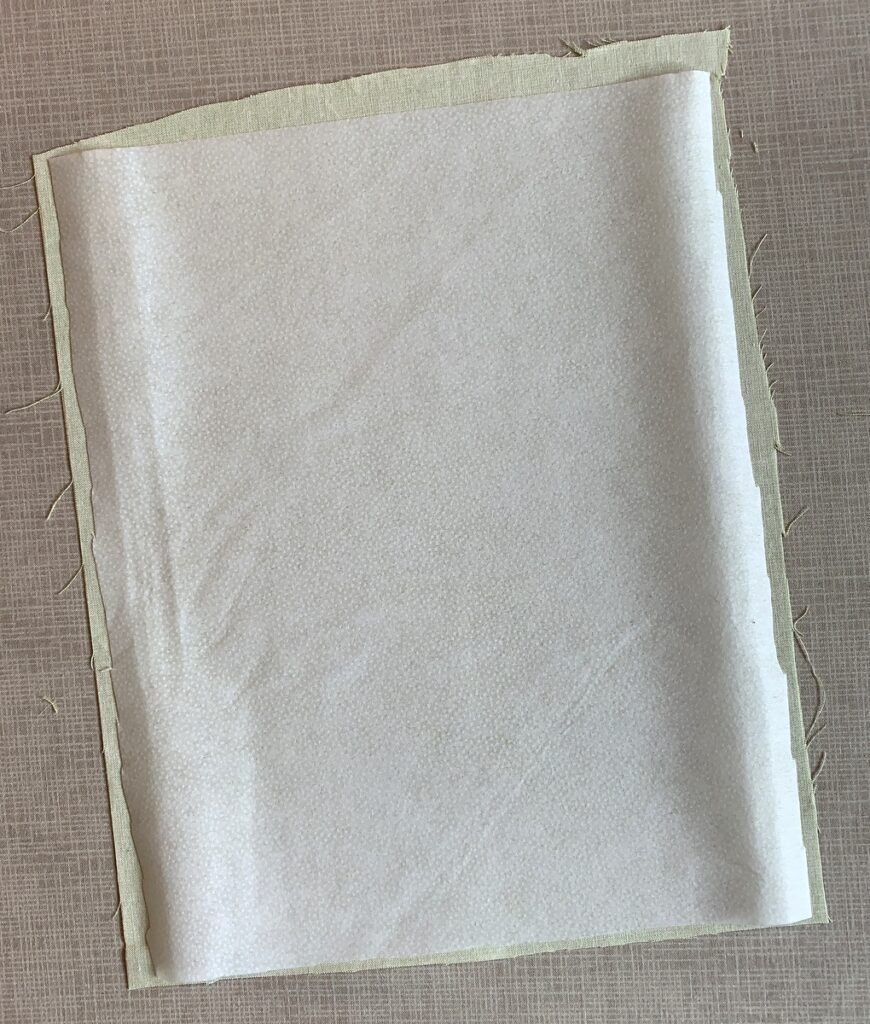
Step 5. Place the fusible side of the interfacing on the wrong side of the label fabric, making sure none of the fusible extends beyond the edges of the label fabric . . .

. . . and fuse in place following the manufacturer’s directions.

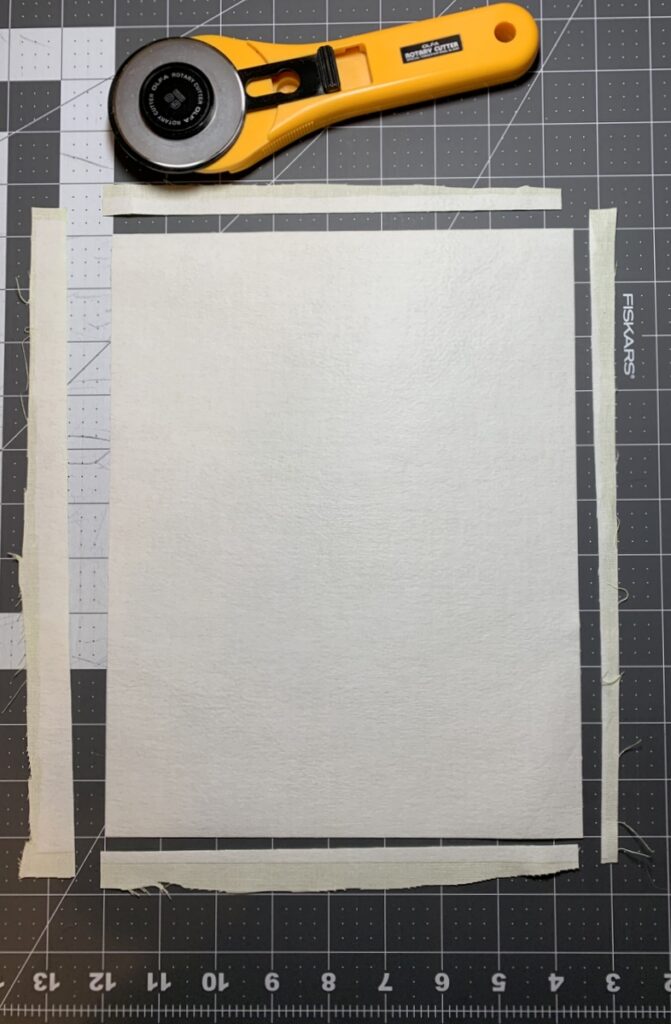
Step 6. Place the fabric on your cutting mat interfacing side up. Trim to 8½” x 11”:

Make sure your cutting is precise because the piece of interfaced fabric needs to fit perfectly in the paper tray of your inket printer.

Step 7. Place the fabric in your printer’s paper tray. (Make sure you know whether the fabric side needs to go in the tray right side down or right side up, as it varies from printer to printer. It goes right side down in my HP Office Jet Pro 8620.) Now print the label:

Voilà! It should slide out of the printer just as if it were a piece of paper. (You’ll notice I put two labels on my page; I’ll explain why in Part 2.)

One more thing to do:

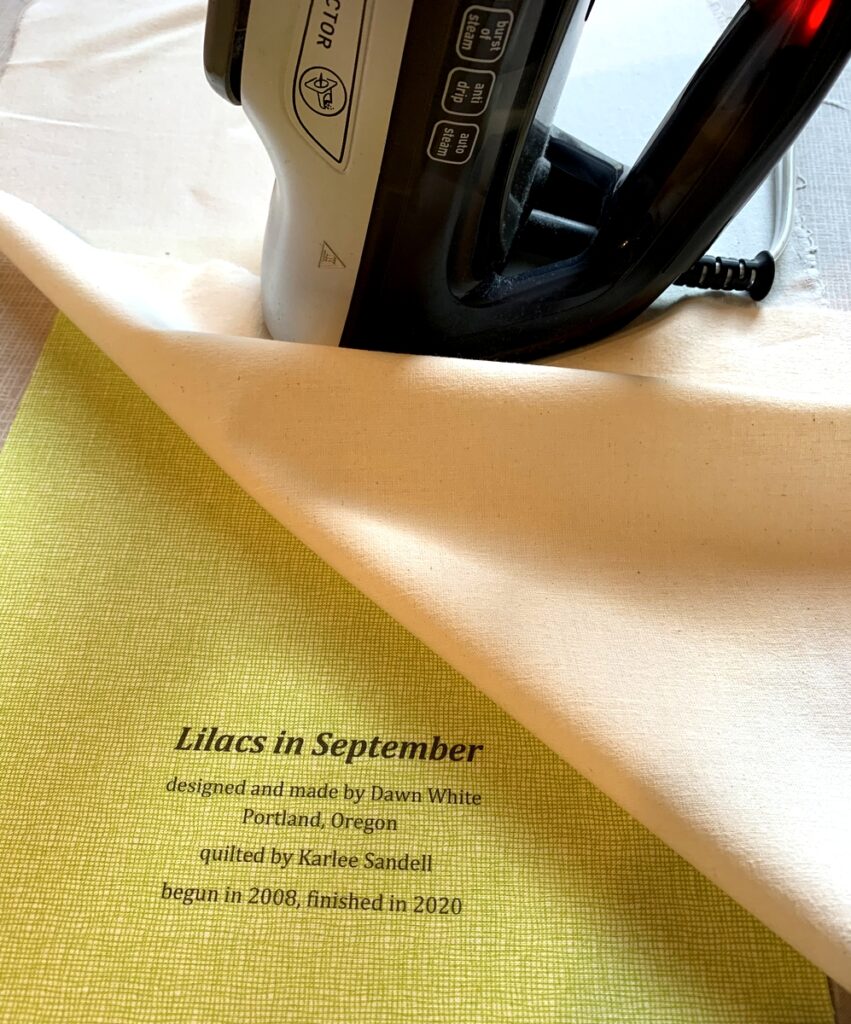
Step 8. Heat-set the ink on the label using a press cloth and plenty of steam:

This helps to keep the ink on the label from fading with repeated washings. Irons vary widely so let me caution you not to have the iron too hot as it may scorch the label, even with a press cloth on it. I like to set my iron on medium high and, with the press cloth on top, steam the writing on the the label for 10 seconds. I let it cool and steam it for 10 more seconds.

Now you’re ready to finish your label and attach it to your quilt. You’ll see in Part 2 below that I like to make my labels round but yours can be any shape you want. Squares and rectangles are popular and easy because all you need to do is turn and press the raw edges under ½” or so and stitch the label to the quilt.


Part 2. Creating the Label on Your Computer

Step 1. Open up a new document on your computer and type the information you want to include about your quilt. What you put on your label is entirely up to you. At a minimum I always include:

the name I have given my quilt
my name
my city and state
the name of my quilter (if I didn’t quilt it myself)
the year of completion

Notice that each line is centered.

If my quilt is an original design I might say “designed and made by Dawn White.” If the quilt was made from one of my own patterns I might include the name of the pattern or say “designed and made by Dawn White of First Light Designs.”

If my quilt was made using someone else’s design, I always credit the designer:

If I tweaked someone’s design, added my own design elements, or significantly changed construction techniques, I might add a line such as “based on (pattern) by (name of designer)” or “inspired by (name of designer)”:

Step 2. Determine the point size and typeface of your label. The point size refers to the size of the type, e.g. 12 point, 14 point, etc. The typeface refers to the design, or style, of the lettering. Most word processing programs offer dozens of typefaces to choose from. On my computer these typefaces are called “theme fonts.” (Did you know that font is the French word for face? Now doesn’t the word typeface make more sense?)

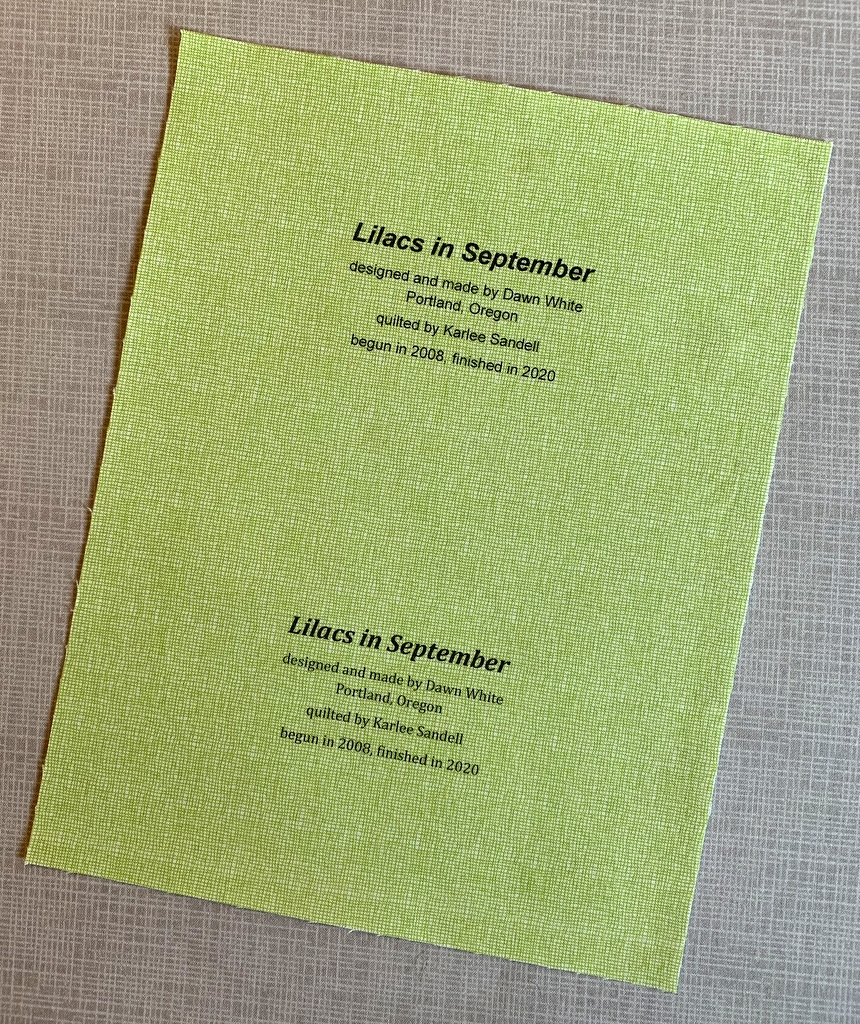
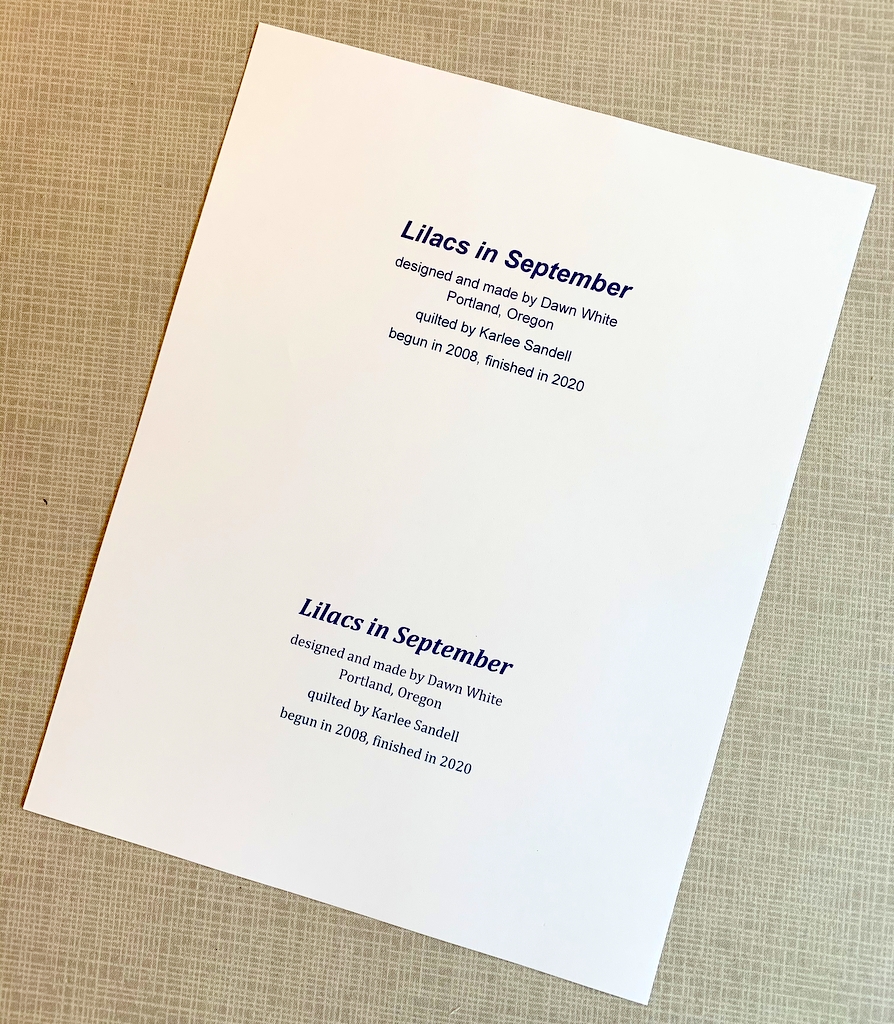
The point sizes you choose depend on the size and shape of your finished label and how much information you want to include. My label for Lilacs in September has five lines of copy. I put the name of the quilt in 24 point boldface and italic. The lines underneath are in 14 point. I auditioned a sans serif type face called Arial and a serif typeface called Cambria. Both labels fit on one page so I could make my final decision on which one to use after this page was printed on fabric. (Putting two labels on one page is just an option, of course. You could create one label and center it on the page, which would give you a lot of flexibility in deciding later on the shape of your label.)

Step 3. Save your document.

Step 4. Print your label on paper. This gives you a good sense of what the label will look like printed on fabric. Here is my label for Lilacs in September, printed with black ink:

If you have a color printer you can experiment with different colors of ink. Print the labels on paper first to test the depth of color. You may find the ink doesn’t look quite as dark or as vivid on fabric as it did on paper.

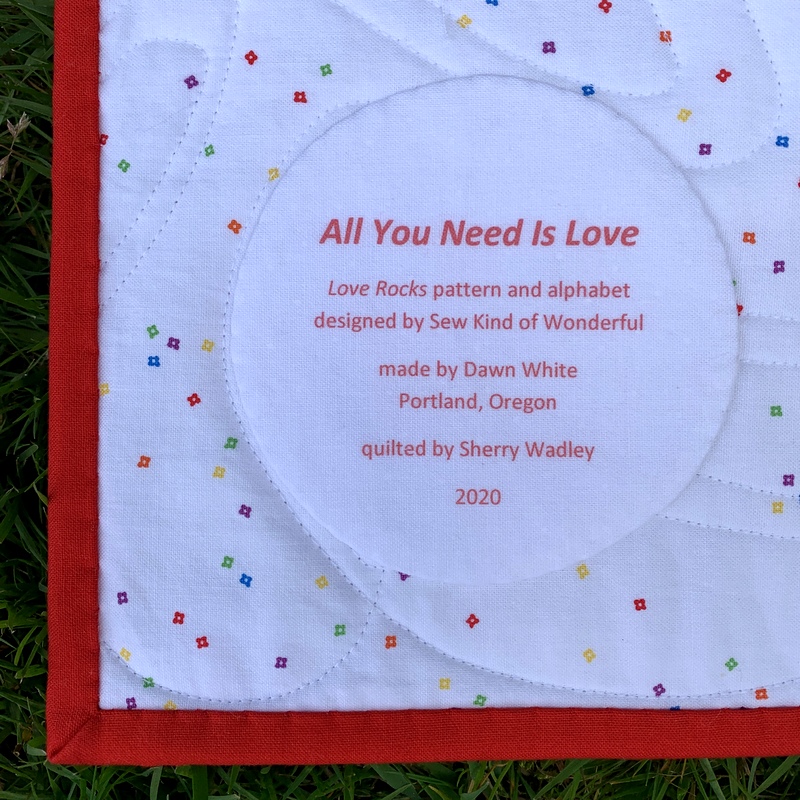
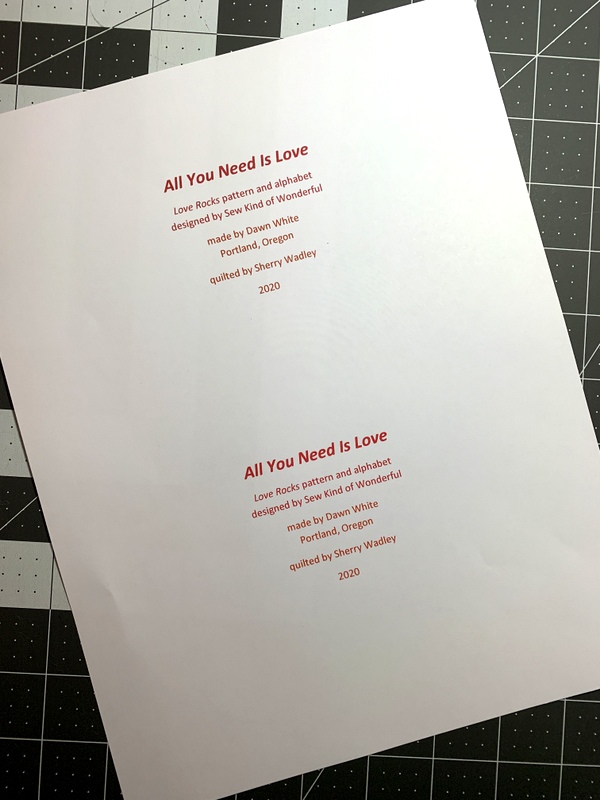
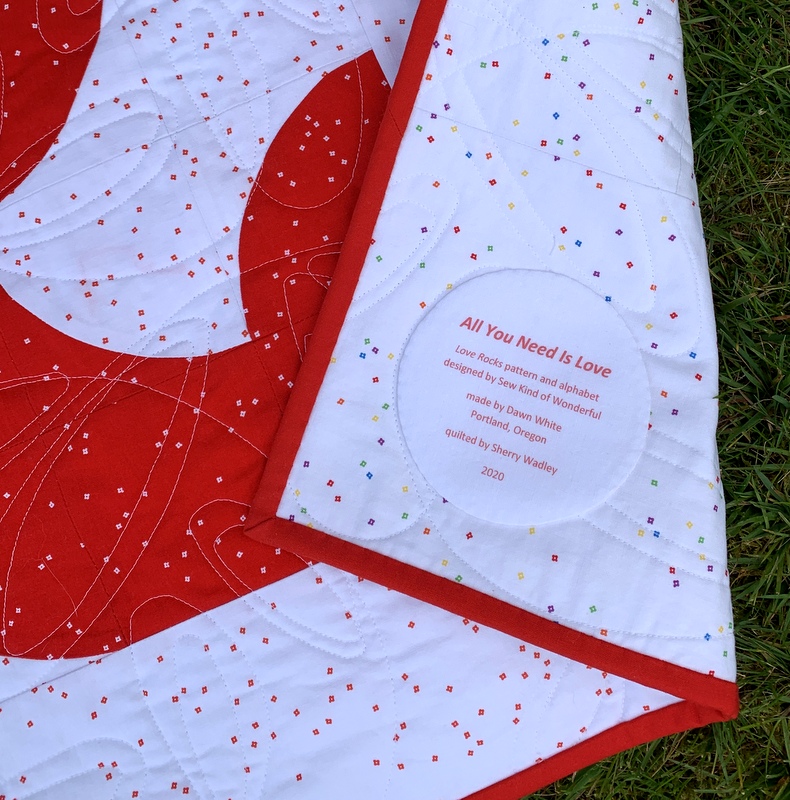
I used red ink on my label for All You Need is Love:

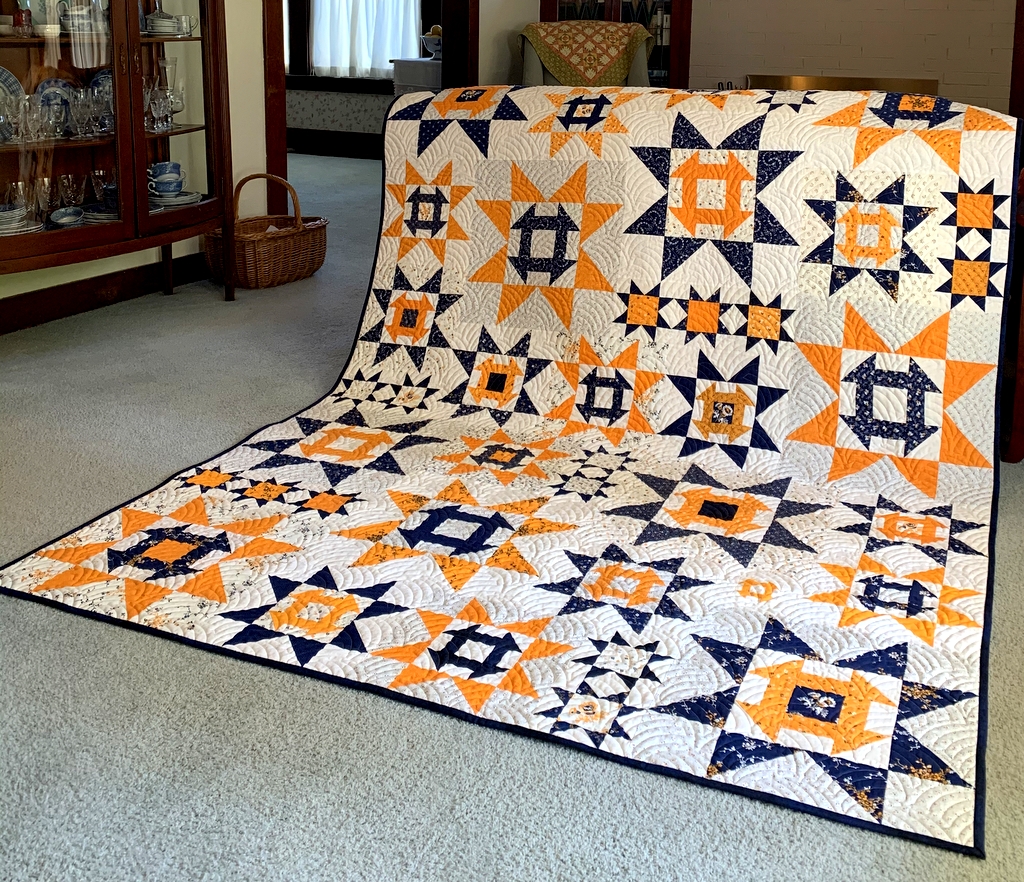
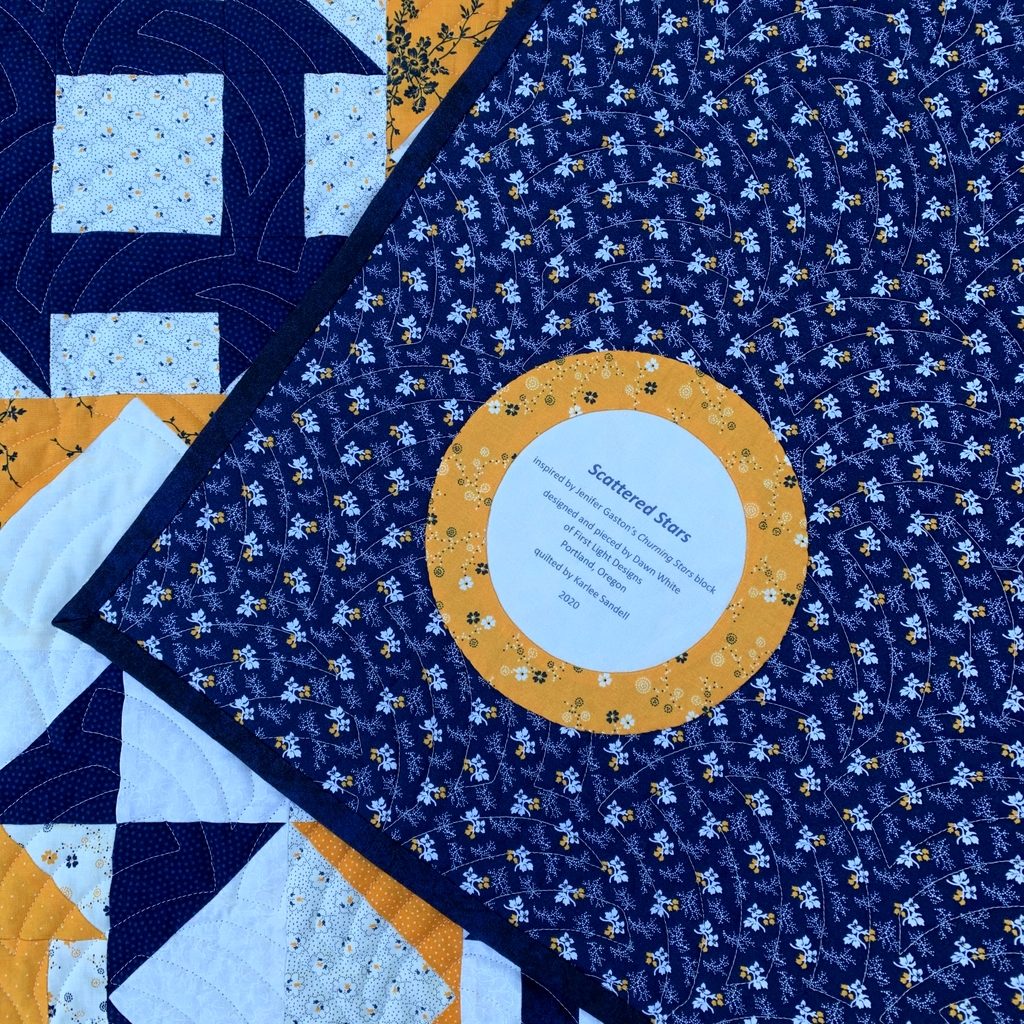
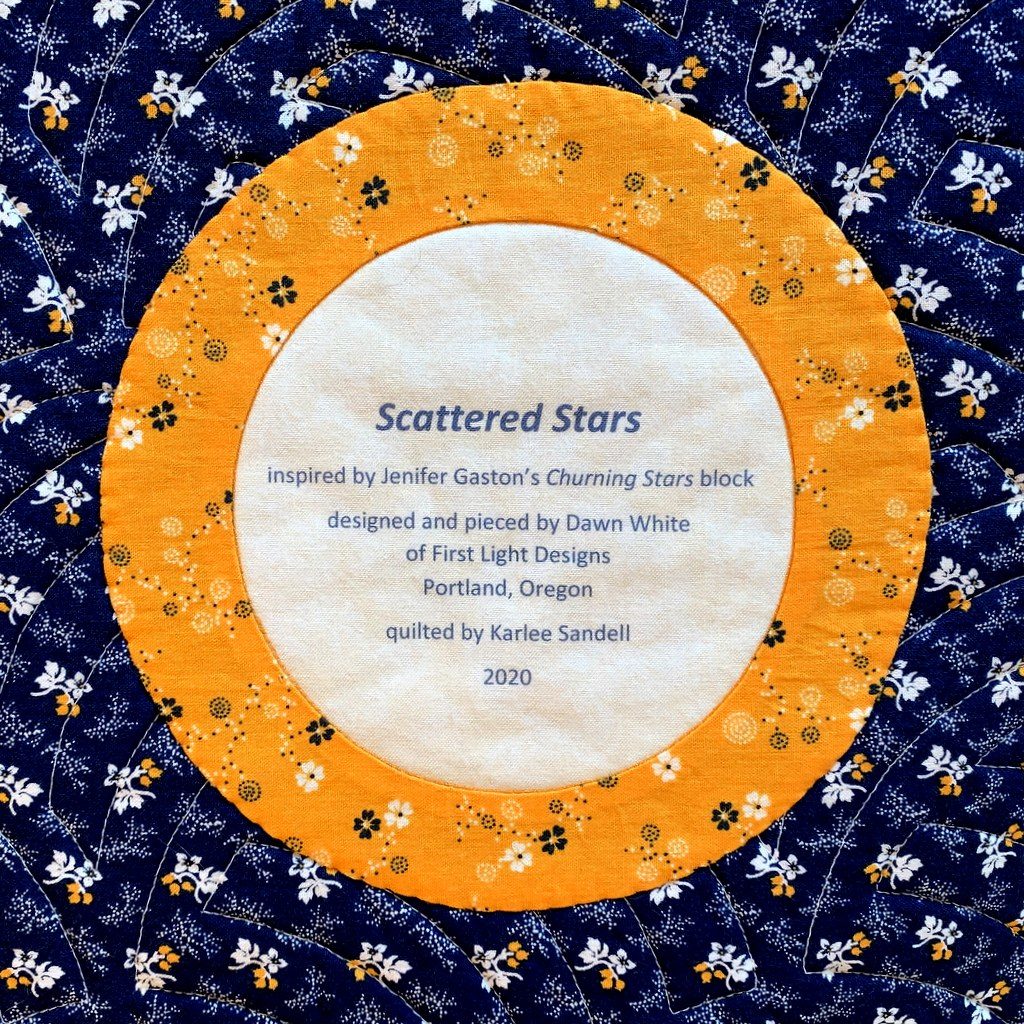
Take another look at the label for Scattered Stars, my cheddar and indigo quilt. I used indigo ink which turned out to be not as dark as I was expecting but I still chose it over black:

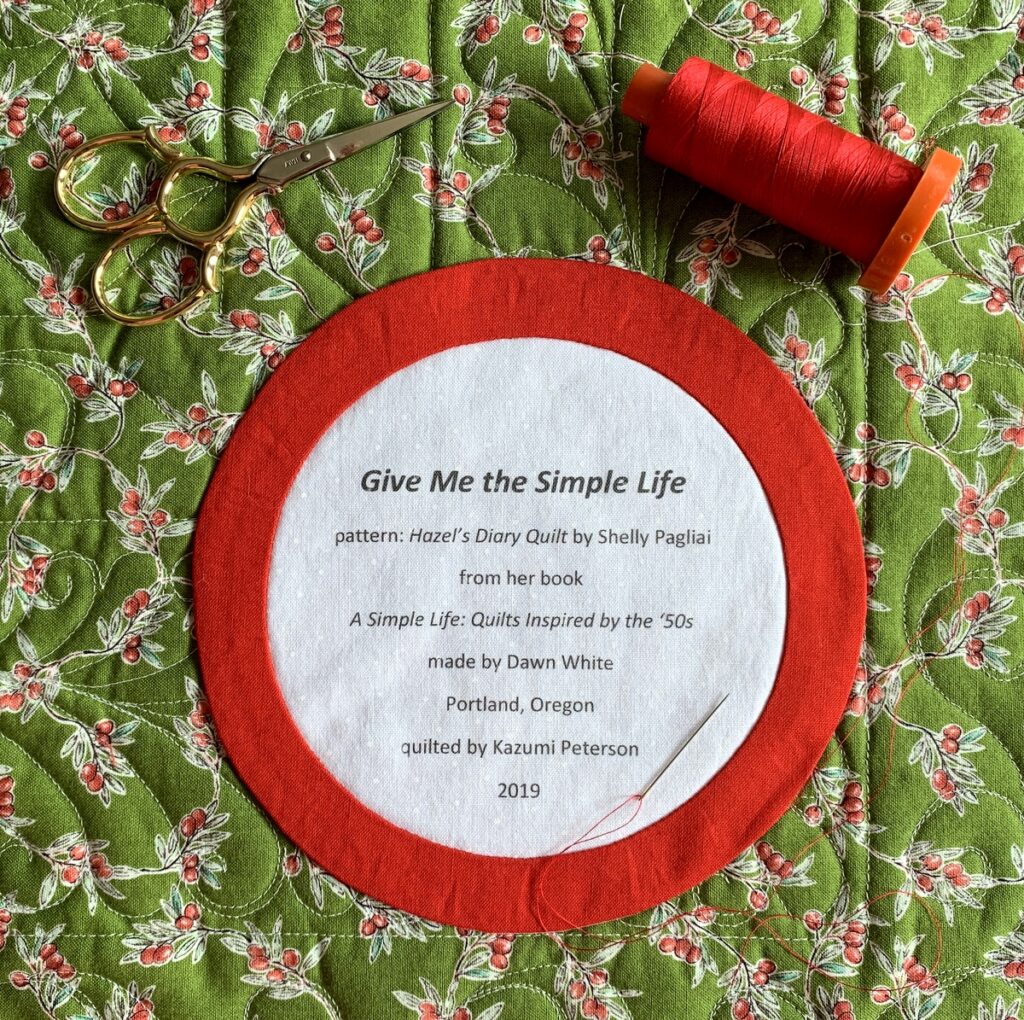
Most of my round labels are made using a compact disc as a pattern. A CD measures 4⅝” in diameter so a label with a few lines of text fits inside that circle nicely. My label for Give Me the Simple Life has eight lines but still fits inside the compact disc pattern size:

The addition of the red ring made the label finish at about 6″ in diameter.

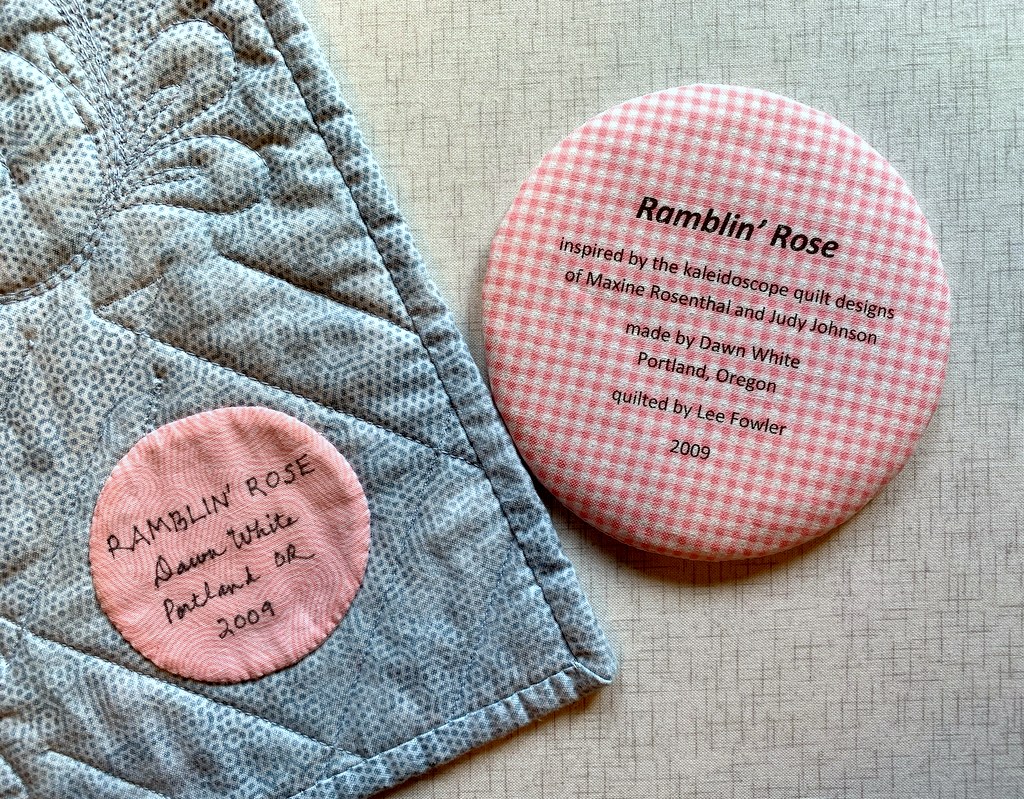
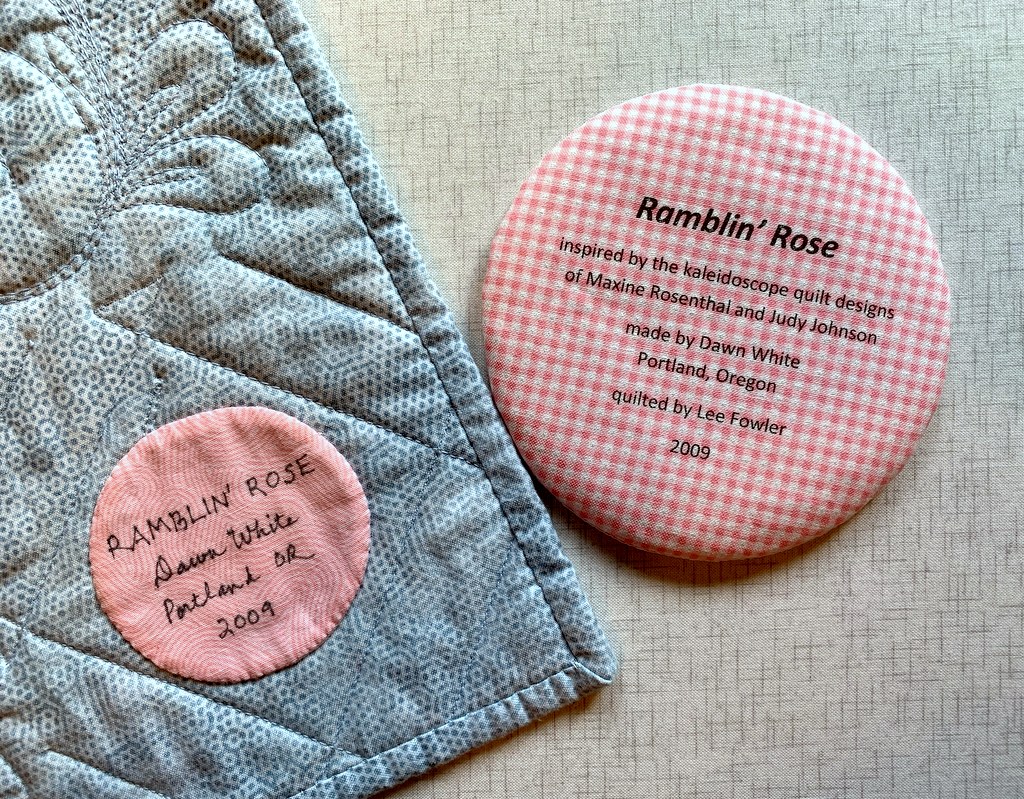
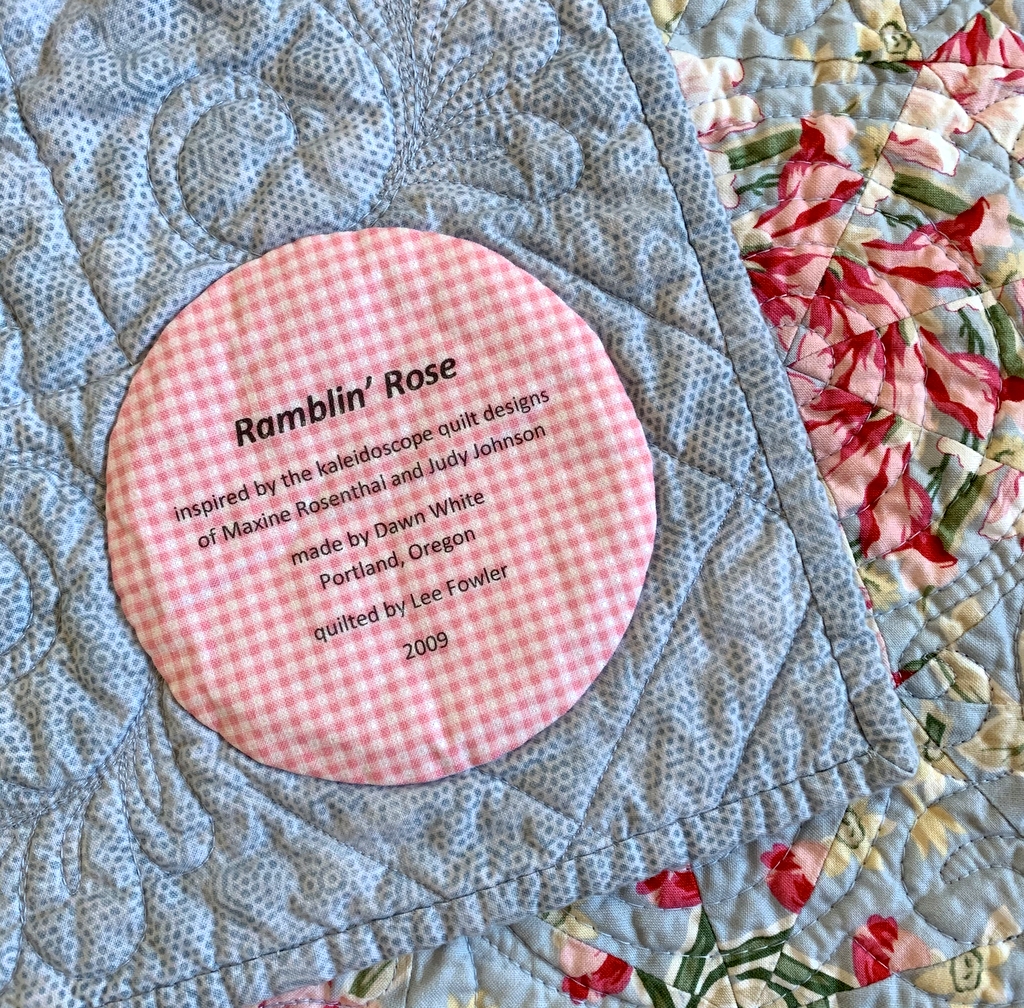
Below is a computer-generated label I made in May to replace a label on Ramblin’ Rose, made several years ago. I had omitted two significant pieces of information — the inspiration for my quilt and the name of the longarm quilter — and wanted to correct those oversights. In the photo below the original label is still on the quilt, about to be removed and replaced with the one on the right:

I used to write all of my labels by hand, a time-consuming endeavor. Creating them on the computer and printing them directly onto fabric has turned out to be quick and easy — and rather fun to do. I don’t think I’ll ever go back to hand-printed labels.

I hope you find my tutorial helpful. Be sure to let me know if you have any questions. As always, thank you for visiting First Light Designs!


Note: I followed up this tutorial with a new one, posted Nov. 6, about how I make my round labels using a compact disc. You can find it here.



Posted in appliqué, cheddar and indigo, Churning Stars quilt block, Hazel's Diary Quilt, quilt labels, tutorial, update | 9 Comments

It’s a Wrap: Scattered Stars

Finally! I got the label made today for my cheddar and indigo quilt, Scattered Stars, so I can officially declare it finished:


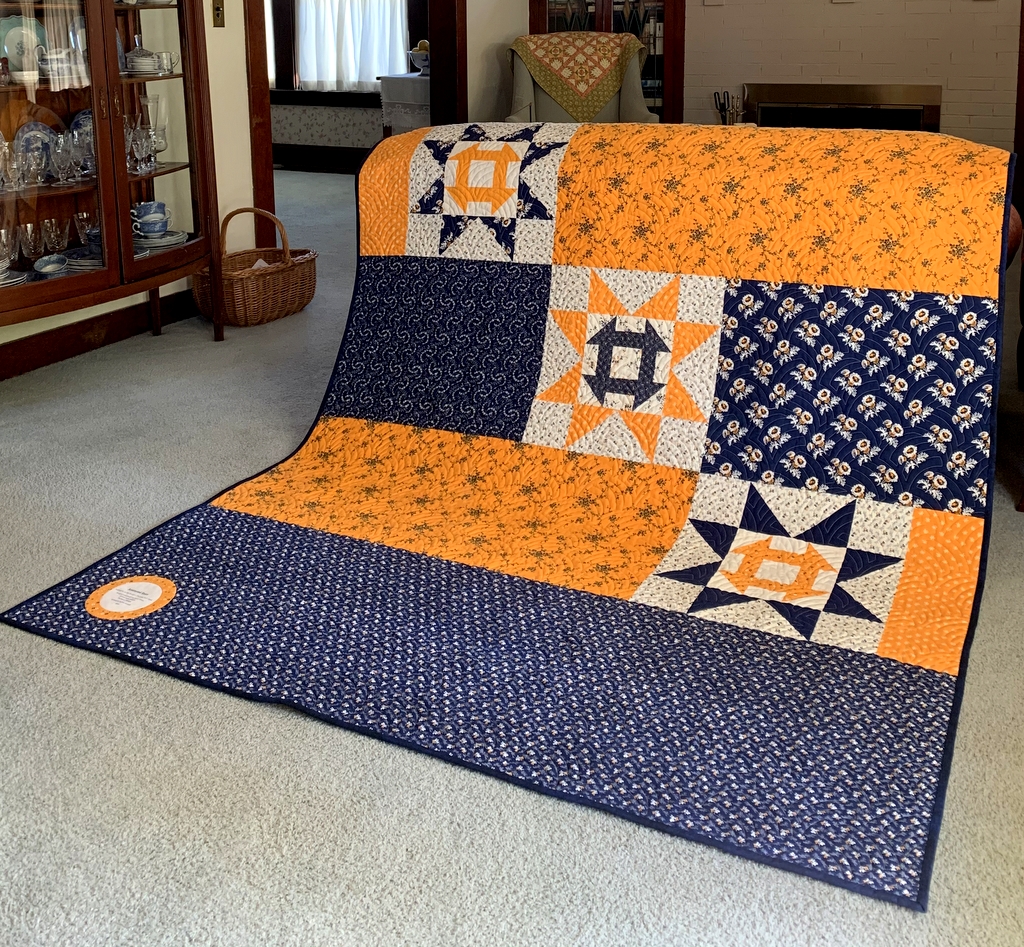
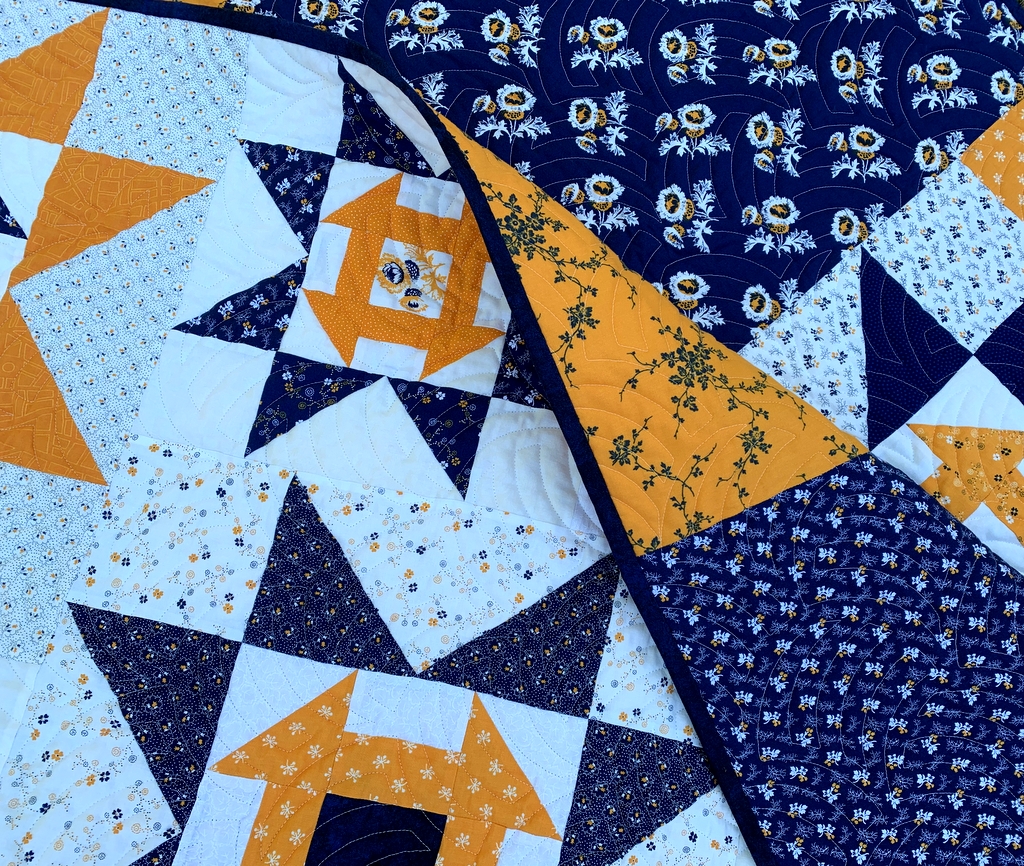
Here’s a look at the back:

Scattered Stars finished at 66″ x 88″.

For the label I made an inset circle and then enclosed it in another circle:


Here’s a close-up:


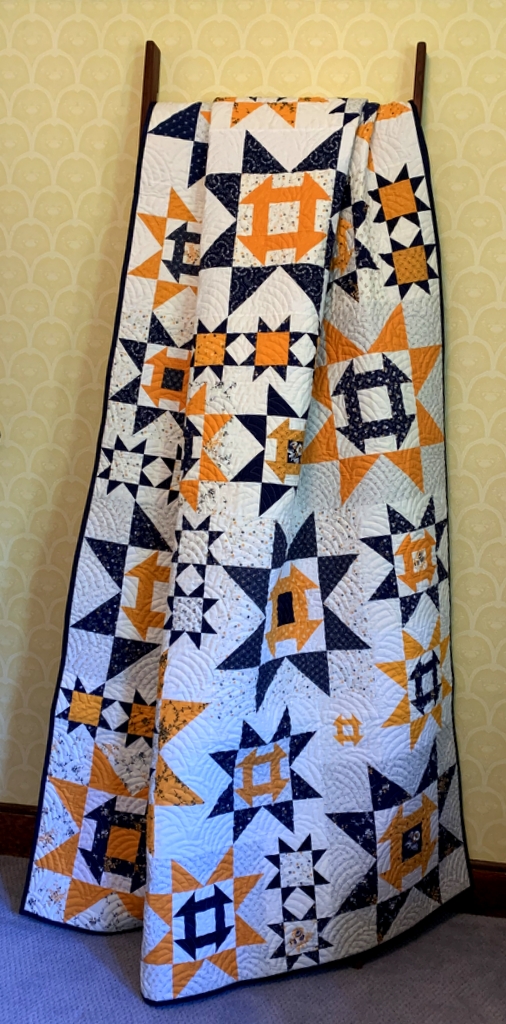
I tried arranging Scattered Stars artfully on a quilt ladder, with mixed results:

At least you get a good look at the beautiful quilting done by Karlee Sandell of SewInspired2Day.

The quilt motif is “Woven Wind,” a contemporary version of the classic Baptist Fan design.

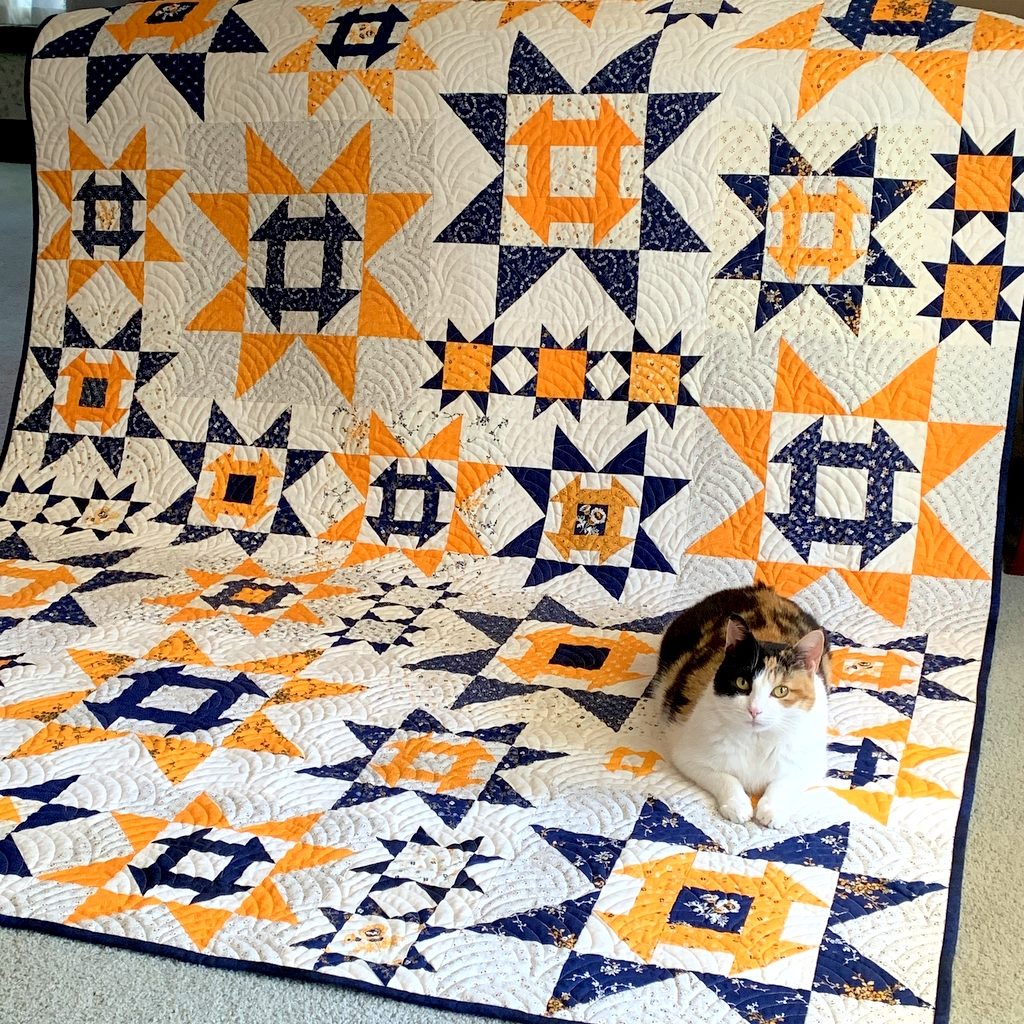
Coco photobombed my quilt at every step in its construction so it seems only right that she should show up for the final reveal:

Thank you for following along on my quiltmaking journey!


Posted in cats, cheddar and indigo, Churning Stars quilt block, quilt labels, update | 16 Comments

Who Knew?

Who knew that playing around with computer-generated quilt labels could be so much fun? Well, not everyone’s kind of fun, I suppose. But I was delighted to learn from comments on my last post that my accidental method of making labels with fusible-backed fabric worked for other quilters using different fusibles and printing their labels on different computers. As promised, I will work on a tutorial for my website to show the method step by step.

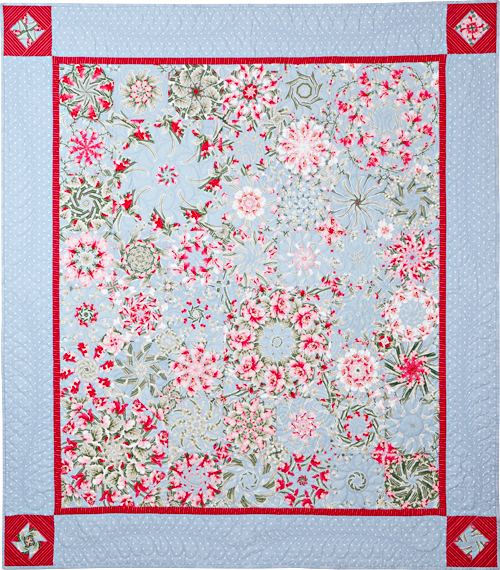
One quilter, Marge, noted that she starches her label fabric and sends it right through the printer. No interfacing, just one layer of fabric. Of course I had to try it! I decided to make a new label for Ramblin’ Rose, another kaleiodoscope quilt from 2009 that needed more information:

Ramblin’ Rose, 53″ x 59″ (2009)

I’m happy to report that Marge’s method worked beautifully. Marge did say she “starches the heck” out of her fabric so I made sure I did too. As a matter of fact, I spent more time starching the fabric than I would have just fusing interfacing to fabric. You really have to iron the fabric after each application of starch until it’s completely dry. The weight and feel of the “page” of starched fabric felt almost identical to the fused layer I experimented with earlier.

Unfortunately, when I printed my starched page I realized that the top line of the label was too close to the top of the page, not allowing enough room to draw around a compact disc for my preferred round label. I had to prepare a new one. Instead of starching a new piece of fabric, I went back to my method of fusing interfacing to the label fabric.

Here’s the old label still on the quilt and the one I just made:

In my last post I described how I used a piece of quilter’s cotton for the back of my label. My friend Arden suggested I try using fusible interfacing instead. That’s what I use for my label backing when I make hand printed labels. With those I have only two layers: the label fabric and the interfacing used for the backing instead of fabric. With a computer-generated label, though, I have three layers: the label fabric fused with interfacing and the second piece of interfacing used as the label backing. Would two layers of interfacing plus the label fabric make the finished label too stiff, I wondered?

Worth a try. Yes, the label did feel a little stiff and I found it very challenging pushing the needle through the layers when I hand appliquéd the label in place. I’m wondering if washing the quilt would soften the label a bit. Ramblin’ Rose has been displayed on a quilt rack in my sewing room for over a decade so it could probably use a trip to the laundry room. I’ll toss it in the washer and dryer and report back.

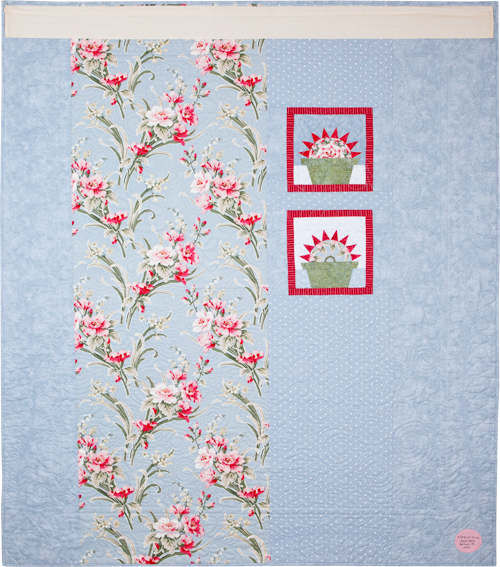
By the way, here’s a look at the back of Ramblin’ Rose (with the old label still in place — and the hanging sleeve so it could hang in a quilt show):

Update

Ramblin’ Rose has made her trip through the washer and dryer, and I’m delighted to report the label turned out beautifully: it has body but is still supple like the rest of the quilt:

This method is definitely a keeper!


Posted in 4-Patch Wonder, appliqué, kaleidoscope quilts, quilt labels, tutorial, update | 2 Comments

Label Me Surprised

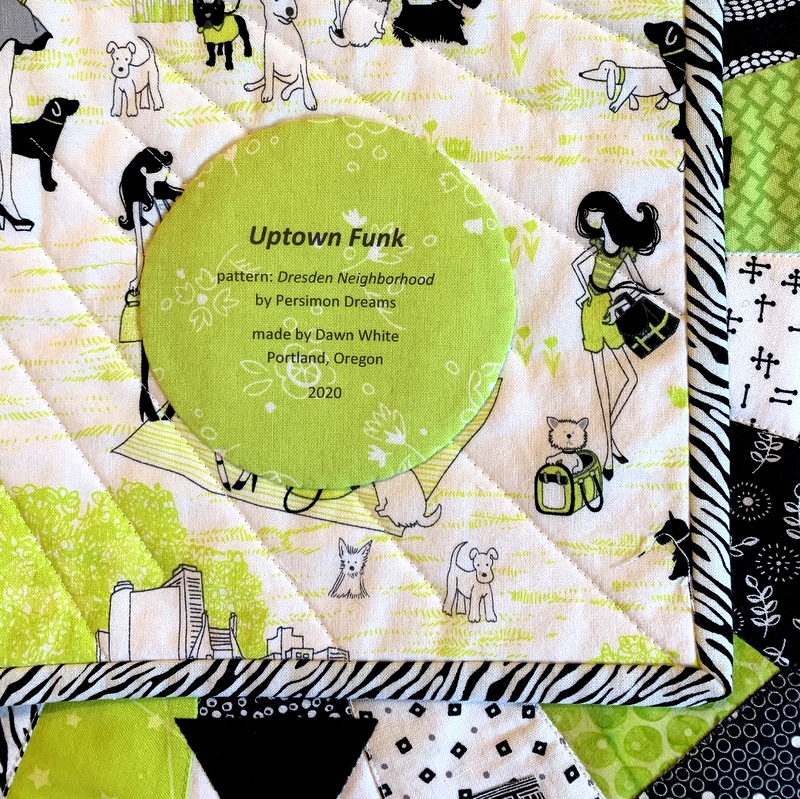
A quilt I made over 10 years ago has an updated label, thanks to a mistake I made the other day creating a computer-generated label for my latest quilt, Uptown Funk. The label pictured above is the fourth one I’ve made using my computer and inkjet printer — and I may never go back to printing them by hand. (The smaller label on the left is the one I removed from the quilt so I could sew the new one on.)

For the first computer-generated label I made, created last fall for Give me the Simple Life, I followed a tutorial that called for label fabric to be fused to a layer of freezer paper and run through the printer. I had to use two layers of freezer paper before I was successful. Even then, the freezer paper rippled a little bit so it took a couple of tries (i.e. the printer jammed and I had to start over) before I got a label I could use.

On my second label, made for All You Need Is Love, I wanted an extra layer under the label so the print on the backing fabric wouldn’t show through. As an experiment I fused interfacing to the back of my label fabric before pressing it to one layer of freezer paper. There was very little rippling of the freezer paper. It went through the printer easily and I got a useable label on the first try. That in itself was serendipitous. Little did I know there was more serendipity to come!

To make label #3 for Uptown Funk, I decided to follow the second method. Three layers: label fabric, fusible interfacing, freezer paper. I made my preparations and trooped from my sewing room on the second story of our house down to the basement where the computer and printer are. Once there I realized I had only two of my three layers. I had fused the interfacing to the label fabric and trimmed it to size but had forgotten all about the freezer paper.

Arghh!! Did I really want to climb two flights of stairs to my sewing room to complete the freezer paper step? Or should I take a chance and run the fabric through the printer without the freezer paper? The worst that could happen is the printer would jam, right? So I tried it with just the two layers . . . and it worked — beautifully!

Was it just a fluke? Or have I stumbled onto an important discovery?

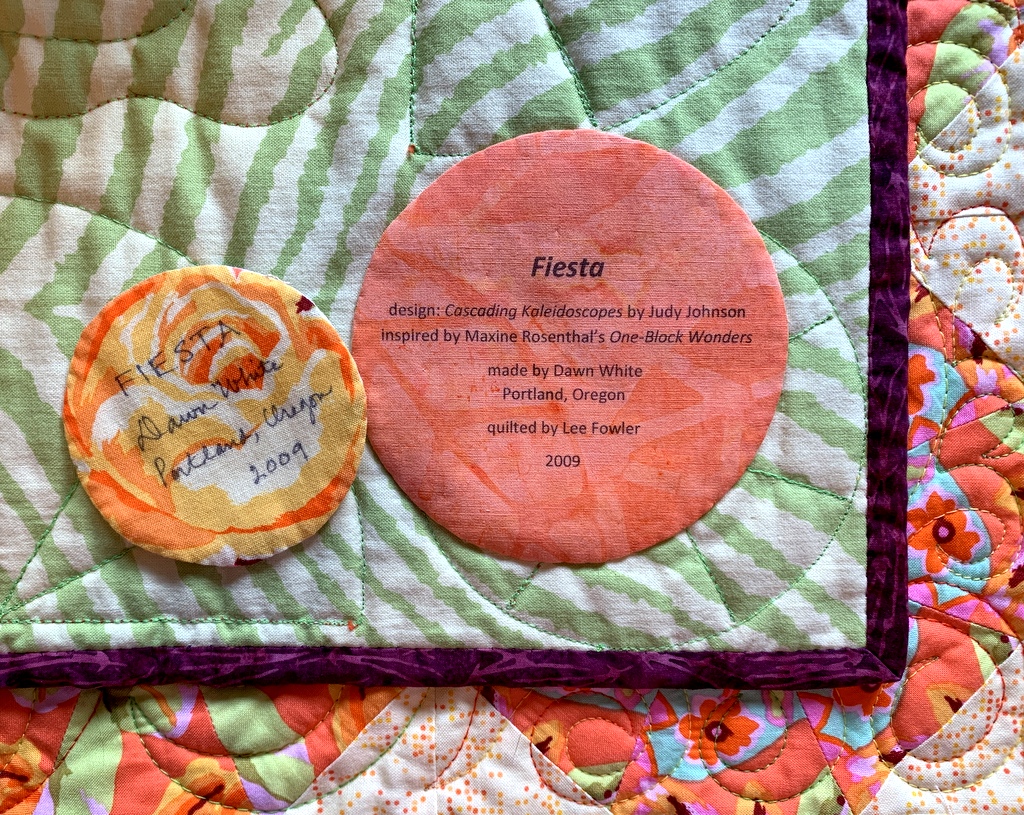
I decided to test my inadvertent discovery today by making a new label for a quilt I’d made in 2009. Back then my standard label information consisted of the name I had given the quilt, my name, and the year completed. At the time I didn’t appreciate the importance of providing additional information, such as the the designer of the quilt (if it wasn’t me) or the name of the person who quilted it for me. Nowadays I make it a point to include all that information on my labels.

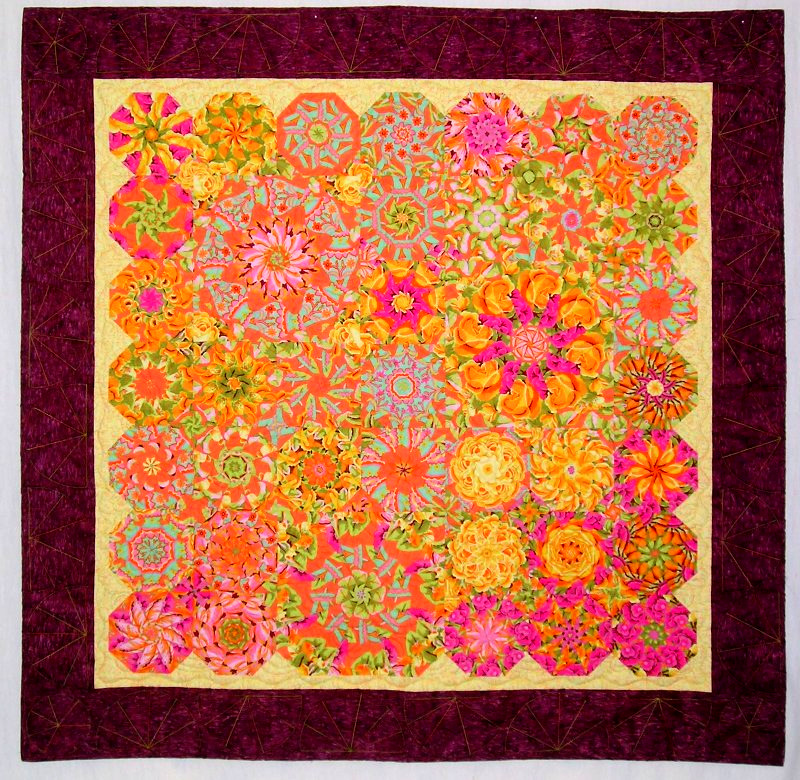
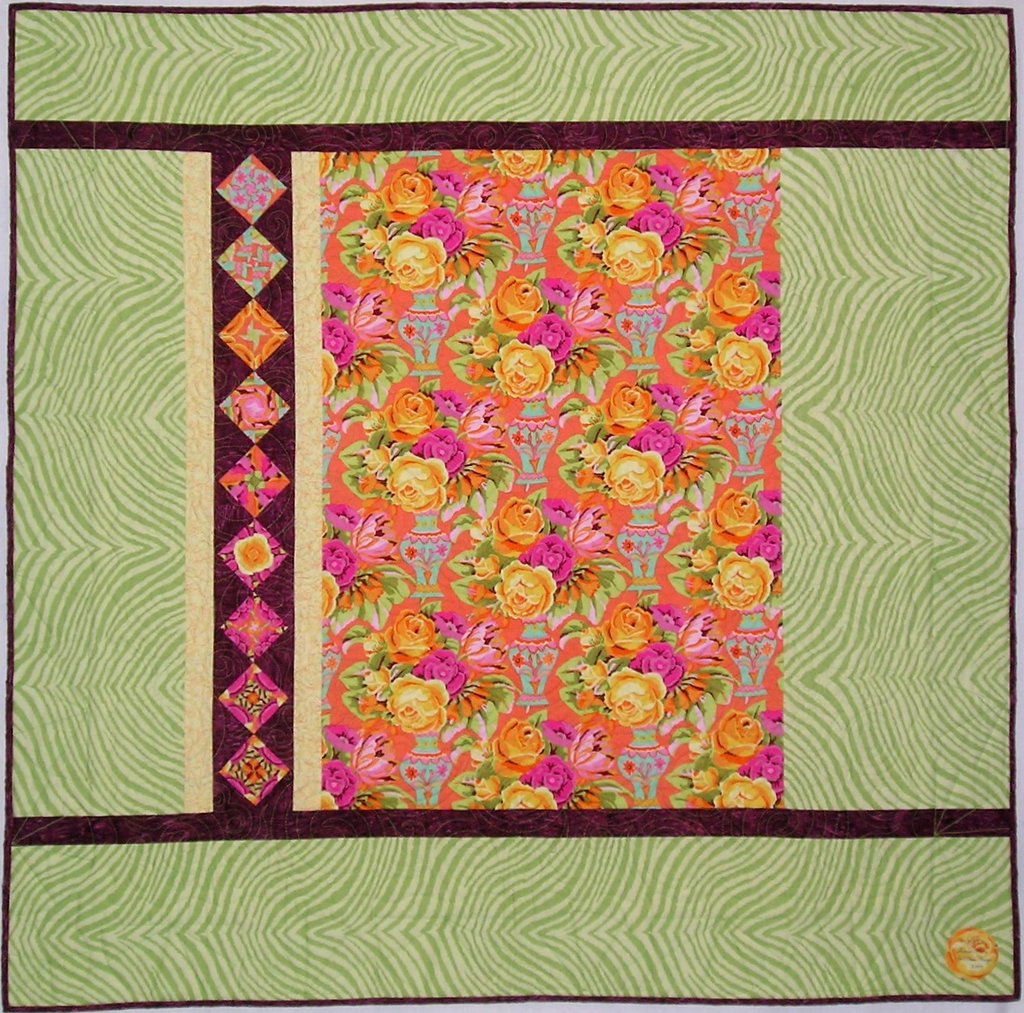
Fiesta was quilted for me by the late great Lee Fowler, and I have been wanting to update the label information to acknowledge that for a very long time. I’ve actually been meaning to go back and remake several of my older labels but have always found an excuse to put it off. Creating labels by hand can be onerous and time-consuming, even when the results are pleasing. But now, thanks to the ease and speed of making a computer-generated label, my procrastination may be a thing of the past.

Here, very briefly, are the steps I took to make this label:

First, featherweight interfacing is fused to the label fabric. (I used Pellon 911FF.) Both pieces are cut slightly larger than a standard sheet of paper, 8½” x 11″:

Second, the fused fabrics are trimmed to 8½” x 11″ exactly:

Third, the two layers are fed into the inkjet printer and the label is printed from a file created on the computer. I tried two different sizes of type since I had room on the page for two labels:

Going with the smaller type, I decided I wanted a round label 4″ in diameter. (Labels can be any shape but I like the look of a round label.) My standard pattern is a compact disc measuring 4⅝” in diameter but it seemed a bit large so I made a trip to the kitchen to find just the right size to trace around. This small blue bowl is exactly 4″ across:

The larger circle drawn around the label was made with a compact disc, the smaller with the blue bowl.

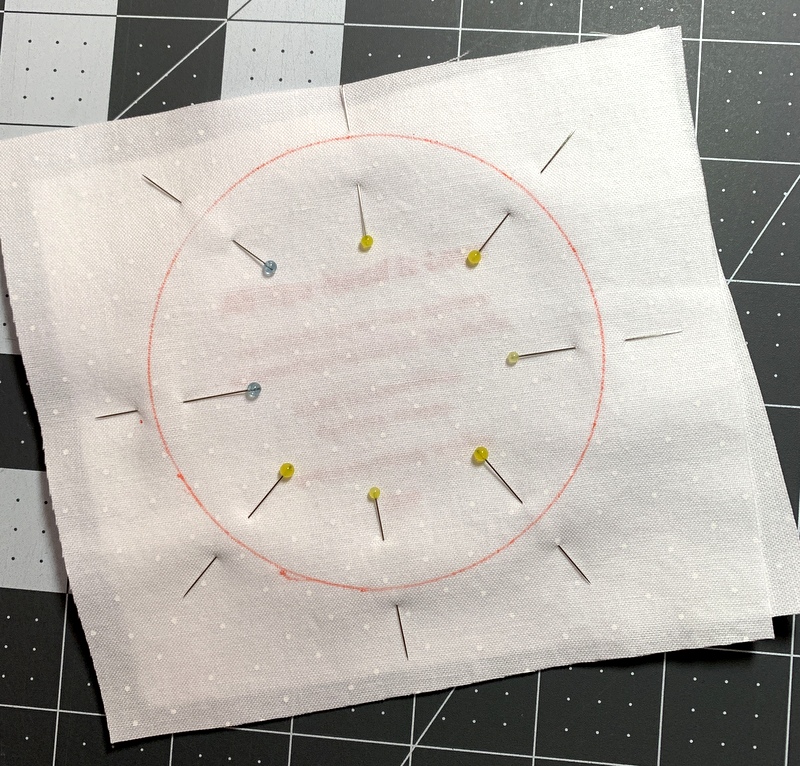
I traced around the blue bowl on the wrong side of my label backing fabric so that when I held both layers up to the light I could position the top layer properly:

I don’t have a light table so the window had to do.

After being stitched and turned inside out, my label was ready to sew into place:

I chose to appliqué mine by hand but on another quilt it might be machine appliquéd if the stitching lines wouldn’t be distracting on the right side of the quilt.

My labels were printed on an HP OfficeJet Pro 8620. I know that all inkjet printers are not created equally. There must be wide variations between brands and models. I can’t help but wonder: with two successful labels behind me made with the new combo of label fabric + fusible interfacing + fabric for the back of the label, how transferable is this method of printing computer-generated labels?

Ah, that’s where you come in. If you are the least bit intrigued with my accidental discovery, would you be willing to make a test label? If this method works with different brands of printers — and different brands of fusible interfacing — I would be willing to create a  tutorial for my website with detailed instructions and a lot of photos. I thank in advance any quilter who decides to go for this.

Before I sign off, here’s a look at Fiesta, the first in my series of kaleidoscope quilts, front and back:

Fiesta, 54″ square (2009)
Back of Fiesta (2009)

Yes, I need to get a new photo of the back with the updated label!


Posted in appliqué, free motion quilting, kaleidoscope quilts, quilt labels, tutorial, update | 12 Comments

Of Luck and Labels

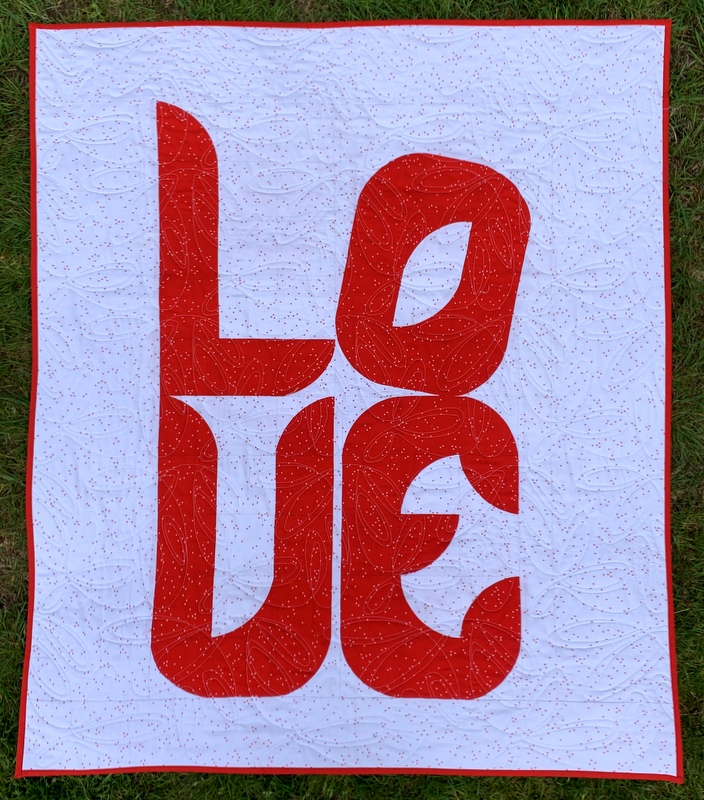
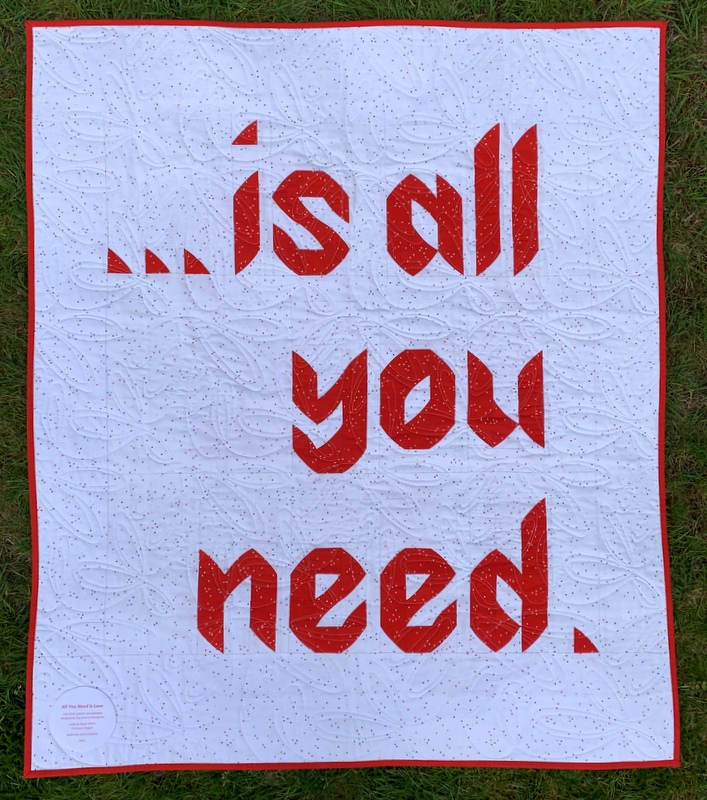
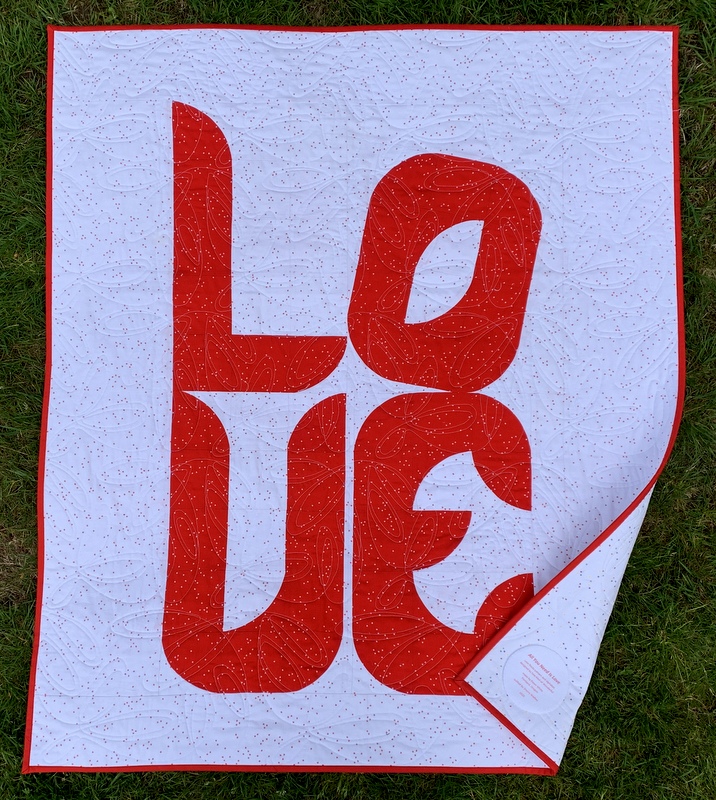
I made a serendipitous discovery today when making the label for All You Need Is Love, my latest quilt. Before I explain, let me show you a few photos of the quilt taken outdoors this afternoon. The photos are so much better than the indoor shots I showed you in my last post. I’m especially loving the contrast between the red of the quilt and the green of the grass:


Did you happen to notice the label in the lower left corner in the photo above?

No? How about in the photo below, showing the front of the quilt with one corner turned back?

It’s not very noticeable, is it? That was my goal!

Here’s a close-up:

The label contains important information: the name of the quilt, who designed it, who made it, where it was made, who quilted it, and the year it was finished. But I wanted the label to take a back seat to the message on the back of the quilt.

To achieve that I did three things: printed the label from my computer so that I could use smaller letters than I can comfortably write by hand; used red ink, which blends into the background better than black ink would; and reduced the size of my circle pattern from my usual measurement of 4⅝” in diameter (the width of a compact disc) to 3¾” in diameter . The quilt finishes at 38″ x 44″ so a smaller label was definitely called for.

This is my second experience printing a label using my inkjet printer. The first time was a few months ago when I made the label for Give Me the Simple Life. The procedure was pretty straightforward. You start with label fabric and freezer paper that are both cut larger than a standard piece of paper, press the shiny side of the freezer paper to the wrong side of the label fabric, and trim the result very carefully to exactly 8½” x 11″. You create a label on your computer, determining the font and point size based on the desired finished size of your label. You insert the fabric/freezer paper combo into your printer and print the label.

When I tried this the first time I found I had to use two layers of freezer paper to get my printer to accept the combo and even then it was a bit temperamental, jamming my printer a couple of times until I got the the result I wanted.

I would have followed the same procedure this time but for my concern that the bright little flowers on my background fabric would show through the white label fabric. I was using the same white fabric for the back of the label but I wanted an extra layer in the middle to make sure those bright little flowers stayed hidden.

I decided to try fusing featherweight interfacing to the back of my label fabric before pressing it to one layer of freezer paper. I’m so glad I did! The interfacing gave the fabric just the right amount of body to feed smoothly through my printer. Serendipity!

I previewed my label first on paper using two different shades of red:

The bottom red was a better match with the red in the quilt. Next I printed the label on my fabric/interfacing/freezer paper combo:

The ink on fabric wasn’t quite as bright as the ink on paper but would certainly be fine for my purpose.

After determining a circle 3¾” in diameter would work well as a finished label size (based on the width of the longest line), I wandered around my kitchen opening cupboard doors until I found something just the right size to trace around for the back of the label:

In the next photo the fabric for the back of the label is on top of the label fabric, right sides together and pinned in place. You can just make out the printing on the label through the top layer:


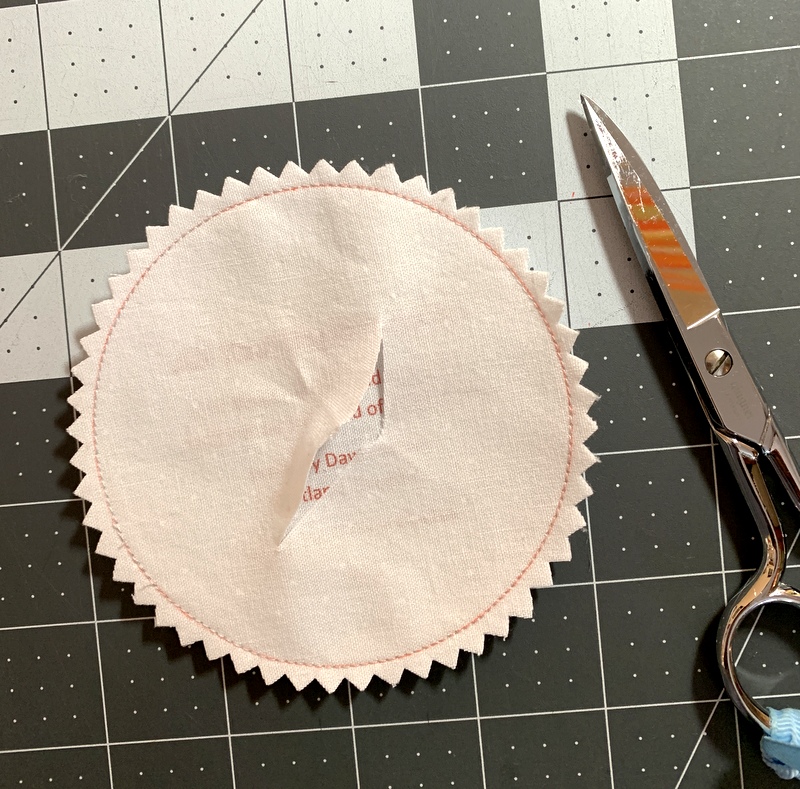
After stitching all the way around the circle (taking out the pins as I come to them) and trimming very close to the stitched edge with pinking shears, I cut a slit in the back of the label so it can be turned inside out:


With the label turned, pressed, and hand appliquéd in place, the slit in the back will never be seen. And I’m very happy with the result:

I have a feeling I will be using this method on future labels!


Posted in appliqué, Hazel's Diary Quilt, quilt labels, update, Wonder Curve Ruler | 9 Comments

Spokesong

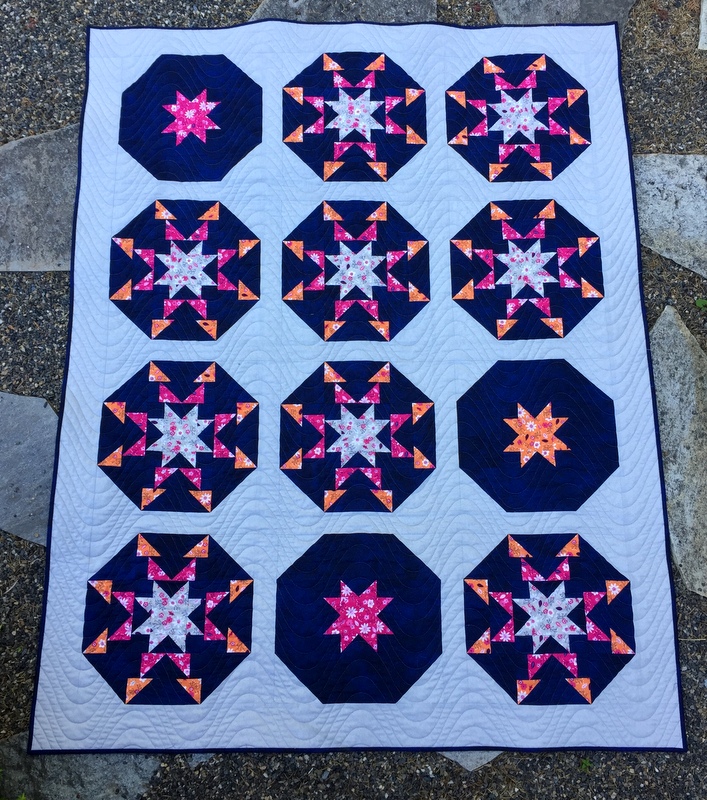
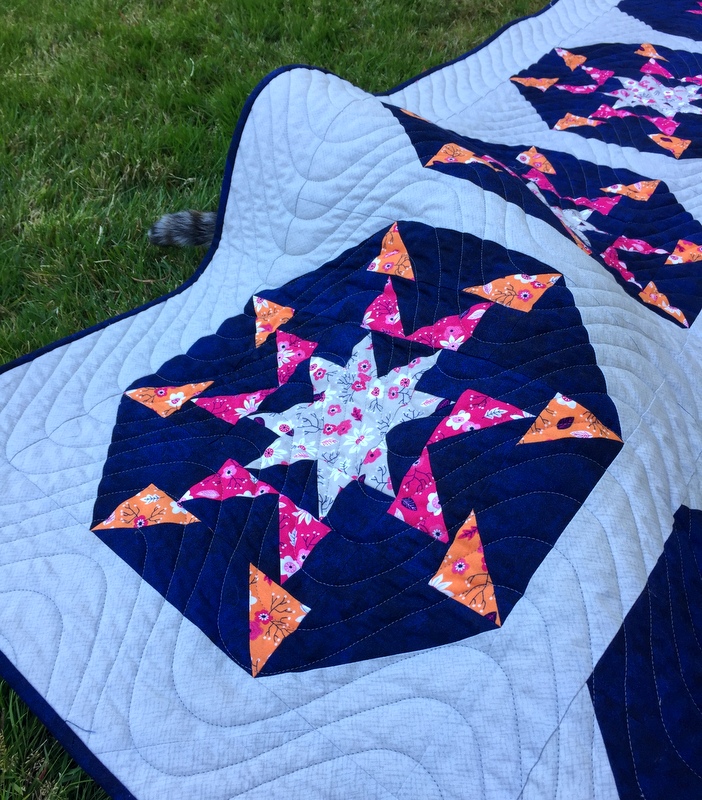
Take a look at my latest quilt, finished late this afternoon:

When you look at the octagonal blocks, do you see bicycle wheels and spokes? I do. That’s why I named this quilt Spokesong, after the play by Irish playright Stewart Parker. Set in a bicycle shop in Belfast, the play is about the troubles in Northern Ireland and the progress of civilization using the history of the bicycle as a framing device. I saw a delightful production of this “play with music” in the early 1980s and it came to mind when I was trying to think of a name.

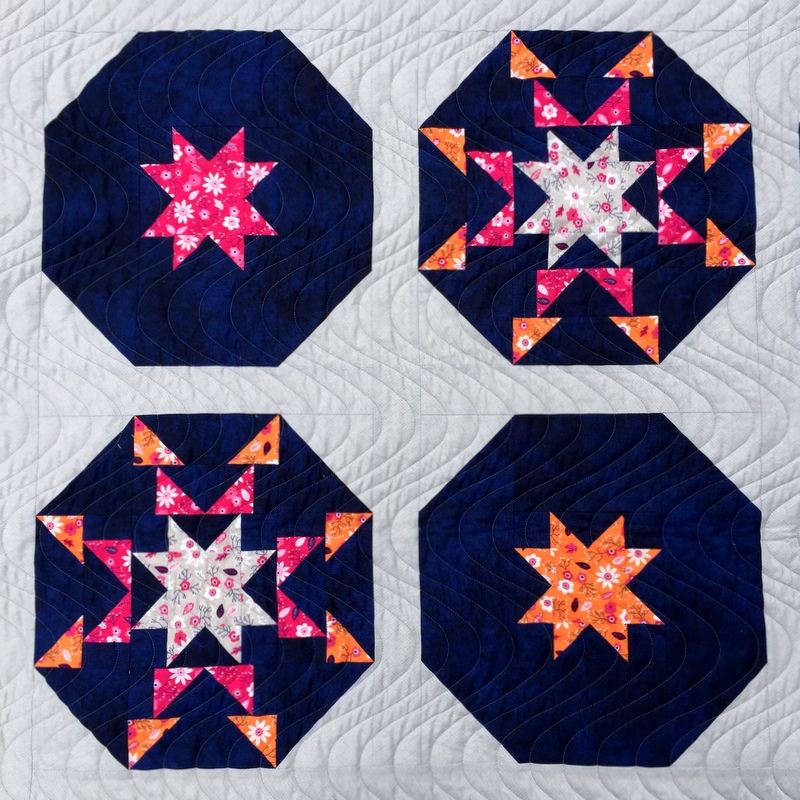
My quilt is based on the pattern Idyllic by Corey Yoder of Coriander Quilts. (It’s the pattern I taught at last month’s Pine Needle quilt retreats on Hood Canal in Washington.) I changed the pattern a bit by simplifying three blocks.

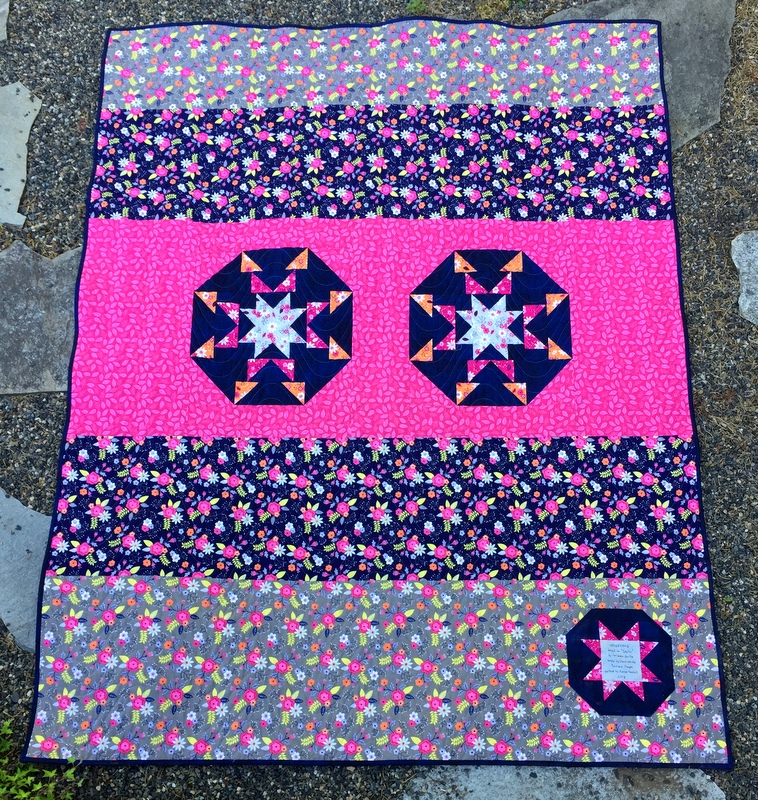
The floral prints are from a line of fabric called “Paradise” designed by Alisse Courter for Camelot Fabrics. I ran off in high spirits one day three years ago and bought a lot of fabric from this line. It has made its way into several projects since then, and I used up more of it on the back of this one:


Karlee Sandell of SewInspired2Day did a beautiful job quilting Spokesong for me on her longarm. I love how the wavy lines of the edge-to-edge design called Serpentine almost make the quilt shimmer:

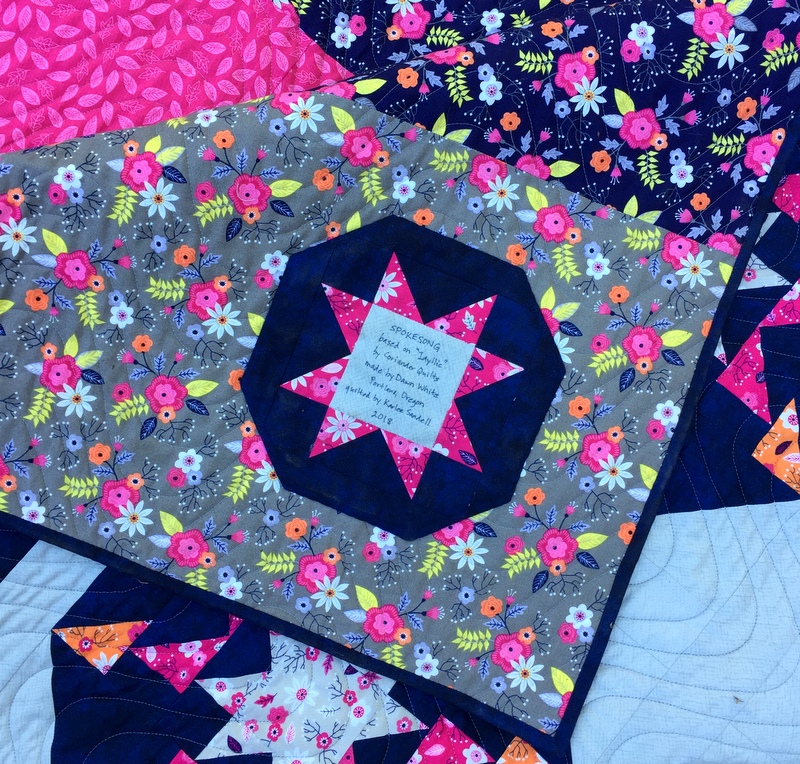
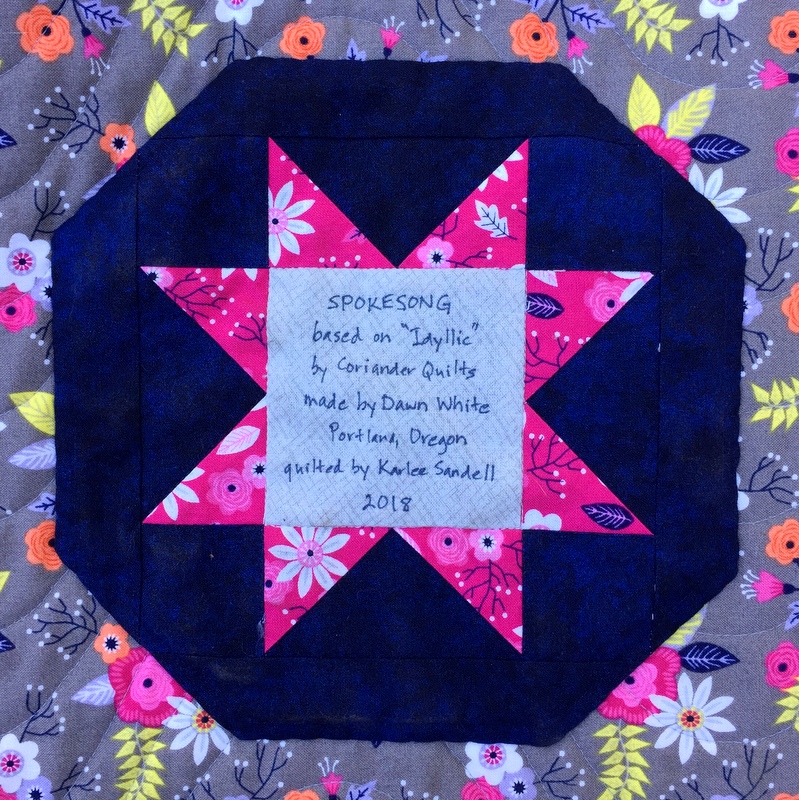
Did you notice the shape of the label?

Here’s a closer look:

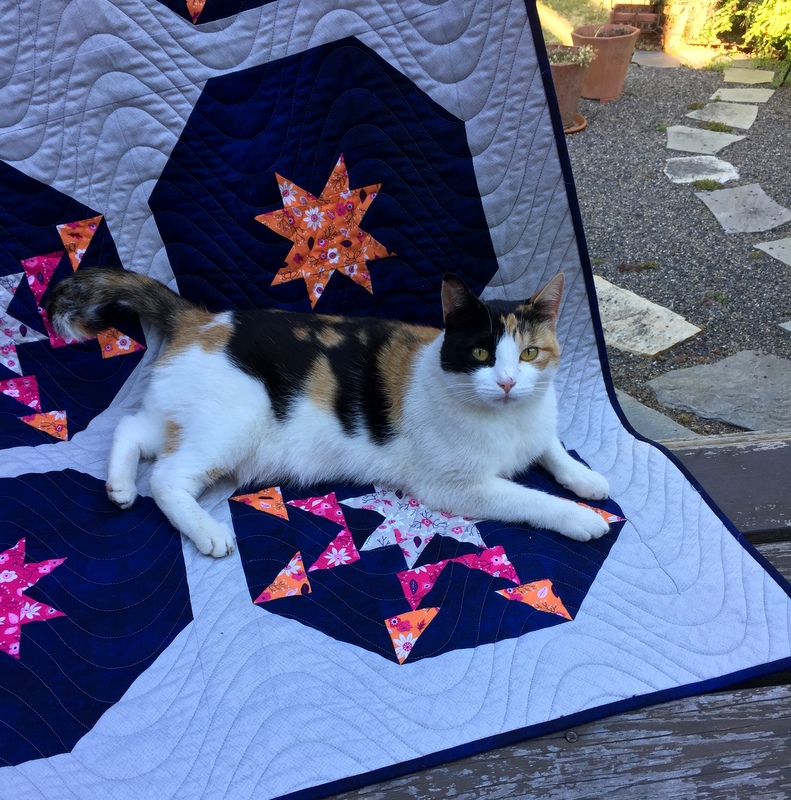
Coco made herself right at home during the photo session:

If she wasn’t on top of the quilt, she was under it:


Finished size is 53½” x 67″.


Posted in cats, Idyllic, Pine Needle quilt retreat, quilt labels, update | 6 Comments

Mini Mod Tiles: A Double Finish


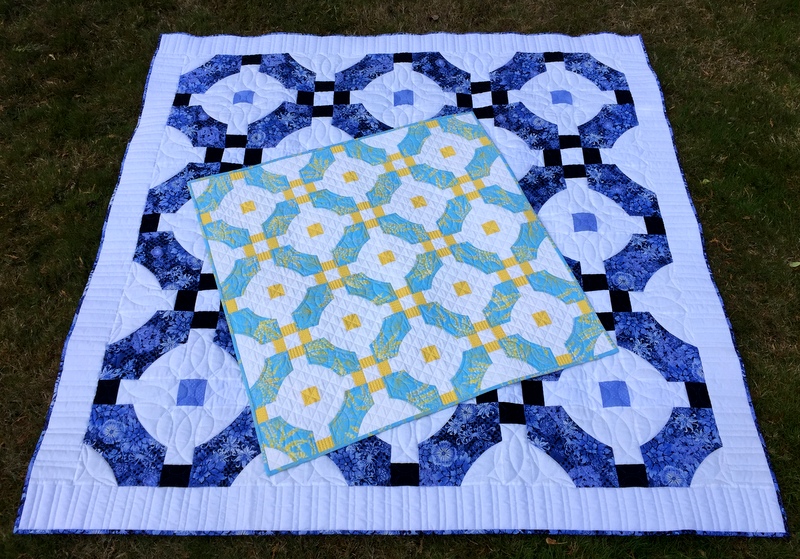
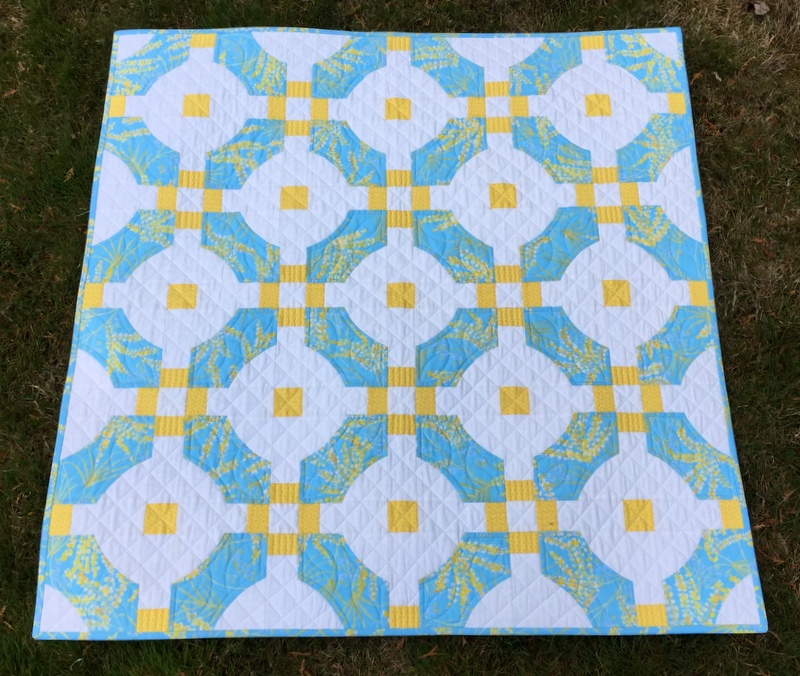
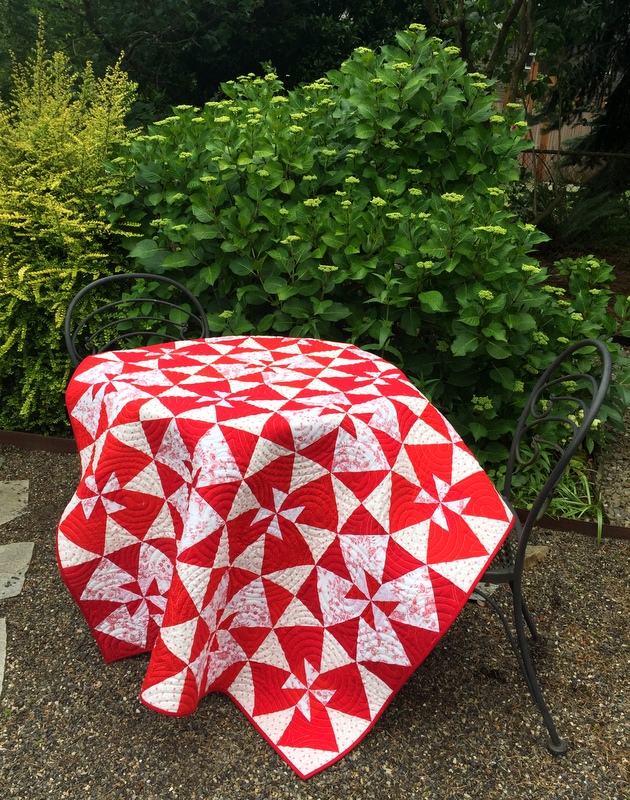
Recognize the pattern? It’s Mini Mod Tiles from Sew Kind of Wonderful. The aqua and yellow quilt was made with the QCR Mini — the smaller of the two Quick Curve Rulers designed by Sew Kind of Wonderful — and finishes at 34½” square. SKW offers this pattern as a free download on its website.

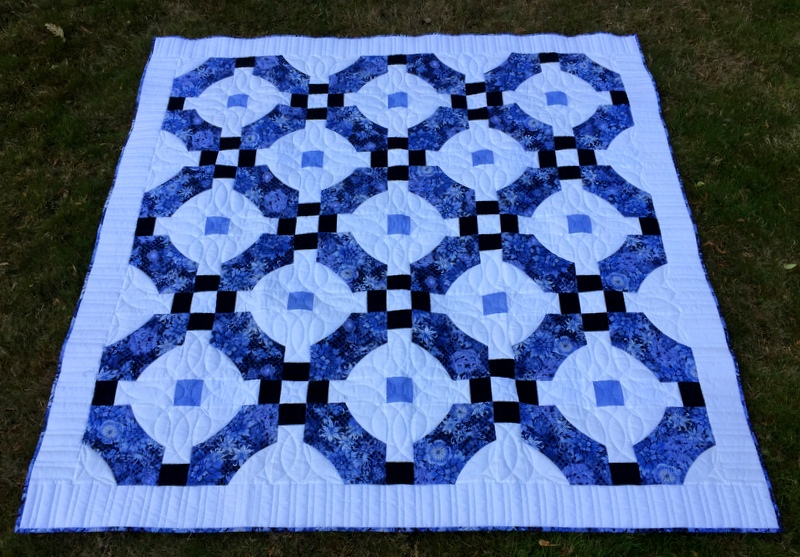
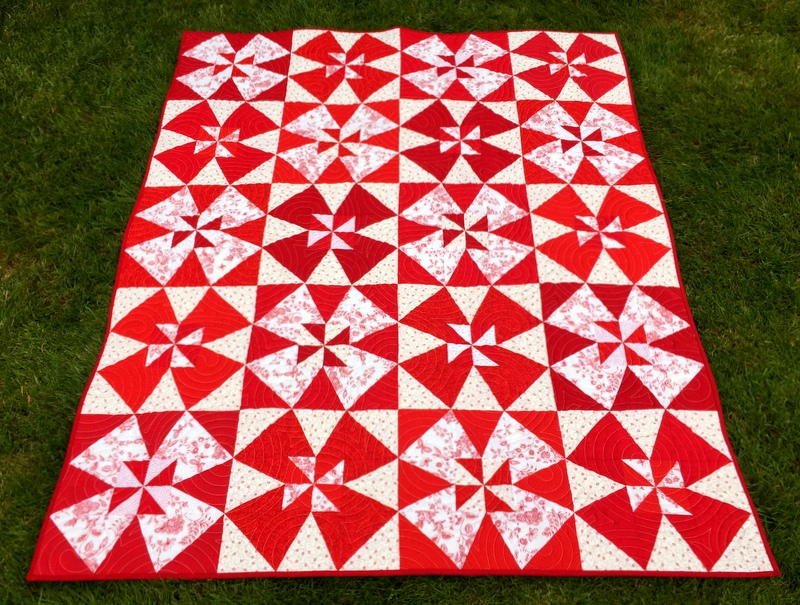
The bigger quilt? I “supersized” SKW’s design to make a larger block using the original Quick Curve Ruler, resulting in a lap quilt measuring 63″ square. Why two sizes? I had chosen Mini Mod Tiles as the pattern to teach at the Pine Needle’s summer 2017 quilt retreat and wanted to offer my students two options.

Both quilts have been back from the longarm quilter for several weeks but it took me a while to get them bound and then labeled. Now I get to show the finished quilts together.

Let’s start with the larger of the two, named Terrazzo Tiles:

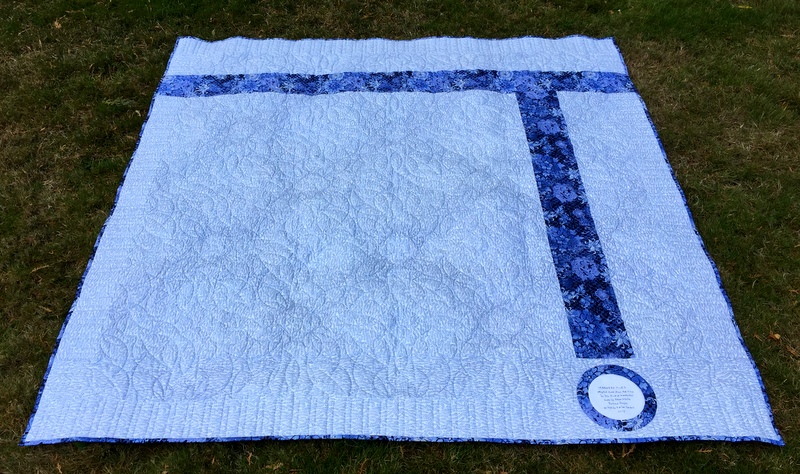
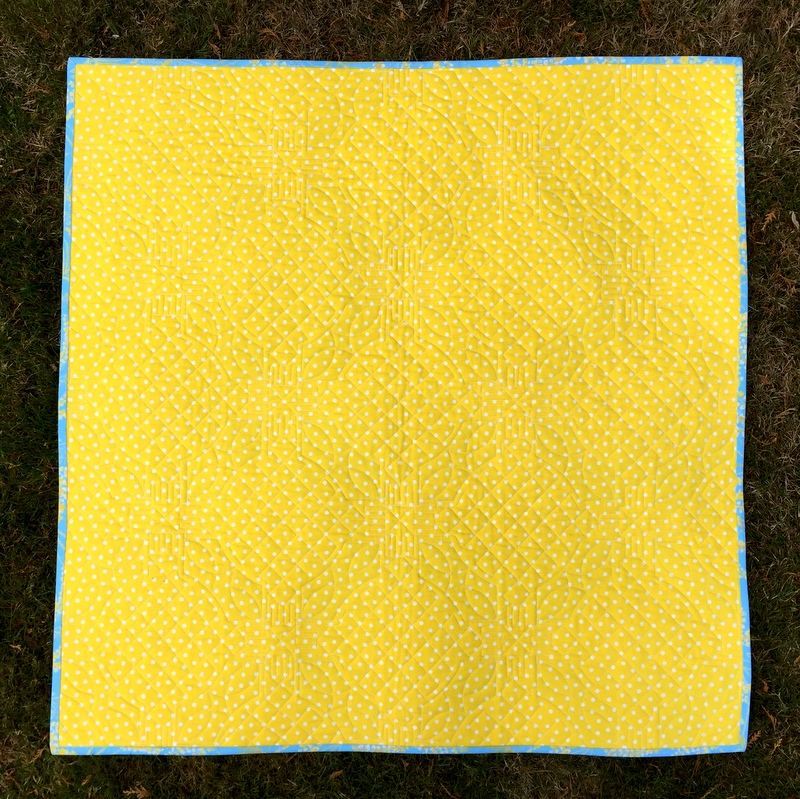
Here it is from the back:


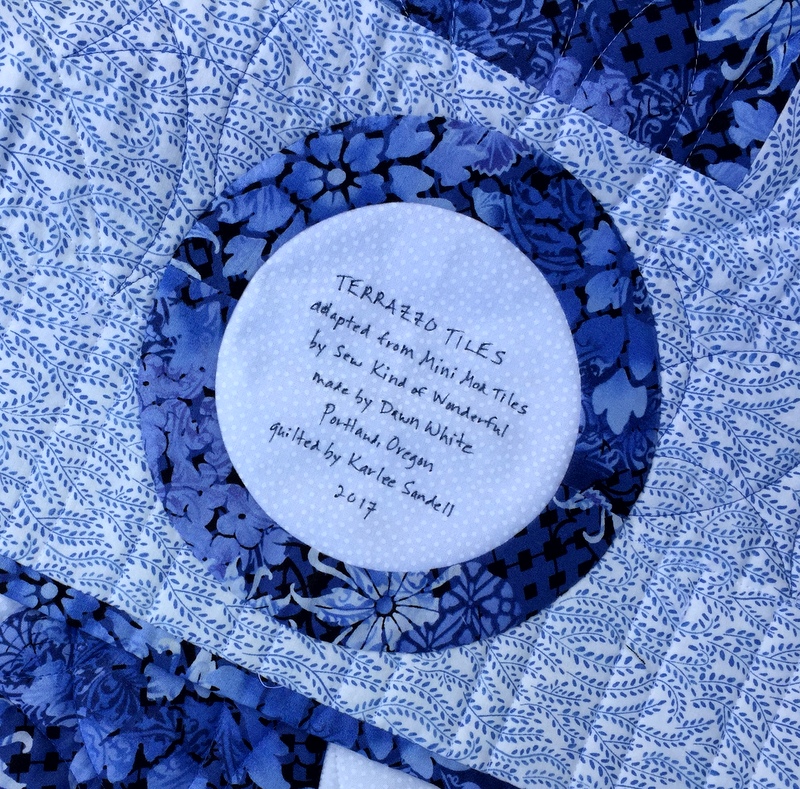
I used every bit of the leftover focus fabric on the back, even piecing scraps to make the ring around the label:

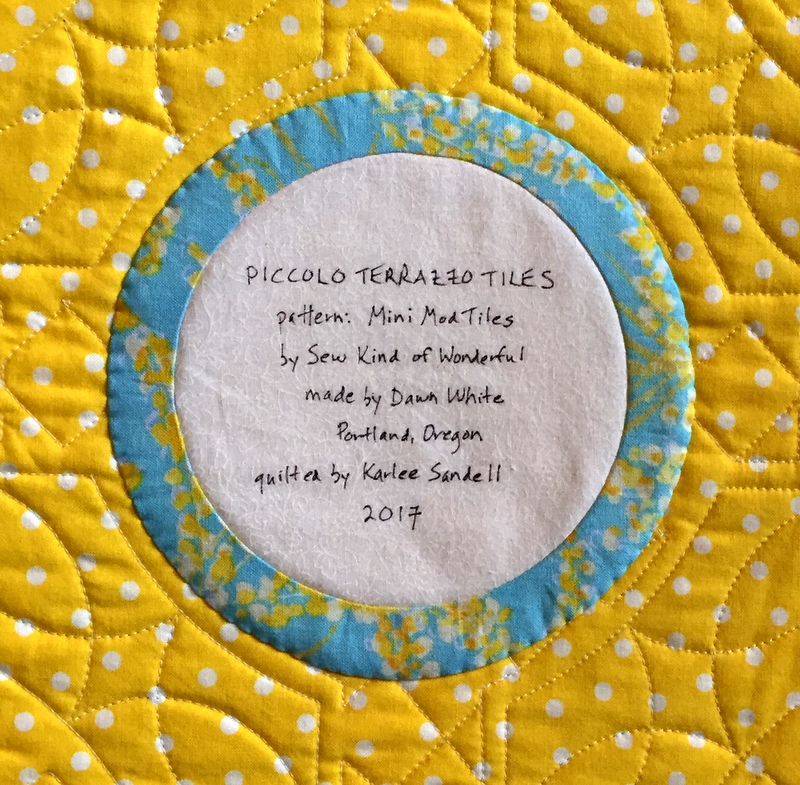
Since the bigger quilt is called Terrazzo Tiles, it made perfect sense to name the mini quilt Piccolo Terrazzo Tiles:

My first inclination was to bind this one with the yellow tone-on-tone fabric you see above, but I had used a different yellow on the back and they just didn’t look good together. The solution was to bind the quilt with the aqua and yellow focus fabric so it provided a frame for the quilt as seen from the back:


The hand-guided quilting (by Karlee Sandell of SewInspired2Day) is so lovely I hesitated to add a label, loving the look of a whole-cloth quilt. But it needed a label — to identify the designer, the maker, and the quilter. Sometimes all three are the same person but more often than not the result is a combination of efforts, and it’s important in my book to give credit where credit is due:

Next week the Pine Needle is planning a reunion for the retreat participants. It will be fun to see the students’ finished projects — both mini and supersized!

One more thing: the talented women of Sew Kind of Wonderful have kindly given me permission to show you how I supersized the mini version. Coming very soon: a new tutorial on my Tutorials page.


Posted in QCR Mini, Quick Curve Ruler, quilt labels, update | 2 Comments

It’s a Wrap: Dutch Treat

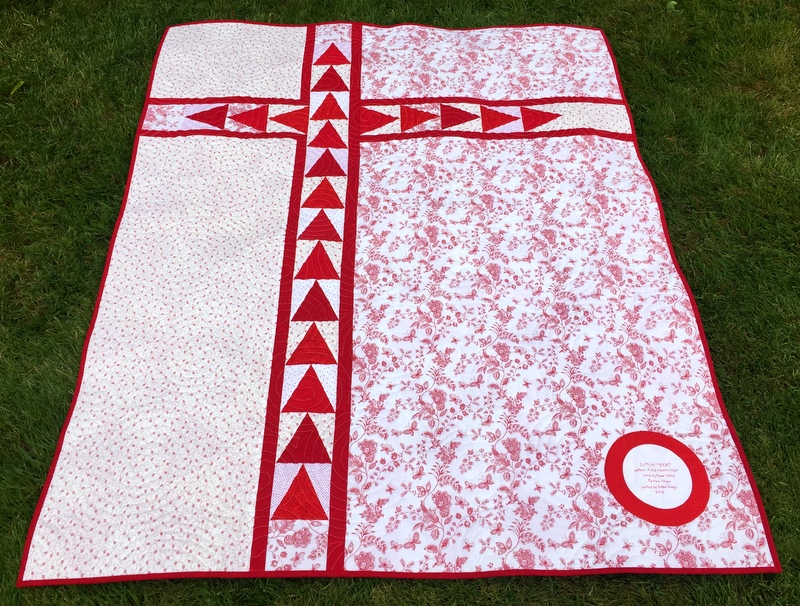
I finished binding and labeling Dutch Treat yesterday. The rain held off just long enough for a few shots taken in the back yard:

Red and green look so good together, don’t they?

Here you can see the entire quilt:

The windmill blocks measure 12″ square and the pinwheels in the center of each block measure 4″ square. The block is a variation of the classic Winding Ways quilt block usually made with curved seams. These seams are straight but the overall design of the quilt gives the illusion of overlapping circles.

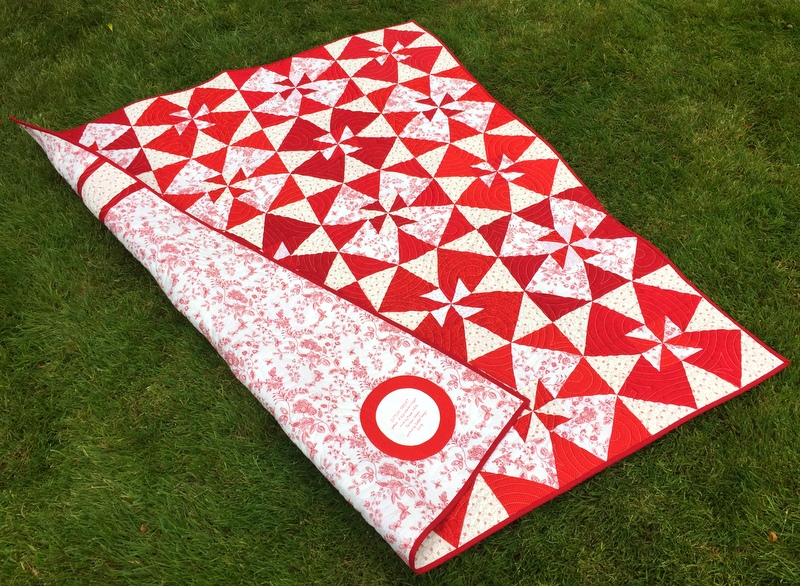
On the back of the quilt I used leftover blocks:


I know what you’re thinking: “Wow, that’s a lot of leftover blocks.” You’re right — and I didn’t even use all of them. I confess: those extras resulted from a miscalculation on my part. At least I was able to put most of them to good use.

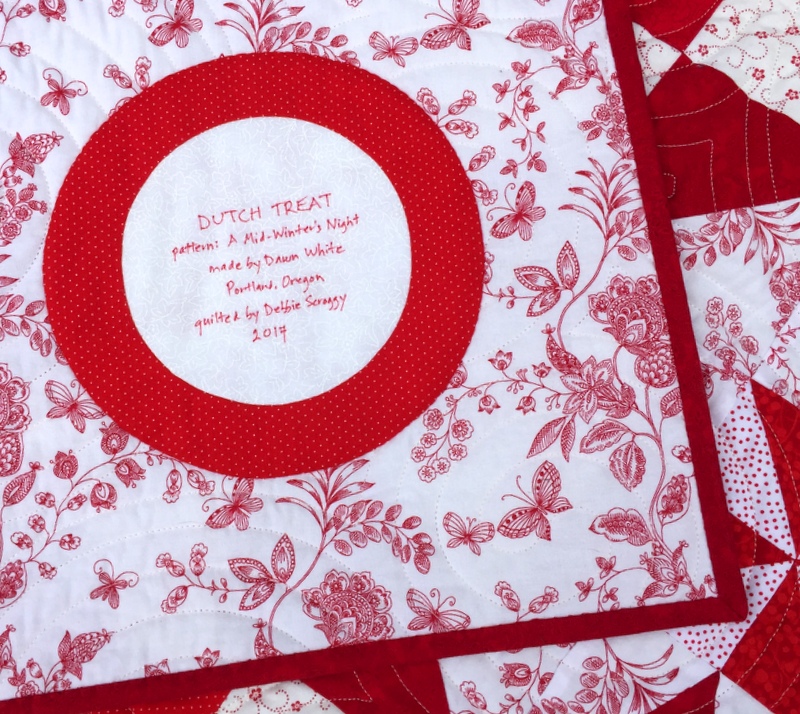
Here’s a close-up of the label:

I made the label round using a compact disc for a pattern (described in my tutorial) and then set the label inside a larger circle of red fabric so it would stand out against the backing fabric.


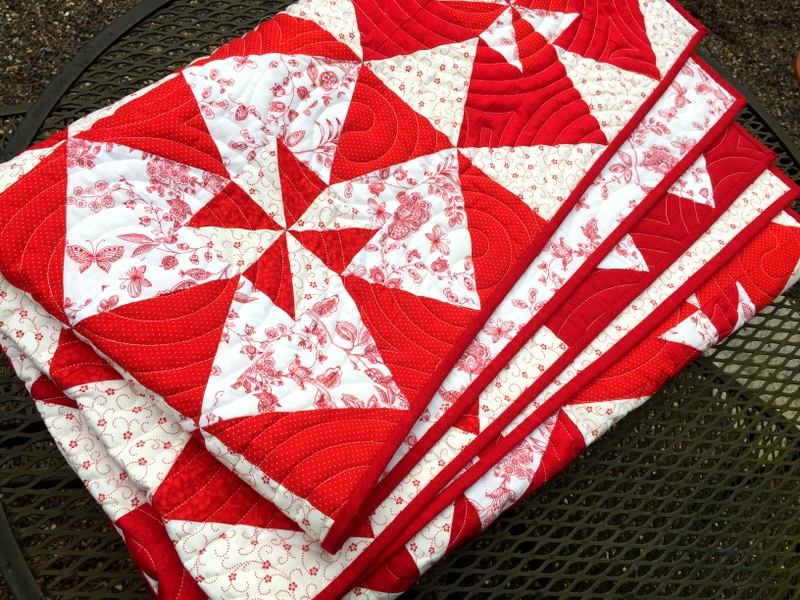
I’m so pleased with the quilting of longarmer Debbie Scroggy. You can see close-ups of Debbie’s quilting in this earlier post.

Dutch Treat (named for the windmill-shaped block)
48″ x 60″
Adapted from the pattern A Mid-Winter’s Night by Cottage Rose
Fabrics: a mix of reds and two light background prints, all from my stash
Quilted by Debbie Scroggy of All Quilted LLC

To read older posts about the making of Dutch Treat, click on the category “windmill block” at the bottom of this post.

Thanks for stopping by. It’s always fun to share a finish!


Posted in quilt labels, update, Winding Ways quilt block, windmill block | 12 Comments

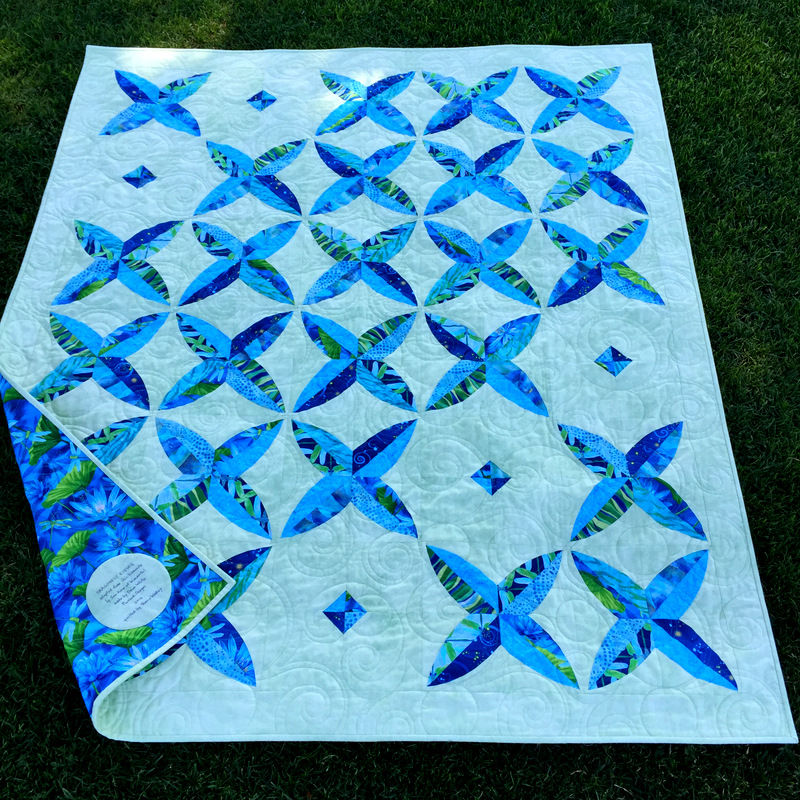
A Quilt Finish: Dragonfly Kisses

. . . and here it is, bound and labeled:

2016-8, Dragonfly Kisses

Dragonfly Kisses measures 50″ x 59″, a good size for a throw. The design is a variation of Chic Diamonds by Sew Kind of Wonderful. I believe this is the seventh or eighth quilt I have made using the Quick Curve Ruler, also made by SKW.

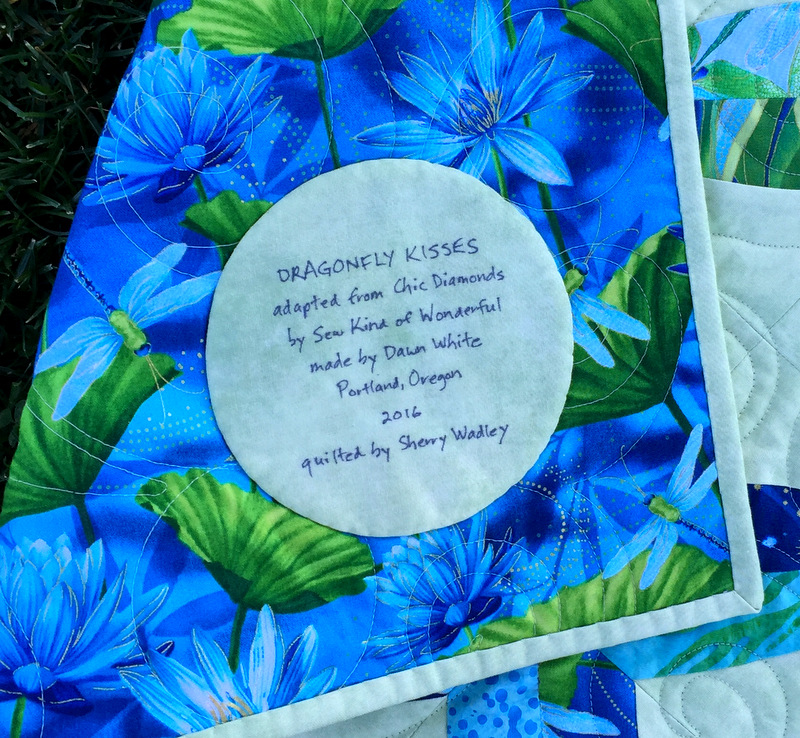
Here’s a close-up of the label, made with my favorite method using a compact disc for a pattern:

2016-8, Dragonfly Kisses label

See that dragonfly just to the left of the label? There’s one in the lower right corner, too. That fabric is one of six I used from the “Dance of the Dragonfly” fabric line, due in quilt shops this month. The fabric line was designed by Maria Kalinowski for Kanvas Studio in association with Benartex. (Something tells me I need more of this fabric, which comes in an equally beautiful plum/olive green colorway.)


Posted in Quick Curve Ruler, quilt labels, update | 12 Comments

Friday Finish: WanderLust

Well, that was fast.

Just yesterday I showed you pictures of WanderLust, the king-size bed runner I picked up on Wednesday from longarm quilter Coleen Barnhardt of the Quilted Thistle. The bed runner needed to be bound and labeled — and that’s been done.

As good as my quilt looked after Coleen worked her free motion quilting magic on it, it looks even better now that it’s bound:

WanderLust complete

WanderLust back and front

Are you surprised I got it bound so quickly? It would have taken me hours to stitch down the binding by hand. Confession: I took the easy way out and fused the binding in place in a matter of minutes with Steam-a-Seam-2, a double-stick fusible web.

I use Steam-a-Seam-2 occasionally on wall hangings and other small pieces that won’t get washed. It should be just fine for this bed runner that will be laundered but not as often as, say, a baby quilt. (Actually, a fusible web should never wash out or come undone if applied properly. I used it on this quilt because I was in a hurry to get it done; my preference is for a binding stitched down by hand.)

The label is a bit unconventional. In fact, it’s not a label at all. I mentioned yesterday that this quilt is reversible so I didn’t want to attach a label as I normally do. Here’s what I did instead:

label

Can you see where I wrote “WANDERLUST, DAWN WHITE, 2016 PORTLAND OR” in permanent ink? It’s hard to see (my plan) but it’s there. I like to include information on my labels about the patterns and designers but I skipped it in this case. Let this post be a permanent record that WanderLust was based on the pattern Spinners by Heather Mulder Peterson. Spinners is one of several delightful designs in her book On the Run Again (Anka’s Treasures, 2014).
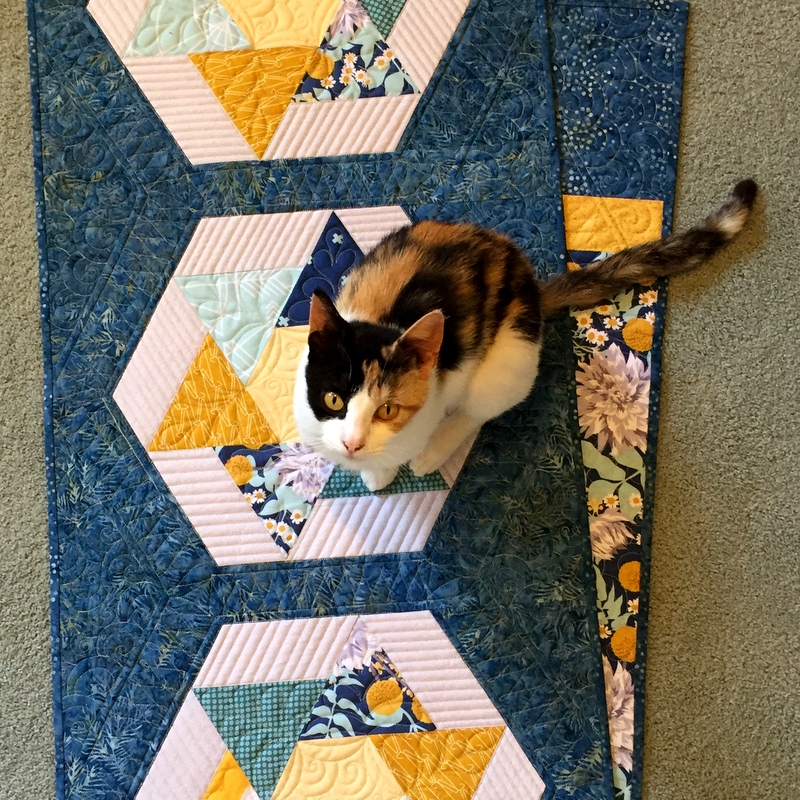
My new cat Coco must really like this quilt. She photobombed it:

Coco photobomb


Posted in bed runners, cats, free motion quilting, quilt labels, update | 6 Comments