
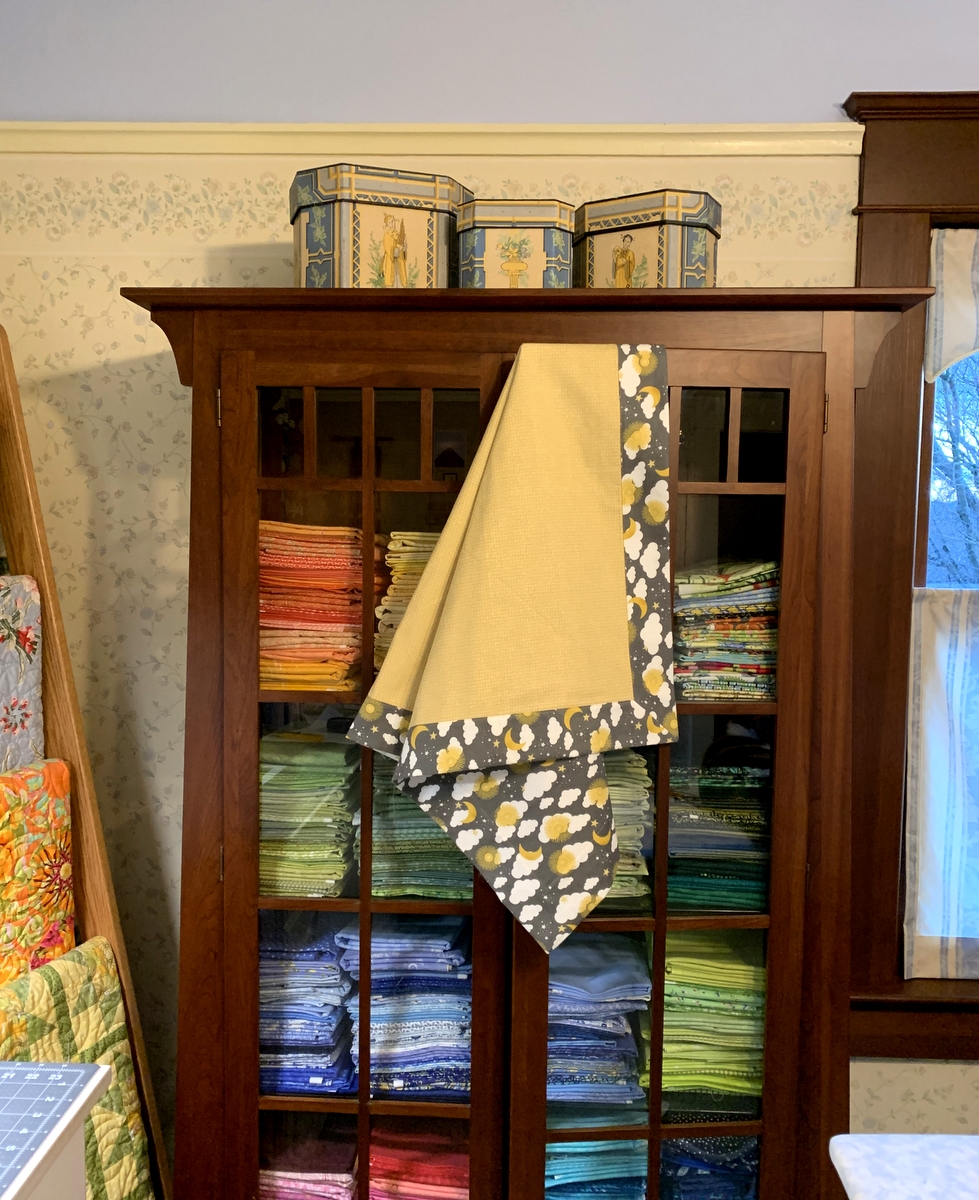
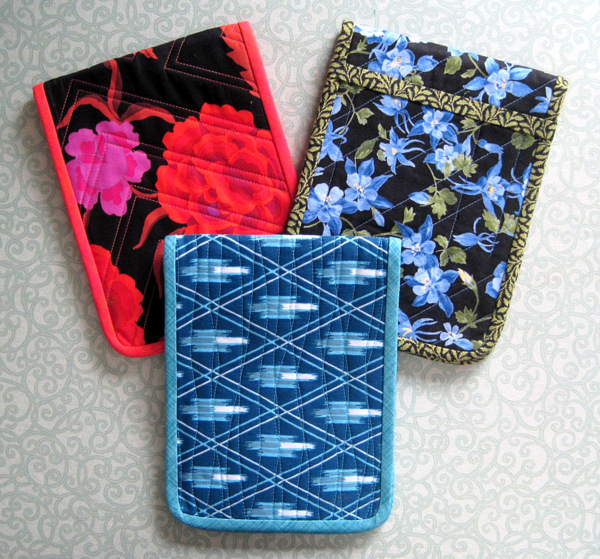
Folded Flap Hot Pads 2024
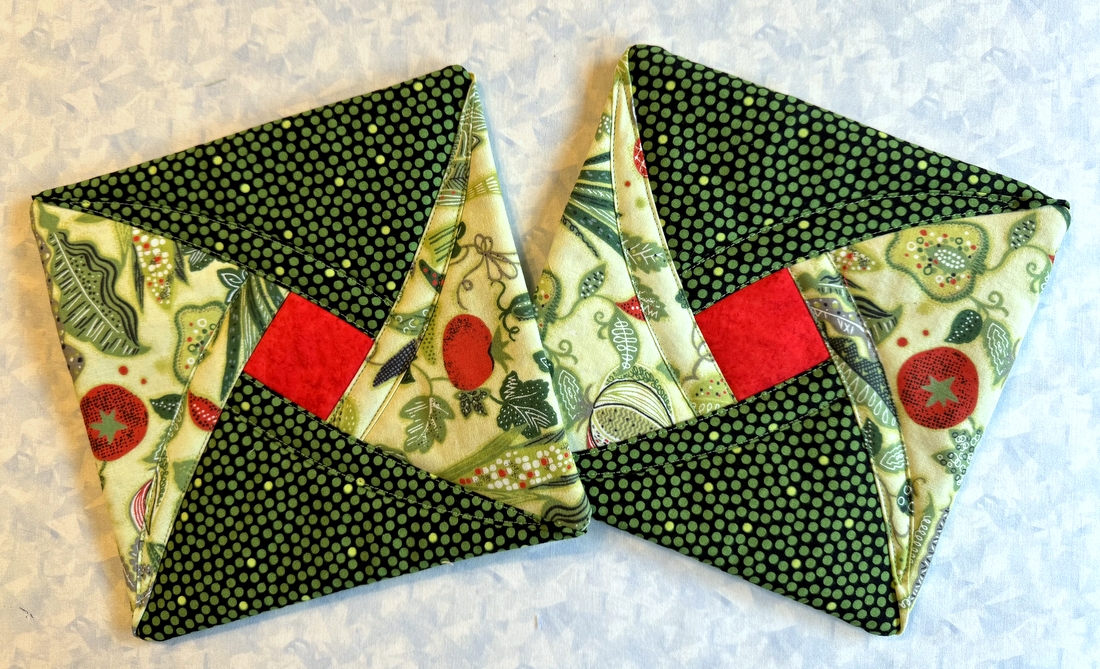 When my twin sister was visiting in November we found these almost-finished 8″ square hot pads in a project box dating back to 2011; she liked them so much I added the final optional step of machine-stitching the folded flaps down so I could give them to her.
Then I decided I needed a pair for the Portland White House and whipped up the first of two:
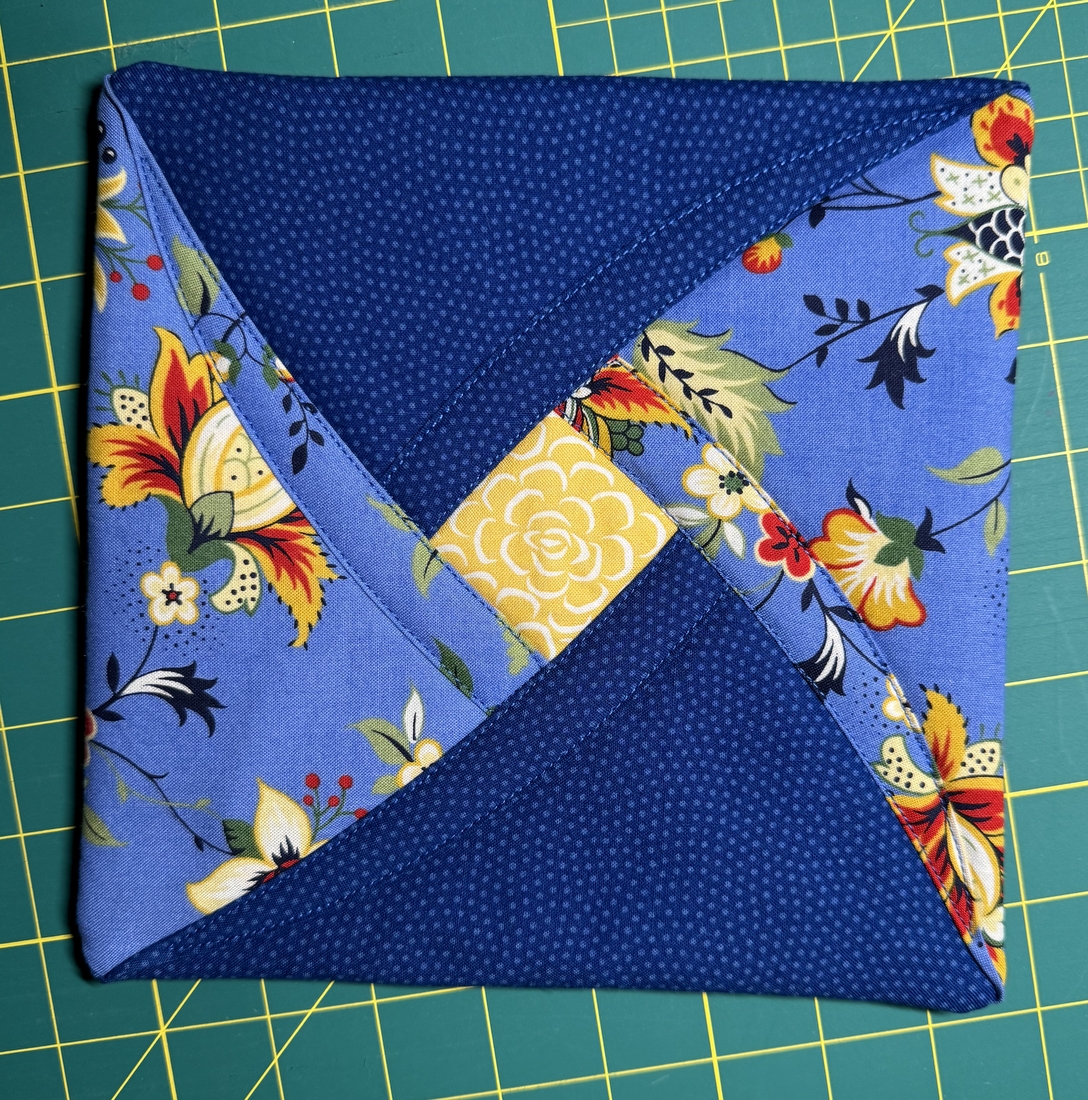
My post on this resulted in a request for a tutorial; I was happy to oblige. Clicking on this link will take you to the tutorial.
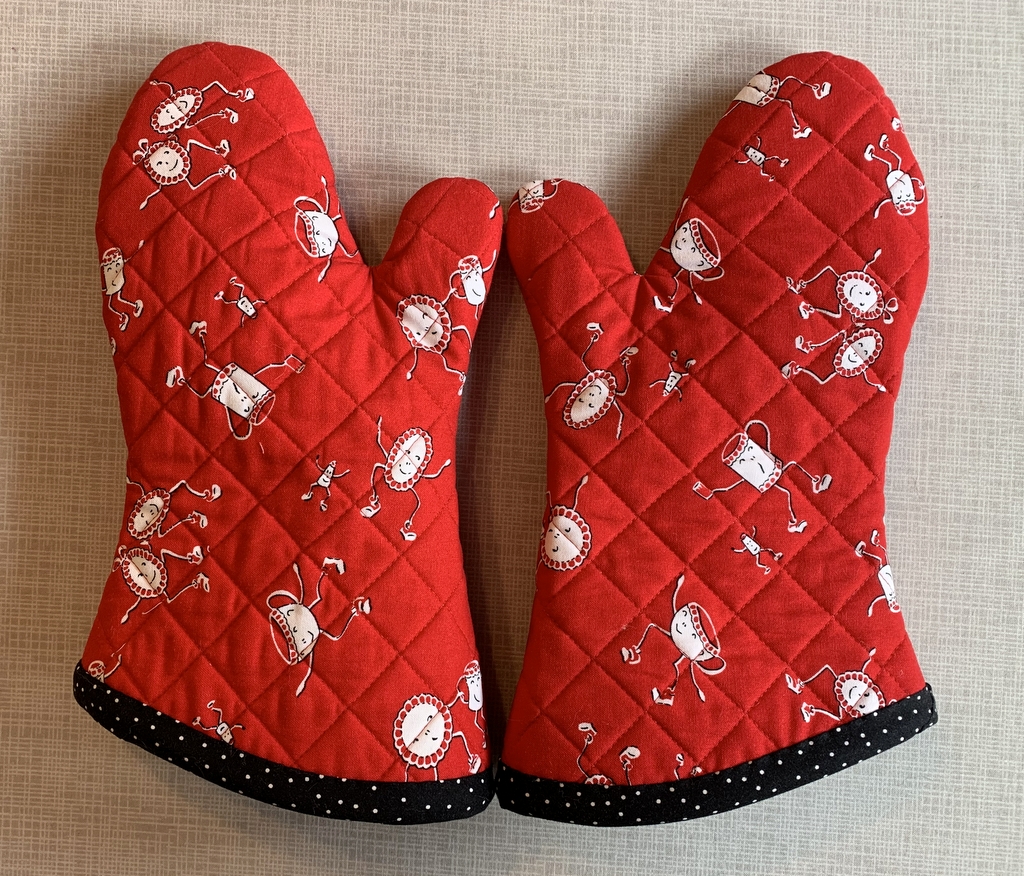
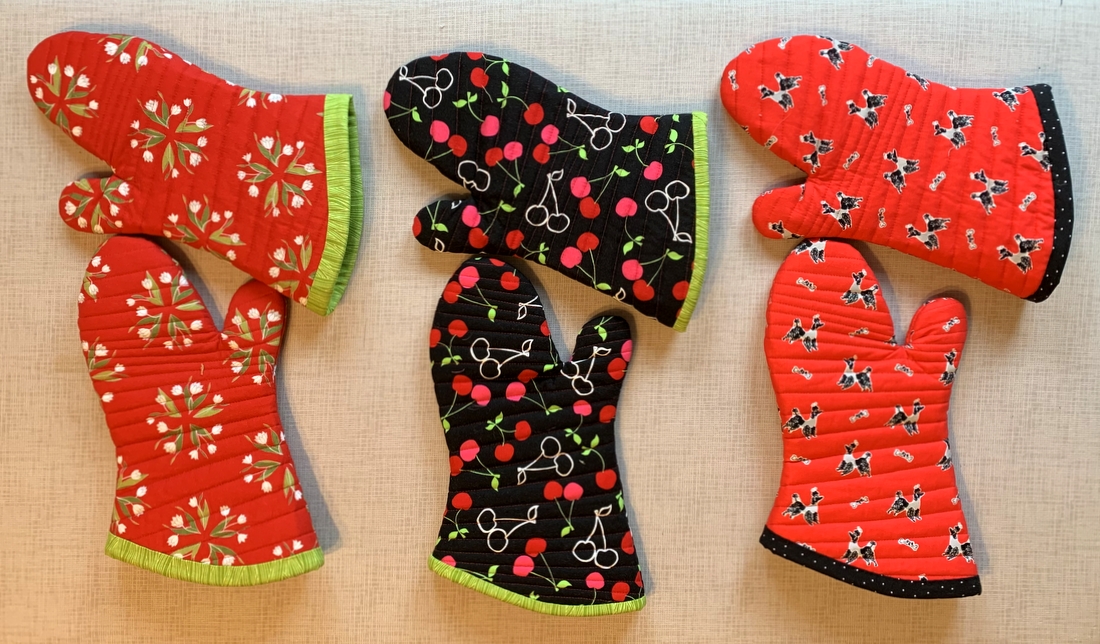
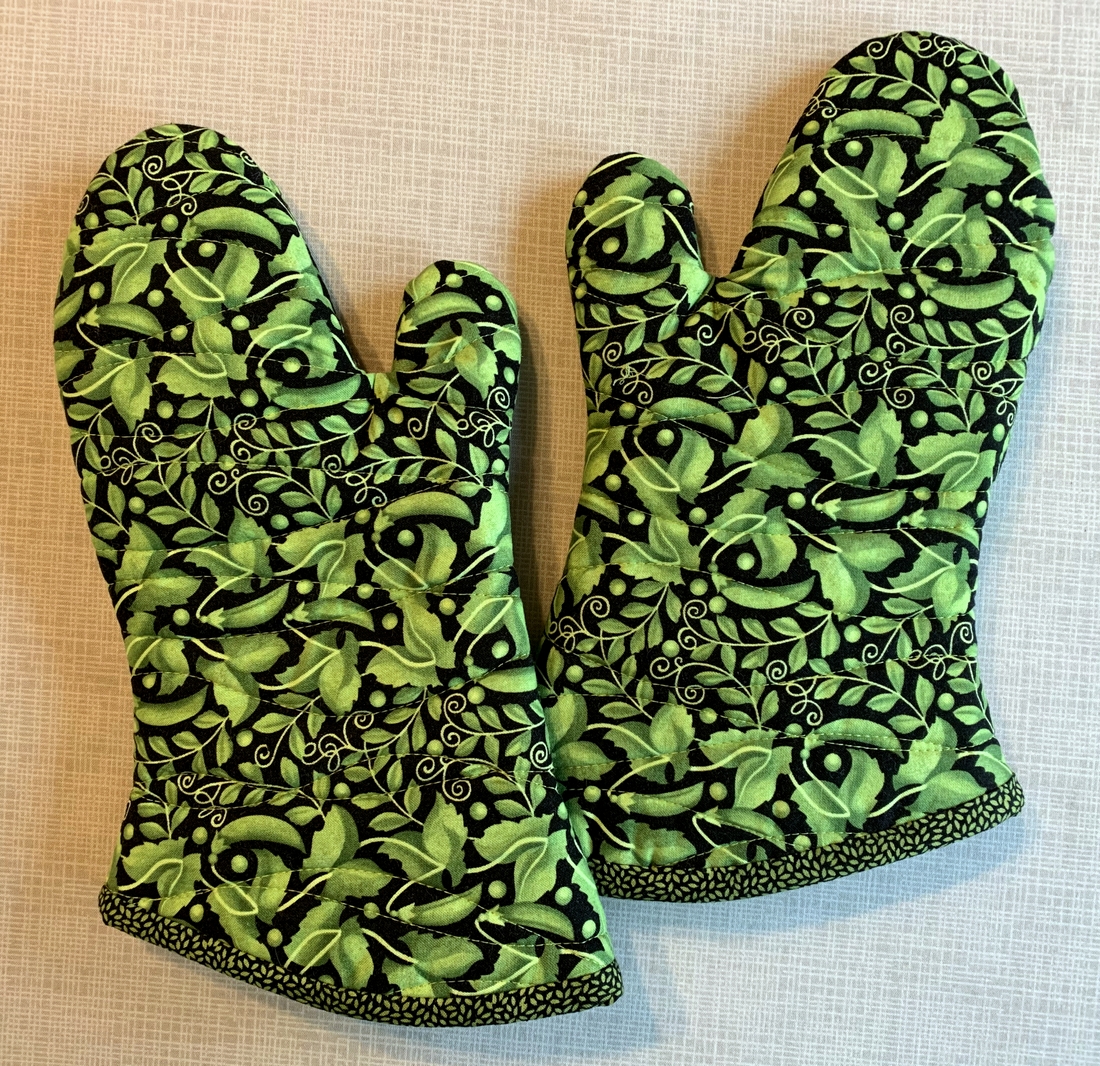
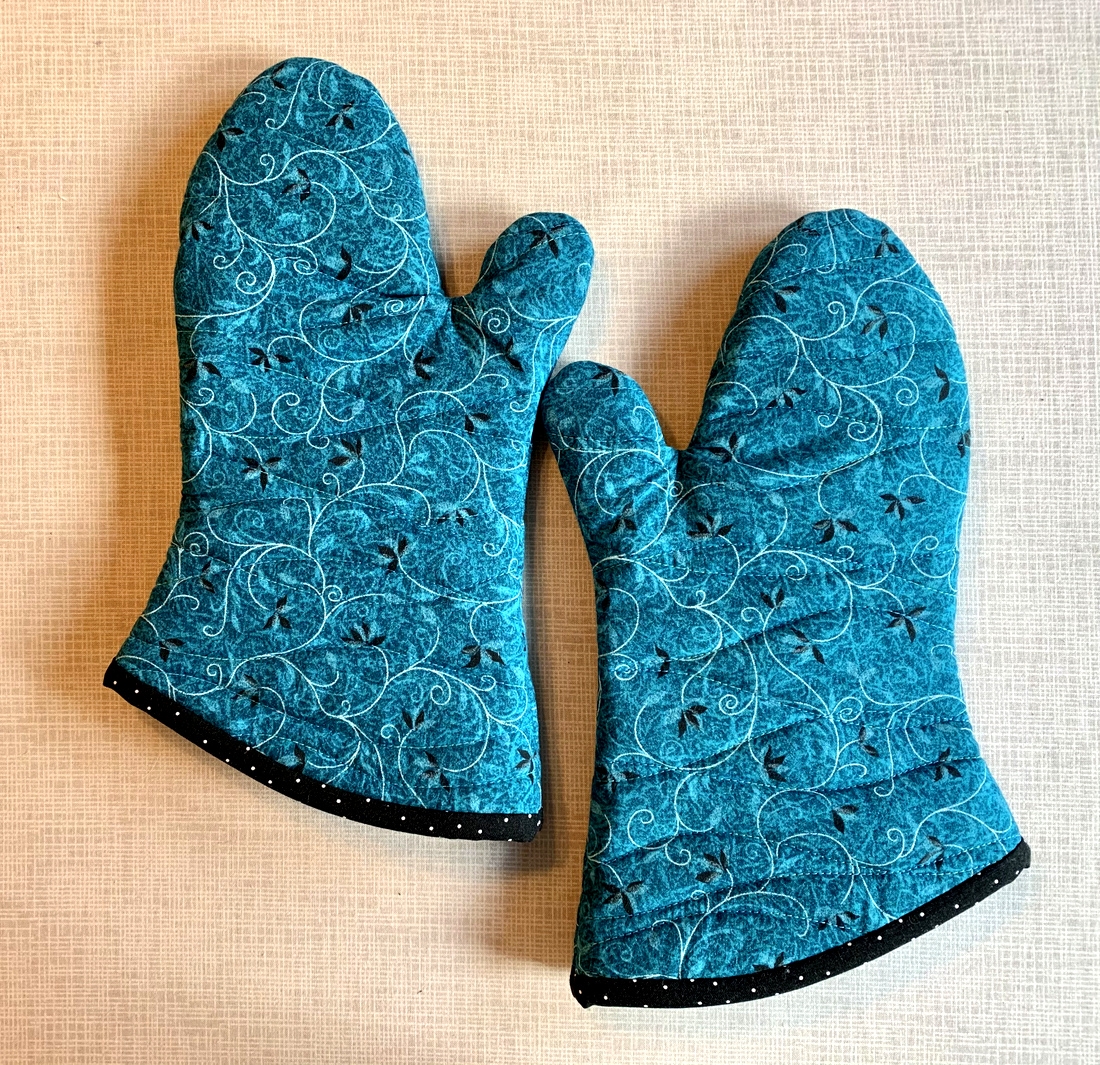
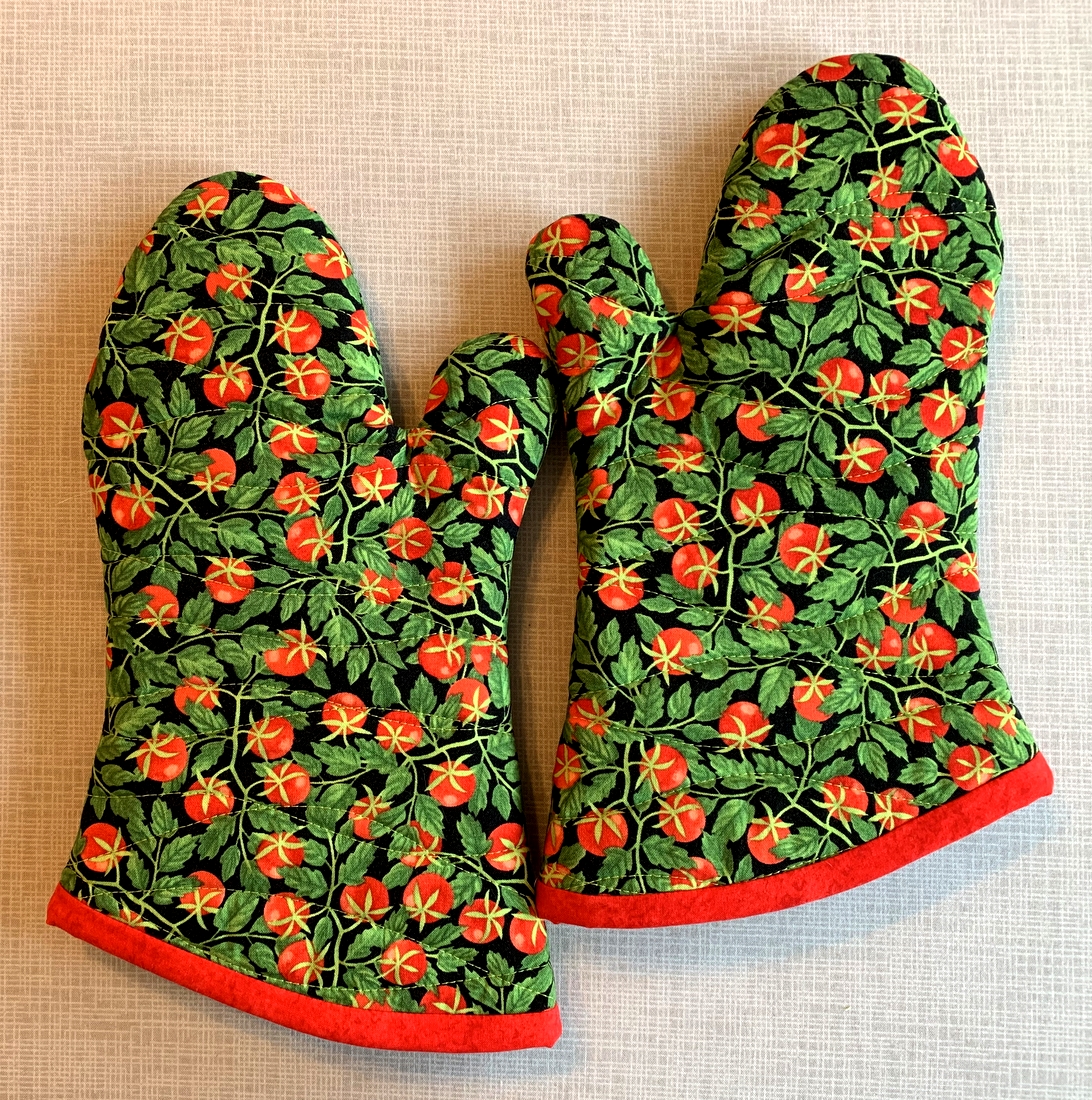
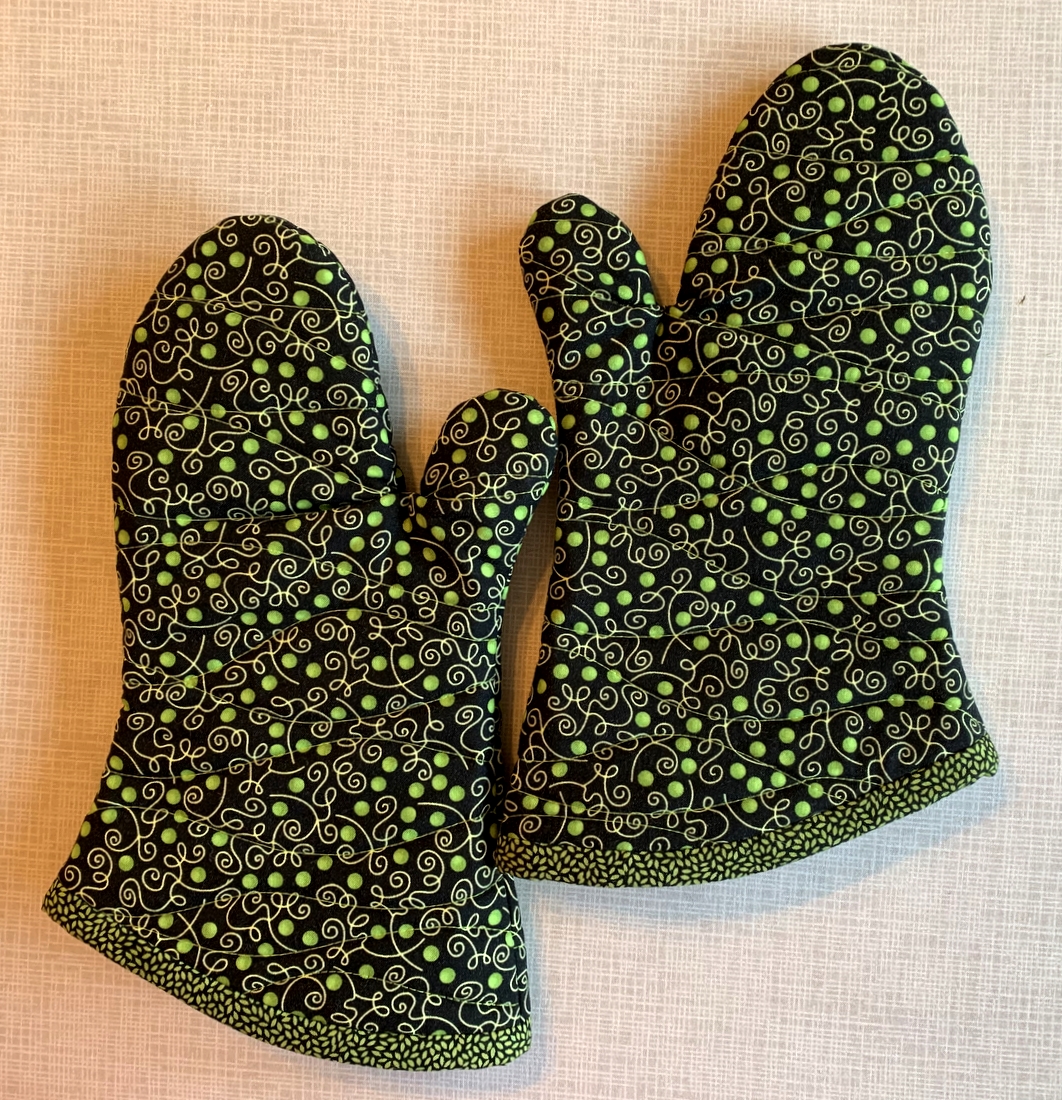
Oven Mitts 2024
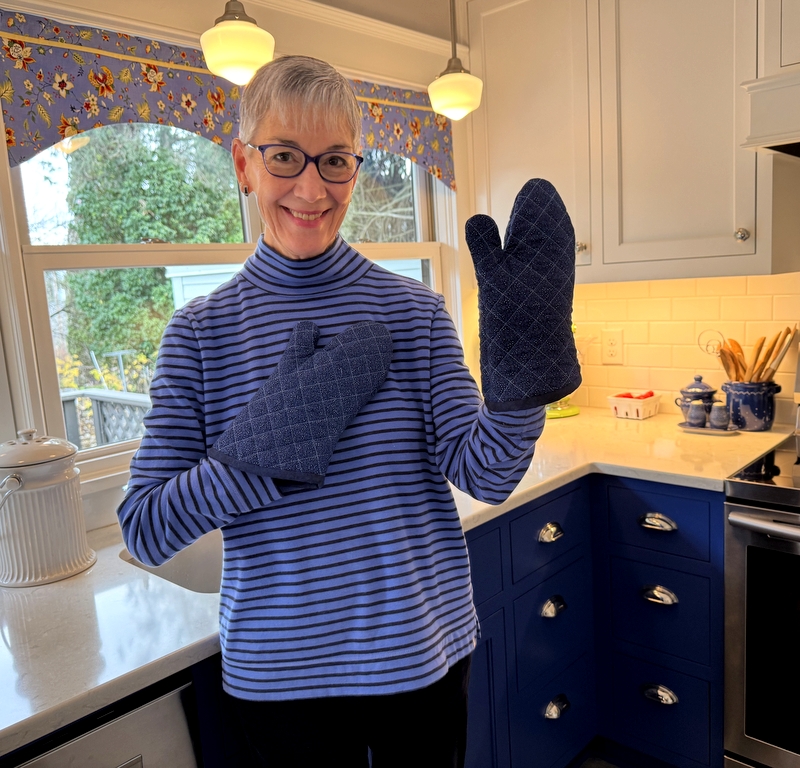
See that green dotted mitt below on the right? I burned a hole in it so I made the pair you see above late in 2024.
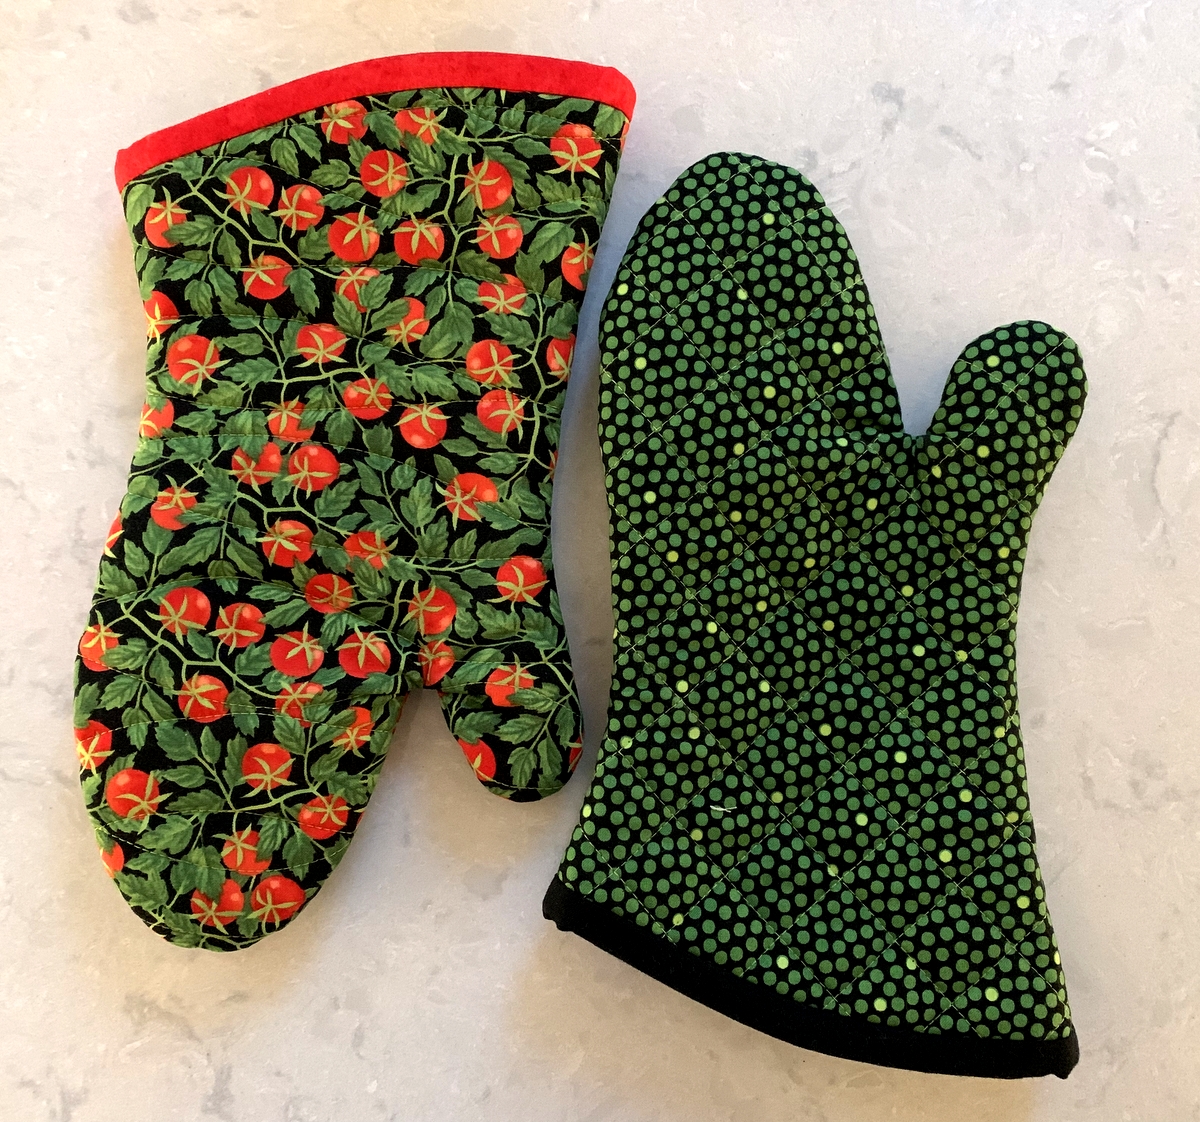
I made these oven mitts to replace ones from a few years ago that wore out. I’m sorry to say I’ve used the last bit of that tomato fabric. Wish I’d bought more at the time! The mitts were made using my own tutorial (#21 on my Tutorials page).
Self-Binding Baby Blanket
I will admit my cat Coco is spoiled. I made this self-binding baby blanket for her out of two pieces of flannel. After laundering it measures 29″ square.
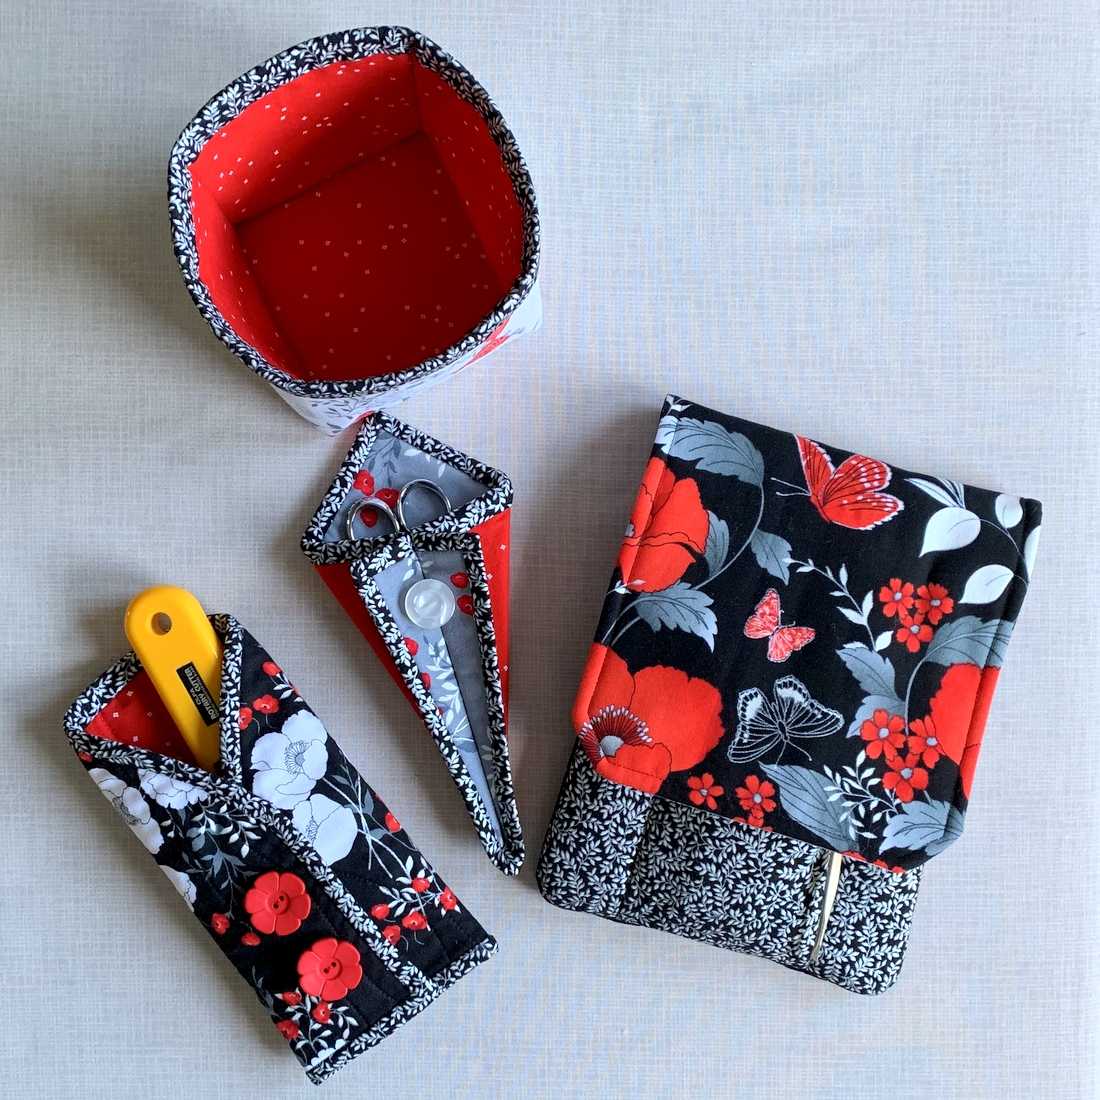
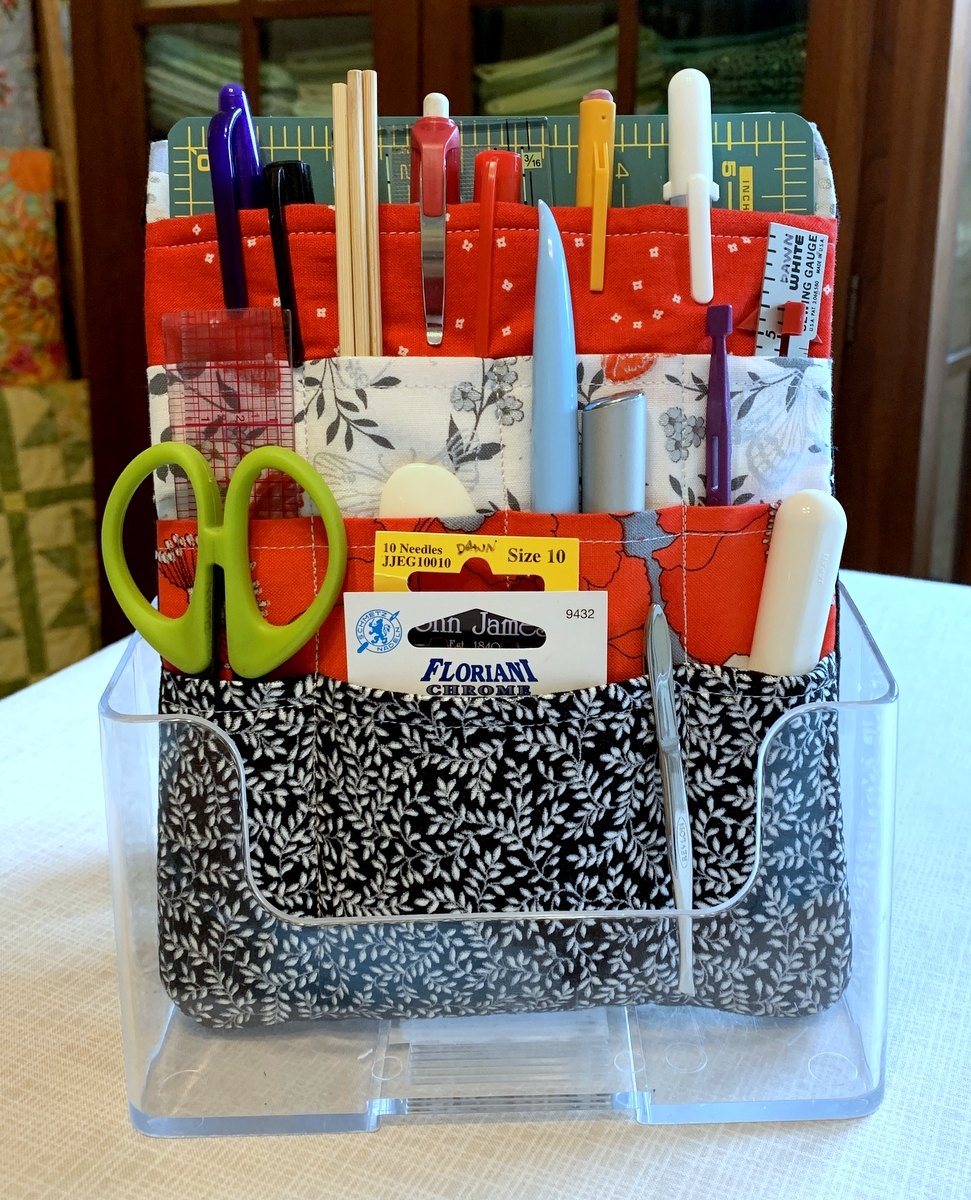
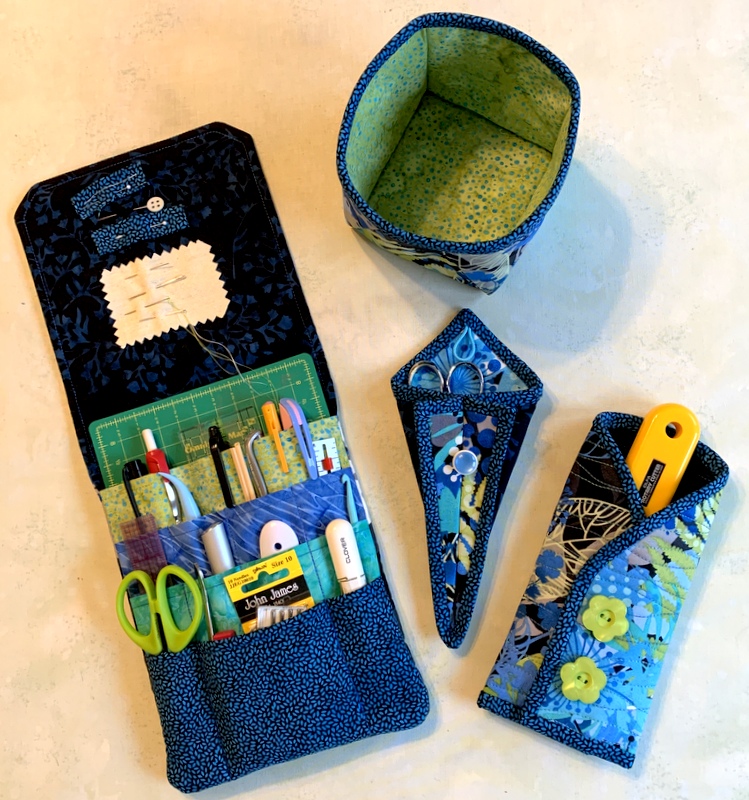
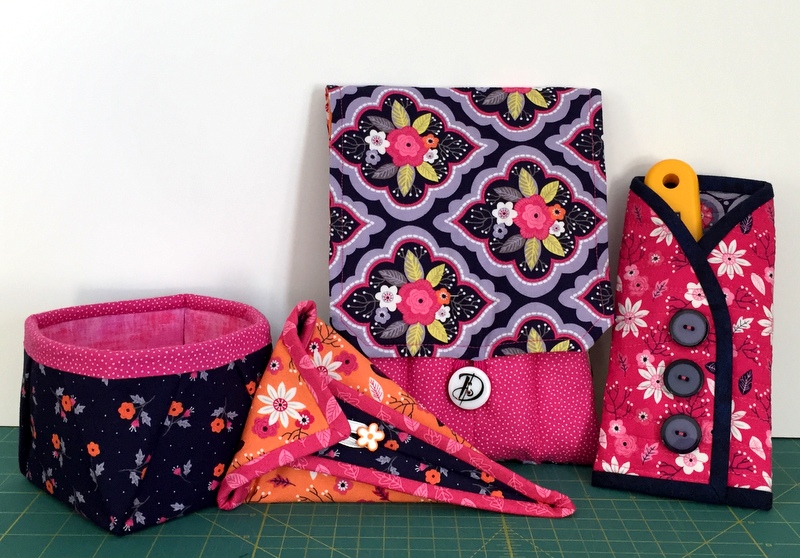
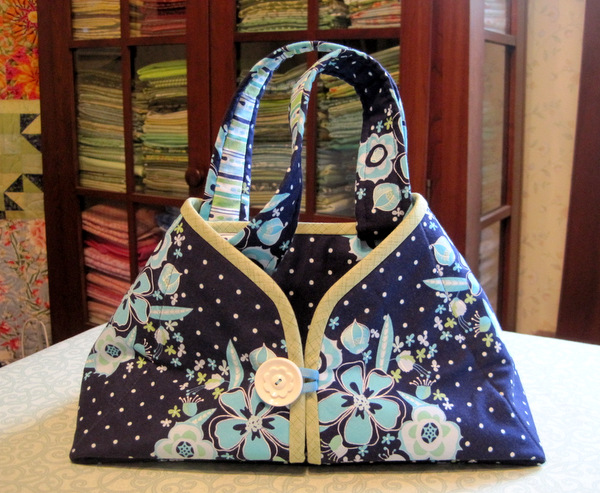
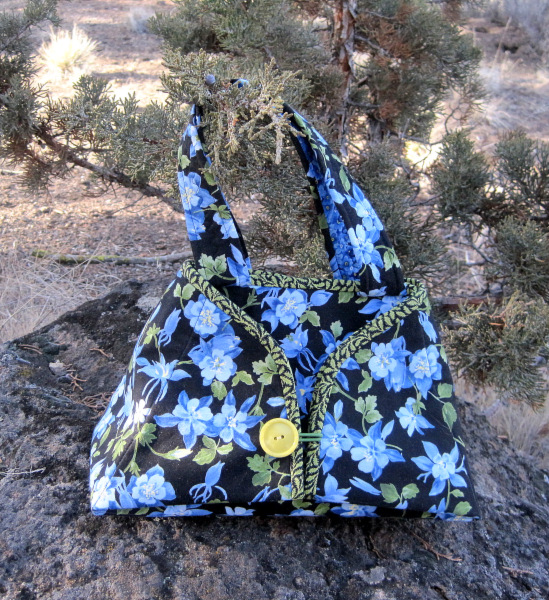
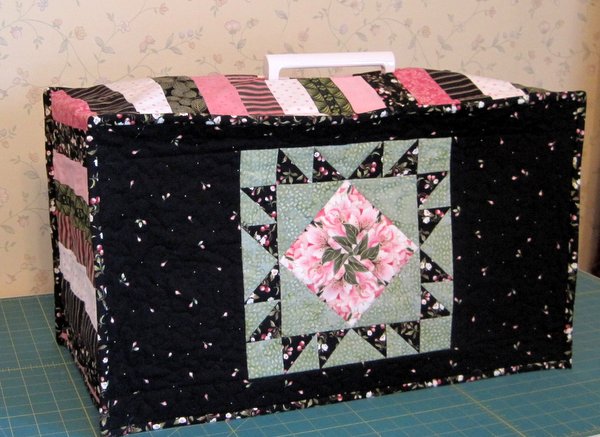
Quilter’s Accessories 2022
I made these accessories to go with my latest Junior Billie Bag:
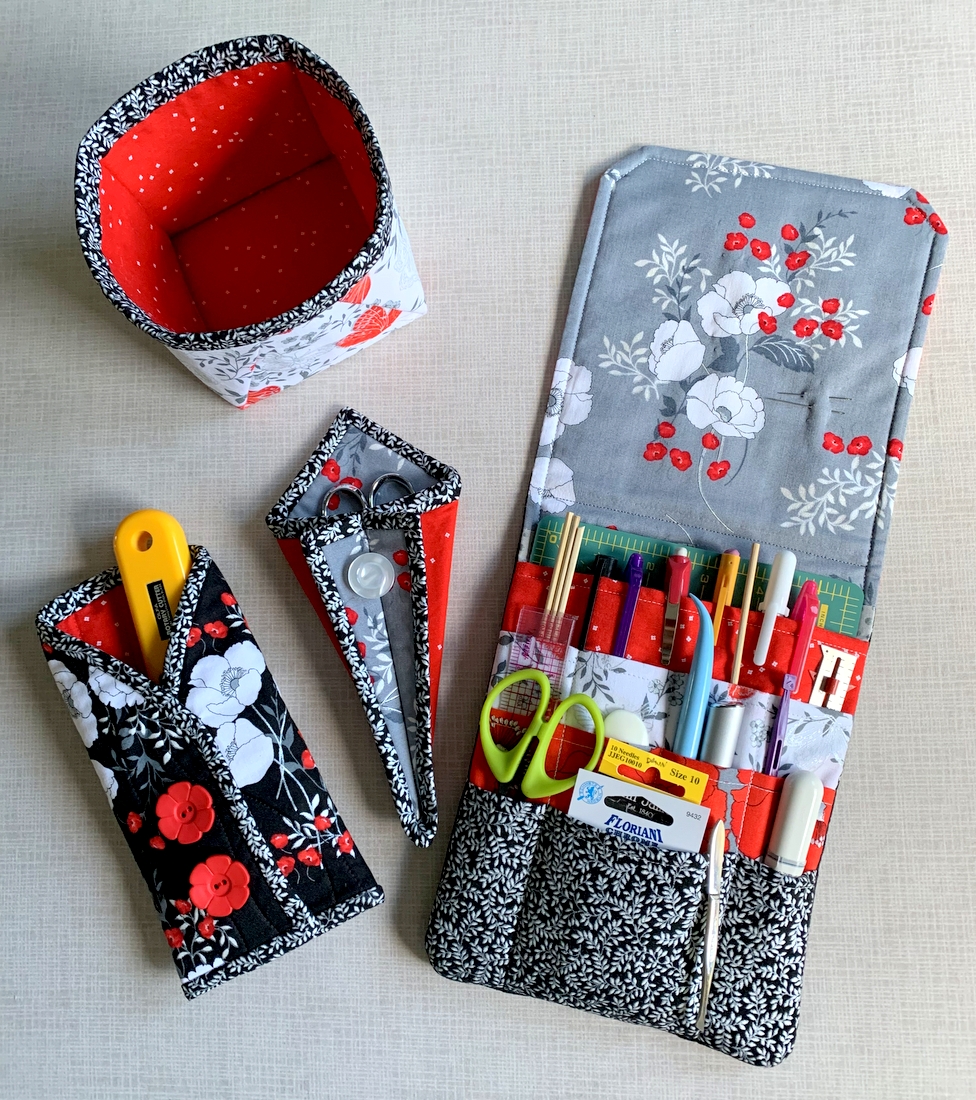
Here’s a look at the tool caddy with the flap down:
 The tools I use most often are easy to reach (and to put back at the end of the day) when the caddy is sitting in the lucite brochure holder:
Oven Mitts Galore!
Using a very old and well used oven mitt as a pattern, I made a pair for my twin sister Diane in December 2020:
They turned out so well I made a pair for myself. Then I resolved to write a tutorial. Fine-tuning the tutorial led to the making of several additional pairs in 2021, including the three below that became part of a giveaway on my blog.
Several more were made for friends and family. A sampling:
Below are links to the tutorial, which comes in three parts.
Oven Mitts that Fit: the Prequel gives the background for my taking on this project and shows you how to make your own pattern based on the size of your hand.
Part 1 covers fabric requirements, instructions for downloading and printing the pattern, assembling the layers, and quilting the resulting “quilt sandwich.”
Part 2 covers the sewing of the mitt and contrasting band around the cuff edge as well as the final step of tacking the band down before turning the mitt right side out.
Quilter’s Accessories 2021
These quilter’s accessories go with a Junior Billie Bag I made for a friend in 2018.
Sorrento Bucket Hat

This fun little project — a reversible bucket hat — was made from a pattern by Elbe Textiles. The reverse side is a bright spring green. Both fabrics came from my stash.
Click here to read my blog post and see more photos of the hat — and me modeling it.
Quilter’s Accessories 2019
These quilter’s accessories were made to go with one of two Junior Billie Bags I made in 2019. That fabric box is my current threadcatcher, and the pointed case in the middle holds my sewing scissors.
Quilter’s Accessories 2017

All of these quilter’s accessories are made from the same fabrics as one of the Junior Billie Bags I made in 2017. That fabric box is my current threadcatcher, and the pointed case in the middle holds my sewing scissors.
Quilter’s Accessories 2016
The very same items as above, made in 2016 to match the Junior Billie Bag I made earlier in the year.
I-Pad Cover
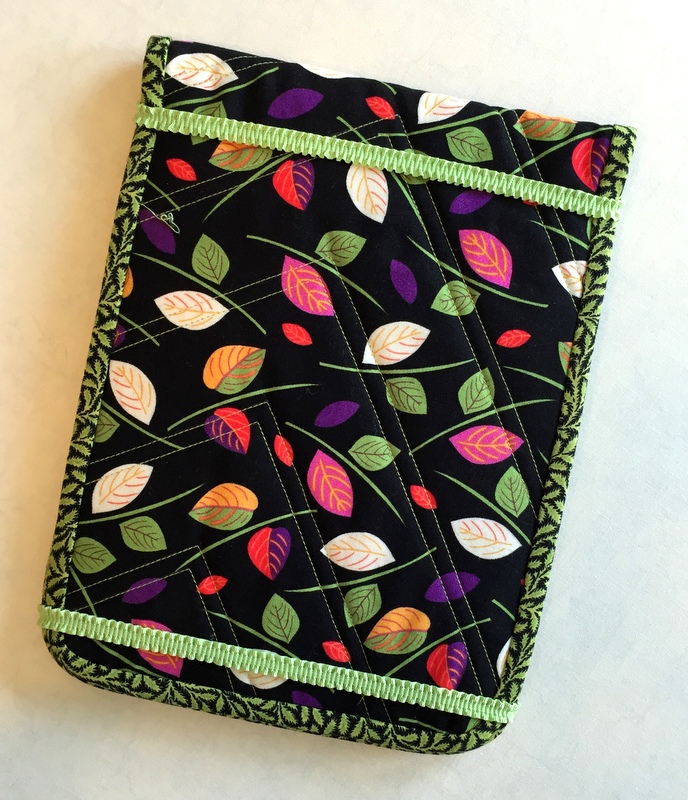
Designed and made for a family member who got a new iPad Pro in 2016. Click here for photos of the inside and a description.
1-Hour Baskets
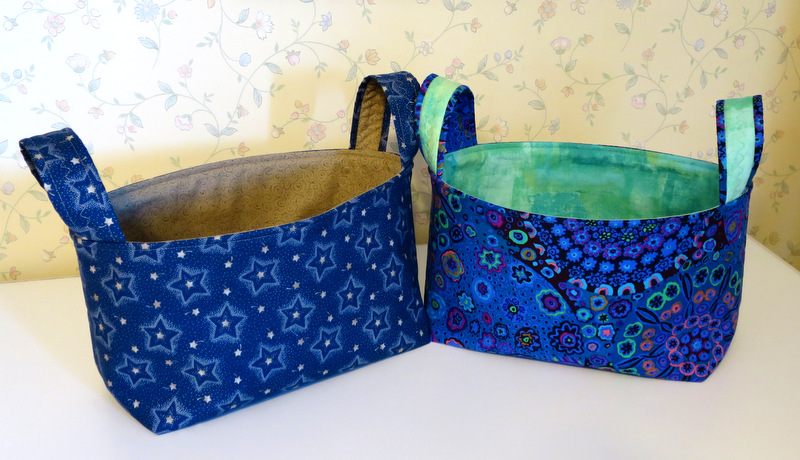
These fabric baskets, made as birthday gifts, are based on the 1 Hour Basket Tutorial from Hearts and Bees. They measure about 9½” wide, 6½” tall, and 5½” deep. I departed from the tutorial in making the handles by lining them with the same fabric used for the inside of the baskets. For the basket on the right I turned the handles inside out because I liked the look of the contrasting fabric on the outside.
Rotary Cutter Coats

I made a rotary cutter case a couple years ago as a birthday gift for a friend. Recently I tweaked my design and made several, which became prizes at a quilt shop Open House and as a Giveaway on my blog. They are quite simple to make. You can see for yourself by clicking on my Tutorials link above or by clicking here.
Little Boxes
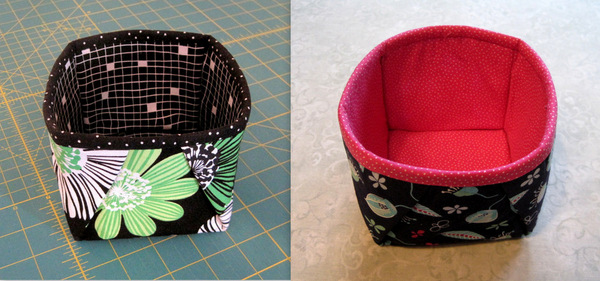
Four inches square and four inches deep — those are the measurements of these handy little fabric-covered boxes. My friend Vivienne sent me directions on how to make them. The original instructions called for a taller basket; I tweaked the dimensions a bit. Peltex, a heavy fabric stabilizer, was used to stiffen the side panels and bottoms. The boxes make great catch-alls. I use mine as thread-catchers.
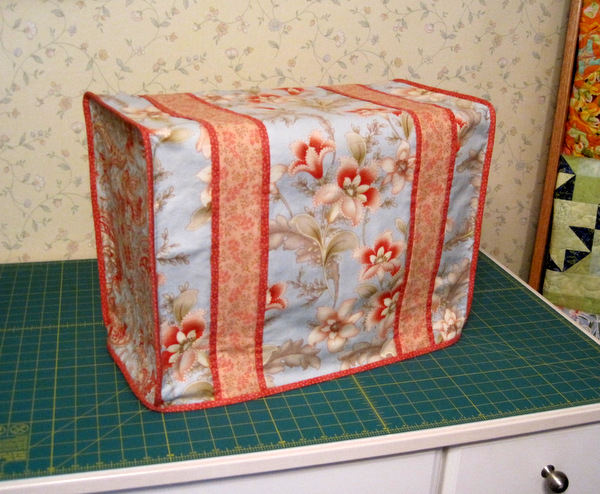
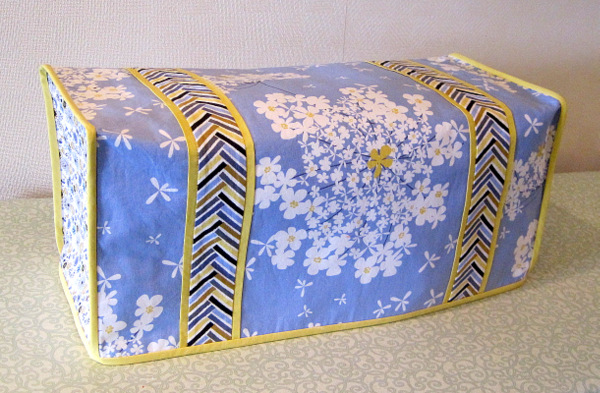
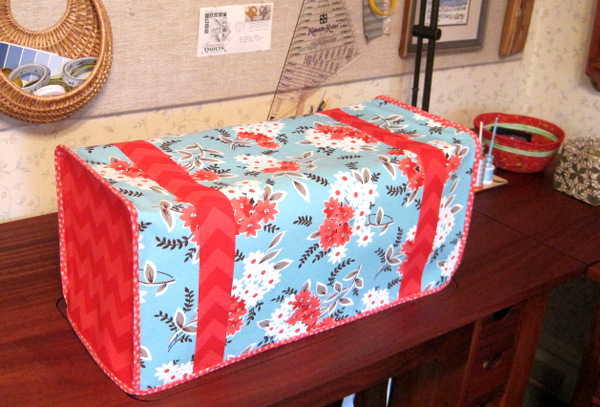
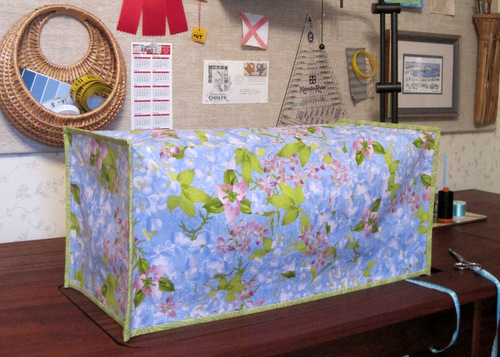
Sewing Machine Dust Covers
For Deborah and Vickie S., two members of my quilt group, the Quisters, I made custom sewing machine dust covers using my own pattern:
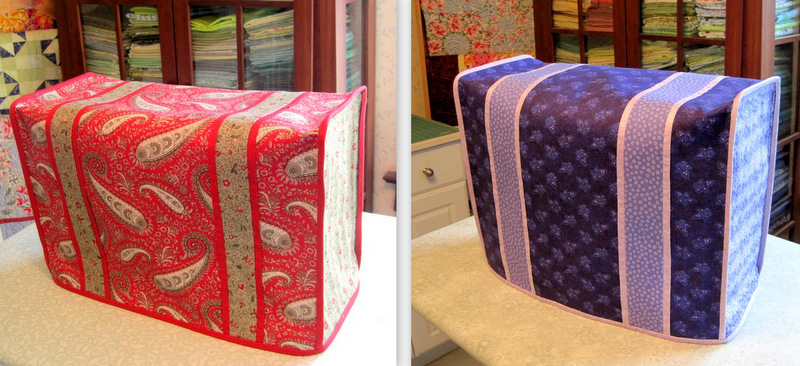
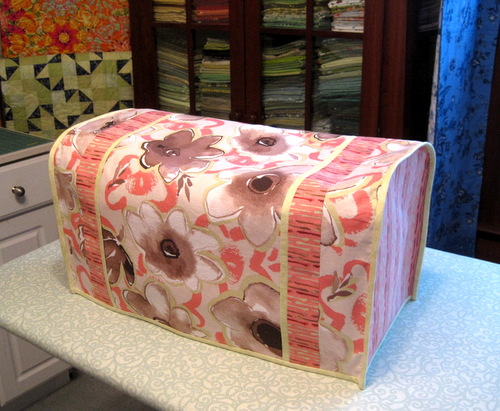
I also made a custom cover for Susan S. in Georgia, winner of my first Giveaway in 2013:
Iron Caddy
I made this iron caddy as a birthday present for my friend Viv. The pattern, which I tweaked a little, is “Caddy Pad” by Sisters’ Common Thread.
Details about the fabric are in my post of May 15, 2013.
I made a caddy for myself a couple months earlier while on a retreat with my quilt group, the Quisters:
You can read more about it here, including the changes I made to the pattern. 2013.
iPad Mini Cases
In early 2013 I got my first iPad Mini and promptly made a case for it. Some of my friends and family members got iPads, too, and before long I had made a half-dozen cases as gifts. Three of them are shown below.
Sewing Machine Dust Cover, Version 4
This version features a flange on both sides of the accent strip. Of the four sewing machine dust covers I’ve made, all shown directly below, I like this one the best.
I made it while on a retreat in March with my quilt group, the Quisters. You can read about it here. 2013.
Sewing Machine Dust Cover, Version 3
Version 3 in my experiments with sewing machine dust covers features a better way of attaching the binding — attaching it to the side panels first and then finishing with one strip around the bottom.
To read my post about the making of this dust cover, click here.
Sewing Machine Dust Cover, Version 2
My second attempt at a sewing machine dust cover yielded this version, accented by contrasting strips and a flange.
I rounded the corners on this one, another departure from the first version shown below. To read more about this dust cover, click here.
Sewing Machine Dust Cover — the Prototype
After making a quilted cover to transport my sewing machine [see the entry below this one], I decided to make a dust cover to put on my machine when I’m done sewing for the day. Instead of using boring old muslin, I picked a pretty floral fabric and bound it in a bright green:
My prototype was a keeper! To read my post about the making of this dust cover, click here.
Sewing Machine Cover
The pattern for this quilted sewing machine cover, designed by Monique Dillard of Open Gate Quilts, was published in the Aug 2012 issue of American Patchwork and Quilting magazine:
I wrote about the construction of the sewing machine cover in my Sept. 2 post, Sewing Machine Cover . . . Done! Clicking here will take you directly to that post.
Rotary Cutter Case

This rotary cutter case was made for my friend Vivienne’s birthday. The design is a riff on one I saw recently in a magazine. It looks like a little coat, doesn’t it? I added buttonholes before binding the case all the way around and then fusing the bottom together with ¼”-wide Steam-a-Seam. I found those buttons last year at the Scott Antique Market in Atlanta, Georgia while visiting my twin sister. The antique market is open the second weekend of every month, which has something to do with the timing of my visits.
Billie Bag

Billie Mahorney, who designed this quilter’s tote, calls it “The Take It All With You Bag” but every quilter who has ever made one simply calls it her “Billie Bag.” Each bag is unique because the maker can put whatever she wants on the front and back, and the inside pockets are custo1ized as well. This is actually my second Billie Bag. My first one measures 21” x 21” x 7½”, following Billie’s original design. The one you see above is slightly smaller, measuring 14½” x 17” x 7½”, and it has both a short and long set of handles. Both bags hold an amazing amount of supplies, including a 6” x 24” acrylic ruler, thanks to the 7½” width of the side panels.
Cases for Sewing Scissors

These sewing scissors cases look complicated but they are surprisingly easy to make. All it takes is contrasting squares of 7” fabric with batting in the middle and a length of binding in a third fabric. A bit of ribbon and vintage buttons make charming fasteners. These were birthday presents for my friends Peggy and Lee.
In the Doghouse

I was teaching a class on folded log cabins at the Pine Needle Quilt Shop when I spotted this fabric with several kinds of dogs on it. It’s from the “Fifi and Fido” line by Anna Griffin. The little hound dog looked like he needed a home — a folded log cabin home. A folded log cabin doghouse, to be precise. I think some of his canine companions need their own doghouses, too, don’t you? This one measures 6” x 10½”.
Fractured Flower

In the summer of 2010 I took a class on fractured images from Johanne Gibson in Sisters, Oregon. I love the ripples-in-a-pond effect. Since then I’ve fractured several images, including this one, and taught how-to classes at the Pine Needle in Lake Oswego, Oregon.

It’s always interesting to compare the original fabric image with its fractured cousin. This measures 17” square.
Triple Decker
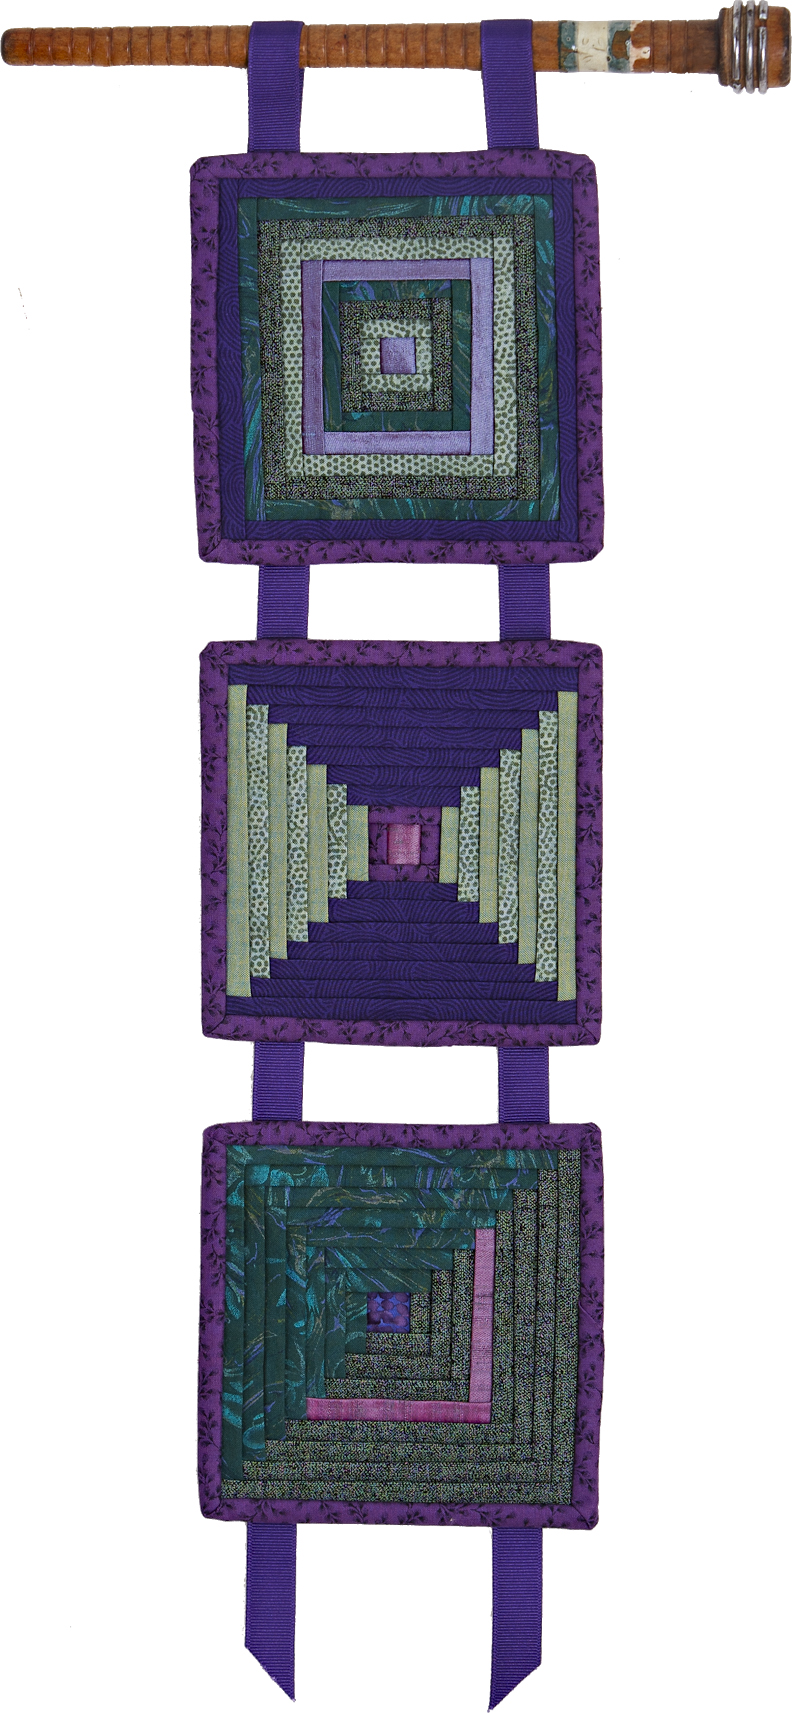
The hanger came first. When I spotted this vintage weaver’s spool for sale at an old mill, I knew right away that it needed a little quilt to hang from it. I decided to make separate folded log cabin blocks and join them with grosgrain ribbon. A few strips of dupioni silk and shot cotton added a bit of shimmer. This measures 5½” x 22”.
Pretty Pincushion
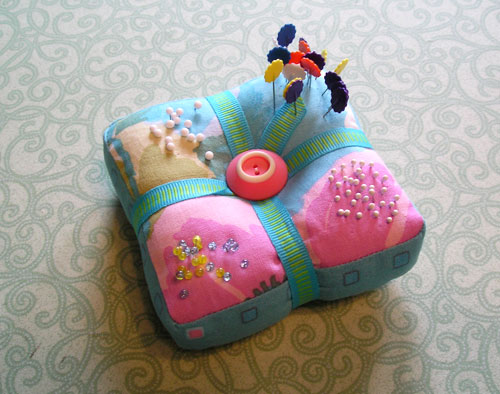
A very handy little pincushion for someone like me who uses a variety of pins and likes to keep them separate. The pattern, designed by Heather Bailey, is a free download from www.allpeoplequilt.com. Enter “pins and needles pincushion” in the search box.
House #1

This was my first folded log cabin project after taking a class in 2009 from Sarah Kaufman, author of Folded Log Cabin Quilts (C&T Publishing, 2010). I envision House #1 as part of a series called “There Goes the Neighborhood.” It measures 6” x 15”.
