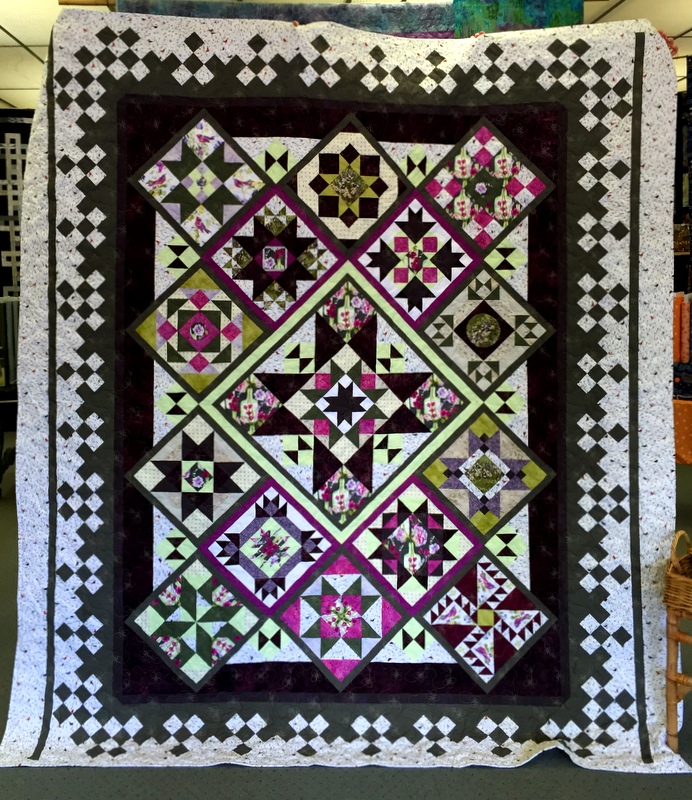
Where It’s @: All Wound Up

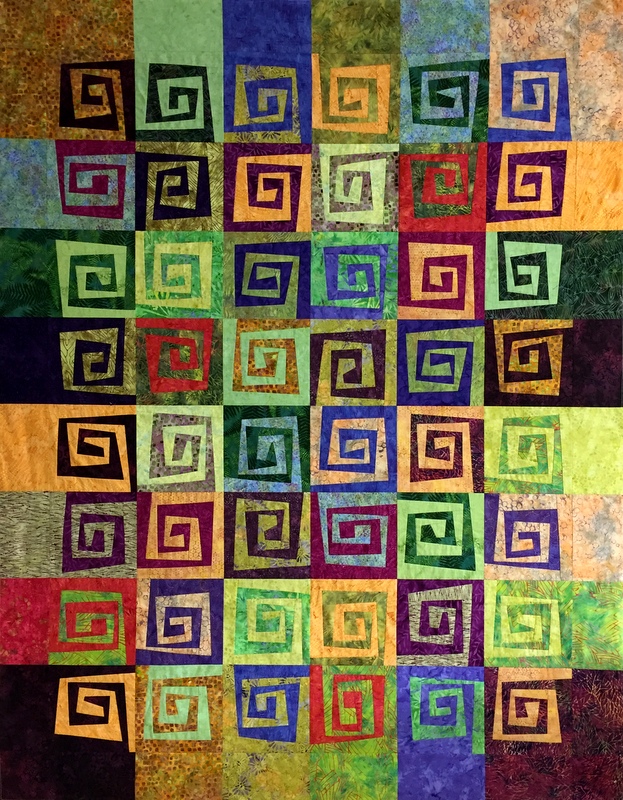
where-its-nov-2016Last night I finished piecing my wonky Greek key quilt, which already has a name: Where It’s @.  The name comes from the resemblance of the @ sign on a keyboard to the classic Greek key motif, which gets a decidedly funky treatment here.
The pattern is Rewind by Karla Alexander of Saginaw Street Quilts. I had the pleasure of taking Karla’s class last summer in Sisters, Oregon during the week of classes known as Quilter’s Affair. Karla provided a template for the block, which is made up of strips sewn in rounds like a log cabin block, and she also demonstrated how to make a block by cutting the strips free form. I can’t tell you how much fun it was cutting those strips free form — the wonkier, the better, as you can see from comparing a few blocks.

By the time I got to the last few blocks, I had finally developed a system for keeping my strips in order — imperative, since I was cutting through four layers of fabric at a time. Before getting to that point, I made a few mistakes, requiring some of the strips to be pieced, but I was hard pressed to find them by the time the finished top was up on the design wall.

One of the things I love about Karla’s design is how the background fabrics in the outer blocks extend to create a pieced border. My blocks finished at 8″ square. With the borders added, the quilt top measures 57½” x 73½”.

Where It’s @ is quite a departure from the quilts I am normally drawn to. It was good for me to step outside my comfort zone and make something a bit on the zany side.


Posted in Quilter's Affair, update, wonky Greek key | 7 Comments

Tempted

I’m not going to start a new quilt until I’ve finished at least two other tops. But if I were, it might be this one:

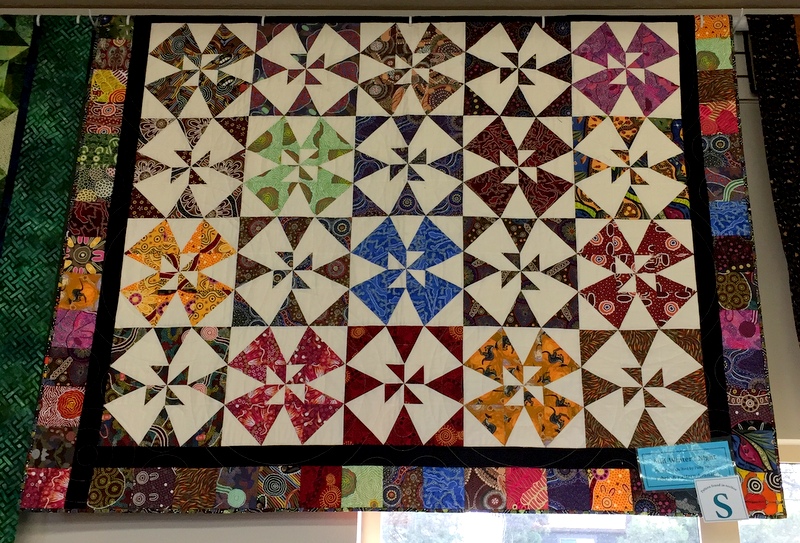
midwinters-night-quilt-at-bjs-quilt-basket-in-bend
Isn’t it a beauty? I saw this quilt on display last week at BJ’s Quilt Basket in Bend, Oregon, where I spent a few days visiting my dad.

At first glance, the basic block in this quilt looks like the classic Winding Ways, with the addition of a pinwheel in the center. As I understand it, the Winding Ways block is made with curved seams, yet all the seams in this quilt are straight. What you see is the illusion of curves. I love that!

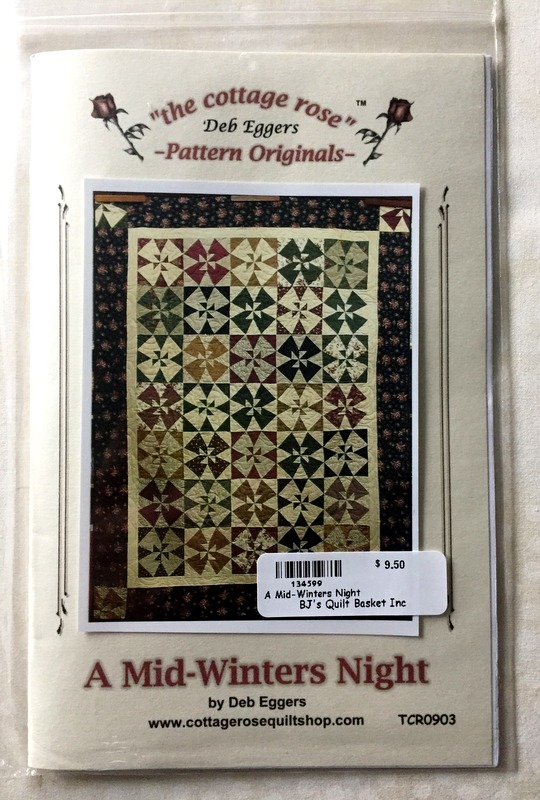
I bought the pattern on the spot:

a-mid-winters-night-quilt-pattern

I’m drawn to this design because it can look traditional or contemporary, depending on the fabrics used. The quilt on the pattern cover looks very traditional while the one in the quilt shop has a contemporary vibe thanks to the Australian aboriginal fabrics used.

I could see making two versions of A Mid-Winters Night. But not just yet. I’m not starting a new quilt. I’m not, I’m not, I’m not!


Posted in update | 15 Comments

More Stars for Stella

After settling on the name Stella by Starlight for my just completed kaleido-spinner quilt (subject of my last post), I made a simple pieced back for it using fabrics from my stash. I decided to stick to black fabrics for the back since the quilt will be quilted primarily with black thread.

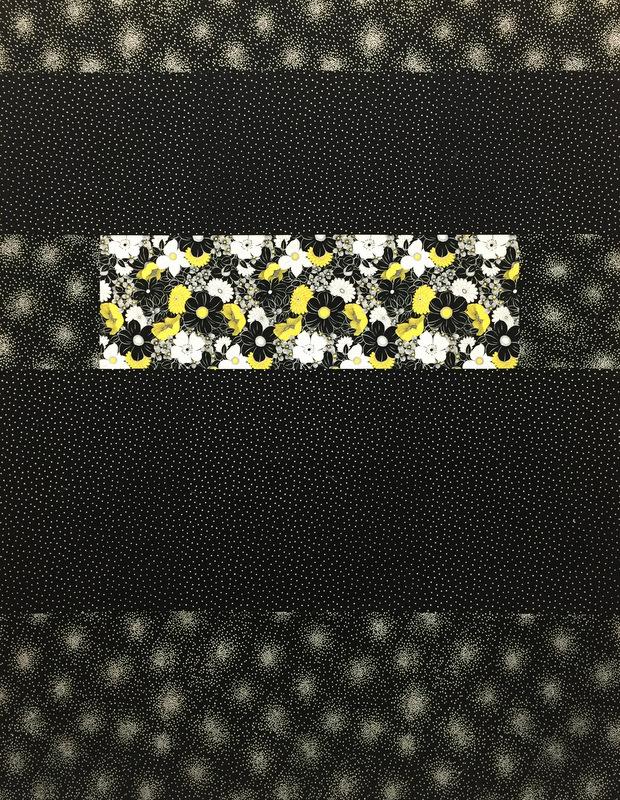
A review of my stash yielded two prints that are perfectly in keeping with the theme of the quilt. How serendipitous! One features tiny white stars on a black background, while the other is a geometric print that from a distance looks like star clusters. Here is the completed back, which measures 60″ x 80″:


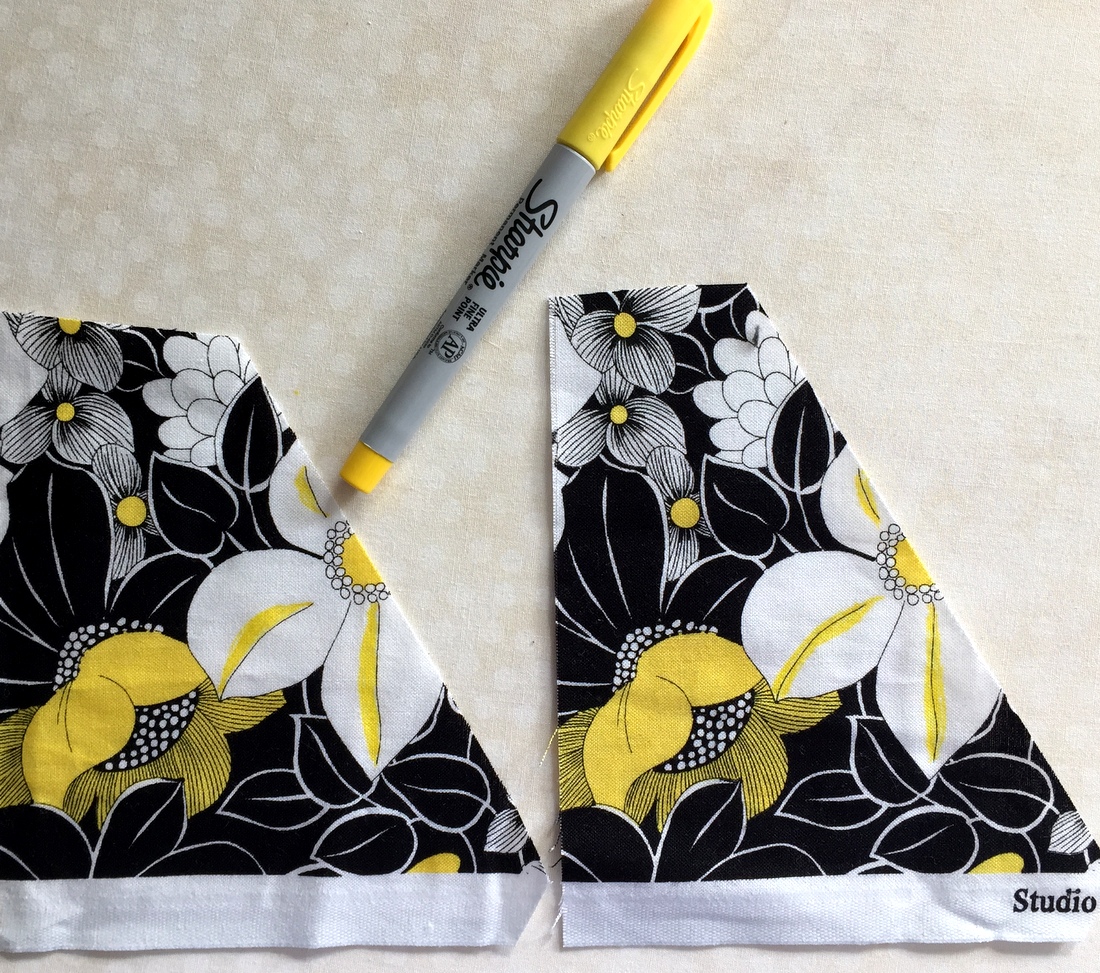
back-of-stella-by-starlightThe strip of floral fabric near the middle is the focus fabric that created the one-of-a-kind kaleido-spinners in the quilt top:
kaleido-spinner-quilt-top-update-oct-2016

I’m going to have Stella custom quilted by a local longarmer whose work is, well, stellar.


Posted in hexagons, kaleido-spinner, kaleidoscope quilts, update | 3 Comments

Fixer Upper

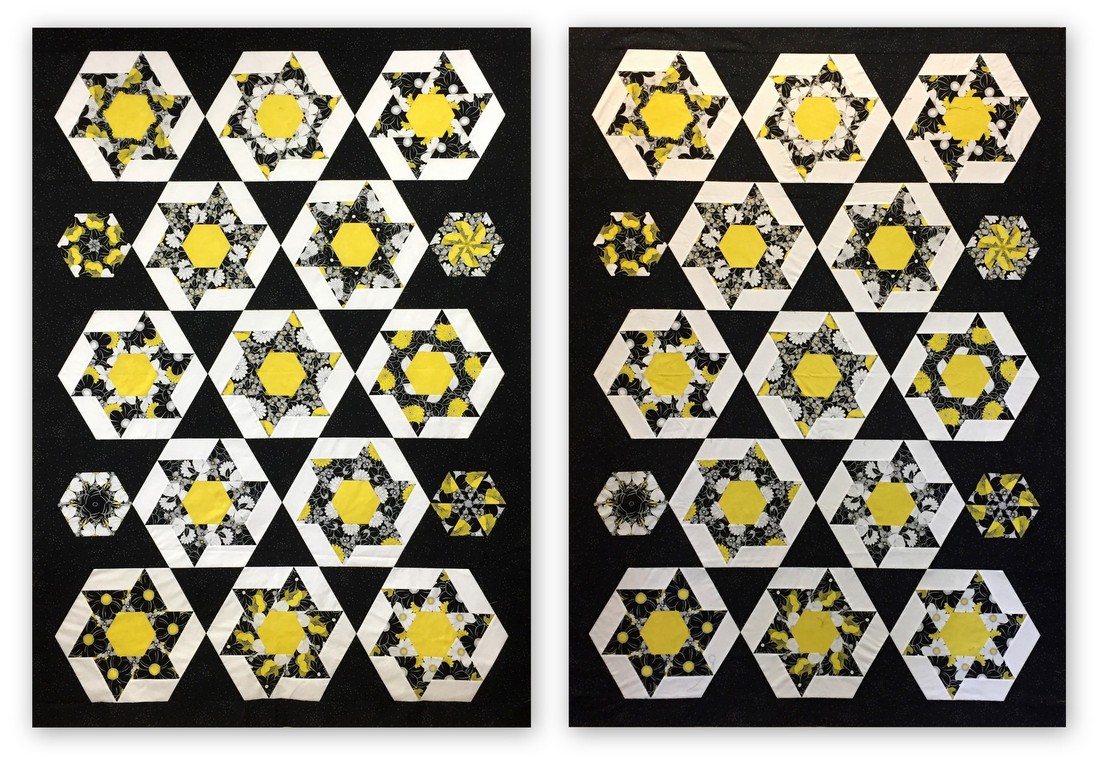
In my last post I showed you my latest kaleido-spinner project, noting that I planned to reverse the two large blocks in the fourth row. That’s been done, and this is what the quilt top looks like now:

kaleido-spinner-quilt-top-update-oct-2016
The change was made to better balance the distribution of yellow in the quilt. That small hexagon kaleidoscope on the left side of the fourth row has very little yellow in it, so it needed some help from its neighboring blocks.

It’s a subtle but significant change. Here’s a look at the quilt top before and after:
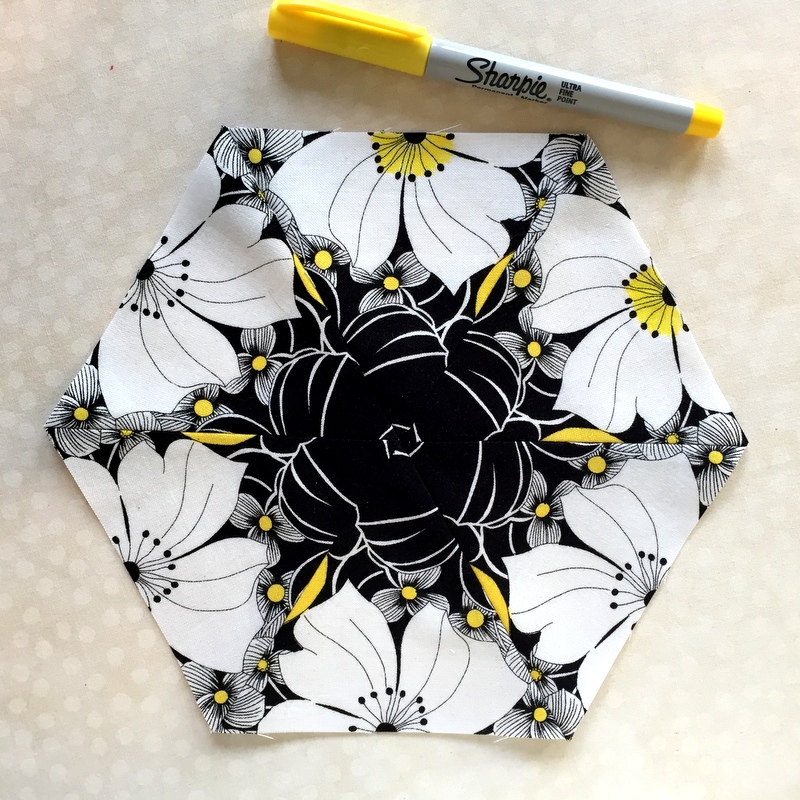
before-and-afterI was concerned about the lack of color in that hexie kaleido block even before I added it to the quilt so I employed a Sharpie Ultra Fine Tip permanent marker to give it a boost:
hexagon-kaleido-1
This is a trick I learned from a quilt teacher, who referred to permanent markers used in this fashion as “quilter’s caulk.”

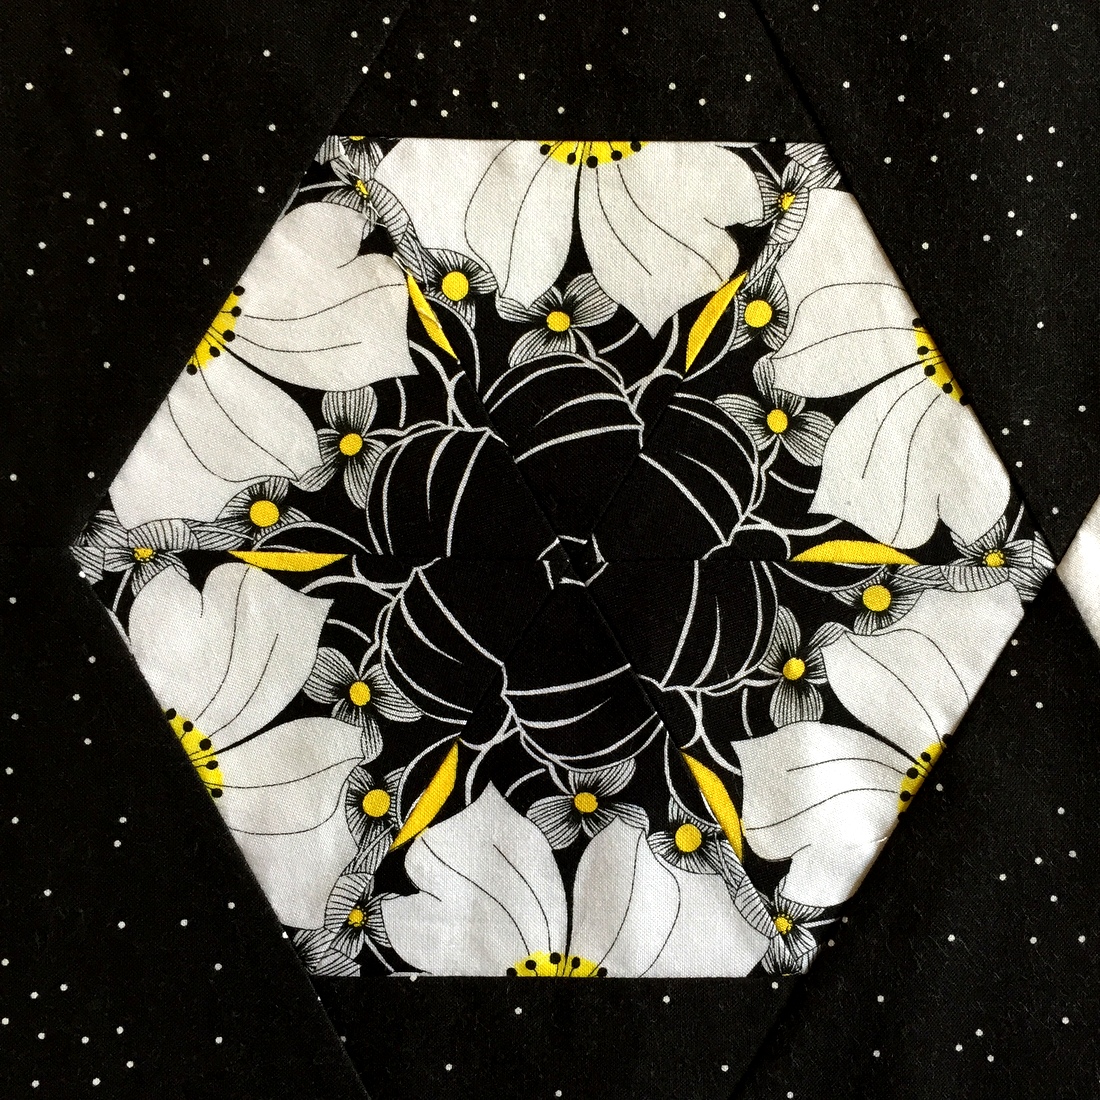
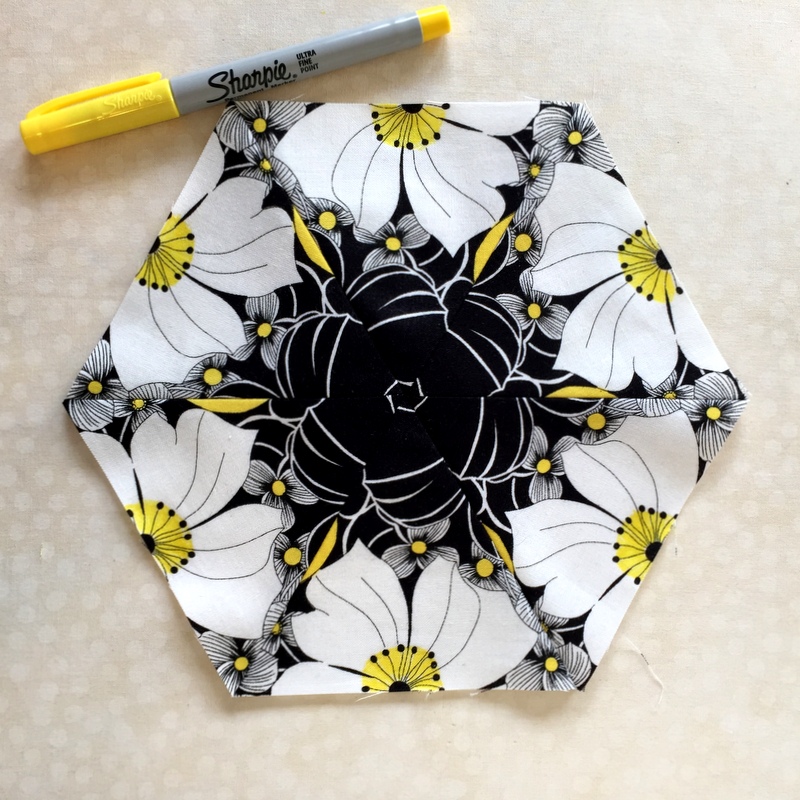
Here’s the block with the color added all around:

hexagon-kaleido-2
Sadly, much of the yellow on the outside edges disappeared because I had to trim the block before I added the side triangles and then I lost more of the color to the ¼” seam allowance:

kaleido-spinner-block-in-situ
I actually toyed with the idea of adding more yellow in the white flowers, practicing on a couple of scraps  . . .

playing-with-yellow-sharpie
. . . before concluding I was taking my obsession with balance too far. And here’s the thing about using permanent markers on fabric: if you make a mistake, it won’t wash out.

So my kaleido-spinner quilt top is done. I have a small piece left of the original floral fabric to put on the back — people always want to see what the fabric looked like before it was cut into little pieces.

Oh, and my quilt now has a name. It’s Stella by Starlight.


Posted in hexagons, kaleido-spinner, kaleidoscope quilts, quilter's caulk, update | 5 Comments

Friday Finish: A New Kaleido-Spinner Project

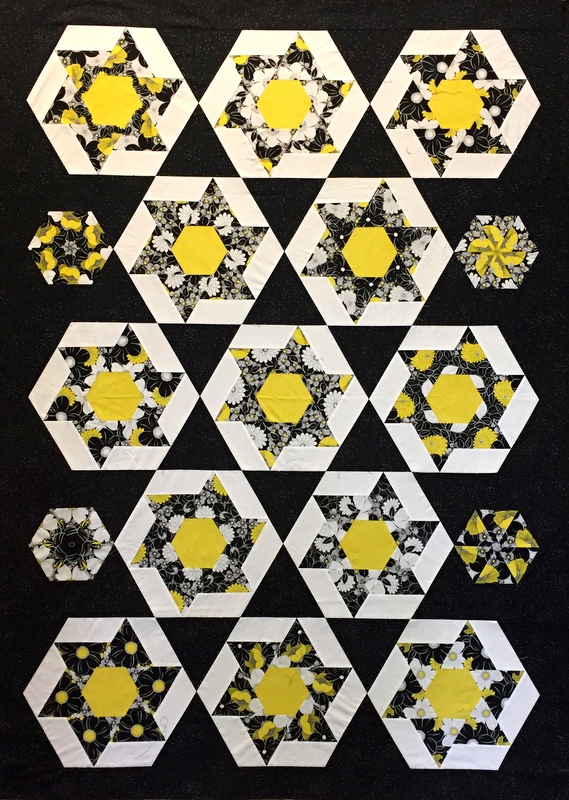
kaleido-spinner-quilt-top-oct-2016
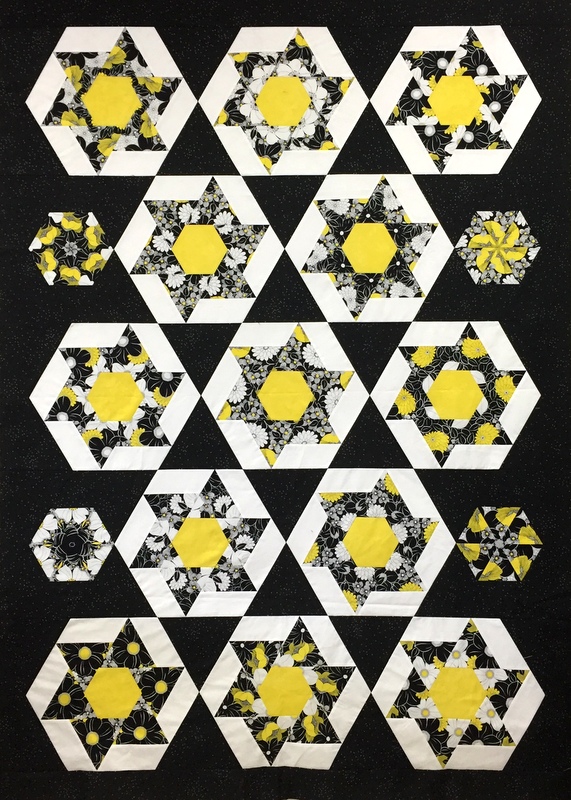
Regular readers will recognize the block — it’s Heather Peterson’s Spinners block from her book On the Run Again (Anka’s Treasures, 2014). I’ve gotten a lot of mileage out of this block. In the last few months it’s shown up in a wall hanging/table runner, a king size bed runner, and one side of a Junior Billie Bag. I even taught Spinners at a quilt retreat in June.

Heather’s original design calls for six different fabrics in the triangles surrounding the center hexagon. I used six identical triangles in each Spinners block to get a kaleidoscope effect of sorts, coming up with the name “kaleido-spinner” to describe the effect.

You probably noticed something different in the quilt top pictured above: the four small kaleidoscope blocks in the second and fourth rows. I was originally going to put half-kaleido-spinner blocks there. But then I was perusing Heather’s blog, Trends and Traditions, several days ago and saw something very clever she had done.

Heather has a brand new booklet, Starstruck, coming out that features chevron fabrics in hexagon blocks; when sewn together in hexagons made of six 60° triangles, the chevron fabrics form stars. Some of the quilts featured in Heather’s book have half-size hexagons in the places where half-blocks would normally go. When I saw those quilts, I knew the concept would work very well in my quilt. So thank you, Heather, for your wonderful block design as well as the inspiration for the setting of this quilt!

Making the half-size kaleidoscope blocks fit properly turned out to be quite a challenge. The full-size kaleido-spinner blocks in my quilt finish at 15½” x 13½”. That means the half-size kaleidoscope blocks finish at 7¾” x 6¾” . On top of that, I opted to finish all of the setting triangles on the sides of the blocks with Y-seams to extend the width. I added 3″ strips at the top and bottom to float the blocks the same amount. The quilt top now measures about 53″ x 73″.

I hope you can tell from the photo that the black background isn’t a solid. It’s a tiny random white-on-black dot by Cotton + Steel called “Sprinkle” that reinforces the feeling that those kaleido blocks are spinning in a night sky. (Hmmm. Perhaps there’s a quilt name in that image. I’ll have to work on that.)

Now, a confession. I didn’t notice until I was cropping the photo above that I had reversed the two large blocks in the fourth row. I can’t believe I didn’t see that when I was sewing the rows together. Am I going to fix it? Yes, I am. I worked very hard when laying out the blocks to achieve a good balance of color and value. It feels “off” to me now. My obsessive-compulsive self will be much happier when that change has been made.

There’s one more thing I need to do to this quilt top before I can declare it truly done. That will be the subject of my next post.

P.S. Heather Peterson did not ask me to promote her new book. I just felt it was important to acknowledge her designs (block and setting) in the creation of my latest quilt top.


Posted in bed runners, Billie Bag, hexagons, Junior Billie Bag, kaleido-spinner, kaleidoscope quilts, update, wall hanging | 5 Comments

Reach for the Stars: Four More Finishes

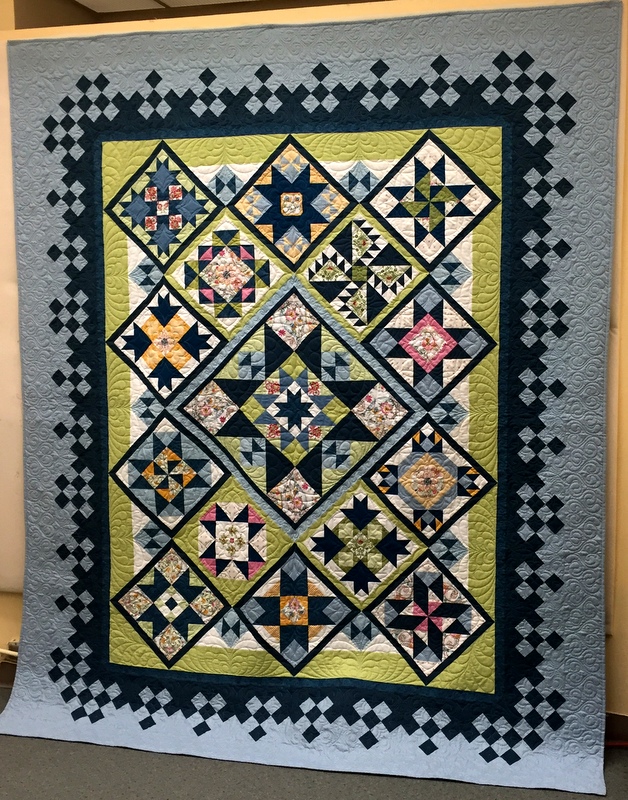
I’m excited to share pictures of four more versions of Reach for the Stars, Terri Krysan’s stunning star sampler quilt that was featured in Quilter’s Newsletter magazine three years ago. By writing about the construction of Catch a Falling Star, my own version, on this blog throughout 2014 and into 2015, I became acquainted with other Reach for the Stars quiltmakers locally and from as far away as Australia.

We have all become fast friends, bonding over our love of quiltmaking and our fascination with Terri’s design (even if some of us decided to modify it a bit, swapping out certain blocks or making changes in the border, for example.)

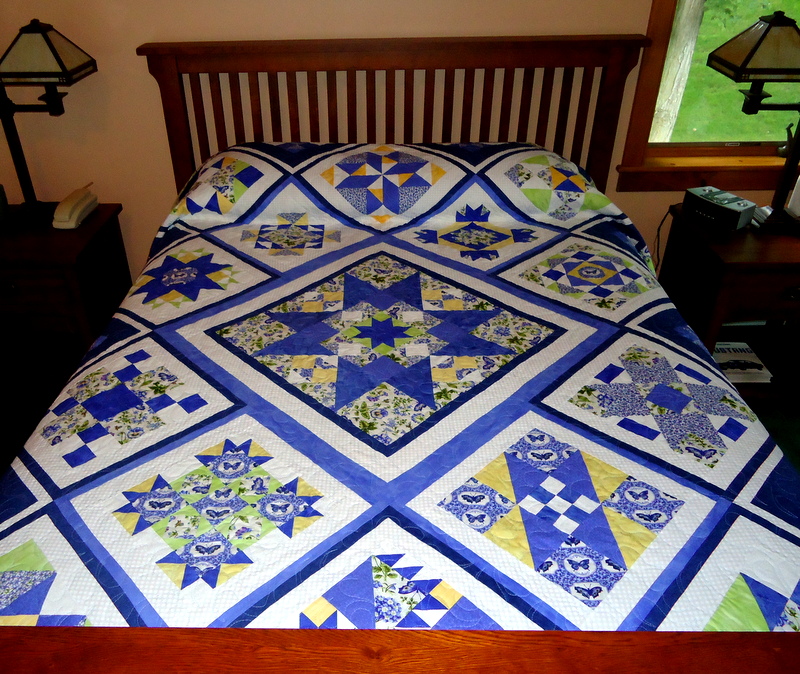
Candy L. from Colonie, New York, is one of my newer cyberspace quilting friends. She recently finished this beautiful version of Reach for the Stars in blues, yellows, and greens on a crisp white background:

candylagace-quilt-1
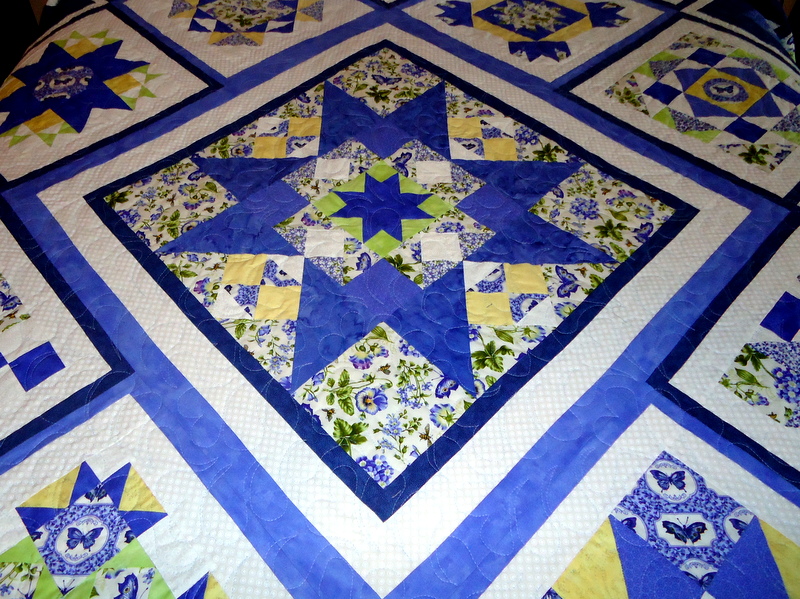
Did you notice the fussy-cut butterflies? If you look closely, you can also see the feather quilting motif in this close-up of the center medallion:

candylagacequilt3
The next three Reach for the Stars (RFTS) quilts were made by quilters I know from teaching at the Pine Needle in Lake Oswego, Oregon. First up: Lana K., who started with a lovely floral print that allowed her to expand her color palette to include a range of colors. Note how just a few touches of pink and gold act as foils against the main blue and green color scheme:

lanas-quilt
Lana made this quilt as a raffle item for her grandson’s school. The winning bid came in at $2,000! I know how much time, effort, and money went into the making of that beautiful quilt. What a generous heart Lana has! If I had made that quilt, it would have been very difficult for me to part with it.

Joie L.’s quilt features a deep purple and forest green color scheme, with pops of fuchsia and lime to liven it up. Joie wanted her quilt to be wider and not quite as long as the original design, so she modified the borders in a clever way to make that happen:

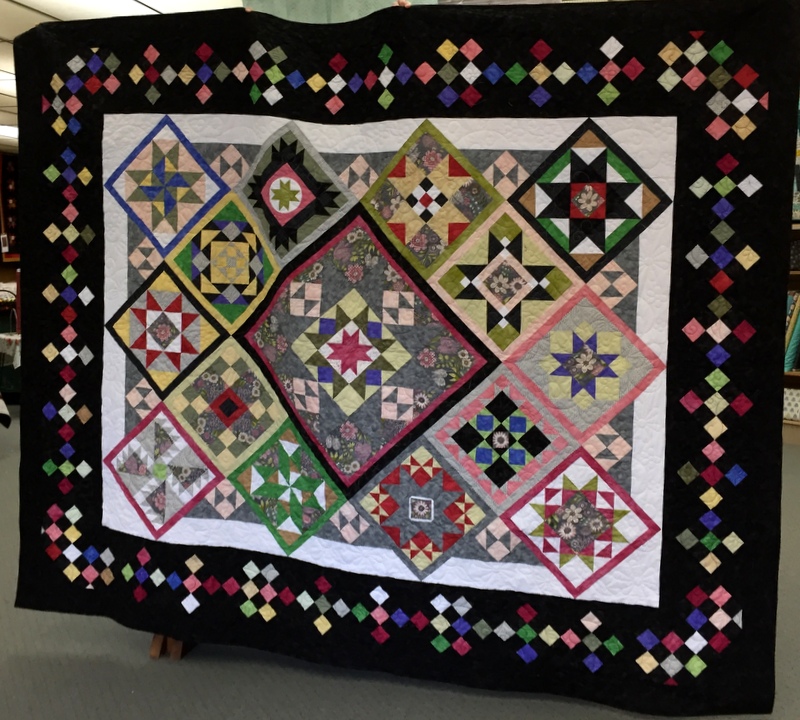
joies-quiltSharon R. did something unexpected and wonderful with her version of Reach for the Stars:
sharon-shapers-quilt

Doesn’t her multicolored checkerboard border make you think of harlequins, those colorful characters from Italian commedia dell’arte dressed in checkered costumes? Sharon’s border ties all of the colors in the individual blocks together in a bold and innovative way.

I’ll continue to publish photos as more of my friends from near and far finish their versions of Reach for the Stars, so please stop by from time to time. If you type in “reach for the stars” in the SEARCH ME box on the right side of my home page, you will be taken to all of my RFTS posts in chronological order.


Posted in Reach for the Stars sampler quilt, update | 4 Comments

JBB Update: Moving Right Along

JBB? That’s the Junior Billie Bag, the most versatile quilter’s tote I’ve ever seen. I’m teaching a class on it at the Pine Needle, making one along with my students but staying a couple steps ahead to show them how the bag, designed years ago by Billie Mahorney, comes together. (You can see what a finished Junior Billie Bag looks like here, and you can see my first post about the JBB currently under construction here.)

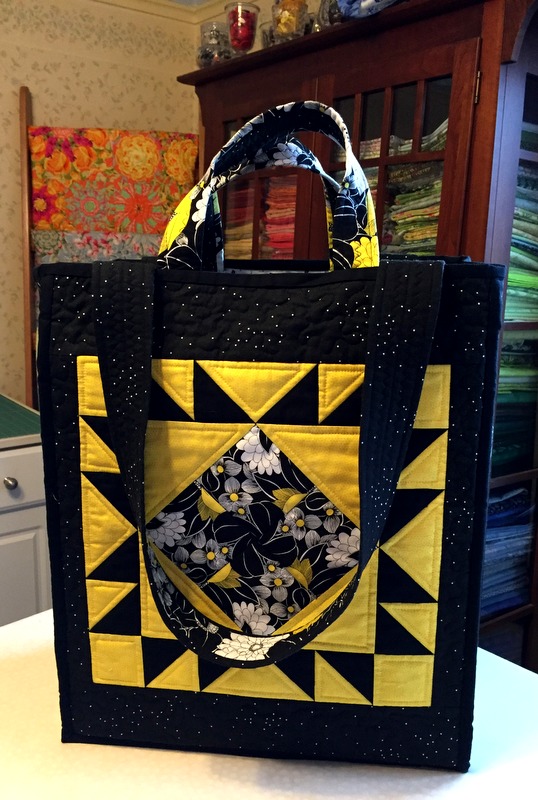
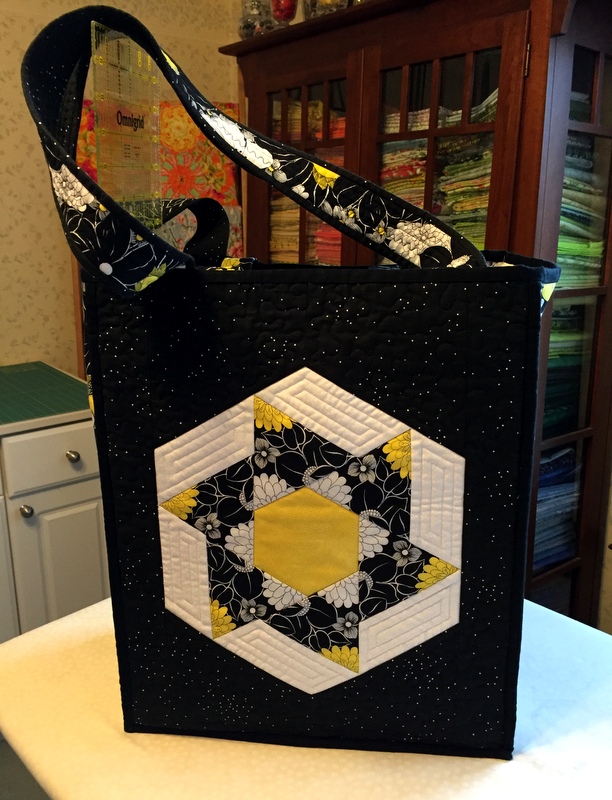
The front and back panels are now quilted, with the lining and two sets of handles attached:

jbb-f2016-front-and-back-panels-quilted
Back in August, before making the two blocks you see above, I used a strip of that bold floral fabric to make a test kaleidoscope block, thinking I might use it on a front or back panel:

jbb-f2016-kaleido-block
It didn’t make the cut. I liked it but didn’t love it. Still, I thought there might be a way to use it in the Junior Billie Bag. And there was. I decided to incorporate the kaleido block into an exterior pocket.

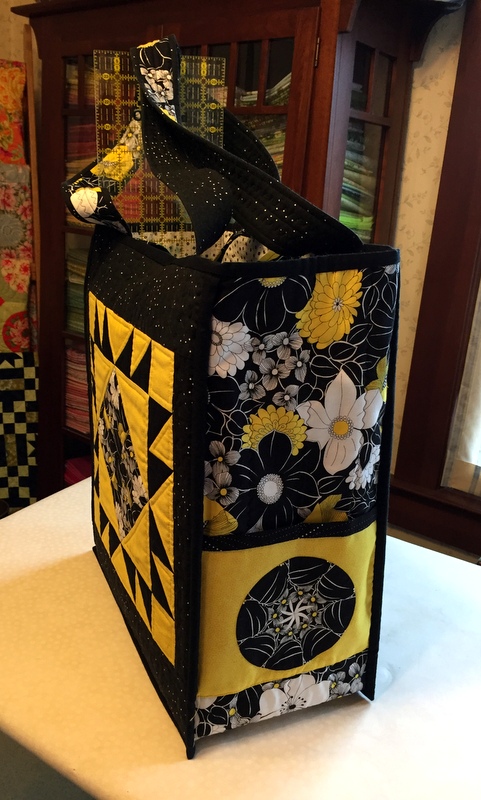
A kaleidoscope block made of eight 45° triangles forms an octagon. I downsized it and converted it into a smaller circle, surrounding the circle in the brightest lemon yellow fabric I could find:

jbb-f2016-kaleido-circle-pocket
Here’s what it looks like now, made into a pocket attached to one of the side panels of the Junior Billie Bag:

jbb-f2016-side-panel-outer-pocket-2
The circle is 4⅝” in diameter and the pocket is 6″ deep.

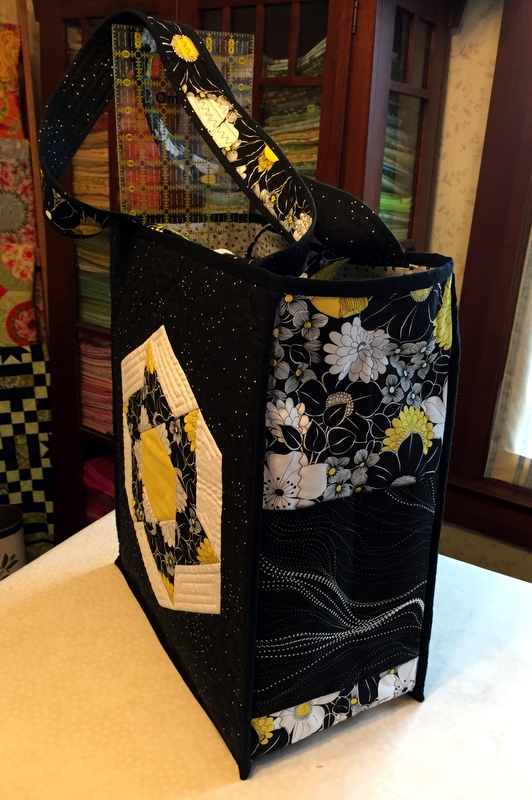
See that band of black fabric at the top of the pocket? I used the same fabric to make a slightly deeper pocket (8″) on the other side panel:

jbb-f2016-side-panel-outer-pocket
I love how the wavy lines on the pocket fabric play against the lush floral you see above it.

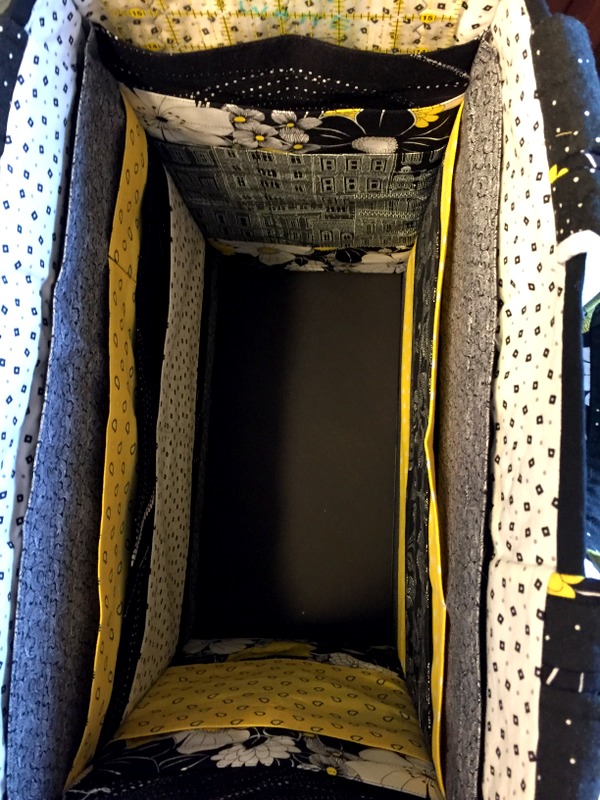
In an upcoming post I’ll show you the pockets on the inside of the bag — lots of them, specifically sized for the tools quiltmakers use most. Please come back for a look.


Posted in 4-Patch Wonder, Billie Bag, faux-kaleido quilts, Junior Billie Bag, kaleido-spinner, kaleidoscope quilts, tote bags, update | 7 Comments

Deal Me In!

Do you play bridge? I like to play poker and pinochle but I must confess that bridge completely mystifies me. My stepmother, Shirley, is a champion bridge player. She qualifies as a Ruby Life Master in the American Contract Bridge League’s masterpoint ranking system, so she must be pretty good. She’s actually gone on cruises where she taught bridge and had all her expenses paid. Sweet!

So what’s an avid bridge player to do when she has arthritis in her hands and finds it difficult to hold a full bridge hand of 13 cards? If she has a stepdaughter who likes to sew, she asks her to make a card holder. And that’s exactly what I did for Shirley. This is what it looks like:

2016-09-28-14-44-37

The cardholder measures approximately 14″ x 8″. The bottom is divided into two sections, with each section easily holding two suits.

The top of the card holder is divided into four sections, each of which contains some evenly divided #12 shot to weight the holder at the top.

On the back of the card holder, at the top, I stitched a length of anti-skid grip-cloth fabric (the kind used on the bottom of children’s pajama feet) to keep the holder from slipping on the table top:

2016-09-28-14-40-05
When Shirley sits at the table to play her bridge hand, this is what it looks like:

2016-09-28-14-43-32
Shirley’s cards are out of sight of the players on either side of her but easy for her to see and pull out to play.

I didn’t just dream up this design. A friend of Shirley’s had made a similar one for her but it didn’t have the gripper fabric on the back and was made of just one layer of fabric. I used two layers, interfacing one layer for additional stability, and made a couple of other small changes at Shirley’s request.

I’m very pleased with how it turned out, and my stepmom is delighted. As my sister Diane would say, “elegantly simple and simply elegant!”


Posted in family, update | 6 Comments

An iPad Pro Cover for Someone Special

The “someone special” is my stepmother Shirley, aka the Irish Princess. That’s what my dad calls her. They’ve been married well over 50 years, and I think she has earned the title.

Shirley asked me to make a quilted case for her new iPad Pro. She got the 9.7″-inch size, the smaller of two sizes the iPad Pro comes in. When I asked about fabric colors for the case, she simply asked for “something with green.”

“No problem!” said I, knowing I have more greens in my stash than any other color. I picked a brightly colored leaf print on a black background and then chose four other prints containing green for the lining, pockets, and binding.

Here’s a look at Shirley’s iPad Pro cover along with a mock tablet measuring 6⅝” x 9½” that I cut from a piece of foam core similar in thickness to the real thing:

ipad-pro-cover-for-shirley
When folded, as in the photo above, the cover measures 8″ x 10½”.

Here’s what the cover looks like on the inside:

ipad-pro-cover-inside
The striped pocket on the upper inside holds the charger cord; the lower pocket in the leaf print is divided. The wide side is for earphones, the narrow one for a stylus or pen.

Now for the back of the cover:

ipad-pro-cover-front
See those two green elastic strips? They come around to the front to hold the case together when it needs to be closed, say for travel:

ipad-pro-cover-with-straps-from-back-to-front
In their original position the elastic strips help hold the iPad Pro in place if Shirley wants to lay it on a flat surface to use it. The back of the cover is fortified with Peltex, a very stiff interfacing.

Shirley’s iPad Pro cover is modeled on one I made in 2013 for my iPad Mini. I made a few other versions, pictured here, for family and friends:

2013-3, iPad Mini covers

All I needed to do to make this one for Shirley was to change the dimensions.


Posted in family, iPad cover, update | 7 Comments

Under Construction: A New Junior Billie Bag

Another Junior Billie Bag?

I’ve already finished two this year, one for myself and one for a friend. Now I’m making a third one. The reason? I’m teaching a class that begins tomorrow at the Pine Needle. I made my first Billie Bag, designed by Billie Mahorney, about 10 years ago, and found it very challenging. It’s definitely not for beginners.

Now that I am teaching Billie’s design (in a slightly smaller version), I find that the easiest way to give my students the confidence to make their own totes is to demystify the process by showing how the individual components go together. I call it a “deconstructed Billie Bag” but in truth it’s a Billie Bag under construction.

I guess every time I teach this class I will wind up with a new Junior Billie Bag. This one is going to a friend as a surprise.

jr-billie-bag-sept-2016
What you are seeing in the photo above are the front and back panels, the side panels/bottom unit, two sizes of straps, and some of the interior pockets. In a few weeks’ time, you will see a finished quilter’s tote measuring 14″ x 17″, with a generous 7½” depth to accommodate a 6″ x 24″ acrylic ruler.

I started out with two 12½” blocks to which strips were added to make two panels that will be trimmed to the proper size after quilting:

jr-billie-bag-front-and-back-panels-sept-2016

The panel on the left is yet another version of the Spinners block, from the book On the Run Again by Heather Peterson of Anka’s Treasures, that I’ve used in some other projects this year. The one on the right is a traditional star block that I jazzed up with a four-patch kaleidoscope (what I call a 4-Patch Wonder block).

Isn’t that a great black-white-yellow floral print? I found it last summer at a quilt shop in Central Oregon and bought the end of the bolt. It’s by Studio 8 for Quilting Treasures. I paired it with one of Cotton + Steel’s Basics from 2015: “Sprinkle,” designed by Sarah Watts. (I love the Sprinkle design so much I bought it in two other colors.)

My biggest challenge in making this Junior Billie Bag will be keeping Coco out of my sewing room:

coco-with-latest-jr-billie-bag

She’s a frequent visitor. Need I say more?


Posted in 4-Patch Wonder, Billie Bag, cats, faux-kaleido quilts, Junior Billie Bag, kaleido-spinner, tote bags, update | 12 Comments